How to Upgrade Your choppy braid Hair in Just Minutes
You spent what felt like hours meticulously braiding your hair, dreaming of a sleek, bohemian masterpiece. But when you finally secure the last elastic and look in the mirror, your heart sinks. Instead of the smooth, defined braid you envisioned, you’re faced with a reality of choppy braid hair: loose pieces sticking out everywhere, uneven sections, and a general look of “I tried, but my hair had other plans.”
We’ve all been there. That frustrating moment when your hairstyle falls short of your Pinterest goals. But before you reach for the hairspray in a last-ditch effort to plaster everything down or, worse, take the whole thing out in a fit of frustration, stop right there.
What if we told you that you could transform that choppy braid into a polished, intentional, and absolutely stunning hairstyle in just a few minutes? It’s true. Upgrading choppy braids isn’t about starting over; it’s about working with what you have and using a few clever styling secrets to create a look that appears effortlessly chic. This guide is your quick fix to turning a hair mishap into a masterpiece.

Why Do Braids Get Choppy, Anyway?
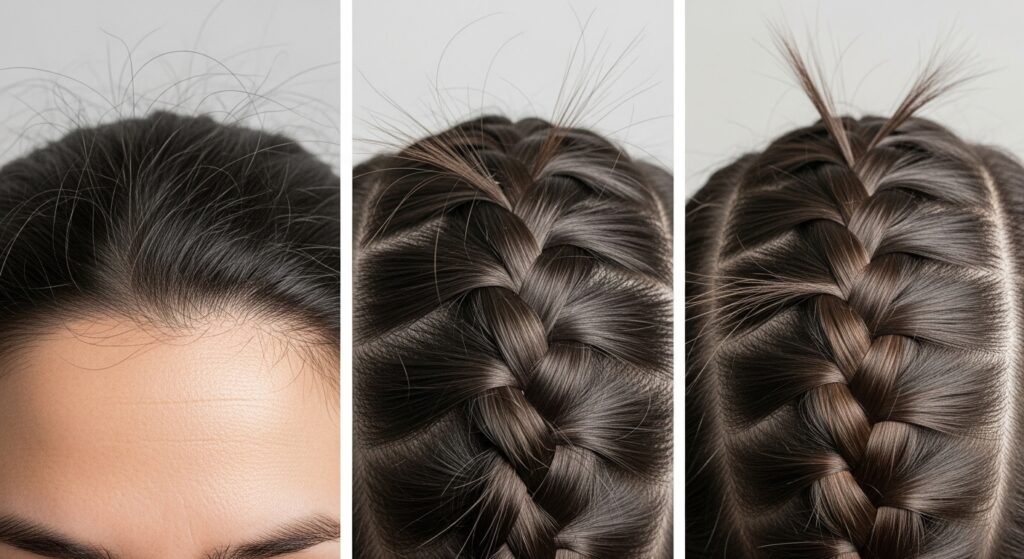
Understanding the enemy is half the battle. Choppy braids don’t just appear out of nowhere; they’re usually the result of a few common culprits. The first, and most universal, is new growth and natural hair texture. If it’s been a few days since you washed your hair, your natural oils and any new baby hairs will start to rebel against the neat lines of your braid.
Another major factor is hair type. Those with fine, silky hair often struggle with braids that slip and loosen quickly, while people with curly or coily textures might find that their hair’s natural volume and frizz create a more textured look than intended. Finally, braiding technique plays a role. If the sections weren’t even to begin with or the braid was created too loosely, it’s destined to devolve into a choppy state faster than you can say “French braid.”
The good news? No matter the cause, the solutions are universal, quick, and incredibly effective.
Your 5-Minute Choppy Braid Rescue Kit
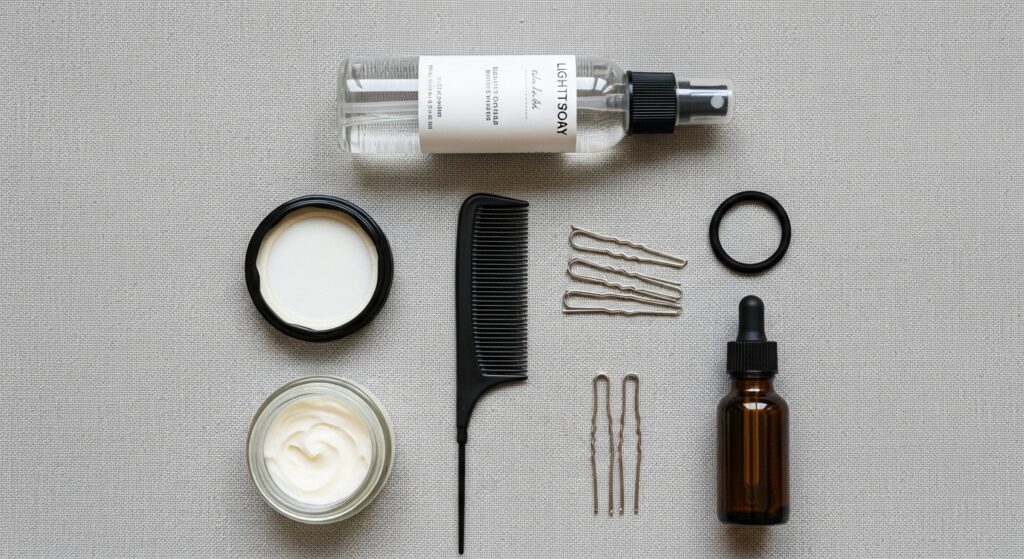
You don’t need a salon’s worth of products to fix this. In fact, you likely have everything you need already in your bathroom. Here’s your go-to kit for a braid emergency:
A Fine-Tooth Comb or Tailing Comb: This is your secret weapon for taming flyaways and smoothing sections.
Strong-Hold Edge Control or Hair Gel: A tiny amount is all you need to lay down those stubborn baby hairs and slick down the perimeter.
Light-Hold Hairspray or Texturizing Spray: Avoid the crispy, helmet-head effect. A flexible hairspray or a texturizing spray can help bind without stiffness.
Bobby Pins that Match Your Hair Color: These are your invisible helpers for securing loose pieces and adding flair.
A Small Hair Elastic (Clear or Matched): For securing any new mini-braids or twists you create.
Frizz-Control Serum or Lightweight Hair Oil: A single drop rubbed between your palms can be smoothed over the surface of the braid to add shine and tame frizz.
The “Smooth Operator” Technique: Taming Flyaways and Uneven Sections
This is your first line of defense. For a braid that looks messy primarily due to flyaways and a fuzzy surface, this technique will be your best friend.
Start by taking your tail comb and gently running it along the part of your braid. Don’t aggressively comb through the entire braid, as this will make it wider and frizzier. Instead, use the very fine tip of the comb to gently coax the stray hairs back into the braid’s main body. Use a light hand.
Next, take a very small amount of your edge control or gel onto your fingertip. We’re talking half a pea-sized amount. Rub it between your index finger and thumb to warm it up. Then, gently glide your fingers along the hairline and the surface of the braid, focusing on the areas with the most rebellion. This technique, often called “shingling,” helps to lay each hair down without applying a heavy, visible layer of product.
Finish with a light mist of flexible-hold hairspray from about 10 inches away. This sets the style without making it look crunchy or overdone.

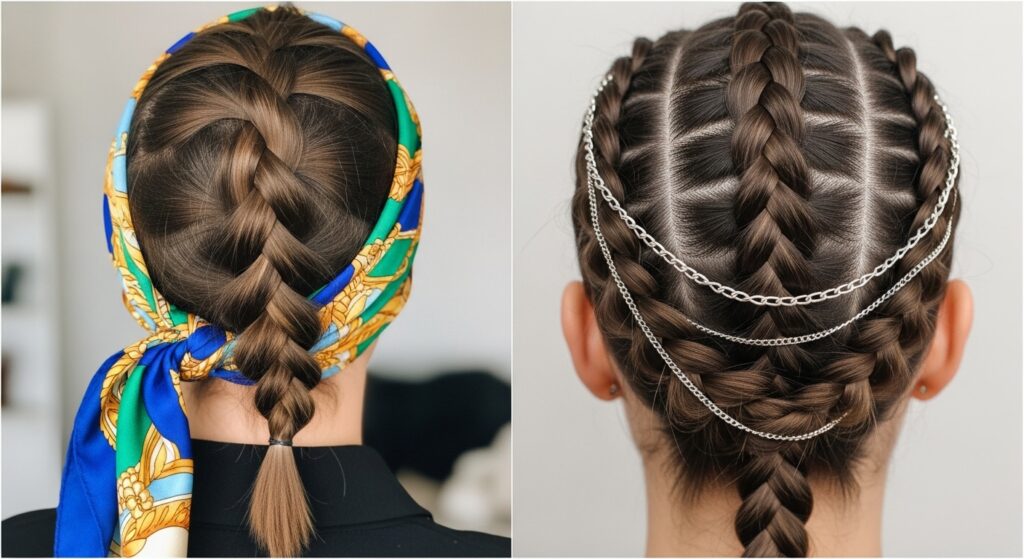
The “Strategic Accessorize” Method: Distract and Conquer
Sometimes, the best way to deal with a problem is to cleverly disguise it. If your braid has one particularly choppy section or you just want to add some instant polish, accessories are your fastest route to a style upgrade.
Take a beautiful silk scarf and wrap it around the base of your braid as a headband, letting the tails flow freely. This instantly covers any messiness at your crown and parts. Alternatively, weave a delicate gold or silver chain through your braid. The sparkle and detail will draw the eye away from any imperfections and towards the beautiful accessory.
For a boho-chic fix, take a few loose pieces from the front that are already sticking out and twist them loosely. Pin them back across the top of your head, creating a mini crown that looks entirely intentional. Bobby pins with decorative ends are perfect for this. Strategically place a few pretty pins along the length of the braid to secure loose pieces while adding a touch of glamour.
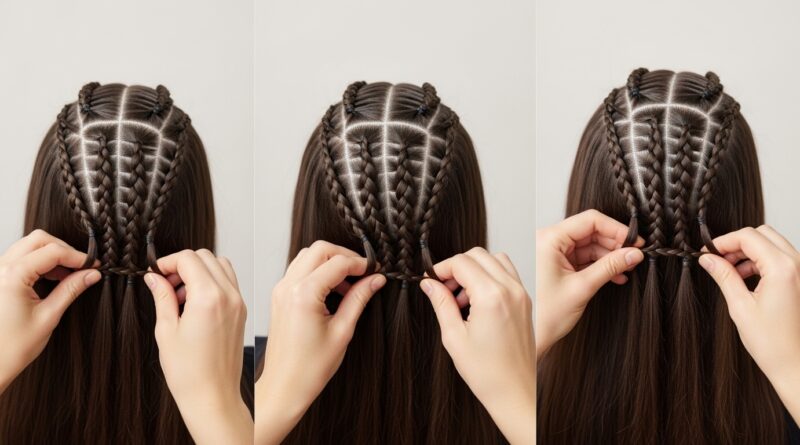
The “Twist and Pin” Fix: Creating an Intentional Look
This method is for when you have larger, more stubborn pieces that refuse to be tamed. Instead of fighting them, incorporate them into the design.
Identify the most problematic loose sections. Take one of these sections and twist it neatly away from your face. You can do a simple two-strand twist or a slightly more structured rope twist. Once it’s smooth and tight, use a bobby pin to secure it back into the main body of the braid. Slide the pin through the twist and then into the base of the braid, making sure it’s hidden from view.
You can repeat this all along the braid, turning a dozen loose pieces into a series of elegant, intentional twists that add texture and interest to your hairstyle. This transforms the narrative from “my braid is falling apart” to “I created a beautiful, textured braid with accent twists.”

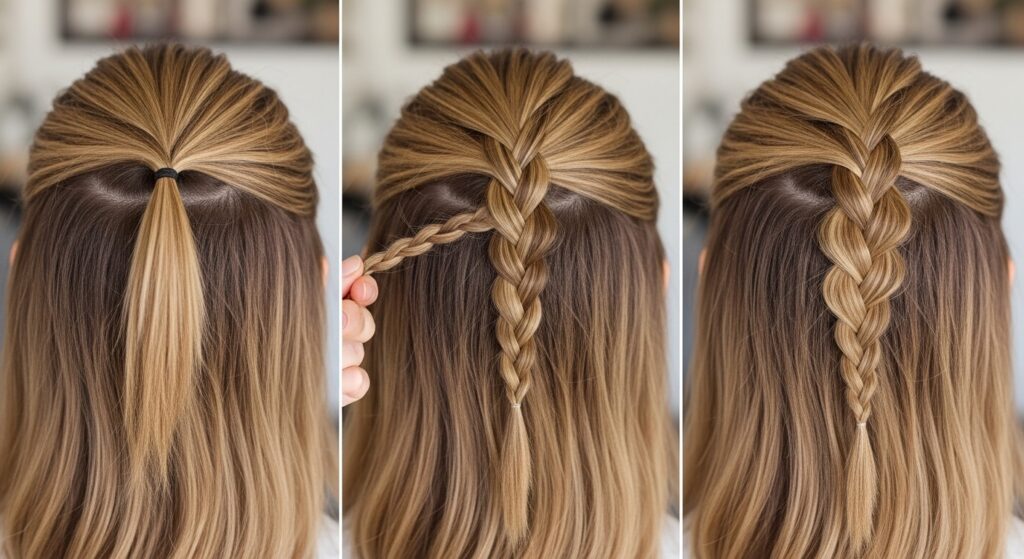
The “Braidception” Upgrade: Adding a Second Layer
If the entire braid feels loose and undefined, sometimes the best solution is to add more structure on top. This is a powerful trick that looks far more complex than it is.
Simply take a small section of hair from the top of your existing braid, near your part. Divide this small section into three and begin braiding it loosely. After two or three crosses, start incorporating this new, small braid over the top of your original, choppy one. As you braid this new piece, use it to “catch” and cover the messy sections of the original braid beneath it.
Continue this all the way down until you reach the end, then secure it with the original hair elastic. This overlays a neat, tight braid over the messy one, instantly creating a look of intricate, double-layered perfection. It’s a brilliant way to add visual interest and hide a multitude of sins.
Prevention is Key: Tips for a Longer-Lasting, Sleek Braid
While these quick fixes are lifesavers, a little prep work can prevent the chop from happening in the first place.
Braid on Day-Old Hair: Hair that is too clean and slippery is hard to braid. Braiding on second-day hair, or hair with a little dry shampoo, provides much better grip.
Use a Light Product Before You Start: Applying a mousse or a light-hold gel to damp hair before braiding can help set the style and reduce frizz as it dries.
Keep Sections Tight and Even: This is the foundation of a good braid. Take your time at the start to ensure your sections are as even as possible and that you’re pulling firmly as you braid.
Silk or Satin for Sleep: Protect your braids while you sleep by using a silk or satin pillowcase or bonnet. This drastically reduces friction and the resulting frizz.

Embrace the Texture!
Before we go, it’s important to remember that not all texture is bad. What you might see as “choppy,” someone else might see as “effortlessly cool” and “lived-in.” The current trends often celebrate a little messiness and volume in braids. The goal of these techniques is to give you control. You get to decide whether your braid is sleek and polished or textured and bohemian.
So the next time you look in the mirror and see a braid that’s less than perfect, don’t despair. See it as a blank canvas. In just a few minutes, with a comb, a little product, and a creative spirit, you can upgrade your choppy braid hair into a hairstyle that turns heads for all the right reasons. Now go forth and braid with confidence.