Ignite 23 2026 Fringe Revival Boldly Curtained for Drama
Okay, let’s talk about the fringe trend that’s about to take over. We’ve seen the whisper-thin wispy bangs and the blunt, heavy ones. But for 2026, the forecast is all about drama. Think less timid, more theatrical.
I’m calling it the Boldly Curtained Fringe. It’s a revival, but with a major modern twist. This isn’t just a haircut; it’s a full-blown hair moment designed to frame your face and ignite your entire look.
If you’re feeling brave and ready to make a change that’s equal parts romantic and statement-making, you’re in the right place. I’m breaking down everything—from the cut itself to how to style it for your face shape. Let’s get into it.
What Is The Boldly Curtained Fringe?
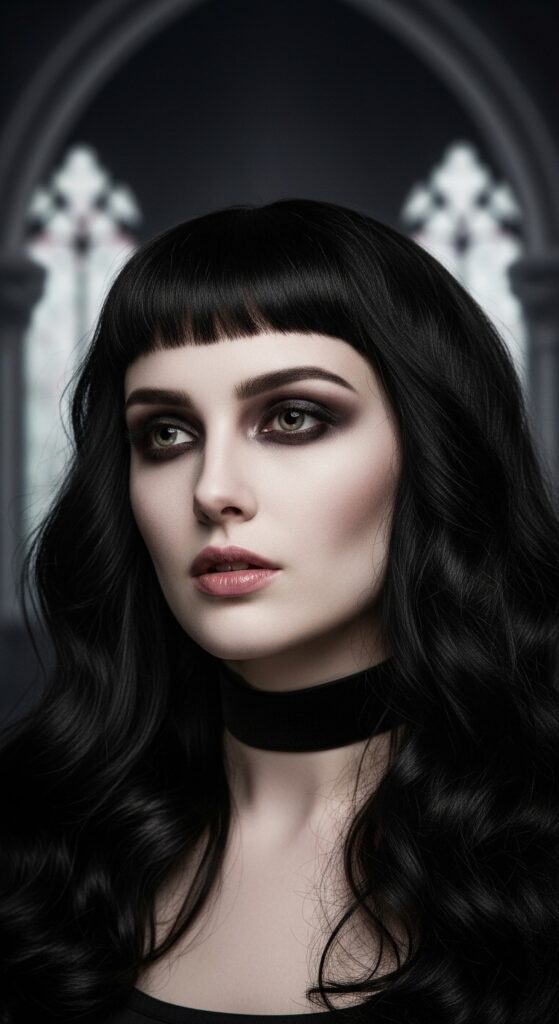
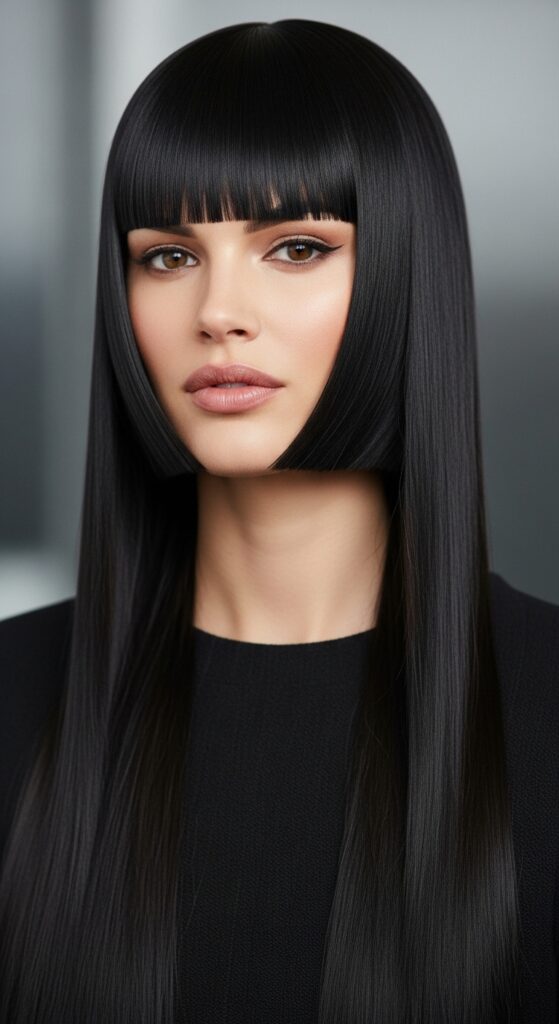
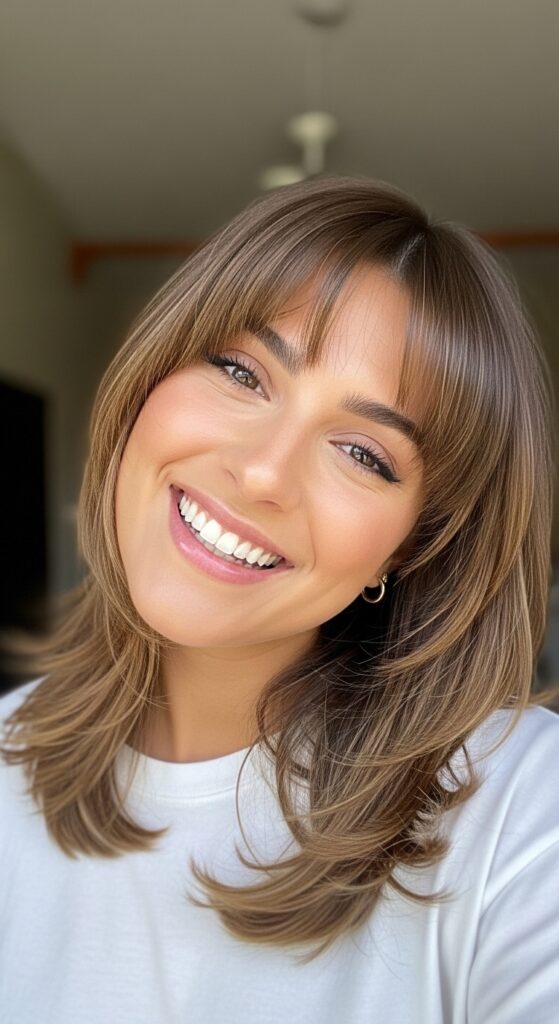
Imagine your fringe (or bangs, as we often say) not as a single block of hair, but as two soft, heavy curtains. They part naturally in the center or slightly off-center, framing your eyes and cheekbones. The key word here is “bold.”
This means more density and a stronger shape than the feathered styles of the past. It’s a deliberate, confident look that draws all the attention to your best feature: your face. It works with almost any base haircut, from a long bob to flowing layers.
Why It’s The 2026 Haircut To Watch
In the world of 2026 hairstyles, we’re seeing a huge push towards personality. It’s a mix of extremes: quiet luxury and high-drama romance. This fringe perfectly bridges that gap.
It has the polished, face-framing intention of an old money hair vibe but executes it with the daring of romantic goth hairstyles. It’s versatile enough to feel elegant one day and edgy the next, which is exactly what we want from a major hair change.
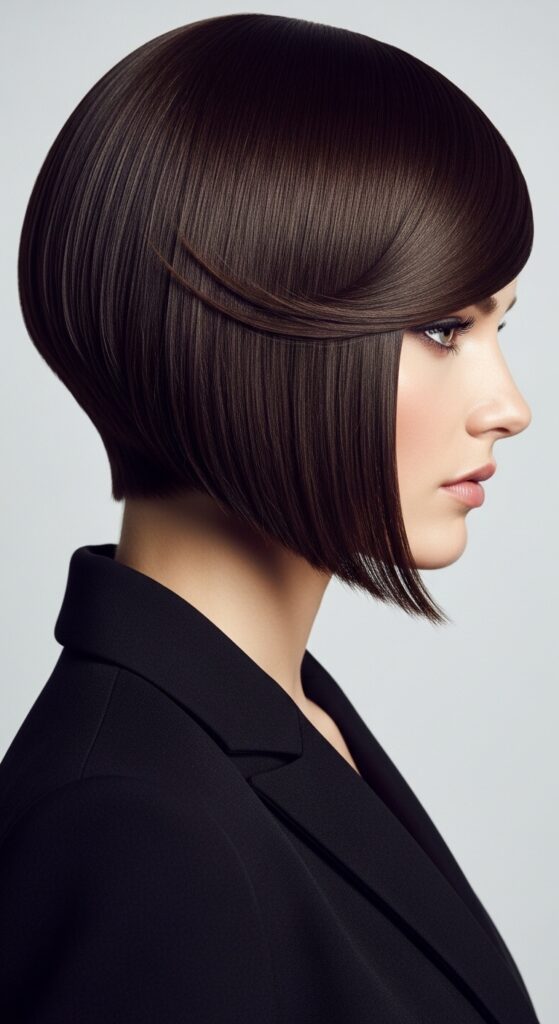
The “Quiet Luxury” Version
For a subdued, elegant take, pair this fringe with a quiet luxury bob. Think clean, sharp lines and impeccable blending. The fringe should be slightly softer around the edges, but still maintain that curtained shape.
This look is all about healthy, shiny hair and a perfect blow-dry. It whispers confidence rather than shouting it. It’s the ultimate “I woke up like this, but chic” hairstyle for everyday drama.

The “Romantic Goth” Interpretation
Lean into the drama! For a romantic goth hairstyles influence, go for a deeper side part or add some subtle, face-framing layers. Texture is your friend here—think a bit of bend or a soft wave.
This version pairs beautifully with darker hair colors and has a slight vintage, vampire haircut allure. It’s mysterious, beautiful, and perfect for making a statement without saying a word.
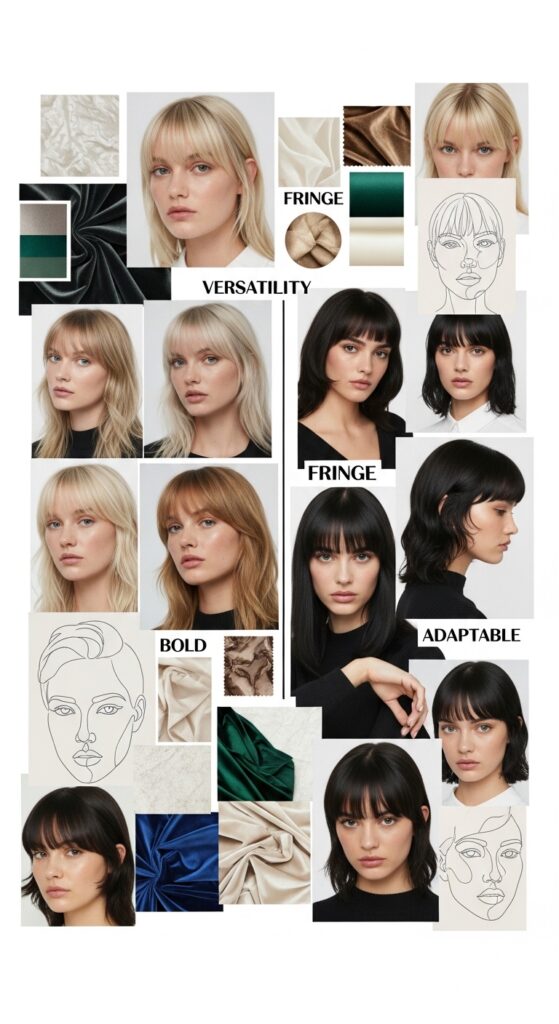
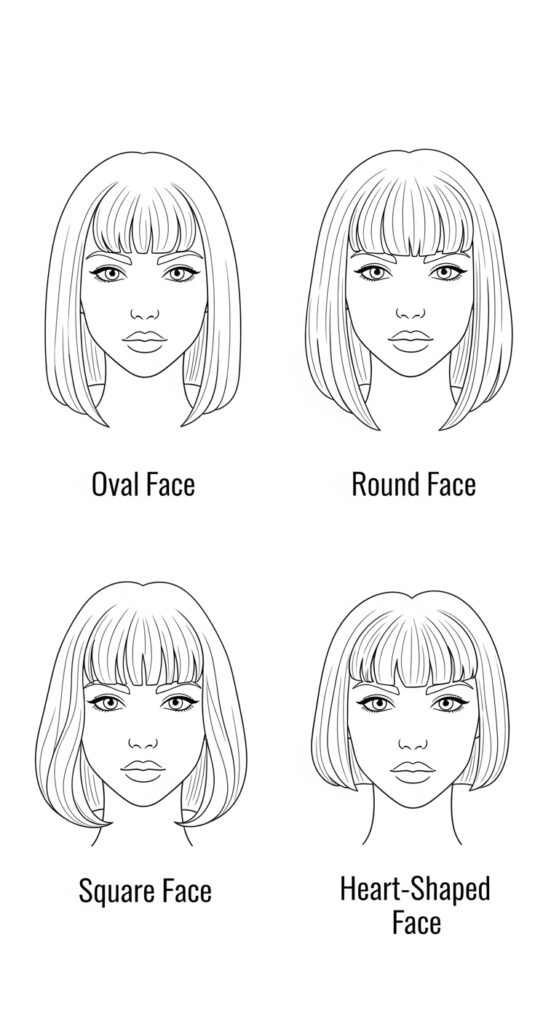
Face Shape Guide: Who Can Wear It?
Good news: with the right tailoring, this fringe can work for almost everyone. The magic is in the width and length of the “curtains.” Here’s a quick cheat sheet.
- Oval: You can pull off any version. A true, centered part will look amazing.
- Round: Opt for a deeper side part to create length. Keep the ends angled.
- Square: Soften angles with wispier ends on the fringe and longer sides.
- Heart: A centered or slightly off-center part helps balance a wider forehead.
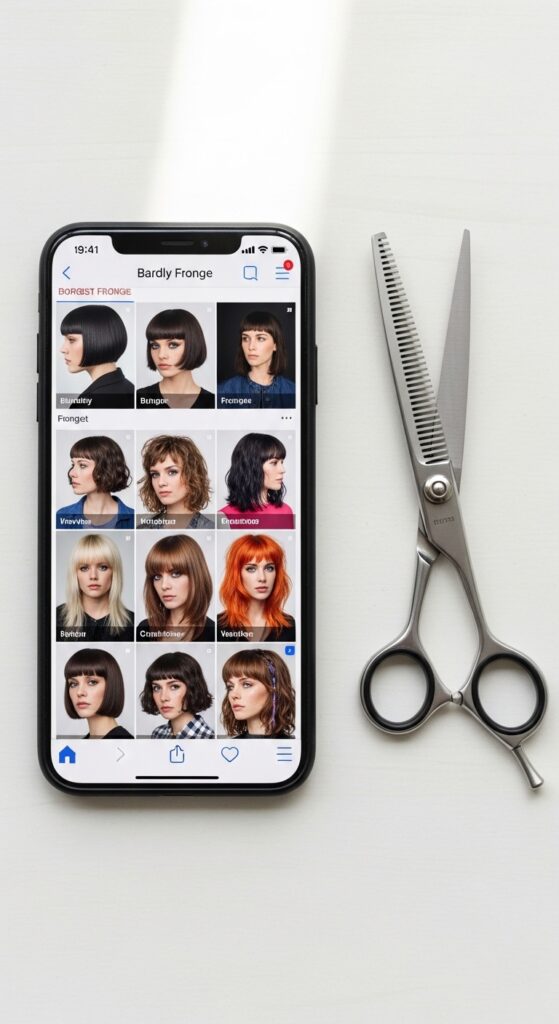
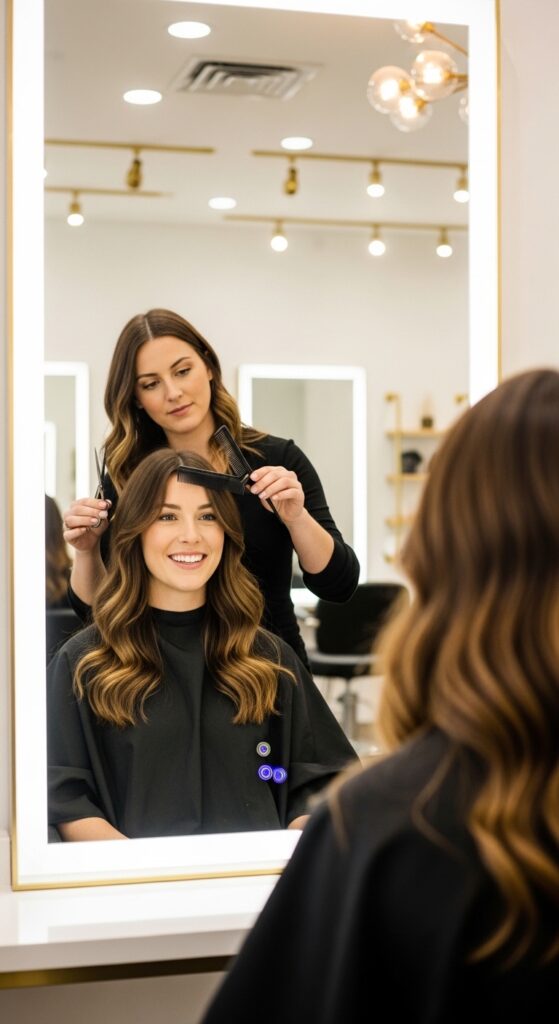
Taking The Photo To Your Stylist
Communication is key for a cut this specific. Don’t just say “curtain bangs.” Show a photo! Use the keywords we’re talking about: “boldly curtained fringe,” “dramatic center-part bangs,” or “heavy face-framing layers.”
Be clear you want weight and a defined shape, not wispy or piecey. Tell them you want it to part naturally. Bringing multiple photos from different angles will give your stylist the best blueprint to work from.
The Essential Cut & Layering Technique
This isn’t a one-length-across chop. A skilled stylist will cut it dry or mostly dry to see how your hair naturally falls. They’ll create a heavy, triangular section from the crown down.
The cutting is all about vertical point-cutting to remove weight without losing the bold shape. The sides are then blended into your longer hair, whether that’s into an asymmetrical lob or longer layers, to avoid a harsh line.

Pairing It With An Asymmetrical Lob
One of my favorite combinations for modern edge. An asymmetrical lob—longer in the front, shorter in the back—already makes a statement. Adding the boldly curtained fringe doubles down on that angular, fashion-forward vibe.
The fringe becomes the focal point, while the lob adds a cool, structural shape from the side and back. It’s a perfect match for the glitchy glam hair trend, where polished meets slightly undone.
Pairing It With A Hime Cut
For the ultimate in dramatic, structured style, look to the hime cut. This traditional Japanese cut features straight, blunt hair at the front and sides with longer back hair.
The boldly curtained fringe is a natural, modern evolution of the hime’s classic front pieces. It keeps that graphic, bold line but with a softer, more wearable separation. It’s a truly artistic choice.
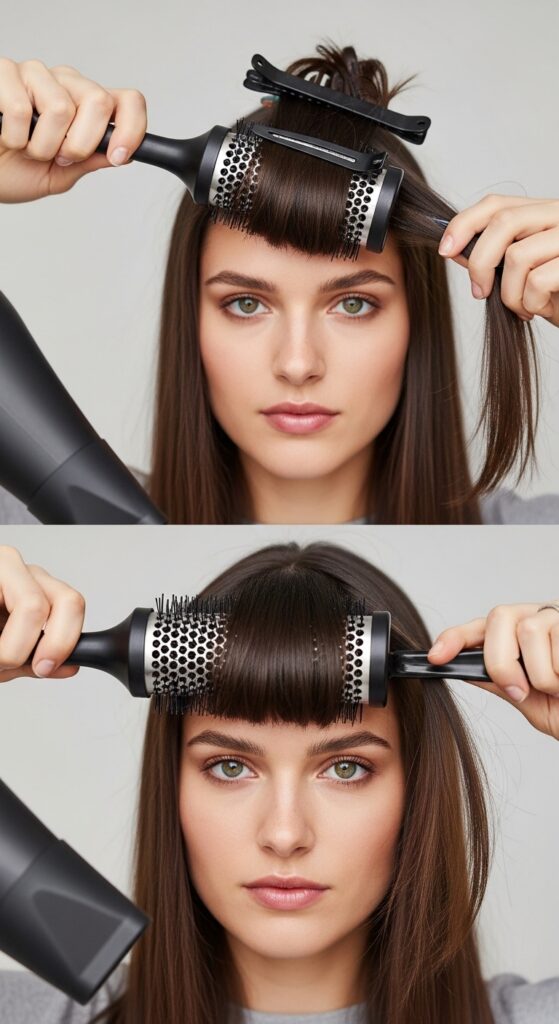
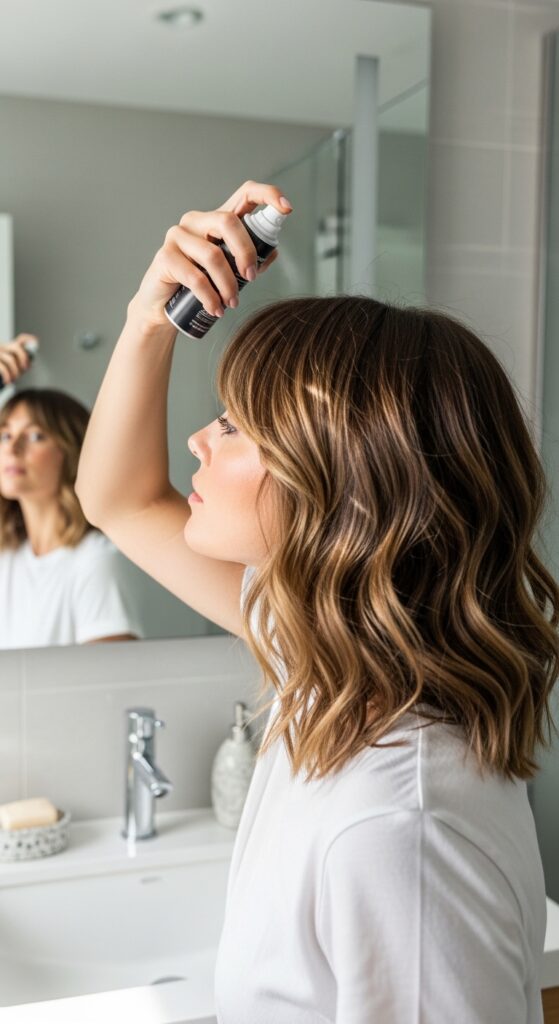
Daily Styling: The 5-Minute Blow-Dry
This fringe is surprisingly low-maintenance. The goal is to encourage the natural part and add a little bend. You’ll need a round brush and a blow-dryer.
- Start with damp hair. Apply a heat protectant.
- Using a medium-round brush, roll each “curtain” section under and blow-dry from the roots.
- Direct the airflow down the hair shaft to smooth it.
- Once dry, use your fingers to separate and place the fringe where it naturally wants to part.
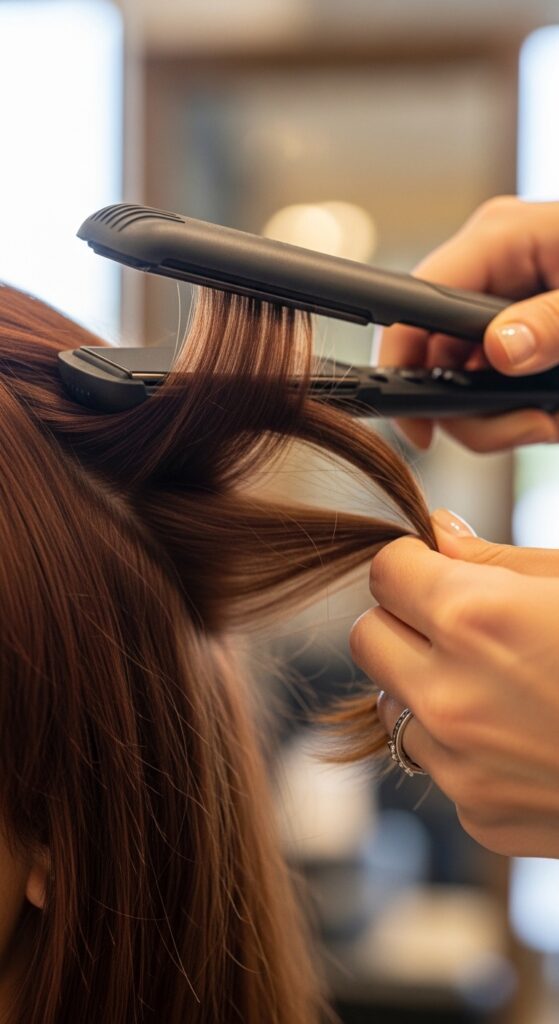
Creating The Perfect “Bend”
The signature bend is what makes this fringe look modern, not helmet-like. After blow-drying, use a flat iron or a large-barrel curling iron to create a soft curve away from your face.
Clamp the iron mid-length on each curtain section and gently rotate it outward, just for a second. Don’t curl it all the way to the ends. You just want to break the line and add movement.
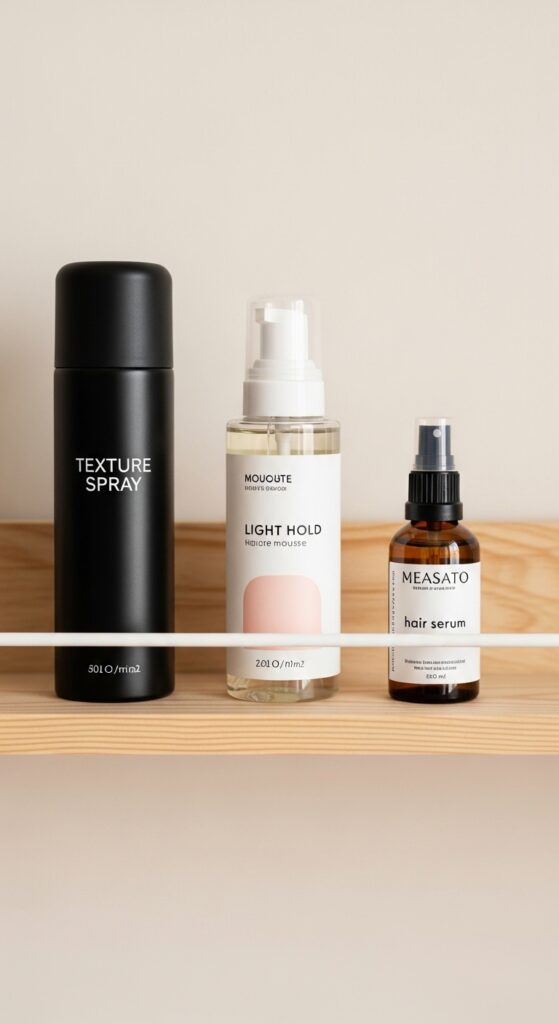
Product Must-Haves For Hold & Texture
The right products prevent a flat, greasy look. You need lightweight control. Here’s my shortlist.
- Light Hold Mousse: Applied to roots before blow-drying for volume.
- Texture Spray: A quick spritz on dry hair to separate and add grit.
- Dry Shampoo: Your best friend for refreshing volume between washes.
- Hair Oil or Serum: A tiny drop on ends only to fight frizz and add shine.
Dealing With Greasy Fringe Days
Bangs always get oily first. Don’t panic. Dry shampoo is your hero. Lift the sections and spray a small amount directly at the roots. Let it sit for 30 seconds, then massage in.
For a quick fix without product, use a boar bristle brush to distribute the natural oils from your roots down the length of the fringe. It can buy you an extra few hours of freshness.
Growing It Out Gracefully
Changed your mind? No problem. The beauty of this cut is that it grows out into beautiful, face-framing layers. As it gets longer, simply blend it with the rest of your hair.
Use small pins or clips to sweep it to the side while it’s in the awkward phase. You can also ask your stylist to help integrate it into a longer shag or layered cut as it grows.
Night-Out Glam: The Glitchy Glam Upgrade
To take this fringe into evening territory, lean into the glitchy glam hair trend. That means intentional imperfection. After styling, gently tease the roots of your fringe for a little height.
Then, use a strong-hold hairspray but scrunch it lightly with your hands to break the cast. The goal is piece-y, textured, bold volume that looks cool, not stiff.

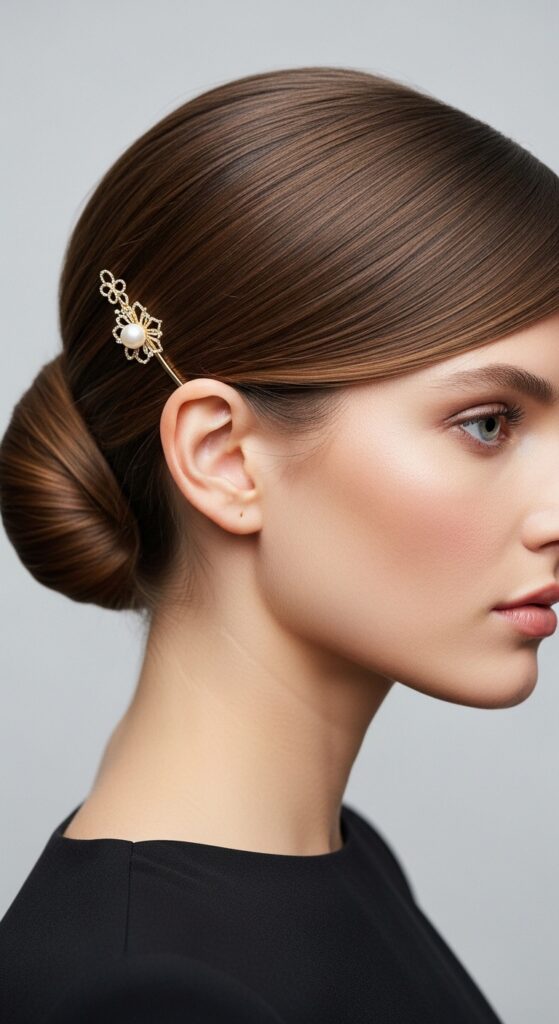
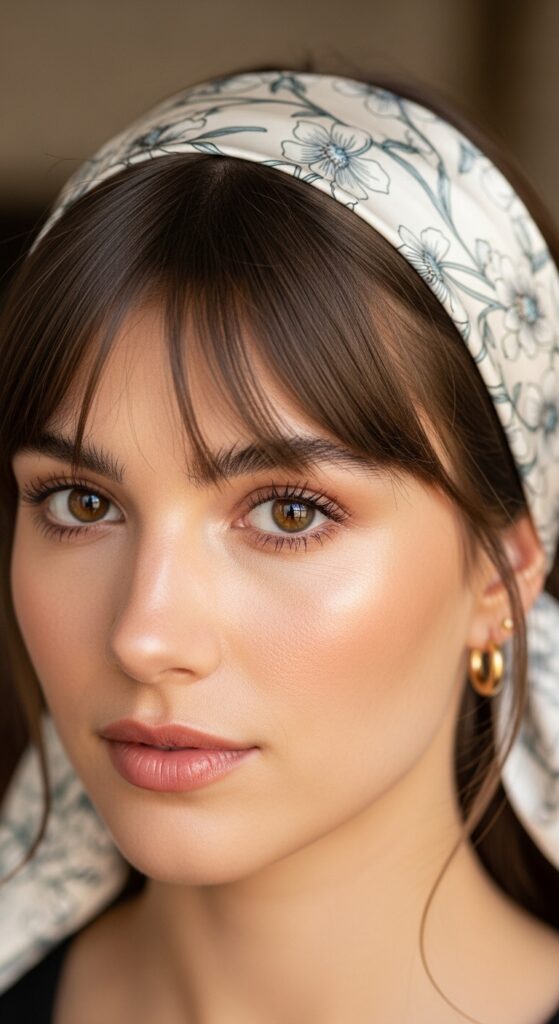
Accessorizing Your New Fringe
Your fringe is already an accessory, so keep others simple. Thin headbands worn behind the fringe look chic. Small, delicate earrings shine since they don’t compete with your face-framing hair.
Avoid heavy, detailed necklaces that crowd the neckline. The focus should stay up top, on your beautiful new cut and your eyes.
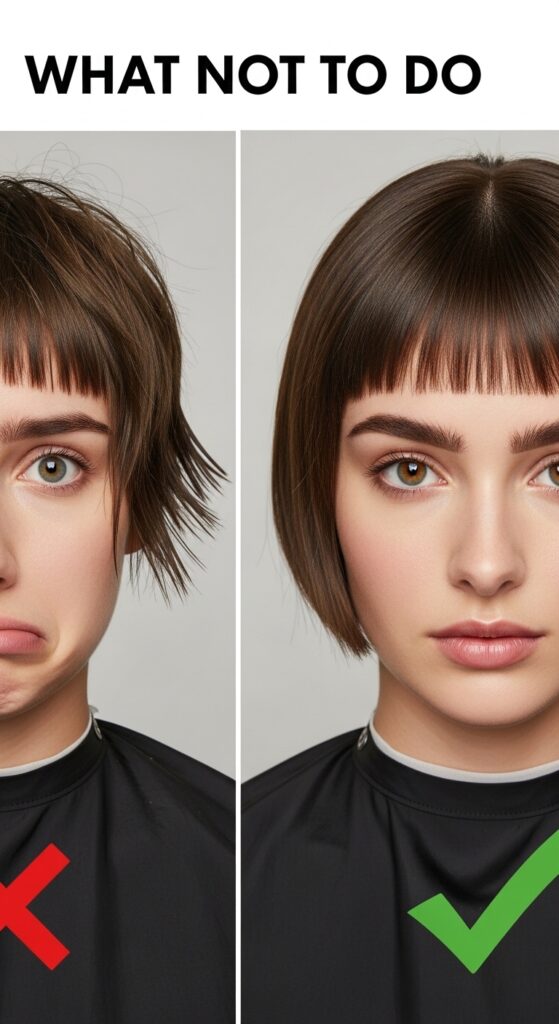
Common Mistakes To Avoid
A few pitfalls can make this fringe feel dated. First, avoid cutting it too short. It should at least graze your eyebrows or be longer. Second, don’t let it get too wide—it should frame, not cover, your entire face.
Finally, skip the heavy, wax-based styling products. They’ll weigh down the shape and make it look greasy fast. Lightness is key for that modern feel.
Is It High Maintenance?
Let’s be real: any fringe requires more frequent trims than the rest of your hair. To keep the bold shape sharp, plan on a salon visit every 3-4 weeks for a quick bang trim.
That said, the daily styling is fast. It often takes less time than trying to style stubborn, grown-out layers. Think of it as trading a little salon time for a lot of daily ease and wow factor.
My Personal Experience & Final Thoughts
I took the plunge last month, and I have zero regrets. It felt like a big change, but it instantly updated my entire look. It made me feel put-together even on my most casual days.
The confidence boost is real. It’s a style that feels both nostalgic and fiercely modern. If you’re on the fence, I say go for it. Hair grows, but the feeling of trying something bold is priceless.
Your Questions Answered
I asked you on stories what your biggest worry was. Here are the fast answers.
- Will it work on curly hair? Yes! Cut dry and styled with curl cream, it creates amazing volume.
- Can I still wear hats? Absolutely. A beanie over the fringe gives cool, piece-y texture.
- Does it work with glasses? It’s a stunning combo. Just ensure the fringe ends above your frames.

Ready For Your Hair Transformation?
If you’re feeling inspired, that’s your sign. Book that salon appointment. Save your favorite images. Take a deep breath and go for it. Remember, your stylist is your partner in this.
Be clear, show pictures, and trust the process. A great haircut is one of the most powerful forms of self-expression. You deserve to have a hair moment that makes you feel incredible every single day.
So, that’s the full breakdown of the fringe trend I believe will define the next year. It’s more than just bangs—it’s an attitude. A way to frame your world and step into a more dramatic, intentional version of your style.
Whether you lean into the quiet luxury side or the romantic goth vibe, this cut is all about highlighting you. It’s a reminder that sometimes, the smallest change (right at the front of your face!) can make the biggest impact.
I’d love to hear what you think! Are you booking the appointment, or are you still gathering inspiration? Let me know in the comments below. And if you found this guide helpful, save this post to Pinterest to keep all these tips and photos handy for your salon consultation. You’ve got this!