Inspire 14 Infinity Knot Sequences Linking Endlessly Around Heads
Okay, let’s be real. Sometimes you just want a hairstyle that feels like a secret. Something intricate and beautiful that looks like it took forever, but secretly has a simple, repeatable trick at its heart. That’s the magic of the infinity knot.
It’s that elegant, endless loop that looks impossibly chic. And when you start linking them? Game over. You create this stunning, crown-like sequence that turns heads in the quietest way.
This isn’t about complicated braiding skills. It’s about one beautiful knot, repeated. I’m going to walk you through 14 ways to sequence them around your head, from barely-there romance to full-on romantic goth drama. Get ready to feel like a hairstyle wizard.
1. The Crown of Quiet Luxury
This is your gateway infinity look. It whispers “old money hair” without saying a word. You’re creating a delicate headband effect that looks polished from every angle.
It works best on second-day hair for grip. Simply create a small infinity knot at one temple, add a small section of hair, and make the next knot, linking them together.
- Start above your left ear.
- Use thin, consistent sections.
- Secure the end with a tiny clear elastic behind your right ear.
- Gently pull on the loops to soften and expand them.
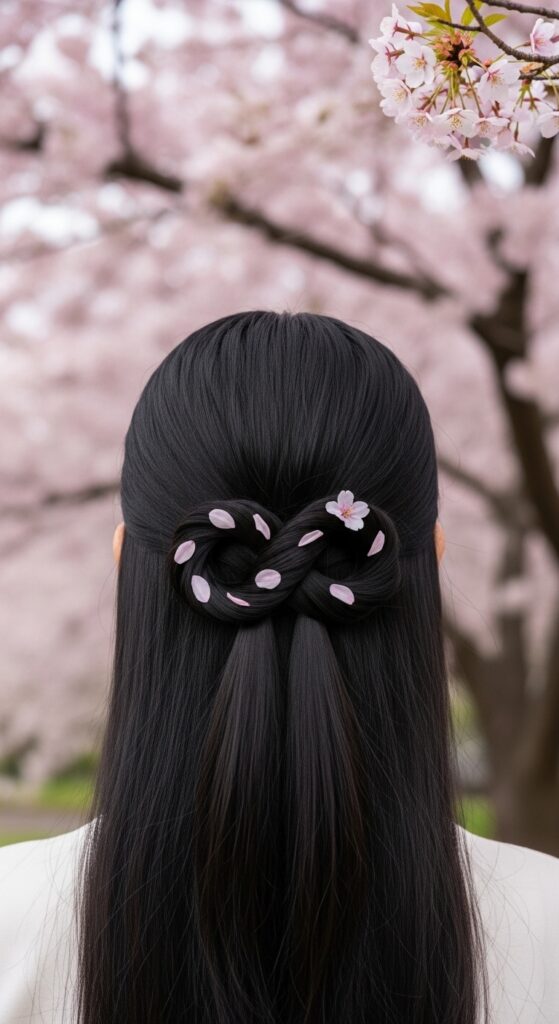
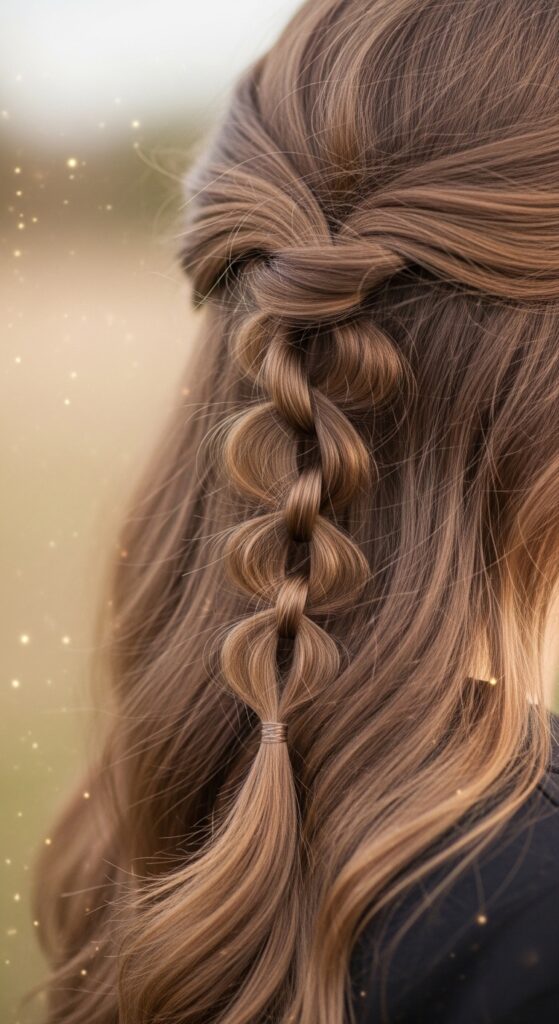
2. The Half-Up Romantic Loop
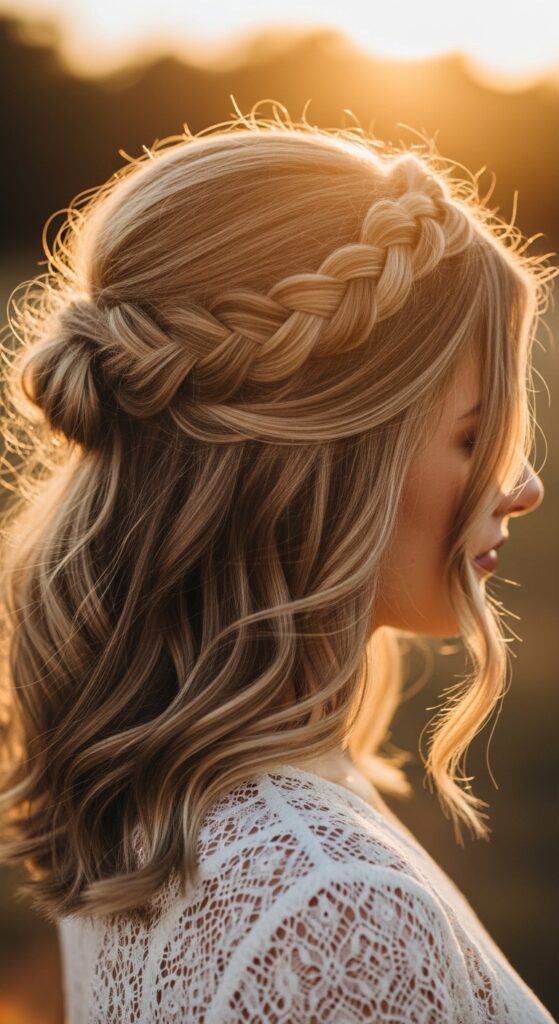
Want that ethereal, romantic feel without committing to a full updo? This half-up sequence is your answer. It keeps your hair down but adds a stunning detail that lifts your features.
This style pairs perfectly with soft waves. It captures that effortless, romantic vibe we all love. It’s practical, beautiful, and takes minutes.
- Take a deep half-up section from temple to temple.
- Split it into two equal strands.
- Tie a single infinity knot at the back of your crown.
- Secure with a pin underneath the knot for an invisible finish.
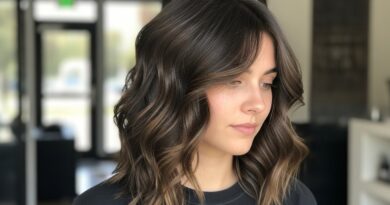
3. The Asymmetrical Lob Accent
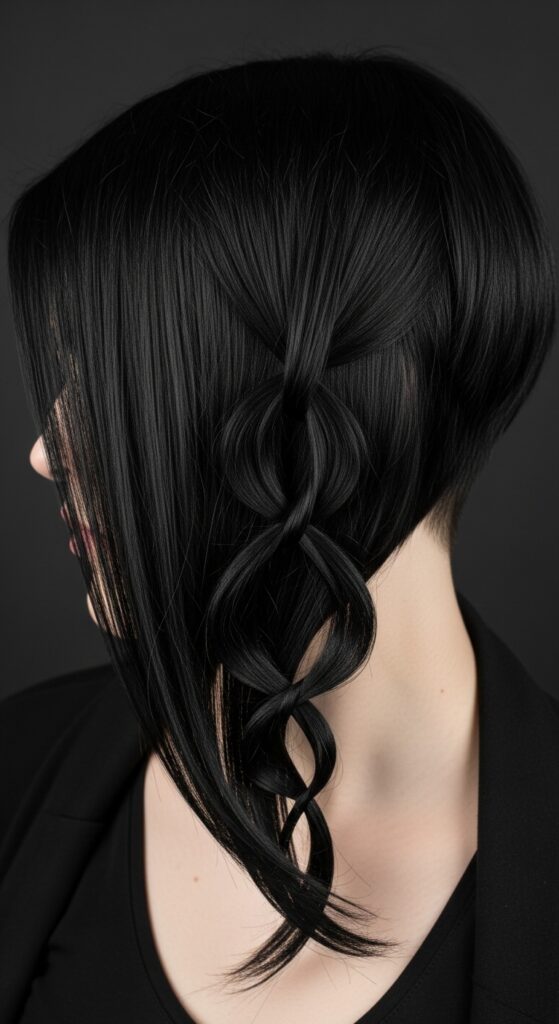
Got a chic asymmetrical lob? This is how you make it unforgettable. A single, statement infinity knot trailing down the longer side creates incredible visual interest.
It plays with the geometry of your cut. This look is a cornerstone of what I’m calling “glitchy glam hair” – a perfect, polished knot against an edgy, modern cut.
- Works best on blunt, one-length lobs.
- Use a section from the front of the longer side.
- Incorporate the knot into the hairline for a built-in look.
- Keep the rest of the hair sleek and smooth.
4. The Gothic Halo Sequence
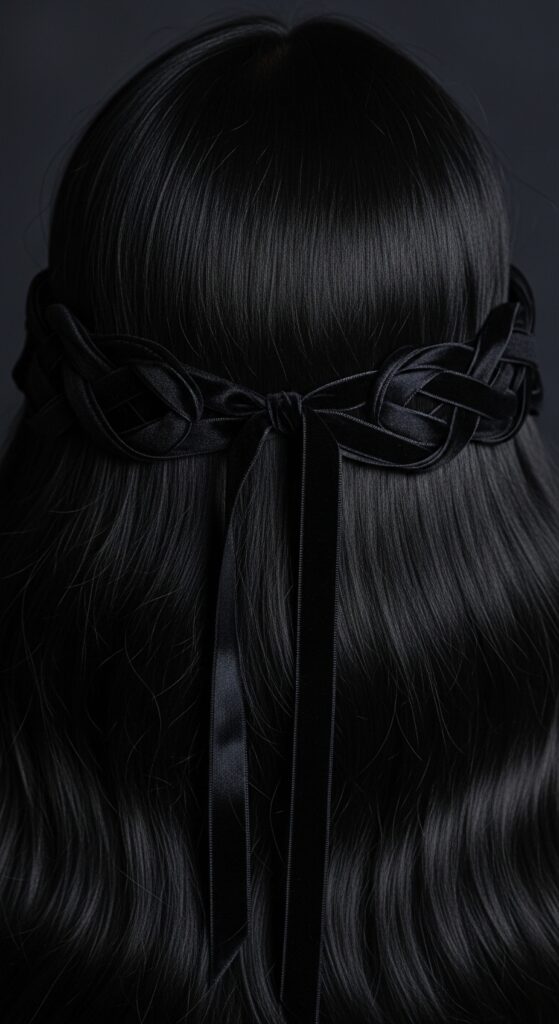
This is for your dark romantic moments. A full circle of linked knots creates a dramatic halo. It’s deeply elegant and has a timeless, almost Victorian feel.
We’re deep in romantic goth hairstyles territory here. The key is consistency. Keep each knot the same size and tension for a mesmerizing effect.
- Part hair down the middle.
- Start knotting from nape of neck up one side.
- Meet at the forehead and continue down the other side.
- Weave a slim ribbon into the sequence as you go.
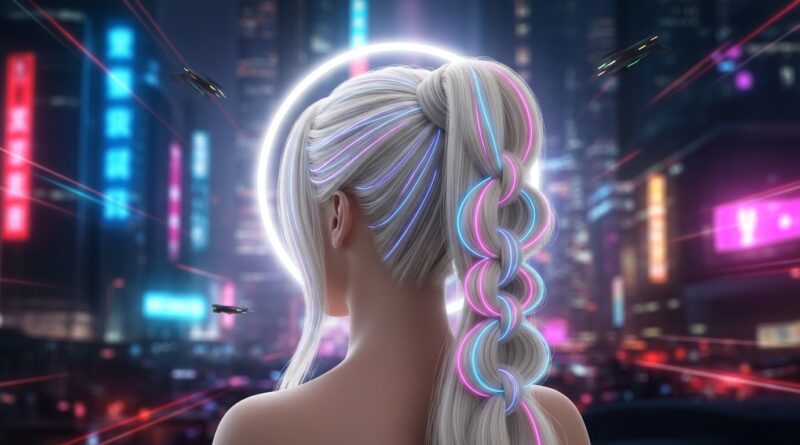
5. The Glitchy Glam Pony
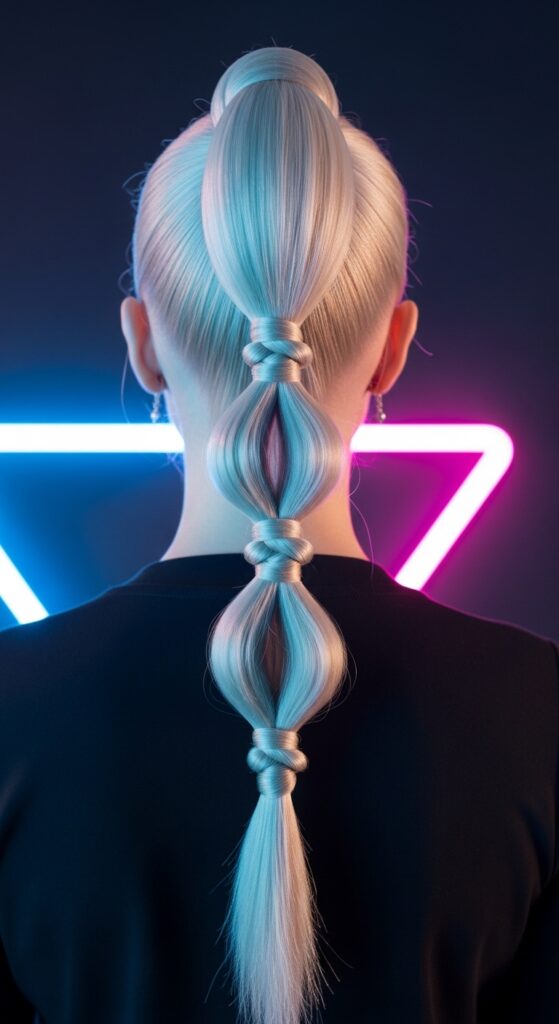
Take your basic pony to the next level. We’re adding a sequence of knots down the length of the tail for a “glitchy glam hair” effect. It’s futuristic and cool.
This is a huge trend for 2026 hairstyles – taking a classic and interrupting it with something structured and beautiful. It looks complex but is so simple.
- Create a sleek, high ponytail.
- Divide the tail into three horizontal sections.
- Make an infinity knot in each section, spacing them out.
- Use a light-hold spray to keep flyaways tame.
6. The Vampire Haircut Companion
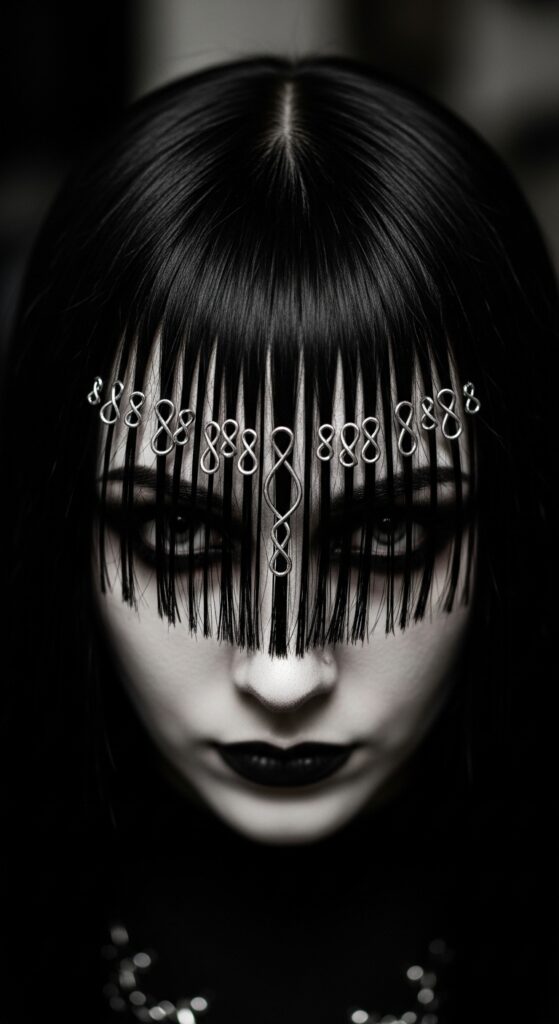
The iconic vampire haircut with its heavy fringe is a statement. Adding a line of tiny infinity knots along the hairline softens it just enough, adding a touch of intricate fantasy.
It complements the cut’s drama without competing. Think of it as armor, but delicate. This detail turns a great cut into a personal signature.
- Take a very thin section along your fringe line.
- Create 4-5 micro infinity knots in a row.
- Pin them discreetly underneath the fringe.
- Let your signature curtain bangs frame the face.
7. The Hime Cut Framing
The hime cut is defined by those long, front framing pieces. Instead of leaving them plain, secure each one with a small infinity knot at cheekbone level.
It honors the structure of the cut while adding a beautiful, intricate detail. It keeps the hair neatly framed and adds a point of visual interest.
- Isolate one long front section.
- Create a single, small knot at your desired length.
- Repeat on the other side for symmetry.
- Leave the rest of the cut’s layers loose and flowy.
8. The Messy Bun Base
Elevate your go-to messy bun. Before you twist your hair up, create a short sequence of infinity knots around the base of your ponytail. Then, form your bun over it.
The knots create a beautiful, textured foundation that peeks out from under the bun’s volume. It looks intentional and artistically undone.
- Make a low ponytail.
- Create 3-4 linked knots around the elastic.
- Tease the ponytail slightly for volume.
- Twist into a bun and secure, letting the knots show.
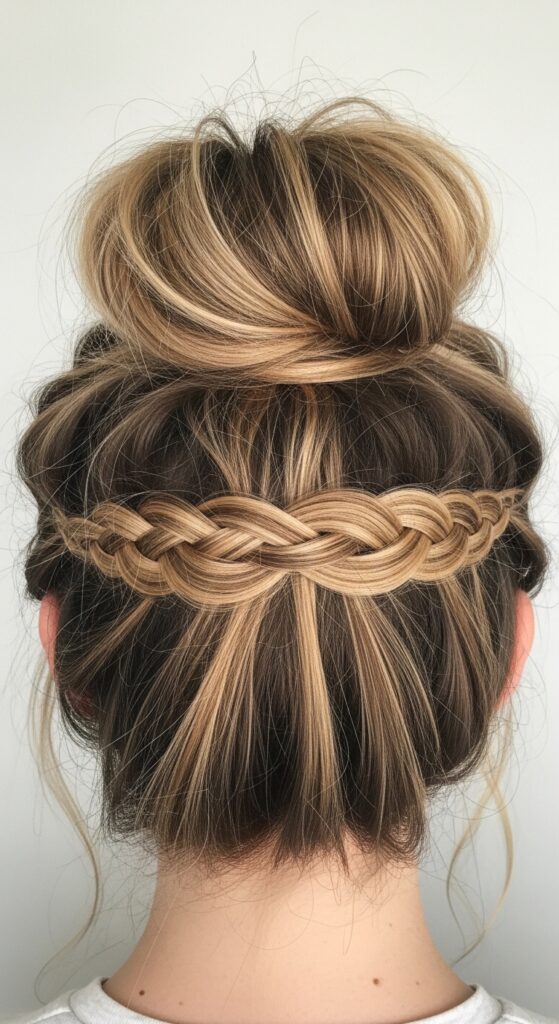
9. The Double Headband Effect
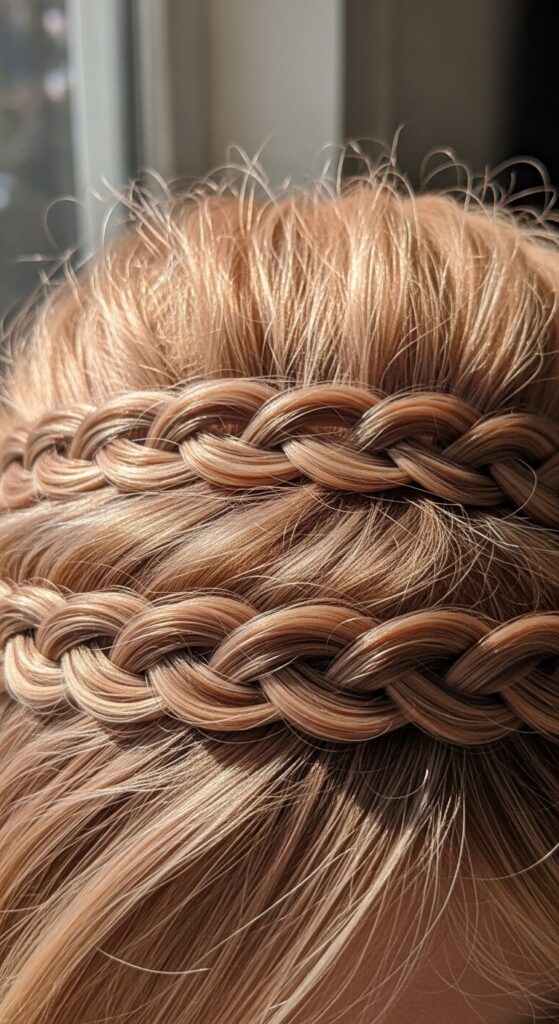
Double the detail, double the impact. This style uses two parallel rows of linked knots for a headband with major volume and texture. It’s playful and perfect for thicker hair.
It fills space beautifully and has a youthful, fresh energy. You can use matching or contrasting ribbon woven through for an extra pop.
- Create the first row close to your hairline.
- Start the second row just below it, using hair from above.
- Link the rows with tiny pins where they meet at the ends.
- Pull gently on all loops for a fuller, softer look.
10. The Infinity French Twist
Imagine a French twist, but the folded hair is a cascade of infinity knots. This is an ultimate “old money hair” move. It’s refined, intricate, and utterly timeless.
It works best on medium to long hair. The knots add grip and texture, helping the twist hold its shape beautifully all day or night.
- Create a sequence of knots down a low ponytail.
- Instead of twisting, fold the knotted tail upward.
- Tuck the ends under and pin securely at the nape.
- Use decorative pins for a final luxurious touch.
11. The Side-Swept Cascading Knots
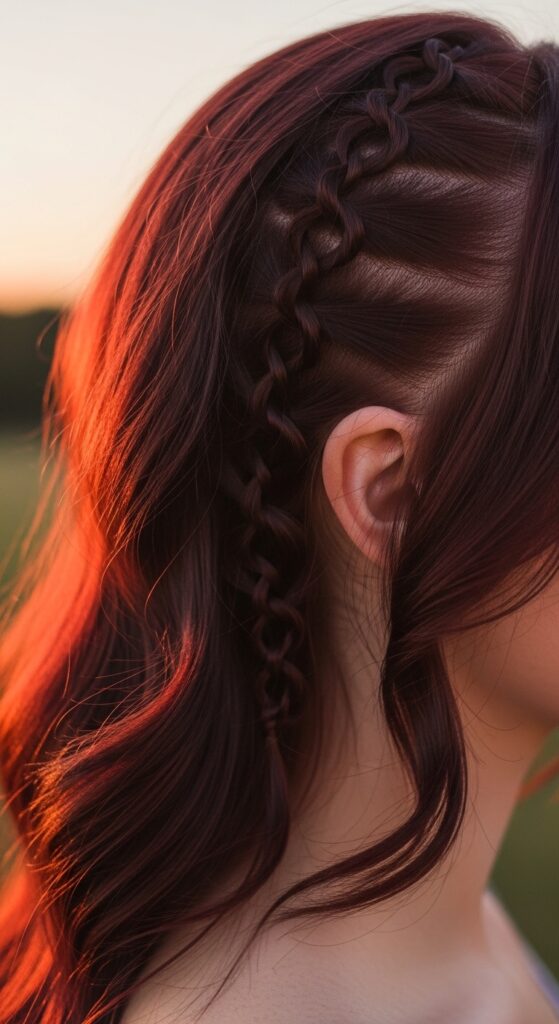
This is a gorgeous, red-carpet worthy look. Start with a deep side part. Create a sequence of knots that begin at one temple and sweep diagonally across your head, ending behind the opposite ear.
It’s dynamic, flattering, and keeps hair perfectly off your face. The diagonal line is incredibly slimming and elegant.
- Start with a deep side part (left or right).
- Begin your first knot at the high point of your temple.
- Continue the sequence along that diagonal line.
- Let the remaining hair flow freely over one shoulder.
12. The Micro-Knot Baby Hairs

This is detail work at its finest. Use the tiniest sections of your baby hairs or edges to create micro infinity knots. It sculpts and defines your hairline with incredible artistry.
It requires patience and a fine-tooth comb, but the result is stunning. Seal with a strong-hold edge control or a tiny bit of gloss for shine.
- Apply edge control to smoothed baby hairs.
- Use a tail comb to isolate a thread-like section.
- Form one perfect, tiny knot.
- Repeat along the hairline, following its natural shape.
13. The Boho Infinity Braid
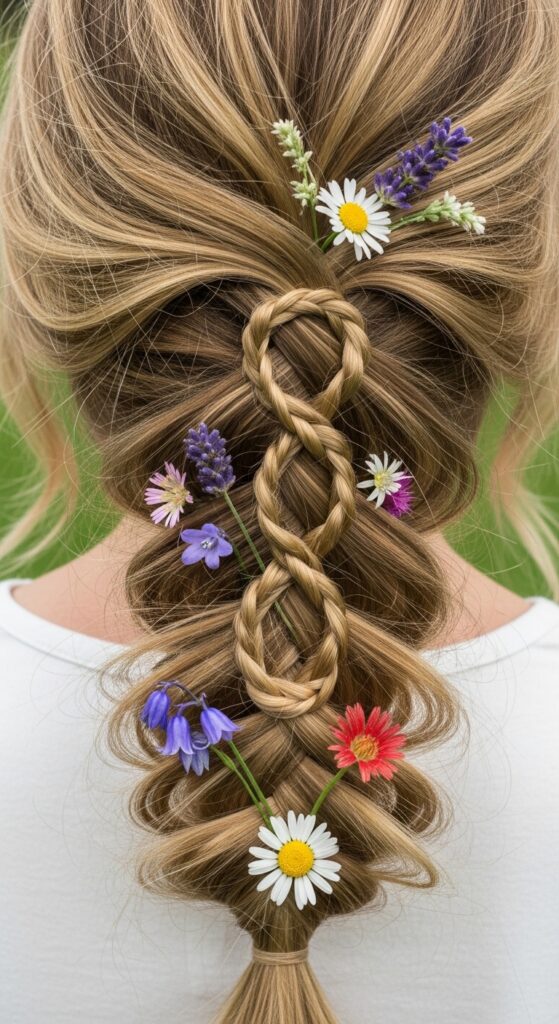
Here’s a fun twist: make an infinity knot your third strand in a braid. As you braid, simply treat the pre-made knot sequence as one continuous strand.
It creates a braid with unbelievable texture and surprise details. Pull it apart gently for a wider, bohemian feel that’s perfect for festivals or a sunny day out.
- Create a short sequence of 4-5 knots on one strand.
- Combine with two other plain strands.
- Braid normally, incorporating the knotted strand.
- Secure the end and gently tug the braid sections wide.
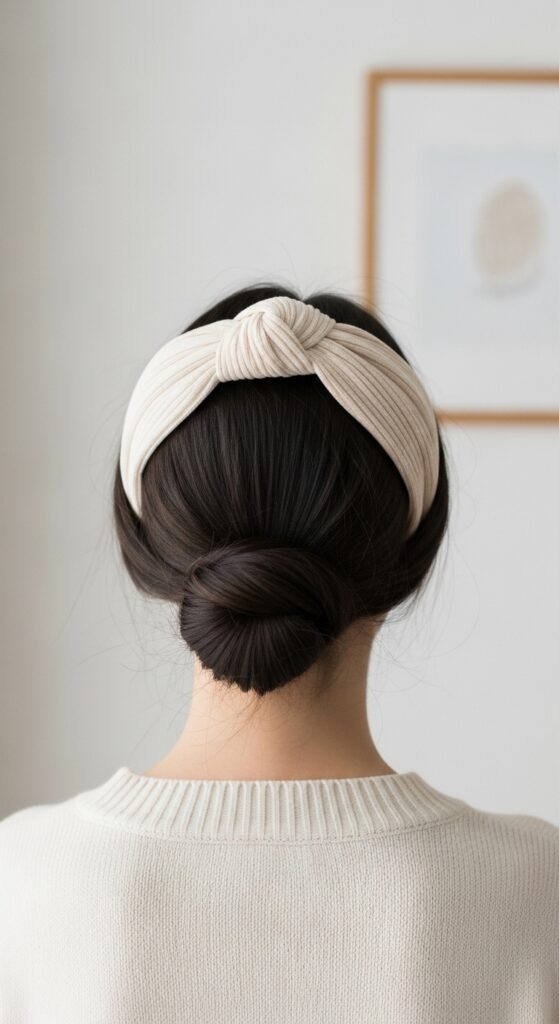
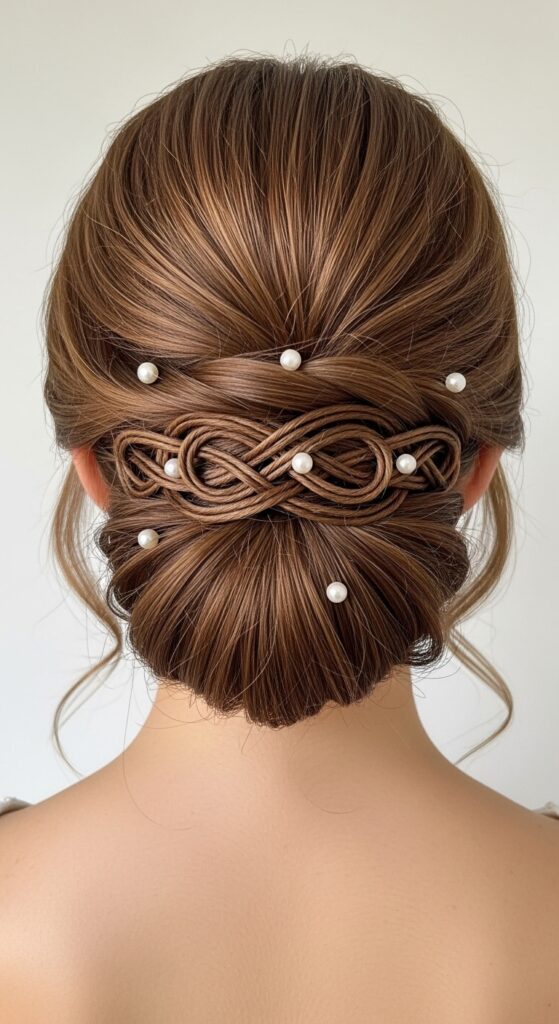
14. The Regal Low Chignon
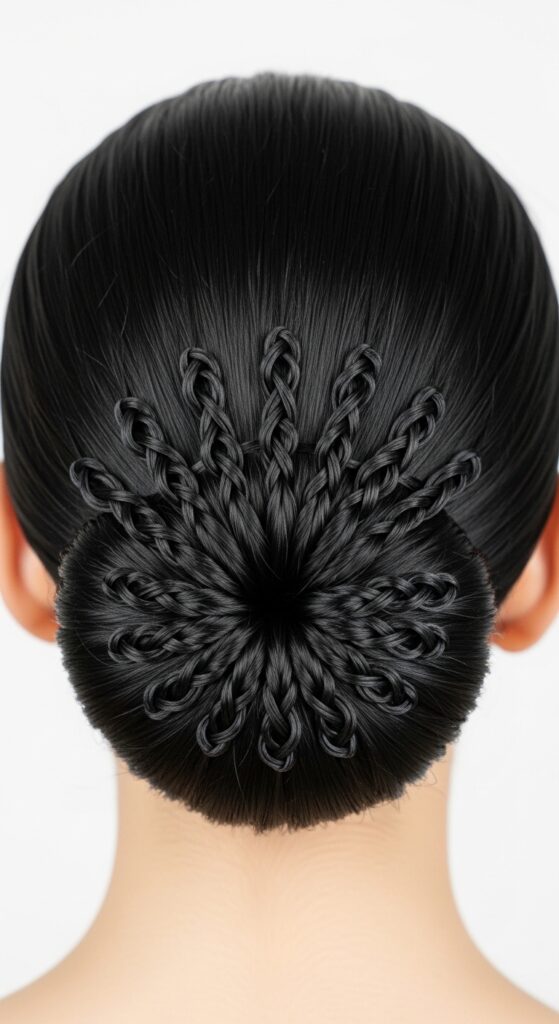
For the ultimate in sleek, controlled glamour. Create a tight, low bun. Then, build a sequence of knots that radiate out from the center like a sunburst or a stylized flower.
This is architectural and powerful. It’s a look that commands attention from the back view. It pairs perfectly with a simple black turtleneck or a dramatic gown.
- Make a perfectly smooth, low bun.
- Using small sections from around the bun, create knots.
- Pin each knot so it points outward from the center.
- Use strong-hold hairspray for a flawless, lasting finish.
15. The Waterfall Infinity
Combine the infinity knot with the waterfall braid technique. As you create your linked knot sequence, drop the bottom strand and pick up new hair from the top, creating a “falling” effect.
It’s fluid, ethereal, and looks incredibly complex. The knots create little windows or jewels in the cascading style. Perfect for a wedding or formal event.
- Start with a small section at the top of your head.
- Form a knot, then drop the bottom-most strand.
- Pick up new hair from the top to replace it.
- Continue down the side of your head to your shoulder.
16. The Textured Pixie Add-On

Short hair girls, you’re not left out! If you have a pixie with some length on top, create one bold, statement infinity knot. It becomes a sculptural piece, a focal point of art on your hair.
This is glitchy glam at its shortest. It plays with texture and form. Use a bit of pomade to keep the knot defined and the rest of your pixie perfectly piecey.
- Isolate the longest section of your pixie, usually on top.
- Work in a strong pomade for hold and separation.
- Form one large, clean infinity knot.
- Pin it discreetly at the base and fan out the loop.
17. The Athletic Knotted Band
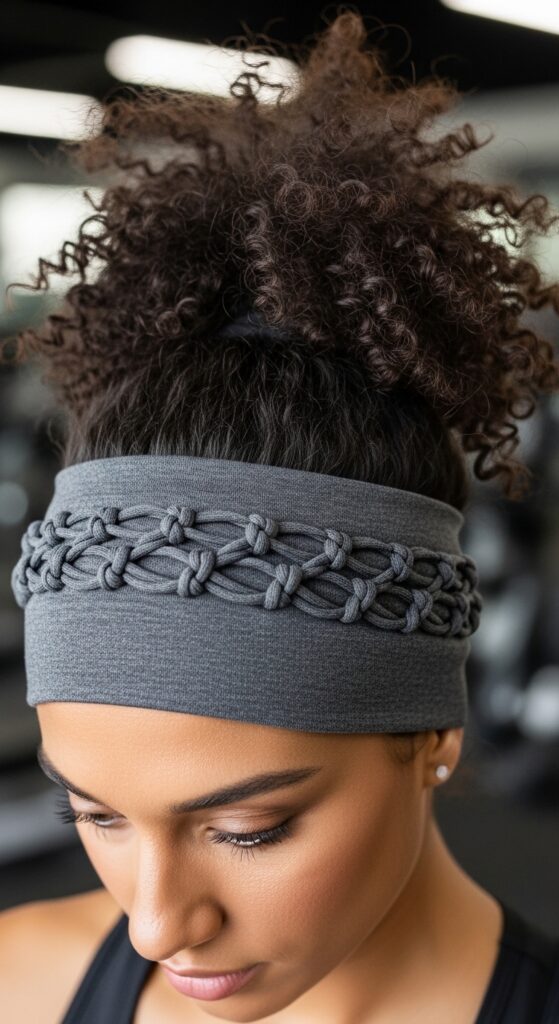
This is form meeting function. A linked infinity knot headband is surprisingly secure for workouts. It keeps every wisp and baby hair in place without the squeeze of a fabric band.
It looks cute with a high pony or bun. Because it’s made of your own hair, it won’t slip. A total game-changer for yoga, running, or just a busy day.
- Start with damp or lightly gelled hair for grip.
- Create tight, secure knots from ear to ear.
- Pull the rest of your hair into your preferred athletic style.
- The knots will stay put through sweat and movement.
18. The Peek-a-Boo Underlayer
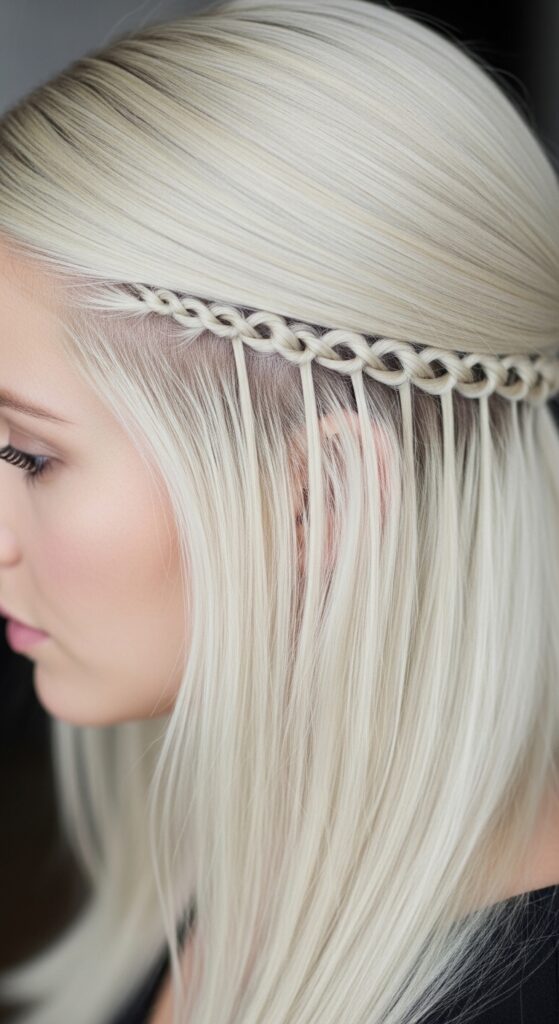
For the truly subtle. Create your sequence on an underlayer of hair. When you wear your hair down and straight, it’s hidden. Toss your hair or part it slightly, and the secret detail is revealed.
It’s the ultimate “for you” detail. This quiet luxury bob trick adds a layer of personal intrigue to the simplest hairstyle.
- Isolate a bottom section of hair at the nape.
- Create a horizontal row of knots on this underlayer.
- Let your top hair cover it completely.
- Reveal it only when you want to, with a hair flip.
19. The Ribbon-Threaded Romance
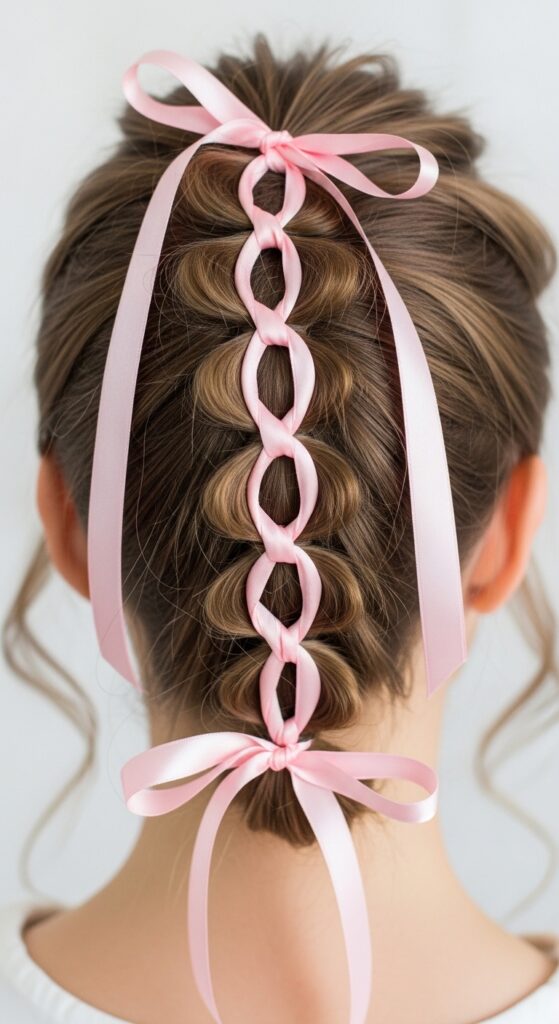
Take any of the half-up or crown styles and add a ribbon. Weave a slim satin ribbon through the center of each knot as you create the sequence. It ties the whole look together, literally and figuratively.
It amplifies the romantic, feminine feel. Choose a ribbon color that complements your outfit or your mood. It’s a beautiful way to add a pop of color.
- Choose a slim, long satin ribbon.
- Begin your first knot with the ribbon placed as one of the strands.
- Weave it in and out as you form each subsequent knot.
- Tie the ribbon ends into a small bow or knot at the finish.
20. The Modern Milkmaid Infinity
Reimagine the milkmaid braid. Instead of two regular braids, use two long sequences of infinity knots. Cross them over the top of your head and pin them in place.
It’s a modern, textured take on a classic pastoral style. The knots add so much more visual weight and interest than a simple braid. It feels fresh and cool.
- Create two long sequences, one on each side of your head.
- Bring the left sequence over the crown to the right side, pin.
- Bring the right sequence over to the left side, tucking the end under.
- Pin generously and fluff the knots for a soft volume.
And there you have it! Fourteen ways to turn one simple knot into a whole universe