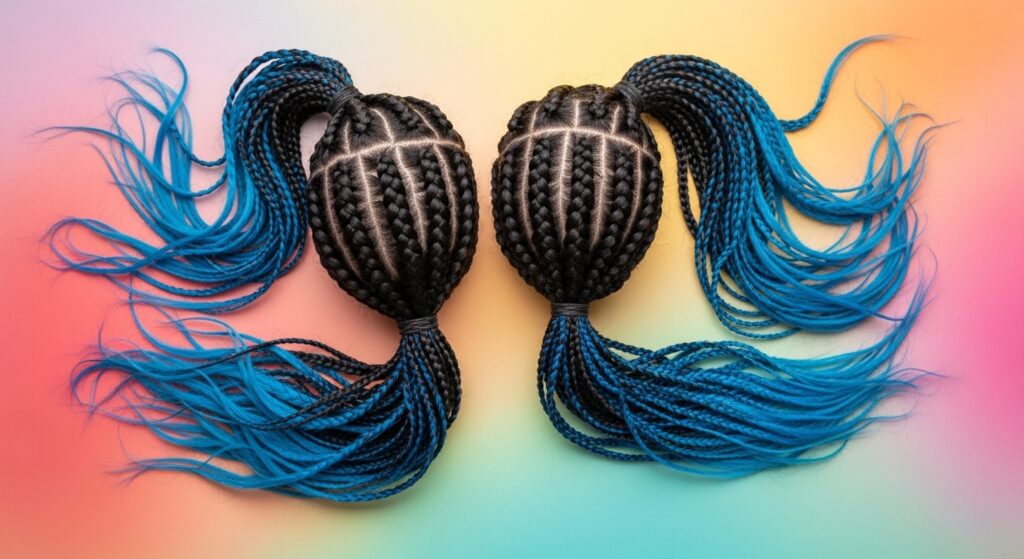
Knotless 21 Seamless Crochet Braids Mimicking Natural Growth Patterns
Okay, let’s talk about the one protective style upgrade that genuinely made me do a double-take. You know me—I’m always hunting for styles that look expensive but are secretly super practical. And friends, knotless 21 seamless crochet braids? They’re the real deal.
If you’ve ever been frustrated with the bulky knots of traditional crochet, or wished your braids looked more like they grew straight from your scalp, this is your solution. The “21” refers to the hair density, giving you that perfect, full-but-not-heavy look.
But the magic is in the “seamless” and “natural growth patterns” part. It mimics how hair actually grows, with a slight irregularity at the part that tricks the eye completely. It’s the ultimate in low-maintenance, high-impact hair. Let’s dive into everything you need to know to get this look right.
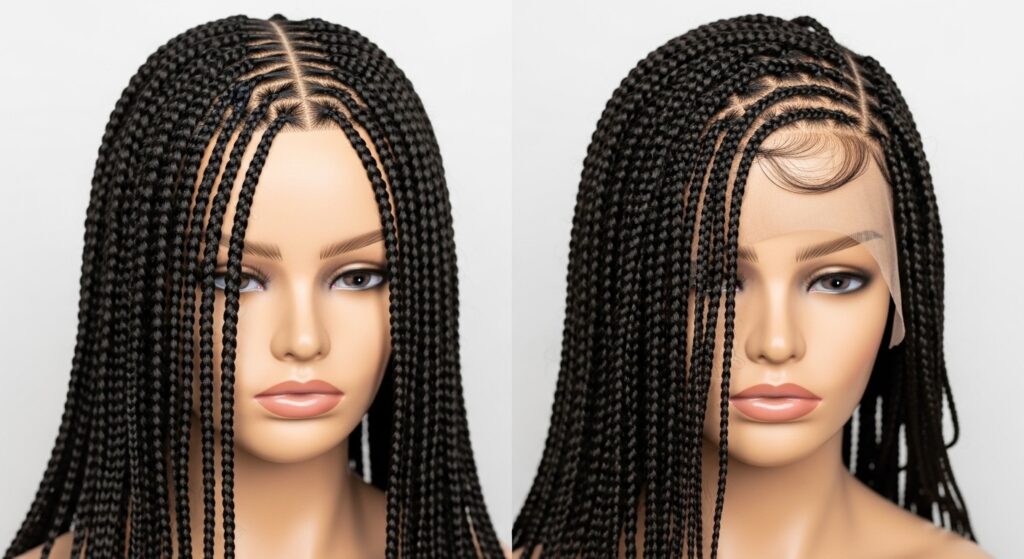
What Are Knotless 21 Seamless Crochet Braids?
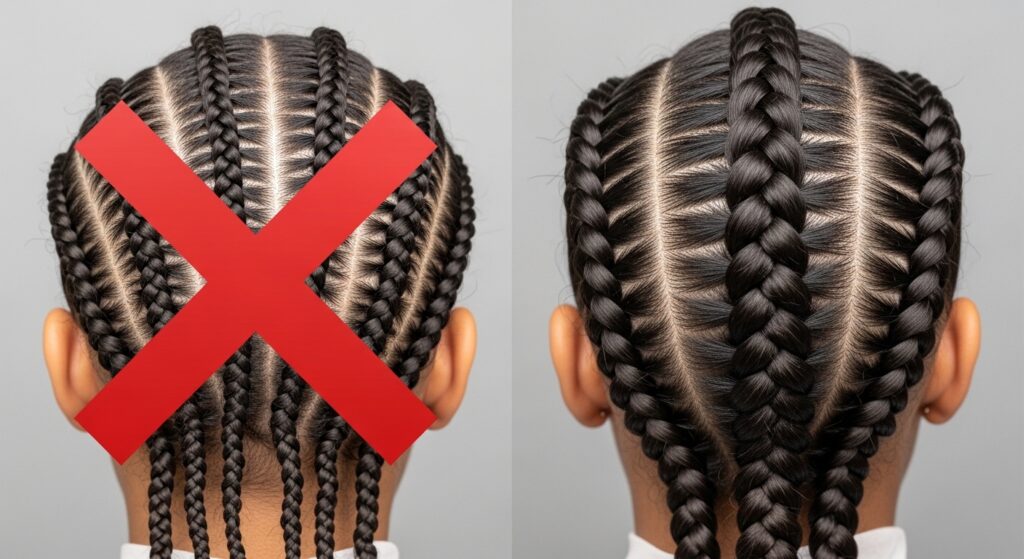
Think of this as the next-generation protective style. Traditional crochet uses a knot to attach braiding hair to your cornrows, which can create bumps and tension. Knotless crochet uses a feed-in technique, leaving no visible knots against your scalp.
The “21” means 21-inch hair, and “seamless” refers to how the hair is looped through the braid base. This combination creates an incredibly flat, natural-looking install. The goal is to make it look like you have a head full of luxurious, healthy hair that’s all your own.
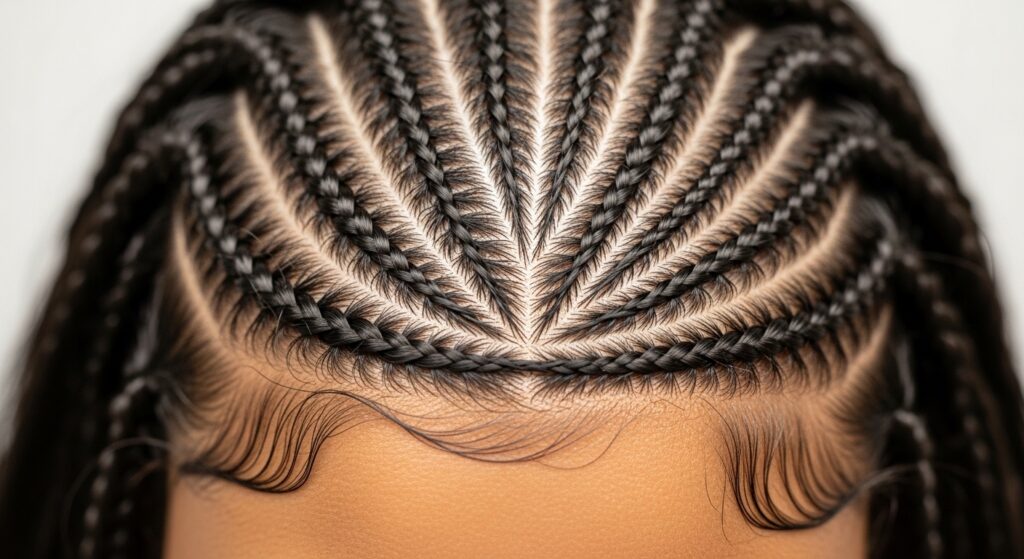
The “Natural Growth Pattern” Illusion Explained
This is the secret sauce. Natural hair doesn’t all grow from one perfectly straight line. It has slight variations. This technique replicates that by installing the braids in a way that mimics a natural hairline and parting.
Instead of a rigid, straight part, you get soft, irregular patterns. This means when you style it—down, in a ponytail, or half-up—the roots look believably real. It’s a detail that takes the style from “nice braids” to “is that her real hair?”
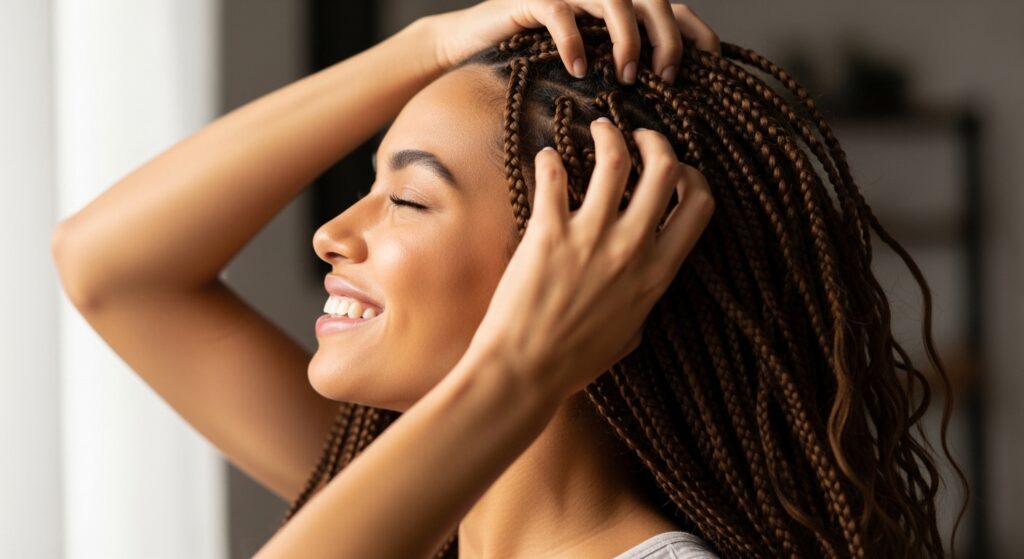
Why This Style is a Total Game-Changer
First, it’s incredibly protective. With no knots digging in, there’s less tension on your edges and natural hair. Your strands get a full break tucked away in those flat cornrows.
Second, the install is often faster than traditional braiding or weaving. Third, the styling versatility is unreal. Because the base is so flat and natural, you can rock almost any look. It’s a perfect canvas for everything from a sleek quiet luxury bob to more dramatic shapes.
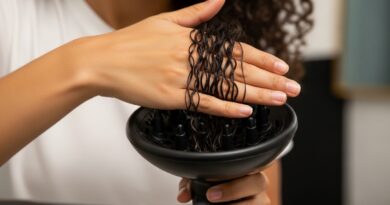
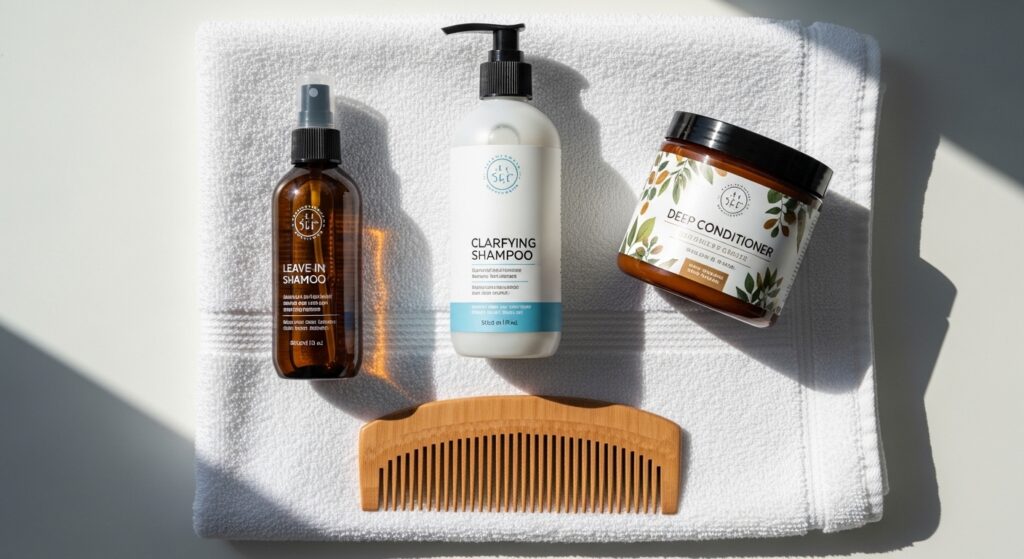
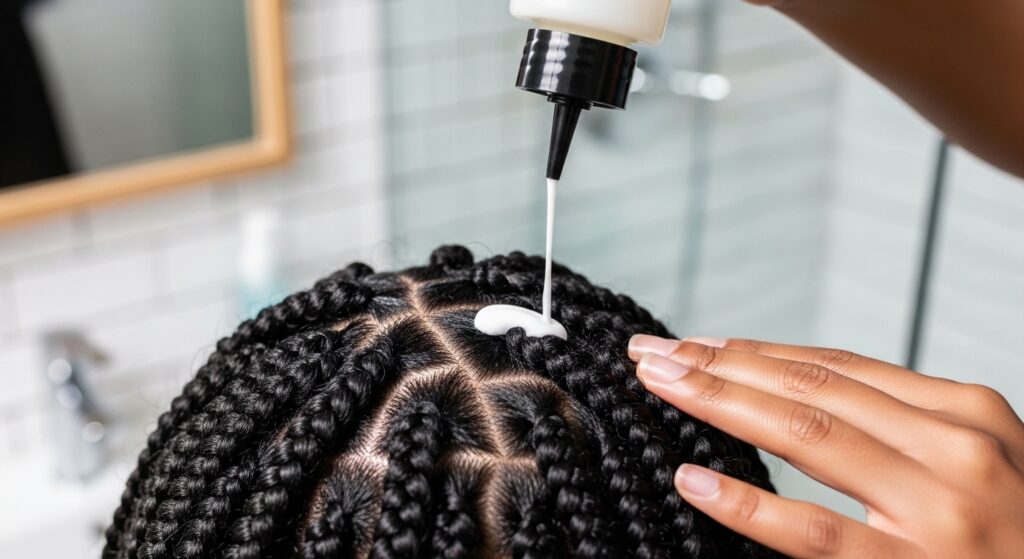
Perfect Hair Prep: The Foundation Matters
Your style will only last as long as the foundation it’s built on. Start with freshly washed, deep-conditioned hair. I recommend a good clarifying shampoo to remove any product buildup.
- Detangle thoroughly from ends to roots.
- Apply a light leave-in conditioner and a sealing oil.
- Braid your natural hair into neat, medium-sized cornrows. Avoid braiding too tightly!
Healthy hair underneath means a healthy style on top and an easy take-down later.
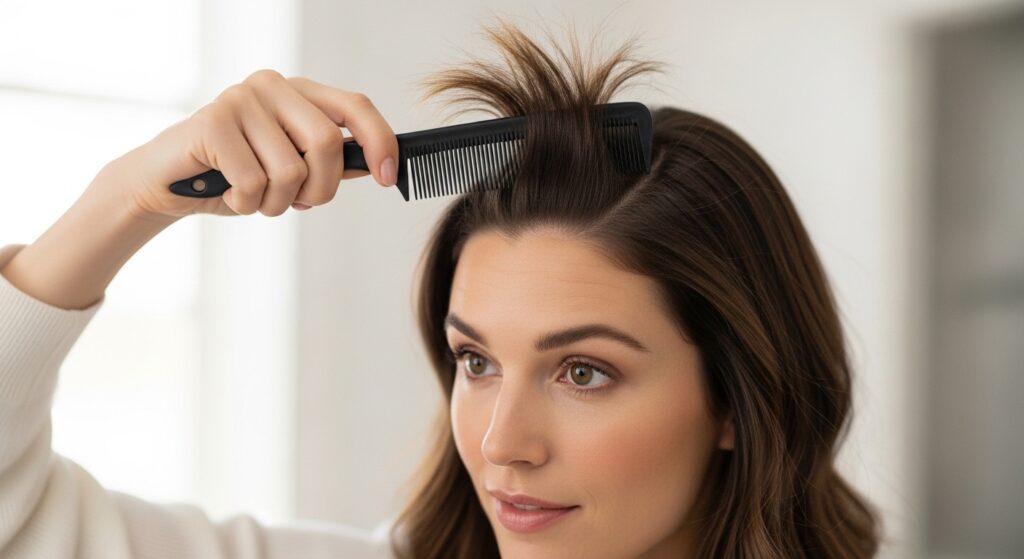
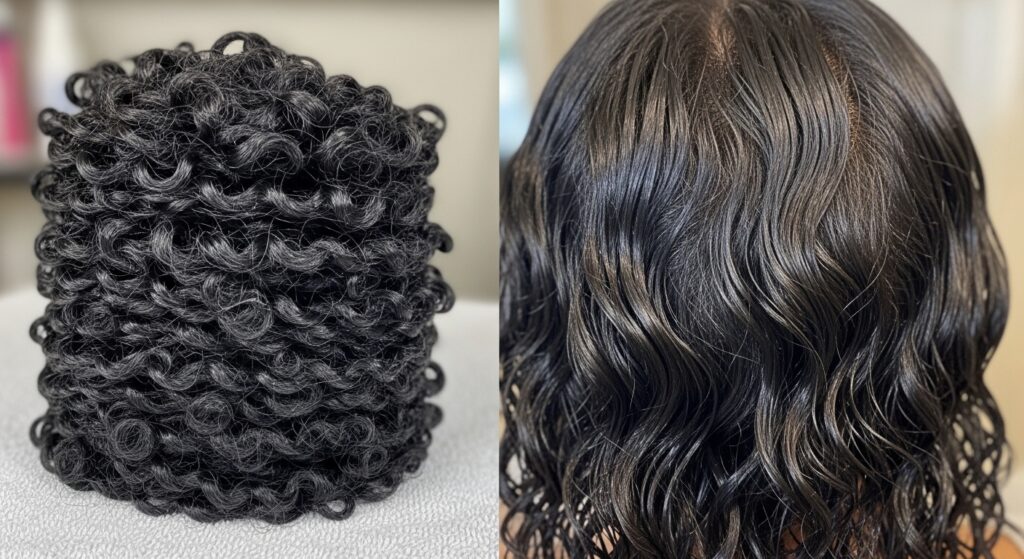
Choosing Your 21-Inch Hair: Quality Check
Not all braiding hair is created equal. For a seamless look, you need hair that’s smooth, doesn’t tangle easily, and has a natural luster. Look for “pre-stretched” or “springy” braiding hair for the easiest installation.
I prefer synthetic hair that mimics human hair texture for this style. It holds better and looks more realistic. Feel the weft—it should be soft and flexible, not stiff or plastic-y. This is an investment in your look’s longevity.

Step-by-Step Installation Guide
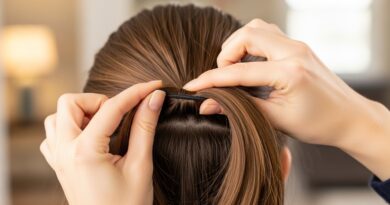
- Create your cornrow pattern, following your desired natural growth direction.
- Take a small crochet hook. Loop the pre-stretched hair through the base of the cornrow, pulling a small amount through.
- Split that hair in two, braid it into the existing cornrow for a few stitches to secure it seamlessly, then continue crocheting the rest of the weft.
- Continue this feed-in method along the entire cornrow until you reach the end.
Take your time. The goal is flatness, not speed.

Styling for a “My Hair But Better” Vibe
Once installed, the real fun begins. You can cut and style this hair like it’s your own. For a timeless look, blunt cut the ends for a heavy, healthy appearance. You can also add layers for movement.
To enhance the natural growth pattern, use a rat-tail comb to gently pick at the roots along your parts. This creates even more of that “baby hair” and irregular growth illusion. A little edge control can polish it without making it look stiff.
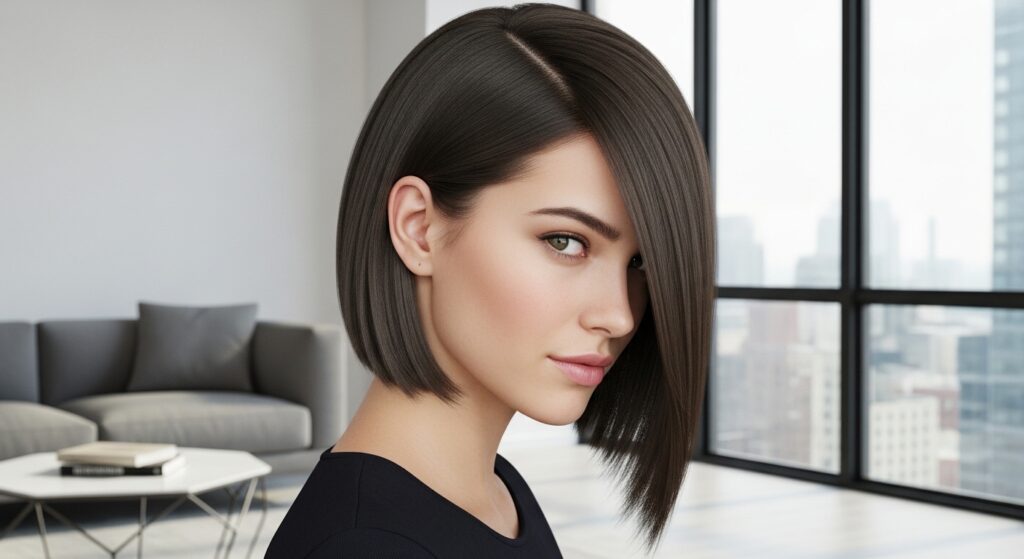
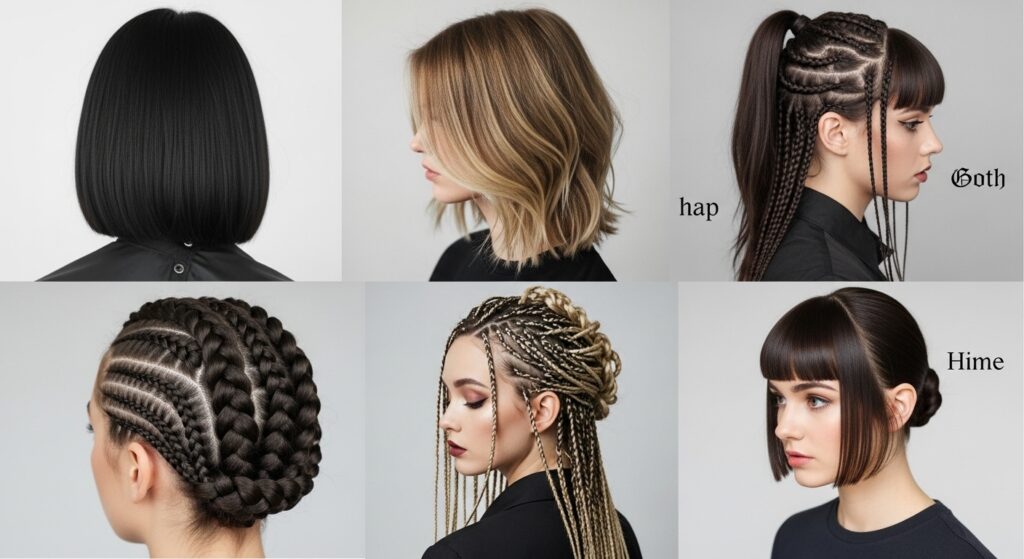
Creating a Sleek Quiet Luxury Bob
This is one of my favorite ways to wear it. The 21-inch length is perfect for a mid-length bob. Once installed, gather all the hair as if for a low ponytail at your nape.
Cut straight across to your desired bob length—maybe just above the shoulders. Use a flat iron on low heat to sleek it down. The seamless base makes it look like you just got an incredibly expensive, sharp bob cut. It’s the ultimate old money hair vibe.

Getting the Asymmetrical Lob Look
Craving something more modern? The asymmetrical lob (long bob) is a stunning option. Style your hair straight first. Then, create a deep side part.
Cut the hair on the longer side to about collarbone length, and angle it up so the shorter side hits at your jawline. This dramatic, face-framing cut works beautifully with the density of the 21 hair and feels very 2026.
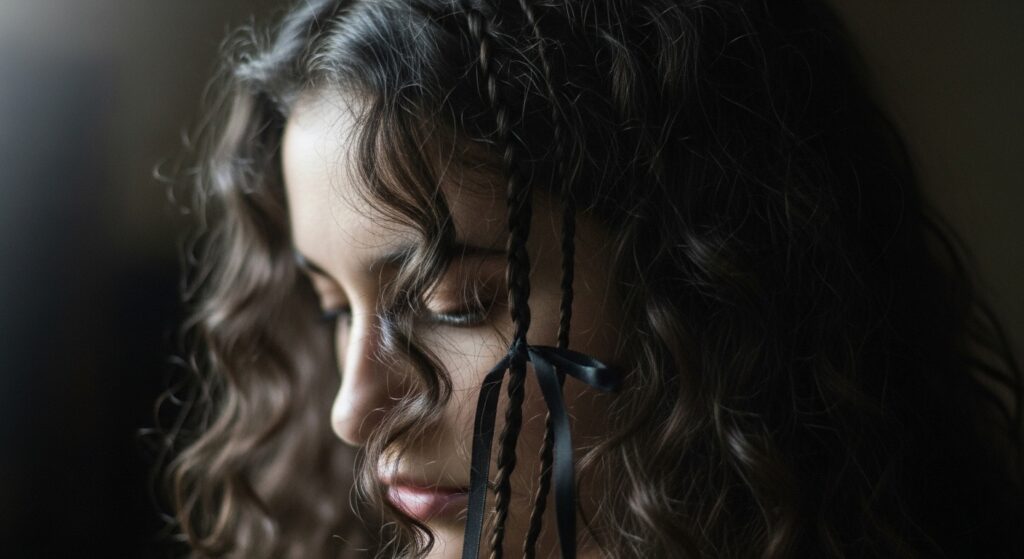
Channeling Romantic Goth Hairstyles
The length and fullness are perfect for romantic goth hairstyles. Think soft, Victorian-inspired waves. Create large, loose curls with a curling wand.
Pull out a few face-framing pieces to curl separately. Accessorize with delicate black velvet ribbons or pearl clips woven into the braids at the base. It’s darkly romantic and utterly beautiful, playing into the vampire haircut aesthetic without being costume-y.
Experimenting with Glitchy Glam Hair
Glitchy glam hair is all about intentional, artful imperfection. With your knotless base, try creating two high pigtails. Braid them loosely, then pull them apart to make them messy and full.
Add in a few streaks of temporary colored hair spray or clip-in pieces in silver or neon. The contrast between the “natural” roots and the playful, glitchy colors and texture is so cool and forward-thinking.
Trying the Dramatic Hime Cut
The hime cut (the Japanese princess cut with straight, face-framing front strands and longer back hair) is a showstopper. Section out the front pieces from your temples forward.
Cut these straight to about chin-length. Keep the back hair at its full 21-inch length and style it pin-straight. The stark geometric lines look incredibly chic and intentional with the seamless base.

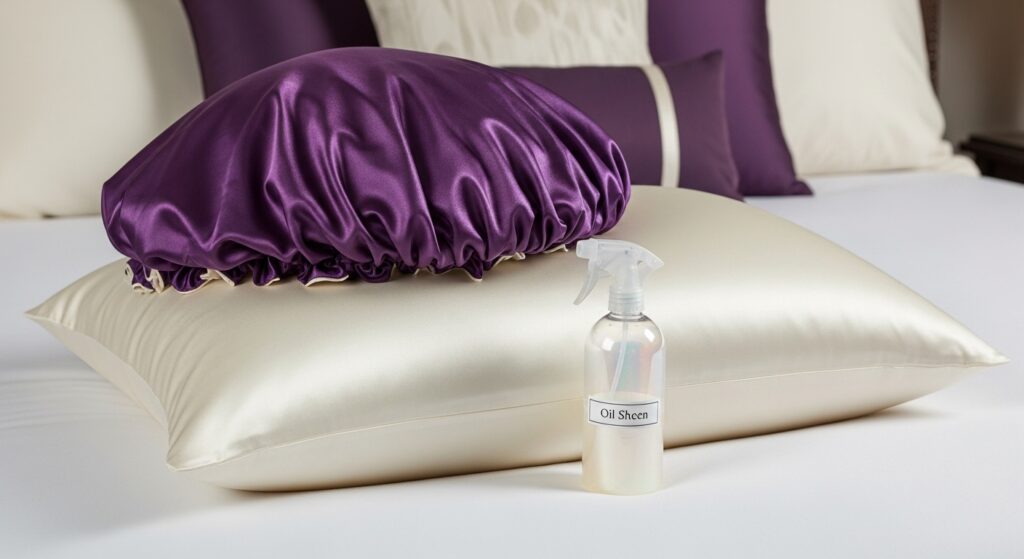
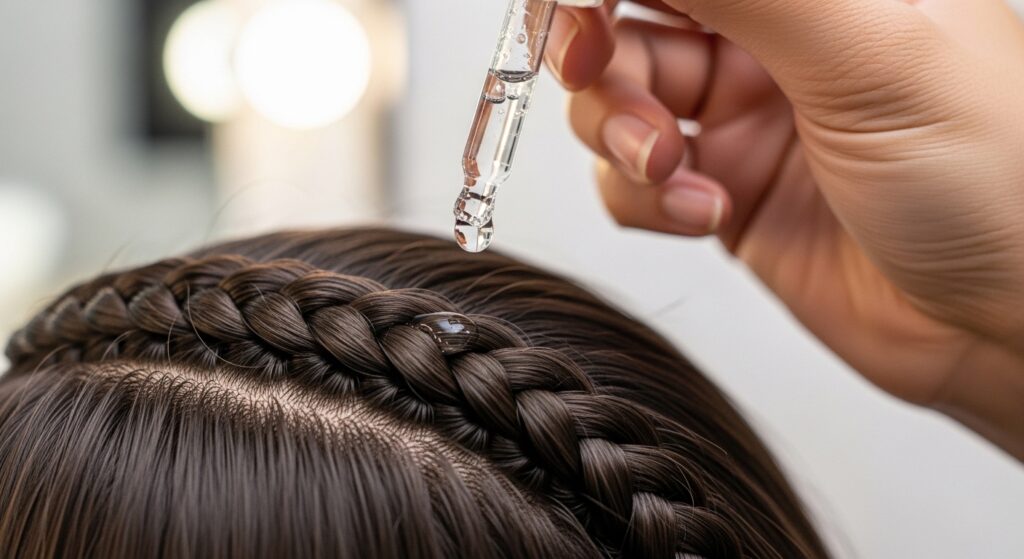
Maintenance & Nighttime Routine
To make your style last 4-6 weeks, a little care goes a long way. At night, always protect it. I recommend a loose, high ponytail or pineapple under a satin bonnet.
- Use a satin pillowcase if you skip the bonnet.
- Refresh curls by lightly misting with water and oil sheen, then pinning them up.
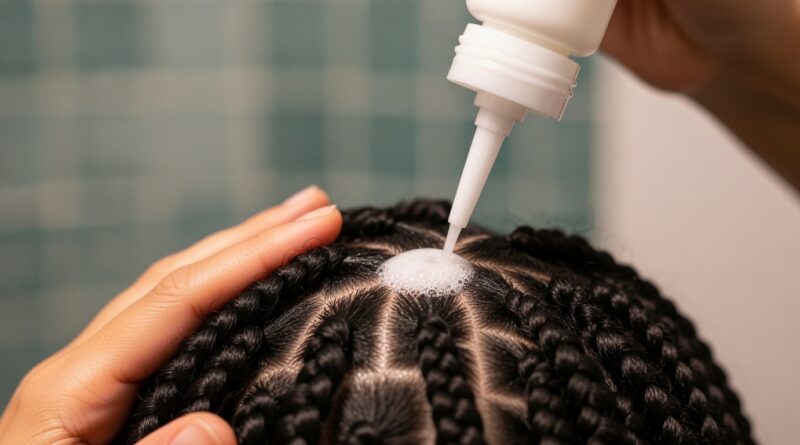
- Gently cleanse your scalp weekly with a diluted shampoo applicator bottle.
This keeps your scalp healthy and your style fresh.
How to Wash Your Scalp While Installed
Yes, you can and should wash your scalp! Mix a gentle shampoo with water in an applicator bottle. Part your hair section by section and apply the mixture directly to your scalp.
Gently massage with the pads of your fingers—don’t scratch! Rinse thoroughly by leaning back in the shower, letting the water flow down your scalp. Follow with a light, watery conditioner on the mids and ends of the installed hair if needed. Air dry or use a hooded dryer on cool.
Fighting Frizz & Keeping Shine
Synthetic hair can get frizzy, especially at the ends. A tiny amount of silicone serum or a dedicated braid sheen spray is your best friend. Apply it sparingly to the lengths, avoiding the roots to prevent buildup.
For a quick refresh between washes, use a soft boar bristle brush (meant for extensions) to smooth the hair cuticles down. This redistributes natural oils and reduces that dry, fuzzy look instantly.
When & How to Take Them Down
Don’t wait until your new growth is matted! Around the 6-8 week mark is usually safe. Start by carefully cutting the installed hair away from your cornrows. Be slow and precise.
Then, unravel your cornrows. Your natural hair will likely be coated in shedded hair and lint. A thorough wash with a clarifying shampoo and a deep, deep condition is non-negotiable. Detangle under the conditioner’s slip with your fingers first, then a wide-tooth comb.
Common Mistakes to Avoid
- Braiding too tightly: This defeats the knotless, tension-free purpose.
- Using heavy products: They cause buildup and weigh hair down.
- Ignoring your scalp: Itchy scalp is a sign it needs cleansing.
- Keeping them in too long: This can lead to matting and breakage.
Listen to your body. If your scalp is consistently sore, the style is too tight.
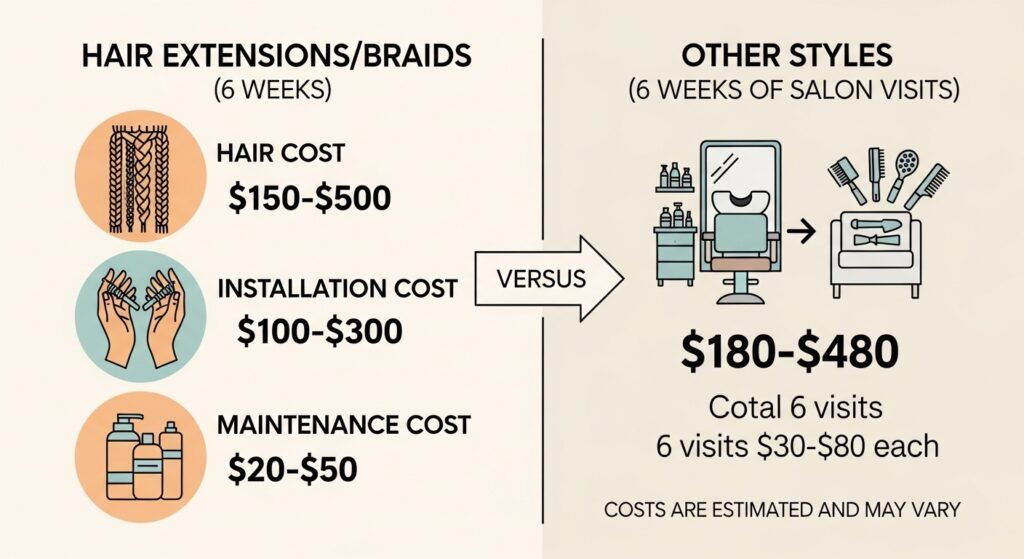
Cost Breakdown: Is It Worth It?
This style is an investment. The hair itself can cost $50-$150 depending on quality. If you go to a stylist, installation can range from $200-$500+ based on location and expertise.
But when you factor in the 6+ weeks of wear, the protection it offers your natural hair, and the sheer versatility, the cost-per-wear is actually quite low. It’s cheaper than constant salon visits for trims and treatments on damaged hair.
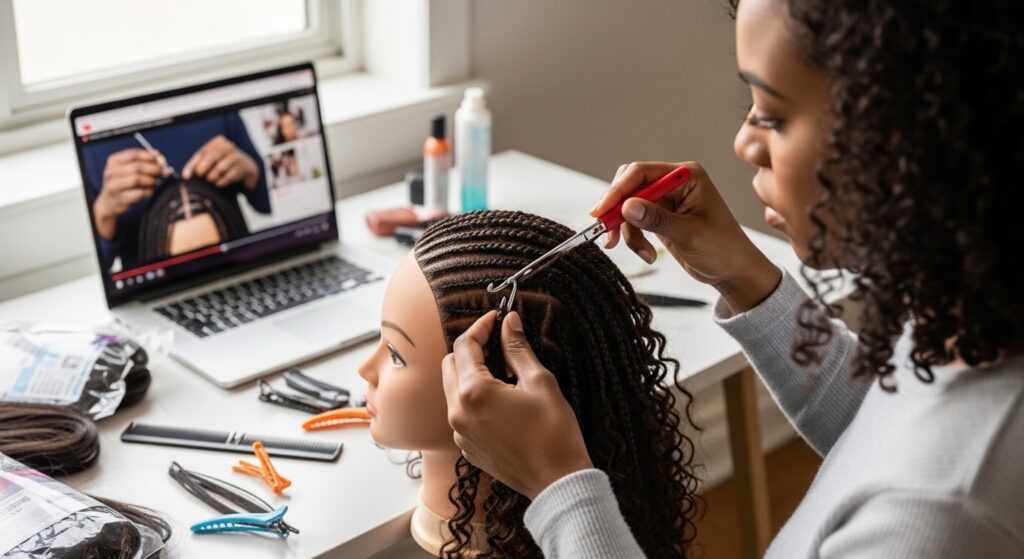
DIY vs. Professional Installation
If you’re a braiding beginner, I highly recommend seeing a professional for your first time. The technique for true seamless, knotless installation has a learning curve. Watch them closely and ask questions.
If you’re experienced with crochet, you can absolutely try this at home. Be patient, watch detailed tutorials, and give yourself a full day. The back sections are the hardest, so have a hand mirror ready or enlist a trusted friend.
How This Fits Into 2026 Hairstyle Trends
Looking ahead to 2026 hairstyles, the focus is on hair health, authenticity, and personalized expression. Knotless 21 seamless braids check every box.
They protect your real hair (health), mimic its growth (authenticity), and can be styled in endless ways, from the vampire haircut to the glitchy glam look (expression). It’s a style that adapts to you, not the other way around.
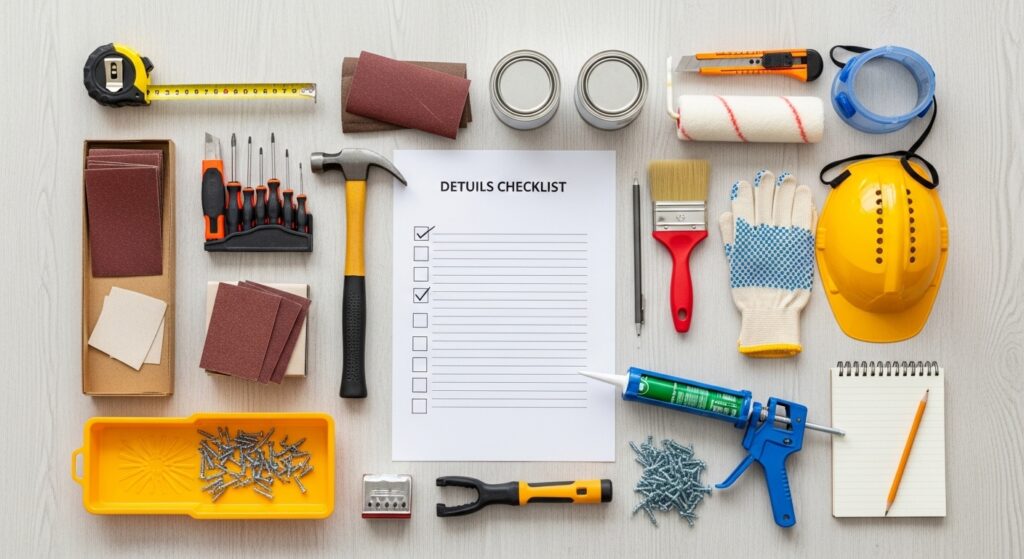
Your Final Checklist Before You Start
- High-quality, pre-stretched 21-inch braiding hair
- Crochet hook (size 0.6mm or 0.75mm)
- Clarifying shampoo, deep conditioner, light oil
- Rat-tail comb, wide-tooth comb, hair clips
- Sharp hair shears for cutting and styling
- Satin bonnet or pillowcase
- A full day set aside for installation
Get your playlist ready and make a day of it!
Answering Your Biggest Questions
How long does it take? A pro can do it in 3-5 hours. DIY might take 6-8 hours. Can I swim/work out? Yes! Just rinse and dry thoroughly afterward. Will it damage my edges? When installed correctly on healthy hair and not kept in too long, it’s very protective.
Can I dye the hair? Only if you purchase human hair blend. Most synthetic hair cannot be dyed. Always do a test strand first!
So, there you have it—your complete guide to achieving one of the most beautiful, practical protective styles out there right now. I truly believe knotless 21 seamless crochet braids are a game-changer because they give you freedom. Freedom from daily styling, freedom to experiment, and freedom to let your own hair just breathe and grow.
It’s more than just a hairstyle; it’s a tool for healthy hair journey and a blank canvas for your creativity. Whether you’re going for that understated old money hair look or something bold and glitchy, this foundation makes it possible.
I’d love to hear what you think! Are you ready to try this method? Or do you have another go-to protective style? Let me know in the comments below. And if you found this guide helpful, save this post to Pinterest so you can easily find it when you’re ready for your install day!