Knotless Braids Tutorial Step-by-Step for Stunning Results
Okay, let’s be real. We’ve all seen those stunning knotless braids on our feeds and thought, “I wish I could do that.” Maybe you’ve even tried, only to end up with a sore scalp and a style that doesn’t look quite right. I’ve been there, and I’m telling you, the secret is all in the prep and the technique.
This isn’t some vague overview. This is your actual, step-by-step guide to getting salon-quality knotless braids at home. We’re going to break it down so it’s totally doable, even if you’re a beginner.
Think of this as your weekend project for a fresh, protective style that lasts. By the end, you’ll have the know-how to create a look that’s not only gorgeous but also way gentler on your hair. Let’s get your toolkit ready and dive in.
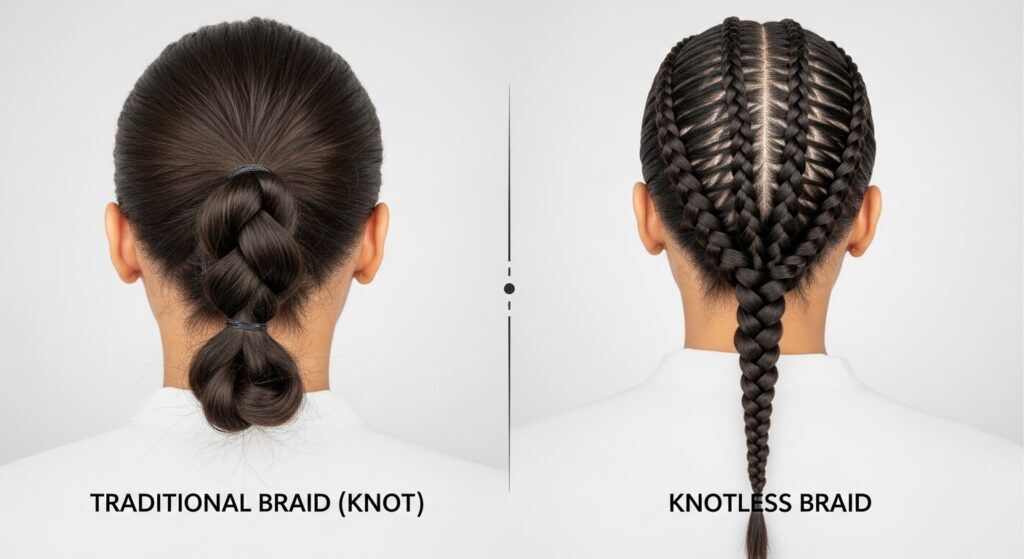
Why Knotless Braids Are a Total Game-Changer
If you’re used to traditional box braids, knotless braids will feel like a revelation. The main difference is right at the root. Instead of a tight knot of braiding hair, you start with your own hair and gradually feed in the extensions.
This one change makes all the difference. It eliminates that initial tension and pulling, which means way more comfort and less risk of breakage. The result is a seamless, natural-looking braid that lays flat and looks incredibly polished.
It’s the ultimate in low-maintenance, high-style hair. Once they’re in, you’re set for weeks with a look that works for everything from the gym to a night out. It’s a perfect base for experimenting with different parts and accessories, fitting right in with the effortless vibe of 2026 hairstyles.
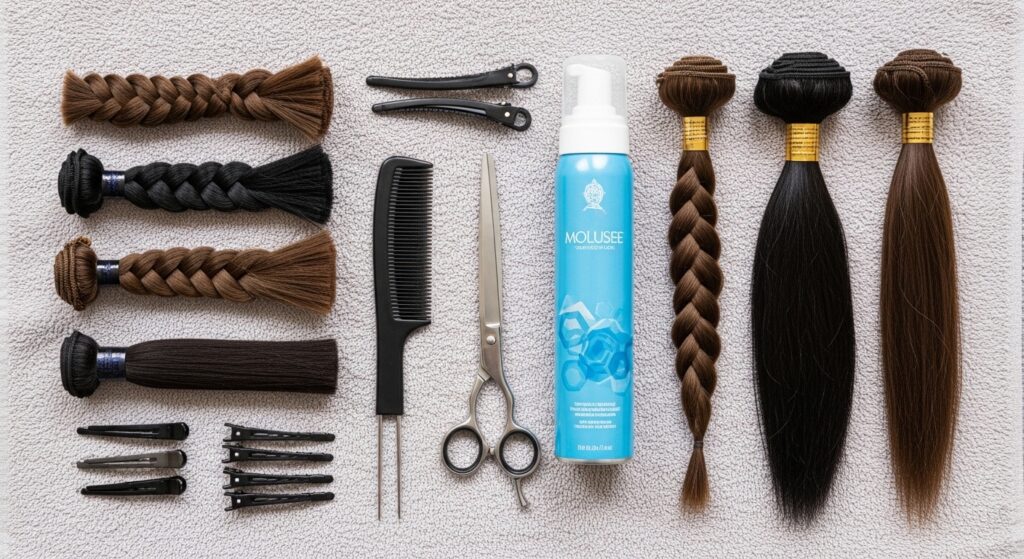
Gathering Your Must-Have Braiding Toolkit
You can’t build a house without tools, and the same goes for great braids. Having everything within arm’s reach before you start is key to a smooth process. Here’s your non-negotiable shopping list.
- Braiding Hair: Choose your favorite type—kanekalon, X-pression, or pre-stretched braiding hair. I love a human hair blend for a more natural feel.
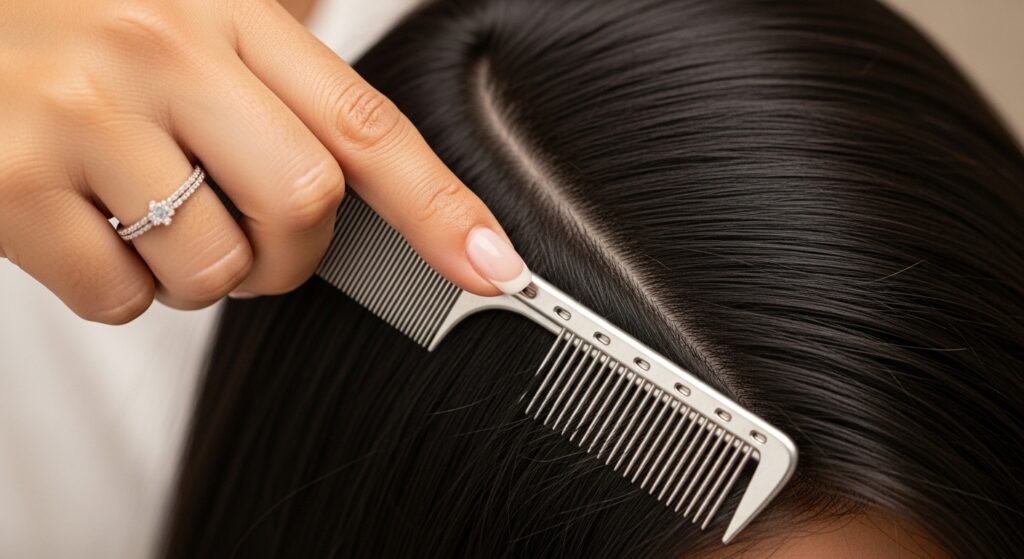
- Rat-Tail Comb: For clean, precise parts. A fine-tooth comb is essential.
- Sharp Hair Shears: To cleanly cut your braiding hair and trim any flyaways.
- Mousse or Edge Control: A good, strong-hold mousse is your best friend for sleekness.
- Clips: To section off the hair you’re not working on.
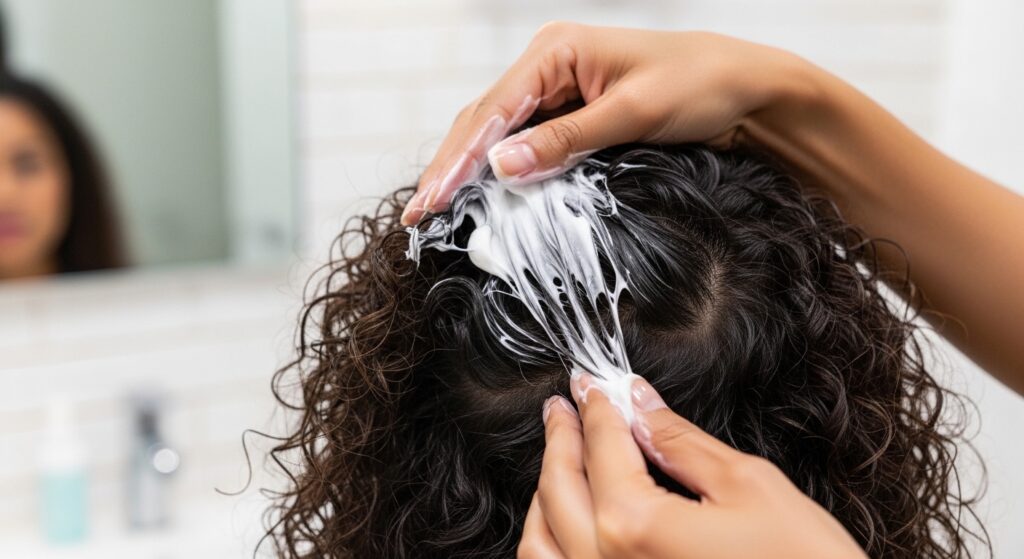
The Crucial First Step: Washing & Prepping Your Hair
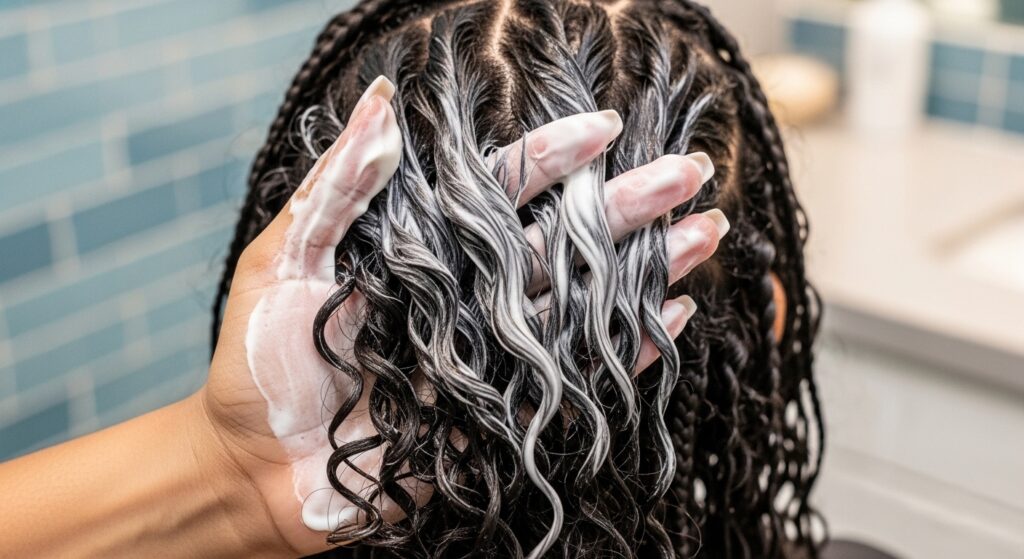
Never, ever braid dirty hair. Starting with a clean, well-moisturized base is the foundation for healthy braids and a healthy scalp. This step ensures your style lasts and your hair thrives underneath.
Use a clarifying shampoo to remove any product buildup. Follow with a deeply hydrating conditioner. While your hair is damp, apply a lightweight leave-in conditioner and a sealing oil to lock in that moisture.
Let your hair air-dry about 80% or blow-dry it on a cool setting until it’s completely dry. Braiding damp hair can lead to mildew and an itchy scalp. Trust me, taking this time upfront saves so much hassle later.
Mastering the Perfect Part for Your Style
The part determines your entire look. Straight parts give a classic, neat appearance, while curved or zig-zag parts add instant personality. For a modern twist, try a deep side part or a middle part with a few face-framing pieces left out.
Use the handle of your rat-tail comb to draw your parts. Take your time here. The cleaner your parts, the more polished your final braids will look. Clip away the sections you’re not ready to braid to keep things organized.
This is where you can really personalize your style. Thinking of the asymmetrical lob or hime cut trends? You can mimic that framed effect with your parts and the braids around your face.
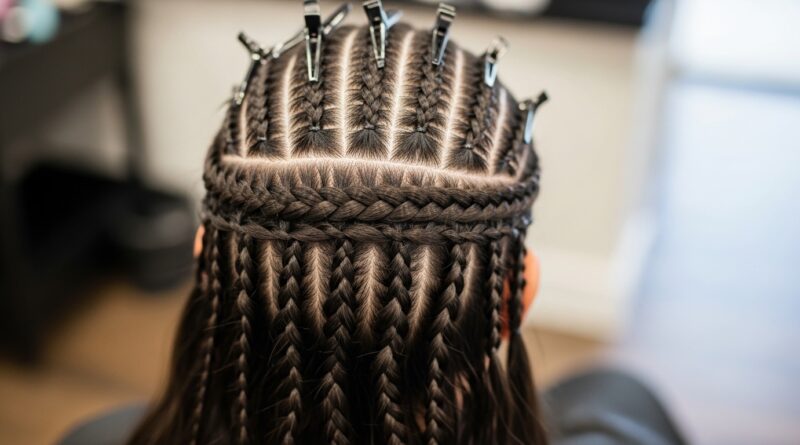
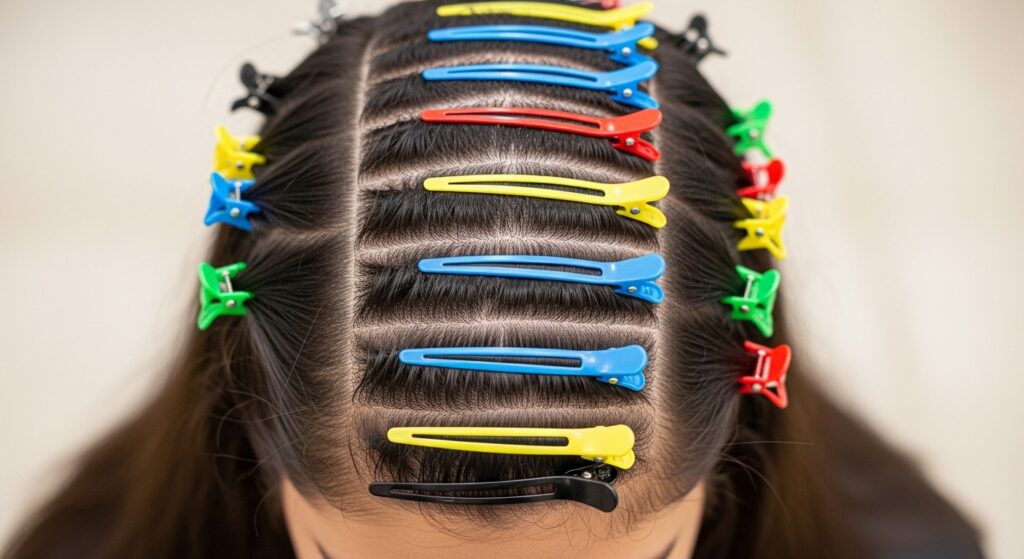
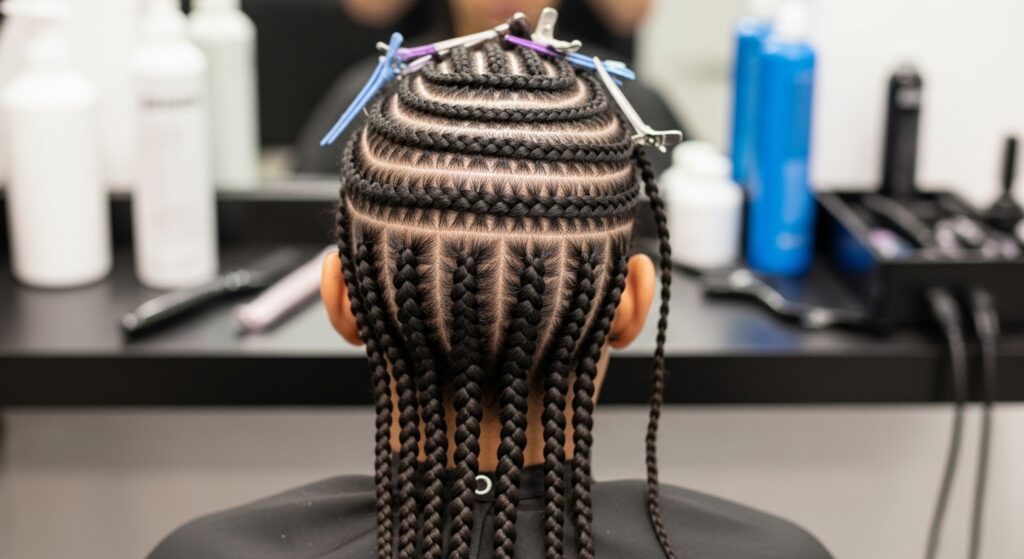
How to Section Your Hair Like a Pro
Now, take each large section from your parting and break it down into smaller, manageable squares. The size of these squares determines the size of your braids. Smaller squares = more, thinner braids. Larger squares = fewer, chunkier braids.
Keep your sections neat and even. I like to start at the nape of my neck and work my way up and forward. This way, the more visible top sections are the freshest when you get to them.
Secure each section with a clip as you go. This prevents tangling and makes the braiding process so much faster. An organized workspace is a happy braiding workspace.
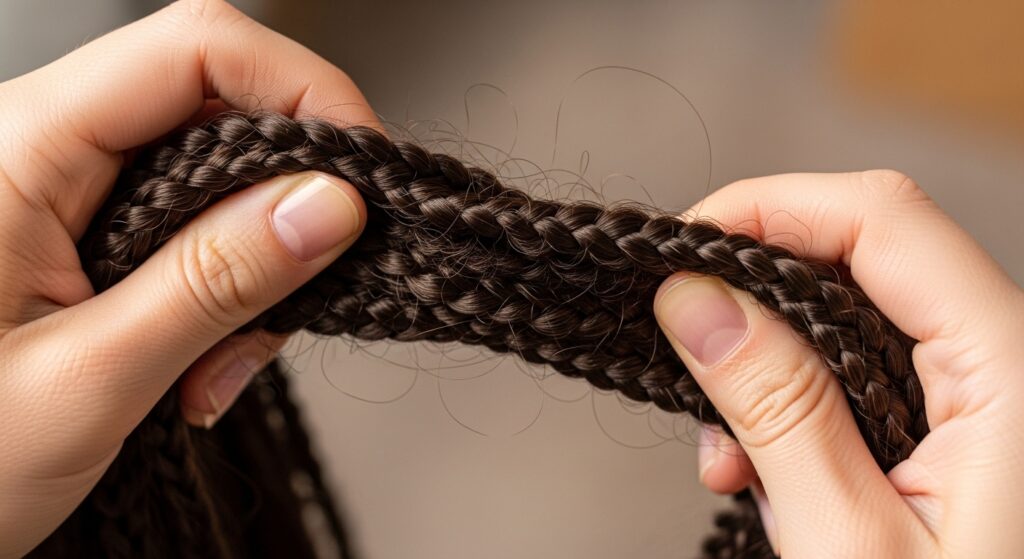
Prepping Your Braiding Hair Bundles
Before you touch your own hair, get your extensions ready. Take one bundle of braiding hair and gently stretch it. This removes any kinks and makes the hair smoother and easier to work with.
If you’re using kanekalon, you can run a hot towel over it or dip it briefly in hot water to soften it. For pre-stretched hair, this step is much easier. The goal is soft, manageable hair that won’t fight you as you braid.
Divide your large bundle into smaller, thumb-sized portions. Each portion will be for one braid. Having these prepped and laid out saves you from fumbling mid-braid.
Starting Your First Braid: The No-Knot Method
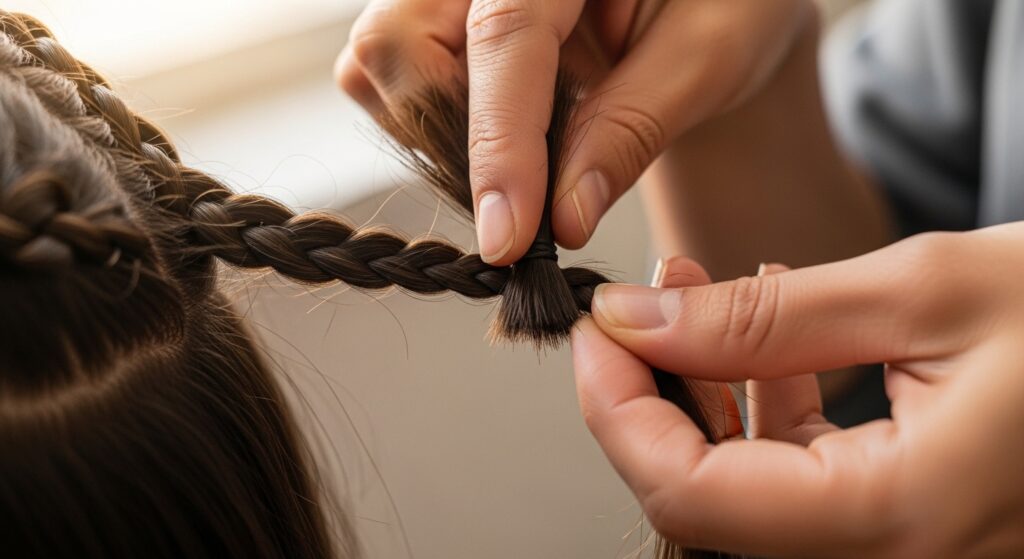
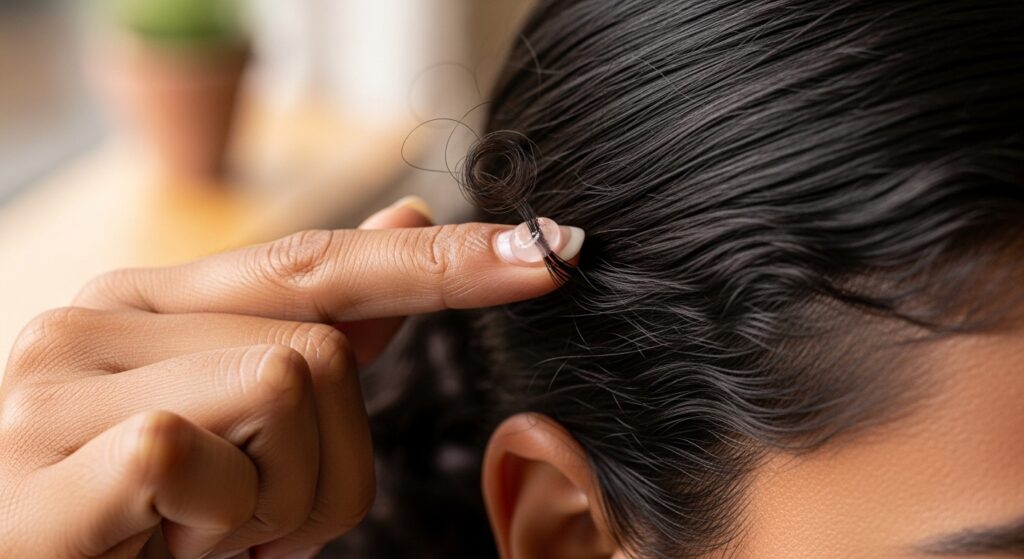
This is the magic moment. Take one of your small sections. Do not tie the braiding hair around it. Instead, take a very small piece of your prepped braiding hair and hold it against the base of your natural hair section.
Now, begin braiding the three strands together: your natural hair and the two strands from the added piece. Braid very tightly for the first three to four stitches, incorporating only your natural hair and that small added piece.
You are essentially creating a tiny, knot-free braid with your own hair. This initial anchor is what gives the knotless technique its name and its comfort. It should feel secure but not painful.
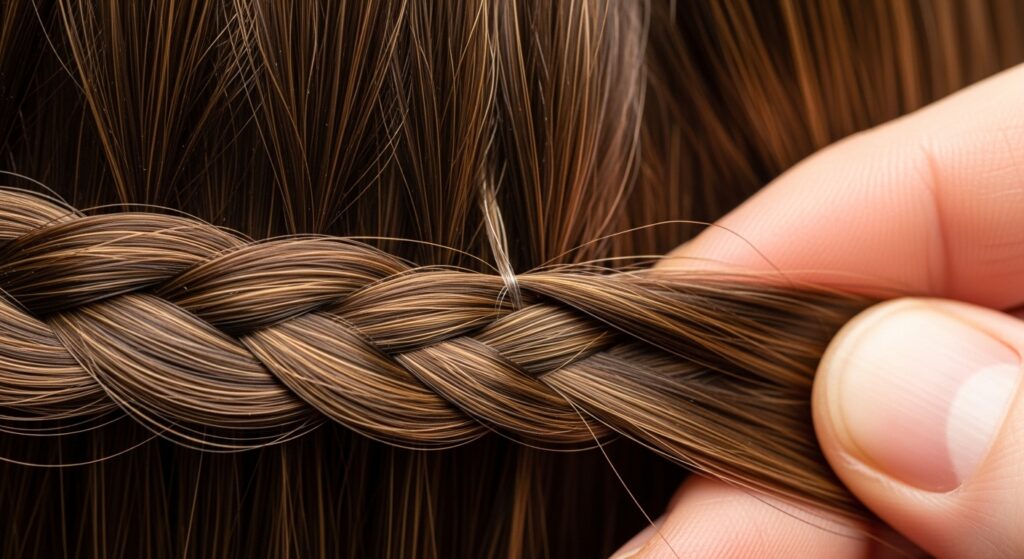
The Feed-In Technique: Adding Hair Smoothly
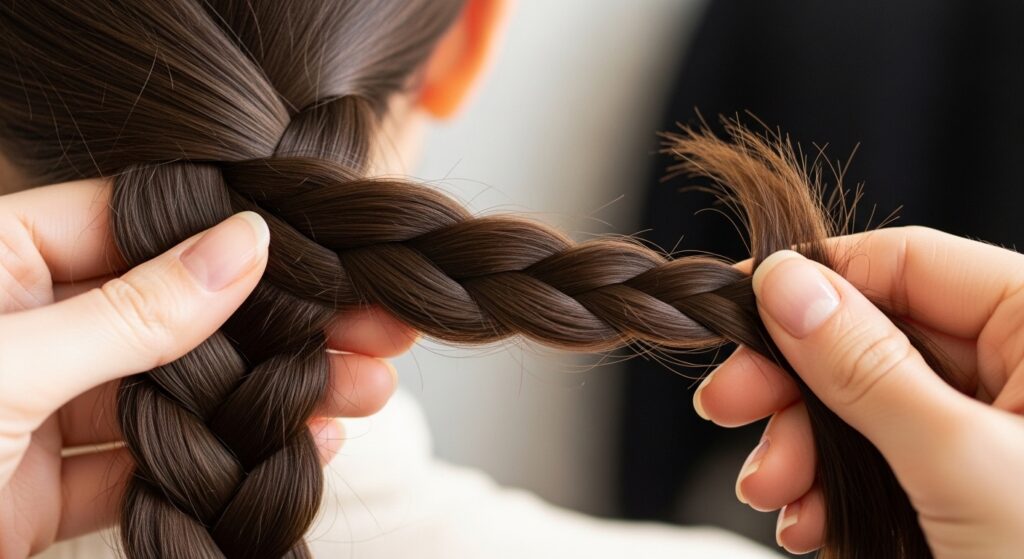
After those first few stitches, it’s time to feed in more hair. Separate the two strands of the added braiding hair. Take one of the outside strands from your braid and combine it with one strand of the new hair you’re adding.
Continue your braid, now with three strands again. Do this every one or two stitches, adding a small amount of extension hair to each side strand. The key is to add little by little.
This gradual feed-in is what creates that seamless, tapered look from root to tip. It should feel like the braid is growing naturally from your scalp, not just attached on top of it.
Keeping Tension Consistent (But Gentle!)
Tension is everything. You want your braid to be secure, but you should never feel a sharp pull on your scalp. The tension should be firm and even all the way down. If your scalp is turning red or hurting, you’re pulling too tight.
Use the weight of the added hair to help you. Let it hang down as you braid, and use your fingers to guide the tension, not yank it. Consistent, medium tension gives you uniform, long-lasting braids without the damage.
Remember, these are meant to be comfortable enough to sleep in. If they aren’t comfortable now, they’ll be a headache later—literally. Check in with yourself often.

Braiding All the Way Down to the Ends
Continue the feed-in technique until you’ve used up all the extension hair in that portion, or until you reach your desired length. Once you stop adding hair, you’ll just be braiding the three remaining strands of pure extension hair.
Braid all the way to the very ends. Make sure these final stitches are tight so the braid doesn’t unravel easily. A loose end will frizz up quickly and shorten the life of your style.
This is also where you decide on length. Feeling a dramatic vampire haircut vibe? Go long. Prefer a chic, quiet luxury bob length? Stop shorter. It’s your call.
Securing the End of Your Braid
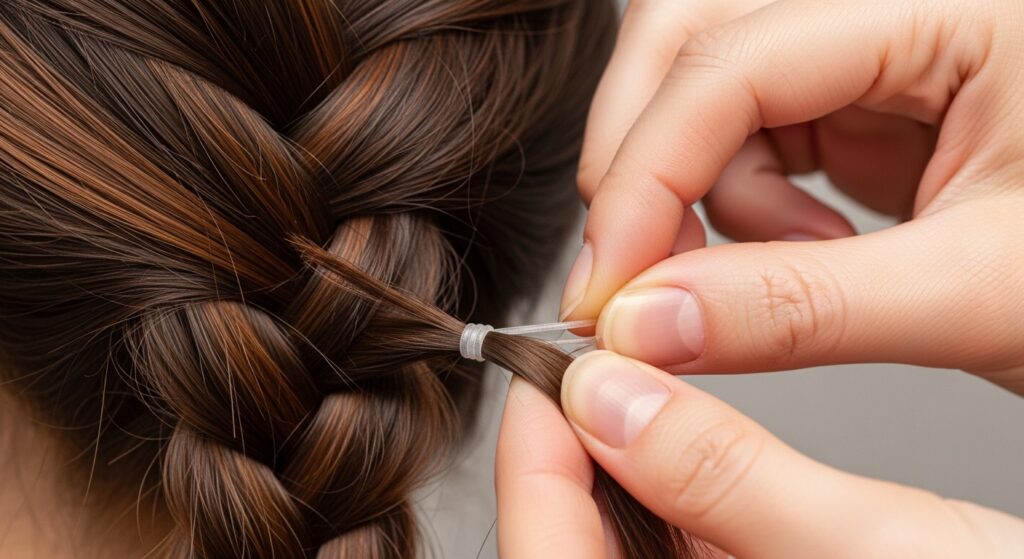
You’ve made it to the end! Now, secure it properly. Take a small, clear elastic band and wrap it tightly around the tip of the braid two or three times. This is a temporary hold until you seal it.
For a more seamless finish, you can also use a tiny bit of strong-hold gel on the tip and twirl it between your fingers before adding the elastic. This helps bind those end hairs together first.
Don’t skip this step. A secured end makes the next step—sealing—much easier and more effective. It keeps everything neatly in place.
How to Seal Braid Ends for No Frizz
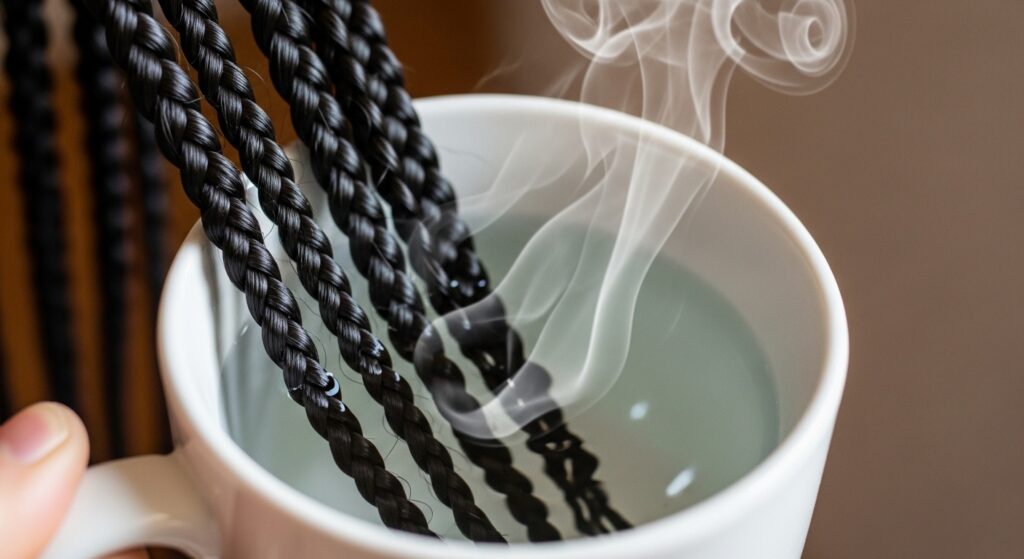
For synthetic hair, sealing is a must. It prevents unraveling and frizz. The easiest method is the hot water method. Boil a pot of water, then let it sit for a minute off the heat.
Dip the last inch of each braid into the hot water for 3-5 seconds. Use a spoon or tongs to avoid steam burns. You’ll see the ends melt slightly and fuse together. For human hair blends, use a lighter for a quick, careful pass.
Let the ends cool and dry. They should feel smooth and blunt, not prickly. This step adds weeks to the lifespan of your braids by keeping those ends tidy.
Moving Section by Section Across Your Head
Repeat the entire process for every section. Work methodically from the back to the sides, then finally the top and crown. The hair at your crown and hairline is most visible, so you want your technique to be flawless by the time you get there.
Take breaks! This is a marathon, not a sprint. Stand up, stretch your hands and back. Your patience will pay off in a uniform, beautiful head of braids.
Seeing each row completed is so satisfying. It’s like watching your own personal work of art come to life, strand by strand.
Styling Your Braids: The Fun Part
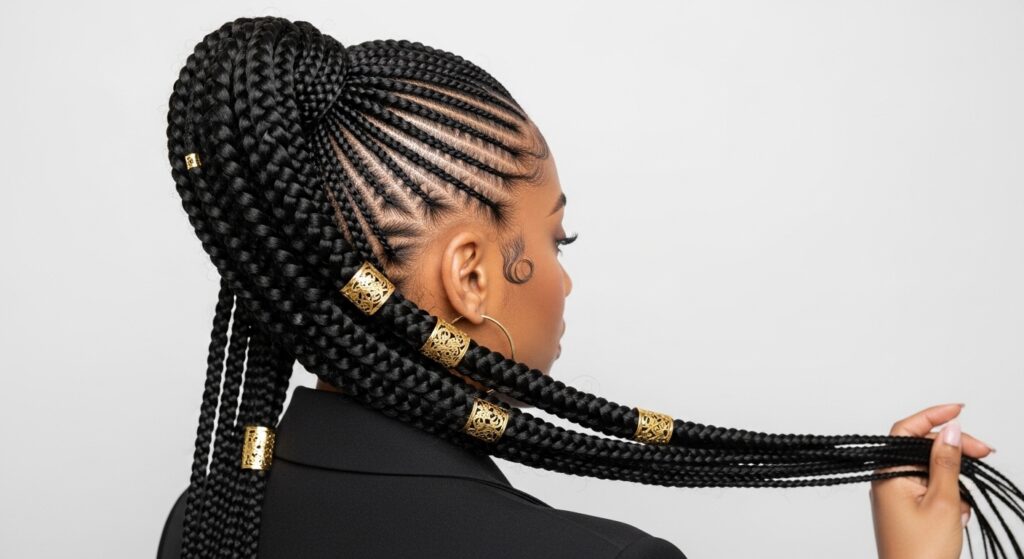
Once all your braids are done, the real fun begins. You can wear them down for a classic look, or try a high ponytail or bun for an elegant old money hair feel. Half-up, half-down styles are incredibly flattering.
Add accessories like gold cuffs, rings, or silk scarves. For a touch of romantic goth hairstyles, weave in a few black satin ribbons or velvet cords. The options are endless.
Play with texture. Gently stretch your braids for a fuller, wavier look, or keep them sleek and straight. They’re your canvas now.
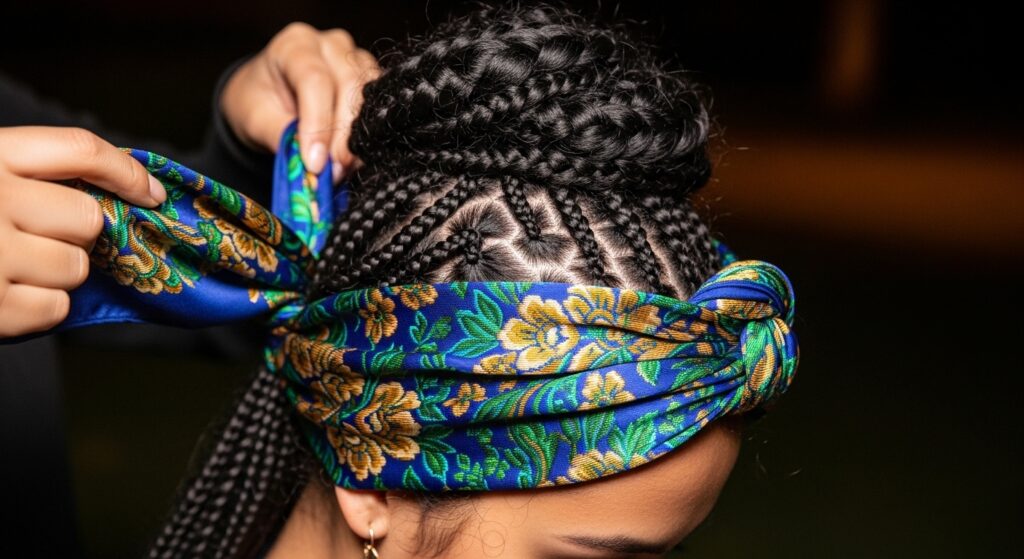
Overnight Care to Keep Braids Fresh
Protect your hard work while you sleep. Always, always wrap your braids in a silk or satin scarf or use a satin pillowcase. Cotton will create friction, leading to frizz at the roots and dryness.
You can also gather your braids into a loose, high ponytail or pineapple on top of your head before wrapping them. This helps preserve their shape and reduces tension on the roots overnight.
This simple habit is the number one thing that will keep your braids looking salon-fresh for weeks. It’s non-negotiable for great hair days, every day.
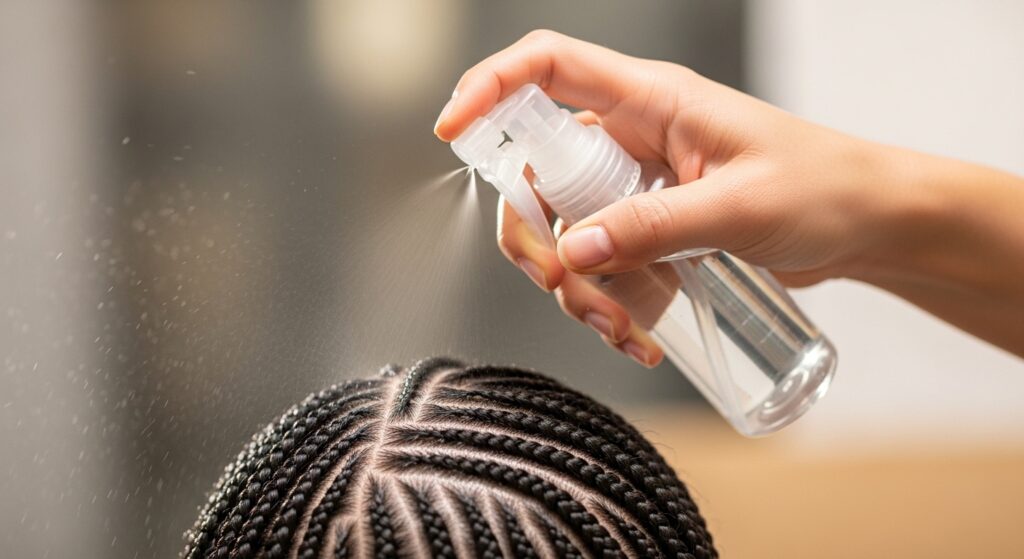
Daily Maintenance & Scalp Health
Keep your scalp clean and itch-free. Mix a few drops of tea tree oil with water in a spray bottle and mist your scalp every other day. It’s refreshing and has antibacterial properties.
Use a light oil, like jojoba or almond oil, on your fingertips to massage your scalp along the parts every few days. This promotes blood flow and keeps your natural hair moisturized underneath.
Don’t overdo it with heavy products. A little goes a long way. You want to avoid buildup, which can make your braids look greasy and weigh them down.
Fixing Frizz & Flyaways Quickly
A little frizz is normal, especially after a few weeks. For flyaways at the roots, use a tiny bit of edge control or a toothbrush with a light gel to lay them down smoothly.
For frizz along the braid shaft, you can use a small amount of hair serum or even a light-hold hairspray on your hands to smooth over them. Be careful not to make the braids sticky.
If an end starts to unravel, simply dip it again in hot water for a second or two to re-seal it. Quick touch-ups keep your style looking intentional, not messy.
When & How to Take Down Your Braids
Don’t leave braids in for longer than 8 weeks. After that, the risk of tangling and matting increases. Set aside a good few hours for a careful takedown. Your future self will thank you.
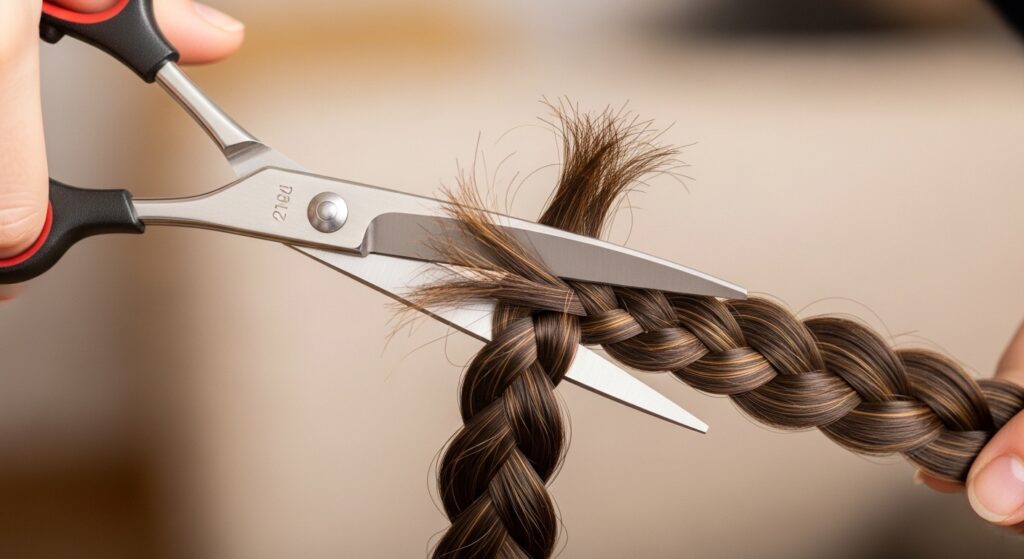
Start by cutting off the sealed end of each braid, above the elastic. Then, gently unravel the braid from the bottom up, using your fingers or a seam ripper for precision. Never just pull them apart.
As you remove each braid, detangle that section of your natural hair with your fingers and apply a bit of conditioner. This makes the final wash much easier.
Post-Braid Hair Care: The Recovery Wash
Once all braids are out, your hair needs love. Start with a thorough detangling session using a slippery conditioner. Then, use a clarifying shampoo to remove all residue.
Follow up with a deep conditioning treatment for at least 30 minutes. This replenishes the moisture your hair may have lost while braided. Finish with your usual leave-in and sealant.
Be gentle. Your hair might shed more than usual—this is normal, as you’re releasing hairs that were held in place for weeks. Give your scalp and hair a break before your next protective style.
Inspiration: Styling Your Braids for Any Vibe
Knotless braids are the ultimate versatile style. For a sleek, modern look, try a center part and tuck them behind your ears. It gives major asymmetrical lob energy but with protective hair benefits.
Feeling edgy? Create a deep side part and add a few face-framing highlights or colored extensions for a glitchy glam hair moment. Or, pair dark braids with a bold lip for a subtle romantic goth aesthetic.
They can be elegant, cool, playful, or fierce. Search for “knotless braids styles” on Pinterest and save your favorites. Your next look is just an inspiration board away.
Your Top Knotless Braids Questions, Answered
How long do they take? For a full head, set aside 6-10