Lemonade Braids Inspired Tutorial You Can Actually Do at Home
Okay, let’s be real. We’ve all seen those stunning lemonade braids on Pinterest and TikTok and thought, “I could never do that myself.” I totally get it. The intricate parts, the tight braids… it looks like a professional-only zone.
But what if I told you that with a bit of patience and the right breakdown, you absolutely can create this look at home? I’m not talking about a rushed, messy version. I mean clean, stylish lemonade braids that you’ll be proud to say you did yourself.
This tutorial is for you—the DIY queen who’s tired of just admiring from afar. We’re going to take it step-by-step, with no fancy salon jargon. I promise it’s more about technique than talent. So grab your comb and some hair gel, and let’s turn that salon dream into a living room reality.
What Are Lemonade Braids, Anyway?
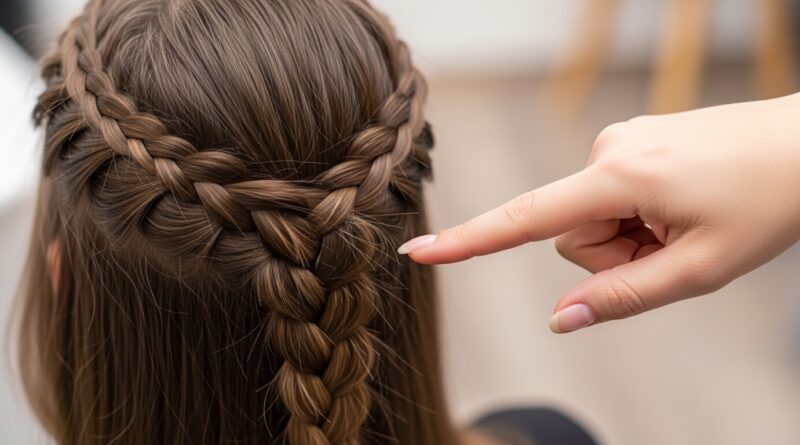
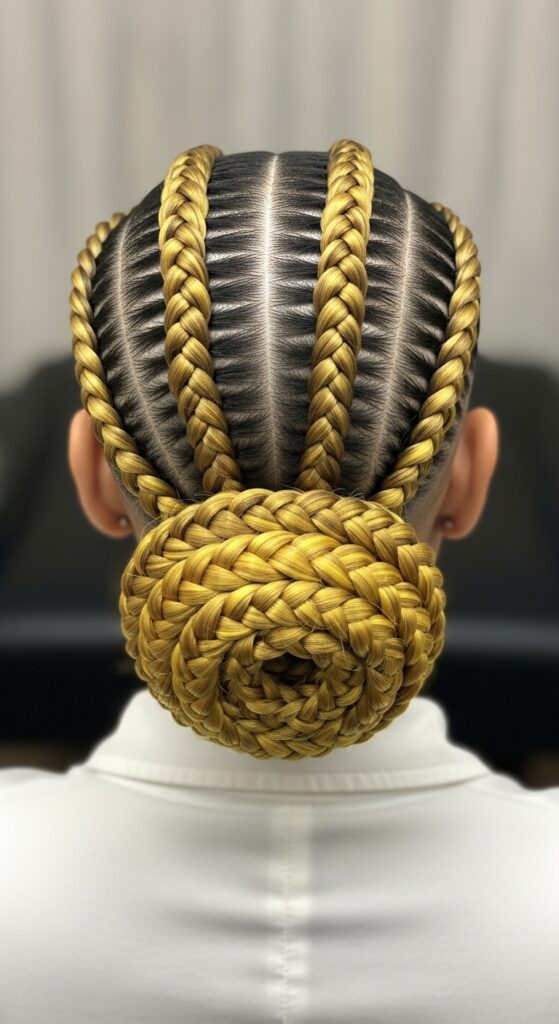
Before we dive in, let’s clear up exactly what we’re making. Lemonade braids are a type of cornrow that starts at the temple and sweeps back along the side of the head, often joining other braids at the back. They’re inspired by Beyoncé’s iconic looks in her “Lemonade” visual album.
They’re sleek, protective, and incredibly versatile. You can wear them straight back, into a ponytail, or as a half-up style. Unlike some of the more avant-garde 2026 hairstyles popping up, this is a timeless, wearable look that works for so many occasions.
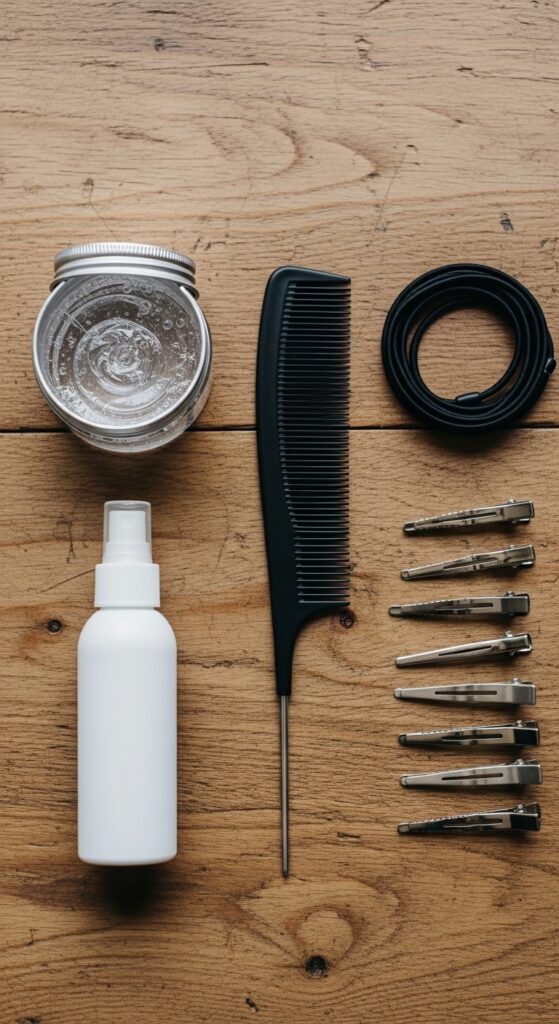
Gathering Your Tools Is Half the Battle
You can’t build a great look without the right tools. The good news? You probably have most of this at home already. Having everything laid out before you start is a game-changer for a smooth process.
- Rat-tail comb: Essential for creating clean, sharp parts.
- Strong-hold edge control or gel: Look for a clear, non-flaking formula.
- Small hair elastics that match your hair color.
- Light hair oil or serum to add shine and reduce frizz.
- A spray bottle with water to keep hair manageable.
- Clips to section off the hair you’re not working on.
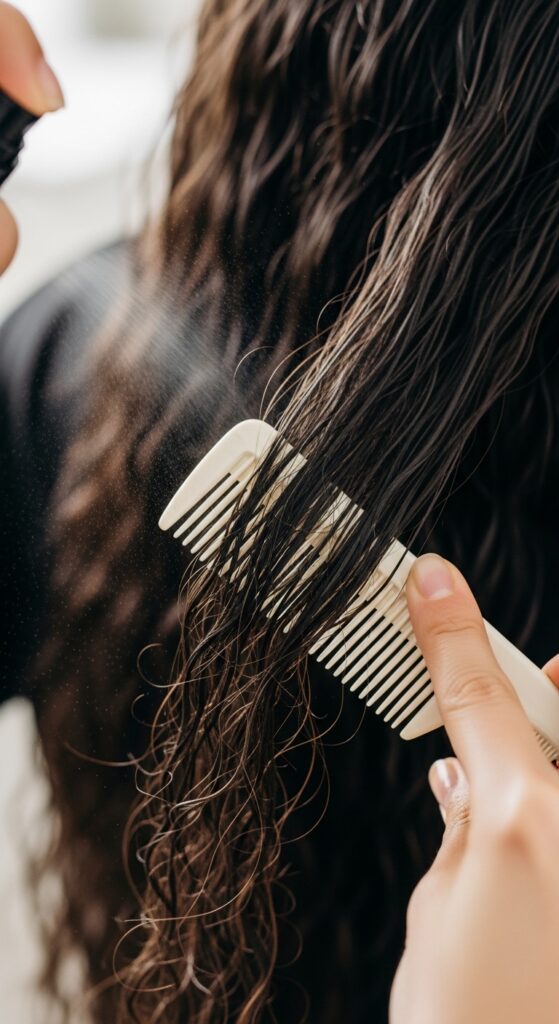
Start With Completely Detangled Hair
This step is non-negotiable. Whether you’re working with your natural hair or adding extensions, it must be completely knot-free. Trying to braid through tangles will give you a bumpy, uneven result and hurt your scalp.
Spray each section generously with water from your bottle. Use a wide-tooth comb first, then follow with a finer comb. Work from the ends up to the roots gently. This might feel tedious, but trust me, it makes every following step ten times easier.
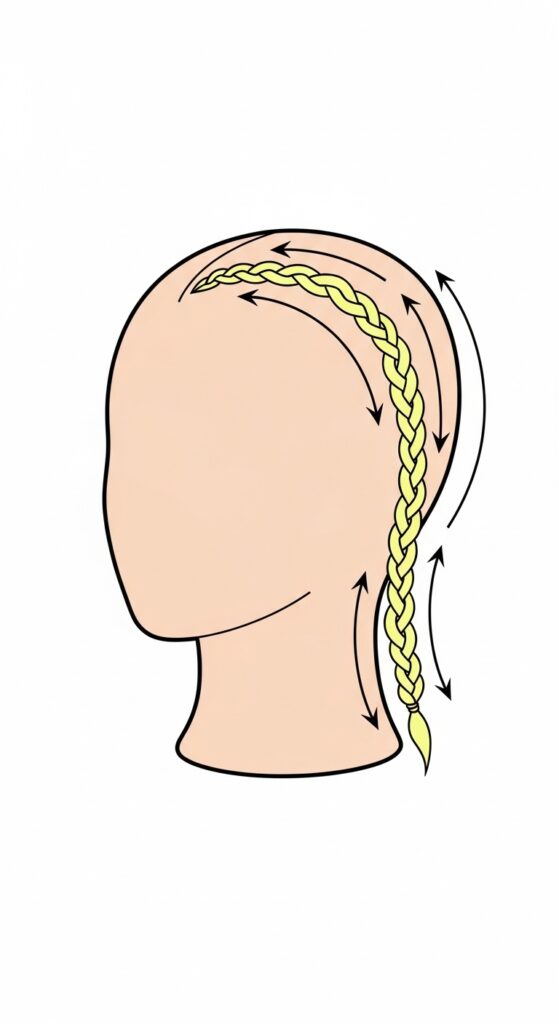
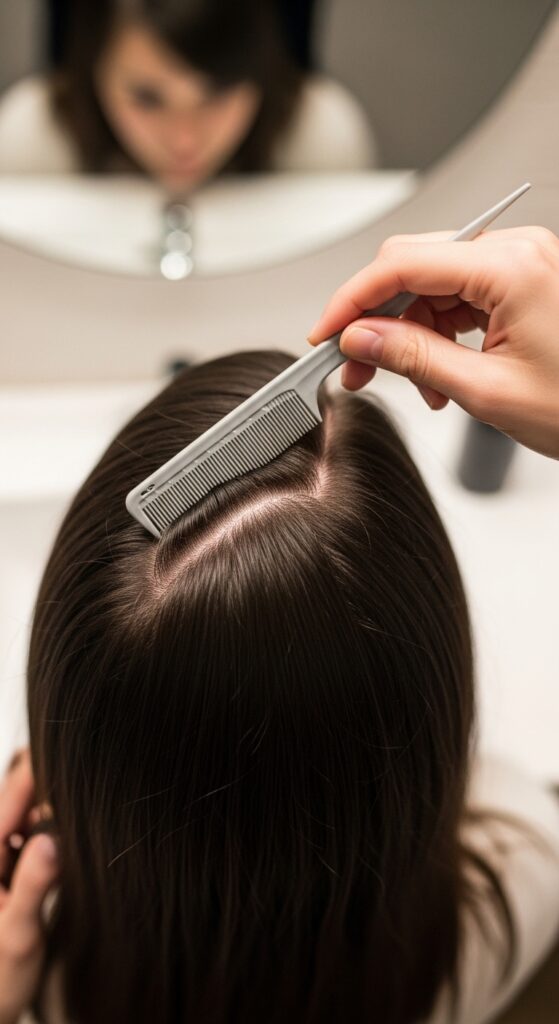
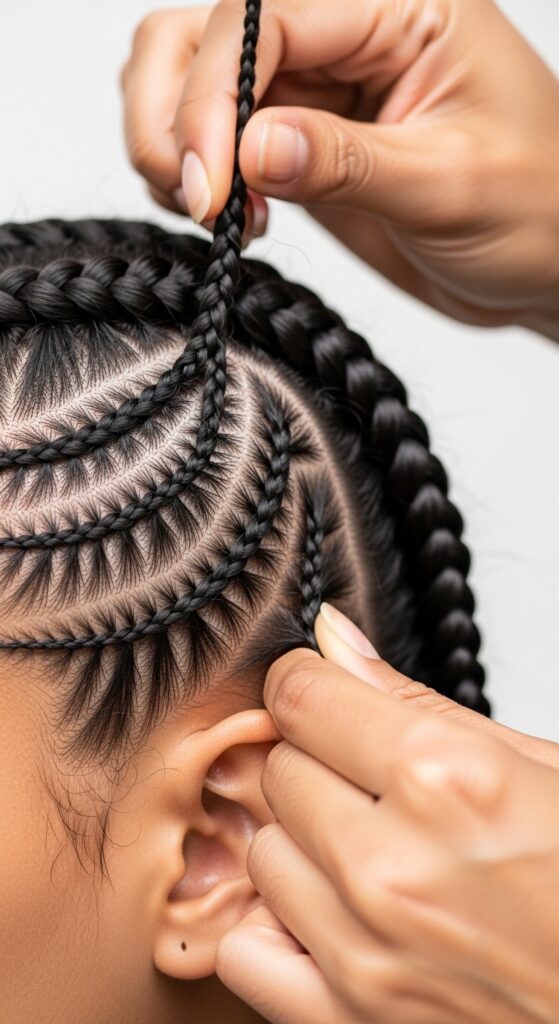
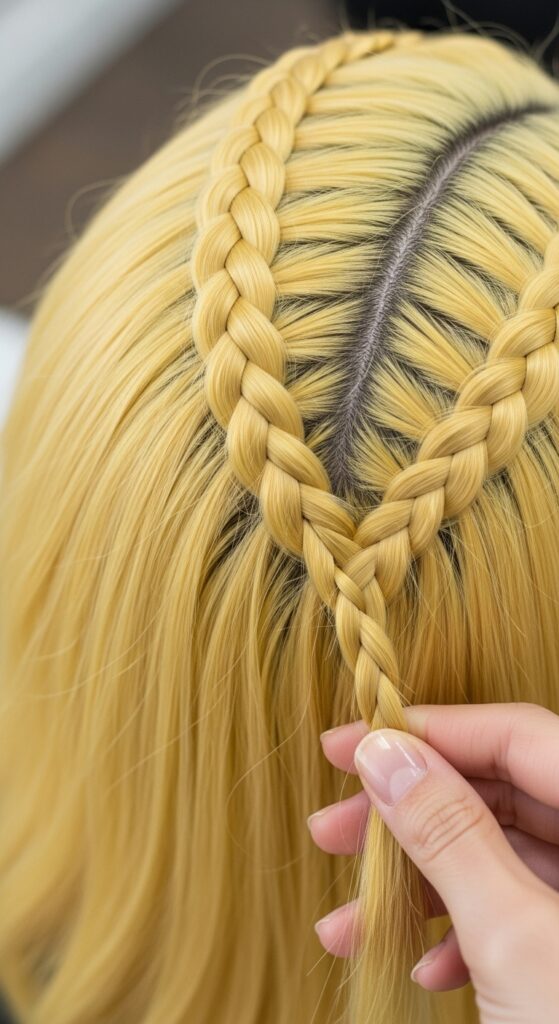
The Magic Is in the Parting
The signature look of lemonade braids comes from those clean, sweeping parts. Using the fine end of your rat-tail comb, start at the front of your temple. Draw a curved line going back towards your crown.
Don’t worry if it’s not perfect on the first try! You can wipe away the part with a damp cloth and redraw it. The curve should feel natural, following the shape of your hairline. A clean part is what gives that salon-fresh, polished feel, much like the precision seen in an asymmetrical lob.
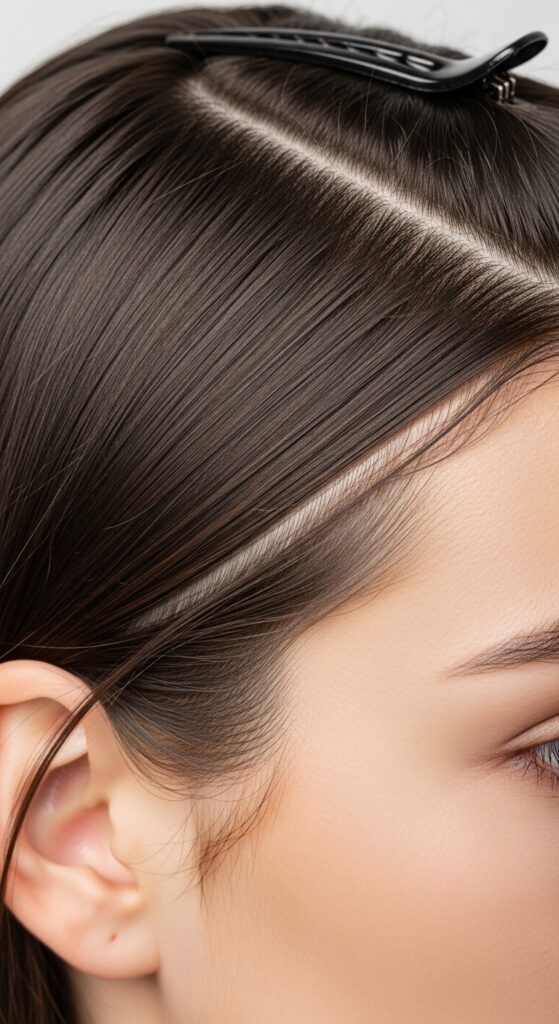
Section and Clip the Rest Away
Once you have your first lemonade braid part defined, clip all the hair outside of that section away. You want to focus on one small, manageable section of hair at a time.
This keeps the rest of your hair from getting in the way and becoming re-tangled. It also helps you see exactly what you’re working with. Use those clips liberally—a neat workspace equals a neat braid.
Apply Your Gel for Control
Now, take a small amount of your edge control or gel. Rub it between your fingers to warm it up, then apply it smoothly along the parted line and through the small section of hair you’ll be braiding.
This step slicks down flyaways and gives you maximum control. It’s what creates that sleek, seamless look from root to tip. Think of it as the foundation for your braid.
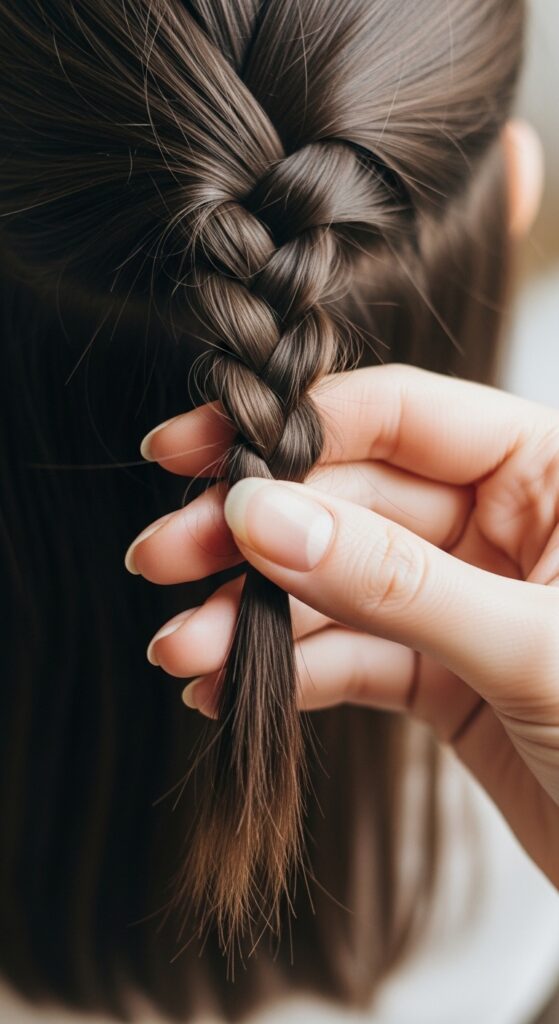
Mastering the Basic Cornrow Technique
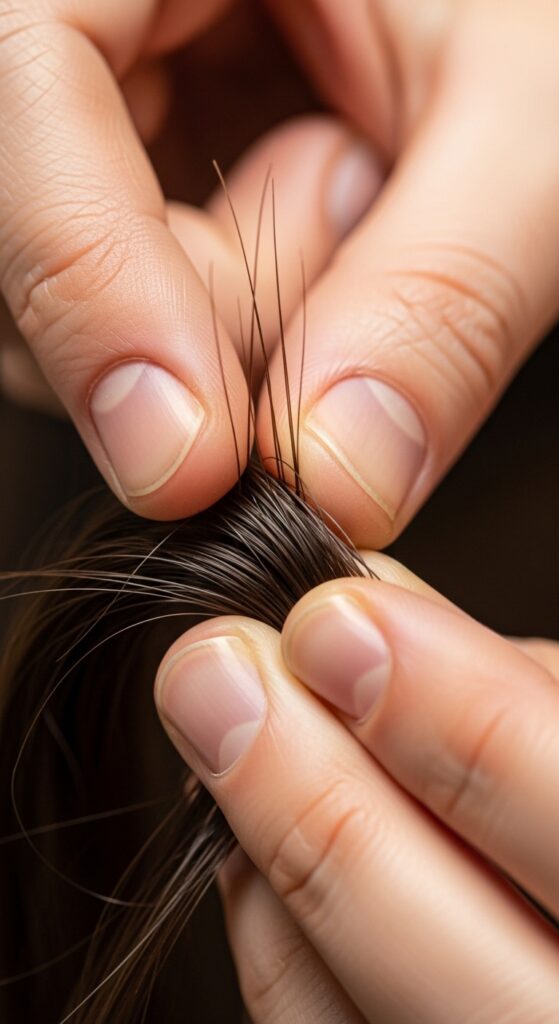
Lemonade braids are essentially cornrows with a specific placement. If you can cornrow, you’re golden. If you’re new to it, here’s the core move: Divide your small section into three even strands.
Start a regular three-strand braid, but as you go, pick up a tiny bit of new hair from the scalp and add it to the strand before you cross it over. This is what attaches the braid to your head. Practice this motion a few times; muscle memory is your friend here.
Braiding Your First Lemonade Braid
Start braiding right at the hairline on your part. Keep your tension firm but not painfully tight. The goal is secure, not scalp-straining. As you braid, follow the curved path you created with your part.
Continue picking up small, neat bits of hair with each stitch. Keep the braid flat against your head. Your first braid might be a bit loose, and that’s okay! This is a learning process. The sleekness is reminiscent of old money hair—polished and perfectly in place.
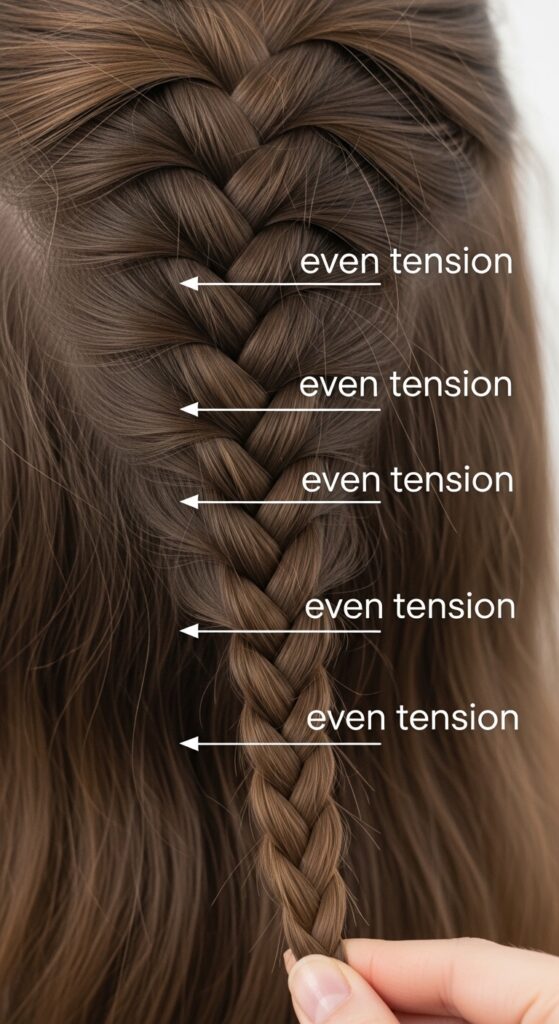
Keeping Your Tension Consistent
This is the secret to a professional-looking finish. Try to keep the amount of hair you add with each stitch consistent and the pull of your hands even. If one section is tight and the next is loose, the braid will look uneven.
Take a deep breath and focus on the rhythm. It’s not a race. Consistent tension is what makes the braid look like one smooth, continuous piece, much like the seamless flow of a quiet luxury bob.
When to Stop Adding Hair
You’ll add hair into the braid all along the part you created. Once the braid reaches the point where your head starts to curve downward (usually near the crown or where you want it to end), you stop incorporating new hair.
From that point, you simply continue with a regular three-strand braid using the hair already in your hands. This creates the “tail” of the braid that you can then style.
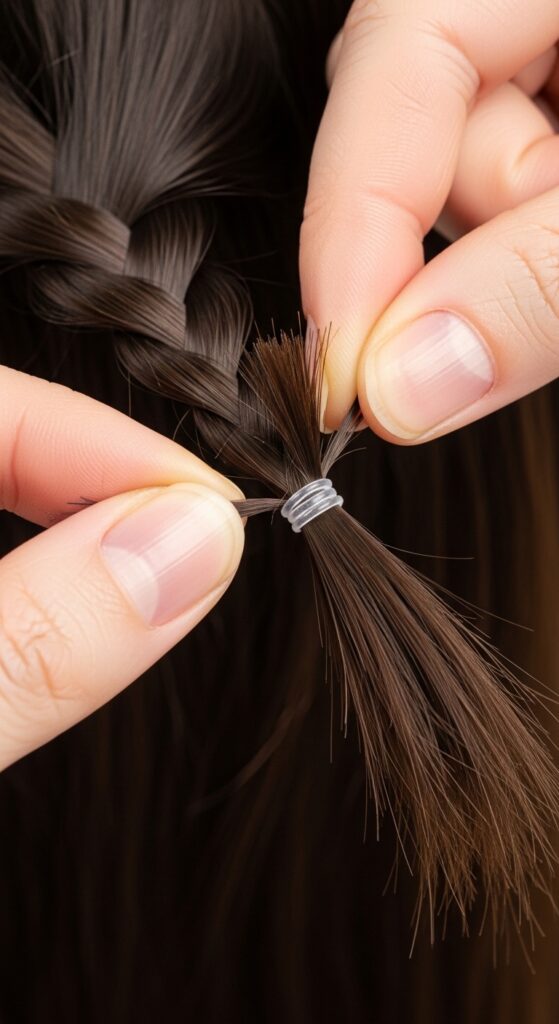
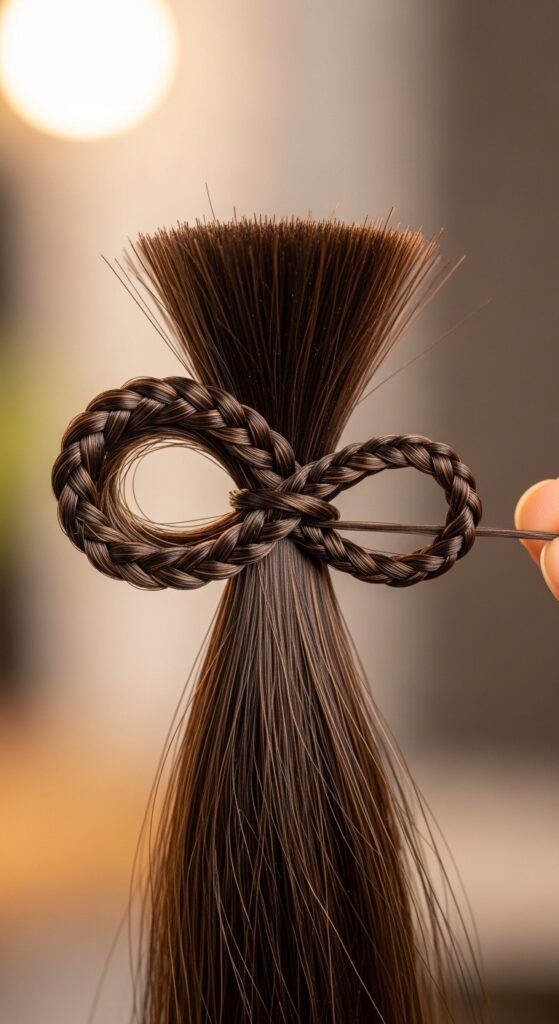
Securing the End Neatly
Once you’ve braided as far as you’d like, secure the end with one of your small elastics. For a super clean finish, you can take a tiny piece of hair and wrap it around the elastic to hide it.
Secure the wrapped piece with a bobby pin tucked inside the braid, or use a tiny dot of gel to stick the end down. This little extra step makes a huge difference in the final look.
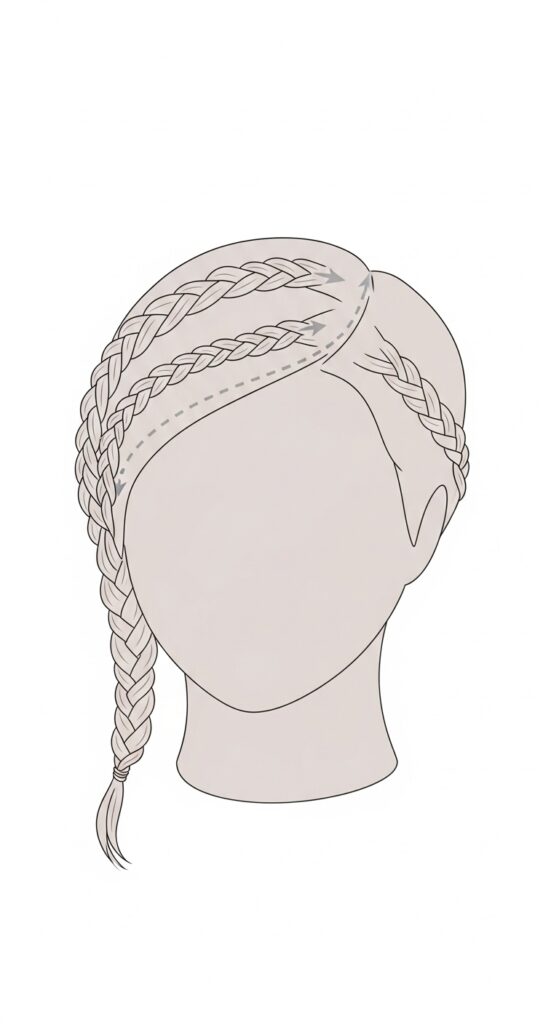
Repeat on the Other Side
Now, go back to the beginning! Unclip the next section of hair. Use your comb to create a matching part parallel to your first braid. This symmetry is key to the classic lemonade braids look.
Follow the exact same process: part, gel, braid with consistent tension, and secure. You’ll be faster this time because you’ve just practiced. It’s like mastering one side of a dramatic vampire haircut—precision is everything.
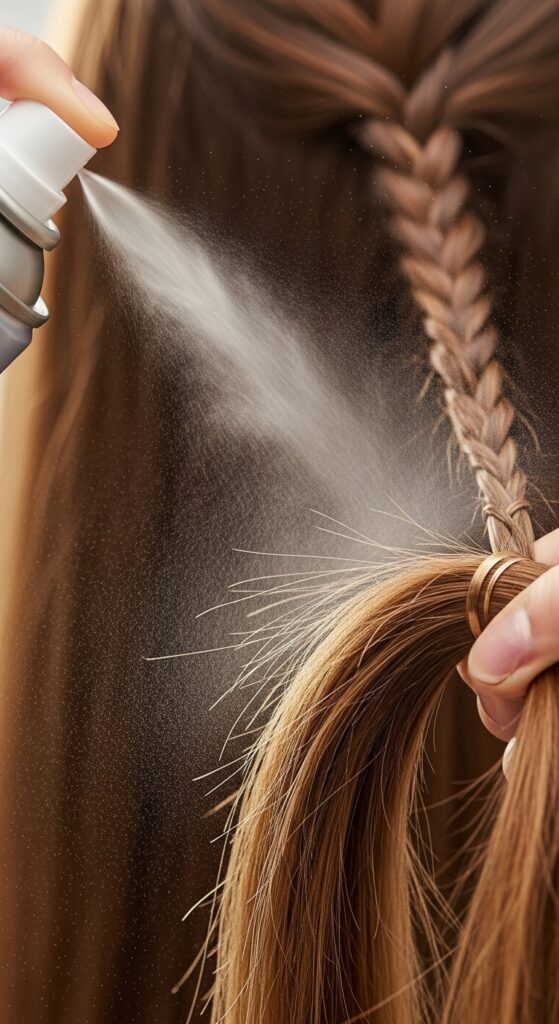
Dealing With Slippery or Fine Hair
If your hair is very silky or fine, it might slip out of the braid. Don’t panic! The trick is to use a stronger-hold gel and make the sections you pick up even smaller.
You can also lightly mist the section with a texturizing spray or dry shampoo before starting to add a bit of grip. Braiding on slightly dirty hair can sometimes be easier than on freshly washed, slippery hair.
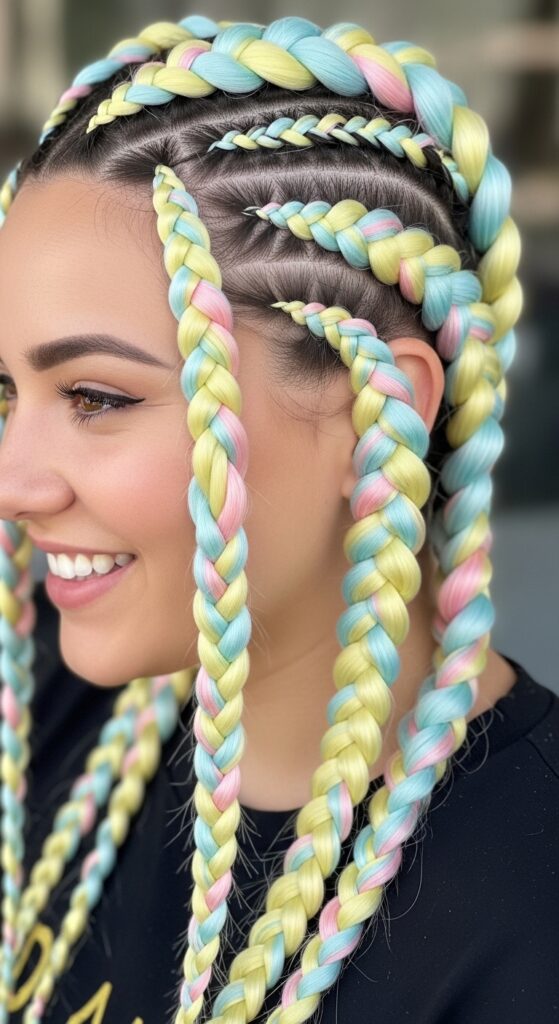
Adding Hair Extensions for Length
Want longer, fuller braids? You can easily add braiding hair. Take a small piece of extension hair and fold it in half. Attach it at the root of your section by looping your own hair through the fold.
Then, simply braid the extension hair in with your own as you go. It adds volume and length, letting you play with more dramatic styles, blending the boldness of glitchy glam hair with a classic technique.
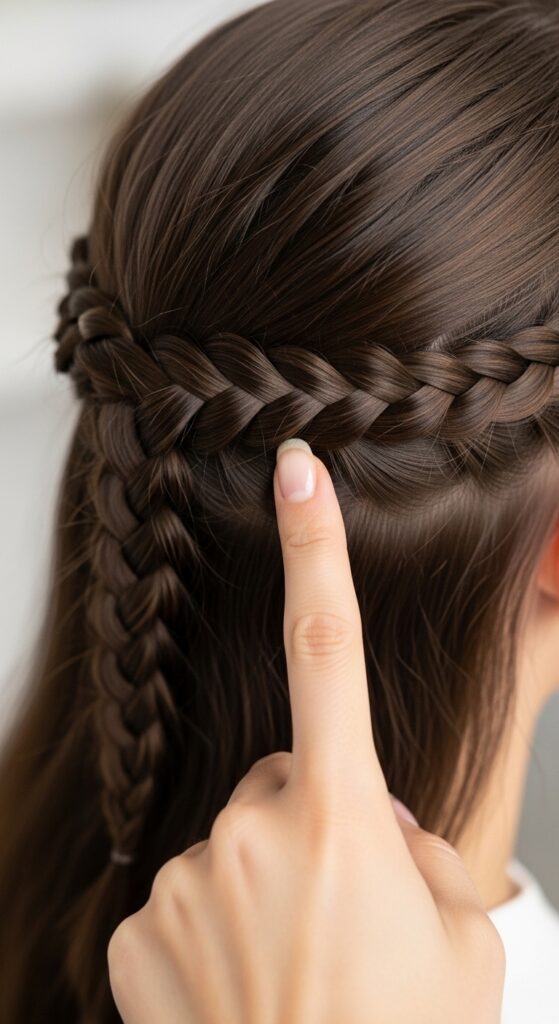
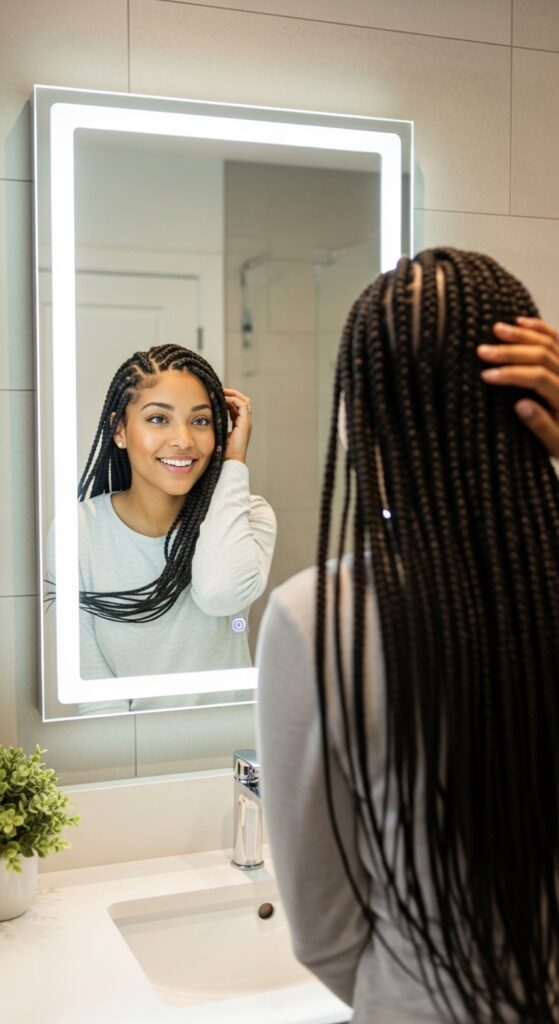
Styling Your Finished Lemonade Braids
Now for the fun part! You can leave them as is for a sleek look. Gather both braids into a low ponytail or bun for a chic, athletic vibe. Or, pin the ends up underneath for a hidden, elegant finish.
You can also accessorize with cute cuffs or rings on the braids. The styling versatility is a huge plus, offering a vibe that can range from simple to something with the edge of romantic goth hairstyles.
Making Them Last: Overnight Care
To keep your braids fresh for days, wrap your hair at night. Use a silk or satin scarf or bonnet. This reduces friction and prevents frizz at the roots and edges.
You can also loosely tie the braids up on top of your head with a soft scrunchie. In the morning, just take them down, and they’ll look almost as good as when you first did them.

Freshening Up the Edges
After a day or two, your baby hairs might start to rebel. To freshen up, dampen a toothbrush or small edge brush with a bit of water and gel. Gently smooth the hairs back along the braid’s part.
You don’t need to redo the whole braid. This quick touch-up makes everything look crisp and neat again. It’s the same principle for maintaining those sharp lines in a hime cut—attention to the front details.

What If You Make a Mistake?
First, don’t stress. It’s just hair! If a part is crooked or a braid is too loose, you have two choices. You can carefully take it down (it’s easier than you think) and redo that one section.
Or, you can get creative. Sometimes adding an accessory or styling the braids a different way can camouflage a small imperfection perfectly. Embrace the learning curve.
Why This DIY Skill Is Worth It
Learning to do this yourself saves money, time at the salon, and gives you a huge sense of accomplishment. It’s a protective style that’s good for your hair’s health when done correctly.
Plus, once you master the basic technique, you can adapt it to so many other looks. It opens up a whole world of styling freedom right from your bathroom.
Your Next Style Challenge
Got this down? Amazing! Now you can play with variations. Try a zig-zag part instead of a curve. Do more than two braids for a fuller look. Incorporate different colors of extensions.
The skills you learned here—clean parting, consistent tension, neat finishing—apply to almost any braided style. You’ve built a fantastic foundation. Who knows, maybe you’ll be creating the top 2026 hairstyles in your own kitchen next!
You Did It! Rock Your Look
Seriously, give yourself a major pat on the back. Doing your own hair is an act of self-care and creativity. Whether they’re perfect or perfectly imperfect, you created this look with your own two hands.
Wear your lemonade braids with confidence. You didn’t just follow a tutorial; you learned a new skill. That’s something to feel amazing about every time you catch your reflection.
And just like that, you’ve got a salon-worthy style without even leaving the house. I hope this breakdown made the process feel less intimidating and more like a fun project you can totally handle. Remember, every pro was once a beginner who kept trying.
The best part about mastering a look like this is the freedom it gives you. You can refresh your style on your own schedule, save some cash, and feel that unbeatable pride of a DIY done well. Hair is meant to be fun, so play with it!
Save this post to Pinterest so you can easily find the steps whenever you’re ready for your braiding session! And I’d love to hear from you—drop a comment below and tell me, what’s the next hairstyle you’re dreaming of trying at home?