Master 15 Invisible Braid Crotchets Blending Undetectably with Naturals
Hey friend. Let’s talk about that hair dream we all share: adding incredible length and volume without anyone knowing it’s not all you. It feels impossible, right? I’ve been there, staring at extensions that looked bulky or braids that screamed “add-on.”
But what if I told you the secret is already here? It’s all about the technique and the right match. This isn’t about obvious weaves or clip-ins. We’re going undercover.
Today, I’m breaking down the magic of invisible braid crotchets. This method is a game-changer for blending extensions so seamlessly, your own mom might do a double-take. It’s the ultimate tool for creating everything from an old money hair look to those intricate 2026 hairstyles we’re starting to see.
Ready to master the undetectable? Let’s get into the details. I promise it’s easier than you think.
What Are Invisible Braid Crochets, Really?
Think of them as the secret agents of the hair world. Instead of a bulky cornrow base, you create ultra-fine, discreet braids close to your scalp. The crochet needle then hooks the extension hair directly through these braids.
The result? The attachment point lies flat and hidden. The extension hair blends from the root, mimicking your natural growth pattern. It’s the foundation for any style that needs to look 100% authentic.
Why This Method Beats Traditional Weaves
Traditional weaves can be heavy, cause tension, and have a noticeable part. Invisible braids solve that. The weight is distributed across many small braids, which is healthier for your edges and scalp.
You also get way more styling freedom. Because the blend is so good, you can pull your hair up into a high ponytail or a sleek bun without fear of exposing tracks. It’s true versatility.
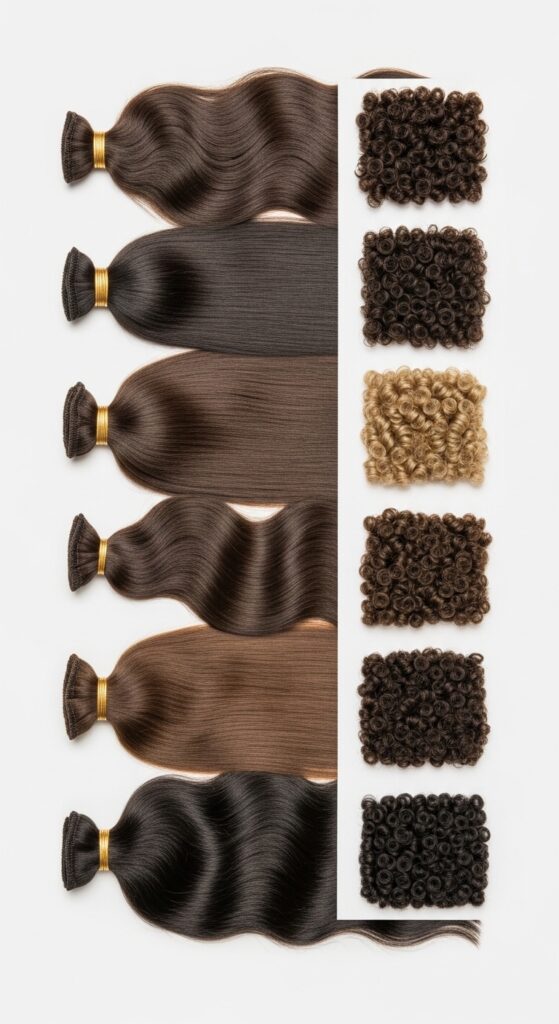
The Golden Rule: Matching Your Texture
This is the non-negotiable step for being undetectable. You must match the texture, curl pattern, and color of your natural hair. Don’t just guess—order samples.
- For straight to wavy hair: Look for silky straight or body wave textures.
- For curly hair: Match the curl diameter (e.g., 3B, 4C).
- For coily/kinky hair: Use kinky bulk or afro-textured hair for a perfect blend.
Essential Tools You Need to Get Started
You don’t need a salon full of equipment. Just a few key items will set you up for success. Having the right tools makes the process smooth and professional-looking.
- A fine-tooth rat-tail comb for precise parting.
- Small, clear hair elastics (the tinier, the better).
- A quality crochet hook (size 0.5mm or 0.6mm).
- Hair clips to section your hair.
- A mirror you can adjust to see the back of your head.
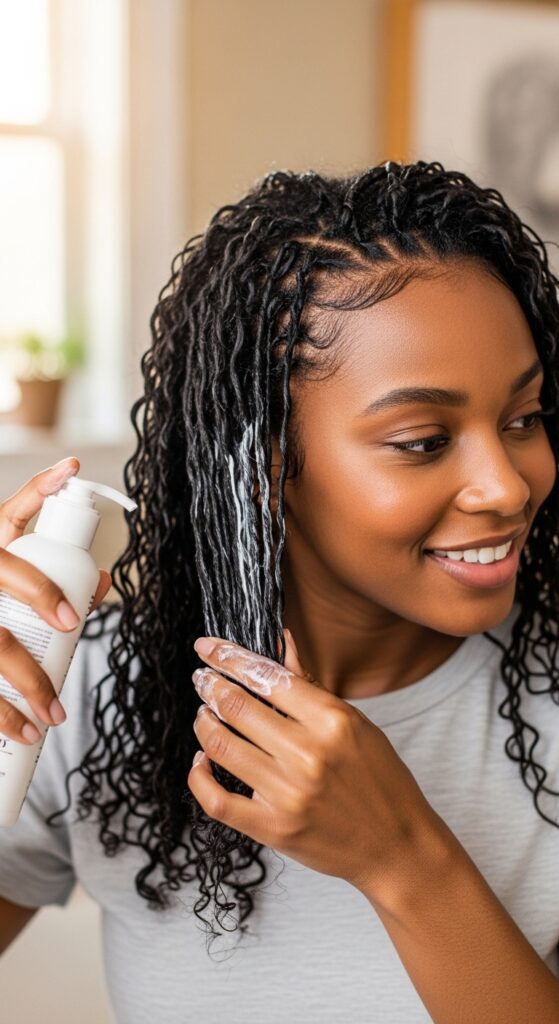
Prepping Your Natural Hair is Key
Start with clean, detangled, and moisturized hair. I recommend a light wash and deep condition. Your hair should be strong and hydrated before any installation.
Blow-dry or stretch your hair so it’s easier to braid smoothly. The goal is to create a flat, even canvas for those tiny braids. This prep work is what makes the final result lie so flat.
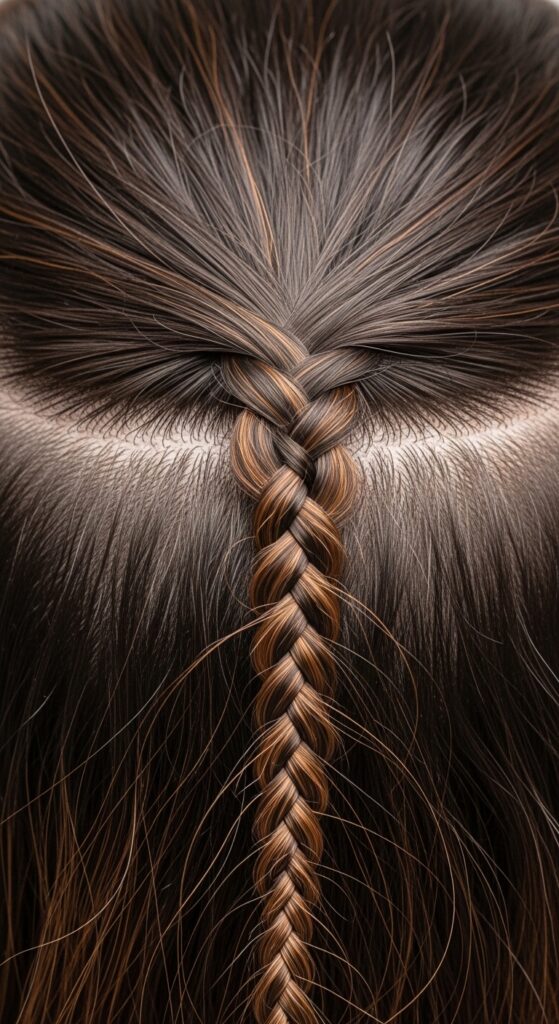
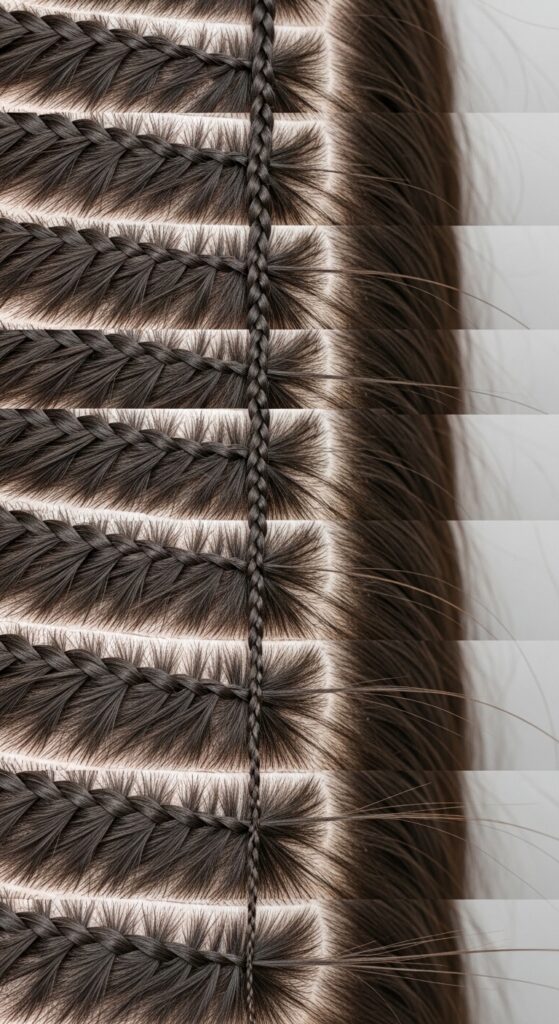
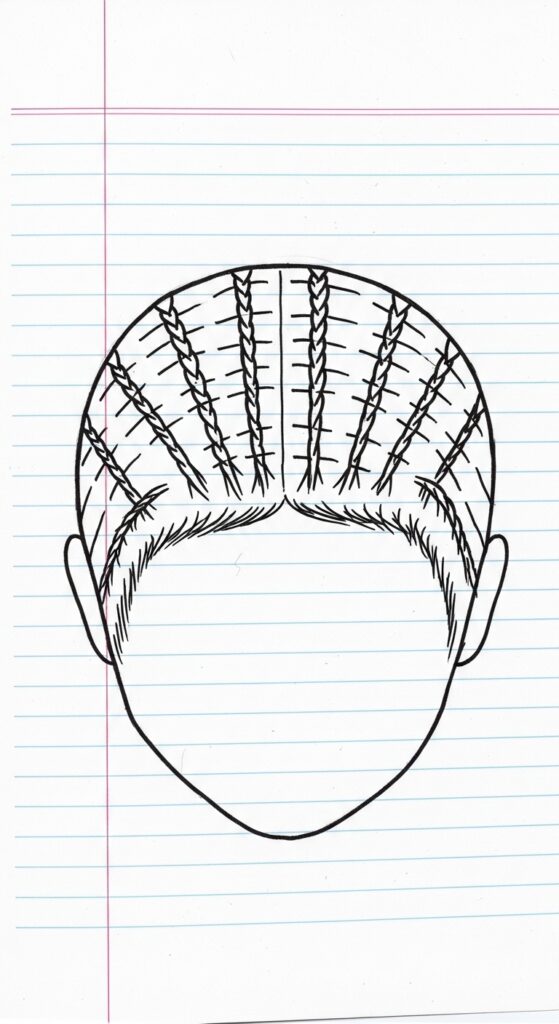
Mastering the Micro-Braid Technique
The braids need to be small—think pencil-thin or smaller. Take small sections of your natural hair and braid it flat against your scalp. Keep the tension even, not too tight.
Braid all the way to the ends and secure with a small, clear elastic. These braids are your anchor. The neater they are, the cleaner your final install will look and feel.
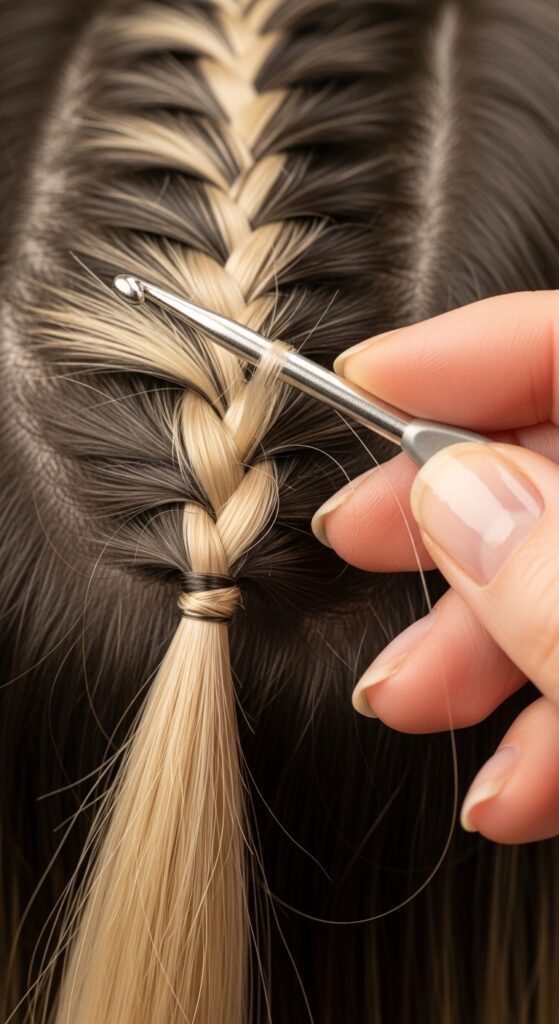
The Crochet Hook Magic: Step-by-Step
Now for the fun part. Take your crochet hook and insert it under the micro-braid, near the elastic. Pull a small loop of the extension hair through the braid.
- Pull the extension hair loop through the braid.
- Take the ends of the extension hair and pull them through that loop.
- Gently tighten the knot down onto the braid. It should feel secure but not bulky.
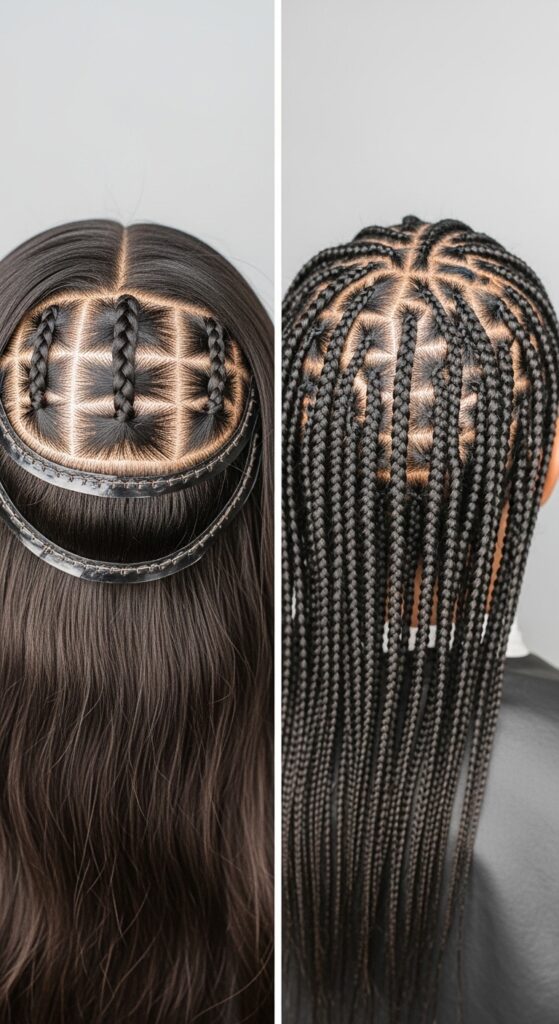
Mapping Your Braid Pattern for Coverage
Don’t just start braiding randomly. Plan it out. For full head coverage, you’ll typically create rows of braids going back from your hairline. For a partial install, just focus on the crown or the areas you want volume.
More braids mean more attachment points and a more natural, movable result. Sketch a quick map on paper if it helps you visualize the layout before you begin.
Blending at the Crown for Updos
The crown is the most visible area when you pull your hair up. Pay extra attention here. Use the smallest braids and the most precise color matching in this section.
When you crochet the hair here, fan it out slightly to cover the braid base completely. This ensures a perfect, thick-looking ponytail base with no signs of help.
Creating a Seamless Side Part
A side part is a classic test of a good install. To master it, create your part line before braiding. Braid along the part line itself, then crochet the hair so it falls naturally to each side.
Use a slightly lighter or highlighted weft along the part for a natural, sun-kissed effect. This little trick adds incredible realism and is a signature of quiet luxury bob styles.
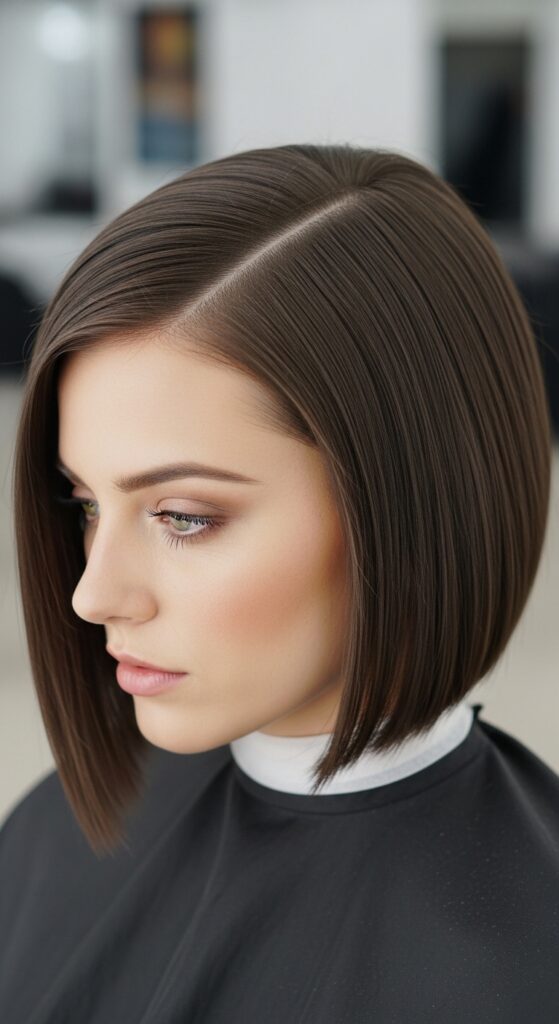
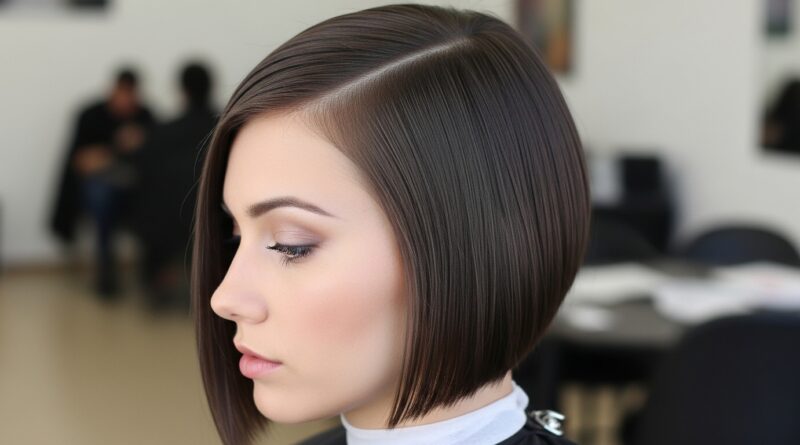
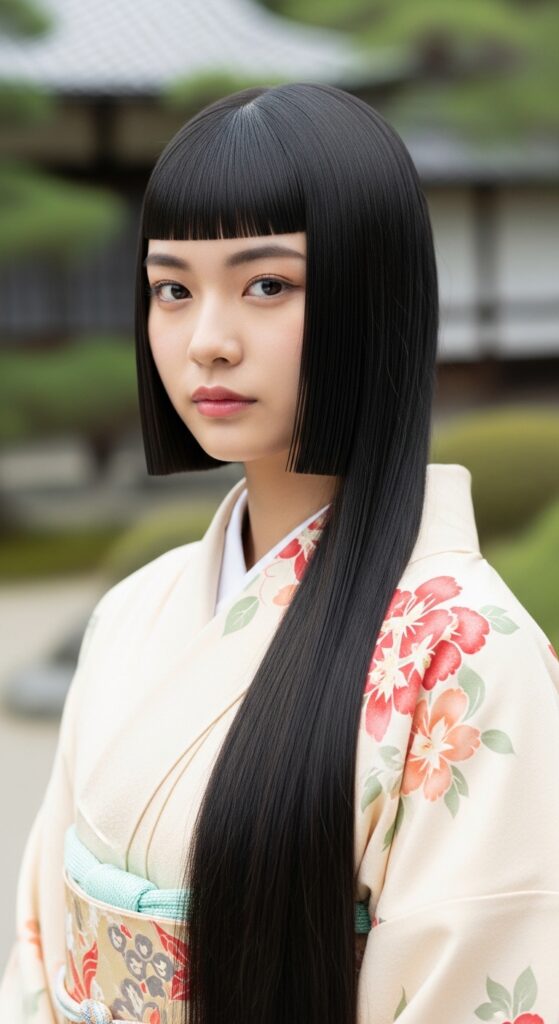
How to Achieve the “Quiet Luxury Bob”
This look is all about impeccable, healthy-looking hair with a perfect shape. Use straight or softly waved hair. Install with a focus on a blunt, sharp cut line.
Ask your stylist to cut the extensions while they’re in your hair, blending them perfectly with your natural ends. The final look should be sleek, polished, and whisper-rich.
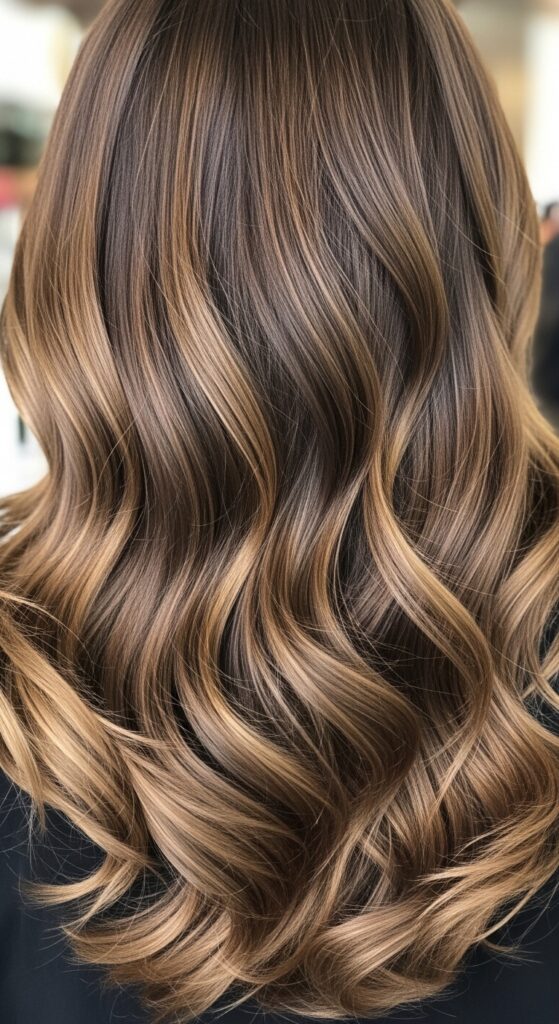
Getting That “Old Money Hair” Volume
Old money hair isn’t big or teased. It’s about dense, lush, healthy-looking volume from root to tip. To get it, use more braids for a fuller base and choose hair with lots of body.
A soft, face-framing layer cut into the front pieces completes the look. It’s the kind of hair that looks inherited, not installed—think timeless, not trendy.
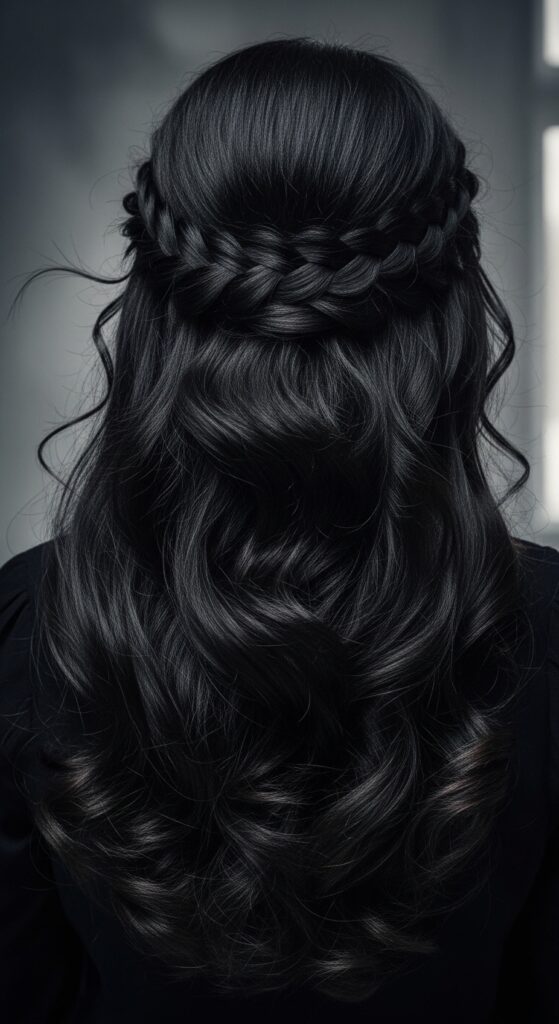
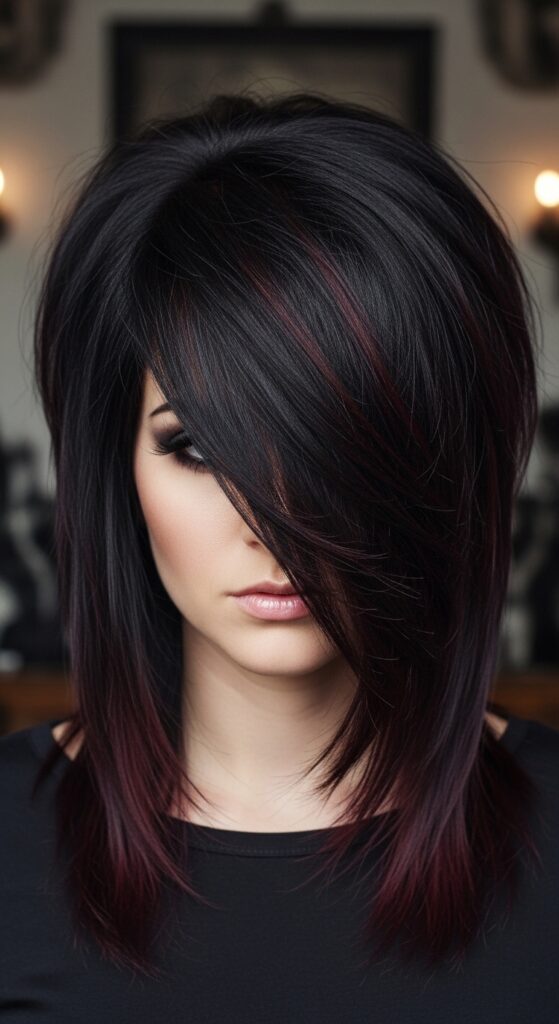
Channeling Romantic Goth Hairstyles
For romantic goth hairstyles</strong, think dramatic length with soft textures. Jet black or deep burgundy extensions added with this method can create incredible, flowing looks.
Add face-framing pieces or soft curls for a touch of romance. The invisible base lets you play with dark, dramatic colors without worrying about an obvious grow-out or line of demarcation.
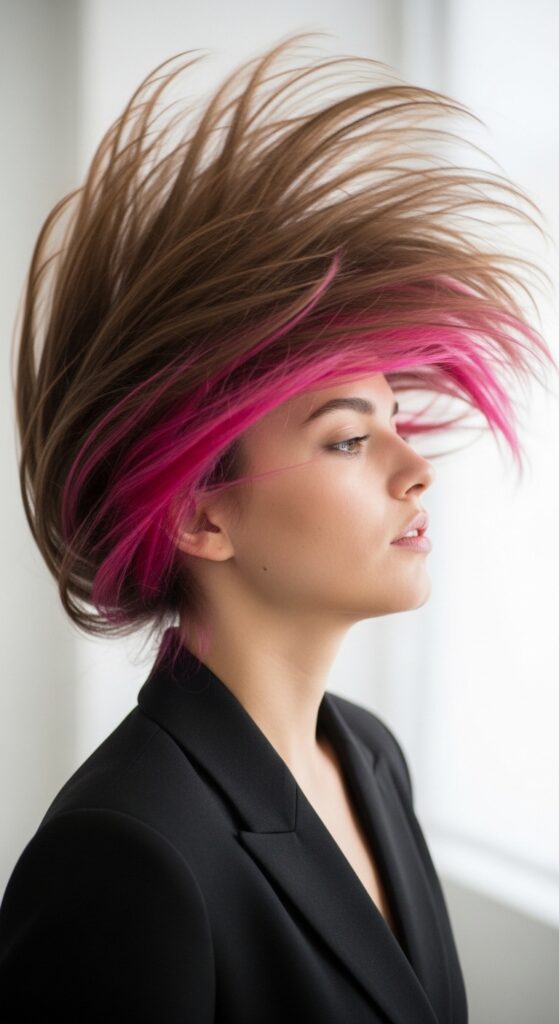
Experimenting with Glitchy Glam Hair
Glitchy glam hair is playful and unexpected. Use your invisible braids as a base to add pops of color in hidden layers or just at the ends. Since the base is hidden, you can play with colors without commitment.
Try crocheting in a few streaks of electric blue or silver underneath your top natural layer. It creates a “glitch” of color that appears only when you move.
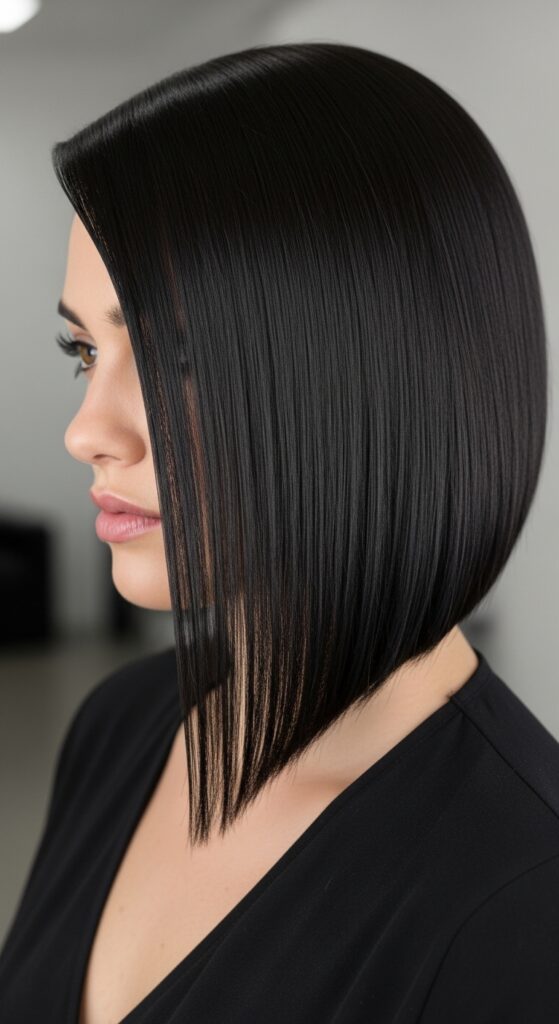
Styling the Modern Asymmetrical Lob
The asymmetrical lob is a sharp, fashion-forward cut. The key with extensions is to build the length on the longer side seamlessly. Your braid pattern will be denser on that side to support the extra hair.
Blend your natural hair into the shorter side. The cut should look intentional and architectural, not like a bad blend. It’s a bold, clean look.
Mastering the Edgy Vampire Haircut
The vampire haircut—all about sharp, dramatic layers and a heavy fringe—relies on perfect texture. Use straight, sleek hair extensions. The invisible braids allow those choppy layers to fall perfectly without bulky attachment points spoiling the line.
Focus on adding length and density specifically in the areas where the longest, most dramatic layers will be cut.
Trying the Bold Hime Cut
The hime cut features straight, blunt front strands and long back hair. This style is ideal for crotchets. You can add length and thickness just to the back sections, creating that stark, beautiful contrast.
Keep your natural hair as the front pieces for the easiest blend, or use perfectly matched extensions to create the full, dramatic shape.
Curly Girl Magic: Blending for Coils
For my curly girls, this method is a blessing. Use pre-curled, kinky, or coily bulk hair. Braid your hair while it’s stretched. After crocheting, spray with water and a curl cream to reactivate both your natural hair and the extension’s curl pattern together.
They will shrink and curl up as one, hiding the braids completely. The blend is absolutely magical.
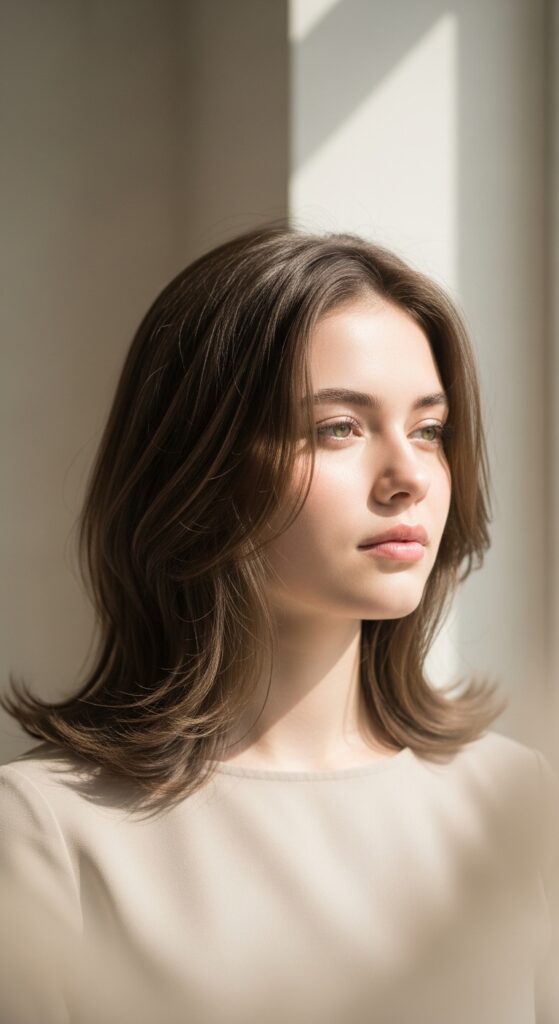
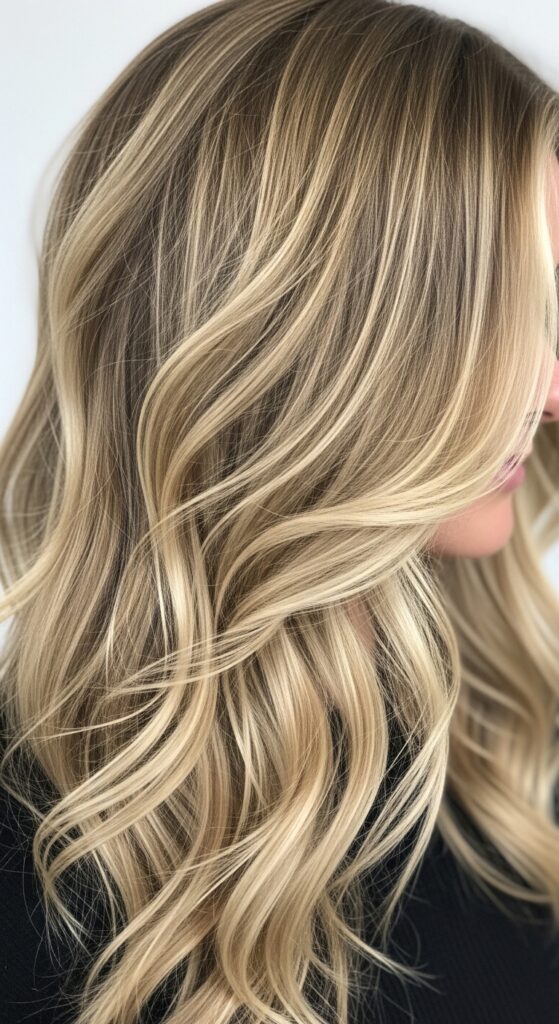
Wavy Hair Perfection: The Beachy Blend
For a beachy wave, use a body wave texture. After installing, braid or twist the hair into large sections while damp and let it air dry. When you unravel it, your waves and the extension waves will have set together into one seamless, tousled look.
Add a texturizing spray for that perfect, lived-in finish.
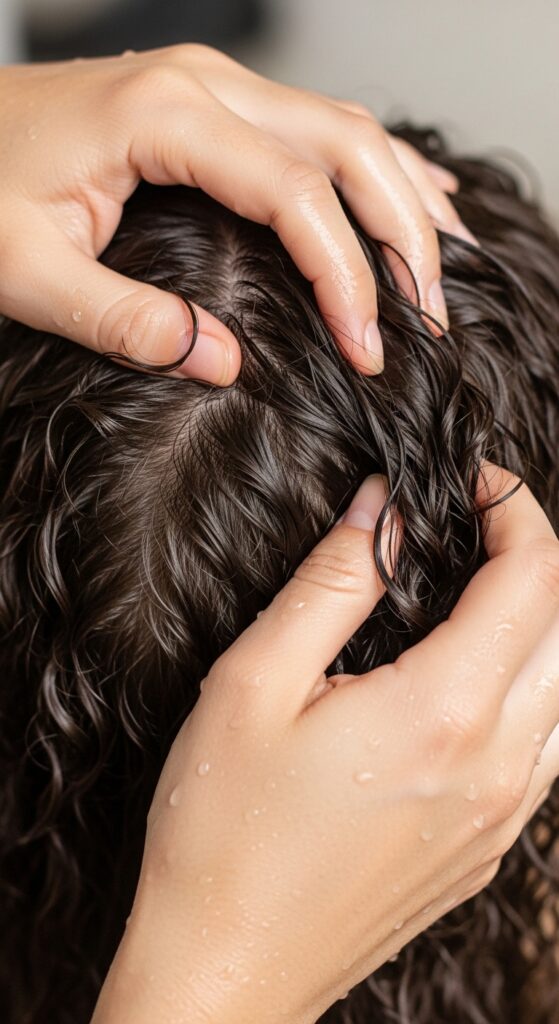
Maintenance: Keeping It Fresh & Healthy
Your natural hair still needs care. Gently cleanse your scalp with a diluted shampoo applied along the braid rows. Condition the lengths. Keep your scalp moisturized with light oils.
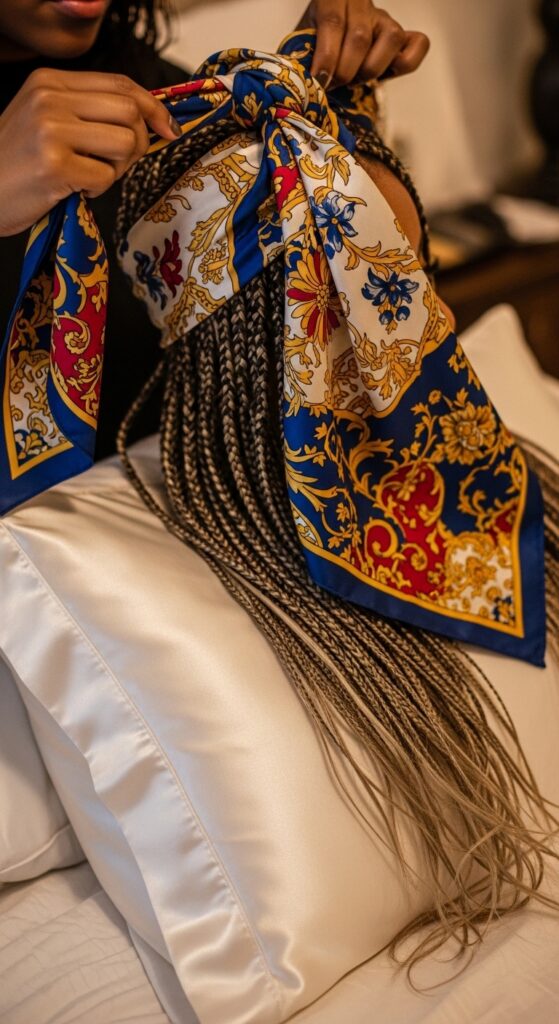
At night, wrap your hair in a silk scarf or use a silk pillowcase. This reduces friction, keeps the style neat, and protects your hair.
When to Take Them Out: Listen to Your Hair
Don’t leave crotchets in for more than 6-8 weeks. Your natural hair needs a break to be cleansed and conditioned thoroughly. Signs it’s time: itching you can’t soothe, noticeable new growth causing lifting, or just needing a refresh.
Removal is simple: just snip the extension hair at the knot and carefully unravel the braid. Be patient to avoid pulling.

Your Final Checklist Before You Start
- Hair extensions that perfectly match texture & color.
- All tools gathered and ready.
- Clean, detangled, moisturized natural hair.
- A clear braid pattern mapped out.
- Plenty of time set aside (it’s a process, but worth it!).
You’ve got this. With a little patience, you’ll achieve that dream hair.
So, there you have it—your complete guide to going undercover with the most undetectable hair secret out there. It might seem detailed, but once you get the hang of it, it becomes second nature. The freedom of having amazing hair that feels like your own is absolutely worth the learning curve.
Remember, the goal is to enhance what you have, to give you the confidence to try any style, from the timeless to the trendy. Your hair is your canvas, and now you have a whole new set of brushes.
Save this post to Pinterest to keep this guide handy for your next install session! And I’d love to know—which style are you dreaming of trying first? The quiet luxury bob or something more like the romantic goth vibes? Tell me in the comments below!
Always here rooting for you,
Hailey & Team


