Mastered 21 Braided End Caps Protecting Tips From Splitting
Okay, let’s be real. You spend all that time on a gorgeous braid, only to have those last few inches look frayed and sad a week later. I’ve been there. It feels like all that protective styling effort is for nothing when your ends are still splitting.
But what if I told you there’s a simple, game-changing trick that solves this? It’s all about the end cap. Mastering this one technique is the secret to braids that actually protect your hair from root to tip.
It’s easier than you think, and it works for every braid style, from a simple three-strand to the most intricate looks. This is the practical step that makes all the difference between a style that damages and one that truly preserves your length and health.
Ready to say goodbye to split ends for good? Let’s dive into everything you need to know.
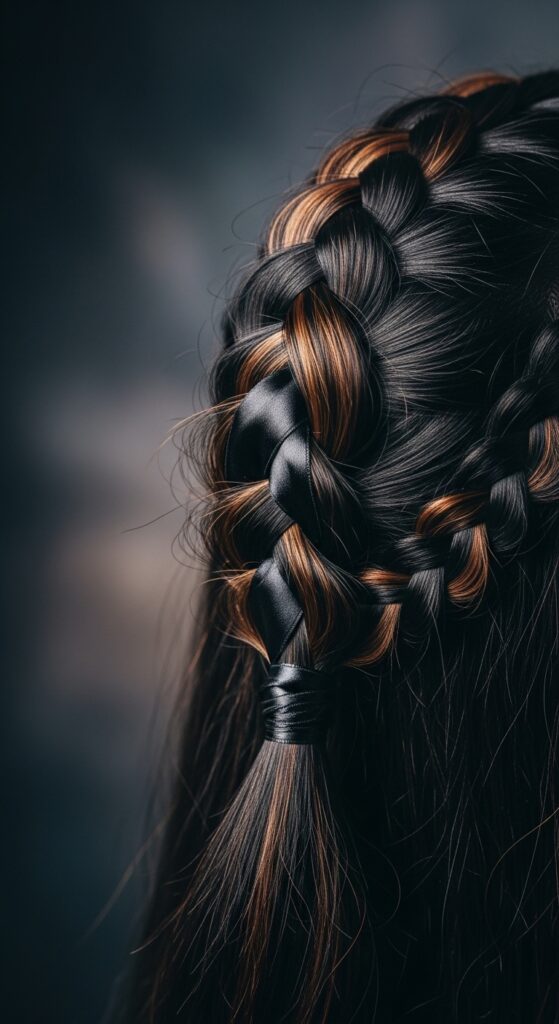
What Is A Braided End Cap, Anyway?
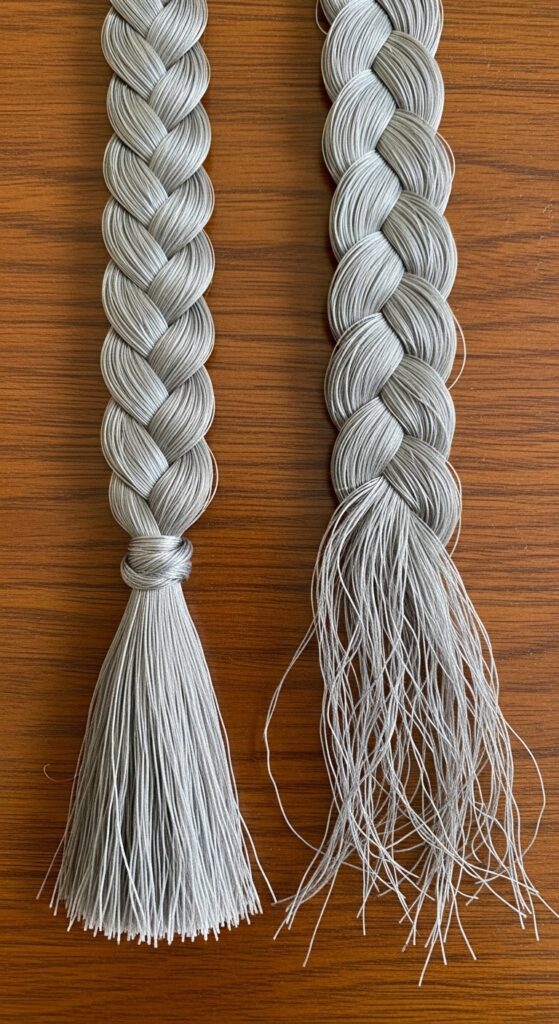
Think of an end cap like the little plastic tip on a shoelace. Its job is to keep everything neatly together and prevent unraveling. For your braid, it’s the final, secure wrap of hair at the very bottom.
Instead of just letting the braid taper off loosely, you intentionally wrap the remaining tail around the base of the braid’s end. This creates a tight, sealed tip that locks in the hair and stops those fragile ends from being exposed and rubbing against your clothes.
Why Your Ends Split (The Real Reason)
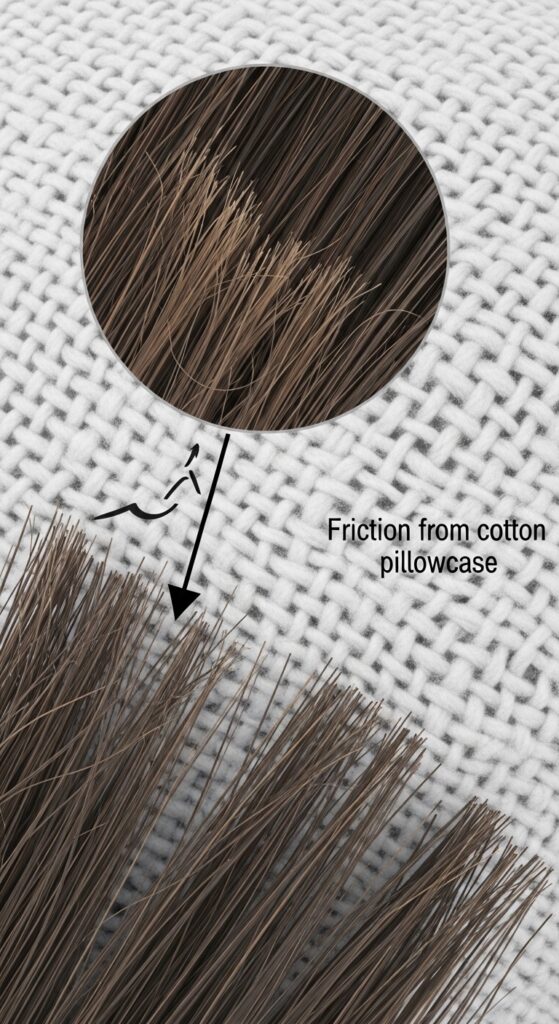
We blame heat and color, but mechanical damage is a huge culprit. When the ends of your braid are loose, they constantly brush against things. Your shirt collar, your bag strap, even your pillowcase creates friction.
This daily rubbing wears down the hair’s protective cuticle layer, leading to splits and breakage. It defeats the whole purpose of a protective style! A secure end cap eliminates this friction point entirely.
It’s the simplest form of TLC for the oldest, most fragile part of your hair strand. Protecting them here means you retain length and see real growth over time.
The Basic End Cap Technique: Step-by-Step
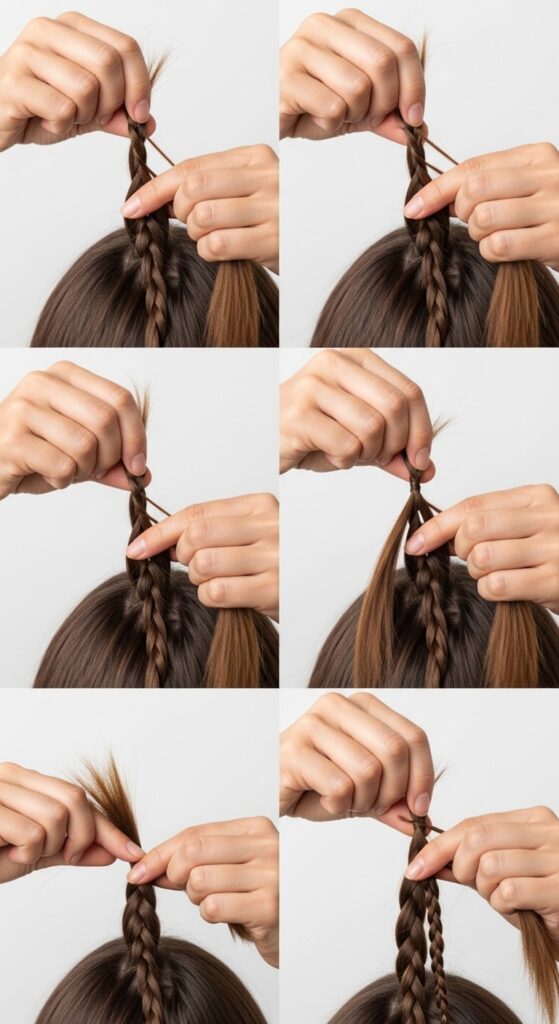
Start with a completed braid. You should have a small tail of hair left, about 2-3 inches long. Hold the very end of this tail between your thumb and forefinger.
- Begin wrapping the tail neatly around the base of the braid’s end, right where the braid stops.
- Wrap it tightly in a circular motion, like you’re coiling a tiny rope.
- After 2-3 wraps, tuck the very tip of the tail under the wrapped coil you just created.
- Gently pull it snug. The tension should hold it in place.
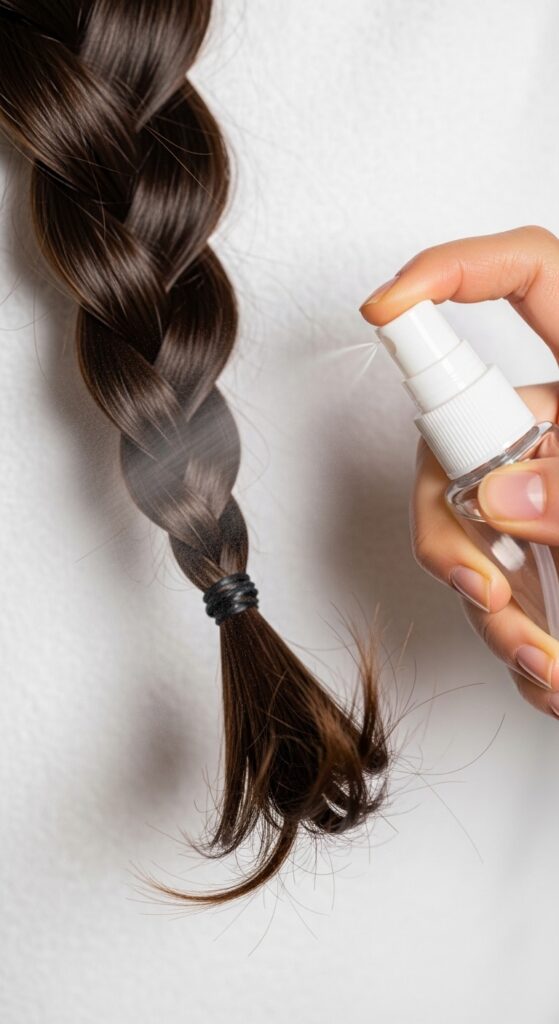
Pro Tip: The Damp Hair Advantage
This is my favorite hack for a bulletproof hold. Do your final wrap on slightly damp, conditioned hair. A light mist from a spray bottle is perfect.
The dampness helps the hair grip itself better as it dries, locking the end cap in place. You can also use a tiny dab of edge control or styling gel on the tail before wrapping for extra security on stubborn, slippery hair.
Just avoid heavy products that cause buildup. The goal is hold, not crispiness. This method keeps your end caps intact for days, even through workouts.
End Caps For Classic Three-Strand Braids
The humble three-strand braid is a perfect practice canvas. Because the plait is uniform, creating a smooth end cap is straightforward. Focus on keeping the wrap tight and even.
This technique elevates even the simplest braid, giving it a polished, intentional look. It’s perfect for that old money hair aesthetic—effortlessly neat and perfectly put-together, like you just left a luxury salon.
Whether it’s a single braid or pigtails, sealing the ends makes the style look more professional and last much longer.
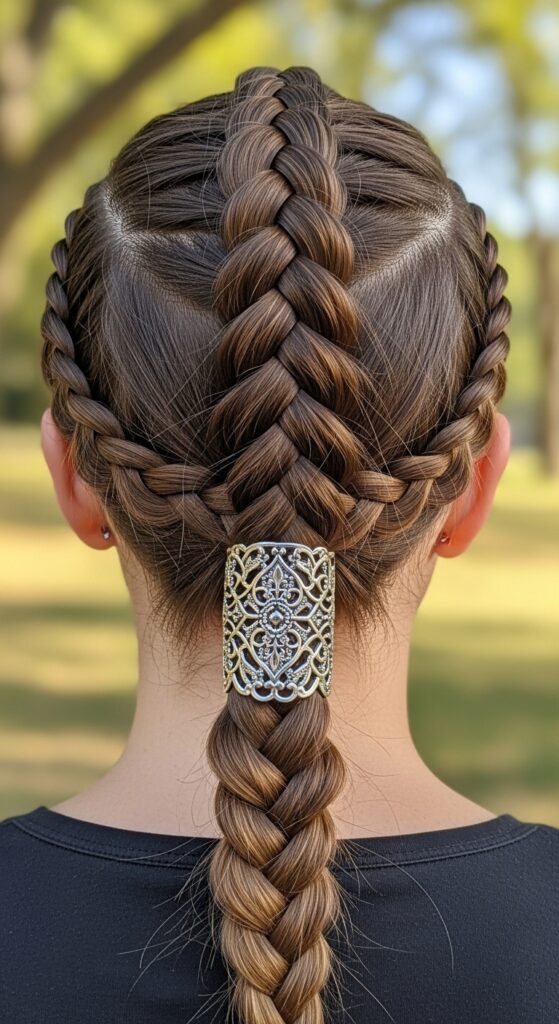
Level Up: Dutch & French Braid End Caps
With inverted or French braids, the end is often thicker. Don’t be afraid to wrap a bit more of the tail to cover the wider base. The principle is the same: wrap, coil, and tuck.
If the braid is very thick, you can split the tail into two smaller sections and wrap them in opposite directions for a flatter, more secure finish. This prevents a bulky, knob-like end.
It ensures your intricate braiding work stays pristine from the scalp all the way down, making it a staple for active days.
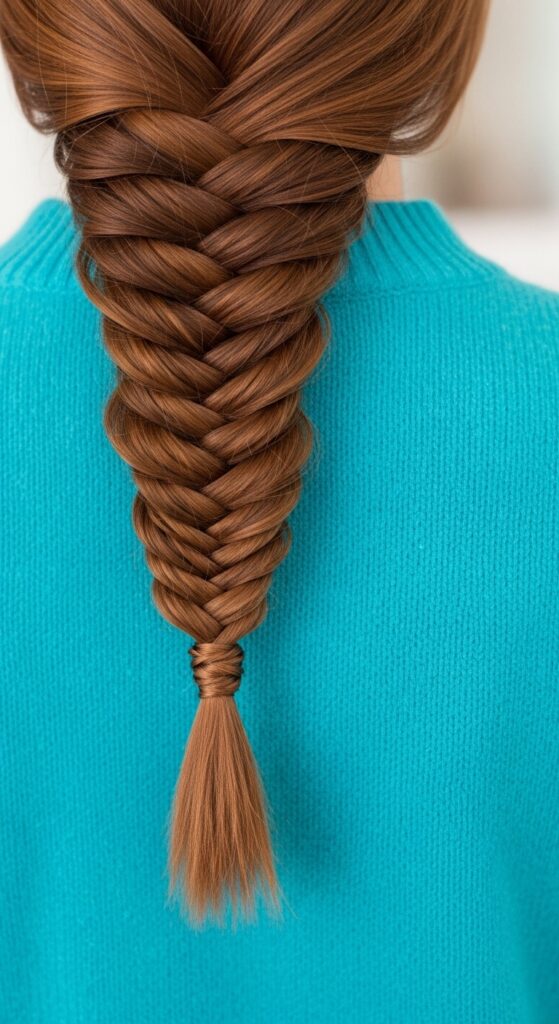
Securing Fishtail & Rope Braids
Fishtail and rope braids have a delicate, intricate texture that frays easily. The end cap is non-negotiable here. Because the hair sections are fine, take your time wrapping.
You might need to hold the end of the braid pinched between your fingers as you make the first wrap to keep it from slipping. A clear elastic band is a great cheat—use it to secure the braid, then wrap the tail around to conceal the band completely.
This keeps that beautiful, detailed pattern intact from top to bottom.
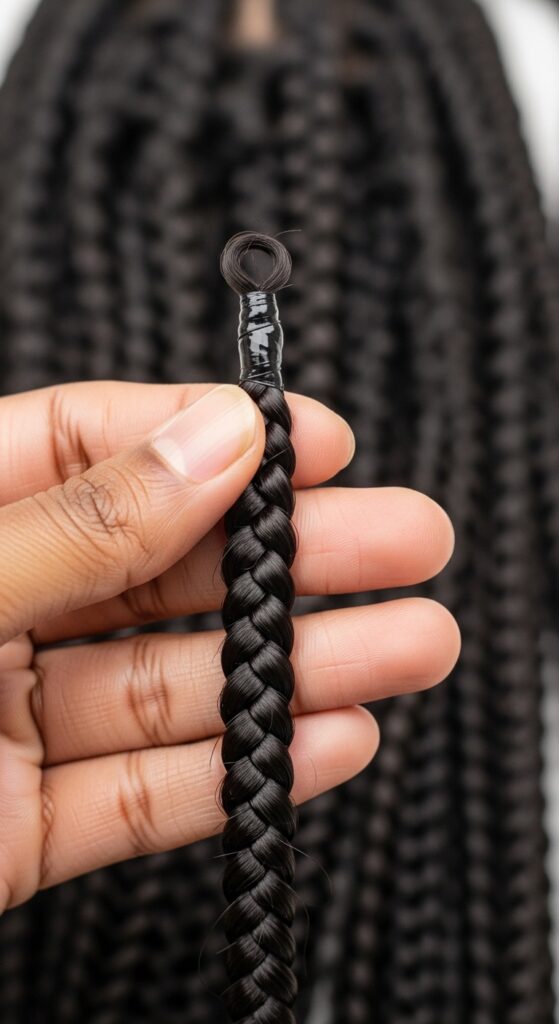
End Caps on Box Braids & Protective Styles
For synthetic or human hair braids, the end cap technique is slightly different. You’ll often use a small rubber band or thread to secure the end first. Then, you can dip the end in hot water (for synthetic hair) or use a tiny bit of glue to seal it.
Finally, wrap the very tip of the braiding hair around this sealed end to create a smooth, finished look. This prevents the braid from unraveling and protects your own hair tucked inside from environmental exposure.
It’s the key to making your protective styles last for weeks.
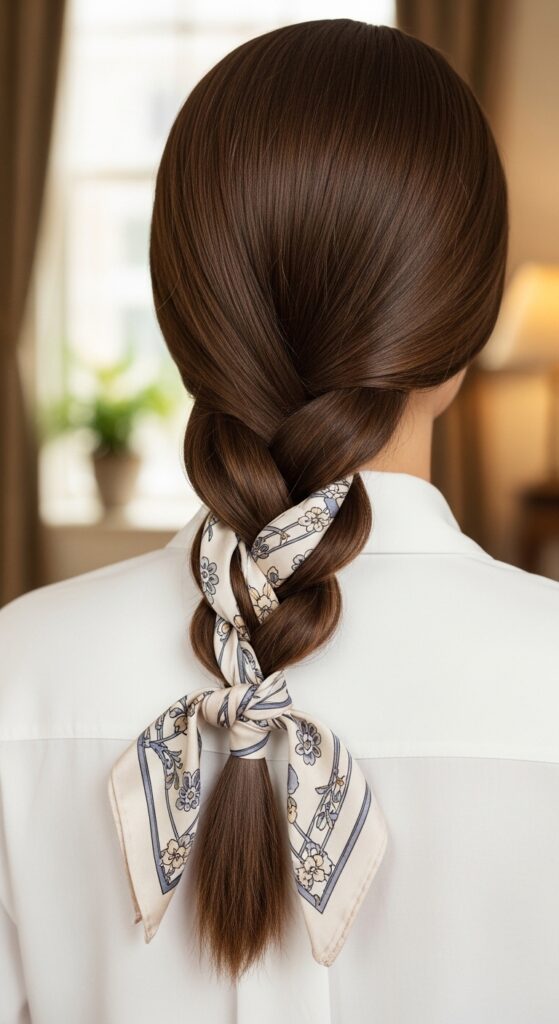
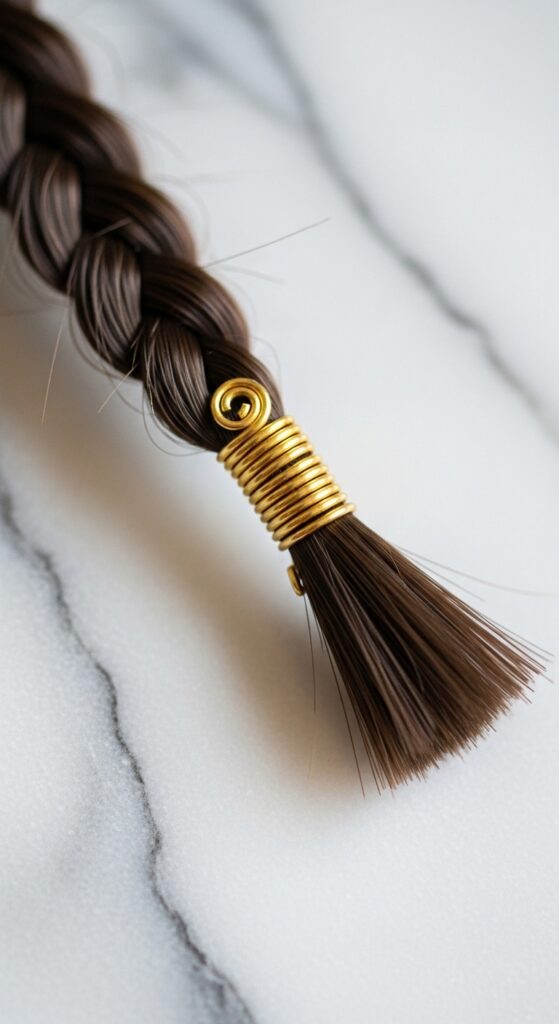
Incorporating Hair Accessories
End caps and accessories are a match made in heaven. Once your end is securely wrapped, you can easily add a cute coil or spiral hair tie. It won’t slip off a frayed end.
You can also thread the tail through a small bead or charm before wrapping it under, locking the accessory permanently into place. This is a beautiful way to add a personal touch to 2026 hairstyles trends, where personalized details are everything.
It turns a functional technique into a stylish statement.
The “Invisible” End Cap for Updos
When you pin a braid into a bun or updo, a clean end is crucial. After wrapping your end cap, simply tuck the wrapped tip under the base of the braid and secure it with a bobby pin.
This hides the end completely, giving you a seamless, professional-looking finish. No more wispy pieces poking out awkwardly. It’s the secret behind those perfectly sleek ballet buns and elegant chignons you see everywhere.
This method keeps every hair in place, all day long.

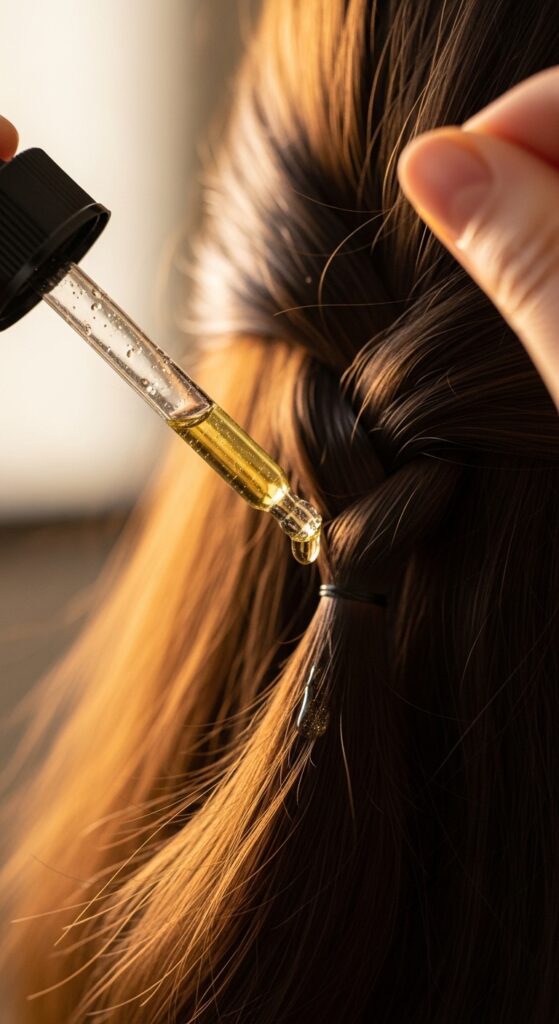
Preventing Frizz at the Tip
If your ends are already dry or frizzy, wrapping them will just create a fuzzy ball. Before you start your braid, apply a tiny amount of hair serum or light oil just to the last two inches of your hair.
This smooths the cuticle and provides slip, allowing you to create a tight, clean wrap. I love using argan or jojoba oil for this. It adds moisture and shine, making the end cap look polished instead of messy.
Healthy ends are the foundation of a good end cap.
How Often to Re-do Your End Caps
For a standard braid you sleep in, check your end caps every morning. A quick re-wrap might be needed. For long-term protective styles, inspect them weekly during your scalp care routine.
If an end cap feels loose or looks fuzzy, simply unwind it, mist the tail lightly with water or a leave-in conditioner, and re-wrap it. It takes 10 seconds but dramatically extends the life and neatness of your style.
Think of it as routine maintenance for your hairstyle.

End Caps for Short Hair: The Asymmetrical Lob
Yes, you can do this on shorter cuts! If you have an asymmetrical lob or a vampire haircut, you might have just enough length for a small braid at the front or side.
The tail will be very short. Use a tiny, clear elastic to secure the braid, then wrap the minuscule tail around the elastic and secure it with a dab of styling wax on your finger. It requires precision but adds incredible detail to short, textured styles.
It’s a perfect detail for glitchy glam hair looks, mixing polished technique with an edgy cut.

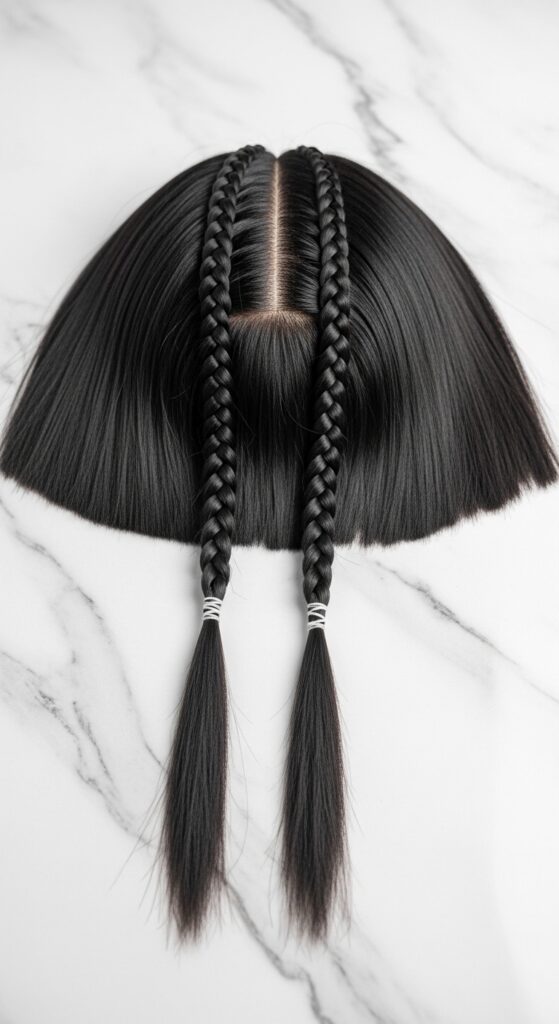
Styling the Hime Cut with Braided Details
The hime cut, with its distinctive front strands, is ideal for accent braids. Create two thin braids from the front sections. A precise end cap on these delicate braids is essential to maintain the cut’s sharp, geometric lines.
It prevents the braids from looking messy and contrasts beautifully with the straight, blunt-cut hair. This blend of structured cut and intricate detail is a cornerstone of 2026 hairstyles thinking—personalized and deliberate.
Adding Romance to Goth Styles
For romantic goth hairstyles, think intricate, woven braids with a darkly elegant finish. A secure end cap on a lace braid or a crown braid ensures the style stays ethereal and precise, not ragged.
Incorporate a single black silk ribbon into the wrap for a dramatic, Victorian-inspired touch. The end cap secures the ribbon permanently. This attention to detail elevates the look from simple to stunningly artistic.
It’s all about dark romance, from start to perfectly finished end.
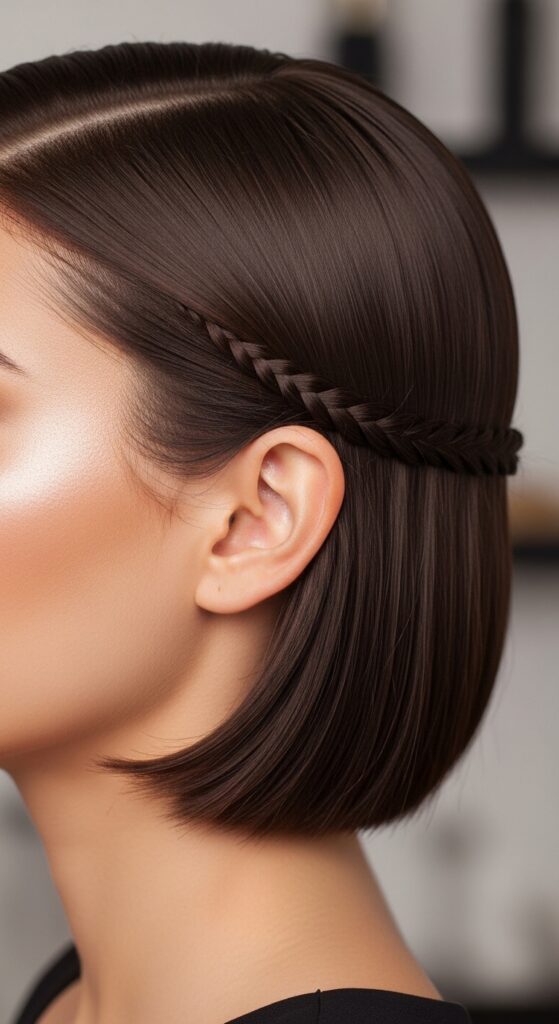
The Quiet Luxury Bob & Braided Accents
A quiet luxury bob is all of clean lines and supreme health. Adding a single, hidden braid behind the ear with a flawless end cap is the ultimate subtle detail. It speaks to effortlessness and care.
The braid should be small and the end cap invisible, tucking away neatly. This is protection and style at its most discreet and chic. It’s a testament to the idea that the best beauty routines are the ones no one sees but everyone notices in your hair’s health.
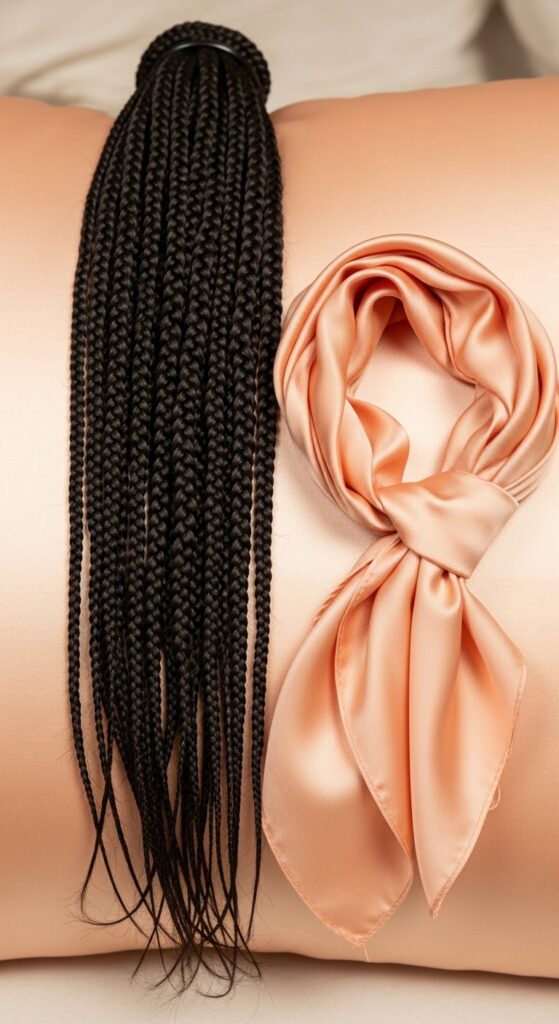
Nighttime Routine: Preserving Your Braids
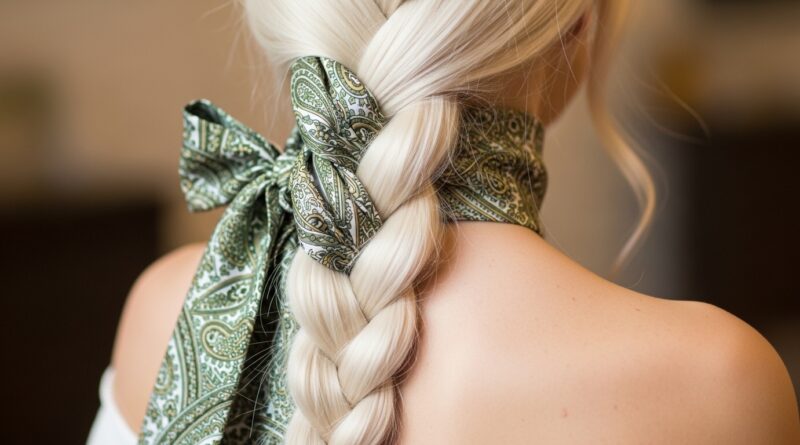
Your end cap’s best friend is a silk or satin pillowcase. It reduces friction while you sleep, so your wrapped ends stay put and don’t get fuzzy. I also loosely tie my braids up in a silk scarf.
This simple routine means you wake up with your braids looking just as good as when you went to bed, end caps intact. It’s the easiest way to get more mileage out of your styling time.
Protect your protection!
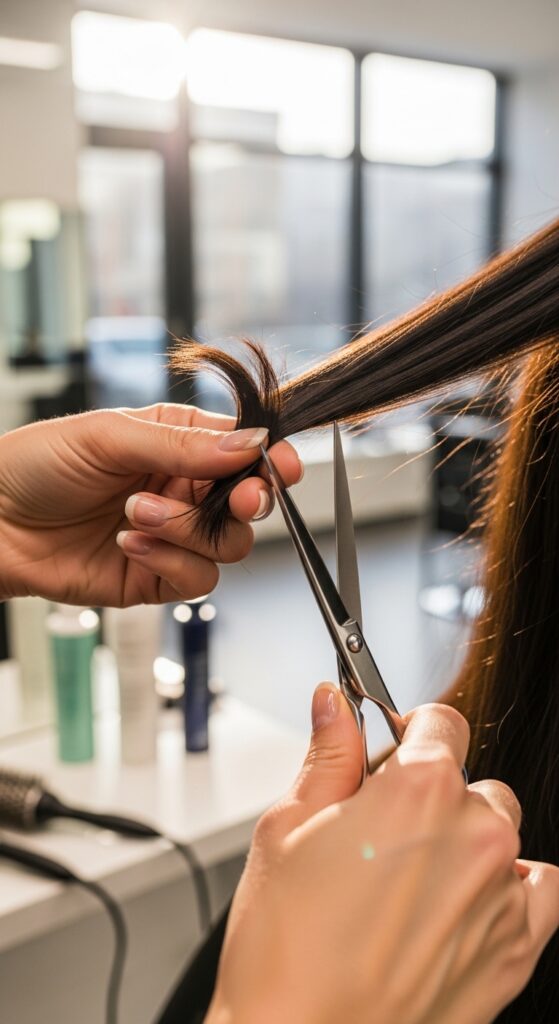
Trimming & Healthy End Basics
No technique can save severely split ends. Regular trims are still vital. Ask your stylist to do a “search and destroy” trim, targeting only the split ends, to preserve your length.
Healthy, trimmed ends are easier to wrap neatly and will hold the end cap better. Pair this technique with consistent trims every 3-4 months, and you’ll see a dramatic reduction in breakage. It’s a powerful one-two punch for hair health.
My Favorite Products for the Job
You don’t need much! Here’s my simple toolkit:
- A fine mist spray bottle for water.
- A lightweight leave-in conditioner.
- A small bottle of hair serum or light oil (like argan).
- Small, clear elastics for tricky braids.
That’s it. Fancy tools aren’t necessary. The technique is the magic. These products just help execute it perfectly on any hair type or texture.

Troubleshooting Common Problems
Problem: The wrap won’t stay. Fix: Your tail might be too thick or too slippery. Dampen it slightly or use a tiny bit of gel.
Problem: The end looks bulky. Fix: Split the tail into two and wrap in opposite directions to flatten it.
Problem: It unravels immediately. Fix: You’re not tucking the final tip under securely. Pinch the coil and really push the tip through.
Practice makes perfect!
Practice Makes Perfect: Start Tonight
Don’t wait for a special occasion. Practice on a simple braid tonight before bed. Follow the steps slowly. Even if it’s not perfect, you’re building the muscle memory.
Within a few tries, it will become second nature. This is the kind of small, daily habit that leads to big, visible changes in your hair’s length and health over the next few months.
Your future self, with her strong, long braids, will thank you.And that’s it, friend. The not-so-secret secret to braids that actually protect. It feels so good to finally have a solution for those frustrating split ends, doesn’t it? This tiny step is the bridge between just wearing a braid and truly leveraging it for hair health.
I promise, once you make end caps a habit, you’ll never go back. Your braids will look more polished, last longer, and most importantly, your ends will stay sealed away from all the little things that cause damage. It’s the ultimate win-win.
Save this post to Pinterest to keep this guide handy for your next braiding session! Did you try it? Tell me in the comments—which braid style are you going to cap first?