The Messy Bun, Done Properly: Styles That Look Relaxed Without Falling Apart
The messy bun is the most worn hairstyle in the world, and the most misunderstood. Done well, it looks relaxed, soft and a little bit romantic — the kind of style that makes people ask how you got your hair to look like that. Done badly, it looks like you gave up halfway through getting ready. The difference is not talent or luck. It is a handful of small decisions: a little texture before you start, a bun built loosely on purpose, volume where it flatters, and two or three pieces left out deliberately.
This guide collects 36 messy bun hairstyles for women, from the classic high bun and the low bun at the nape to braided buns, half-up buns, curly buns, wedding buns and the 60-second bun for mornings when you are already late. Eight short guides cover what makes a bun look effortless, the tools you actually need, how to make a bun last all day, and the mistakes that make one look unfinished. Every style notes who it suits, how to build it, and what to watch out for, so you can find your bun — the one that works for your hair, your face and your day.
What Makes a Messy Bun Look Effortless Instead of Unfinished
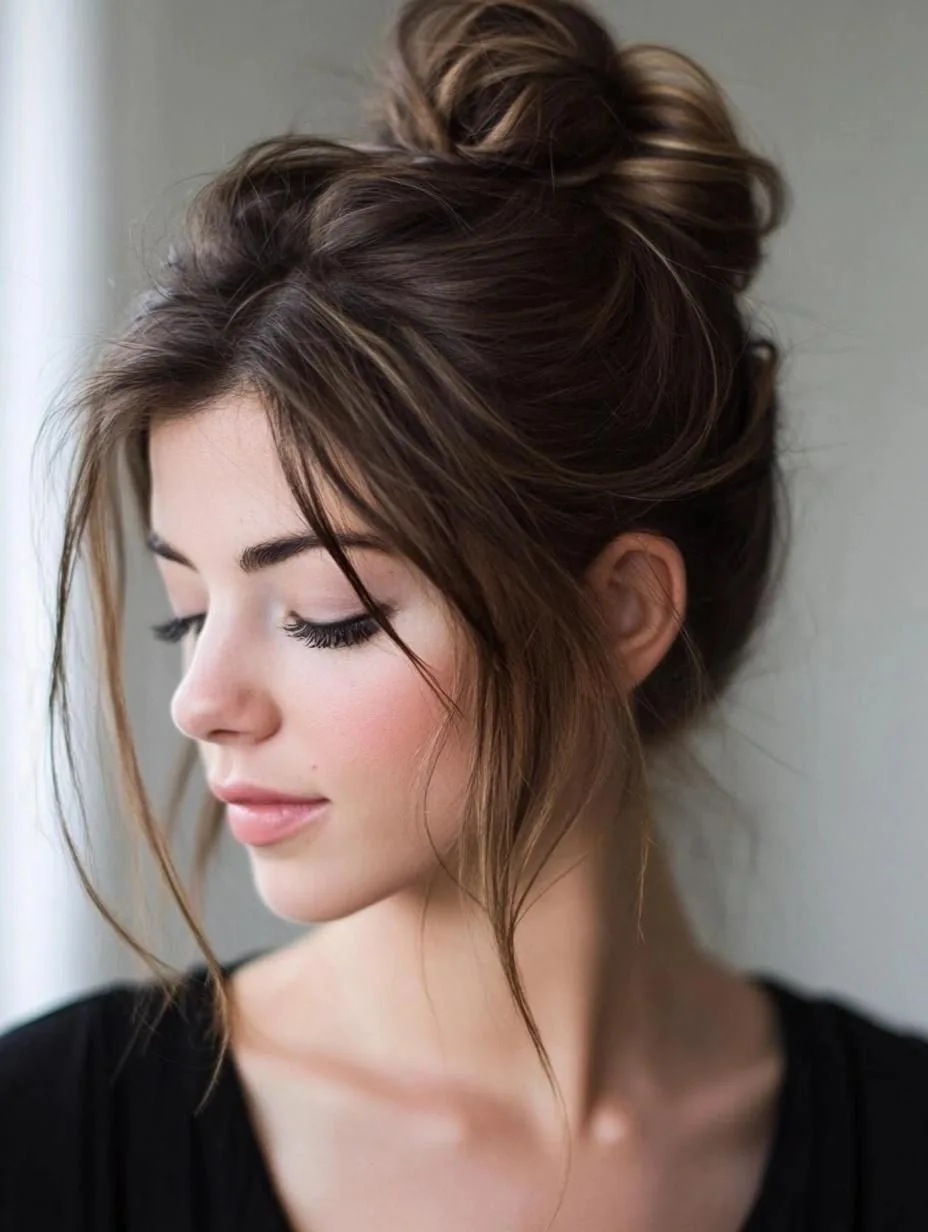
A good messy bun is not a failed neat bun. The difference is intention: volume placed where it flatters, a few soft pieces left out on purpose, and a shape that holds its height for hours. A bun that simply collapses looks tired, while a bun built with a little texture and a loose twist looks relaxed in the way people actually mean when they say effortless.
Start with hair that has some grip. Freshly washed, slippery hair is the hardest to work with, so a little dry shampoo or texture spray at the roots changes everything. Gather, twist loosely rather than tightly, and pin in a few places instead of relying on one elastic. The final step matters most: gently pull at the bun to widen it, and tug two or three pieces loose around the face.
The Tools and Products a Messy Bun Actually Needs
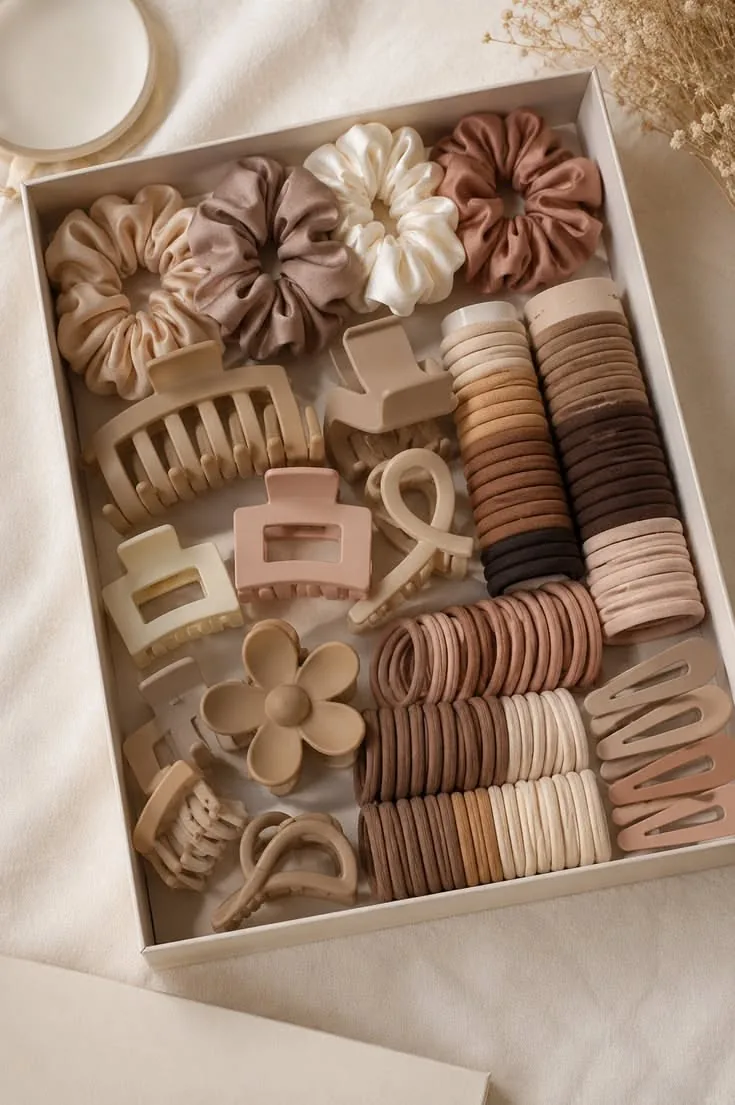
You do not need a drawer full of products for a messy bun, but the right few make the difference between a bun that lasts and one that slides out by lunchtime. The essentials are snag-free elastics that match your hair colour, four to six bobby pins, a texture spray or dry shampoo, and one claw clip or scrunchie for variety.
Keep a small kit in your bag if you wear buns often: two spare elastics, three pins and a travel-size texture spray weigh almost nothing. The most useful product is usually the one people skip — texture spray or dry shampoo on day-one hair gives fine hair the grip it needs, while a pea-sized amount of styling cream smooths frizz on thick or curly hair before you twist it up.
Messy Buns for Your Hair Type: Fine, Thick, Curly and Straight
Fine hair needs volume before it needs a bun. Tease the crown lightly, use dry shampoo at the roots, and choose a smaller, higher bun so it does not look lost against your head.
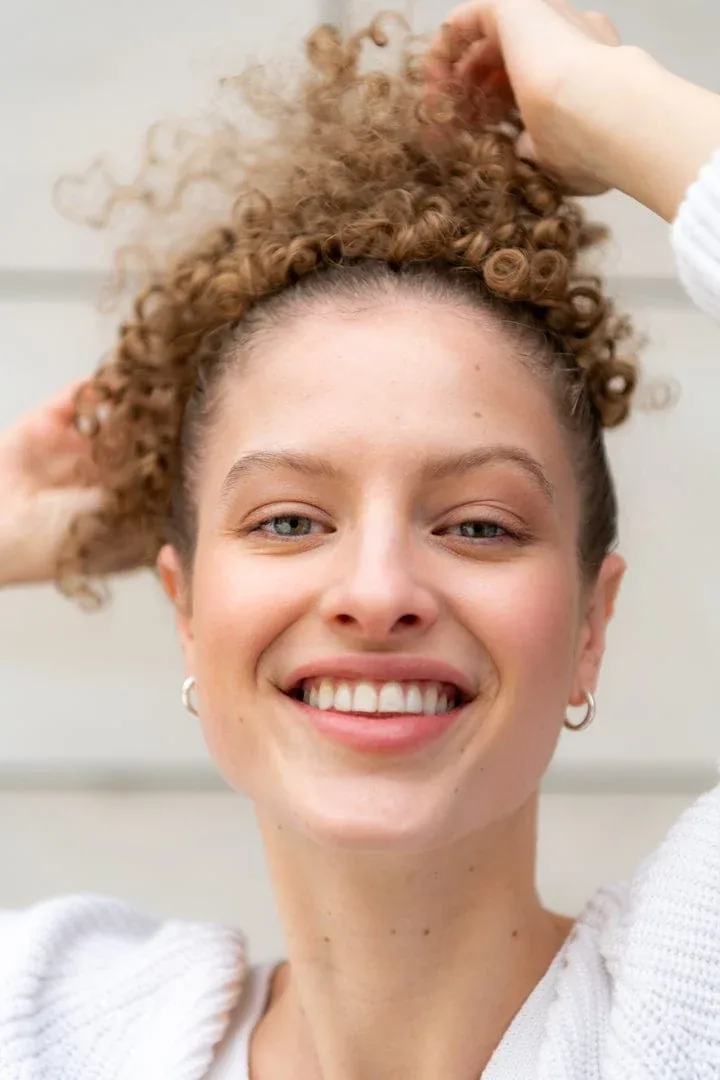
Curly hair makes the easiest messy buns, because the texture is already there — gather it loosely, twist once, and let the curls do the rest. Straight hair needs the most help: a quick wave with a curling iron, or braiding damp hair the night before, gives the bun the bend it needs to look soft instead of severe. The bun itself is the same; the preparation is what changes.
How to Make a Messy Bun Last All Day
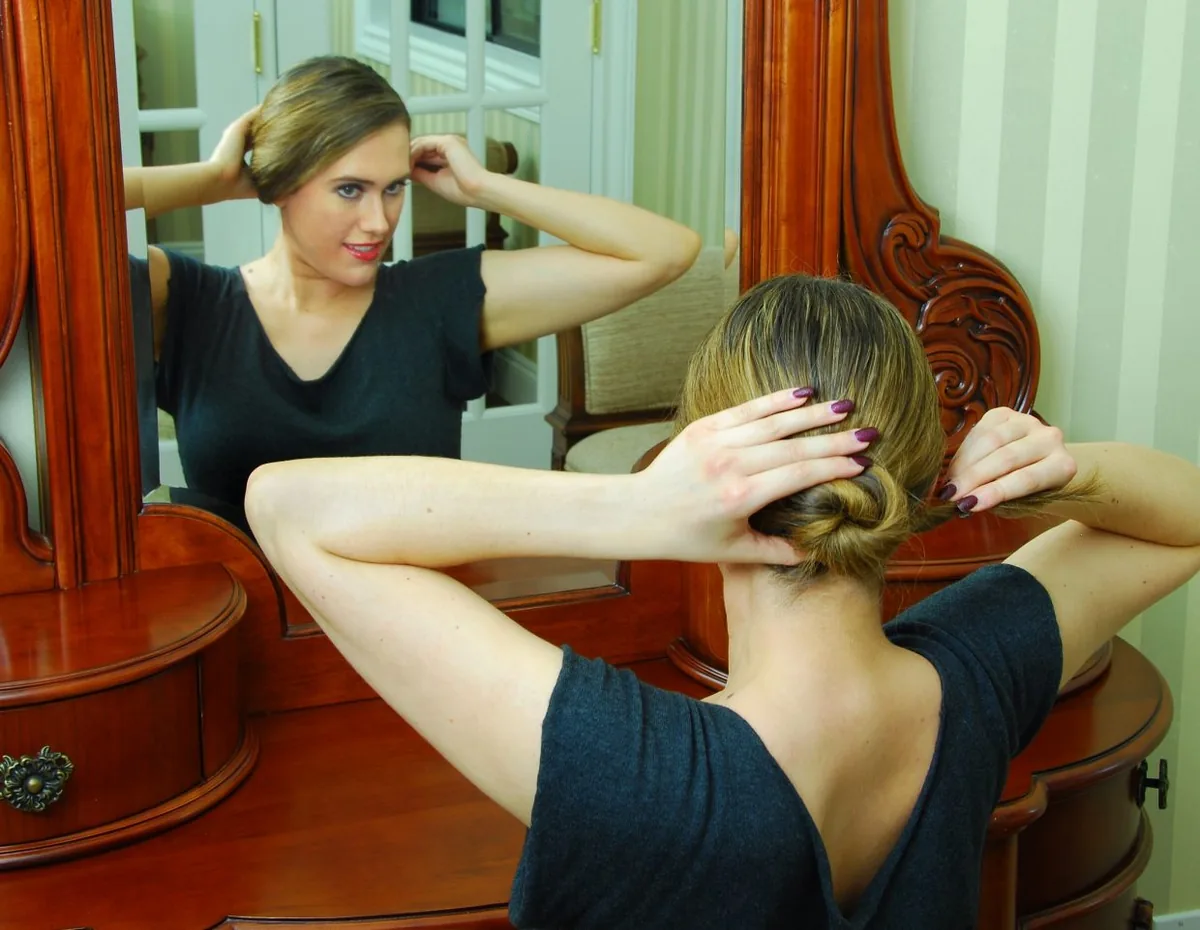
A messy bun falls apart for three reasons: slippery hair, one weak elastic, and too few pins. Fix all three and it will survive a full day. Work texture spray through the lengths before you start, use an elastic you have to wrap three times rather than two, and anchor the bun with pins placed in different directions so they lock against each other rather than sliding the same way.
Placement matters too. A bun that sits at the very top of the crown bears the full weight of your hair and will droop; sit it slightly back, where the head curves, and it stays put. If it starts to slip midday, do not keep tightening the same elastic — take it down, add a little more texture spray, and rebuild it in under a minute.
1. The Classic High Messy Bun
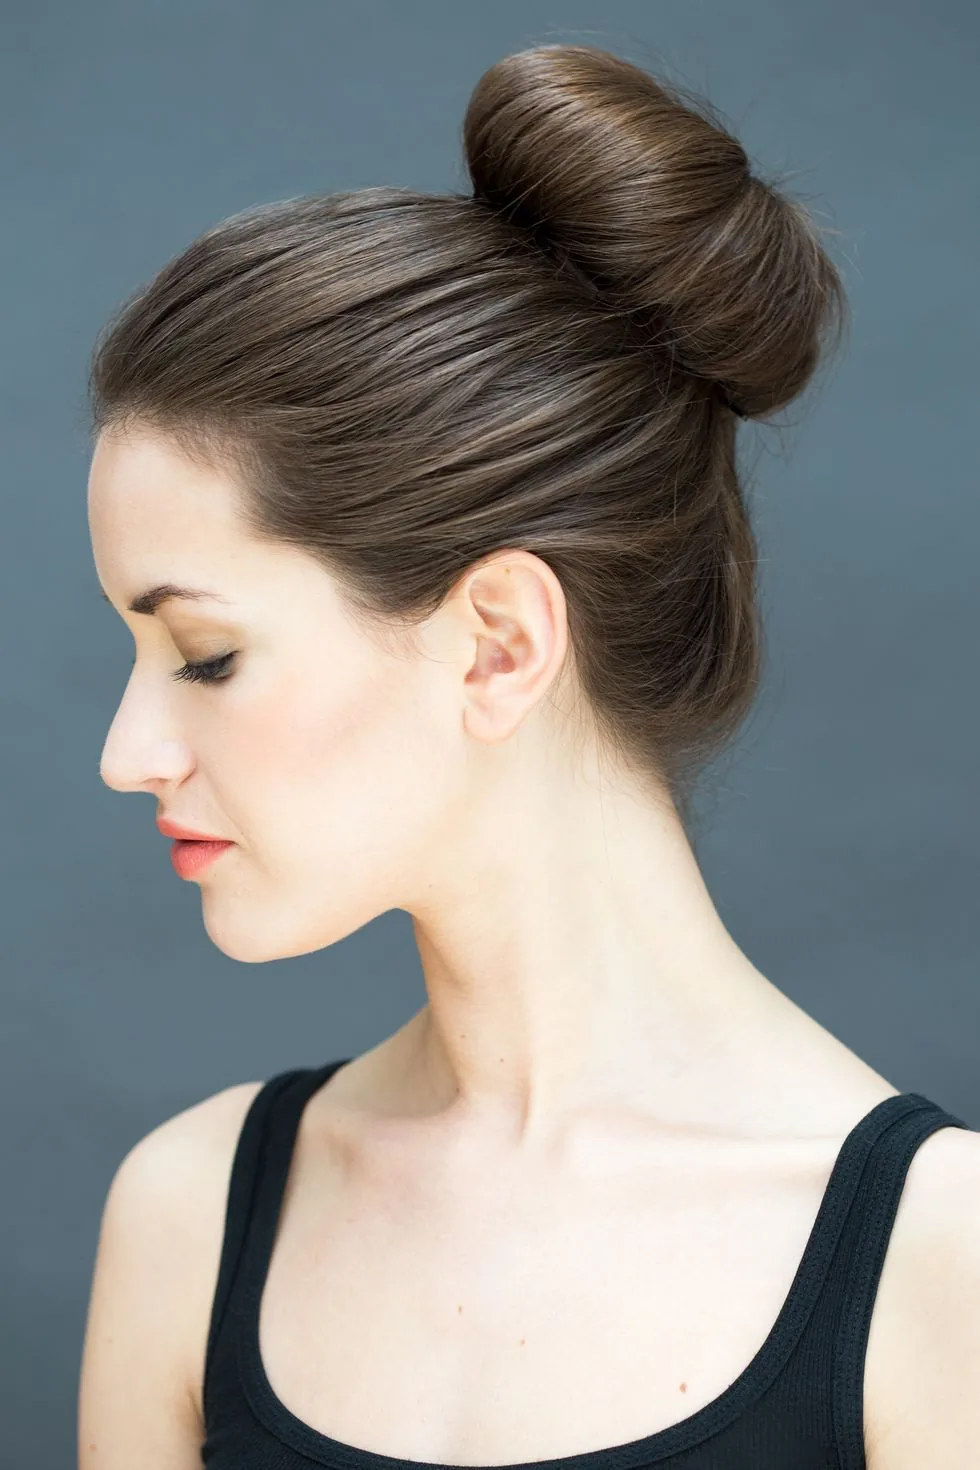
Best for: almost everyone, and the first messy bun to learn. Gather your hair high on the crown, twist it loosely, wrap it around its own base and pin it. Pull the bun gently wider with your fingers, then tug two thin pieces loose at the temples.
How to style it: work texture spray through the lengths first, especially on clean hair. Twist in the same direction all the way around, and pin at the base of the bun rather than through its centre, so the pins hold the shape without flattening it. If the bun looks too neat, pinch and pull small sections outward until it looks deliberately undone — that is the point.
2. The Low Messy Bun at the Nape
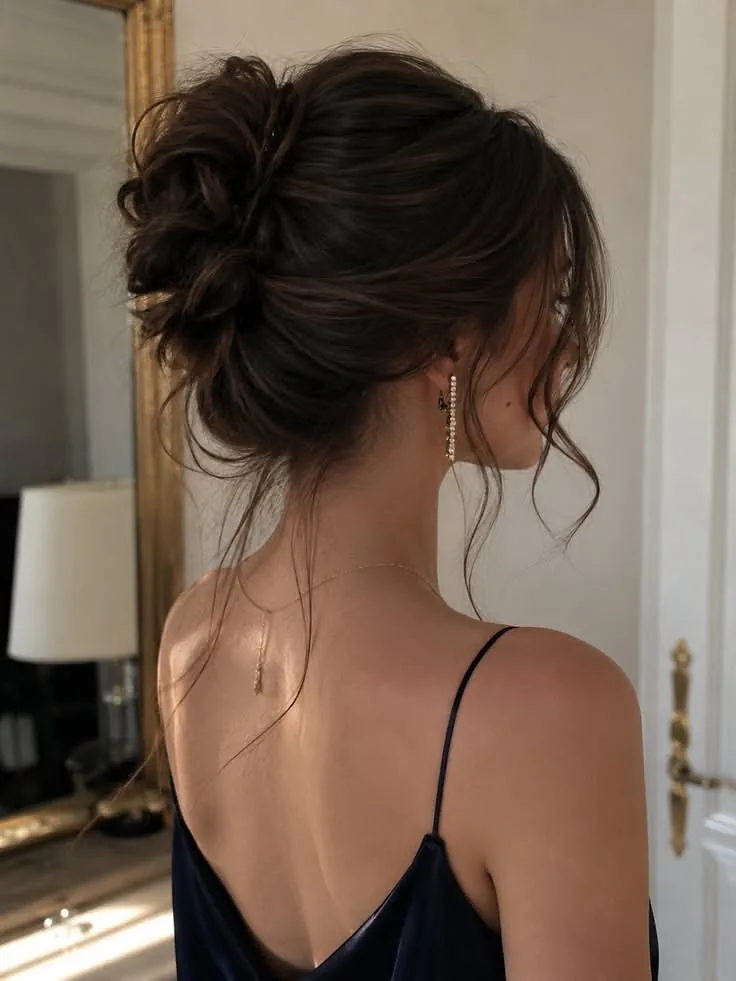
A low messy bun sits at the nape of the neck, which makes it kinder than a high bun if you wear a hat, and softer on the face if you have a long or angular face shape. Gather hair low, twist it into a loose loop, pin the ends underneath and leave the front relaxed rather than pulled tight.
Pros: comfortable for hours, works under hats and headphones, suits formal outfits as well as weekend ones. Cons: it can look flat from the front if you do not loosen the crown first, and on very thick hair it can feel heavy at the neck.
3. The Side Messy Bun
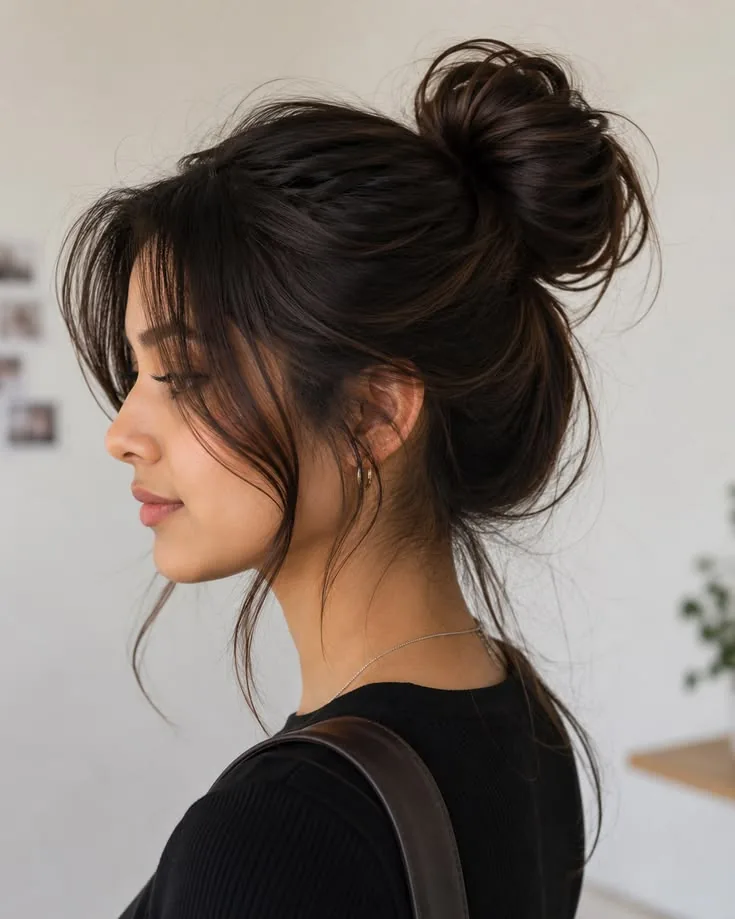
Common mistake: placing the bun too far back, where it disappears behind the ear and just looks like a lopsided low bun. A side bun should sit low behind one ear and slightly forward, so it is visible from the front. Sweep hair to one side, twist it loosely, coil it and pin it, then leave a few pieces free on the opposite side to balance the look.
Best for: evenings, photos and anyone who finds a centred bun too severe. It suits hair that has already dried into waves, because the texture does half the work. Maintenance is easy — if it loosens, it still looks intentional, since a side bun is meant to look a little undone.
4. The Messy Top Knot
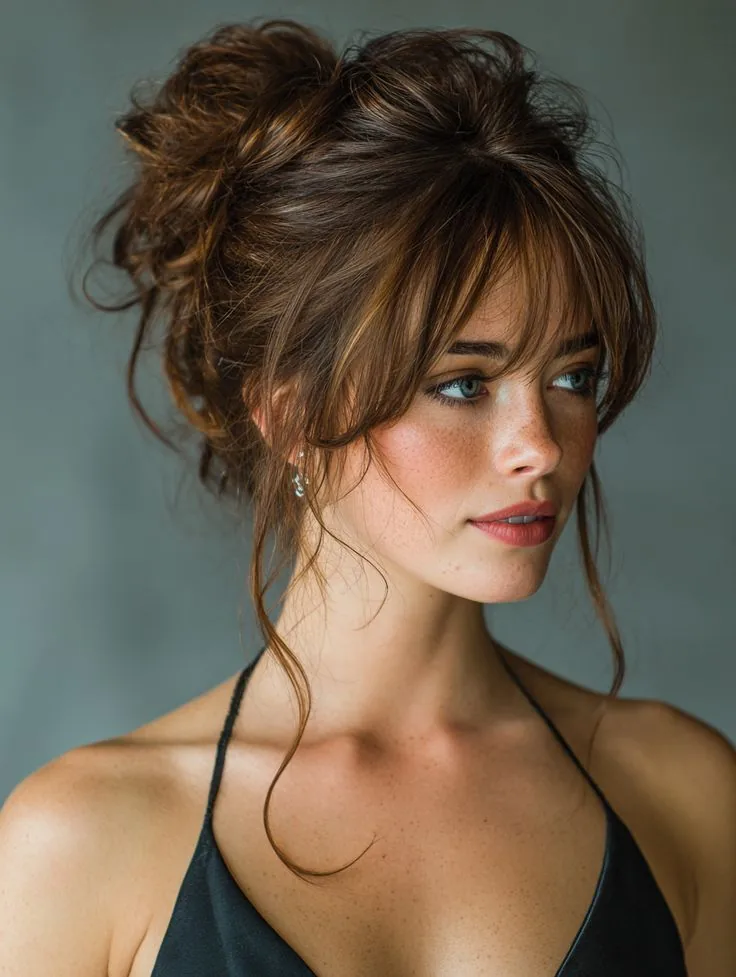
The top knot is the highest, boldest version of the messy bun: hair gathered right on top of the crown and coiled into a compact, textured knot. It keeps every strand off the neck, which makes it a favourite in summer and at the gym, and it gives the face an instant lift.
Who should avoid it: anyone with a very round face who dislikes extra height on top, since a top knot adds several inches to your silhouette. For everyone else, it is the fastest updo there is. Cost and time: zero cost, about ninety seconds, and it uses one elastic and two pins. Pair it with soft, undone makeup or it can look too severe for a relaxed day.
5. The Half-Up Messy Bun
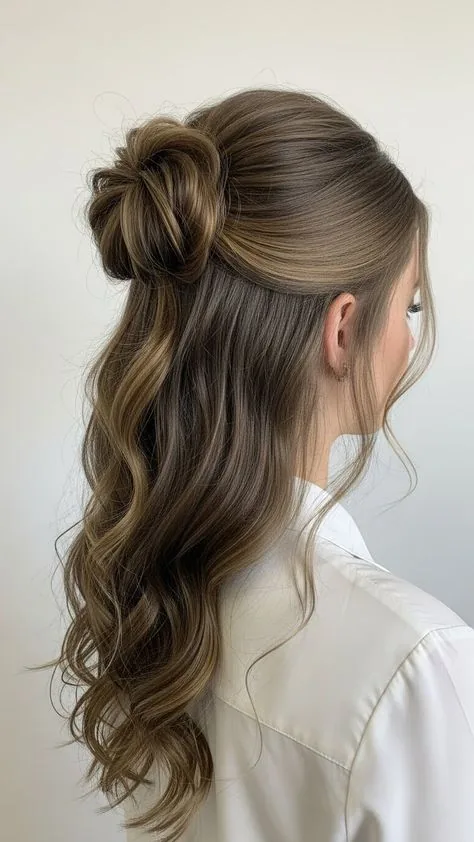
Quick verdict: the best messy bun for people who do not want all their hair up. Take the top half of your hair into a small messy bun and leave the rest down. You get the cooling effect of hair off your face with the length and movement of loose hair at the back, and it suits every hair length from a long bob upward.
How to style it: part the top section from ear to ear, gather it at the crown and twist it into a small bun. Keep the bun small — a big half-up bun overwhelms the loose hair underneath. Best for medium to long hair, and for second-day hair, when the lengths already have a little texture.
6. The Messy Bun With Face-Framing Pieces
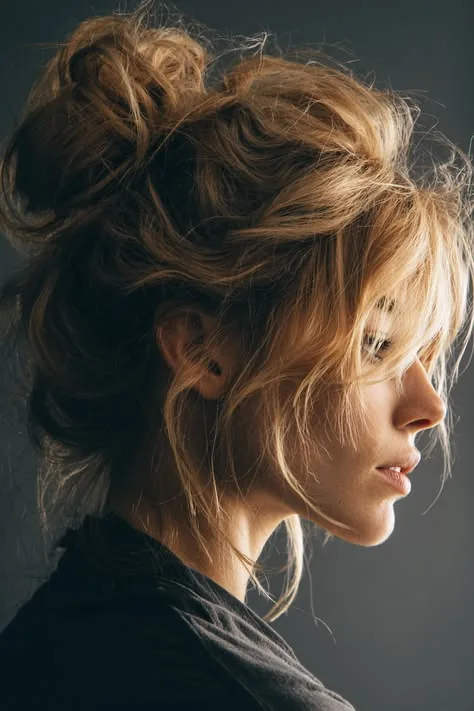
Best for: softening a strong jawline, a high forehead or a very neat outfit. Before you gather your hair, pull out two thin sections at the front, one on each side. Build the bun as usual, then curl or twist those pieces lightly so they fall beside the cheeks instead of hanging straight. The pieces are what make the style look romantic rather than rushed.
What to ask for at the salon: face-framing layers that start at the cheekbone, cut slightly shorter at the front than at the back. Those layers are what fall out naturally into framing pieces. Without them, you have to pull pieces out artificially, and they tend to be too thick or too short. With them, the style almost builds itself, and the pieces grow out gracefully between cuts.
7. The Messy Bun With Curtain Bangs
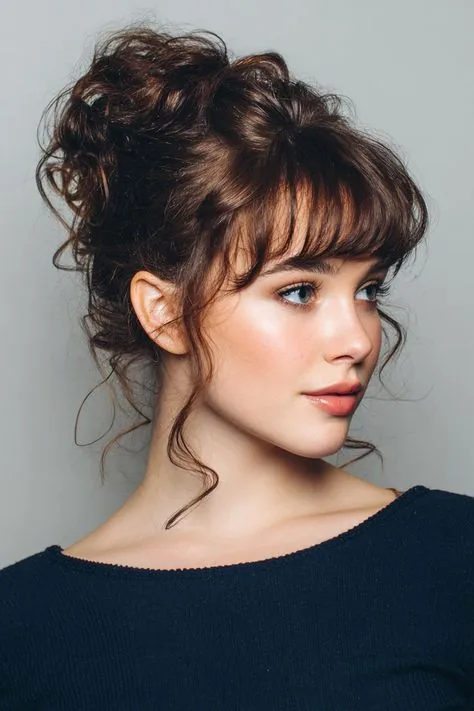
Curtain bangs and a messy bun are a natural pair: the bangs frame the face while the bun keeps everything else up and out of the way. Part the bangs in the middle, sweep each side outward, and gather the rest into a loose high or mid bun. The contrast between the soft, parted fringe and the textured bun is what makes the look feel current rather than thrown together.
Common mistake: pulling the bangs back into the bun, which removes the whole point of the style and leaves the face bare. Leave them out, and if they look too neat against a messy bun, rough them up with your fingers or a little texture spray. Maintenance is simple: the bangs need a quick blow-dry or a twist while damp, but the bun itself needs nothing at all.
8. The Braided Messy Bun
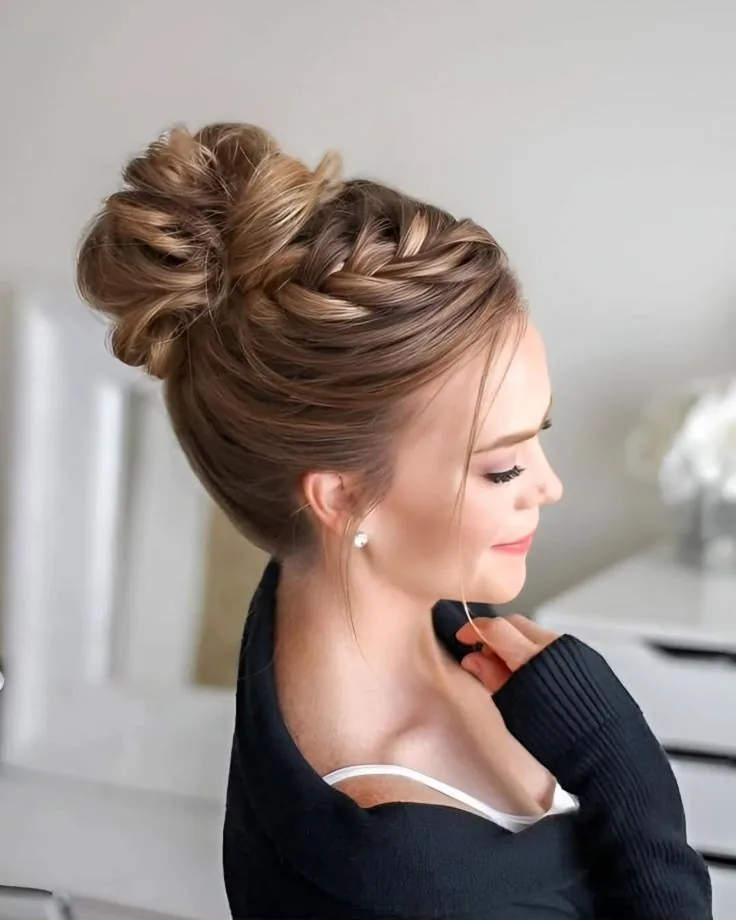
Pros: this is the messy bun that actually stays put. Braid a ponytail first, then wrap the braid into a bun and pin it. The braid gives the bun grip and texture, so it holds far better than a bun made from loose hair, and it looks more finished without any extra effort. It is the updo to choose when you want one style to last from morning to evening.
Cons: it takes a few minutes longer than a plain bun, and on very short hair there may not be enough length to braid and wrap. How to style it: braid loosely rather than tightly, then pull the braid gently apart to widen it before wrapping — a plump, soft braid makes a much prettier bun than a tight, thin one. Pin the tail underneath so no ends stick out.
9. The Messy Bun With a Scarf
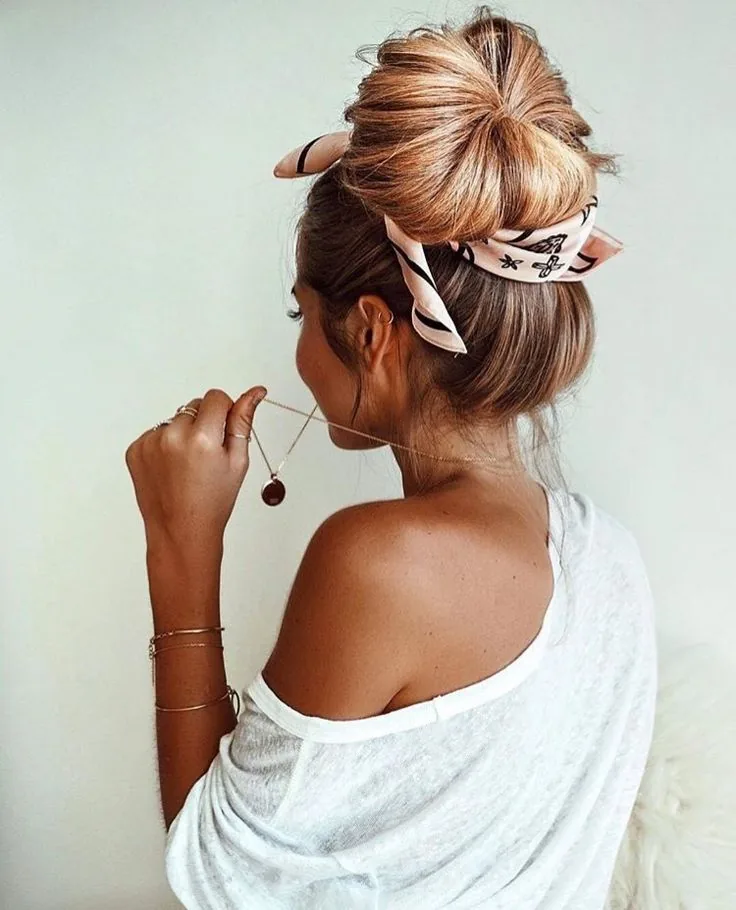
Cost and time: a scarf you already own, two extra minutes. Tie your messy bun as usual, then wrap a silk or cotton scarf around its base and knot it, letting the ends trail down or tucking them in.
Best for: holidays, weekends and days when your hair is not cooperating but your outfit is. Choose a lightweight scarf in a colour that picks up something you are wearing, and keep the knot small so it does not compete with the bun. Who should avoid it: anyone heading to the gym or into strong wind, where the scarf will come loose and need constant fixing.
10. The Messy Bun With a Scrunchie
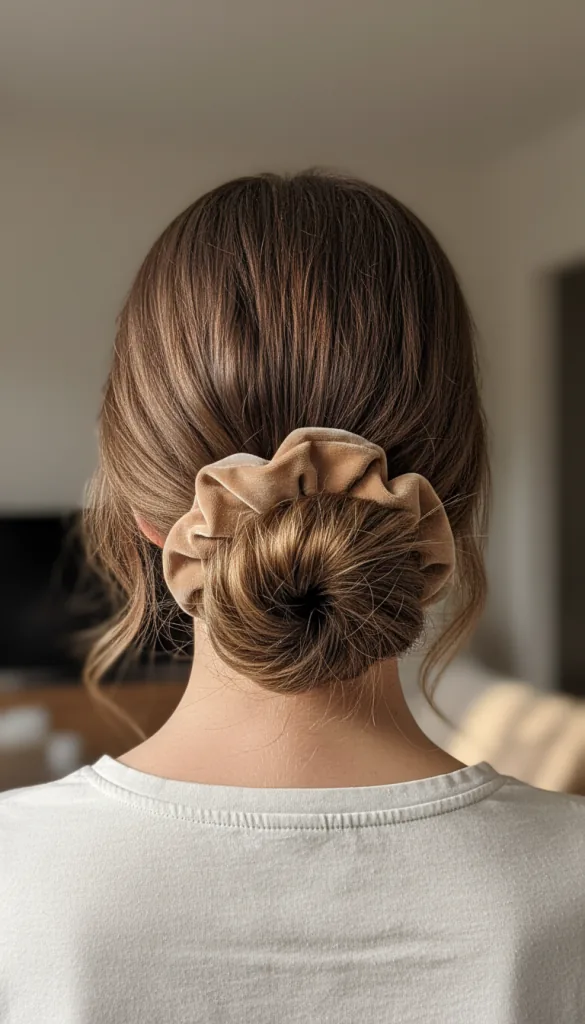
A scrunchie does two jobs in a messy bun: it holds the hair with less creasing and breakage than a thin elastic, and it adds a soft, fabric detail that suits the relaxed mood of the style. Use a silk or satin scrunchie for the gentlest hold, or a velvet one in winter for extra grip.
Maintenance: scrunchies are kinder to hair than elastics, so this is the bun to choose if you wear your hair up every day. Keep a spare in your bag, because a scrunchie that has lost its stretch will let a bun droop within an hour. Quick verdict: the most hair-friendly messy bun, and the easiest to make look deliberate — the scrunchie itself is the accessory.
11. The Messy Bun With a Claw Clip
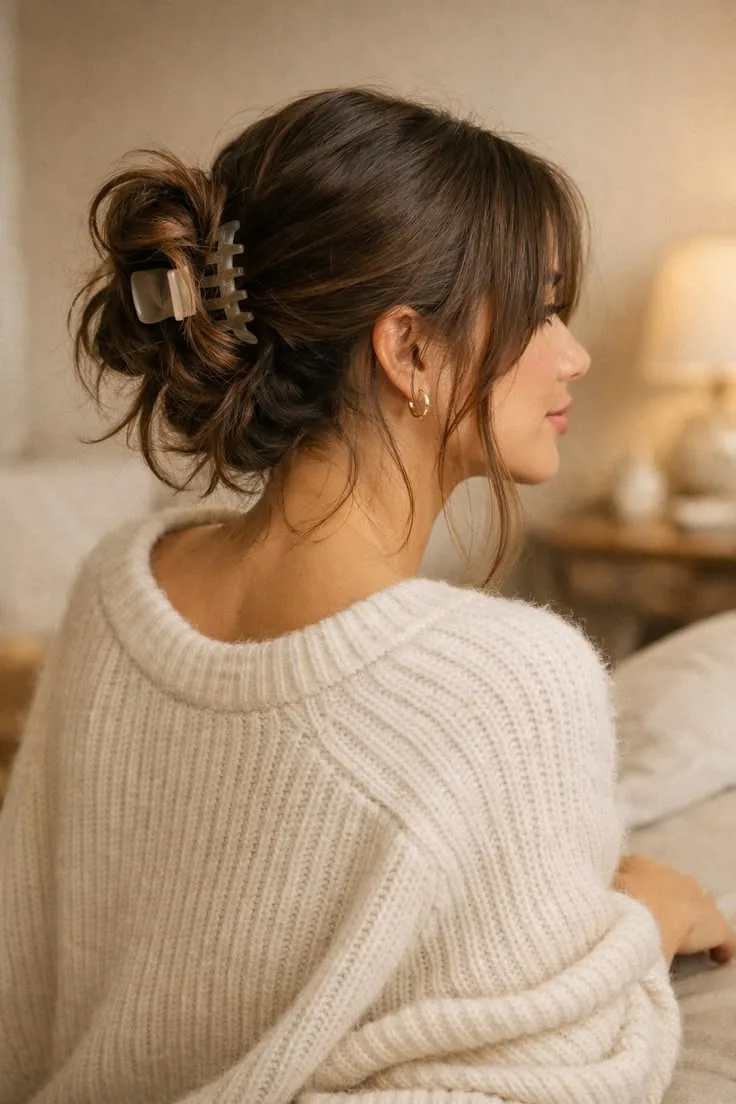
Common mistake: using a clip that is too small for your hair, which pops open at the worst moment. Match the clip to your hair thickness — a large clip for thick hair, a medium one for fine hair — and twist the hair up before you clip rather than clipping flat hair.
Best for: anyone who finds elastics uncomfortable or gets headaches from tight buns, since a clip distributes the weight differently. It also leaves no crease, so you can take the bun down later and still have wearable hair. The style takes under a minute, works on damp hair as well as dry, and a claw clip costs less than a coffee — the lowest-effort messy bun there is.
12. The Sleek-Front Messy Bun
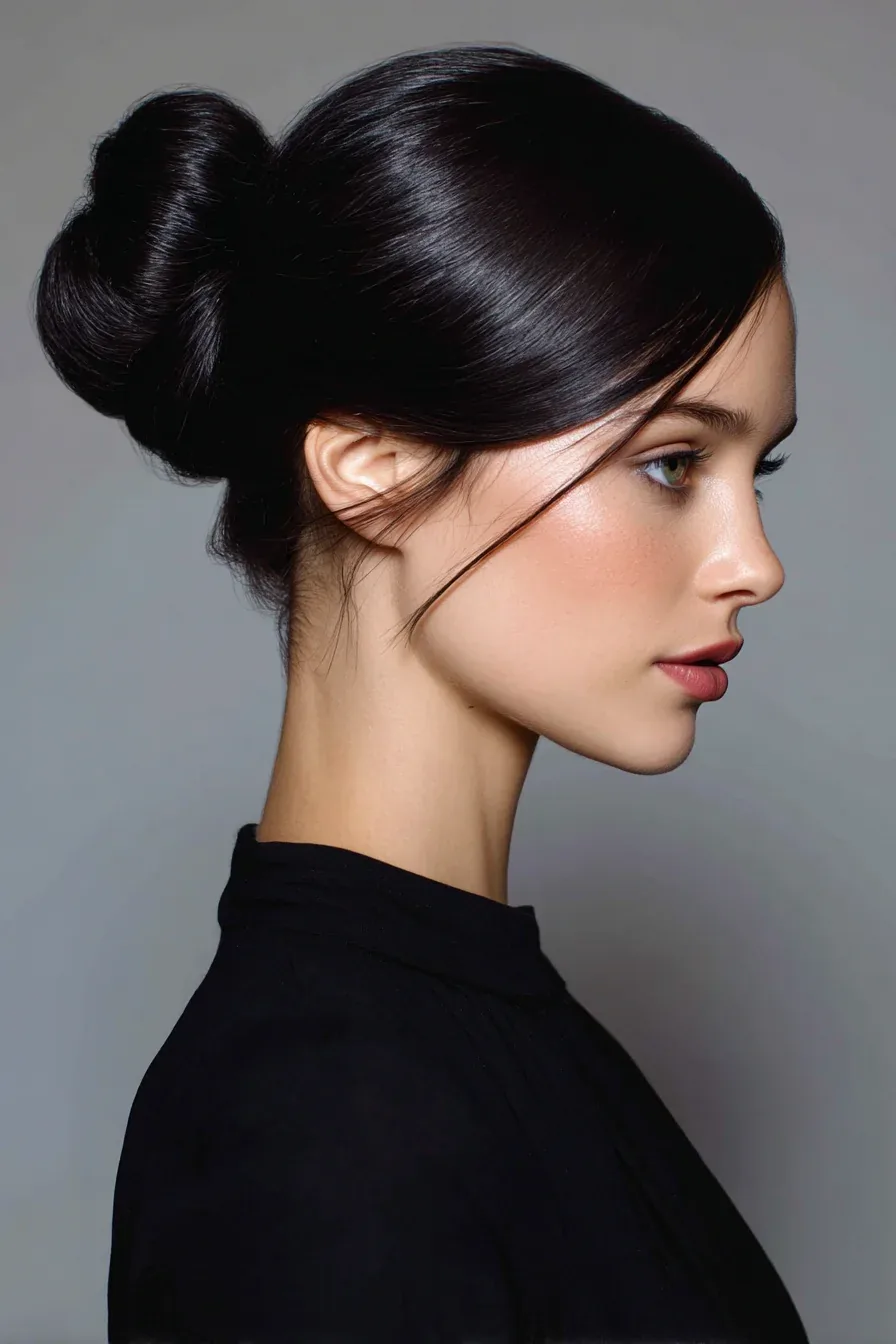
Best for: work, interviews and occasions where you want polish at the front and softness at the back. Smooth the front of your hair with a brush and a little gel or cream, keeping the parting clean, then gather everything into a loose, textured bun. The contrast is the whole style: sleek where people look at your face, messy where the bun sits.
How to style it: brush the front back with a fine comb, apply a pea-sized amount of gel at the hairline, and secure the ponytail before you twist the bun. Do not smooth the bun itself — pull it wide and let it stay textured. What to ask for: nothing at the salon, since this is purely a styling trick.
13. The Messy Bun for Curly Hair
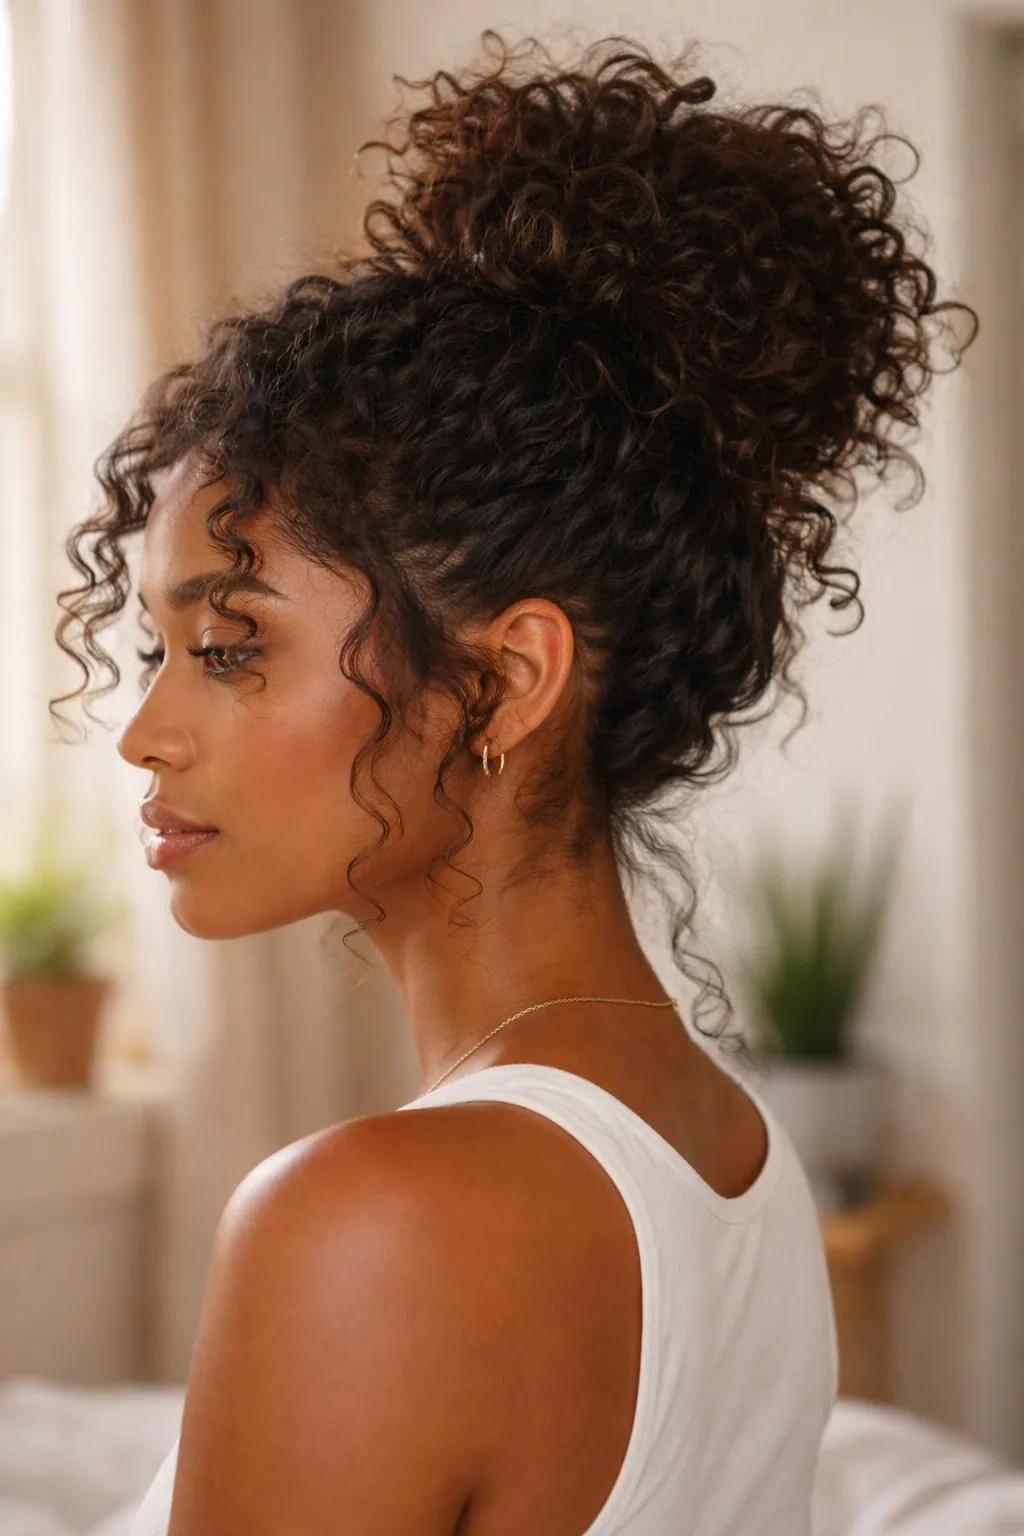
Quick verdict: curly hair makes the easiest messy bun of all, because the texture is already built in. Gather your curls loosely on top of the head, twist once, wrap and pin — the curls give the bun volume and softness without any teasing, spraying or pulling apart. The pineapple method works beautifully here: gather high, secure loosely with a satin scrunchie, and let the curls spill over the top.
How to style it: work with second- or third-day curls rather than freshly washed ones, since they have more grip. Use a little curl cream on the lengths before gathering, and never brush curly hair before a bun — it creates frizz. Pin the bun in three or four places and leave a few curls loose around the face.
14. The Messy Bun for Fine Hair
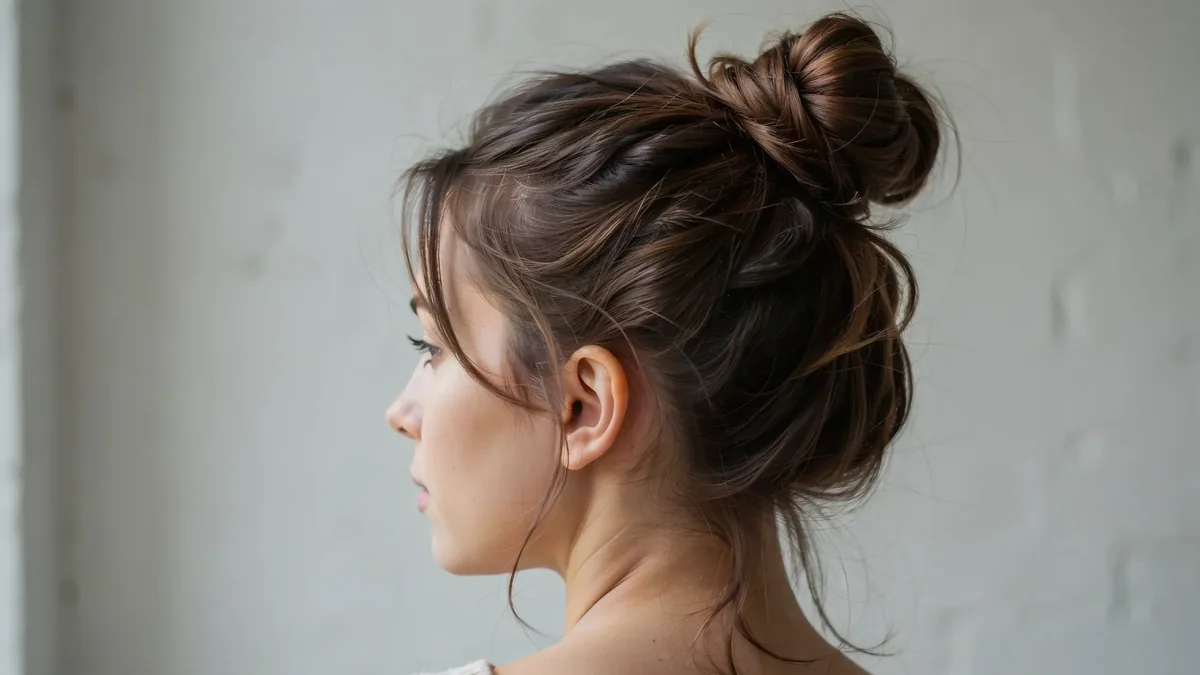
Pros and cons, honestly: fine hair is the hardest hair for a messy bun, because a bun needs volume and fine hair has very little of it. But a small, well-placed bun can look elegant and neat in a way thick hair never does.
Common mistake: making the bun too big by pulling it too wide, which exposes the scalp through the hair and makes the bun look thin rather than full. Keep the bun compact, pin it securely, and use a small hair donut or a rolled sock inside the bun if you want more size without teasing.
15. The Messy Bun for Thick Hair
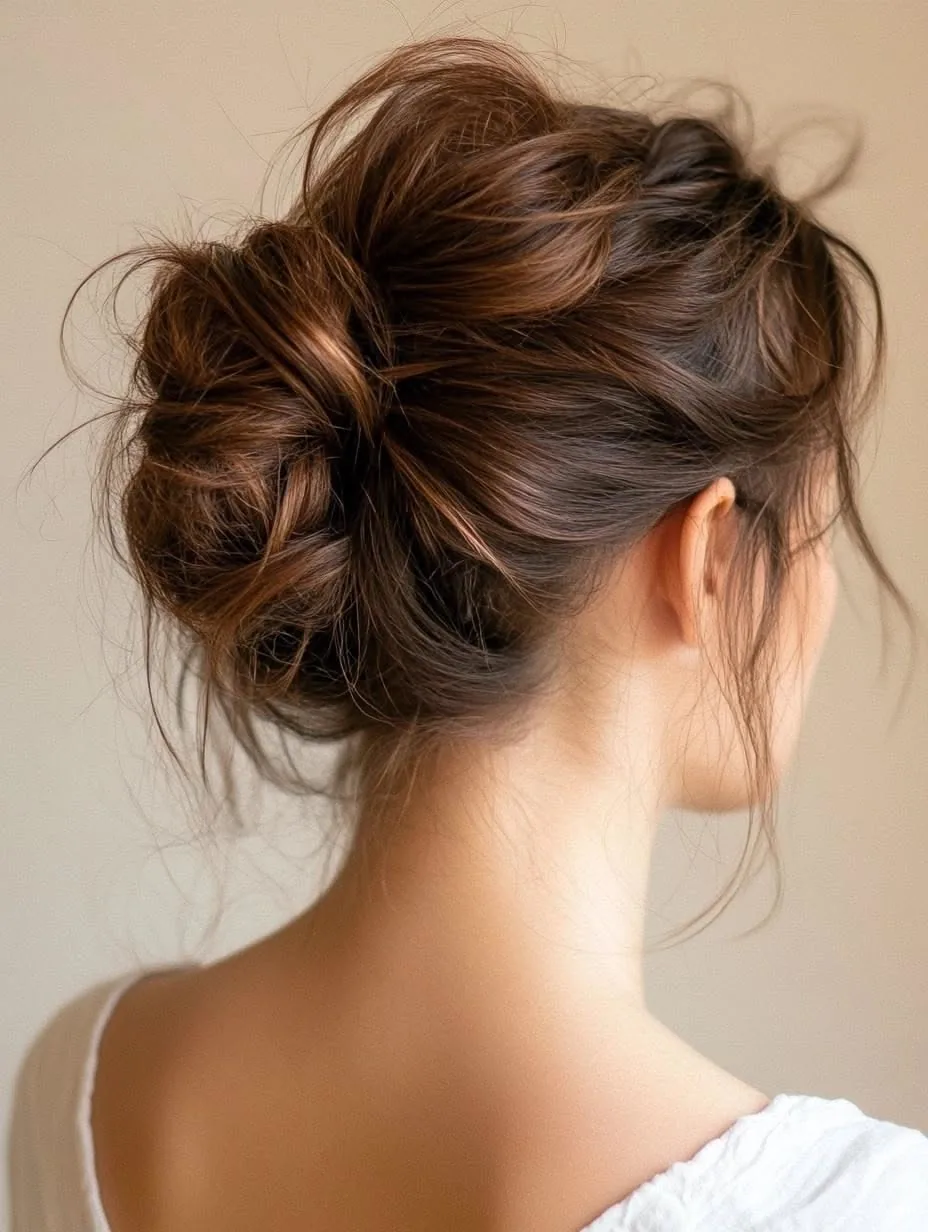
Best for: showing off just how much hair you have. Thick hair gives a messy bun real presence — the bun is full, textured and visible from every angle. The challenge is weight: a heavy bun pulls loose within an hour if it is held by one elastic. Twist firmly, use a strong elastic wrapped three times, and anchor the bun with at least six pins placed in different directions.
Maintenance: thick hair holds a messy bun well once it is pinned, and the style survives wind, humidity and a long day. Split the hair into two sections before twisting if the bun feels too heavy — twist each one separately, then wrap them around each other. The result is a bun with more texture and less strain on any single point.
16. The Messy Bun for Short Hair
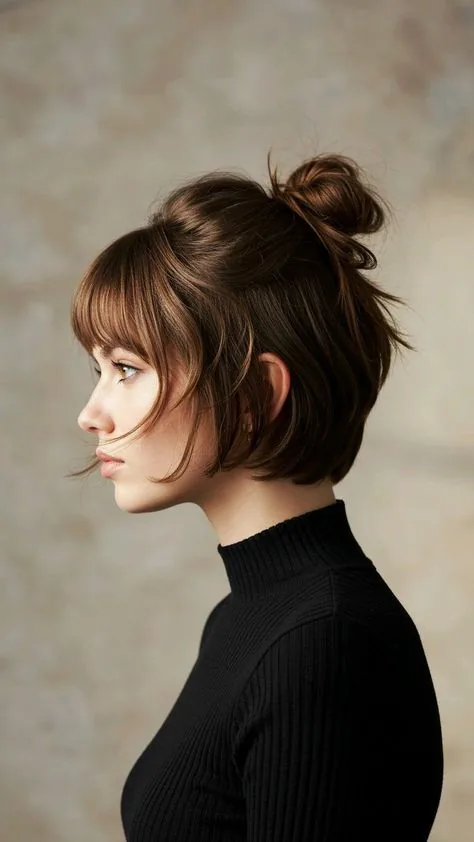
Common mistake: assuming short hair cannot go into a bun. A bob or lob can make a charming small messy bun, or a half-up bun if the back layers are too short to reach. Gather what you can at the crown, twist it into a small knot, pin it well, and let the shorter layers at the nape fall out naturally — they read as face-framing pieces rather than escapees.
How to style it: use texture spray generously, since short hair is often too smooth to grip. A small claw clip can hold the bun better than an elastic on very short hair. Cost and time: nothing, about two minutes.
17. The Messy Bun for Long Hair
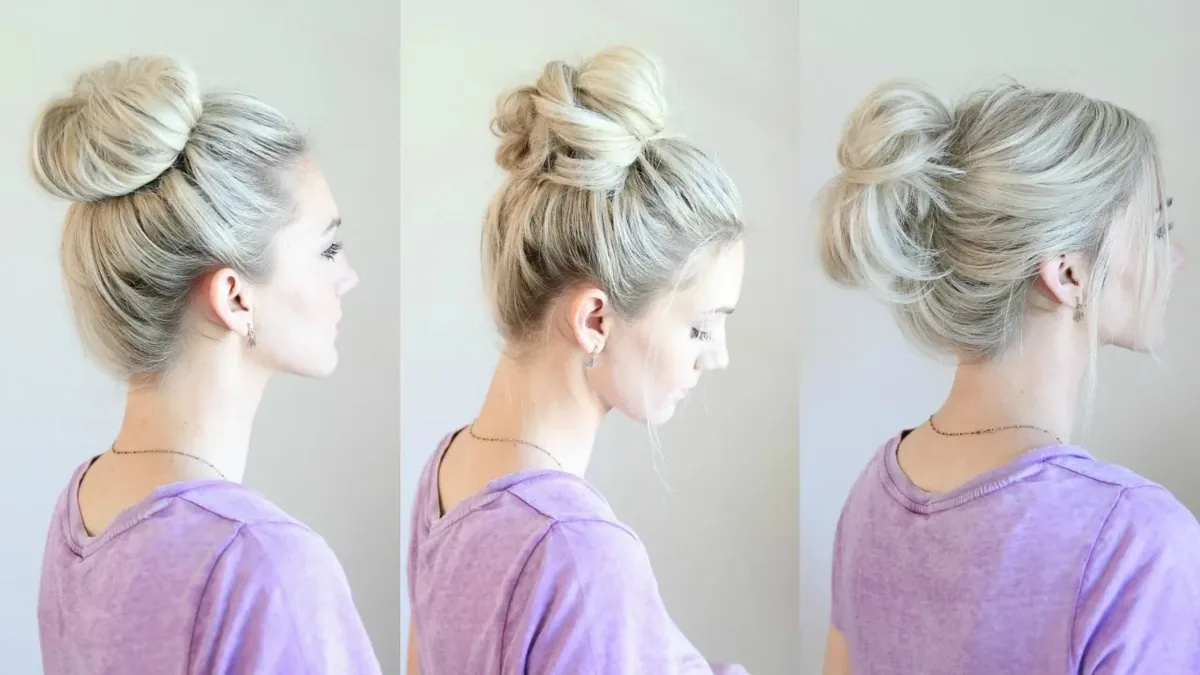
Long hair gives you the fullest, most dramatic messy bun — and the most ways to build it. You can twist and wrap a single coil, split the hair into two twists and wrap them in opposite directions for extra texture, or braid first and wrap the braid. The extra length means the bun can sit higher and look bigger without any padding or teasing.
Pros: the bun holds its shape for hours, the weight keeps it anchored, and letting it down later gives you soft waves for the evening. Cons: a long-hair bun is heavy, so placement matters — sit it slightly back on the crown rather than right on top, or it will droop.
18. The Messy Bun With a Headband
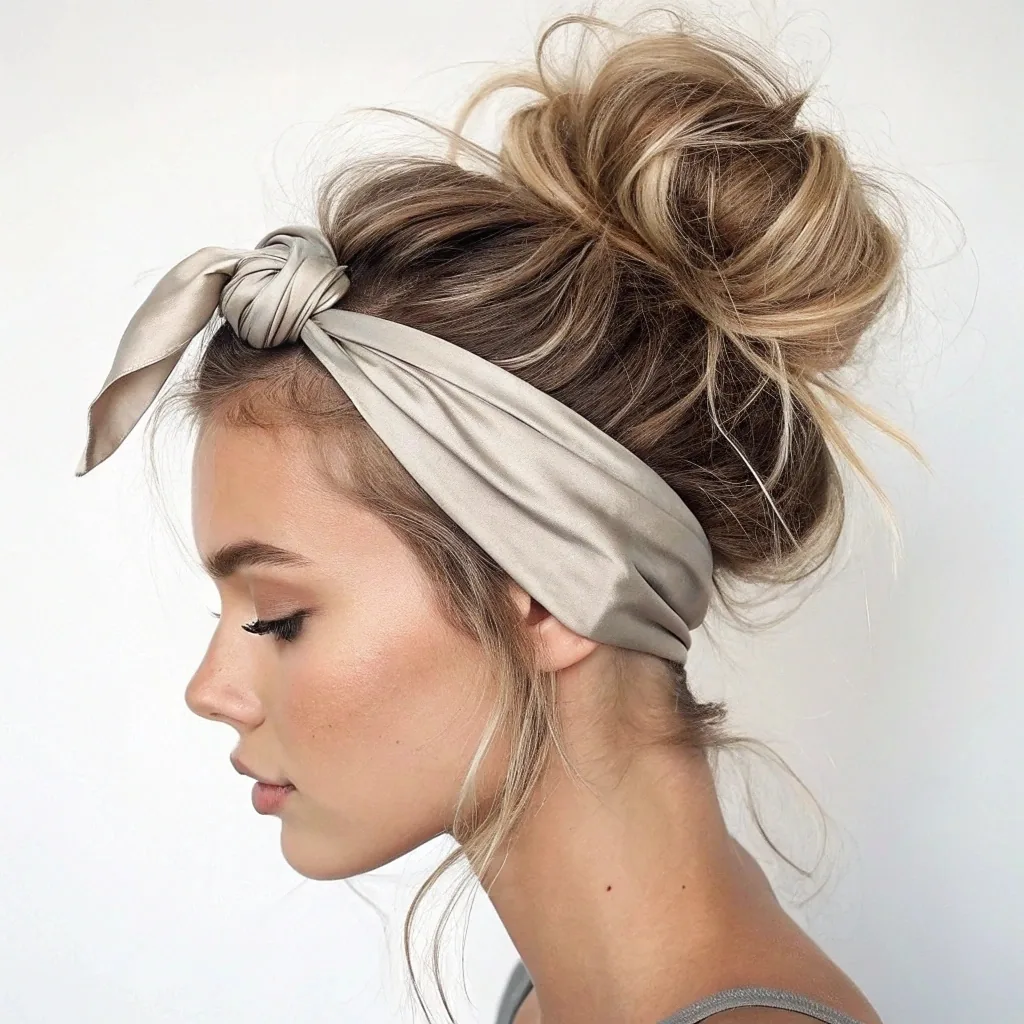
Best for: bad hair days and second-day hair, when a headband does the work of hiding a frizzy hairline. Push a soft fabric headband back over the hair, then gather the rest into a messy bun. The headband keeps the front tidy while the bun stays relaxed, and the combination turns a rushed style into a deliberate look in under two minutes.
What to ask for: nothing at the salon — but choose the headband well. A thin metal band suits a sleek-front bun, a wide fabric band suits a soft, high bun, and a knotted band adds a retro touch. Avoid hard plastic bands that slide off, and keep a spare in your bag: one will inevitably get lost.
19. Double Messy Buns (Space Buns)
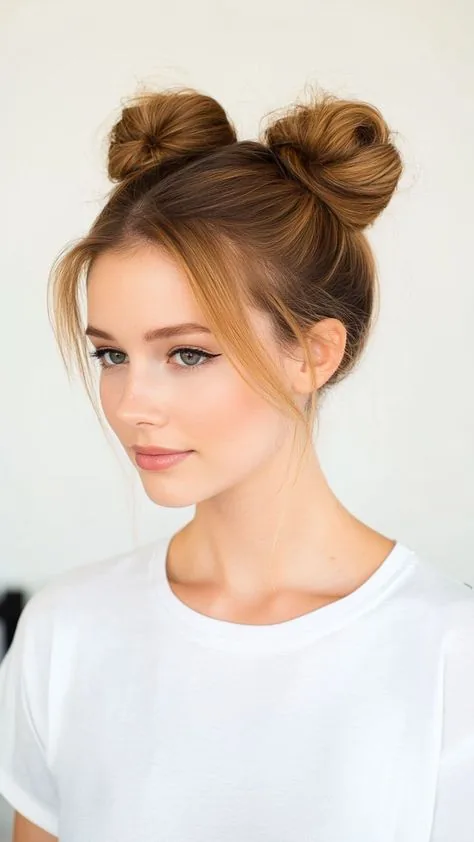
Quick verdict: the most playful messy bun, and surprisingly practical. Two buns, one on each side of the crown, keep all your hair up and off your neck while looking deliberately fun. They suit festivals, holidays and casual days, and they work on surprisingly short hair if you keep the buns small and pin them well.
How to style it: part the hair down the middle, gather each side into a high ponytail, twist and wrap each one into a small bun. Keep the two buns even in size — check in a mirror from the front, not just by feel. Common mistake: placing them too low, where they look like pigtails rather than space buns. They should sit high, above the ears.
20. The Messy Bun With a Twist
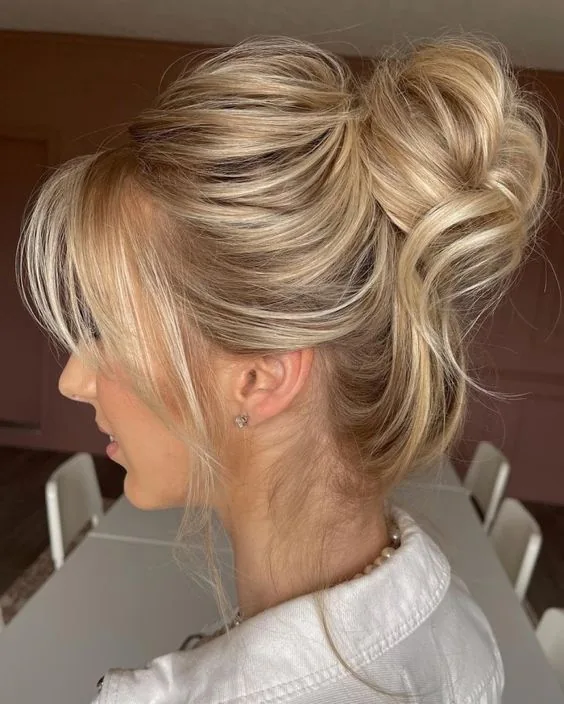
Pros: a twisted bun holds better than a wrapped bun, because the twist itself locks the hair in place. Take the ponytail, split it into two sections, twist each one in the same direction, then wind them around each other and coil the rope into a bun.
Cons: it takes an extra minute, and the rope texture can look too neat if you twist tightly — keep the twists loose and pull them apart slightly before coiling. Best for: thick or layered hair, where a plain bun tends to shed short pieces, because the twist traps them.
21. The Messy Bun With a Braided Crown
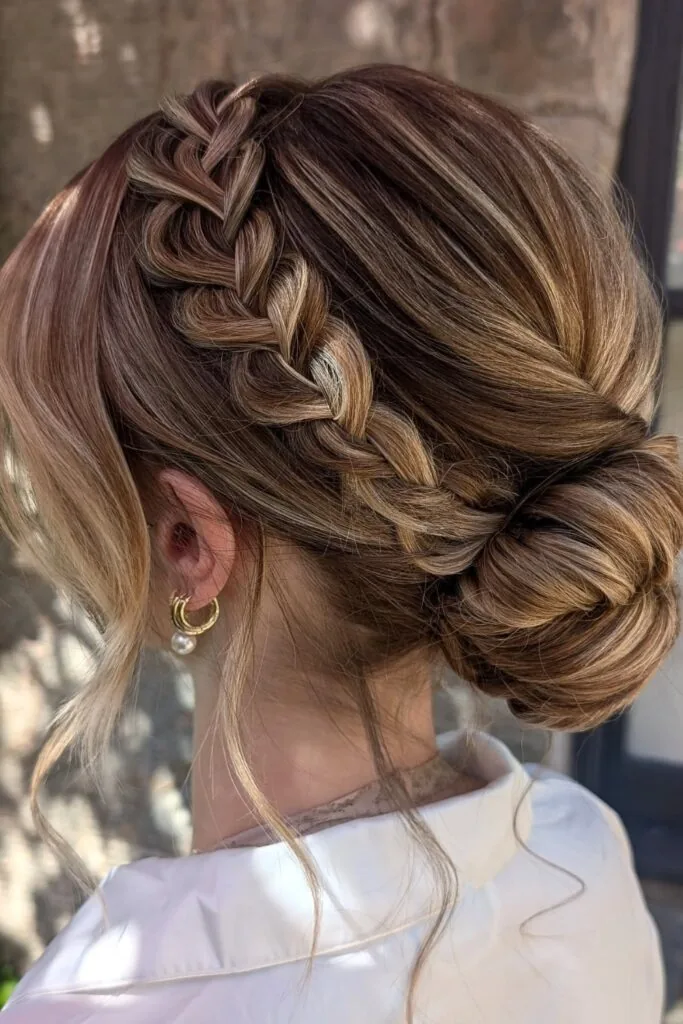
Best for: weddings, parties and any day when you want a messy bun to look like an occasion style. Braid a small section from one side of the head across the front like a headband, pin it behind the opposite ear, then gather the rest into a loose messy bun. The braid frames the face while the bun keeps the look relaxed — romantic without being fussy.
How to style it: braid loosely and pull the braid apart gently to make it look soft, not severe. Keep the braid thin; a thick braid competes with the bun. Time and cost: about five minutes once you know the braid, and nothing to buy.
22. The Messy Bun for the Gym
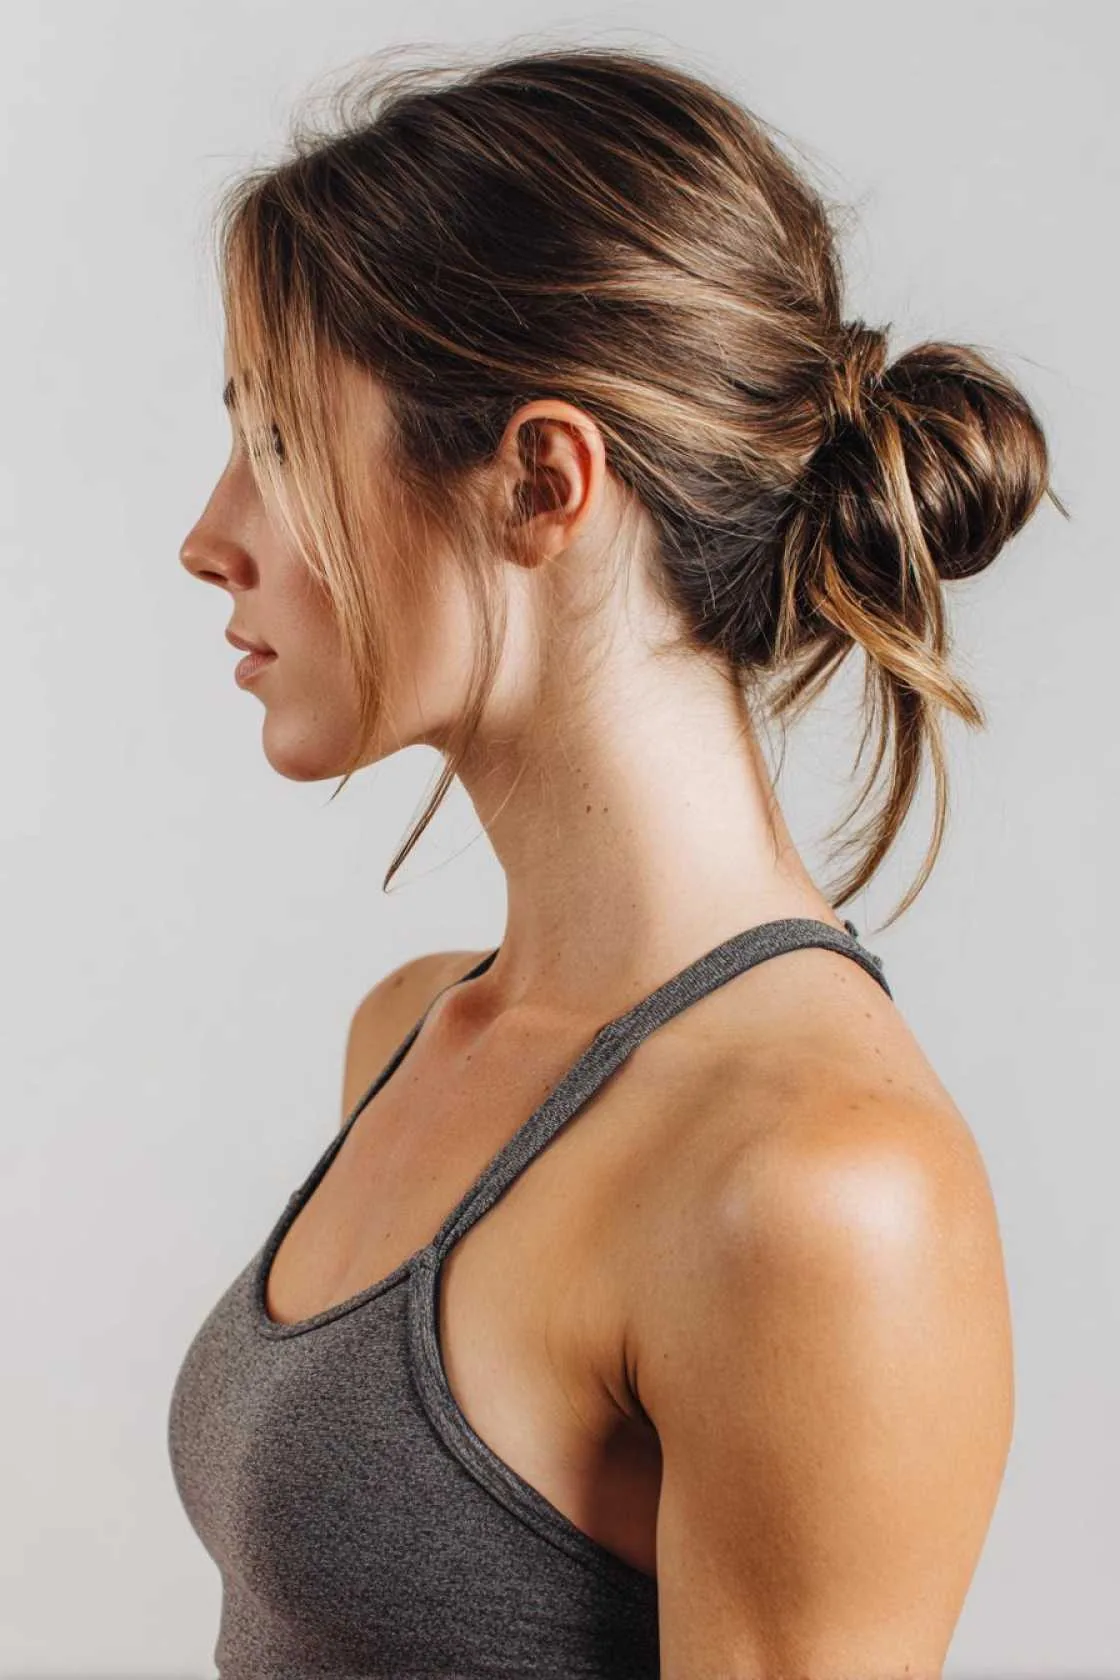
Common mistake: wearing a loose, romantic messy bun to a workout and expecting it to survive. A gym bun needs to be secure first and pretty second. Gather hair high, twist it firmly, use a strong elastic, and pin it in at least four places. A braided bun or a twisted bun holds best during exercise, because the structure stops the bun unravelling when you move.
How to style it: use a sweat-wicking headband at the hairline to catch sweat before it reaches the bun, and choose a scrunchie rather than a thin elastic to avoid dents. After the workout, take the bun down, shake the hair out and rebuild it loosely — the post-gym texture makes a perfect casual bun.
23. The Messy Bun for Work
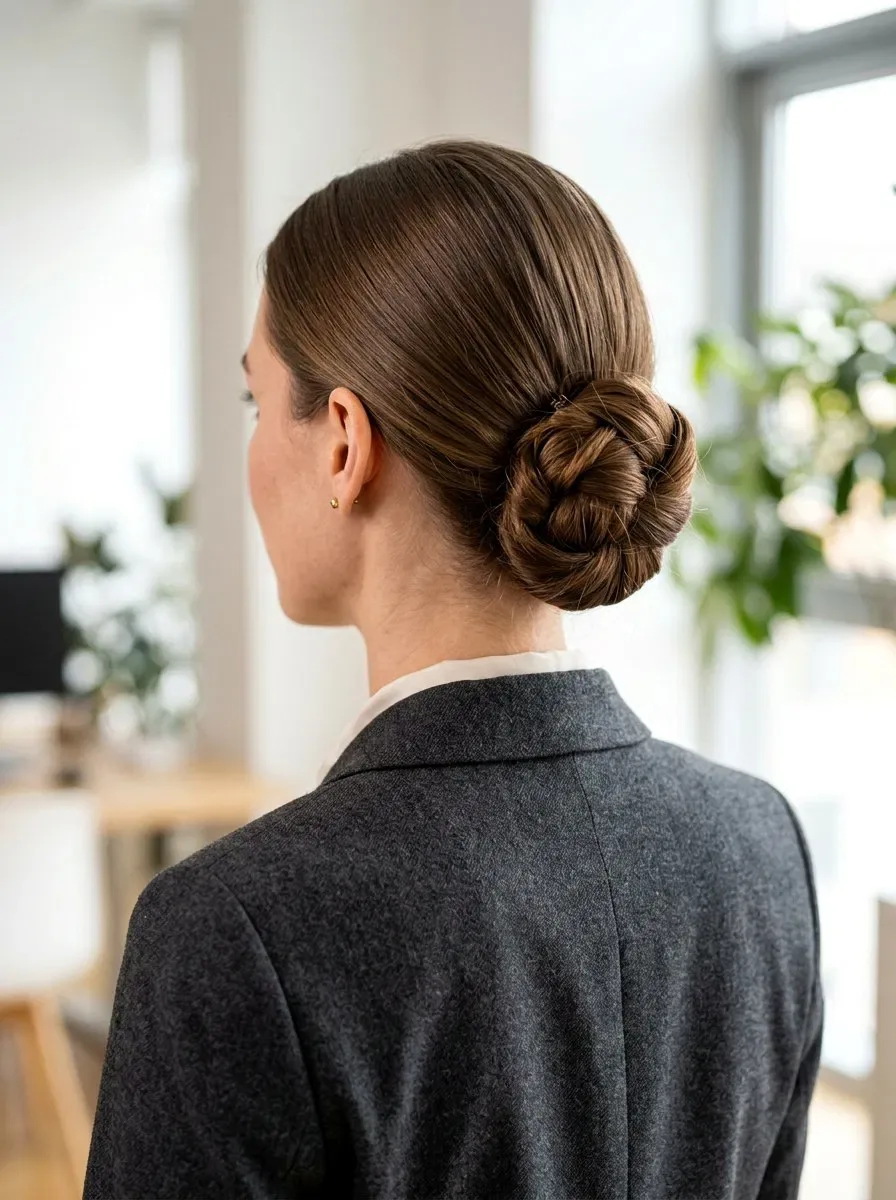
Best for: the office, because it looks polished without looking stiff. Choose a mid or low placement rather than a very high bun, keep the front smooth with a brush and a little cream, and leave only one or two soft pieces out. The bun itself should be neat-loose: textured and relaxed, but not falling apart. This is the sleek-front bun’s natural home.
Pros: it keeps hair out of your face during long days, survives a full working day, and works with everything from a blazer to a dress. Cons: a very loose bun can look too casual for a formal meeting — in that case, pin it more securely and skip the face-framing pieces.
24. The Messy Bun for Weddings
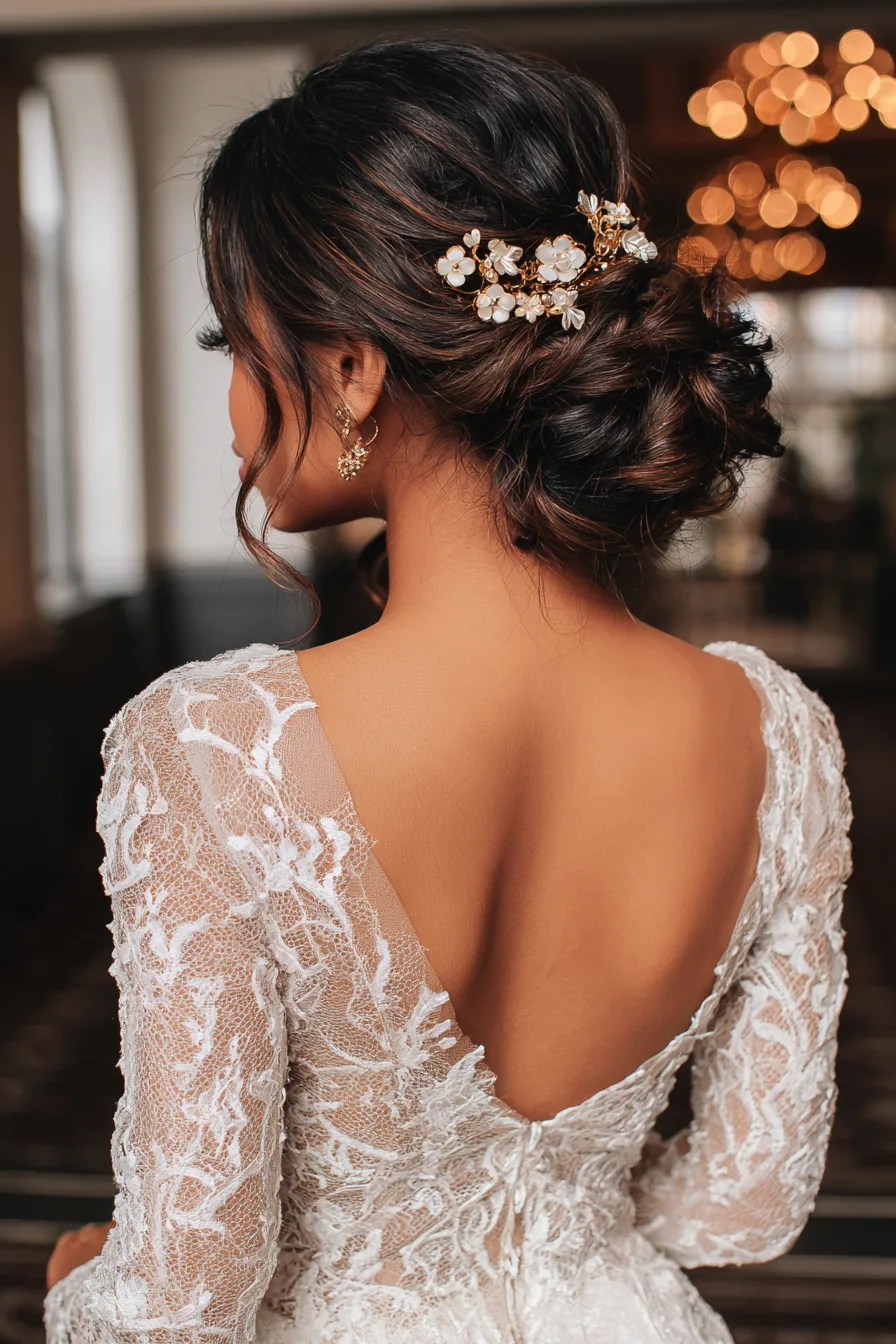
Best for: brides and wedding guests who want an updo that looks soft, romantic and modern rather than stiff and sprayed. A low messy bun with loose tendrils, sometimes with a braided detail or fresh flowers tucked in, is one of the most requested bridal styles — it photographs beautifully, it survives dancing, and it looks just as good at midnight as it did at the ceremony.
What to ask for at the salon: a low, textured bun with face-framing pieces, soft volume at the crown, and a finish that is pinned rather than sprayed solid. Bring a photo, and ask for a trial run before the day. Maintenance on the day: a few spare pins and a small bottle of flexible-hold spray in your bag, and a bridesmaid who knows how to pin a loose piece back in.
25. The Messy Bun for a Date Night
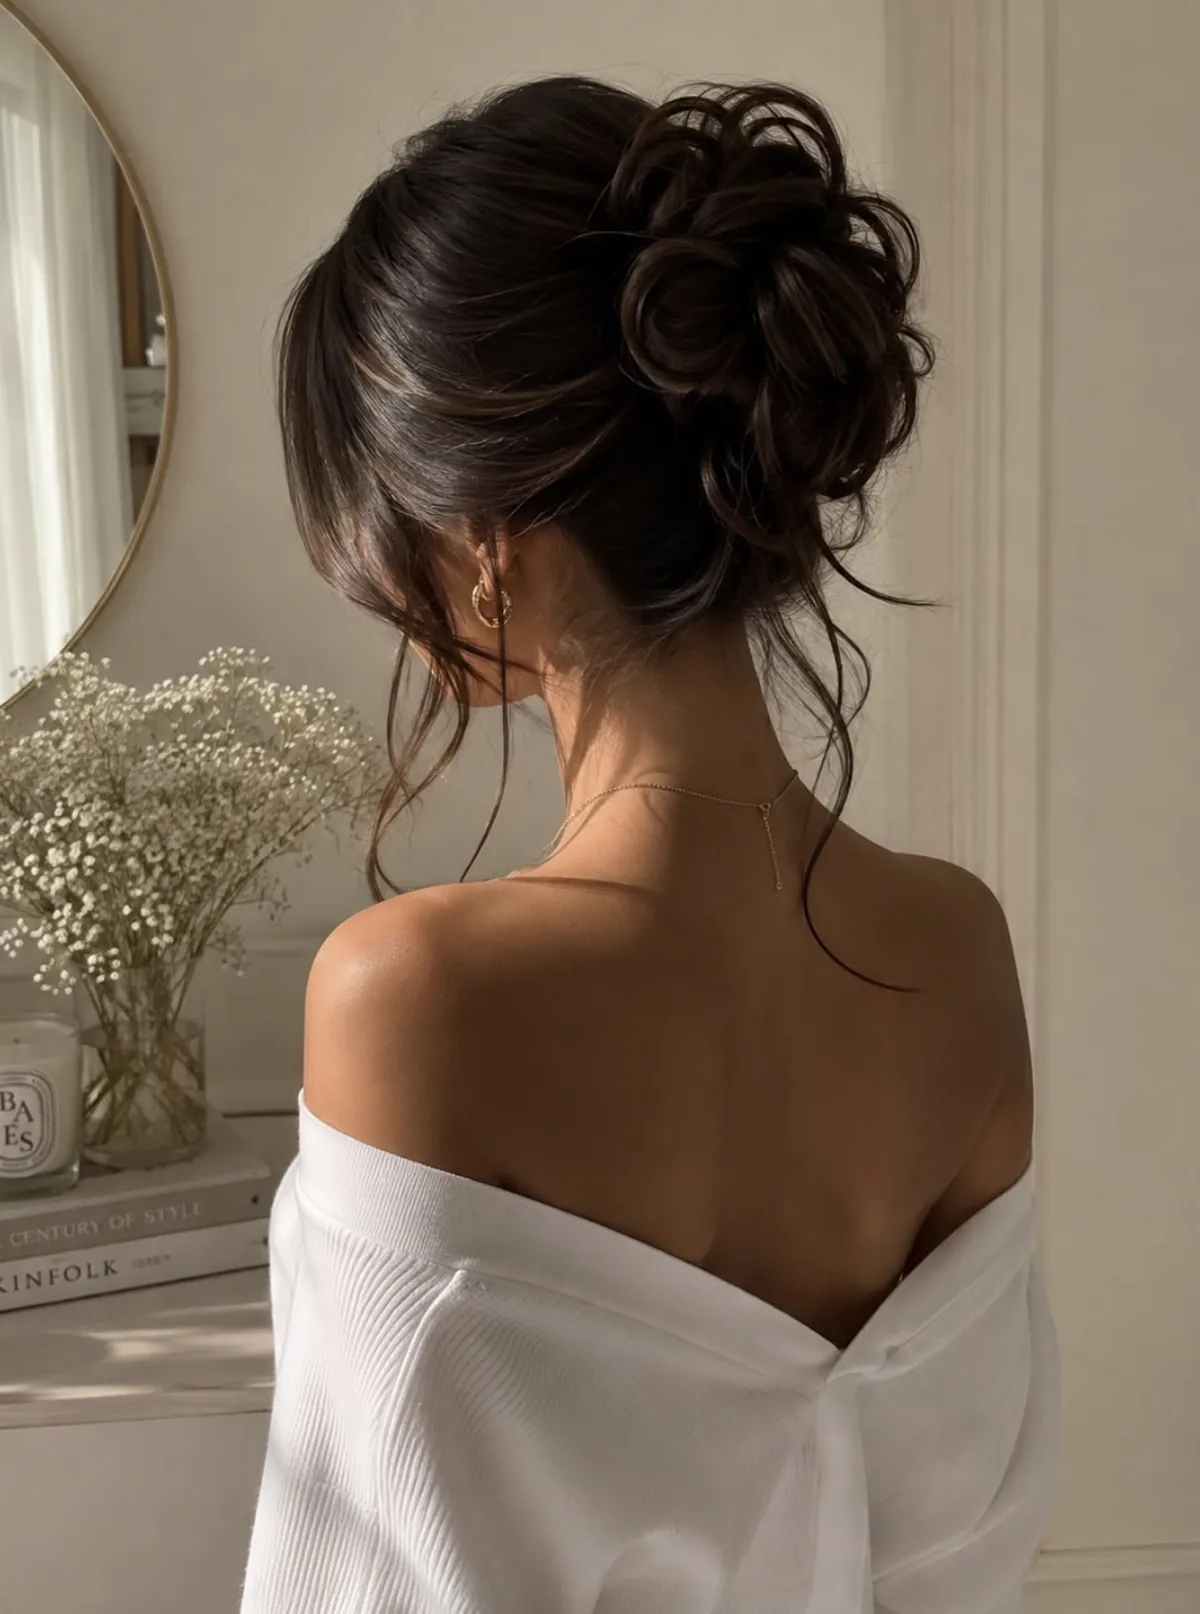
Best for: a date, because it looks like you made an effort without looking overdone. Choose a low or side placement, leave soft pieces around the face, and add one small detail — a silk scarf, a pretty pin, or a braided section. The bun should look touchable and soft, not lacquered, and the face-framing pieces are what make it romantic rather than practical.
Common mistake: over-styling it. A date-night bun should not take 45 minutes or half a can of hairspray; if it does, a loose blow-dry would have been a better choice. Build it in five minutes, check it from the front and the side, then leave it alone.
26. The Messy Bun for Second-Day Hair
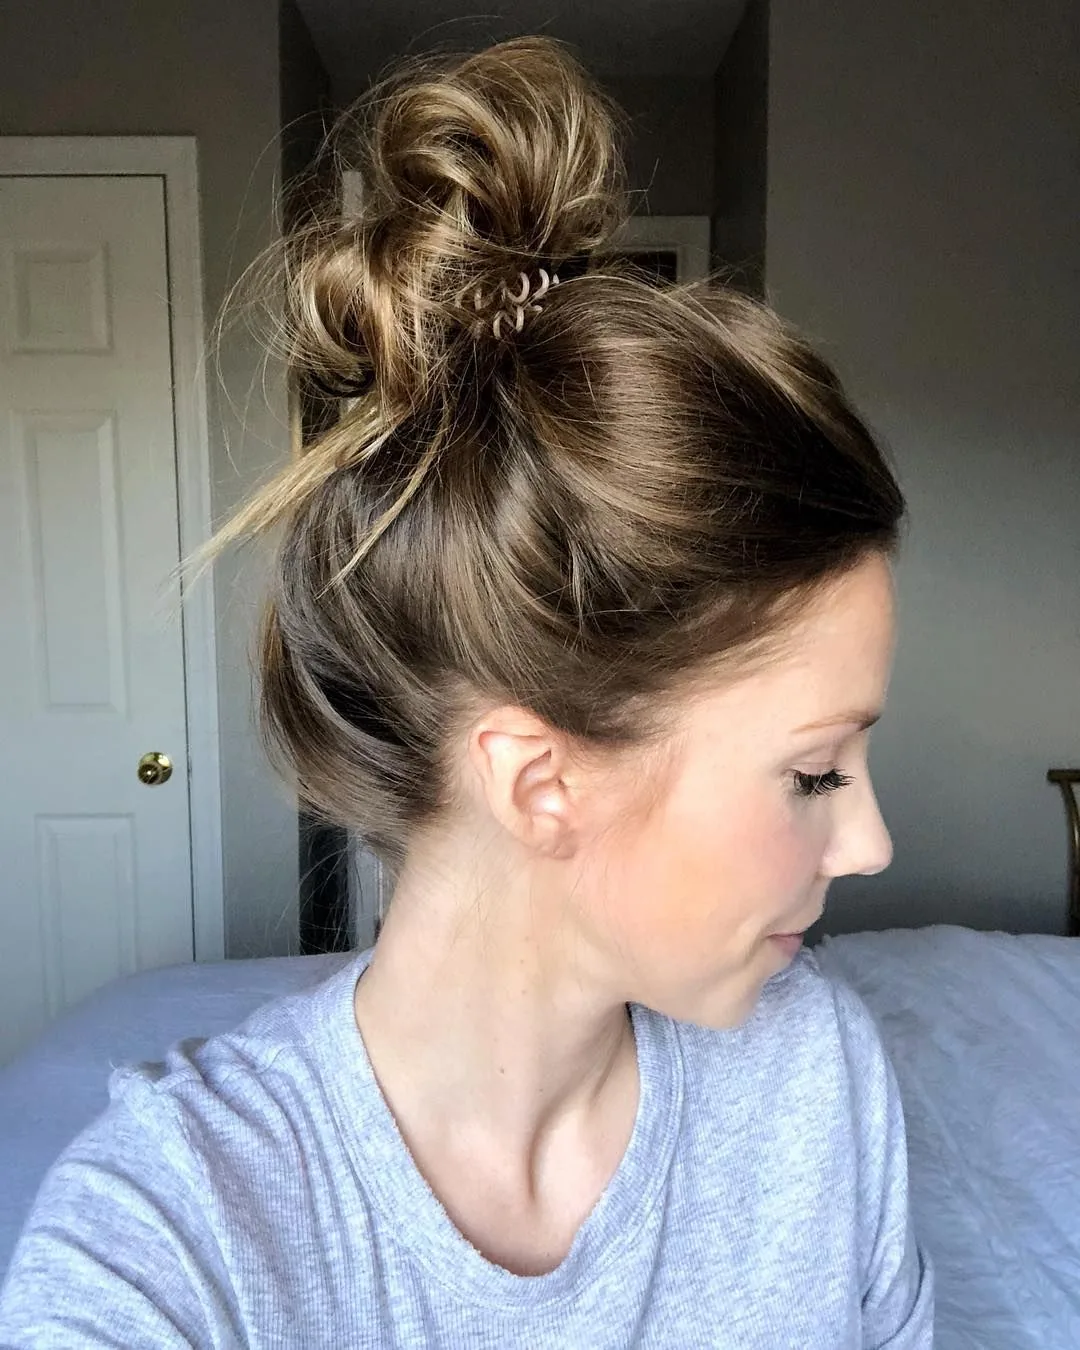
Pros: second-day hair is the best hair for a messy bun, because it already has texture, grip and a little natural oil at the roots. A bun that slides out of freshly washed hair will hold perfectly on day-two hair. Spray dry shampoo at the roots, brush it through, gather the hair up and twist — the bun will look full and stay put with minimal pinning.
Cons: if the roots are genuinely greasy rather than just textured, no bun will hide it — dry shampoo helps, but it cannot rescue hair that needed washing yesterday. How to style it: focus the dry shampoo on the crown and hairline, where oil shows first. Maintenance is simple: a second-day bun can be taken down and rebuilt all day, and the texture only improves with each rebuild.
27. The Messy Bun With a Silk Scarf Wrap
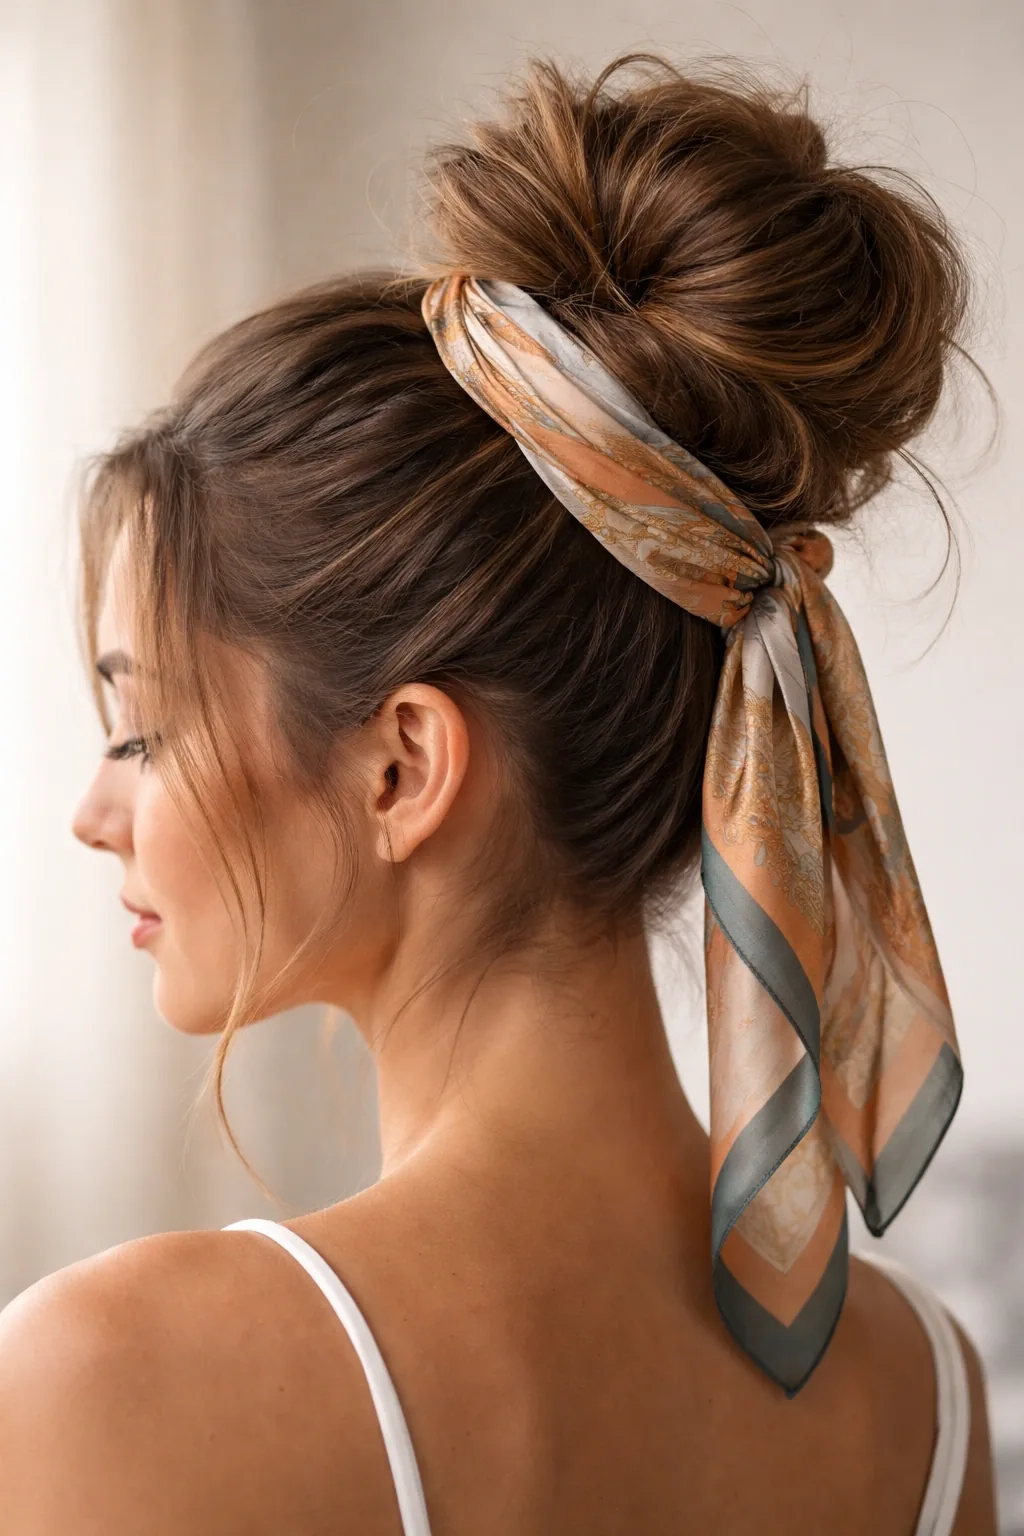
Cost and time: one silk scarf, three extra minutes, and a result that looks far more expensive than it is. Build your messy bun, then wrap a silk scarf around its base, knotting it at the top or the side and letting the ends fall. Silk is kinder to hair than cotton and adds a soft sheen that makes the whole style look intentional.
Best for: holidays, brunch and days when you want colour without wearing colour. Choose a scarf with a print you love — it becomes the accessory. Who should avoid it: anyone in strong wind or at the gym, where the scarf will slip. Maintenance: silk scarves crease, so roll rather than fold them in your bag, and keep the knot small so it does not overwhelm the bun itself.
28. The Messy Bun With a Hair Donut
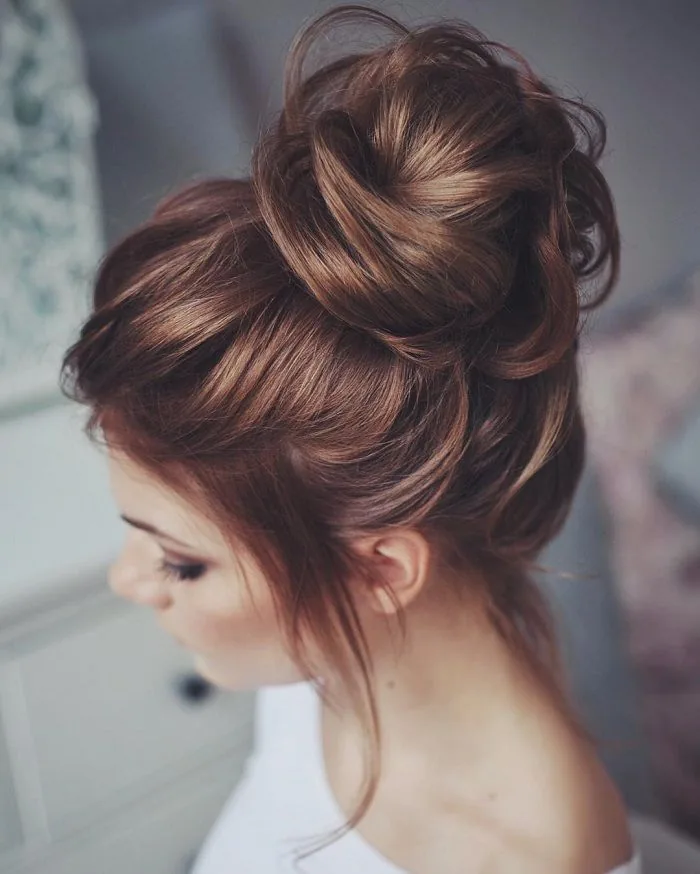
Common mistake: using a donut and then making the bun too neat, so it looks like a ballet bun rather than a messy one. The donut is only there to add size and shape — the messiness comes afterwards. Pull your ponytail through the donut, spread the hair over it, tuck the ends under, and then pull and pinch the bun to loosen it, leaving pieces out around the face.
Best for: fine or medium hair that needs help looking full. A donut gives you the volume of thick hair in seconds, and it makes the bun hold its shape for hours. Pros: the bun stays round and high all day. Cons: the donut can feel heavy and warm, and if the hair is too short it may peek out.
29. The Low Messy Chignon
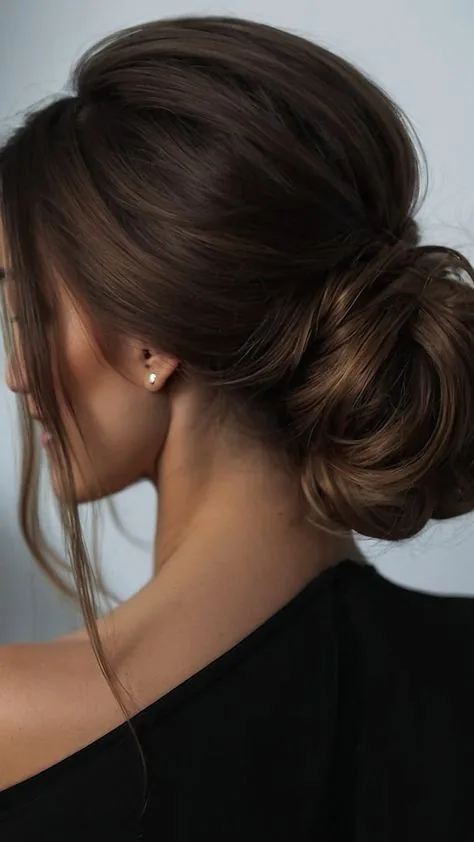
Best for: anyone who wants a messy bun that reads as elegant. A chignon is a low bun twisted flat against the nape rather than coiled into a ball, and the messy version keeps the twist loose, the front soft and a few pieces free. It suits weddings, dinners and formal events, and it looks particularly good with earrings and an open neckline.
How to style it: gather hair low, twist it upward rather than around, fold it flat against the head and pin it securely. Leave the front loose and pull a little volume at the crown. What to ask for at the salon: a soft, low chignon with texture — show a photo, since the word chignon means different things to different stylists.
30. The Messy Bun With Loose Tendrils
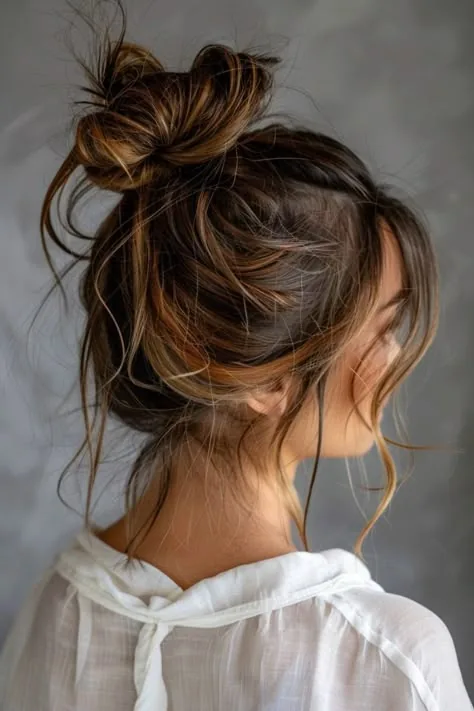
Quick verdict: the tendrils are the whole style. A messy bun with two soft tendrils left loose around the face looks romantic, soft and a little undone — the version of the bun you see in films and on red carpets. The tendrils should be thin, curled gently, and long enough to reach the jawline or the collarbone.
How to style it: pull the tendrils out before you build the bun, not after, so they fall naturally from the front. Curl them lightly with a curling iron or twist them while damp and let them dry. Common mistake: pulling out tendrils that are too thick, which looks accidental rather than romantic.
31. The Messy Bun With a Side Part
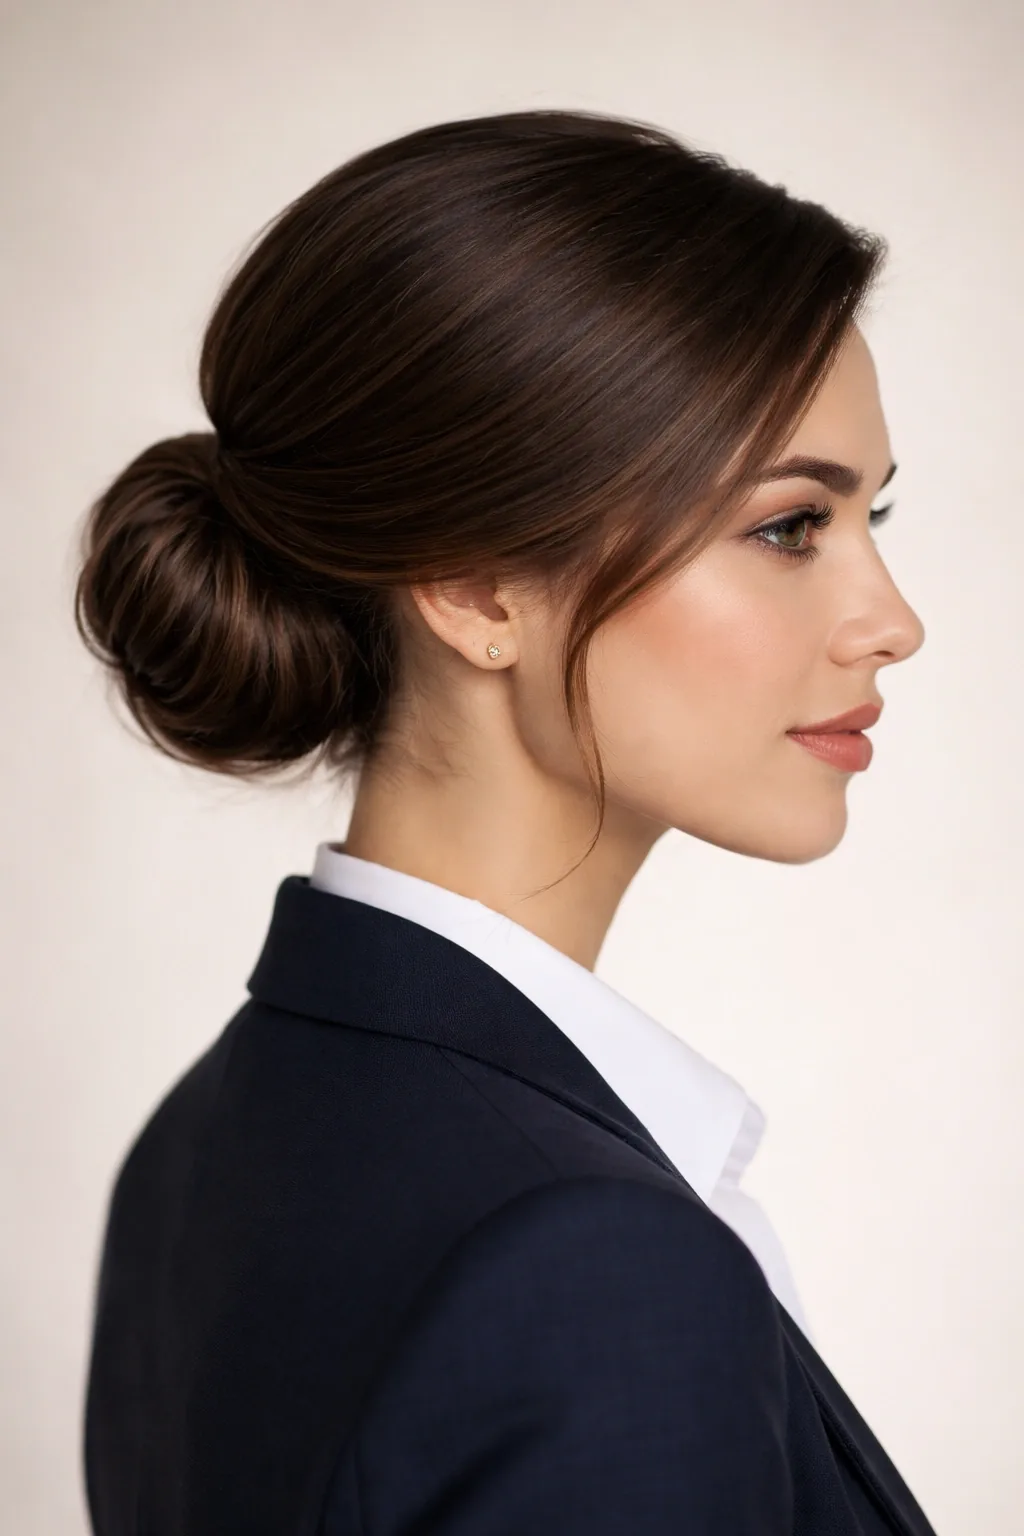
Pros: a side part changes the whole feeling of a messy bun. It adds volume at the roots on the heavier side, gives the face an asymmetrical frame, and makes the style look more styled than a centre part does — useful when you want a bun to look intentional for work or an event.
Cons: a deep side part can fall back into a centre part during the day, especially on fine hair, so pin the part in place at the front. Best for: anyone with a round face, since the asymmetry slims the face, and anyone whose hair naturally falls to one side. Maintenance is easy — if the part slips, just re-part it and smooth it down with your hands.
32. The Messy Bun With a Centre Part
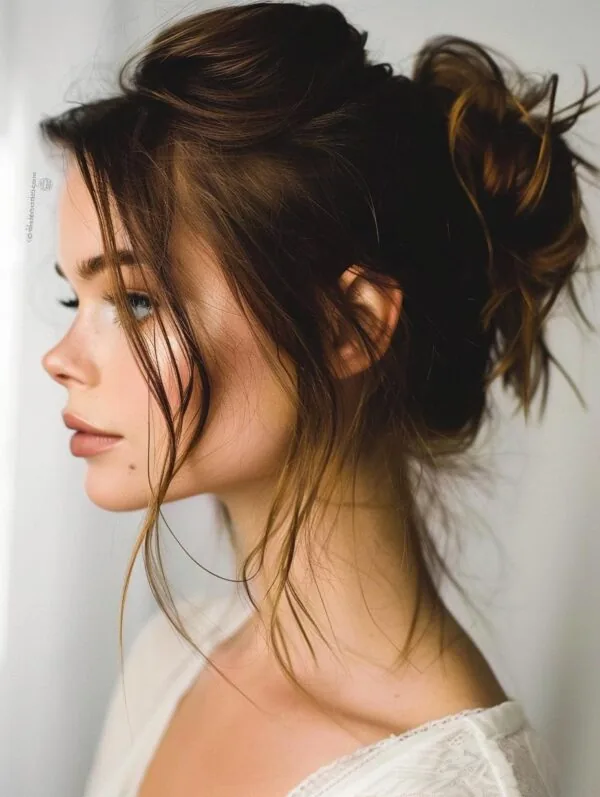
Best for: a calm, symmetrical look that suits oval and heart-shaped faces particularly well. Part the hair in the middle, smooth both sides back evenly, and gather into a mid or low bun. The symmetry is flattering and clean, and it lets the bun itself be the focus rather than the parting.
Common mistake: parting the hair so severely that the front looks scraped back and harsh. Soften a centre part by loosening the hair at the temples with your fingers after you have built the bun, and leave one thin piece out on each side. How to style it: use a tail comb for a clean part line, then brush both sides back before you gather.
33. The Messy Bun With Volume at the Crown
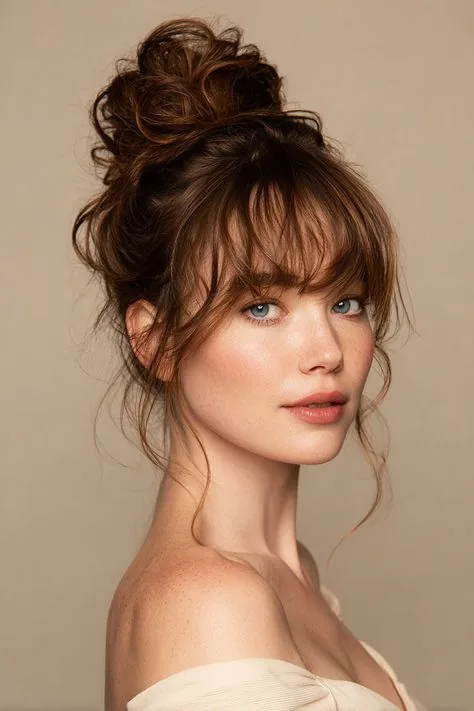
Best for: anyone who finds a messy bun makes their head look flat from the side. The fix is volume at the crown: before you gather your hair, tease the roots at the crown with a fine comb, or use a volumising powder.
Maintenance: crown volume lasts a few hours on most hair, longer if you use a light mist of hairspray at the roots before teasing. Common mistake: teasing too aggressively, which creates a visible bump rather than soft volume. Tease in small sections, smooth the top layer over it, and stop while it still looks natural.
34. The Messy Bun With a Fishtail Wrap
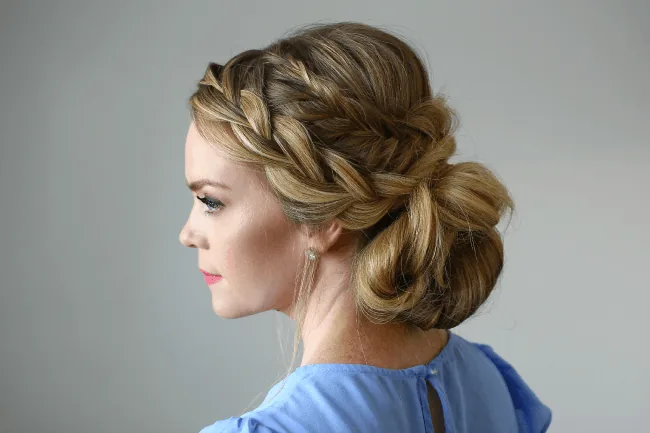
Pros: the prettiest messy bun in this guide, and the one that gets the most compliments. Make a loose fishtail braid from a low ponytail, pull the braid apart gently to make it wide and soft, then wrap it into a bun and pin it. The fishtail texture shows all around the bun, so it looks detailed from every angle.
Cons: it takes the longest of any bun here — about eight minutes once you know the fishtail — and it needs enough length to braid and wrap. Best for: special occasions, photos and days when you have time to enjoy the process. How to style it: keep the fishtail loose and plump; a tight fishtail makes a small, hard bun.
35. The Messy Bun for Layered Hair
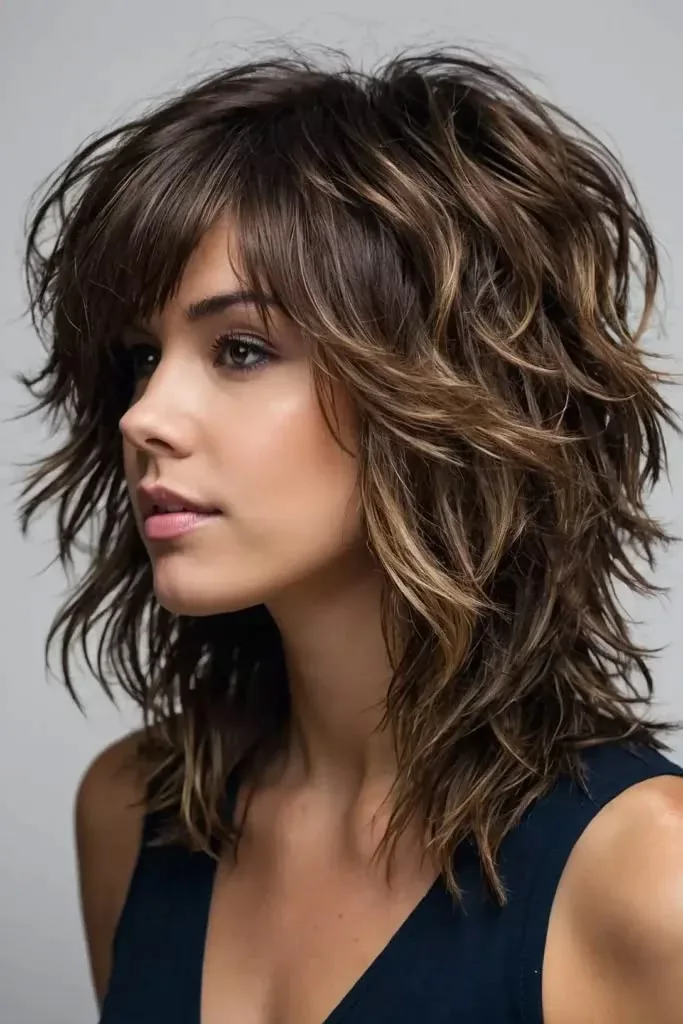
Common mistake: fighting layers. Layered hair sheds short pieces from a bun, and trying to pin every one back makes the style look stiff and overworked. Instead, let the layers do what they want: build the bun loosely, pin the longest layers in, and accept the shorter pieces around the face and nape as part of the look. They are the reason layered hair makes the softest messy buns.
Best for: anyone with layers, a shag or a wolf cut. A twisted or braided bun traps layers better than a plain wrapped bun, so choose one of those if shedding bothers you. Maintenance is easy: the style improves as it loosens through the day. What to ask for at the salon: long layers through the lengths rather than short layers at the crown, which shed the most.
36. The 60-Second Messy Bun
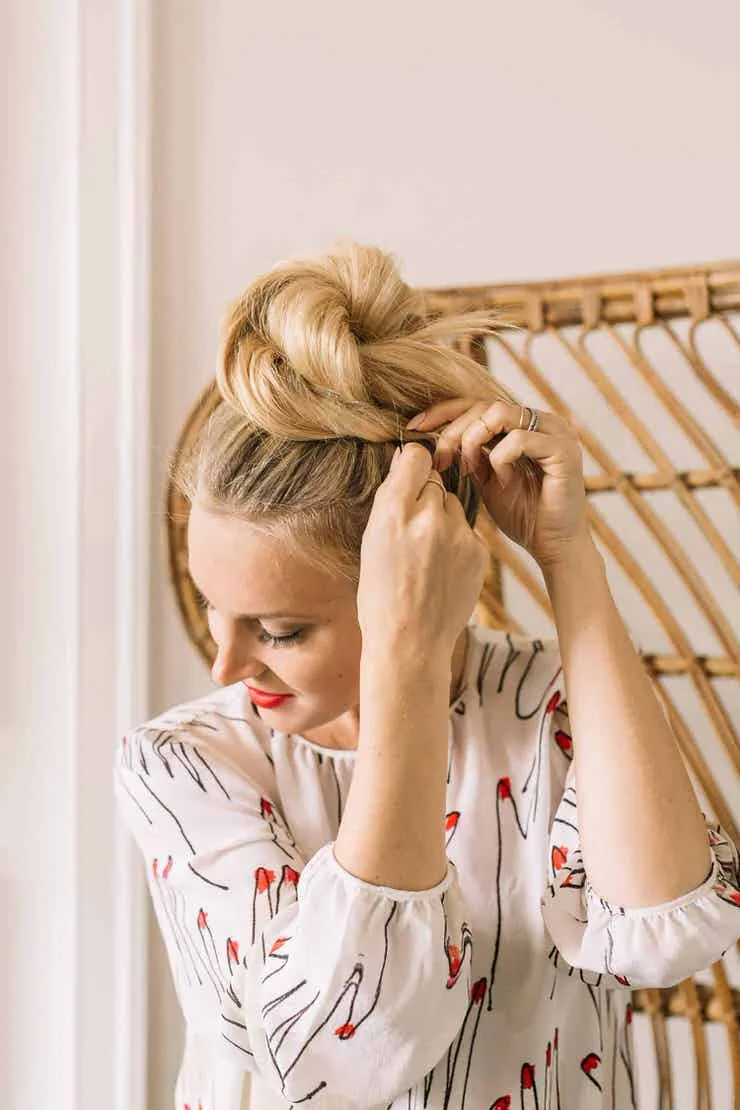
Quick verdict: the bun for real life. No mirror, no pins, no products — just gather, twist, wrap and tuck the ends under the elastic. It will not be the prettiest bun in this guide, and it will not last all day, but it gets your hair off your neck in under a minute, and that is sometimes the whole job.
How to style it: bend forward, gather all your hair at the crown, twist it once and wrap it into a loose coil, securing it with one elastic looped twice. Pull a few pieces out around the face and go. Pros: the fastest style there is. Cons: it will loosen within a couple of hours, so do not choose it for a long event.
Messy Bun Mistakes That Make It Look Unfinished
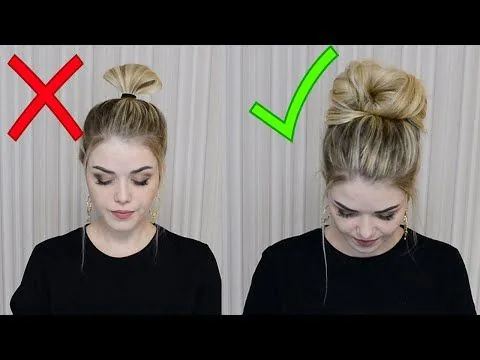
The most common messy bun mistake is making it too tight and too neat, then calling it messy because a few pieces fell out. A bun that is scraped back and wound tight is a ballerina bun, not a messy bun — and the pieces that escape look accidental rather than intentional.
The second mistake is using the wrong tools: one thin elastic that snaps, pins that are too short to hold, or a scrunchie that has lost its stretch. The third is skipping the mirror check from the side and the back — a bun that looks good from the front can look flat or lopsided from the side.
Messy Buns for Occasions: Work, Weddings, Gym and Dates
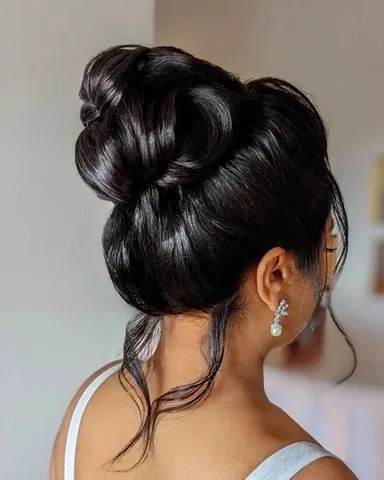
The same messy bun can suit a gym session and a wedding — what changes is the placement, the finish and the details. For the gym, go high, firm and pinned, with a braided or twisted base so it survives movement. For work, choose a mid or low placement, a smooth front and only one or two pieces out.
For a date, a low or side bun with soft face-framing pieces is the most romantic choice. The rule for every occasion is the same: match the looseness to the setting. The more formal the occasion, the more secure the pins and the smoother the front — but the bun itself should always keep some texture, or it stops being a messy bun at all.
Second-Day Hair and the Messy Bun
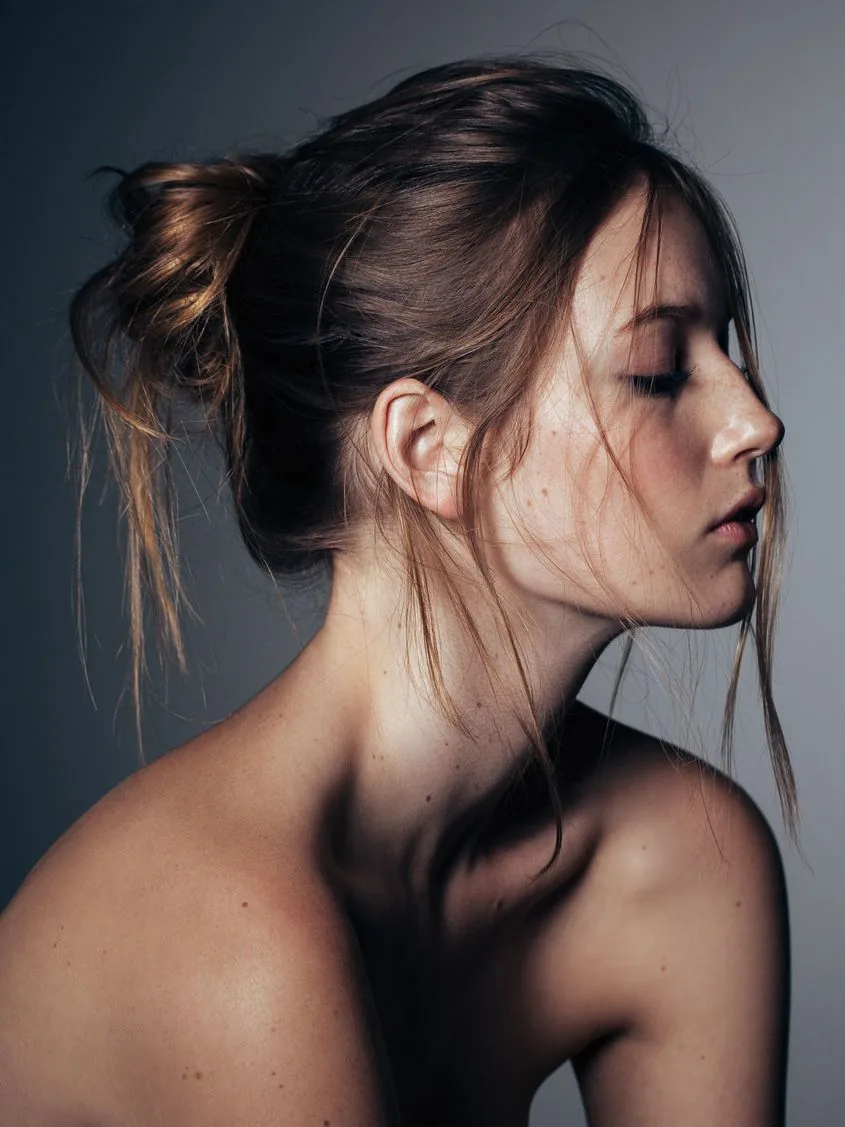
Second-day hair is a messy bun’s best friend. It has natural texture, grip and a little oil at the roots, which is exactly what a bun needs to hold. Spray dry shampoo at the roots, brush it through, and build the bun as usual — it will hold with fewer pins and look fuller than a bun built on freshly washed hair.
If your hair is on day three or four, the bun still works, but be honest about the roots: dry shampoo helps, but it cannot hide genuinely greasy hair. In that case, a sleek-front bun is a better choice than a loose one, since the smooth front disguises oil better than loose pieces do.
Taking Your Bun Down Without Damage
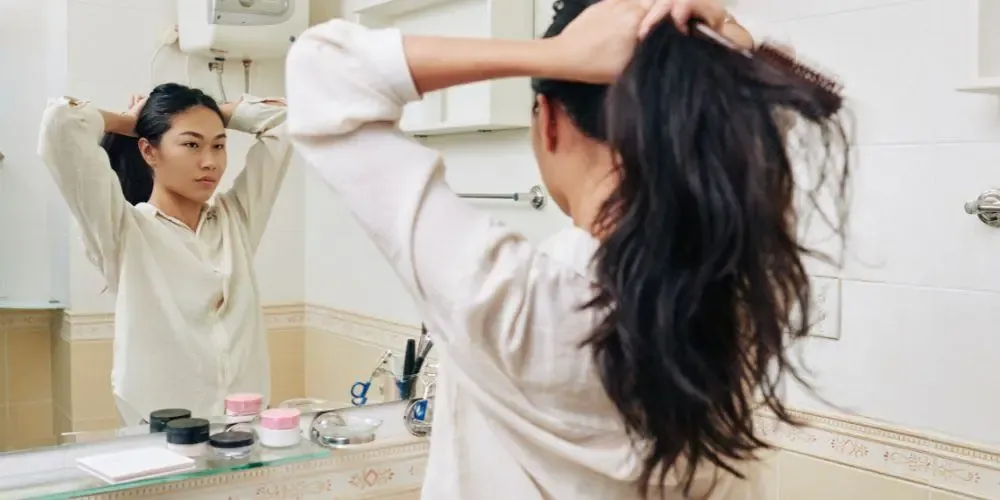
A messy bun is gentle on your hair while it is up, but taking it down carelessly can undo that. Never pull an elastic out — unwind it loop by loop, and if it catches, work a little oil or conditioner onto the spot before you slide it free.
Do not wear a tight bun in the same place every day. Varying the placement — high one day, low the next — stops breakage in the same spot, and giving your hair a day down between bun days helps too.
How do I make a messy bun that stays up all day?
Use texture spray or dry shampoo for grip, wrap a strong elastic three times, and anchor the bun with pins placed in different directions. Sit the bun slightly back on the crown rather than right on top, and rebuild it once midday if it starts to slip — a rebuilt bun always looks fresher than a rescued one.
Why does my messy bun keep falling out?
The usual reasons are slippery, freshly washed hair, one weak elastic, or too few pins. Add texture spray before you start, use an elastic you have to wrap three times, and pin the bun in at least four places. A braided or twisted bun also holds far better than a plain wrapped bun.
How do I make a messy bun look good and not messy in a bad way?
Build it loosely on purpose: add volume at the crown, pull the bun gently wider, and leave two or three thin pieces out around the face. The difference between a good messy bun and a bad one is intention — volume placed where it flatters and pieces left out deliberately, not hair escaping because the bun is falling apart.
Can you do a messy bun with short hair?
Yes. A bob or lob can make a small messy bun, and a half-up bun works even when the back layers are too short to reach. Use texture spray for grip, keep the bun small, and let the shorter layers at the nape fall out naturally — they read as face-framing pieces.
What is the best messy bun for fine hair?
A small, high bun built on teased, dry-shampooed hair, kept compact rather than pulled wide. A hair donut inside the bun can add size without teasing. Avoid pulling the bun too wide, which exposes the scalp and makes fine hair look thinner.
How do I do a messy bun with curly hair?
Gather second- or third-day curls loosely, twist once, wrap and pin, and let the curls spill over the top. Never brush curly hair before a bun, use a little curl cream on the lengths, and secure it with a satin scrunchie rather than a tight elastic to protect the curl pattern.
Is a messy bun bad for your hair?
A loose messy bun is one of the gentlest updos, but a tight bun worn in the same place every day can cause breakage and headaches. Vary the placement, keep it loose, use silk scrunchies, unwind elastics rather than pulling them out, and give your hair a day down between bun days.
How do I make a messy bun look professional for work?
Choose a mid or low placement, smooth the front with a brush and a little cream, leave only one or two soft pieces out, and pin the bun securely. The bun should look neat-loose: textured and relaxed, but not falling apart. Skip the face-framing pieces for a formal meeting.
What should I use instead of an elastic for a messy bun?
A silk scrunchie is the gentlest option, a claw clip works well for a twisted bun and leaves no crease, and a spiral hair tie holds thick hair without denting it. For a very secure bun, use a strong elastic for the base and pins for the shape, rather than relying on one accessory alone.
How long does a messy bun take to do?
A basic messy bun takes 60 seconds to two minutes. A braided or fishtail bun takes five to eight minutes, and a wedding or occasion bun takes 20 to 45 minutes in a salon. The 60-second bun is the everyday version; the slower versions are for days when the bun is the hairstyle, not just a way to get hair out of the way.
Conclusion
A good messy bun is not an accident. It is a style built with intention — texture first, a loose twist, volume where it flatters, and a few pieces left out on purpose — and once you know that, you can build one in two minutes that looks like it took twenty. The bun you choose matters less than how you build it: a high bun, a low bun, a braided bun or a half-up bun all work when they are built loosely and pinned well.
Start with the classic high messy bun and the version that suits your hair — curly, fine, thick or short — and practise it until it takes two minutes. Then add one variation for special days: a low chignon for a wedding, a braided bun for a long day, a side bun for an evening out. Between those few styles, you have a messy bun for every day of the week, and none of them will fall apart by lunchtime.