The Groom’s Mum Deserves Great Hair Too: 41 Mother of the Groom Hairstyles for the Big Day
On your son’s wedding day, all eyes are on the bride — and quite rightly so. But you, the groom’s mum, are in almost every important photograph of the day: walking in beside your son, standing in the family portraits, dancing at the reception, and hugging your new daughter-in-law. Your hair needs to look elegant in the morning, hold through tears, hugs, wind and dancing, and still look beautiful in the last photo of the night. That is a bigger job than most wedding-guest hairstyles ever have to do.
This guide brings together 41 mother of the groom hairstyles, chosen for your distinct role on the day. Eight guides first walk you through what actually matters — how to complement the bride without matching her, how to look wonderful beside your son in photos, how to choose age-flattering elegance over anything fussy or trying-too-hard, and how to make a style last from the ceremony to the last dance. Then come 41 styles for short, medium and long hair, for grey and silver hair, for curls, fine hair and thick hair — each one comfortable enough to wear all day and polished enough for the photographs that will last forever.
Choosing a Style for Your Role: The Groom’s Mum, Not a Guest
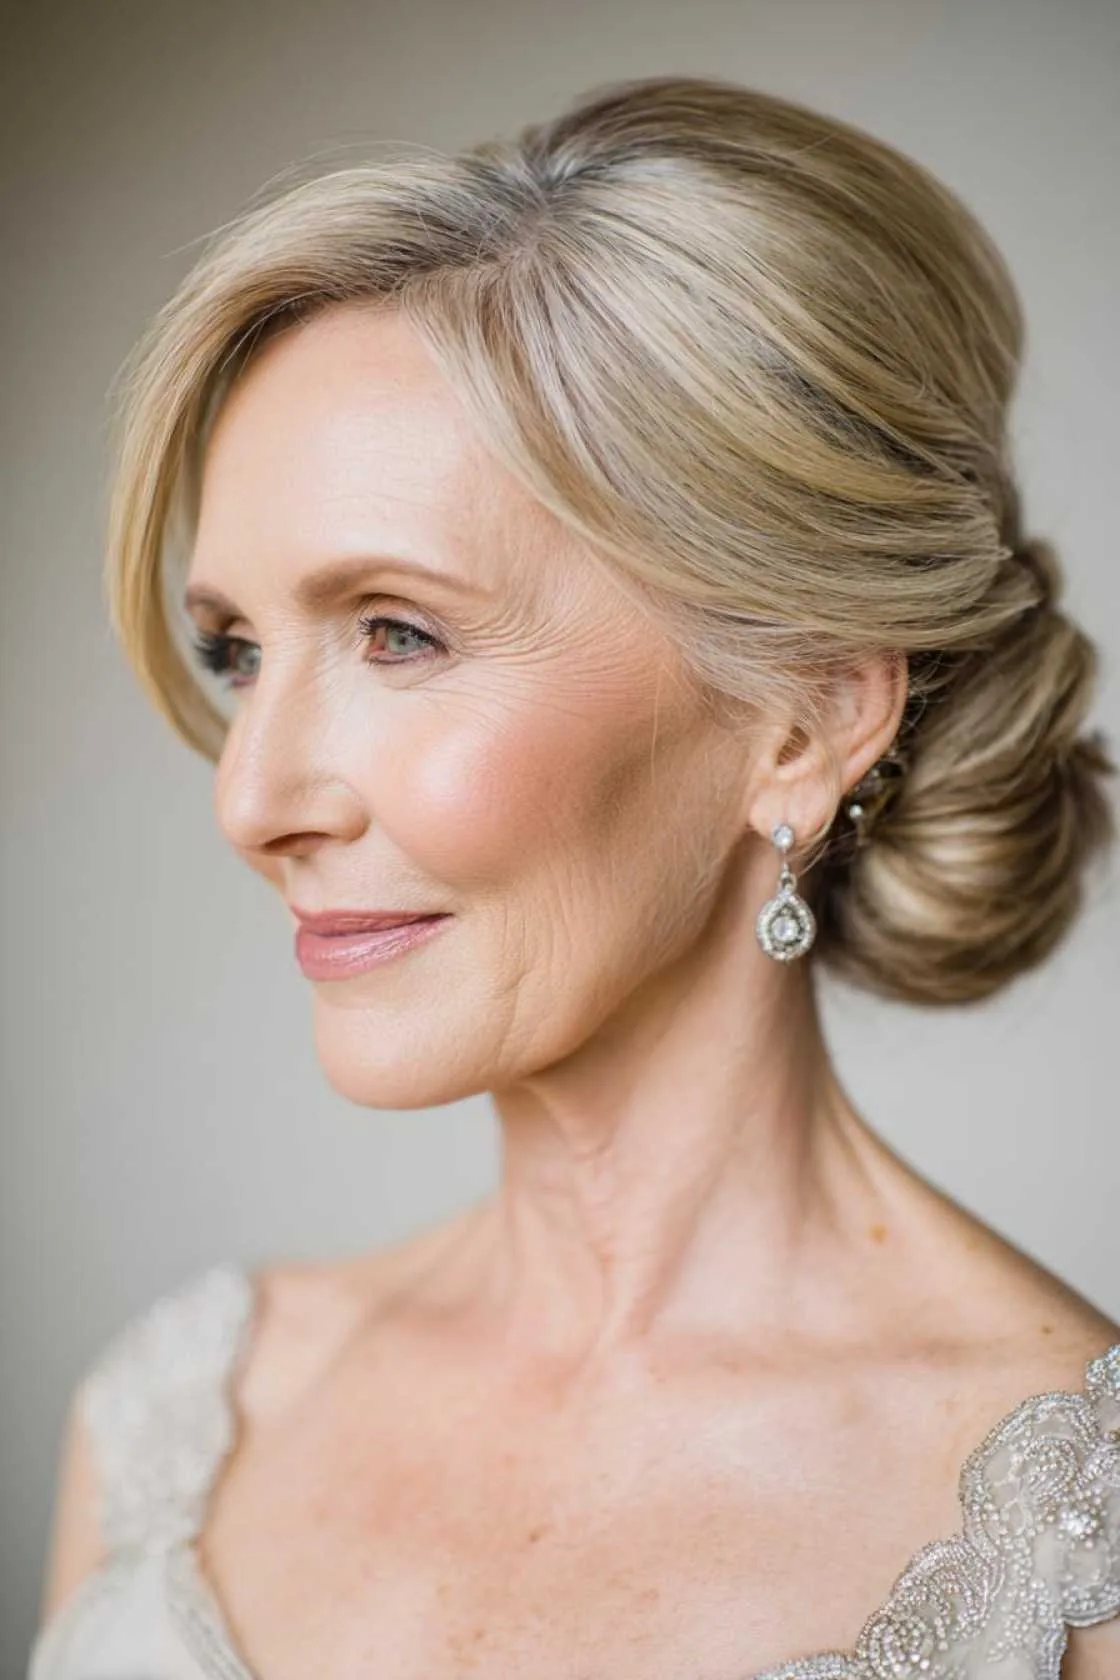
Your role on the wedding day is unlike any other guest’s. You are family, you are in the formal portraits, and you will be photographed beside the groom more than almost anyone else. That calls for a style with a little more polish than a wedding-guest look, but it should never compete with the bride. Think of it as the difference between a beautiful outfit and a bridal gown: yours should be lovely, considered and photogenic, while hers remains unmistakably the centre of attention.
Best for: every mother of the groom, whatever your age or hair length. How to choose it: start from the formality of the wedding — a grand church wedding calls for a structured updo, a relaxed garden wedding suits soft waves or a loose chignon. Common mistake: picking a style so elaborate it reads as bridal, or so casual it disappears in the family portraits. Quick verdict: if it looks elegant in a full-length photograph and comfortable after six hours, it fits your role.
Complement, Don’t Match: Hair That Sits Beautifully Beside the Bride
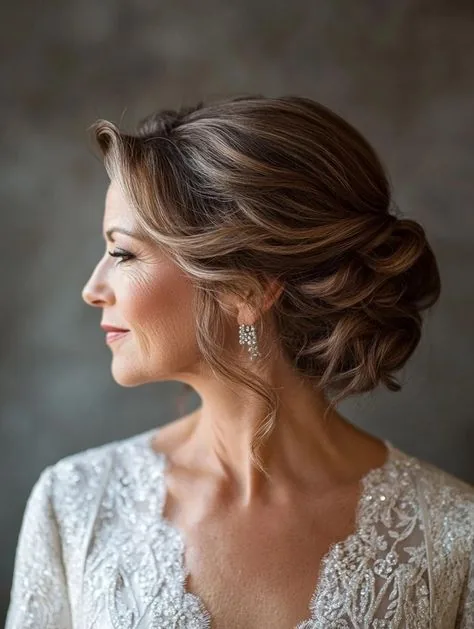
The golden rule for the groom’s mum is simple: complement the bride, never copy her. If she is wearing a sleek updo, a soft half-up style or gentle waves will sit beautifully beside her. If her hair is down in romantic curls, a polished chignon or a swept-up bun gives the photographs contrast and balance. Ask her — or the groom — what she has planned, and choose something in a different shape and finish so the two of you look harmonious rather than matched.
Pros: this approach flatters you both and makes the group photographs look considered rather than accidental. Cons: it takes one conversation, and some mums feel shy about asking — ask anyway, it is always appreciated. What to ask: whether the bride’s hair will be up or down, and whether the mother of the bride has chosen a style yet, so the two mothers do not accidentally arrive in identical updos. Quick verdict: different shape, same level of polish.
Photos with the Groom: Hairstyles That Look Wonderful Beside Your Son
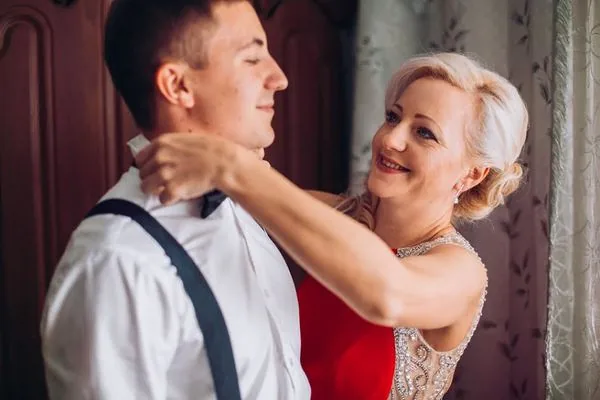
You will be photographed beside your son more than anyone except the bride, and those pictures — the walk down the aisle, the first dance, the family portraits — are the ones that end up framed. The styles that work best in them have a clear, flattering shape from the front and the side, because that is the angle most of the photographs are taken from. Soft volume at the crown, a gentle sweep across the forehead, and a neat finish at the nape all help you look your best next to a tall son in a suit.
How to check it: take a test photograph of yourself from the front and from a three-quarter angle, standing tall, before the day. Best for: every mum, but especially if you are shorter than your son and the camera will be looking slightly down. Common mistake: a style that is perfect from the front but flat or messy from the side, where half the photographs are taken. Maintenance on the day: a quick mirror check before the family portraits is all it takes.
From Ceremony to Last Dance: Hair That Lasts All Day in Comfort
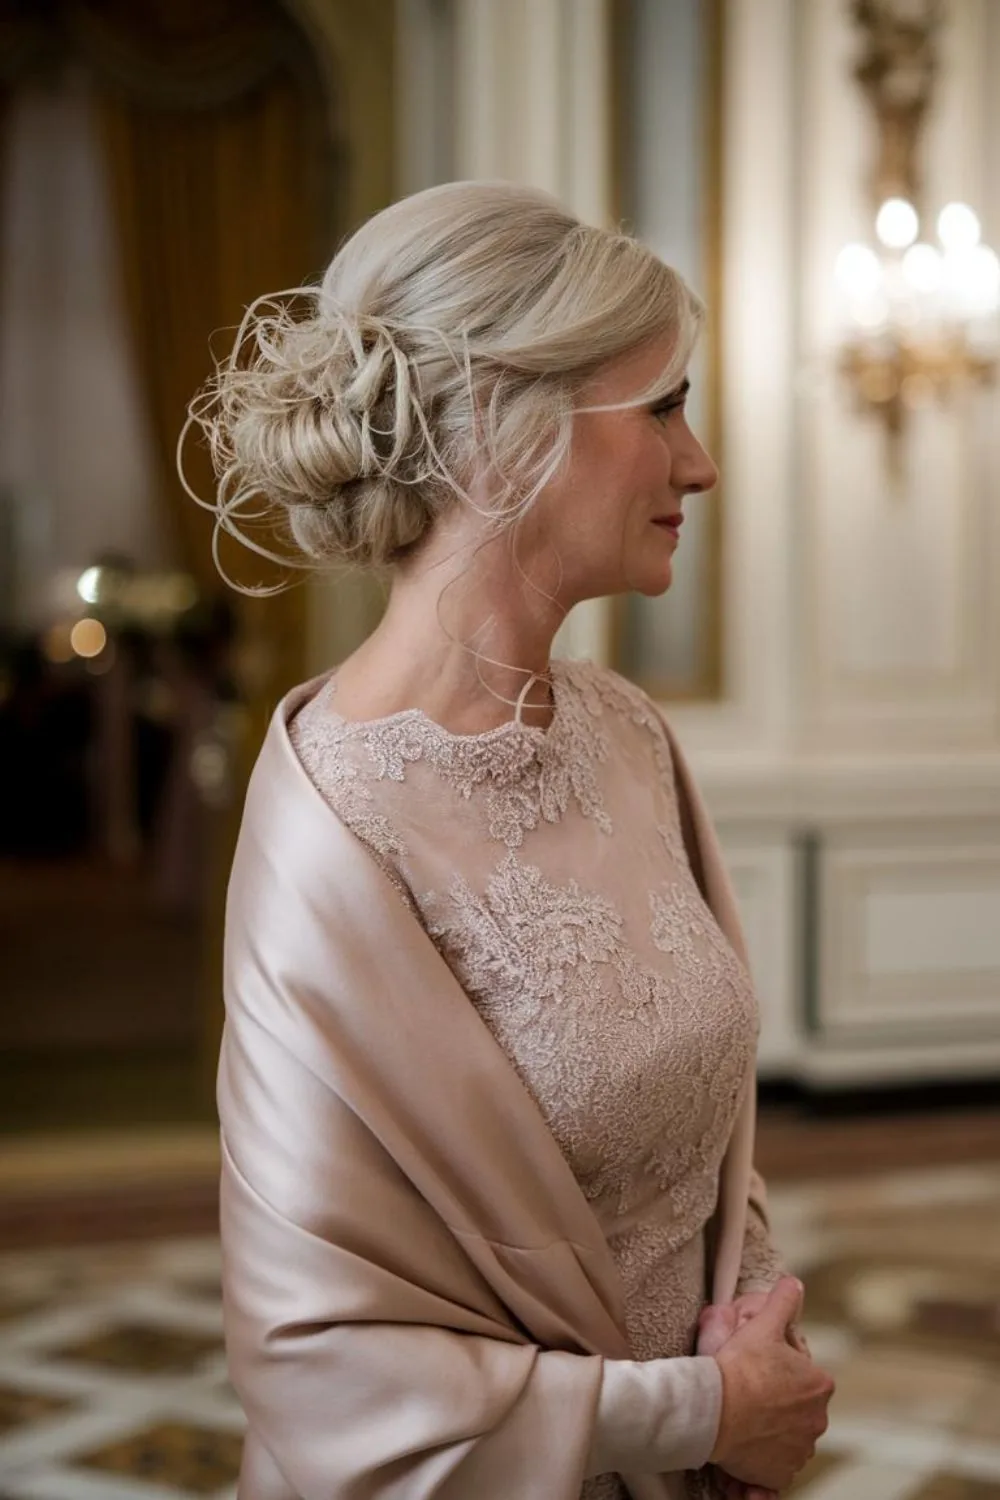
A wedding day is long. There is the ceremony, the photographs, the drinks reception, the meal, the speeches, and then dancing that can go on for hours. Your hair has to survive all of it — and survive hugs, happy tears, a warm marquee, and possibly a breeze if any of it is outdoors. The styles that last are built on pins and structure, not just hairspray, and they are comfortable enough that you forget about them entirely by the second hour.
Cost and time: a professional updo usually takes 45 to 60 minutes and is worth every penny for a day this long. How to make it last: build on a slightly textured base, use criss-crossed bobby pins rather than a single grip, and pack a tiny kit — three bobby pins, a small hairspray, and a spare hair tie. Who should avoid it: nobody should choose a style that pulls or aches; if it hurts at the trial, it will be unbearable by the speeches. Quick verdict: comfort is not a compromise, it is the whole point.
Age-Flattering Elegance: Styles That Soften and Lift, Never Age You
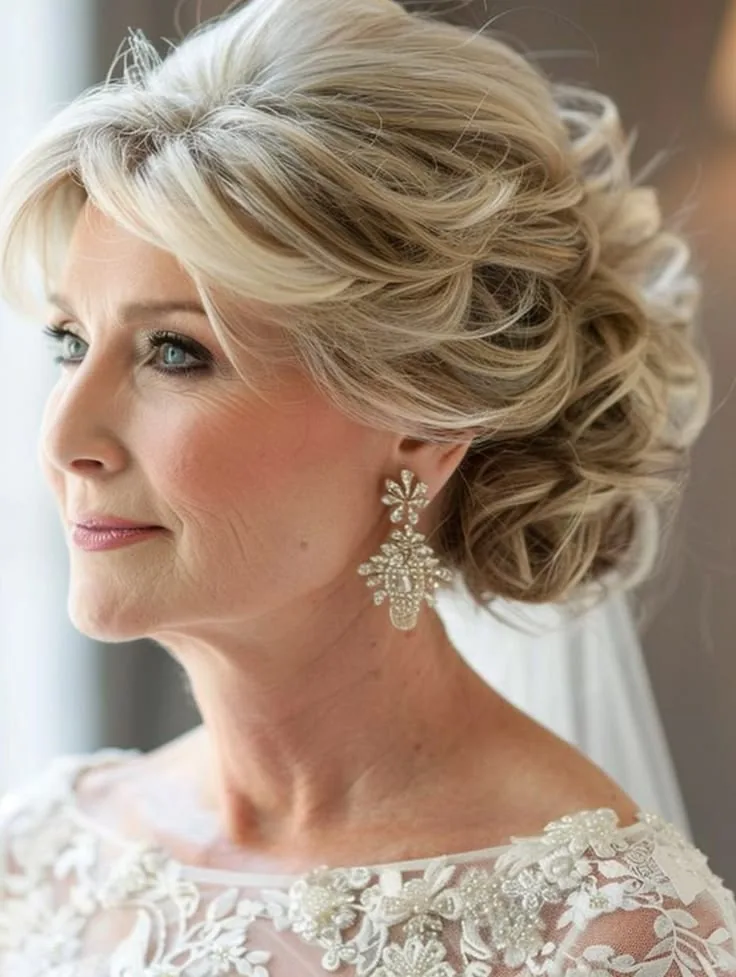
The most flattering mother of the groom hairstyles share three things: softness around the face, a little lift at the crown, and movement rather than stiffness. Hard, scraped-back styles and severe centre partings can add years, while soft face-framing pieces, gentle volume and a slightly textured finish take them away. The goal is not to look younger in an obvious way — it is to look like the best, most rested version of yourself.
Best for: women in their fifties, sixties and beyond, and anyone who wants a style that photographs kindly. How to style it: ask your stylist for softness at the temples, volume at the crown, and no harsh lines. Common mistake: a rock-hard helmet of hairspray, which photographs as a solid shape and feels dated. Pros: soft, lifted styles suit almost every face shape and hair type. Quick verdict: soft, lifted and moving beats sleek, flat and frozen every time.
Grey and Silver Hair: Making Your Natural Colour Shine on the Day
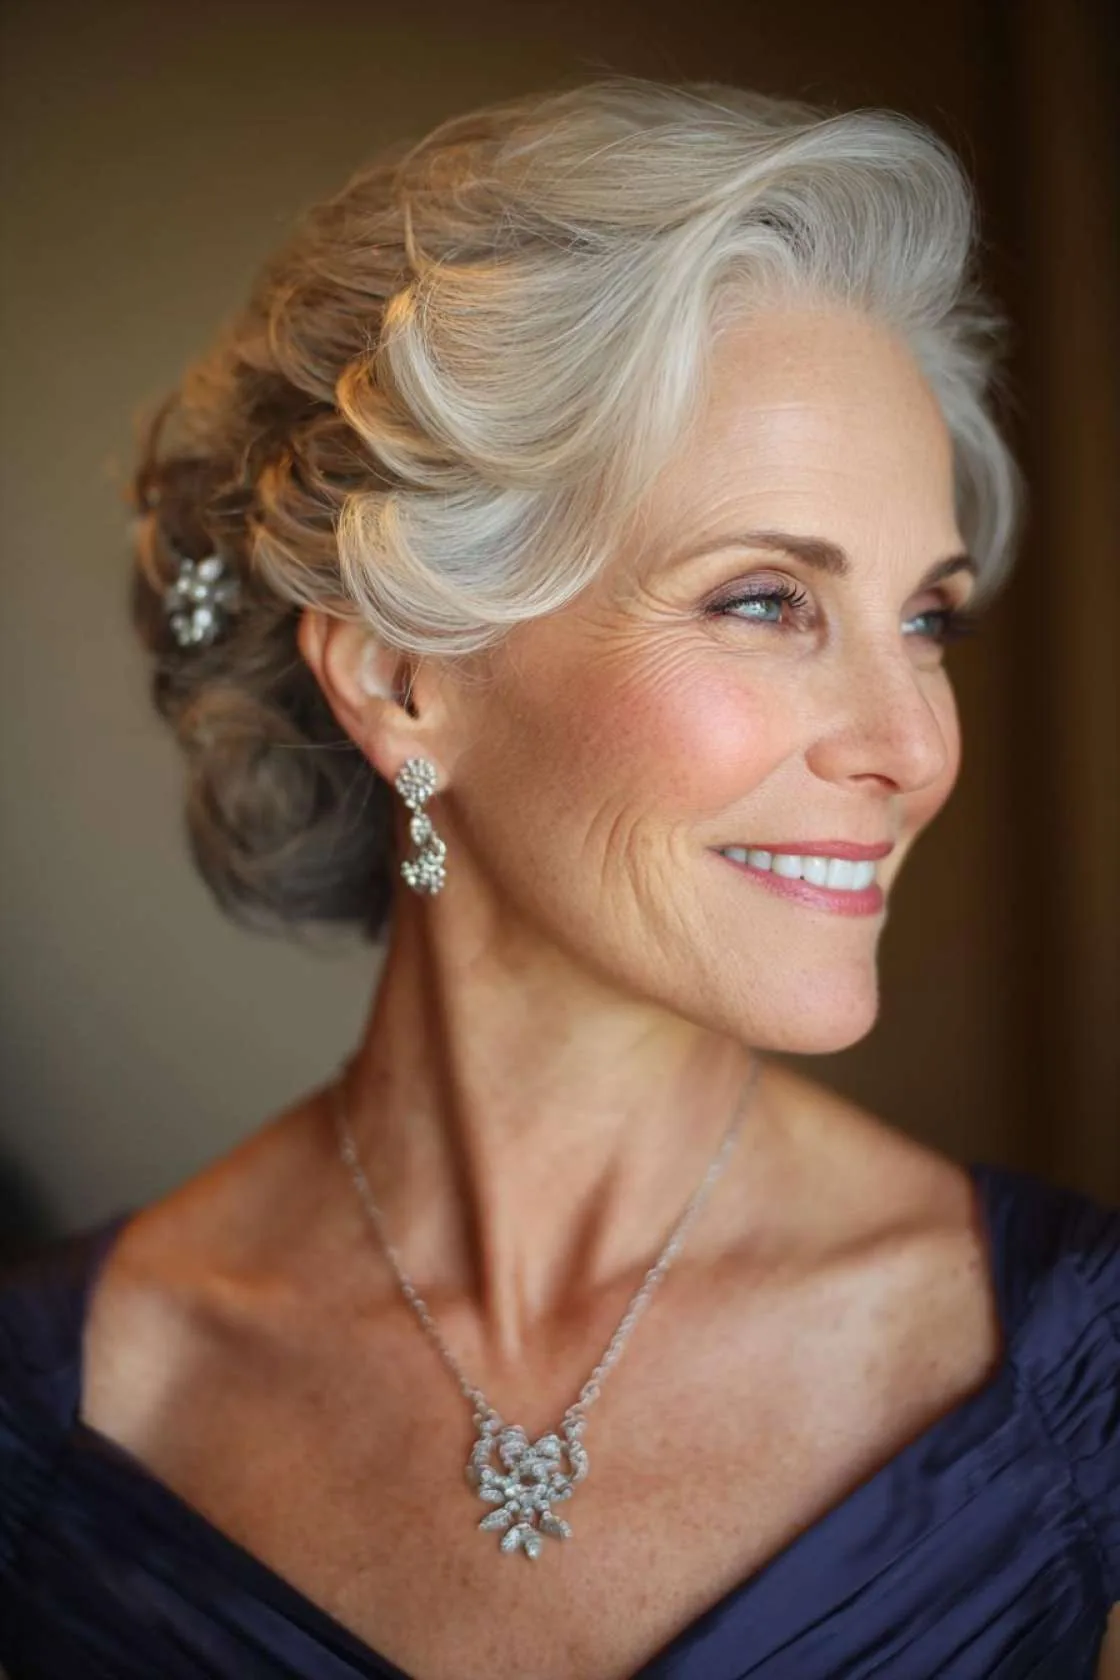
If your hair is grey or silver, the wedding day is the perfect occasion to show it off rather than hide it. Silver hair photographs beautifully — it catches the light in a way no dye can match — and a polished silver bob or a soft silver chignon looks genuinely striking beside a wedding dress. The secret is shine: a purple shampoo in the weeks before the wedding removes any yellow tones, and a shine serum on the day gives silver hair a luminous finish.
How to prepare it: use a silver-enhancing shampoo for two to three weeks before the wedding, and book a trim a week before so the ends look sharp. Best for: anyone with natural grey, silver or white hair. What to ask your stylist: for a cut that shows off the colour — layers and a clean outline make silver hair look deliberate and expensive. Common mistake: covering silver hair with a flat dye just for the wedding; the regrowth shows in photographs within weeks. Quick verdict: silver is a feature, not a flaw.
Short, Medium or Long: Picking the Right Style for Your Length
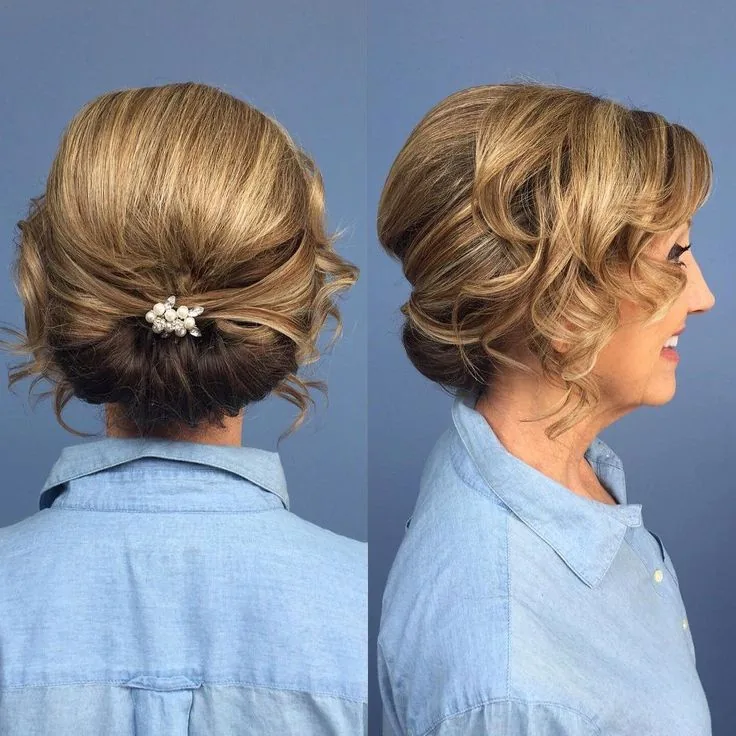
You do not need long hair to have a beautiful wedding hairstyle. A short pixie with soft texture can look chic and modern, a shoulder-length lob with waves is effortlessly elegant, and long hair gives you the full range of updos and chignons. The mistake is choosing a style made for a different length and forcing your hair into it — a chignon needs length, and a pixie needs texture, not pins. Work with the length you have, and the result will look natural and hold all day.
Short hair: choose texture, volume and a pretty accessory — a pearl clip or a sparkle comb does the work an updo would do. Medium hair: you have the most choice of all, from a soft chignon to a polished blowout. Long hair: use the length for a low, elegant updo that will not pull or ache. Cost and time: short hair often needs less salon time, which leaves more of the morning for everything else. Quick verdict: the right style for your length always beats a borrowed one.
The Trial Run and the Timeline: Getting the Morning Right
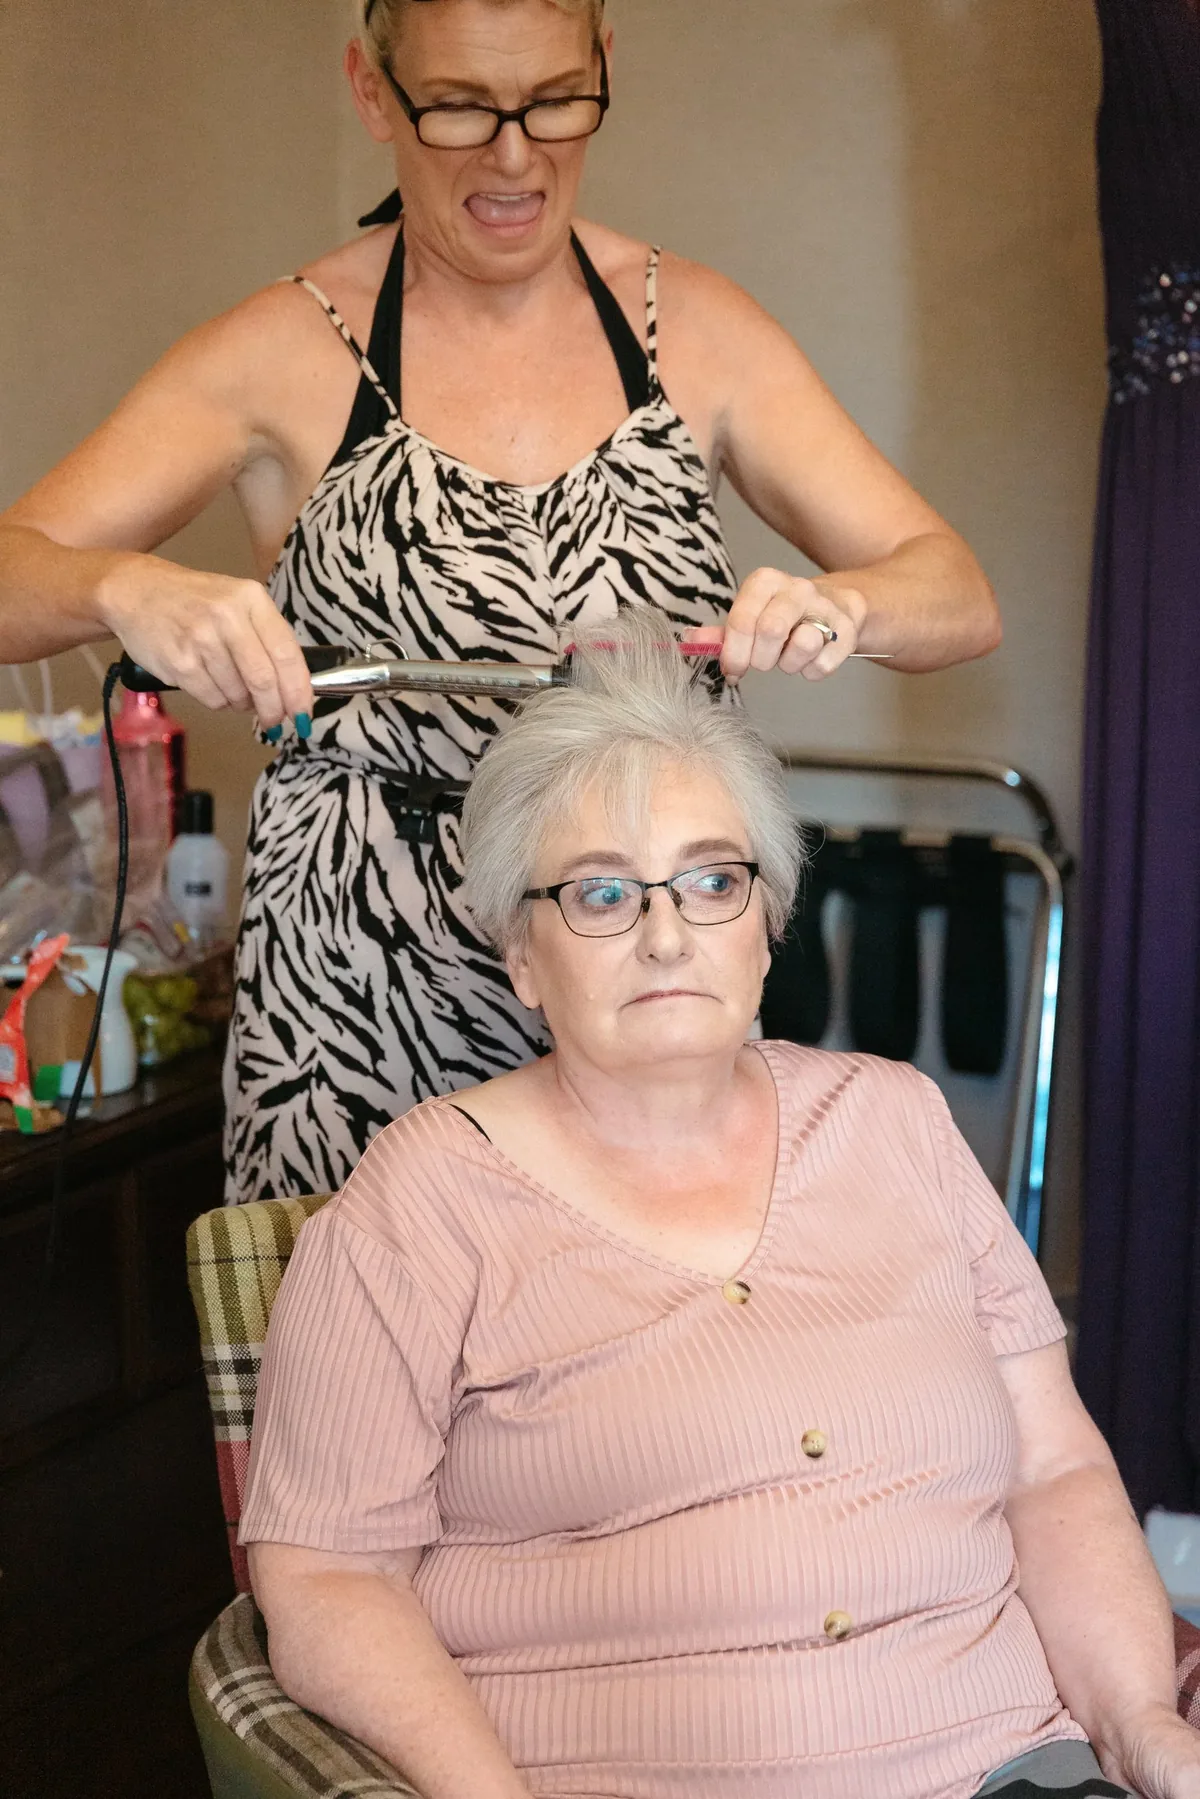
A hair trial is the single best investment you can make before the wedding. Book it four to six weeks before the day, wear the outfit or a similar neckline, bring the accessory you plan to wear, and take photographs from every angle in daylight. The trial is where you discover whether the style holds, whether it aches, and whether it photographs the way you imagined — all things you cannot fix on the morning itself.
On the day, allow 45 to 60 minutes for hair, after make-up or before it depending on your stylist’s preference, and build in ten minutes of buffer. Bring your accessory, your veil or hat if you are wearing one, and a photograph of the trial style. Common mistake: skipping the trial to save money, then spending the wedding morning worrying. Pros: a trial means the morning is calm and the result is certain. Quick verdict: try it once, photograph it, and the day takes care of itself.
1. The Classic Low Chignon
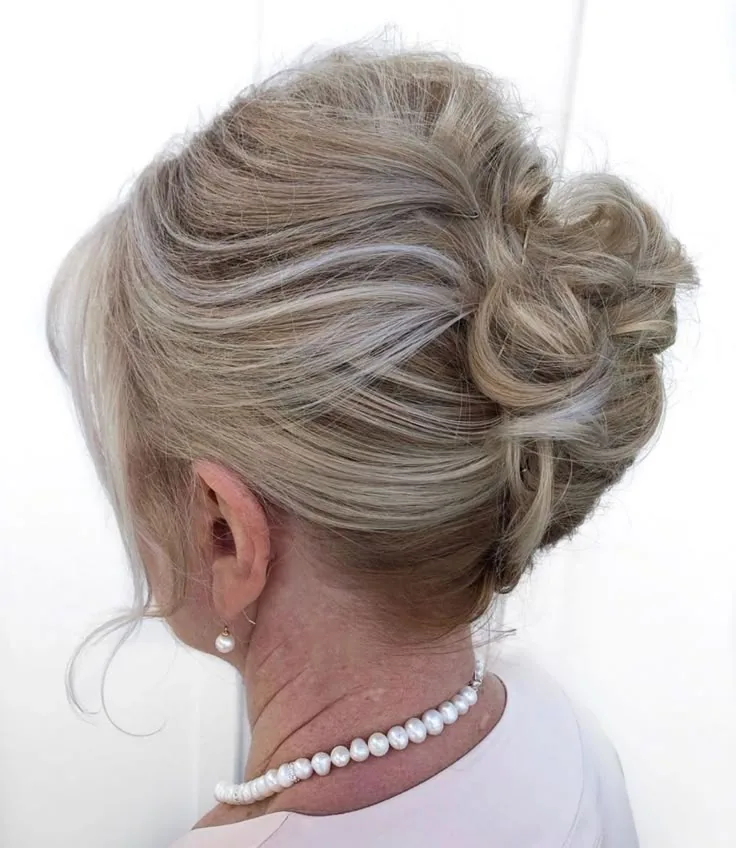
The classic low chignon is the mother of the groom hairstyle against which all others are measured. Tucked low at the nape, it is elegant without being stiff, formal without being bridal, and it photographs beautifully from every angle. It suits almost every face shape, works with medium and long hair, and it will still be perfectly in place when the last dance finishes.
Best for: medium to long hair, and any wedding formality from a church ceremony to a grand hotel reception. How to style it: gather the hair low, twist it into a soft roll, and pin it with four or five bobby pins in a criss-cross pattern, leaving two soft tendrils at the front. What to ask your stylist: for a chignon anchored with pins, not just hairspray, and a slightly loosened finish so it never looks severe.
Pros: holds all day, looks expensive, and flatters every age. Cons: it can look severe if pulled too tight, so keep the front soft. Common mistake: using too few pins and trusting hairspray to do the structural work. Maintenance: almost none — one pin check before the family portraits is enough.
Who should avoid it: very short hair, which cannot form a proper roll. Cost and time: about 30 to 45 minutes with a stylist. Quick verdict: if you choose only one style from this list, make it this one — it is the safest elegant choice there is.
Pair it with pearl pins or a small sparkle comb and the chignon turns from simple to evening-ready in seconds, without anything that competes with the bride.
2. The Soft French Twist

The French twist is pure elegance, and the soft modern version is far kinder than the severe twists of decades past. Hair is swept up and tucked into a vertical roll, with softness at the crown and gentle pieces framing the face. It is the style to choose for a formal wedding, a black-tie reception, or any day where you want to look unmistakably polished.
Why it works for the groom’s mum: it lifts the face, lengthens the neck, and looks wonderful in profile photographs beside your son. How to style it: sweep the hair to one side, roll it upward, and pin along the fold, then gently loosen the front for softness. Best for: medium to long hair with some thickness.
Pros: supremely elegant, very photogenic, and it holds for hours. Cons: it is a stylist’s job — this is not a do-it-yourself style for most people. Common mistake: a twist pulled so tight it looks severe; the modern version should always have softness at the front.
Maintenance: none beyond a pin check. Who should avoid it: very fine or very slippery hair, which can slide out of the roll. Quick verdict: the most formal style on this list, and one of the most beautiful.
3. Elegant Low Bun with Pearl Pins
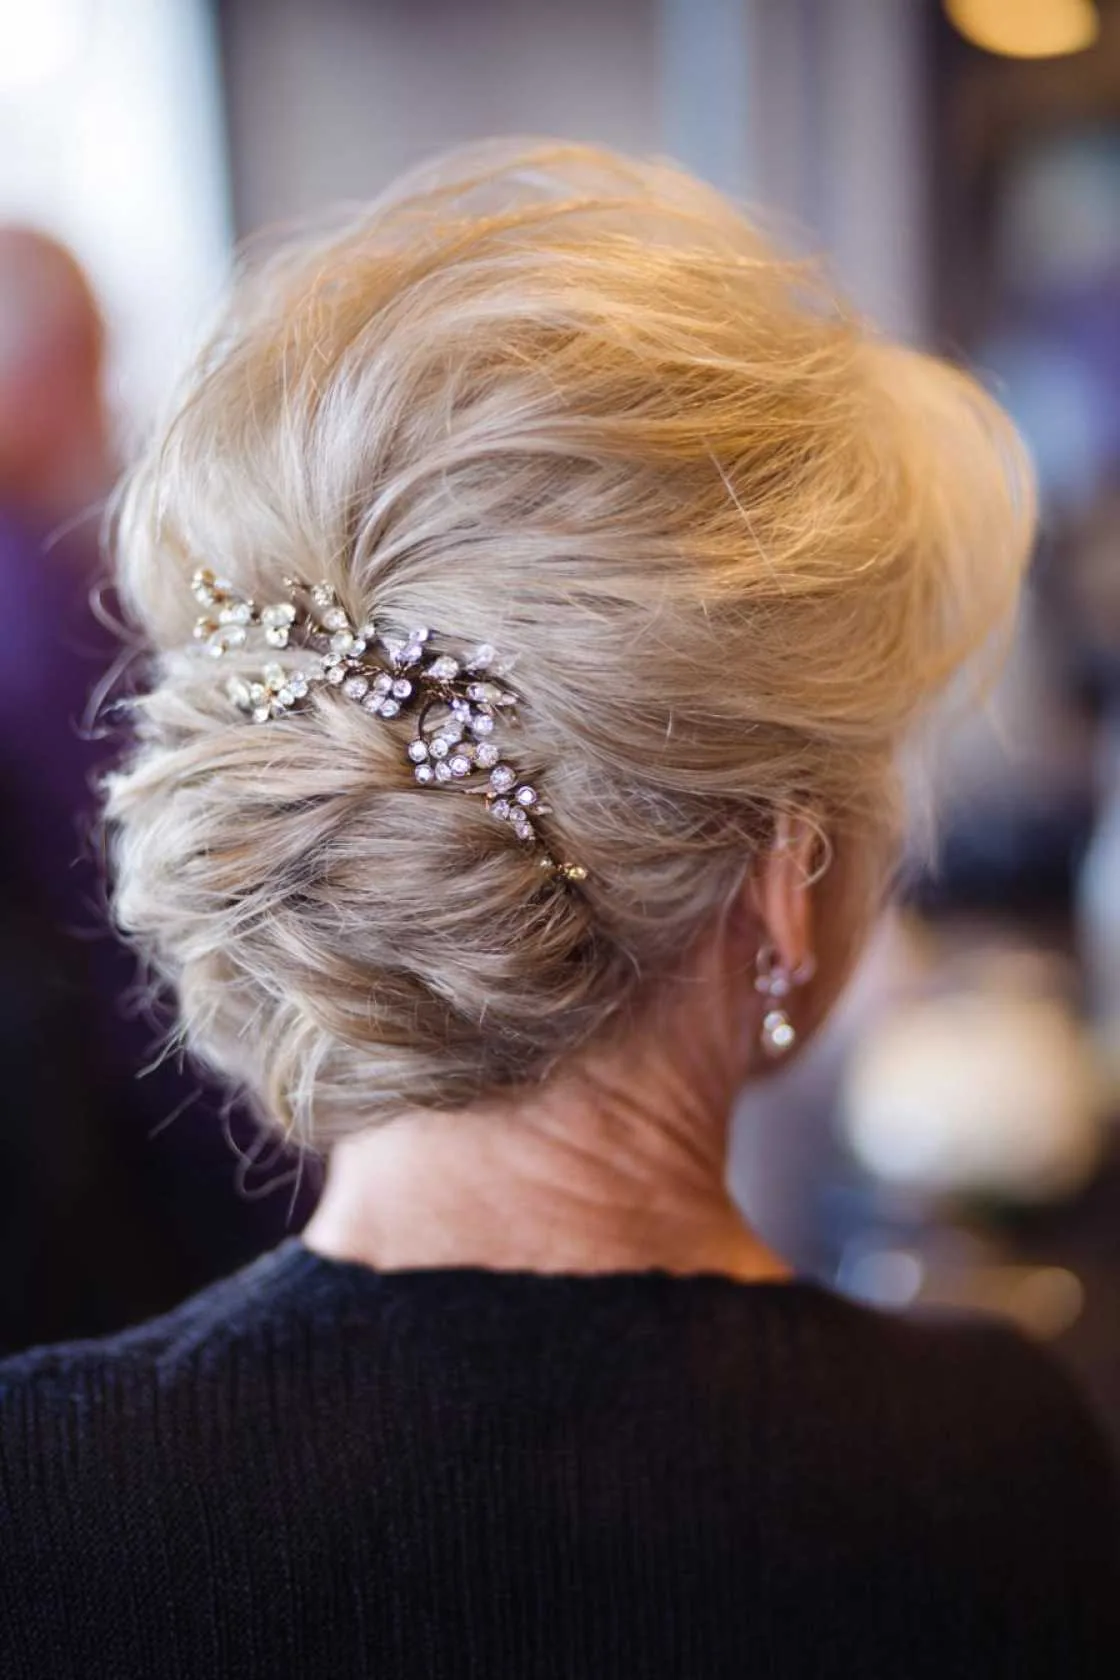
A low bun with pearl pins is quietly luxurious — the kind of style that looks effortless in photographs and feels comfortable all day. The bun itself is simple and secure, and the pearls add just enough sparkle to mark the occasion without ever looking bridal. It is a wonderful choice if you want elegance without fuss.
Best for: medium to long hair, and mums who want a style they can forget about once it is done. How to style it: form a low bun at the nape, secure it well, then place two or three pearl pins along the top edge where the light catches them. What to ask your stylist: for pins that clamp firmly, so nothing works loose during dancing.
Pros: comfortable, secure, and the pearls photograph beautifully. Cons: the pins need to be good quality — cheap ones can slip. Common mistake: placing the pins symmetrically like a crown; a slightly off-centre cluster looks more modern and more elegant.
Cost and time: 30 minutes, plus the cost of the pins. Who should avoid it: nobody — this suits almost everyone. Quick verdict: simple, sparkling, and completely appropriate for the groom’s mum.
4. The Swept-Up Ballerina Bun
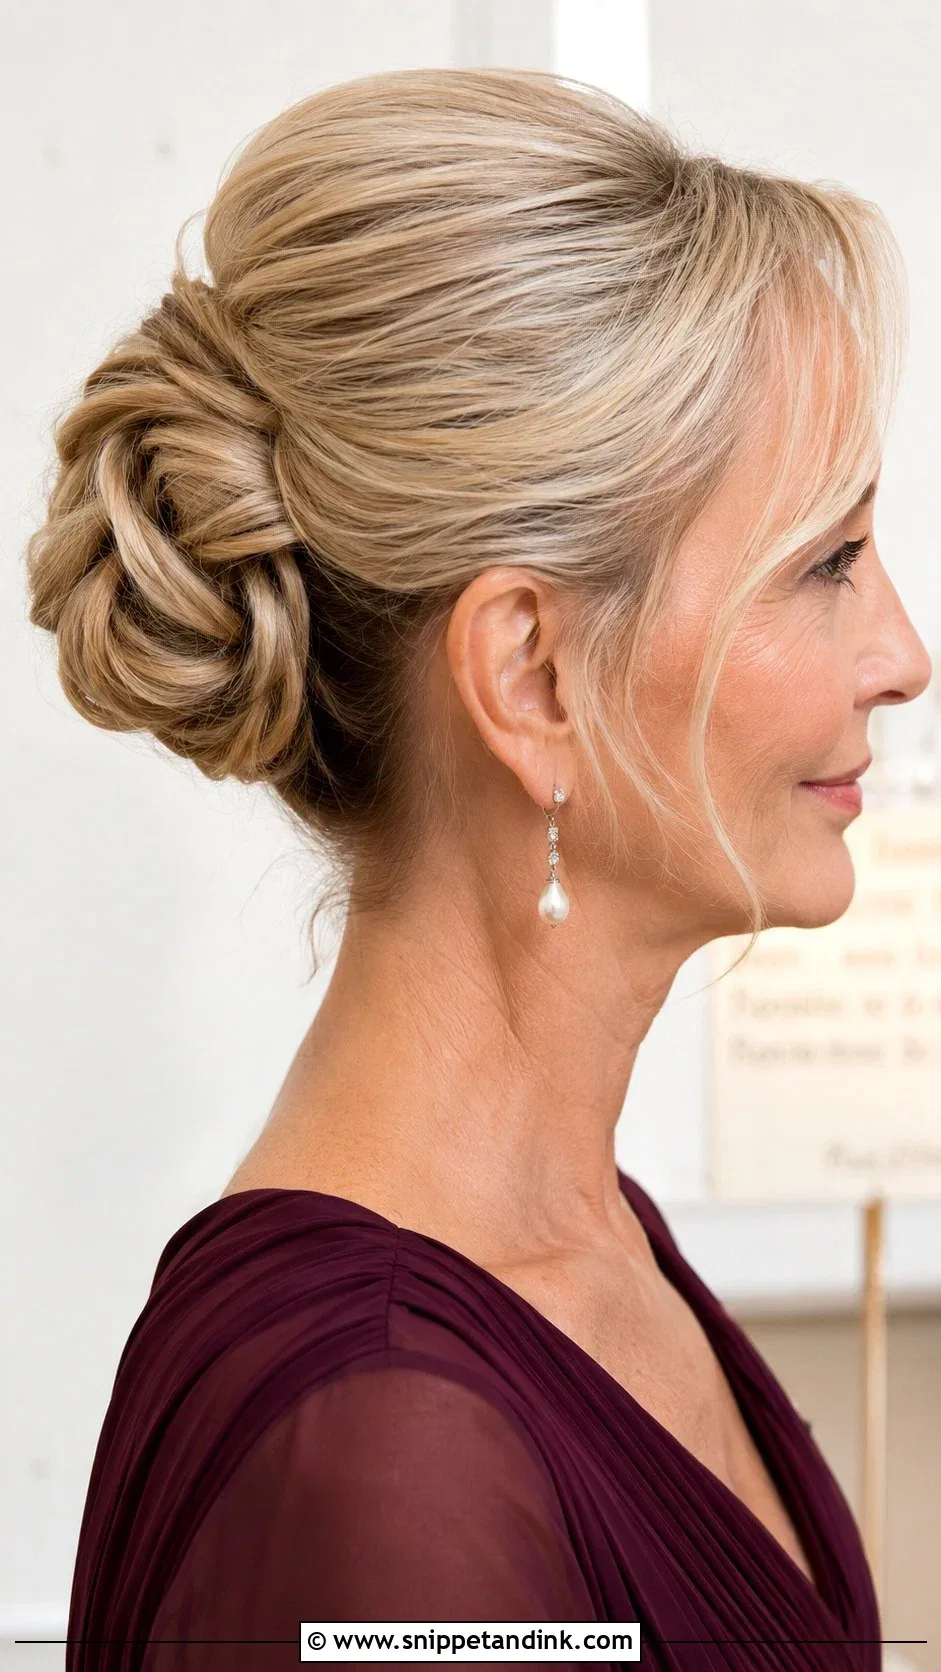
The ballerina bun is polished, poised and wonderfully practical. Swept smoothly up and pinned into a neat bun, it keeps hair completely off your face and neck, which matters on a warm day or a long evening of dancing. It also shows off your cheekbones and any earrings you are wearing, and it looks immaculate in the formal portraits.
How to style it: smooth the hair back with a bristle brush and a little serum, gather it high or at the crown, twist into a bun, and pin it firmly. Best for: medium to long hair, and anyone wearing a dress with an interesting neckline or an open back that deserves to be seen.
Pros: completely secure, cool on a warm day, and very photogenic. Cons: a very tight bun can ache by evening, so do not pull it drum-tight. Common mistake: a bun placed too high, which can look more dancer than wedding guest — the crown or just above it is the sweet spot.
Maintenance: one pin check halfway through the day. Who should avoid it: anyone with very fine hair that slips out of elastics — use a textured base first. Quick verdict: neat, graceful, and built to last.
5. Half-Up, Half-Down with Soft Curls
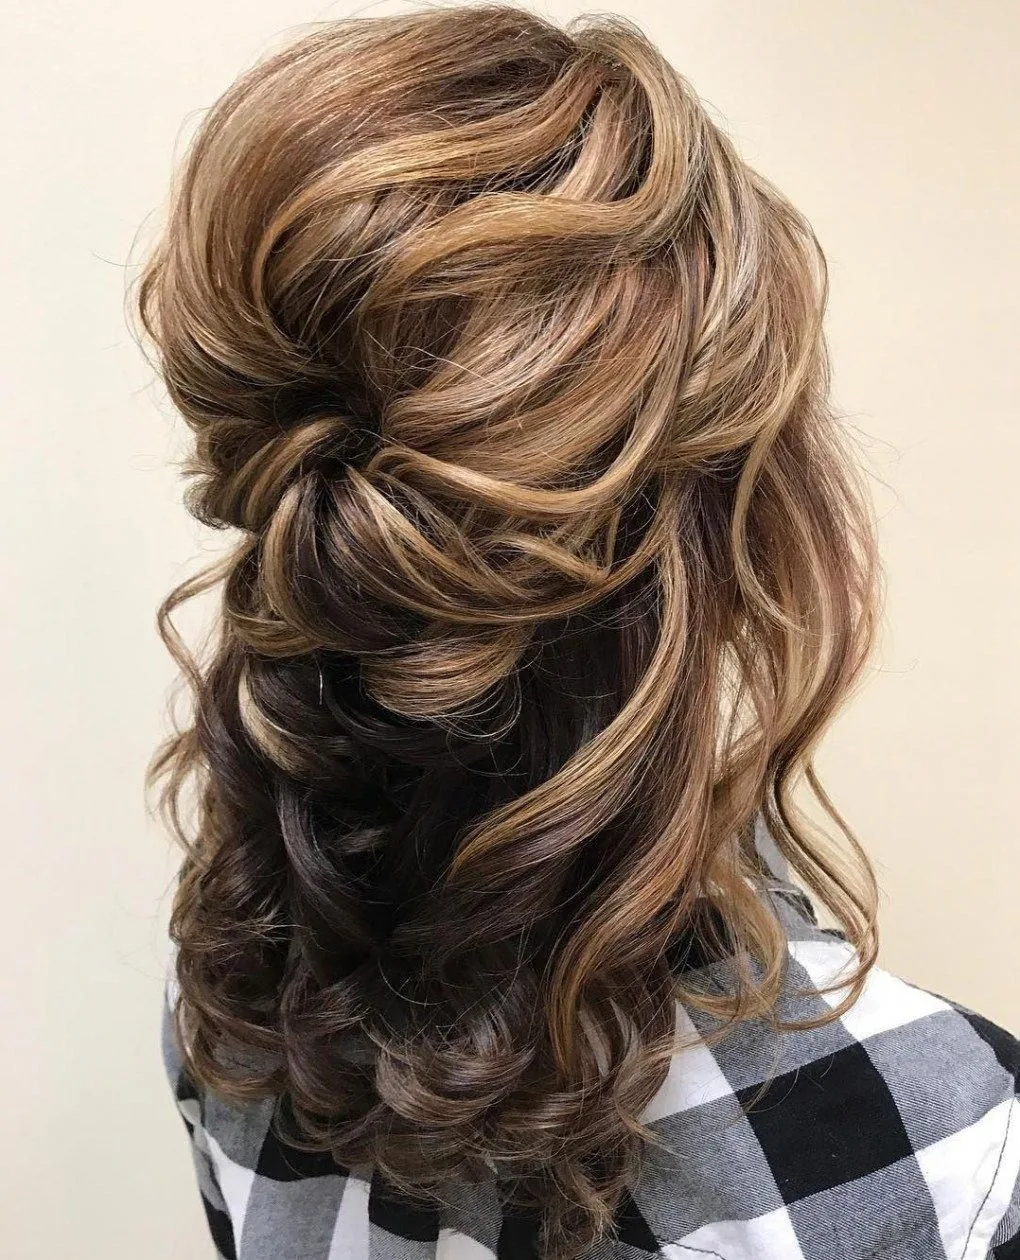
Half-up, half-down is the perfect compromise for the groom’s mum: the top is pinned back so your face is clear for photographs, while the length stays free in soft curls that move beautifully. It feels romantic without being bridal, and it works for almost every wedding style, from a garden ceremony to a grand reception.
Best for: medium to long hair, and mums who love wearing their hair down but want it out of their face. How to style it: curl the length first, then take the top sections from each side, twist them gently back, and pin them where they meet. Leave soft pieces at the temples.
Pros: flattering, comfortable, and it photographs wonderfully from the front and the side. Cons: the loose length can tangle in a breeze if any part of the day is outdoors. What to ask your stylist: for twists pinned with criss-crossed bobby pins, not a single clip that can slip.
Maintenance: a quick finger-comb revives the curls. Who should avoid it: very short hair, which cannot form the twists. Quick verdict: the best of both worlds, and one of the most popular choices for a reason.
6. A Voluminous Blowout with Layers
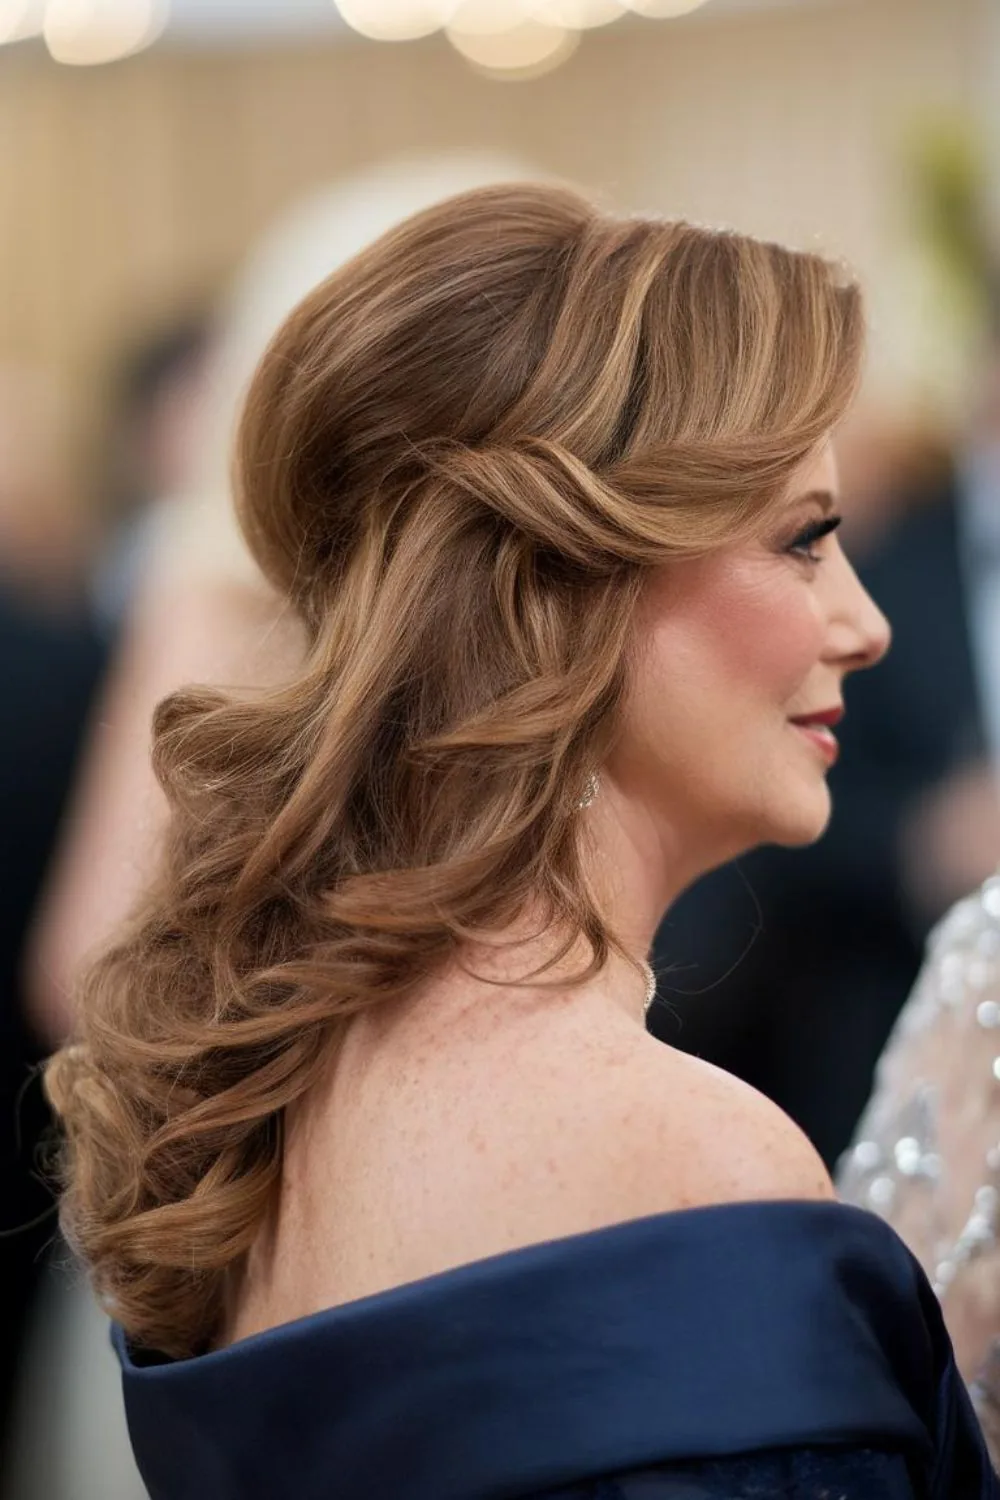
A voluminous blowout is the style for the mum who wants to wear her hair down and look polished doing it. Big, bouncy, layered hair frames the face, moves beautifully, and looks wonderful in photographs. Layers are the secret: they give the blowout shape and movement instead of a single heavy curtain of hair.
Why it works: volume at the crown lifts the face, and layers keep the style light rather than heavy. How to style it: blow-dry with a large round brush, lifting at the roots, and curl the ends under or away from the face. A light volumising spray at the roots helps the lift survive the day.
Pros: high impact, very photogenic, and it makes the whole outfit look more polished. Cons: volume drops in humidity, so it needs a fairly dry day. Common mistake: overloading the roots with product, which weighs the volume down instead of lifting it.
Cost and time: 40 to 60 minutes at the salon. Who should avoid it: very fine hair on a humid day — choose a pinned-up version instead. Quick verdict: gorgeous, glamorous, and wonderfully flattering when the weather cooperates.
7. The Sleek Bob with a Side Part
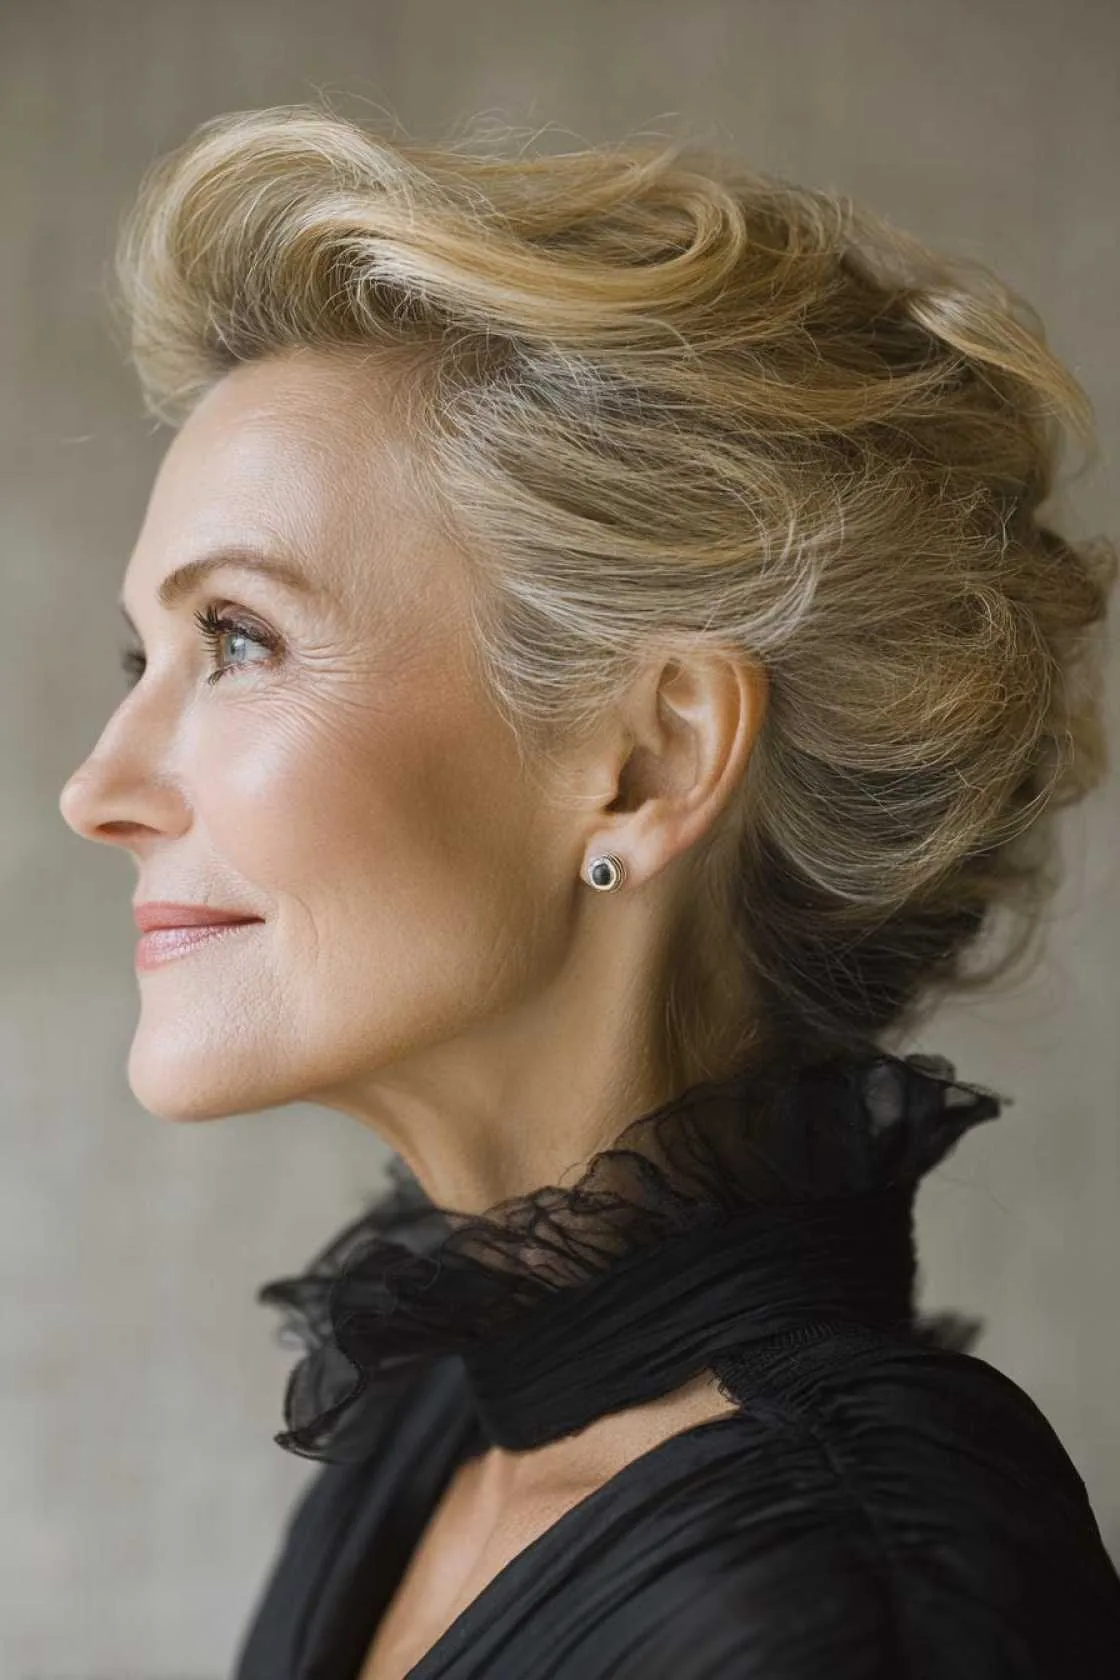
A sleek bob with a deep side part is chic, modern and effortlessly elegant. It suits short to medium hair, frames the face beautifully, and needs very little maintenance during the day. For the groom’s mum who has a bob already, this is often the best choice of all — your own cut, polished to its best.
Best for: short to medium hair, straight or slightly wavy. How to style it: part the hair deeply to one side, smooth it with a flat iron and a shine serum, and tuck one side behind the ear to show off an earring. What to ask your stylist: for a clean, sharp outline and a finish with visible shine.
Pros: low maintenance, very chic, and it photographs cleanly. Cons: it shows frizz quickly in humidity, so a smoothing serum is essential. Common mistake: a centre part with a sleek bob, which can look severe — the side part is what gives it softness.
Maintenance: a quick smooth with your palms revives it. Who should avoid it: very curly hair, unless you are happy to straighten it. Quick verdict: proof that short hair can be every bit as elegant as an updo.
8. The Textured Pixie with a Soft Fringe
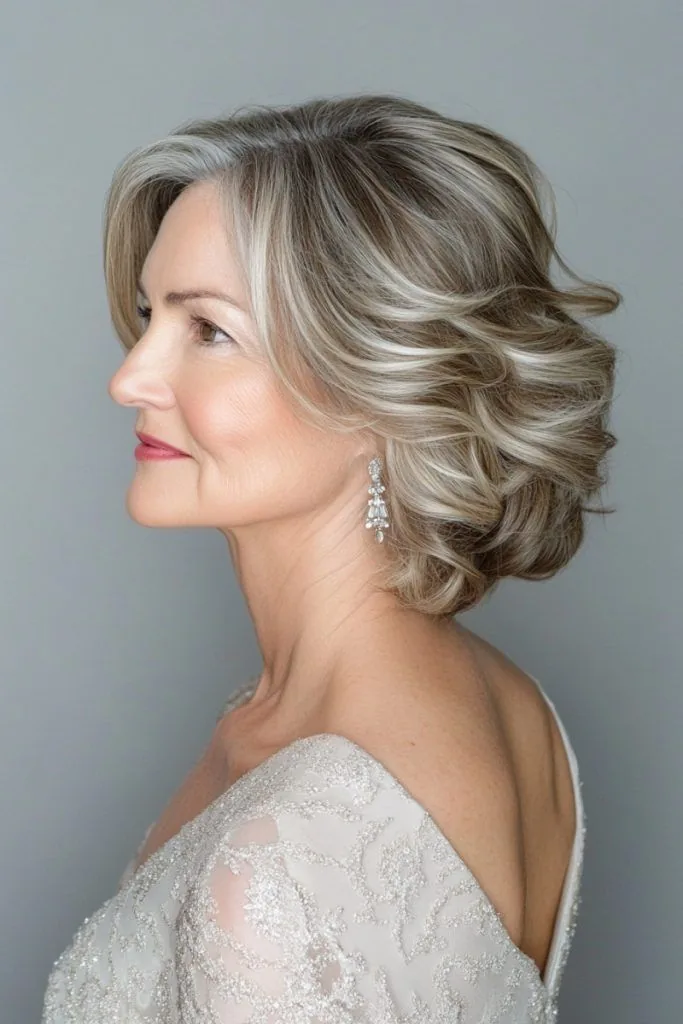
A textured pixie with a soft fringe is the most modern choice on this list, and it can look absolutely stunning on the groom’s mum. Texture gives the cut movement and life, the soft fringe frames the eyes, and a pretty accessory — a pearl clip or a sparkle comb — adds the wedding-day touch. It is confident, chic and completely age-appropriate.
Why it works: a pixie shows off your face, your cheekbones and your earrings, and it needs no pins at all. How to style it: add a little texturising paste, lift the top for volume, and sweep the fringe softly to one side. Best for: short hair, and anyone who already wears a pixie and loves it.
Pros: no pins, no aching, no worrying about it falling down — it simply stays. Cons: it cannot be transformed into an updo, so you need to love the cut itself. Common mistake: over-styling it into stiffness; a pixie should move.
Cost and time: the quickest style on this list, often 15 minutes. Who should avoid it: nobody who already wears a pixie — this is your cut at its best. Quick verdict: short, chic, and completely worry-free.
9. The Shoulder-Length Lob with Soft Waves
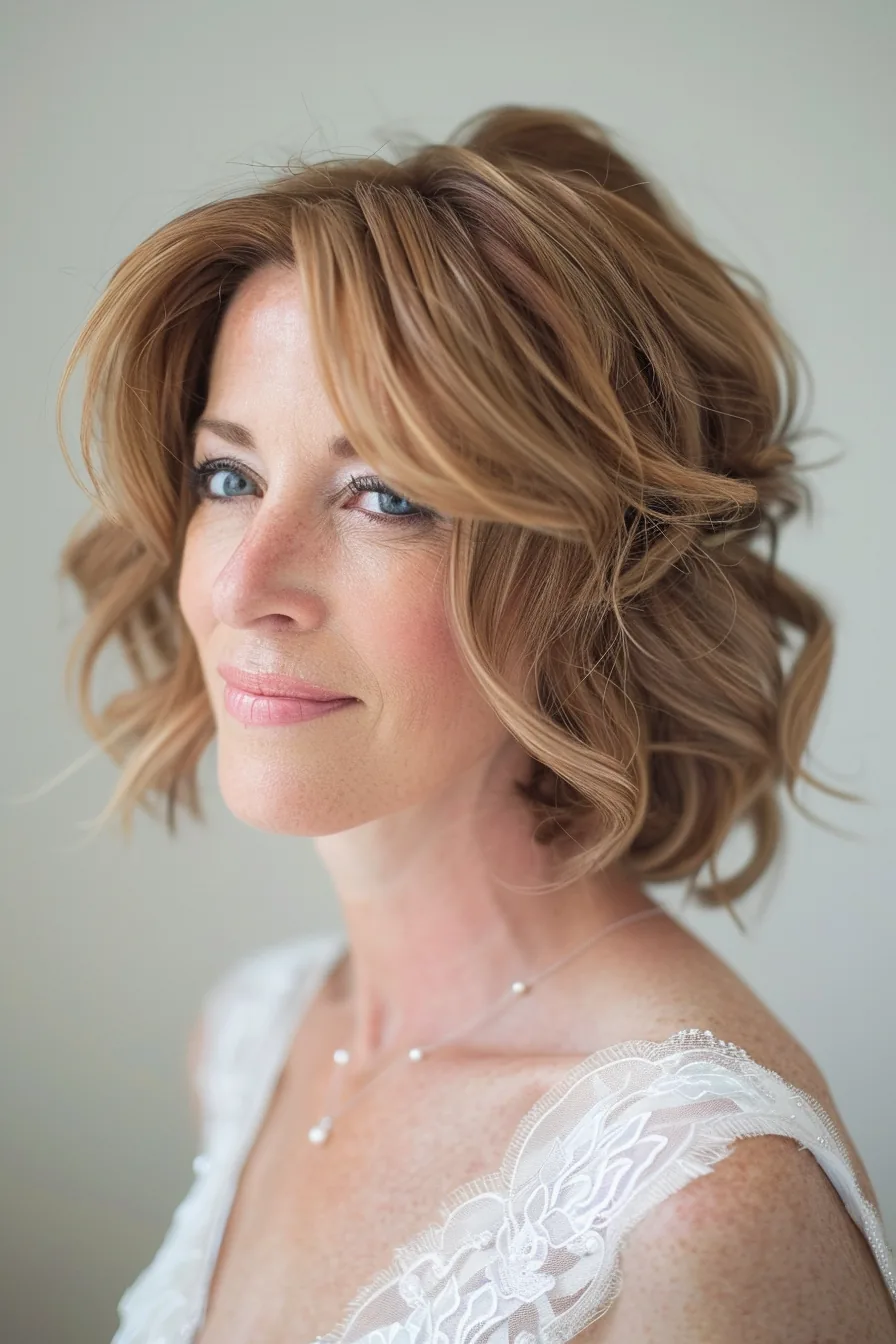
The lob — a long bob that sits at the shoulders — with soft waves is one of the most flattering styles a mother of the groom can choose. It is long enough to feel feminine and romantic, short enough to be comfortable, and the waves give it movement that photographs beautifully. It suits almost every face shape and every age.
Best for: medium hair, and mums who want their hair down without the weight of very long hair. How to style it: curl the hair in large sections with a wide-barrel iron, brush through gently for soft waves, and finish with a flexible-hold spray. What to ask your stylist: for waves that start below the cheekbone, which is the most flattering place for them to begin.
Pros: comfortable, flattering, and easy to refresh. Cons: the waves can drop in humidity, so a setting spray helps. Common mistake: curling the hair too tightly, which reads as formal rather than soft.
Maintenance: a quick finger-comb and a light mist revive the shape. Who should avoid it: very fine hair that will not hold a wave — add texture spray first. Quick verdict: the effortless elegant choice, and one of the most popular for a reason.
10. Romantic Side-Swept Waves
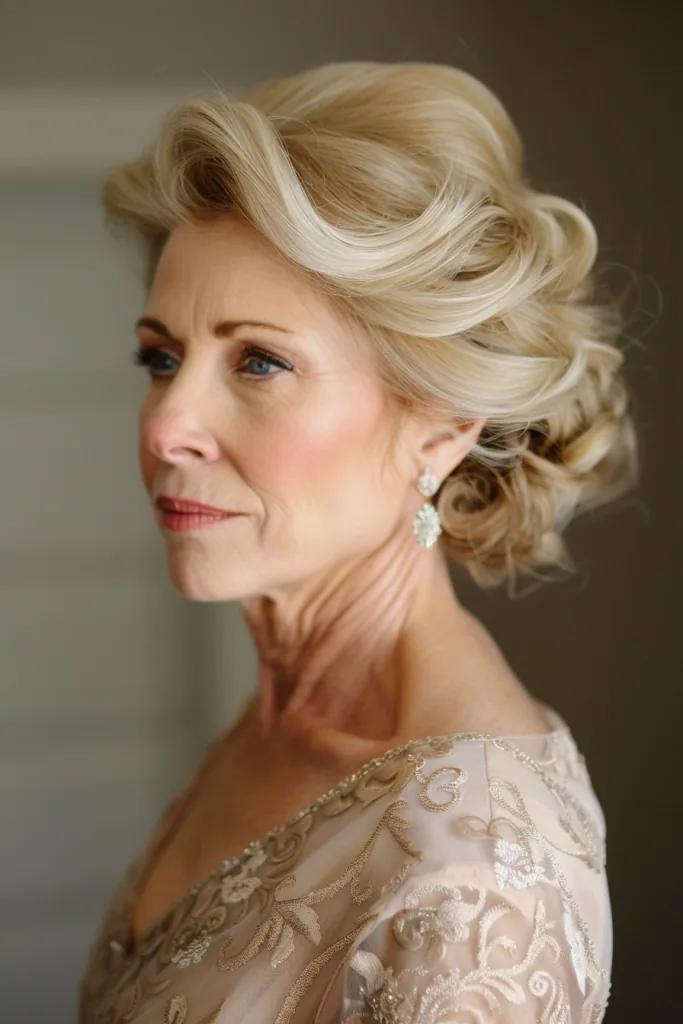
Side-swept waves are romantic, glamorous and wonderfully flattering. Sweeping the hair to one side shows off your neckline and your earrings, gives the style a clear shape in photographs, and keeps the hair off one side of your face entirely. It is a beautiful choice for an evening reception, where the light catches the waves as you move.
How to style it: part the hair deeply to one side, curl the length in large sections, then sweep it all over one shoulder and pin it discreetly at the back. Best for: medium to long hair, and anyone wearing a dress with a pretty neckline on one side.
Pros: glamorous, photogenic, and it shows off your outfit. Cons: the sweep can slip if it is not pinned well, so use two hidden pins. Common mistake: sweeping the hair so far that it covers the face in photographs — keep the sweep behind the shoulder.
Cost and time: about 40 minutes. Who should avoid it: very short hair, which cannot be swept. Quick verdict: romance with structure, and a wonderful evening look.
11. The Braided Crown Soft Updo
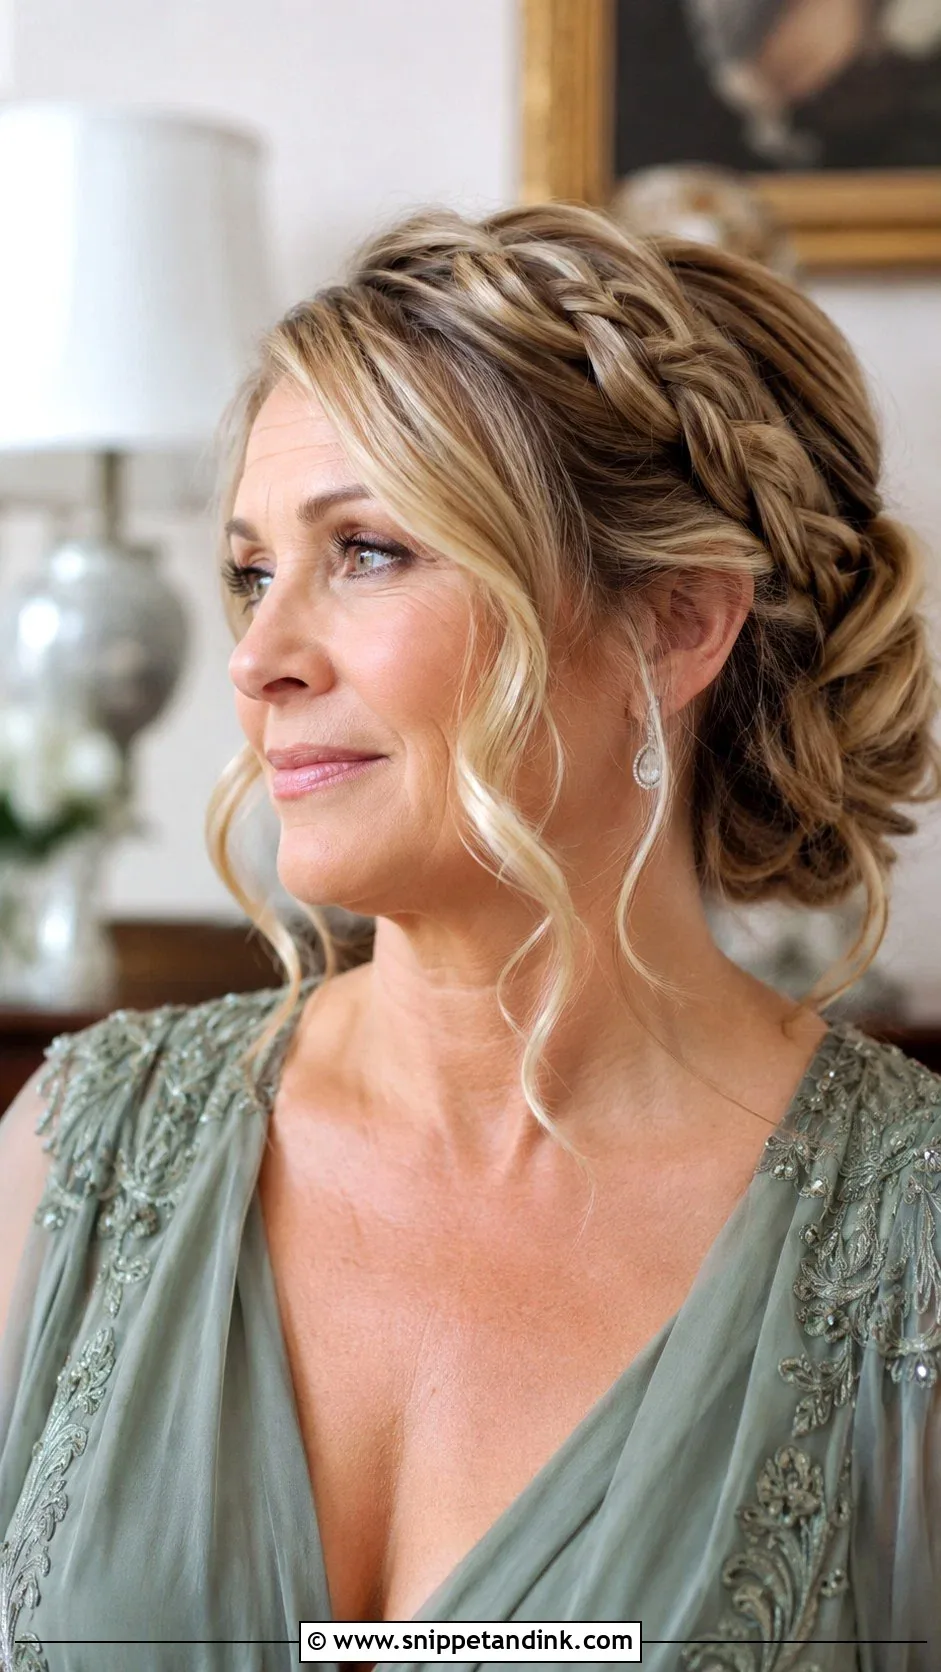
A braided crown is a gentle, romantic updo that keeps the hair completely secure while looking soft and feminine. A braid is worked around the head like a crown, and the remaining hair is pinned into a soft updo at the back. It is the style to choose if you want an updo that does not look severe or formal.
Best for: medium to long hair, and outdoor or garden weddings where the hair needs to stay put. How to style it: braid from one side around the head, pin the end under, then gather the rest into a loose bun. Keep the braid slightly loose for a softer, modern look.
Pros: completely secure, lasts all day, and looks detailed in photographs. Cons: it takes longer to create than a simple bun. Common mistake: braiding too tightly, which can ache by the end of the night.
Maintenance: almost none. Who should avoid it: very short hair, which cannot form the crown. Quick verdict: romantic, secure, and beautifully photogenic from every angle.
12. The Twisted Chignon with Loose Tendrils

The twisted chignon is the relaxed cousin of the classic chignon — the same secure, elegant structure, but softer, with loose tendrils framing the face and a little volume at the crown. It looks effortless, which is exactly the mood of a joyful wedding, and it is forgiving: if a strand comes loose during dancing, it only adds to the look.
How to style it: add texture spray, gather the hair low, twist it loosely, pin it in place, then gently pull at the chignon for fullness and free two tendrils at the front. Best for: anyone who finds a perfect chignon too severe, and mums who want softness around the face.
Pros: comfortable, flattering, and it improves as it loosens. Cons: very straight, slippery hair may need extra pins. What to ask your stylist: for a soft, lived-in chignon with face-framing pieces and visible texture.
Maintenance: none beyond a quick pin check. Who should avoid it: no one, really — this is one of the most universal styles on the list. Quick verdict: elegant without trying too hard, and the breeze only makes it better.
13. Glamorous Hollywood Waves
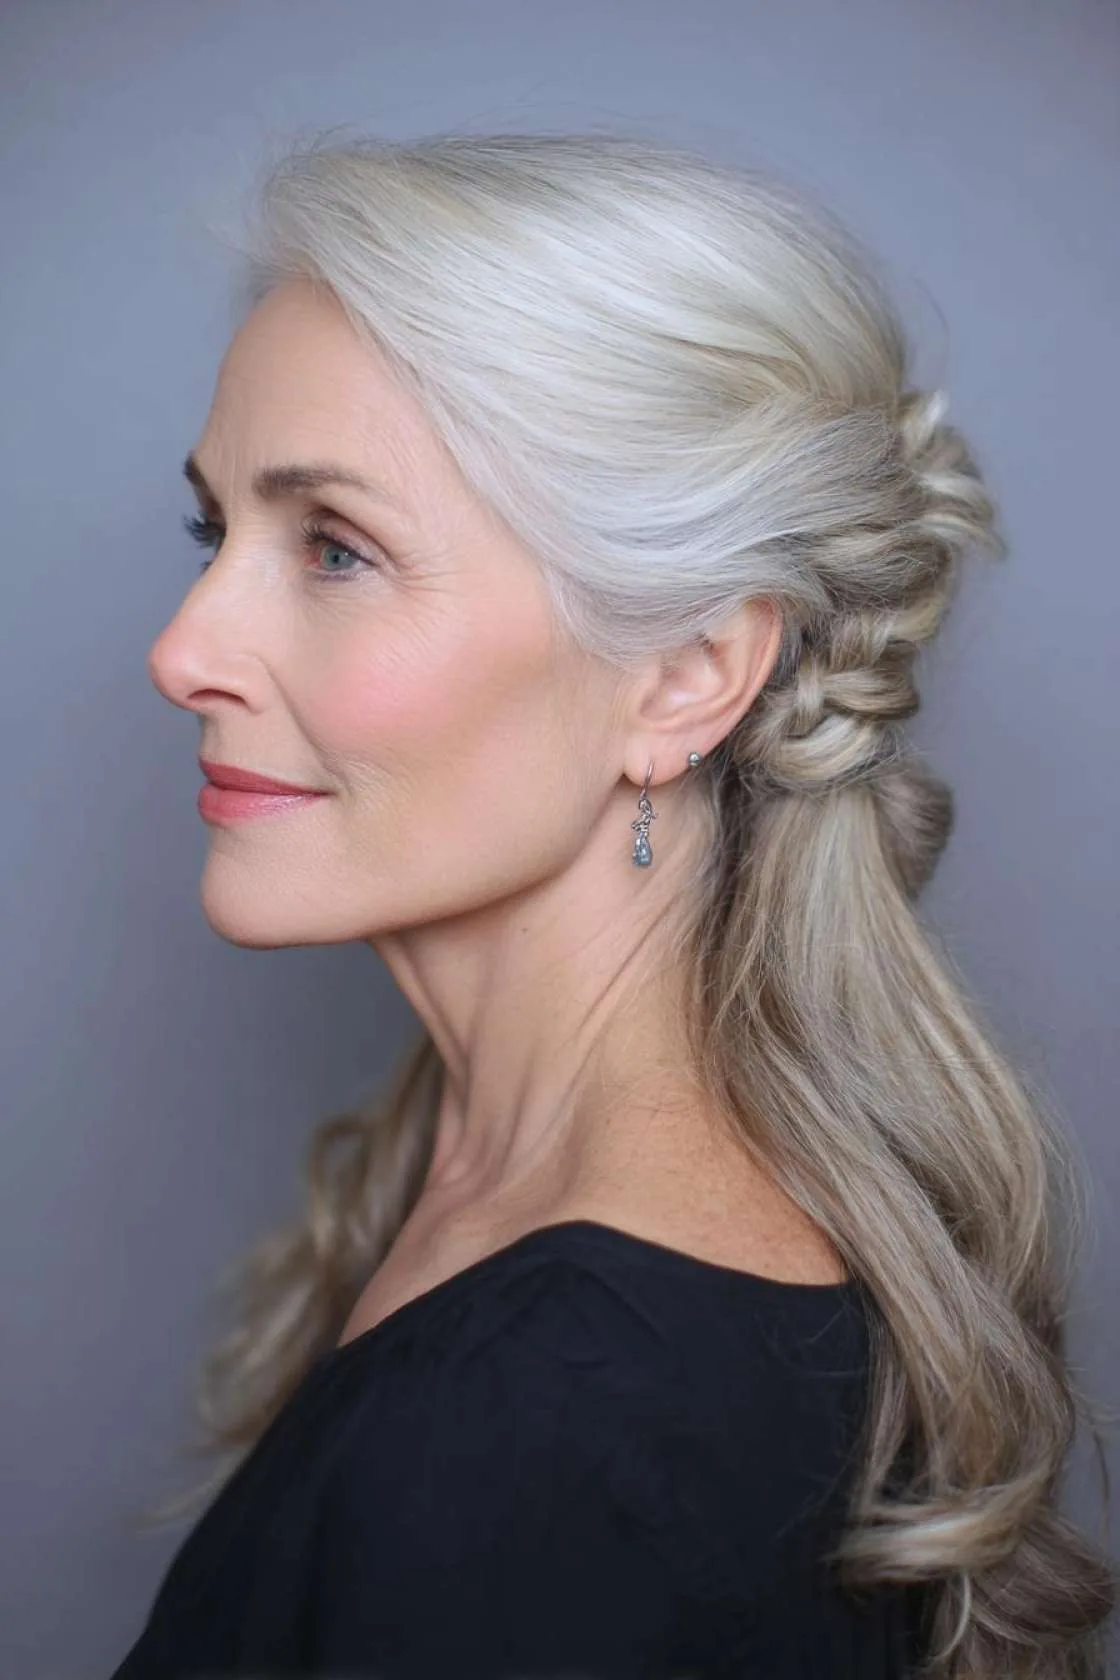
Hollywood waves are made for wedding photographs. Big, glossy, uniform waves catch the light beautifully, and they give even a simple outfit a red-carpet feel. The trick is to set them properly: waves that are only curled will drop within an hour, while waves that are set with rollers or pinned to cool will hold their shape from the ceremony to the reception.
Best for: medium to long hair with some natural body. How to style it: curl all the hair in the same direction with a large-barrel iron, pin each curl to cool, then brush through gently and finish with a flexible-hold spray. Common mistake: brushing the curls out too hard, which turns waves into frizz.
Pros: the most glamorous option on this list, and it photographs beautifully. Cons: the least secure of the loose styles — a strong breeze will loosen it. What to ask your stylist: for set waves with a cool-down pin, not just a quick curl.
Maintenance: carry a small brush and a travel spray; a quick finger-comb revives the shape. Who should avoid it: very fine hair on a windy day — choose a pinned-up version instead. Quick verdict: maximum glamour for the photographs, with a little extra care.
14. The Low Ponytail with a Wrapped Base
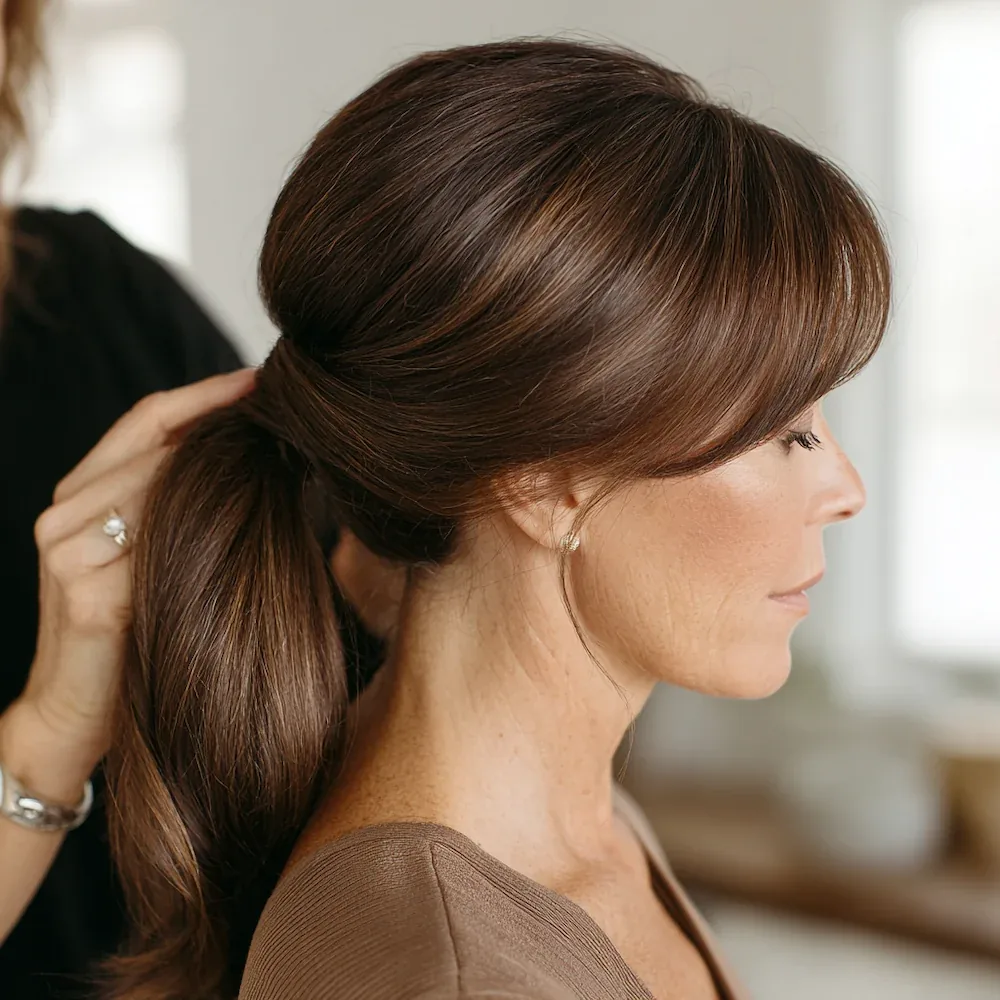
A low ponytail with a wrapped base is understated elegance at its best. It is polished without being formal, comfortable for hours, and it keeps the hair neatly out of the way while still showing off its length and shine. The wrapped base — a strand of your own hair wound around the elastic — turns a simple ponytail into something considered and refined.
Best for: medium to long hair, and relaxed or outdoor weddings where comfort matters. How to style it: gather the hair low at the nape, smooth the sides, secure with a strong elastic, then wrap a strand around the base and pin it underneath. Add a gentle wave to the length first for movement.
Pros: comfortable, secure, and it takes very little time. Cons: it can look too casual for a very formal wedding, so judge the formality carefully. Common mistake: placing the ponytail too high, which loses the elegance of the low placement.
Cost and time: about 20 minutes. Who should avoid it: anyone with very fine hair that slips out of elastics. Quick verdict: simple, polished, and completely appropriate when the wedding is relaxed.
15. The Curly Updo with Defined Curls
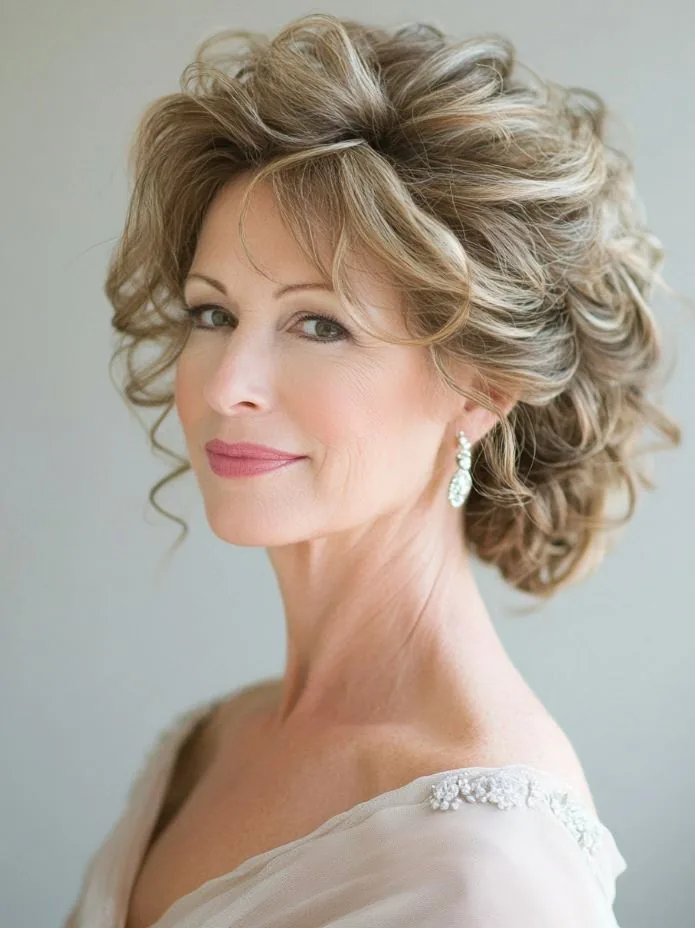
If your hair is naturally curly, the wedding day is the time to celebrate it, not straighten it away. A curly updo gathers the curls into a soft, voluminous shape at the back or the crown, with a few defined curls left free to frame the face. It is joyful, elegant and completely you — and curls hold an updo better than straight hair ever will.
Best for: naturally curly or wavy hair of any length. How to style it: define the curls with a curl cream on damp hair, let them dry naturally or diffuse them, then gather them loosely and pin them, leaving the front curls free. What to ask your stylist: for a stylist who understands curly hair, and for pins rather than a tight elastic.
Pros: curls give an updo natural volume and texture, and the style improves as it loosens. Cons: humidity can expand curls, so a little anti-frizz cream helps. Common mistake: brushing curly hair out before pinning it, which turns defined curls into frizz.
Maintenance: a quick scrunch with a little cream revives the curls. Who should avoid it: nobody with curly hair — this is your hair at its best. Quick verdict: work with your curls, and they will work for you all day.
16. The Silver Grey Bob with Shine
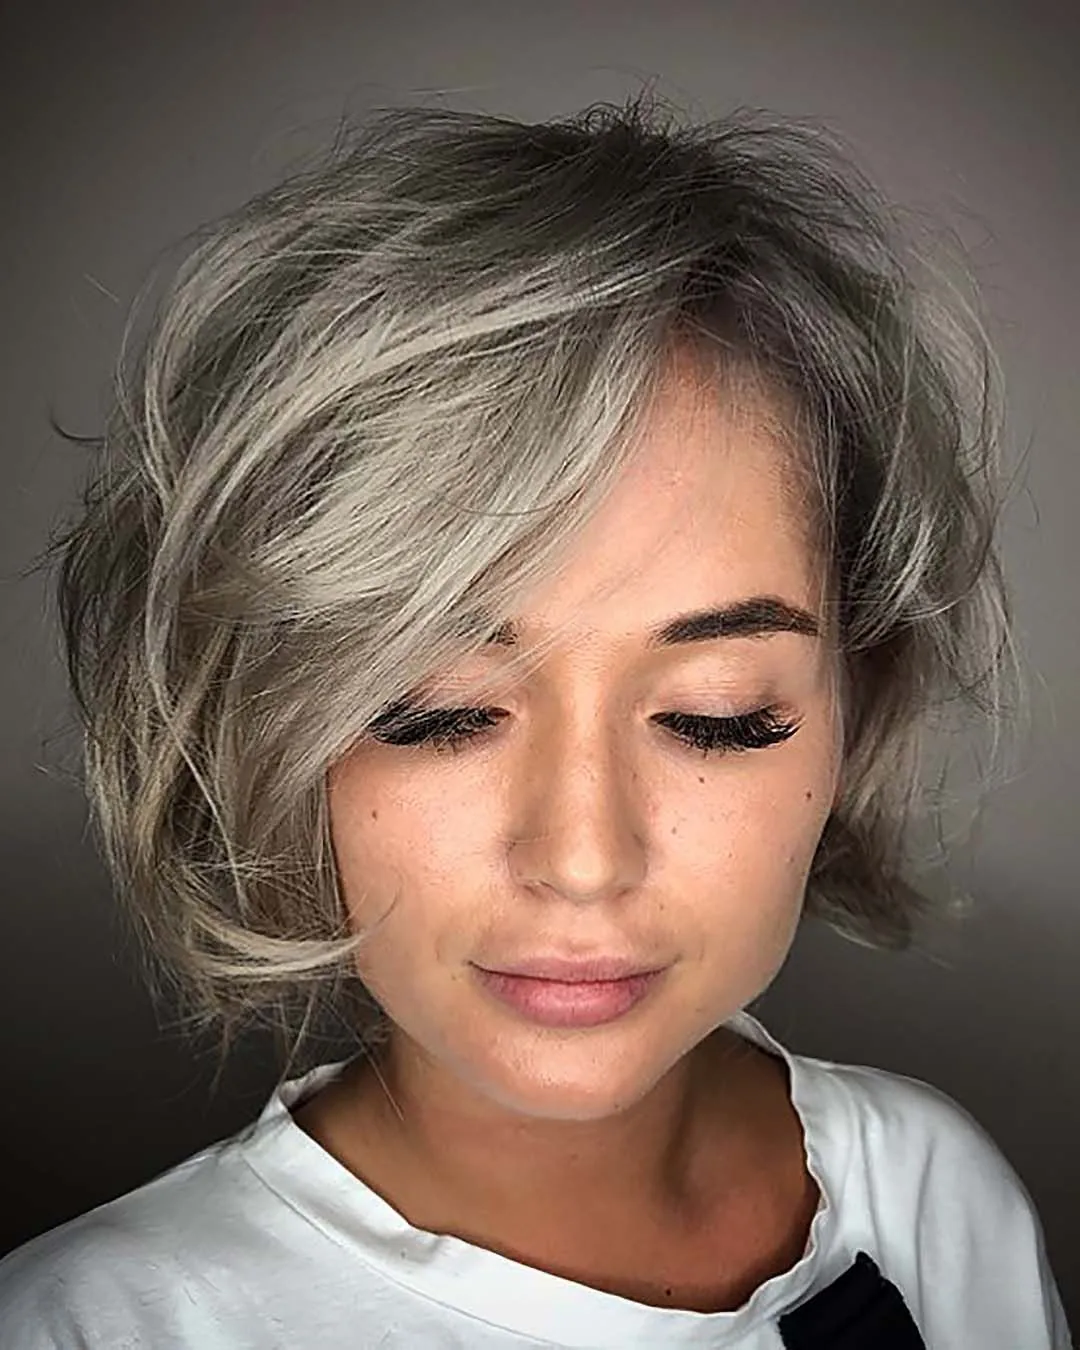
A silver grey bob with a high-shine finish is one of the most striking looks a mother of the groom can wear. The clean outline of the bob shows off the colour, the shine makes it luminous in photographs, and the whole style reads as deliberate, modern and confident. It is proof that grey hair is not something to hide — it is something to celebrate.
How to prepare it: use a purple shampoo for two to three weeks before the wedding to remove any yellow tones, and book a trim a week before so the ends are sharp. How to style it: blow-dry smooth with a round brush, finish with a shine serum, and part it softly to one side.
Best for: short to medium grey, silver or white hair. Pros: low maintenance on the day, very chic, and it photographs beautifully. Cons: it needs the colour to be in good condition — dull grey hair needs the shampoo preparation to shine.
Cost and time: a trim and a blow-dry, often under an hour. Who should avoid it: nobody with silver hair. Quick verdict: silver, sharp and shining — a wonderful wedding-day statement.
17. The Short Bob with Face-Framing Layers
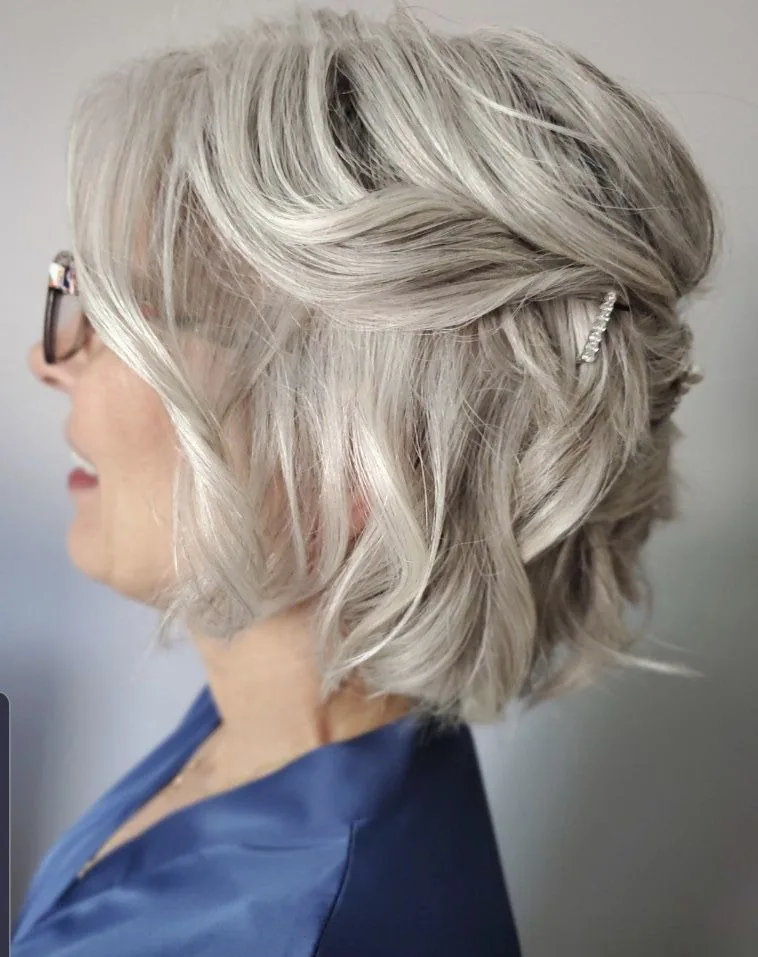
A short bob with face-framing layers is soft, flattering and wonderfully easy to wear. The layers around the face soften the jawline and cheekbones, the length at the front gives the style shape, and the whole cut moves naturally. It is a beautiful choice for the mum who wants a polished look without an updo.
Best for: short to medium hair, and anyone who wants softness around the face. How to style it: blow-dry with a round brush, turning the front layers under or away from the face, and finish with a light texturising spray for movement. What to ask your stylist: for layers that start at the cheekbone, which is the most flattering place for them.
Pros: comfortable, flattering, and easy to refresh with a quick brush. Cons: it can lose its shape in humidity, so a little product helps. Common mistake: a bob cut too bluntly with no layers, which can look heavy and severe.
Maintenance: a quick brush and a mist of spray. Who should avoid it: very curly hair, unless the layers are cut for curls. Quick verdict: soft, shaped and effortlessly elegant.
18. Medium Curls with Volume
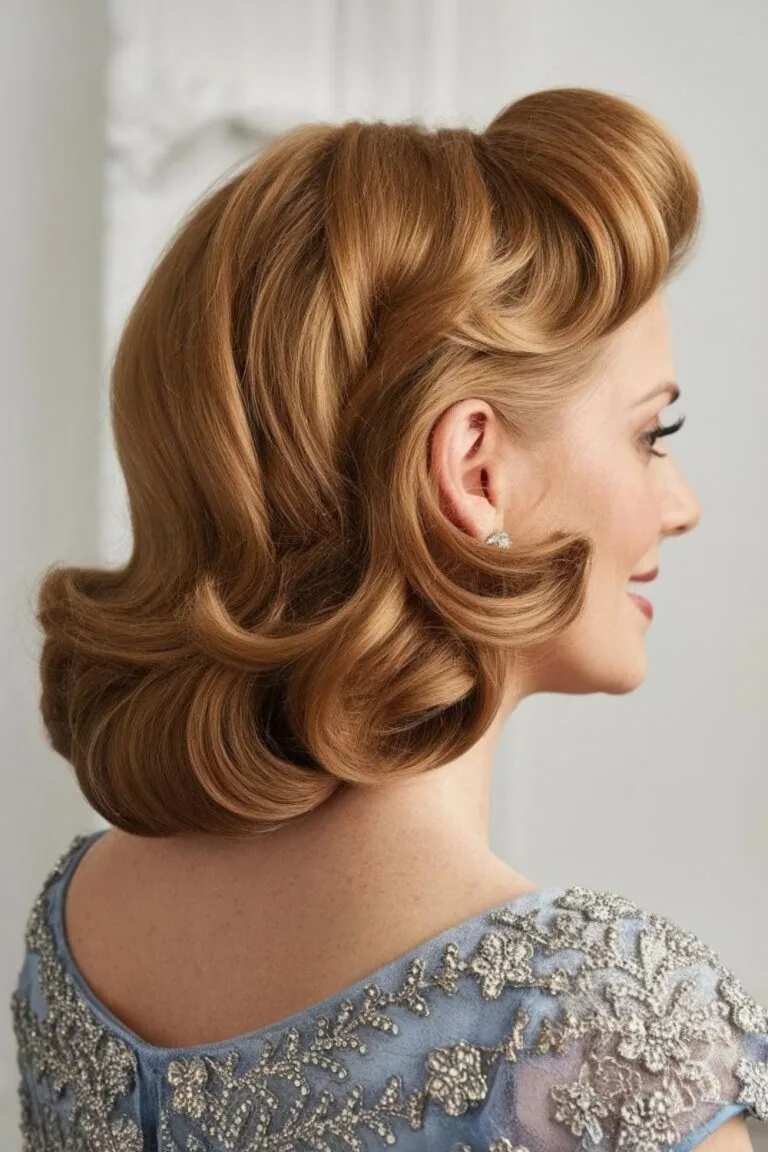
Medium curls with volume are joyful and flattering — full, bouncy curls that frame the face and move as you do. This is the style for the mum who loves her curls and wants them to be the feature of her look. Volume at the crown lifts the face, and the curls themselves give the style a celebratory, happy energy that suits a wedding perfectly.
How to style it: curl the hair in medium sections, pin each curl to cool so it holds, then brush through gently for soft, voluminous curls. Best for: medium-length hair with some natural wave or body, and anyone who wants their hair down with presence.
Pros: full of life, very photogenic, and it suits a joyful occasion. Cons: curls can drop in humidity, so a setting spray is worth using. Common mistake: curling every section the same way, which looks uniform rather than natural — vary the direction slightly.
Cost and time: 40 to 50 minutes. Who should avoid it: very fine hair that will not hold a curl. Quick verdict: bouncy, happy and completely wedding-appropriate.
19. Long Layers with Face-Framing Pieces
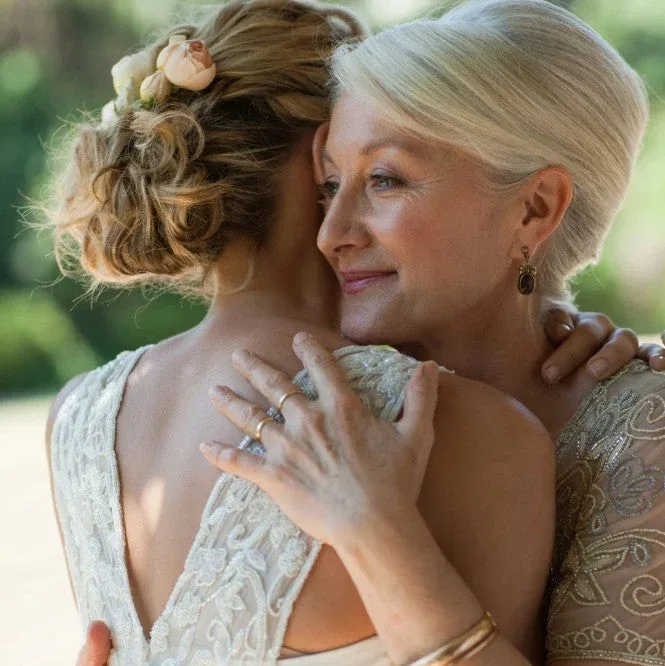
Long layers with face-framing pieces are the most versatile way to wear long hair to a wedding. The layers give the hair movement and shape, the face-framing pieces soften the face, and the length itself looks beautiful in photographs. It is elegant without being formal, and comfortable enough to wear from the first photograph to the last dance.
Best for: long hair, and mums who want to wear their hair down. How to style it: blow-dry the layers with a large round brush, curl the face-framing pieces away from the face, and finish with a shine spray. What to ask your stylist: for layers that start at the cheekbone and get longer toward the ends.
Pros: flattering, comfortable, and it moves beautifully. Cons: very long hair can feel heavy by evening, so a half-up option is worth considering. Common mistake: layers cut too short at the front, which can look choppy rather than soft.
Maintenance: a quick finger-comb revives the layers. Who should avoid it: very fine hair, which can look thin in long layers — add texture spray. Quick verdict: long, layered and lovely.
20. The Modern Beehive
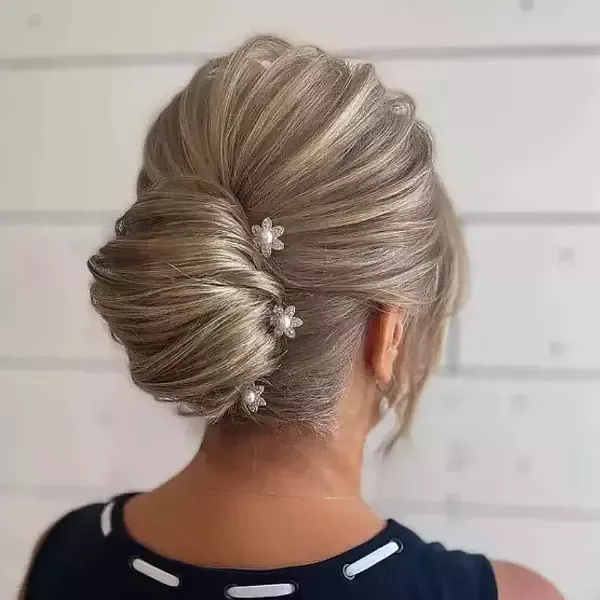
The beehive is back, and the modern version is softer, lower and far more wearable than the towering styles of the sixties. Volume is built at the crown, the sides are smooth, and the finish is polished rather than stiff. It is a wonderful choice for a formal wedding, and it looks magnificent in photographs beside a groom in a suit.
Why it works for the groom’s mum: height at the crown lifts the face and lengthens the neck, and the style has a clear, elegant silhouette. How to style it: backcomb the crown gently, smooth the top layer over it, and pin the sides neatly. Keep the height moderate — this is a modern beehive, not a costume.
Pros: very elegant, very photogenic, and it holds all day. Cons: it needs a stylist, and it can feel heavy if built too high. Common mistake: building the height too tall, which tips the style from elegant into fancy dress.
Cost and time: 45 to 60 minutes with a stylist. Who should avoid it: anyone who dislikes volume at the crown. Quick verdict: vintage glamour, modernised — and genuinely beautiful.
21. Vintage Finger Waves

Finger waves are pure vintage glamour — sculpted, glossy waves that lie close to the head in a beautiful S-shaped pattern. They are the style to choose for a vintage-themed wedding, or for any mum who loves the elegance of the 1920s and 1930s. On short to medium hair they are especially beautiful, and they photograph like a dream.
How to style it: this is a stylist’s job, using gel and a comb to sculpt the waves, then setting them with clips until they dry. Best for: short to medium hair, and vintage or formal weddings. What to ask your stylist: for waves that are sculpted but not stiff, with a little softness at the ends.
Pros: utterly glamorous, very distinctive, and it holds perfectly. Cons: it is a specialist style that takes time and a skilled stylist. Common mistake: attempting it at home without practice — the waves need a trained hand.
Maintenance: none at all once set. Who should avoid it: very long hair, which is harder to sculpt into finger waves. Quick verdict: the most glamorous vintage choice on this list.
22. The Soft Updo with a Pearl Comb
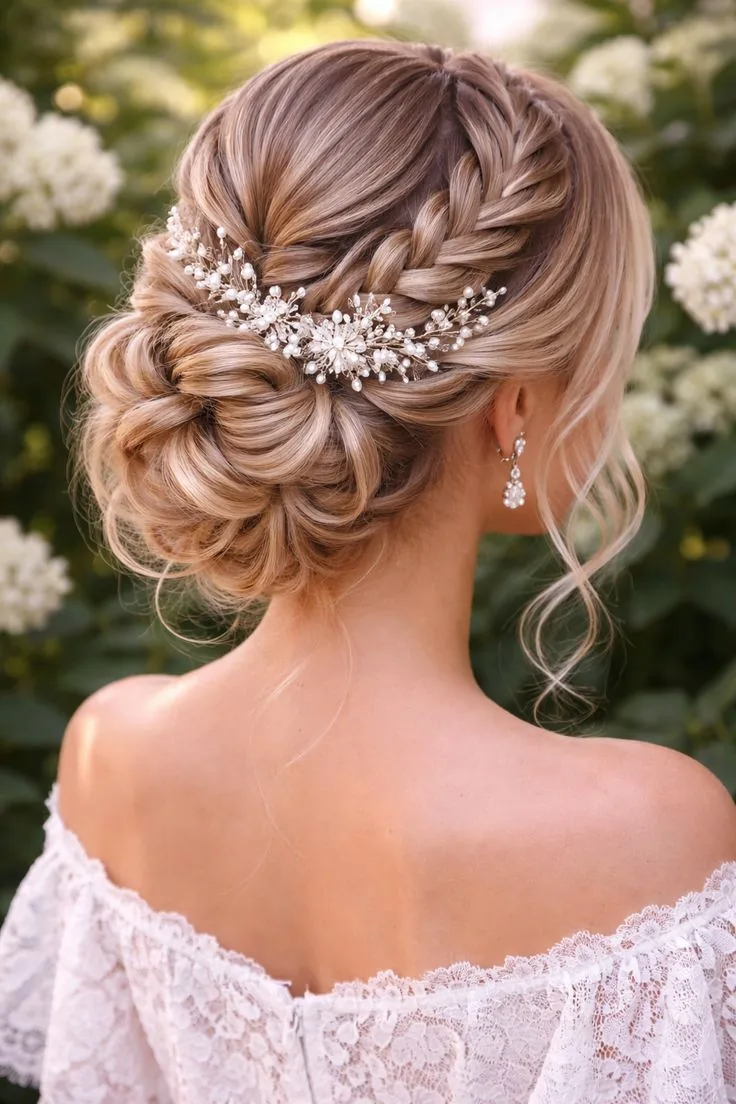
A soft updo with a pearl comb is the definition of understated wedding elegance. The updo itself is gentle and loose, with softness at the crown and tendrils at the face, and the pearl comb adds a single touch of occasion sparkle. It is the style to choose when you want to look special without looking overdone.
Best for: medium to long hair, and any wedding formality. How to style it: gather the hair into a soft, low updo, pin it loosely, then slide the pearl comb in above the bun or at the side. What to ask your stylist: for a comb that pins firmly, so it does not slide during dancing.
Pros: comfortable, elegant, and the comb photographs beautifully. Cons: a cheap comb can look cheap — choose one with real weight and lustre. Common mistake: placing the comb dead centre, which can look bridal; a little to the side is more flattering for the groom’s mum.
Cost and time: 30 to 45 minutes, plus the comb. Who should avoid it: nobody — this suits almost everyone. Quick verdict: soft, sparkling and perfectly pitched.
23. The Side Chignon with a Low Sweep
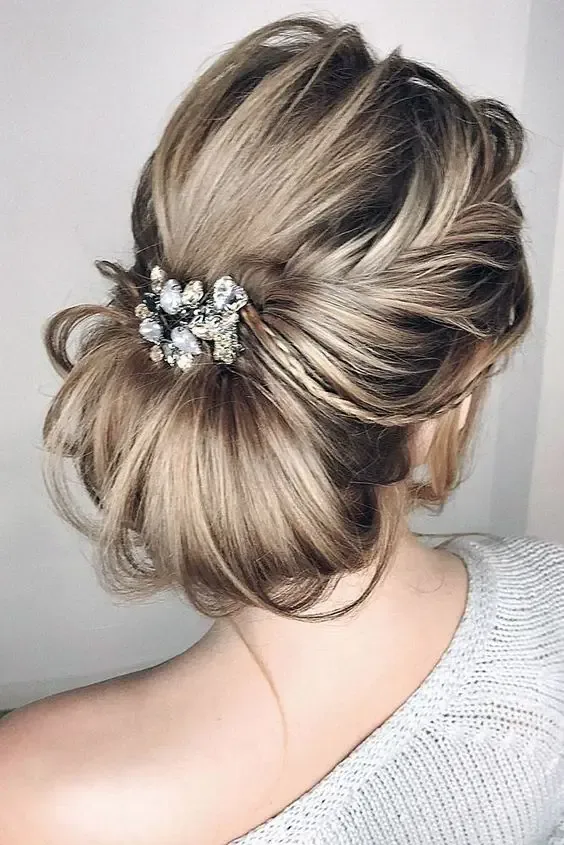
A side chignon is a lovely variation on the classic: the bun sits low and to one side, giving the style an asymmetry that photographs beautifully and shows off your neckline. The low sweep across the forehead adds softness, and the whole look feels a little more modern and a little less formal than a centred chignon.
How to style it: sweep the hair to one side, gather it low behind the ear, twist it into a chignon, and pin it securely. Best for: medium to long hair, and anyone wearing a dress with a one-shoulder or asymmetric neckline, which the side placement complements beautifully.
Pros: elegant, distinctive, and very photogenic from the side. Cons: it can feel unbalanced if you are not used to an asymmetric style — try it at the trial. Common mistake: placing the chignon too high, which loses the low, elegant line.
Maintenance: one pin check before the portraits. Who should avoid it: anyone who strongly prefers symmetry. Quick verdict: a small twist on a classic, with a big payoff in photographs.
24. The Polished High Bun
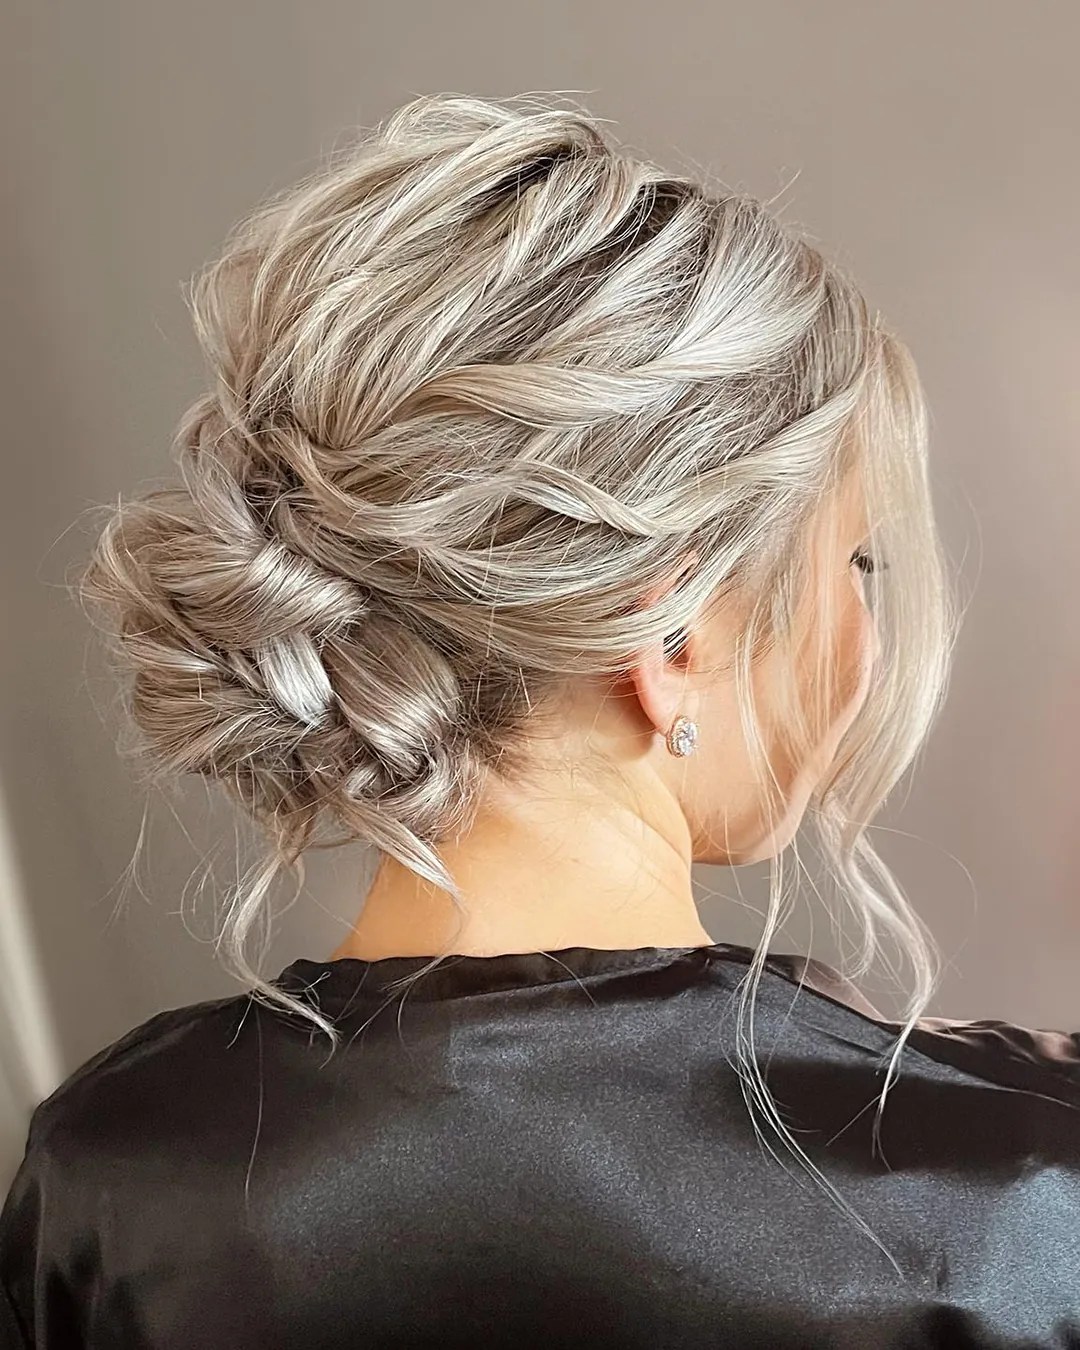
A polished high bun is clean, confident and completely practical. It lifts the face, shows off your cheekbones and earrings, and keeps your hair entirely out of the way for a long day of hugging, dancing and celebrating. It is a wonderful choice for a summer wedding or a warm venue, where keeping cool matters as much as looking good.
How to style it: smooth the hair up with a bristle brush, gather it at the crown, twist into a neat bun, and pin it firmly. A little shine serum gives it a polished finish. Best for: medium to long hair, and warm-weather weddings.
Pros: cool, secure, and very photogenic. Cons: a very tight bun can ache, so keep it firm but not drum-tight. Common mistake: a bun placed too far forward, which can look severe — the crown is the right spot.
Cost and time: about 30 minutes. Who should avoid it: very fine hair that slips — use a textured base. Quick verdict: neat, graceful, and built to last all day.
25. Loose Waves with a Centre Part
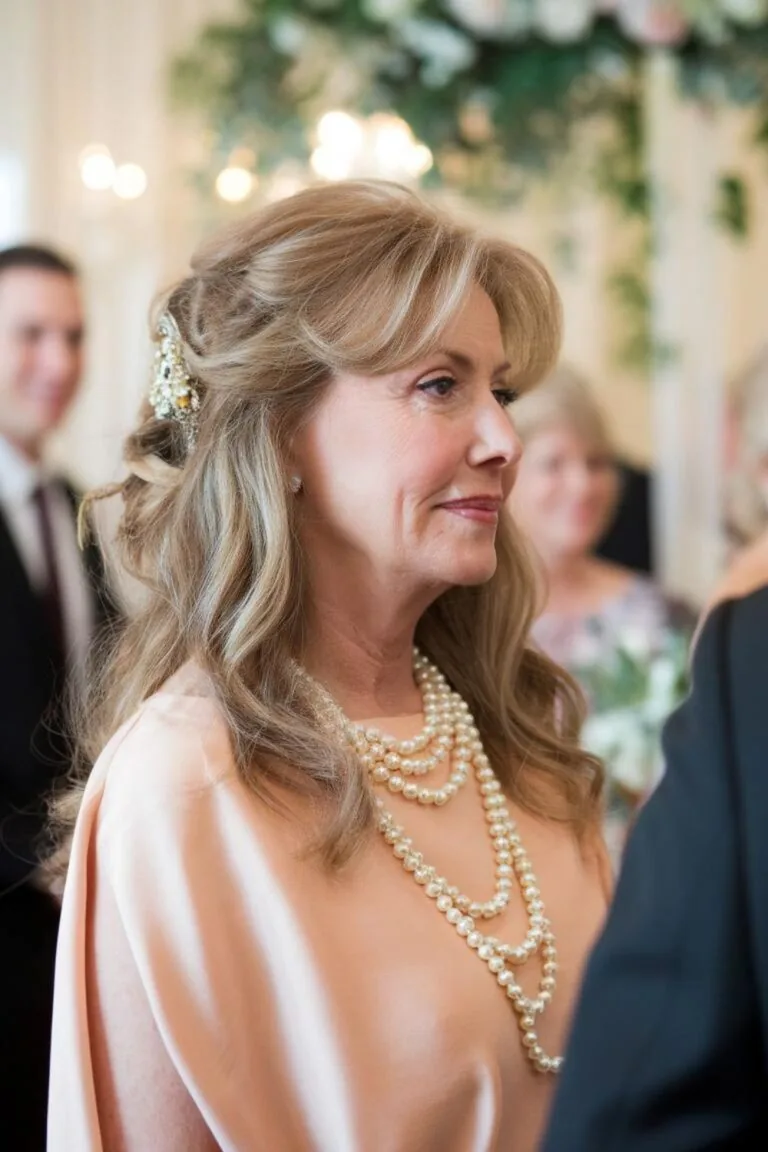
Loose waves with a centre part are relaxed, modern and effortlessly flattering. The centre part gives the style symmetry, the waves give it movement, and the whole look feels natural rather than over-styled. It is a beautiful choice for a relaxed or outdoor wedding, where a formal updo would feel out of place.
Best for: medium to long hair, and mums who want their hair down. How to style it: part the hair in the centre, curl the length in large sections, brush through for soft waves, and finish with a light texturising spray. What to ask your stylist: for waves that start below the cheekbone.
Pros: comfortable, natural, and easy to refresh. Cons: a centre part can look severe on some face shapes — try it at the trial and switch to a side part if it does not suit you. Common mistake: waves curled too tightly, which reads as formal rather than loose.
Maintenance: a finger-comb revives the waves. Who should avoid it: anyone whose face shape suits a side part better. Quick verdict: relaxed, modern and lovely.
26. The Half-Up Twisted Crown
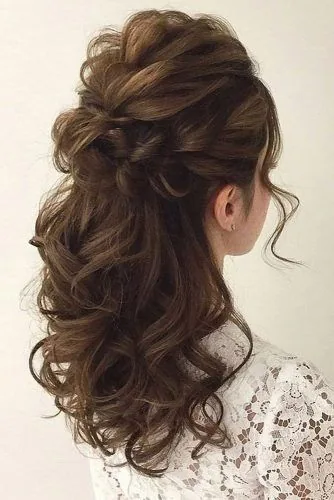
A half-up twisted crown keeps the hair off your face while leaving the length free, which makes it a perfect compromise for the wedding day. Two twists meet at the back of the head and pin into a soft crown, giving the style shape from every angle — including the back, which appears in so many wedding photographs.
Best for: long hair, and anyone who wants to wear their hair down without fighting it all day. How to style it: take a section from each side, twist them toward the back, cross them over, and pin securely. Add a little wave to the loose length first for movement.
Pros: romantic, photogenic, and cooler than a full updo on a warm day. Cons: the loose length can tangle in a breeze outdoors. What to ask your stylist: for twists pinned with criss-crossed bobby pins, not a single clip.
Maintenance: re-pin the crown once during the day. Who should avoid it: very short hair, which cannot form the twists. Quick verdict: the best of both worlds — up and down at once.
27. The Braided Low Bun
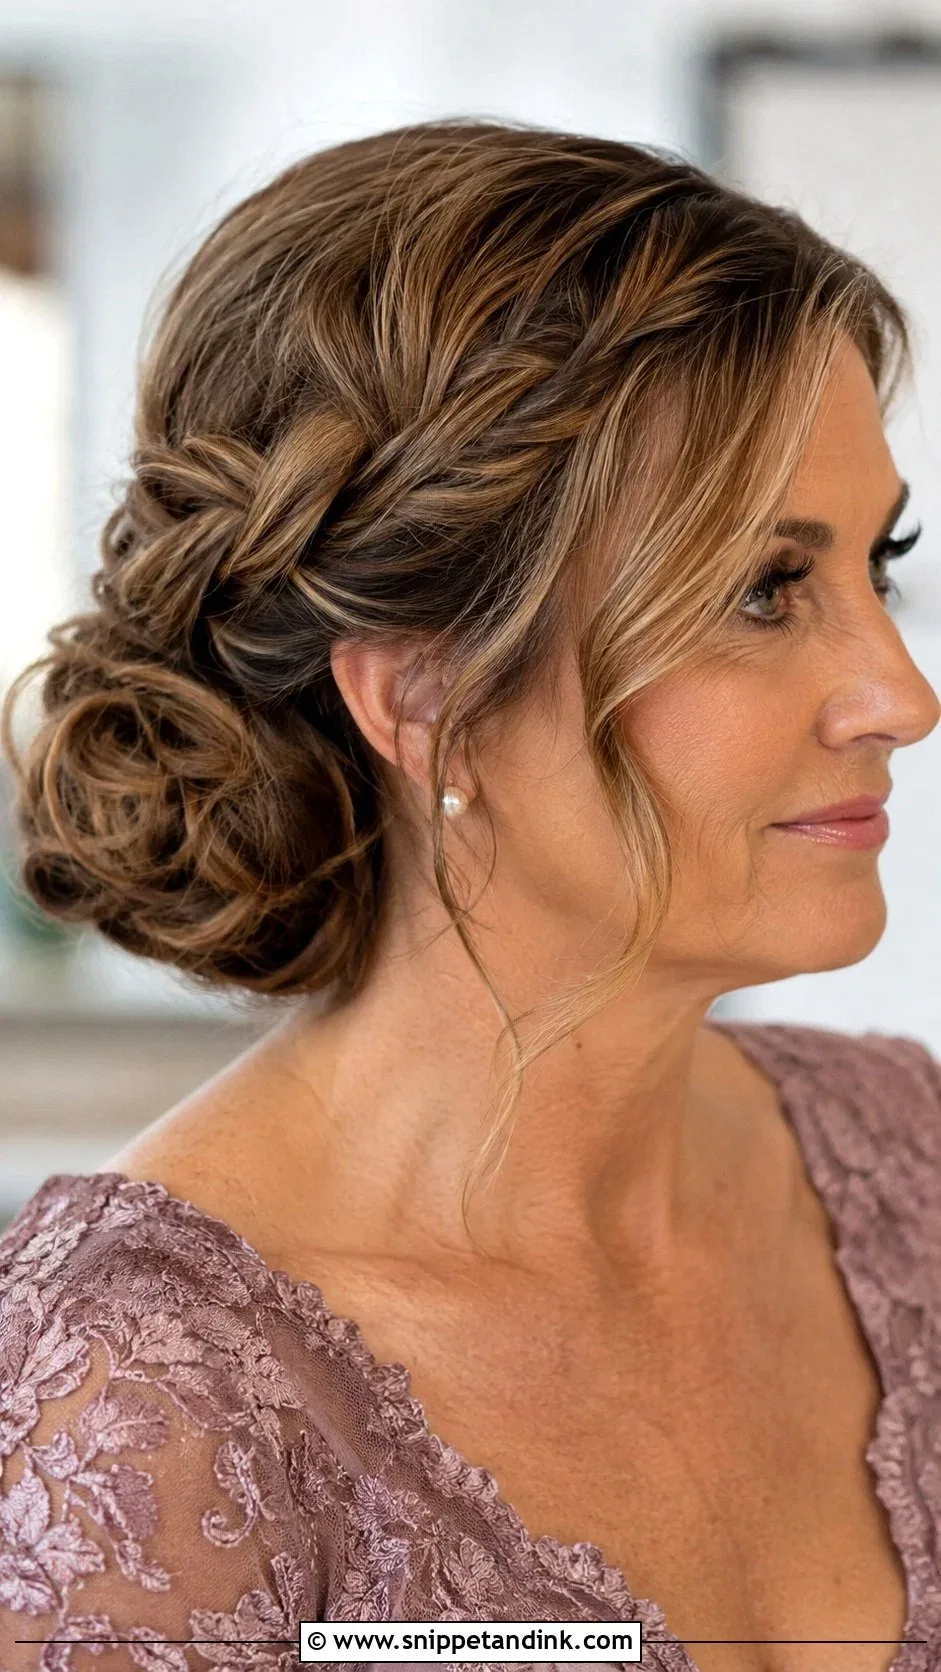
A braided low bun combines two of the most reliable wedding styles into one: a braid that locks the front hair away from your face, and a low bun that anchors the ends. Nothing is left loose for the wind to grab, and the braid adds a beautiful detail that shows in photographs from the front and the side.
Best for: long hair, and outdoor weddings where the hair needs to stay put. How to style it: braid from the front hairline down one side or straight back, then coil the remaining hair into a low bun and pin it. Keep the braid slightly loose for a softer, modern look.
Pros: completely secure, lasts all day, and looks detailed in photos. Cons: it takes longer than a simple bun. Common mistake: braiding too tightly, which can ache by evening.
Cost and time: 45 minutes. Who should avoid it: short hair, which cannot form the braid. Quick verdict: secure, detailed and beautifully photogenic.
28. Sleek Straight with a Glass Finish
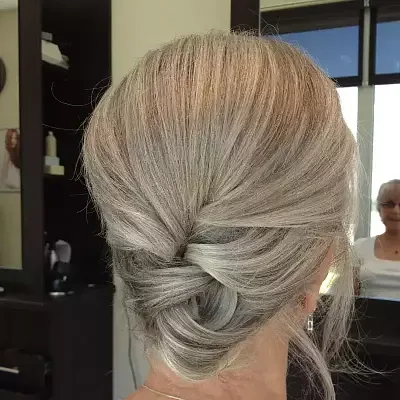
Sleek, straight hair with a glass-like shine is modern, polished and quietly luxurious. It suits the mum who loves her hair straight and wants it to look its absolute best, with a mirror shine that catches the light in photographs. The key is condition: sleek hair shows every split end, so a trim the week before is essential.
How to style it: blow-dry smooth, flat-iron in small sections, and finish with a shine serum smoothed over the surface, never rubbed in. Best for: medium to long straight hair in good condition. What to ask your stylist: for a trim a week before, and a finish with visible shine.
Pros: very chic, very modern, and it shows off healthy hair beautifully. Cons: it shows frizz quickly in humidity, and it can look flat in photographs if there is no volume at the crown. Common mistake: skipping the trim — sleek hair forgives nothing.
Maintenance: a quick smooth with your palms. Who should avoid it: very curly hair, unless you are happy to straighten it, and humid outdoor weddings. Quick verdict: simple, shining and sophisticated.
29. The Wavy Bob with Curtain Bangs
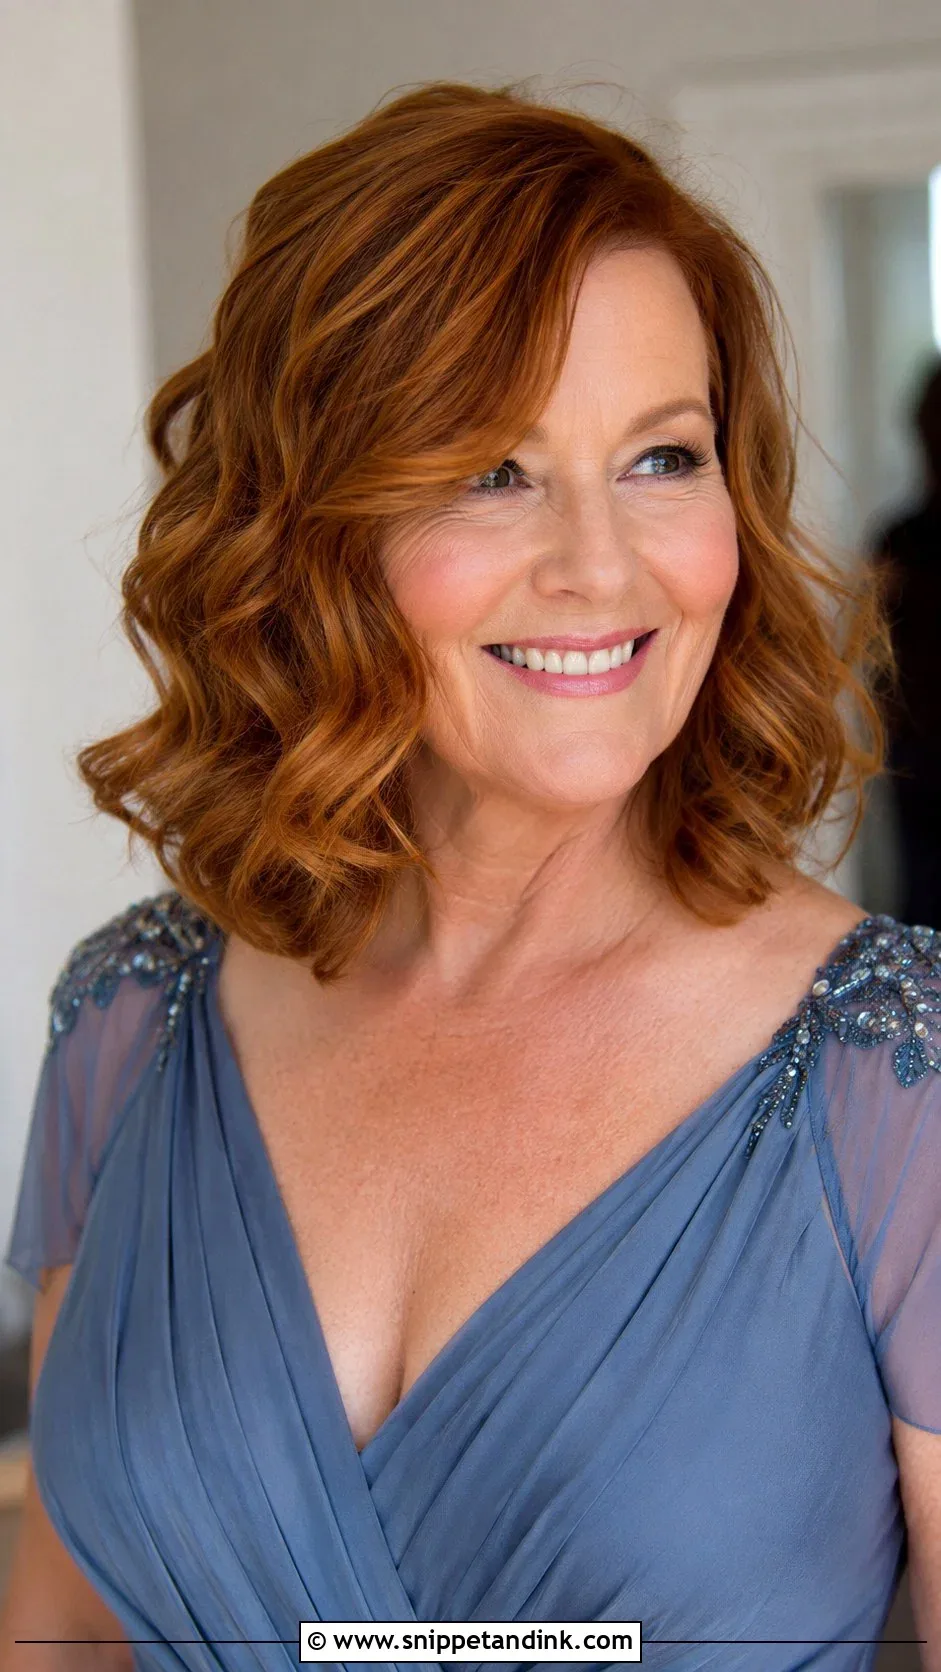
A wavy bob with curtain bangs is soft, modern and wonderfully flattering. The waves give the bob movement, the curtain bangs frame the forehead and soften the face, and the whole style feels fresh rather than formal. It is a beautiful choice for the mum who wants to look current without trying too hard.
Best for: short to medium hair with some natural wave. How to style it: curl the bob in large sections, brush through for soft waves, and part the curtain bangs softly in the middle so they fall to each side. What to ask your stylist: for bangs that part softly, not a blunt fringe.
Pros: fresh, flattering, and easy to wear all day. Cons: the bangs need a little attention in humidity. Common mistake: bangs cut too short, which can look severe rather than soft.
Maintenance: a quick finger-comb revives the waves. Who should avoid it: very straight hair that will not hold a wave without help. Quick verdict: modern, soft and completely wedding-ready.
30. The Chignon with Fresh Flowers
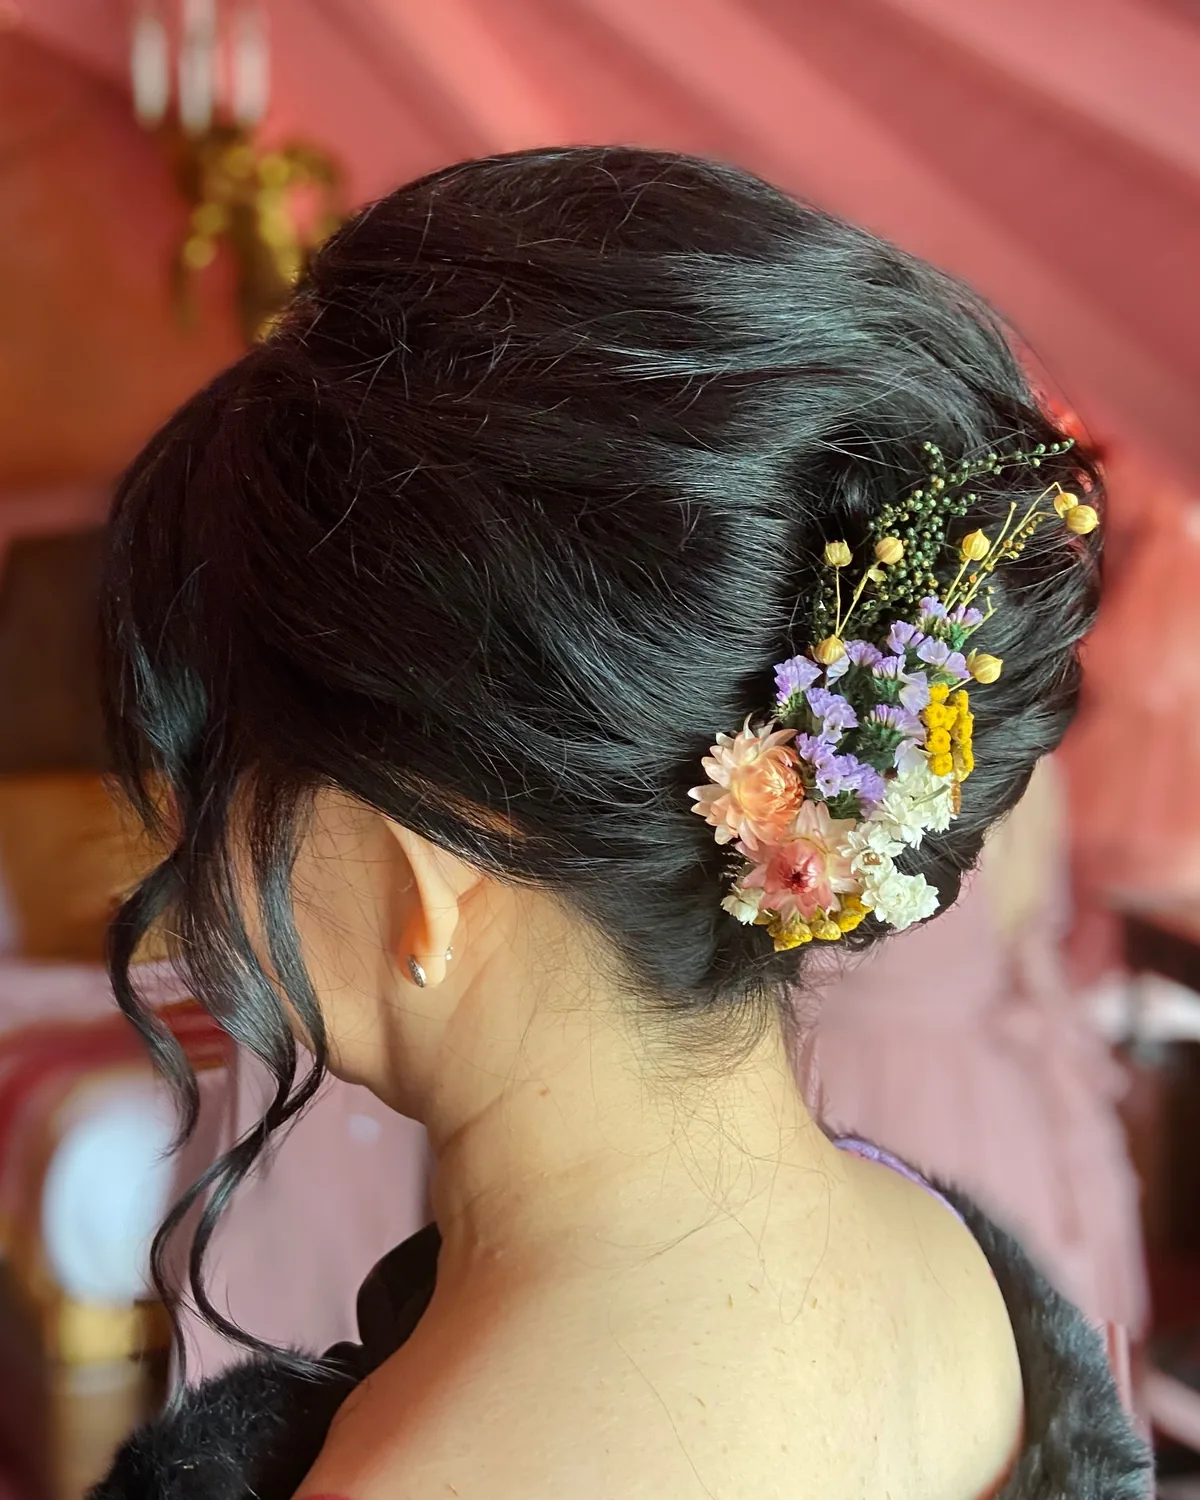
A chignon with fresh flowers is romantic, natural and perfectly suited to a garden or outdoor wedding. The chignon itself is classic and secure, and a few small fresh flowers — chosen to echo the wedding flowers — add colour and softness. It is a lovely way to connect your look to the day without ever competing with the bride.
How to choose the flowers: ask the florist for a few small, hardy blooms that will last the day, and avoid anything that wilts quickly. How to style it: form a low chignon, pin it well, then tuck the flowers in along the top edge. Best for: medium to long hair, and garden, outdoor or spring weddings.
Pros: romantic, personal, and it ties your look to the wedding flowers. Cons: fresh flowers need to be added on the morning, and they can wilt in heat. Common mistake: using too many flowers, which can look bridal — a few small blooms are enough.
Cost and time: 30 minutes plus the flowers from the florist. Who should avoid it: very formal indoor weddings, where flowers can look out of place. Quick verdict: a small, beautiful, personal touch.
31. The Low Twist with a Gold Clip
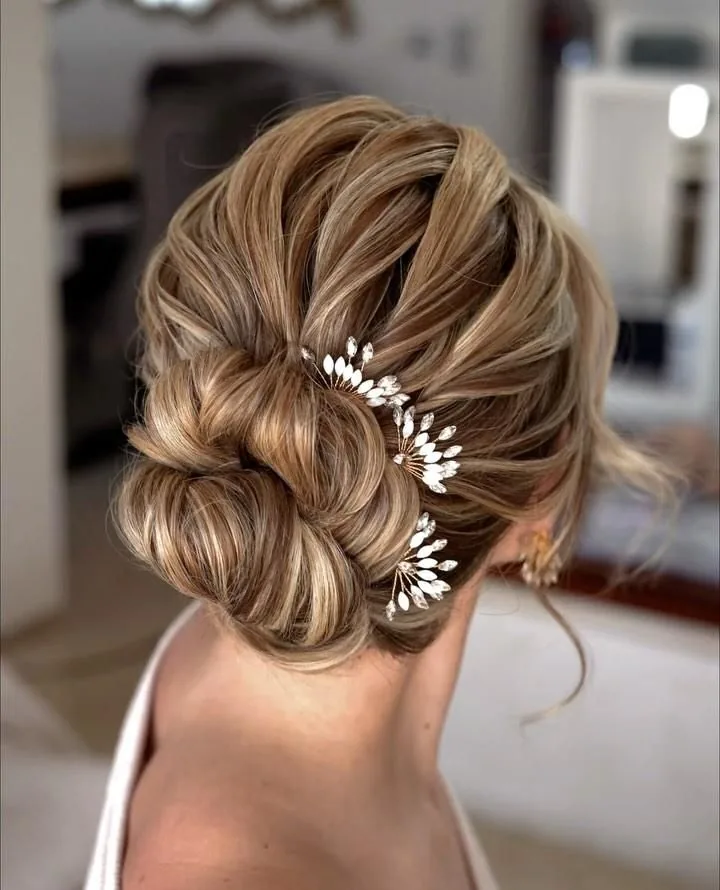
A low twist with a gold clip is elegant, simple and quietly glamorous. The twist itself is soft and secure, and the gold clip adds a single point of shine that catches the light in photographs. It is the style to choose when you want one beautiful detail rather than a complicated updo.
Best for: medium to long hair, and mums who like a clean, simple look. How to style it: twist the hair low at the nape, pin it, then place a gold clip where the twist meets the head. What to ask your stylist: for a clip that clamps firmly, so it stays put through dancing.
Pros: comfortable, secure, and the clip does the decorative work. Cons: the clip needs to be good quality — a flimsy one will slip. Common mistake: placing the clip too low, where it disappears behind the twist.
Maintenance: none. Who should avoid it: nobody — this suits almost everyone. Quick verdict: one twist, one clip, and complete elegance.
32. The Textured Lob with Beachy Waves
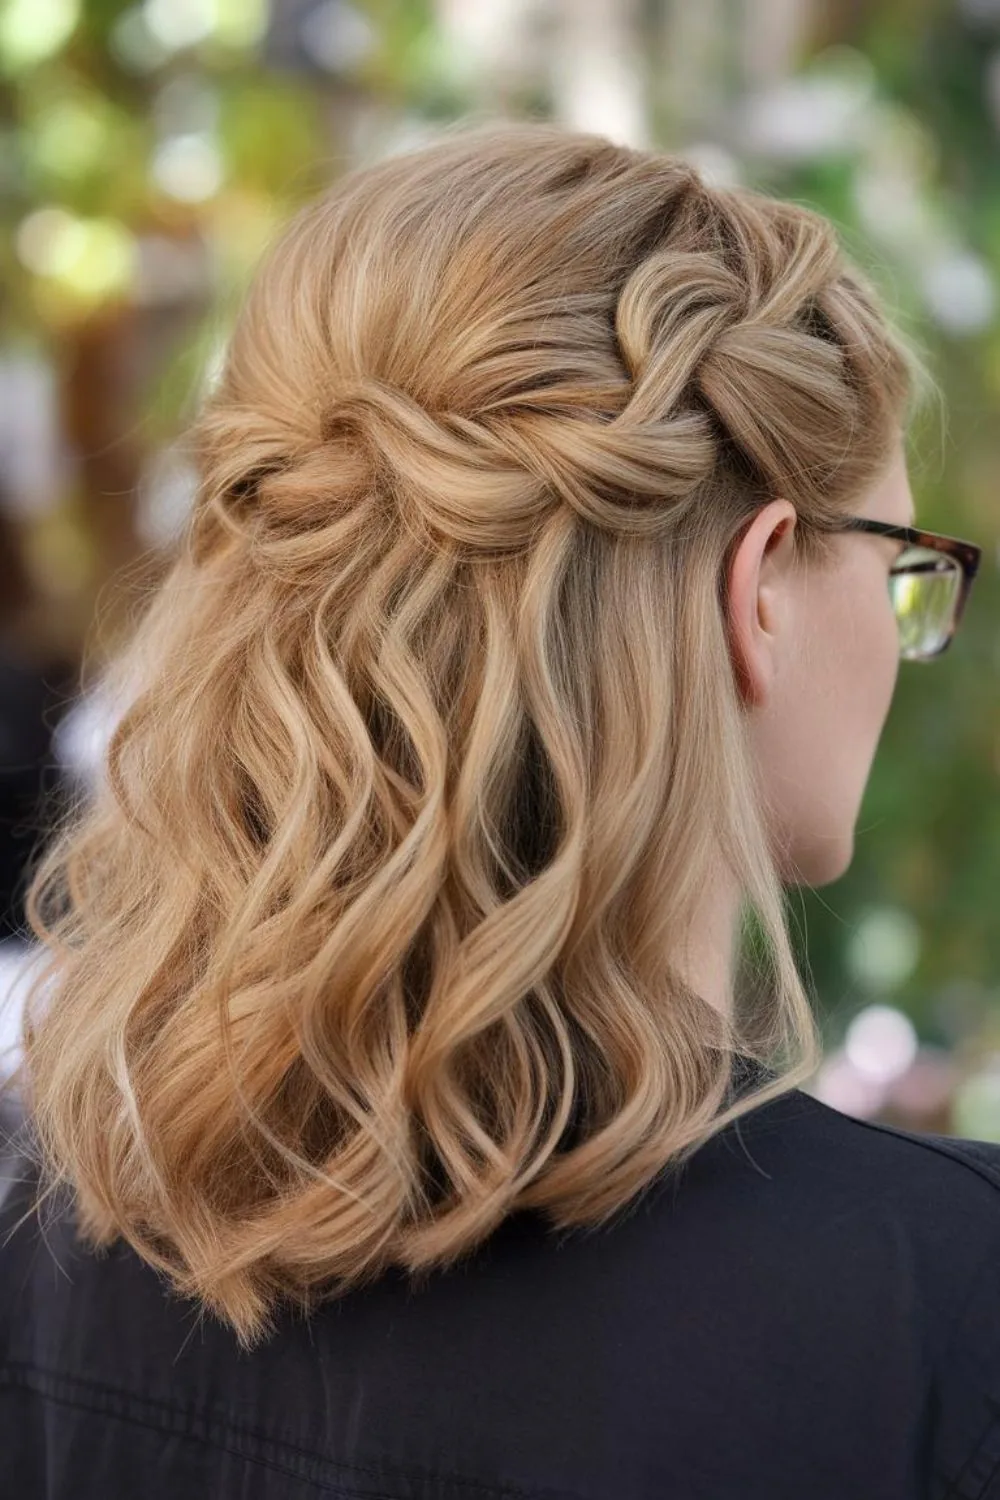
A textured lob with beachy waves is relaxed, modern and full of movement. It is the style for a beach wedding, a destination wedding, or any celebration where the mood is joyful rather than formal. The texture keeps the waves from looking too done, and the shoulder length keeps the style comfortable in warm weather.
How to style it: add texture spray to damp hair, curl in large, varied sections, then tousle gently with your fingers for a beachy finish. Best for: medium hair, and relaxed or destination weddings. What to ask your stylist: for texture and movement, not a polished curl.
Pros: comfortable, modern, and it looks better as it loosens. Cons: it can look too casual for a very formal wedding, so judge the formality carefully. Common mistake: over-curling, which loses the relaxed beachy feel.
Cost and time: about 35 minutes. Who should avoid it: very formal church weddings. Quick verdict: relaxed, joyful and completely at home by the sea.
33. The Classic Bun with a Hat or Fascinator
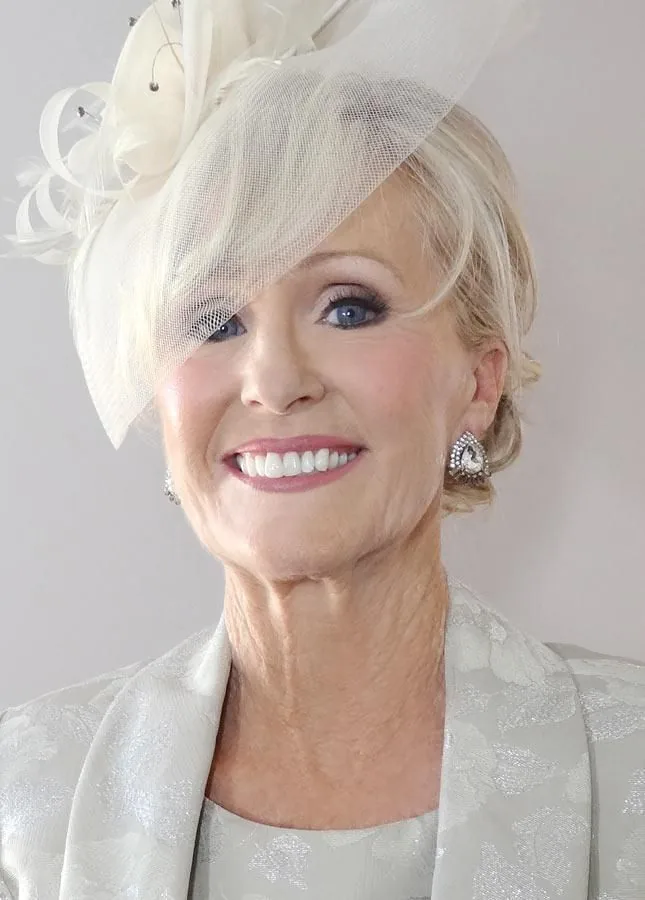
If you are wearing a hat or a fascinator, your hairstyle needs to work with it, not against it. A classic low bun is the perfect partner: it sits below the hat, keeps the hair neat and secure, and lets the hat be the statement. It is the traditional choice for a formal wedding, and it still looks wonderful today.
How to style it: form a low, neat bun at the nape, pin it firmly, then position the hat or fascinator and pin it through the bun for security. Best for: medium to long hair, and formal weddings where a hat is expected. What to ask your stylist: to style your hair with the hat present, so the placement is exactly right.
Pros: traditional, elegant, and the hat stays secure all day. Cons: the hat can flatten the top of the hair, so a little volume at the crown helps. Common mistake: styling the hair first and adding the hat as an afterthought — always style them together.
Maintenance: check the hat pins before the portraits. Who should avoid it: nobody wearing a hat — this is the style made for it. Quick verdict: the hat is the star, and the bun is its perfect support.
34. Soft Curls with a Headband

Soft curls with a headband are pretty, comfortable and wonderfully easy to wear. The curls give the style softness and movement, and the headband — whether it is a slim sparkle band or a soft fabric one — keeps the hair off your face and adds a touch of occasion sparkle. It is a lovely choice for a relaxed wedding, or for a mum who does not want an updo.
Best for: medium to long hair, and anyone who wants their hair down with a little structure. How to style it: curl the hair softly, brush through, then place the headband a little behind the hairline and pin it discreetly at each side.
Pros: comfortable, pretty, and it keeps the hair off your face. Cons: a headband can slip, so pin it well and choose one with a little grip. Common mistake: placing the headband too far forward, which can look like a schoolgirl style rather than an elegant one.
Cost and time: about 30 minutes plus the headband. Who should avoid it: very short hair, where a headband can dominate. Quick verdict: soft, sparkling and simple.
35. The Elegant French Braid Updo

A French braid that flows into a soft updo is detailed, secure and beautifully romantic. The braid locks the front hair away from your face, the updo anchors the ends, and the whole style has a handmade, intricate quality that photographs wonderfully. It is a lovely choice for a mum who wants something a little different from a plain bun.
Best for: medium to long hair, and anyone who loves braids. How to style it: French-braid from the front hairline, working back, then gather the remaining hair into a soft low bun. Keep the braid slightly loose for a modern, soft finish.
Pros: secure, detailed, and it lasts all day. Cons: it takes longer than a simple updo, and it needs a stylist who braids well. Common mistake: braiding too tightly, which can ache by evening.
Maintenance: almost none. Who should avoid it: very short hair, which cannot form the braid. Quick verdict: intricate, romantic and completely secure.
36. The Short Crop with Textured Volume
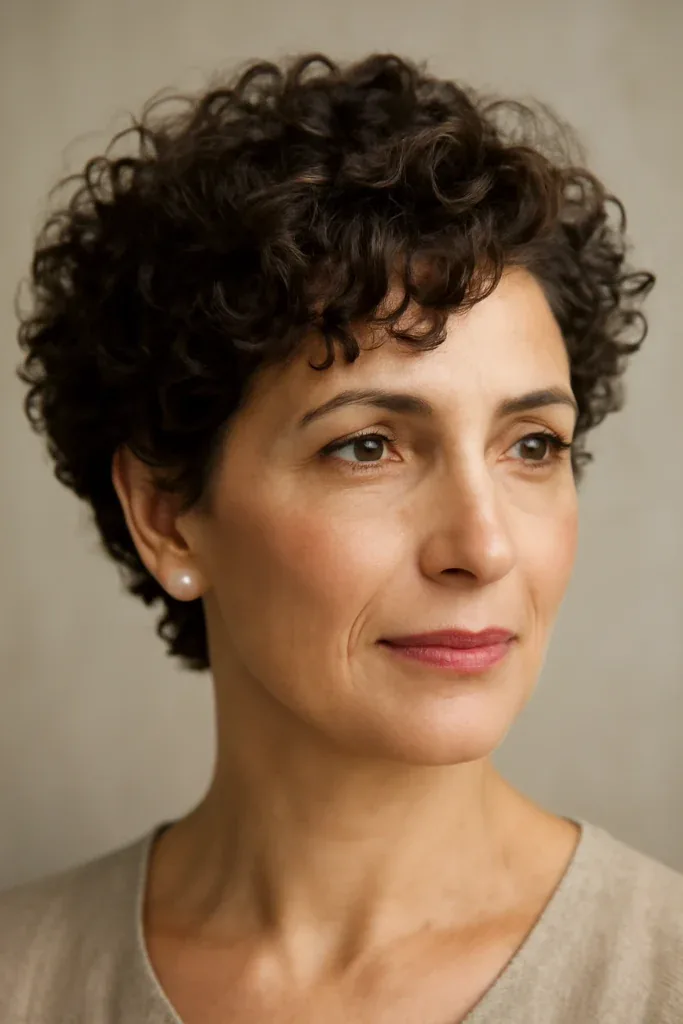
A short crop with textured volume is confident, chic and modern. Texture on top gives the cut lift and life, the sides stay neat, and a little styling paste is all it takes to make it wedding-ready. It is the style for the mum who loves her short hair and wants it to look its absolute best, not hidden under pins.
Why it works: a short crop shows off your face and your earrings, and it needs no maintenance at all during the day. How to style it: add texturising paste, lift the top for volume, and shape the front softly to one side. Best for: short hair, and anyone who already wears a crop.
Pros: no pins, no aching, no worrying — it simply stays. Cons: it cannot be dressed up with an updo, so the cut itself must be good. Common mistake: over-styling it into stiffness; a crop should move.
Cost and time: the quickest style on this list, often 15 minutes. Who should avoid it: nobody who already wears a crop. Quick verdict: short, chic, and completely worry-free.
37. The Side-Swept Bob
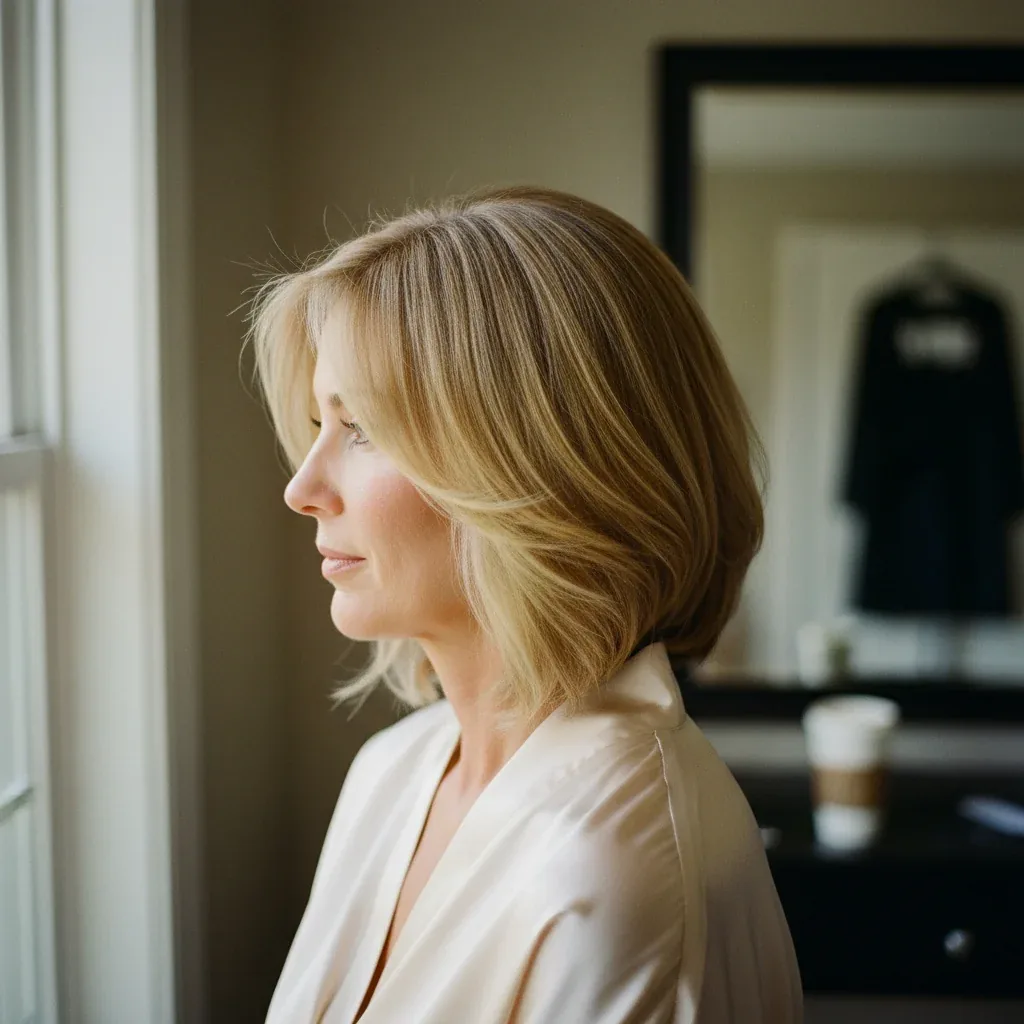
A side-swept bob is sleek, modern and wonderfully flattering. Sweeping the bob to one side gives it shape and movement, shows off your neckline, and keeps the hair off one side of your face. It is a beautiful choice for the mum with a bob who wants a little more drama than her everyday style.
Best for: short to medium hair, straight or slightly wavy. How to style it: part the hair deeply to one side, smooth it with a flat iron or a round brush, and sweep the longer side across the forehead. Tuck the shorter side behind the ear.
Pros: chic, low maintenance, and very photogenic. Cons: the sweep can fall forward in photographs if it is not pinned discreetly. Common mistake: a sweep so deep it covers one eye — keep it above the brow.
Maintenance: a quick smooth with your palms. Who should avoid it: very curly hair, unless you are happy to smooth it. Quick verdict: a small sweep, a big difference.
38. The Glamorous Updo with Volume at the Crown
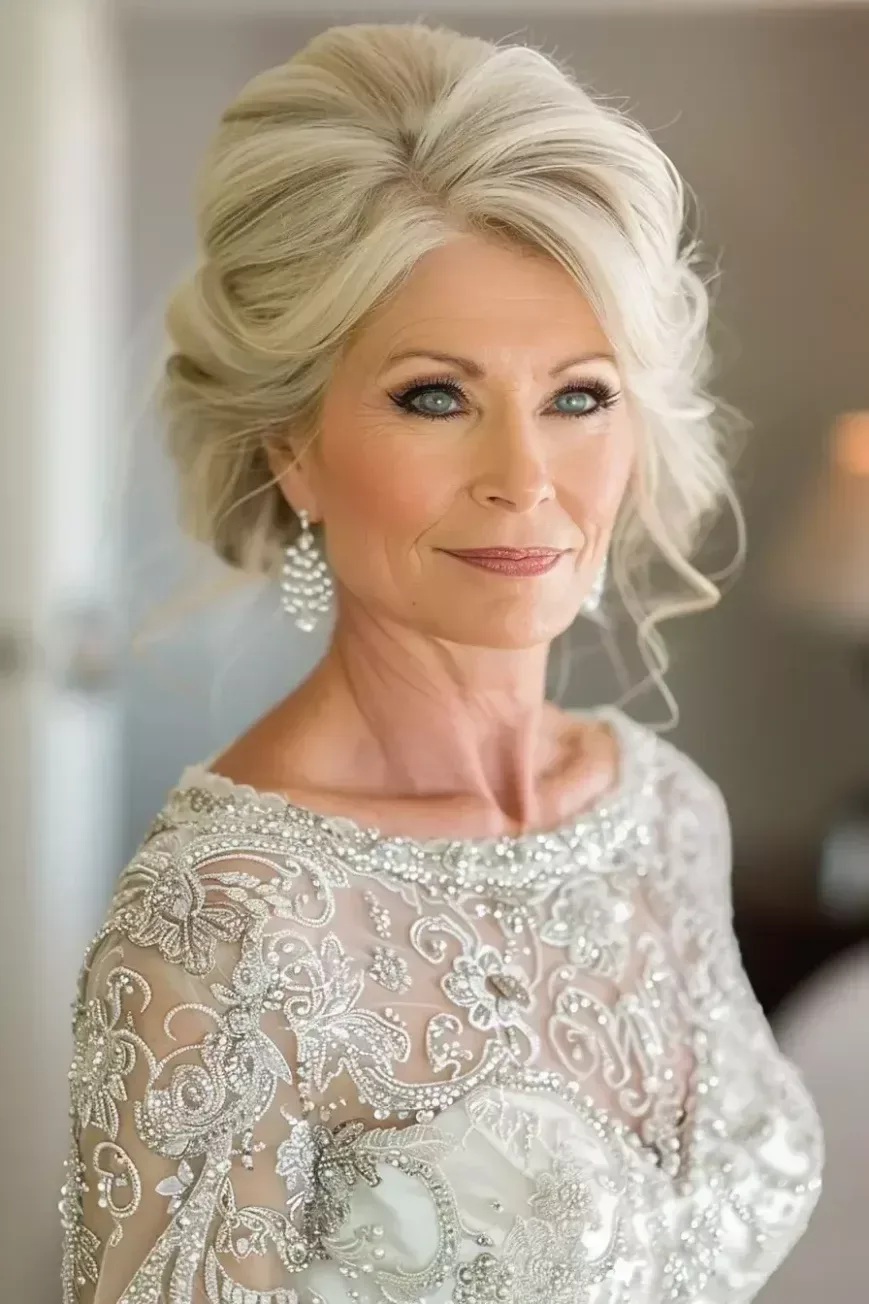
A glamorous updo with volume at the crown is the style for the mum who wants to look her most polished. Height at the crown lifts the face, the updo itself is secure and elegant, and the whole look has a celebratory, red-carpet quality. It is a wonderful choice for a formal evening reception, where the light catches the volume as you move.
How to style it: backcomb the crown gently for volume, smooth the top layer over it, then gather the hair into a soft updo at the back. Best for: medium to long hair, and formal weddings. What to ask your stylist: for volume that is soft, not stiff, and an updo that feels comfortable.
Pros: very elegant, very photogenic, and it holds all day. Cons: it needs a stylist, and too much volume can look dated — keep it moderate. Common mistake: building the height too tall.
Cost and time: 45 to 60 minutes. Who should avoid it: anyone who dislikes volume at the crown. Quick verdict: glamour with lift, and a wonderful evening look.
39. The Loose Braid Romantic Updo
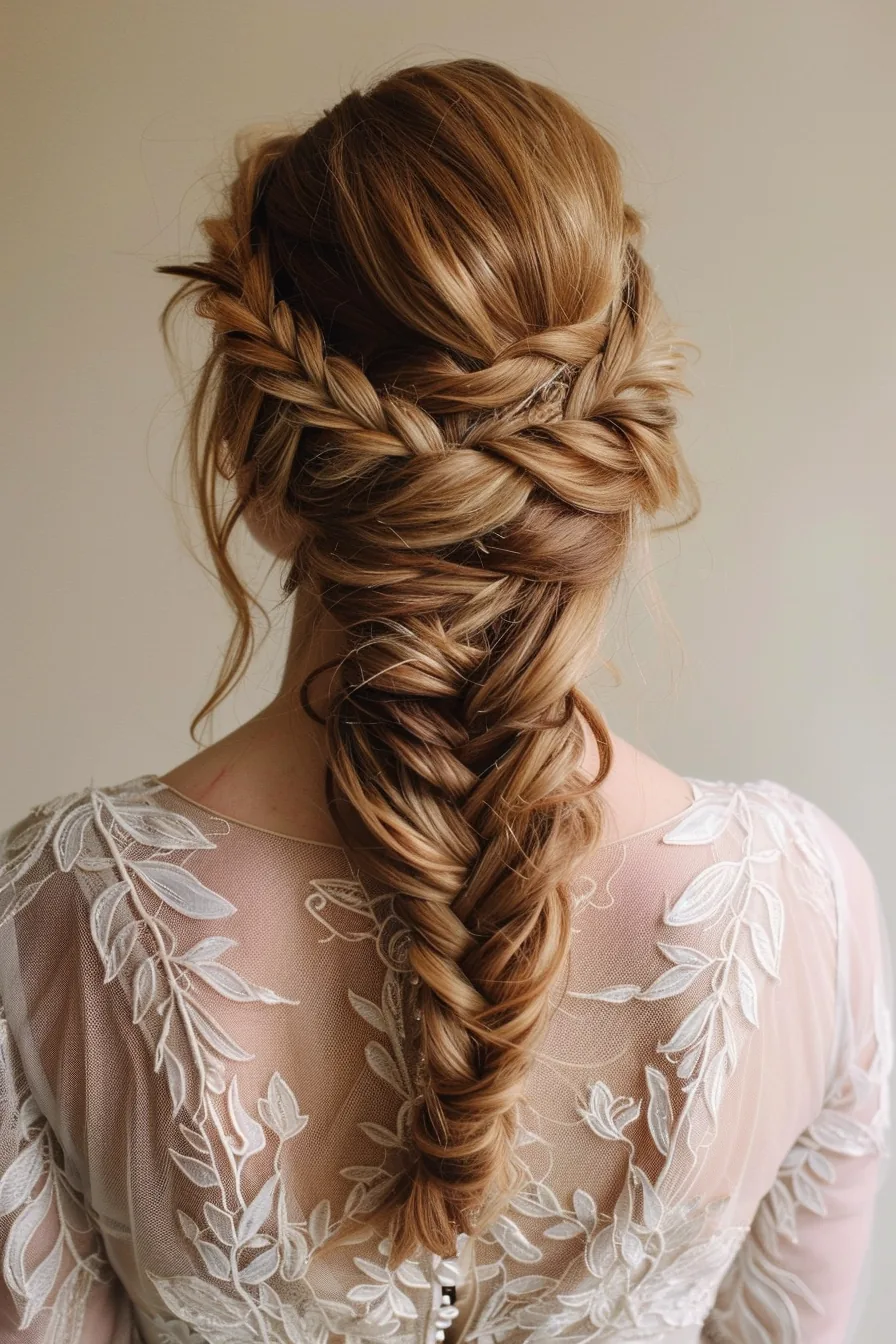
A loose braid woven into a romantic updo is soft, feminine and full of charm. The braid is kept deliberately loose, so it looks gentle rather than severe, and the updo beneath it is soft and textured. It is the style to choose for a romantic or garden wedding, where a formal updo would feel too stiff.
Best for: medium to long hair, and romantic or outdoor weddings. How to style it: braid loosely from one side, then gather the hair into a soft low updo, leaving tendrils at the face. Gently pull at the braid for fullness.
Pros: romantic, secure, and it improves as it loosens. Cons: a very loose braid can come undone if it is not pinned well, so use enough pins. Common mistake: pulling the braid apart too aggressively, which can undo it entirely.
Maintenance: a quick pin check. Who should avoid it: very short hair. Quick verdict: romance with structure, and a beautiful garden-wedding choice.
40. The Sophisticated Shag with Soft Layers
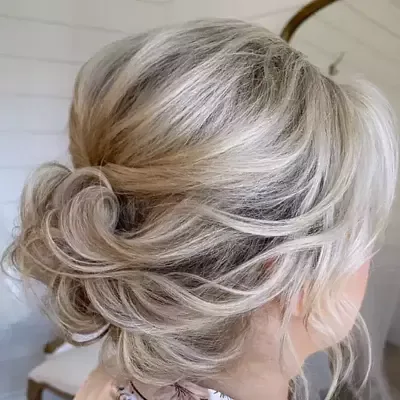
A sophisticated shag with soft layers is the most modern choice for the mum who wants texture and movement. The layers give the style life, the soft ends keep it from looking harsh, and the whole cut feels fresh and current. It is a wonderful choice for a mum who wants to look stylish rather than formal.
Best for: medium hair, and anyone who loves texture. How to style it: add texture spray, blow-dry with your fingers for movement, and finish with a light wax on the ends. What to ask your stylist: for layers that are soft, not choppy, and a finish that moves.
Pros: modern, flattering, and easy to refresh. Cons: it can look too casual for a very formal wedding, so judge the formality carefully. Common mistake: over-texturising, which can look messy rather than modern.
Cost and time: a cut and a blow-dry. Who should avoid it: very formal weddings. Quick verdict: modern, moving and full of life.
41. The Timeless Updo with a Sparkle Comb
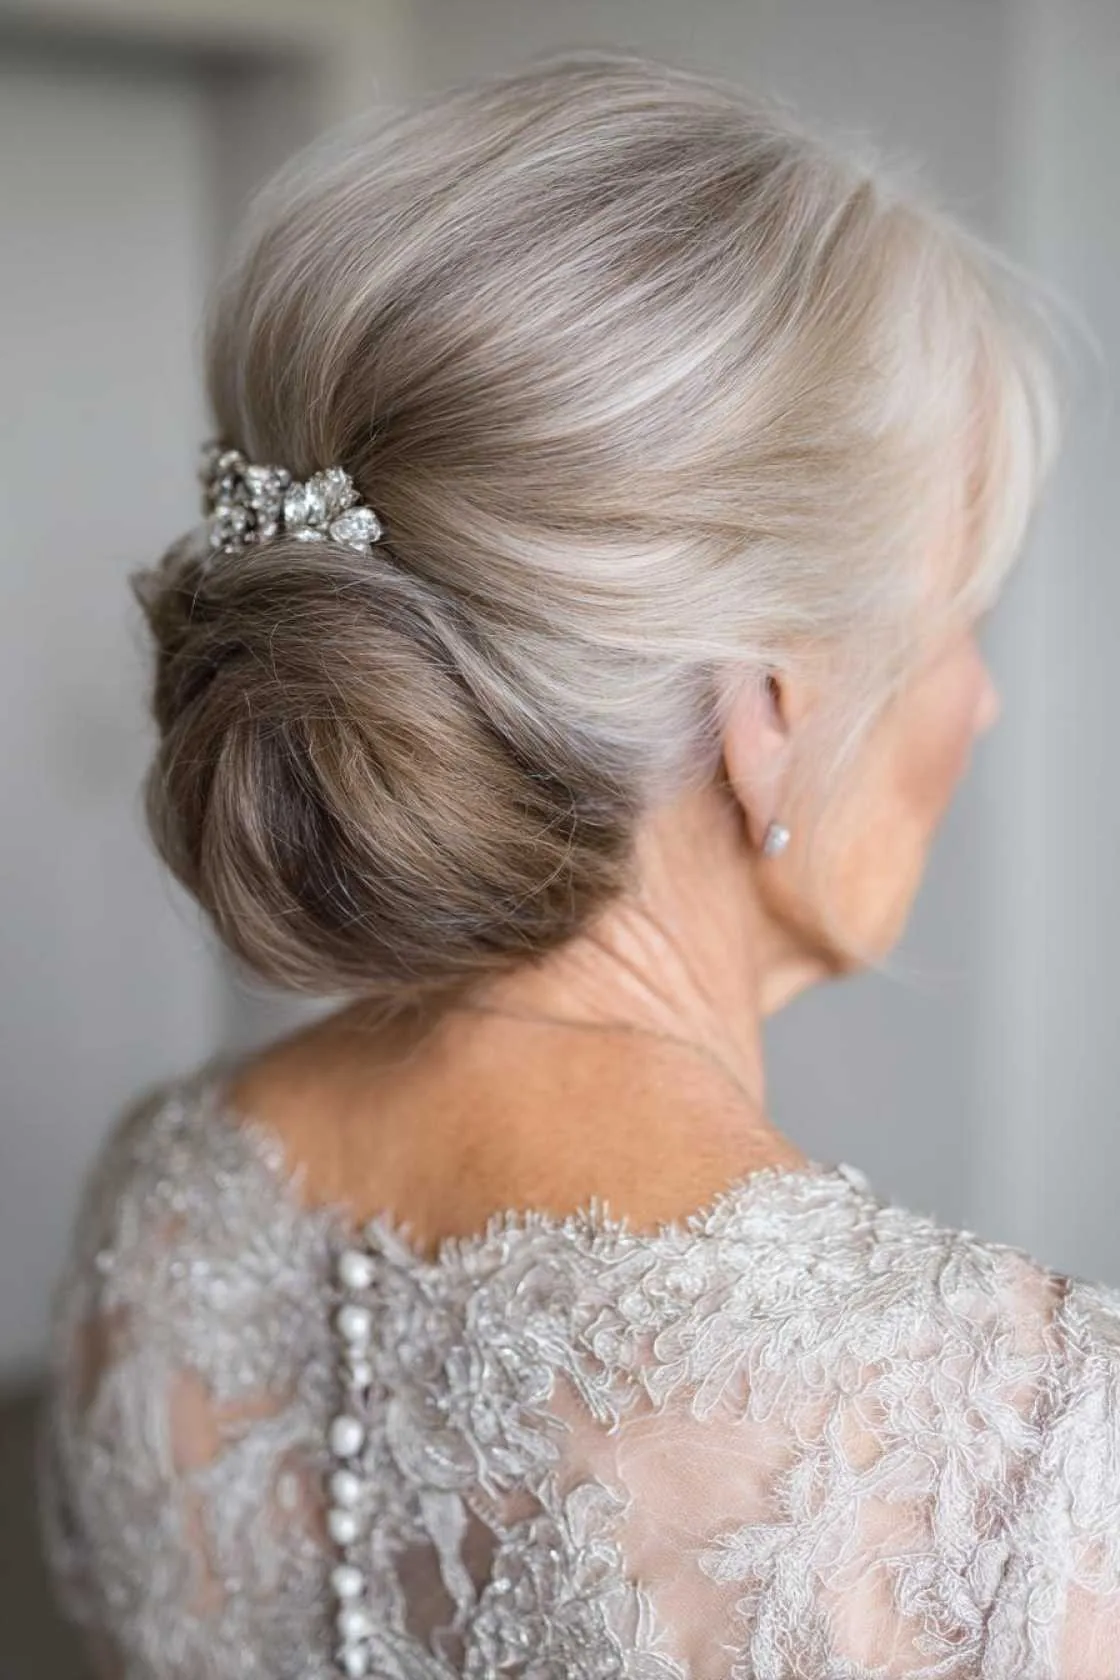
The timeless updo with a sparkle comb is the perfect final style on this list: a classic, soft updo, polished and secure, with a single sparkle comb that catches the light in every photograph. It is elegant, appropriate, comfortable, and just special enough for the day your son gets married. It is the style that says you thought about this, and you got it exactly right.
Best for: medium to long hair, and any wedding formality. How to style it: gather the hair into a soft, low updo, pin it well, then slide the sparkle comb in at the side, where the light catches it. What to ask your stylist: for a comb that pins firmly, and an updo with softness at the front.
Pros: timeless, elegant, and the comb photographs beautifully. Cons: a cheap comb can look cheap — choose one with real sparkle. Common mistake: placing the comb dead centre, which can look bridal; a little to the side is more flattering.
Cost and time: 30 to 45 minutes, plus the comb. Who should avoid it: nobody — this is the style that suits almost every mother of the groom. Quick verdict: timeless, sparkling, and exactly right for the big day.
What should the mother of the groom wear her hair as?
There is no single right answer, but the most popular choices are a low chignon, a soft French twist, a half-up style with curls, or a polished blowout. Choose a style that suits your hair length, flatters your face, and feels comfortable for a long day — and one that complements, rather than copies, the bride.
Should the mother of the groom wear her hair up or down?
Either works. Wear it up if the wedding is formal, outdoors, or likely to be warm, because an updo stays secure and keeps you cool. Wear it down if you love your hair down and the wedding is relaxed, but choose a style with soft waves or layers so it photographs well and does not fall flat by evening.
How is the mother of the groom’s hairstyle different from the mother of the bride’s?
It is not very different in practice — both mothers should look elegant and polished. The main difference is coordination: the two mothers should not arrive in identical styles. A quick conversation beforehand, so one chooses an updo and the other chooses soft waves, for example, keeps the photographs looking balanced.
Should the mother of the groom have a hair trial?
Yes, absolutely. Book a trial four to six weeks before the wedding, wear a similar neckline, bring your accessory, and take photographs from every angle in daylight. The trial is where you discover whether the style holds, whether it aches, and whether it photographs the way you imagined.
What hairstyle suits the mother of the groom with short hair?
A textured pixie, a sleek bob with a side part, a short bob with face-framing layers, or a wavy bob with curtain bangs all look wonderful on short hair. Add a pearl clip or a sparkle comb for the wedding-day touch, and you need no pins at all.
What hairstyle suits the mother of the groom with grey hair?
A silver grey bob with shine, a soft silver chignon, or a polished grey blowout all look striking. Use a purple shampoo for two to three weeks before the wedding to remove yellow tones, and finish with a shine serum on the day for a luminous result.
How can the mother of the groom make her hairstyle last all day?
Build the style on pins and structure, not just hairspray. Use criss-crossed bobby pins, a textured base so pins grip, and a flexible-hold spray. Pack three bobby pins and a small hairspray, and do one quick check before the family portraits and once before the evening reception.
Should the mother of the groom wear a hat or a fascinator?
Only if the wedding is formal enough for one, and only if you are comfortable wearing it all day. If you do wear one, choose a low bun or a neat updo that sits below the hat, and style your hair with the hat present so the placement is exactly right.
What hair accessories suit the mother of the groom?
Pearl pins, a pearl or sparkle comb, a gold clip, or a few small fresh flowers all suit the groom’s mum. Keep it to one statement accessory, place it a little to the side rather than dead centre, and choose pieces that pin firmly so nothing works loose during dancing.
How early should the mother of the groom book her hairstylist?
Book your stylist as soon as you know the wedding date, and book the trial four to six weeks before the day. On the wedding morning, allow 45 to 60 minutes for hair, with ten minutes of buffer, and bring your accessory and a photograph of the trial style.
Conclusion
Being the groom’s mum on the wedding day is a role like no other — you are in the family portraits, beside your son, dancing at the reception, and in the photographs that will be looked at for decades. The 41 hairstyles in this guide were chosen for exactly that role: elegant updos that hold all day, soft chignons and twists that photograph beautifully, and styles for short, medium and long hair, for grey and silver hair, for curls and for fine hair. Whatever your length or texture, there is a style here that will let you enjoy the day instead of worrying about your hair.
Pick the style that matches the wedding you are actually going to — the formality, the venue, and how long you plan to stay — and then try it once at a trial, photograph it from every angle, and book it with confidence. Pack three bobby pins and a small hairspray, give yourself a thirty-second check before the family portraits, and then forget about your hair for the rest of the day. Your son is getting married, and you deserve to look — and feel — wonderful.
The groom’s mum deserves great hair too. Choose a style that is elegant, comfortable and unmistakably you, pin it well, and enjoy every moment of the big day.