Sock 12 Bun Alternative Using Hair Donut for Perfect Circles
Okay, let’s be real. We’ve all been there. You see a gorgeous, perfect circle bun tutorial, grab a sock, and end up with a messy, lumpy knot that looks nothing like the picture. I feel you. The classic sock bun trick is a great starting point, but if you’re craving that flawless, polished look, it’s time for a tiny upgrade.
I’m talking about the humble hair donut. This little foam ring is the secret weapon for the perfect, voluminous bun every single time. It’s what all the hairstylists use backstage to create those red-carpet looks.
Today, I’m walking you through my foolproof method. It’s easier than the sock trick, faster, and gives you that clean, “I woke up like this” elegance. Whether you’re aiming for an old money hair vibe or a sleek base for 2026 hairstyles, this is your new go-to.
Grab a donut that matches your hair color, and let’s get that perfect circle bun in under five minutes.
Why Ditch the Sock for a Donut?
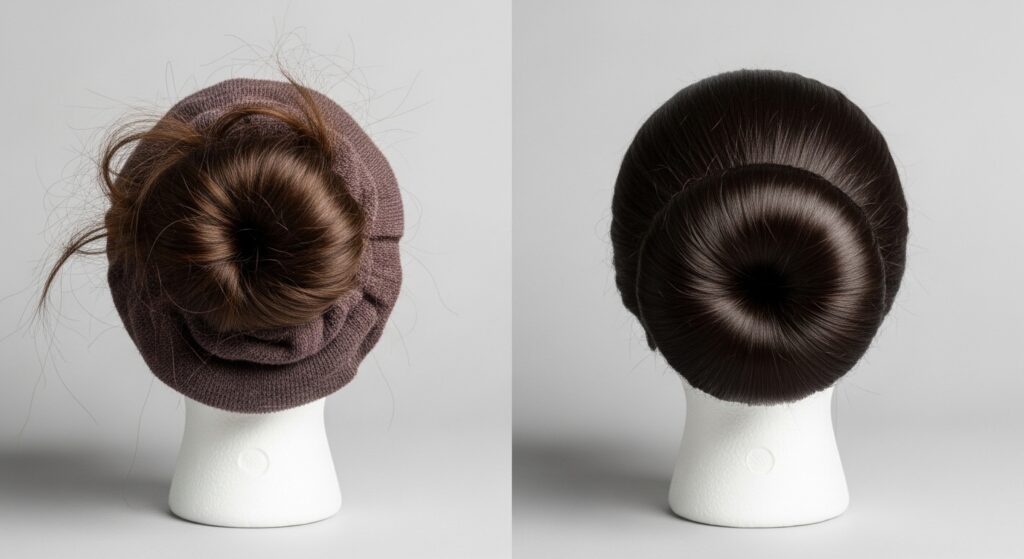
Don’t get me wrong, the sock bun hack is iconic for a reason. It’s a brilliant DIY solution. But it has its flaws. Socks can be too soft, causing the bun to collapse. They often create a bumpy texture because of the fabric weave.
A hair donut, on the other hand, is made of firm, uniform foam. It gives you a perfect circular base to wrap your hair around. This means your bun will be round, full, and smooth from every angle. It’s the difference between a homemade look and a salon-quality style.
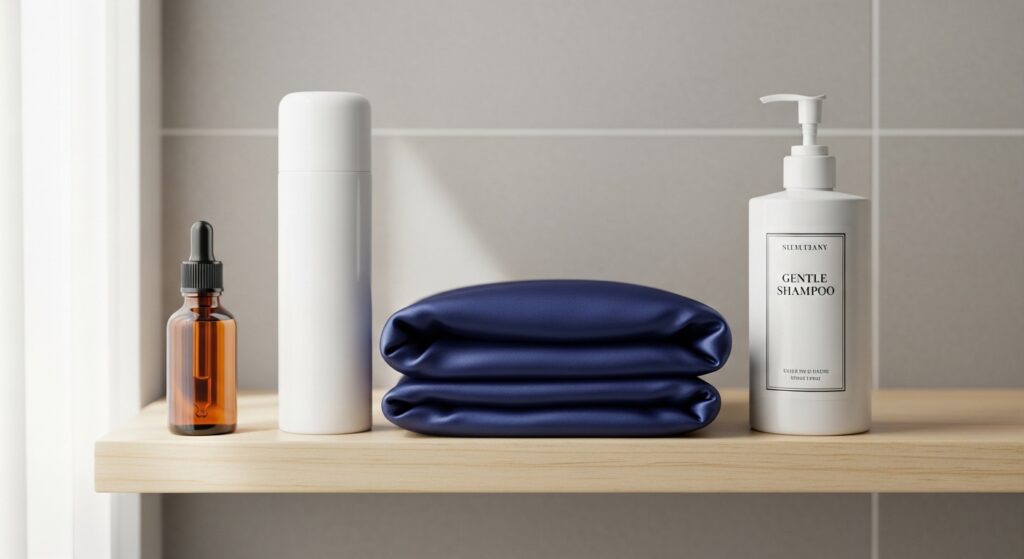
What You’ll Need: The 2-Minute Kit
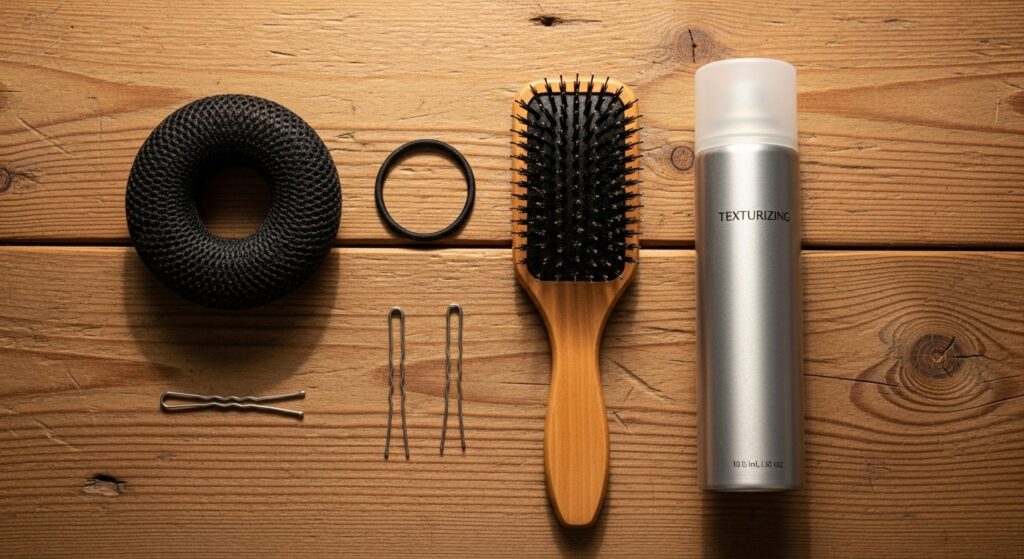
This is the beauty of it—you only need a few things. First, the star: a hair donut. Get a mesh one for better grip. You’ll also need a hair elastic, a brush, and a few bobby pins.
For extra hold and volume, keep a texturizing spray or dry shampoo nearby. If your hair is very silky, this helps the donut grip better. That’s truly it. No fancy tools required.
Choosing the Right Hair Donut
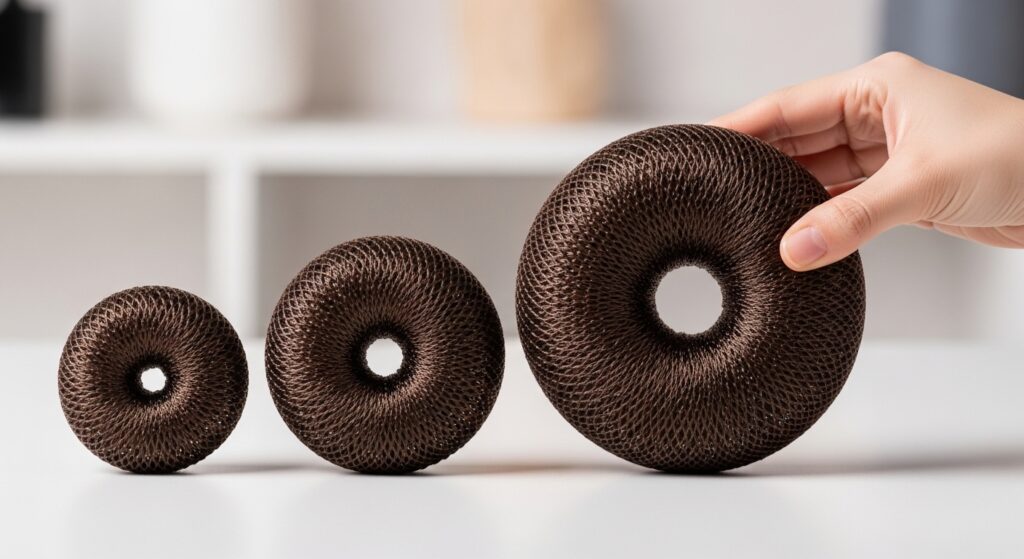
Size matters here. Picking the right donut will make or break your bun. For a subtle, elegant look, choose a donut slightly smaller than your fist. For major volume and drama, go for one about the size of your palm.
Also, match the color to your hair. A blonde donut for blonde hair, a brown for brown hair, and so on. This hides the base perfectly. If you can only get one, a medium brown or dark blonde works for most hair colors.
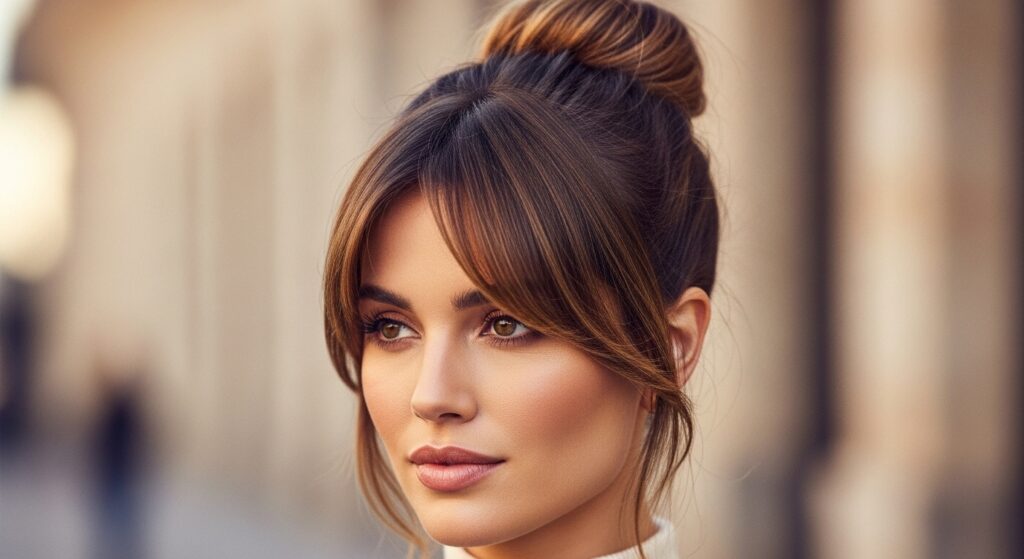
Step 1: The Perfect Ponytail Base
Start with day-old hair or add a little dry shampoo. Clean hair can be too slippery. Brush all your hair back into a ponytail. The height determines the bun’s style.
- High on the crown for a fun, trendy look.
- At the nape of your neck for a sophisticated, quiet luxury bob-like elegance.
- Somewhere in the middle for a classic style.
Make this ponytail as tight and smooth as you can. This is your foundation.
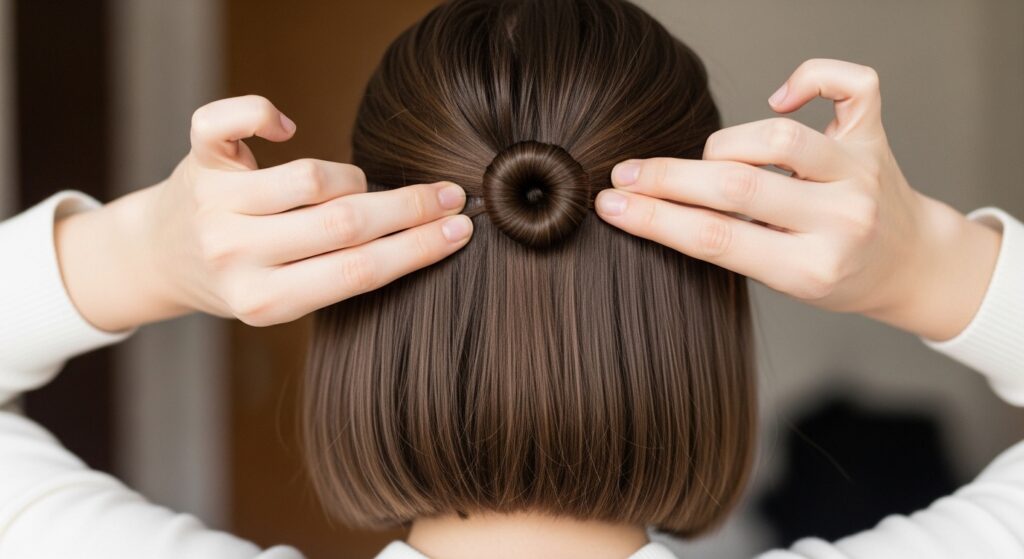
Step 2: Securing the Donut
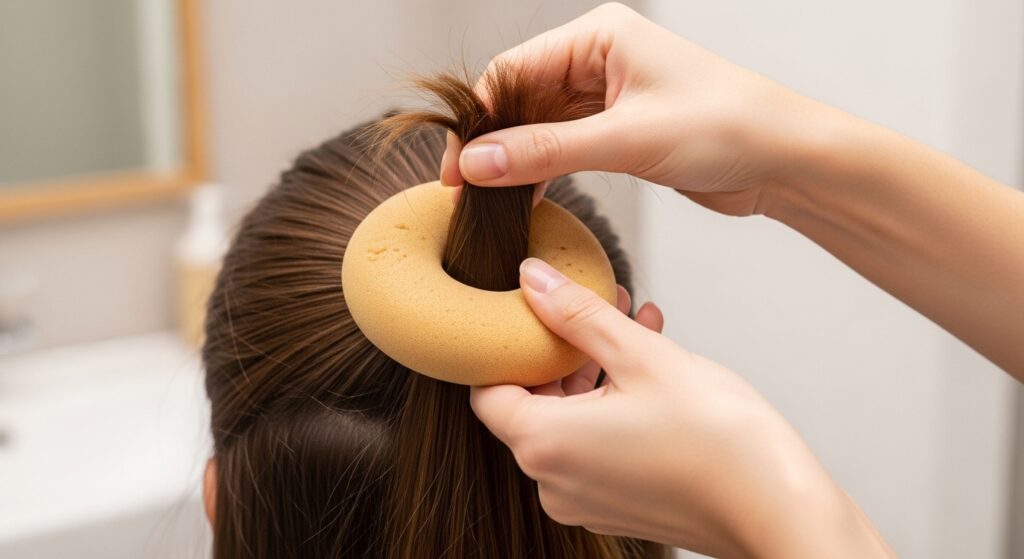
Take your hair donut and pull your ponytail straight through the center hole. Slide the donut all the way down to the base of your ponytail, right against your scalp.
It should look like your ponytail is sticking out of the donut. Secure it here by giving the elastic one more tighten around the donut. We want it to be nice and snug before we start wrapping.
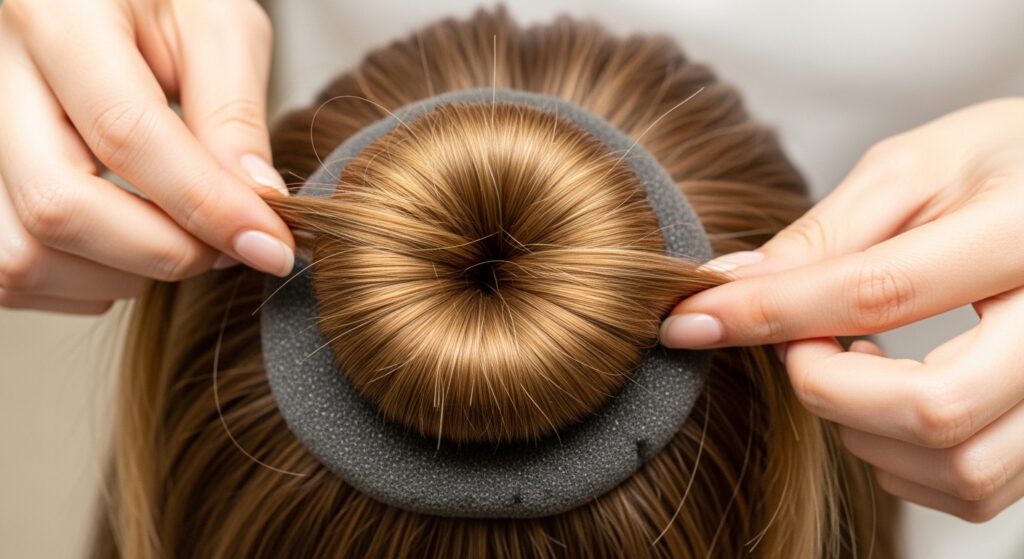
Step 3: The Wrapping Technique
This is the magic step. Separate your ponytail into sections around the donut. Start by spreading the hair over the top of the donut to cover it.
Then, take the remaining hair and tuck it under and around the donut. The goal is to distribute the hair evenly over the entire foam surface. Don’t worry about perfection yet—just get it covered.
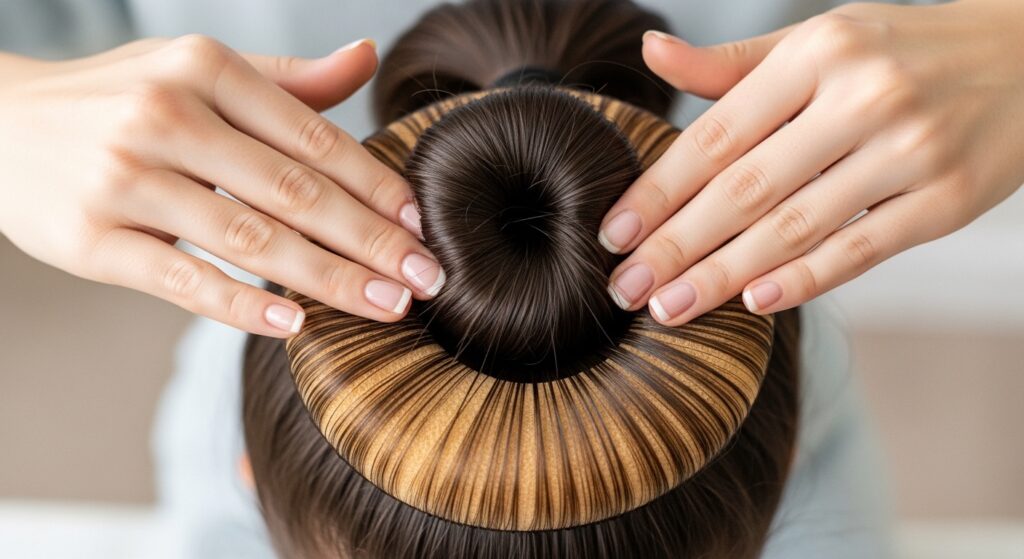
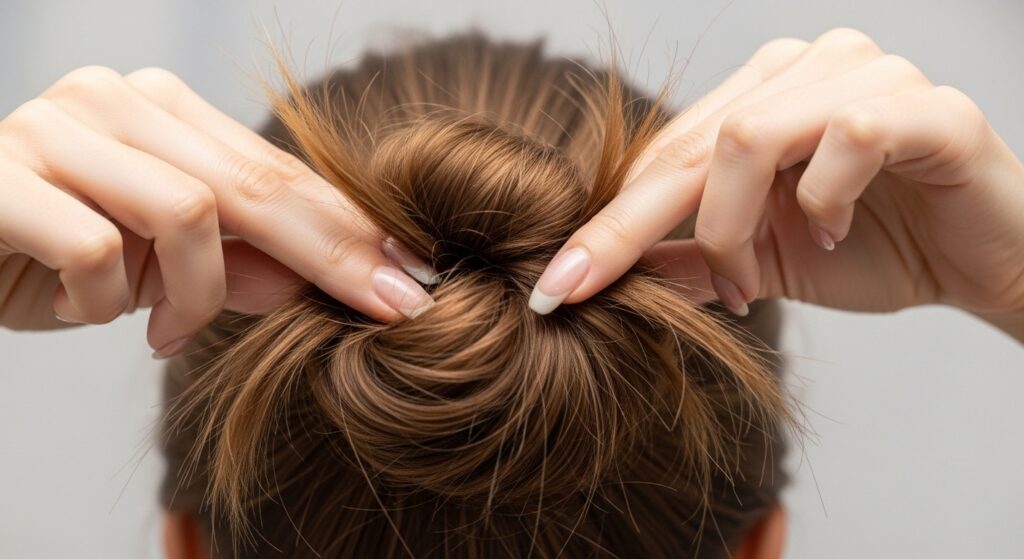
Step 4: Twisting and Tucking
Now, gather the ends of your hair. Begin twisting them around the base of the donut. As you twist, the hair will naturally start to wrap and encase the foam.
Keep twisting until you’ve wrapped all the loose ends. You’ll see the bun shape forming. Guide the hair to cover any bare spots on the donut as you go.
Step 5: Locking It All In Place
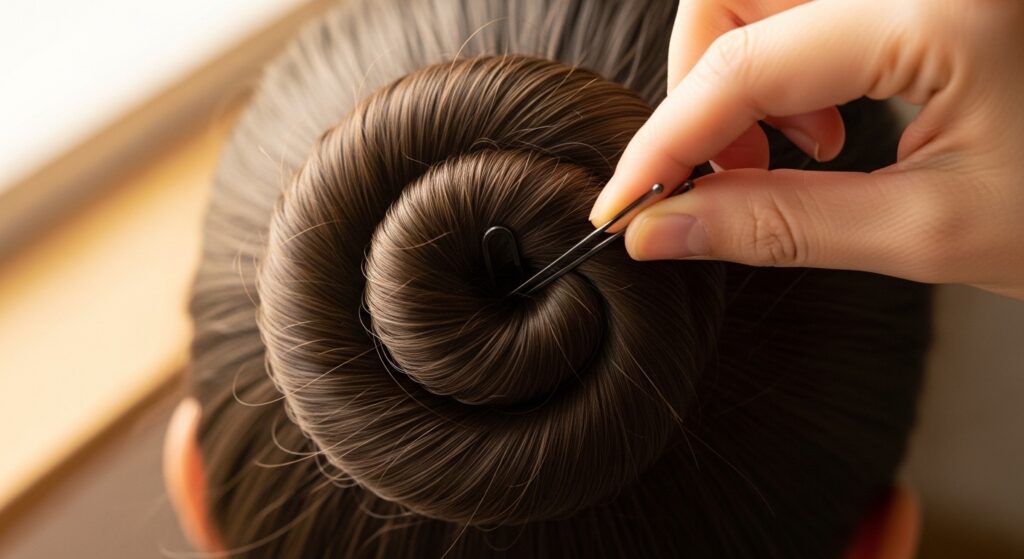
This is where bobby pins are your best friend. Once the hair is wrapped, tuck the very end of your hair under the bun.
Then, take 3-4 bobby pins. Slide them into the bottom of the bun, aiming upward into the center. This anchors the style to the donut and your own hair. For extra security, criss-cross the pins.
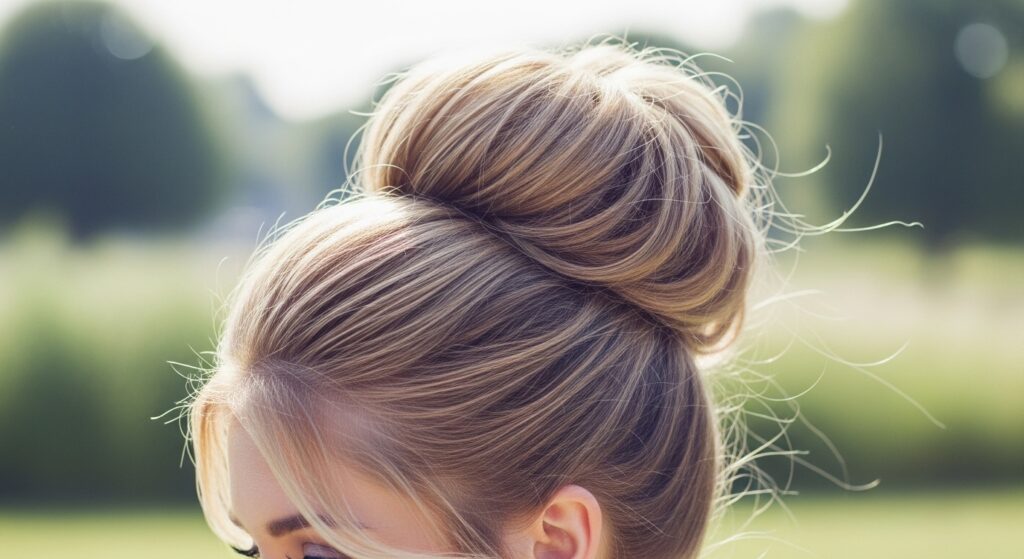
Step 6: The Final Fluff & Polish
No one likes a flat, tight bun. Now for the fun part: gently pull at the sides of your bun. Loosen small sections to add volume and create that soft, romantic shape.
You can make it as neat or as messy as you like. Spray lightly with hairspray to hold any flyaways. This fluffing is what makes it look effortless.
Pro Tip for Super-Slippery Hair
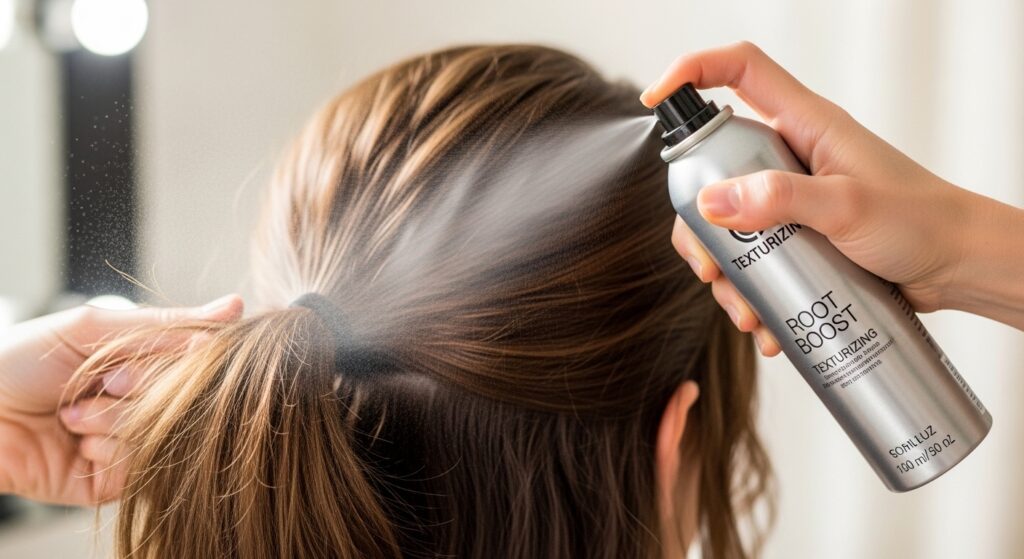
If your hair is very fine or silky, the donut might slip. Here’s my trick: before you even make your ponytail, spray your roots with a texturizing spray or dry shampoo.
You can also lightly backcomb the base of your ponytail for extra grip. Another option is to use a mesh or “grip” donut, which has a rougher texture that holds onto hair better than smooth foam.
Transforming Your Bun for Day to Night
Your perfect circle bun is incredibly versatile. For day, keep it clean and polished. For night, transform it in seconds.
- Pull out a few face-framing tendrils.
- Wrap a small strand of hair around the base to hide the elastic.
- Add sparkly clips or a silk scarf.
It instantly goes from office-ready to dinner-ready. This adaptability makes it a staple for 2026 hairstyles focusing on multi-function.
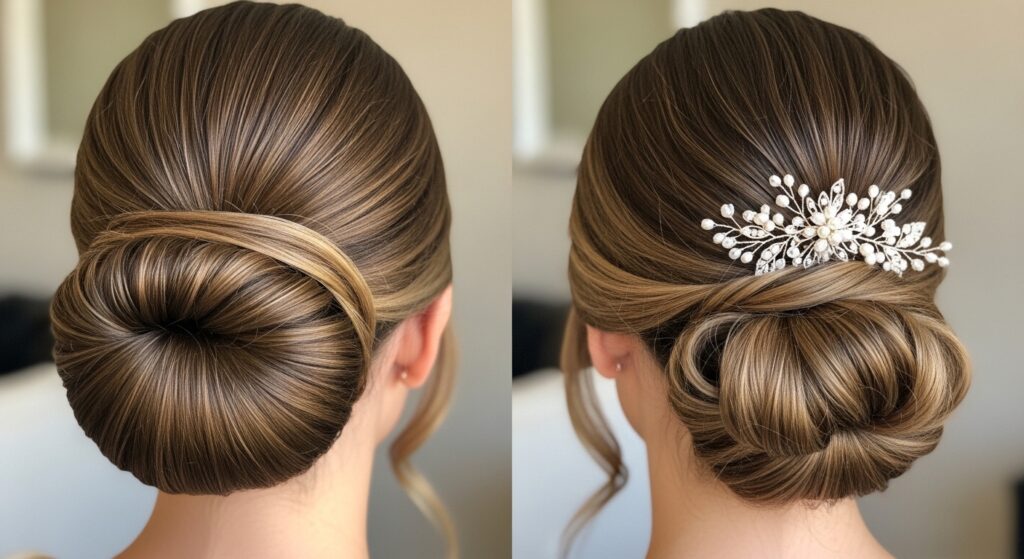
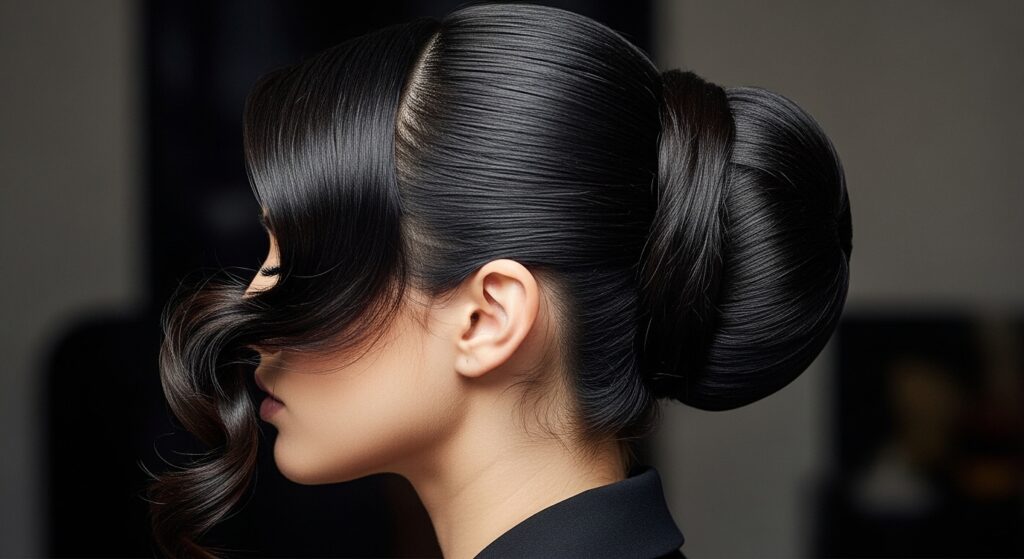
The Low, Elegant Donut Bun
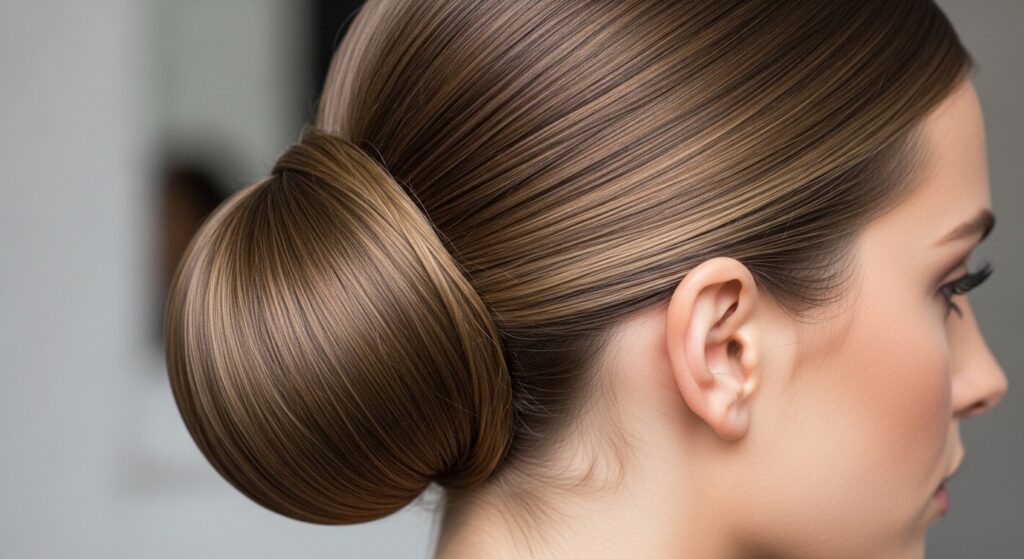
This is the ultimate old money hair look. It’s polished, quiet, and incredibly chic. Follow all the same steps, but place your initial ponytail at the nape of your neck.
Keep the wrapping very neat and avoid too much fluffing. The result is a smooth, elegant bun that pairs perfectly with trench coats and simple gold jewelry. It’s the definition of quiet luxury.
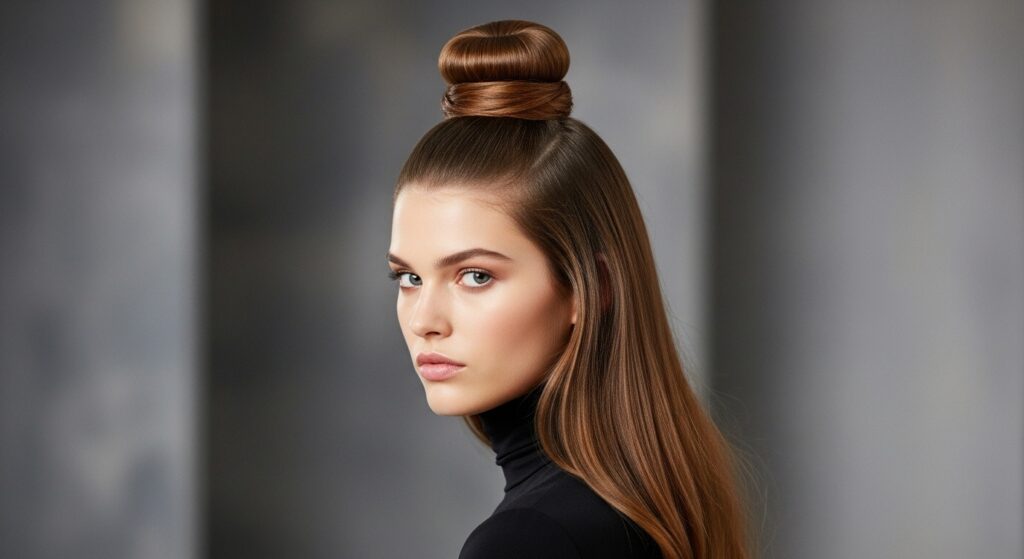
The Voluminous Top Knot
For a trendy, youthful vibe, go for a high top knot. Place your ponytail as high on your crown as possible. Use a larger donut for maximum volume.
After securing, fluff the bun generously. You can even gently tease the wrapped hair with your fingers for a bigger, more dramatic effect. It’s a confident, look-at-me style.
Half-Up Donut Bun Magic
Don’t have time to wash your hair? This is your solve. Only gather the top section of your hair into a ponytail. Use a smaller donut.
Create a mini bun just on the crown. It gives you beautiful volume at the roots and keeps hair out of your face, while leaving the rest down. It’s a romantic, soft look.
Pairing Your Bun with 2026 Trends
Your perfect bun isn’t just a standalone style. It’s the perfect base to showcase other trends. Think of it as your canvas.
Pair it with face-framing layers or curtain bangs. It balances the severity of an asymmetrical lob. It even works with the bold fringe of a hime cut. The bun keeps the look polished, while your cut adds the fashion edge.
From Bun to Romantic Goth
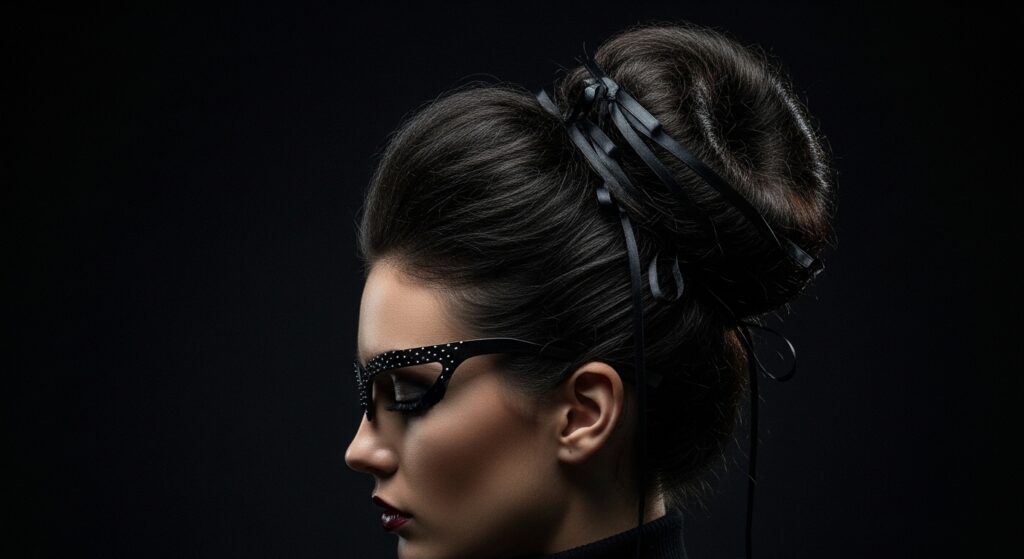
Yes, this classic bun can even dive into dark academia or romantic goth hairstyles. Start with textured, slightly messy hair. Create a looser, less perfect bun.
Pull out more wispy pieces. Weave in a black velvet ribbon or some delicate silver chains. The contrast between the structured bun and the dark, romantic details is absolutely stunning.
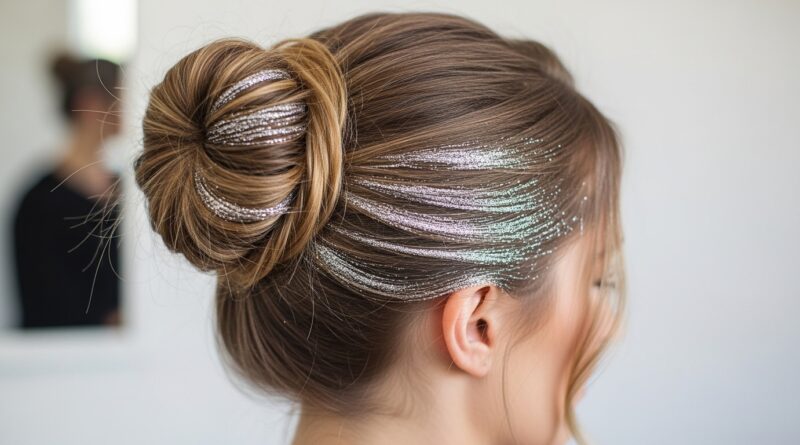
Adding Glitchy Glam Texture
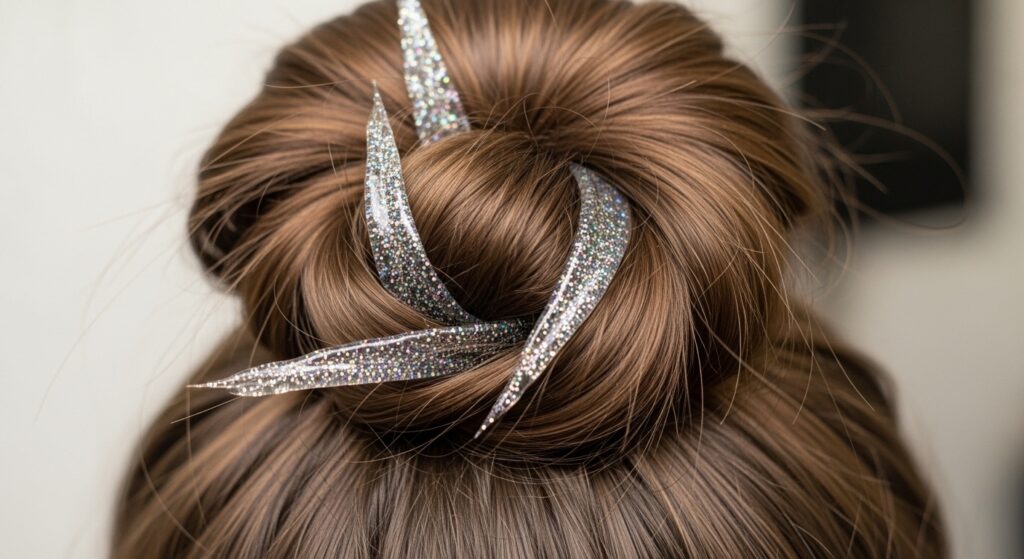
For a touch of glitchy glam hair, play with texture and shine. After making your bun, deliberately pull out a few small, random sections.
Then, take a glitter hair gel or a metallic spray. Lightly coat just those pulled-out strands or add a sheen to one side of the bun. It creates a “digital” error effect that’s so cool for a night out.
Accessorizing Your Creation
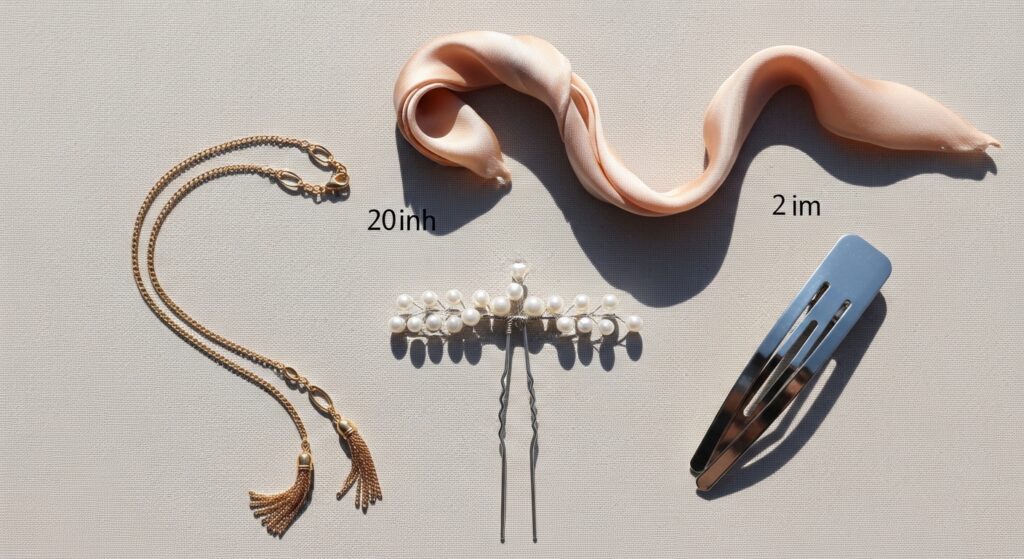
Accessories take your bun to the next level. Slide in a few pearl-ended pins for a classic touch. A statement barrette at the base adds modern flair.
You can also tie a silk scarf around the base before you make your ponytail, letting the ends flow out. Or try a delicate hair chain that sits under the bun. The options are endless.
What to Do with Shorter Hair
If you have a quiet luxury bob or even an asymmetrical lob, you can still do this. Use a very small, “mini” donut. Gather what you can into a low ponytail.
You might not be able to wrap all the hair around, and that’s okay. The donut will give you a perfect, rounded shape with the hair you do have, creating a beautiful, twisted knot effect.
Common Mistakes and How to Fix Them
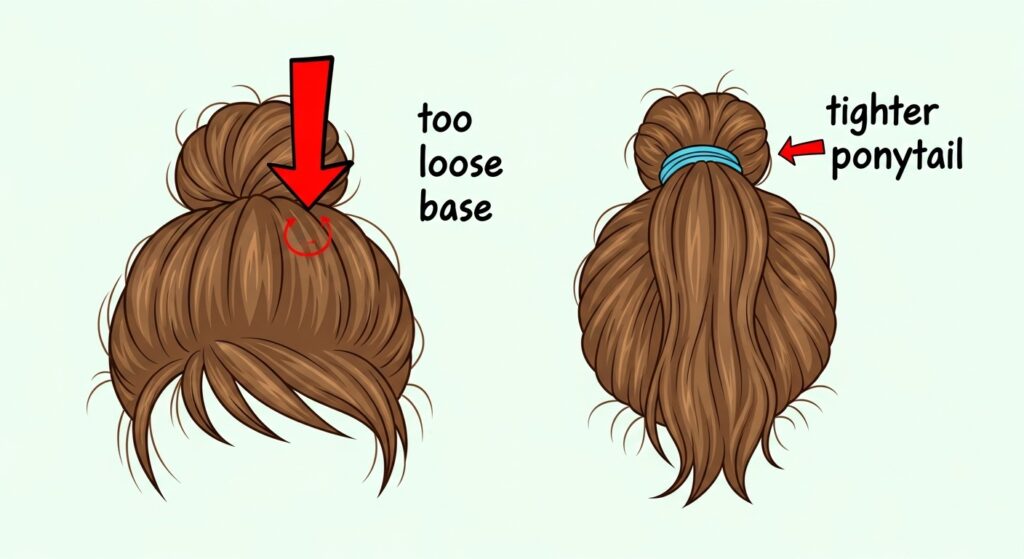
Is your bun lopsided? The base ponytail wasn’t centered. Is it sliding out? You didn’t secure the donut tightly enough at the base or use enough pins.
Does it look flat? You didn’t fluff it. Every problem has a simple fix. The most common issue is rushing the initial ponytail. Take your time there.
Making It Last All Day & Night
For all-day hold, a good hairspray is key. After fluffing, do a light mist all over. Carry a few extra bobby pins in your bag just in case.
If you’re dancing all night, consider using a stronger-hold spray or even a little hair gel on the flyaways before you pin. A well-made donut bun, though, is surprisingly resilient.
The Vintage Vampire Vibe
Lean into the vampire haircut aesthetic with your bun. Create a deep side part before making your ponytail. Keep the bun smooth and tight at the nape.
Then, pull out one generous, romantic curl or wave to frame your face on the heavier side of the part. It’s alluring, dramatic, and perfectly undone.
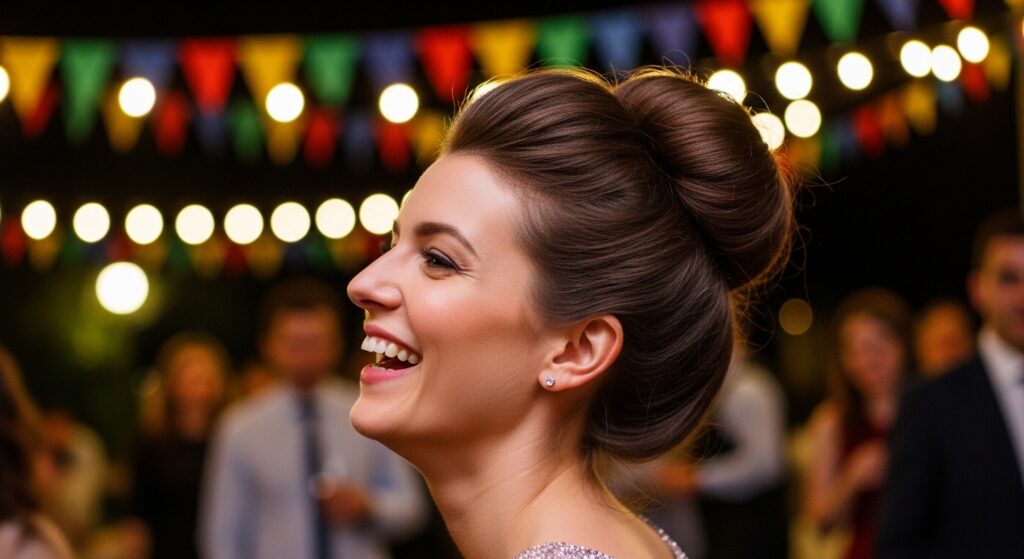
Your New Go-To Hairstyle
And there you have it. What started as a search for a better sock bun method has turned into your most reliable hairstyle. It works for the gym, the office, a wedding, or a date.
It’s the skill you’ll use for years. Once you get the hang of it, you can do it in your sleep. It’s that easy, and that good.
So, that’s my not-so-secret secret for the perfect, circle bun every single time. It feels like a small upgrade from the sock method, but the difference in the final look is honestly huge. You get that professional, polished finish without any of the guesswork.
I hope this gives you the confidence to toss that sock back in the drawer and play with your new hair donut. It’s one of those simple tools that genuinely makes your morning routine faster and your look more put-together.
Did you try it? I want to see your perfect buns! Save this post to Pinterest so you can find the steps anytime. And tell me in the comments—what’s the first occasion you’re going to wear your new donut bun to? A work day, or a special night out? Let me know!
Happy styling,
Hailey & Team