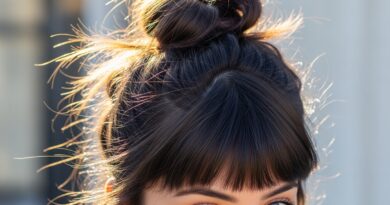
Sock Bun Creation Without Socks for Perfect Shape
Okay, let’s be real. We’ve all been there. You see a gorgeous, perfect sock bun tutorial, you grab a sock, and… it just looks lumpy. Or you don’t even have a sock that matches your hair color. I felt that frustration for years.
I wanted that polished, ballerina-esque shape without the weird bulk. So, I started experimenting. And guess what? You can get that flawless, voluminous bun without a single sock.
It’s all about the technique and one simple, cheap tool you probably already own. This method gives you control and a perfect shape every single time. It’s a game-changer for quick, elegant updos.
Whether you’re aiming for that old money hair sleekness or a more relaxed vibe, this base technique is your new best friend. Let me show you exactly how it’s done.
The Secret Tool You Already Own
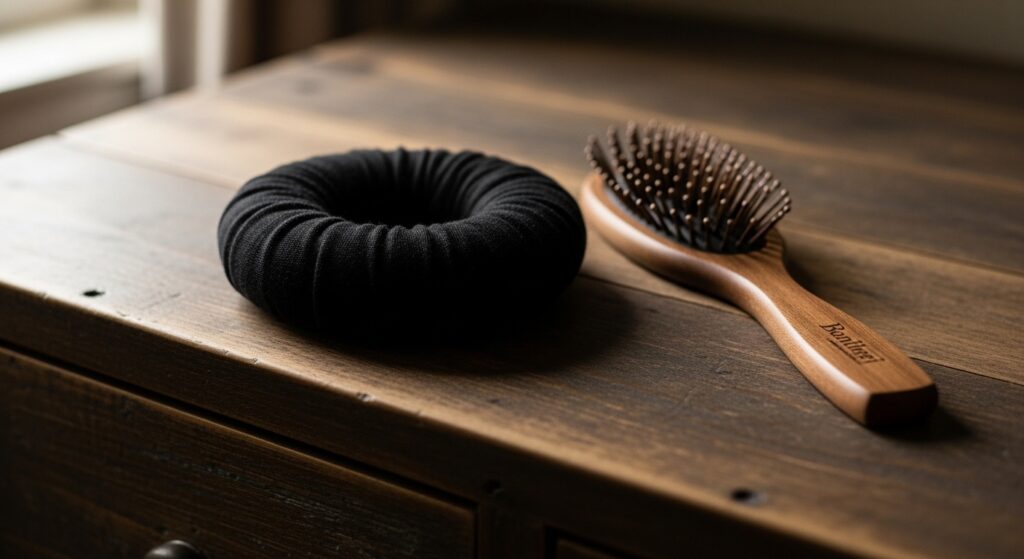
Forget cutting up socks. The real secret is a simple hair donut, also called a bun form. You can find these at any drugstore or beauty supply for a few dollars. They come in different colors to match your hair.
Why is it better than a sock? It’s made of a lightweight, mesh material that grips your hair without adding unnecessary weight or bulk. This is key for getting that smooth, rounded shape instead of a lumpy mess.
It creates the perfect foundation for so many styles, from classic chic to more modern 2026 hairstyles trends we’re starting to see. It’s the ultimate hair hack tool.
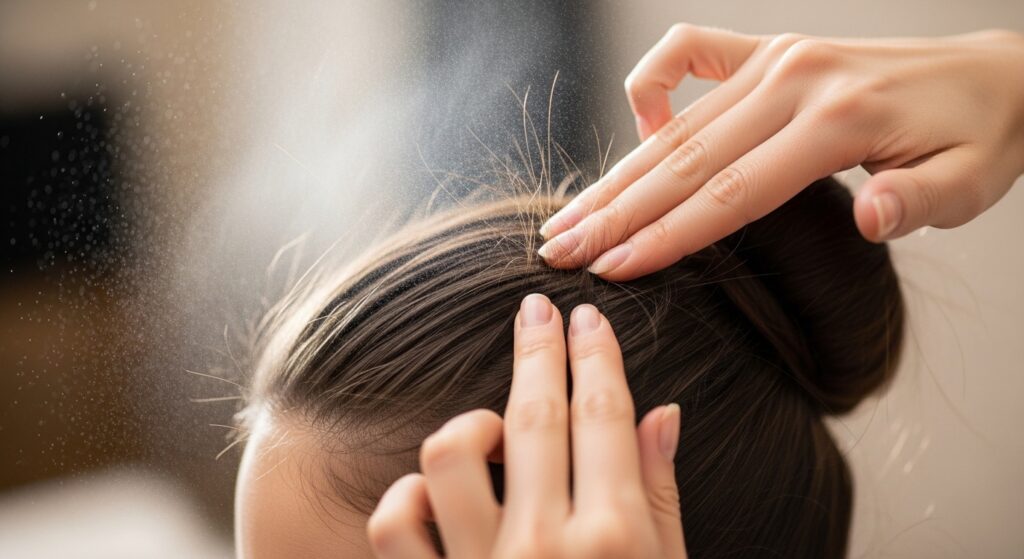
Prepping Your Hair for the Perfect Base
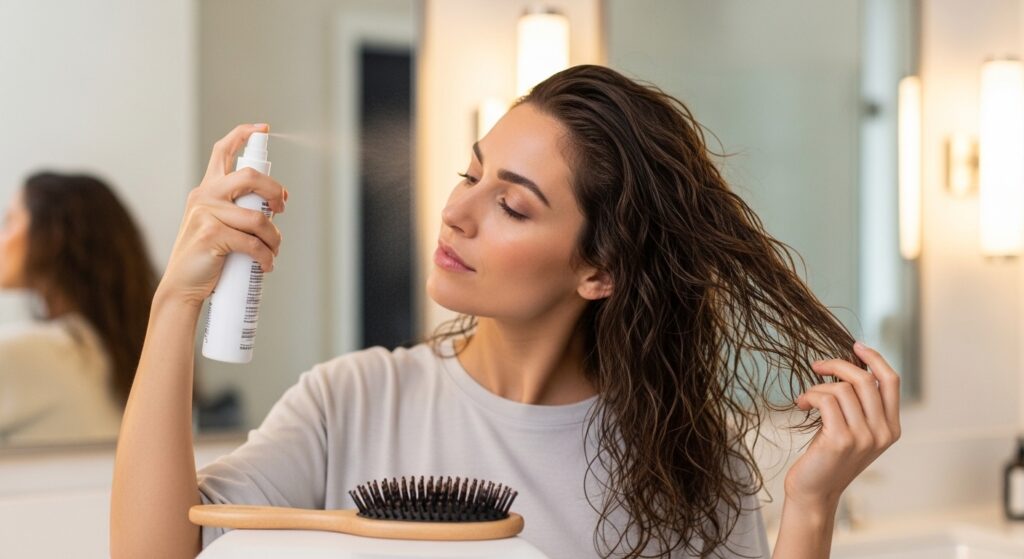
Start with day-old hair or add a bit of dry shampoo at the roots. Clean, slick hair can be too slippery and won’t hold the style as well. You want a little texture and grip.
Brush your hair thoroughly to remove any tangles. For a sleeker look, you can use a smoothing cream or a light-hold mousse. For more volume, a texturizing spray is your friend.
The goal is hair that’s manageable but not flyaway. This prep step makes wrapping the hair around the donut so much easier and helps the final bun stay put all day or night.
Step One: Creating a Secure Ponytail
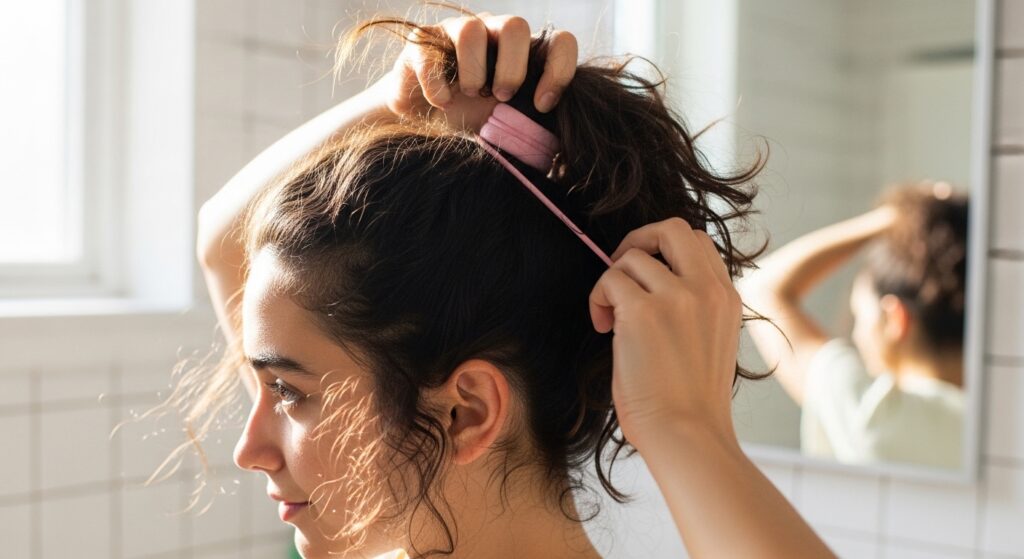
Decide where you want your bun. High on the crown is classic and elegant. At the nape of your neck is more relaxed. Secure your hair with a strong elastic. Make sure it’s tight.
This ponytail is the anchor for your entire bun. If it’s loose, the whole style will sag. For extra volume, you can gently backcomb the base of the ponytail a little.
Tip: Use a hair tie that matches your hair color for a more seamless look. This little detail makes a big difference in the final polish.
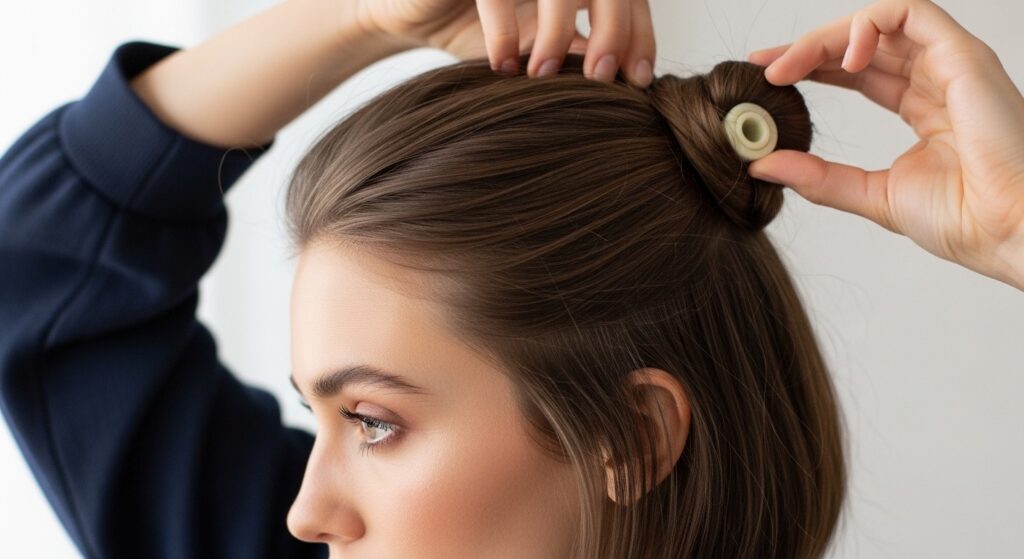
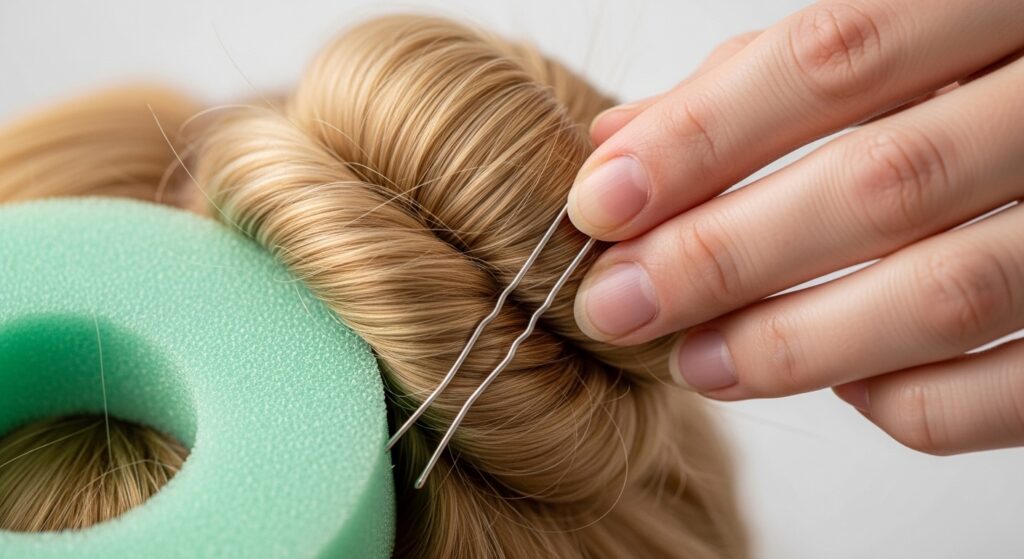
Step Two: Threading the Donut
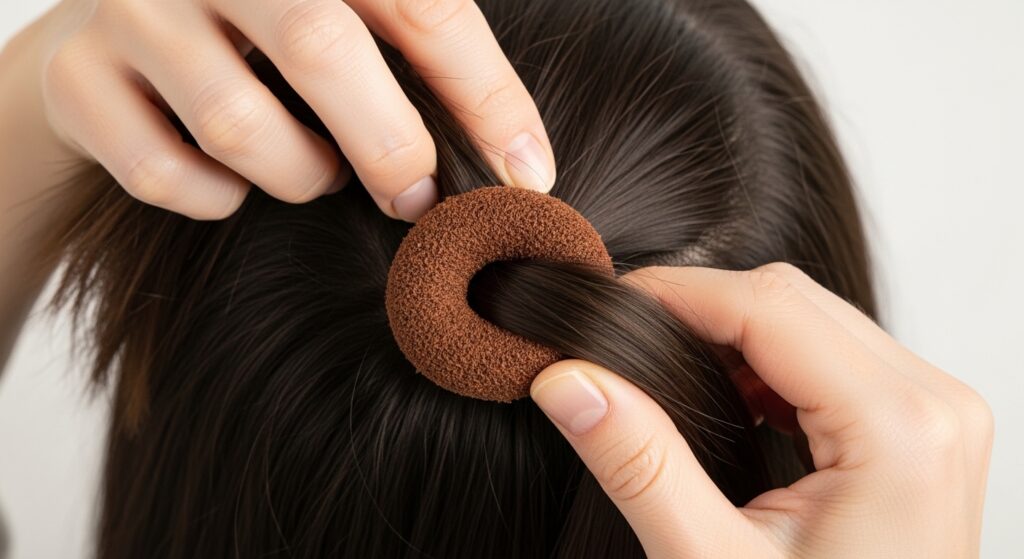
Take your hair donut and pull your ponytail completely through the center hole, like you’re putting on a giant bracelet. Slide the donut all the way down until it sits right against the base of your ponytail.
It should be snug. Spread your hair evenly around the donut so it’s covered. This creates the round shape you’ll be wrapping over.
If you have very thick hair, you might need a larger donut. For finer hair, a smaller one works best to add the illusion of fullness.
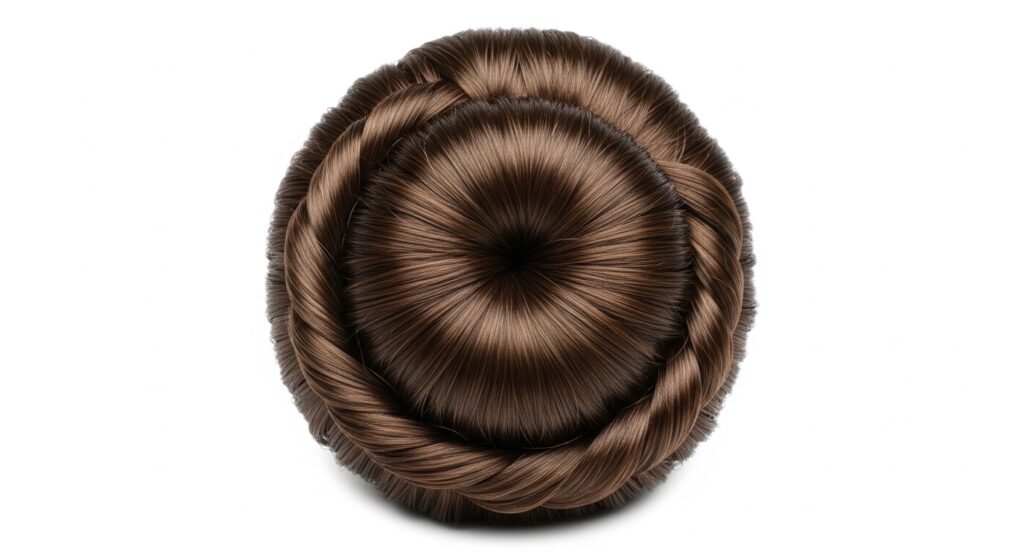
Step Three: The Simple Wrap Technique
Now, start spreading your hair over the donut. Imagine you’re covering a ball with a blanket. Work your way around, tucking the ends of your hair under the donut as you go.
Use your other hand to hold the hair you’ve already tucked in place. Don’t worry if it’s not perfect yet. The goal is to get all the hair distributed over the surface.
This step is the most important for avoiding gaps or thin spots. Take your time to get the coverage even all the way around.
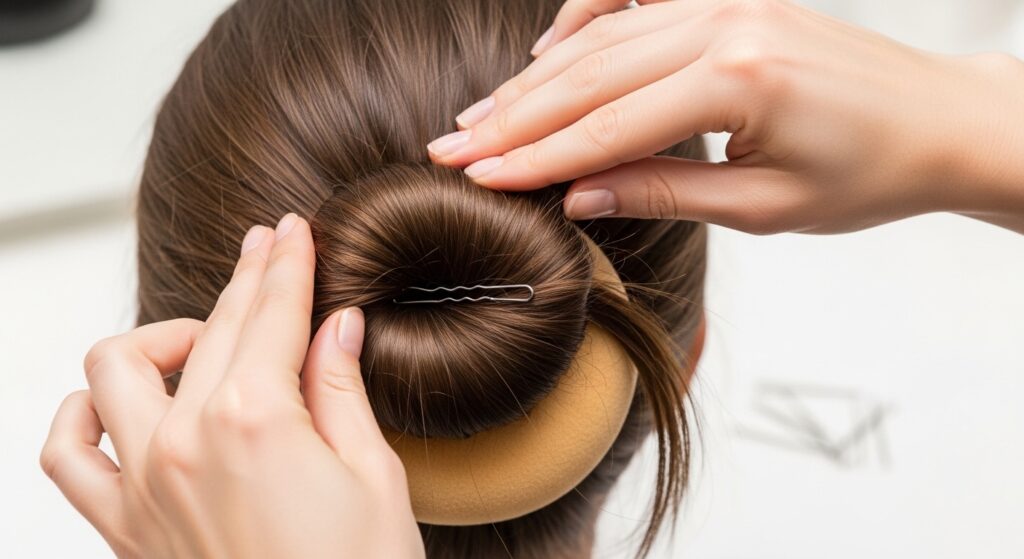
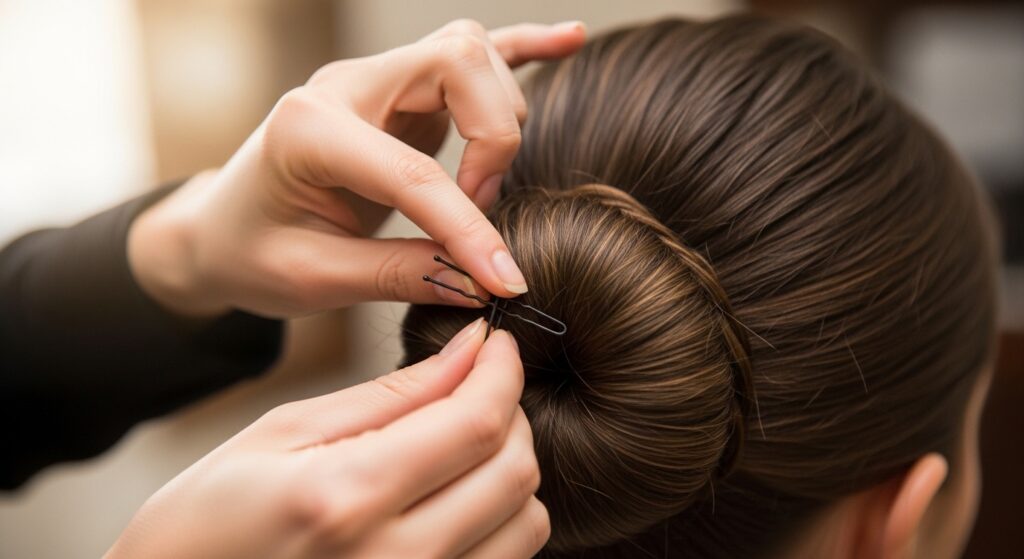
Step Four: Securing with Bobby Pins
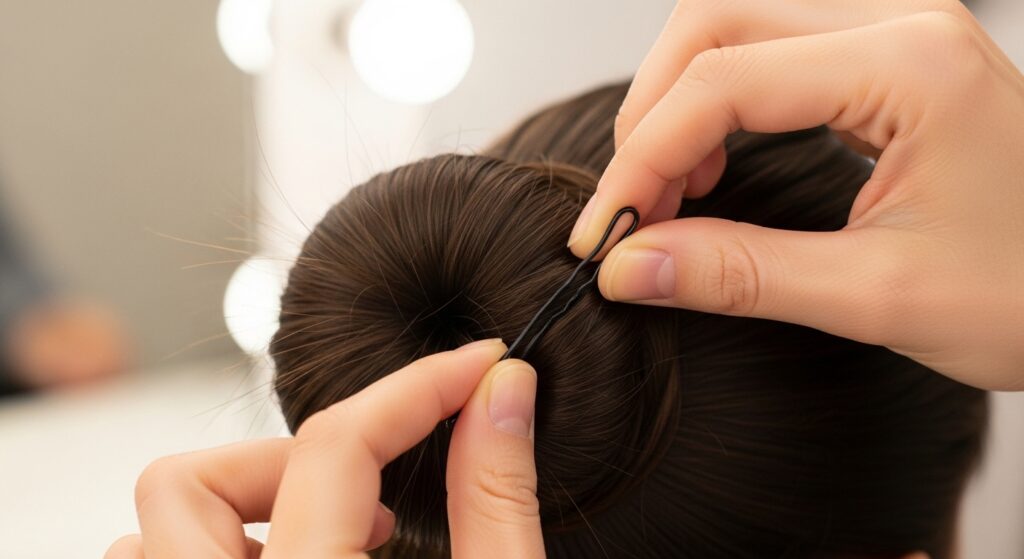
Once all your hair is tucked under, it’s time to lock it in. Take strong, good-quality bobby pins. Start by pinning the tucked ends underneath the bun.
Slide the pins through the mesh of the donut for a super secure hold. Place them in a criss-cross pattern for strength. Use more than you think you need!
This is what turns a messy wrap into a polished, professional-looking bun. The pins hidden underneath will keep everything secure through wind, rain, and a busy day.
Smoothing the Final Look
After pinning, gently smooth the surface of the bun with your hands. Spritz a light-hold hairspray on a toothbrush or a clean mascara wand.
Use it to gently tame any baby hairs or flyaways around your hairline and the bun itself. This gives you that incredibly sleek, intentional finish.
For a softer, more romantic look, you can actually pull out a few tiny face-framing pieces. This technique works for both super sleek and softer styles.
The Low, Messy Bun Variation
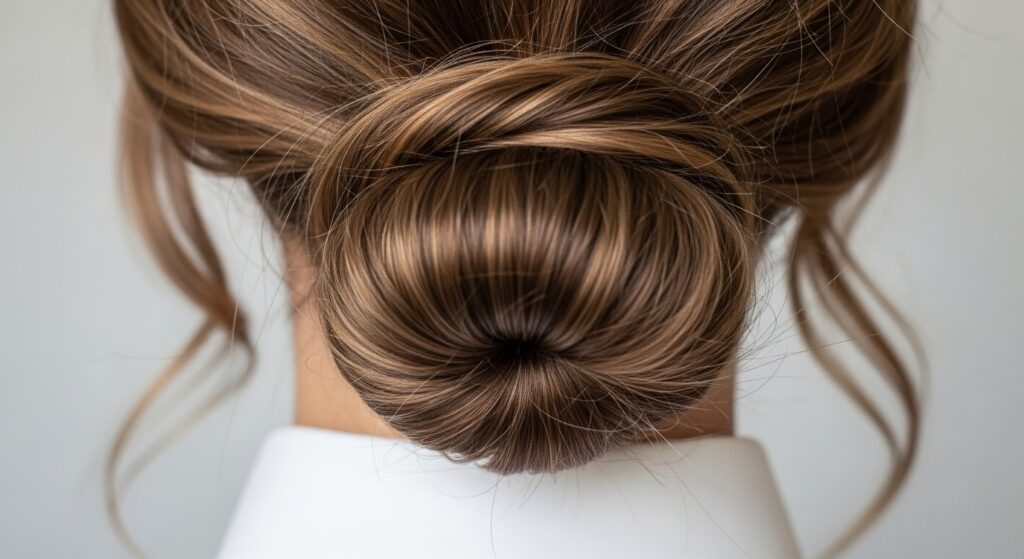
For a more effortless vibe, place your initial ponytail at the nape of your neck. Follow all the same steps, but don’t worry about making it super smooth.
After pinning, gently pull at the sides of the bun to loosen it and create a slightly messy, larger shape. This is a great base for a romantic goth hairstyles look when paired with darker accessories.
It’s the perfect “I woke up like this” updo that’s actually totally secure. It pairs beautifully with an asymmetrical lob once your hair grows out a bit.
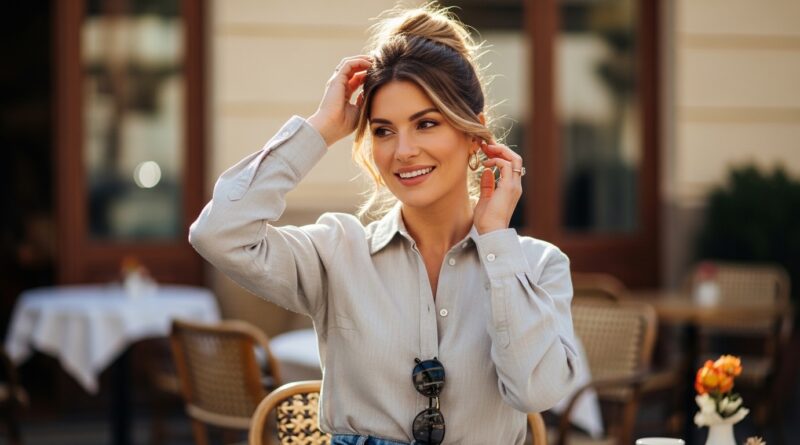
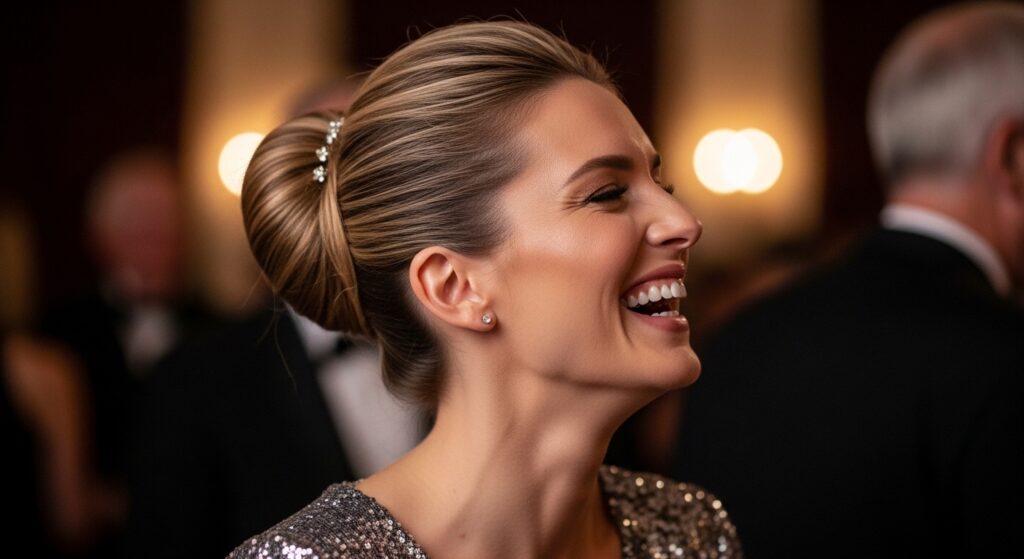
The High, Voluminous Ballet Bun
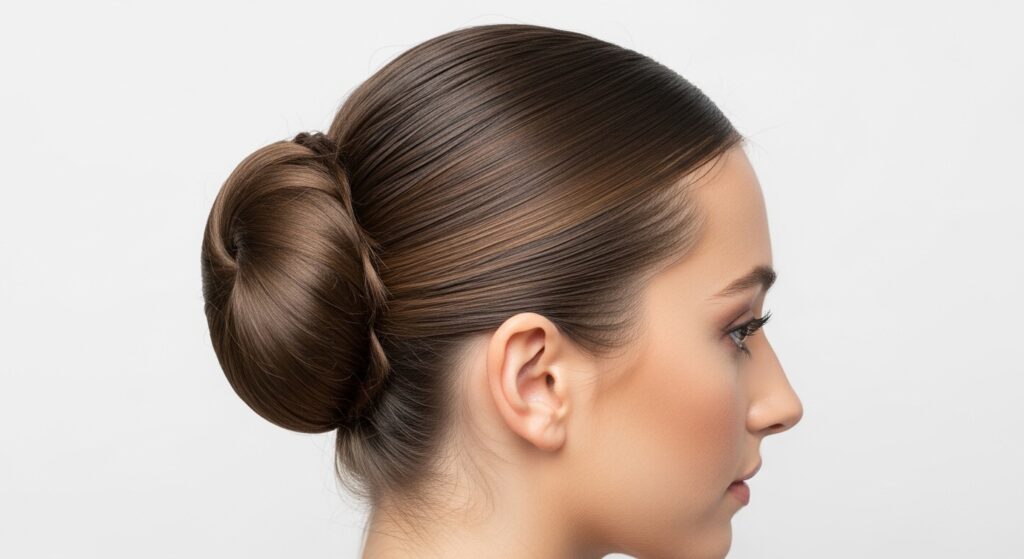
This is the classic. For the true ballet bun, place your ponytail directly on the crown of your head. Make sure your hair is sleek before you start.
When wrapping, focus on keeping the surface very smooth. Use plenty of pins and that hairspray-toothbrush trick for ultimate sleekness.
This style is the epitome of quiet luxury bob energy—if the bob were an updo. It’s polished, timeless, and goes with absolutely everything.
Adding Braids for a Detailed Twist
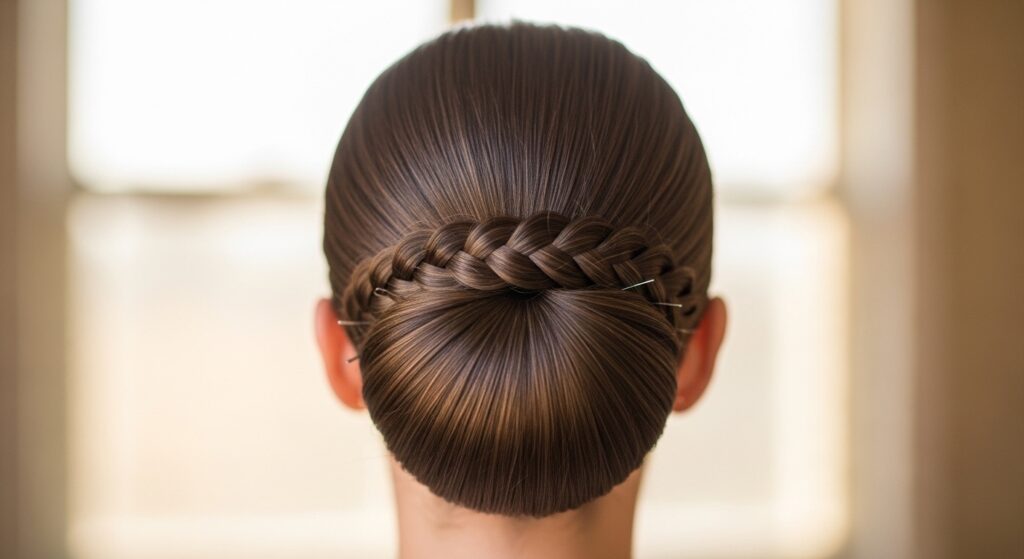
Take your bun to the next level by incorporating a braid. Before making your ponytail, create a small braid along your hairline or at the side.
Incorporate the tail of the braid into your ponytail. As you wrap your bun, you can also wrap the remaining length of the braid around the base for a beautiful, detailed accent.
It’s a simple way to make your everyday bun feel special and intricate, tapping into that detailed vibe we see in hime cut styling.
Using the Bun for Half-Up Styles
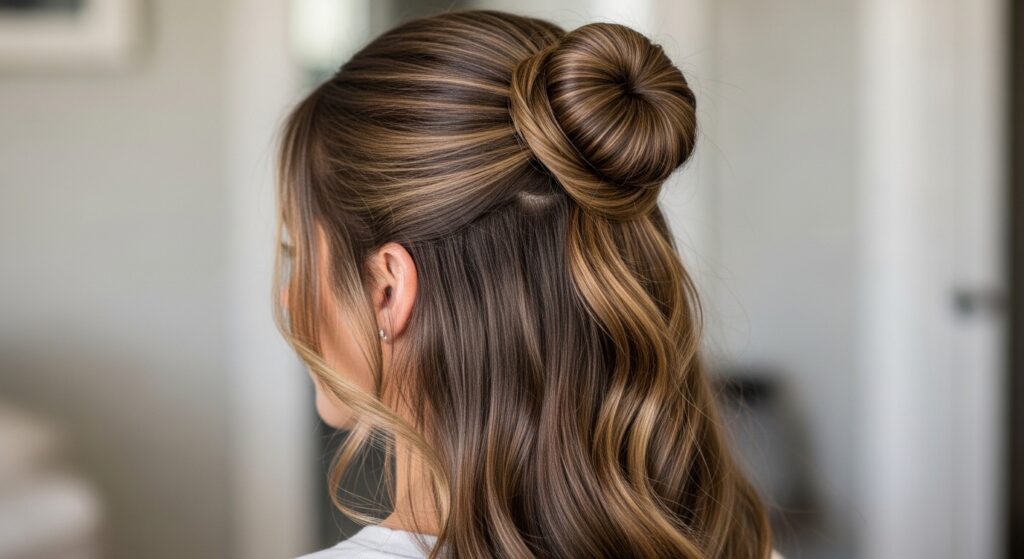
Don’t want all your hair up? Use a mini donut! Simply take a section of hair from the crown of your head and make a small ponytail.
Follow the same process, but with this smaller section and a mini bun form. This gives you a perfectly shaped half-up bun that’s far better than a simple twist.
It’s a gorgeous way to add polish to down hairstyles, especially if you’re growing out a vampire haircut and want to keep hair off your face.
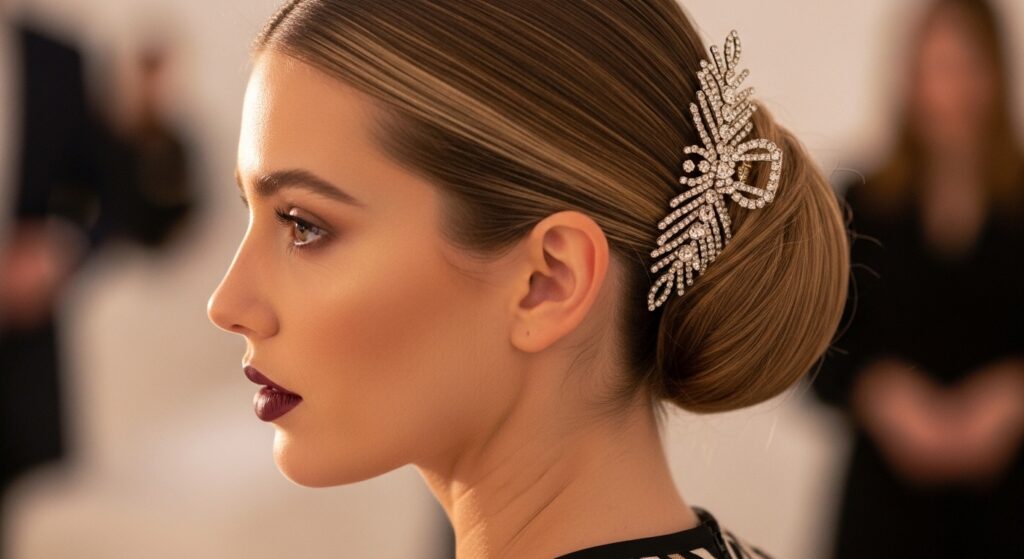
Accessorizing Your Perfect Bun
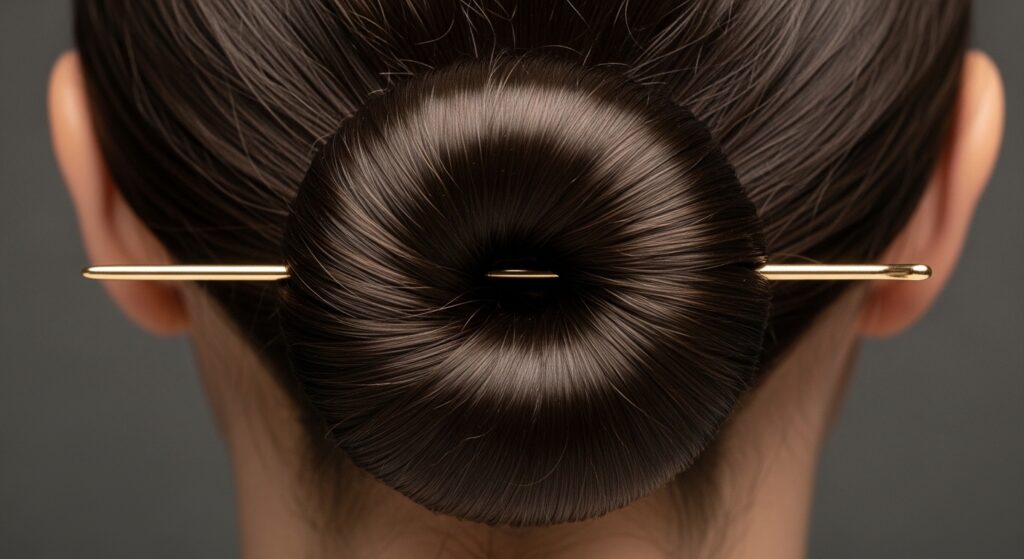
A perfect bun is the best canvas for accessories. After your bun is set, slide in a decorative hair pin or a few delicate ones. You can also use a sleek scarf as a headband.
For evening, try inserting pretty hair sticks or even small fresh flowers. The bun holds them securely because of its firm base.
This is where you can play with different aesthetics, from minimalist to something with a bit of glitchy glam hair edge using metallic or unexpected accessories.
What to Do With Shorter Hair
If you have a bob or lob, you can still do this! Use a very small, donut or even make a “mini” version by rolling the toe part of a sock very tightly.
Gather what you can into a low ponytail. You’ll have shorter pieces that won’t tuck, and that’s okay! Just pin them neatly around the base.
It creates a beautiful, textured knot that’s perfect for asymmetrical lob lengths. It’s more of a chic nub than a big bun, and it’s just as stylish.
Making It Last All Day & Night
The combination of the donut’s grip and good bobby pins is what gives you longevity. Always pin through the mesh of the donut itself.
Carry a few extra bobby pins and a travel hairspray for touch-ups. If you’re dancing all night, a final, firm-hold hairspray mist over the whole style will lock it in.
I’ve worn this bun through 12-hour days and it’s still going strong. It truly is a set-it-and-forget-it style once you master the pinning.
Fixing Common Problems: The Lumpy Bun
If your bun looks lumpy, you probably didn’t spread your hair evenly over the donut. It’s an easy fix! Gently pull the bun apart slightly.
Redistribute the hair over the form, smoothing it with your palms as you go. Add a few more bobby pins to secure the newly smoothed sections.
Sometimes, using a donut that’s too big for your hair thickness can also cause this. Don’t be afraid to take it out and start over—the second try is always faster.
Fixing Common Problems: The Slipping Bun
A slipping bun means your anchor ponytail wasn’t tight enough, or you didn’t pin into the donut. First, make sure your initial elastic is secure.
When pinning, always aim your bobby pin so it goes through the mesh of the donut AND catches some hair from your original ponytail. This ties the whole structure together.
Using criss-crossed pins is stronger than placing them all in the same direction. This creates a net of security that holds everything in place.
Fixing Common Problems: Visible Donut
If you can see the mesh of the donut peeking through, you need more hair coverage. Carefully pull the bun shape outward a little to stretch the hair over the thin spot.
Tuck any extra length you have into that area and secure it with an extra pin. Choosing a donut color that matches your hair closely also helps hide any minor gaps.
This is usually only a problem with very fine hair. Using a smaller donut can help, as there’s less surface area you need to cover with your hair.
From Day to Night in Seconds
This bun is the ultimate quick-change artist. Wear it sleek and smooth for the office or daytime meetings. When it’s time for dinner or an event, your base is already done.
Simply add your accessories. Slide in a statement hair comb, wrap a jeweled chain around it, or change your lipstick to something bold. It instantly feels new.
This versatility makes it a cornerstone for any hairstyle arsenal, easily adapting from old money hair classic to evening-ready drama.
Why This Method Beats The Sock Every Time

Socks are cotton and stretchy, which can create uneven bulk. A hair donut is made of a uniform, lightweight mesh that creates a perfect round shape every time.
It’s also designed to grip hair, so your style is more secure. Socks can slide and get misshapen throughout the day.
Investing in a two-dollar bun form saves you so much time and frustration. It’s a tool designed for the job, and it shows in the flawless result.
Your New Go-To Hairstyle

Once you get this method down, it will become your default “I need to look polished fast” style. It takes less than five minutes after a little practice.
It works for the gym, the office, a wedding, or just a day when you don’t want to think about your hair. It’s reliably chic.
Mastering this one technique opens up so many styling possibilities and gives you that put-together feeling instantly. It’s a true confidence booster.
Experiment and Make It Your Own
Don’t stop at the basic bun! Use this as your foundation. Try wrapping only part of your hair, leaving tails out. Or create two smaller space buns for a fun look.
Play with texture—start with braided hair or curled hair for a totally different effect. The donut method works as a base for so many of the fun 2026 hairstyles emerging.
Hairstyling should be fun. This is a foolproof base camp. From here, you can explore any direction, from romantic to edgy.
And that’s it! The no-sock, no-fuss secret to the perfect bun. It took me a few tries to get the pinning just right, but once it clicked, I never went back. It’s such a simple switch that makes all the difference.
Having a few of these bun forms in your drawer is a game-changer. They last forever, and they give you that salon-perfect shape without any guesswork. It’s the kind of simple, practical trick that makes getting ready a joy.
I’d love to hear how it works for you! Did you try a high bun or a low one? What accessories did you add? Tell me in the comments below!
Save this post to Pinterest to keep this tutorial handy for your next hair day!