Upcycle Old Braids Creatively for Fresh New Looks
Okay, let’s be real. We’ve all been there. You put in the work for a gorgeous set of braids, rocked them for weeks, and now… you’re kind of over them. But taking them out feels like a whole project, and honestly, a waste of a perfectly good foundation.
What if I told you your old braids are actually your secret ticket to a dozen fresh looks? No cutting, no re-braiding, just pure creative magic. Think of them as your hair’s built-in styling tools.
This is all about upcycling what you already have. I’m sharing my favorite, super-easy ways to transform tired braids into something you’ll love all over again. We’re talking quick, practical, and seriously stylish saves.
Get ready to fall back in love with your hair in minutes. Let’s dive into these creative fixes that feel totally new.
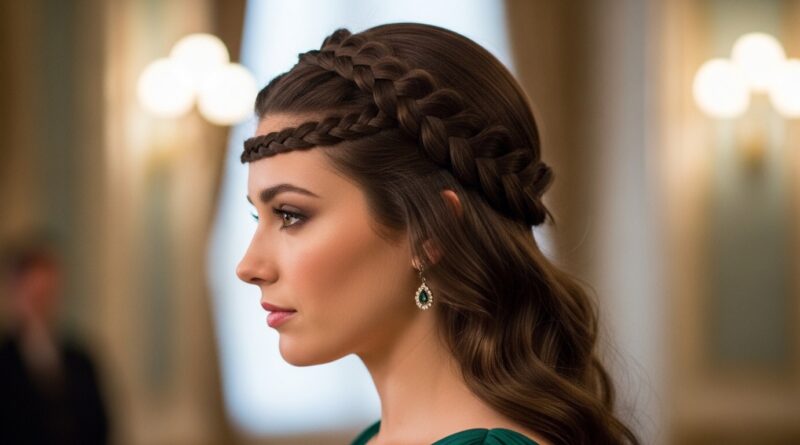
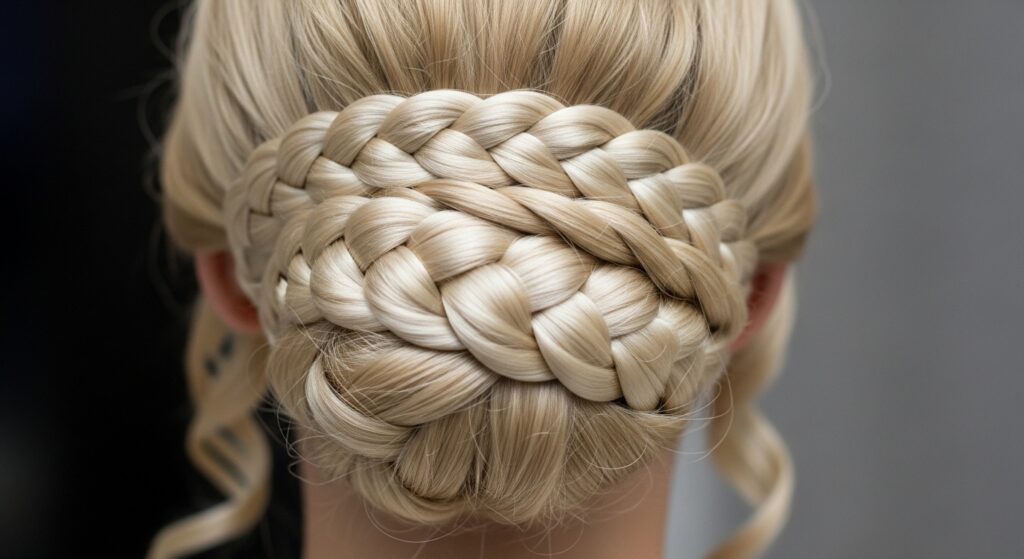
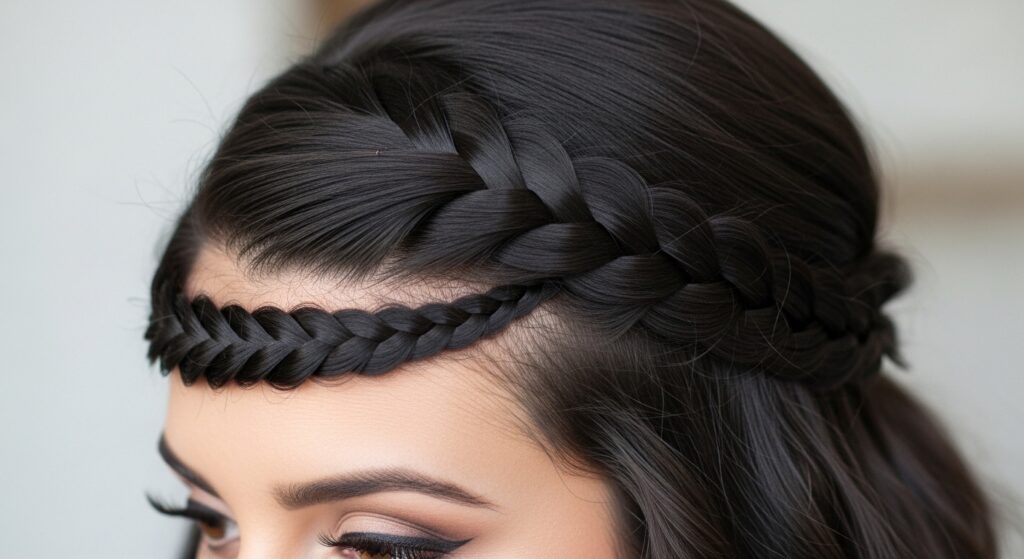
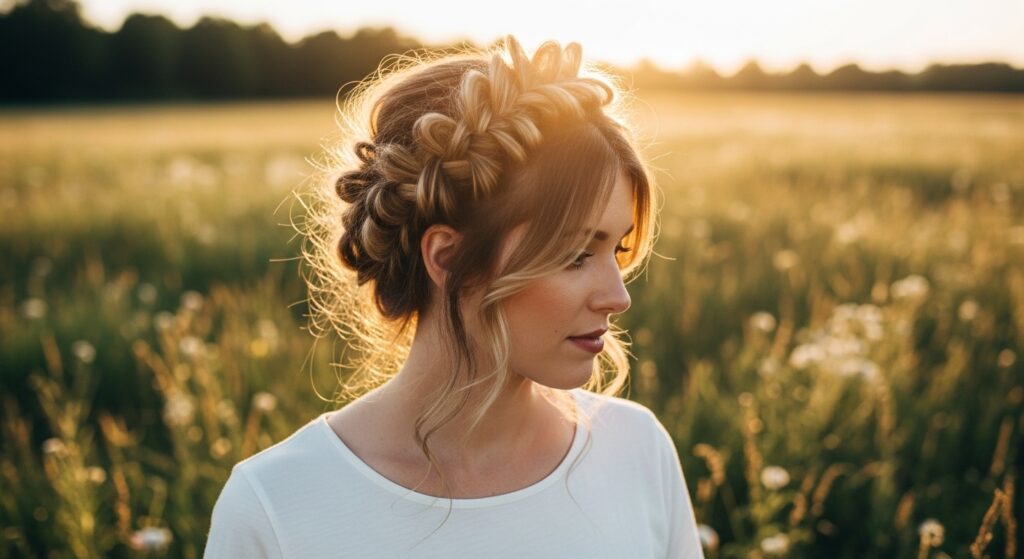
1. The Effortless Braided Crown
This is my go-to for a bad hair day or when I need to look polished fast. It gives off major romantic, ethereal vibes with zero effort. It works with any braid length, even if they’re a bit frizzy at the roots.
Simply gather the top section of your braids and twist them gently back, securing with pins as you go. Don’t aim for perfection. A few loose pieces make it feel soft and lived-in.
- Start with a deep side part for extra volume.
- Use bobby pins that match your hair color.
- Pull out a few face-framing pieces for a flattering touch.
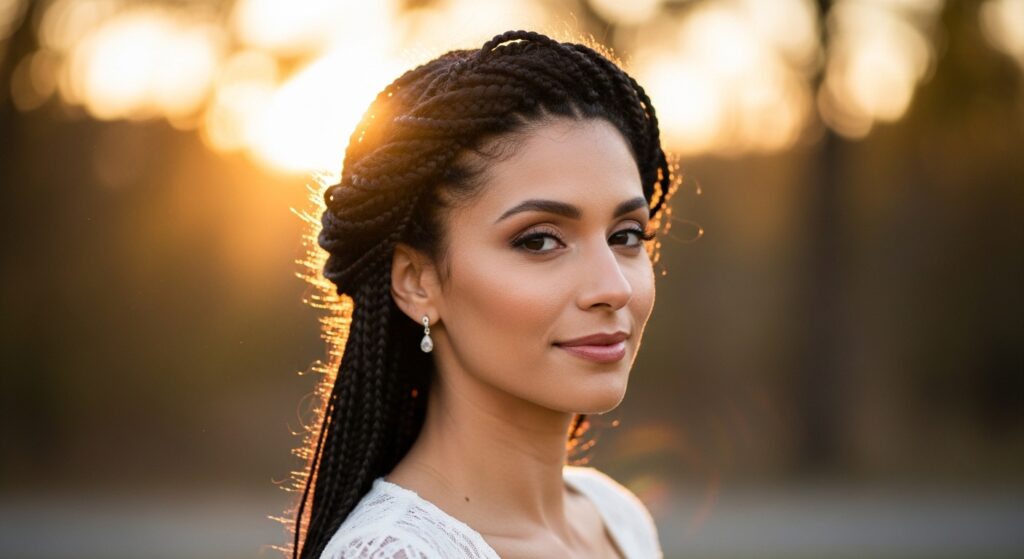
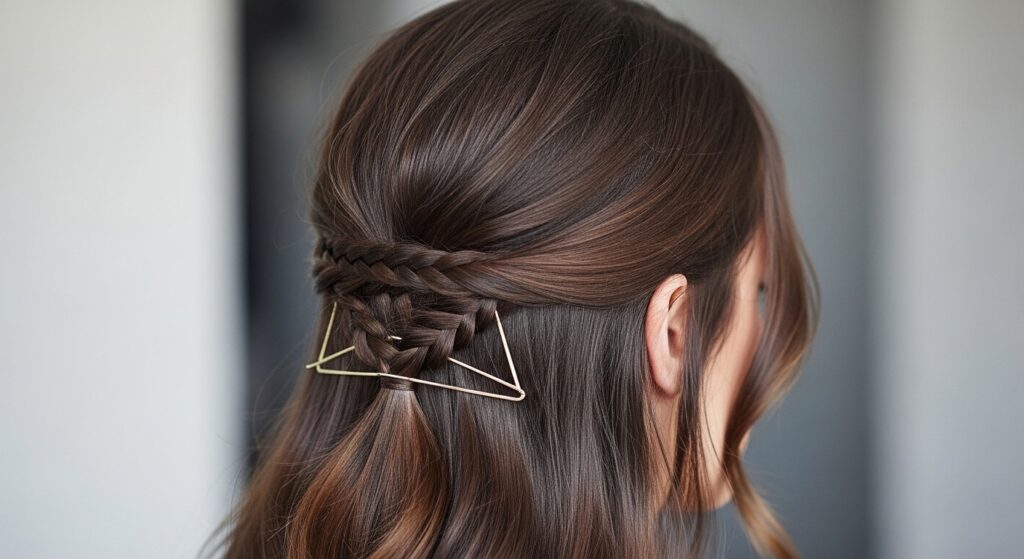
2. The Half-Up, Half-Down Volumizer

If your braids are looking flat, this trick adds instant volume and style. It’s a playful look that takes two minutes but looks like you tried. Perfect for that “I woke up like this” chic.
Gather the front sections of your braids, from about your temples back. Pull them to the crown of your head, but don’t just make a ponytail. Tease the base gently or twist the section before securing it to create lift.
- Use a small, clear elastic to secure the section.
- Wrap a small braid from the tail around the elastic to hide it.
- Gently tug on the sides of the half-up section to widen it.
3. Chic Low Bun with Braid Wrap
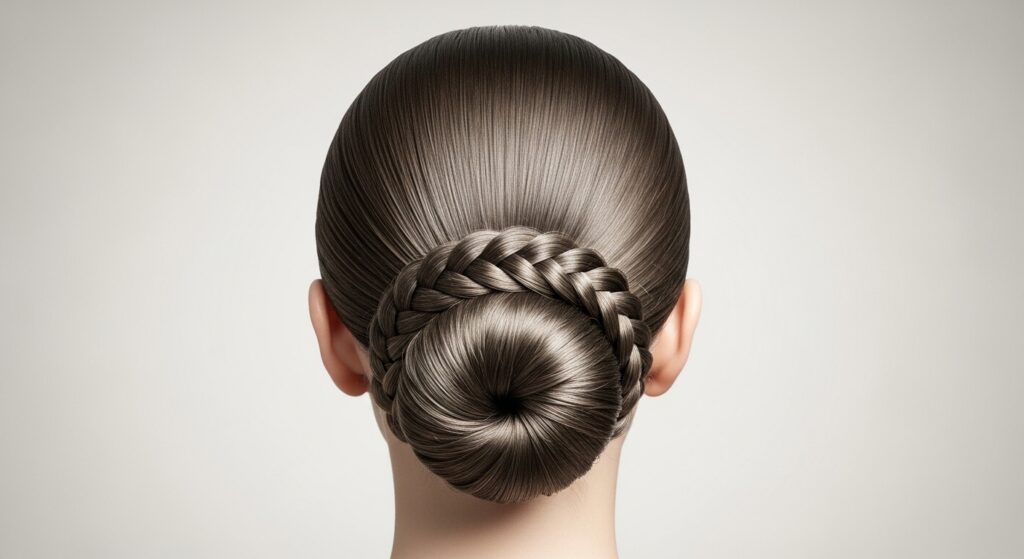
For a look that screams quiet luxury bob energy, but on braids, this is it. It’s sleek, sophisticated, and keeps all the hair completely off your face and neck. Ideal for hot days or fancy events.
Pull all your braids into a low, tight ponytail. Twist or coil the ponytail into a bun and pin it securely. Now, take one loose braid from the bunch (or separate one) and wrap it around the base of the bun, pinning the end underneath.
- Make a low ponytail and coil into a bun.
- Secure the bun firmly with bobby pins.
- Select one braid, wrap it around the base, and pin it down.
4. Boho Headscarf Fusion
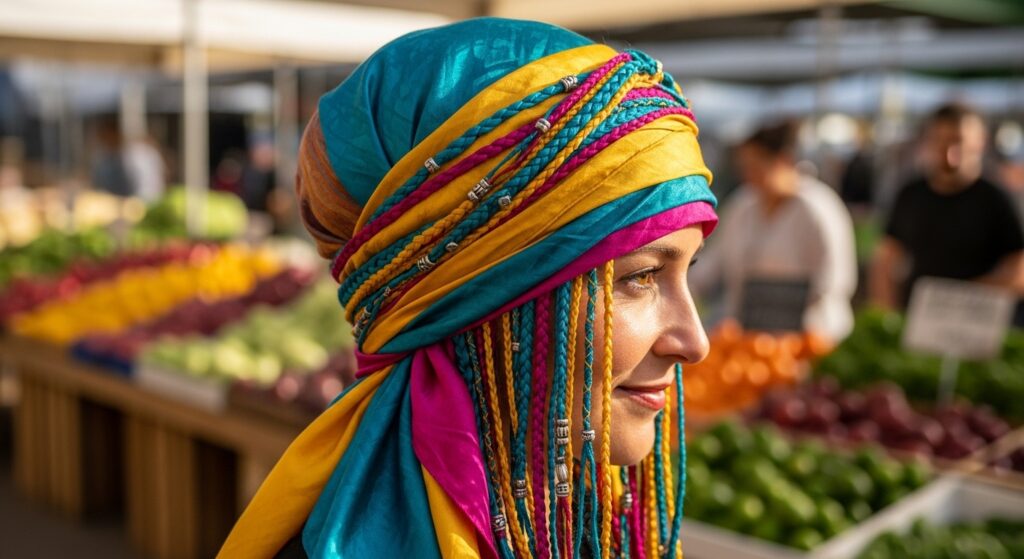
Add a pop of color and pattern to refresh your look instantly. A scarf hides any fuzzy new growth and makes your style look intentional and artistic. It’s a huge trend for 2026 hairstyles leaning into personal expression.
Fold a long, rectangular scarf into a band. Tie it around your head like a headband, letting your braids flow down. For more flair, you can braid the ends of the scarf with a few of your hair braids near your face.
- Choose a silk or satin scarf to prevent friction.
- Let the tails of the scarf drape over your shoulders.
- This also protects your hairline and edges overnight.
5. The “Hime Cut” Illusion

Love the dramatic, geometric look of a hime cut but don’t want to cut your hair? Your braids can create the perfect illusion. It’s a bold, statement look that changes your entire silhouette.
Take two front braids from near your temples. Bring them forward over your shoulders, letting them frame your face sharply. Pin the rest of your braids back smoothly to emphasize the two long, front pieces.
- Isolate two front braids on each side.
- Cut a piece of black ribbon and tie it around the base of each for a polished look.
- Keep the back hair very sleek to sell the cut illusion.
6. Textured High Ponytail
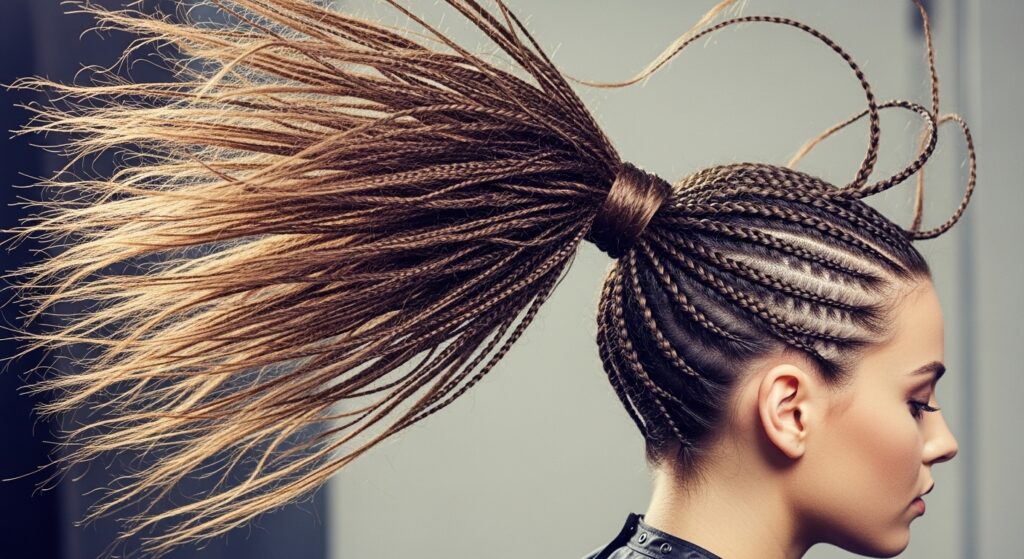
Don’t just make a basic ponytail. A high pony with braids has amazing texture and body. It gives you that cool, model-off-duty vibe and is surprisingly comfortable because the weight is distributed.
Sweep all your braids up to the very crown of your head. Use a strong, coated elastic. The key is to not make it too tight. After securing, gently pull on a few braids near the base to create volume and a messier, fuller effect.
- Use a bristle brush to smooth only the very top section.
- Wrap a small braid around the elastic to conceal it.
- Hairspray the roots of the ponytail for extra lift.
7. Romantic Goth Side Sweep
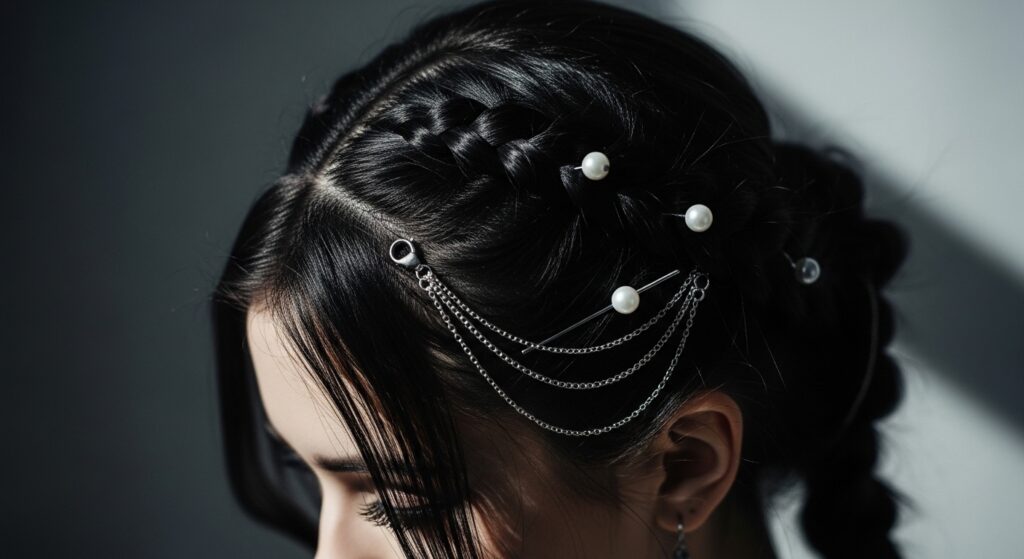
This takes your braids into romantic goth hairstyles territory. It’s dramatic, elegant, and perfect for a night out. The deep side part and gathered volume create a stunning, sculptural effect.
Create a deep side part. Gather all your braids over one shoulder. Secure them loosely at the nape of your neck on that side, not at the bottom. Let them cascade down. Add some delicate, dark accessories for that extra touch.
- Create the deepest side part you can.
- Gather hair to the heavier side.
- Pin in small, dark hair jewels or chains.
8. The Asymmetrical Lob Twist
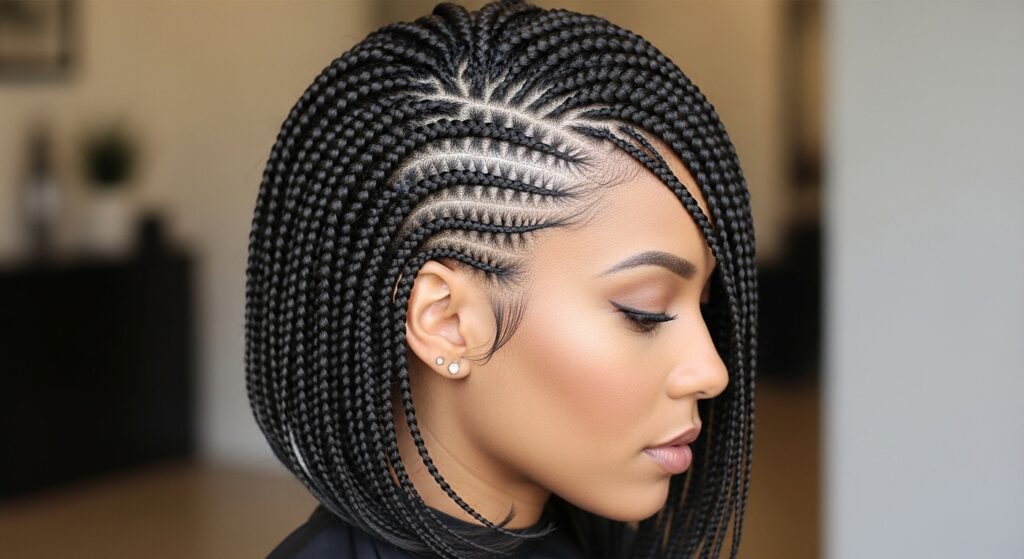
Craving a chic, modern chop like an asymmetrical lob? Style your braids to mimic the shape. It’s a cool, architectural look that feels very fresh and modern, playing with different lengths.
Part your hair deeply. On the shorter side, tuck the ends of the braids up and pin them neatly at the nape. On the longer side, let them fall freely. This creates the iconic angled line of the lob without any scissors.
- Use plenty of pins on the “short” side for a clean tuck.
- Flat iron the braids on the “long” side for a sleeker bob look.
- Finish with a light-hold hairspray to keep the shape.
9. Glitchy Glam Space Buns
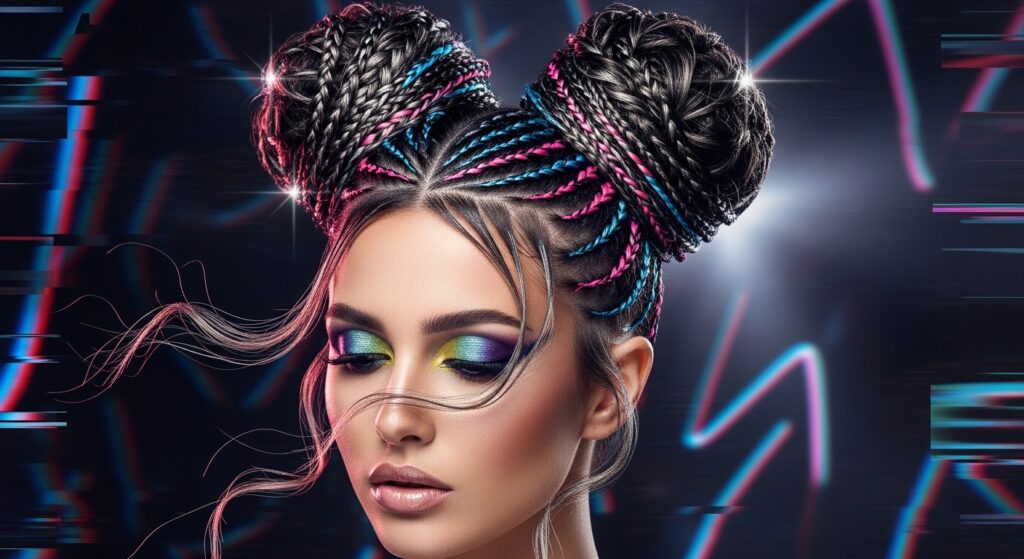
Space buns get a futuristic upgrade. This is pure glitchy glam hair—think intentional wispies, a bit of texture spray, and an edgy, playful attitude. It’s not about being neat; it’s about cool, controlled chaos.
Split your braids into two high pigtails. Twist each into a bun, but don’t pin all the ends. Leave some pieces sticking out deliberately. Pull out tiny hairs around your face and nape. A spritz of colored or metallic hair spray adds the “glitch.”
- Make two very high pigtails.
- Coil into buns, leaving ends free.
- Pull out strategic wispies and mist with texturizing spray.
10. Old Money Hair with Silk Ribbons
Capture that timeless, polished old money hair aesthetic. Incorporating luxurious ribbons into your braids or updo instantly elevates the look. It whispers quality, tradition, and understated wealth.
Take a thick silk ribbon and braid it into one of your front braids. Then, incorporate that braid into a low, twisted bun or chignon. Let the ribbon tail hang down with the braid’s end. The key is using a high-quality ribbon.
- Choose a ribbon in cream, navy, or classic stripe.
- Secure the ribbon at the start of the braid with a small knot under your hair.
- Keep the overall style simple and sleek.
11. The Vampire Haircut Vibe
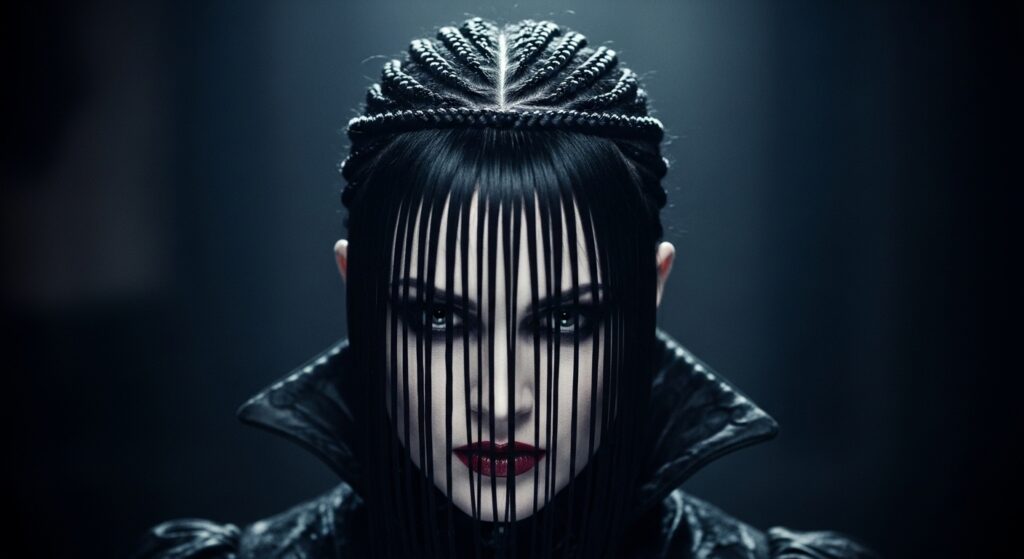
Channel the sharp, mysterious allure of the vampire haircut. It’s all about a heavy, blunt fringe and stark lines. Your braids are perfect for creating that structured, dramatic frame around the face.
Create a section where bangs would be. Take a few thin braids from this section and bring them straight down over your forehead, trimming the ends temporarily with a clip to create a blunt line. Pin the rest back severely.
- Isolate a front section for “bangs.”
- Bring selected braids forward to create a blunt fringe.
- Keep the back hair extremely smooth and dark.
12. Braided Hair Tapestry (Boho Chic)
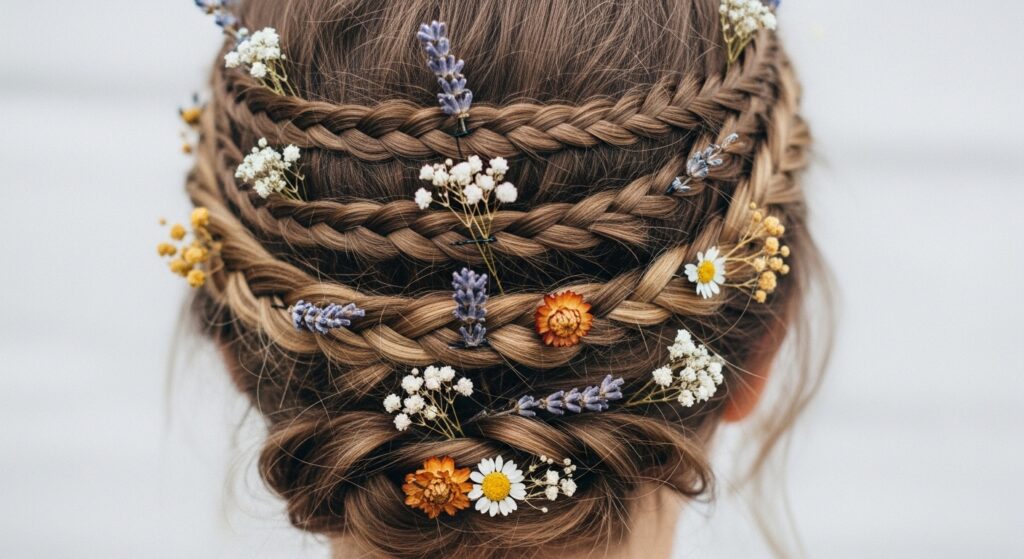
Turn your head into a work of art. This involves loosely pinning your braids in an intricate, woven pattern at the back of your head. It looks complex but is just playful pinning. Add flowers for a festival feel.
Start with all braids down. Take one from the left side, bring it across the back of your head, and pin it. Take one from the right, cross it over the first, and pin. Continue criss-crossing loosely, creating a woven effect.
- Don’t pull braids tight—keep it loose and flowy.
- Use pins that match your hair color.
- Tuck in small, real or faux dried flowers as you go.
13. The Slicked-Back Power Look
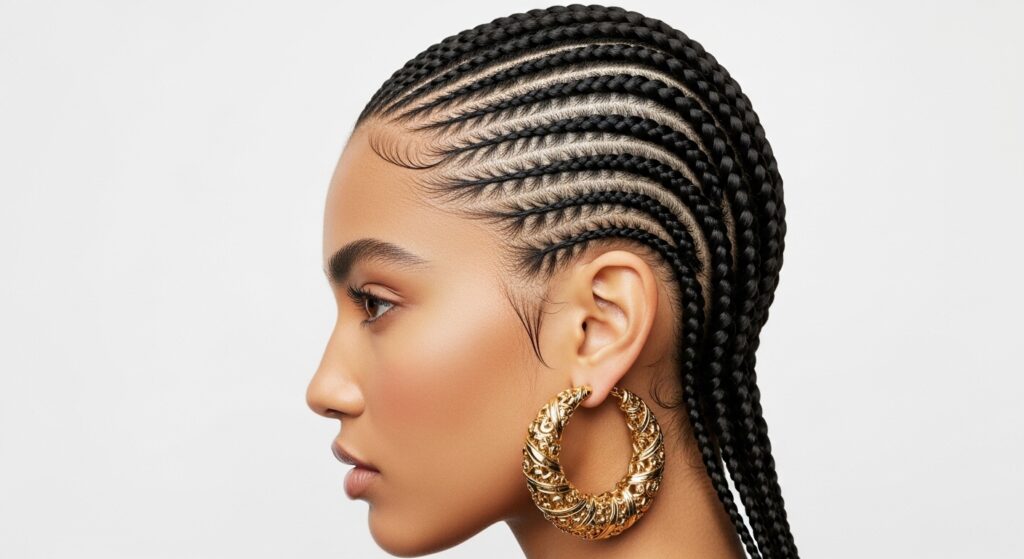
Sometimes the most powerful look is the simplest. A tightly slicked-back style with braids is bold, modern, and puts all the focus on your beautiful features. It’s a red-carpet favorite for a reason.
Use a strong-hold edge control gel or styling gel. With a small brush, slick your edges and the front section of your braids straight back. Secure everything into a low ponytail or bun. The shine and severity are the statement.
- Apply a strong gel to edges and hairline.
- Use a boar bristle brush for maximum smoothness.
- Pair with statement earrings for the full effect.
14. Fishtail Braid Upgrade
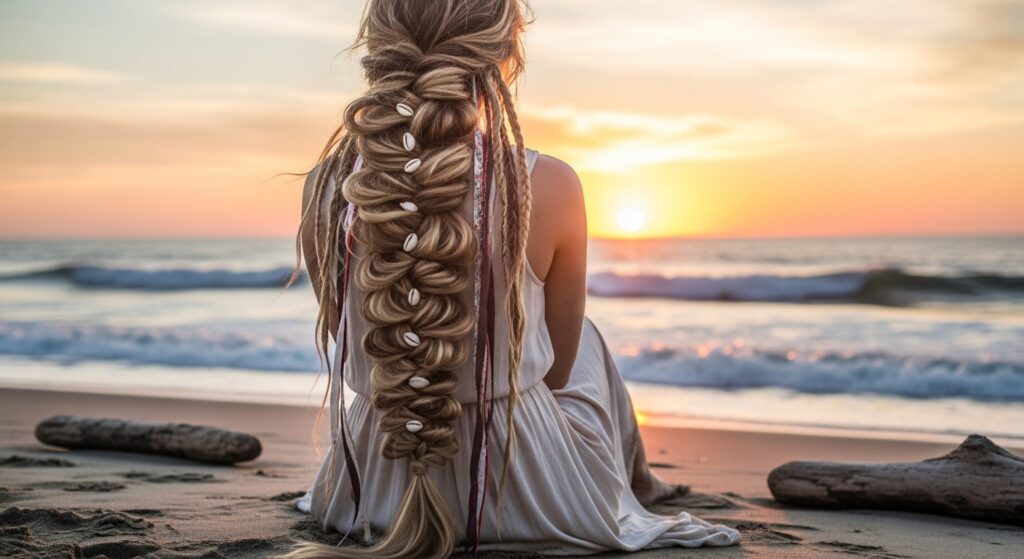
You already have the perfect base for a mega, textured fishtail braid. Combining your individual braids into one large fishtail creates incredible dimension and bohemian texture. It’s easier than it looks!
Gather all your braids as if making a low ponytail. Split them into two equal sections. From the outside of one section, pick up one braid and cross it over to the inside of the other section. Alternate sides. It’s just like a normal fishtail, but with braids as your “strands.”
- Keep the tension loose for a messier, fuller look.
- Secure the end with a clear elastic that matches your hair color.
- Pull gently on the sides of the fishtail to widen it after.
15. Mini Braid Accent Pieces
If you don’t want to restyle everything, just add a detail. Create one or two new, tiny braids from your loose hair or by unraveling a small section of an existing braid. Use them as accent pieces.
Pin a small braid in a straight line across the crown. Or create a curved shape near your temple. You can also criss-cross them at the back. This adds a touch of modern, minimalist artistry to your look in seconds.
- Create 1-2 very small, tight braids.
- Use them like “hair jewelry” by pinning them in shapes.
- Secure with bobby pins that match your hair color.
16. The Mermaid Wave Effect
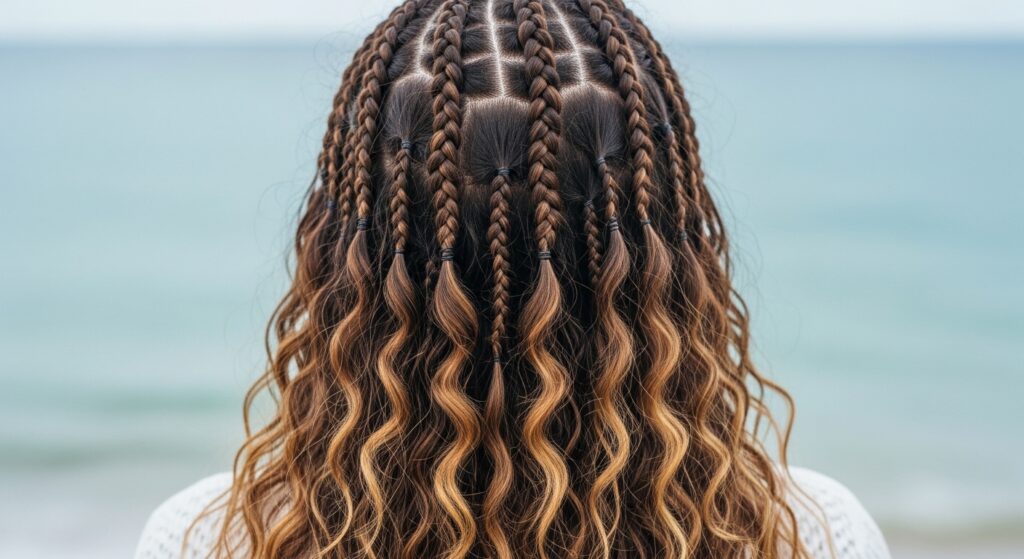
Unravel the ends of your braids to discover beautiful, crimped waves. This gives you a completely different texture—soft, beachy, and romantic. It’s like getting a brand-new hairstyle from the shoulders down.
Choose how much you want to unravel. For a subtle look, just unravel the last few inches. For full mermaid waves, unravel each braid about halfway up. Use your fingers to gently separate and fluff the waves. A light hair oil will tame any frizz and add shine.
- Start unraveling from the bottom up.
- Use fingers, not a brush, to separate waves.
- Apply a drop of hair oil to smooth the ends.
17. Elegant Braided Headband
Use one of your own braids as a hair accessory. This creates a beautiful, ethereal headband effect that keeps hair out of your face in the most elegant way possible. It feels very princess-core but in a cool way.
Take a front braid from one side. Gently pull it across your hairline to the other side, placing it like a headband. Pin it securely behind your ear on the opposite side. Let the rest of your braids flow down freely.
- Select a front braid with some length.
- Drape it across your forehead like a tiara base.
- Pin it securely behind the opposite ear.
18. The Modern Milkmaid Style
The milkmaid braid crown gets a 2026 update—less perfect, more textured. It’s romantic, practical, and keeps all your hair beautifully contained. It works amazingly well on second or third-day braids.
Split your braids into two sections. Twist each section forward and up, wrapping them around your head like a crown. Pin them securely where they meet. The goal isn’t a perfect braid crown, but a twisted, soft one.
- Twist, don’t braid, the sections for a softer look.
- Leave out your baby hairs and some face-framing pieces.
- Tuck in small flowers for a sweet, rustic touch.
19. Sporty Braided Updo for Active Days
When you need your hair completely secure and off your neck, this is the answer. It’s a functional, sleek updo that lays flat and looks polished. Perfect for the gym, under a wig cap, or a


