Wash and Go Hairstyles for Natural Hair: The Routine That Turns Wash Day Into Your Best Hair Day
Here is the quiet truth about the wash and go: it is not a hairstyle you put on after wash day — wash day is the hairstyle. The wash and go takes the curl pattern your hair already has, feeds it water and the right products, and lets it dry into its most defined self. No hot tools, no braids to unravel the next morning, no hours in front of a mirror. Just clean, soaking-wet hair, a leave-in, a styler, and the patience to let your curls and coils do what they were built to do.
This guide walks through 38 wash and go hairstyles for natural hair, from loose 3A curls to tight 4C coils, short TWAs to long wash and gos, gel casts to custards, diffused volume to air-dried definition. Eight guides explain what a wash and go really is, how curl pattern and porosity change the routine, which products define and which weigh hair down, the wash-day routine step by step, diffusing versus air-drying, shrinkage and how to stretch it, refreshing second and third-day hair, and the mistakes that turn definition into frizz. One honest note first: a wash and go is a routine you learn, not a product you buy — the same gel can give one person glossy ringlets and another a crunchy halo, and the difference is almost always technique, not the bottle.
What a Wash and Go Really Is — And What It Is Not
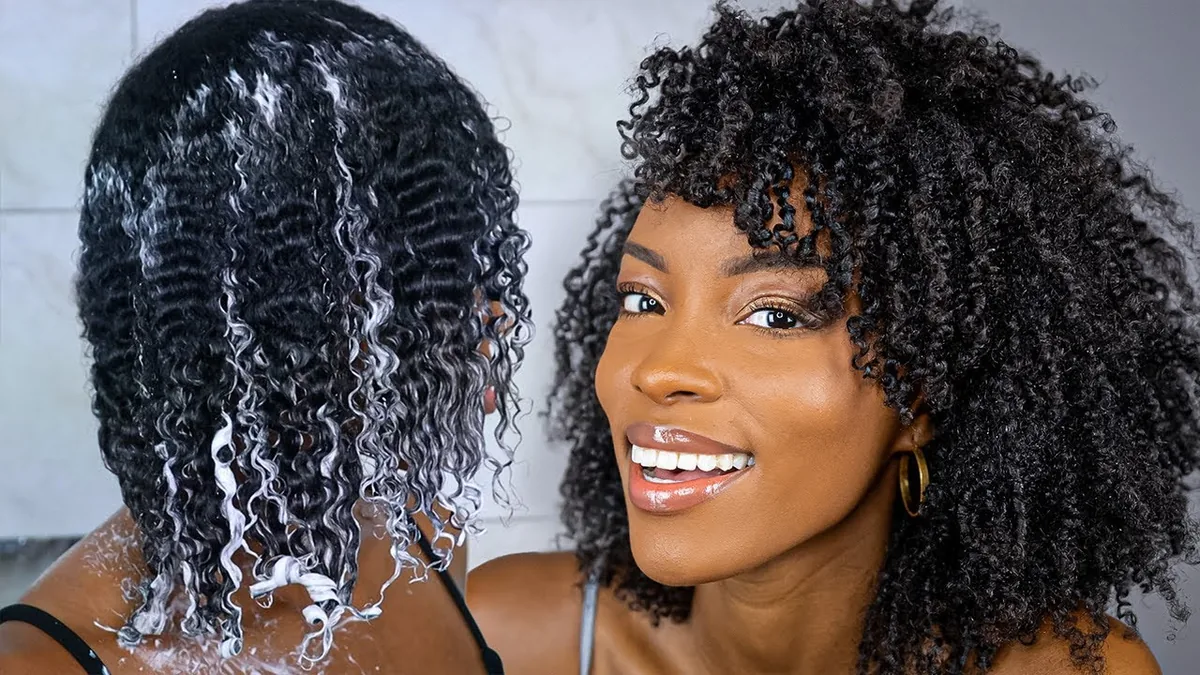
A wash and go is exactly what it sounds like: you wash your hair, apply styling products to soaking-wet hair, and let it dry — go. There is no heat styling, no twisting or braiding to set a pattern, and no stretching the curl out of shape. The style is your natural curl pattern, defined. That is the whole idea, and it is also why the wash and go is the most honest hairstyle natural hair has: it shows your real texture, exactly as it grows, with nothing hiding it.
What it is not: a shortcut to someone else’s curl pattern. A wash and go will not turn 4C coils into 3A ringlets, and it will not make fine, low-density hair look thick. What it will do is show your own pattern at its best — clumped, shiny, defined curls or coils that last for days when the routine is right. Quick verdict: if you want your natural texture, only better, the wash and go is the style to master — and if you want a different texture altogether, a twist-out or a silk press will serve you better than forcing a wash and go to be something it is not.
Curl Pattern and Porosity: Know Your Hair Before You Pick a Product
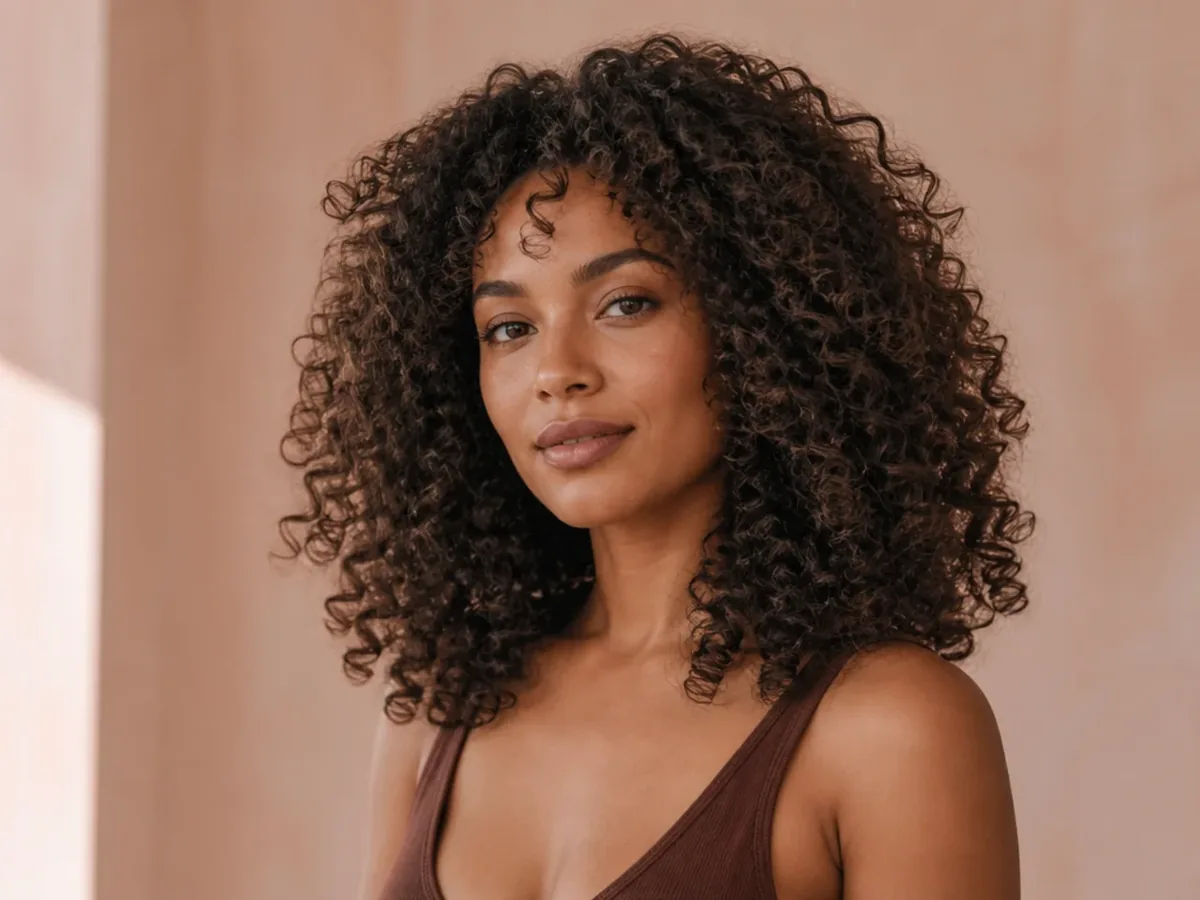
Curl pattern is the shape of your curl — loose 3A waves, springy 3B and 3C curls, tight 4A coils, zigzag 4B coils, and dense 4C coils with almost no visible curl at all when dry. Most heads have two or even three patterns at once, and the looser pattern at the front often needs a different product than the tighter pattern at the nape. Porosity is how easily your hair absorbs and loses water: low-porosity hair has a tight cuticle that resists water and product, high-porosity hair drinks it up and dries out fast, and normal porosity sits in between.
Why it matters: low-porosity hair usually needs lighter products and warm water to open the cuticle, and heavy butters will sit on top of it and flake. High-porosity hair needs creams and butters to seal moisture in, and it loves a gel with strong hold. A simple test: drop a clean strand in a glass of water — if it floats for minutes, your porosity is low; if it sinks fast, it is high. Pros and cons: knowing your pattern and porosity saves you from buying every gel on the shelf, but it is a starting point, not a rule — always test a product on one section before committing your whole head to it.
Products That Define vs Products That Weigh Down: Gels, Creams, Custards and Mousses
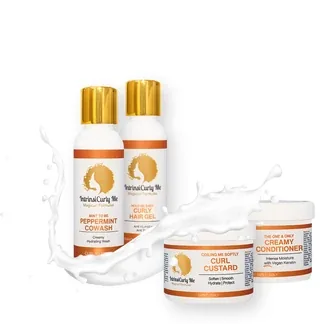
Every wash and go runs on two jobs: moisture and hold. A leave-in conditioner does the moisture job, and a styler — gel, custard or mousse — does the hold job. Gels give the strongest definition and the longest-lasting cast, which is why they are the backbone of most wash and gos. Custards are thicker, creamier gels that add moisture along with hold and suit dense, thirsty hair. Mousses are light and foamy, great for volume and for fine hair that gels would crush. Creams define softly but rarely hold a wash and go on their own past day one.
The weighing-down problem is real: heavy butters and thick creams under a gel can stop the gel from forming a cast at all, leaving soft, undefined hair that frizzes by lunchtime. The usual fix is to layer light to heavy — leave-in, then cream if you need it, then gel last — and to use less than you think on the first pass. Common mistake: stacking three stylers because one did not work. If a gel gives you flakes, it is usually reacting with the cream underneath, not failing on its own. Test pairs, not piles: one leave-in plus one styler, and change only one thing at a time.
The Wash-Day Routine, Step by Step: From Soaking Wet to Defined
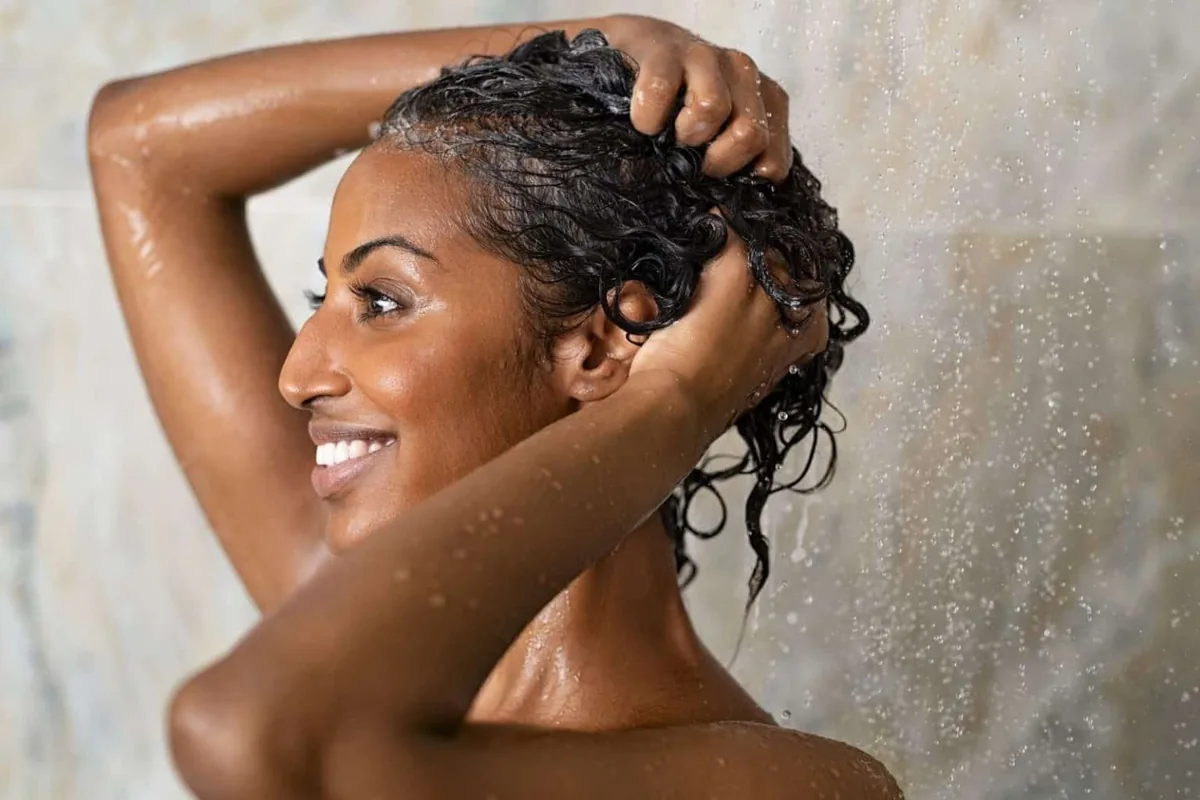
A good wash and go starts before any product touches your hair. Detangle on soaking-wet, conditioned hair with a wide-tooth comb or your fingers, working from the ends up, and rinse thoroughly — product cannot define hair that still has old buildup on it. Then, while the hair is still dripping wet, apply your leave-in in sections, raking it through so every strand is coated. Follow with your styler the same way, section by section, smoothing it down each clump of curls. The hair should look like wet ribbons or coils before you even think about drying.
Drying is where the style is made or broken. Do not touch the hair while it dries — every touch breaks a clump and invites frizz. If you diffuse, use low heat and low speed and hover the diffuser rather than scrunching the hair into it. If you air-dry, give it time: thick, dense hair can take four to six hours to dry fully, and a wash and go that feels dry on the outside may still be damp at the roots. Time and cost: a wash day takes about 45 minutes of hands-on work plus drying time, and the products cost a few dollars per wash. Quick verdict: the routine is simple, but the discipline — wet hair, sections, no touching — is the whole game.
Diffusing vs Air-Drying: Which Gives You Volume, Which Gives You Definition
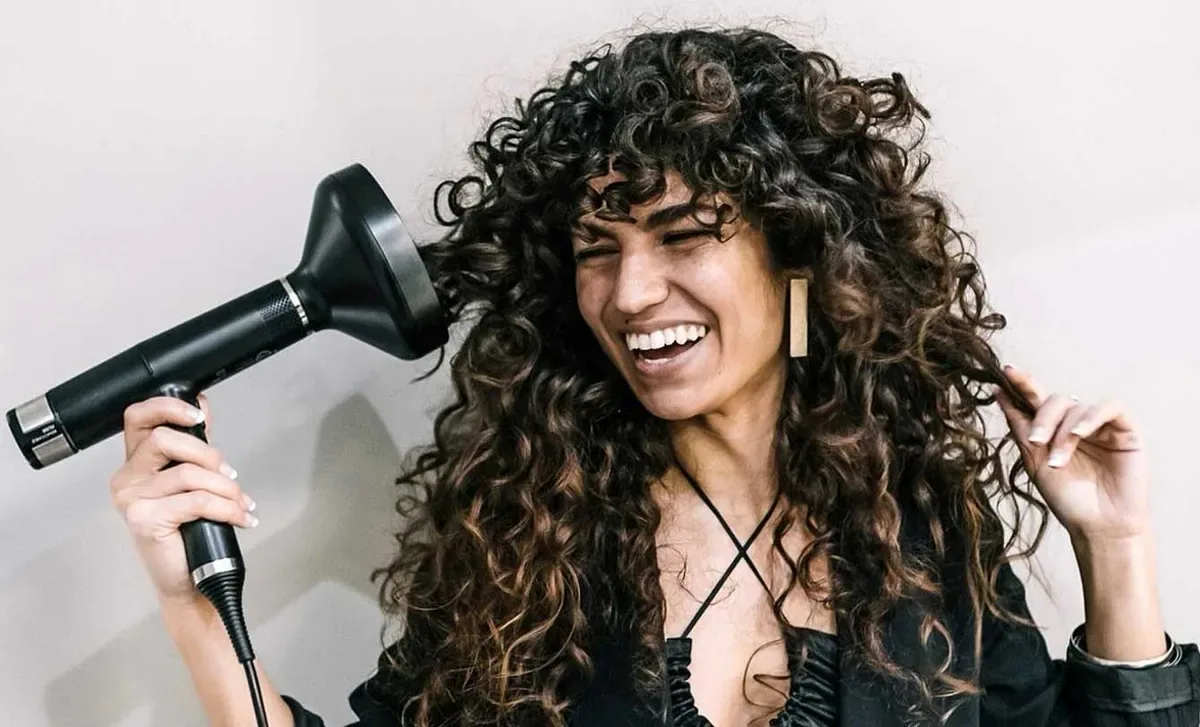
Air-drying gives the most definition: the curls dry exactly as they formed, with no wind to disturb them, and the result is usually the shiniest, most clumped wash and go you can get. The price is time — dense hair can take half a day to dry — and the roots dry flat, so air-dried wash and gos often have less volume at the crown. Diffusing flips that trade: warm air speeds drying to under an hour and lifts the roots, giving big, full volume, but every bit of movement risks frizz if the airflow is too strong.
The middle path works for most people: air-dry for the first 20 to 30 minutes until the cast starts to set, then diffuse on low heat and low speed, hovering around the roots and ends without scrunching the hair up into the bowl. A diffuser with prongs lets you lift at the roots without disturbing the curl clumps. Pros and cons: air-drying is free, gentle and the most defined, but slow and flat at the roots; diffusing is fast and voluminous, but it needs a gentle hand and a heat protectant. Who should avoid diffusing: anyone whose hair frizzes at the slightest touch — air-dry those wash and gos, and diffuse only the roots.
Shrinkage: Why Your Hair Looks Short — And How to Stretch It Without Heat
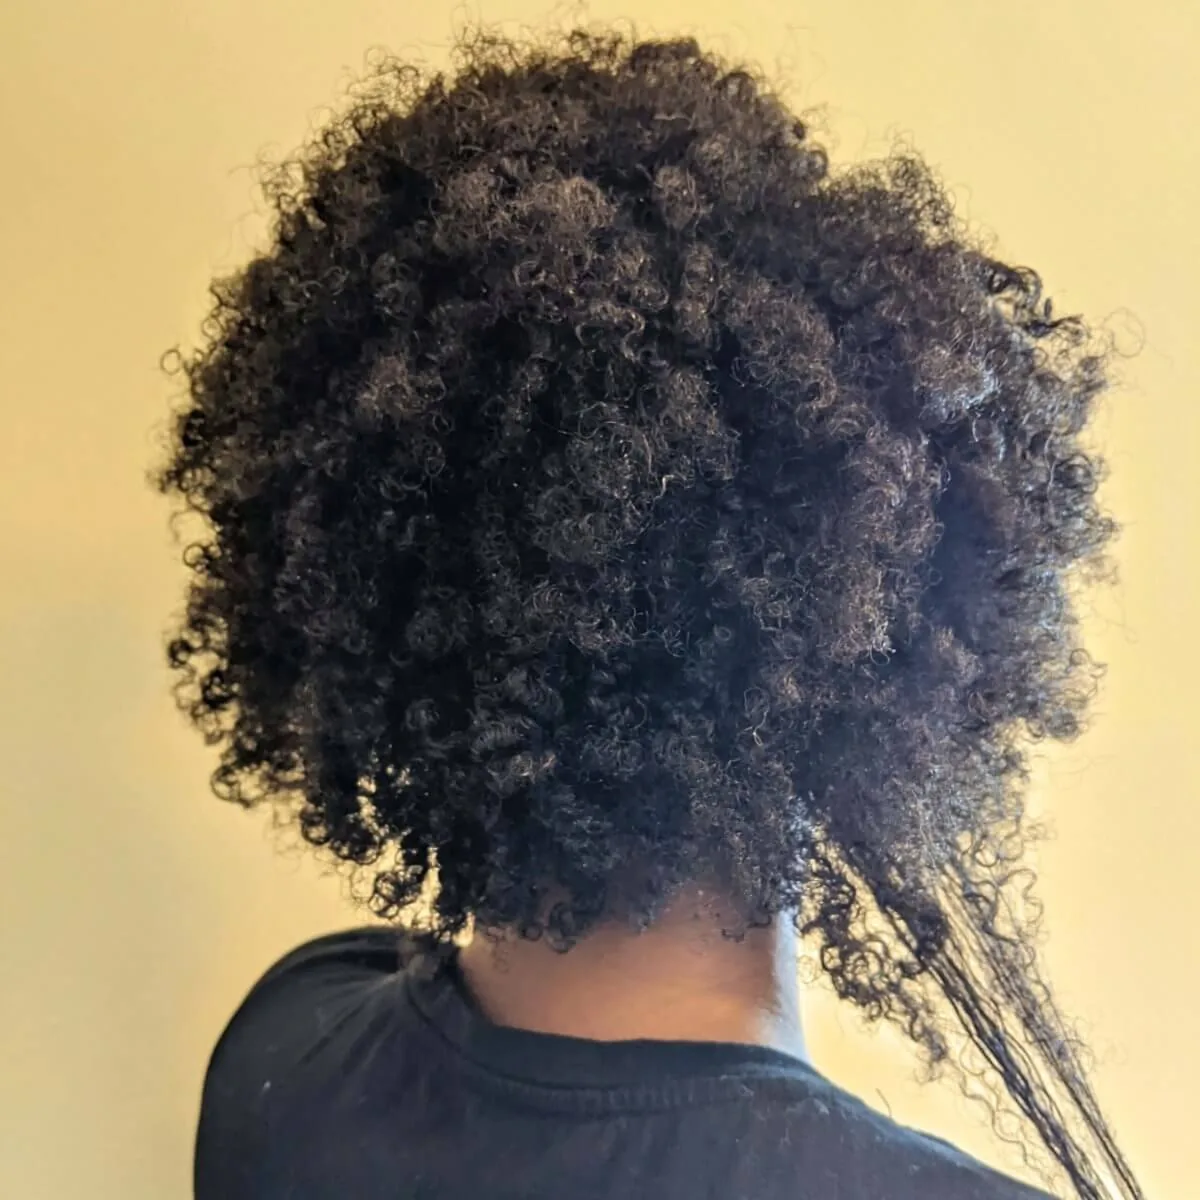
Shrinkage is not damage and it is not a problem to fix — it is what healthy curly and coily hair does. A 4C coil can shrink to a third of its stretched length, and even 3C curls can lose half their length when they dry. The tighter the curl, the more shrinkage, and the more shrinkage, the more people assume their hair is not growing. It is growing; it is just springing back. Understanding that is the first step, because the goal is never to eliminate shrinkage — it is to choose when you want length and when you want definition.
To stretch without heat, try banding: after the wash and go dries, wrap loose fabric bands or ouchless elastics down the length of each section and leave them for an hour. African threading does the same thing more thoroughly. A stretched wash and go can also be achieved with a light root stretch — gently pulling the roots upward while diffusing, or clipping the roots with duckbill clips while the hair dries. Common mistake: stretching wet hair, which breaks the curl clumps and causes frizz. Always stretch dry or nearly dry hair, gently, and accept that some shrinkage is the price of definition.
Refreshing Second and Third-Day Hair: Bring the Curls Back Without Rewashing

A wash and go that only looks good on day one is a wash and go that is not finished yet. The refresh is the second half of the routine: each morning, mist the hair lightly with water — a spray bottle with water and a drop of leave-in is enough — then smooth a pea-sized amount of gel or cream over the frizziest sections and let it dry again without touching it. The water reactivates the products already in your hair, so you rarely need a full reapplication. Ten minutes, and day-two hair can look almost as good as day one.
Sleep is the other half of the refresh: a satin bonnet, a silk scarf, or a satin pillowcase keeps the curls from being crushed and frayed overnight, and a loose pineapple — hair gathered high and loosely on top of the head — protects the curl pattern while you sleep. In the morning, take the pineapple down, shake the roots gently, and refresh only the sections that need it. Maintenance: most wash and gos last three to five days with a daily refresh; by day four or five, the roots are usually ready for a wash. Quick verdict: the refresh is not a rescue mission — it is part of the style, and it is what makes a wash and go a multi-day hairstyle instead of a one-day wonder.
Mistakes That Cause Frizz: The Habits Undoing Your Wash and Go
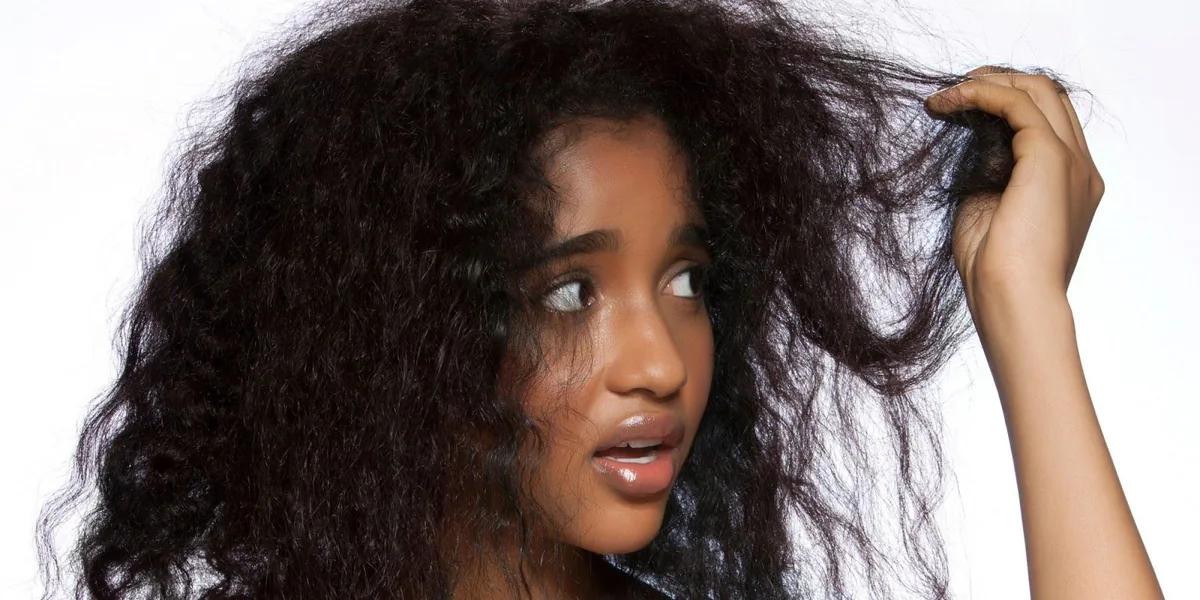
Frizz is not a hair type — it is a sign that something in the routine broke a curl clump or let moisture escape. The most common culprit is touching the hair while it dries: every poke, scrunch and rearrangement separates curls into frizz. The second is a regular terry-cloth towel, whose rough loops rough up the cuticle; a microfibre towel or an old cotton T-shirt is the fix. The third is applying product to damp hair instead of soaking-wet hair — the curls have already started to separate by then, and no amount of gel will put them back together.
Other frizz makers: skipping the leave-in under a strong gel, which leaves the hair dry and crunchy; using a gel that flakes with your leave-in; and sleeping without protection, which rubs the curls apart overnight. The fix for most of them is the same: more water during styling, less touching during drying, and a gel cast that you leave completely alone until the hair is 100 percent dry. Who should worry least: anyone whose wash and go looks good on day one and only frizzes by day three — that is normal wear, and a refresh fixes it. Quick verdict: a wash and go is a hands-off style, and the hands are usually the problem.
1. The Classic Wash and Go on 3A Curls
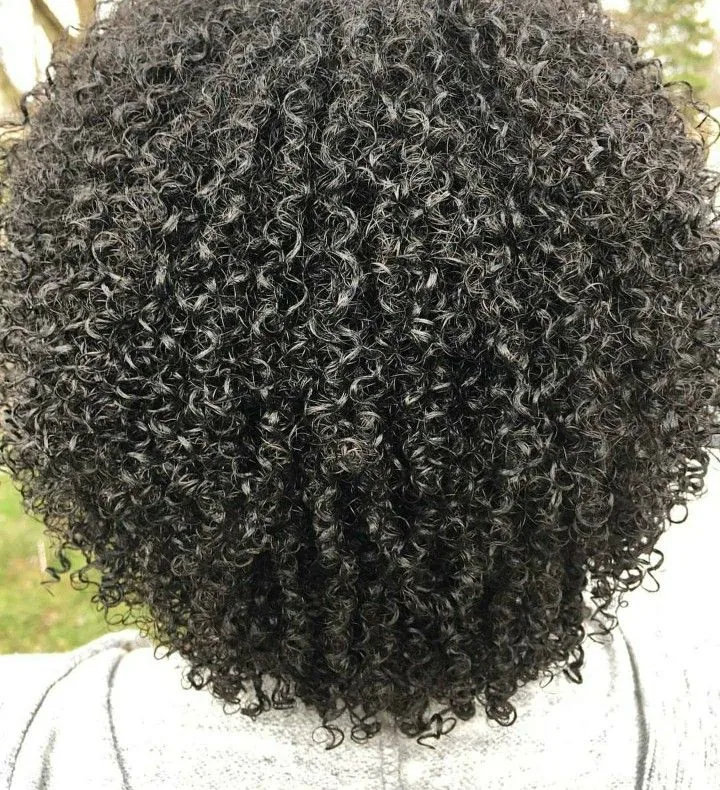
Type 3A curls are loose, S-shaped waves that fall in wide, silky loops — the easiest curl pattern to wash and go, and the one most likely to look good with the lightest products. The goal here is not to force more curl, but to keep the waves from falling flat: a lightweight leave-in and a light-hold gel or mousse, applied to soaking-wet hair, give the waves definition without weighing them down. The result is soft, bouncy, beachy-looking curls that move when you walk.
Best for: 3A curls and anyone whose waves drop out by midday. How to style it: rake a light gel through soaking-wet hair, scrunch upward once, and air-dry — the lighter the touch, the better the wave holds. Pros and cons: 3A wash and gos dry fast and need the least product, but they also lose definition fastest and may need a day-two refresh. Common mistake: using a heavy cream or butter, which pulls the loose wave straight. Quick verdict: the lightest wash and go in this guide — and proof that less product often means more curl.
2. The Wash and Go for 3B Curls
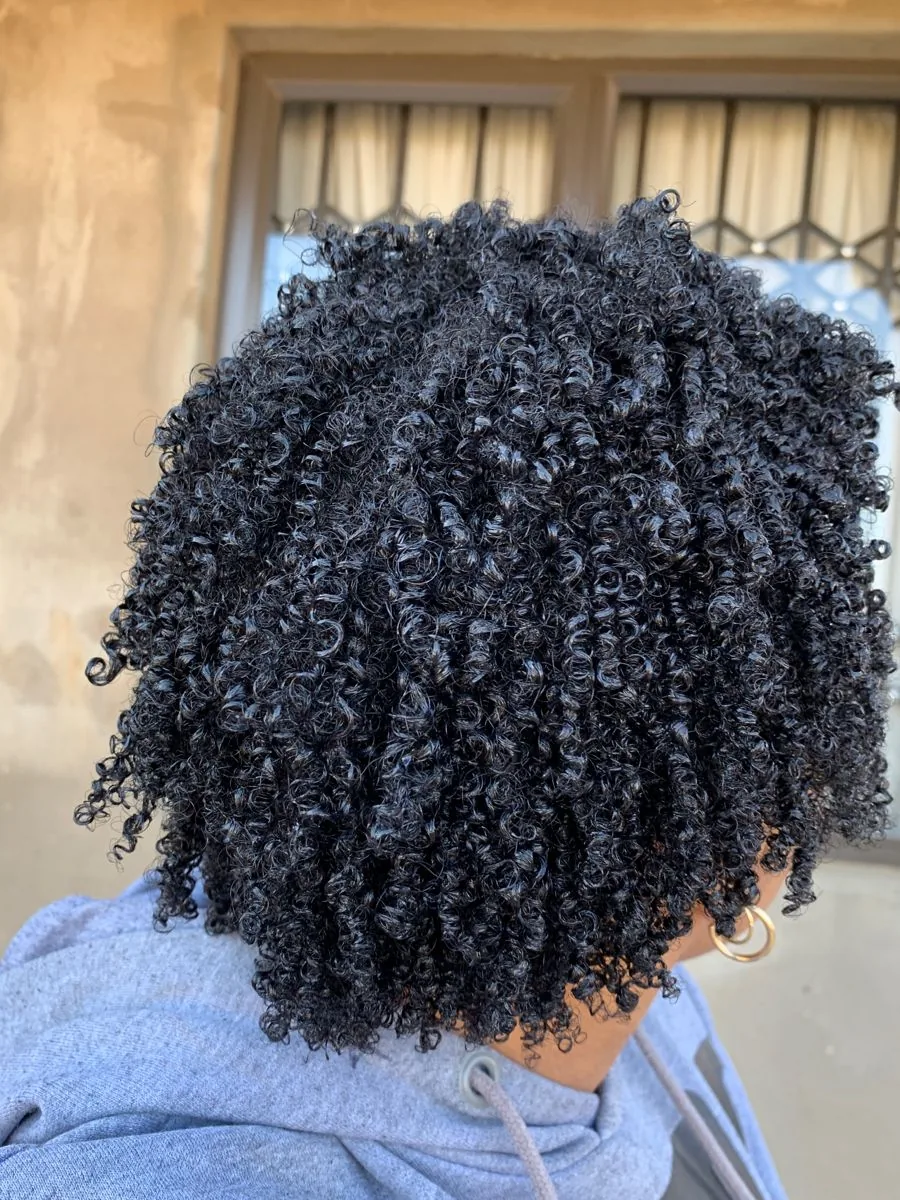
Type 3B curls are springy, well-defined ringlets about the width of a marker — bouncy, shiny, and full of natural volume. A wash and go on 3B hair is all about clumping: the curls want to group together into ribbons, and your job is to help them do it with enough water and a medium-hold gel. Rake the product through, then smooth each clump down with praying hands, and let the curls form their own groups as they dry.
Best for: 3B curls that frizz easily at the crown. How to style it: leave-in, then gel, section by section, on dripping-wet hair; diffuse the roots for lift or air-dry for maximum shine. Maintenance: a silk pillowcase at night and a light mist refresh in the morning keep 3B curls going for three to four days. Who should avoid heavy products: 3B hair gets weighed down faster than tighter patterns, so skip the thick butters. Quick verdict: the most forgiving wash and go — 3B curls practically define themselves when they are wet enough.
3. The Wash and Go for 3C Curls
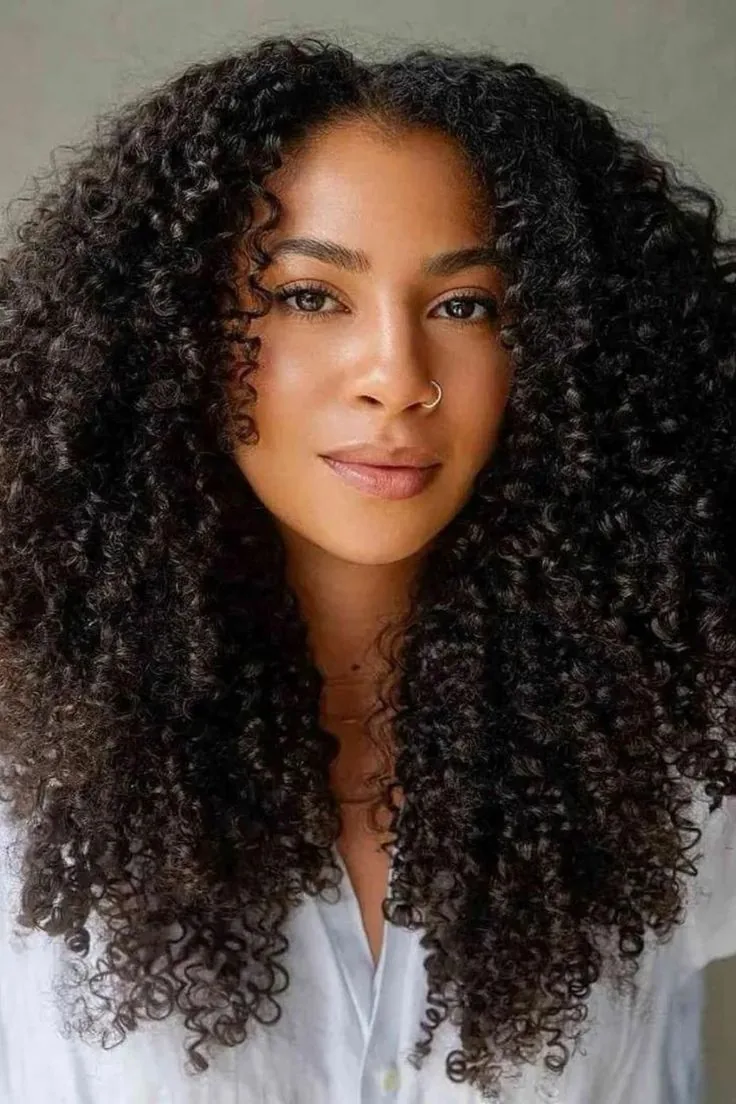
Type 3C curls are tight, corkscrew ringlets about the width of a pencil — dense, springy, and full of volume the moment they dry. A wash and go on 3C hair needs more moisture than 3B: a rich leave-in, then a gel or custard with real hold, because these curls are strong enough to drink up product and still ask for more. The payoff is definition that holds for days and a wash and go that looks deliberately styled, not accidental.
Best for: 3C curls and dense hair that needs hold. How to style it: shingle the gel through small sections on soaking-wet hair, smoothing each curl clump between your fingers as you go. Cost and time: about an hour of hands-on work for dense 3C hair, plus drying time. Common mistake: using too little product — 3C hair needs a generous amount, applied evenly, or the outer layers frizz while the inside stays defined. Quick verdict: the wash and go that rewards patience — give 3C hair the product and the time, and it gives you ringlets for days.
4. The Wash and Go for 4A Coils
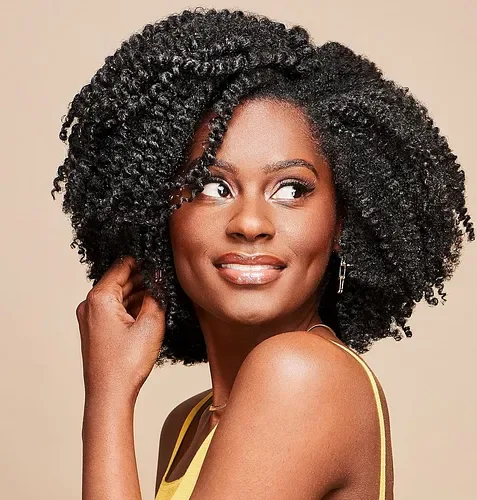
Type 4A coils are tight, S-shaped coils about the width of a crochet needle — springy, defined, and prone to shrinkage that can hide half the hair’s true length. A wash and go on 4A hair is a balancing act: enough moisture and hold to define the coils, without so much product that the hair feels coated. A leave-in plus a gel or custard, applied in small sections to soaking-wet hair, gives coils that clump beautifully and shine when the light catches them.
Best for: 4A coils and anyone learning their first wash and go. How to style it: work in four to six sections, rake in leave-in, then smooth gel over each coil clump with praying hands. Maintenance: refresh with water and a little gel on day two and three; 4A coils hold a wash and go well for three to five days. Pros and cons: 4A definition is stunning and long-lasting, but the hair shrinks dramatically, so do not judge the length until it is stretched. Quick verdict: the coil pattern where a wash and go really earns its name — wash, define, go, and the coils do the rest.
5. The Wash and Go for 4B Coils
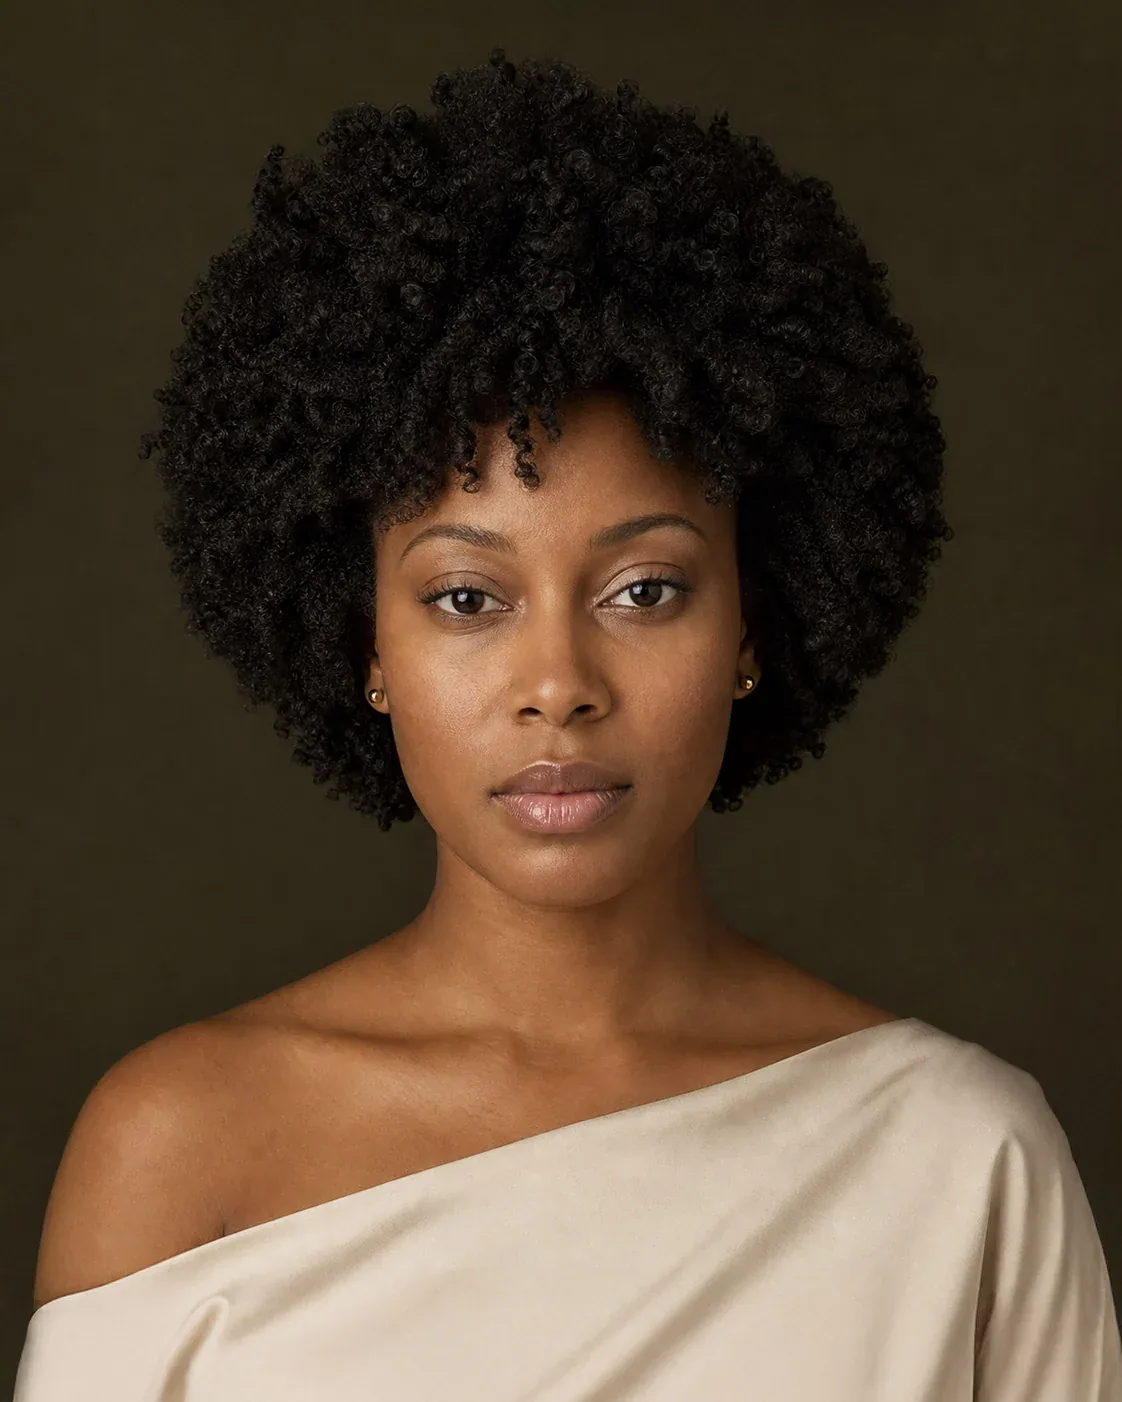
Type 4B coils are tighter and more zigzag than 4A, with less visible curl when dry and a soft, cottony texture. A wash and go on 4B hair is less about showing a curl pattern and more about creating clumped, defined coils that hold together instead of separating into frizz. That means moisture first — a rich leave-in on soaking-wet hair — then a gel with strong hold, applied in small sections with the shingling method, smoothing each section between your fingers until the coil pattern shows.
Best for: 4B coils that usually look undefined after wash day. How to style it: shingle in small sections, using more product than you think you need, and let the hair dry completely before touching it — 4B hair that is touched while damp turns to frizz fast. Common mistake: expecting 4B coils to look like 3C curls. They will not, and they should not — 4B definition is softer, denser and more textured, and it is beautiful on its own terms. Quick verdict: the wash and go that needs the most technique, and the one that proves definition is not only for loose curls.
6. The Wash and Go for 4C Coils
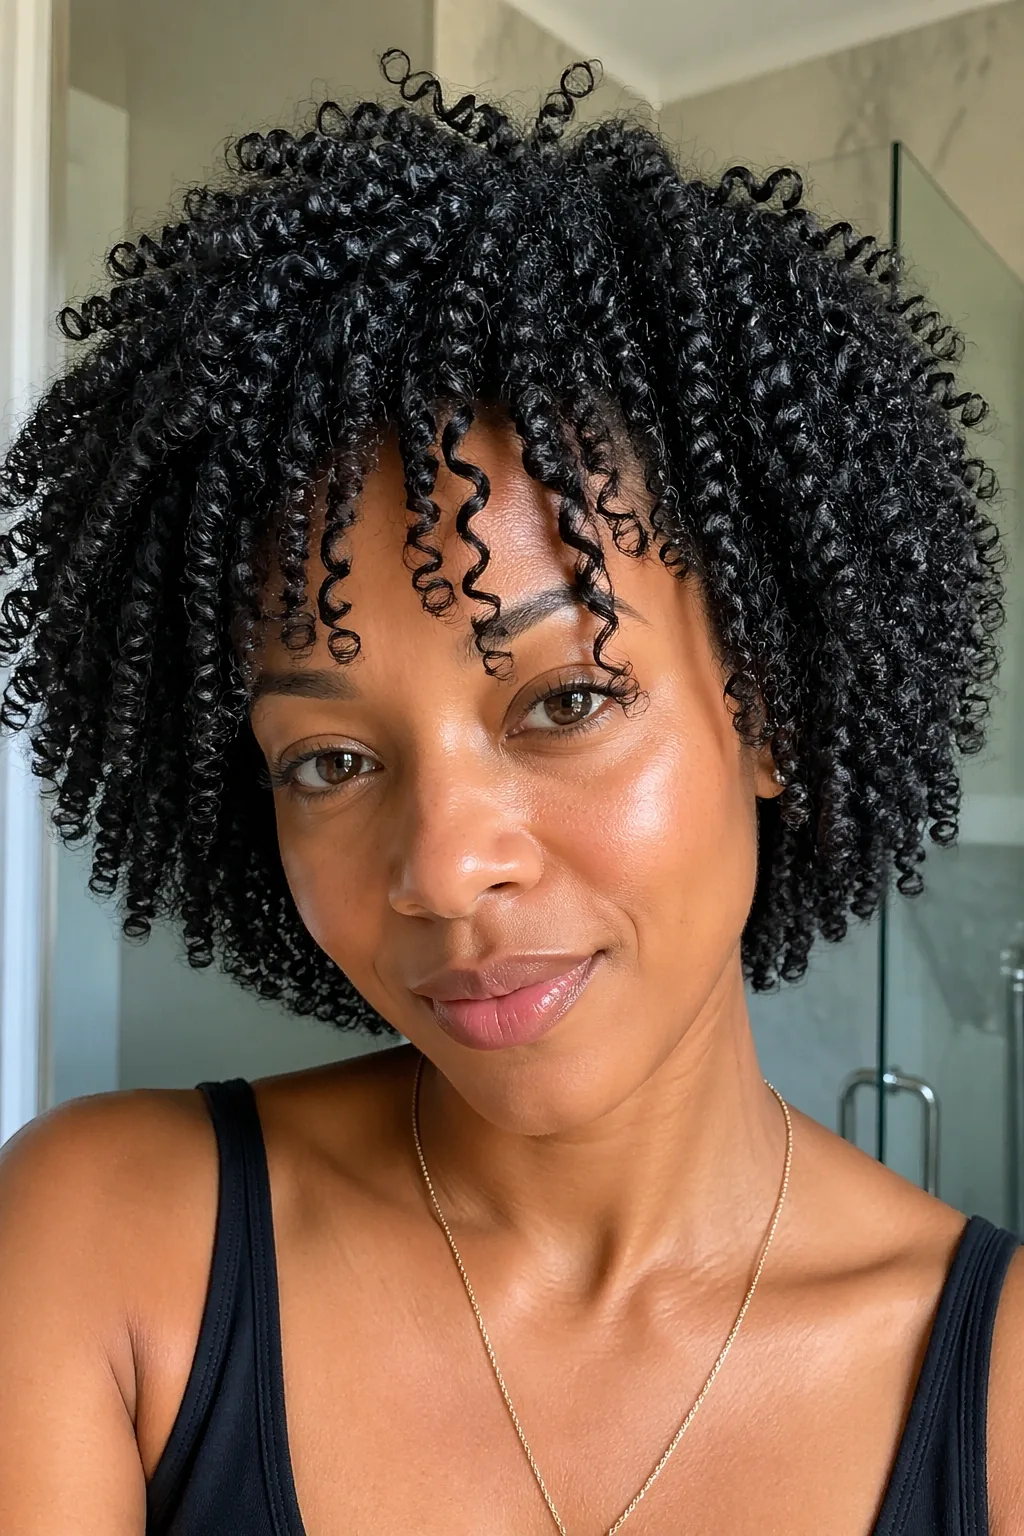
Type 4C hair is the tightest coil pattern, with almost no visible curl when dry and the most shrinkage of any hair type — up to 70 percent of its length can disappear into the coil. A wash and go on 4C hair is the hardest in this guide and the most rewarding: the goal is defined, clumped coils with shine, and it takes a rich leave-in, a strong-hold gel or custard, and small sections worked slowly on soaking-wet hair. The result is not ringlets — it is dense, defined, sculptural coils that hold their shape for days.
Best for: 4C hair and anyone who has been told a wash and go will not work on their texture. How to style it: work in eight or more small sections, shingle the gel through each one, and diffuse or air-dry without touching a single strand. Cost and time: the longest wash and go here — up to 90 minutes of hands-on work for dense 4C hair. Who should avoid rushing it: a 4C wash and go done in a hurry will frizz, and the fix is not more product, it is more time. Quick verdict: the most underestimated wash and go — 4C coils define beautifully when the routine respects them.
7. The Short TWA Wash and Go
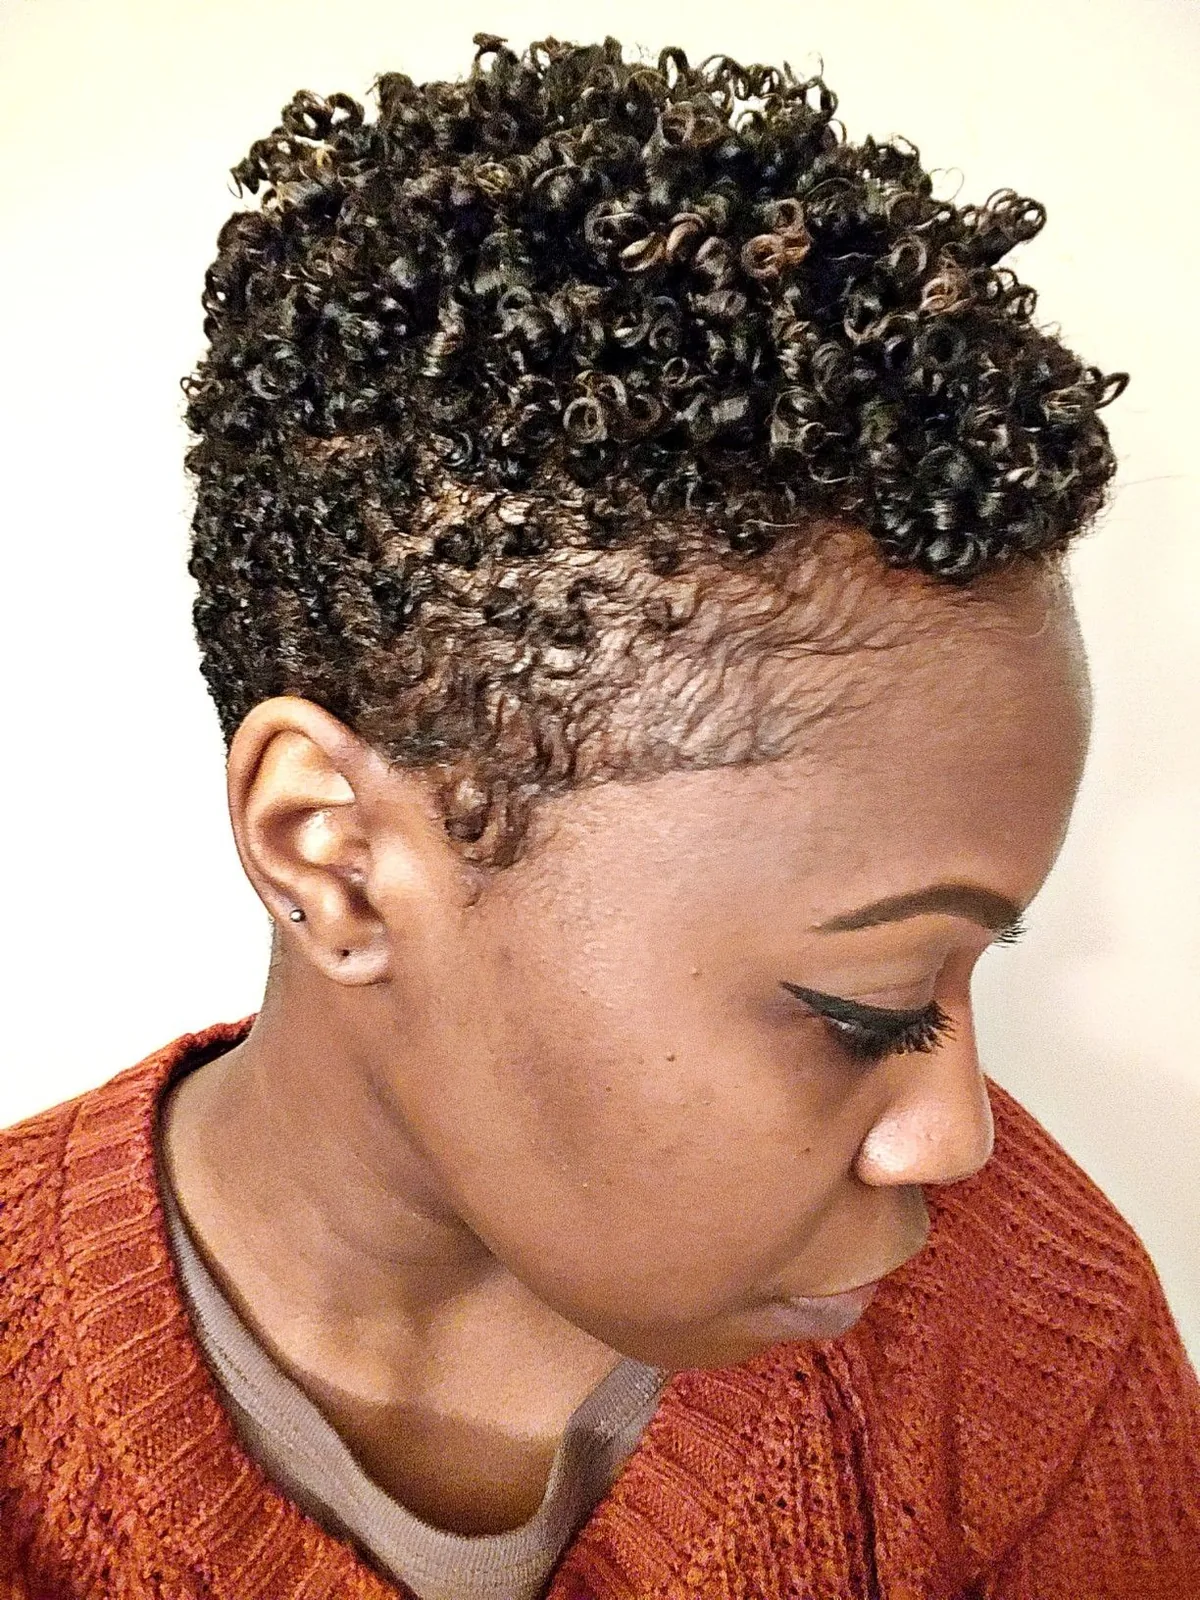
A TWA — a teeny weeny afro — is the shortest wash and go there is, and the easiest: the hair is so short that the whole routine takes ten minutes. Wash, apply leave-in and a little gel or curl cream, smooth it over the coils with your palms, and let it dry. The coils form instantly, the shrinkage is the style, and the result is a neat, defined, low-effort look that suits almost every face shape. It is also the best wash and go to learn on, because there is so little hair that mistakes are obvious and cheap.
Best for: new naturals, post-big-chop hair, and anyone who wants a five-minute morning. How to style it: a curl cream or a light gel, smoothed over the hair with your hands — no tools needed. Maintenance: almost none; a nightly bonnet and a quick water refresh keep a TWA looking fresh for a week. Pros and cons: the fastest wash and go, with the least product and the least drying time, but the shortest style — if you want length, you will need to grow it out. Quick verdict: the wash and go in its purest form — wash, define, go, done.
8. The Medium-Length Wash and Go
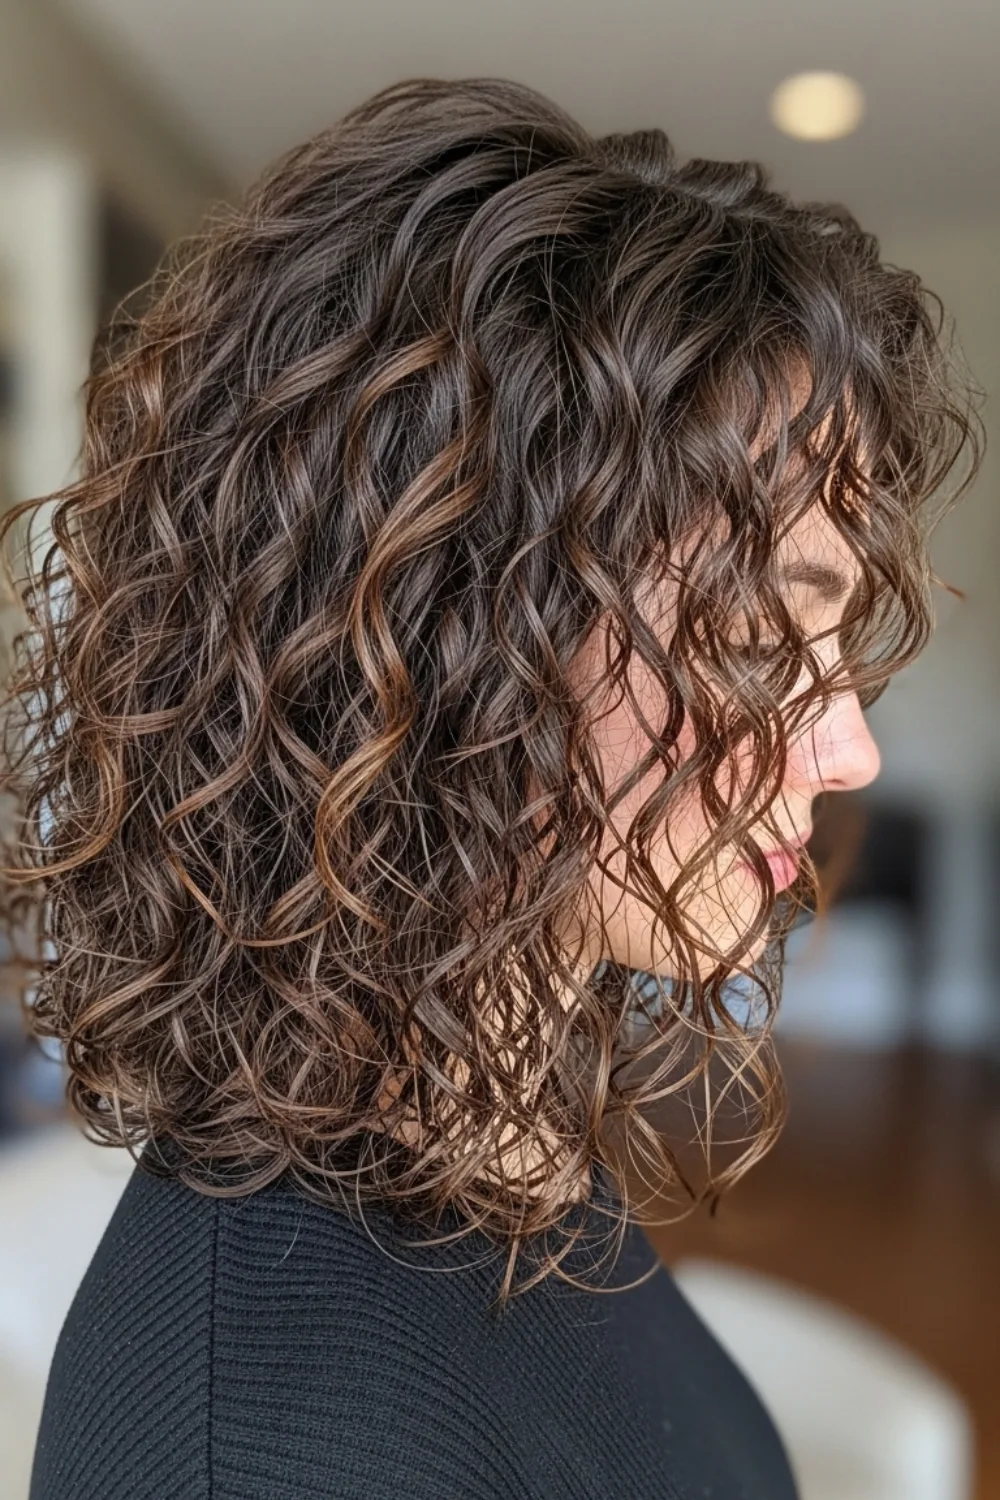
Medium-length natural hair — roughly shoulder length when stretched — is the sweet spot for a wash and go: long enough for the curls to form properly and show their pattern, short enough to dry in a reasonable time. The routine is the standard one — leave-in, gel, sections, no touching — but the length gives you options: you can part it, clip the roots for volume, or wear it with the curls falling forward for a fuller look. It is also the length where a wash and go starts to look like a finished hairstyle rather than a routine.
Best for: shoulder-length natural hair and first-time wash and go wearers. How to style it: four to six sections, gel smoothed through each, then diffuse the roots for lift. Pros and cons: the most versatile length — it dries faster than long hair and shows more pattern than a TWA — but it can look flat at the roots if you air-dry without clipping. Common mistake: skipping the root clips. A few duckbill clips at the crown while the hair dries make the difference between flat and full. Quick verdict: the length where a wash and go stops being a routine and starts being a look.
9. The Long Wash and Go
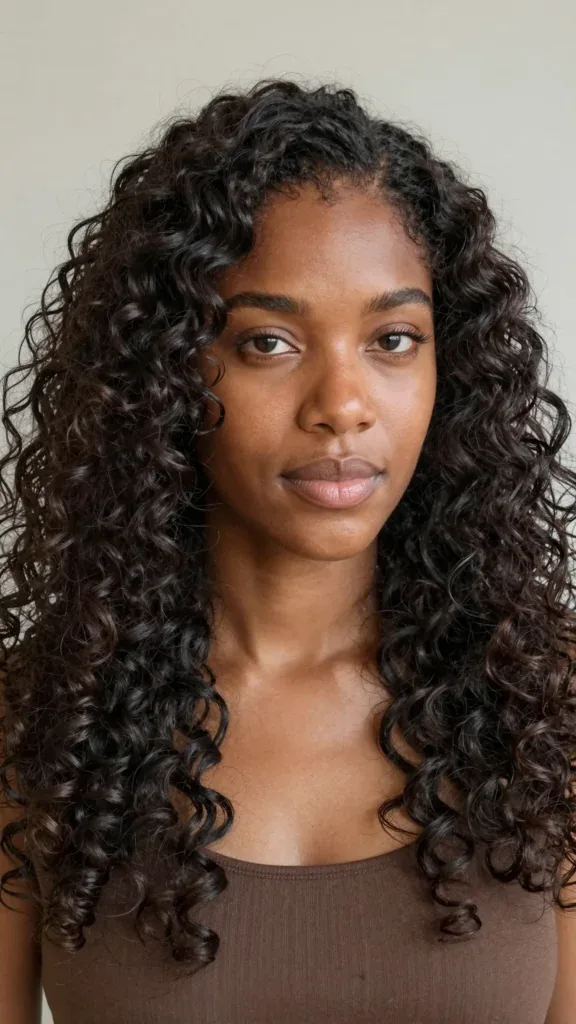
A long wash and go — hair that falls past the shoulders when stretched — is the most dramatic version of the style: long, defined curls and coils that move, swing and catch the light. It is also the most demanding: long hair takes longer to wash, longer to section, longer to dry, and it needs more product and more patience. The weight of the length stretches the curl slightly, so long wash and gos often look looser and more flowing than the same pattern on short hair, which many people prefer.
Best for: long natural hair that is healthy and strong. How to style it: work in eight sections, apply product generously, and diffuse in sections — air-drying long hair can take six hours or more. Maintenance: long wash and gos need a refresh by day two, and the ends need a little oil or cream to stay soft. Cost and time: the longest wash day in this guide — budget two hours from wash to dry. Quick verdict: the most glamorous wash and go, and the one that saves the most styling time over the week, because the curls are done for days.
10. The Gel-Cast Wash and Go
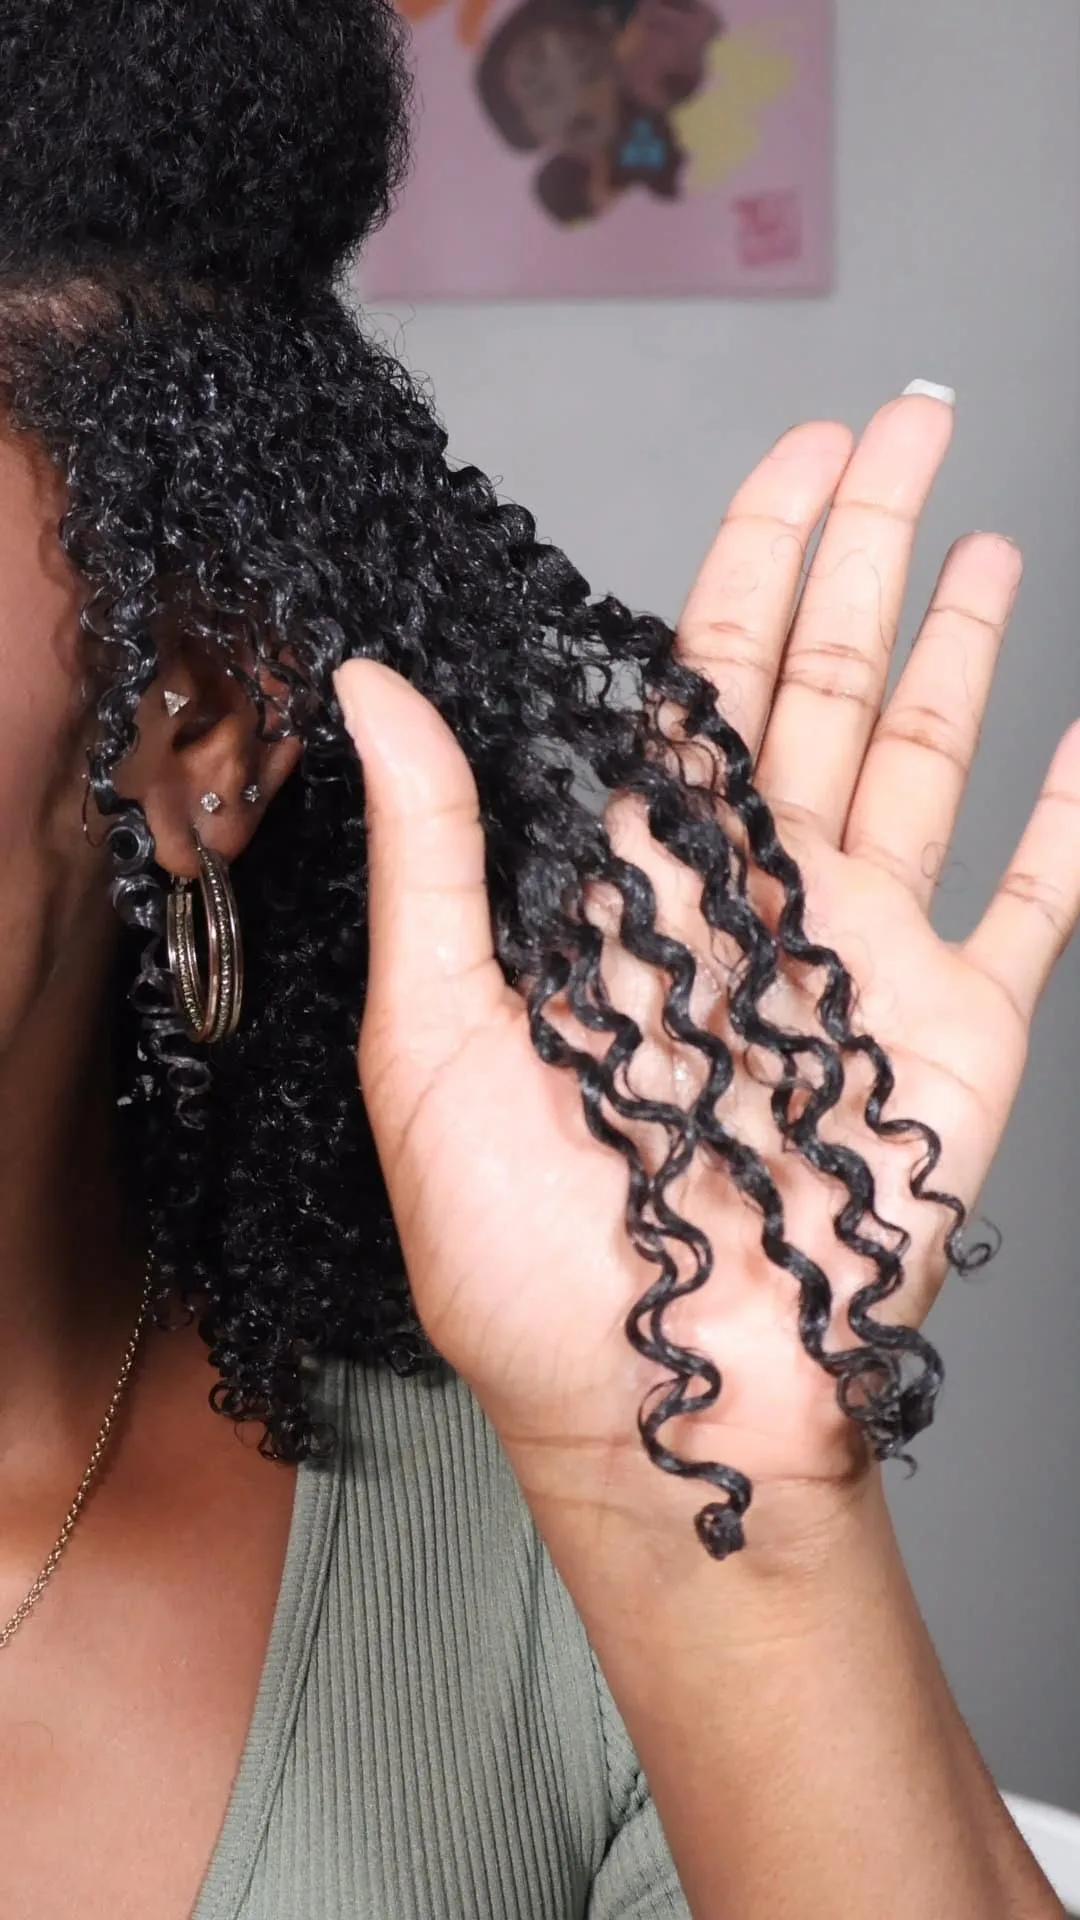
The gel cast is the secret weapon of the wash and go: a hard, crunchy shell that forms as the gel dries, locking every curl in place. It looks alarming — the hair feels stiff and looks wet and hard — but it is temporary. Once the hair is 100 percent dry, you scrunch out the crunch with your hands, or with a drop of oil on your palms, and the cast breaks away to reveal soft, defined, frizz-free curls underneath. The cast is what makes a wash and go last for days instead of hours.
Best for: anyone whose wash and go frizzes by lunchtime. How to style it: apply a strong-hold gel generously to soaking-wet hair, let it dry completely without touching it, then scrunch out the crunch gently. Common mistake: scrunching too early. If the hair is even slightly damp inside, breaking the cast will cause frizz — wait until it is fully dry, roots and all. Pros and cons: the longest-lasting definition of any method, but it needs patience, and the crunchy stage is not a look to wear out of the house. Quick verdict: trust the cast — it looks wrong and works perfectly.
11. The Leave-In and Cream Wash and Go
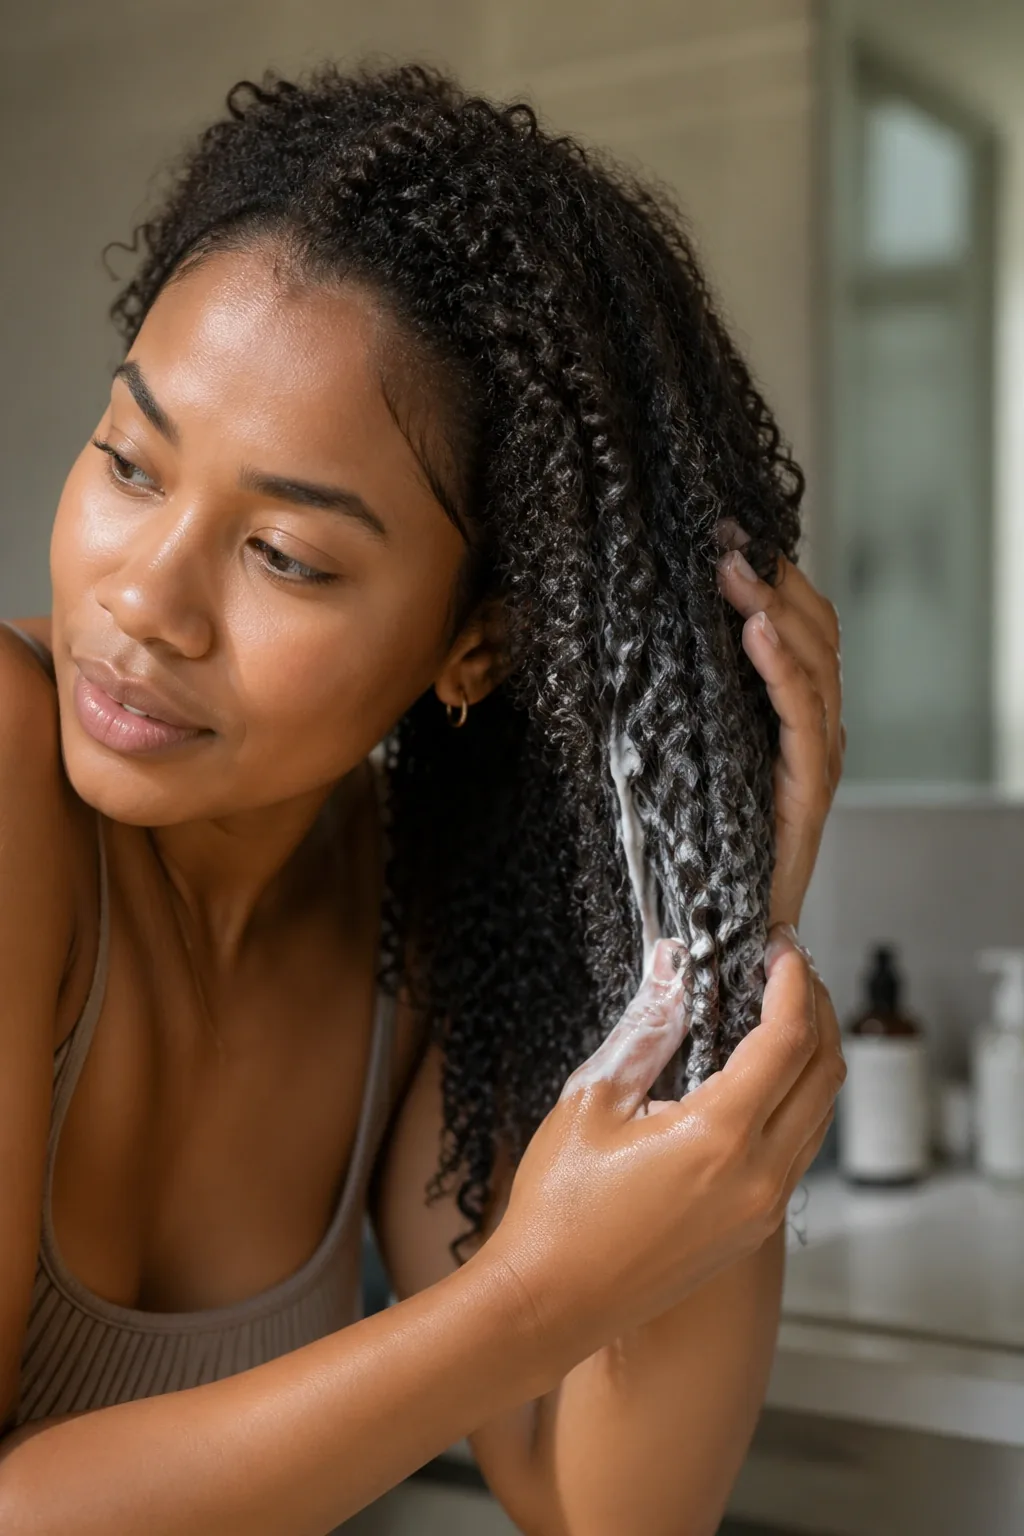
Not every wash and go needs a gel. The leave-in and cream method skips the cast entirely: a leave-in conditioner for moisture, then a curl cream smoothed through the hair for soft definition. The result is a wash and go that feels soft from the first minute — no crunch, no waiting to scrunch anything out — with natural, touchable curls that move freely. It is the gentlest wash and go in this guide, and the best choice for anyone who hates the feeling of gel in their hair.
Best for: soft, touchable curls and anyone who dislikes gel. How to style it: leave-in on soaking-wet hair, then cream, section by section, smoothing each clump down. Pros and cons: the softest, most natural-feeling wash and go, but the shortest-lived — expect one to two days of definition before a refresh is needed. Maintenance: refresh daily with water and a little cream. Who should avoid it: anyone who needs their wash and go to last four or five days — a cream alone will not hold that long. Quick verdict: the comfortable wash and go — less hold, more softness, and a style you can actually run your fingers through.
12. The Mousse Wash and Go

Mousse is the lightest styler in the wash and go toolkit: a foam that spreads easily, dries fast, and gives volume without weight. A mousse wash and go is the answer for fine hair, low-density hair, and anyone whose curls collapse under gels and creams. Apply it to soaking-wet hair, scrunch it in, and diffuse or air-dry — the foam coats each curl lightly, holds it as it dries, and leaves the hair bouncy and full rather than coated. It is also the fastest-drying wash and go, because the foam is mostly air.
Best for: fine, low-density and 3A hair that gels weigh down. How to style it: a generous handful of mousse, scrunched into soaking-wet hair in sections, then diffused for volume. Cost and time: the quickest wash and go — mousse spreads fast, and the hair dries faster than with a gel. Common mistake: using too little. Mousse looks like a lot in your hand and disappears into the hair, so use more than feels right. Quick verdict: the volume wash and go — light, bouncy and fast, and the best choice when gels feel too heavy.
13. The Custard Wash and Go
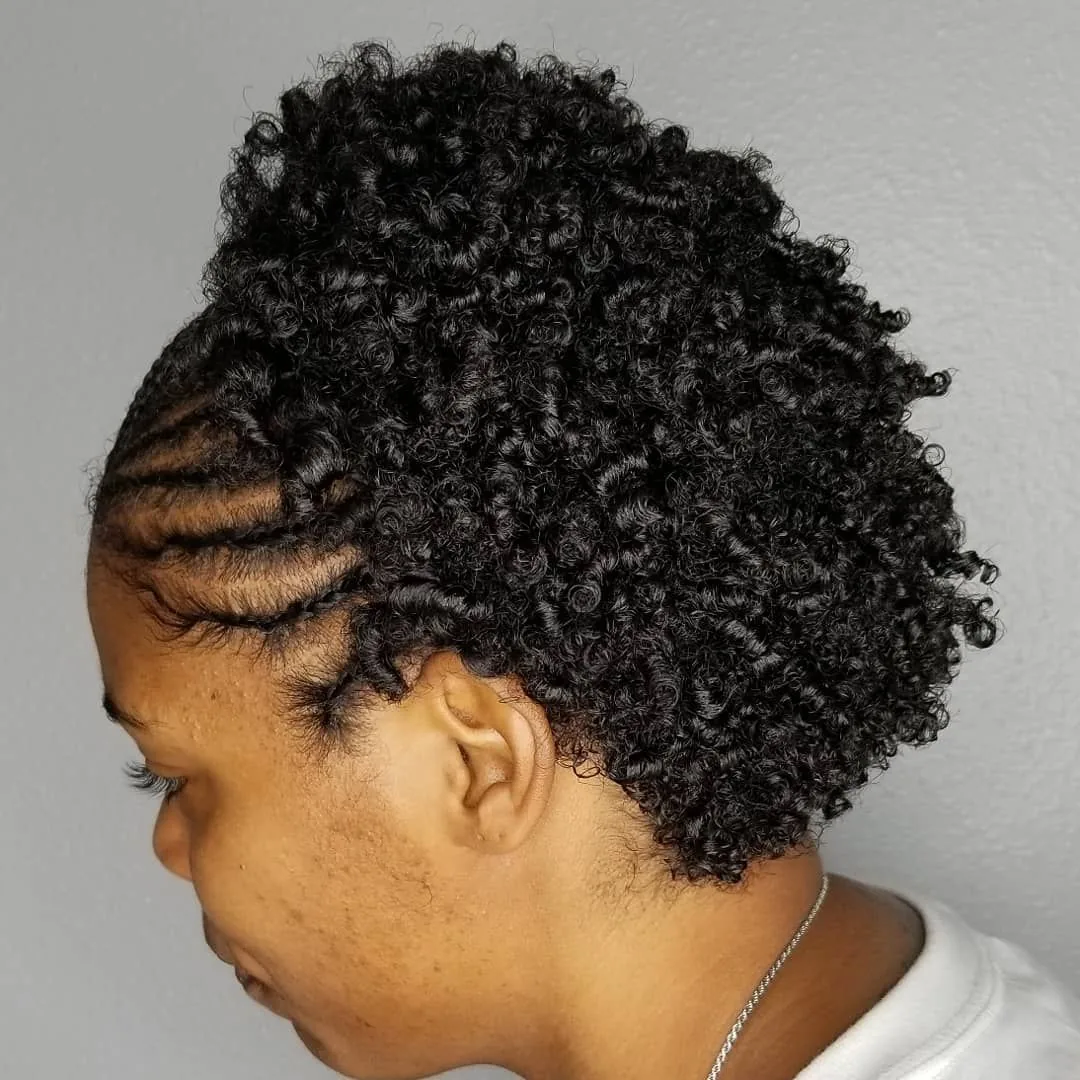
A curl custard is a thick, creamy gel — heavier than a gel, lighter than a butter — and it is the styler of choice for dense, thirsty hair that needs moisture and hold in one product. A custard wash and go gives strong definition with a soft, shiny finish and no flakes, because the cream base keeps the hair moisturised while the hold polymers set the curl. It is especially good on 3C and 4A hair, where a plain gel can dry the hair out and a cream alone cannot hold the curl.
Best for: dense, dry hair that needs moisture and hold together. How to style it: smooth the custard through soaking-wet hair in small sections, using praying hands, then let it dry untouched. Maintenance: custard wash and gos usually last three to four days, and they refresh well with water alone. Pros and cons: the best moisture-plus-hold combination, and very little flaking — but custards are heavy, so fine hair should use a light hand or skip them. Quick verdict: the rich wash and go — if your hair drinks product and still feels dry, a custard is probably the answer.
14. The Flaxseed Gel Wash and Go (DIY)
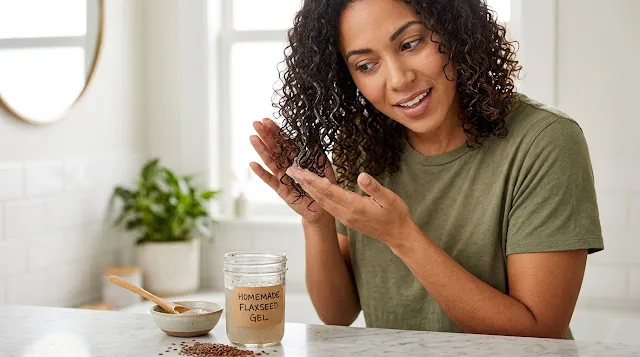
Flaxseed gel is the homemade hero of the wash and go world: whole flaxseeds boiled in water until the liquid turns thick and slippery, then strained into a clear, slippery gel. It costs almost nothing, it has no fragrance or preservatives, and it gives a soft, flexible hold with real shine. A flaxseed gel wash and go defines curls without crunch, and it is the best option for anyone with a sensitive scalp or an ingredient list they want to keep short. The catch is shelf life — a batch lasts about two weeks in the fridge.
Best for: sensitive scalps, DIY lovers, and anyone avoiding commercial gels. How to style it: make the gel the night before, then apply it generously to soaking-wet hair like any other gel. Pros and cons: cheap, natural and flake-free, with a soft hold — but it takes 30 minutes to make, it spoils fast, and the hold is lighter than a commercial gel, so it suits looser patterns best. Common mistake: boiling the seeds too long, which makes a thick, gloopy gel that is hard to strain. Quick verdict: the cheapest wash and go in this guide, and the one with the shortest ingredient list.
15. The Finger-Coil Finish Wash and Go
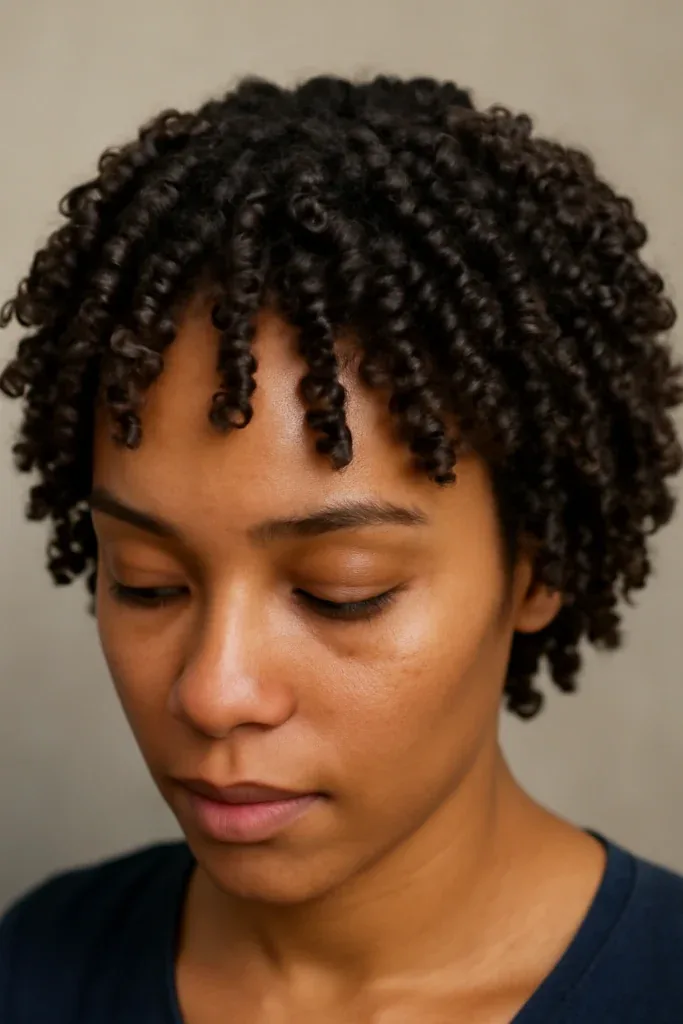
Finger coiling is the most precise way to finish a wash and go: after applying your products, you take small sections of hair and twirl each one around your finger, coiling it in its natural direction until it forms a perfect ringlet. It is slow — a full head can take an hour — but the result is the most defined wash and go in this guide, with uniform, glossy ringlets that look almost too perfect to be natural. It is the technique to use when you want your wash and go to look its absolute best, for a special occasion or a photo.
Best for: special occasions, photos, and anyone who wants maximum definition. How to style it: apply leave-in and gel, then finger-coil the front and crown sections where definition shows most, and leave the back to dry naturally to save time. Cost and time: the slowest finish here — up to an hour of coiling on top of the wash. Maintenance: finger-coiled wash and gos last longer than a standard wash and go, often four to five days. Who should avoid it as a daily routine: anyone short on time — save the coils for the days that matter. Quick verdict: the red-carpet wash and go — slow, precise, and the most defined curls you will ever get from your own hair.
16. The Shingling Method Wash and Go
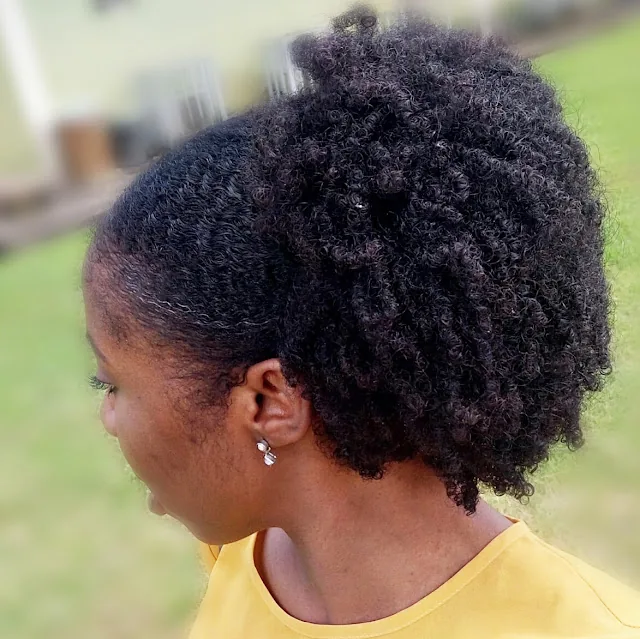
Shingling is the technique behind most great wash and gos on coily hair: you take a small section of soaking-wet hair, smooth product through it with your fingers, and gently stretch and smooth the section from root to tip, so the hair separates into defined clumps that show the coil pattern. The name comes from the way the sections lie on top of each other like shingles on a roof. It is slower than raking, but it gives the most definition on 4A, 4B and 4C hair, where a quick rake would leave the coils tangled and undefined.
Best for: 4A, 4B and 4C coils that need real definition. How to style it: work in small sections — the tighter your pattern, the smaller the sections — and smooth each one with product until the coil shows. Pros and cons: the best definition for coily hair, and a wash and go that lasts for days — but it is the slowest application method, taking up to an hour for dense hair. Common mistake: taking sections that are too big. If the coil does not show, the section is too large. Quick verdict: the definition method — slow, thorough, and the reason coily wash and gos can look so sculpted.
17. The Raking Method Wash and Go
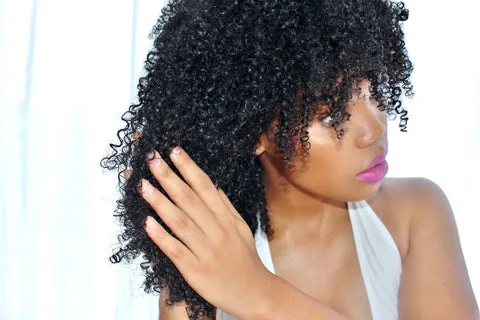
Raking is the fastest way to apply product to a wash and go: you rake your fingers through soaking-wet hair like a comb, spreading the leave-in and gel evenly from roots to ends. It is quick, it coats every strand, and it works beautifully on looser curl patterns — 3A, 3B and 3C — where the curls will clump together on their own as they dry. The trade-off is definition: raking separates the curls, so the result is looser, fuller and more voluminous than a shingled wash and go, with less visible curl pattern.
Best for: loose curls, big volume, and wash days when you are short on time. How to style it: rake leave-in through wet hair, then rake the gel the same way, and finish with one gentle scrunch to encourage clumping. Maintenance: raked wash and gos refresh well, because the looser clumps come back with a mist of water. Pros and cons: the fastest application, with great volume — but less definition, and on tight coils it can cause tangling. Who should avoid it: 4B and 4C hair, where raking usually means frizz. Quick verdict: the quick wash and go — five minutes of product, big soft volume, and a style that looks effortless because it was.
18. The Praying Hands Method Wash and Go
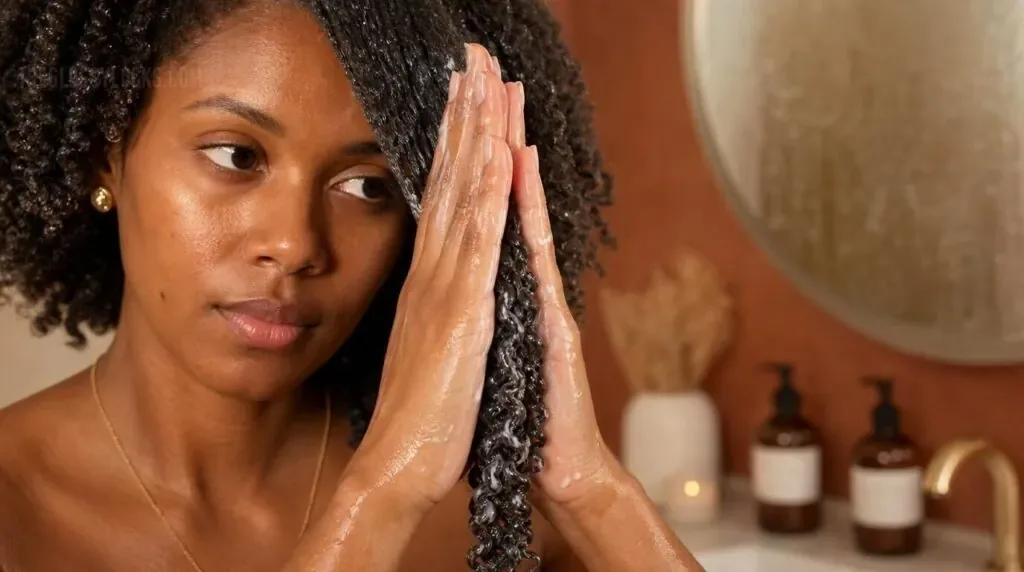
Praying hands is the smoothing technique that makes a wash and go look polished: you press a section of soaking-wet hair between your palms, like praying hands, and glide them down the length of the section, smoothing the product over the curl clumps and pressing down any flyaways. It is the finishing move after raking or shingling, and it is what turns a good wash and go into a sleek, shiny one — the curls lie flatter, the frizz is pressed away, and the definition looks deliberate. It works on every curl pattern, and it costs nothing but a few extra minutes.
Best for: frizz-prone hair and anyone who wants a sleek, polished finish. How to style it: after applying product, take each section between your palms and smooth downward, then do not touch the hair again until it is dry. Common mistake: smoothing too hard, which pulls the curl straight. The pressure should be firm but gentle — you are smoothing the clump, not stretching it. Pros and cons: the best frizz control of any technique, and it works on every pattern — but it can flatten volume at the roots, so keep the smoothing to the lengths. Quick verdict: the polish move — a small technique that makes the whole wash and go look more expensive.
19. The Brush-Styled Wash and Go
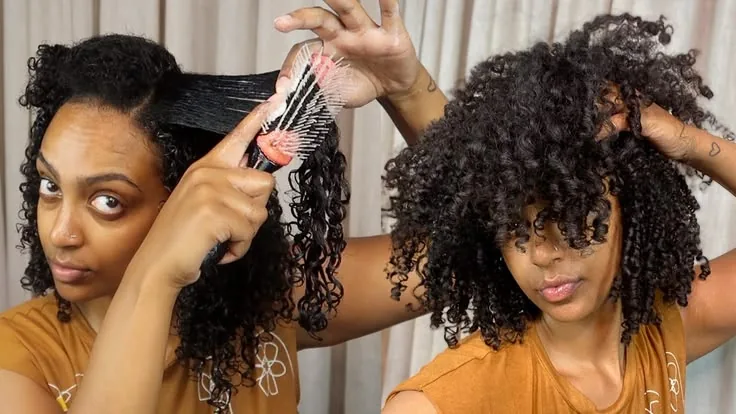
Brush styling is the wash and go technique that has taken over social media: a brush — usually a Denman-style brush with widely spaced rows — is used on soaking-wet, product-coated hair to separate the curls into uniform, defined ribbons. You brush each section away from the head, and as the brush moves through, the hair forms into clumps that dry into glossy, even curls. It is the fastest way to get a uniform curl pattern, and it works on 3A through 4A hair, giving a wash and go that looks almost salon-styled.
Best for: anyone who wants uniform, salon-looking curls. How to style it: apply leave-in and gel, then brush each small section in the direction you want the curl to fall, and shake the section gently to let the curls form. Maintenance: brush-styled wash and gos hold their pattern well for three to four days. Common mistake: brushing dry or damp hair, which causes frizz and breakage — the hair must be soaking wet, with plenty of product, for the brush to glide. Who should avoid it: very tight 4B and 4C coils, where a brush can disrupt the coil pattern. Quick verdict: the viral wash and go — a brush, wet hair, and curls that look like they were done by a stylist.
20. The Diffused Wash and Go for Volume
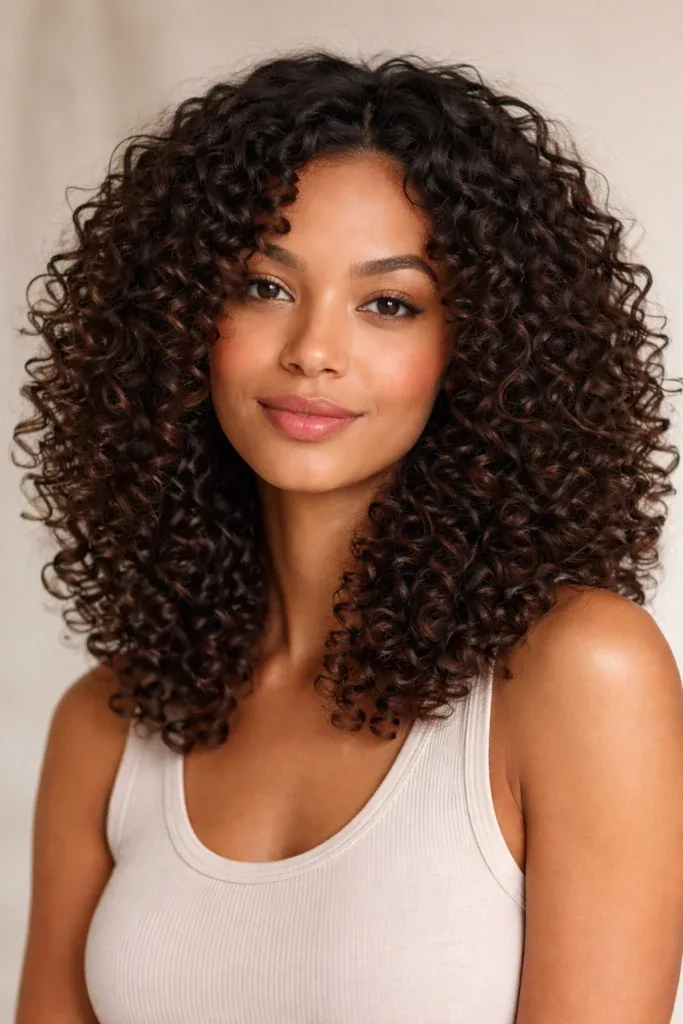
If your wash and go always dries flat at the roots, diffusing is the fix. A diffuser spreads the airflow from your dryer so it dries the curls gently, and when you lift the roots with the diffuser’s prongs — or flip your head upside down — the hair dries with the roots lifted, giving a wash and go with big, full, bouncy volume. The curls stay defined because the airflow is gentle, and the volume lasts because the roots dried in a lifted position. It is the wash and go for anyone who wants their hair to look big.
Best for: flat roots, fine hair, and anyone who wants a big wash and go. How to style it: apply products, then diffuse on low heat and low speed, lifting at the roots and hovering around the ends. Cost and time: a diffuser costs little, and it cuts drying time from hours to under an hour. Pros and cons: the most volume of any drying method, and much faster than air-drying — but it needs a gentle hand, and too much heat or speed will frizz the curls. Common mistake: scrunching the hair up into the diffuser bowl. Hover instead, and let the air do the work. Quick verdict: the big-hair wash and go — volume on demand, with definition intact.
21. The Air-Dried Wash and Go for Definition
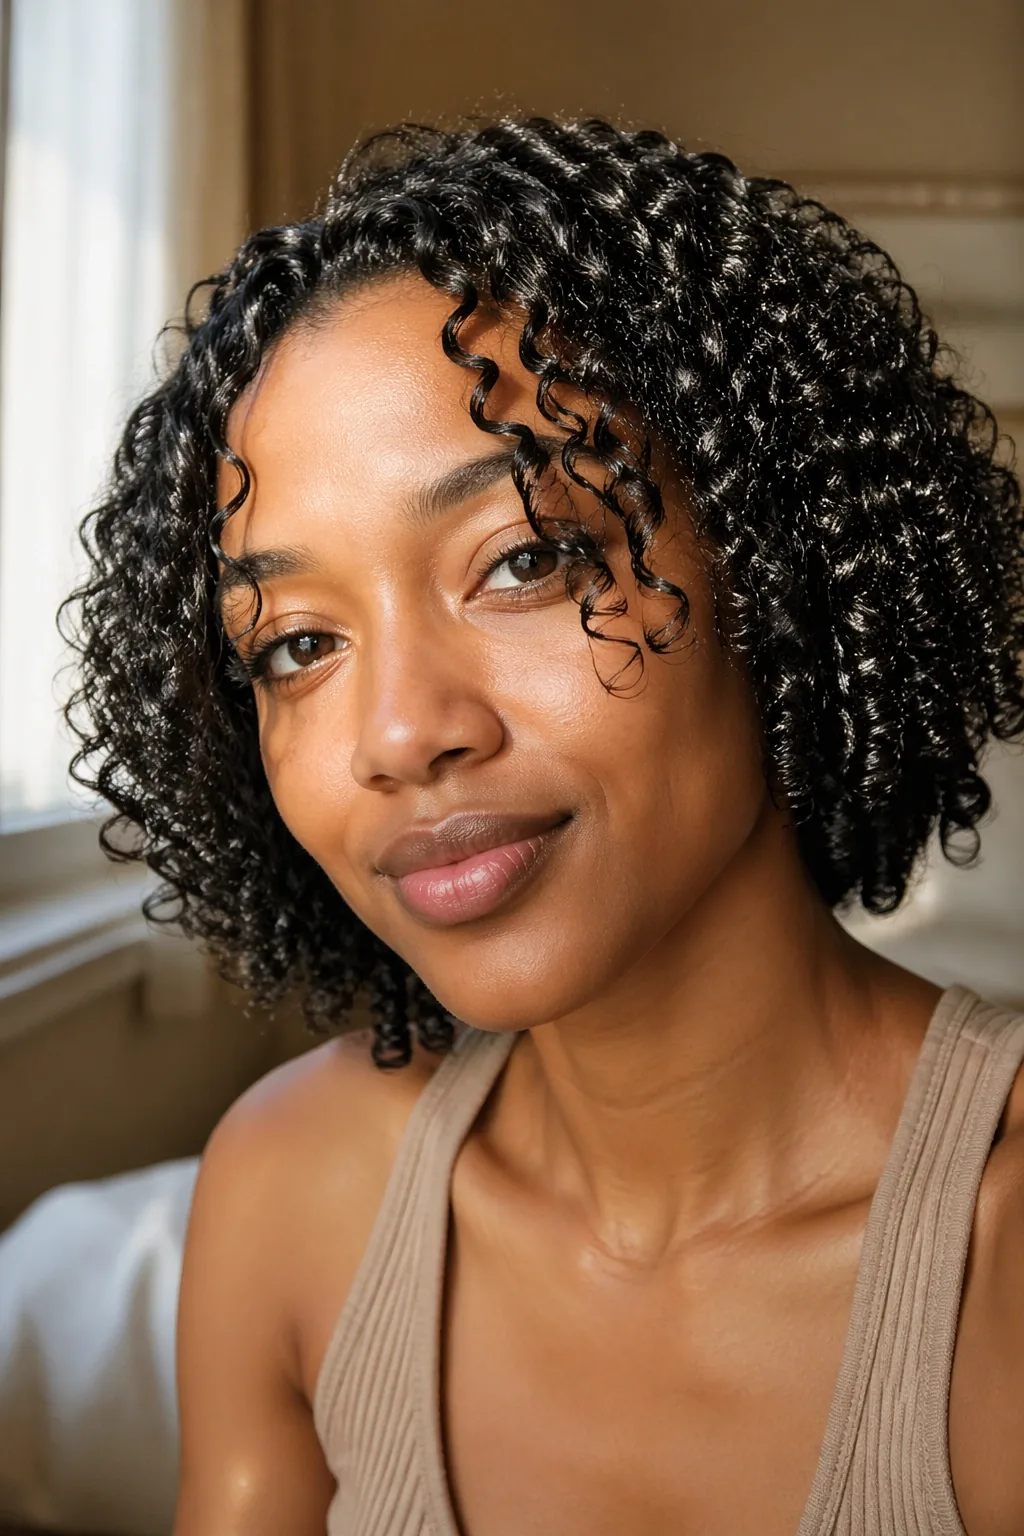
Air-drying is the purest wash and go: no heat, no wind, no touching — just wet, product-coated hair left alone until it dries. The result is the most defined, shiniest wash and go you can get, because nothing disturbs the curl clumps while they set. The curls dry exactly as they formed, the gel cast sets hard and even, and when you scrunch it out, the definition is at its best. The price is time: dense hair can take four to six hours to dry, and the roots will lie flat, because gravity pulls them down while they dry.
Best for: maximum definition, healthy hair, and anyone avoiding heat. How to style it: apply products, clip the roots with duckbill clips for lift, then do not touch the hair at all until it is completely dry. Maintenance: air-dried wash and gos last the longest — often five days — because the cast sets so evenly. Pros and cons: the best definition and the healthiest method, but the slowest, and the flattest at the roots without clips. Who should avoid it on wash day: anyone who needs to leave the house within an hour — plan air-dried wash and gos for a day at home. Quick verdict: the patient wash and go — slow, gentle, and the most defined curls of all.
22. The Wash and Go With Stretched Roots
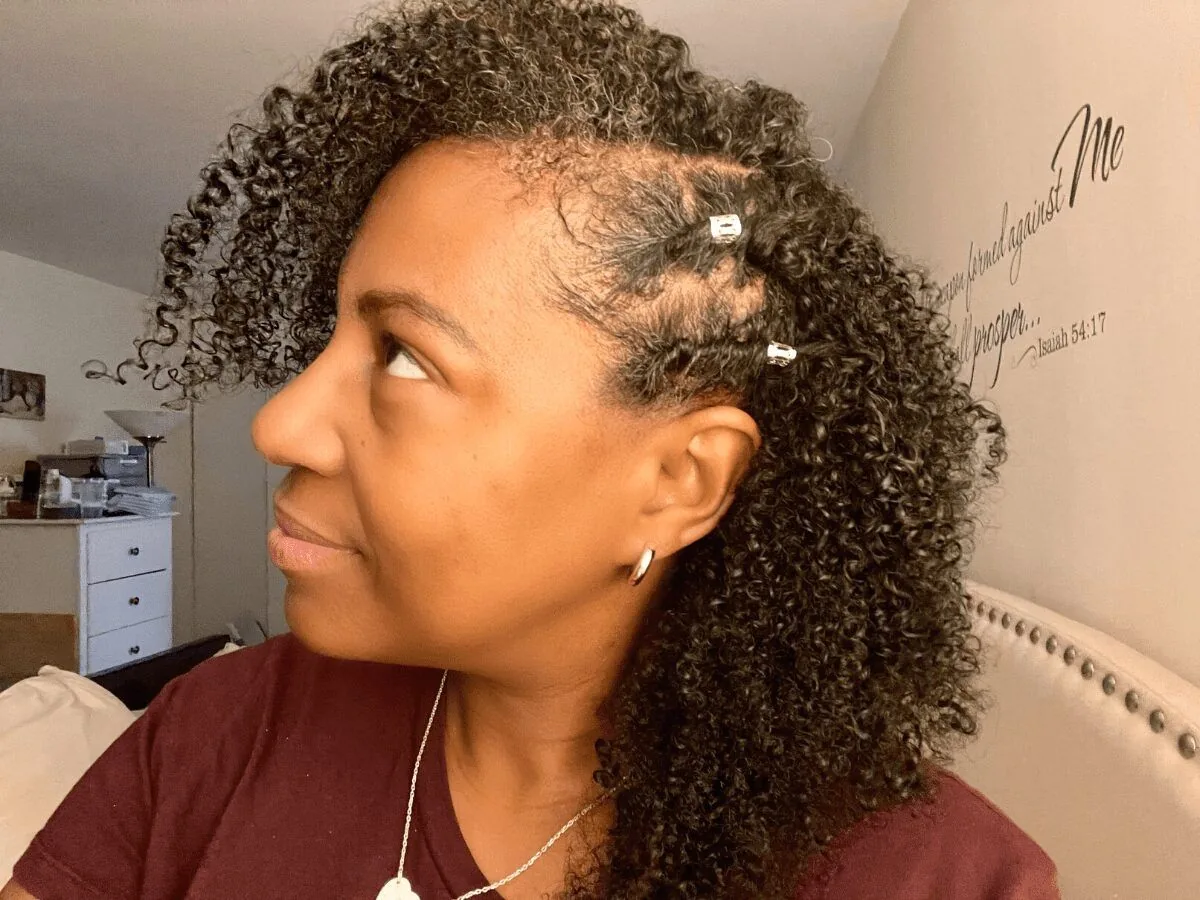
Stretched roots are the middle ground between a shrunken wash and go and a blown-out style: the curls keep their definition through the lengths, but the roots are lifted and stretched so the hair shows more length and volume. The trick is to stretch only the roots, while the hair is drying, using duckbill clips at the crown or by gently pulling the roots upward as you diffuse. The curls stay intact, the roots gain height, and the whole wash and go looks fuller and longer without losing its pattern.
Best for: anyone whose wash and go looks great but too short. How to style it: after applying product, clip the roots with duckbill clips while the hair dries, or diffuse with the roots lifted. Common mistake: stretching the whole length, which pulls the curl out and turns the wash and go into a puff. Keep the stretch at the roots only. Pros and cons: more length and volume with no heat and no extra products — but the clips leave marks if you leave them in too long, so take them out once the hair is mostly dry. Quick verdict: the length trick — a few clips, and your wash and go suddenly looks an inch longer.
23. The Wash and Go With Banding for Length
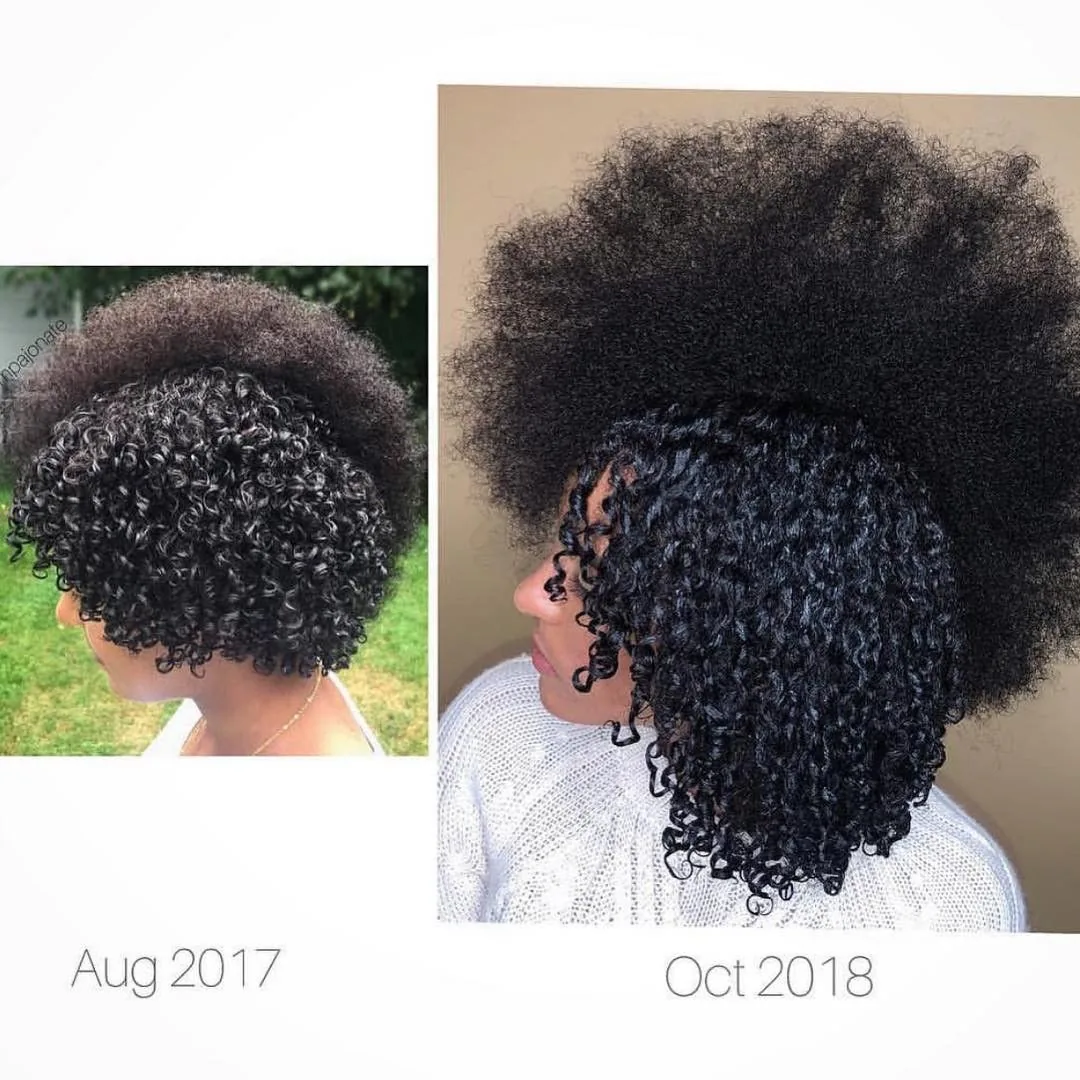
Banding is the heat-free way to show your wash and go’s true length: after the hair is dry, you wrap loose fabric bands or ouchless elastics down the length of each section, stretching the curls out gently, and leave them in for an hour or overnight. When you take the bands off, the curls are stretched and elongated, with most of their definition still intact — a wash and go that shows length without a blow dryer. It is the gentlest stretch there is, and it is the method to use before a length check or a special occasion.
Best for: length checks, special occasions, and anyone who wants to see their growth. How to style it: band the dry hair loosely — never tight, and never on wet hair — and leave the bands in for at least an hour. Maintenance: a banded wash and go keeps most of its definition, and it refreshes like any other wash and go. Pros and cons: no heat, no damage, and real length — but it takes time, and the stretch relaxes the curl a little, so it is not the method for maximum definition. Who should avoid tight banding: anyone with fragile hair — tight bands cause breakage. Quick verdict: the honest length check — banding shows you how long your hair really is, without a drop of heat.
24. The Overnight Pineapple Wash and Go
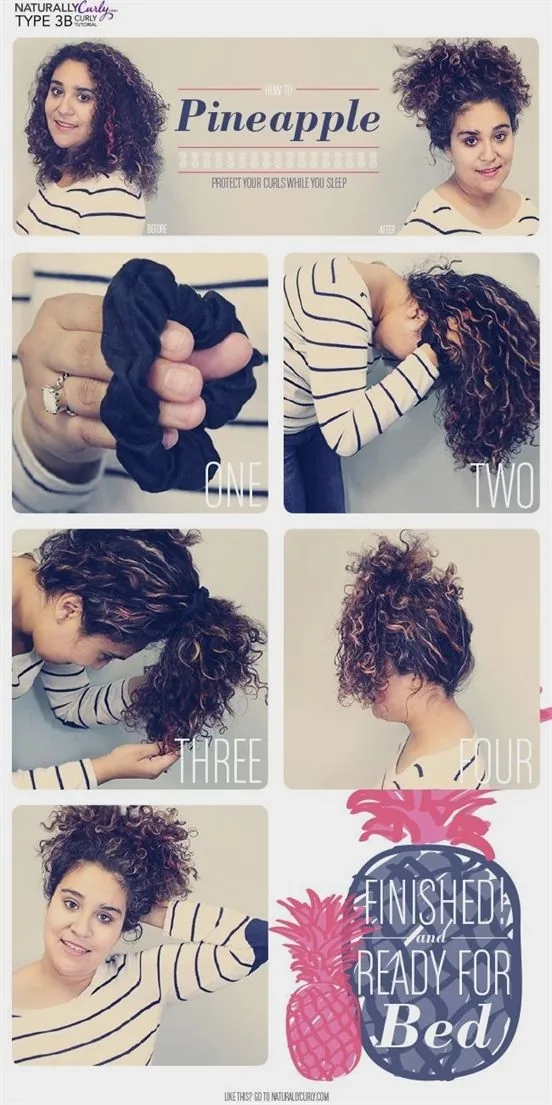
The pineapple is not a style — it is how a wash and go survives the night. You gather the hair loosely on top of your head, high and soft, with a satin scrunchie, so the curls are piled up and protected instead of being crushed under your head all night. Add a satin bonnet or a silk scarf, and the curls wake up almost as defined as they went to sleep. The pineapple is the reason a wash and go can last three to five days: it is the overnight half of the routine, and it matters as much as the wash itself.
Best for: multi-day wash and gos and anyone who sleeps on their curls. How to style it: gather the hair loosely and high, tie it with a satin scrunchie, and cover it with a bonnet — never a tight elastic, which leaves a dent. Maintenance: in the morning, take the pineapple down, shake the roots gently, and refresh only the sections that need it. Common mistake: pineappling wet hair. The hair must be fully dry before bed, or it will dry in a crushed, frizzy shape overnight. Quick verdict: the sleep trick — ten seconds at night, and your wash and go gets three more days of life.
25. The Gym and Workout Wash and Go

A wash and go and a workout can coexist — but only with a plan. Sweat is mostly water and salt, and it can actually refresh a wash and go if you handle it right: the trick is to protect the curls during the workout and refresh them after. Before the gym, gather the hair into a loose, high puff or pineapple with a satin scrunchie, and wear a sweatband at the hairline to catch sweat before it reaches the curls. After the workout, mist the hair lightly, smooth a little gel over the frizzy edges, and let it dry — no full rewash needed.
Best for: active lifestyles and anyone who works out several times a week. How to style it: a loose pineapple or puff for the workout, then a water-and-gel refresh afterwards. Pros and cons: a wash and go survives workouts better than a twist-out, because the curls are already set — but heavy sweating will still shorten the style’s life, so plan a wash day after your hardest workouts. Common mistake: washing after every workout. Most of the time a refresh is enough, and overwashing dries the hair out. Quick verdict: the active wash and go — protect it, refresh it, and save the full wash for wash day.
26. The Office and Work Wash and Go

A wash and go can be thoroughly professional — defined, neat, and polished — as long as the edges are smooth and the volume is controlled. The work wash and go is the same routine, with two additions: edge control smoothed along the hairline with a soft brush, and a shape that suits the workplace — a side part, the curls swept back from the face, or a low, loose puff that keeps the hair out of the way. The definition does the talking: neat curls read as intentional, and intentional reads as professional.
Best for: work, interviews, and professional settings. How to style it: define the curls as usual, then smooth the edges and part the hair to one side for a polished shape. Maintenance: a silk scarf at night keeps the edges smooth, and a morning refresh takes five minutes. Pros and cons: the most low-effort professional style — no hot tools, no daily restyling — but it needs the edges done, or the whole look reads as unfinished. Who should avoid a huge, wild wash and go at work: anyone in a very conservative office — a side part and smoothed edges make the same style read as polished. Quick verdict: the professional wash and go — defined curls, smooth edges, and a style that needs no apology.
27. The Wedding and Formal Wash and Go
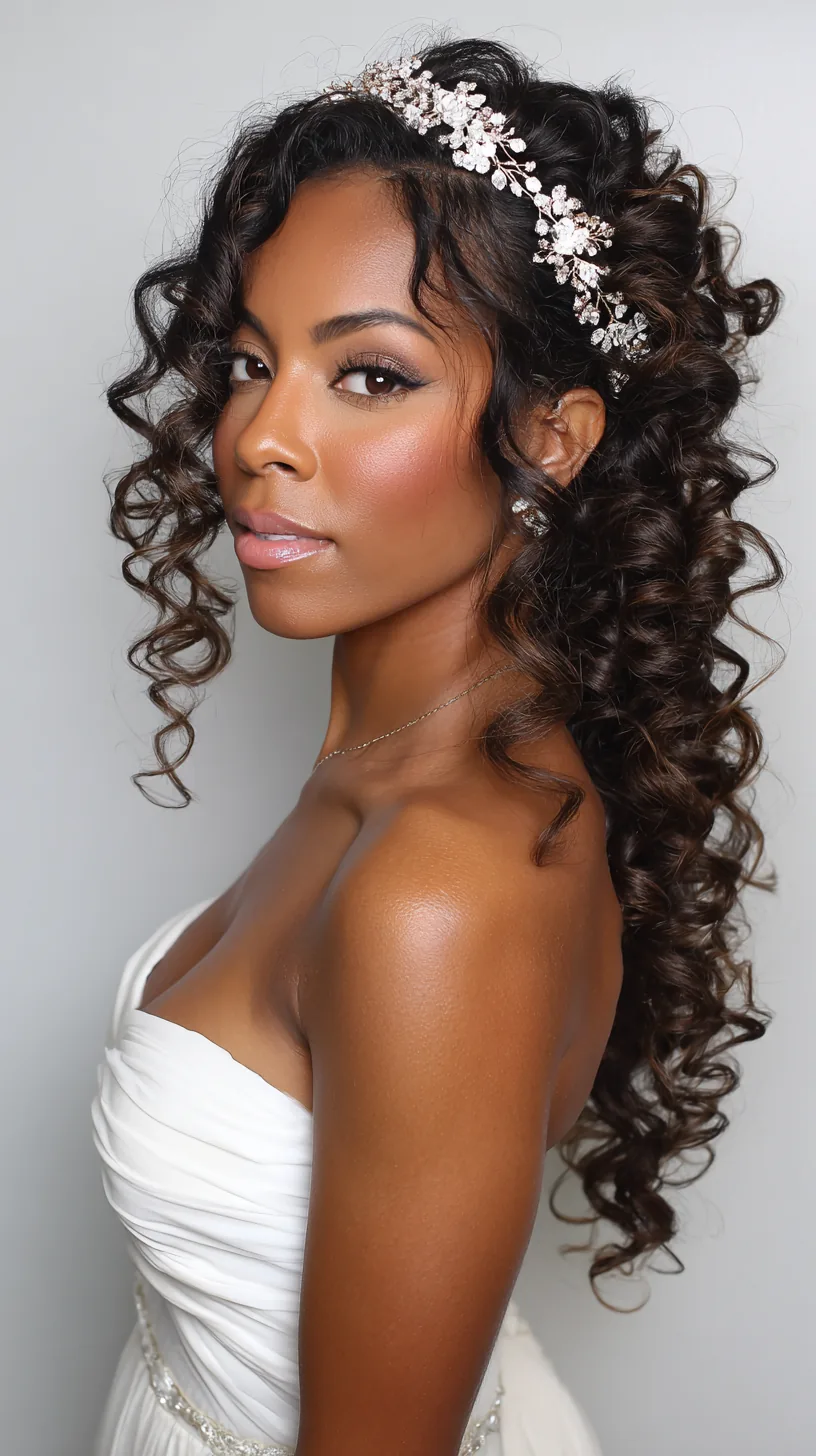
A wash and go can be a wedding hairstyle — defined, glossy, elegant curls, worn loose or half-up, with a few fresh flowers or a gold hair accessory. The key is timing: do the wash and go the day before, so the cast is fully set and the curls have settled into their softest, most natural state, and refresh it lightly on the morning of the wedding. A half-up wash and go — the top section pinned back, the curls falling free — is the most popular formal version, because it shows the face and lets the curls do the talking.
Best for: weddings, formal events, and brides who want their natural texture. How to style it: finger-coil or brush-style the front sections for extra definition, then pin the top back loosely. Cost and time: no salon appointment needed, but do a trial wash and go a week before the event to check the timing and the products. What to ask: if a stylist is doing it, ask for a wash and go trial, not a silk press — the technique is different, and the products matter. Quick verdict: the most personal formal style — your own curls, at their best, on the day that matters.
28. The Side-Part Wash and Go
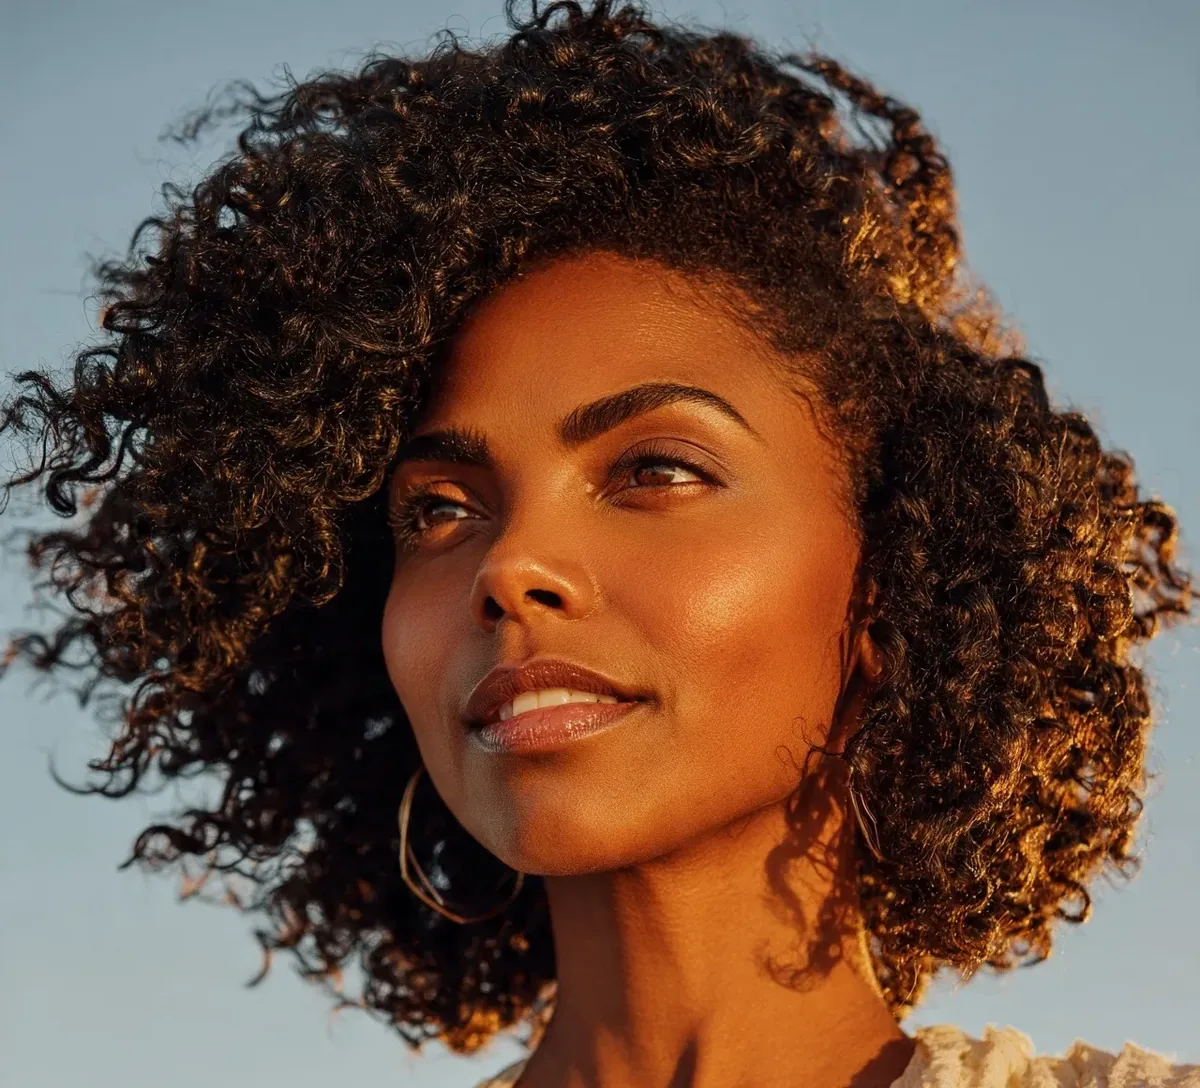
A side part changes a wash and go completely: the hair sweeps across the forehead in a deep wave, the volume piles up on one side, and the whole style looks glamorous and deliberate. The part should be set while the hair is wet — part it deeply, then apply product and let the curls dry in that direction, so the pattern sets with the part in mind. A side part also adds lift at the roots, because the hair is being pushed against its natural fall, and it suits a wash and go on every curl pattern.
Best for: evenings, photos, and anyone who wants a glamorous wash and go. How to style it: part the hair deeply while wet, clip the roots on the heavy side for lift, and let it dry. Common mistake: switching the part daily — the curls set with a memory of the part they dried with, so pick a side and stick to it for the life of the wash and go. Pros and cons: the most glamorous parting, with built-in root volume — but it needs the part set while wet, or it will fight you. Quick verdict: the dramatic wash and go — one deep part, and the whole style looks like an occasion.
29. The Middle-Part Wash and Go
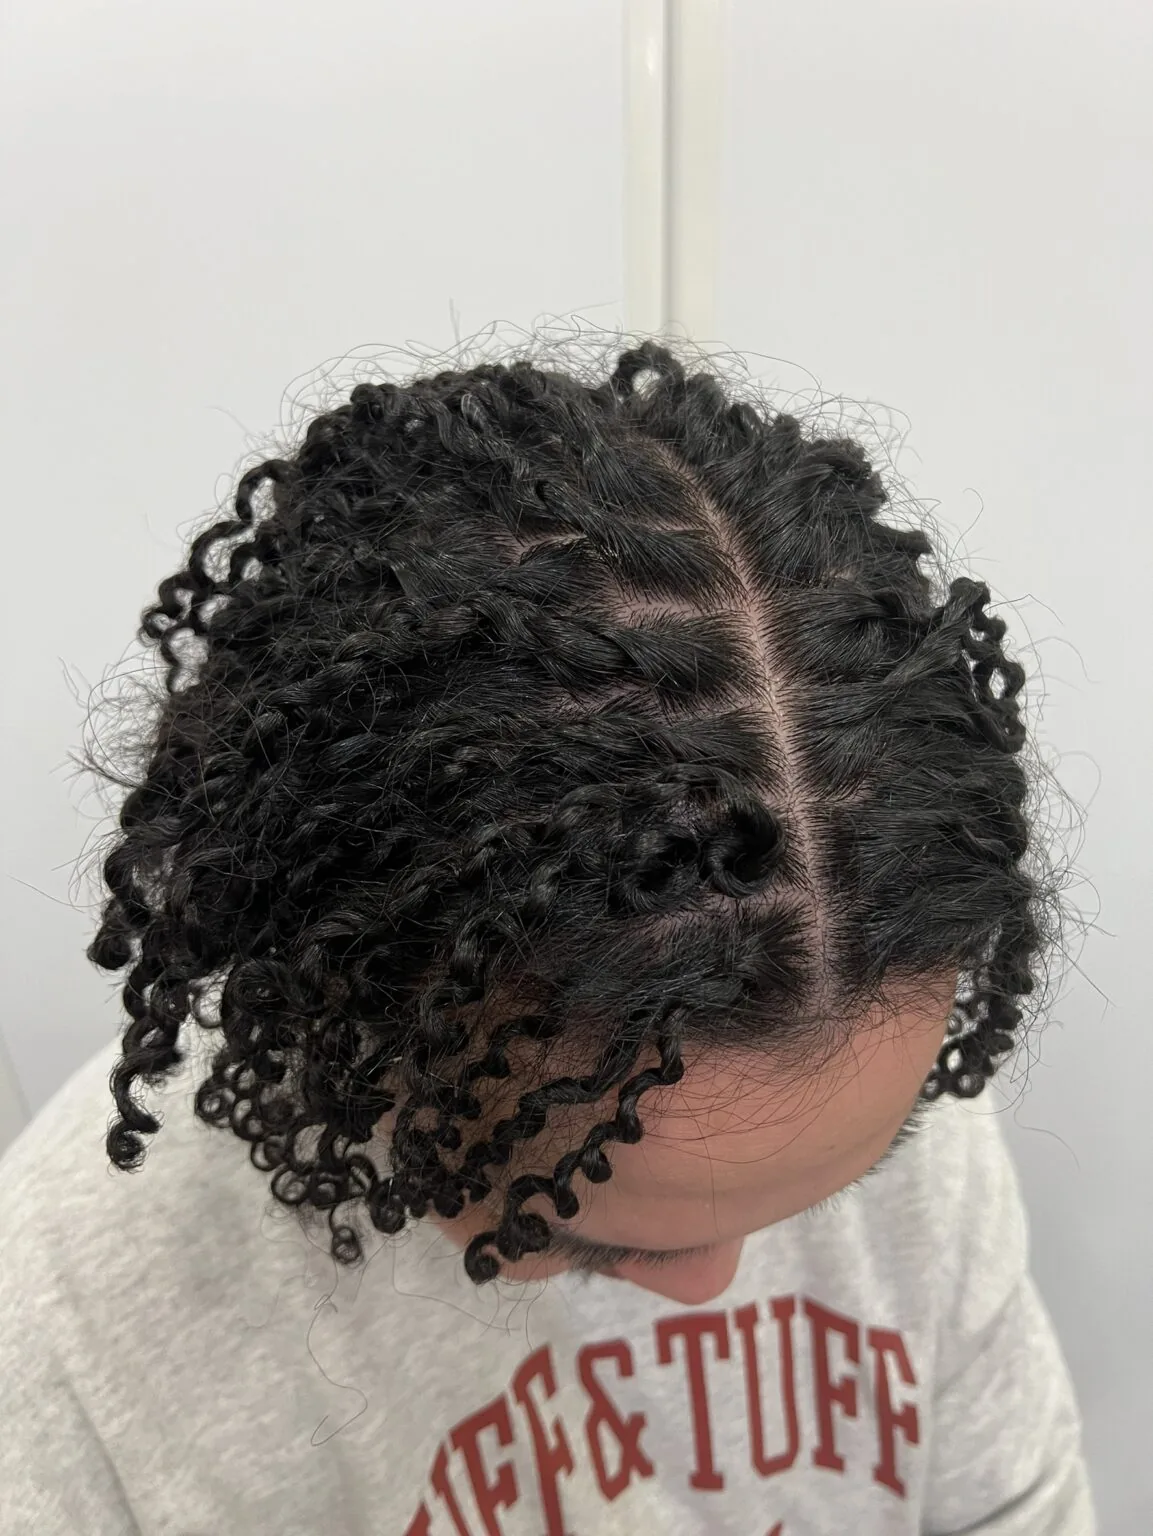
A middle part and a wash and go give a balanced, symmetrical look: the curls fall evenly on both sides of the face, framing it like a curtain, and the style feels calm, classic and a little bit seventies. It suits medium and long wash and gos best, where the curls have room to fall, and it works especially well with face-framing curls that curl inward on both sides. The middle part also shows off the curl pattern most clearly, because there is no sweep hiding half of it.
Best for: symmetrical faces, long hair, and a classic, balanced look. How to style it: part the hair in the middle while wet, smooth the product through, and let it air-dry or diffuse. Pros and cons: the most balanced and timeless way to wear a wash and go, but also the most revealing — a middle part shows any unevenness in the curl, so it needs careful sectioning. Who should avoid it: anyone whose face is very asymmetrical — a side part will flatter it more. Quick verdict: the calmest wash and go — symmetrical, classic, and the one that photographs most evenly.
30. The Wash and Go With Colour and Highlights
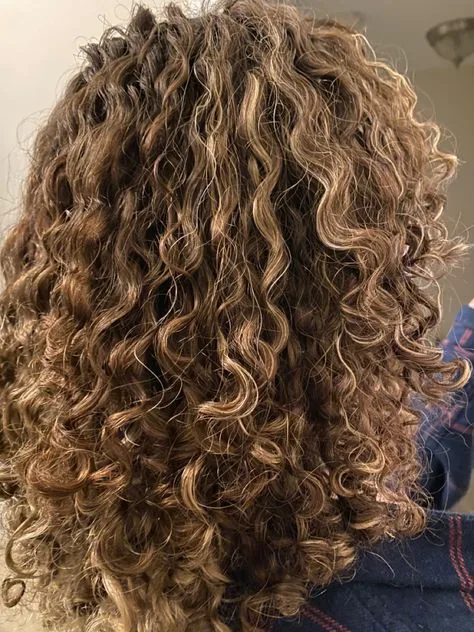
Colour and a wash and go are a natural partnership: highlights lighten the bends of each curl, so the curl pattern looks deeper, more defined and more dimensional, and the light catches the curls as they move. A few face-framing highlights make the curls around the face glow, while highlights through the lengths give the whole style movement and light. The combination needs care, though — coloured hair is drier and more porous, so it needs a richer leave-in and a gel that will not flake on porous strands.
Best for: anyone who wants dimensional, light-catching curls. How to style it: use a moisturising leave-in and a custard or gel with good slip, and refresh with water and cream rather than gel alone. Maintenance: colour-safe, sulfate-free shampoo, a weekly deep-conditioning mask, and a toning treatment if blonde highlights turn brassy. Common mistake: using a strong-hold gel on freshly coloured hair without enough moisture underneath — the result is dry, crunchy curls. Quick verdict: the prettiest wash and go — colour does half the styling, and the curls do the rest.
31. The Wash and Go for Fine Natural Hair
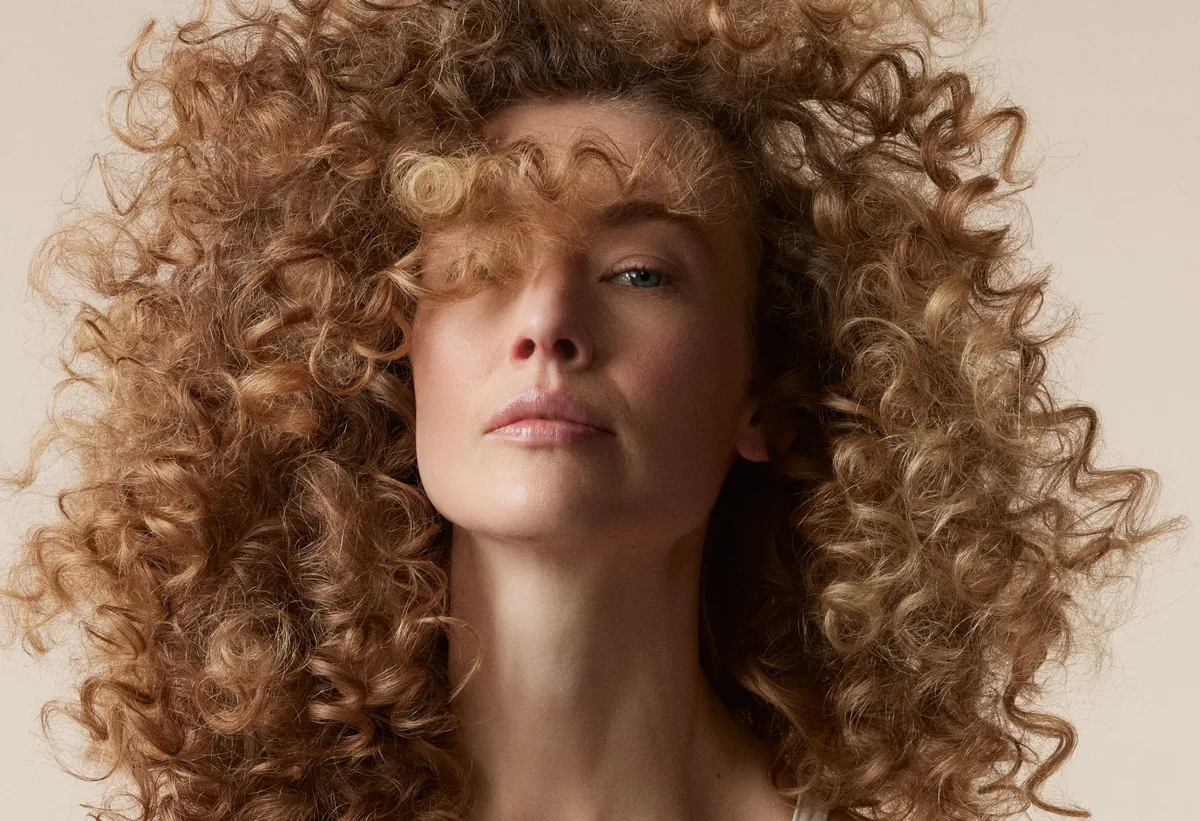
Fine natural hair — thin individual strands, even if there is a lot of it — needs the lightest wash and go in this guide. Heavy creams and butters will crush fine curls, and a strong gel can make them stringy, so the routine is light all the way through: a lightweight leave-in, a mousse or a light-hold gel, and no cream at all unless the hair is very dry. The goal is volume and definition without weight, and the best tool for it is a diffuser, which lifts fine curls at the roots and dries them fast.
Best for: fine, thin natural hair that falls flat. How to style it: mousse or light gel on soaking-wet hair, diffused on low heat for volume. Maintenance: fine hair needs a refresh by day two, and it should be washed more often — every three to four days — because fine hair shows oil and buildup faster. Who should avoid heavy products: anyone with fine hair — a butter-based wash and go will look greasy by lunchtime. Quick verdict: the lightest wash and go — fine hair does not need more product, it needs less, and a diffuser.
32. The Wash and Go for Thick, Dense Natural Hair
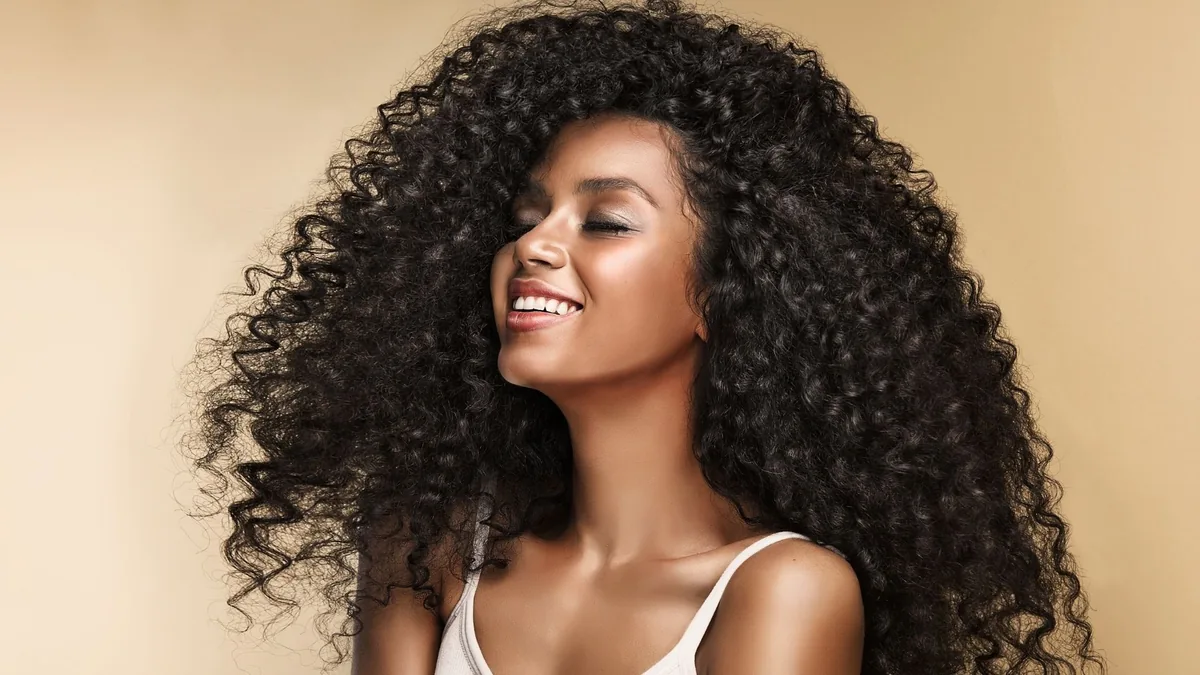
Thick, dense natural hair takes a wash and go beautifully, because there is plenty of hair to curl and the curls hold their shape for days. The challenge is time and product: dense hair takes longer to section, longer to dry, and it drinks product — a wash and go on dense hair can use twice as much gel as the same style on fine hair. Work in small sections, use a rich leave-in and a strong-hold gel or custard, and diffuse in sections so the inside layers dry as well as the outside ones.
Best for: thick, dense hair that needs shape and definition. How to style it: eight or more small sections, generous product, and a diffuser used section by section. Maintenance: thick wash and gos last the longest — often five days — because the density protects the inner curls. Cost and time: the most product-hungry wash and go, and the longest drying time — budget two hours from wash to dry. Quick verdict: the most dramatic wash and go — thick hair was made for this style, and the volume is the reward for the effort.
33. The Wash and Go for Low-Porosity Hair

Low-porosity hair has a tight cuticle that resists water and product — water beads on it, products sit on top of it, and it takes forever to get fully wet and forever to dry. A wash and go on low-porosity hair needs heat and lightness: warm water to open the cuticle, lightweight leave-ins and gels, and no heavy butters, which will only sit on the surface and flake. Apply product to very wet hair, and use a diffuser on low heat — the gentle warmth helps the product absorb instead of sitting on top.
Best for: low-porosity hair that never seems to absorb product. How to style it: wash with warm water, apply a lightweight leave-in and gel to soaking-wet hair, and diffuse on low heat. Common mistake: using heavy butters and creams to force moisture in. They will not absorb, and they will leave a white, flaky residue. Pros and cons: low-porosity hair holds a wash and go well once the product is in, because the tight cuticle keeps moisture locked in — but getting the product in is the work. Quick verdict: the patient wash and go — light products, warm water, and a diffuser, and low-porosity hair will define beautifully.
34. The Wash and Go for High-Porosity Hair
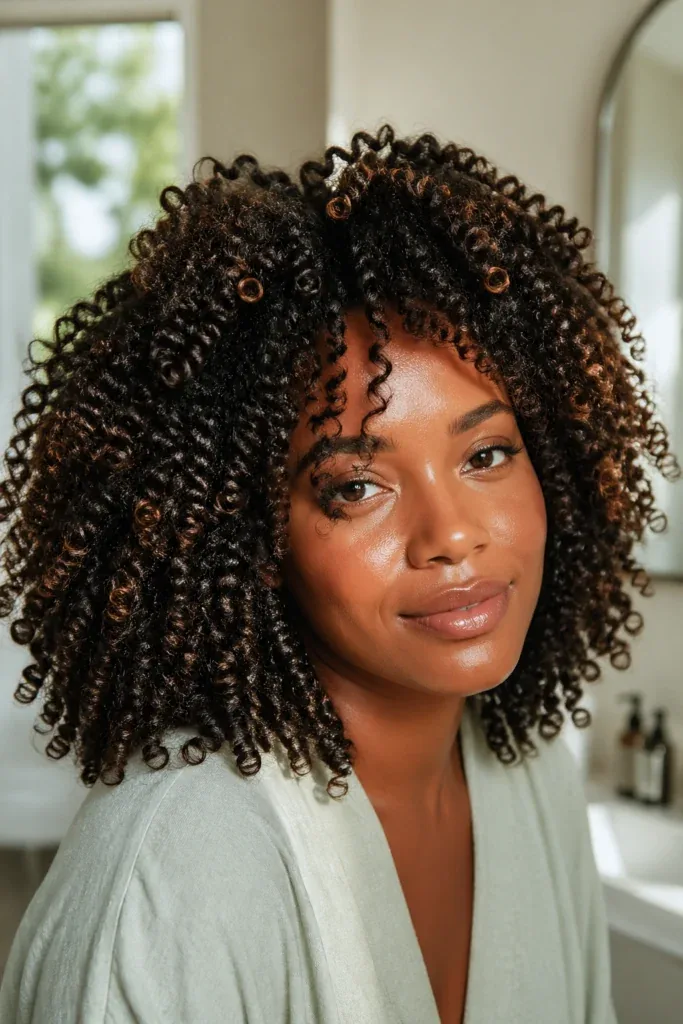
High-porosity hair drinks water and product fast, and loses them just as fast — it gets wet instantly, dries quickly, and frizzes easily, because the cuticle is open and moisture escapes. A wash and go on high-porosity hair needs sealing: a rich leave-in, a cream layer, and a strong-hold gel on top, with a drop of oil smoothed over the finished curls to lock the moisture in. The goal is to slow the moisture loss down enough that the curls stay defined for days instead of hours.
Best for: high-porosity, colour-treated or heat-damaged hair. How to style it: layer leave-in, cream, then gel — the full LOC or LCO method — and finish with a light oil once the hair is dry. Maintenance: high-porosity wash and gos need a refresh every day, and a weekly deep-conditioning treatment is not optional. Common mistake: skipping the cream layer. On high-porosity hair, a gel alone will dry the curls out and flake. Quick verdict: the sealing wash and go — layer it, seal it, and high-porosity hair will hold its definition far longer than you expect.
35. The Wash and Go After a Big Chop
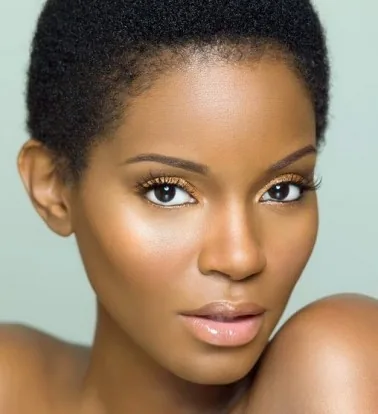
A big chop — cutting off all the relaxed or damaged hair at once — leaves a short, fresh head of natural curls, and a wash and go is the first style most people try on it. It is the perfect first wash and go: the hair is short, the curl pattern is finally visible, and the routine takes minutes. Wash, leave-in, a little gel, smooth it over with your palms, and the coils appear. It is also an emotional style — the first time many people see their real texture — and it is worth doing slowly, with products you trust, on a day when you have time to enjoy it.
Best for: new naturals and anyone in their first month after a big chop. How to style it: a curl cream or light gel, smoothed over the hair with your hands — no tools, no fuss. Pros and cons: the easiest wash and go to learn, with the least product and the least drying time — but the hair is short, and the style will change every month as it grows. Maintenance: almost none; a nightly bonnet and a quick refresh keep it looking fresh. Quick verdict: the fresh-start wash and go — short, simple, and the first time your real curls get to introduce themselves.
36. The Wash and Go While Transitioning
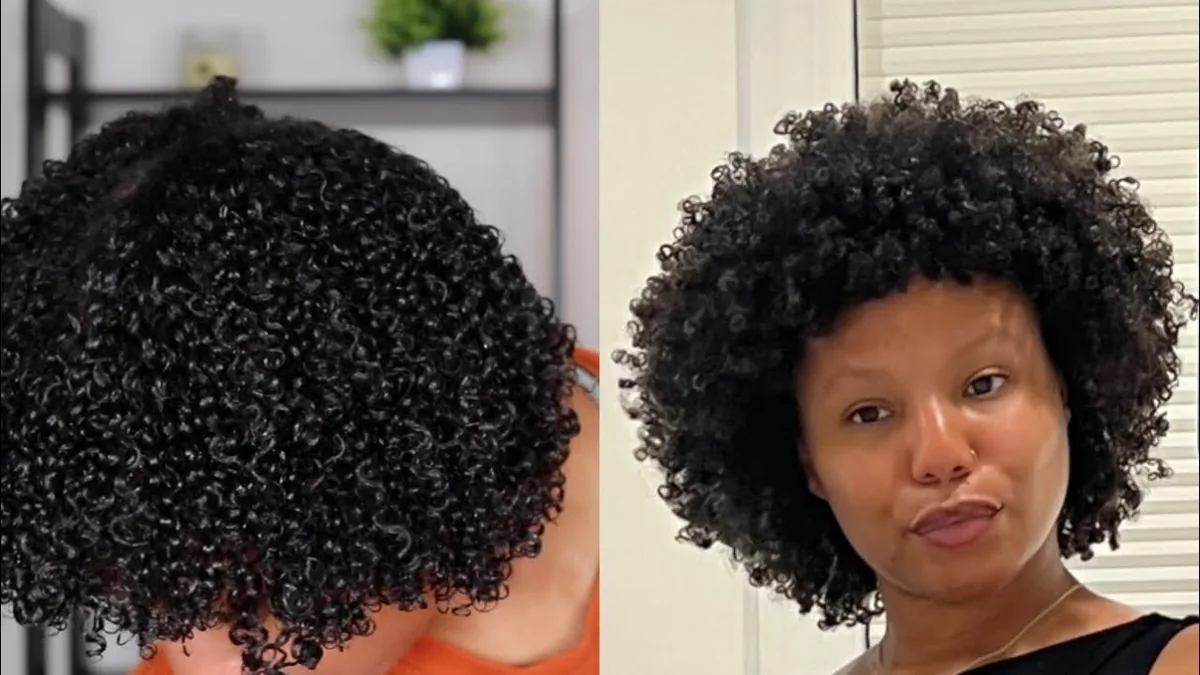
Transitioning — growing out relaxed hair without cutting it all off — means living with two textures at once: natural curls at the roots and straight, relaxed ends. A wash and go during transition is tricky, because the two textures will not behave the same way, but it is not impossible. The trick is to treat the roots like a wash and go and the ends like a blow-out: apply your products to the roots, then smooth a little extra gel or cream over the straight ends to blend them, and let the hair dry. The result is not a perfect wash and go, but it is a wearable one, and it lets you see your natural pattern growing in.
Best for: transitioners who want to wear their natural texture while they grow it out. How to style it: focus the product on the roots, smooth the ends with extra gel, and diffuse for volume. Common mistake: expecting the relaxed ends to curl. They will not, and fighting them will only cause breakage at the line where the two textures meet. Maintenance: deep-condition weekly, and handle the line of demarcation gently — it is the weakest point in the hair. Who should consider a big chop instead: anyone whose two textures are so different that the wash and go looks unfinished. Quick verdict: the in-between wash and go — not perfect, but honest, and a preview of the curls to come.
37. The Gentle Wash and Go for Kids and Teens

A wash and go for kids and teens should be the simplest version of the routine: gentle products, no strong gels, and a style that a child can sit still for. Wash with a mild, tear-free shampoo, detangle gently with conditioner, then apply a light leave-in and a curl cream — no gel cast, no diffusing, no hour-long routine. The curls will be soft and defined, the hair will be easy to manage, and the whole thing takes fifteen minutes. The point is not a perfect wash and go; it is a healthy routine a child can grow up with.
Best for: kids, teens, and anyone new to natural hair care. How to style it: leave-in and curl cream on wet hair, smoothed through with your fingers, then air-dry. Pros and cons: the gentlest wash and go, with no harsh products and no heat — but the definition will be softer and shorter-lived than an adult gel wash and go. Common mistake: using adult-strength gels on a child’s hair. They are too heavy, too drying, and they make the hair hard and uncomfortable. Quick verdict: the kind wash and go — gentle, quick, and the right first routine for young curls.
38. The Wash and Go With a Twist-Out Refresh on Day 3
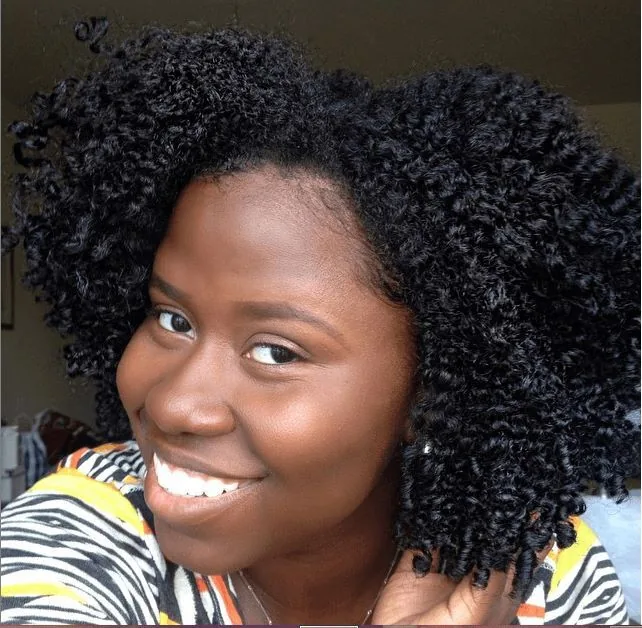
By day three, even the best wash and go starts to lose its definition — the curls are stretched, the roots are flat, and a refresh is not quite enough. That is when the twist-out refresh saves the style: take the day-three hair, mist it lightly with water, apply a little cream, and twist it into six to eight loose two-strand twists. Leave the twists in for a few hours or overnight, then unravel them, and the wash and go is reborn as a twist-out — defined, voluminous, and good for another two or three days. It is the wash and go’s second life.
Best for: day-three hair and anyone who wants to stretch a wash and go to a full week. How to style it: mist, cream, twist loosely, and unravel when fully dry — never unravel damp twists. Maintenance: the twist-out refresh extends the style by two to three days, and it needs no wash at all. Pros and cons: the longest-lasting wash and go strategy in this guide, and it gives you two styles for one wash — but the twist-out will look different from the original wash and go, so it suits people who like variety. Quick verdict: the second-life wash and go — when the curls fade, twist them, and the style starts all over again.
What is a wash and go?
A wash and go is a hairstyle for natural hair where you wash your hair, apply leave-in conditioner and a styler like gel or custard to soaking-wet hair, and let it dry without heat styling, twisting or braiding. The style is your natural curl pattern, defined — and a good wash and go lasts three to five days with a daily refresh.
How long does a wash and go last?
A wash and go usually lasts three to five days. Gels and custards give the longest-lasting definition, while creams and mousses last one to two days. Sleeping in a satin bonnet or pineapple and refreshing each morning with water and a little gel will stretch it to the full five days.
Why does my wash and go frizz?
Frizz usually means a curl clump was broken or moisture escaped. The most common causes are touching the hair while it dries, using a regular terry-cloth towel, applying product to damp rather than soaking-wet hair, or skipping the leave-in under a strong gel. Let the gel cast form and dry completely before touching the hair.
What products do I need for a wash and go?
You need two things: a leave-in conditioner for moisture and a styler for hold — a gel, custard or mousse. A cream is optional and suits dry or high-porosity hair. Start with one leave-in and one styler, and change only one thing at a time until the routine works.
Does a wash and go work on 4C hair?
Yes — a wash and go works on 4C hair, but it needs a different technique: a rich leave-in, a strong-hold gel or custard, and small sections worked slowly with the shingling method on soaking-wet hair. The result is defined, clumped coils rather than ringlets, and it takes more time than a wash and go on looser patterns.
Should I diffuse or air-dry my wash and go?
Air-drying gives the most definition and the healthiest result, but it is slow and the roots dry flat. Diffusing is faster, gives more volume at the roots, and suits fine hair and busy mornings. Many people do both: air-dry for 20 to 30 minutes, then diffuse on low heat and low speed.
What is a gel cast and should I scrunch it out?
A gel cast is the hard, crunchy shell that forms as gel dries, locking the curls in place. Yes, scrunch it out — but only once the hair is 100 percent dry, roots and all. Scrunching too early causes frizz. Use your bare hands, or a drop of oil on your palms, and scrunch gently until the crunch disappears and soft, defined curls remain.
How do I refresh a wash and go on day 2 or 3?
Mist the hair lightly with water, or water mixed with a drop of leave-in, then smooth a pea-sized amount of gel or cream over the frizziest sections and let it dry without touching it. Sleep in a satin bonnet or a loose pineapple overnight to protect the curls, and refresh only the sections that need it.
How do I stop shrinkage in a wash and go?
You cannot stop shrinkage — it is what healthy curly and coily hair does — but you can stretch it. Diffuse with the roots lifted, clip the roots while the hair dries, or band the dry hair with loose fabric bands for an hour. Always stretch dry or nearly dry hair, never wet hair, which breaks the curl clumps and causes frizz.
How often should I wash my hair if I wear wash and gos?
Most people wash every three to five days, when the wash and go has run its course. Washing more often than that can dry the hair out, while waiting much longer lets buildup sit on the scalp. Wash when the refresh stops working — when the curls will not come back with water and product — and that is your wash day.
Conclusion
The wash and go is the most honest hairstyle natural hair has: it is your curl pattern, exactly as it grows, made a little more defined and a little more lasting. It is not a shortcut and it is not a trick — it is a routine, and like any routine, it gets better every time you do it. The first wash and go may frizz, the second may be too crunchy, and the third may be the one where it all clicks: the right products, the right sections, the discipline not to touch the hair while it dries.
Start with the simplest version — a leave-in, a gel, soaking-wet hair, and patience — and learn your own hair before you buy anything else. Try the routine on a day at home, let the cast dry completely, and scrunch it out to find your curls underneath. Then build from there: a diffuser for volume, a refresh for day two, a pineapple for the night. Your curls were already there. The wash and go just lets them be seen.