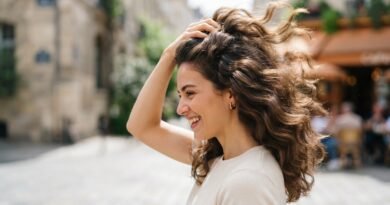
25 Effortless Winter Hairstyles Straight From Runway Backstage Trends Now
I spent last weekend rewatching backstage clips from the winter shows, and honestly, I paused way more for the hair than the clothes. There’s something about cold-weather hair that just works. It’s a little undone, a little moody, and somehow looks even better after a long day.
So I pulled together the styles that kept showing up again and again. Quiet luxury bobs, romantic goth hairstyles, that glitchy glam hair everyone is talking about, plus a few classics like the hime cut and the vampire haircut.
Every single one of these 25 winter hairstyles is doable at home. No salon appointment required, no fancy tools. Most take under ten minutes, and a few take under five.
Grab a hair tie and a mirror. Let’s get into it.
Quiet Luxury Bob: The Winter Classic

The quiet luxury bob is everywhere right now, and it’s easy to see why. It’s blunt, chin to jaw length, and it moves like silk. No choppy layers, no heavy styling, just clean lines.
Ask your stylist for a blunt cut with a tiny bit of softness at the ends. If you already have a bob, fake the polish by blow-drying with a round brush and pinning the ends under while they cool.
- Middle part for the sleekest look
- Side part if you want more volume
- A drop of shine serum on the ends only
This is the base for so many 2026 hairstyles, so it’s worth getting right.
Old Money Hair: Polished, Never Overdone
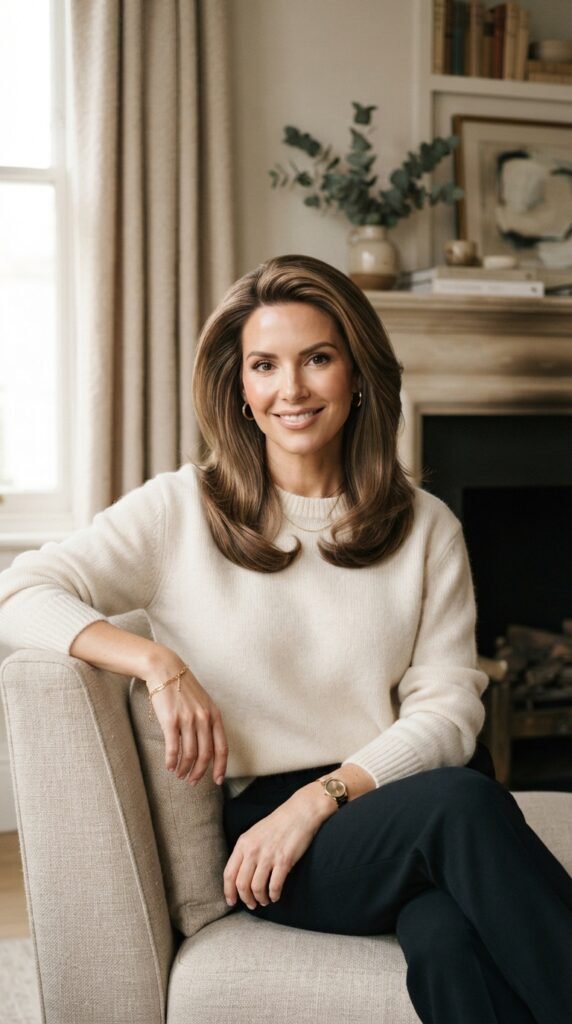
Old money hair is less about a cut and more about how it’s finished. Think glossy, healthy, and slightly bouncy. It looks inherited, not styled.
The trick is a good blowout with a round brush and a cool shot at the end to lock it in. Volume at the roots, smooth through the middle, and a tiny bend at the ends.
- Satin pillowcase for shine overnight
- Weekly deep conditioning mask
- Nothing too tight, nothing too teased
The vibe works for work, dinners, and every holiday party this season. It never looks like you tried too hard.
Romantic Goth Hairstyles
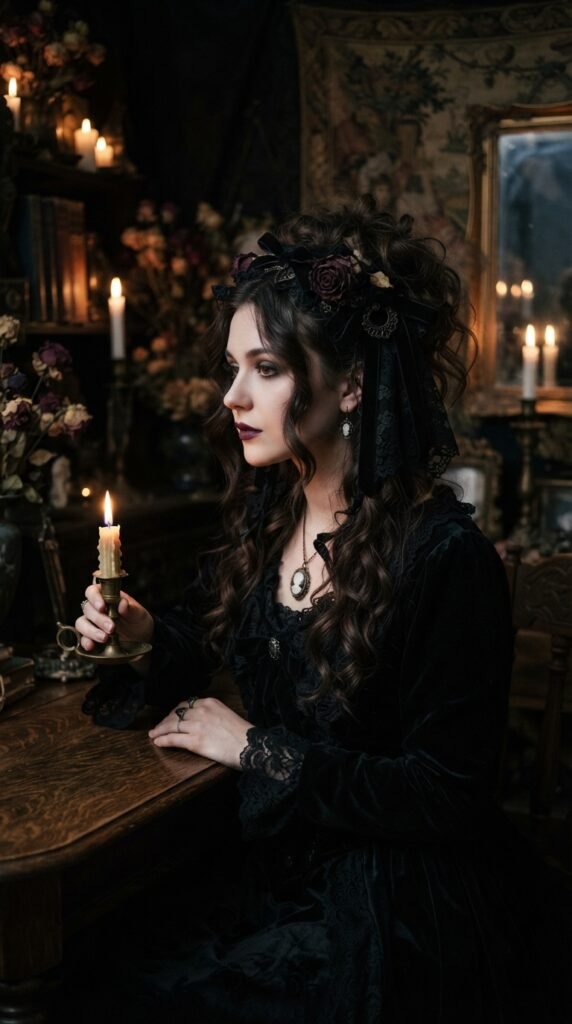
Romantic goth hairstyles are soft, dark, and a little dramatic. Think long waves, loose pins, velvet ribbon, and hair that falls like a curtain.
It’s not scary. It’s moody and pretty. The key is keeping the texture soft while the color and accessories do the heavy lifting, so the shape stays romantic instead of severe.
- Wash and rough-dry your hair
- Spray a fine mist of salt spray
- Twist small sections around your finger and pin loosely
Let it sit for 20 minutes, take the pins out, and you’re done. Mist with a light hold spray and you’re set for the night.
Glitchy Glam Hair

Glitchy glam hair is my favorite weird little trend. It takes the slicked-back look and adds sharp, deliberate details like tiny braids, metal pins, or a hard center part that looks almost digital.
Backstage, stylists use strong gel and a fine-tooth comb. You can do the same at home with what you already own. The whole point is clean lines plus one unexpected detail.
- Slick everything back with gel
- Add two contrast pins or a thin braid
- Leave the very ends slightly undone
That last part matters. Perfect looks flat. A little mess keeps it modern.
Asymmetrical Lob
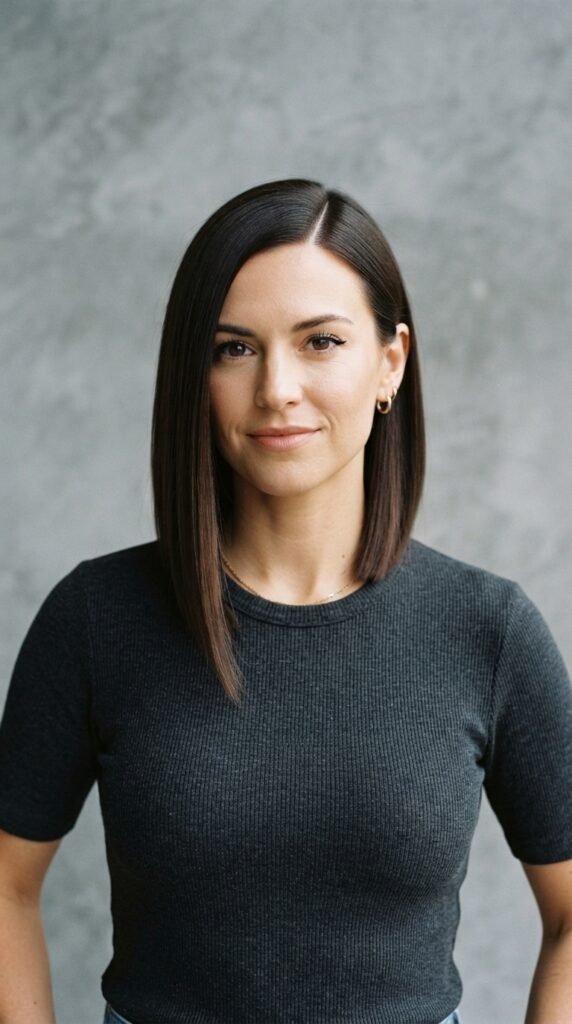
The asymmetrical lob is the grown-up cousin of the bob. One side hits collarbone, the other grazes the jaw, and the lines are nowhere near even. That’s the whole point.
It works on almost every face shape because the longer side stretches the neck and the shorter side adds lift.
- Ask for a deep side part
- Keep ends blunt, not thinned
- Style with a flat iron and a slight tuck
Use a heat protectant every time. This cut shows every split end you have.
The Vampire Haircut

The vampire haircut is exactly what it sounds like: long, layered, and dramatic, with sharp face-framing pieces that graze the cheekbones. Think old movies, not Halloween.
Ask for long layers that start below the chin and framing pieces that point down and slightly inward. That inward angle is what makes it look expensive.
- Middle part for the full effect
- Deep side part for a softer version
- Volume at the crown, sleek through the mid-lengths
It looks best on healthy hair, so book a trim before you commit to it.
Hime Cut
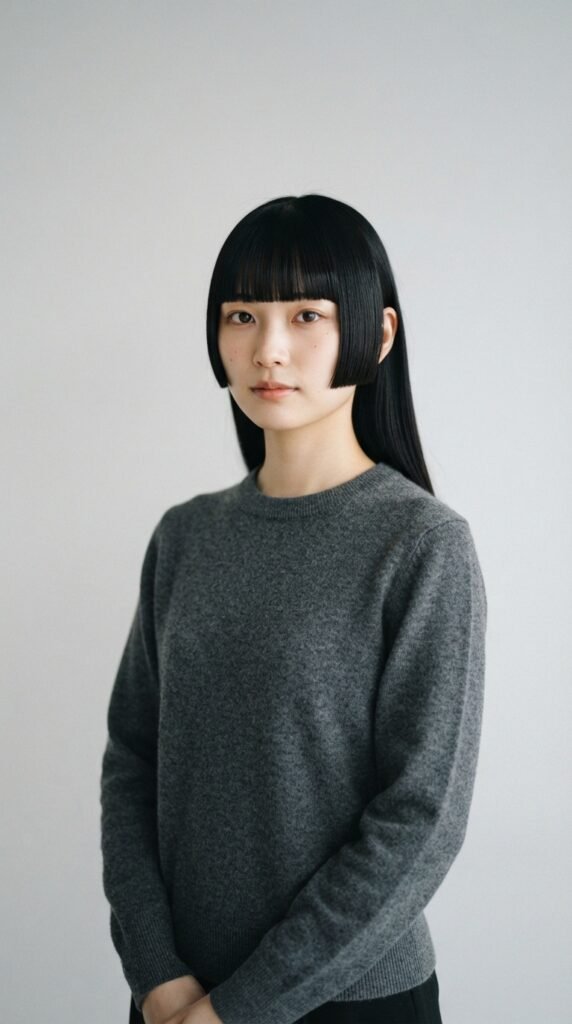
The hime cut is a straight, blunt cut with two shorter side pieces framing the face and the rest left long. It’s striking, clean, and surprisingly wearable once you see it in person.
It works best on straight hair or hair you’re willing to smooth out. A flat iron and a light oil are all you need to keep it looking sharp.
- Get the bangs cut blunt and straight across
- Have side pieces cut to cheekbone or jaw
- Keep the back long and even
It reads a little fantasy, a little elegant. I’m seeing it everywhere this year, especially with simple black outfits.
Sleek Low Bun with a Middle Part
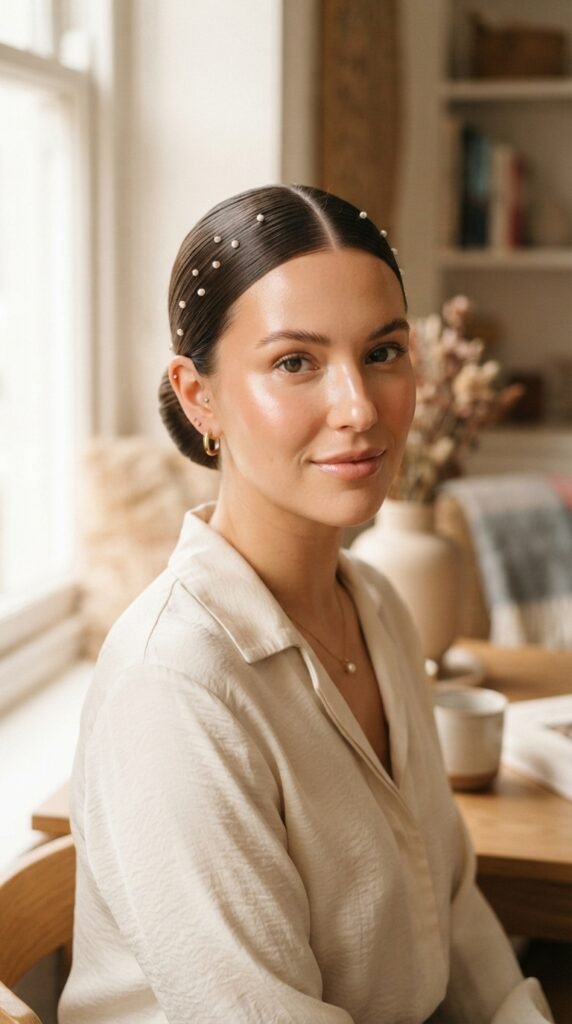
This one is my go-to when I have four minutes and somewhere to be. A low bun, brushed flat on top, with a part so clean it looks drawn with a ruler.
It’s the easiest way to look put together in winter, especially on day-three hair when nothing else is cooperating.
- Brush hair back with a little gel
- Gather at the nape, twist, and pin
- Smooth flyaways with a spoolie and hairspray
Add a velvet ribbon or two pearl pins and it instantly feels a lot more expensive.
Textured Faux Bob

A faux bob gives you the short-hair look without the scissors. It’s the smartest way to test a chop before you commit to one.
All you do is tuck your ends under and pin them at the nape. The more texture you have, the better it looks, so skip the straightener on this one.
- Curl or wave your hair lightly
- Gather the bottom half and roll it under
- Pin, then pull a few pieces loose around your face
It takes about five minutes and photographs beautifully. Try it before you book that appointment.
Curtain Bangs, Grown Out

Good news if you’ve been growing your bangs out: grown-out curtain bangs are a whole hairstyle now, not an awkward phase.
They open up your face, work with almost any length, and need way less maintenance than a blunt fringe.
- Blow-dry them outward with a round brush
- Keep the ends soft, not curled
- Use a tiny bit of dry shampoo at the roots
If they’re getting long, a light dusting at the ends keeps them looking intentional instead of forgotten.
The Wet Look, Winter Edition
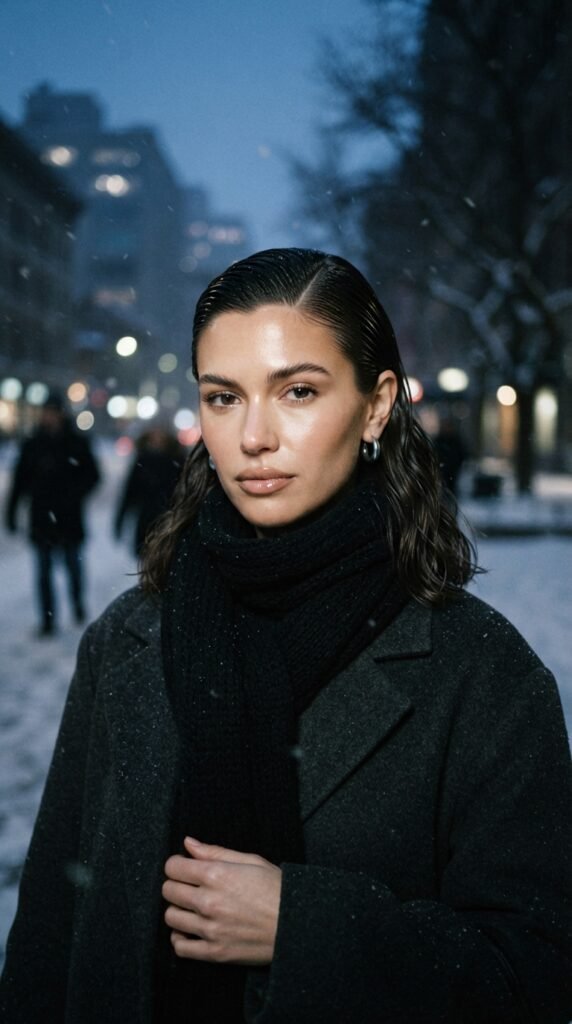
The wet look used to feel strictly summer. Not anymore. This winter version is glossier, softer, and a lot more wearable for everyday.
Instead of a full gel slick, you use a cream or oil to create shine and then leave a little movement at the ends so it doesn’t look like you just got out of a pool.
- Apply product to damp hair only
- Comb back with a wide-tooth comb
- Scrunch the last two inches for texture
Pair it with the quiet luxury bob or the asymmetrical lob and it looks incredible. Great for dinners and holiday photos.
Half-Up Twist with a Velvet Ribbon
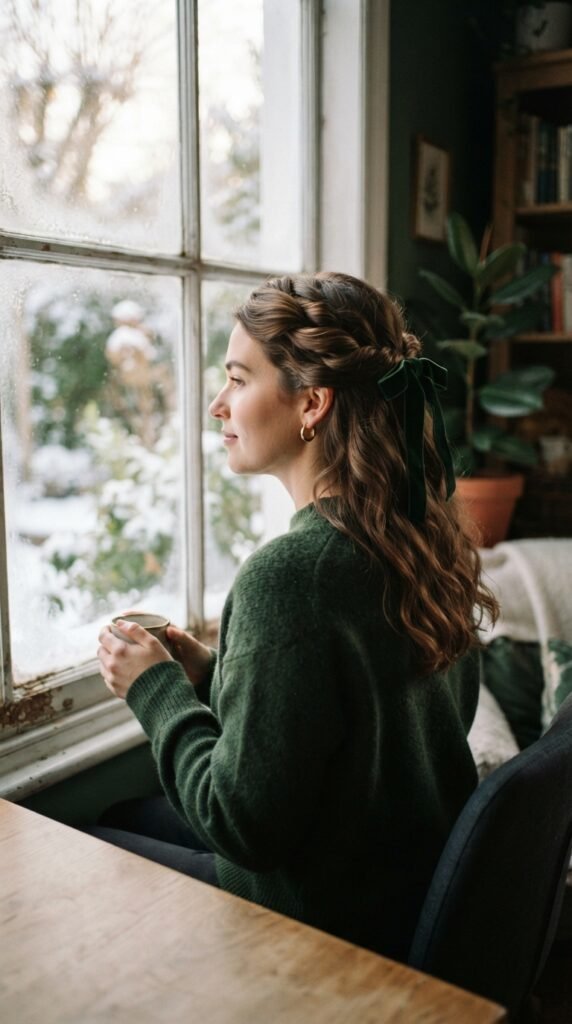
This is the hairstyle I get the most compliments on, and it takes two minutes. Twist the top sections back, pin them, and tie a ribbon around the base.
Velvet is the move for winter. It looks rich and it holds better than satin, which tends to slip right out of fine hair.
- Take two sections from above your ears
- Twist each toward the back and cross them
- Secure with bobby pins and add your ribbon
Leave the rest of your hair down and wavy. Old money hair energy, no salon needed.
Deep Side Part Waves
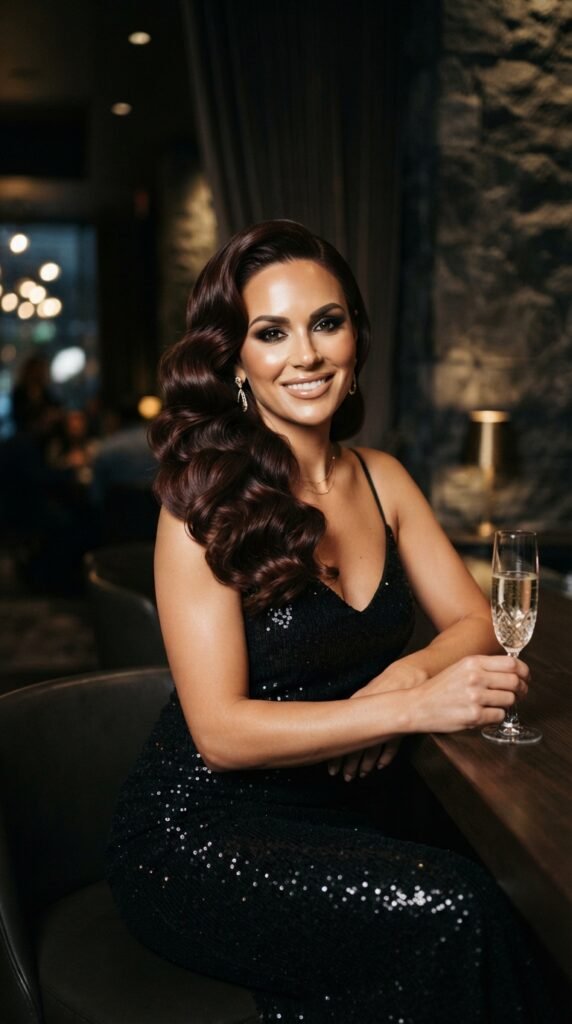
A deep side part with big, brushed-out waves is the most classic way to look glamorous in about ten minutes flat.
It creates instant volume at the root and frames one side of the face beautifully, which is flattering on pretty much everyone.
- Part from above the arch of one eyebrow
- Curl away from the face in big sections
- Brush through with a paddle brush
Finish with a light hold spray and a tiny bit of shine serum. This works on any length, from a bob to waist-length hair, and it never goes out of style.
Braided Crown with Baby Hairs
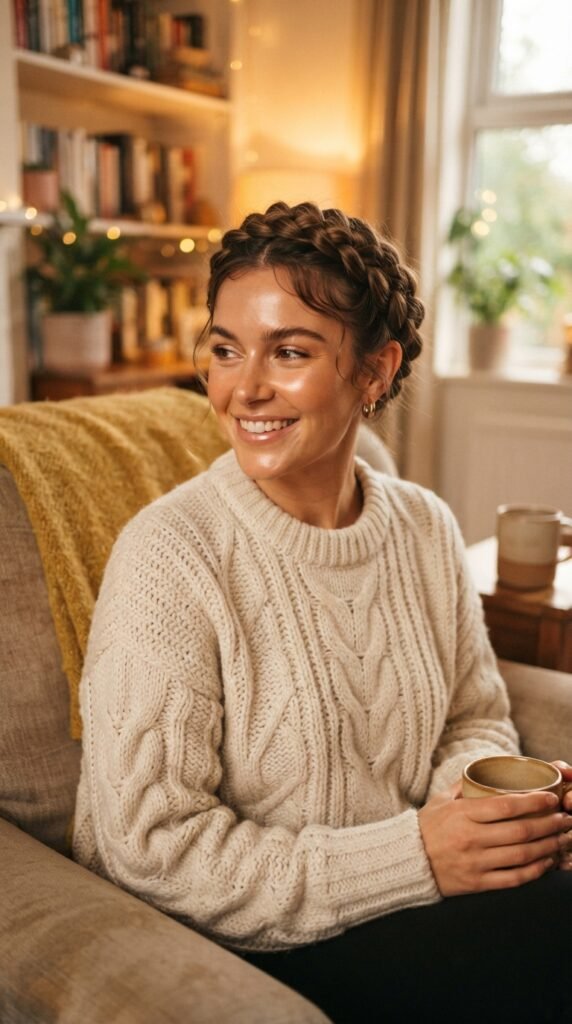
A braided crown sounds fancy but it’s basically two braids pinned across your head. It’s cozy, romantic, and perfect for cold days when you want your hair off your face.
Start with a middle part and two loose braids going back. Loose is key. Tight braids look harsh here.
- Section hair into two halves
- Braid each side loosely, starting near the front hairline
- Cross them at the back and pin
Pull out a few baby hairs around your face with a toothbrush and a little gel. That tiny detail makes it look intentional.
Micro Braids and Face-Framing Pieces
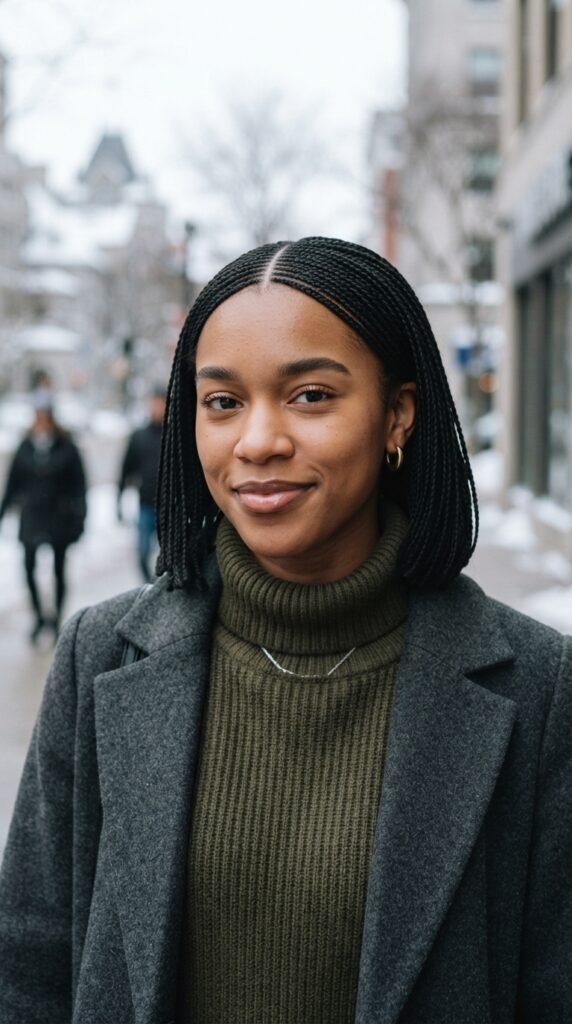
You don’t need a full head of braids to get the look. Two or four thin micro braids at the front of a sleek style is more than enough.
It’s the easiest way to make simple hair look designed. I do this on day-two hair all the time.
- Two tiny braids on either side of the part
- Or one braid woven into a low ponytail
- Keep the rest of the hair glossy and flat
This plays perfectly with glitchy glam hair and the sleek low bun. It’s one of those 2026 hairstyles that looks way harder than it actually is.
Chunky Ribbons and Hair Bows

Ribbons are doing a lot of work this season. A plain pony with a big velvet bow reads instantly elevated, like you spent an hour on it.
The trick is proportion. A thin ribbon on thick hair disappears. A wide ribbon balances it out.
- Velvet for winter texture
- Grosgrain for a sharper, cleaner look
- Satin for something softer and more romantic
Match your ribbon to your coat or your bag and everything looks intentional. That’s the whole quiet luxury bob and old money hair idea in one small accessory.
Air-Dried Waves with Texture Spray

If you’re tired of heat styling, air-dried waves are your friend. This is my actual everyday look from November through February.
Wash at night, add a light leave-in, and let your hair dry while you sleep in a damp braid or two.
- Apply leave-in to damp hair
- Braid loosely into two or three sections
- Sleep, unravel in the morning, spray with texture spray
No heat, no damage, and it gets better every day you don’t wash. That’s a win in my book.
Blunt Collarbone Cut

The blunt collarbone cut is the longer sister of the quiet luxury bob. It’s one length, sharp at the ends, and falls right at the collarbone.
It looks amazing on almost everyone and it grows out beautifully, which is the real reason I love it so much.
- Ask for one length with no layers
- Keep it slightly shorter in the back
- Blow-dry smooth with a round brush
This is the cut I recommend if you want low maintenance but still want to look expensive. It delivers every single time.
Curly Shag with Bangs

Curly girls, this one’s for you. The curly shag is layered, a little messy, and completely effortless once it’s cut right.
You want round layers that let the curls clump, plus soft bangs that hit just above the brows. Nothing sharp or heavy.
- Cut dry so the curl pattern shows
- Diffuse with your head upside down
- Use a curl cream, then a light gel
Don’t touch it while it dries. That’s the whole secret. Scrunch out the crunch when it’s fully dry and you’ll have soft, defined curls all day.
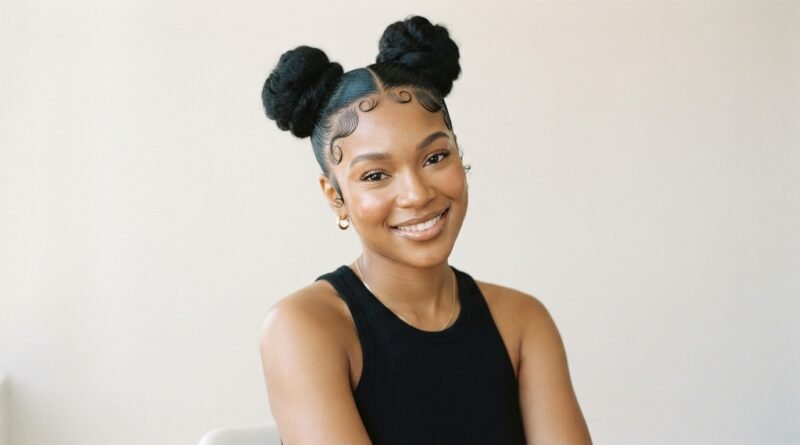
Space Buns with Sleek Edges
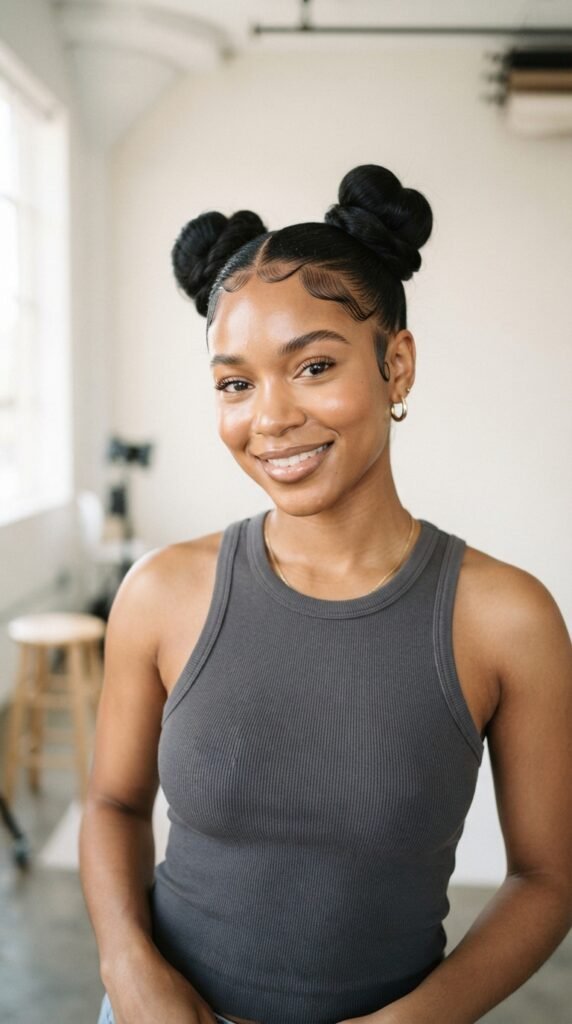
Space buns are back, but the winter version is sleeker. Less festival, more fashion week.
Part your hair down the middle, smooth the front flat, and place the buns high on each side so they sit above your ears.
- Brush hair flat with gel
- Split into two high ponytails
- Wrap each into a bun and pin
Lay your edges with a soft brush and a little edge control. Add tiny rhinestone pins if you’re feeling the glitchy glam hair vibe. Cute for parties, easy for day-two hair.
Pearl Clips and Velvet Headbands
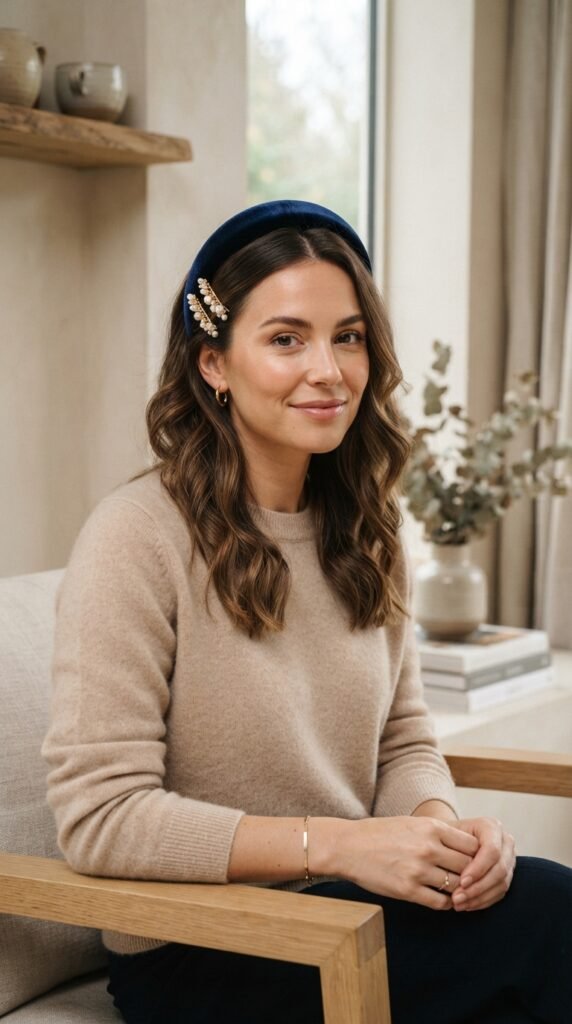
Accessories are the fastest way to make any winter hairstyle feel new. Two pearl clips and you’re basically done.
Velvet headbands are especially good in winter because they add warmth and hold slippery hair in place without any effort.
- One pearl clip on one side for a soft look
- Three small clips in a row for something bolder
- A velvet headband over air-dried waves
Buy them in black, cream, and deep green and you’ll have something for every outfit you own. This is the quiet luxury bob’s best friend.
The Five-Minute Backstage Routine
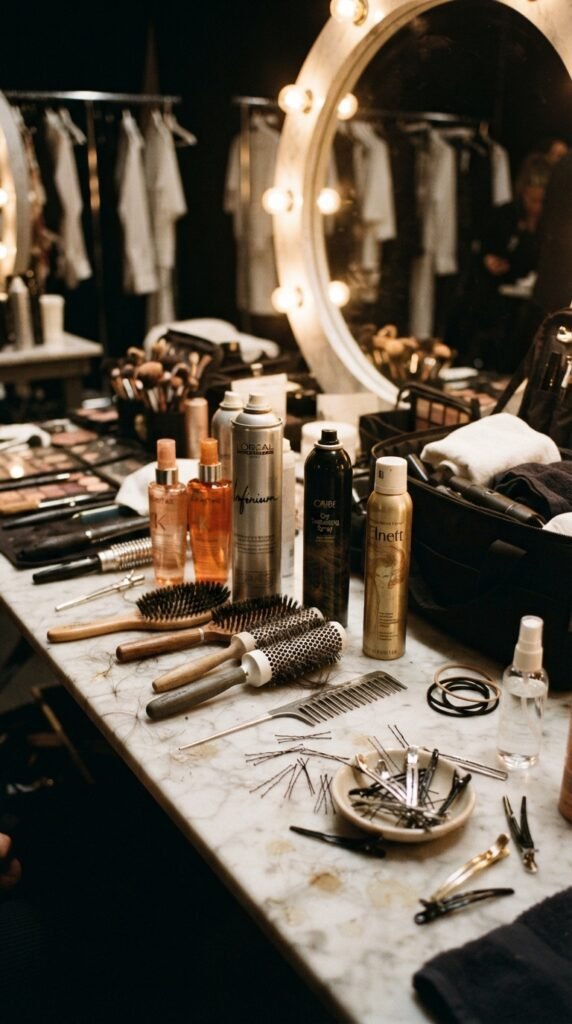
Here’s what actually happens backstage, and you can copy all of it. Nobody is spending an hour. They’re spending five minutes and using their hands.
- Dry shampoo at the roots
- Texture spray through the mid-lengths
- Brush everything back with your fingers, not a brush
- Pin or tie it in one spot
- Pull two pieces loose at the front
That’s the formula behind almost every effortless look on this list. Messy on purpose, clean where it counts, and done before your coffee gets cold.
How to Make Any Style Last All Day
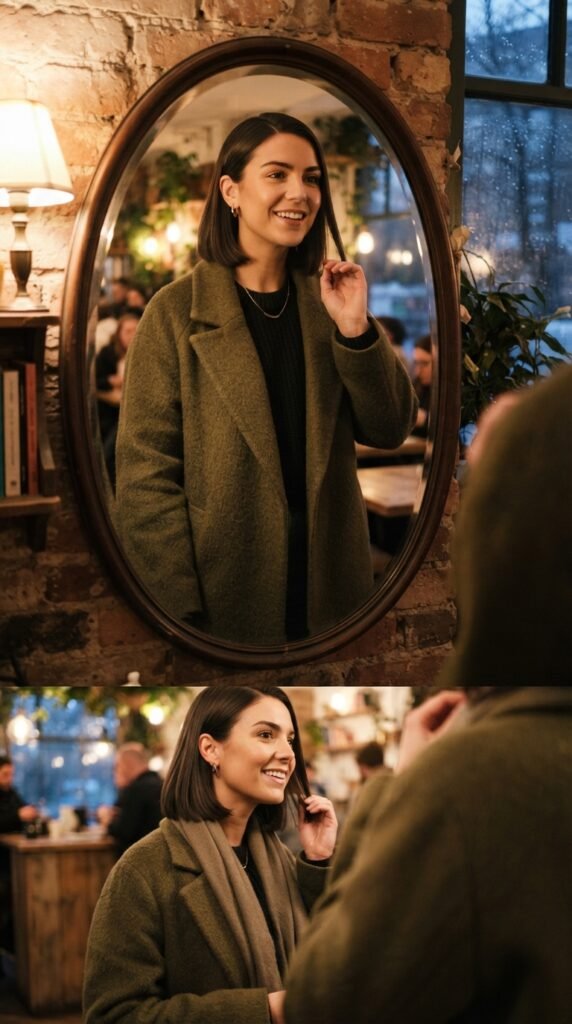
Winter air is dry and indoor heat is worse, so styles tend to fall flat by lunch. A few small habits fix that for good.
- Start on day-old hair whenever possible
- Use dry shampoo before you style, not after
- Set pins with a light mist of hairspray
- Carry two bobby pins and a mini texture spray
Also, don’t touch your hair. Hands add oil and oil flattens everything. I learned that one the hard way, and now my styles last from morning to night.
Winter Hair Care That Keeps Styles Looking Good
No hairstyle looks good on dry, brittle hair. Winter is rough on strands, so a little care goes a long way.
- Deep condition once a week
- Sleep on satin or silk
- Use a heat protectant every single time
- Trim every eight to ten weeks
If your ends are splitting, no amount of styling will hide it. A small trim makes everything else look better, especially the blunt collarbone cut and the asymmetrical lob.
Picking the Right One for You
With 25 options, here’s how I’d choose. Pick based on how much time you actually have, not how much time you wish you had.
- Five minutes or less: sleek low bun, half-up twist, space buns
- Fifteen minutes: quiet luxury bob, blunt collarbone cut, deep side part waves
- Want a real change: asymmetrical lob, hime cut, vampire haircut, curly shag
Start with one, live with it for a week, then try another. That’s how you find your winter signature.
A Warm Little Wrap-Up
Winter hair doesn’t have to be a fight. A good cut, a little texture, and one nice accessory will get you through the whole season looking like you tried harder than you did.
Pick two or three styles from this list, practice them on a lazy Sunday, and you’ll have a routine you actually enjoy instead of dread.
Save this post to Pinterest so you can find it the next time you’re standing in front of the mirror with five minutes to spare. And tell me in the comments which one you’re trying first. I read every single one.