28 Dutch Braid Variations That Look Complicated but Are Actually Easy
You know that feeling when you see a Dutch braid on Pinterest and immediately think, That would take me three hours and a miracle? I’ve been there. The good news? Dutch braids are way simpler than they look. Once you learn one basic move, you can riff on it for weeks.
I’ve rounded up 28 Dutch braid variations that look like you sat in a salon chair for an hour but honestly take minutes. We’re talking braided buns, half-up styles, loose textured looks, and even a few date-night stunners you can wear to the office or out with friends.
Think of this as your friendly cheat sheet for 2026 hairstyles. Grab a mirror, a few hair ties, and let’s braid together. You’ve totally got this.
The Classic That Starts It All

The Dutch braid is the inside-out cousin of the French braid. Instead of crossing strands over, you cross them under. That little flip makes the braid pop and look way more detailed than it should.
Variation 1: the classic center-back Dutch braid. One mirror, about six minutes, done. Variation 2: move your part to the side and Dutch braid down the opposite side for an instant visual switch.
Keep your tension loose and let your natural texture show. If it looks slightly undone, that is the look. Tight and perfect is so last season.
Double Dutch Braids, Twice as Nice

Double Dutch braids are the ultimate lazy-girl flex. Part your hair in the middle, split each side into a deep side part, and braid each side all the way to the ends.
- Variation 3: classic matched double Dutch braids.
- Variation 4: double braids that tie together into a low ponytail at the nape.
Add a little pomade to your roots first. It calms flyaways and gives the braids a glossy finish. Plus, they keep your hair off your face all day, which is always a win.
The Dutch Crown for Half-Up Waves
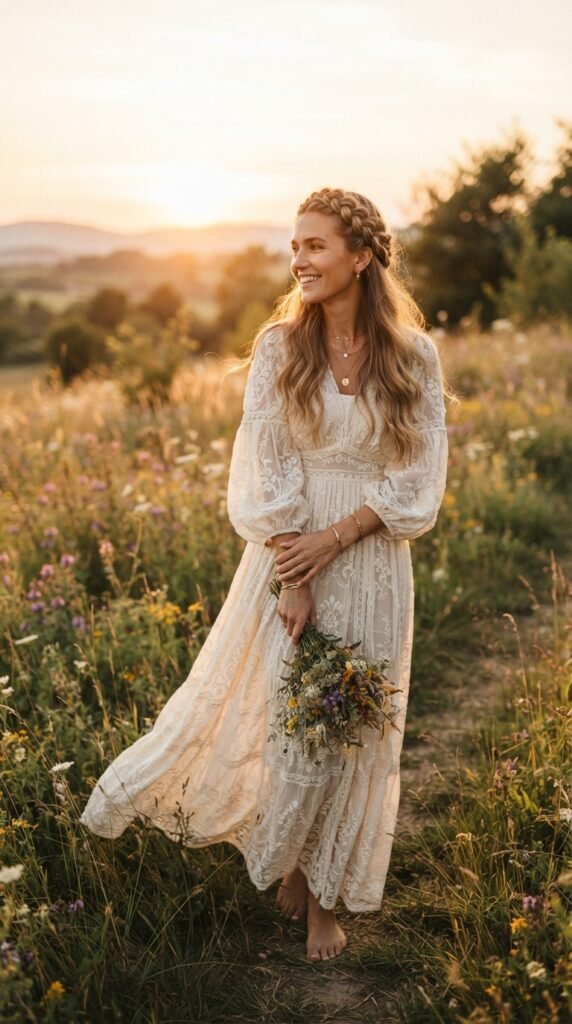
The crown Dutch braid looks like festival royalty, but it’s really just one braid that wraps around your head.
- Variation 5: braid from one ear around the nape to the other, then tuck the end. Instant crown.
- Variation 6: finish with loose waves at the back for that soft half-up feel.
Start with a small triangle at your part, grab hair along the hairline as you wrap, and go slow. Secure the tail with bobby pins, then gently fluff the braid. That’s truly it.
Dutch Braid Bun, Two Ways
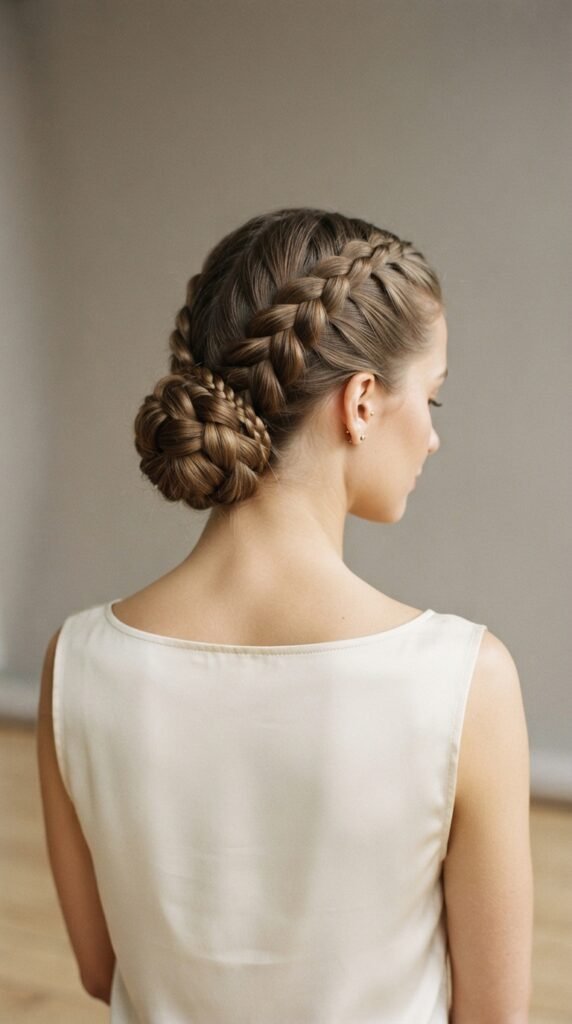
A braided bun always looks polished, but a Dutch braid adds texture and depth, even from across the room.
- Variation 7: Dutch braid the top half, gather everything into a low bun, and wrap the braid around it.
- Variation 8: braid two small Dutch sections at the front, then pull the rest into a high messy bun.
For the low bun, use a donut or sock bun to give it shape. For the messy bun, leave your face-framing pieces out. Pin wherever the braid meets the bun, and you’re ready to go.
Side Dutch Braid in Under 10 Minutes

A single side Dutch braid reads as romantic and carefree, and it’s genuinely foolproof. Sweep your hair to one side, then braid from the nape down over your shoulder. A nape start is easier than a top start, and it looks extra soft.
- A center part gives retro vibes.
- A deep side part is perfect for date night.
- Tugging the edges widens the braid and adds volume.
Pin the end behind your ear and let a few strands fall loose. Instant charm.
The Headband Dutch Braid
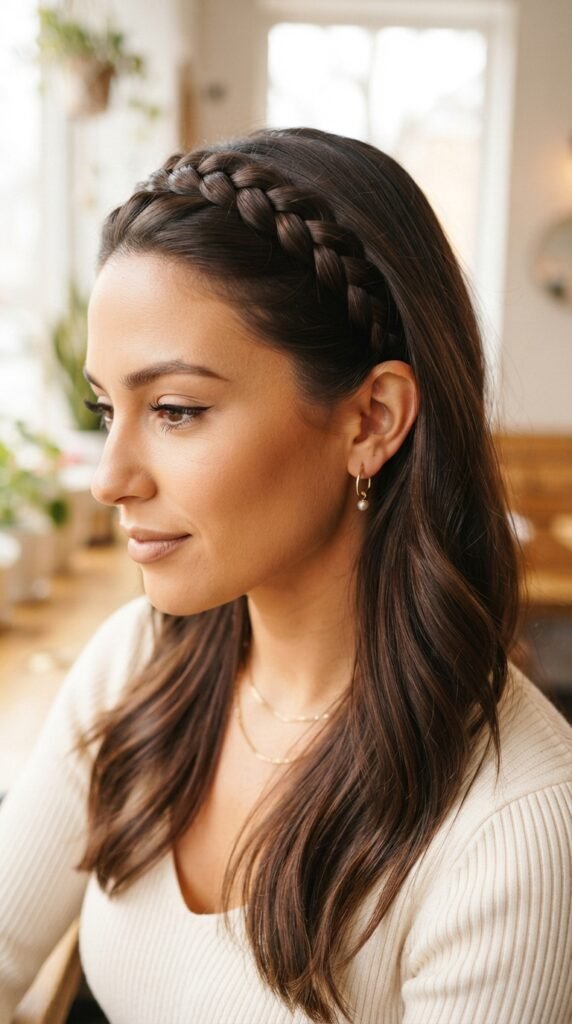
If you love hair accessories, here’s how you make the accessory part of the hairstyle. Start at one temple and Dutch braid horizontally along your hairline toward the other ear. The result is a built-in headband.
- Pick up hair only from the front as you go.
- Keep the braid close to your scalp.
- Pin the end behind your other ear.
Leave the rest down or toss it in a ponytail. Add a tiny pearl pin to elevate the whole look.
Soft-Girl Pigtails with a 2026 Twist
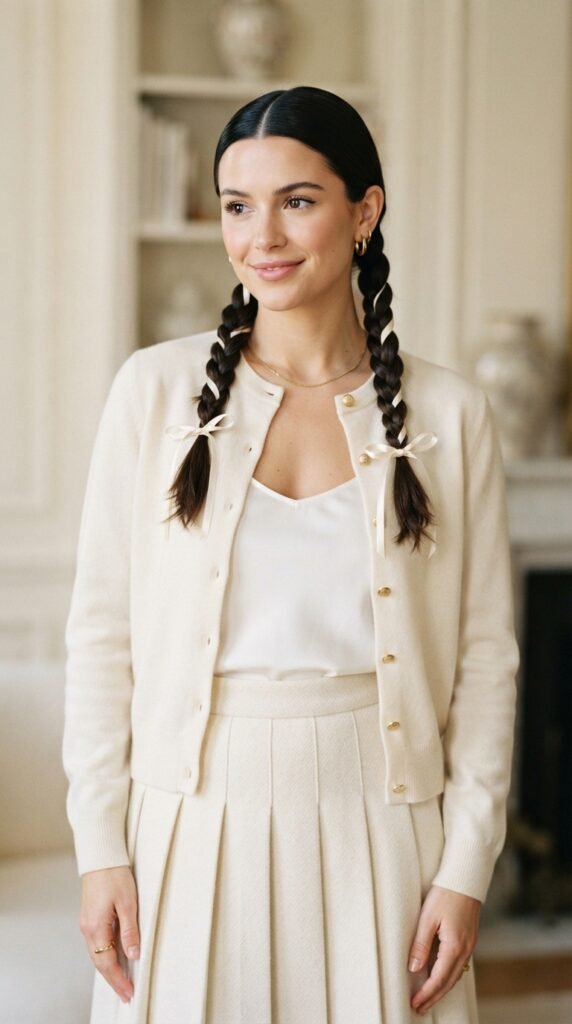
Pigtails can skew young, but the 2026 version is softer and more grown-up.
Variation 11: two high Dutch braids with wispy baby hairs left out. Braid just to the nape, then leave the ends loose or seal them with clear bands.
These age up nicely when you curl the ends, keep a center part, and fluff the braids for fullness. They work perfectly on day-three hair and take far less time than you think.
Low Dutch Braids with Old Money Elegance
We talk a lot about old money hair around here. The low Dutch braid version feels expensive with almost no effort.
Variation 12: part your hair cleanly, braid two neat Dutch braids behind your shoulders, and tie the ends with thin ribbon. Keep the braids sleek and small.
The secret is smoothness. Brush through each section first, add a touch of shine spray, and keep your part crisp. Tuck the ends under for a lovely looped finish. Very polished, very quiet luxury.
The Dutch Mohawk
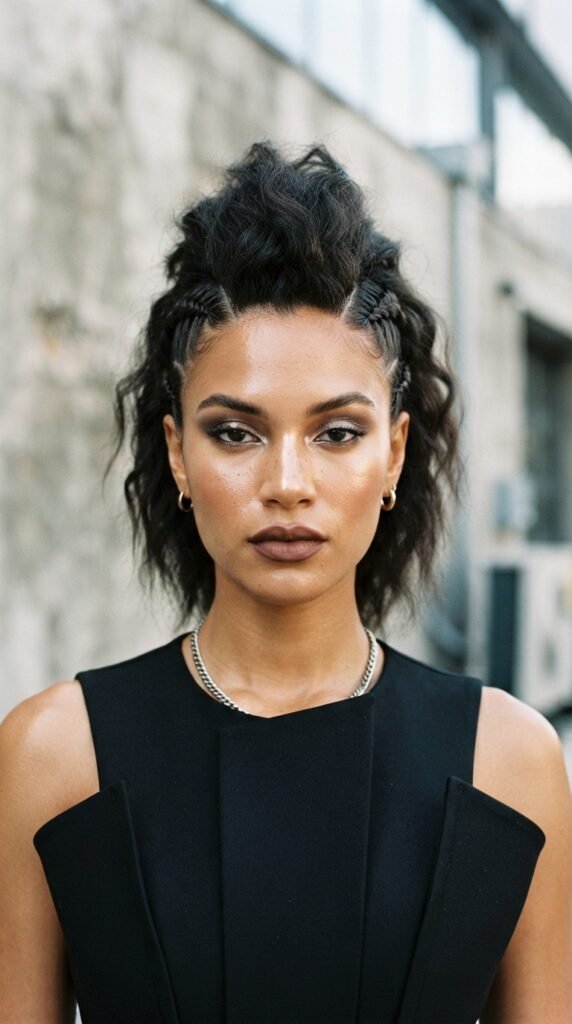
If you want a statement style, the Dutch mohawk is it. It looks bold, but it never pulls on your neck.
- Part your hair into three vertical sections.
- Dutch braid the two outer sections.
- Pin or tie them together at the nape.
Your middle hair stays loose and bouncy, so you get braided texture and movement at the same time. Variation 13 photographs really well and pairs nicely with romantic goth hairstyles if you add a chunky dark sweater.
Half-Up Dutch Braids, Done Right
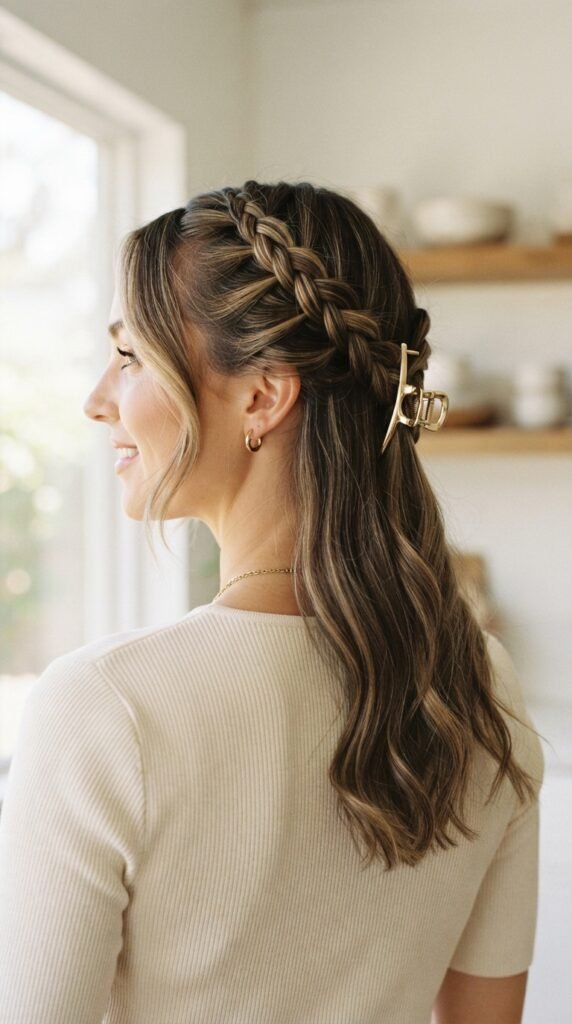
The half-up Dutch braid is my top pick when I want braided detail but not a full braided day.
- Variation 14: take a section from each side, Dutch braid toward the back, and join them into one low ponytail or clip.
- It keeps hair out of your face.
- Loose bottom hair keeps it casual.
- It works with waves, straight hair, or curls.
Swap the elastic for a claw clip and you’ve got a quiet luxury finish.
Wrapped Ponytail Magic

An ordinary ponytail is fine, but a Dutch braided ponytail is a whole mood.
Variation 15: create a Dutch braid along one side from the front to the nape. Pull your ponytail up, then wrap the braid tail around the elastic base. Pin the end underneath.
Bonus points if you also wrap one strand from the ponytail around the elastic for a seamless look. This style reads as salon-done, but it’s just a couple of extra steps on your usual ponytail.
Curly Dutch Braid for Natural Texture
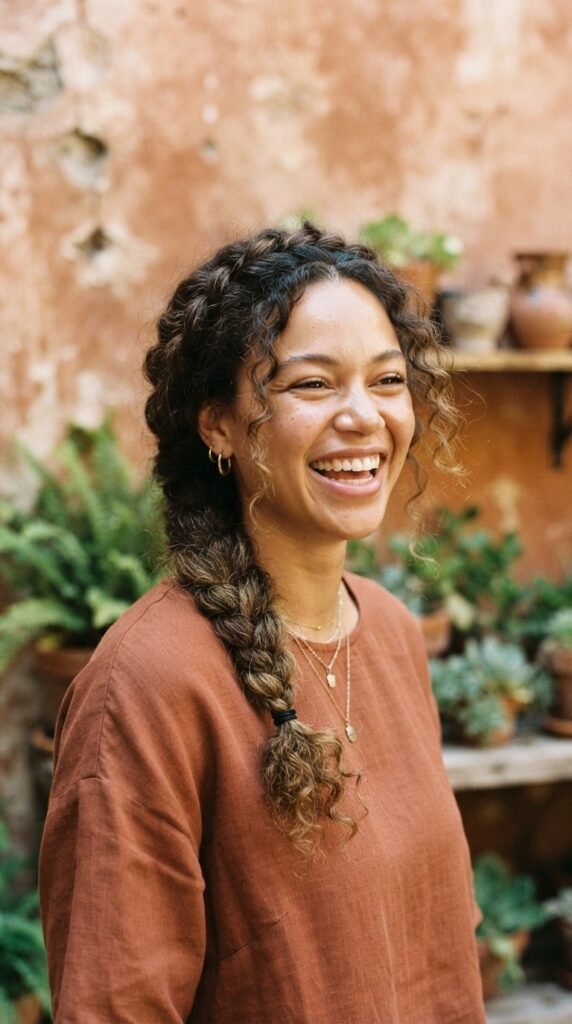
Dutch braids and natural curls are best friends. Your texture adds volume and makes the braid look chunkier and more interesting.
Variation 16: freshly washed curls, second-day curls, and everything in between work. Just avoid brushing. Finger-comb and braid on slightly damp hair for a softer hold.
After braiding, gently pull the edges and let the curls frame your face. You will feel like a low-maintenance goddess, and your curls stay protected.
Milkmaid Braids, Minus the Fuss

Milkmaid braids are that romantic classic that always looks high-end. The Dutch version is even better.
- Variation 17: Dutch braid each side, then pin them across the top of your head like a halo.
- Cross the braids at the crown.
- Hide your bobby pins underneath.
- Leave a few face-framing pieces out.
It reads dressy, even though it’s a five-minute style. Wear it to brunch, a wedding, or any day you want to feel a little bit special.
Space Buns, Dutch-Style
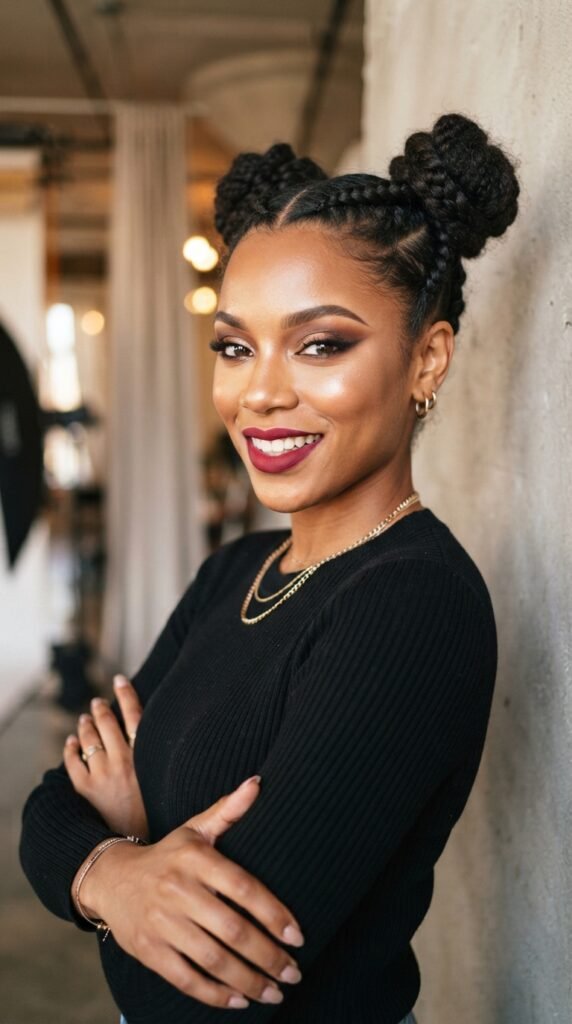
Space buns keep trending because they’re playful and endlessly cute. Adding a Dutch braid makes them extra.
- Split your hair down the middle.
- Dutch braid each half as you go upward.
- Twist the ends into coiled buns and pin.
You can finish in under 15 minutes. Variation 18 works for festivals, gym days, or an unexpected video call.
Ribbon-Woven Dutch Braids
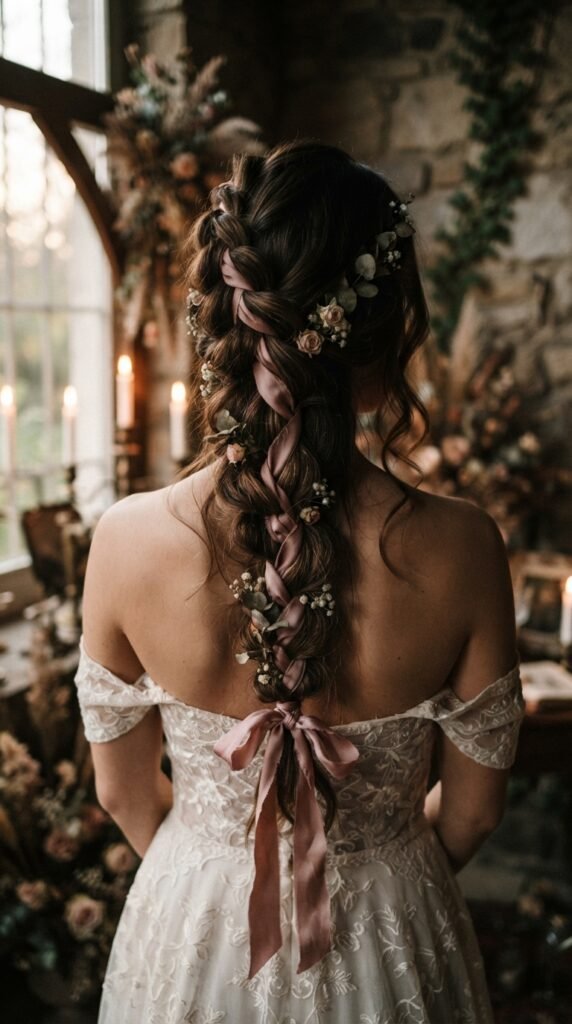
A ribbon can make a simple braid look custom-made. Tie a thin ribbon around your first big strand, then Dutch braid it normally.
When you reach the end, tie the ribbon into a small bow. Matching colors make an ordinary braid pop. Variation 19 looks lovely with black or burgundy lace ribbon for romantic goth hairstyles, and with blush satin for a bridal shower.
It’s one tiny detail that does a lot of heavy lifting.
Face-Framing Dutch Braids with Hime Cut Energy
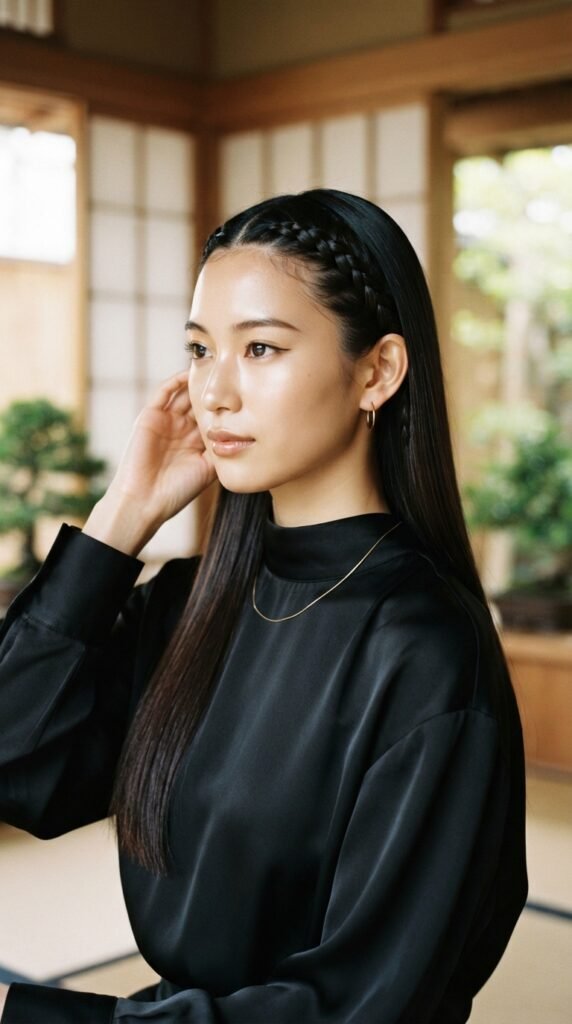
A hime cut is all about sharp face-framing pieces. If you love that vibe but don’t want to commit to scissors, try this trick.
Variation 20: braid two small, tight Dutch braids at your temples and leave the rest of your hair sleek and straight. The braids frame your face just like a hime cut, but they only last as long as you want them.
This is your answer for awkward growing-out stages and for days when you want your haircut to feel a little extra.
Low Chignon with a Dutch Twist
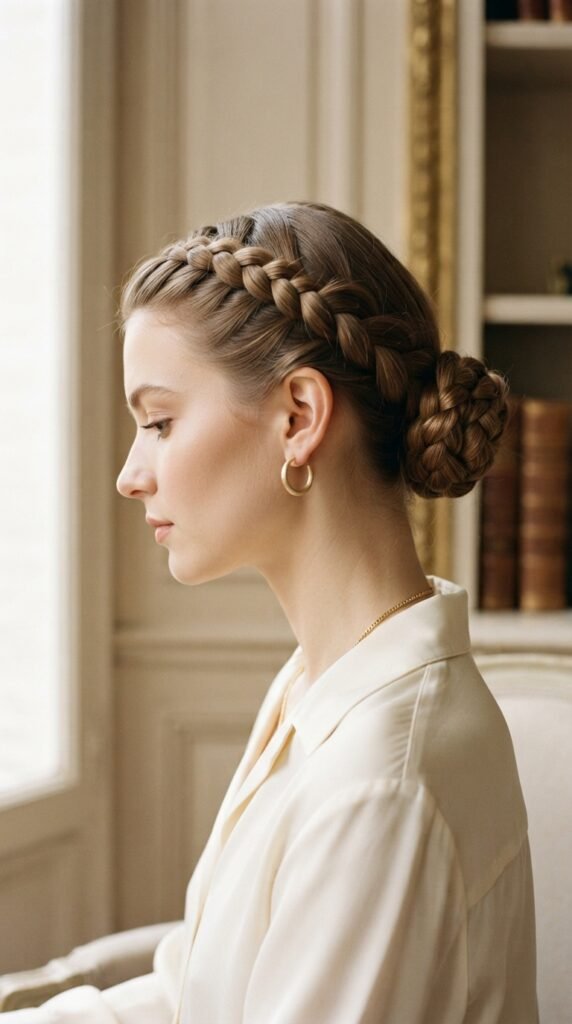
Chignons will never go out of style. Add a Dutch braid wrap and it instantly looks red-carpet ready.
Variation 21: Dutch braid a section along the back, gather everything into a low chignon, and wrap the braid around the base. Pin everything in place.
Keep it sleek for an old money hair effect. Leave pieces loose for a softer, romantic feel. Wear it to dinner, interviews, or anywhere you need to feel pulled together in five minutes.
Glitchy Glam Dutch Braid

Glitchy glam hair is all about high-shine, futuristic energy, and it translates to braids beautifully.
Variation 22: make a standard Dutch braid, weave in a few strands of silver tinsel or liquid-gold thread, and finish with a high-gloss shine spray.
Pull your roots back with gel to complete the look. The effect feels like a deliberate glitch in a really good way. Pair it with silver earrings and minimal makeup.
Dutch Braids for Short Hair and Asymmetrical Lobs

If you have a lob or a bob, you can still Dutch braid. I know it sounds tricky, but small braids are your secret weapon.
- Variation 23: an asymmetrical lob is perfect for one Dutch braid along the longer side, tucked behind the ear.
- Try two tiny Dutch braids at the temples.
- Or braid the underlayer so it peeks out when you push your hair back.
Even a quiet luxury bob can take a mini Dutch braid accent along the hairline. It’s more of a detail than a full style, and it looks very intentional.
One-Shoulder Dutch Braid for Date Night

The one-shoulder Dutch braid has that effortlessly romantic energy. Variation 24: sweep your hair to one side and Dutch braid along the nape so the tail rests on one shoulder.
- Loosen the braid edges with a gentle tug.
- Tuck a tiny pearl pin or small flower into the braid.
- Add waves to the loose pieces if your style includes them.
It reads sweet and thought-out, but it only takes minutes. Perfect for date night.
Quiet Luxury Dutch Braid with Curtain Bangs

Quiet luxury is all about expensive-feeling minimalism, and a glossy Dutch braid with curtain bangs fits right in.
Variation 25: create one seamless Dutch braid starting above the ear. Keep the rest of your hair smooth and free of fiddly accessories, except maybe a clear elastic.
- A clean center part helps.
- Run a drop of hair oil over the braid for sheen.
- Use a round brush on your curtain bangs for soft movement.
It’s the same braid you already know, dressed to whisper rather than shout.
Vampire Dutch Braid for Romantic Goth Hairstyles
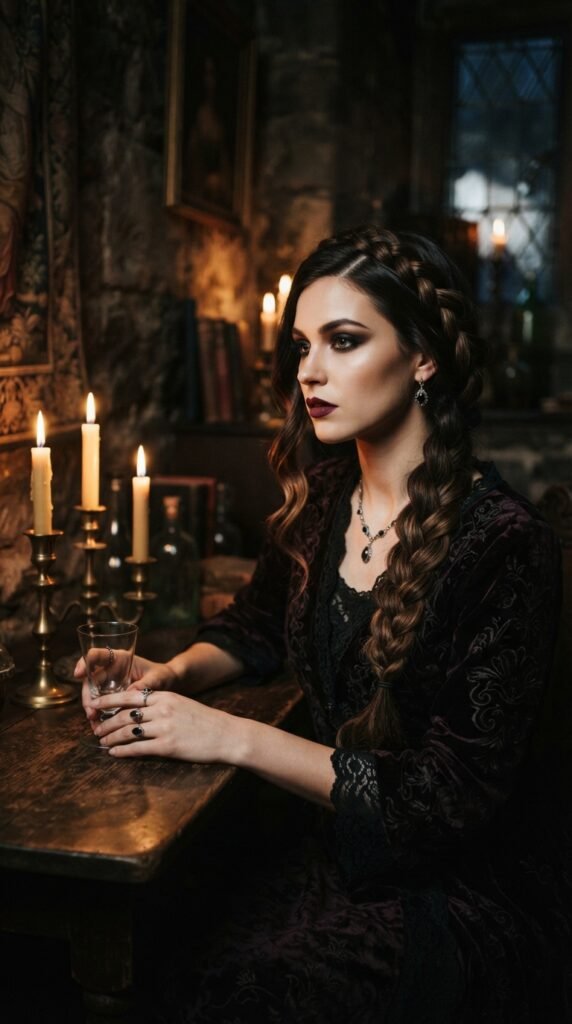
Romantic goth hairstyles have fully arrived. If you have a vampire haircut with long layers, a dark Dutch braid is the perfect complement.
Variation 26: go with a deep side part, keep the braid low in back, and bring it forward over one shoulder.
- Use a matte texturizing paste for grip.
- Pull a few strands loose around your face.
- Add a small black claw clip for extra drama.
Paired with a dark lip, it gives just the right amount of mysterious.
The 2026 Top-Knot Dutch Braid
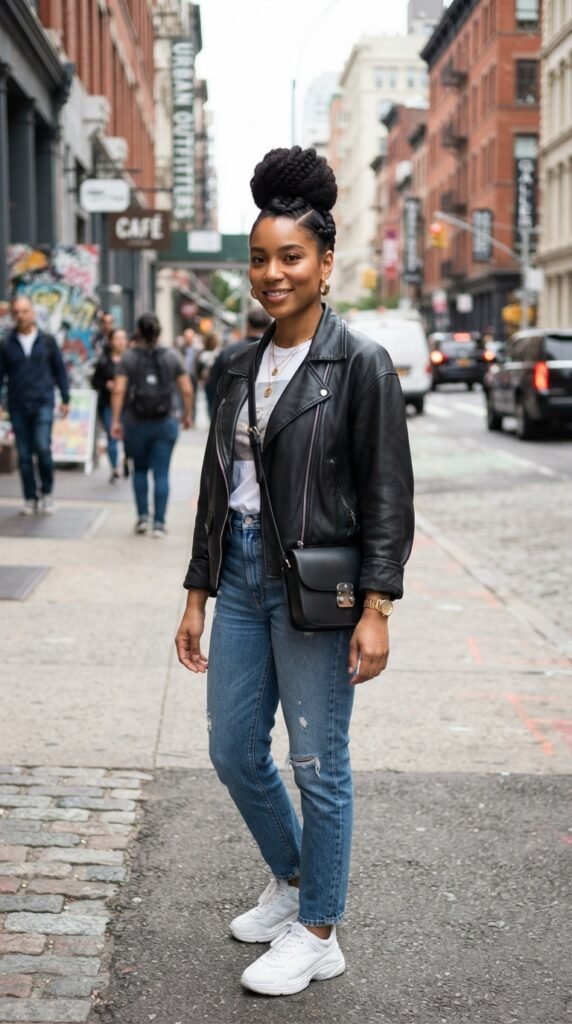
Top knots are still going nowhere. For 2026 hairstyles, they feel fresh when a Dutch braid leads up into the knot.
- Dutch braid the top section from your forehead toward the crown.
- Gather all remaining hair into a high top knot.
- Wrap the braid tail around the knot’s base.
Variation 27 adds visual interest while the knot keeps everything off your neck. It’s also the best trick on unwashed hair days. Yes, I tested it on a video call.
Your New Go-To: The Done-Quick Dutch Braid
Variation 28 is the one you’ll reach for on repeat: a loose, slightly messy Dutch braid that takes three minutes.
Skip the perfect sections. Braid with big chunks and pull the edges outward right away. You’ll get an undone texture that somehow reads as very intentional.
Leave a few front strands loose. Let tiny pieces fall. This is my everyday braid when I want to look like I made an effort but really didn’t.
A Little Braid Pep Talk
Okay, friend, we made it through twenty-eight Dutch braid variations. If you only try one, start with the classic or the done-quick version. Braids get easier every single time you do them.
Some of these might look better on your second attempt. That’s entirely normal. And if a variation doesn’t work out, just loosen it, add a claw clip, and call it a soft braid moment.
Save this post to Pinterest so it’s waiting for you next time you stand in front of the mirror with zero ideas. Then tell me in the comments: which Dutch braid variation are you trying first? I really do want to know.


