Cute Ribbon Braid Ideas for Birthday Parties and Photo Sessions
Birthday parties and photo sessions both deserve a little extra magic. And honestly, a ribbon braid is the easiest way to get it. You don’t need a stylist or a bunch of fancy tools. You just need a braid, a pretty ribbon, and the simple steps I’m about to walk you through.
I’ve rounded up my favorite ribbon braid ideas that photograph beautifully, hold up during cake time, and feel comfy from the first photo to the last. Whether you’re styling a little one, a teen, or your own hair, there’s an idea here for every hair length and personality.
Best part? Most of these take five minutes or less once you know the trick. Let’s grab a ribbon and get started, friend. You’re about to become the person everyone asks for hair advice at party time.
Why Ribbon Braids Are the Perfect Party Hair
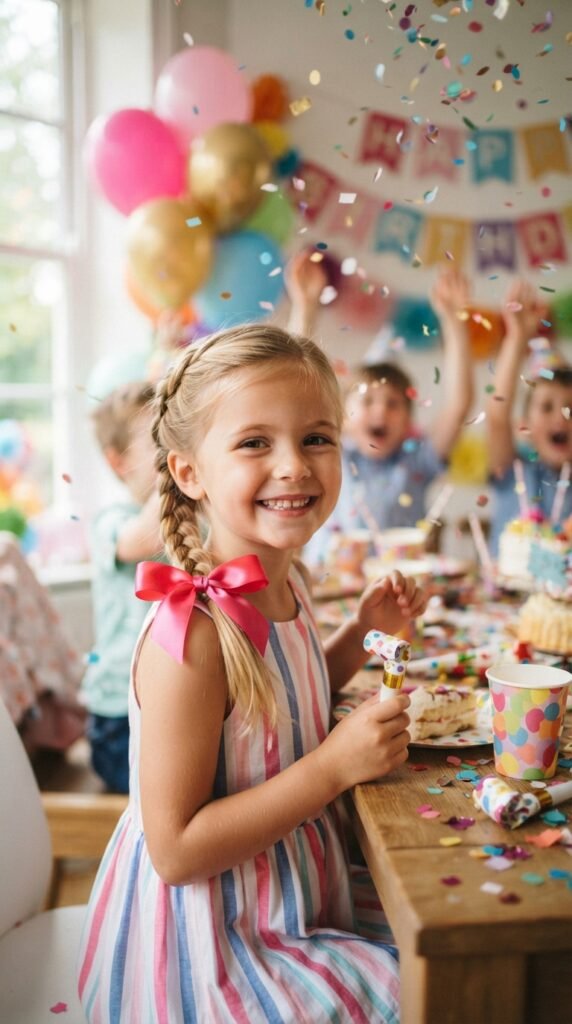
Ribbon braids are having a serious moment in 2026 hairstyles, and honestly, I’m completely here for it. They give a plain braid instant party energy without needing heavy products or heat styling.
They’re crazy versatile too. One day you can do a soft pastel bow for a birthday party, and the next, a sleek black ribbon for a moody photo session. The ribbon also hides flyaways and makes fine hair look fuller in seconds.
Plus, they photograph beautifully. Ribbon catches the light and adds movement, so every angle looks intentional in pictures. And if you’re short on time, this is the fastest way to make hair look done.
Pick the Right Ribbon: Width Matters
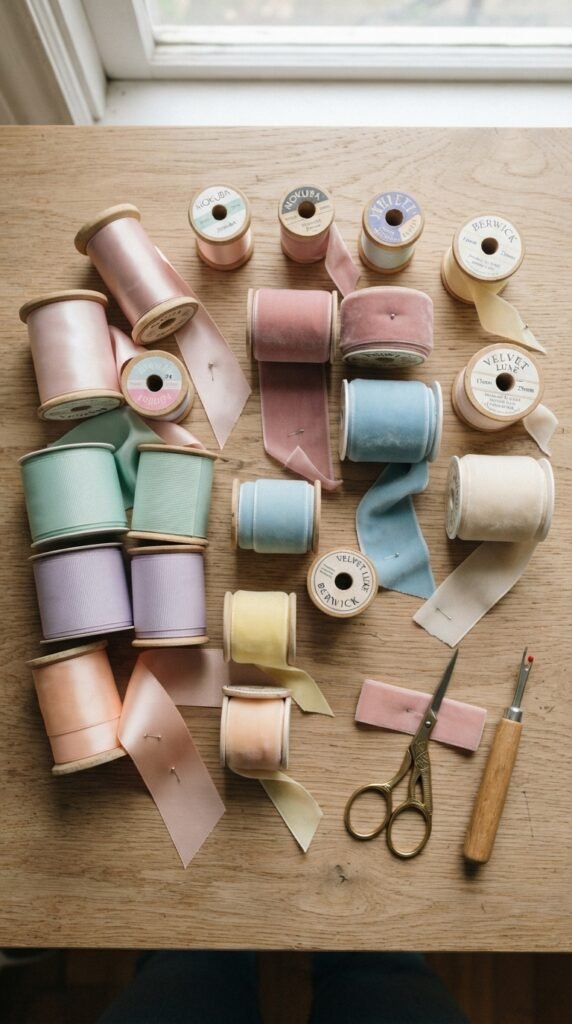
Not all ribbon is created equal for braiding. Ribbon thinner than half an inch gets lost in the hair, while extra-wide ribbon looks bulky. For most braids, aim for ribbon about one inch wide.
Here’s what I keep in my styling kit:
- Satin ribbon: smooth and shiny, perfect for photo sessions.
- Grosgrain ribbon: grippy and stays put, ideal for active kids.
- Velvet ribbon: soft and dreamy with old money hair or romantic goth hairstyles.
- Checkered or polka-dot ribbon: preppy and fun for birthday parties.
Pro tip: cut the ribbon twice as long as you think you need. You can always trim the ends, but you can’t add length once it’s in the braid. And skip any wire-edge ribbon, because it snags hair.
The Easy Trick to Start Any Ribbon Braid
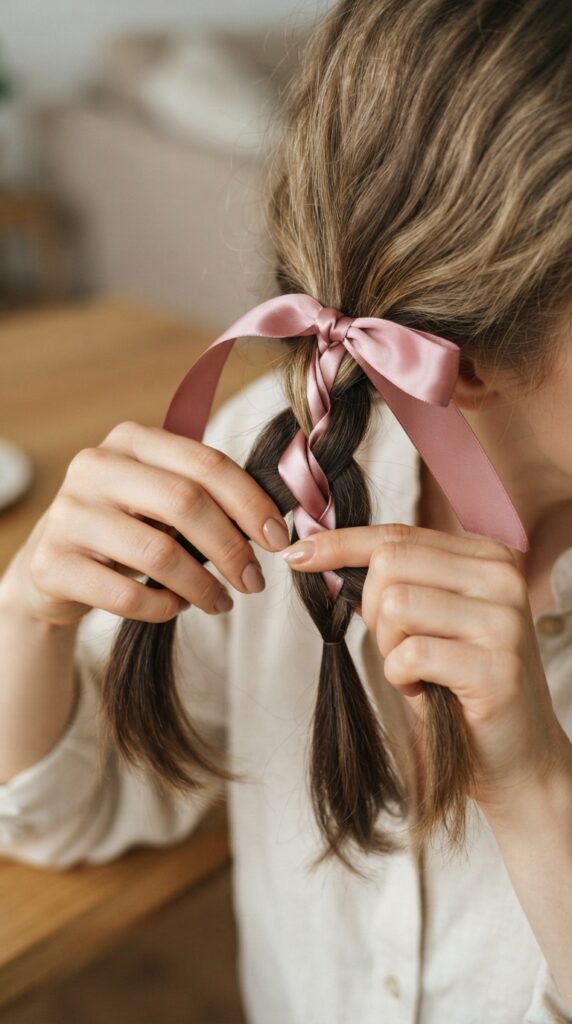
This little step makes everything easier. Instead of tying the ribbon at the end and hoping it stays, you anchor it right at the base for a clean, secure start.
Start to finish:
- Grab a small section at the crown.
- Tie the ribbon around the base with a tight double knot.
- Split your hair into three pieces, holding the ribbon together as one piece in the middle.
- Braid normally until the ribbon ends.
- Secure with a clear elastic and tuck the tails under.
This simple start keeps the ribbon from sliding out and makes sure it sits exactly where you want it. It works for every single braid in this post.
Classic Three-Strand Braid with Ribbon
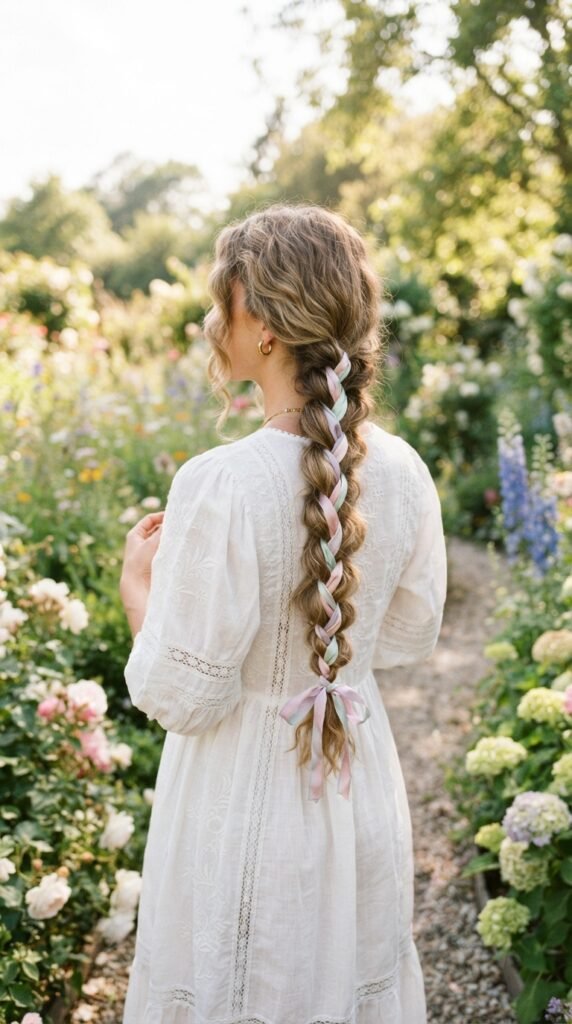
Sometimes the classic idea is the cutest, right? A simple three-strand braid with ribbon woven through the middle is my go-to for quick party mornings.
How I get the look:
- Start with the anchor trick above.
- Braid it loose and easy.
- Let the ribbon hang out of the bottom for a few inches.
- Tie the ends in a tiny bow.
For birthday parties, match the ribbon to the cake or decorations. For photo sessions, pick a contrasting color, like mustard on dark hair or cream on blonde. It reads beautifully on camera. Trust me, this is the braid I do when I’m running late but still want compliments.
Bubble Braid with Ribbon Bows
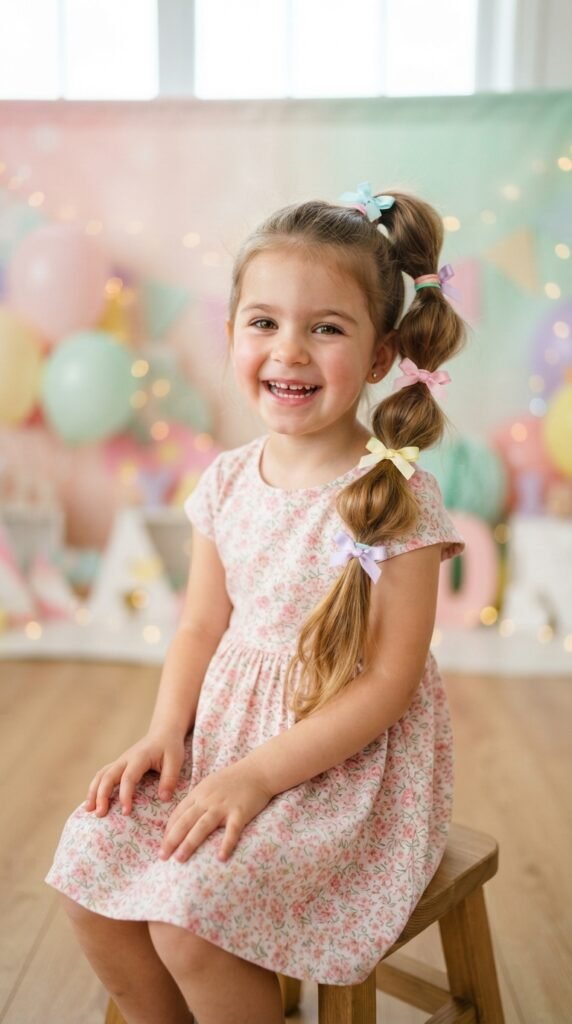
The bubble braid is the prettiest thing for little girls, and adding ribbon bows makes it feel extra special for birthday parties. It’s also way easier than it looks.
How I do it:
- Put hair in a high ponytail.
- Tie small clear elastics every two inches down the tail.
- Gently pull each section to make puffy bubbles.
- Tie a small ribbon bow over each elastic.
For a grown-up version, use one velvet ribbon bow at the base. It gives that vampire haircut energy without going over the top. This style also works great for photo sessions because the bubbles add such a playful, dimensional look.
Dutch Braid with Woven Ribbon
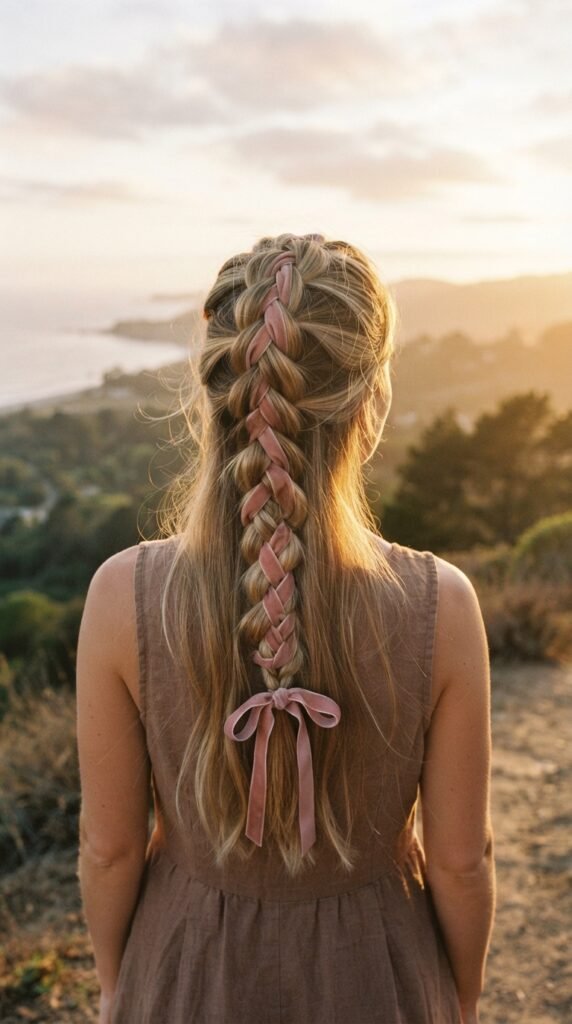
Dutch braids already give off that soft romantic vibe. Add ribbon and it becomes a fun 2026 hairstyle you’ll want to wear all year long.
Here’s the flow:
- Start with a center or deep side part.
- Anchor ribbon at the crown.
- Braid under, crossing each section beneath the middle.
- Every second or third crossover, tuck the ribbon in with the strand.
It looks intricate, but once you do it twice, it’s honestly easy. The ribbon weaves up and down through the braid, giving it a high-end finish. For photo sessions, this one looks amazing from behind, so ask your photographer to grab that back angle.
Milkmaid Crown with Ribbon Ends

For that old money hair mood, the milkmaid crown braid is an instant classic. It feels straight from a countryside photo session, and the ribbon ends make it extra special. It’s the kind of detail that makes people stop and ask where you got your hair done.
How to style it:
- Part hair down the middle.
- Braid both sides with ribbon woven through.
- Wrap each braid over the crown and pin it.
- Let the ribbon tails fall loosely near your ears.
This is a dreamy choice for flower-style portraits, first birthdays, or springtime photo sessions. It pulls hair off the face and looks absolutely precious from every angle. Quiet luxury, right?
Low Side Braid with a Long Ribbon Tail
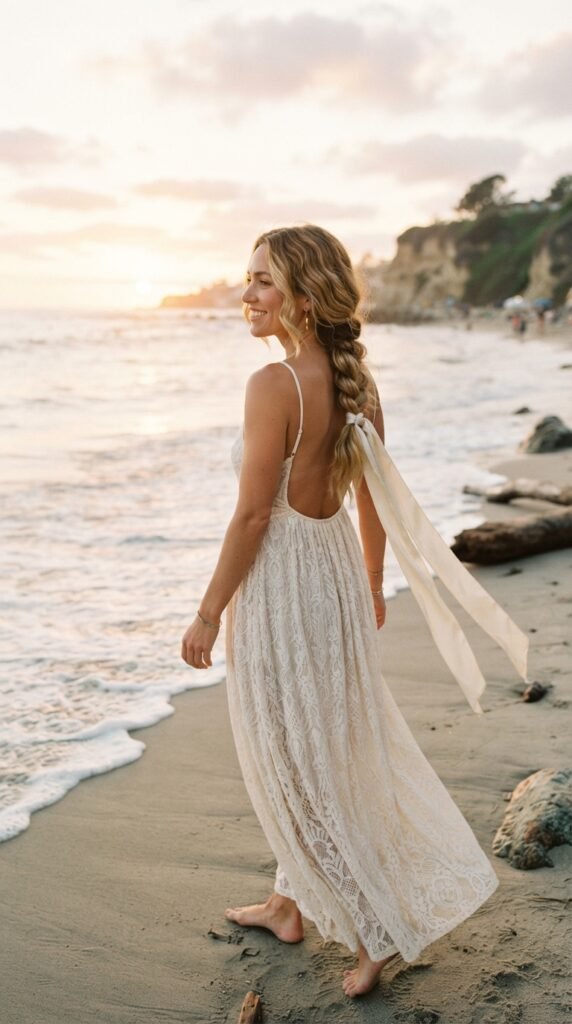
Sometimes you want something soft and undone. A low side braid with ribbon trailing past the ends gives you modern and romantic all at once. It’s my go-to when I can’t decide what to do with my hair.
My favorite tips:
- Braid loosely and leave a few face-framing pieces out.
- Keep the braid draped over one shoulder.
- Let the ribbon extend a few inches past the elastic.
For photo sessions, this style moves beautifully when your subject turns or laughs. It also works well with romantic goth hairstyles when you choose black ribbon and keep the rest of the texture a little messy. Very cool-girl energy, and so easy to create.
Low Braided Bun with Ribbon Wrap
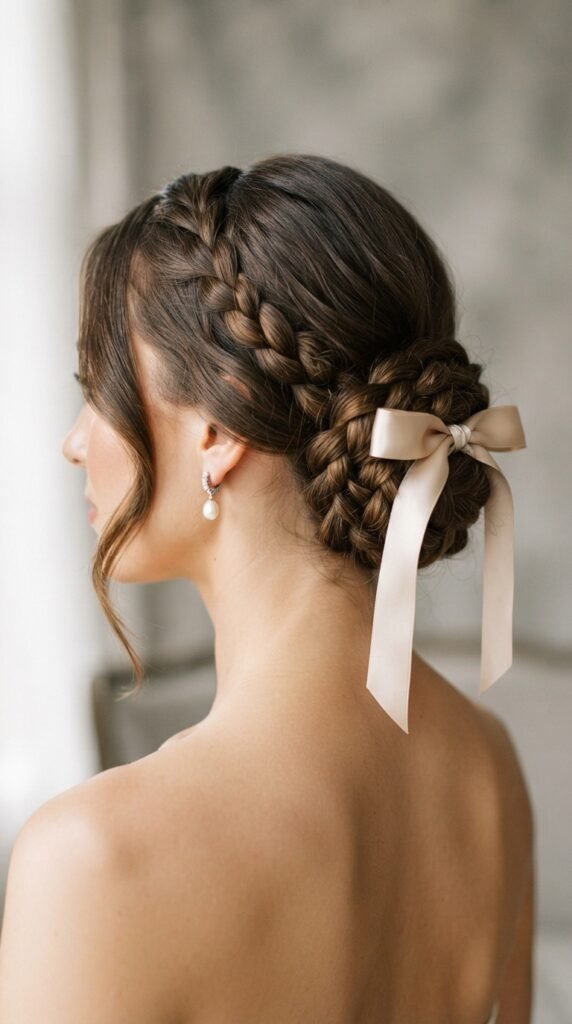
A low braided bun is already elegant, but winding ribbon around the base? Total chef’s kiss for milestone birthdays and formal photo sessions.
The steps:
- Braid your hair into a low ponytail braid.
- Wrap it into a loose bun and pin it well.
- Wind the ribbon around the bun base once or twice.
- Tie a small bow off to the side.
Honestly, this one surprises people because it’s simpler than it looks. It pairs beautifully with pearl earrings and a simple dress. For a quiet luxury bob, don’t worry: you can still try it using clip-in braids around the nape. It will look completely expensive and intentional.
Half-Up Ribbon Braid for Birthday Girls
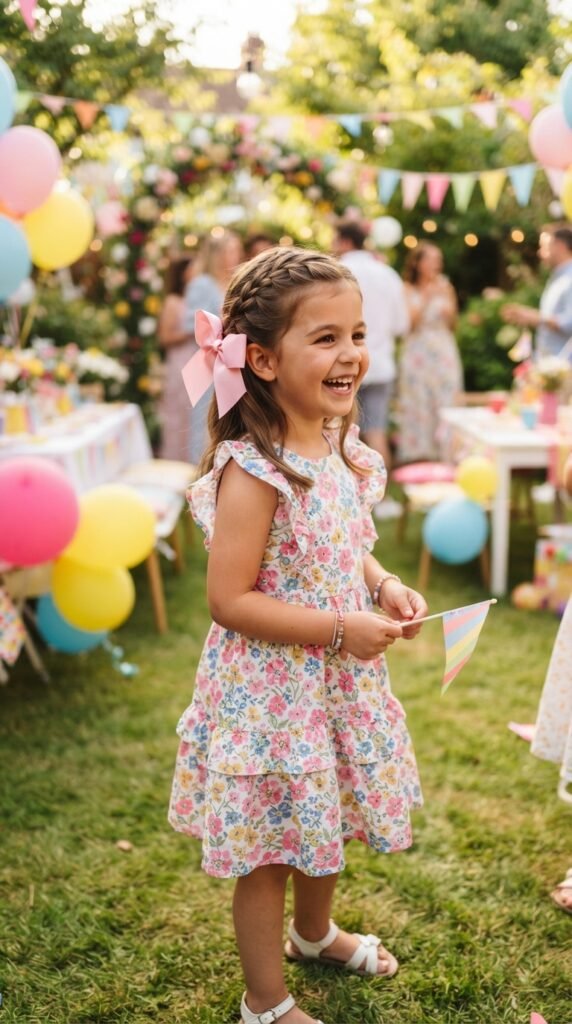
The half-up ribbon braid might be the most wearable idea on this whole list. It frames the face, keeps hair out of the eyes, and still lets everything else flow down.
Birthday-perfect steps:
- Take two front sections, one from each side.
- Braid each side loosely with thin ribbon.
- Bring them to the back and tie a bow.
- Let the rest of the hair hang loose.
It looks adorable on every age and works great for cake smash sessions because it doesn’t hide that sweet little face. Add a small flower clip beside the bow for an extra sprinkle of cute. This is my most requested party style.
Hime Cut Meets Ribbon Braids
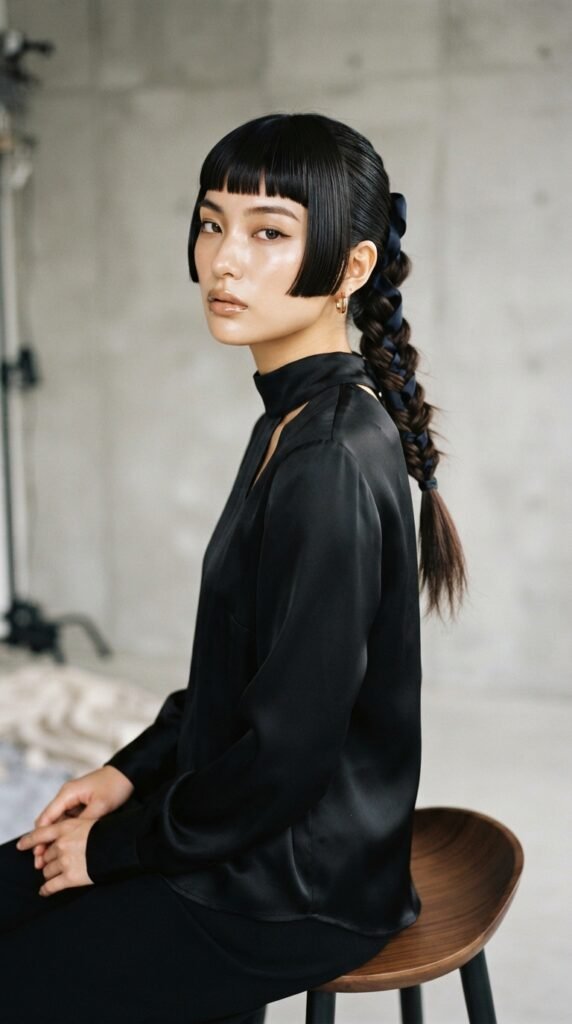
If you love the hime cut, you already know how striking blunt face-framing pieces look. Add a ribbon braid into the back and it feels brand new for 2026.
Try this:
- Keep the hime cut side pieces smooth and straight.
- Braid just the back section with a ribbon.
- Pull it into a low side position.
The contrast of sharp front layers and a soft ribbon braid is such a cool mix. It’s girly, edgy, and perfect for teen birthday photos or fashion-forward sessions. I’m genuinely obsessed with this combo. It photographs like a magazine editorial.
Old Money Hair with a Thin Silk Ribbon

The old money aesthetic loves clean, quiet elegance. A sleek low braid with a thin silk ribbon delivers that understated polish in seconds. I reach for this when I want to feel polished but not try-hard.
How to keep it classy:
- Brush hair until it’s completely smooth.
- Use a narrow ribbon in cream, navy, or burgundy.
- Keep the braid tight and low at the nape.
- Skip the big bow and tuck the ends under.
This is the perfect bridge between old money hair and quiet luxury trends. It works for birthday luncheons and refined studio sessions alike. A whisper of ribbon, nothing loud, and that’s exactly the point.
Quiet Luxury Bob and the Ribbon Accent
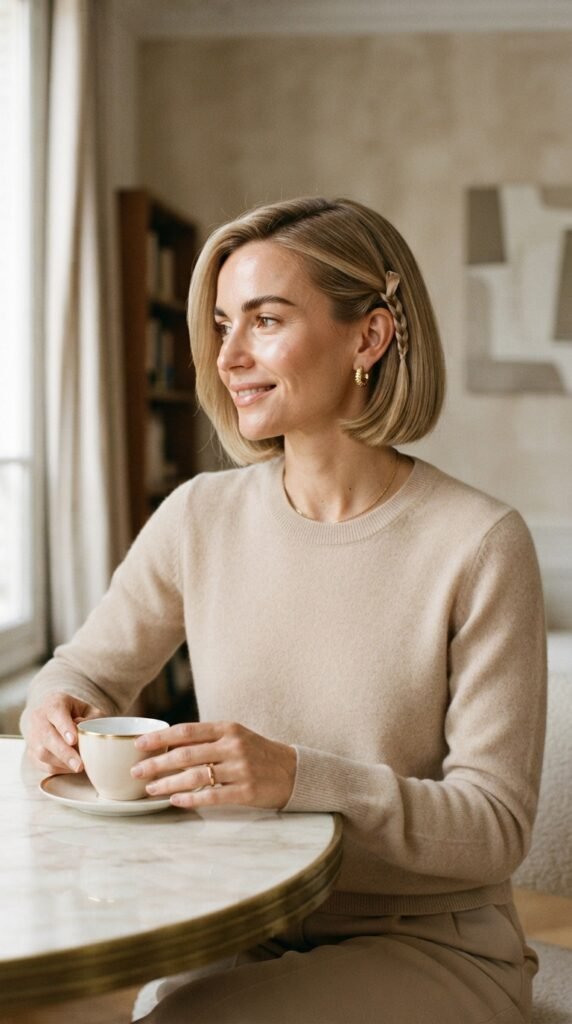
Short-haired friends, this one’s for you. You can absolutely join the ribbon braid party, even with a quiet luxury bob.
Make it work:
- Create a tiny three-strand braid near your temple.
- Weave a thin ribbon through it.
- Secure it behind your ear.
The braid reads like a delicate hair accessory while the bob stays clean and sleek. For 2026, use champagne or pearl-toned ribbon for that expensive feel. It looks like you spent an hour, but it takes less than five minutes. Perfect for birthday dinners and intimate photo sessions.
Romantic Goth Braids with Black Lace Ribbon
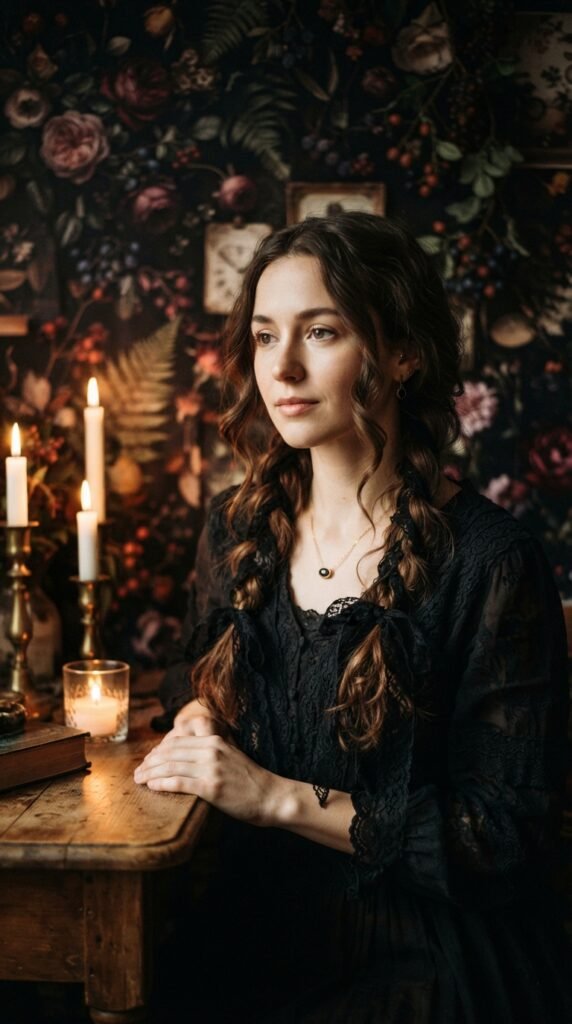
Let’s have a little fun with an edge. Romantic goth hairstyles deserve delicate details, and black lace ribbon woven into braids is just gorgeous. Try a deep red ribbon too, because the contrast is stunning.
Style it this way:
- Create two loose braids, one on each side.
- Weave black lace ribbon through each braid.
- Leave a few face-framing pieces loose.
- Add a tiny silver charm to the ribbon ends.
This style photographs beautifully in moody or candle-lit scenes. It’s mysterious but soft, and pairs perfectly with a dark floral birthday dress or an editorial photo shoot. Full romantic energy with zero effort.
Glitchy Glam Hair with Scraps of Ribbon
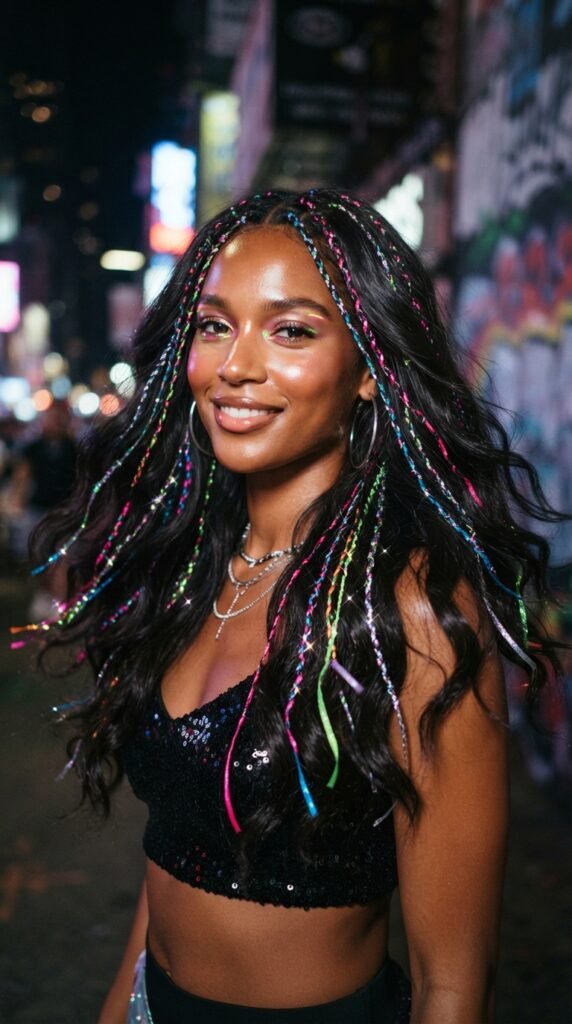
Okay, this idea is equal parts playful and fashion-forward. Glitchy glam hair loves metallic shine, unexpected texture, and fun color mixes, so ribbon is perfect. You can even use leftover gift ribbon scraps.
For this look:
- Braid tiny sections all over the head.
- Use a different ribbon shade in each braid.
- Pull a few loops out for accidental twists.
Think silver, chrome, and soft pastel pink strands all mixed together. Honestly, the chaos is the point and it works. It feels like a digital-age twist on braids, ideal for teen birthday parties or editorial-style photo sessions. This is definitely going to show up in trend boards for 2026 hairstyles.
Vampire Haircut with Ribbon Detail
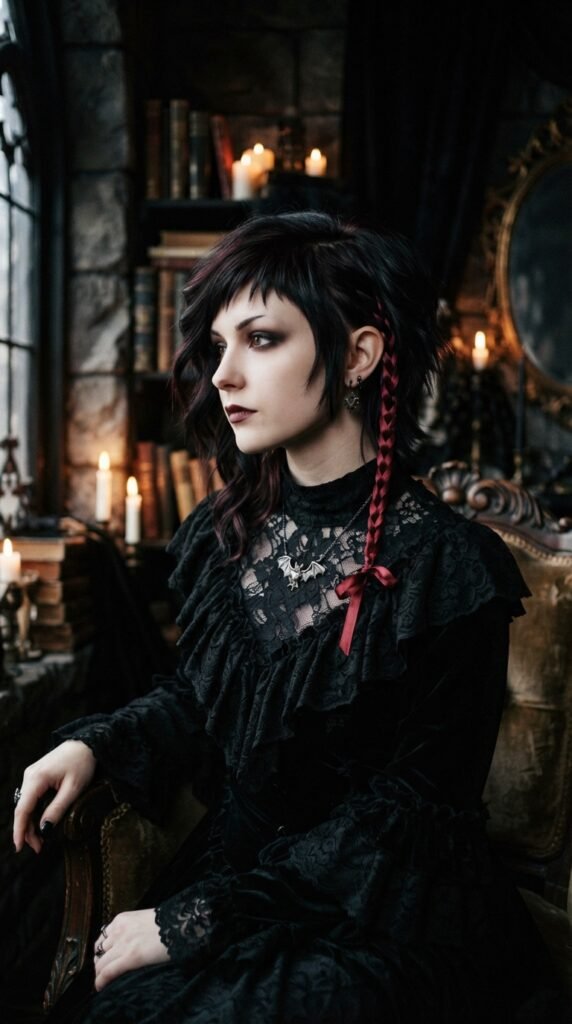
The vampire haircut is having a real moment, and a tiny ribbon braid softens its dramatic layers beautifully. Keep the choppy edges, add one delicate braid.
Styling notes:
- Braid one front section away from the face.
- Let it tuck neatly behind the ear.
- Use deep red or burgundy ribbon for a subtle bite of color.
This keeps the rock-and-roll attitude of the vampire haircut while adding something soft and feminine. It’s a great birthday choice when you want to feel edgy but polished. It’s a favorite among my clients who like a little drama.
Asymmetrical Lob with a Tiny Ribbon Braid
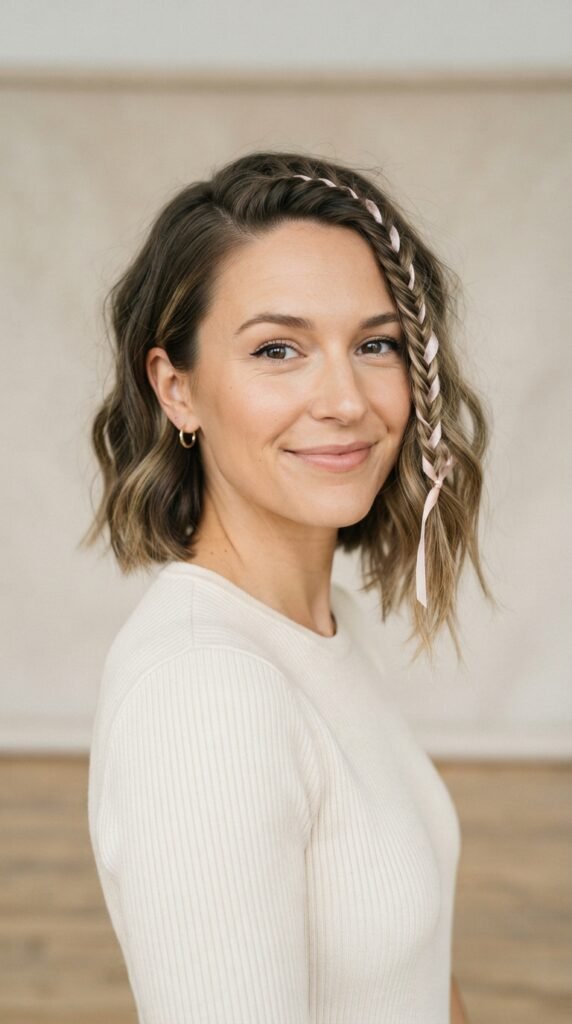
Just cut an asymmetrical lob? Don’t worry, you can still play with ribbon. A tiny braid along the longer side adds charm and dimension.
Try this:
- French braid the front hairline down to the ear.
- Weave a skinny ribbon through it.
- Pin it behind the ear.
The contrast of a sleek lob and a delicate braided accent is super chic. Whether you’re going for old money polish or soft party vibes, this little detail makes it look like you tried. In less than five minutes, you get an expensive, styled finish. Photographers love this angle.
Ribbon Braids for Little Ones: Toddler-Safe Ideas
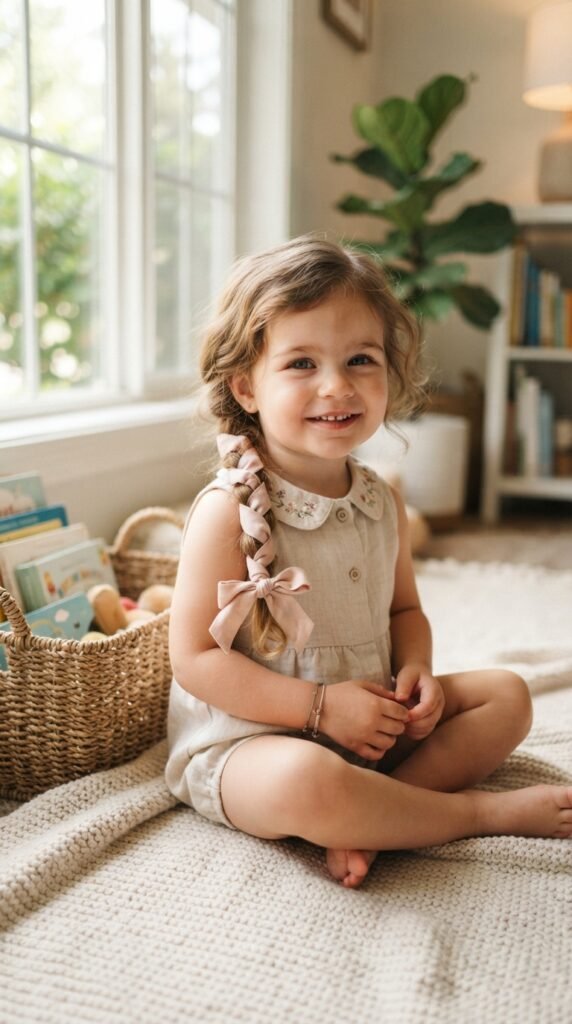
Let’s talk about the under-five crowd. Birthday meltdowns are real, so these braids need to be quick, comfy, and never too tight. I’ve learned this the hard way at my own niece’s parties.
My toddler-safe rules:
- Use wide, soft ribbon that won’t tug.
- Keep the braid loose and gentle.
- Wrap ribbon around the elastic instead of weaving it.
- Skip beads and charms so nothing gets pulled.
These are the styles that survive cake, gifts, and a whole afternoon of play. In photo sessions, they keep wispy baby hairs out of little faces while still looking ridiculously cute. Happy baby, happy pictures.
Best Ribbon Colors for Photo Sessions
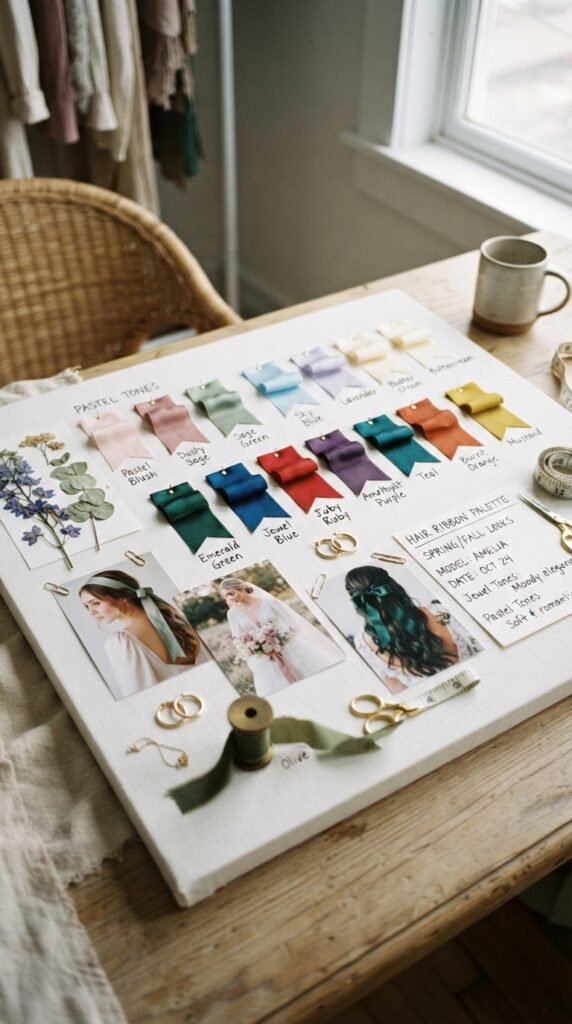
Ribbon color can make or break a photograph, so choose with intention. Natural light, outfits, and backgrounds all matter here.
My simple guide:
- White and cream: dreamy and soft, great for bright sessions.
- Pastel pink and lavender: classic birthday energy.
- Deep jewel tones: rich and striking in any setting.
- Metallic ribbon: fun for glitchy glam and festive moments.
- Black ribbon: moody and dramatic for romantic goth looks.
Try to avoid neon colors unless the whole party is candy-themed. They can cast color onto skin in bright sunlight. When in doubt, pick a shade lighter than the hair for something soft and ethereal.
DIY Ribbon Braid Extensions for Volume
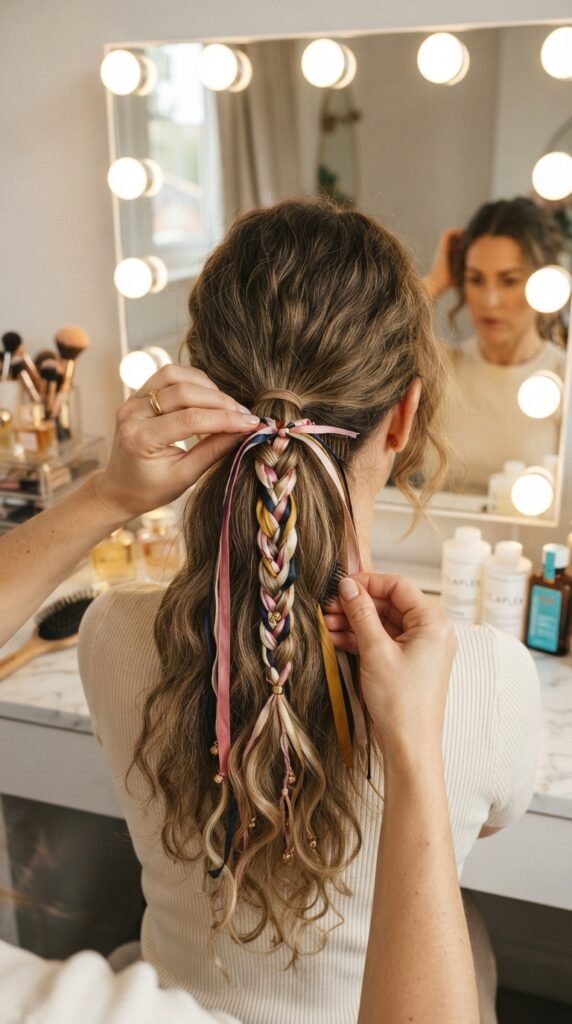
What if you want a long, thick ribbon braid but your hair is shorter? Easy. You can fake it with a DIY extension piece. It’s the secret behind half the braids I post.
The cheat code:
- Cut three long ribbons.
- Braid them together by themselves.
- Attach the ribbon braid under your natural ponytail.
- Wrap a thin ribbon over the elastic to hide it.
Now you have a longer, wispy braid with zero heat damage, and it only takes a few minutes. This trick works beautifully for quiet luxury bob wearers who want a temporary longer moment. Try it for the next party, it surprises everyone.
How to Remove Ribbon Without Snagging

Nobody talks about the taking-out part. Ribbon can absolutely snag and pull if you rush, which is rough on fragile strands. I learned this after one very sad tangle.
Use the gentle method:
- Unbraid the hair first, leaving the ribbon inside.
- Slide the ribbon out slowly instead of yanking it.
- Use your fingers to loosen any knots.
- Never cut the ribbon while it’s still in the hair.
Satin ribbon is the easiest because it slips right out. If you want zero pulling, you can also just tie the ribbon into a loose bow at the end instead of weaving it through the whole braid. Safe, simple, and painless.
Quick Ribbon Ponytail Braid in One Minute

Running late? This one-minute style is the answer. It’s a ponytail braid with ribbon that somehow looks like you planned it all along. I seriously do this on my way out the door all the time.
Fastest steps ever:
- Make a low ponytail.
- Tie ribbon around the base in a bow.
- Braid the ponytail, letting ribbon ends hang out.
- Secure with a clear elastic.
This works with every hair type and every ribbon, from old money silk to glitchy glam metallic scraps. It keeps you comfortable for cake, dancing, and portraits. If you only try one idea from this post, let it be this one.
A Few Final Words, Friend
Friend, birthday parties and photo sessions fly by so fast. A ribbon braid is one of those tiny details that makes the whole moment feel more special, and you can create it in minutes. Whether you pick a classic three-strand or something more dramatic, I hope you feel as pretty as the photos will look.
Save this post to Pinterest so you have it ready for the next birthday party or photo session. Future you will be so glad you did.
Now tell me: which ribbon braid are you trying first? I read every single comment and would love to cheer you on. See you in the comments, friend.


