Beyond the Basic Ponytail: Ponytail Hairstyles for Women That Actually Look Finished
The ponytail has an unfair reputation. Ask most women what they do with their hair when they have no time, and the answer is a ponytail — which is exactly why it gets treated as the lazy option, the fallback, the thing you do when you have given up. But a ponytail is not a surrender. It is one of the oldest, most versatile hairstyles there is, and when it is done deliberately — the right height, the right base, the elastic hidden, the front softened — it looks finished in a way that a rushed blow-dry never will.
This guide treats the ponytail as a real style, not a default. It walks through 34 ponytail hairstyles for women — sleek and low, high and voluminous, curly, braided, bubbled, wrapped and accessorised — with the pros and cons, the common mistakes, and the time and cost of each one. Eight short guides first cover the foundations: height and face shape, volume without damage, a hold that lasts all day, fine versus thick hair, hiding the tie, breakage, workouts versus work, and refreshing second-day hair. By the end, the ponytail will not be your fallback. It will be a choice.
Ponytail Height and Face Shape: Where to Place It
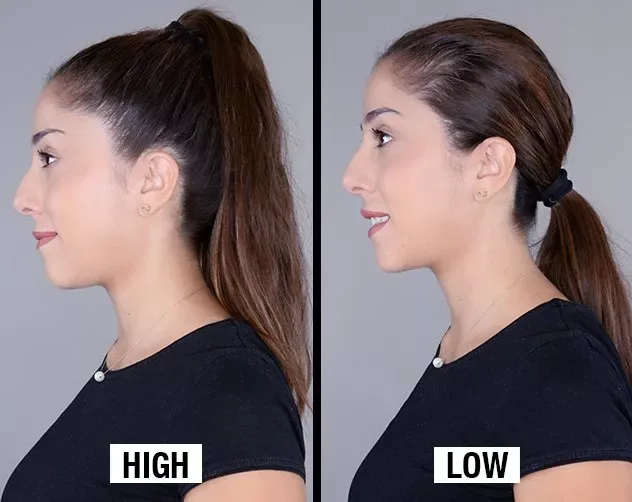
Where a ponytail sits changes your whole face, and the right height is worth thirty seconds of thought before you tie it. A high ponytail — at or above the crown — lifts the eyes, lengthens the neck and suits round and square faces, because the upward line adds length and angles. A low ponytail at the nape does the opposite in the best way: it elongates a long face, softens a strong jaw, and reads instantly polished. The mid-height ponytail, level with the tops of the ears, is the neutral option that flatters almost everyone and is the safest choice when you are in a hurry.
The test is simple: gather the hair loosely at each height and look in the mirror before you commit to the elastic. If a high pony makes your forehead look bigger, drop it an inch. If a low pony makes your face look longer, lift it. And remember the angle matters as much as the height — pulling the hair straight back flattens the crown, while brushing it up and back at a diagonal keeps volume where your face needs it.
Volume Without Teasing Damage: Lift That Lasts
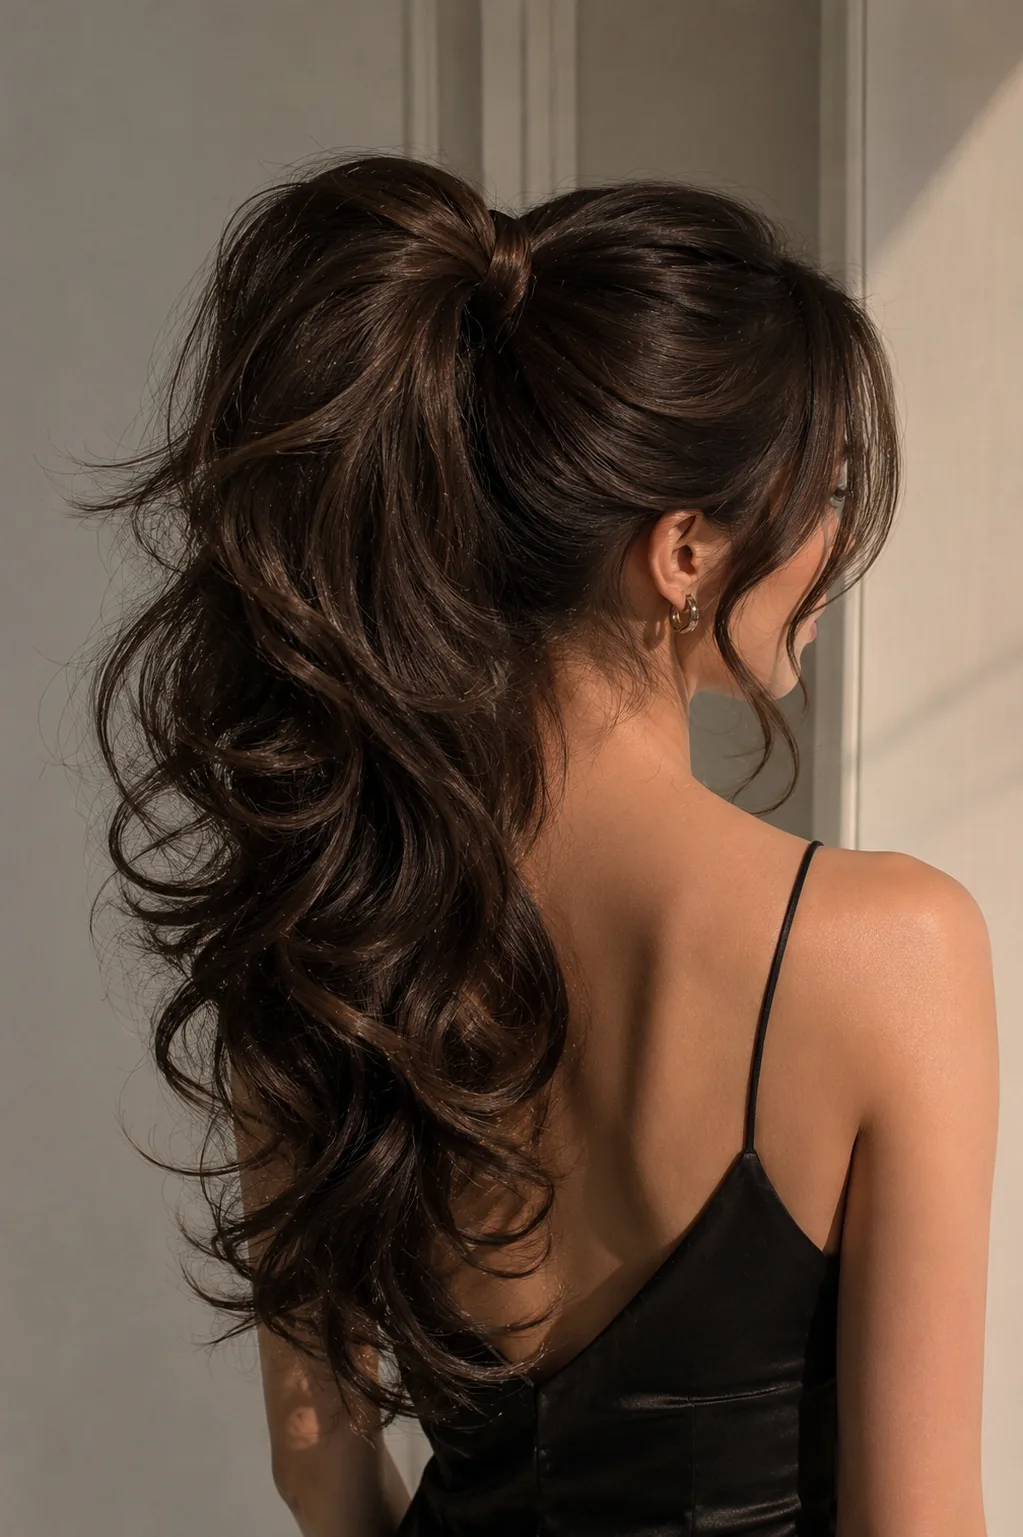
Teasing works, but it is not the only way to get a ponytail that stands up instead of sliding flat — and for hair that is already fragile, it is not the kindest way. The gentlest lift starts before the elastic: flip the hair upside down, mist the roots with dry shampoo or a light volumising spray, and blow-dry the roots for thirty seconds. Then, instead of backcombing, slide two bobby pins vertically into the base of the ponytail, one above and one below the elastic — they act like a tiny shelf that props the tail up.
For a fuller tail, the double-ponytail trick beats teasing every time: tie one ponytail on top of another, and let the upper one cover the lower one. The result looks like twice the hair with none of the breakage. A quick verdict: teasing has its place for a special occasion, but for everyday volume, dry shampoo, root lift and clever pinning give you the same height without the knots you have to rip out later.
Securing a Ponytail That Lasts All Day
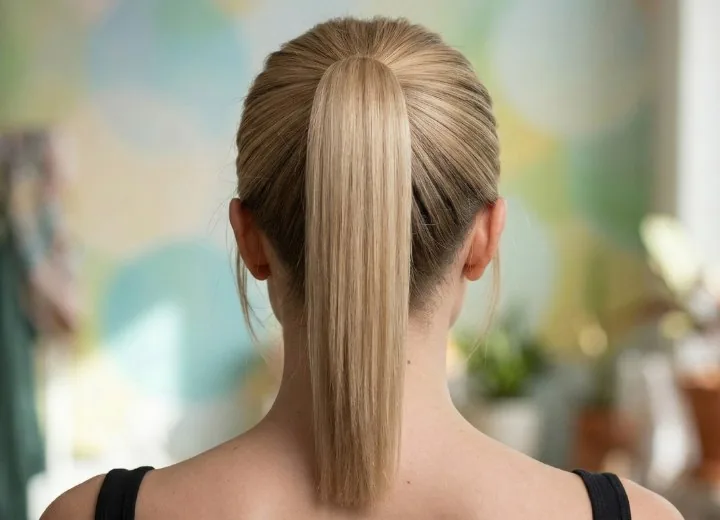
A ponytail that sags by lunchtime usually failed at the base, not at the elastic. Start with the right tie: a thick, snag-free elastic for heavy hair, a fabric-covered band for fine hair, and never a rubber band, which grips by friction and takes hair with it when you remove it. Wrap the elastic three times, not two — the third wrap is what stops the slow slide — then tug the tail gently upward while holding the base, which tightens the band against the scalp without pulling your hairline.
The second secret is anchoring: push two bobby pins through the elastic, one from above and one from below, so the pins cross inside the tie. They lock the elastic in place and stop it rotating, which is what makes a ponytail droop. Finish with a light mist of hairspray on the base, not the whole tail. Time and cost: nothing but a good elastic and two pins, and the style that used to sag by noon will still be sitting where you put it at dinner.
Ponytails for Fine Hair vs Thick Hair
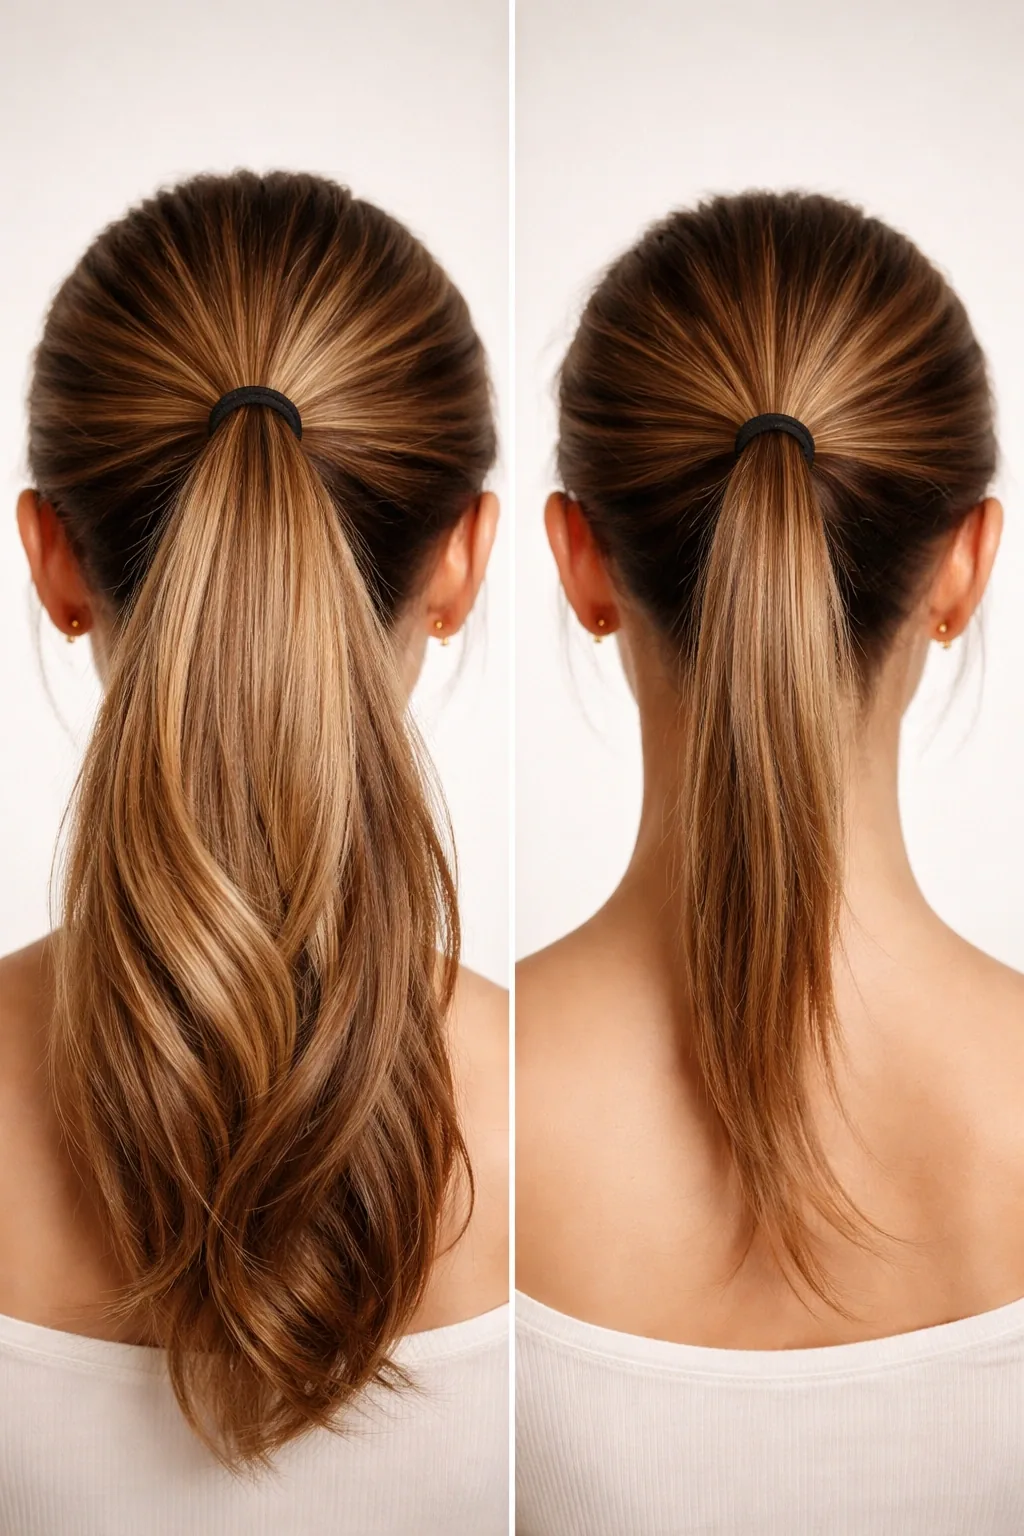
Fine hair and thick hair need opposite ponytail strategies, and using the wrong one is why so many ponytails look thin or feel heavy. Fine hair benefits from texture first: a little dry shampoo or texturising spray at the roots, a looser tie so the hair is not pulled flat, and a double ponytail or a clip-in volume trick to make the tail look fuller. Keep the base soft — a severe, slicked-back fine ponytail shows every gap at the hairline, while a slightly loosened one looks deliberately full.
Thick hair has the opposite problem: weight. A single thin elastic will snap or slide, so use a thick band, or two elastics stacked, and anchor the base with bobby pins. Section the hair into two ponytails — one high, one low — if the weight pulls one tie down. The common mistake for thick hair is tying it too tight to control the bulk, which causes headaches and breakage at the hairline; a firm but not strangling tie, plus pins for support, holds better than brute force.
Hiding the Hair Tie: The One Detail That Changes Everything
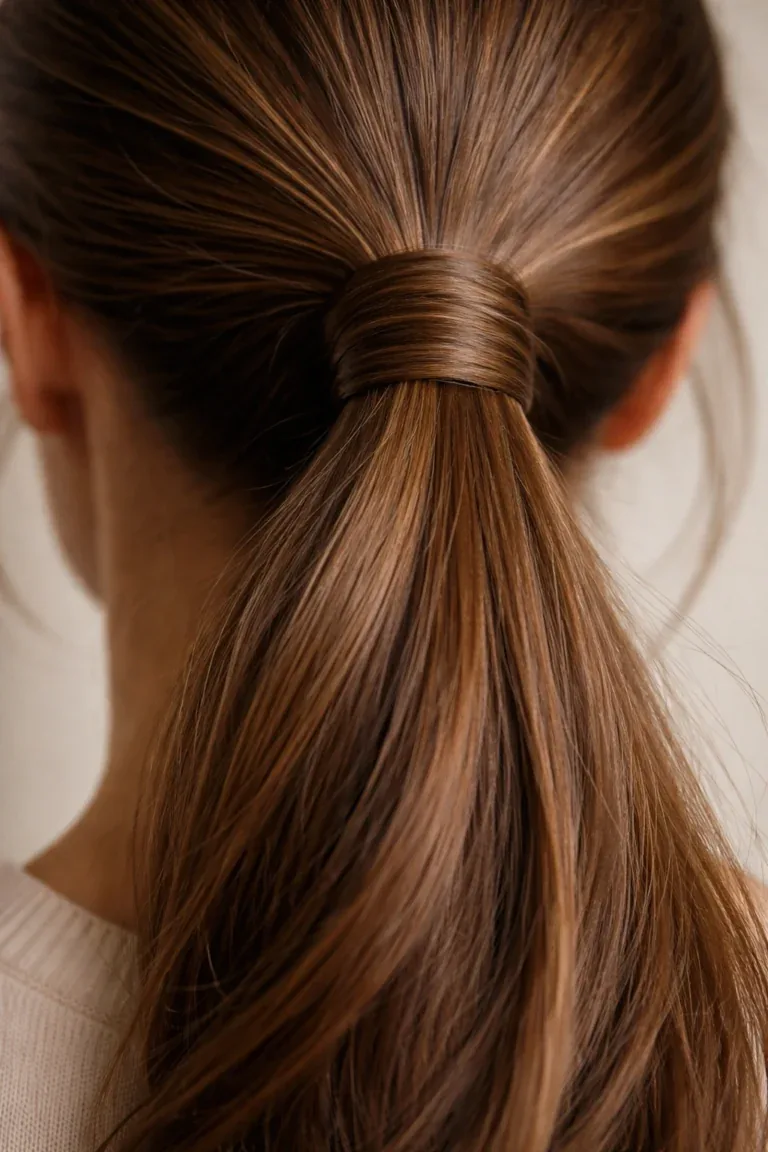
The difference between a ponytail that looks thrown together and one that looks styled is often a single detail: the elastic. Hiding it takes ten seconds. Take a thin strand from underneath the ponytail, wrap it around the base two or three times, and tuck the end under the elastic with a bobby pin. On short hair, a small claw clip or a fabric scrunchie in a matching shade does the same job with even less effort.
For a more polished finish, wrap a ribbon, a silk scarf or a leather cord around the base instead of hair — it doubles as an accessory and hides the elastic completely. The mistake to avoid is wrapping the strand too tightly, which pulls the ponytail off-centre, or using a strand so thick that it looks like a second ponytail. A thin strand, a flat wrap, and a hidden pin: that is the whole technique, and it is the reason salon ponytails never show their elastic.
Ponytail Mistakes That Cause Breakage
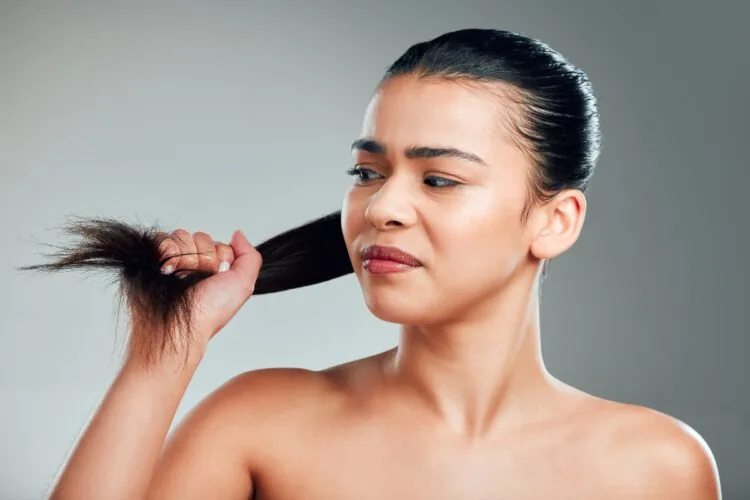
The ponytail is the hairstyle most likely to damage hair, not because it is inherently harmful, but because it is worn every day in the same spot with the same tension. The biggest mistake is tying wet hair into a tight ponytail: wet hair stretches and snaps far more easily than dry hair, and a wet, tight tie leaves a dent and a weak point that breaks over time. The second mistake is always tying it in exactly the same place — the elastic grinds the same strands day after day until they thin.
Fix both by varying the height and the tension: wear it high one day, low the next, and loose on the days you can. Switch to fabric-covered elastics or spiral ties, which distribute pressure instead of concentrating it, and never rip a tie out — unwind it. If you already see breakage around the hairline, give the ponytail a rest for a few weeks, wear the hair down or in a loose braid, and let the short pieces recover before you pull them back again.
Ponytails for Workouts vs Work: Two Different Jobs
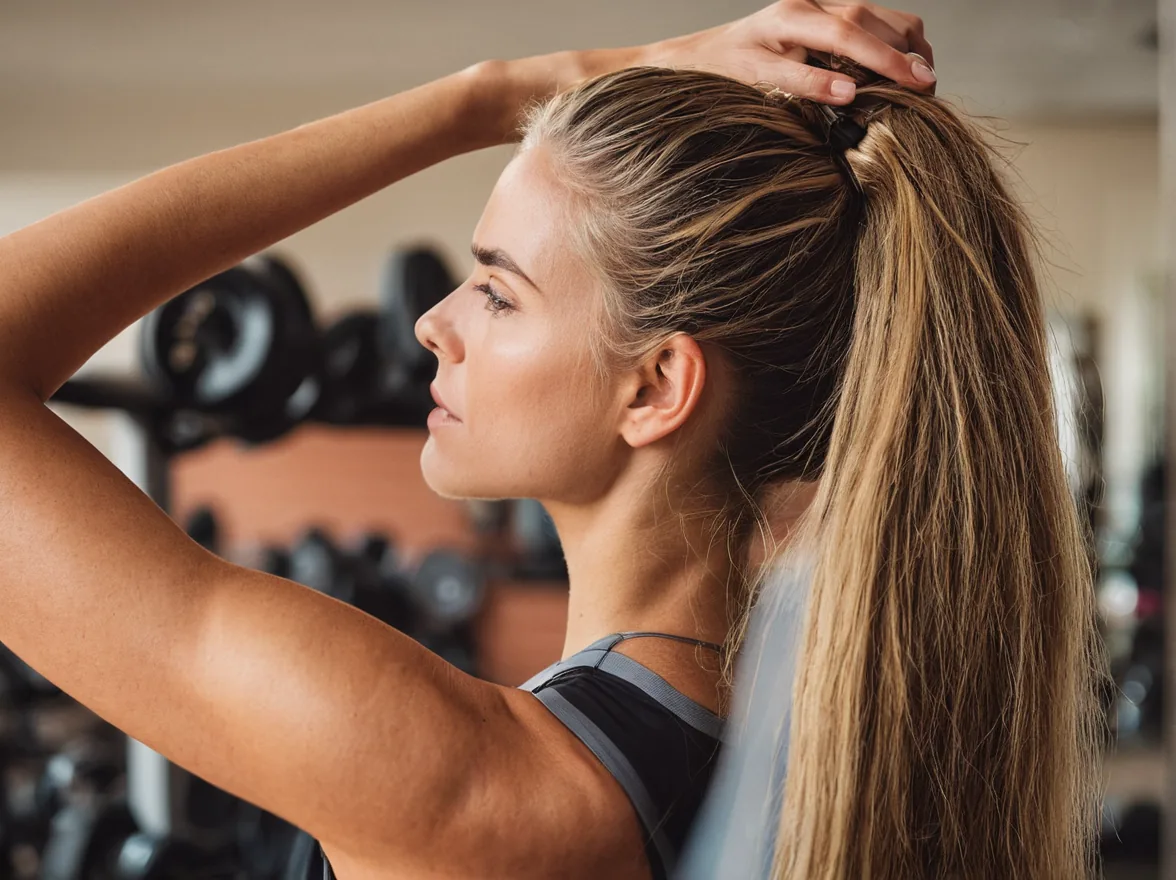
A workout ponytail and a work ponytail are doing two different jobs, and the style that survives a run will look wrong in a meeting, and vice versa. For workouts, the priorities are hold and comfort: a high or mid ponytail, a thick snag-free elastic, bobby pins anchoring the base, and the hair braided or twisted inside the tail so it does not whip around. A low, loose ponytail is the worst gym choice — it bounces against the neck and slides out within minutes.
For work, the priorities are polish and softness: a sleek low or mid ponytail, the elastic hidden, a few face-framing pieces pulled out, and flyaways smoothed with a little cream or hairspray on a toothbrush. The time cost is the difference: a gym ponytail takes thirty seconds and should be functional first, while a work ponytail takes three to five minutes and earns them. Keep two elastics in your bag — a heavy-duty one for the gym and a slim, pretty one for the office — and you never have to choose between them.
Refreshing a Second-Day Ponytail
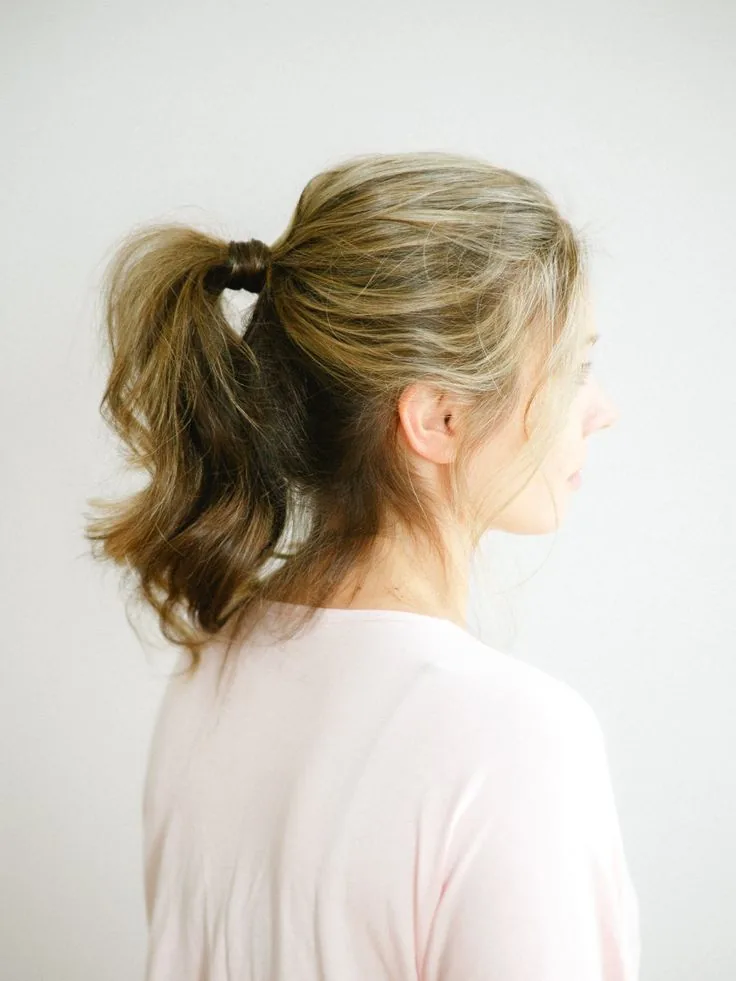
Second-day hair is actually the best hair for a ponytail — it has grip, texture and natural volume that freshly washed hair lacks — but only if you refresh it first. The quickest reset is dry shampoo at the roots: lift sections, spray, wait a minute, and massage it in. Then brush the hair back with a boar-bristle brush, which redistributes the oils and smooths the surface, and re-tie the ponytail slightly higher or lower than yesterday so the elastic does not sit in the same dent.
If the tail itself looks flat, wrap the ends around a curling wand for ten seconds, or braid it loosely for a few minutes and let it out for soft waves. A spritz of water on the front pieces and a quick finger-comb resets the face-framing strands without washing anything. Cost and time: under three minutes, no wash, no heat damage — and a ponytail that looks like you styled it this morning, even though you did not.
1. The Classic High Ponytail
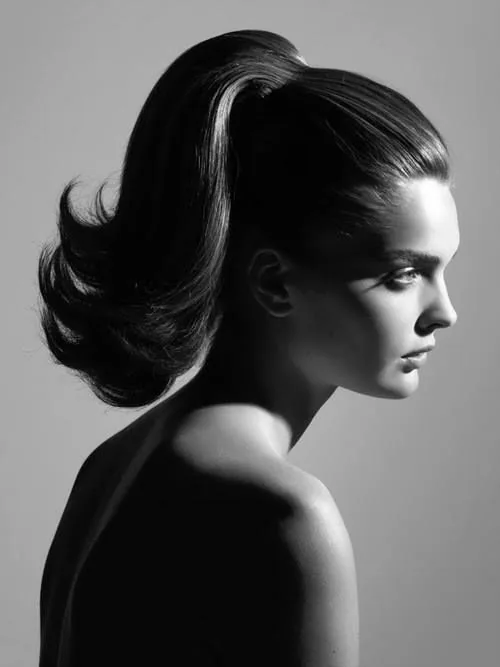
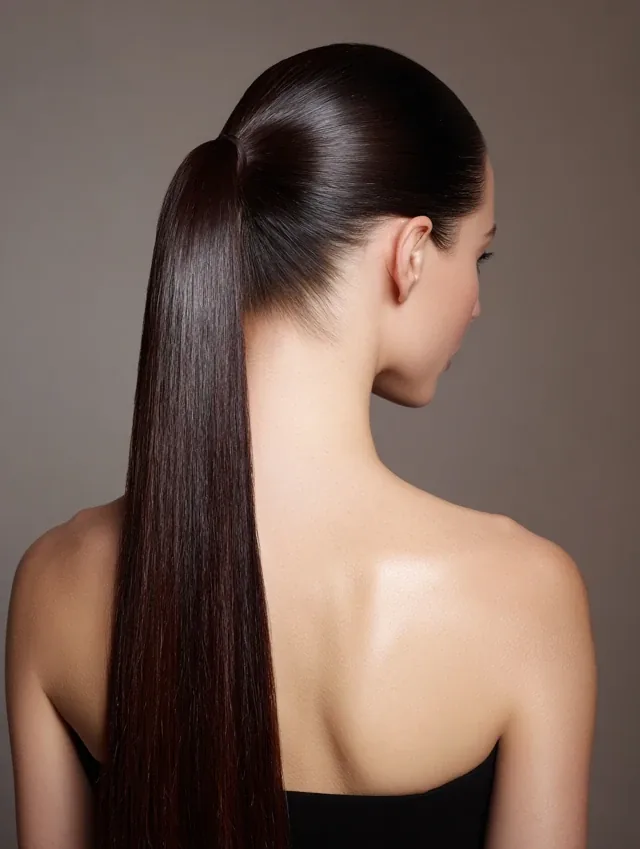
The classic high ponytail is the original, and it is still the one every other ponytail is measured against: hair gathered at the crown, tail falling long and straight, face fully open. It works because it does two things at once — it lifts the eyes and cheekbones, and it shows off the length and shine of the hair itself. On long, healthy hair it needs almost nothing else; the height is the style.
Pros: instant lift, works for workouts and evenings alike, and makes a simple outfit look intentional. Cons: it can pull at the hairline if tied too tight, and it shows every uneven layer at the ends. Common mistake: placing it too far back, which makes it droop — gather it at the crown, where your head starts to curve, and anchor it with two bobby pins. Time needed: two minutes, and a good elastic.
2. The Sleek Low Ponytail
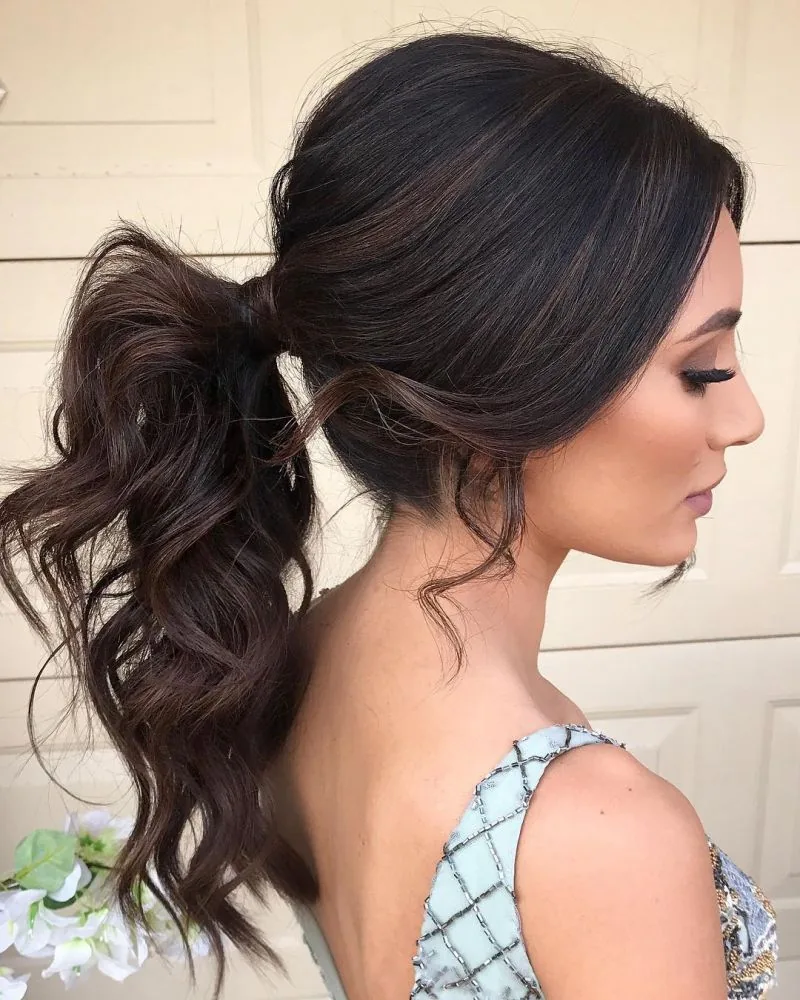
A sleek low ponytail is the ponytail that gets mistaken for a professional blowout. Hair smoothed back, parted in the middle or to the side, and tied low at the nape, with not a flyaway in sight — it is quiet, expensive-looking, and far easier than it appears. The trick is the prep: a smoothing cream through damp hair, a fine-tooth comb to remove bumps, and a boar-bristle brush to finish.
Who should avoid it: nobody, really, but it is least forgiving on very short layers, which poke out at the nape. Pros: it suits every face shape, works for interviews and weddings, and stays neat all day. Cons: it needs product and a mirror, and it shows oily roots faster than a textured style. Cost and time: five minutes, a smoothing cream and a strong elastic — the cheapest polished look on this list.
3. The Mid-Height Polished Ponytail
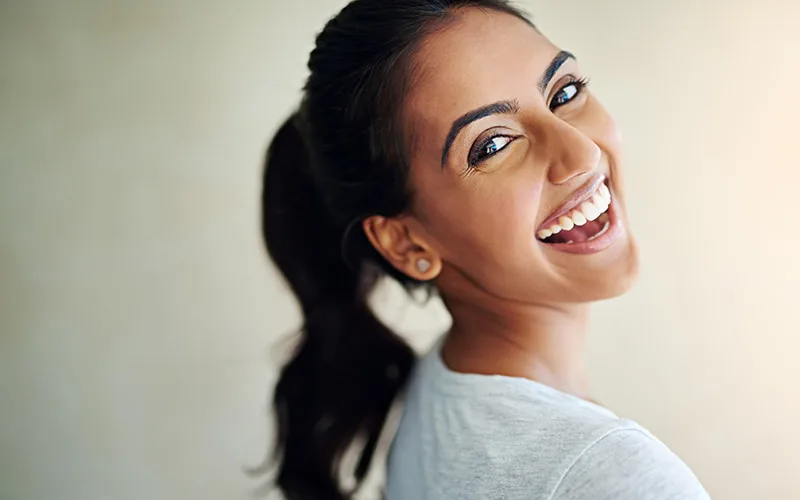
The mid-height ponytail sits level with the tops of the ears, and it is the most versatile placement there is — not as severe as a high pony, not as soft as a low one. It suits oval, round and heart-shaped faces equally well, and it works with straight, wavy and curly hair without any adjustment. If you only learn one ponytail placement, learn this one.
Best for: work, school runs, and days when you cannot decide between casual and polished. How to style: brush the hair back at a slight upward angle, tie it, then gently tug the crown for a little lift. Maintenance is zero — no special products, no pins required. A quick verdict: the mid-height pony is the default good ponytail, and the one to reach for when you have three minutes and no plan.
4. The Voluminous Curly Ponytail
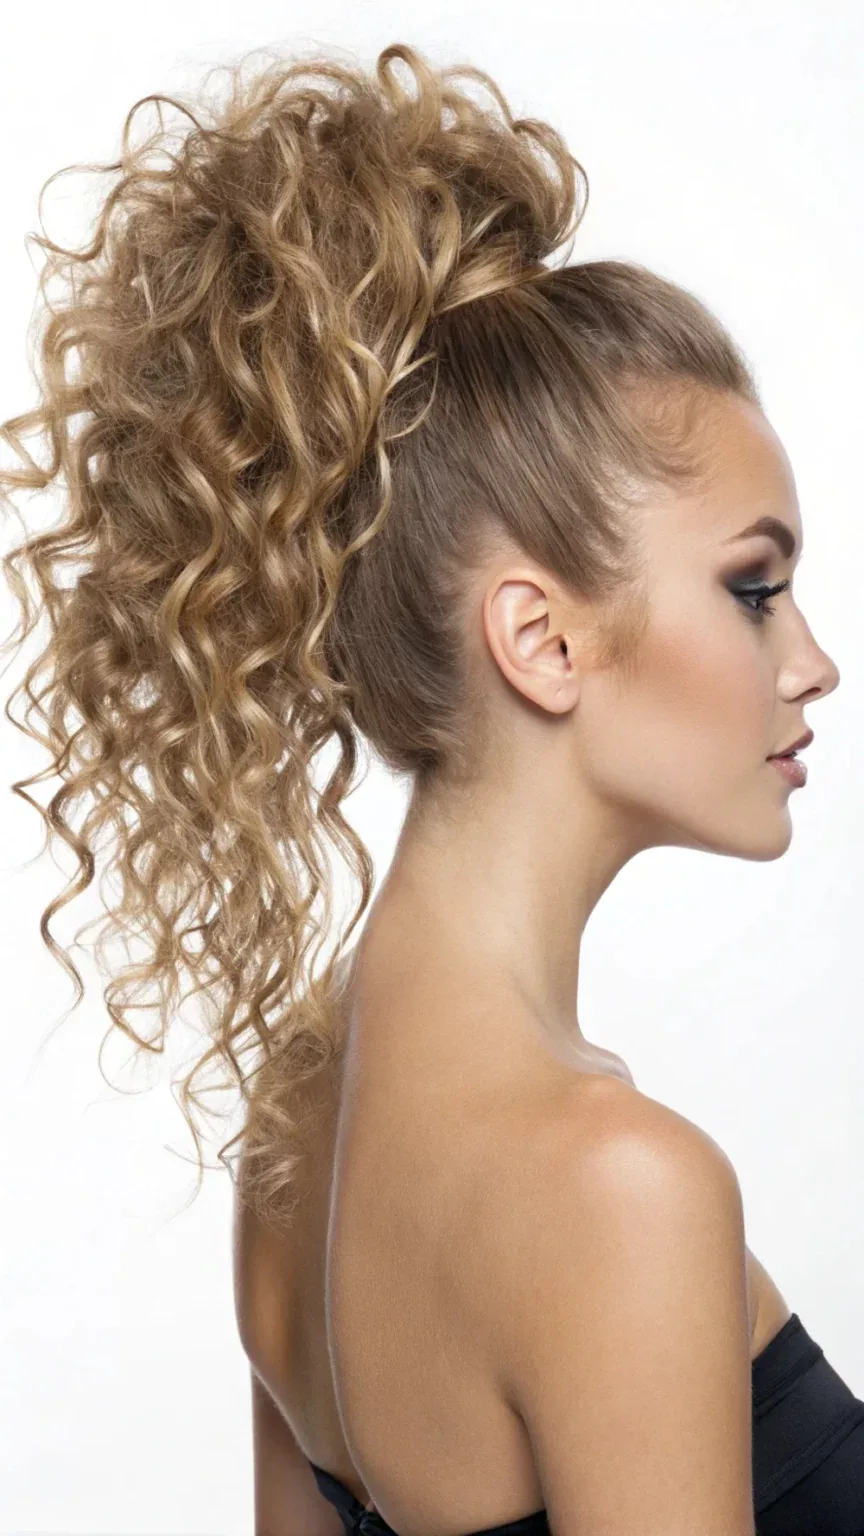
A curly ponytail is volume you cannot fake with a straightener. The curls stack on top of each other, the tail looks twice as full as it is, and the whole style has movement that straight hair has to work for. The key is gathering the curls loosely: pull them back with your fingers, not a brush, so the curl pattern stays intact, and tie the elastic at the height where the curls fall best — usually high or mid.
Pros: enormous natural volume, no heat required, and it looks better as the day goes on. Cons: the tail can shrink as curls dry, so tie it slightly higher than the target. Common mistake: brushing curly hair before tying it, which turns defined curls into frizz. Time and cost: two minutes, a curl cream scrunched through damp ends, and a fabric-covered elastic that will not snag the curls.
5. The Bubble Ponytail
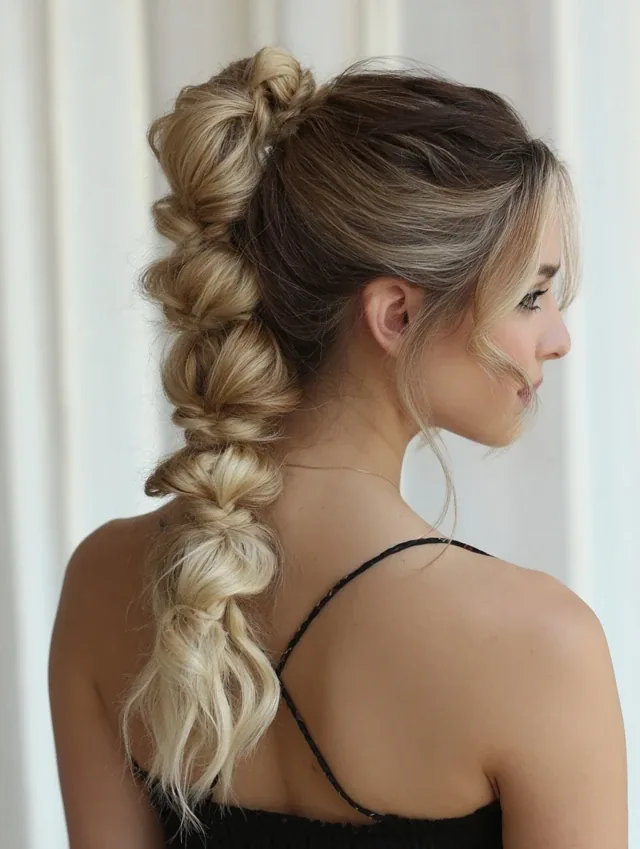
The bubble ponytail turns a plain tail into a trend: elastics spaced every few inches down the length, with each section gently pulled out to form a soft bubble. It looks playful and modern, it photographs beautifully, and it is far easier than braiding — if you can tie an elastic, you can do this. It works best on long, straight or wavy hair, where the bubbles hold their shape.
Pros: no braiding skill needed, instantly more interesting than a plain pony, and it keeps long hair from tangling. Cons: it takes five to ten minutes, and the bubbles flatten on very fine hair. Who should avoid it: very short hair, where there is not enough length for more than one bubble. A quick verdict: the best party ponytail on this list for the least effort — add a ribbon at the top bubble and it reads as a finished occasion style.
6. The Braided Ponytail
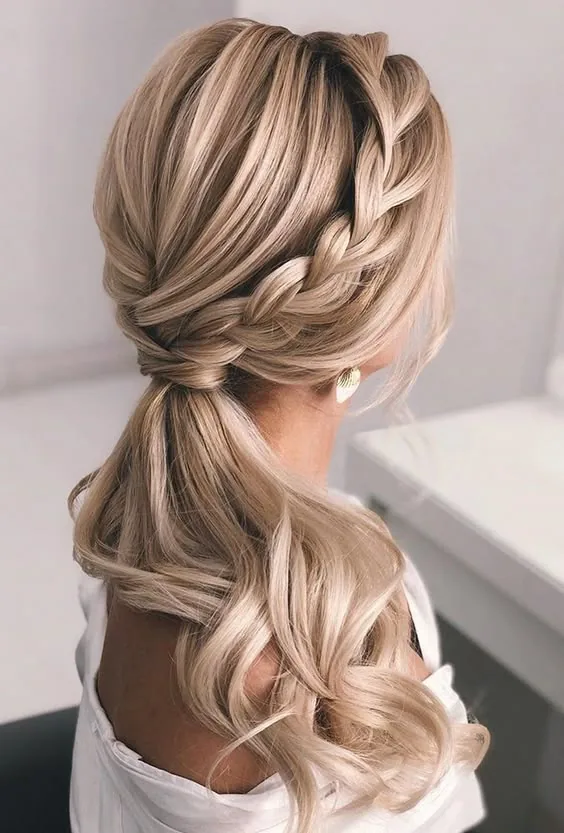
A braided ponytail — a ponytail that continues into a braid — is the style that survives everything: wind, workouts, long days, and humidity. The braid locks the length in place, so there is no whipping, no tangling, and no re-tying by midday. A classic three-strand braid reads polished; a fishtail or Dutch braid reads more intricate, and both start from the same high or mid ponytail.
Best for: long hair, active days, and anyone who hates re-doing their hair. How to style: tie the ponytail, braid the tail, secure the end with a small clear elastic, and gently pull the braid’s edges out for fullness. Common mistake: braiding too tightly, which pulls at the base and causes a headache. Cost: nothing but elastics, and the braid itself takes three minutes once you know the pattern.
7. The Side Ponytail
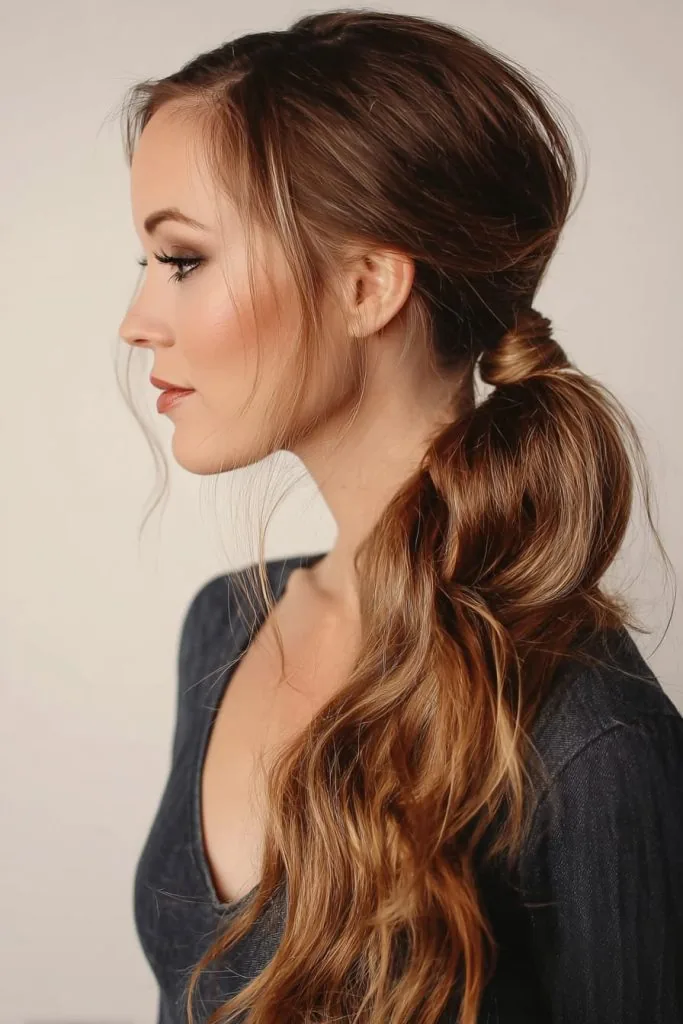
The side ponytail has a reputation for being an eighties throwback, and it deserves better: worn low over one shoulder, it is soft, romantic, and far more flattering than a centre-back pony on many faces. It shows off the hair from the front, which is where most people actually see you, and it suits wavy and curly hair beautifully, because the waves fall naturally over the shoulder.
Pros: flattering on round and square faces, shows off length, and feels softer than a back ponytail. Cons: it can slip toward the centre if the elastic is loose, so anchor it with a bobby pin. Who should avoid it: nobody — but keep it low and loose, not high and tight, or it tips into costume. Time needed: two minutes, and it is one of the best ponytails for a date night.
8. The Wrapped-Base Ponytail
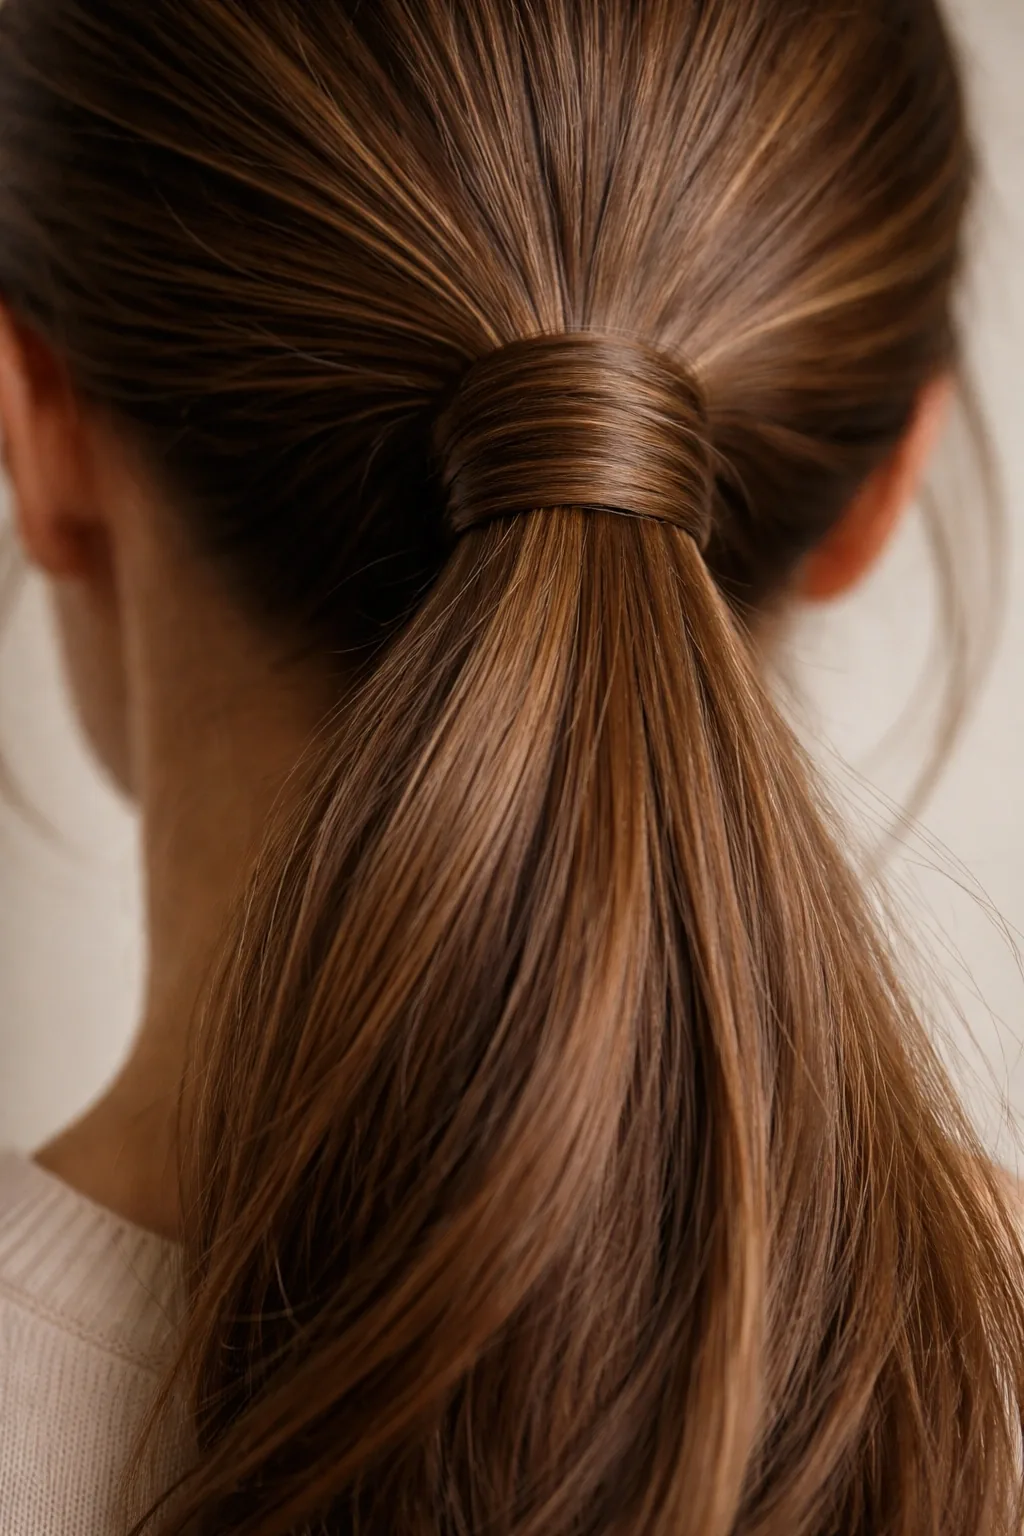
The wrapped-base ponytail is the same ponytail you already wear, with one upgrade: a strand of hair wrapped around the elastic so the tie disappears. It is the single fastest way to make a ponytail look styled, and it works at any height, on any texture, in under a minute. Take a thin strand from under the tail, wrap it twice around the base, and pin the end underneath.
Best for: anyone who wants a polished look without learning a new style. The mistake is using too thick a strand — it looks bulky and unravels — or wrapping it so tight that the ponytail tilts. A thin strand, a flat wrap, and a bobby pin hidden inside the tail: that is all it takes. Cost: zero. Time: thirty seconds. Verdict: if you learn one ponytail upgrade, learn this one.
9. The Ponytail With Curtain Bangs
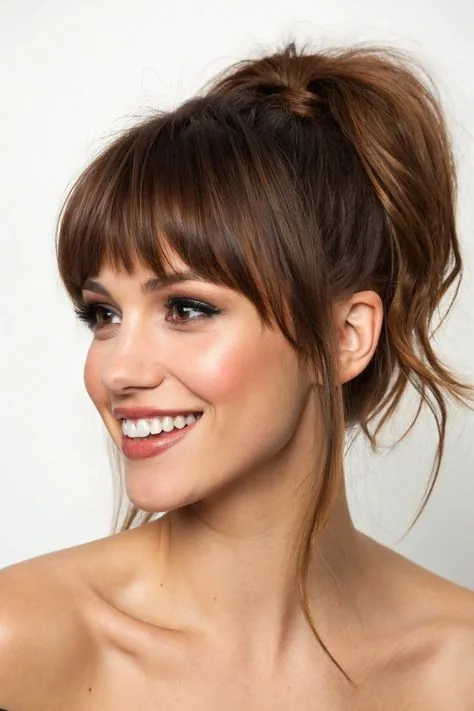
A ponytail with curtain bangs is the softest version of the style: the tail is pulled back, but the face stays framed by two parted, cheekbone-length pieces. It solves the ponytail’s one real drawback — that it can look severe — without adding any work. The bangs do the softening, the ponytail does the tidying, and together they look like a full hairstyle rather than a quick fix.
Pros: flattering on every face shape, hides a wide forehead, and looks deliberate with almost no styling. Cons: the bangs need a quick blow-dry or roller to sit right, and they frizz on humid days. Common mistake: pulling the bangs back into the elastic — leave them out, always. Time needed: three minutes, plus a minute for the bangs.
10. The Messy Textured Ponytail
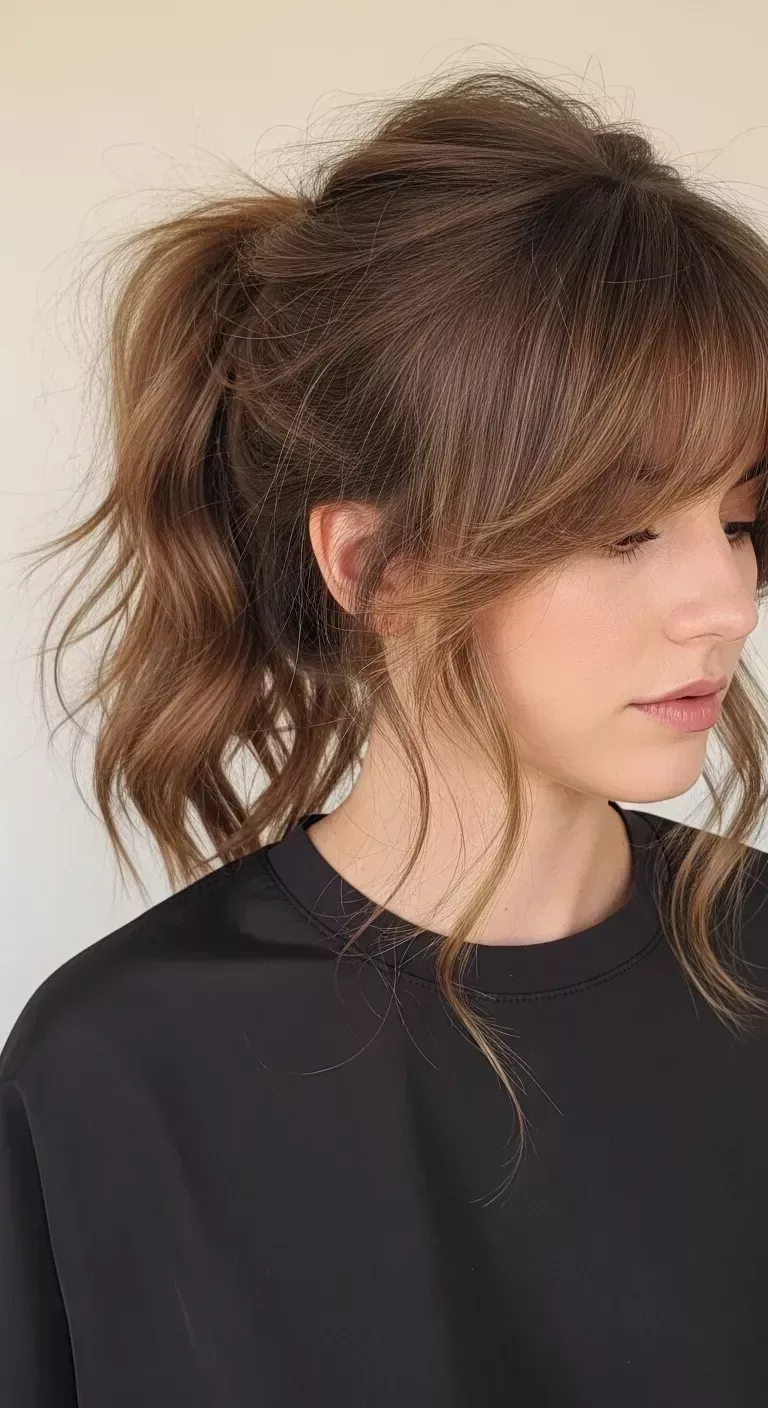
The messy ponytail is not a failed ponytail — it is a deliberate one, and the difference is in the details. The base is loose, the crown is gently pulled out for volume, a few pieces are pulled free around the face, and the tail is tousled rather than smoothed. It looks effortless, and it is, but only if you build the texture in on purpose with dry shampoo and a little backcombing at the crown.
Best for: second-day hair, weekends, and anyone whose hair refuses to look sleek. Pros: fast, forgiving, and it hides dirty roots better than any other ponytail. Cons: it can tip into genuinely messy if the base is too loose — keep the elastic firm even while the crown stays soft. Who should avoid it: formal occasions, where the same looseness reads as unfinished. Time: three minutes.
11. The Half-Up Ponytail
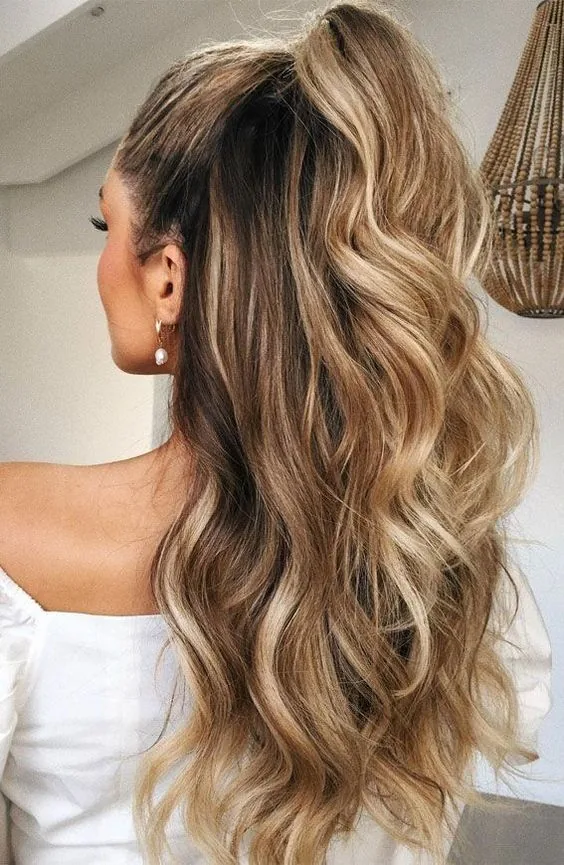
A half-up ponytail takes the top half of the hair and ties it back, leaving the rest down — the best of both worlds, and the ponytail for women who do not want to commit to having all their hair up. It keeps hair out of your face, shows off your length, and suits every length from a lob down. The top section should be generous, roughly from temple to temple, so the ponytail has real presence.
Pros: flattering, versatile, and it works for weddings, work and weekends. Cons: the top section can slide down if it is too thin — take enough hair, and anchor it with a pin. How to style: gather the top section, tie it at the crown, and gently tug the hair above the elastic for volume. A quick verdict: the most forgiving ponytail on this list, and the one to try first if ponytails usually feel too severe on you.
12. The Ponytail With a Scarf
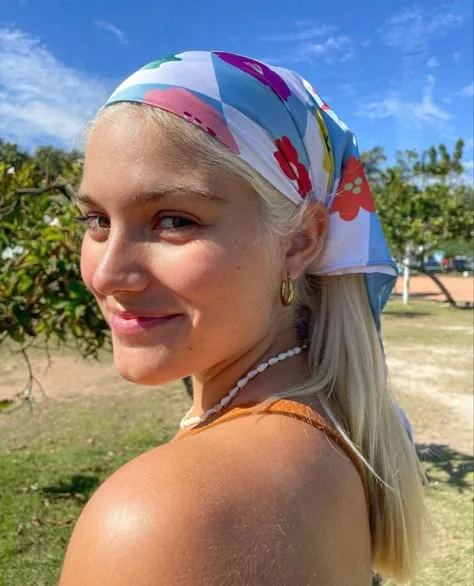
A silk scarf tied around a ponytail base is the fastest accessory upgrade there is: it hides the elastic, adds colour and pattern, and turns a basic pony into an outfit. Choose a small square scarf, fold it into a band, wrap it around the base, and tie it in a bow or a knot with the ends hanging down the tail. A printed scarf adds personality; a plain one in a solid colour reads more polished.
Best for: holidays, brunch, and days when your outfit needs one more detail. Pros: no hair skill required, and the scarf doubles as a hair tie in a pinch. Cons: a slippery silk scarf can slide, so anchor it with a bobby pin through the knot. Cost: whatever scarf you already own. Time: one minute. Common mistake: a scarf so large it overwhelms the ponytail — keep it small, and let the hair be the star.
13. The Fishtail Braid Ponytail
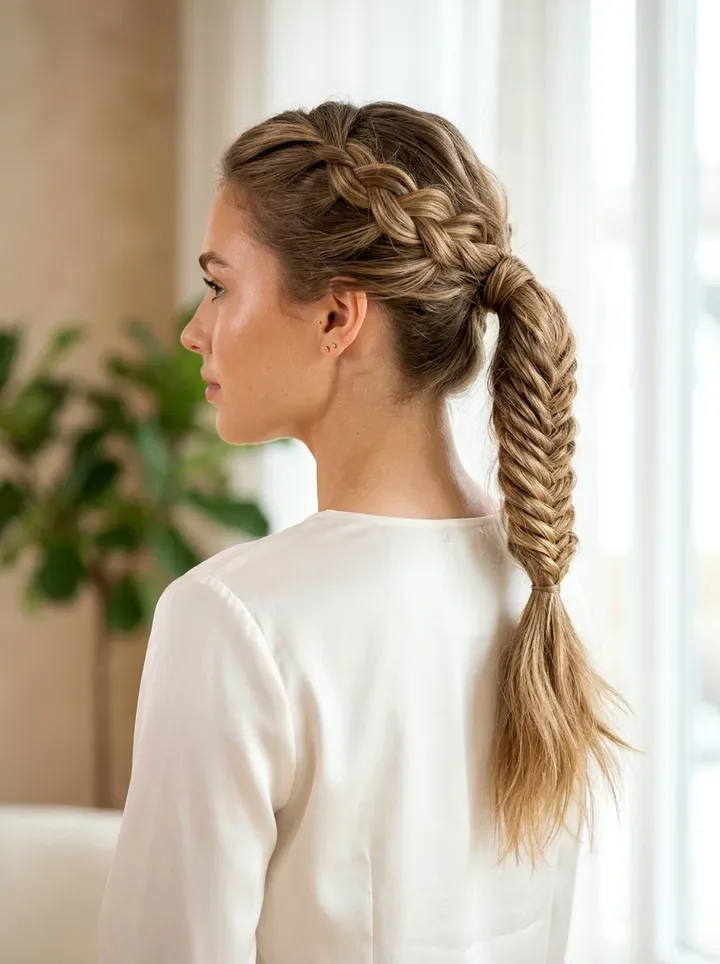
A fishtail braid inside a ponytail looks far more complicated than it is: two sections, crossed in small pieces, and the result is a fine, intricate braid that holds its shape all day. It suits long hair best, and it is the ponytail to choose when a plain braid feels too simple but a Dutch braid feels too fiddly. Start from a high or mid ponytail, split the tail in two, and cross small pieces from the outside of each section to the inside of the other.
Pros: holds all day, looks expensive, and keeps long hair completely tangle-free. Cons: it takes five to ten minutes, and it is hard to do on yourself the first few times — practise on a friend’s hair first. Common mistake: taking pieces that are too big, which makes it look like an ordinary braid; small pieces are what make the fishtail pattern. Time and cost: nothing but elastics and patience.
14. The Wavy Ponytail
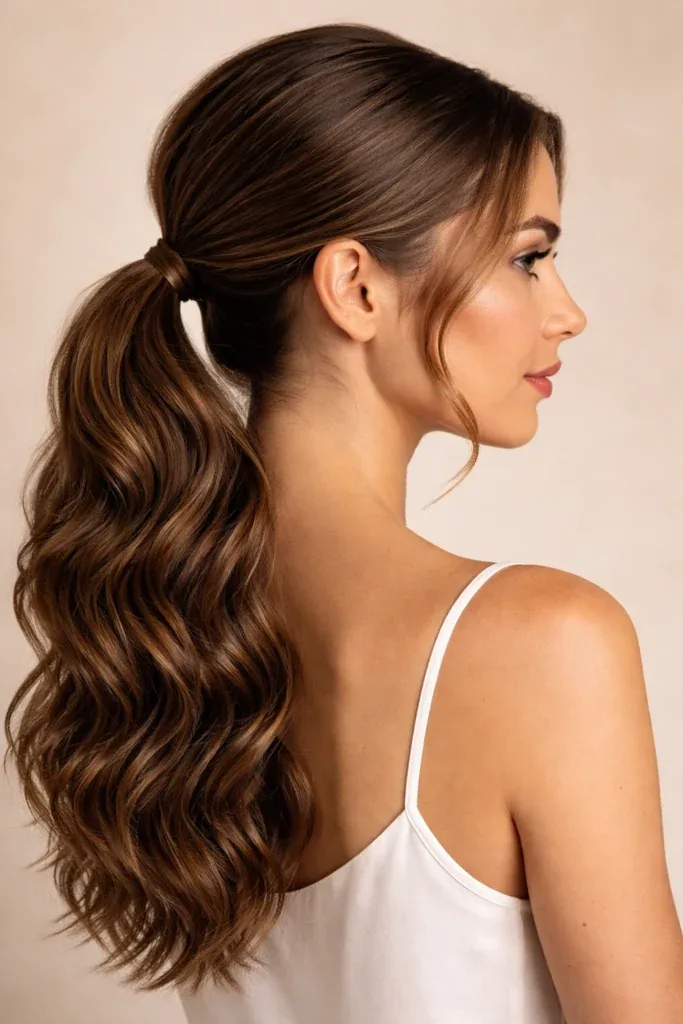
A wavy ponytail is the middle ground between sleek and curly: soft bends through the tail, a little movement at the front, and a finish that looks styled without looking done. It works on naturally wavy hair with almost no effort — just gather and tie — and on straight hair it needs only a quick pass with a curling wand on the tail after it is tied, which is faster than curling all of your hair.
Best for: date nights, weddings, and any day you want a ponytail that reads as a hairstyle rather than a fallback. Pros: soft, romantic, and it photographs beautifully. Cons: the waves drop out on very fine hair unless you use a little hairspray. Who should avoid it: nobody — but if your hair is pin-straight, set the waves with a cool shot from the dryer so they last. Time needed: five minutes with a wand, two without.
15. The Ponytail With Face-Framing Layers
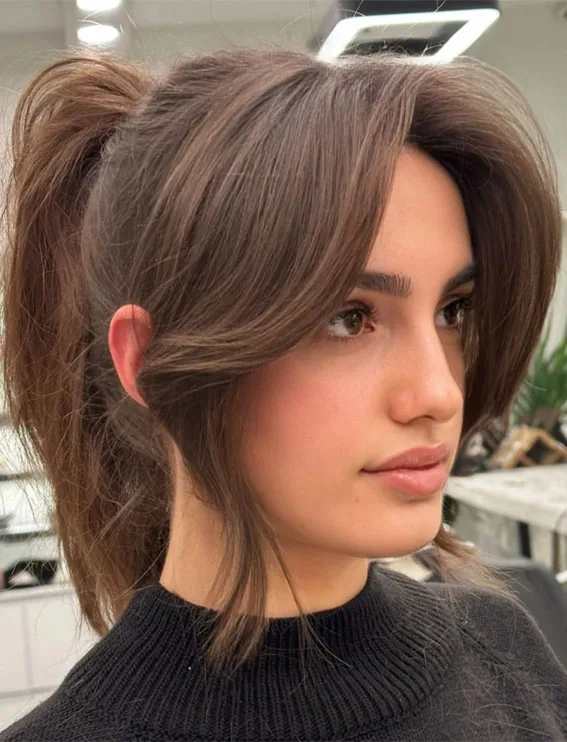
Face-framing layers are the reason some ponytails look like a salon style and others look like a gym style: two or three longer pieces left out at the front soften the hairline, flatter the cheekbones, and keep the ponytail from looking severe. The layers should be long enough to tuck behind the ears — chin-length or longer — so they frame rather than poke. If your cut has no layers, pull out two thin pieces and curl them lightly.
Pros: instantly softer, suits every face shape, and it hides a wide forehead. Cons: the loose pieces can fall into your face on a windy day, so keep a pin handy. Common mistake: pulling out too much hair, which thins the ponytail itself — two pieces per side is enough. A quick verdict: if your ponytail ever looks harsh, the fix is almost always two face-framing pieces, not a different ponytail.
16. The Low Ponytail With a Middle Part
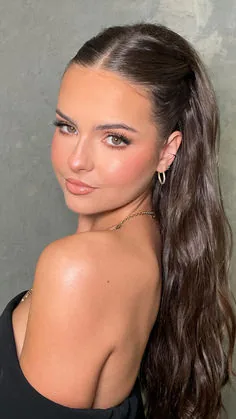
A low ponytail with a clean middle part is the most symmetrical, editorial ponytail there is — the kind you see on runways and red carpets, where the part does half the styling. The centre part draws the eye down the middle of the face, which lengthens and balances it, and the low tail keeps everything calm and controlled. It needs a precise part, so use the end of a comb, not your fingers.
Best for: oval and heart-shaped faces, straight hair, and formal occasions. Pros: extremely polished, and it makes the hair look thicker because nothing is pulled to one side. Cons: a middle part is unforgiving on a very round face, and it shows an uneven hairline. Cost and time: five minutes, a comb and a smoothing cream. Who should avoid it: anyone whose part never sits straight — a side part version of the same low pony is just as elegant.
17. The High Ponytail With Crown Volume
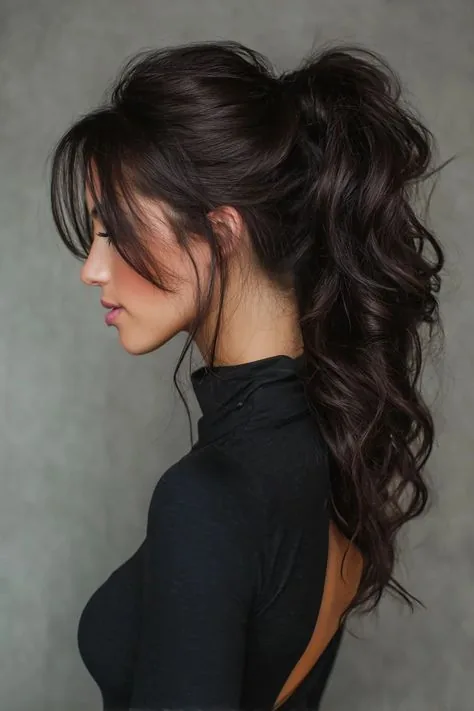
This is the high ponytail with a lift: the crown is teased or bumped up before the hair is gathered, so the profile has height instead of lying flat against the head. It is the ponytail for nights out and photos, where a little drama is the point. The volume comes from the crown, not the tail — lift the hair at the roots, smooth the top layer over it, and then tie the ponytail high, letting the bump stay visible.
Pros: dramatic, lengthening, and it makes the whole style look intentional. Cons: the bump can collapse by evening unless you pin it, so anchor the base with two bobby pins crossed underneath. Common mistake: teasing the whole crown instead of just the roots — you need lift, not a nest. Time needed: five minutes, a comb and a little hairspray.
18. The Ponytail for Short Hair
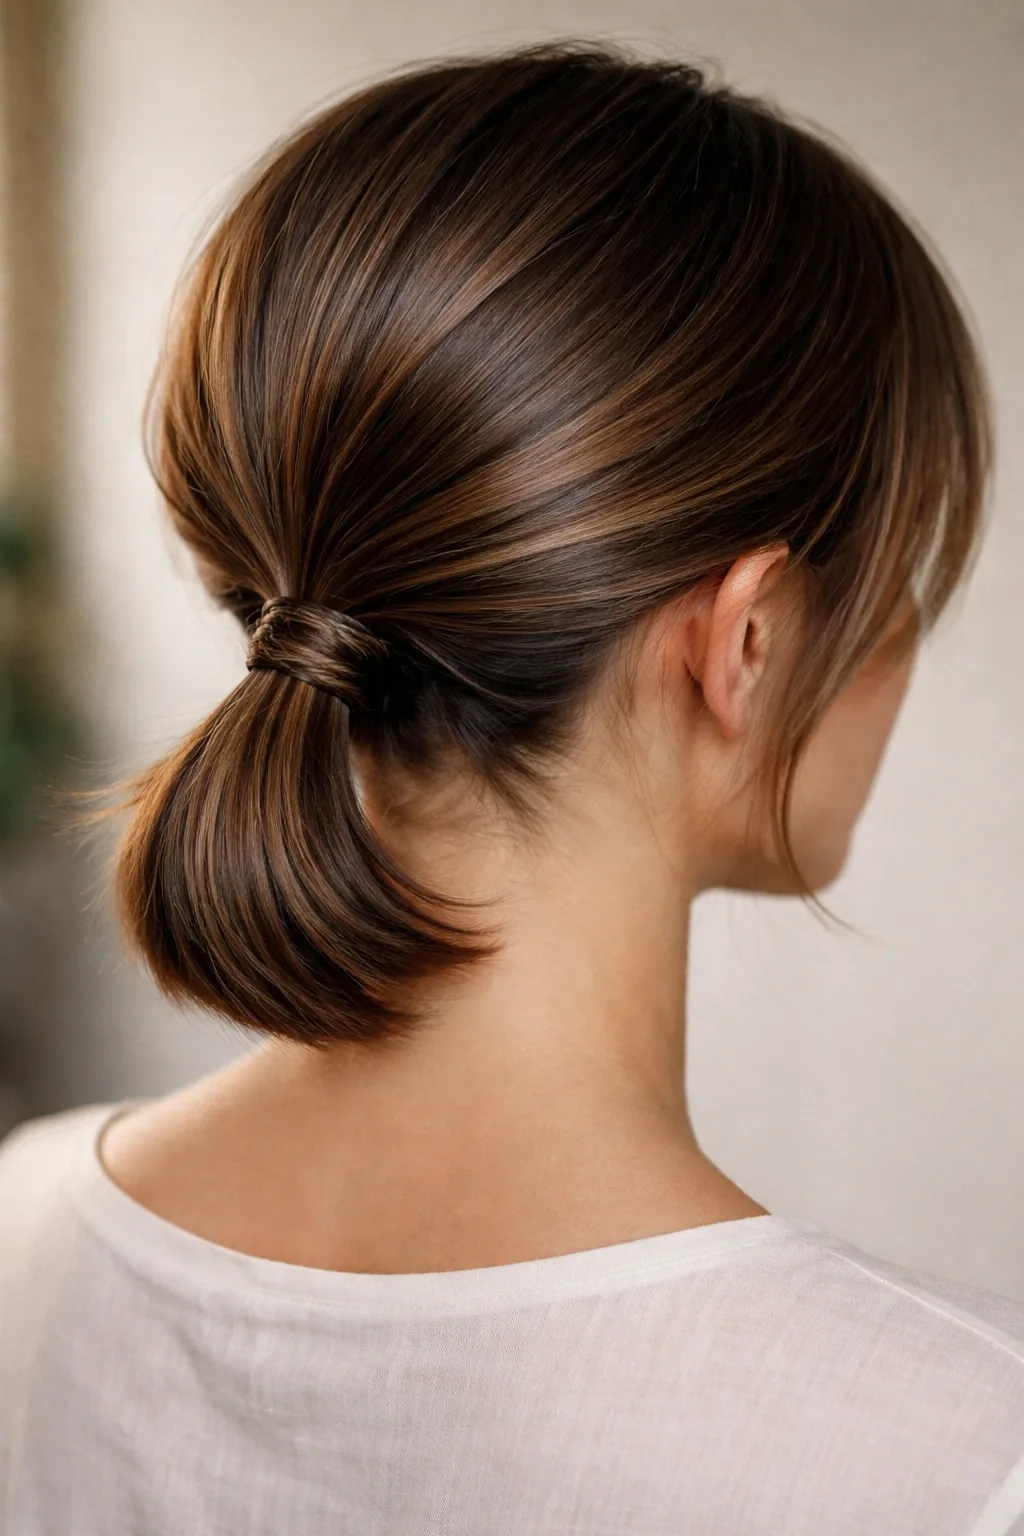
Short hair can wear a ponytail — it just needs a different technique. A bob or lob that barely reaches the elastic will not hold in a single tie, so gather what you can at the back, secure it with a small elastic, and pin the loose pieces at the nape with bobby pins. A half-up ponytail is often the better choice for short hair: the top section ties easily, and the rest of the length stays down, so nothing has to reach.
Pros: keeps hair off the face on hot days, even at bob length. Cons: the nape pieces will escape, so carry pins. Who should avoid a full ponytail at this length: anyone with layers shorter than chin-length at the back — the half-up version will look better and hold longer. Time and cost: three minutes, a small elastic and three or four bobby pins. A quick verdict: short hair does not mean no ponytail — it means a smaller, smarter one.
19. The Ponytail With a Ribbon or Bow
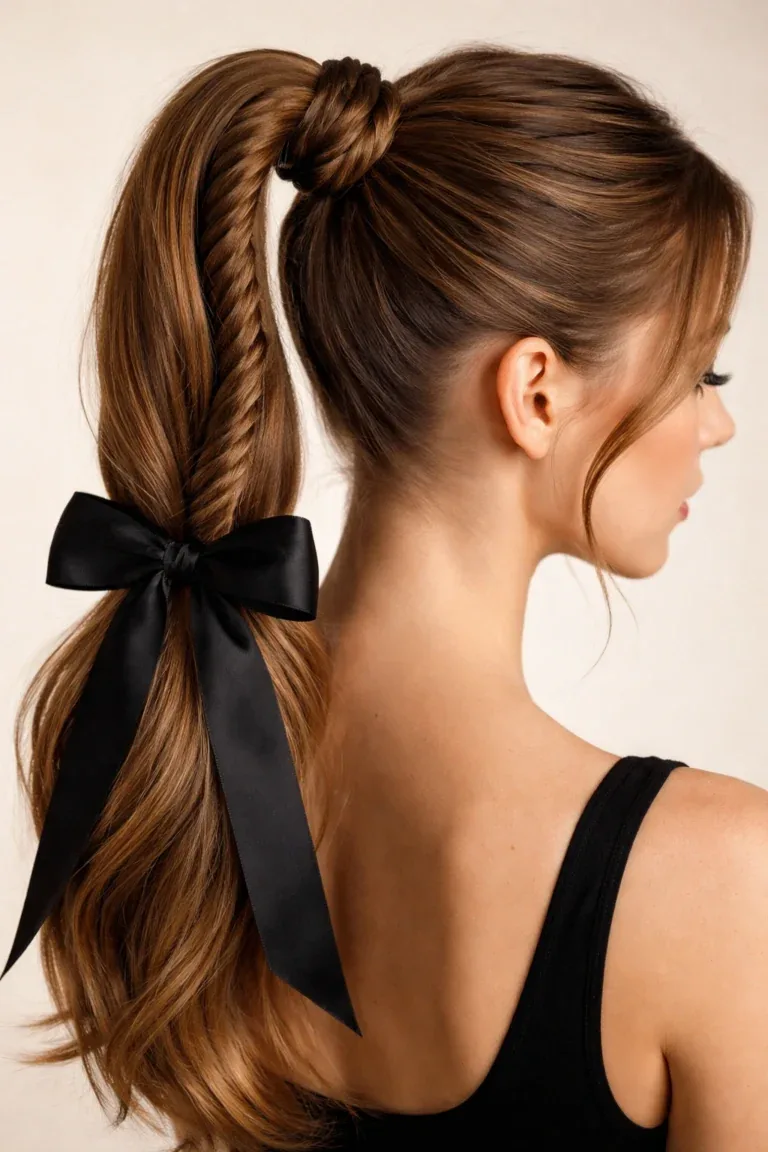
A ribbon tied around a ponytail base is the simplest way to make the style feel finished, and it works at any age when the ribbon is chosen well: a velvet ribbon in winter, a silk one in summer, a narrow black ribbon for work, a wider patterned one for weekends. Tie it in a bow with the tails hanging down, or wrap it twice and knot it — either way, it hides the elastic and adds a deliberate, pretty detail.
Best for: parties, school, and days when you want the ponytail to look like a choice. Pros: cheap, fast, and it instantly elevates a basic pony. Cons: a ribbon can slide on silky hair, so pin it through the knot. Common mistake: a bow so big it becomes the whole hairstyle — keep it in proportion to the ponytail. Cost: the price of a ribbon, and about thirty seconds.
20. The Sleek Ponytail With a Deep Side Part
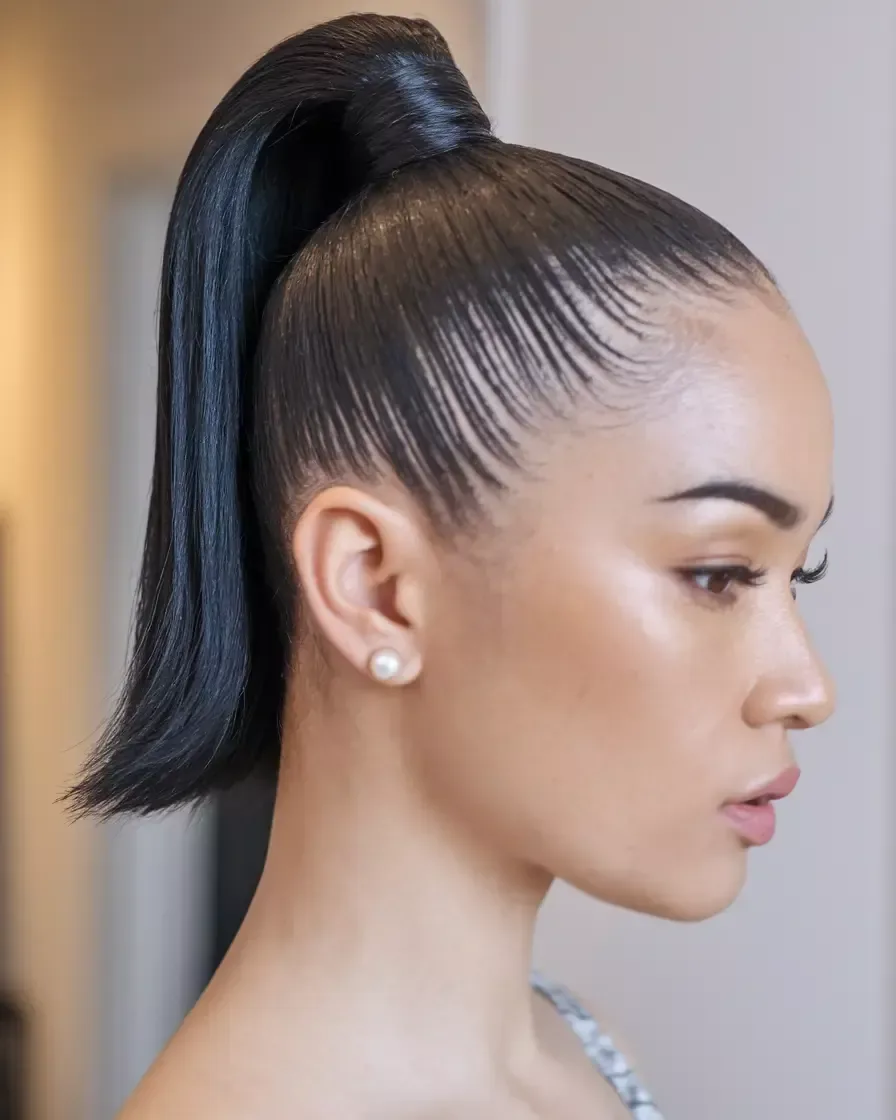
A deep side part changes a sleek ponytail completely: the sweep across the forehead adds asymmetry, volume on one side, and a glamorous, old-Hollywood feel that a middle part never has. It suits round and square faces especially well, because the diagonal line breaks up the symmetry and adds length. Part the hair deeply — above the arch of one eyebrow — smooth it across, and tie the ponytail low or mid.
Pros: glamorous, flattering, and it gives fine hair instant volume at the part. Cons: the part can drift during the day, so set it with a little hairspray. Who should avoid it: anyone with a strong cowlick at the front, which will fight the part all day. Time needed: five minutes, a comb and a smoothing product. A quick verdict: the most elegant ponytail on this list for the least extra effort.
21. The Curly Puff Ponytail
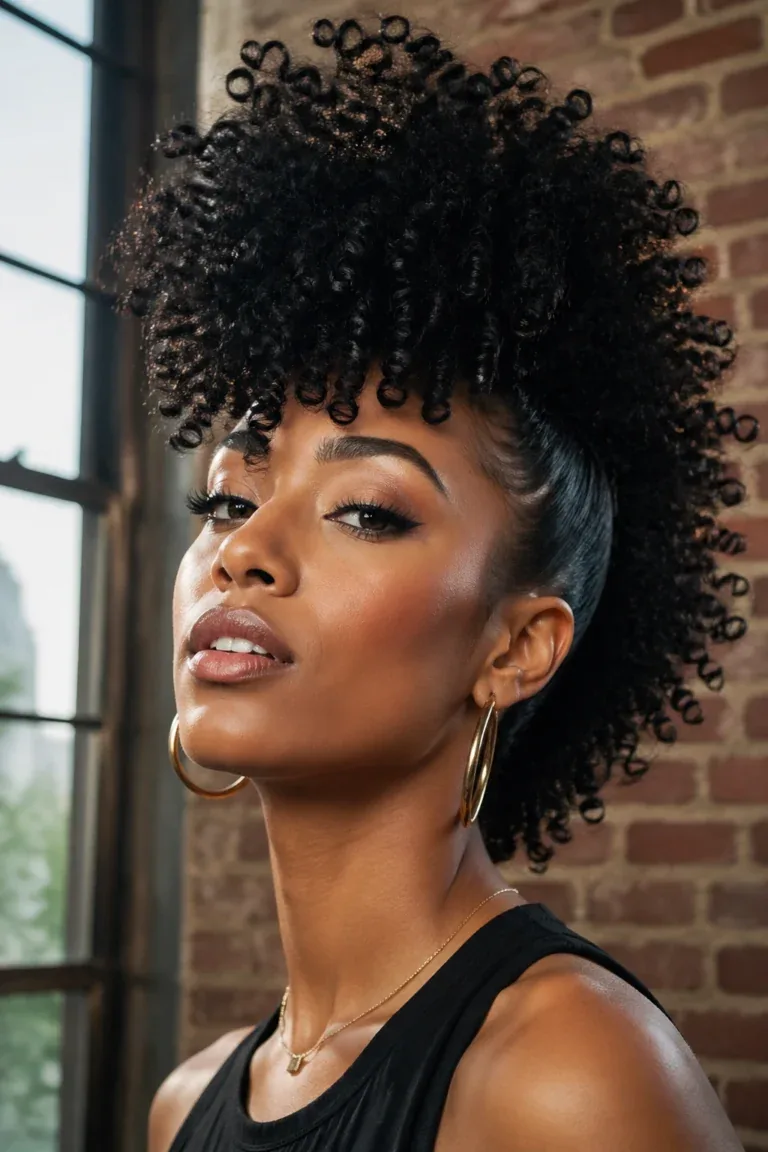
The curly puff is the natural-hair ponytail: hair gathered into a full, round puff at the crown or the back, with the curls left free and voluminous instead of pulled straight. It celebrates texture rather than fighting it, and it is one of the most flattering ponytails for coily and curly hair, because the puff’s shape is the style. Use a wide, soft elastic or a stretchy headband to gather the hair, and pick the roots gently for height.
Best for: natural curls and coils, and anyone who wants volume without heat. Pros: no heat, no braiding, and the puff looks fuller as the day goes on. Cons: a tight elastic can cause breakage on curly hair, so use a fabric band and never tie it soaking wet. Common mistake: brushing the puff out, which turns defined curls into frizz — use fingers or a wide-tooth comb only. Time: two minutes.
22. The Twisted Ponytail
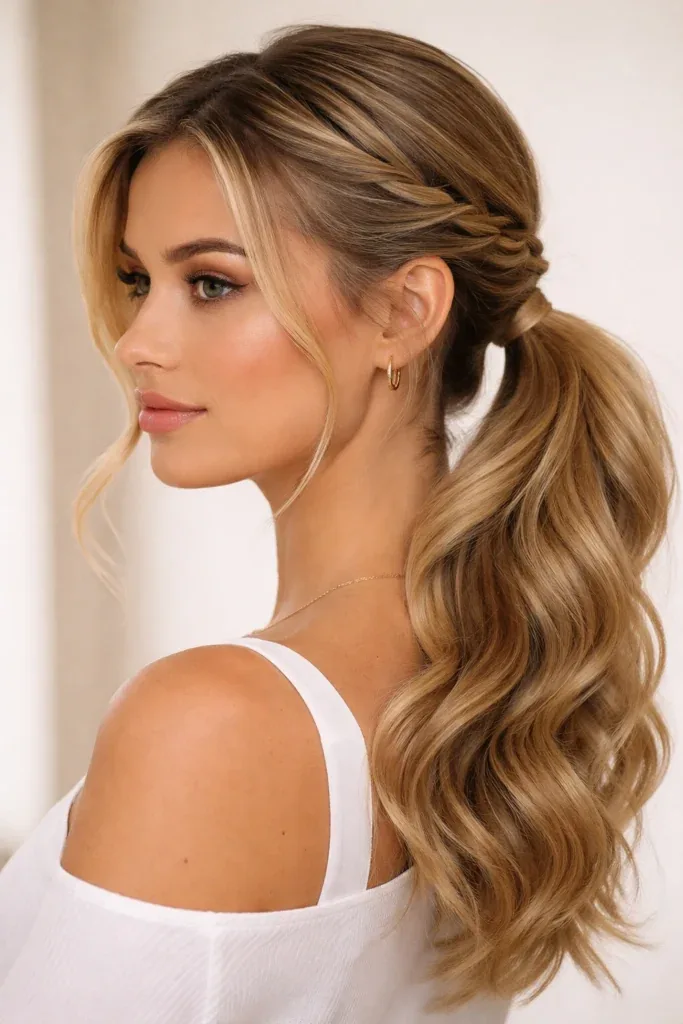
A twisted ponytail adds texture without braiding: two sections of hair twisted around each other before being tied, or a single twist on each side pulled back into the ponytail. The twists create a rope-like detail at the base that looks intricate and holds the front hair back more neatly than a plain gather. It works on medium to long hair, and it is a good middle step if braids still feel too hard.
Pros: looks more complex than it is, holds the front sections neatly, and suits weddings and work alike. Cons: the twists can loosen on very silky hair, so pin them at the base. How to style: twist two front sections back, pin them where they meet, then gather everything into a ponytail. Time needed: five minutes. A quick verdict: the ponytail to learn when you are bored of the plain version but not ready for a braid.
23. The Double Ponytail for Volume
The double ponytail is a stylist’s trick, not a hairstyle you can see: two ponytails, one above the other, with the top one falling over the bottom one so the tail looks twice as full and twice as long. It is the best volume trick for fine or thin hair, and it works because the eye reads one long, thick tail instead of two stacked ones. Tie the lower ponytail first, then the upper one slightly above it, and fluff the top tail over the lower.
Pros: instant fullness, no extensions, no teasing, and it holds all day. Cons: the two elastics can show if the hair is very thin, so keep the upper tail full and the parting invisible. Who should avoid it: very short hair, where there is not enough length to hide the lower ponytail. Cost and time: two elastics, three minutes, and a ponytail that looks like it belongs to someone with twice your hair.
24. The Wet-Look Slicked Ponytail
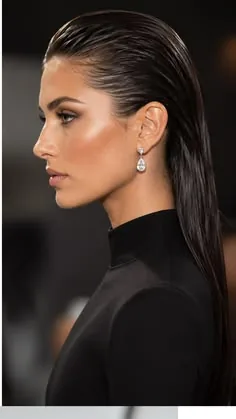
The wet-look ponytail is the fashion-forward version: hair slicked back with gel or a strong-hold cream so it looks damp and glossy, tied high or low, with a shine that reads as deliberate rather than unwashed. It suits straight hair best, and it is the ponytail for evenings, photoshoots and nights out — not for the office, where the shine can read as greasy under fluorescent light.
Best for: evenings, events, and anyone with straight, healthy hair. Pros: striking, modern, and it stays put all night. Cons: it needs a lot of product, and it is unforgiving on damaged or frizzy hair. Common mistake: using oil instead of gel, which never dries and transfers onto everything. Time needed: five minutes, a gel or pomade, and a fine-tooth comb. A quick verdict: save it for occasions — the impact is real, but so is the product.
25. The Gym-Secure Ponytail

A gym ponytail has one job: stay put. Everything else is secondary. The secure version starts with a high or mid placement, a thick snag-free elastic wrapped three times, and two bobby pins anchoring the base so the tie cannot rotate or slide. Then braid the tail — a simple three-strand braid — so it does not whip around your face or tangle during a run, and tuck the end under with a small elastic.
Pros: it survives running, jumping and hot yoga without re-tying. Cons: it is not a pretty ponytail — it is a functional one, and the braid makes it look sporty rather than polished. Common mistake: a low, loose ponytail for exercise, which bounces against the neck and slides out in minutes. Time and cost: two minutes, a heavy-duty elastic, and two pins. A quick verdict: build it for function first, and it will still look neat when you leave the gym.
26. The Ponytail With a Baseball Cap
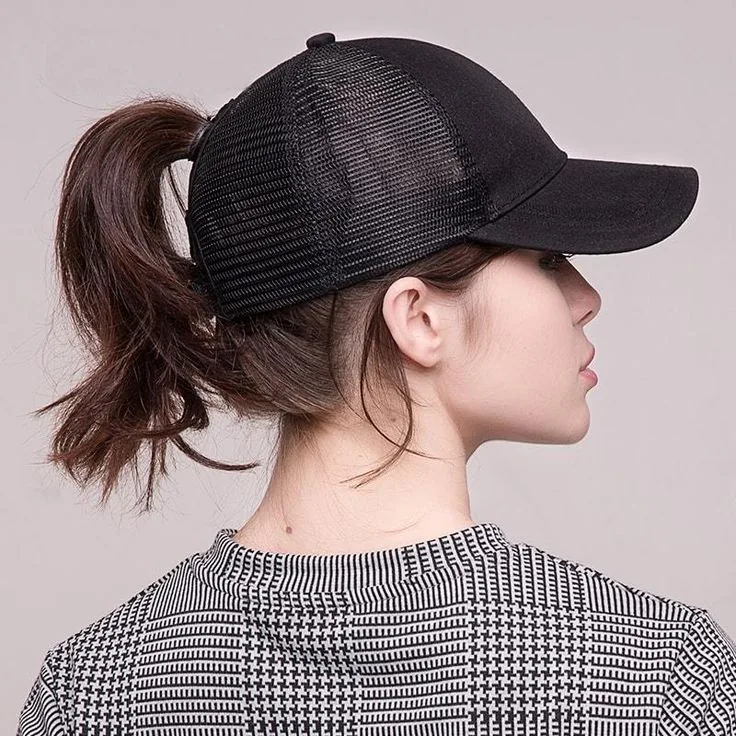
A ponytail through the back of a baseball cap is the ultimate off-duty hairstyle: practical, sun-smart, and instantly casual. The trick is the placement — pull the ponytail through the cap’s opening at the height where the cap sits naturally, not too high, or the cap tips forward. A low or mid ponytail works best; a high one fights the cap and looks awkward from the side.
Best for: errands, travel, bad hair days, and sunny weekends. Pros: hides unwashed roots, keeps the sun off your face, and takes thirty seconds. Cons: the cap flattens the crown, so do not expect volume — this is a relaxed style, not a polished one. Common mistake: tying the ponytail first and then forcing the cap over it; put the cap on first, then thread the tail through. Time: one minute.
27. The Low Chignon Ponytail
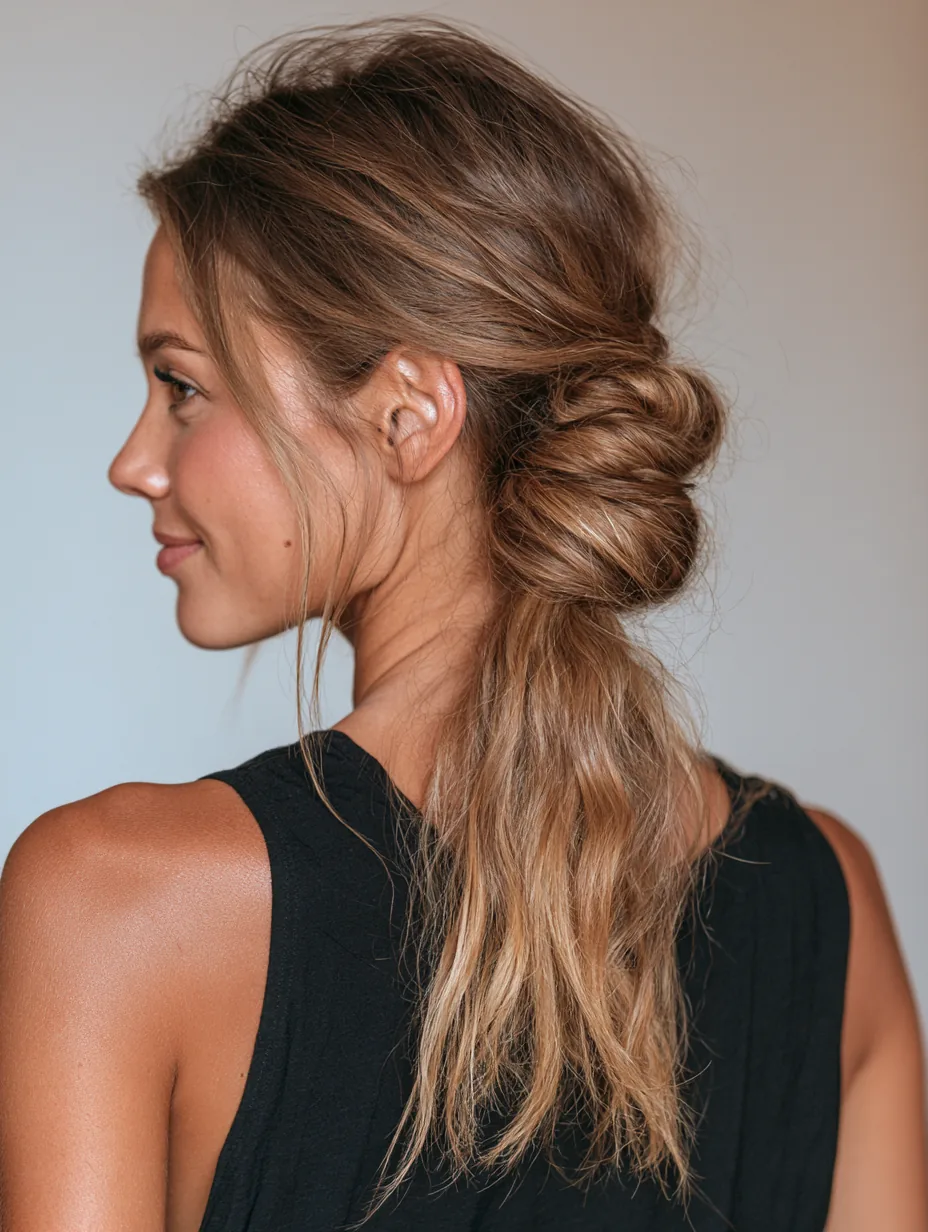
The low chignon ponytail is a hybrid: a ponytail tied low, then looped and pinned into a soft chignon shape, so it reads as an updo from the front and a ponytail from the back. It is the elegant option for weddings, formal dinners and job interviews, where a plain ponytail feels too casual but a full updo feels like too much work. Tie the ponytail low, twist the tail, loop it up and pin it, leaving the ends soft.
Pros: elegant, secure, and it photographs beautifully. Cons: it takes five to ten minutes and a handful of bobby pins, and the pins need to match your hair colour to stay invisible. Who should avoid it: very short hair, where there is not enough length to loop. Cost and time: ten minutes and a box of pins — a fraction of a salon updo for a very similar result.
28. The Ponytail With a Headband
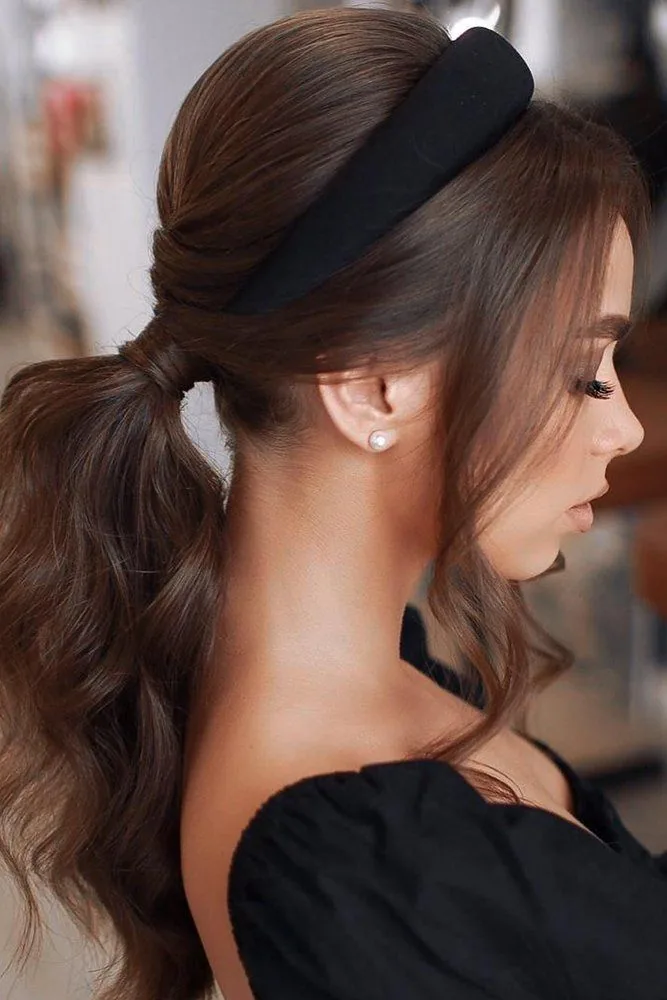
A headband with a ponytail does two jobs: it holds back the front hair and flyaways, and it adds a finished, put-together detail to an otherwise simple style. A padded fabric headband reads soft and casual; a thin metal or embellished one reads dressy; a sporty band reads athletic. Put the headband on first, position it where it feels comfortable, then gather the ponytail — the band holds the front sections in place while you tie.
Best for: workouts, school, and days when the front hair will not behave. Pros: no pins needed, and it hides a grown-out fringe beautifully. Cons: a tight headband causes headaches, so choose one with some give. Common mistake: placing the headband too far back, where it slides off — it should sit just behind the hairline. Time: one minute, plus the headband you already own.
29. The Ponytail With Loose Tendrils
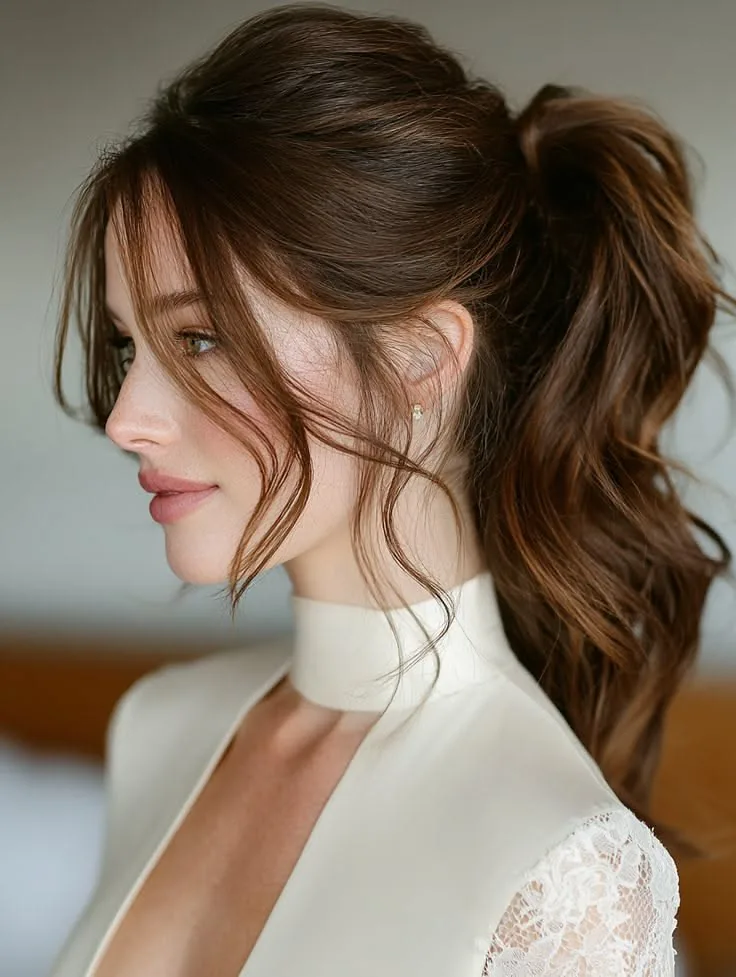
Loose tendrils are the soft detail that makes a ponytail look romantic: two thin pieces left out at the front, curled lightly, framing the face while the rest of the hair is pulled back. They suit round and square faces best, because the vertical lines add length, and they turn a basic ponytail into a date-night style with almost no extra work. Pull the tendrils out after tying the ponytail, not before, so you control exactly how much hair comes free.
Pros: soft, romantic, and it flatters every face shape. Cons: tendrils fall flat on very straight hair unless you curl them, and they need a little hairspray to hold. Who should avoid it: windy days, when the tendrils blow everywhere. Time needed: three minutes, a curling wand or a quick twist with a straightener, and a light mist of spray.
30. The Bridal Ponytail
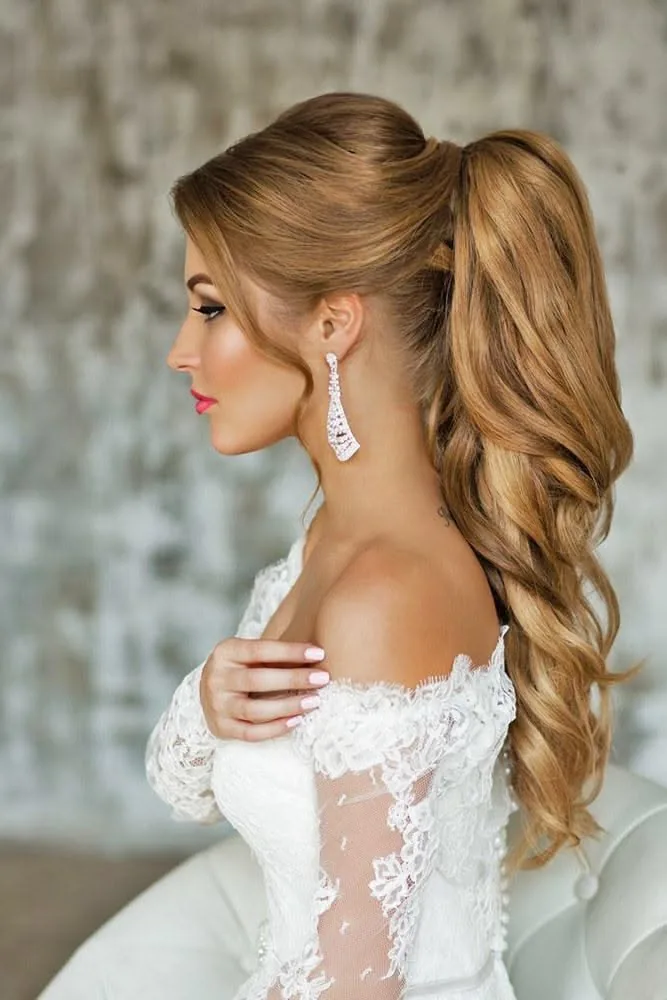
A bridal ponytail is proof that a ponytail can be formal: a high or mid ponytail with volume at the crown, soft waves through the tail, face-framing pieces, and the elastic hidden under a wrap of hair or a decorative clip. It suits brides who want to look like themselves — not like a different person in an updo — and it photographs beautifully, because the tail moves and catches the light in a way a pinned bun cannot.
Best for: weddings, formal events, and bridesmaids. Pros: comfortable all day, secure through dancing, and it shows off long hair. Cons: it needs setting spray and pins to survive a long day, and the waves need to be set properly or they drop. Cost and time: twenty minutes at home, or a salon visit — but the comfort is worth it. A quick verdict: the ponytail for the day you want to look polished and still feel like you.
31. The Braided Crown Ponytail
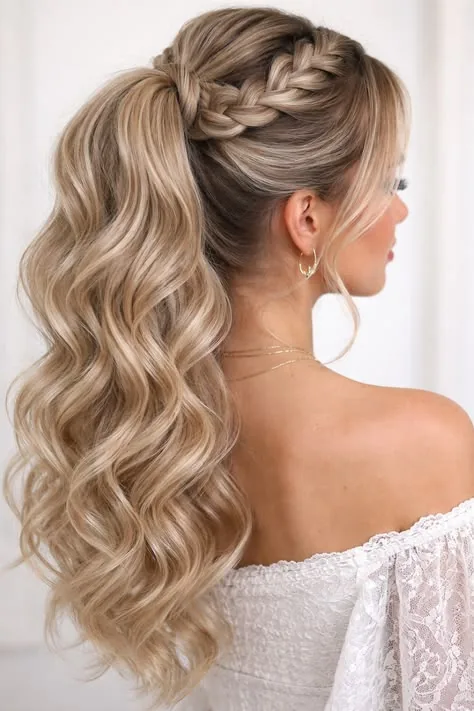
A braided crown ponytail combines two styles: a braid that circles the front of the head like a halo, and a ponytail gathering the rest at the back. The braid keeps the front hair off the face, the ponytail keeps the length tidy, and together they look far more elaborate than the sum of their parts. Braid two front sections from the temples, bring them to the back, and tie everything into a ponytail.
Pros: romantic, secure, and it works for weddings, festivals and holidays. Cons: it takes ten minutes and some braiding practice — try it once before the day you need it. Common mistake: braiding too tightly, which pulls at the hairline; keep the braids loose and pull the edges out gently for softness. Time: ten minutes with practice.
32. The Ponytail With Straight Bangs
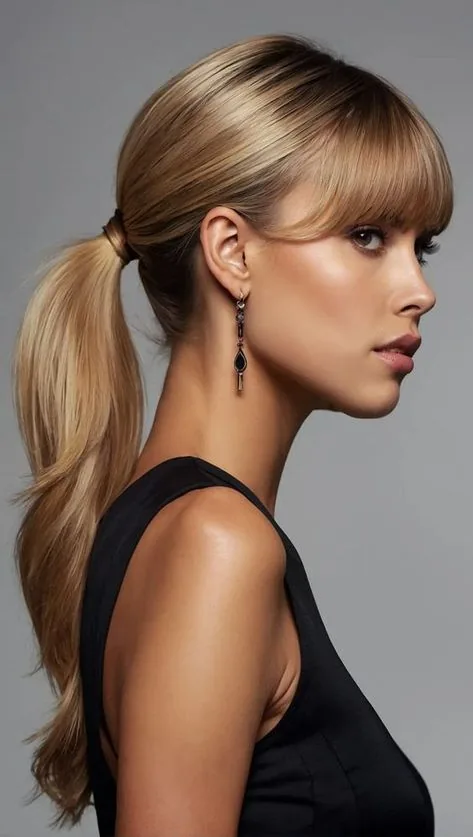
A ponytail with straight bangs is a bold, graphic pairing: the fringe sits straight across the forehead, the ponytail pulls everything else back, and the contrast between the sharp horizontal line and the vertical tail is what makes it striking. It suits oval and long faces best, and straight hair, where the fringe’s line reads clearly. The bangs are the star here, so keep them smooth and the ponytail simple.
Pros: dramatic, eye-framing, and it hides a high forehead completely. Cons: the fringe needs trimming every three to four weeks and a straightener on humid days. Who should avoid it: very curly hair, unless you are happy to straighten the fringe daily. Maintenance: the ponytail itself is effortless — it is the fringe that needs the work. Time needed: three minutes for the pony, plus a minute for the bangs.
33. The Ponytail for Thin Hair
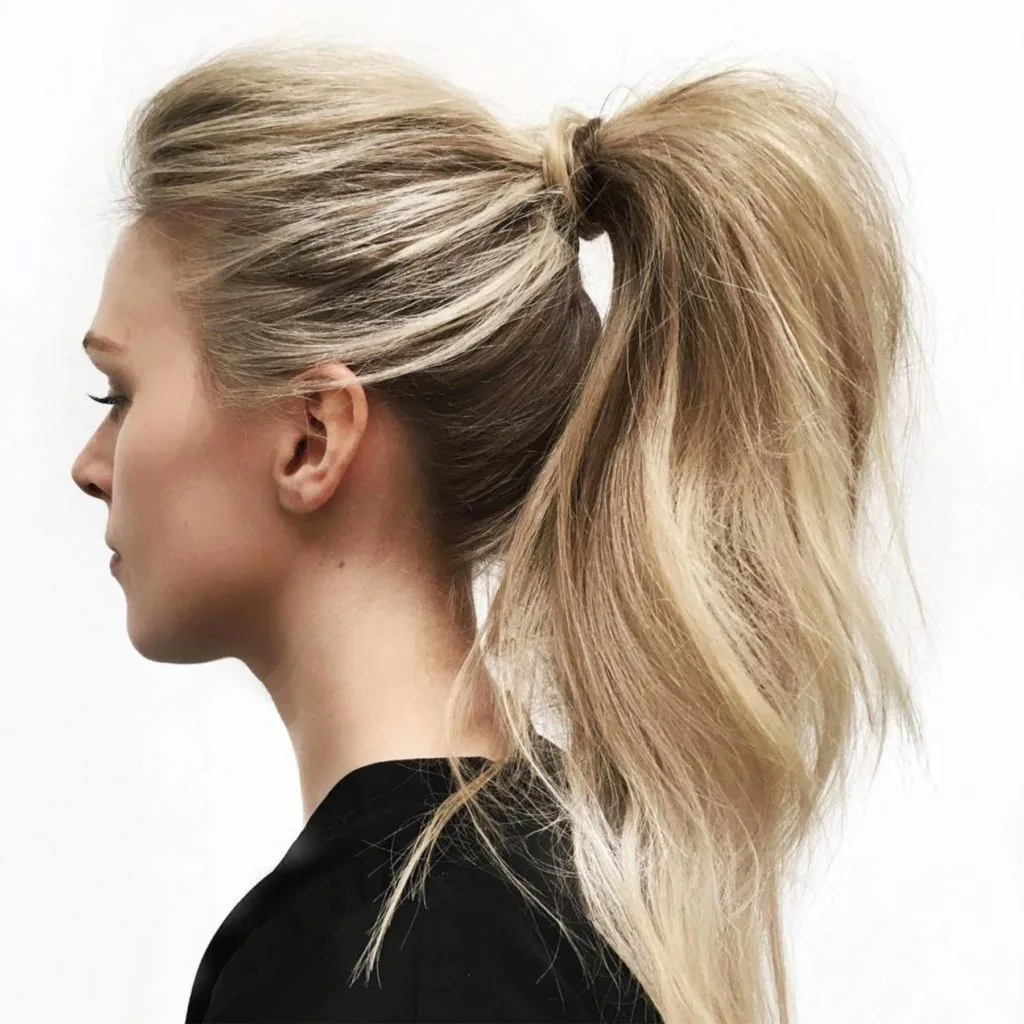
A ponytail on thin hair can look sparse if you tie it the usual way, but a few tricks change that completely. Start with dry shampoo or texturising spray at the roots for grip, then use the double-ponytail trick — one ponytail above another — so the tail looks twice as full. Keep the base soft and slightly loosened rather than slicked flat, which only shows the scalp, and finish by gently pulling the tail’s edges out to widen it.
Pros: the double ponytail and texture spray make thin hair look genuinely full. Cons: the tricks need to be redone each morning — they are styling, not a cut. Common mistake: tying thin hair very tight to make it look neat, which flattens it further and shows the scalp. Time and cost: five minutes, dry shampoo, and two elastics. A quick verdict: thin hair does not mean no ponytail — it means a ponytail built with volume in mind.
34. The Ponytail for Thick Hair
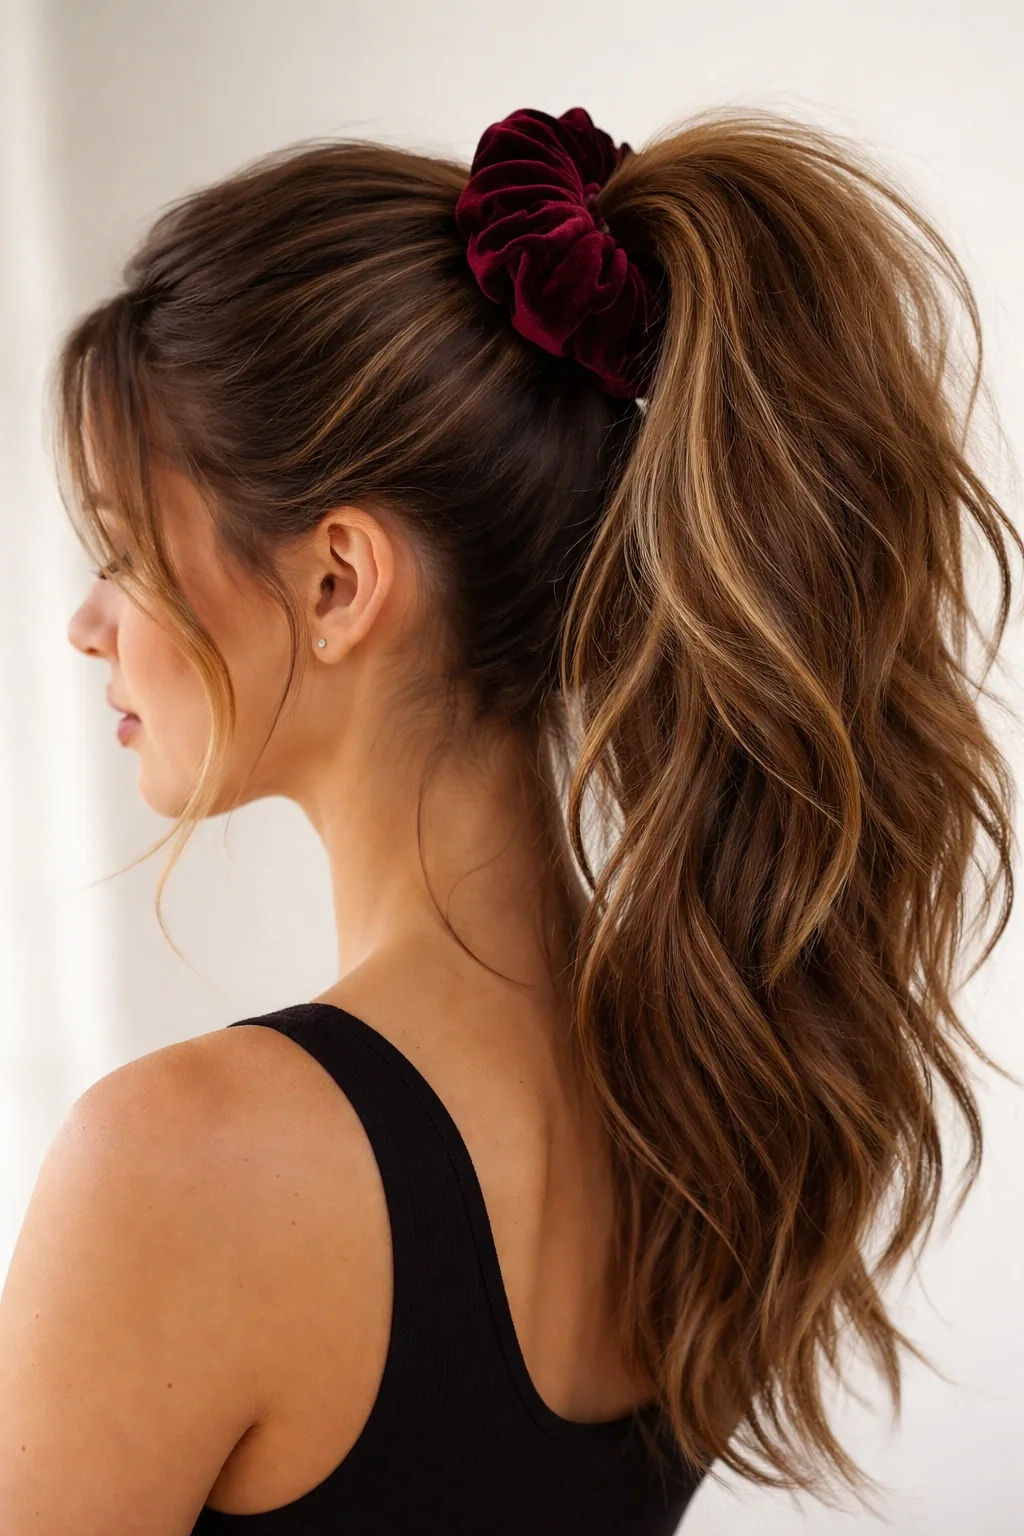
Thick hair makes a magnificent ponytail — full, heavy, and impossible to ignore — but it also makes a heavy one, and the weight is the challenge. A single thin elastic will snap or slide, so use a thick fabric-covered band, or two elastics stacked, and anchor the base with bobby pins pushed through the elastic. Section the hair if needed: tie a lower ponytail first, then gather the top half over it, so the weight is shared between two ties.
Best for: anyone with heavy hair who is tired of ponytails that sag by noon. Pros: the fullness is real, no tricks needed, and the tail looks luxurious. Cons: the weight can cause headaches if tied too tight — keep the tie firm but not strangling, and vary the height day to day to avoid breakage at the same spot. Time needed: three minutes, a heavy-duty elastic, and pins. A quick verdict: thick hair is the ponytail’s natural advantage — support the base properly, and let the weight do the work.
What is the best ponytail height for my face shape?
A high ponytail suits round and square faces because the upward line adds length, a low ponytail suits long faces because it shortens the face visually, and a mid-height ponytail flatters almost every face shape. Gather the hair loosely at each height and check the mirror before you commit to the elastic.
How do I make my ponytail look fuller?
Use dry shampoo or texturising spray at the roots, try the double-ponytail trick with one ponytail above another, and slide two bobby pins vertically into the base to prop the tail up. Gently pulling the tail’s edges out also widens it, and a bubble ponytail adds fullness without any teasing.
How do I stop my ponytail from sagging?
Wrap the elastic three times instead of two, tug the tail upward while holding the base to tighten it, and push two bobby pins through the elastic from above and below so it cannot rotate. A thick, snag-free elastic holds better than a thin one, especially on heavy hair.
Does wearing a ponytail every day damage your hair?
Wearing a tight ponytail in the same spot every day can cause breakage, especially on wet hair. Vary the height and tension, use fabric-covered or spiral elastics, never tie wet hair tightly, and give your hair a break with loose styles a few days a week.
How do I hide the hair tie in a ponytail?
Take a thin strand from underneath the ponytail, wrap it around the base two or three times, and tuck the end under the elastic with a bobby pin. A ribbon, silk scarf or leather cord wrapped around the base hides the elastic just as well and doubles as an accessory.
What is the best elastic for a ponytail?
A thick, snag-free fabric-covered elastic is best for most hair, a spiral tie is gentlest on fine or fragile hair, and a heavy-duty elastic is needed for thick hair. Avoid rubber bands, which grip by friction and pull hair out when you remove them.
How do I make a ponytail last through a workout?
Tie a high or mid ponytail with a thick elastic wrapped three times, anchor the base with bobby pins, and braid the tail so it does not whip around. A low, loose ponytail is the worst choice for exercise because it bounces and slides out quickly.
Can I wear a ponytail with short hair?
Yes, but use a different technique: gather what you can at the back with a small elastic and pin the loose nape pieces with bobby pins. A half-up ponytail is often better for bob-length hair, because the top section ties easily and the rest stays down.
How do I refresh a second-day ponytail?
Spray dry shampoo at the roots, wait a minute and massage it in, brush the hair back with a boar-bristle brush, and re-tie the ponytail slightly higher or lower than yesterday. A quick curl of the tail’s ends or a loose braid left in for a few minutes adds fresh waves.
Are ponytails good for fine hair?
Yes, ponytails work well for fine hair if you add texture first with dry shampoo or texturising spray, keep the base soft instead of slicked flat, and use the double-ponytail trick for fullness. Avoid tying fine hair very tight, which flattens it and shows the scalp.
Conclusion
A ponytail is only a lazy hairstyle when it is done lazily. The difference between a ponytail that looks thrown together and one that looks finished is rarely more than a few minutes: the right height for your face, a base that is anchored instead of just tied, an elastic that is hidden, and a front that is softened instead of scraped back. Those four details are the whole secret, and they cost nothing but attention.
Start with the version that matches your life — sleek and low for work, high and braided for the gym, soft and wavy for a night out — and learn one upgrade at a time. Hide the elastic this week, try the double ponytail next week, and give your hair a rest from the same tight tie the week after. The ponytail has been with you since childhood for a reason: it is practical, it is flattering, and when you treat it as a real style, it is one of the best hairstyles you own.