Sand, Sea and ‘I Do’: 41 Beach Wedding Hairstyles That Stay Beautiful in the Breeze
A beach wedding is the one wedding where the weather is a guest. The wind shows up before the bridesmaids do, the humidity settles in before the vows, and the salt air touches every strand of hair within minutes of stepping onto the sand. A hairstyle that looks perfect in a salon mirror can unravel in a sea breeze, and a style that fights the beach will lose — so the smartest beach wedding hair is designed around the beach, not against it. Loose, moving styles that look better when the wind catches them, updos anchored in more than one place, braids that lock the hair down section by section, and accessories chosen because they will actually stay put: these are the looks that photograph beautifully at golden hour and still look beautiful at the last dance.
This guide brings together 41 beach wedding hairstyles for brides, bridesmaids and guests, grouped so you can find your look fast: romantic styles for the bride who wants soft and dreamy, sleek looks for a polished ceremony, braids and boho hair for a barefoot celebration, updos that hold through wind and dancing, half-up styles that split the difference, and beautiful options for short hair and curly or textured hair. Eight guides answer the questions every beach wedding asks: how to wind-proof your hair, which products actually hold in humidity and salt air, how to match your hair to a beach dress and neckline, what to do about veils on the sand, and what to pack in your touch-up kit. Every style notes how long it takes, what it costs in time and effort, and who it suits best — so you can walk down the aisle knowing the breeze is on your side.
Wind-Proofing Your Beach Wedding Hair
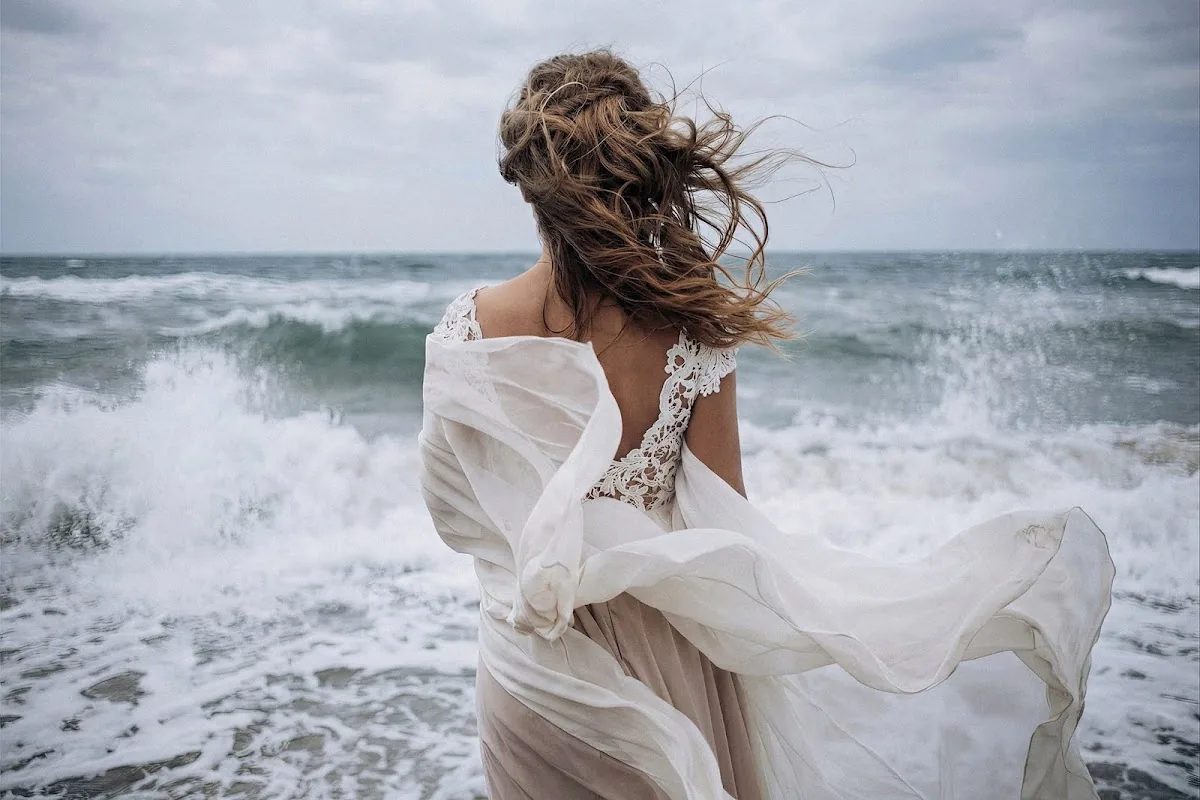
The wind is the first thing to plan for at a beach wedding, and the trick is to stop treating it as the enemy. A hairstyle that is built to move — soft waves, a loose braid, tendrils that are meant to drift — looks better when the wind catches it than a stiff, sprayed-up style that cracks and frizzes. The styles that survive a sea breeze are the ones anchored in more than one place: a braid that holds section by section, a low bun pinned at several points, or a half-up style where the top is secured and the lengths are free to move. A single high ponytail held by one elastic, or hair worn completely loose with no anchor at all, is the style most likely to end up across your face in the photos.
Build wind-proofing into the styling itself, not just into the hairspray. Start with hair that has grip — day-old hair, or hair worked through with a texturising spray or dry shampoo before styling, holds pins and braids far better than slippery clean hair. Pin every section against the scalp with bobby pins that match your hair colour, and push each pin through two layers of hair so it locks rather than slides. Do the wind test at your trial: stand in front of a fan, or step outside on a breezy day, and watch what moves. Anything that lifts or flips in a gentle breeze will fly in a real sea wind, so pin it now, while you still have time and a mirror.
Humidity and Salt Air — Products That Actually Hold
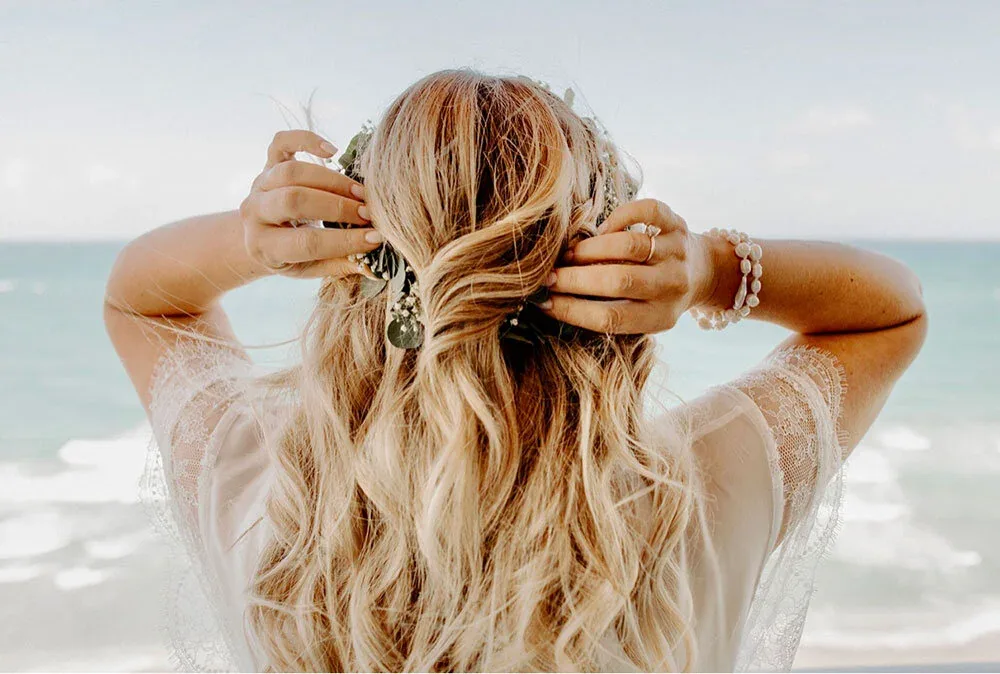
Humidity and salt air change the rules of hair completely, and the products that work in a city salon can fail within an hour on a beach. Humidity swells the hair shaft, which is why straight hair goes wavy and curly hair goes frizzy near the sea — so the goal is not to fight the moisture but to seal the hair against it. A lightweight anti-humidity serum or a smoothing cream applied to damp hair before styling does more than any amount of hairspray applied afterwards, because it coats the cuticle and slows the moisture getting in. Salt air adds texture and grip, which is actually useful: hair styled on the beach has more hold than hair styled indoors, and a little sea-salt spray can be a styling product in itself.
What to pack in your product kit, and what to leave behind: a humidity-resistant hairspray with a flexible hold, because a rock-hard spray cracks in the wind and flakes in the sun; a small bottle of anti-frizz serum for touch-ups; dry shampoo for the roots, which absorbs both sweat and salt; and a travel-size sea-salt spray if you want to refresh waves after the ceremony. Leave heavy oils and waxes at home — they go greasy in the heat and attract sand. And test every product at your trial, on a humid day if you can: a product that holds in air-conditioning and fails in humidity is worse than no product at all, because it gives you false confidence.
Matching Hair to a Beach Dress and Neckline
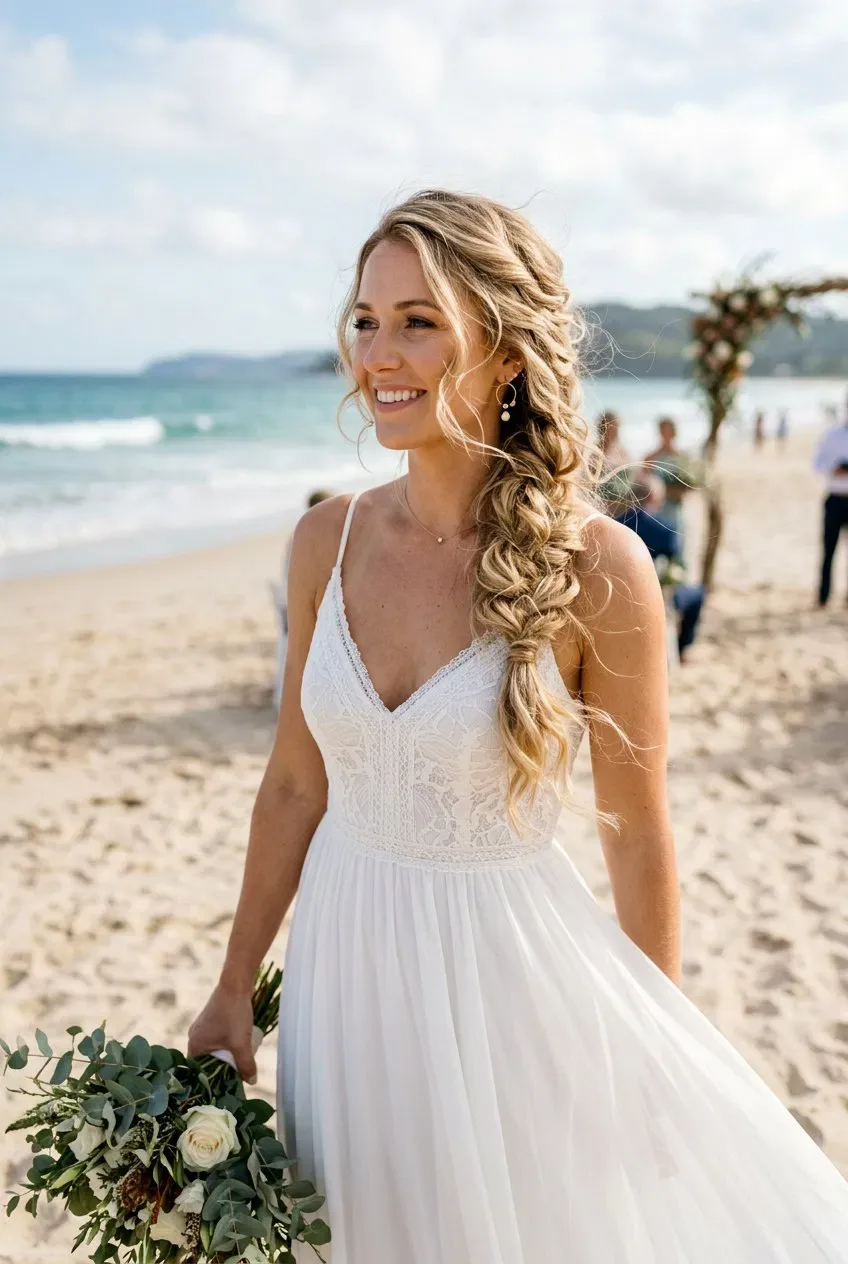
A beach wedding dress is usually lighter, softer and more flowing than a ballroom gown, and the hair should match that feeling. A heavy, sculpted updo can look out of place next to a chiffon dress and bare feet, while soft waves, a loose braid or a relaxed low bun looks like it belongs on the sand. Start with the neckline, because it decides how much hair should be up: a strapless or off-the-shoulder dress shows off the shoulders, so hair worn down or half-up frames that open neckline beautifully; a halter or high-neck dress already has a lot happening around the neck, so an updo or a swept-back style keeps the lines clean and stops the hair competing with the fabric.
Then think about the fabric and the silhouette. A flowing, bohemian dress pairs with loose, textured hair — beachy waves, a messy braid, a flower crown — because the movement of the hair echoes the movement of the dress. A sleek, fitted sheath dress calls for something more polished: a low bun, a smooth ponytail, or side-swept waves that match the clean lines of the gown. If the dress has heavy beading or a dramatic back, keep the hair simpler and pull it up so the detail shows. And always try the hair with the actual dress on, on the beach if you can — a style that looks perfect in a hotel room can look completely different once the dress, the sand and the wind are all in the picture.
Beach Wedding Hair for the Bride vs Bridesmaids vs Guests
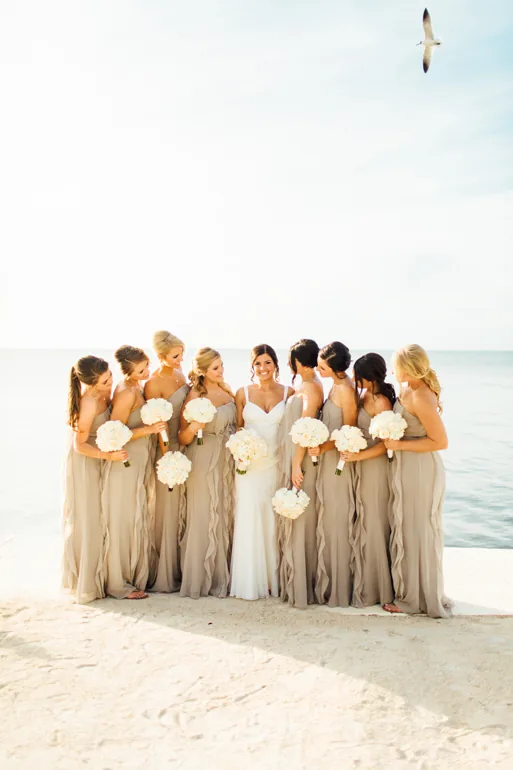
At a beach wedding, the bride, the bridesmaids and the guests all face the same wind and humidity, but their hair should not all look the same. The bride’s style is the most elaborate — it is her day, her photos, and her look that the whole celebration is built around — so she can have the braided crown, the flowers, the veil alternative or the most detailed updo. The bridesmaids should look beautiful and coordinated without competing: matching or complementary styles, like the same half-up waves in different lengths, or the same low bun with different accessories, keep the group looking polished in photos while letting the bride stand out.
Guests have the most freedom, and the least pressure: a beautiful, comfortable style that survives the ceremony, the photos and the dancing, without needing a stylist or a trial run. A guest can wear the same loose waves or low chignon as a bridesmaid, but should avoid anything that reads as bridal — no white flowers in the hair, no veil, no flower crown that could be mistaken for the bride’s. The practical rule for everyone is the same: choose a style you can forget about once the ceremony starts. The bride needs a style that lasts from the first look to the last dance; a bridesmaid needs one that holds through the group photos; a guest needs one that still looks good at the reception. Pick the level of effort that matches your role, and the wind will treat you all the same.
Flowers, Shells and Coastal Accessories
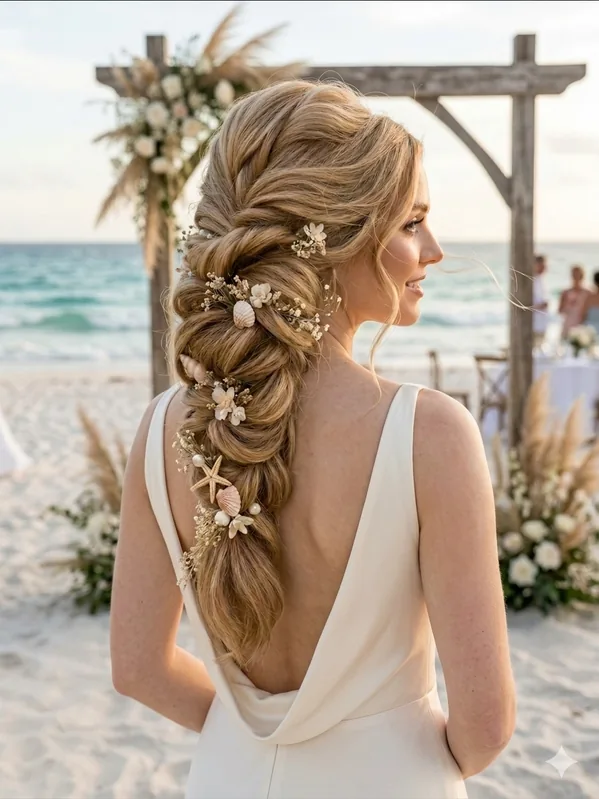
Coastal accessories are what turn a beach hairstyle into a beach wedding hairstyle: a sprig of fresh flowers tucked into a braid, a small shell comb holding back a half-up twist, a pearl pin catching the light, or a silk flower that will not wilt in the heat. The key is choosing accessories that belong on a beach — natural, light, and a little bit undone — rather than heavy, formal pieces that fight the setting. Fresh flowers are beautiful but fragile in sun and salt air, so ask your florist for hardy varieties like orchids, succulents or baby’s breath, and keep them in water until the last minute. Silk flowers last all day and look just as good in photos, which is why many beach brides choose them.
The rule with coastal accessories is one statement, not five: a flower crown and a shell comb and a pearl headband and a veil will fight each other, and the photos will look busy. Pick one hero piece — a flower crown for a boho bride, a shell comb for a classic one, pearl pins for an elegant one — and let the hairstyle do the rest. Attach the accessory last, after the hairspray, and secure it with a hidden bobby pin as well as its own clip, because clips slip on smooth, salty hair and the wind will test every attachment. And if your dress has a lot of detail, keep the accessory smaller; if the dress is plain, the accessory can be bigger. The accessory should finish the look, not compete with it.
Veils on the Beach — Yes, No, or Alternatives
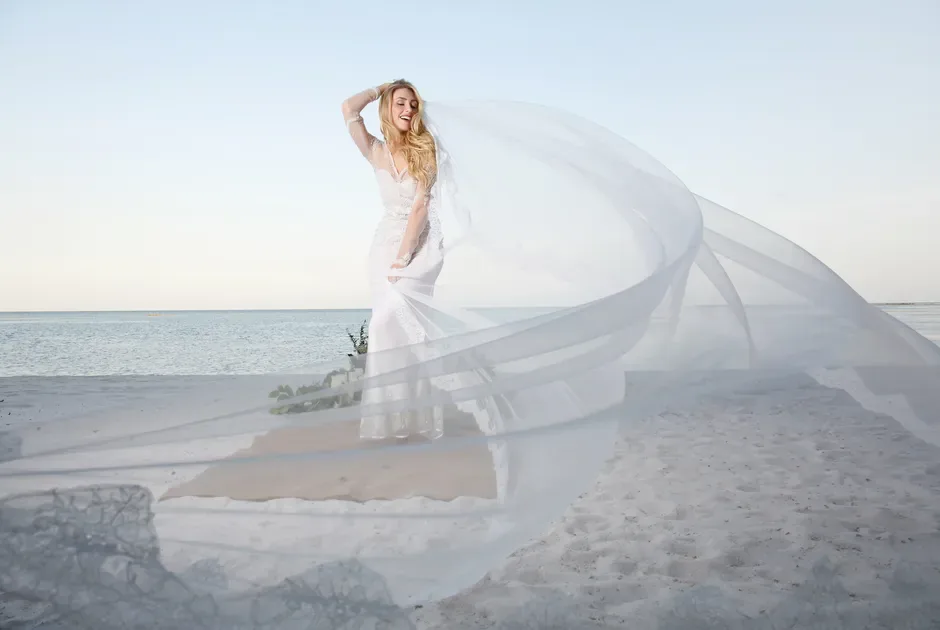
A traditional long veil on a windy beach is a gamble: it can billow beautifully in one photo and wrap itself around your face in the next, and it will spend the whole ceremony fighting the wind. That does not mean no veil at all — it means choosing the right veil for the beach. A short birdcage veil, a fingertip veil in a lightweight tulle, or a veil worn only for the ceremony and the first photos and then removed, all work far better than a cathedral-length veil on open sand. The lighter the tulle and the shorter the length, the less the wind has to grab.
The alternatives are often better than the veil itself, and they are made for the beach. A flower crown, a pearl headband, a silk flower comb, or a delicate hair vine gives you the bridal feeling without the wind risk, and they stay put through the ceremony, the photos and the dancing. A cape veil — a sheer, lightweight cape attached at the shoulders rather than the head — gives you the drama of a veil with none of the face-wrapping, and it photographs beautifully from behind. If your heart is set on a long veil, wear it for the ceremony only, have a bridesmaid ready to hold it during the vows, and take it off before the beach photos. The best beach veil is the one you are not fighting all day.
The Beach Wedding Hair Trial — What to Test
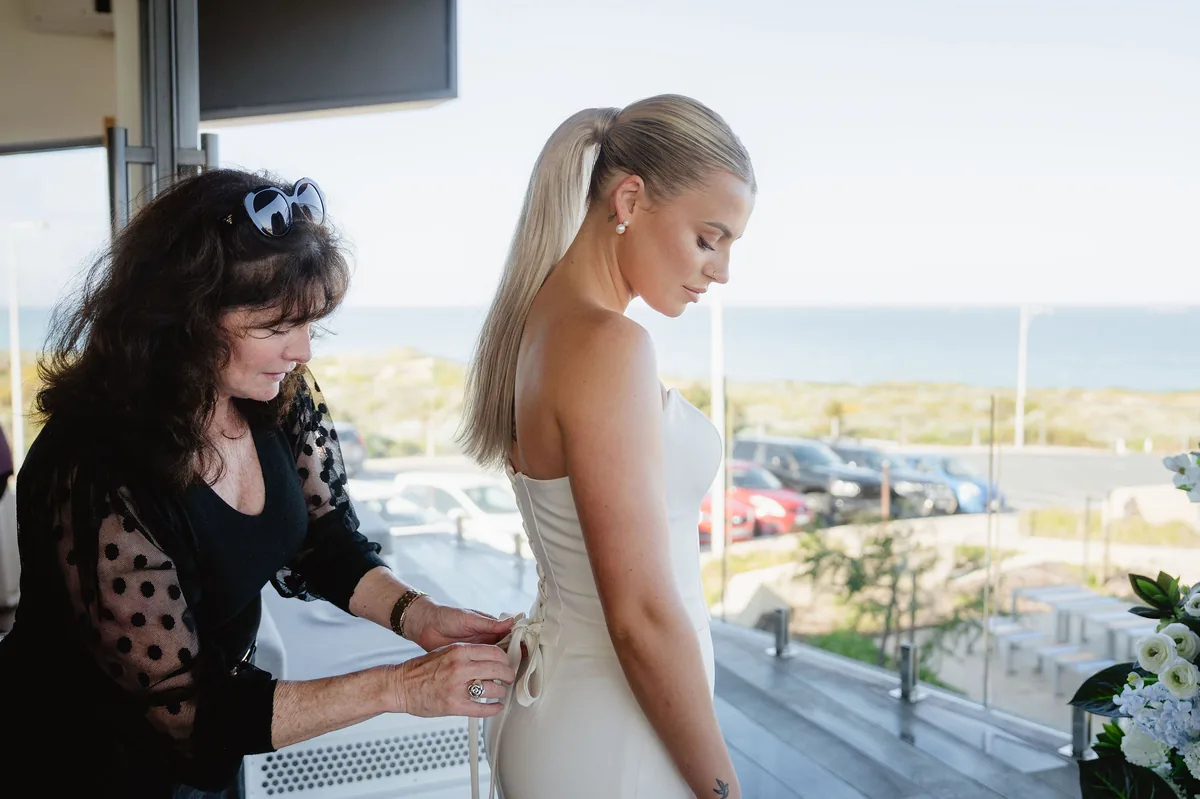
A beach wedding hair trial is not just a rehearsal of the style — it is a test of the style against the beach itself, and it should happen outdoors if at all possible. Book the trial at least a month before the wedding, and do it on a day with weather like the wedding day is likely to be: warm, humid, a little breezy. Bring the dress, the veil or accessory, and the shoes, because the hair has to work with all of them, and bring photos of the exact style from more than one angle. Then take the style outside: stand in the wind, walk for ten minutes, sit down and stand up again, and take photos from the front, the side and the back, with flash and without.
Test the things that only the beach can reveal. Does the style hold when the wind hits it from the side? Does the humidity frizz the front pieces within half an hour? Does the accessory stay put, or does it slide? Does the hairspray go sticky in the heat? And how does the style look after an hour — because the ceremony, the photos and the reception will take far longer than the trial. Write down everything the stylist used, in order, and photograph the finished style from every angle so it can be recreated on the day. If the style fails the trial, change the style, not the beach — and be glad you found out a month early instead of an hour before the ceremony.
Touch-Up Kit for the Day (and the Photos After the Ceremony)
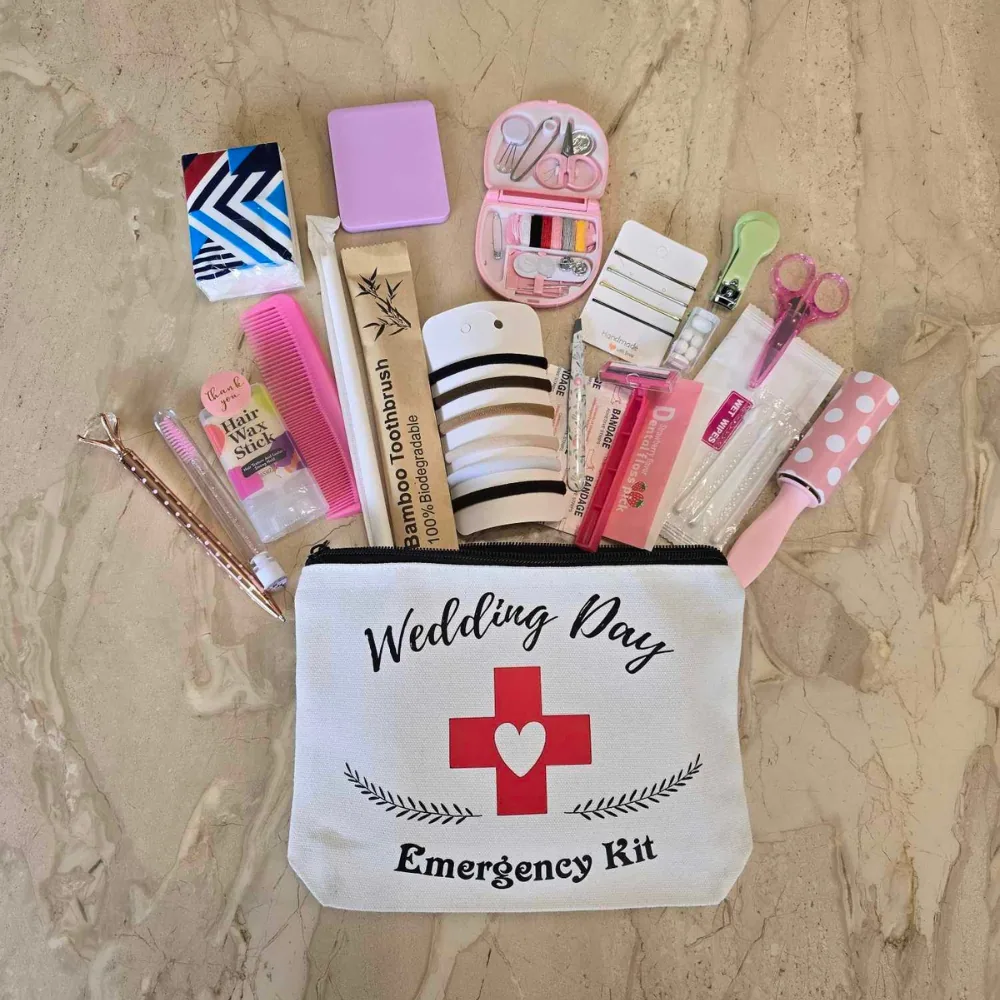
The touch-up kit is the difference between a hairstyle that looks perfect at the ceremony and one that still looks perfect at the last dance — and at a beach wedding it matters more than anywhere else, because the wind, the humidity and the salt air keep working on your hair all day. Pack a small, dedicated bag and give it to a bridesmaid or the maid of honour, because you will not be carrying it yourself. Inside: a handful of bobby pins in your hair colour, two small elastics, a travel-size flexible-hold hairspray, a mini anti-frizz serum, a small bottle of dry shampoo, a wide-tooth comb, and a few spare pins for the veil or accessory.
Plan the touch-up moments, not just the kit. The most important one is between the ceremony and the photos: five minutes to smooth the front pieces, re-pin anything the wind loosened, and refresh the spray before the photographer starts. The second is before the first dance, when the hair has had an hour of wind and dancing and needs a quick reset. And keep the kit for the photos after the ceremony too — the golden-hour portraits on the beach are the ones that end up framed, and they happen after the hair has had the longest exposure to the wind. A quick touch-up before those portraits is the best five minutes you will spend all day. The kit is small, the effort is tiny, and the photos will thank you for it.
1. Loose Beachy Waves for the Bride
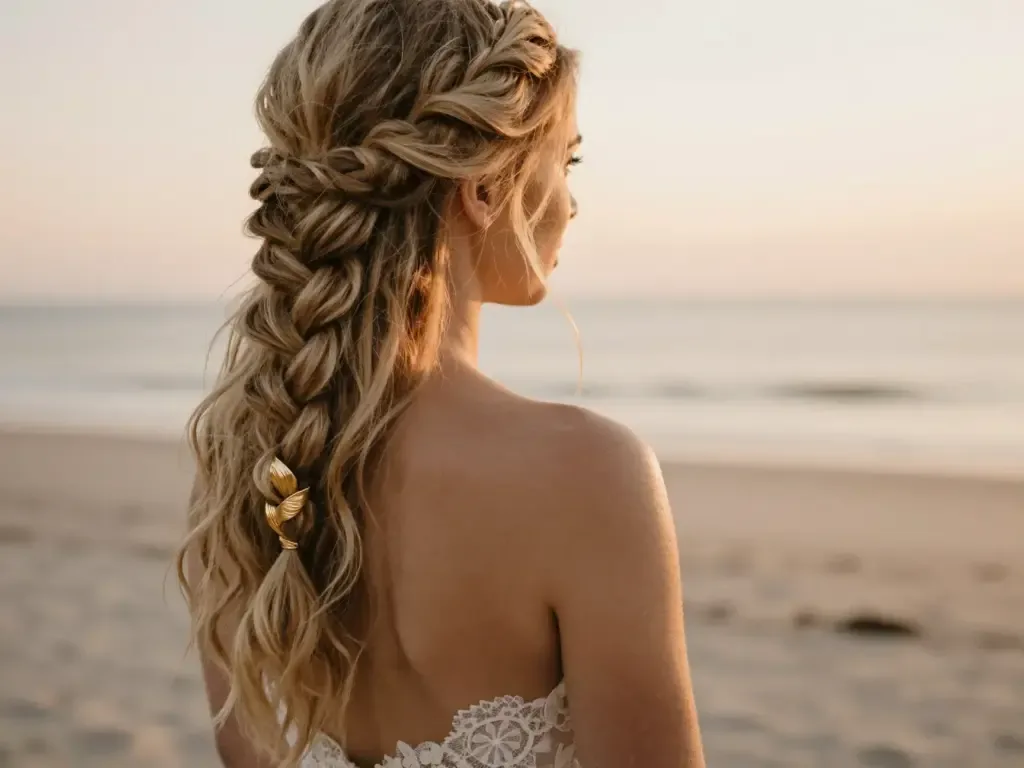
Loose beachy waves are the beach wedding classic for a reason: soft, brushed-out waves that fall past the shoulders, move when the wind catches them, and look better on the sand than they ever could in a salon. The waves are not tight ringlets — they are loose, touchable and a little bit undone, which is exactly what makes them work at the beach, because the wind and the salt air add texture rather than destroying it. This is the style to choose when your dress is soft and flowing, when you want to look beautiful without looking overdone, and when you want your hair to move with you down the aisle. It suits almost every face shape and every hair length past the shoulders, which is why it is the most requested beach wedding style year after year.
Best for: a flowing chiffon or boho dress, a strapless or sweetheart neckline, and medium to long hair. How to style: curl large sections away from the face with a large-barrel iron, let each curl cool in your hand, then brush through with a soft-bristle brush and finish with sea-salt spray instead of heavy hairspray. What to ask a stylist: ask for the waves to be set looser than you think you want — the wind will tighten nothing, but the humidity will drop the curl, so a slightly stronger wave at the start is the right call. Time: 30 to 40 minutes. Cost: a salon blowout and wave, or free if you do it yourself with a curling iron you already own.
2. Romantic Low Chignon with Loose Tendrils
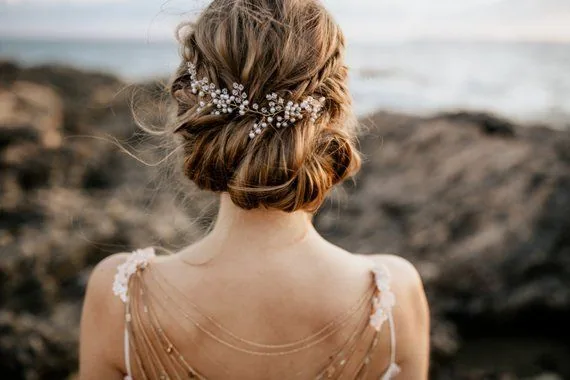
A romantic low chignon with loose tendrils is the updo for a bride who wants to look elegant without looking stiff: the hair gathered low at the nape, twisted into a soft knot, and a few face-framing pieces left loose to drift in the breeze. Unlike a tight ballerina bun, this chignon is deliberately a little undone — the knot is loose, the texture is soft, and the tendrils are meant to move, so the wind becomes part of the style instead of its enemy. It is also one of the most practical romantic styles, because the hair is completely off your neck in the heat, it will not fall in your face during the vows, and it shows off an open back or a halter neckline beautifully.
Pros: holds through wind and dancing, keeps you cool, photographs beautifully from the back. Cons: needs pins and a touch-up kit, and the tendrils can frizz in high humidity if they are not sealed with serum. Common mistake: pulling the knot too tight — a chignon that is too tight looks severe, and a little looseness is what makes it romantic, so ask your stylist to pull the knot apart gently once it is pinned. How long it takes: 20 to 30 minutes. What you need: a hair tie, four to six bobby pins, a texturising spray and a flexible-hold hairspray. Quick verdict: the safest elegant choice for a beach bride who wants her hair up and her face free.
3. Soft Half-Up Curls with a Coastal Twist
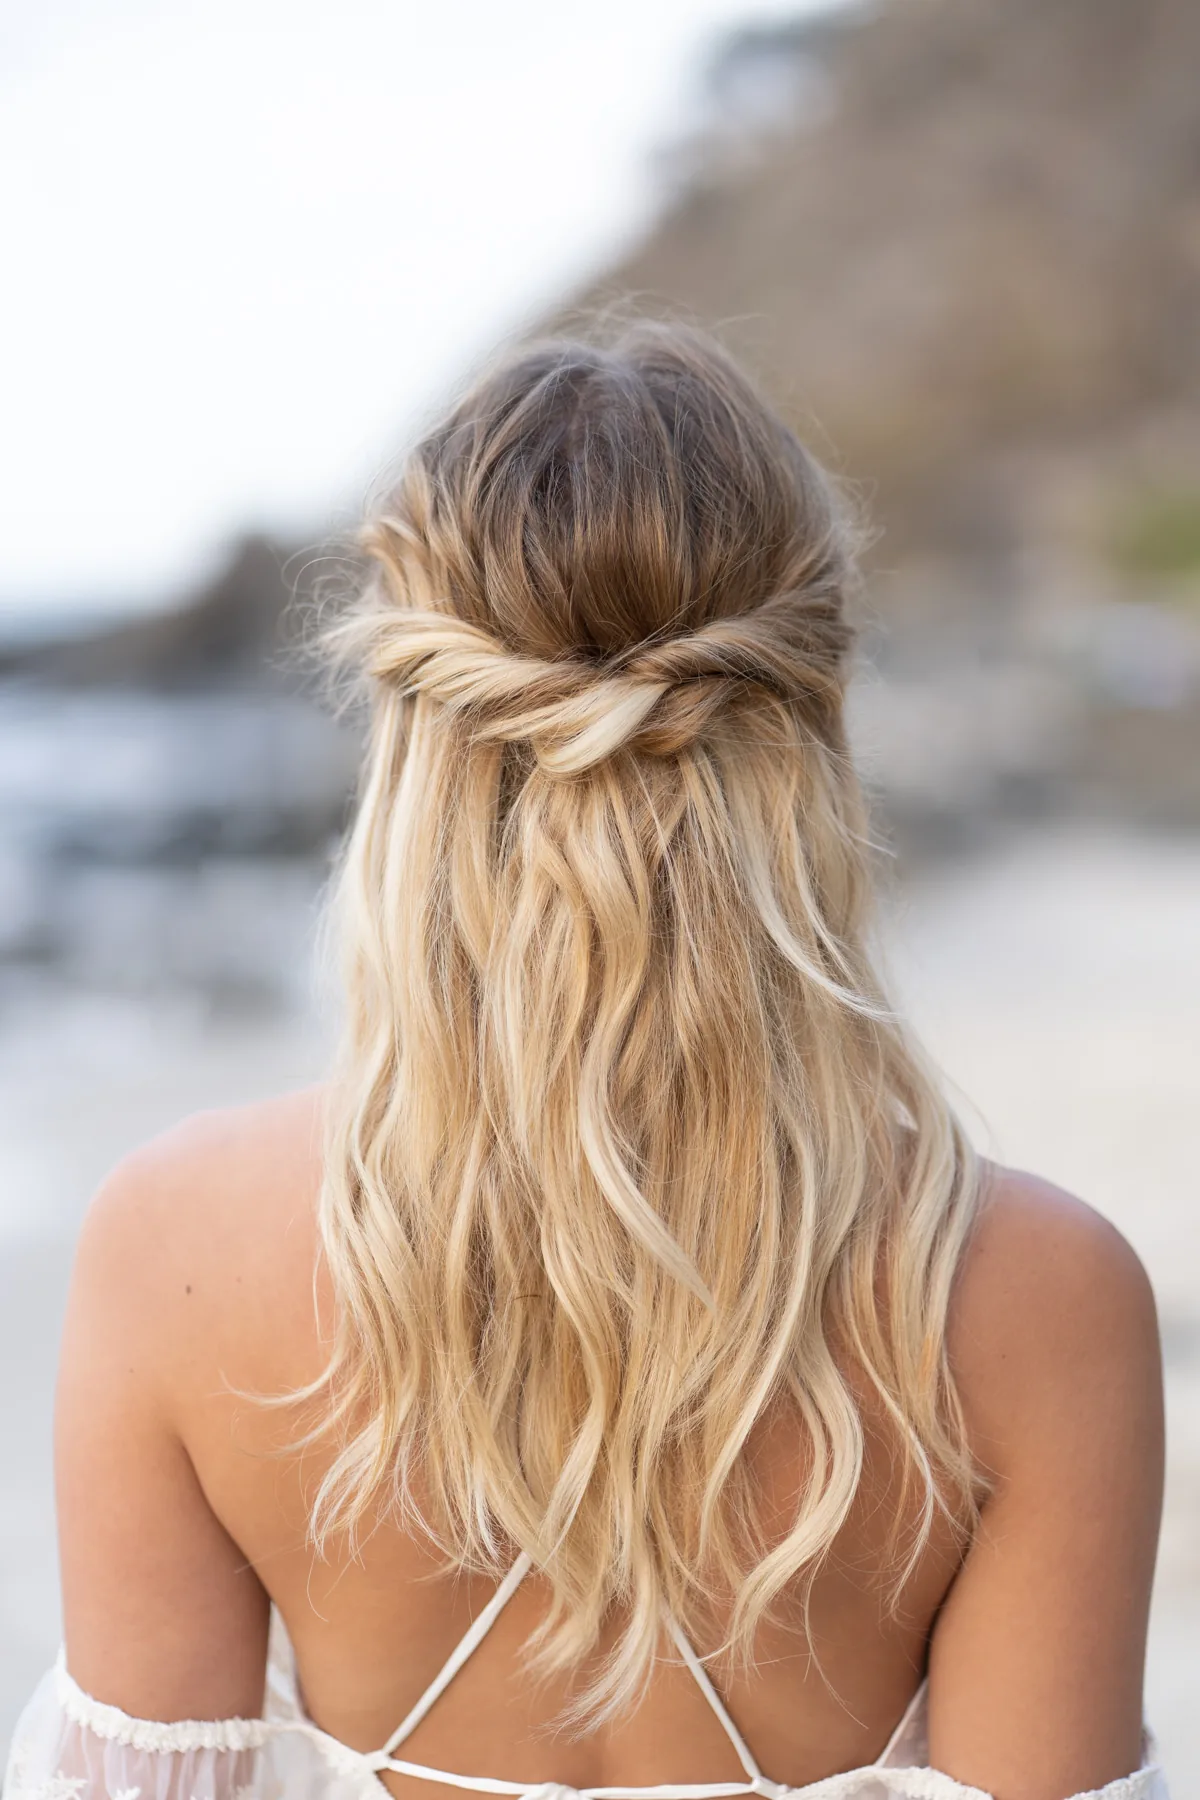
A soft half-up with a coastal twist takes romantic curls and gives them a little structure: the top sections are twisted back from the face and pinned at the crown, while the rest falls in loose curls down the back. The twist is what makes it photograph so well — it keeps your face open for the ceremony photos, shows off your earrings, and gives the back of the head a pretty detail that a plain down style does not have. It is also one of the most forgiving styles to do yourself, because the twist hides any unevenness in the curls and the pins disappear into the hair. On the beach, the half-up twist has a real advantage: the top is anchored, so the wind cannot blow the hair across your face, while the lengths are free to move.
Best for: a strapless or sweetheart dress, a dress with a detailed bodice you want to show off, and medium to long hair. How to style: curl the hair first, then twist two sections from the temples back to the crown, cross them over each other, and pin with two or three bobby pins hidden under the twist. What to ask a stylist: ask for the twist to be pinned at the crown, not at the back of the head, so it holds the weight of the hair without pulling. Maintenance: one pin check before the photos and one before the first dance is all it needs. Time: 25 to 35 minutes. Cost: low — a few pins and a curling iron you probably already own.
4. Braided Crown with Fresh Flowers
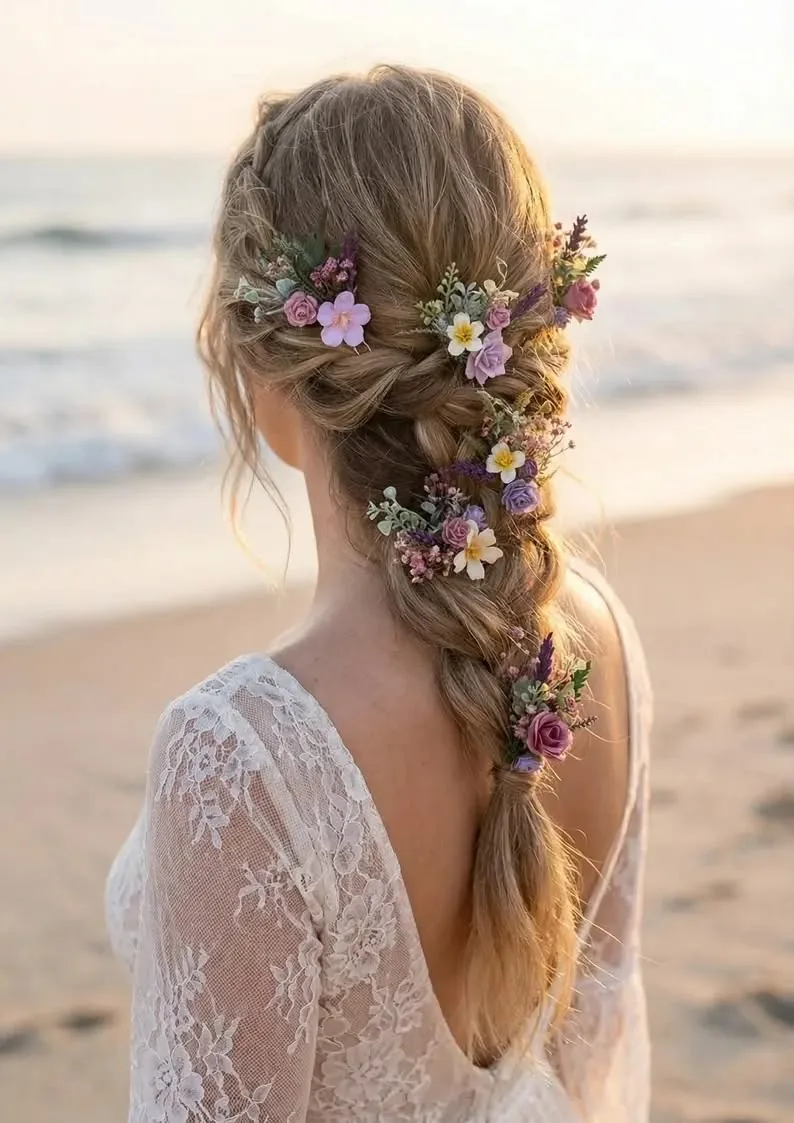
A braided crown with fresh flowers is the most romantic hairstyle on this list, and the one that gets the most compliments in photos: two braids worked from each side of the head and pinned across the crown like a halo, with small fresh flowers tucked into the braid and the rest of the hair falling in loose waves underneath. The braid puts the texture on display — every twist shows off the colour and dimension of the hair — while the flowers add the colour of the wedding itself. It is also a surprisingly secure style, because the braid anchors the hair in place section by section, so it survives the wind far better than loose curls alone, and the flowers sit inside the braid where the wind cannot easily reach them.
Pros: extremely wind-proof, endlessly photogenic, and the flowers can match the bouquet exactly. Cons: takes longer than a simple style, and fresh flowers wilt in sun and salt air, so silk flowers or hardy varieties like orchids are the safer choice. Common mistake: choosing flowers that are too big — small, delicate blooms tucked into the braid look romantic, while large flowers overwhelm the braid and slide out in the wind. How long it takes: 30 to 45 minutes. What you need: a curling iron, texturising spray for grip, six to eight bobby pins, and flowers kept in water until the last minute. Quick verdict: the fairytale choice, as long as you pick flowers that can survive the beach.
5. Waterfall Braid with Soft Curls
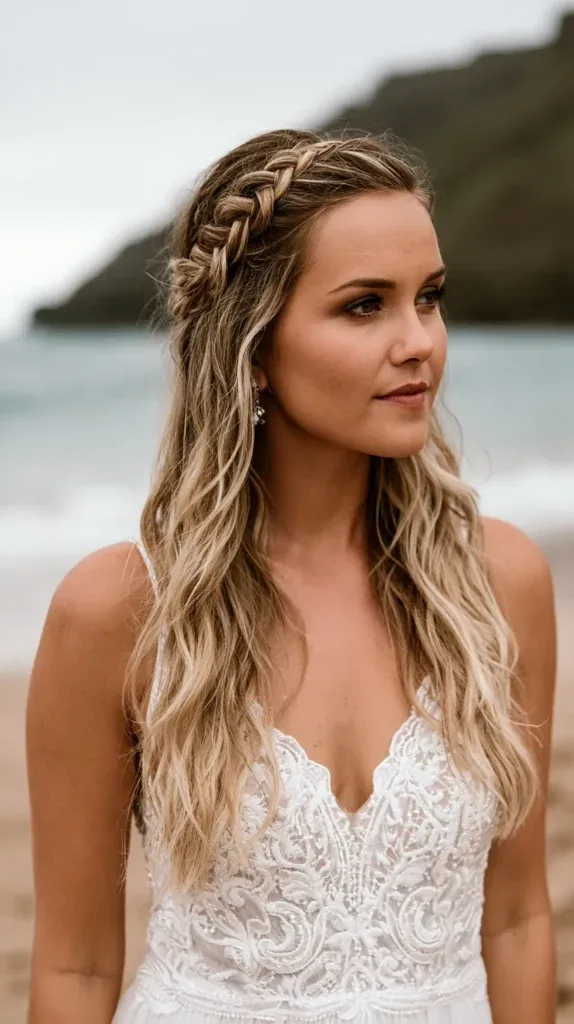
A waterfall braid is the prettiest trick in the beach wedding book: a braid worked across the back of the head that lets strands of hair fall through it like water, so the braid looks woven into the curls rather than sitting on top of them. The falling strands are the whole point — they create a cascading effect that is endlessly photogenic from the back, which is where half your beach wedding photos are taken, with the ocean behind you. On the beach the waterfall braid has a hidden advantage: the braid itself is anchored, so the style holds its shape in the wind, while the falling strands are meant to move, so the breeze makes it look better, not worse.
Best for: a backless or open-back dress, a dress with a plain back that needs a little interest, and long hair. How to style: curl the hair first, then work the waterfall braid across the back of the head, dropping a strand and picking up a new one at each step, and secure with a small clear elastic hidden under the curls. What to ask a stylist: ask them to practise the braid on you at the trial, because the dropping motion feels strange the first time and you want it smooth on the day. Time: 15 minutes on top of curling time, so 40 minutes in total. Cost: low — a curling iron, two small elastics and a few pins. Quick verdict: the most photogenic back view in this guide, and easier than it looks once your hands learn it.
6. Boho Fishtail Braid over One Shoulder
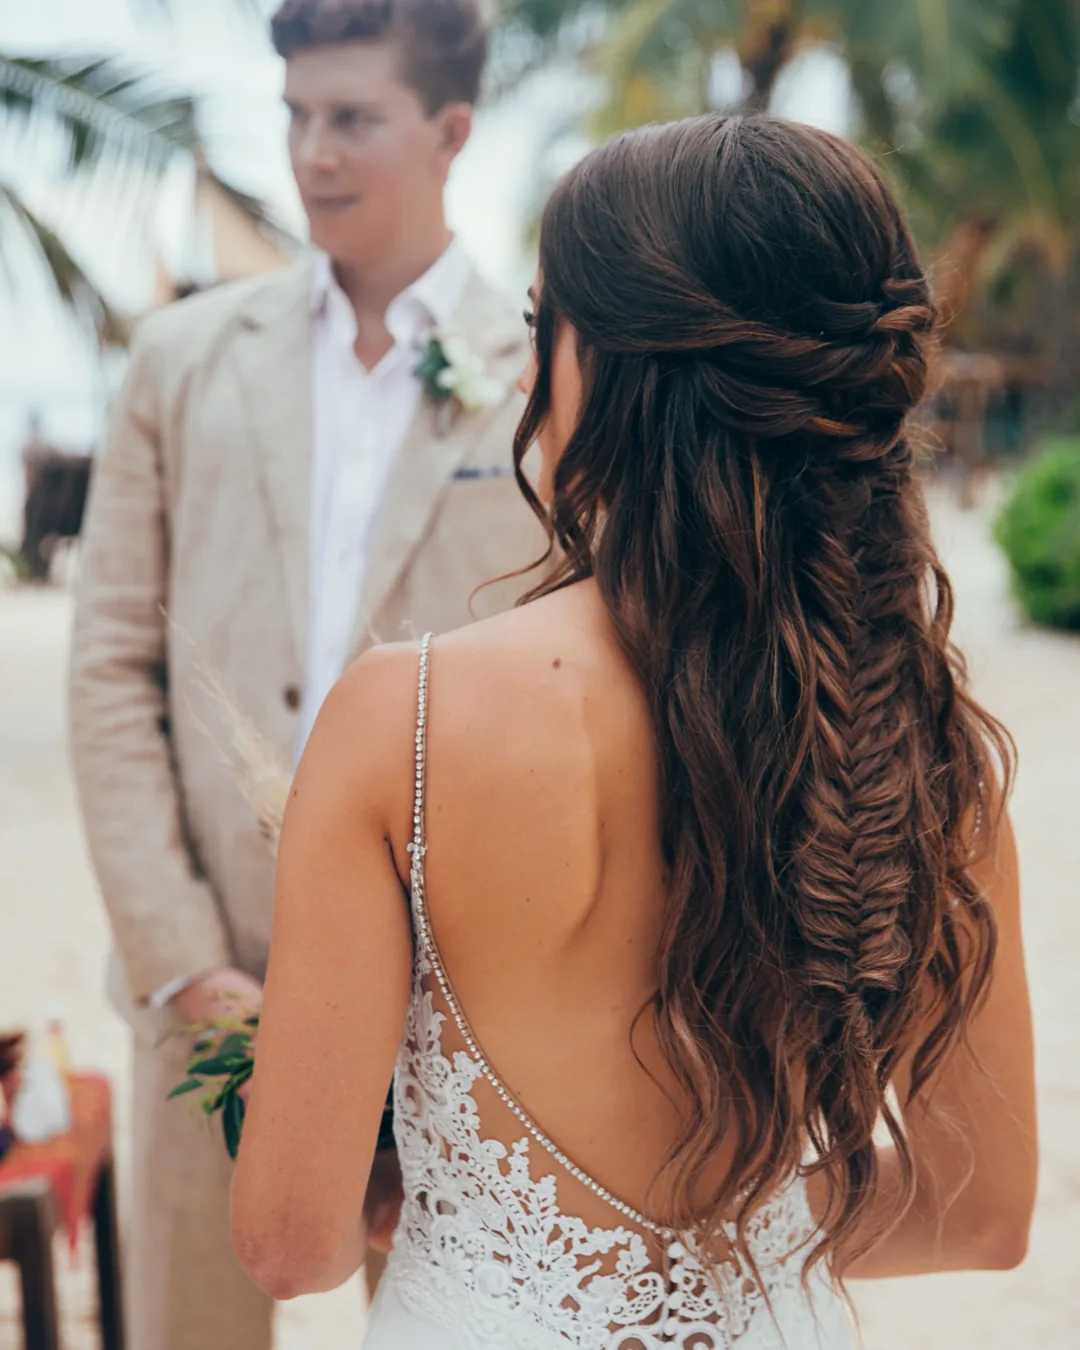
A boho fishtail braid worn over one shoulder is relaxed glamour: the braid itself is intricate and detailed, woven from two sections instead of three, so it looks finer and more delicate than an ordinary braid, and wearing it over one shoulder shows it off from the front instead of hiding it down the back. The fishtail is the star of this style, so the rest of the hair stays simple — a soft side part, a little volume at the crown, and the braid falling over the shoulder in a long, textured rope. It is one of the most secure braids you can wear on a beach, because the two-section weave locks the hair in place and barely loosens over hours of wind and dancing.
Pros: extremely wind-proof, looks detailed without much effort, and survives the whole day. Cons: needs long hair to look its best, and a fishtail takes practice if you are doing it yourself. Common mistake: keeping the braid too tight — pull it apart gently once it is tied, because a pancaked, full fishtail looks boho and romantic, while a tight, skinny one looks thin and severe. How long it takes: 20 to 30 minutes. What you need: a texturising spray for grip, a small clear elastic, and a few bobby pins. Quick verdict: the best braid for a bride who wants her hair down and out of her face at the same time.
7. Sleek Low Bun That Defies the Sea Breeze
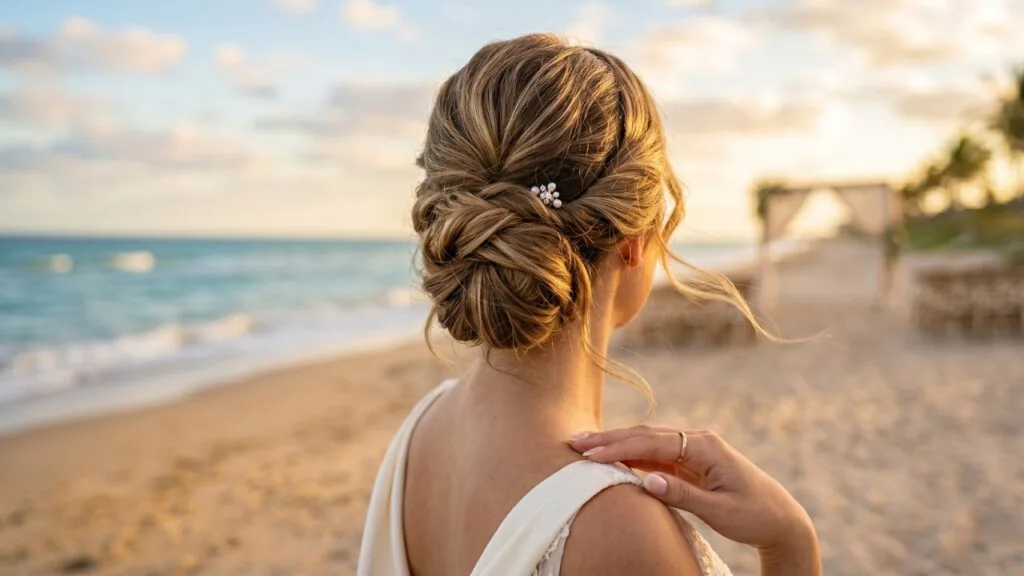
A sleek low bun is quiet luxury in hairstyle form: the hair smoothed back without a single flyaway, gathered low at the nape, and coiled into a clean, polished knot. There is nothing fussy about it, and that is exactly the point — the sleekness makes the dress, the jewellery and the makeup the stars, while the hair provides a calm, expensive frame. On a beach it is also one of the most reliable styles of the day: once it is pinned, it does not move, it does not frizz, and it looks exactly the same in the last photo as it did in the first. If your dress is sparkly, beaded or dramatic, a sleek low bun is the hairstyle that lets the dress do the talking.
Best for: a beaded or sequinned dress, a high-neck or halter neckline, and straight to wavy hair. How to style: smooth the hair in sections with a pomade before you gather it, because a bun smoothed as you go will be far sleeker than one gathered first and smoothed afterwards. What to ask a stylist: ask for a humidity-resistant smoothing serum and a flexible-hold spray, not a rock-hard one, because a hard spray cracks in the wind and flakes in the sun. Maintenance: almost none — one pin check before the photos. Time: 20 to 25 minutes. Cost: low, and one of the easiest styles to recreate yourself.
8. Polished Low Ponytail with a Wrapped Base
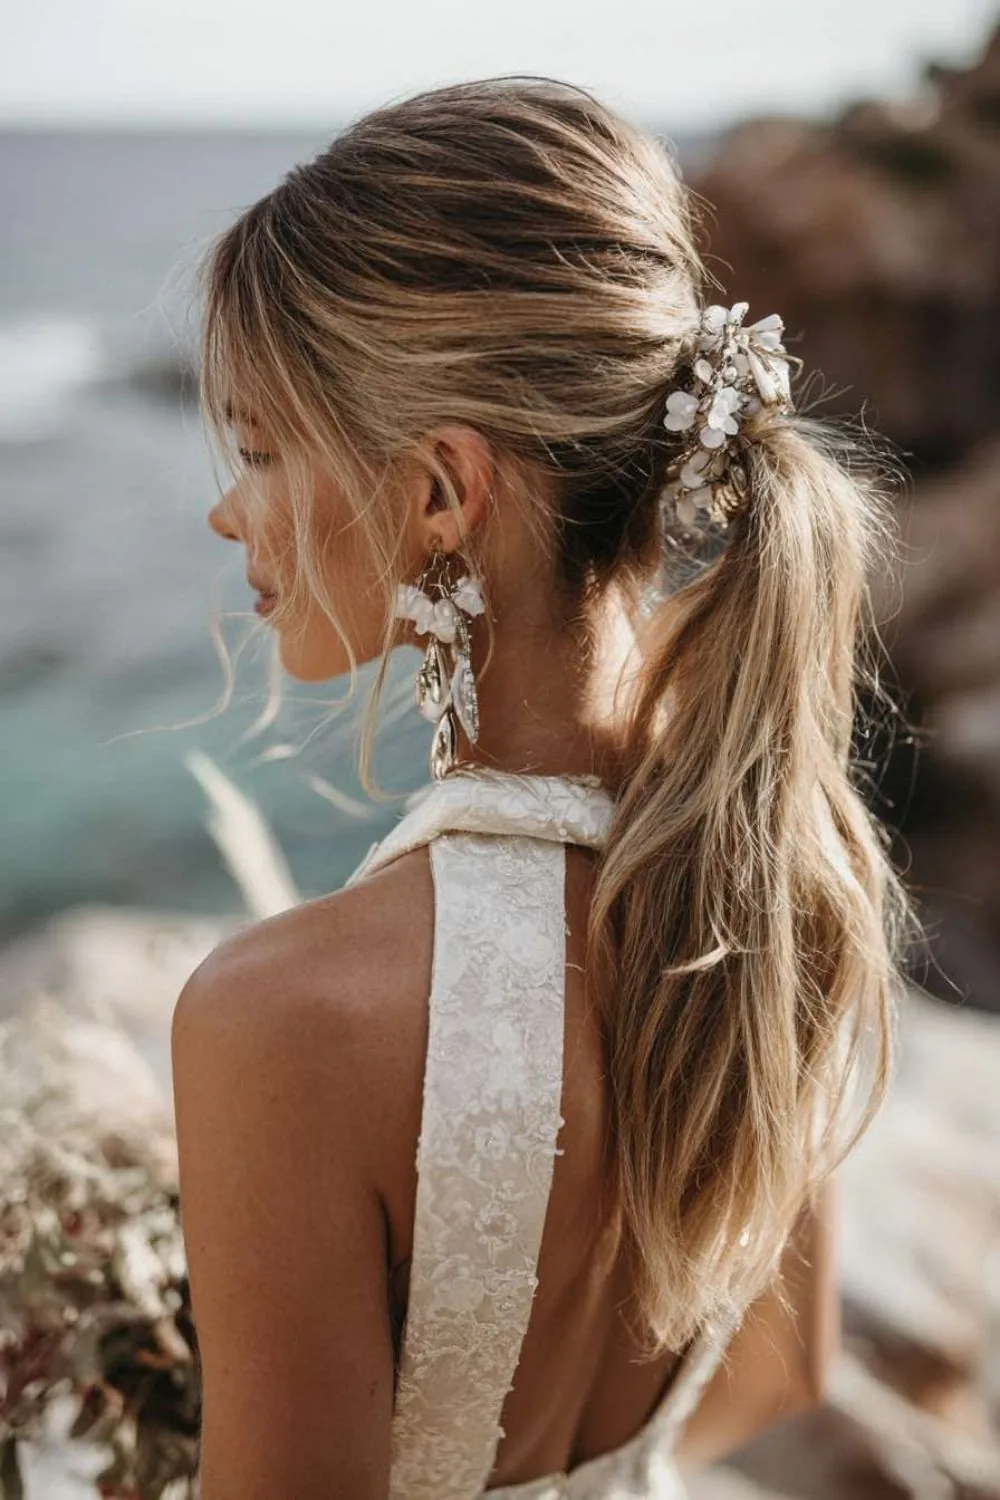
A polished low ponytail with a wrapped base is the beach bride’s answer to a windy ceremony: the hair gathered low and smooth at the nape, with a small section wrapped around the elastic to hide it, so the whole look reads as deliberate and elegant rather than casual. The low placement is what makes it work on the sand — a high ponytail swings and whips in the wind, but a low one stays close to the neck and barely moves, and the wrapped base is the detail that turns a ponytail into a hairstyle. It is also a brilliant choice for a bride who wants her hair off her neck in the heat but does not want a full updo.
Pros: fast, comfortable, and one of the most wind-proof styles here. Cons: it can look plain without the wrap and a good accessory, so the finishing matters. Common mistake: wrapping the base too loosely — wrap the section twice around the elastic and pin it underneath, or it will unravel in the wind. How long it takes: 15 to 20 minutes. What you need: a smoothing brush, a strong elastic, a shine serum, and a pearl or gold hair cuff if you want extra polish. Quick verdict: the simplest elegant style in this guide, and the one least likely to fail you on the day.
9. Side-Swept Old Hollywood Waves
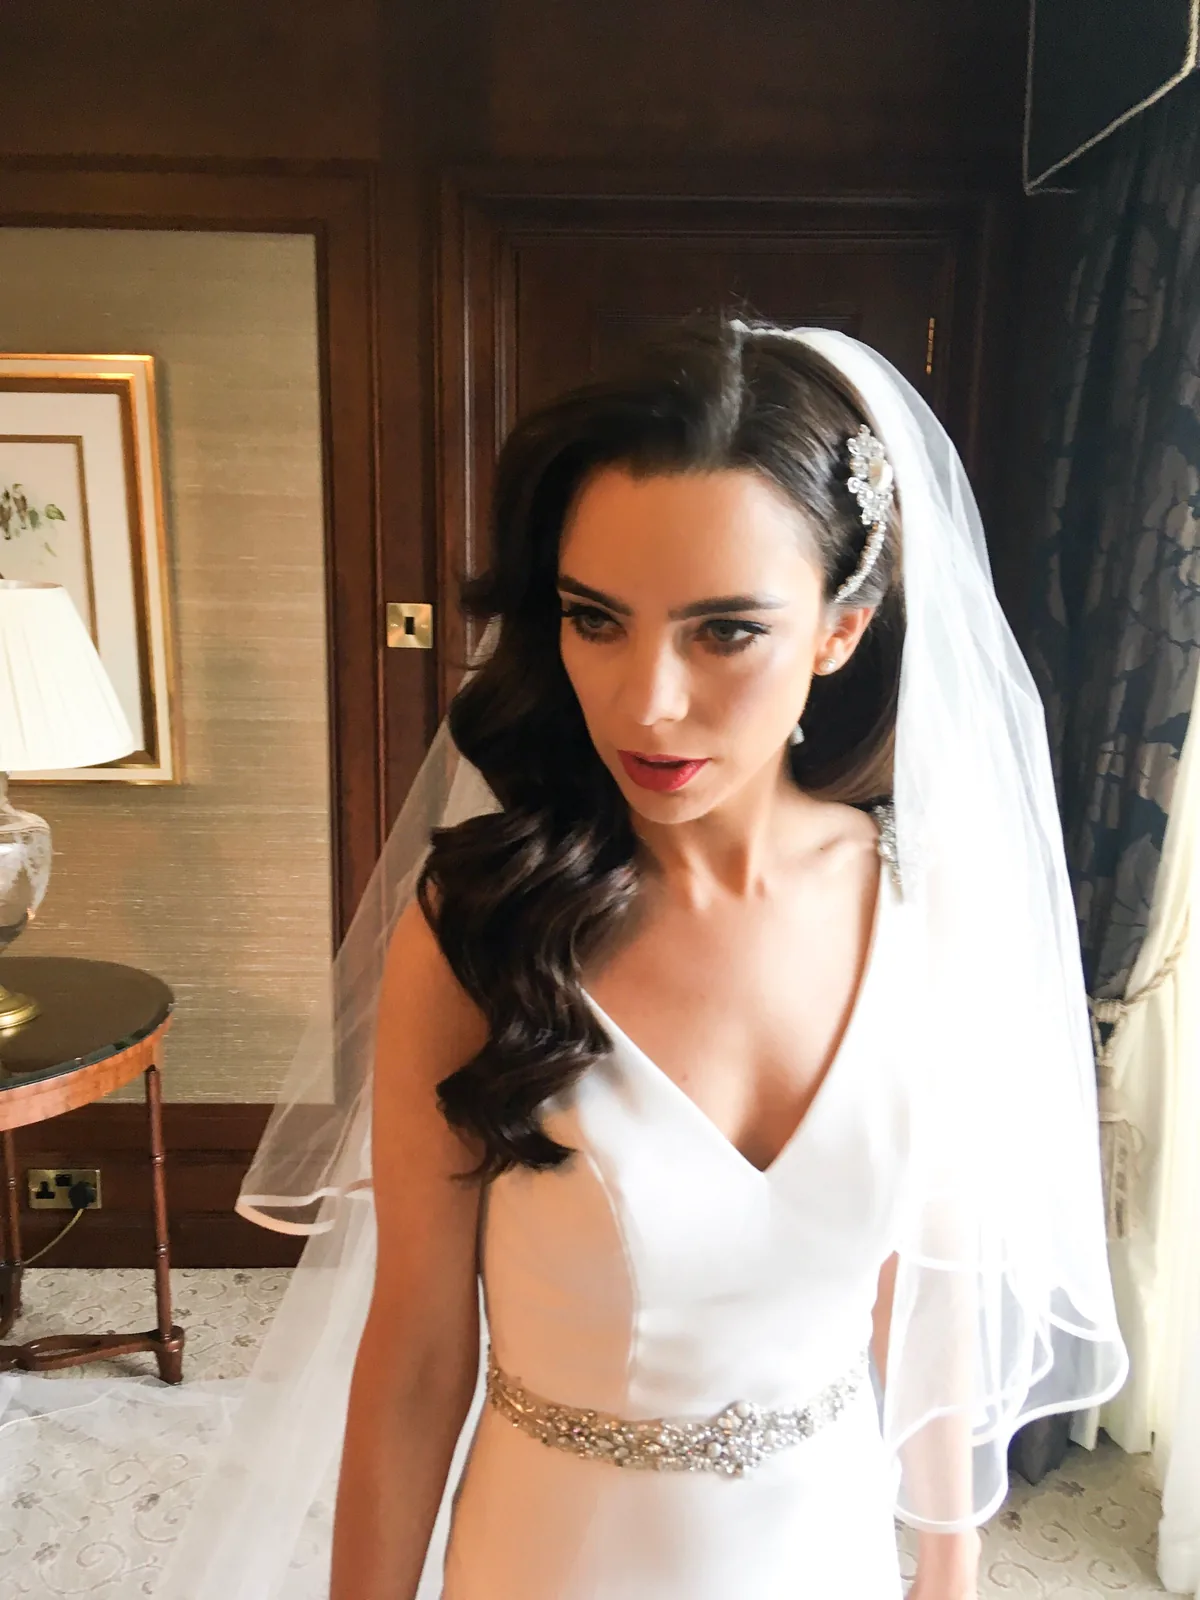
Side-swept old Hollywood waves are the most glamorous style on this list, and the one that makes the biggest entrance: deep, sculpted waves that fall in a single, glossy curtain over one shoulder, with a deep side part and a shine that looks like it belongs on a red carpet — or a golden beach at sunset. The waves are not loose or tousled; they are set, brushed out and shaped into a smooth, continuous S-curve that holds its shape. This is the style for a long, formal beach gown, for a bride who wants to look like a film star, and for anyone who loves drama. It takes time and patience, but the result is the most photographed hairstyle at any beach wedding.
How long it takes: 45 to 60 minutes, so book extra time with your stylist. What you need: a curling iron, setting clips, a soft-bristle brush, a shine spray and a strong-hold hairspray. Best with: a long formal gown, a dress with a dramatic neckline, and medium to long hair. Set the curls with clips while they cool — a wave that cools in a clip will hold its shape for hours in the humidity, while a wave brushed out while still warm will fall flat within the hour. What to ask a stylist: ask for a humidity-resistant setting spray, and confirm they have done this style outdoors before, because the setting technique matters more than the curling.
10. Glossy Blowout with Beach Volume
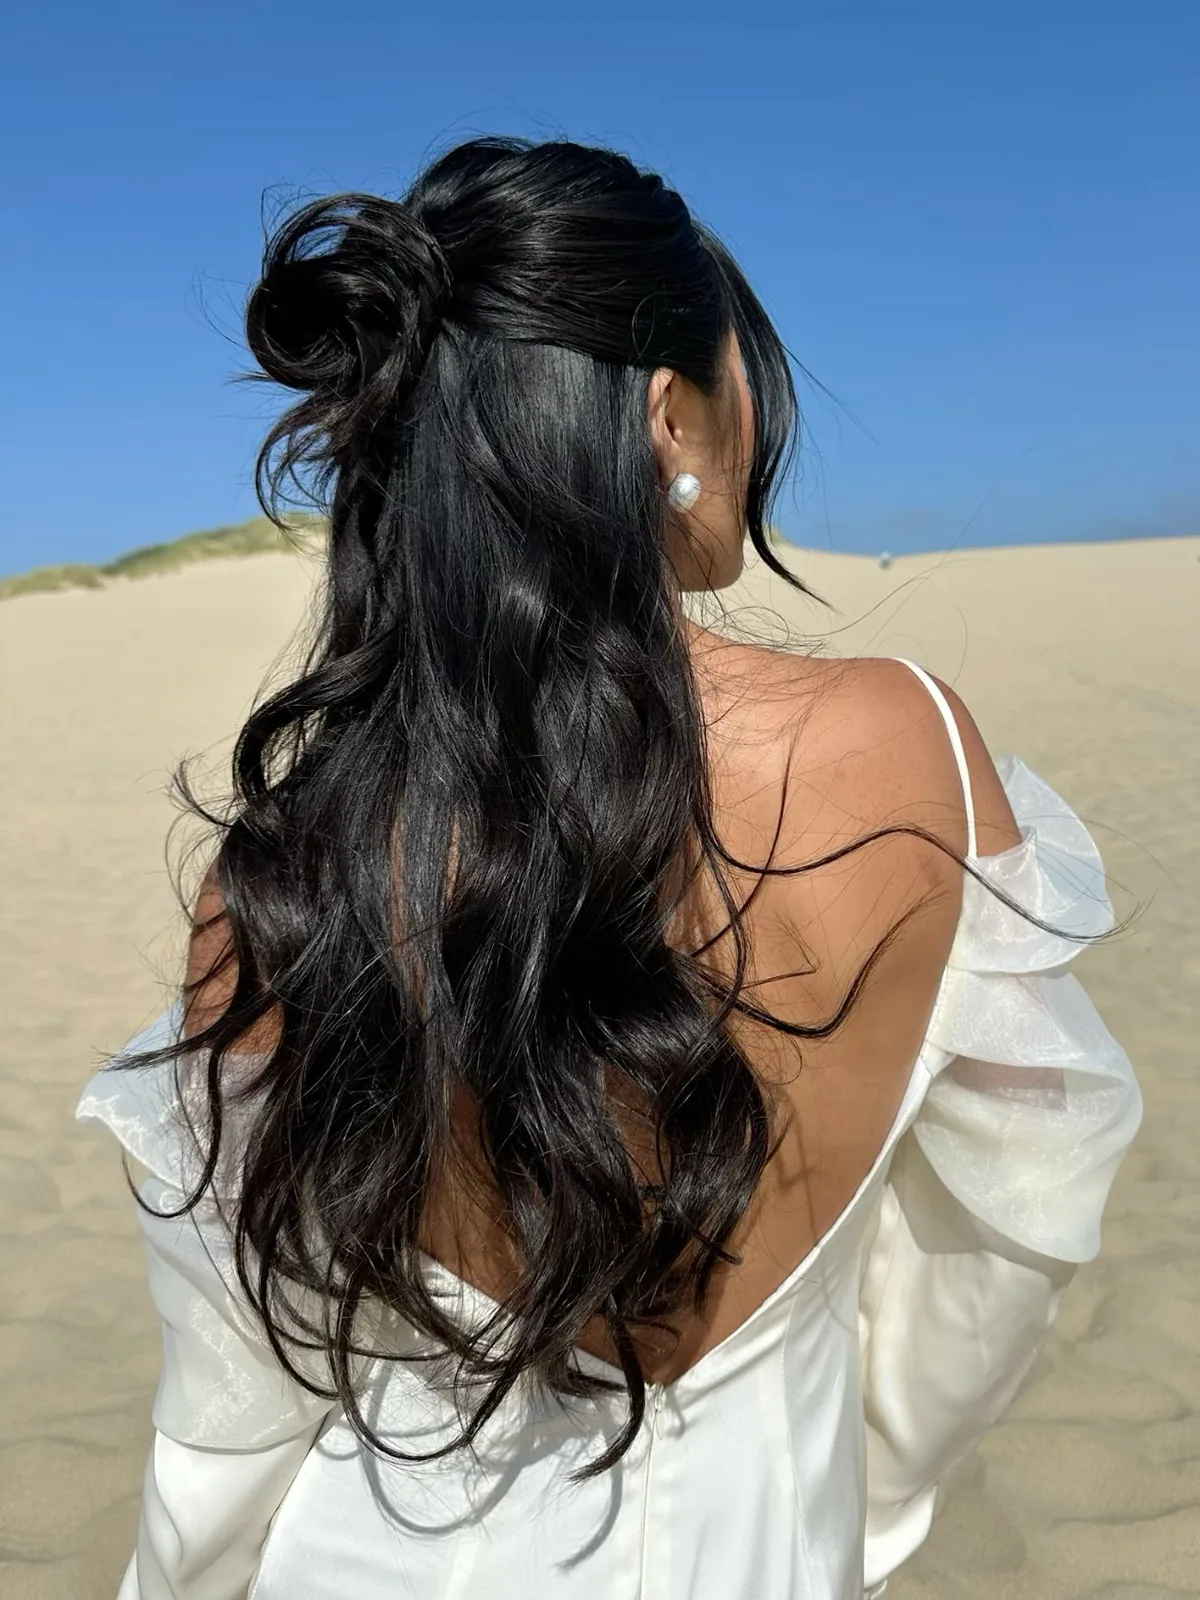
A glossy blowout with beach volume is the salon-fresh look that makes everyone ask where you got your hair done: big, bouncy, smooth hair with lift at the roots, curved ends, and a shine that catches the light from across the beach. The volume is the key — it is what separates a blowout from hair that has just been dried straight — and it comes from blow-drying in sections with a round brush, rolling the roots up and the ends under. This is the style to choose when your dress is simple and you want the hair to carry the glamour, or when you have naturally thick hair that looks its best with a bit of bounce. It is also the most comfortable style on this list, because there is nothing pinned, pulled or tight.
Pros: comfortable, glamorous, and suits almost every dress. Cons: the volume drops fastest in humidity, so it needs a strong volumising mousse and a humidity-resistant spray, and it is the style most likely to need a touch-up before the photos. Common mistake: blow-drying the roots downwards — lift the hair at the root as you dry, because drying flat leaves it limp no matter how much mousse you use. How long it takes: 40 to 50 minutes. What you need: a round brush, a blow dryer with a nozzle, a volumising mousse and a light-hold hairspray. Quick verdict: gorgeous for the ceremony, but keep the touch-up kit close for the photos.
11. Glass Hair, Beach-Proof and Shiny
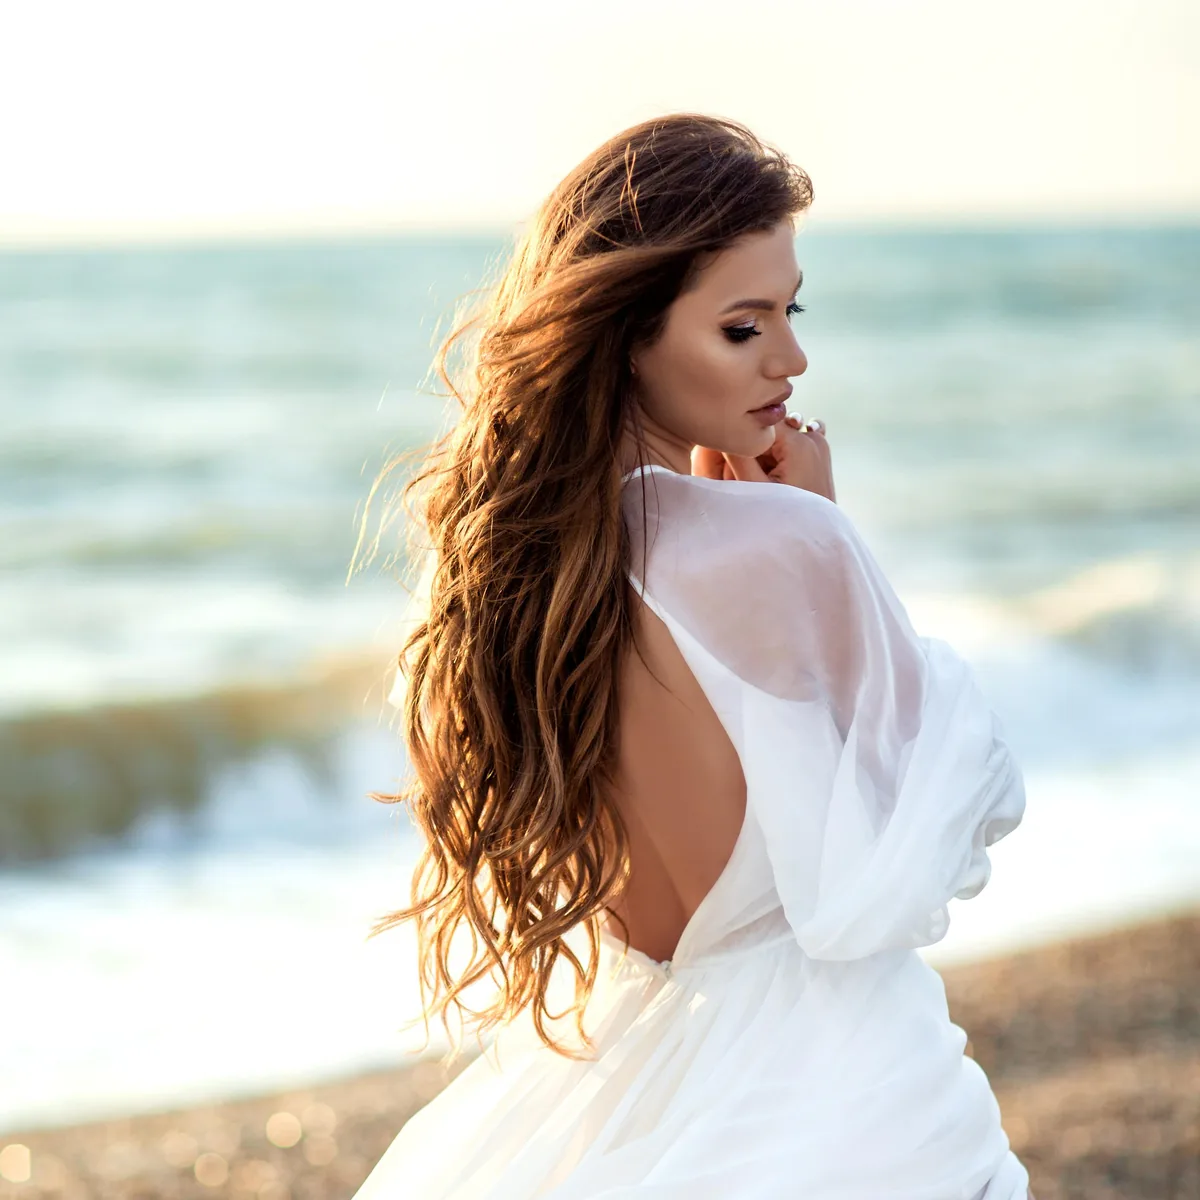
Glass hair is the ultra-sleek, ultra-shiny straight style that looks like a sheet of polished glass: dead straight, perfectly smooth, and so glossy that it reflects the light. It is the most minimalist style on this list, and it works because the shine does all the talking — there are no curls, no braids and no accessories to distract from the pure, clean line of the hair. Glass hair suits brides with naturally straight hair best, because the style is about enhancing what the hair already does, and it pairs beautifully with a bold dress or a statement earring, because the hair stays quiet and lets the outfit shine. The catch is condition and humidity: glass hair shows every split end and every dull patch, and it needs a humidity-resistant serum or the sea air will puff it up within the hour.
Best for: a bold or colourful dress, a dress with statement details, and naturally straight hair. How to style: apply a shine serum to the lengths before you flat-iron, not after — the heat seals the serum in and creates the glassy finish, while serum applied afterwards just sits on the surface and looks greasy. What to ask a stylist: ask for an anti-humidity serum and a flat iron with a ceramic plate, and confirm the hair is freshly trimmed, because glass hair shows every split end. Maintenance: a quick serum touch-up before the photos is all it needs. Time: 25 to 35 minutes. Cost: low, plus the cost of a good serum.
12. Dutch Braid Crown
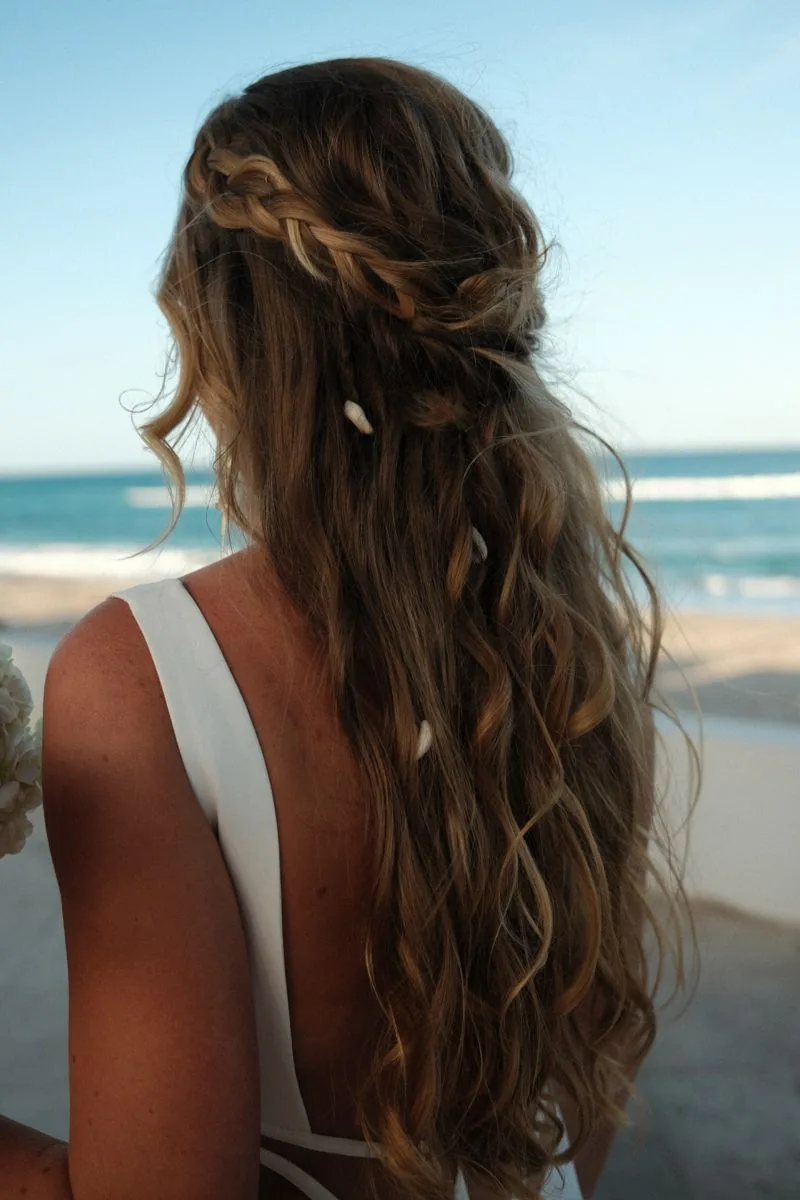
A Dutch braid crown is the most secure braided style you can wear on a beach: two Dutch braids worked from each side of the head and pinned across the crown, with the braid sitting on top of the hair so every twist is visible. The Dutch braid is the reverse of a French braid — the sections go under rather than over — which makes the braid pop out from the head and gives it a bold, sculpted look. It is a style that says boho and fairytale at once, and it is the braid to choose when the wind is strong, because the hair is locked down section by section and there is almost nothing loose for the wind to grab.
Pros: the most wind-proof braid here, photographs beautifully, and lasts all day. Cons: needs medium to long hair and a stylist or a practised friend, because a Dutch braid is hard to do on yourself. Common mistake: braiding too tightly at the front — a crown braid that pulls at the hairline hurts by the second hour, so ask for it to be braided firmly but not tight. How long it takes: 30 to 40 minutes. What you need: a texturising spray for grip and six to eight bobby pins. Quick verdict: the braid for a windy beach, and the one least likely to need a single touch-up.
13. Messy Braid with Loose Pieces
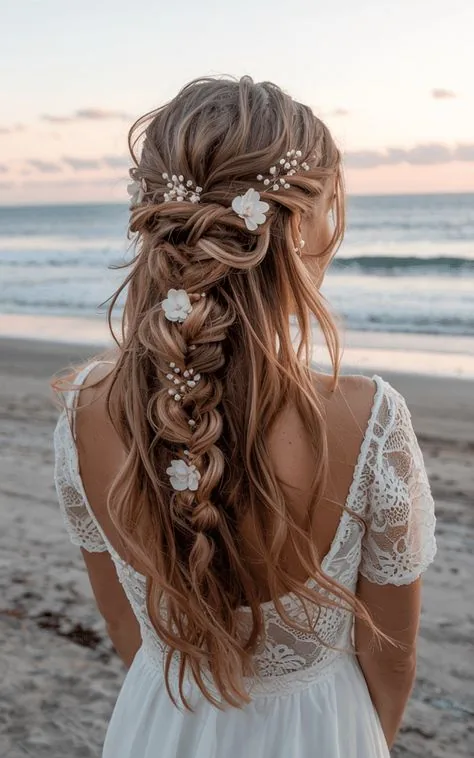
A messy braid with loose pieces is the easiest boho style on this list, and the one that looks most like you did not try — even though you did. The braid itself is loose and textured, falling over one shoulder or down the back, and the loose pieces are pulled out around the forehead and cheeks to soften the whole look. The pieces are the secret: without them, a messy braid can look like a gym hairstyle, but with them, it looks romantic, intentional and photogenic. On the beach it has a real advantage, because the style is already undone — the wind can pull a piece loose and it still looks right, which is more than you can say for a sleek updo.
Best for: a casual or boho dress, a barefoot or garden ceremony, and medium to long hair. How to style: braid loosely, then pull the braid apart gently to make it look fuller, and pull out two or three pieces around the face before you finish, not after — pulling them out afterwards tugs the braid loose. What to ask a stylist: ask for the braid to be secured with a small clear elastic and hidden under a piece of hair, so the end looks finished rather than tied. Maintenance: almost none — it is supposed to look undone. Time: 15 to 20 minutes. Cost: nearly free, and one of the easiest styles to do yourself.
14. Mermaid Waves with a Deep Side Part
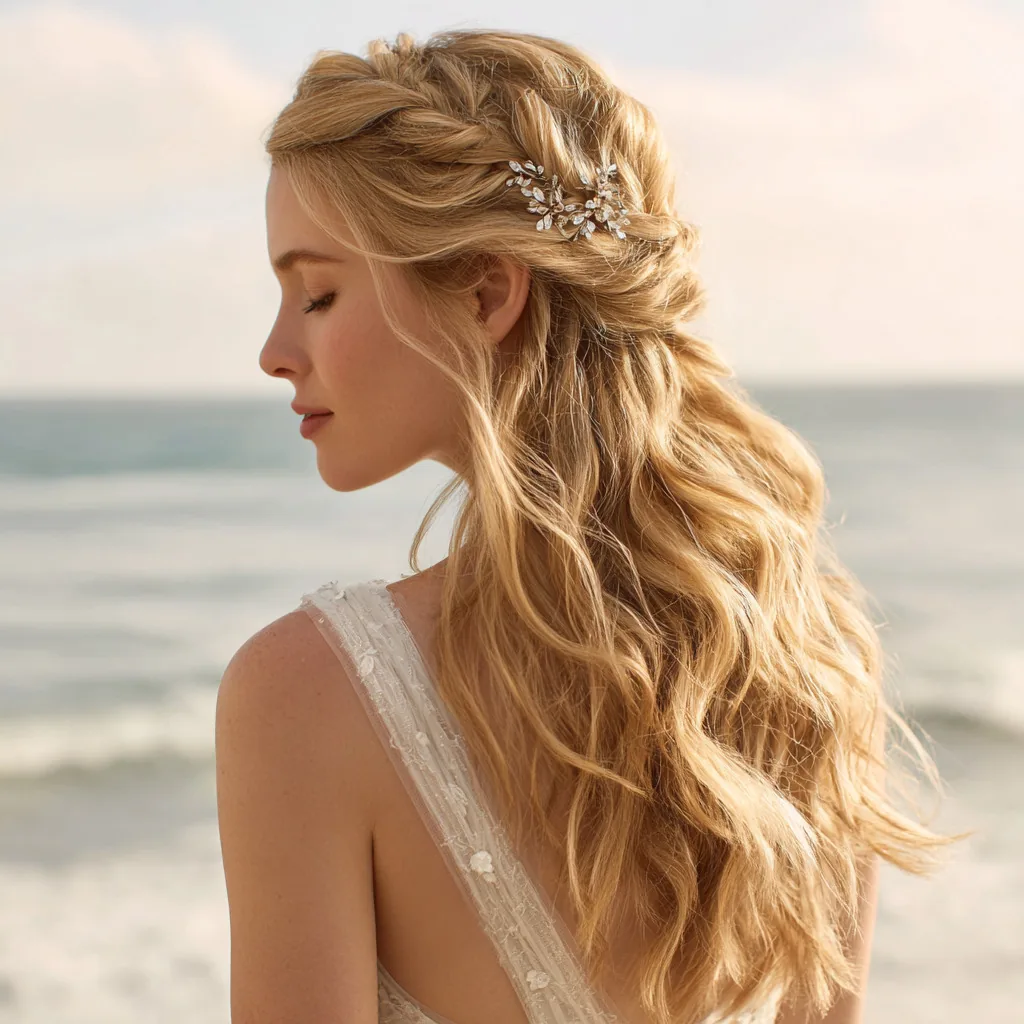
Mermaid waves with a deep side part are the beach wedding style that looks like it was made for the ocean: long, flowing waves with a deep side part, the hair falling in a heavy, glossy curtain over one shoulder, and the whole look echoing the movement of the sea. The deep part is what makes it glamorous — it creates a long, elegant line from the crown to the shoulder and shows off one earring and one side of the neckline — while the waves themselves are soft and touchable rather than sculpted. This is the style for a bride who wants her hair down, who loves the idea of looking like a mermaid, and who has long hair that can carry the length.
Pros: stunning in photos, especially at golden hour, and suits long hair perfectly. Cons: needs long hair and a lot of product to hold in humidity, and the waves will drop if they are not set properly. Common mistake: parting the hair in the middle — a centre part makes mermaid waves look flat, while a deep side part gives them the drama. How long it takes: 35 to 45 minutes. What you need: a large-barrel curling iron, a deep side part, a shine serum and a flexible-hold hairspray. Quick verdict: the most romantic down style here, as long as your hair is long enough to carry it.
15. Boho Half-Up Braid with Loose Waves
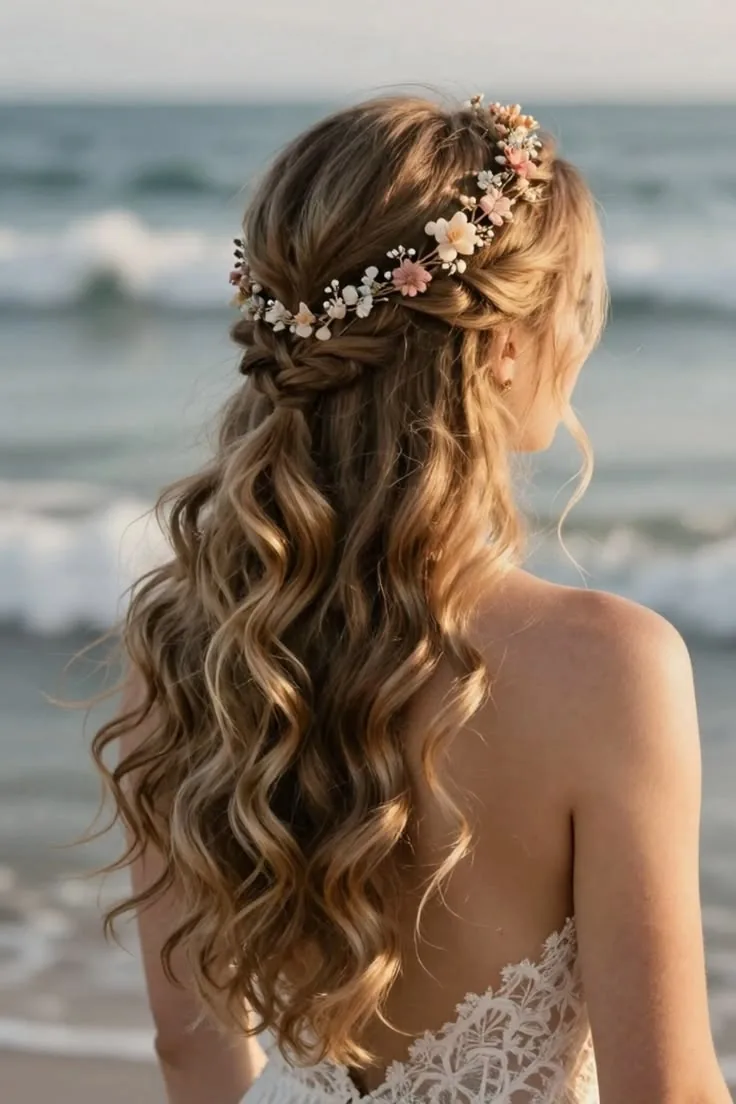
A boho half-up braid with loose waves combines the two most reliable beach wedding ideas: the braid keeps the hair off your face and gives the style structure, while the loose waves underneath keep it soft and romantic. Two small braids from each side meet at the back of the head and are pinned together, and the rest of the hair falls in waves below them — so the style looks detailed from the back and effortless from the front. It is also one of the easiest styles to do on yourself, because the braids are small and forgiving, and any unevenness disappears into the waves. On the beach, the anchored top is what saves it: the wind can move the waves all it likes, but it cannot blow the hair across your face.
Best for: a flowy or romantic dress, a dress with a soft neckline, and medium to long hair. How to style: curl the hair first, braid two small sections from the temples, cross them at the back of the head and pin with three or four bobby pins. What to ask a stylist: ask for the braids to be pulled apart a little before pinning — a soft, full braid looks boho and romantic, while a tight braid looks severe. Maintenance: one pin check before the photos. Time: 25 to 30 minutes. Cost: low — a curling iron, two small elastics and a few pins.
16. Flower Crown with Loose Waves
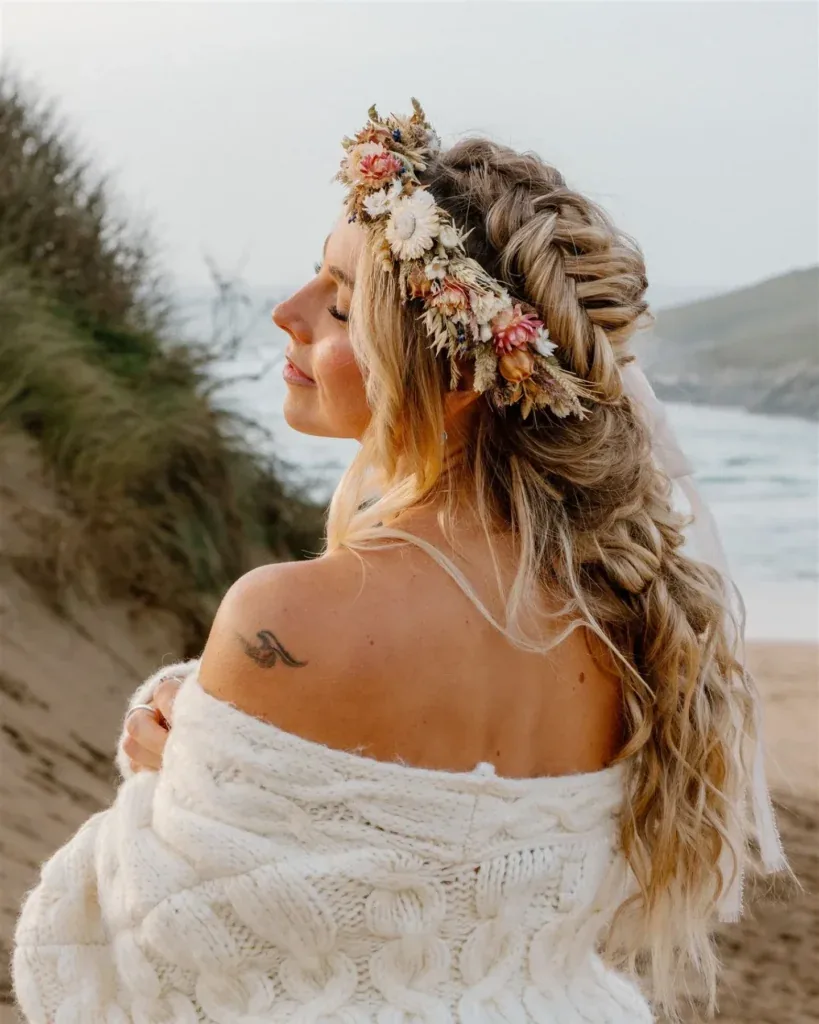
A flower crown with loose waves is the most whimsical style on this list: soft, tousled waves worn down, with a crown of small fresh or silk flowers sitting across the forehead or the crown of the head. The flowers are the whole look — they turn an ordinary wavy hairstyle into something that feels like a garden party on the sand — and they photograph beautifully, because the colour of the flowers picks up the colour of the dress and the bouquet. The hair itself stays deliberately simple, so the crown is the star: soft waves, a centre part, and no pins or braids competing with the flowers. Use silk flowers if you want them to last all day in the sun, and fresh flowers if you want the scent and the softness — just keep fresh flowers in water until the last minute.
Pros: instantly bridal, endlessly photogenic, and no veil to fight the wind. Cons: fresh flowers wilt in heat and salt air, and a crown that is too loose will slide forward into your eyes. Common mistake: choosing a crown that is too heavy — a light crown with small flowers sits comfortably and stays put, while a heavy one slides and gives you a headache. How long it takes: 20 minutes for the hair, plus fitting the crown. What you need: a curling wand, a texturising spray, and a flower crown that fits snugly, pinned in place with two bobby pins hidden under the flowers. Quick verdict: the boho bride’s crown, as long as you pin it down.
17. Seashell-Adorned Braid
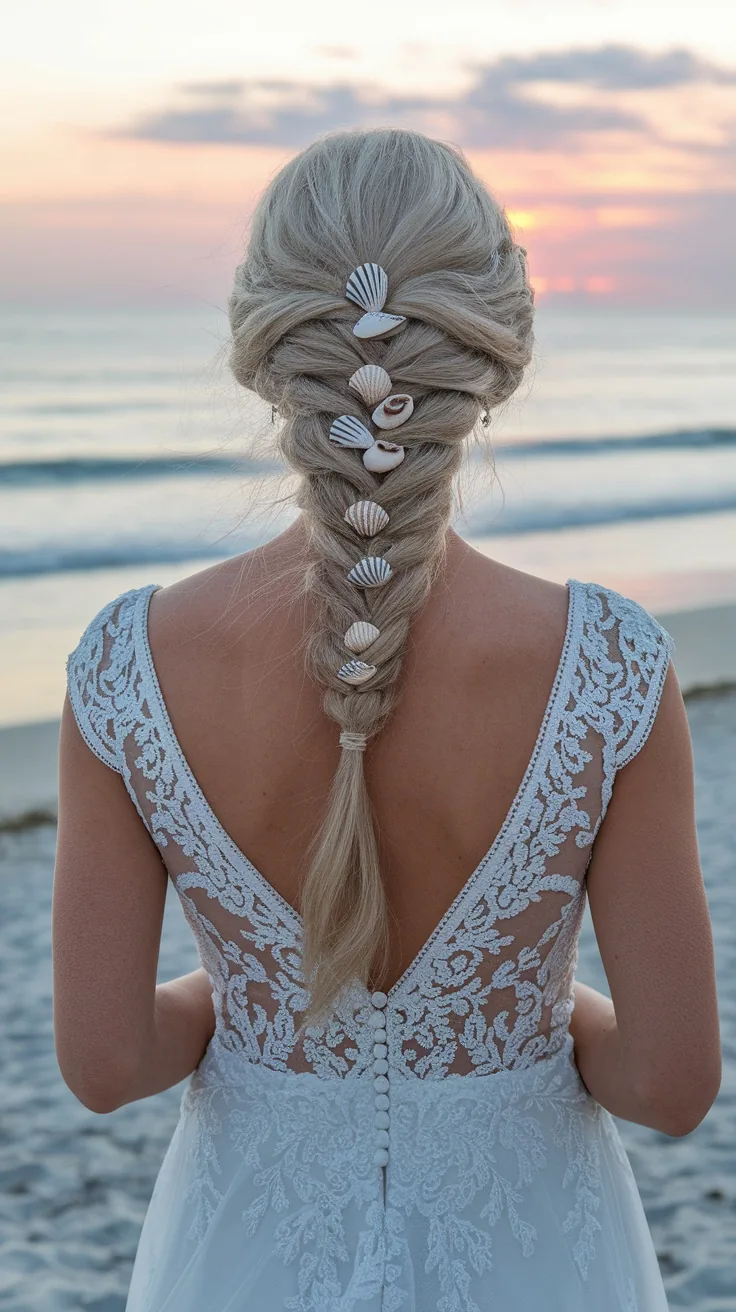
A seashell-adorned braid is the most beach-specific style in this guide: a long braid — French, Dutch or fishtail — with small shells, starfish charms or pearl beads woven into it, so the hair itself carries the theme of the wedding. The shells catch the light and the eye, and they turn a simple braid into a statement that could only belong on a beach. The braid is the practical part: it locks the hair down section by section, so it survives the wind, and the shells sit inside the braid where they are held by the weave rather than by a clip. Choose small, light shells — real ones are beautiful but heavy, and a heavy shell will drag the braid down and pull at the hair.
Best for: a beach-themed or coastal wedding, a boho or relaxed dress, and long hair. How to style: braid the hair first, then thread small shells or pearl beads onto bobby pins and slide them into the braid at intervals, so they sit inside the weave. What to ask a stylist: ask for the shells to be pinned in, not glued, so they can be removed without damaging the hair. Maintenance: one check before the photos to make sure no shell has slipped. Time: 25 to 35 minutes. Cost: low — the shells and beads are inexpensive, and the braid is a style you can do yourself.
18. Twisted Low Updo with Pinned Curls
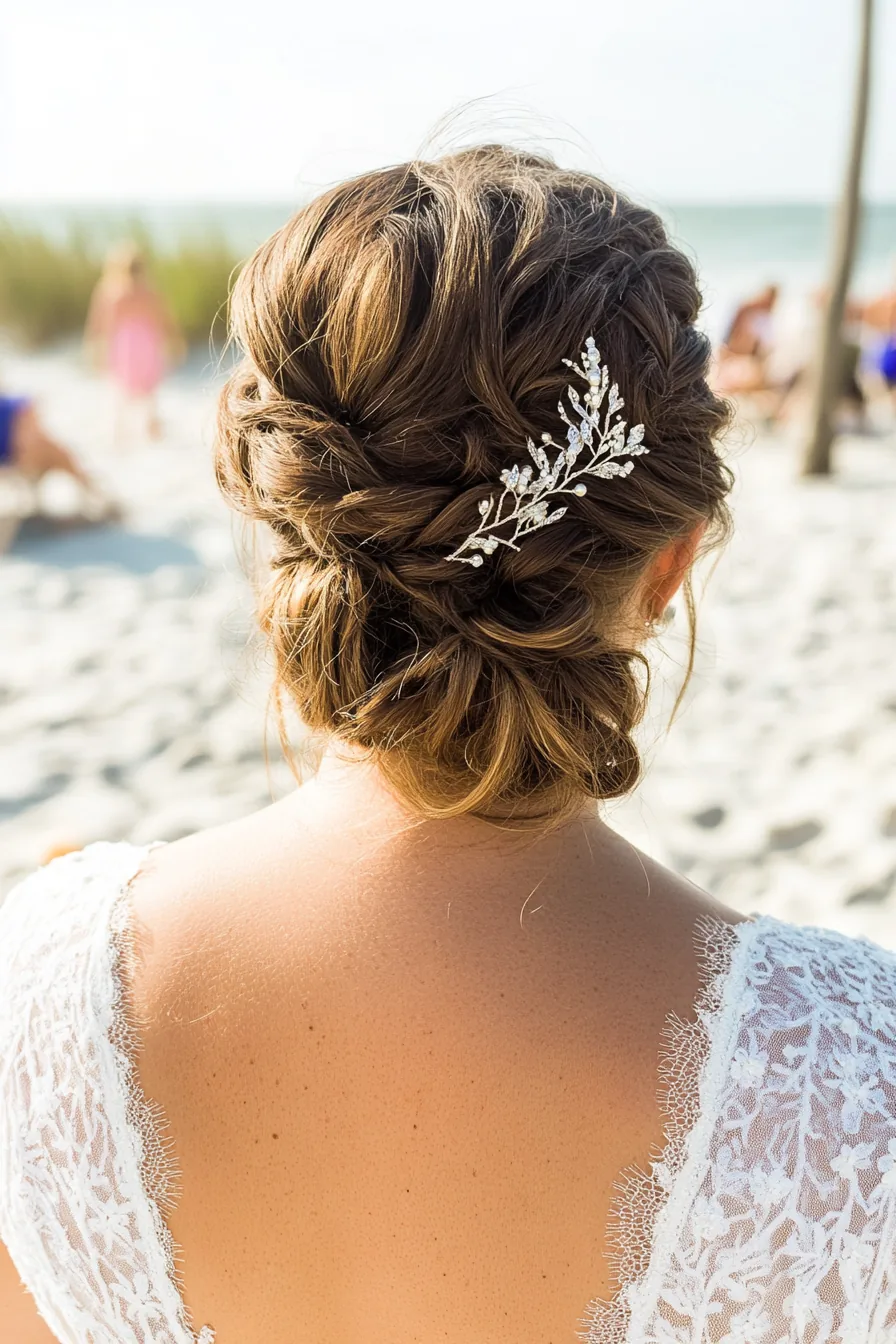
A twisted low updo with pinned curls is the updo for a bride who wants texture and romance without the formality of a chignon: the hair is divided into sections, each one twisted and pinned low at the nape, and the curls are allowed to fall where they want within the twist. The result is an updo that looks soft and organic rather than sculpted — more like the hair happened to fall into a beautiful shape than like it was engineered. On the beach it holds well, because every section is anchored separately, so even if one twist loosens in the wind, the rest stays put. It is also one of the most flattering updos for round and heart-shaped faces, because the twists frame the face without hiding it.
How long it takes: 25 to 35 minutes. What you need: a curling iron, a texturising spray, plenty of bobby pins and a flexible-hold hairspray. Best with: a romantic or vintage-style dress, a dress with a soft neckline, and medium to long hair. Build the updo in layers, pinning each twist as you go — a section that is pinned to the one beneath it will hold all day, while a section that is just sitting on top will slide. What to ask a stylist: ask for the twists to be left a little loose, because a tight twist looks severe and a soft one looks romantic.
19. Beach French Twist
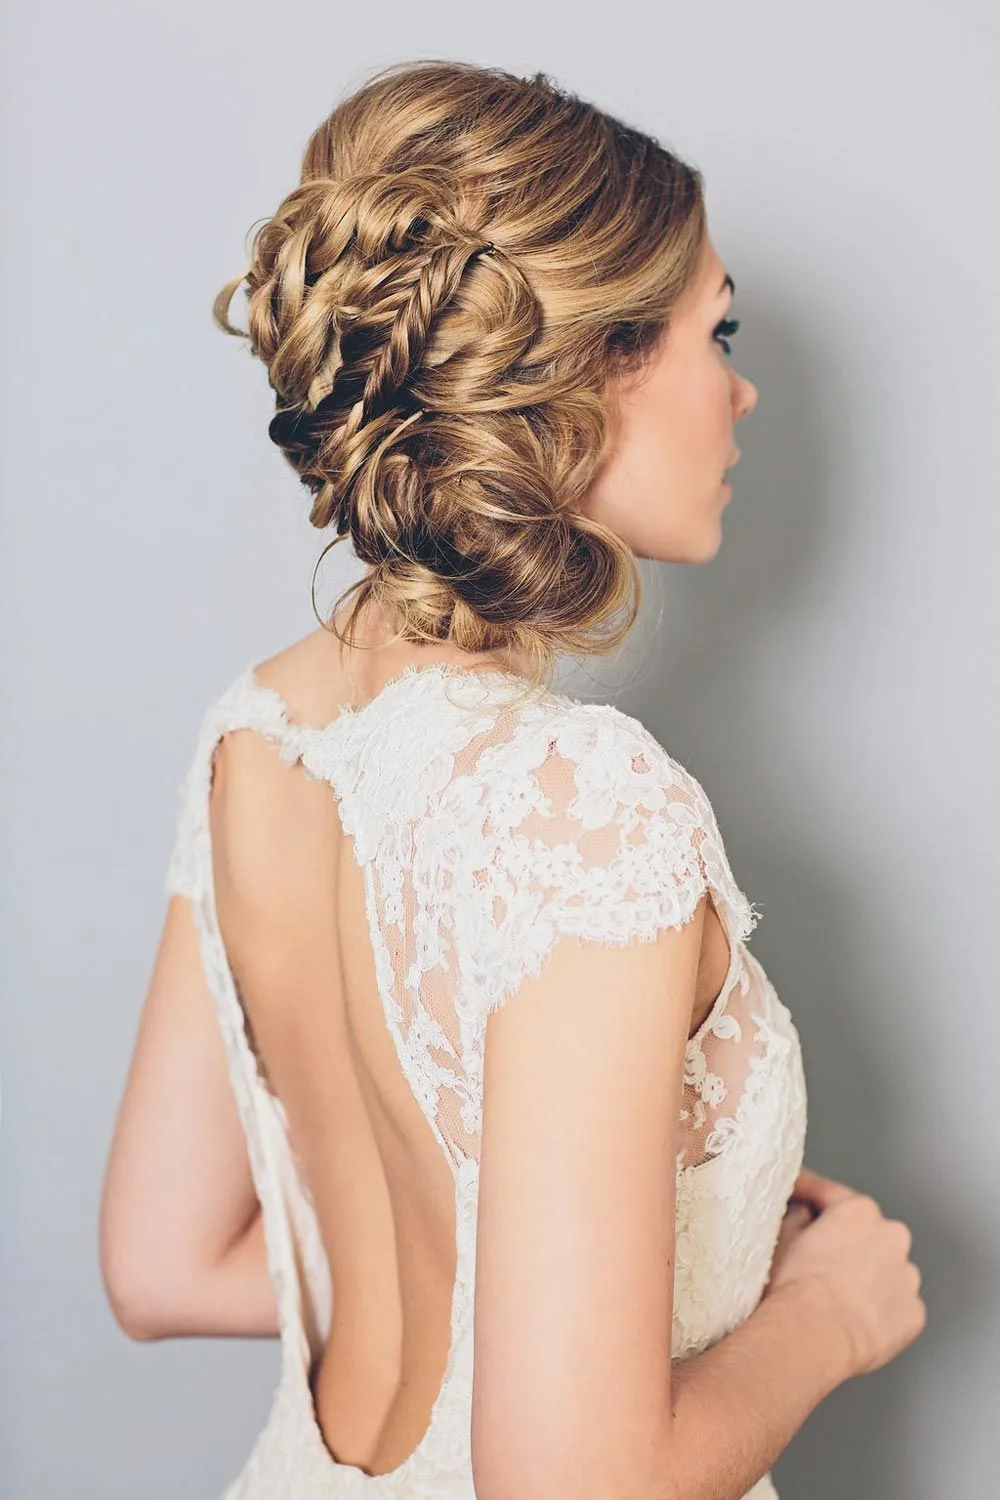
A beach French twist takes the most elegant updo there is and softens it for the sand: the hair is smoothed back, folded up the back of the head, and pinned into a sleek vertical roll — but with a few face-framing pieces left loose and the surface left a little softer than a ballroom twist. The twist shows off the neck and the shoulders, it pairs beautifully with a high neckline or an open back, and it has a timeless quality that no trend can touch. On the beach, the twist has a real advantage: the hair is completely contained, so the wind cannot touch it, and it will look exactly the same at the last dance as it did at the first look.
Pros: completely wind-proof, timelessly elegant, and shows off the neck and back. Cons: needs a skilled stylist, and a twist that is too tight will hurt by the second hour. Common mistake: skipping the smoothing — every strand must be brushed into place before the twist begins, because a single stray piece will show against the clean surface of the roll. How long it takes: 30 to 40 minutes. What you need: a smoothing pomade, a fine-tooth comb, six to eight bobby pins and a strong-hold hairspray. Quick verdict: the most elegant updo here, and the one most likely to survive the whole day untouched.
20. Braided Low Bun
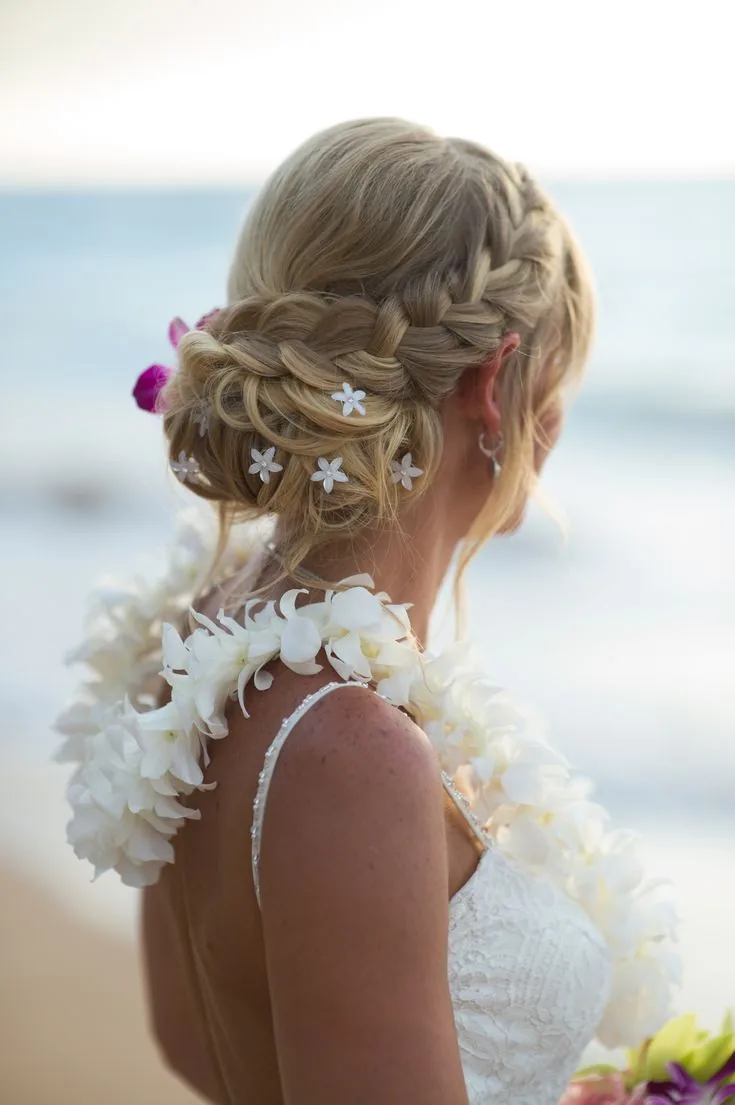
A braided low bun combines the two most wind-proof ideas in this guide: a braid that locks the hair down section by section, and a low bun that anchors the weight at the nape. The hair is braided first — a French or Dutch braid worked from the crown to the nape — and then the braid is coiled into a low bun and pinned. The result is an updo with texture and detail that a plain bun does not have, and with a hold that a plain bun cannot match, because the braid is doing half the work before the bun even starts. It is also a beautiful style from the back, which is where the ceremony photos are taken when you walk down the aisle.
Best for: a formal beach wedding, a dress with a detailed back, and medium to long hair. How to style: braid from the crown to the nape, coil the braid into a bun, and pin it with four to six bobby pins pushed through two layers of hair. What to ask a stylist: ask for the braid to be pulled apart slightly before coiling, so the bun looks full rather than tight and thin. Maintenance: almost none — one pin check before the photos. Time: 25 to 35 minutes. Cost: low, and one of the easiest updos to recreate yourself if you can braid.
21. Messy Low Bun with Face-Framing Strands
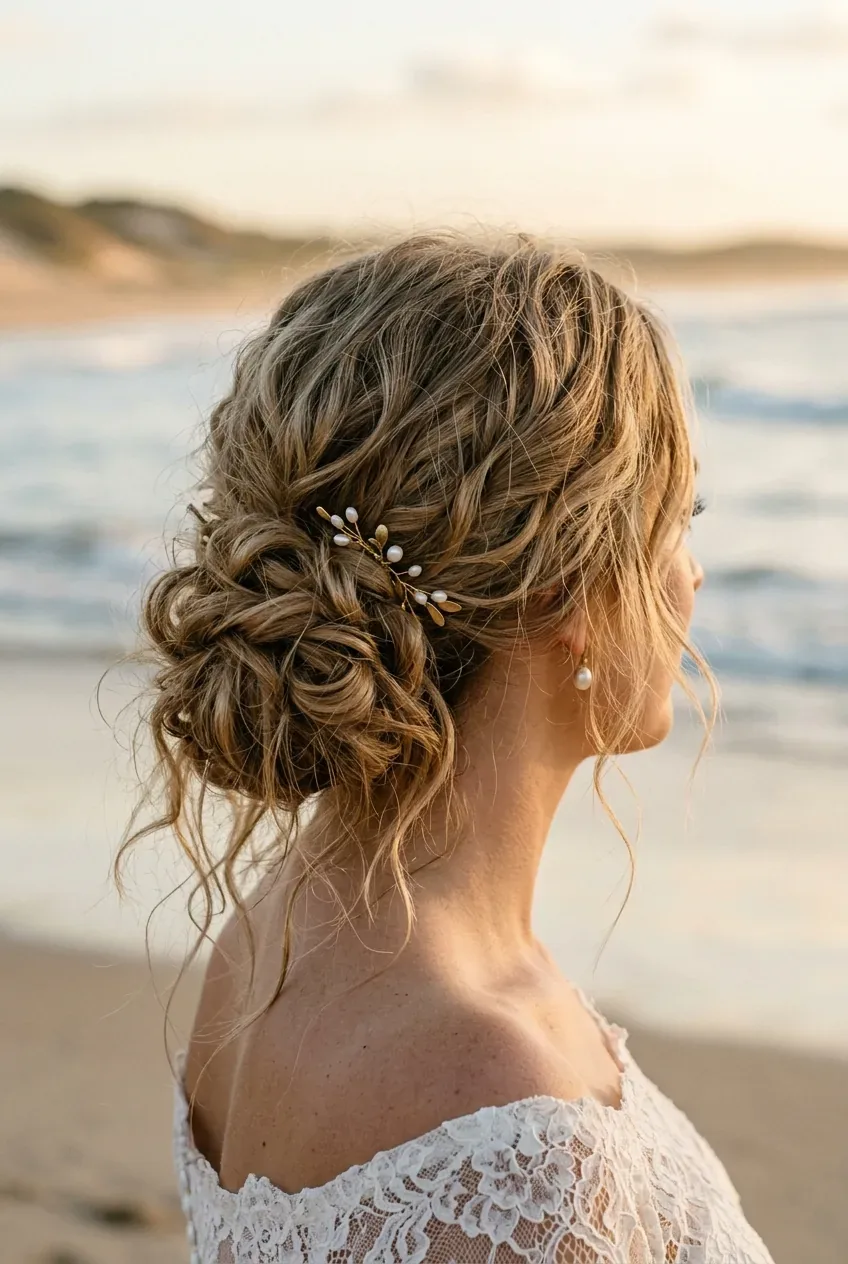
A messy low bun with face-framing strands is the easiest elegant updo on this list, and the one that looks most like you did not try — even though you did. The bun itself is loose and textured, sitting low at the nape, and the face-framing strands are pulled out around the forehead and cheeks to soften the whole look. The strands are the secret: without them, a messy bun can look like a gym hairstyle, but with them, it looks romantic, intentional and photogenic. On the beach it is a natural fit, because the style is already undone — the wind can pull a strand loose and it still looks right, and the bun itself is anchored low where the wind barely reaches it.
Pros: fast, comfortable, and forgiving in the wind. Cons: it can look too casual for a very formal wedding, so the dress and the accessories have to do the formal work. Common mistake: pulling the strands out after the bun is finished — pull them out before you finish the bun, because pulling them out afterwards tugs the bun loose. How long it takes: 10 to 15 minutes. What you need: a hair tie, three or four bobby pins, a texturising spray and a light-hold hairspray. Quick verdict: the relaxed bride’s updo, and the fastest elegant style in this guide.
22. Pinned-Up Curls with a Shell Comb
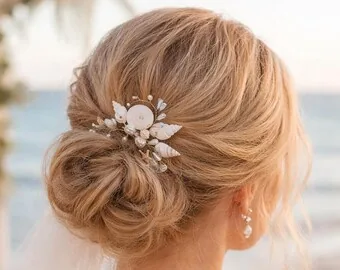
Pinned-up curls with a shell comb are the romantic updo for a bride who loves curls but does not want them in her face on the beach: the hair is curled, then pinned up in soft, loose sections, so the curls are on display but the face is free — and a shell comb holds the whole thing together while adding the coastal detail. The curls are the star: they give the updo volume and texture that a smooth bun cannot, and the shell comb is the finishing touch that says beach wedding without saying a word. It is also a practical choice, because the pinned sections are anchored separately, so the style holds through wind and dancing far better than curls worn down.
Best for: a romantic or vintage dress, a dress with a soft neckline, and naturally curly or wavy hair. How to style: curl the hair in large sections, pin each section up loosely with the curls falling where they want, and slide the shell comb in last, securing it with two hidden bobby pins. What to ask a stylist: ask for the curls to be left longer than you think — they will spring up as the day goes on, and a curl that starts at the cheekbone will be at the temple by the first dance. Maintenance: one pin check before the photos. Time: 30 to 40 minutes. Cost: low, plus the comb.
23. Low Top Knot with a Silk Scarf
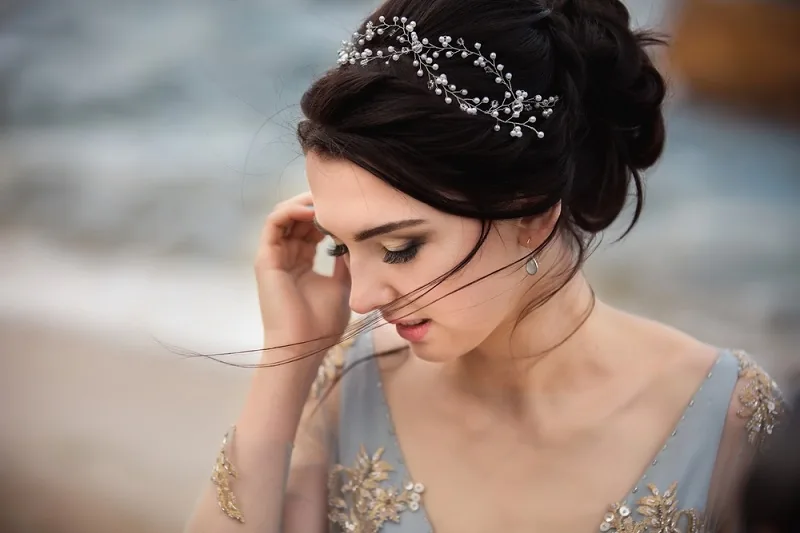
A low top knot with a silk scarf is the most modern style on this list: the hair gathered into a low, soft knot at the nape or just above it, with a silk scarf tied around the base in a bow or a knot that matches the dress. The scarf is what turns a simple knot into a wedding hairstyle — it adds colour, texture and a focal point, and it echoes the softness of a beach dress in a way a plain elastic never could. It is also a practical choice for the beach: the knot keeps the hair completely off the neck in the heat, the scarf hides the elastic and any pins, and the whole style takes ten minutes. Choose a scarf in a colour that matches the dress or the flowers, and tie it after the knot is secure, wrapping it twice so it stays put in the wind.
Pros: fast, cool, and the scarf adds a beautiful pop of colour. Cons: a scarf can look casual, so it suits a relaxed or boho wedding better than a very formal one. Common mistake: tying the scarf once — a scarf tied once will slip in the wind, but one wrapped twice will stay put all day. How long it takes: 10 minutes. What you need: a soft elastic, a silk scarf in a colour that matches your dress, and a light-hold hairspray. Quick verdict: the chicest quick style here, and the one most likely to be copied by your guests.
24. Half-Up Twisted Crown
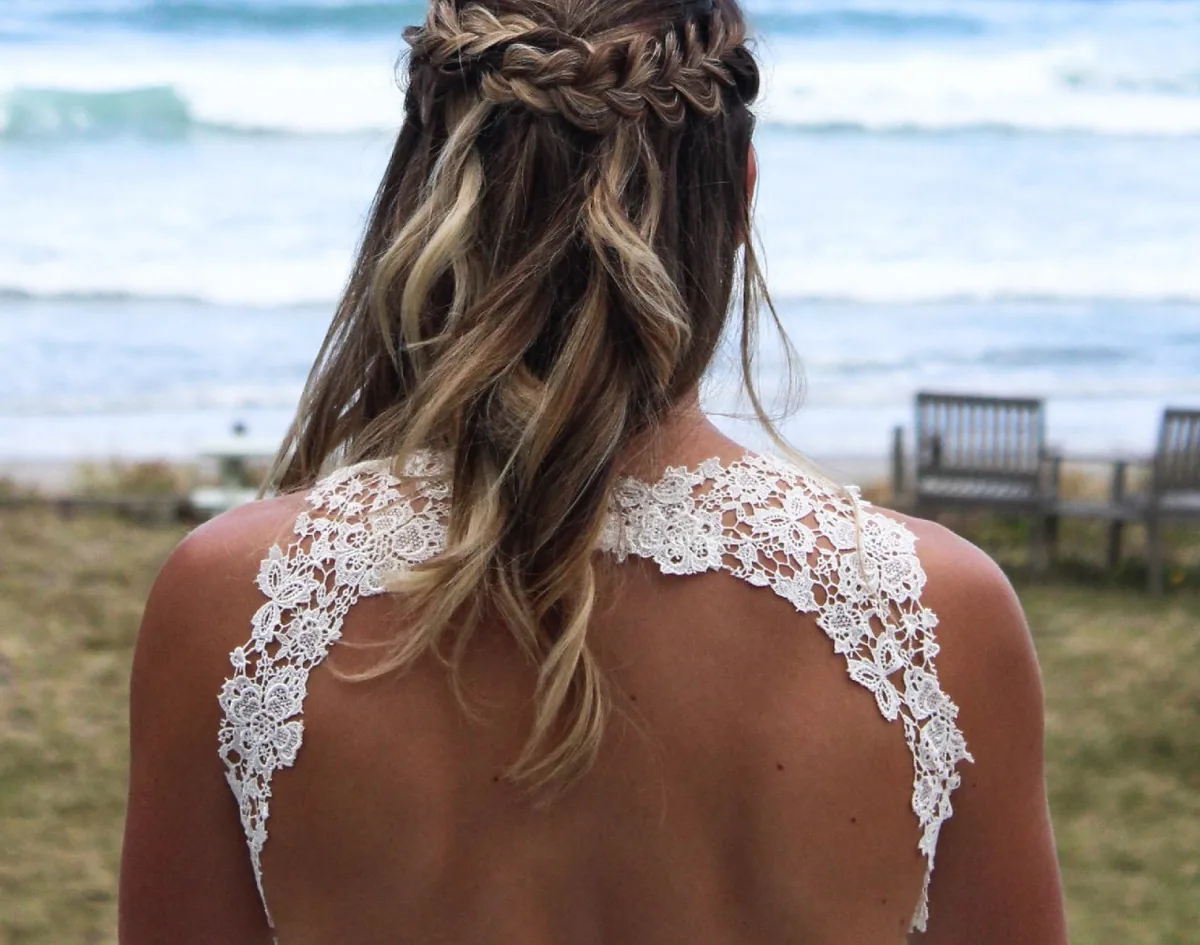
A half-up twisted crown is the most photographed half-up style at a beach wedding for a reason: two sections of hair twisted back from the face and pinned at the crown, with the rest falling in soft waves down the back. The twist gives you the best of both worlds in a photo — your face is open and visible, your earrings show, and the hair left down gives the photo movement, softness and length. A full updo can look severe in a flash photo, and hair worn completely down can hide the face and the dress neckline; half-up sits right in the middle, and it flatters almost every face shape. The key is volume at the crown: a little backcombing or texturising spray at the roots stops the top from looking flat, which is the one thing that makes half-up styles look tired in pictures.
Best for: a strapless or sweetheart dress, a dress with a detailed bodice, and medium to long hair. How to style: twist two sections from the temples back to the crown, cross them, and pin with two or three bobby pins hidden under the twist. What to ask a stylist: ask for the twist to be pinned at the crown rather than at the back, so it holds the weight of the hair without pulling. Maintenance: one pin check before the photos. Time: 20 to 25 minutes. Cost: low — a curling iron and a few pins.
25. Half-Up with a Shell Clip
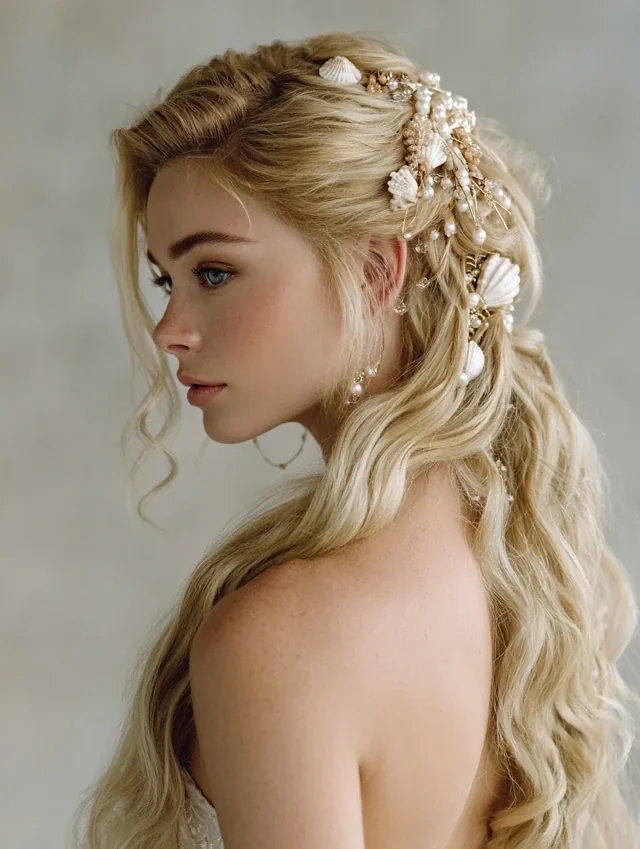
A half-up with a shell clip is the simplest coastal style in this guide: the top half of the hair pulled back and held with a single shell clip, comb or barrette, and the rest left down in soft waves. The clip is the whole look — it adds the beach detail, it holds the hair off the face, and it takes ten seconds to put in. It is also a style that works for the bride, the bridesmaids and the guests alike, because it is beautiful without being bridal, and it suits every hair length from a lob to waist-length waves. On the beach it holds well, because the clip is anchored with a hidden bobby pin as well as its own grip, and the wind can move the lengths all it likes without touching the top.
Pros: fast, easy, and suits everyone. Cons: a clip alone can slip on smooth, salty hair, so the hidden bobby pin is not optional. Common mistake: clipping the hair too high — a half-up clipped at the crown looks polished, while one clipped at the very top of the head looks like a ponytail that gave up. How long it takes: 10 to 15 minutes. What you need: a curling iron or wand, a shell clip or comb, and two bobby pins. Quick verdict: the easiest style here, and the one your bridesmaids will actually be able to copy.
26. Half-Up Voluminous Curls
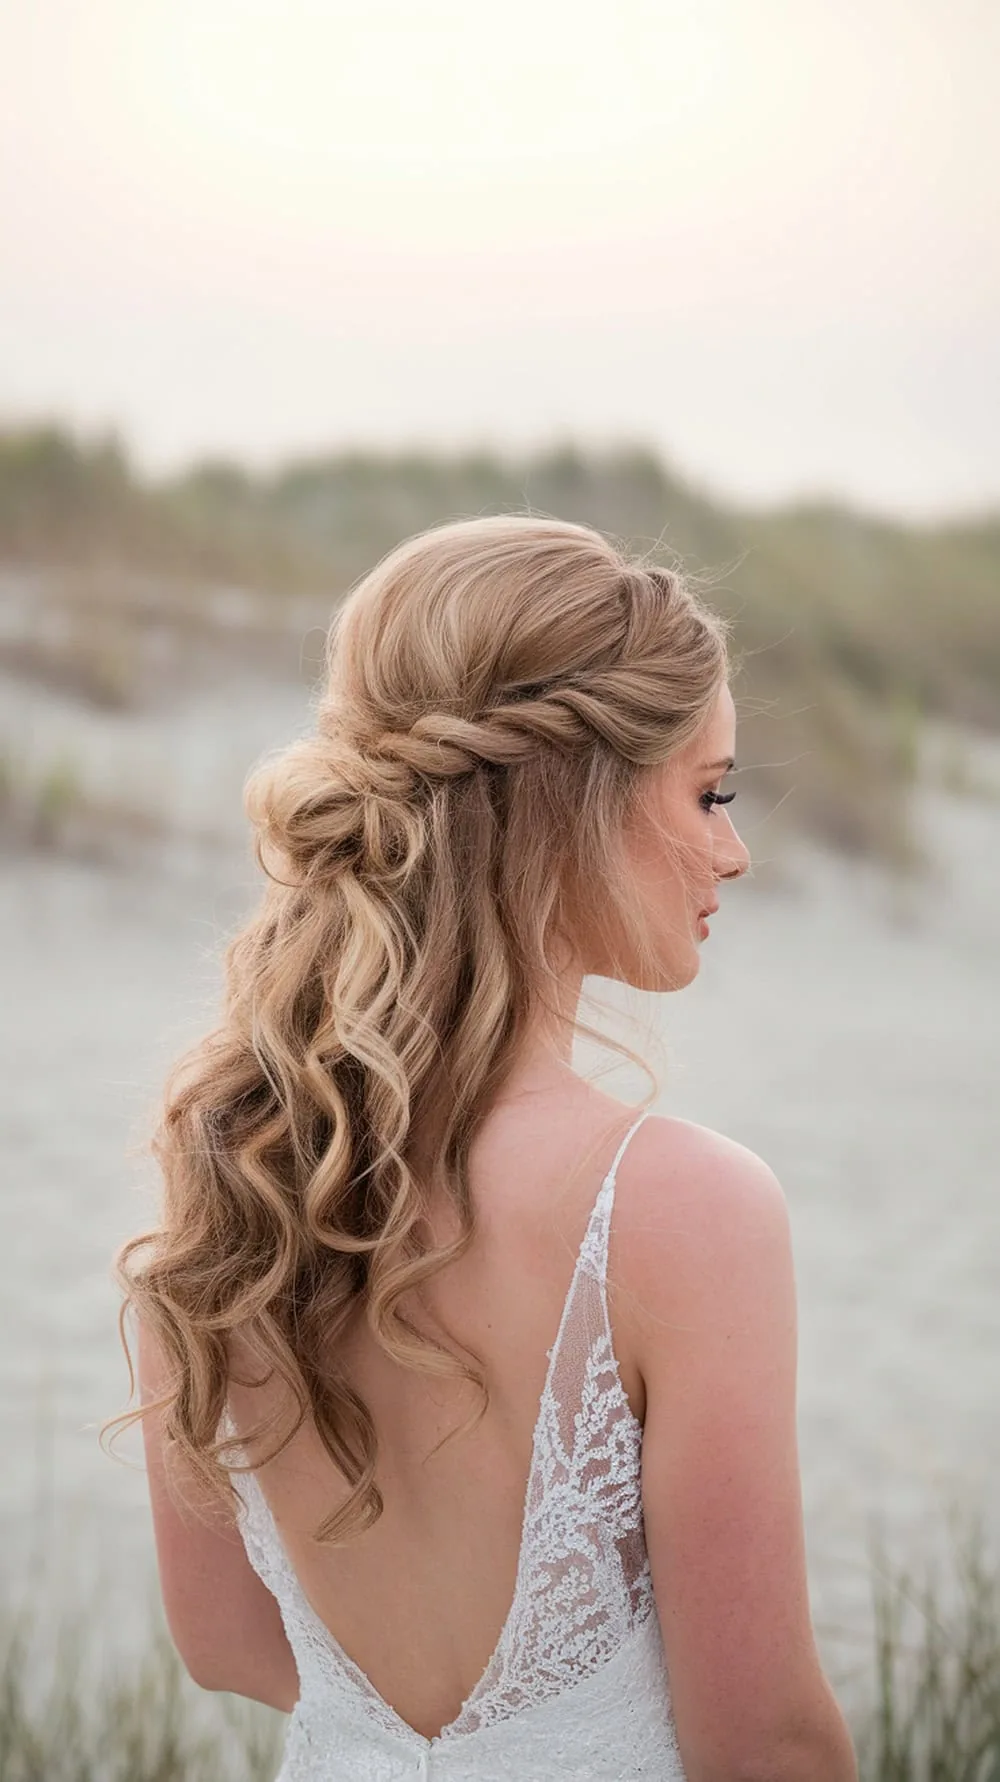
Half-up voluminous curls are the glamorous middle ground between wearing your hair up and wearing it down: the top half is pulled back with volume at the crown, and the bottom half falls in big, bouncy curls that catch the light with every turn. The volume is the key — it is what separates this style from a plain half-up — and it comes from backcombing the crown or using a volumising mousse before you pin the top back. This is the style to choose when your dress is simple and you want the hair to carry the glamour, or when you have naturally thick hair that looks its best with a bit of bounce. It is also one of the most comfortable styles here, because there is nothing pinned tightly or pulled hard.
How long it takes: 30 to 40 minutes. What you need: a curling iron, a volumising mousse, a few bobby pins and a flexible-hold hairspray. Best with: a simple or plain dress that needs the hair to add glamour, a strapless dress, and medium to thick hair. Backcomb the crown in small sections, not big ones — small, tight backcombing creates a firm foundation that holds its height in the humidity, while big, loose backcombing will collapse within the hour. What to ask a stylist: ask for a humidity-resistant mousse, because volume is the first thing humidity takes away.
27. Half-Up with a Side Braid
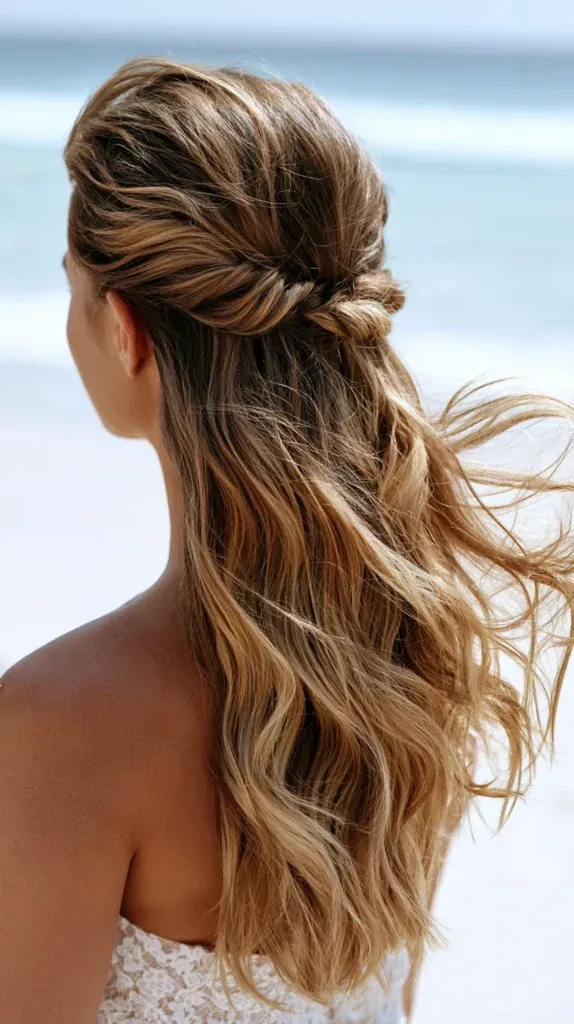
A half-up with a side braid is the boho answer to the half-up: a single braid worked along one side of the head and pinned at the back, with the rest of the hair falling in loose waves. The braid is the detail that makes it special — it gives the style structure and a focal point, and it anchors the top so the wind cannot blow the hair across your face, while the waves underneath keep it soft and romantic. It is also one of the easiest braided styles to do on yourself, because the braid is small and forgiving, and any unevenness disappears into the waves. Choose this one when you want a style that looks like you put thought into it, but you do not want to spend an hour on it.
Pros: quick, secure, and the braid adds a beautiful detail. Cons: a single side braid can look thin if your hair is fine, so pancake the braid to make it look fuller. Common mistake: braiding too tightly — pull the braid apart gently once it is pinned, because a soft, full braid looks boho and romantic, while a tight one looks severe. How long it takes: 20 to 25 minutes. What you need: a curling iron, a small clear elastic, and three or four bobby pins. Quick verdict: the prettiest quick braid here, and a favourite for bridesmaids too.
28. Half-Up with a Cape Veil
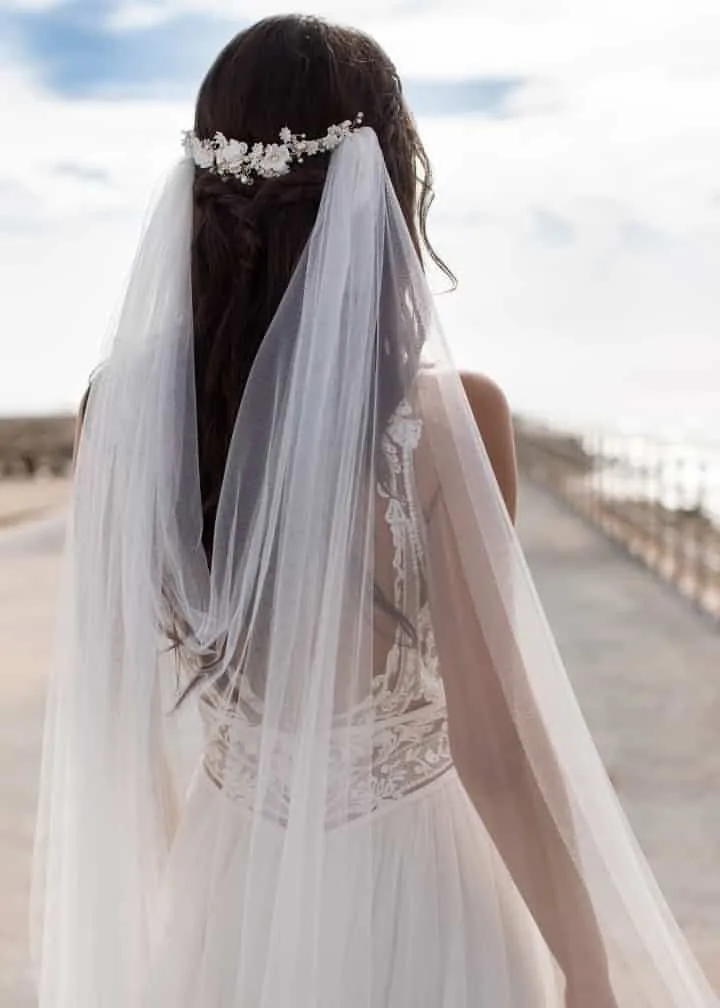
A half-up with a cape veil is the most dramatic half-up in this guide: the top half of the hair pulled back softly, with a sheer, lightweight cape veil attached at the shoulders or the crown, falling down the back like a second layer of the dress. The cape veil gives you the drama of a veil with none of the face-wrapping — it sits behind you, it moves with the wind instead of against it, and it photographs beautifully from behind, which is where the ceremony photos are taken when you walk down the aisle. The half-up underneath keeps the style grounded: the top is anchored, the face is open, and the cape is free to billow.
Best for: a formal beach wedding, a bride who wants a veil without the wind risk, and medium to long hair. How to style: style the half-up first, then attach the cape veil at the crown or the shoulders with small, hidden pins, and check that it falls straight before the ceremony. What to ask a stylist: ask for the veil to be attached with pins as well as its own comb, because a cape veil that is only clipped will slide in the wind. Maintenance: one check before the photos to make sure the cape is falling evenly. Time: 25 to 30 minutes for the hair, plus fitting the veil. Cost: the veil itself is the cost — the hair is simple.
29. Textured Pixie with a Pearl Pin
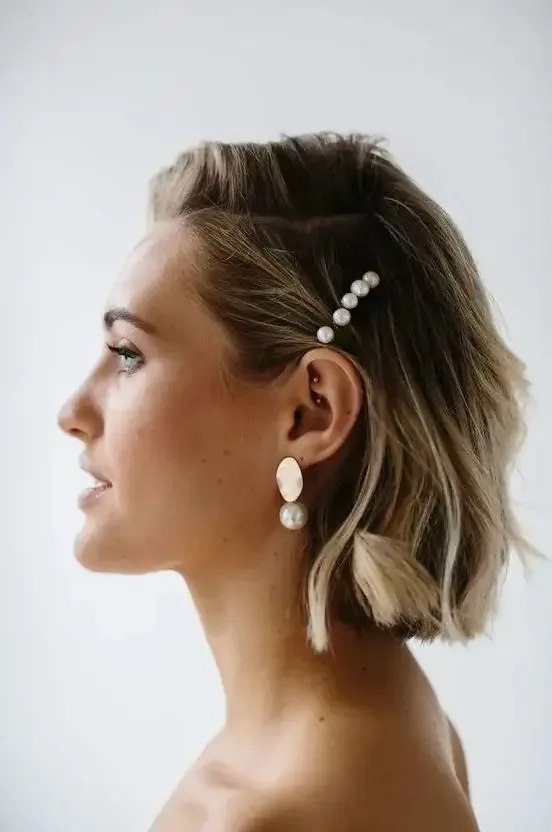
A textured pixie with a pearl pin is proof that short hair is not a limitation at a beach wedding — it is an advantage. A pixie is already a statement, it needs far less work to look finished than long hair does, it photographs brilliantly, it shows off earrings and necklines, and it will not wilt or fall flat in the humidity. The mistake is trying to force short hair into a long-hair style: a tiny, tight bun on a pixie looks like an afterthought, while a sleek, textured pixie with a pearl pin looks deliberate and glamorous. Work with the cut you have, and add the occasion with texture, shine and one beautiful accessory rather than with length you do not have.
Best for: a pixie or very short cut, a dress with a detailed neckline, and a bride who wants to feel like herself. How to style: work a little pomade or texturising paste through the hair, sweep the pieces to one side, and pin a pearl pin or a small crystal clip at the temple. What to ask a stylist: ask for the texture to be piecey rather than smooth, because piecey texture catches the light and looks intentional in photos. Maintenance: none — a pixie is the most wind-proof style in this guide. Time: 10 to 15 minutes. Cost: the pin is the only cost, and the styling is free.
30. Wavy Bob with a Deep Side Part
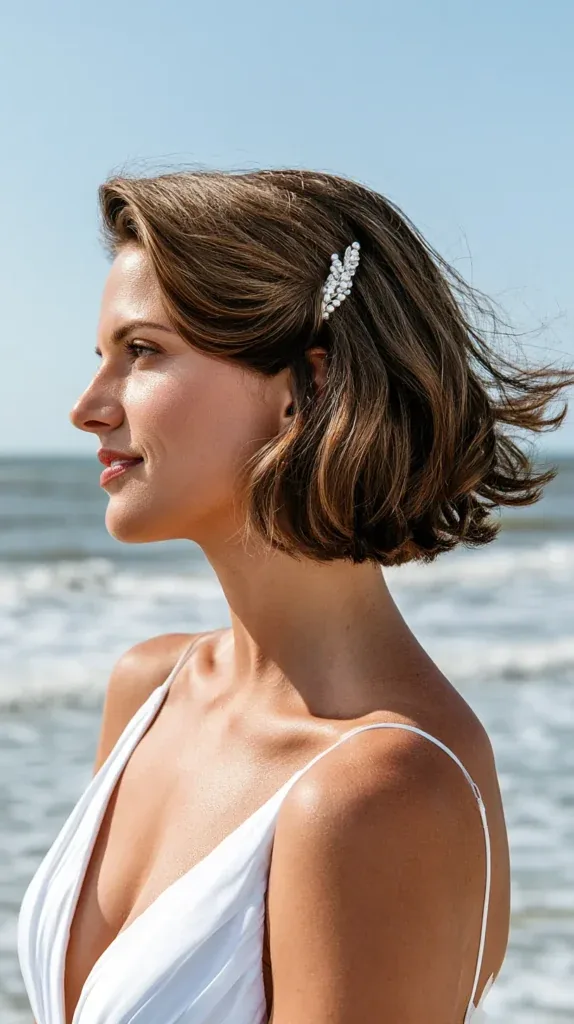
A wavy bob with a deep side part is the short-hair bride’s answer to beach glamour: a shoulder-length cut with soft, choppy waves, a deep side part, and the ends flipped out just enough to catch the breeze. The texture is built into the cut, so the waves need almost no effort — a little salt spray, a scrunch, and the bob does the rest. This is the style for a bride who cut her hair short and never looked back, who wants a wedding look that feels like her rather than a costume, and who wants to dance without a single pin in her hair. It is also one of the most flattering lengths there is: long enough to wave, short enough to stay bouncy all day in the humidity.
Pros: fast, bouncy, and completely wind-proof. Cons: a bob can look plain without the deep part and a good accessory, so the finishing matters. Common mistake: curling the bob with a curling iron — bend the hair with a flat iron instead, because a bend creates a wave with straight ends, which is the beachy look, while a curl creates a ringlet, which is not. How long it takes: 15 to 20 minutes. What you need: a flat iron for bends, a sea-salt spray, and a texturising spray. Quick verdict: the easiest beautiful style for a short-haired bride.
31. Curly Bob with Volume
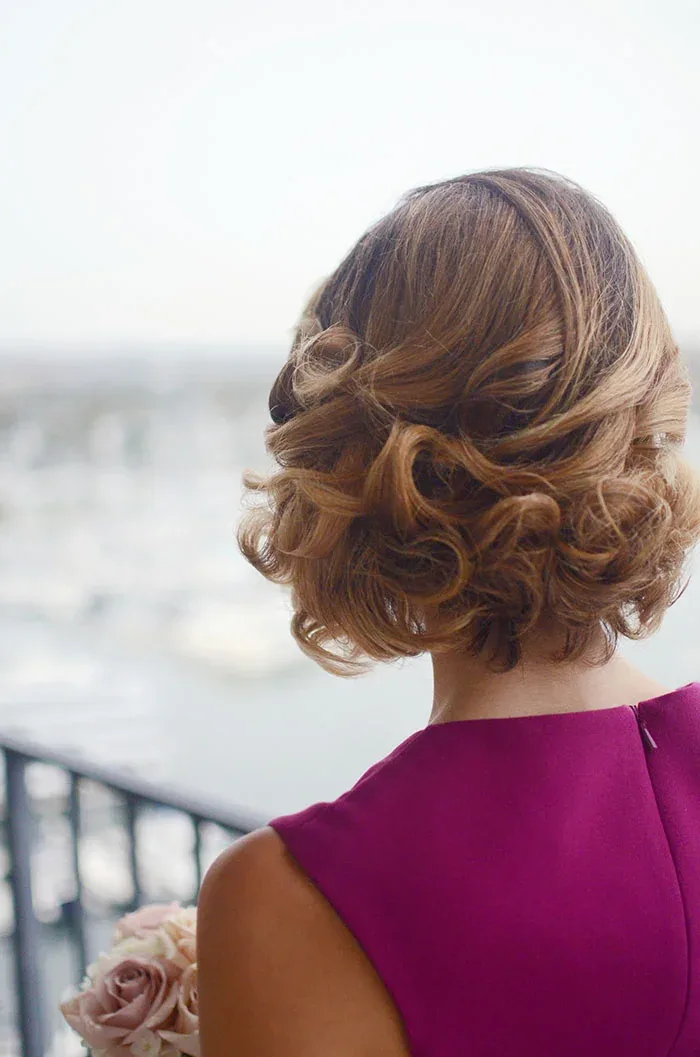
A curly bob with volume is the style for a bride whose hair is naturally curly and who wants to let it do what it does best: the curls are defined, the volume is at the crown, and the whole look is soft, joyful and completely at home on a beach. Curly hair has natural volume and texture, so you do not need to backcomb or add padding to make the shape look full — the curls do the work for you. The key is definition: a curl cream or a light gel applied to damp hair, scrunched in and left to dry, gives the curls shape without crunch, and a diffuser on low heat speeds the drying without frizzing the curls. On the beach, a curly bob has a hidden advantage: the humidity that ruins a straight style only makes curls look fuller.
Best for: naturally curly hair, a relaxed or boho dress, and a bride who wants to wear her curls as they are. How to style: apply curl cream to damp hair, scrunch, and diffuse on low heat, then pin one side back with a small clip if you want the face open. What to ask a stylist: ask for a curl-by-curl cut if you have not had one, because a curly bob cut dry holds its shape far better than one cut wet. Maintenance: a quick scrunch with a little cream before the photos. Time: 20 to 30 minutes. Cost: low — a curl cream and a diffuser you probably already own.
32. Sleek Bob with a Shell Barrette
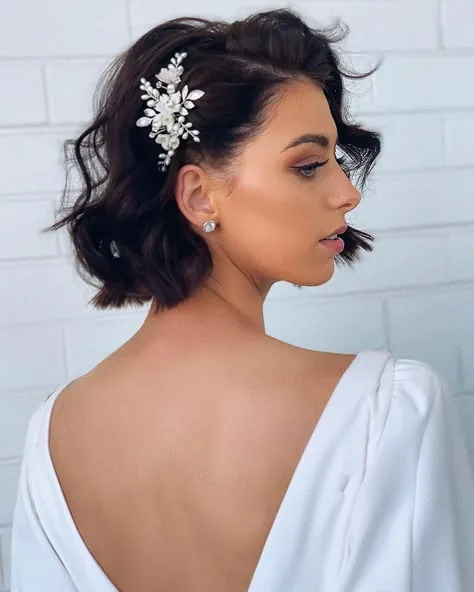
A sleek bob with a shell barrette is the polished short-hair choice for a beach wedding: the bob smoothed straight and glossy, with a deep side part, and a single shell barrette holding back one side. The sleekness is what makes it formal — it reads as deliberate and expensive — while the shell barrette is what makes it a beach wedding, adding the coastal detail without any fuss. It is also a practical choice: a sleek bob has nothing loose for the wind to grab, it will not frizz if it is sealed with an anti-humidity serum, and it shows off earrings and a neckline beautifully. If your dress is bold or colourful, a sleek bob is the hairstyle that stays quiet and lets the outfit shine.
Pros: polished, wind-proof, and shows off the neckline. Cons: needs a serum and a flat iron, and it shows every split end, so the hair has to be freshly trimmed. Common mistake: applying serum after flat-ironing — use a shine serum on the lengths before you flat-iron, because the heat seals it in, while serum applied afterwards just sits on the surface and looks greasy. How long it takes: 20 to 25 minutes. What you need: a flat iron, a heat protectant, a shine serum, and a shell barrette. Quick verdict: the most polished short style here, and the easiest to keep perfect all day.
33. Defined Natural Curls Worn Down
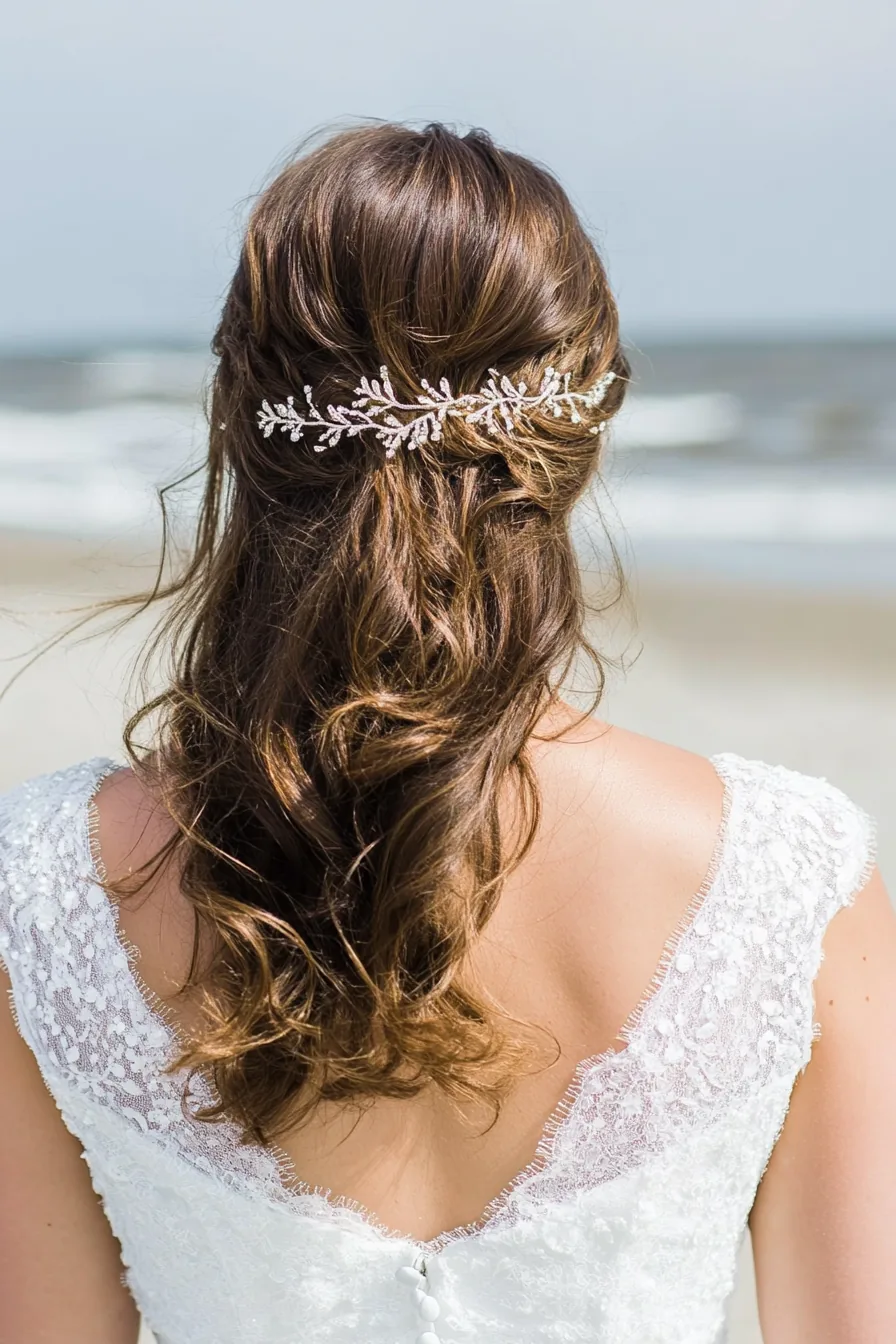
Defined natural curls worn down are the most honest style in this guide: the curls are defined, shaped and left to fall where they want, with no pins, no braids and no attempt to make them into something they are not. On a beach, natural curls have a secret advantage — the humidity that ruins a straight style only makes curls look fuller and more alive, and the salt air adds texture that a salon cannot replicate. The key is definition and moisture: a curl cream or a leave-in conditioner applied to damp hair, scrunched in section by section, gives the curls shape without crunch, and a light gel cast that is scrunched out once dry keeps the definition through the wind.
Best for: naturally curly or coily hair, a relaxed or boho dress, and a bride who wants to wear her texture proudly. How to style: wash and condition the night before, apply curl cream to damp hair in sections, scrunch, and diffuse on low heat or air-dry. What to ask a stylist: ask for a stylist who specialises in curly hair, because the cut and the styling technique matter more than the products. Maintenance: a quick scrunch with a little cream before the photos, and a silk scarf if the wind gets strong. Time: 30 to 40 minutes. Cost: low — a curl cream, a leave-in and a diffuser.
34. Curly Half-Up with a Twist
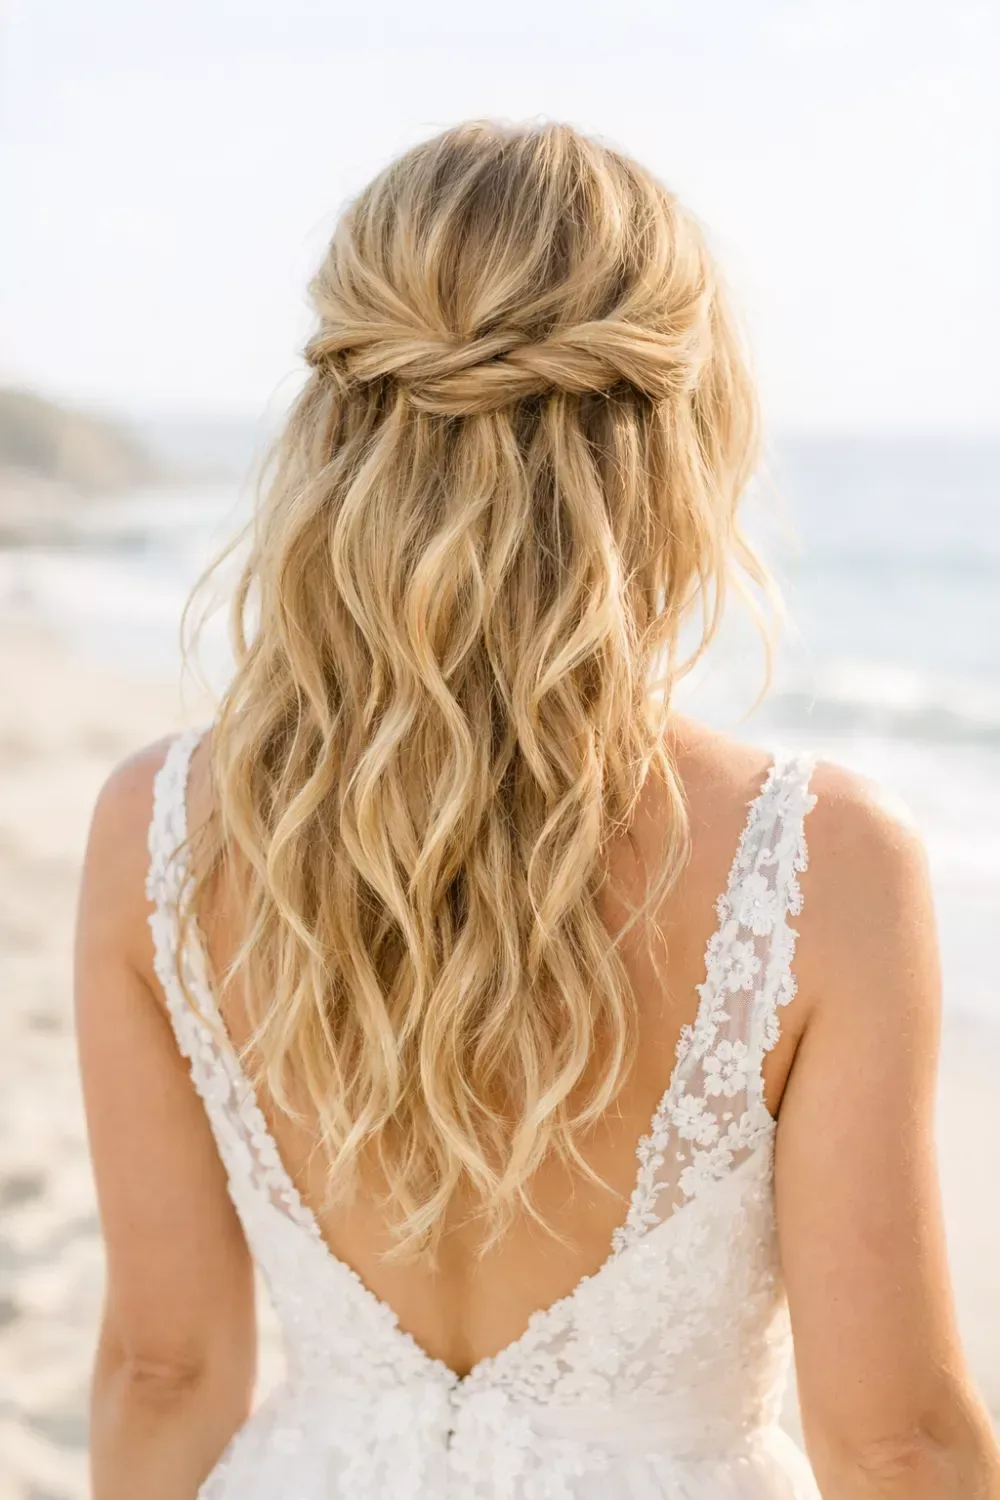
A curly half-up with a twist is the curly bride’s answer to keeping the hair off her face without losing the curls: two sections twisted back from the temples and pinned at the crown, with the rest of the curls falling down the back in all their volume. The twist is what makes it work on the beach — it anchors the top, so the wind cannot blow the curls across your face during the vows, while the curls underneath are free to move and catch the breeze. It is also one of the most flattering curly styles, because the twist lifts the face and shows off the earrings, while the curls frame the shoulders and the dress neckline.
Pros: keeps the face free, shows off the curls, and holds in the wind. Cons: the twist can pull at curly hair if it is done too tightly, so ask for it to be loose. Common mistake: twisting the sections while the hair is dry — twist on damp, defined curls, because dry curls will frizz and break when they are pulled. How long it takes: 20 to 30 minutes. What you need: a curl cream, two or three bobby pins, and a flexible-hold spray. Quick verdict: the best curly style for a bride who wants her hair up and her curls on show at the same time.
35. Elegant Afro Puff with a Headwrap
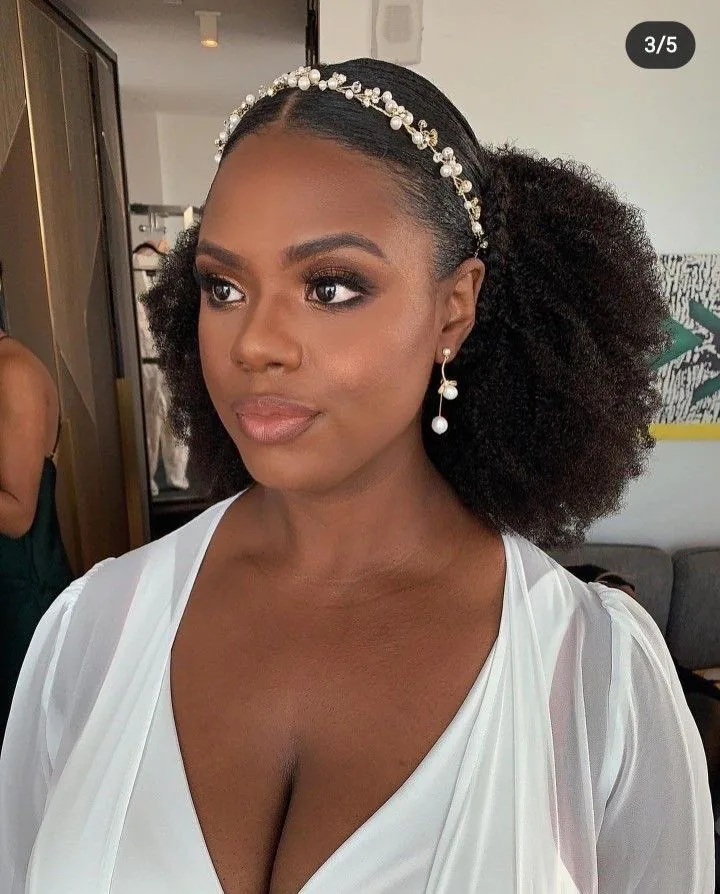
An elegant afro puff with a headwrap is a statement of beauty and pride: the hair gathered into a full, round puff high on the head, with a silk or satin headwrap tied around the base in a bow that matches the dress. The puff is the star — it is bold, sculptural and impossible to ignore — while the headwrap adds the colour and the occasion, and protects the hairline from the sun and the salt air. On the beach it is a practical choice too: the hair is completely up and off the neck in the heat, the puff holds its shape in the wind, and the headwrap keeps the edges smooth through the humidity. Choose a headwrap in a colour that matches the dress or the flowers, and tie it after the puff is secure.
Best for: natural or textured hair, a bold or colourful dress, and a bride who wants a look that is unmistakably hers. How to style: moisturise and define the curls, gather the hair into a puff with a wide elastic or a puff cuff, and tie the headwrap around the base, knotting it at the front or the side. What to ask a stylist: ask for a stylist who works with natural hair, and for the edges to be smoothed with a light edge control that will not flake in the heat. Maintenance: none — a puff is the most wind-proof style here. Time: 20 to 30 minutes. Cost: low — a puff cuff and a headwrap.
36. Wash-and-Go Waves with a Shine Finish
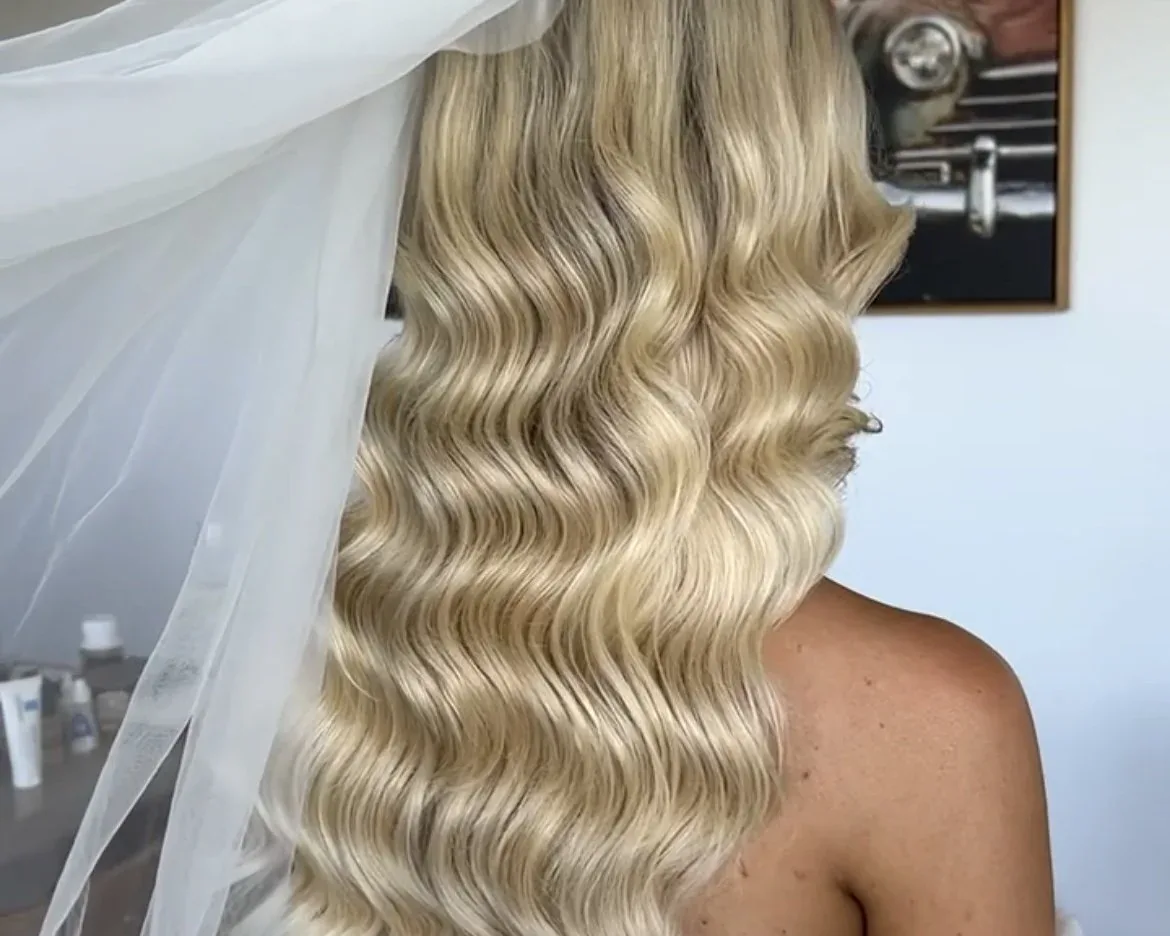
Wash-and-go waves with a shine finish are the most effortless style in this guide: the hair washed, scrunched with a curl cream or a sea-salt spray, and left to dry into soft, natural waves — then finished with a shine serum so the waves catch the light. There is no curling iron, no pins and no heat, which means there is nothing to fail in the humidity and nothing to fix when the wind picks up. This is the style for a bride who loves her natural texture, who wants to feel like herself on her wedding day, and who would rather spend the morning relaxing than sitting in a stylist’s chair. The shine finish is what makes it a wedding style rather than an everyday one: a light serum on the lengths, a smooth part, and the waves look polished rather than just damp.
Pros: the most comfortable and natural style here, and nothing to go wrong. Cons: it depends entirely on your natural texture, so it will not work if your hair is very straight. Common mistake: touching the hair while it dries — leave it alone until it is completely dry, because touching wet waves breaks them up and creates frizz. How long it takes: 10 minutes of styling, plus drying time. What you need: a curl cream or sea-salt spray, a shine serum, and a diffuser if you are short on time. Quick verdict: the most relaxed style here, and the one that feels most like you.
37. Matching Bridesmaid Half-Up Waves
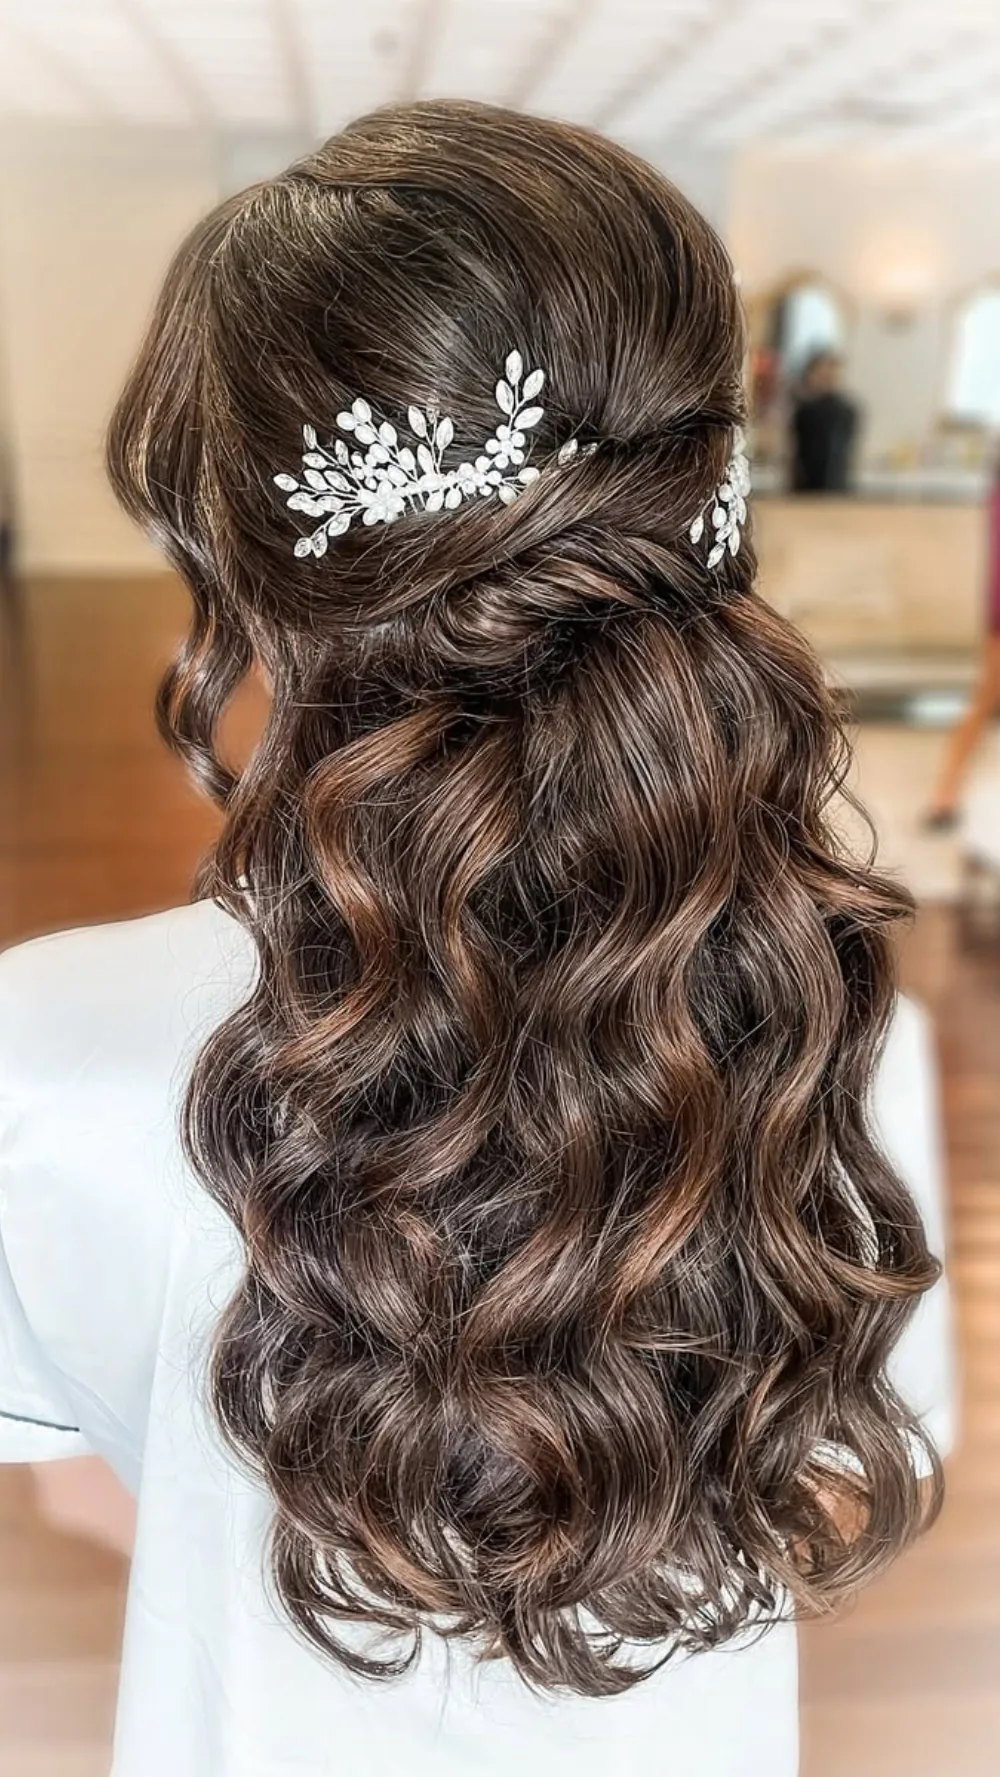
Matching bridesmaid half-up waves are the group photo secret: every bridesmaid wears the same soft half-up waves, in her own length and texture, so the group looks coordinated without looking identical. The half-up is the right choice for a group because it suits almost every face shape and every hair length, it keeps the face open for photos, and it holds in the wind because the top is anchored while the lengths are free to move. The key is to agree on the same style, not the same exact look — a bridesmaid with short hair wears a shorter version, a bridesmaid with curly hair wears her curls, and the group still looks like a group. It is also a style every bridesmaid can do herself, which matters when five girls are getting ready in one hotel room.
Best for: bridesmaids, a coordinated group look, and medium to long hair. How to style: curl the hair, twist two sections back from the temples, cross them at the crown and pin with two or three bobby pins. What to ask a stylist: ask for a group booking if you are using a stylist, because five half-ups take an hour and a half and need to be scheduled. Maintenance: one pin check before the group photos. Time: 20 to 25 minutes per person. Cost: low, and the most budget-friendly bridesmaid style here.
38. Guest Beach Waves with a Straw Hat
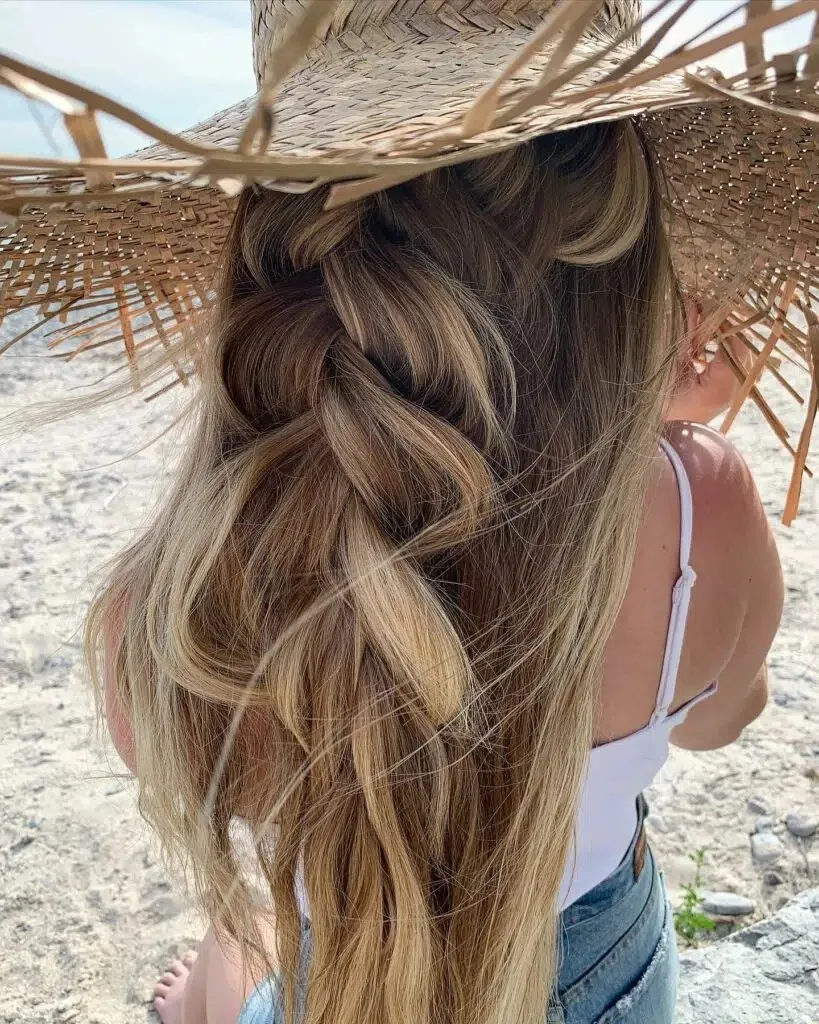
Guest beach waves with a straw hat are the most practical guest style in this guide: soft, loose waves worn down, with a straw hat that does three jobs at once — it shades you from the sun, it holds the hair back from your face in the wind, and it looks effortlessly chic in the photos. The waves themselves are simple: a curling wand, a sea-salt spray, and a brush-through, so they look like they happened at the beach rather than in a bathroom. The hat is the detail that makes it a wedding-guest look rather than a beach-day look, so choose one that is elegant rather than floppy — a structured straw boater or a wide-brim hat in a neutral colour that matches your outfit.
Pros: sun protection, wind protection, and effortlessly chic. Cons: a hat can flatten the crown, so lift the roots with a little dry shampoo before you put it on. Common mistake: choosing a hat that is too big — a wide brim is beautiful in photos but will block the view of the guest behind you during the ceremony, so save the biggest hat for the reception. How long it takes: 20 minutes. What you need: a curling wand, a sea-salt spray, and a straw hat. Quick verdict: the smartest guest style here, because the hat does half the work.
39. Guest Low Chignon with a Ribbon
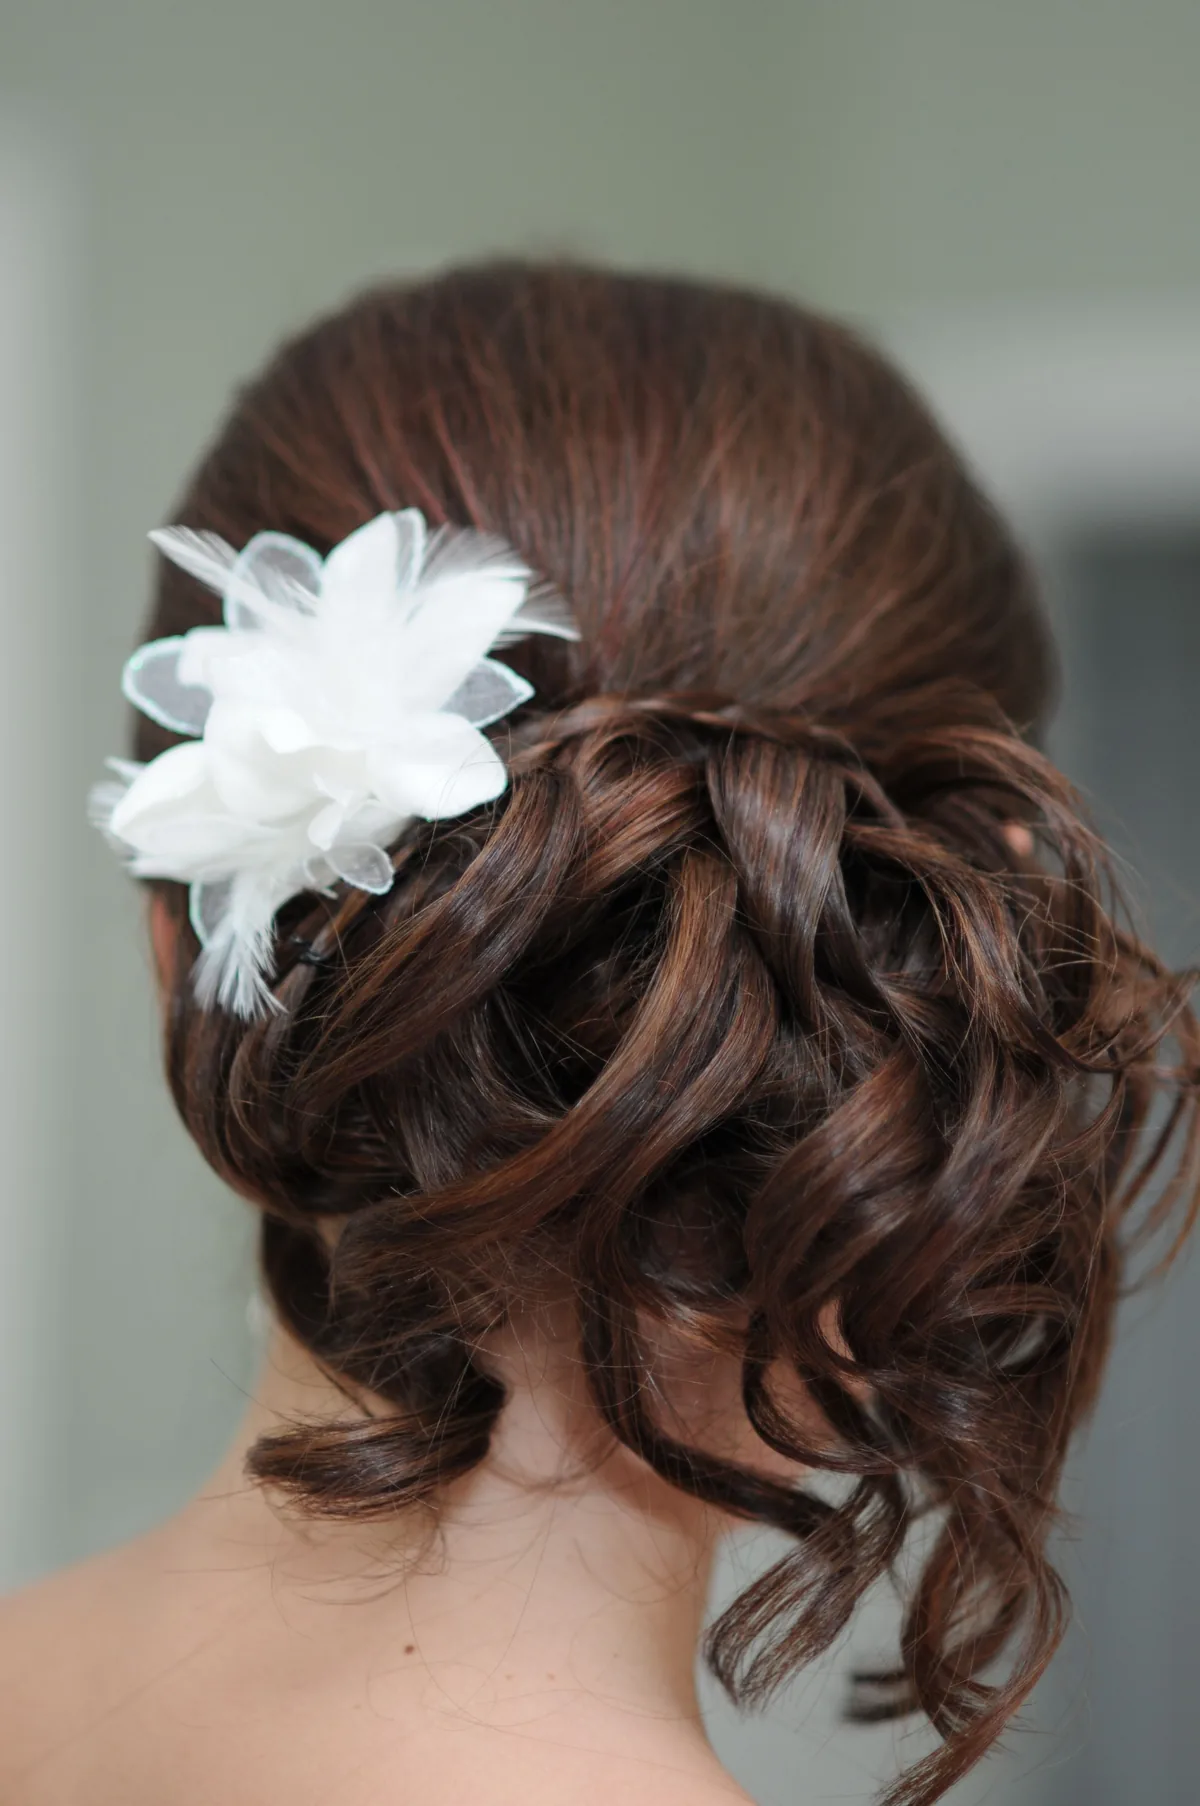
A guest low chignon with a ribbon is the most elegant guest style in this guide: the hair gathered low at the nape, twisted into a soft knot, and finished with a velvet or satin ribbon tied around the base in a bow that matches the outfit. The ribbon is what turns a plain chignon into a wedding-guest hairstyle — it adds colour, texture and a focal point, and it echoes the softness of a summer dress in a way a plain elastic never could. It is also a practical choice for a guest: the hair is completely off the neck in the heat, it will not fall in your face during the ceremony, and it shows off an open back or a halter neckline beautifully. And it takes fifteen minutes, which leaves plenty of time for the rest of the getting-ready.
Best for: a wedding guest, a formal beach wedding, and medium to long hair. How to style: gather the hair low, twist into a soft knot, pin with four to six bobby pins, and tie the ribbon around the base, wrapping it twice so it stays put in the wind. What to ask a stylist: you probably do not need one — this is one of the easiest styles to do yourself. Maintenance: almost none — one pin check before the photos. Time: 15 minutes. Cost: the ribbon is the only cost. Quick verdict: the most elegant guest style here, and the fastest to do yourself.
40. Guest Braided Updo for a Formal Beach Wedding
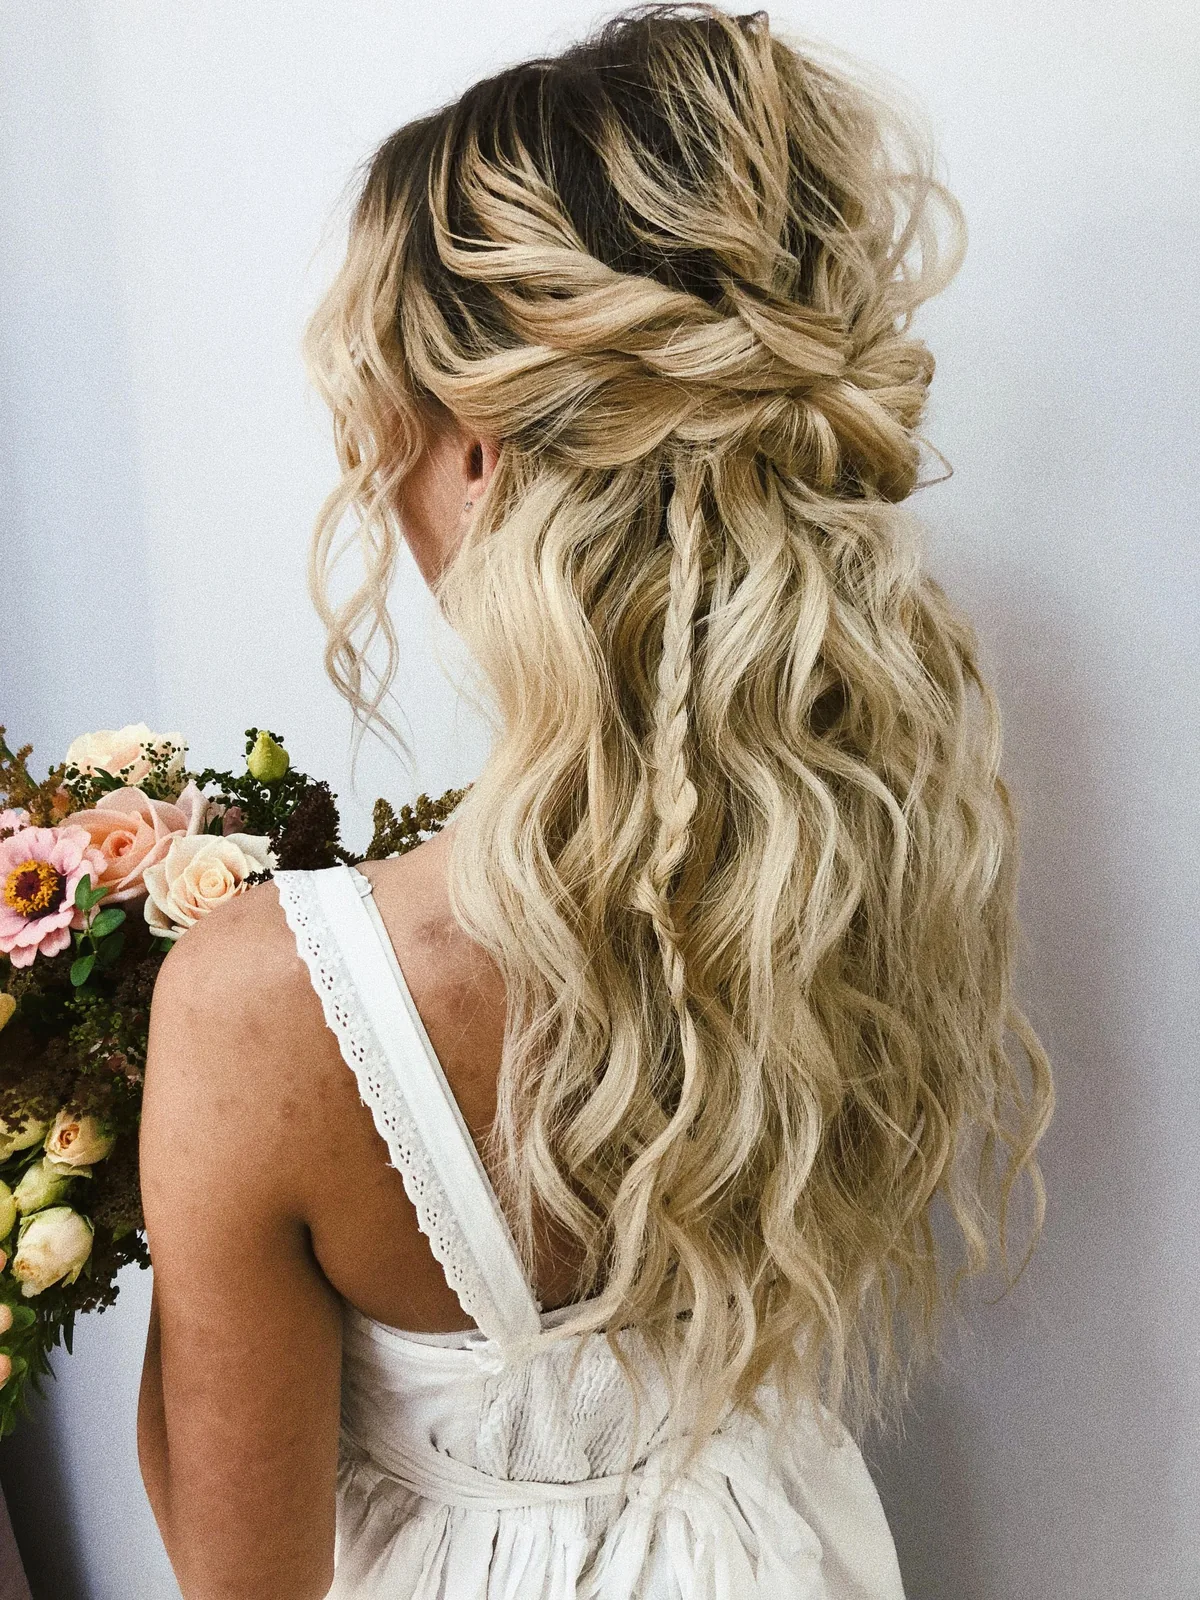
A guest braided updo for a formal beach wedding is the style for a guest who wants to look polished without looking bridal: the hair braided and pinned up into a low, textured updo, with the braid giving it detail and the updo giving it formality. The braid is the practical part — it locks the hair down section by section, so it survives the wind and the dancing — and the updo is the formal part, because it keeps the hair off the neck and shows off the dress. The key for a guest is to keep it simpler than the bride’s: a single braid into a low bun, or two small braids pinned into a twist, rather than a braided crown with flowers, which reads as bridal. It is a style that looks like you made an effort, without looking like you are competing with the bride.
Pros: formal, wind-proof, and lasts all day. Cons: needs a little skill with braiding, so practise it once before the wedding. Common mistake: adding flowers or a veil-like accessory — a guest should avoid anything that reads as bridal, so keep the accessories to a simple pin or a ribbon. How long it takes: 25 to 35 minutes. What you need: a texturising spray, a few bobby pins, and a small clear elastic. Quick verdict: the most polished guest updo here, as long as you keep it simpler than the bride’s.
41. Guest Sleek Ponytail with a Gold Cuff
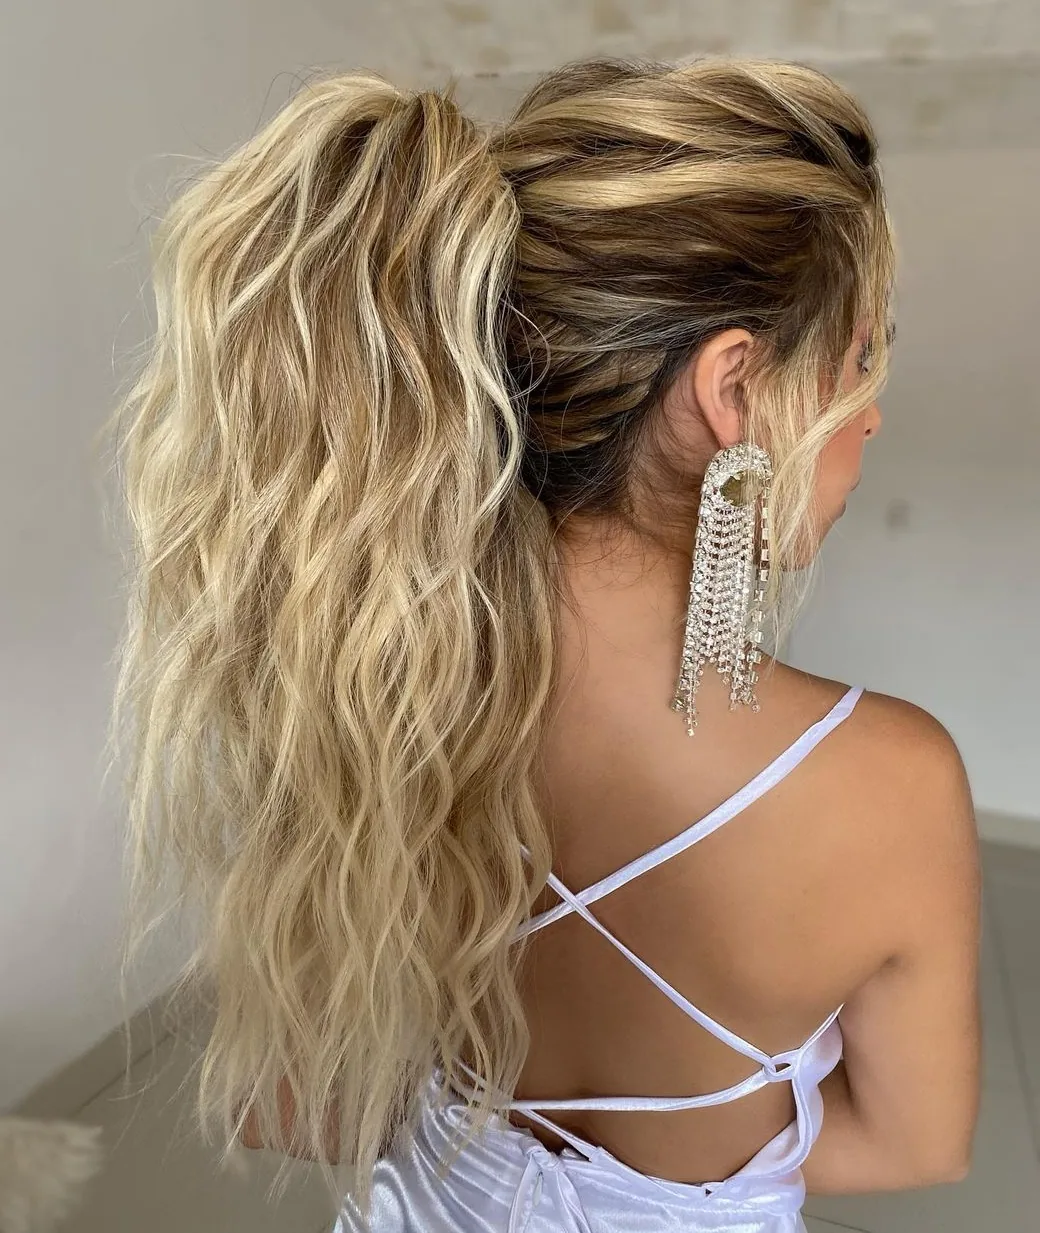
A guest sleek ponytail with a gold cuff is the modern guest style: the hair pulled back smooth and low, with a gold cuff or a wrapped section around the base, so the whole look reads as deliberate and polished rather than casual. The sleekness is what makes it formal — every strand smoothed into place, not a flyaway in sight — while the gold cuff is the jewellery that makes it a wedding look. It is also one of the best styles for a guest on a beach, because the hair is completely off the face and neck, it will not frizz if it is sealed with an anti-humidity serum, and a low ponytail barely moves in the wind. Pair it with statement earrings and a dress with a clean neckline, and the whole look is sharp, modern and unforgettable.
Pros: fast, polished, and one of the most wind-proof guest styles. Cons: it needs a serum and a good brush, and it shows every flyaway, so the smoothing matters. Common mistake: pulling the ponytail too high — a low ponytail is elegant and wind-proof, while a high one swings and whips in the sea breeze. How long it takes: 15 to 20 minutes. What you need: a smoothing brush, a strong elastic, a shine serum, and a gold cuff or a section of hair to wrap the base. Quick verdict: the chicest guest style here, and the one least likely to need a touch-up.
What is the best hairstyle for a beach wedding?
The best hairstyle for a beach wedding is one designed around the wind, humidity and salt air, not against them. Loose beachy waves, a braided crown, a low chignon with tendrils, a half-up twist or a braided low bun all hold up well on the sand, because they are anchored in more than one place or they are meant to move. Avoid styles that depend on perfect smoothness or a single anchor point, like a high ponytail held by one elastic, and always do a trial run outdoors before the wedding.
How do I keep my hair from frizzing at a beach wedding?
To keep your hair from frizzing at a beach wedding, apply a lightweight anti-humidity serum or smoothing cream to damp hair before styling, because it coats the cuticle and slows the moisture getting in. Choose a style that works with the humidity rather than against it — braids, updos and textured waves frizz far less than sleek straight hair — and carry a mini anti-frizz serum in your touch-up kit for the photos. Avoid touching your hair during the day, because the oils on your hands break the style down and add frizz.
Should a bride wear her hair up or down at a beach wedding?
A bride should wear her hair up at a beach wedding if her dress has a high neckline, a detailed back, or a lot of sparkle, because an updo keeps the lines clean and shows off the dress — and updos survive the wind far better than hair worn down. She should wear it down if her dress is strapless or off-the-shoulder, because soft waves frame the open neckline beautifully. A half-up style is the safest middle ground: it keeps the face visible in photos, shows off the earrings, and still gives the softness of wearing the hair down.
Can I wear a veil at a beach wedding?
You can wear a veil at a beach wedding, but a long veil on a windy beach will wrap around your face and fight the wind all day. A short birdcage veil, a fingertip veil in lightweight tulle, or a veil worn only for the ceremony and the first photos and then removed, all work far better than a cathedral-length veil on open sand. Many beach brides choose an alternative instead: a flower crown, a pearl headband, a silk flower comb, a hair vine, or a cape veil attached at the shoulders, which gives the bridal feeling without the wind risk.
What hairstyle is best for a beach wedding guest?
The best hairstyle for a beach wedding guest is a beautiful, comfortable style that survives the ceremony, the photos and the dancing without needing a stylist or a trial run. Loose beach waves with a straw hat, a low chignon with a ribbon, a braided updo, or a sleek low ponytail with a gold cuff all work well. A guest should avoid anything that reads as bridal — no white flowers in the hair, no veil, and no flower crown that could be mistaken for the bride’s — and should choose a style that can be forgotten about once the ceremony starts.
How do I keep my beach wedding hairstyle from falling in the wind?
To keep your beach wedding hairstyle from falling in the wind, choose a style anchored in more than one place — a braid, a low bun or a pinned-up style holds far better than a single ponytail or hair worn completely loose. Start with hair that has grip, using day-old hair or a texturising spray before styling, push each bobby pin through two layers of hair so it locks rather than slides, and finish with a flexible-hold hairspray rather than a rock-hard one, because a hard spray cracks in the wind. Do the wind test at your trial: stand in front of a fan and watch what moves.
What hair products work best for a beach wedding?
The hair products that work best for a beach wedding are a lightweight anti-humidity serum or smoothing cream applied to damp hair before styling, a flexible-hold humidity-resistant hairspray, dry shampoo for the roots, and a sea-salt spray if you want to refresh waves after the ceremony. Leave heavy oils and waxes at home — they go greasy in the heat and attract sand — and test every product at your trial on a humid day if you can, because a product that holds in air-conditioning and fails in humidity gives you false confidence.
Should I wash my hair the morning of a beach wedding?
No, you should not wash your hair the morning of a beach wedding. Wash it the night before instead, because day-old hair has more grip and holds pins, braids and curls far better than slippery freshly washed hair, and a wash the night before gives you time to let it dry properly instead of blow-drying in a panic. Use a deep-conditioning mask, rinse with lukewarm water, and sleep with your hair in a loose braid or a loose high bun for soft, natural texture that is the perfect starting point for the morning’s styling.
What accessories work best with beach wedding hair?
The best accessories for beach wedding hair are coastal and light: fresh or silk flowers tucked into a braid, a small shell comb or barrette, pearl pins, a silk flower crown, or a gold hair cuff. Pick one statement piece rather than several, because a flower crown and a shell comb and a pearl headband will fight each other in photos. Attach the accessory last, after the hairspray, and secure it with a hidden bobby pin as well as its own clip, because clips slip on smooth, salty hair and the wind will test every attachment.
Do I need a hair trial before a beach wedding?
Yes, you need a hair trial before a beach wedding, and it should happen outdoors if at all possible. Book it at least a month before the wedding, bring the dress, the veil or accessory, and photos of the exact style from more than one angle, then take the style outside: stand in the wind, walk for ten minutes, and take photos from the front, the side and the back. Test whether the style holds in the wind, whether the humidity frizzes the front pieces, and whether the accessory stays put — and if the style fails the trial, change the style, not the beach.
Conclusion
A beach wedding is the one wedding where the weather is a guest, and the best hairstyle is the one that welcomes it. The wind, the humidity and the salt air are not problems to solve — they are part of the setting, and the hairstyles in this guide are built to work with them: waves that look better when the wind catches them, braids that lock the hair down section by section, updos anchored in more than one place, and accessories chosen because they will actually stay put. Whether you are the bride in loose beachy waves, a bridesmaid in matching half-up curls, or a guest in a low chignon with a ribbon, the right style is the one that matches your dress, suits your hair, survives the beach, and feels like you.
Start with the dress, then choose the vibe, then do the trial run — outdoors, in the wind, with the dress on and photos from every angle. Pack the touch-up kit, give it to a bridesmaid, and then stop worrying about your hair and enjoy the day. The photos will last for years, and the best ones are always the ones where you are laughing, dancing, and not thinking about your hair at all — because it stayed exactly where you put it, even with the sea breeze doing its best.