Dutch Braid Hairstyles for Women: Inside-Out, Double Dutch and Crown Braids That Hold All Day
A Dutch braid looks like a French braid turned inside out — and that is exactly what it is. Instead of crossing each section over the middle, you cross it under, so the braid sits on top of the hair like a raised rope instead of sinking into it. The difference is small in technique and huge in effect: a Dutch braid is bolder, clearer and far more visible than a French braid, which is why it photographs so well and why it holds its shape for hours. It is the braid that does the talking, whether it runs down the back, wraps around the head like a crown, or splits into two neat plaits.
This guide gathers 34 Dutch braid hairstyles for women, from the classic single Dutch braid and double Dutch braids to the Dutch crown, Dutch braids into buns, ponytails and top knots, and versions for short, fine, thick, curly and straight hair — plus looks for work, weddings, the gym and a night out. Eight guides cover what makes a Dutch braid different, how to braid one step by step, how the style changes with length and hair type, how to make it last, and the mistakes that make a Dutch braid go flat. An honest note first: a Dutch braid takes a little practice — the underhand motion feels backwards for the first few tries — but once your hands learn it, it is no harder than a French braid, and it stays put far longer.
What Makes a Dutch Braid Different — the Inside-Out Braid
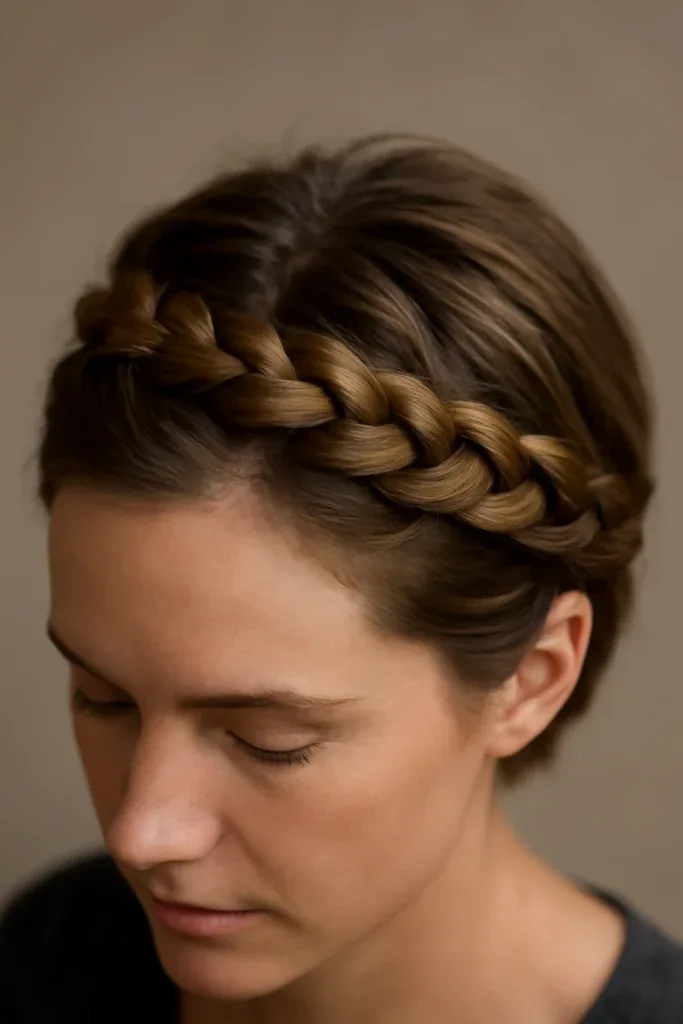
A Dutch braid is sometimes called a reverse braid, and the name tells you everything. In a French braid you cross each side section over the middle strand, so the braid weaves itself into the hair and sits almost flat. In a Dutch braid you cross each side section under the middle strand, so the braid pops out and sits on top of the hair like a raised cord. Same three strands, same adding-in of hair as you go down — the only change is the direction of the cross, and it changes the whole look.
That raised effect is why women choose Dutch braids. The braid is easier to see from a distance, it shows off the pattern of the plait, and it looks thicker than a French braid made from the same amount of hair — which is why it is the braid of choice for fine hair. It also holds better: because the braid sits on top, it does not loosen into the hair the way a French braid can, and a Dutch braid pinned at the end will still look neat at the end of a long day. If you can French braid, you can Dutch braid — you only have to remember one rule, under, not over, and your hands will learn the rest in a few tries.
How to Do a Dutch Braid — Step by Step for Beginners
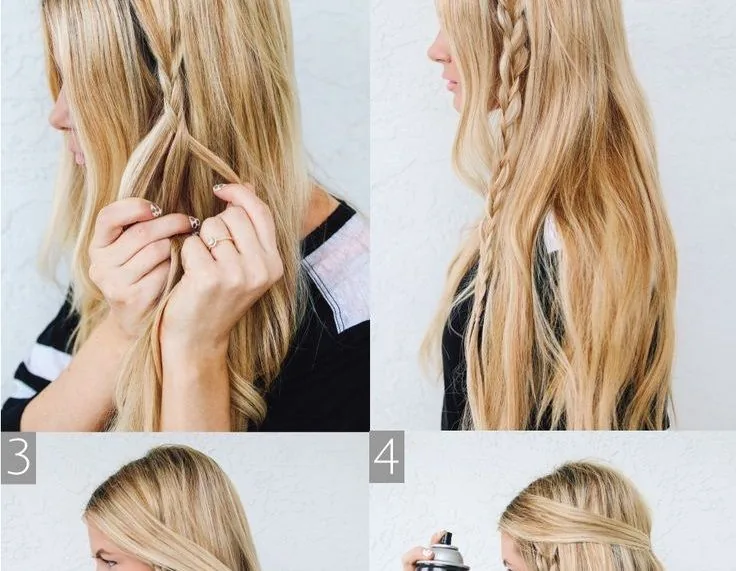
Start with brushed, slightly textured hair — a little dry shampoo or texturising spray helps, because very clean, slippery hair slides out of a Dutch braid. Take a section at the front hairline and split it into three equal strands. Cross the right strand under the middle strand, then the left strand under the new middle strand. That is the whole motion, and the rest is repetition: each time you cross a side strand under, pick up a little more hair from that side and add it to the strand before you cross it. Keep the sections even, keep the tension firm but not tight, and keep the braid close to the scalp as you work down.
The most common beginner mistake is letting the braid drift, so check your line every few crosses — a Dutch braid should run straight down the centre, or in a clean diagonal if that is the look you want. When you run out of hair to add, keep braiding the three strands to the ends and tie off with a small elastic. Then, if you want the fuller look, gently pull at the outer edges of the braid — pancaking — starting from the bottom and working up, a little at a time. Practise on someone else first if you can; it is easier to learn the underhand motion on another head than on your own, and once your fingers know it, your own hair is no harder.
Dutch Braids on Different Lengths — Short, Medium and Long
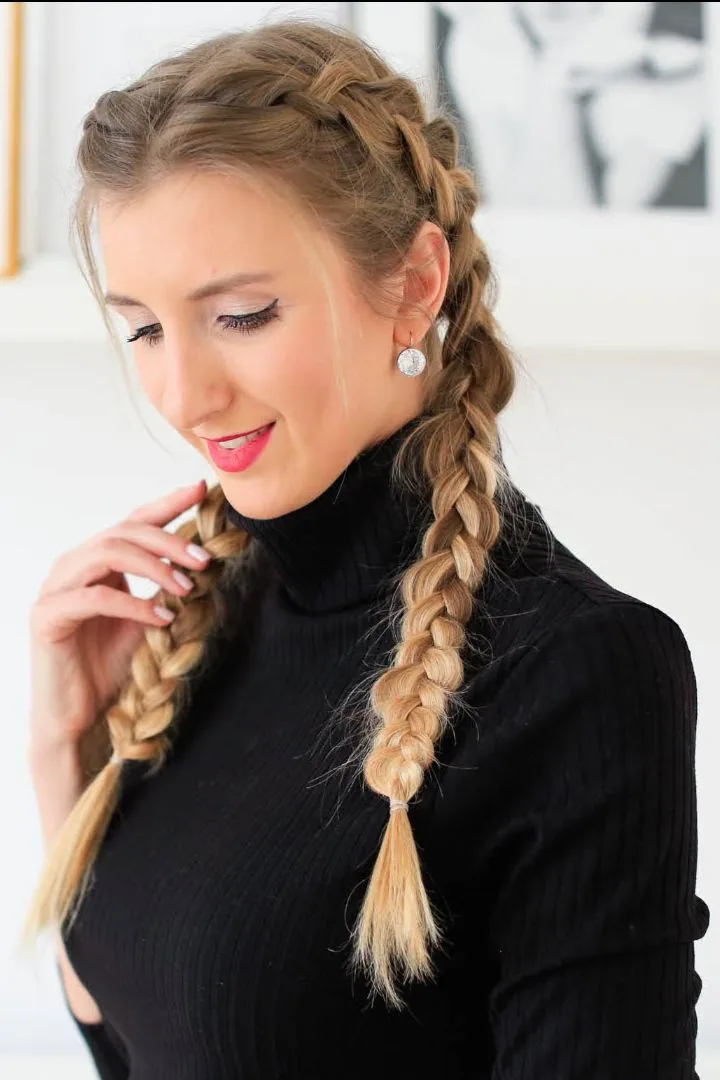
A Dutch braid works on almost any length, but it behaves differently at each one. On short hair — a bob or a lob — a Dutch braid is best kept small and close to the head: a single braid along the hairline, a crown braid, or two short double Dutch braids that end in little plaits. The braid will be shorter and the ends will need pinning rather than tying, but the raised pattern shows up beautifully on short hair, and a Dutch braid is one of the best ways to grow out a bob without the awkward in-between stage showing.
Medium hair is the easiest length for a Dutch braid: long enough for a full single braid down the back or double Dutch braids that reach the shoulders, short enough that your arms do not tire halfway through. Long hair is where the Dutch braid is at its most dramatic — a thick, raised plait that runs the whole length of the back — but it takes longer, about fifteen to twenty minutes for a neat single braid, and the braid gets heavy, so a bun or a ponytail finish is often more comfortable than leaving it hanging. Whatever your length, start with clean sections and a little texture spray, and the braid will behave.
Dutch Braids by Hair Type — Fine, Thick, Curly and Straight
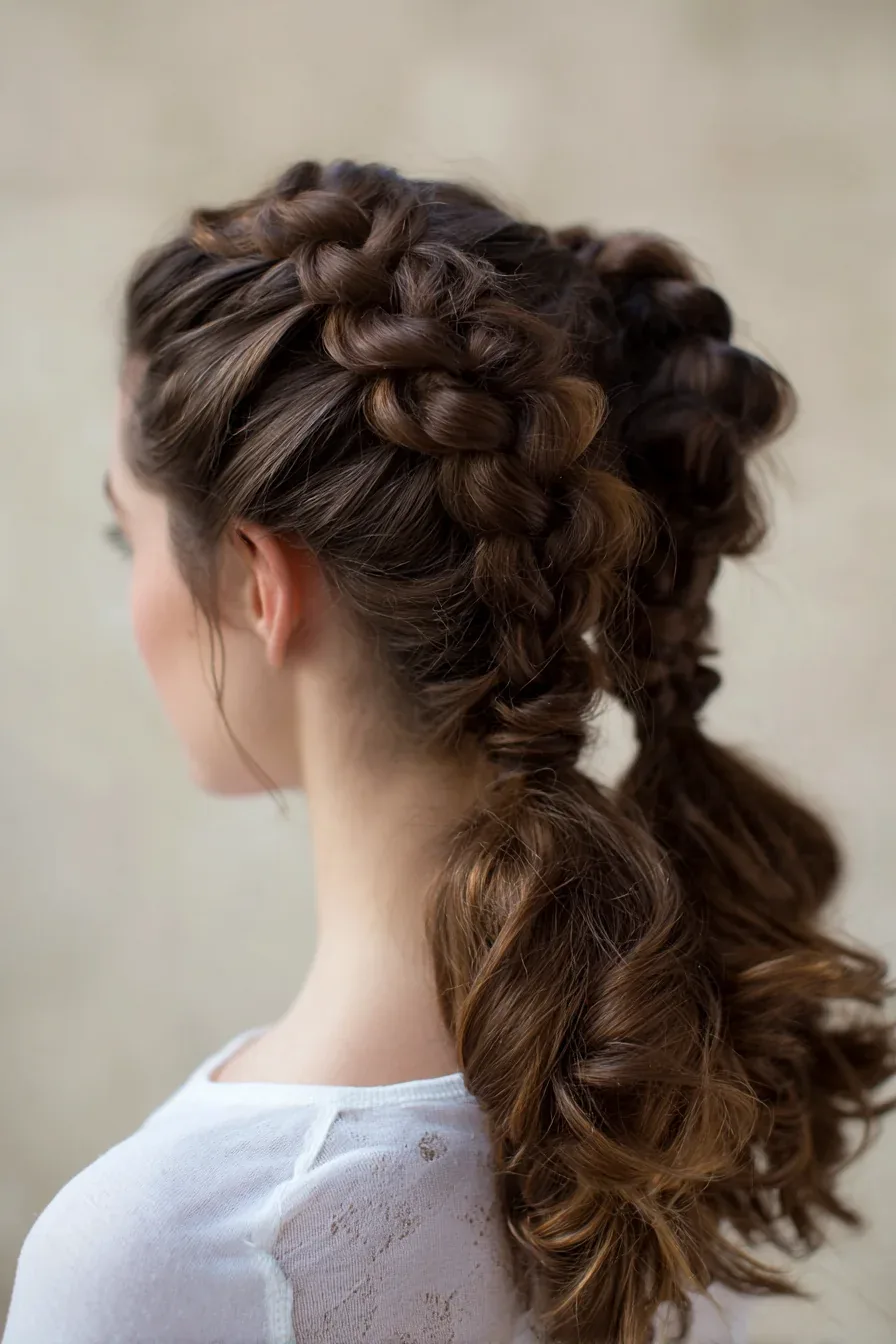
Fine hair is where the Dutch braid earns its reputation, because the raised braid looks thicker than the hair really is — and pancaking, gently pulling the edges of the braid wider, can double the apparent width of a fine-haired braid. Use a volumising mousse or dry shampoo before you start, braid a little looser than you think you should, and pancake generously once the braid is tied. The result looks full and deliberate, not thin and apologetic, which is exactly what fine hair needs from a braid.
Thick hair makes a Dutch braid look magnificent and takes a little more effort: the sections are heavier, the braid is wider, and your arms will feel it by the end. Work in clean, even sections, keep the tension steady, and use a strong elastic — a thin one will snap. Curly hair braids beautifully into a Dutch braid, and the braid tames the curls into a neat, defined plait; braid it while the hair is slightly damp and smooth, and the curls will hold the pattern without frizzing out. Straight hair is the slipperiest, so texture spray is not optional — without it, a Dutch braid on straight hair loosens within the hour. Every hair type can wear a Dutch braid; the prep is what changes.
Making a Dutch Braid Last — Hold, Pancaking and Frizz Control
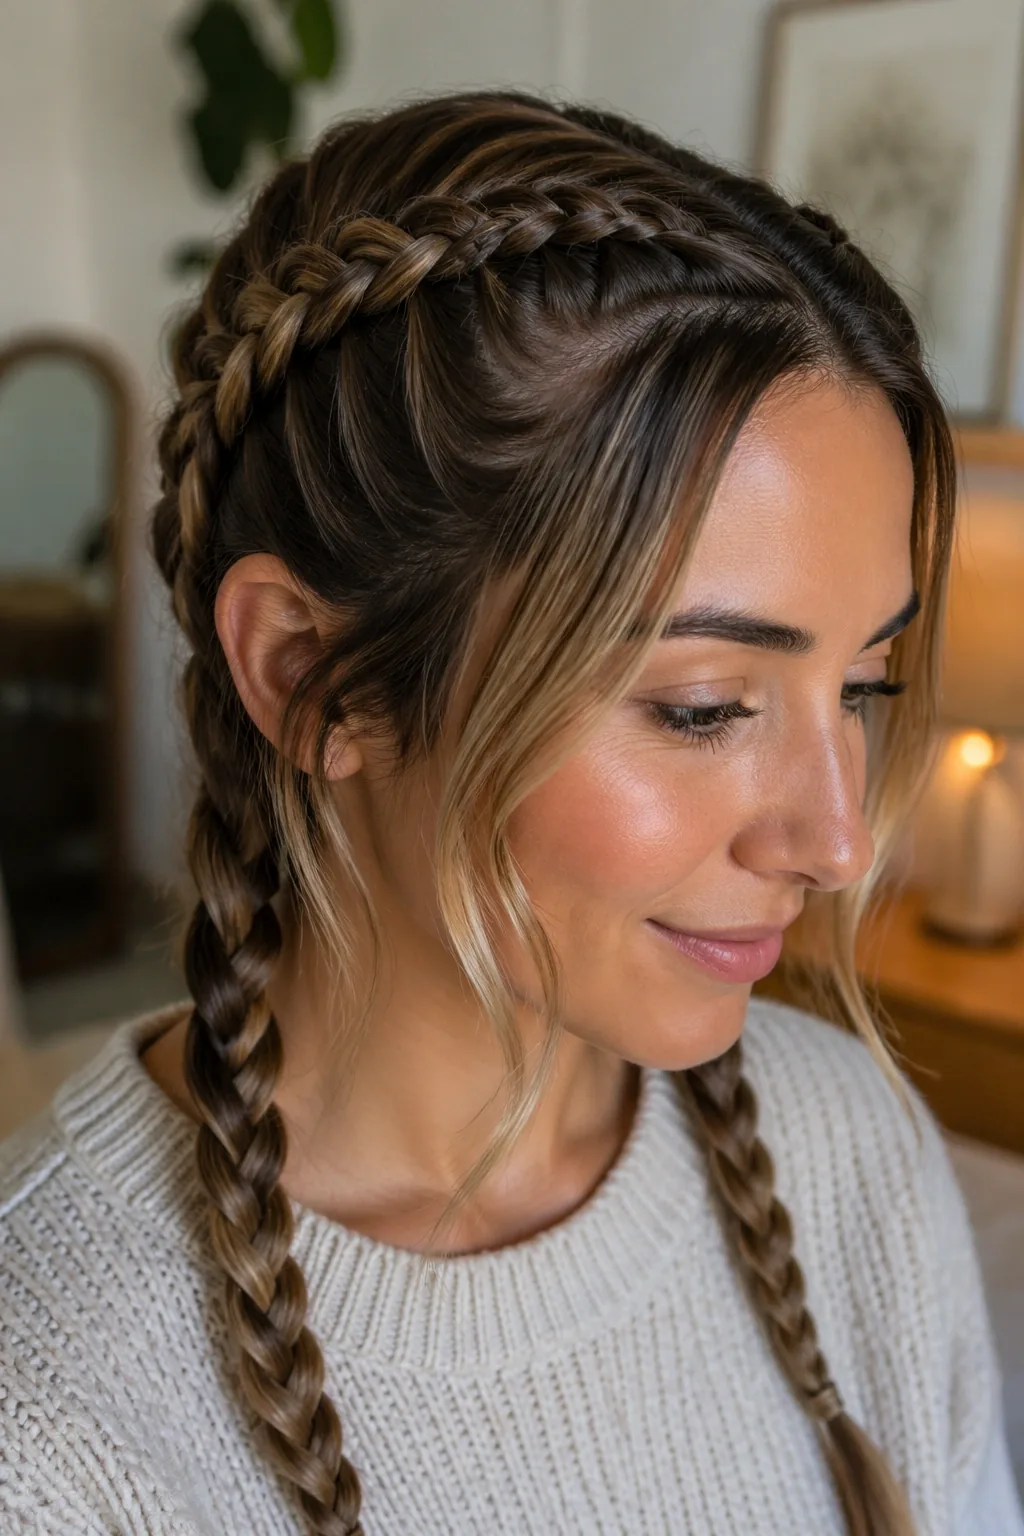
A Dutch braid should last all day, and the secret is in the preparation, not in the hairspray. Start with hair that is not freshly washed — second-day hair has more grip — or add dry shampoo and a little texturising spray to clean hair. Braid with firm, even tension, and keep the braid close to the scalp as you go, because a braid that starts loose will only get looser. Tie the end with a small, snag-free elastic, and pin the tail under or tuck it into a bun if you want the style to survive a workout or a windy day.
Pancaking is the technique that makes a Dutch braid look full, and it is also the one that can ruin it if you are too rough. Pull gently at the outer edges of the braid, one loop at a time, starting at the bottom and working up, and stop while the braid still looks neat — over-pancaked braids fall apart. For frizz, smooth a little gel or pomade over the hairline before you braid, and mist the finished braid lightly with a flexible-hold hairspray rather than a hard one, which makes the braid stiff and flaky. Sleep in a Dutch braid and you will wake up with soft waves when you take it out — a bonus style for the next day.
Dutch Braids for Every Occasion — Work, Wedding, Gym and Party
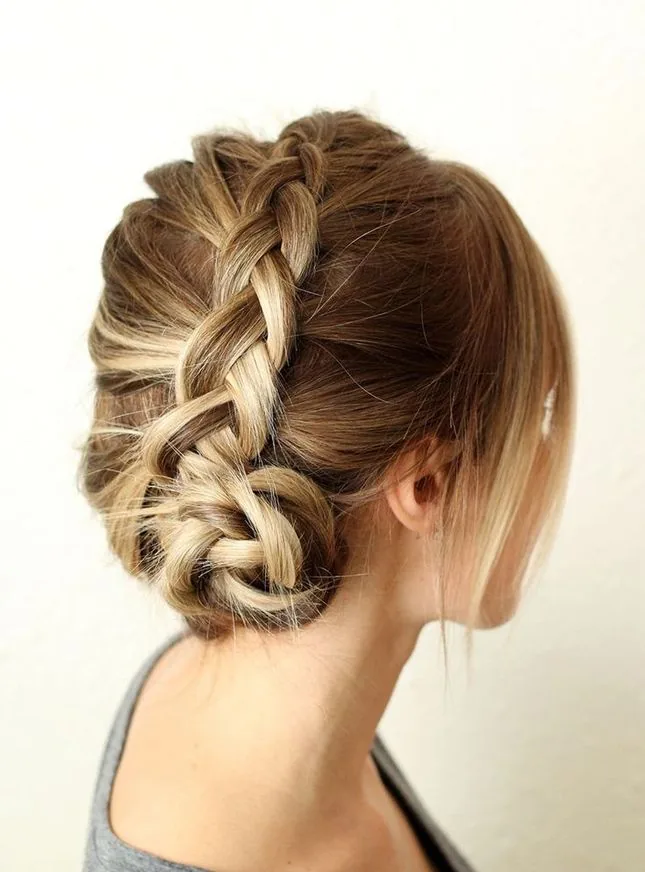
A Dutch braid is one of the few hairstyles that genuinely works everywhere, because the same braid can be dressed up or down. For work, a neat single Dutch braid or a Dutch braid into a low bun reads as polished and deliberate, keeps the hair off the face all day, and needs no attention after the morning. For a wedding, a Dutch crown braid or a Dutch braid woven into a low, soft updo is bridal without being stiff — add a few small flowers or pearl pins and the braid becomes the centrepiece of the whole look.
For the gym, double Dutch braids are the practical choice: they keep every strand out of the way, they do not bounce the way a ponytail does, and they survive a full workout without loosening. For a party, a pancaked Dutch braid — pulled wide and soft — with a few face-framing strands left loose is the evening version, romantic rather than sporty. The braid itself never changes; the finish does. Neat and tight for work and the gym, soft and pancaked with accessories for a wedding or a night out, and the same ten minutes of braiding covers all four.
Dutch Braids with Accessories, Colour and Highlights
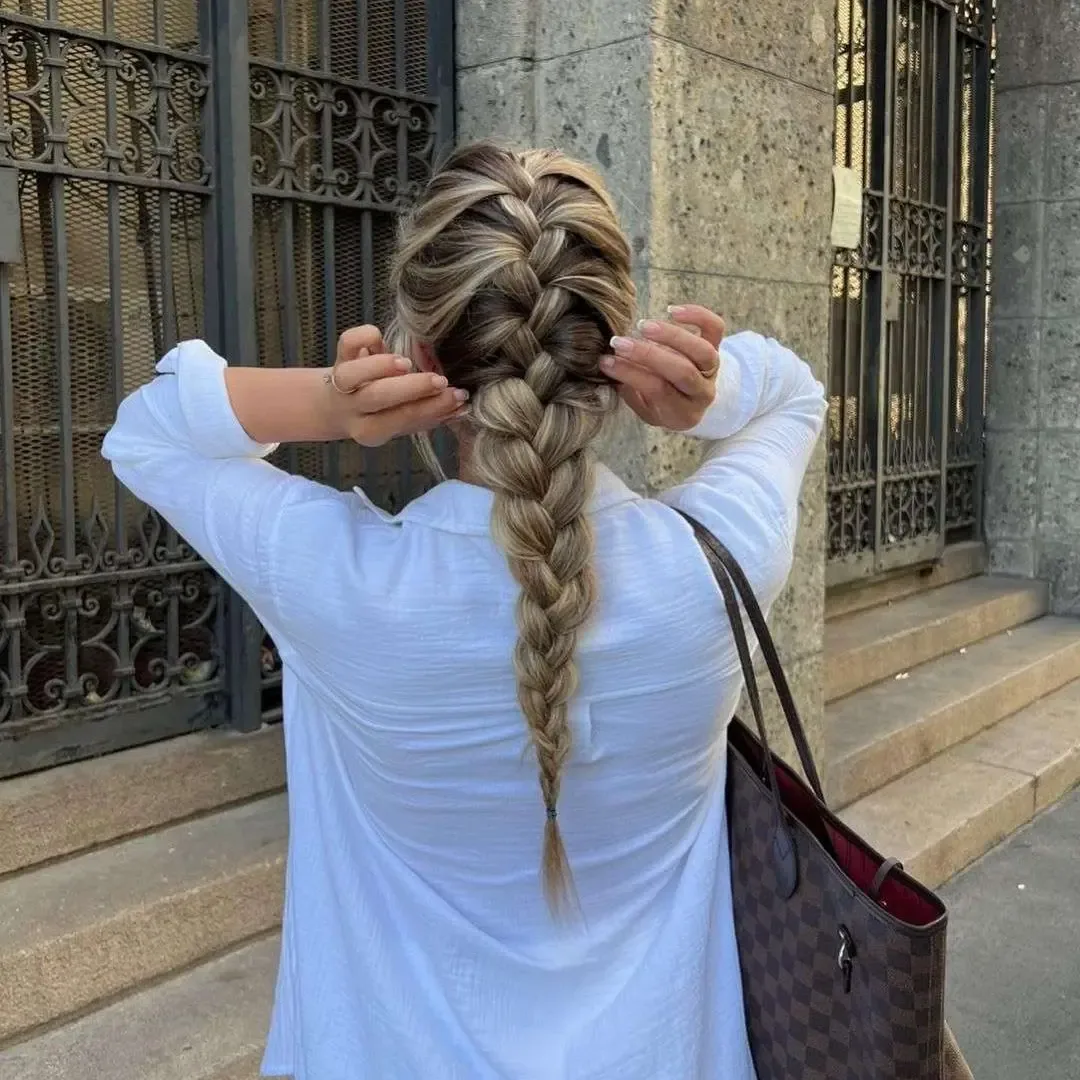
Accessories turn a Dutch braid from a practical style into a statement, and the raised braid is the perfect base for them, because there is a clear, visible plait to decorate. A ribbon woven through the braid as you go — in place of one of the three strands, or threaded through the finished plait — gives a soft, romantic finish that suits weddings and festivals. Gold hair rings and cuffs clipped onto the braid at intervals catch the light and give the style an edge, and small pearl pins pushed into the braid are the simplest bridal touch there is.
Colour shows up beautifully in a Dutch braid, because the raised plait displays every shade. Highlights and balayage look three-dimensional in a Dutch braid — each cross of the braid shows a different tone — and a peekaboo colour underneath the top layer appears as the braid curves. If you are colouring for a Dutch braid, ask your stylist for dimension rather than a single flat shade: a little variation in tone is what makes the braid pattern pop. One rule, as with any accessorised braid: one accent at a time. A ribbon and rings and pearls together is too much; pick one, let the braid do the rest.
Common Dutch Braid Mistakes and How to Fix Them
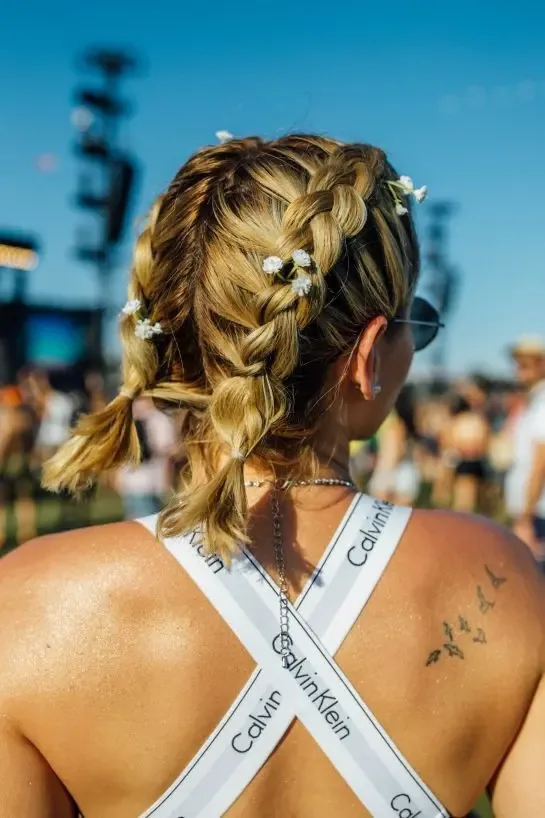
The most common Dutch braid mistake is crossing over instead of under — which gives you a French braid, not a Dutch one. If your braid keeps sinking into the hair instead of sitting on top, check your hands: every side strand goes under the middle strand, every time. The second mistake is uneven sections: if one strand is thicker than the others, the braid will twist to one side and the pattern will look lopsided, so take a moment at the start to split the hair into three truly equal parts.
The other mistakes are about tension and patience. Braiding too tightly pulls at the hairline, hurts by midday, and can cause breakage — firm is enough, tight is too much. Pancaking too hard, or pancaking from the top down, pulls the braid apart; always pancake gently, from the bottom up. Starting with slippery, freshly washed hair is the mistake that makes the whole braid fall out by lunchtime — a little dry shampoo or texture spray first fixes it. And the mistake that costs the most time is rushing the first few crosses: if the start is crooked, the whole braid will be. Undo it, start again, and the second try will take half the time.
1. The Classic Single Dutch Braid
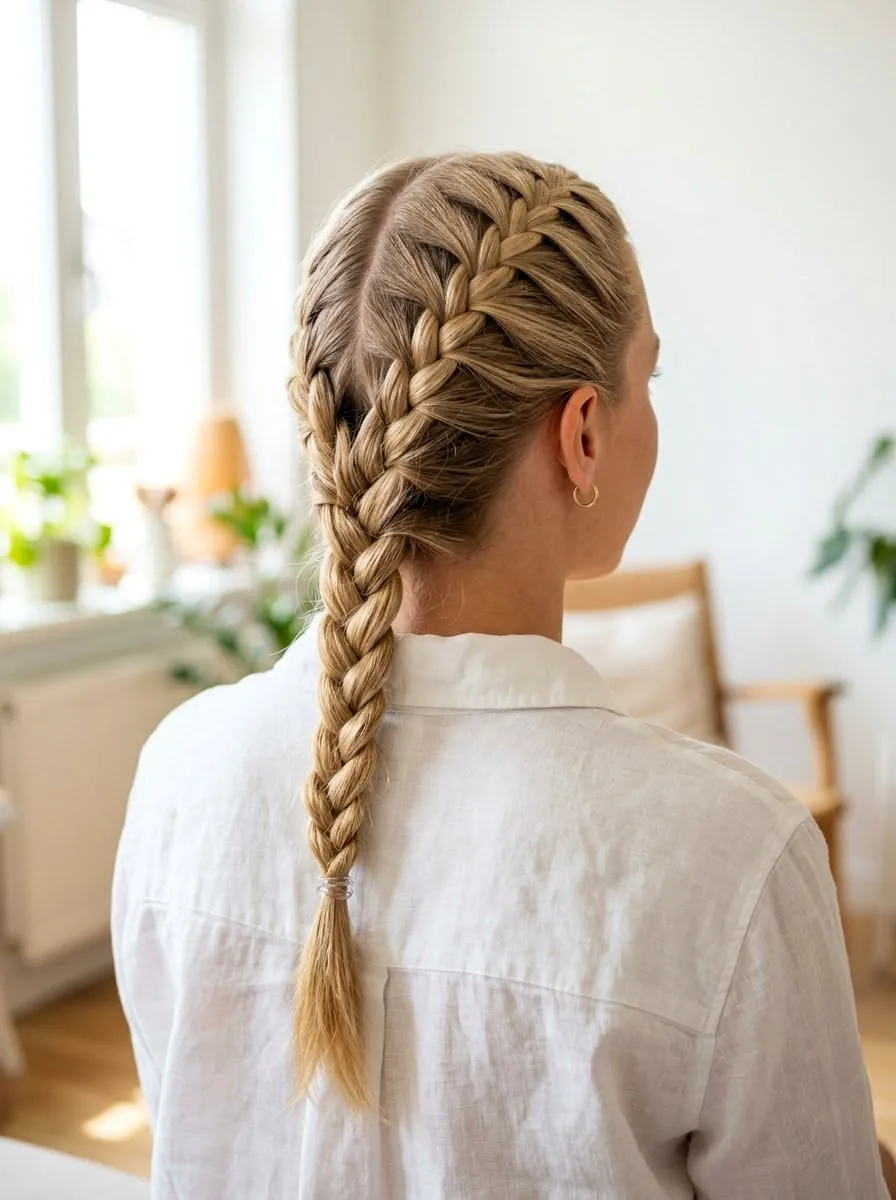
The classic single Dutch braid is where every Dutch braid begins: one raised plait running straight down the centre of the back, starting at the hairline and ending in a tied tail. It is the simplest Dutch braid and the most useful, because it shows off the inside-out pattern at its clearest — a bold, rope-like braid sitting on top of the hair, visible from across the room. It keeps every strand out of the way, it lasts all day, and it suits almost any outfit, from a gym kit to a dress.
Best for: anyone learning the Dutch braid, and anyone who wants a neat, all-day style with no fuss. How long it takes: ten to fifteen minutes once you know the motion, a little longer the first few times. What to ask for at the salon: a centre-part Dutch braid, braided close to the scalp with the tail left loose. A common mistake is crossing over instead of under — if the braid sinks into the hair, you have made a French braid by accident. Quick verdict: the one Dutch braid everyone should know first; master this and every other style in this guide gets easier.
2. Double Dutch Braids
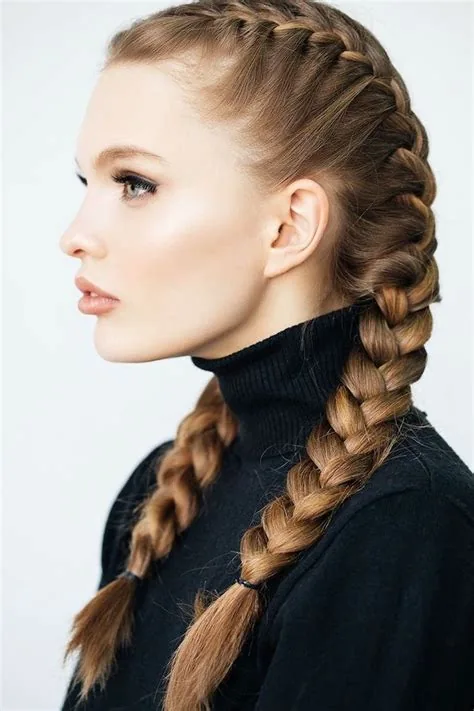
Double Dutch braids — two raised plaits, one on each side of a centre part — are the most recognisable Dutch braid style there is. They are sporty, neat and symmetrical, and they are the braid that stays put through a workout, a festival day or a long flight. The two braids frame the face, keep the hair completely under control, and look just as good pancaked wide and soft as they do braided tight and neat. They suit almost everyone, and they are the Dutch braid most women learn second.
The trick to good double Dutch braids is an even centre part and equal sections on each side, or the braids will come out different sizes. Braid each side with the same tension, tie them at the same length, and pancake them equally — a mirror check from the front and the back is worth the minute it takes. Time: fifteen to twenty minutes for both. They last a full day easily, and they are comfortable to sleep in, which makes them a favourite for festivals and holidays. If one style had to stand for the whole Dutch braid family, it would be this one.
3. The Dutch Crown Braid
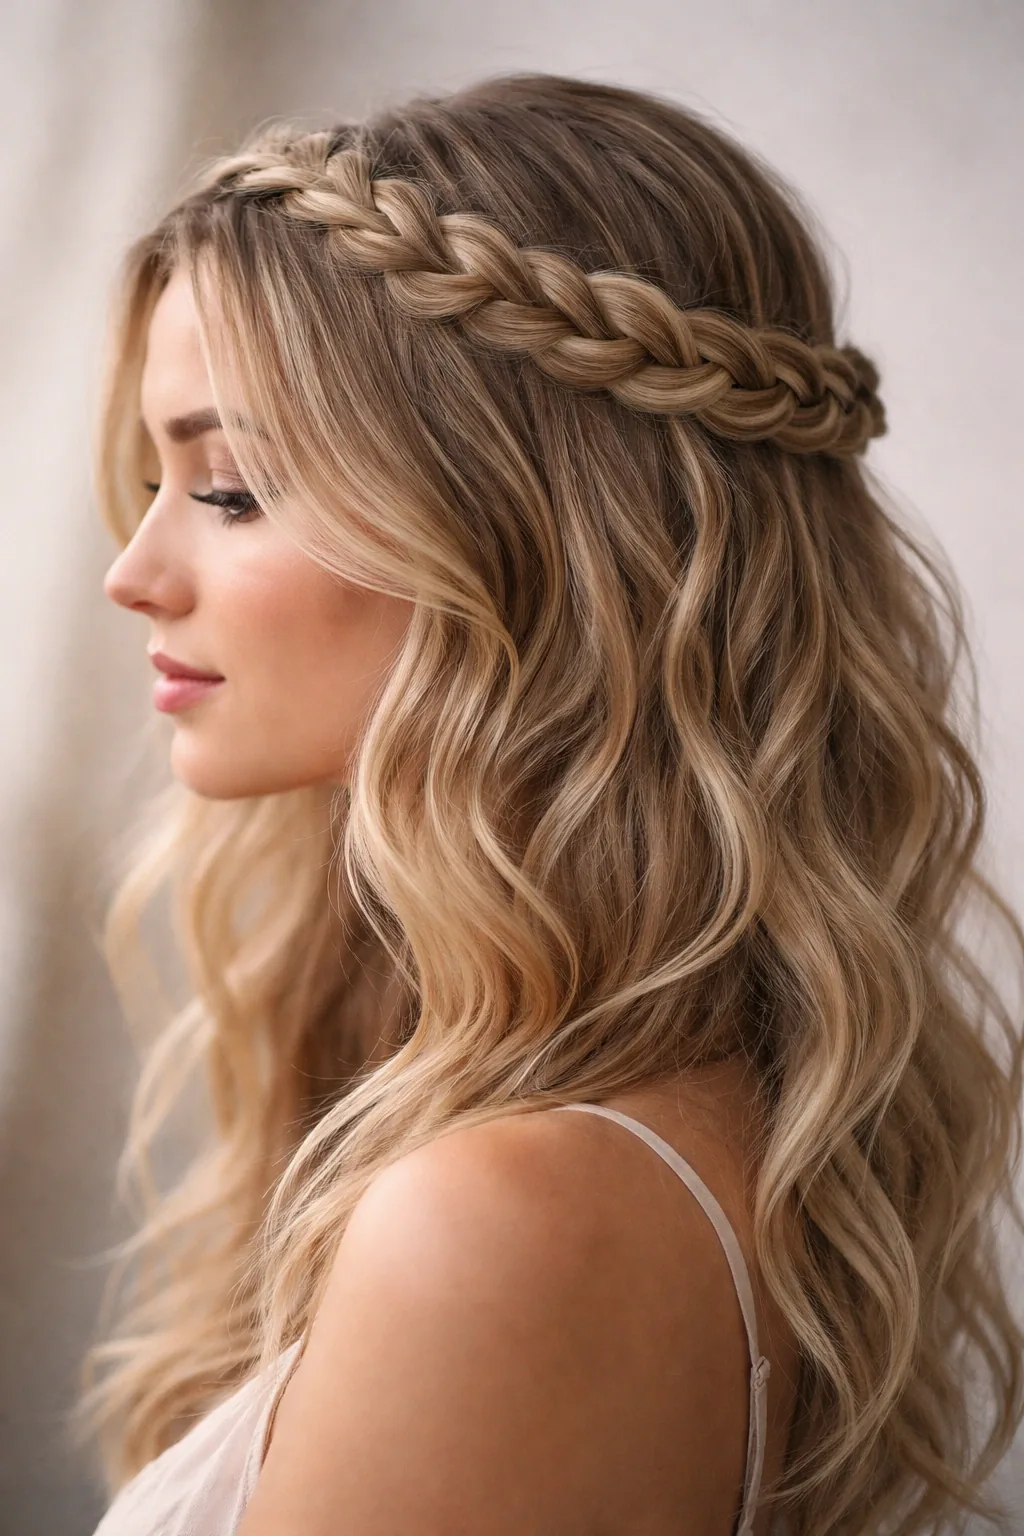
The Dutch crown braid wraps a single raised plait all the way around the head like a halo, and it is one of the most elegant braided styles there is. The braid follows the hairline around the crown, is pinned where it meets its own start, and leaves the face completely open — a style that looks like a crown and behaves like an updo. It suits weddings, formal evenings and any occasion when you want your hair up and your neckline on show, and it photographs beautifully because the braid is visible from every angle.
This is a style best done by a stylist or a patient friend, because braiding around the back of your own head is hard to see. Expect twenty to thirty minutes, and ask for the braid to be pancaked slightly so it looks full rather than thin. It holds well all day if the ends are pinned securely, and a few small flowers or pearl pins tucked into the braid turn it bridal. Who should avoid it: anyone in a rush — a crown braid done hurriedly looks lopsided. Done well, it is the most regal Dutch braid in this guide.
4. The Dutch Braid into a Low Bun
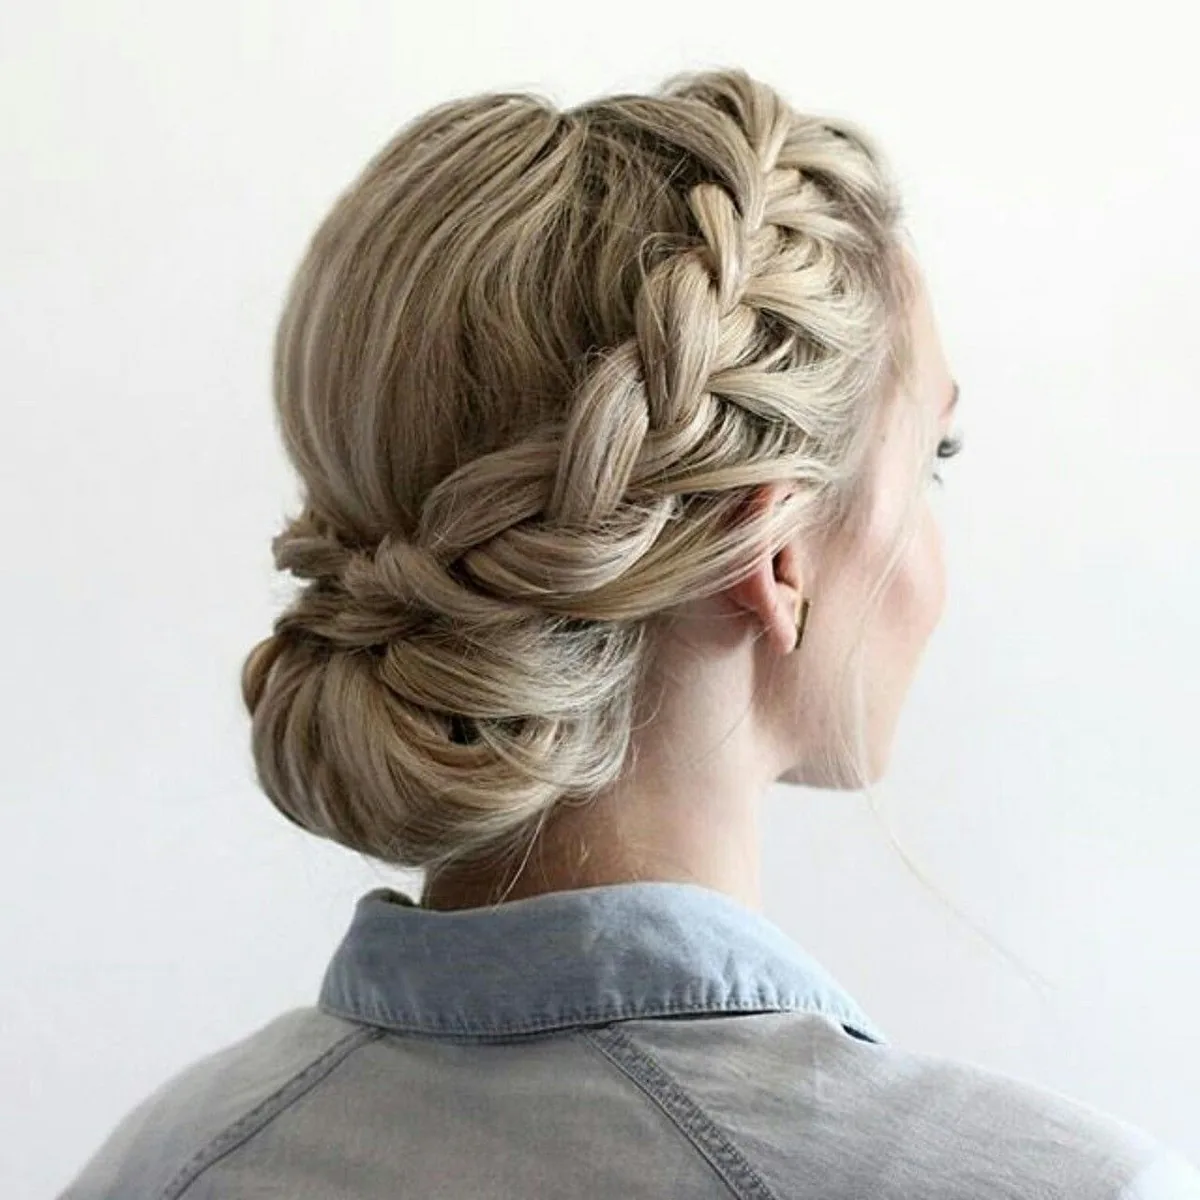
A Dutch braid into a low bun takes the classic single braid and finishes it properly: braid down the back, coil the tail into a bun at the nape, and pin it in place. The result is an updo with a braided spine — structured at the back, soft at the front, and neat enough for work or a wedding. It is the Dutch braid for women who like their hair up but find a plain bun too plain, and it is far more secure than a bun on its own, because the braid anchors it.
How to style it: braid to the nape, then keep braiding the tail to the ends, coil it flat against the head and pin with U-shaped pins rather than straight ones, which hold a heavy bun better. Time: fifteen minutes, and it lasts all day without a touch-up. Cost: free at home, a modest salon updo price if you have it done. Best for: work, weddings, and any day you want your hair up and forgotten about. A soft, pancaked version with a few loose strands at the front is the romantic take; a tight, neat version is the professional one.
5. The Dutch Braid Ponytail
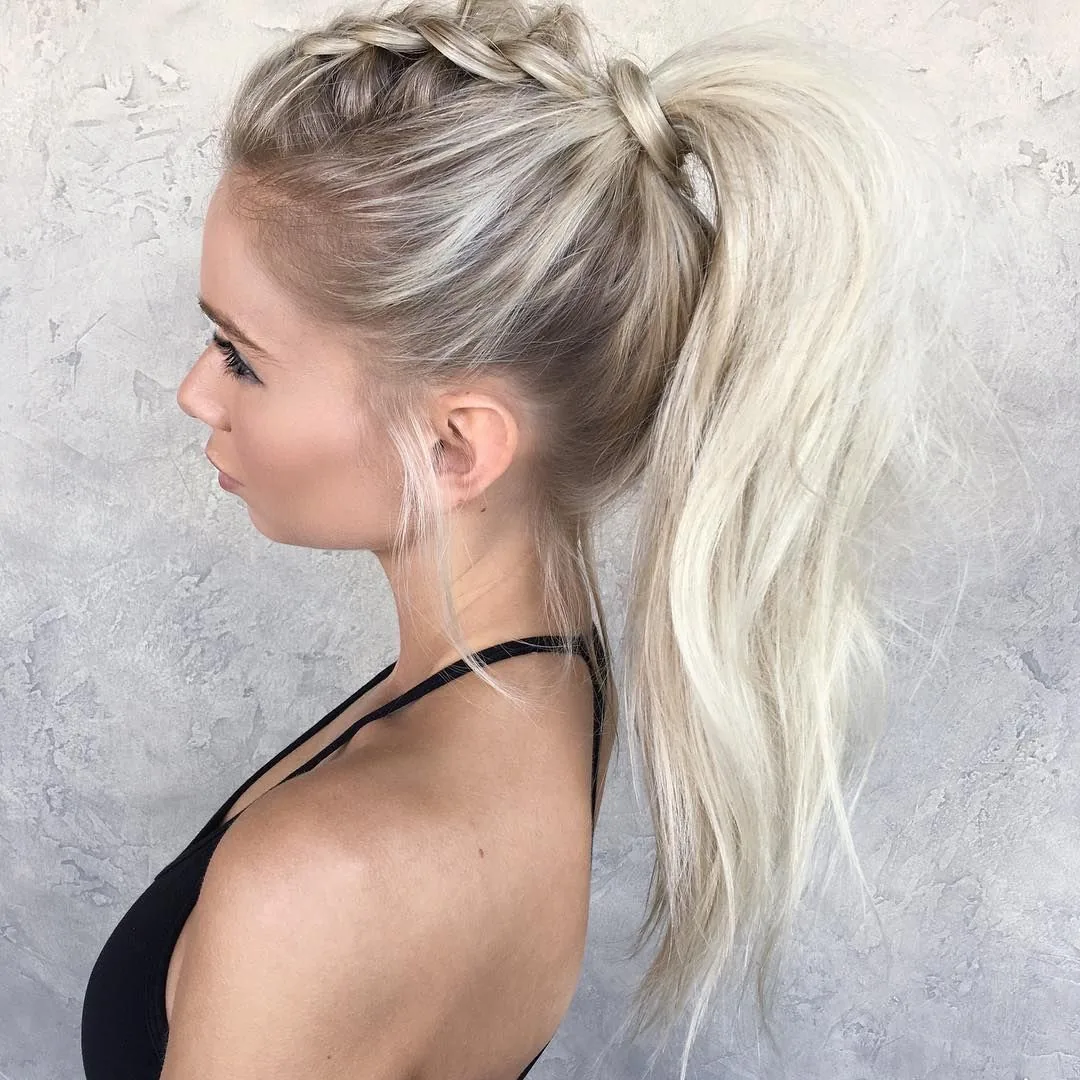
The Dutch braid ponytail is a high ponytail with a braided beginning: a Dutch braid runs from the hairline back over the crown, and the rest of the hair is gathered into a ponytail where the braid ends. It is sporty and polished at the same time — the braid gives the ponytail structure, the ponytail gives the braid movement — and it is the style for a day when a plain ponytail feels too plain and a full braid feels too much. It works high on the crown, or lower and softer at the back.
Pros: it keeps the front hair out of the face completely, it holds through a workout, and it takes only a few minutes longer than a normal ponytail. Cons: the braid needs to be neat at the front, because that is where everyone looks, and a ponytail that is too tight will pull at the hairline. Maintenance is minimal — a quick smooth of the edges with a little gel in the morning, and the style is done. Quick verdict: the Dutch braid for ponytail lovers, and the easiest Dutch style to learn after the classic single braid.
6. The Dutch Braid Half-Up Style
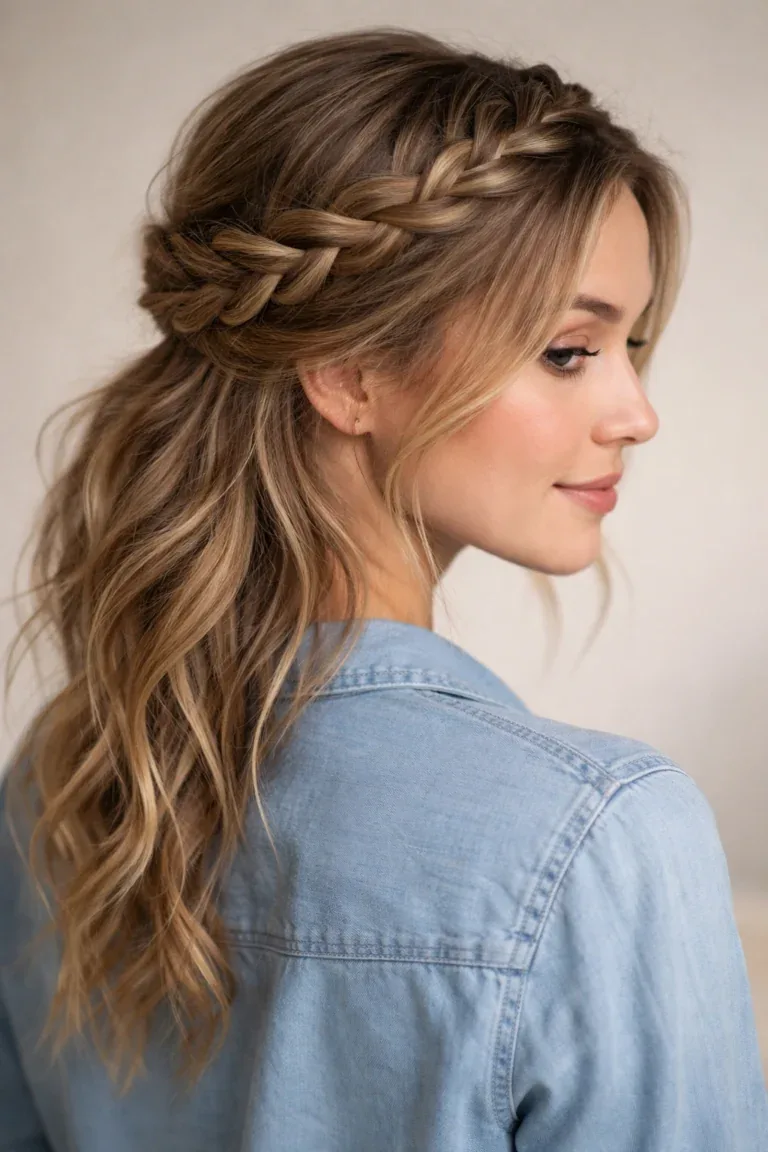
The Dutch braid half-up style braids only the top section of the hair and leaves the rest down — the best of both worlds, and the most forgiving Dutch braid for beginners. Two small Dutch braids from the temples, joined at the back, or a single Dutch braid down the crown that ends in a tie, both keep the front hair out of the face while the length stays loose and free. It suits wavy and curly hair particularly well, because the loose hair shows off the texture while the braid adds structure.
Best for: everyday wear, dates, and anyone who wants to try a Dutch braid without committing to a full plait. How long it takes: five to ten minutes, which makes it the fastest Dutch braid in this guide. A common mistake is taking too much hair into the braid, which makes the half-up section heavy and pulls the style flat — take a smaller section than you think you need. It works on medium and long hair, and on short hair the braids can be pinned rather than tied. If you only learn one Dutch braid for daily life, learn this one.
7. The Dutch Side Braid
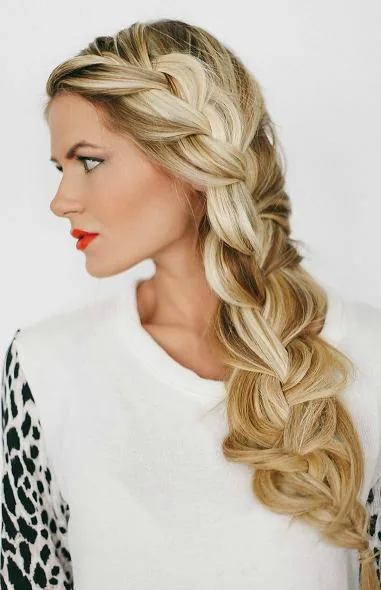
The Dutch side braid sweeps the plait over one shoulder, so the braid is visible from the front — which is the whole point of a Dutch braid, since the raised pattern deserves to be seen. It starts at the opposite temple, runs diagonally across the back of the head, and falls forward over the shoulder, where it can be pancaked wide for a soft, romantic finish. It is the Dutch braid for a date, a party, or any day when you want the braid where you can see it.
This style suits oval, round and heart-shaped faces, and it is most flattering with a few face-framing strands left loose at the front. Time: ten to fifteen minutes, and it is one of the easier Dutch braids to do on yourself, because the diagonal line is forgiving — a slightly uneven braid still looks deliberate when it runs diagonally. Who should avoid it: no one, really, though very short hair will need pins to hold the ends. A ribbon tied at the end, or a few small rings on the braid, finishes it. Quick verdict: the prettiest way to wear a Dutch braid, because the braid is always in view.
8. The Dutch Fishtail Braid
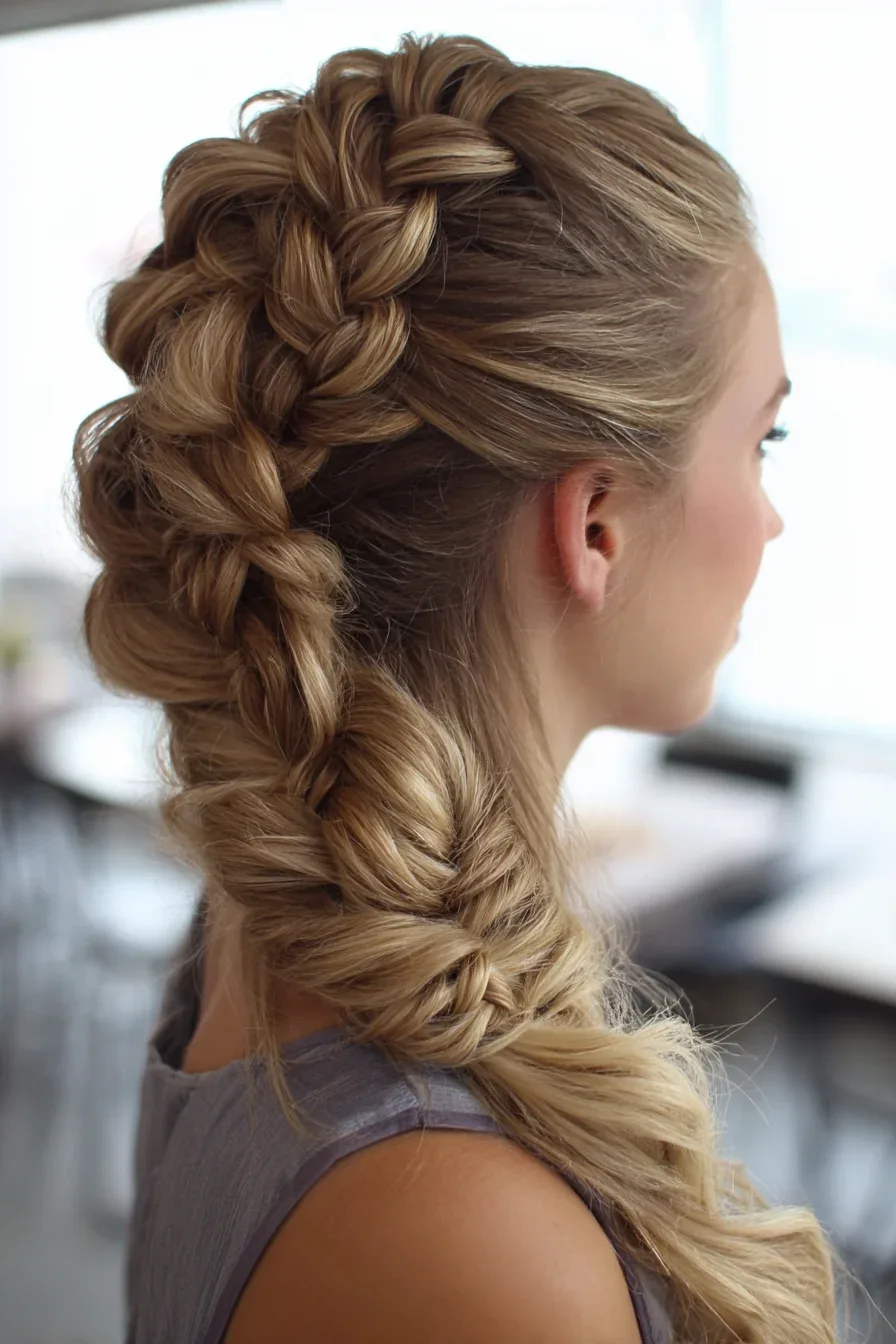
The Dutch fishtail braid combines two braiding techniques: the fishtail’s fine, intricate weave, worked with the Dutch underhand motion so the pattern sits raised on the hair. The result is a braid that looks far more complicated than it is — a delicate, herringbone-like plait with the bold, three-dimensional presence of a Dutch braid. It is the showpiece braid of this guide, and it suits long hair best, where the fine weave has room to show.
Time is the trade-off: a Dutch fishtail takes twenty to thirty minutes, because the sections are smaller than in a normal Dutch braid, and it is best done slowly, with even, thin pieces. A common mistake is taking sections that are too thick, which makes the fishtail look like an ordinary braid — keep the pieces fine, and the herringbone will appear. Best for: weddings, parties and photoshoots, or any occasion when the braid is the outfit. It is not an everyday style, but it is the one people will ask about.
9. The Pancaked Dutch Braid
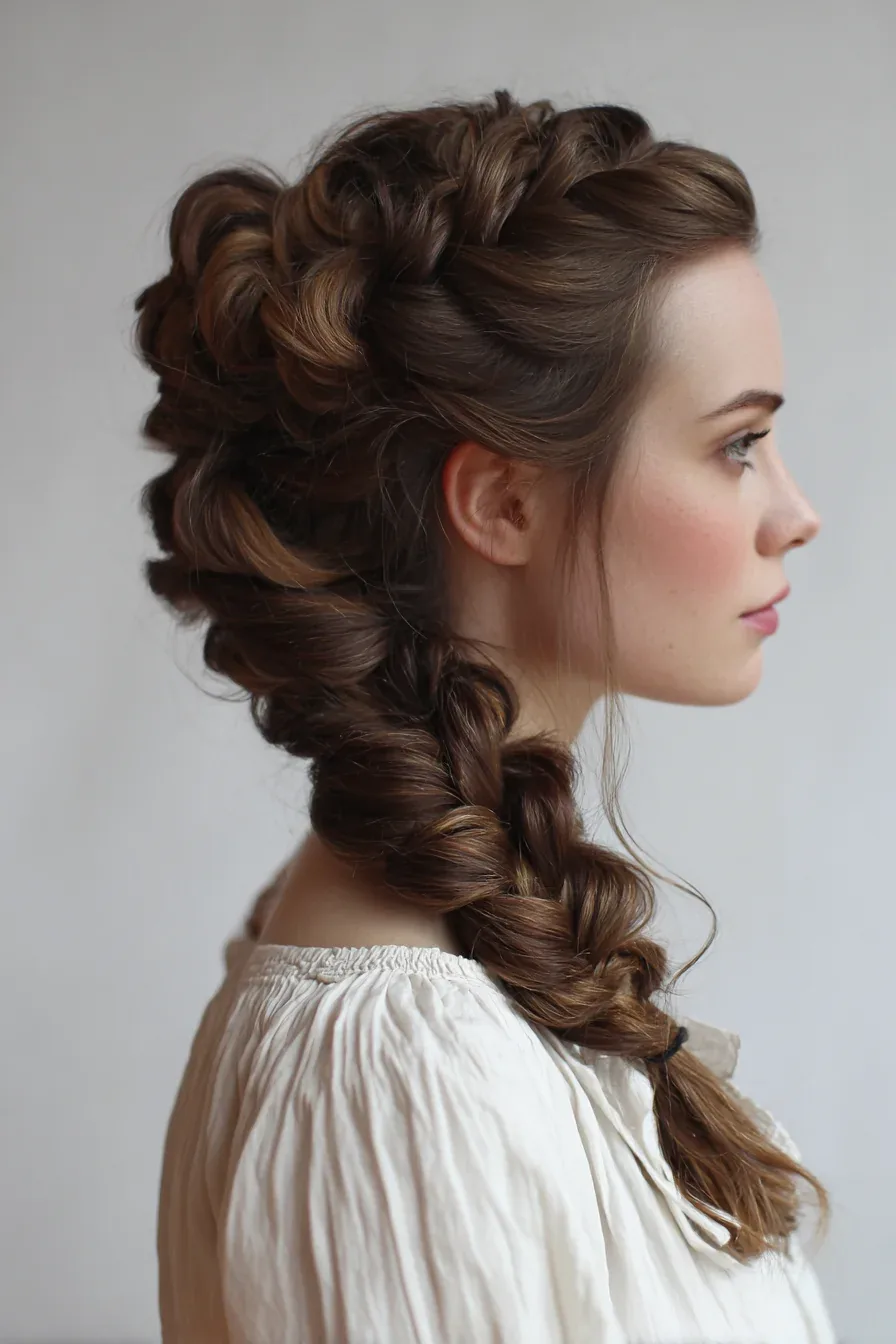
The pancaked Dutch braid is the same classic braid, pulled gently wider after braiding so it looks twice as full — and it is the single most useful Dutch braid trick there is. Pancaking turns a thin braid into a thick one, a neat braid into a soft one, and a fine-haired braid into a statement. The technique is simple: once the braid is tied, pinch the outer edge of each loop and pull it gently outward, starting at the bottom and working up, a little at a time, until the braid is as wide as you want it.
Best for: fine and thin hair, where pancaking is the difference between a braid that disappears and a braid that shows. How to get it right: pancake before you add hairspray, work in small pulls rather than big yanks, and stop while the braid still looks tidy — an over-pancaked braid falls apart and cannot be fixed without re-braiding. Time: two extra minutes on top of the braid itself. Cost: nothing. If your Dutch braid ever looks too thin, do not re-braid it — pancake it, and watch it double in size.
10. The Dutch Braid for Short Hair
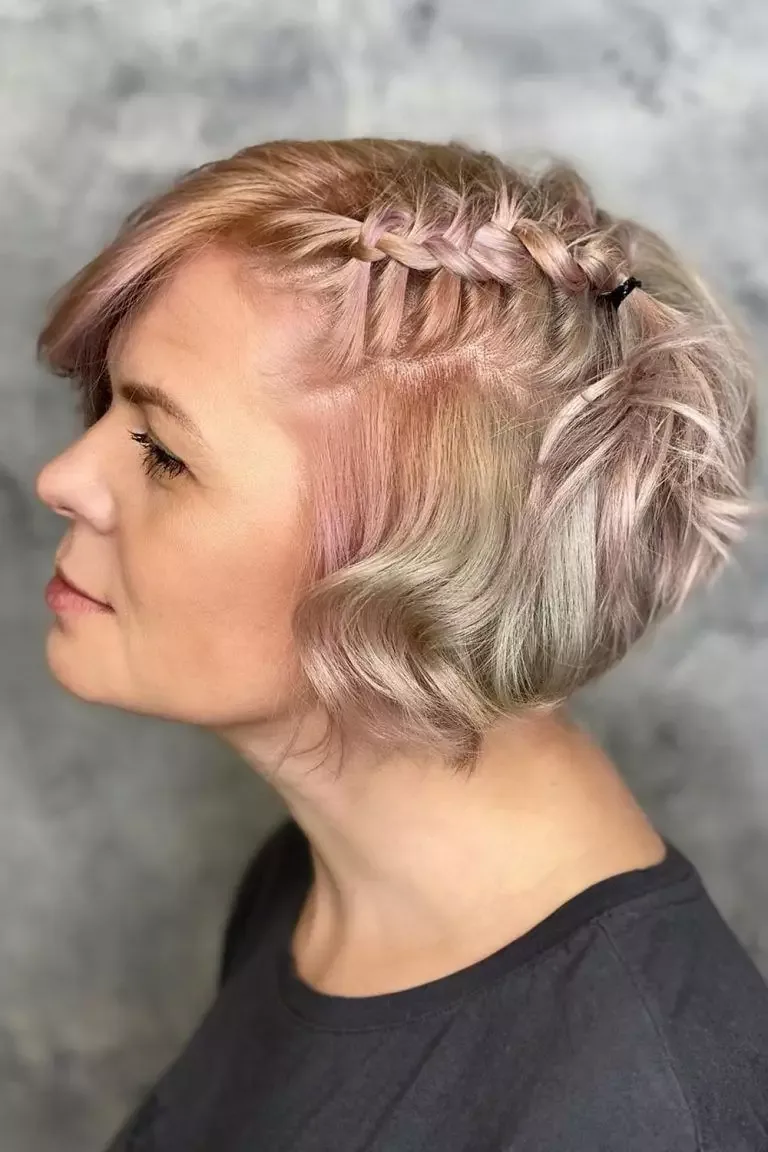
A Dutch braid on short hair — a bob or a lob — is a small, neat plait that runs along the hairline or down the crown, and it is one of the best styles for growing out a short cut. The braid keeps the front hair out of the face, adds interest to a length that can feel plain, and shows off the raised Dutch pattern beautifully, because a short braid is all pattern and no tail. Two short double Dutch braids, or a single braid along one side, are the versions that work best.
The challenge is the ends: short hair will not stay tied, so pin the tail flat against the head with bobby pins crossed in an X, and smooth the edges with a little gel. Time: five to ten minutes, and the style lasts all day if the pins are secure. Who should avoid it: no one — but very short, pixie-length hair is too short for a Dutch braid, and a twist or a pin will serve better. Quick verdict: the Dutch braid that proves you do not need long hair to wear a braid, and the best friend of anyone growing out a bob.
11. The Dutch Braid for Long Hair
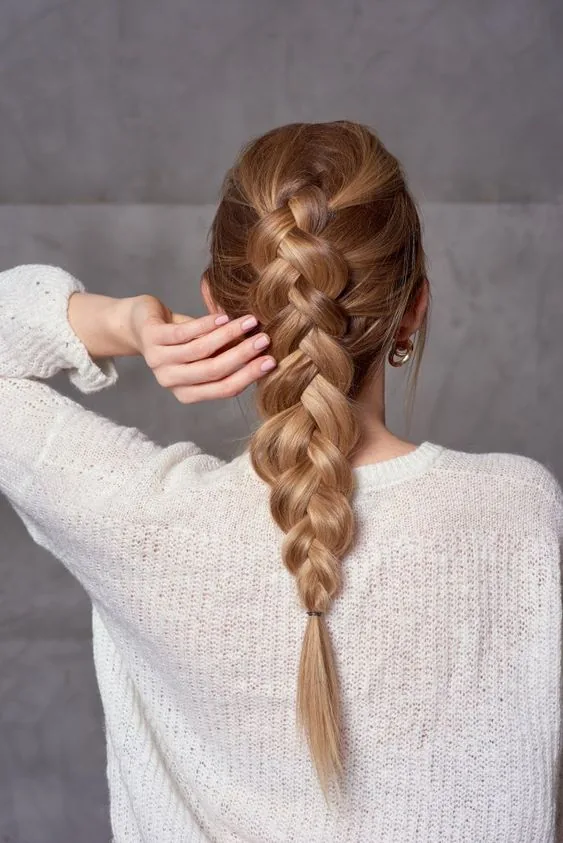
A Dutch braid on long hair is the style at its most dramatic: a thick, raised plait that runs the whole length of the back, heavy, glossy and impossible to miss. Long hair gives the Dutch braid its full effect, because the pattern repeats down the back for as far as the hair reaches, and a pancaked long braid looks like something from a fairytale. It is the braid for a wedding, a festival, or a day when you want your hair to be the main event.
Maintenance is the honest part: a long Dutch braid takes fifteen to twenty-five minutes, your arms will tire, and the braid is heavy, so a bun or ponytail finish is often more comfortable than leaving it hanging all day. Use a strong elastic, keep the tension even so the braid does not twist, and carry a few spare pins — a long braid loosens at the nape first. Best for: long, thick hair, and occasions worth the effort. If you have the length, this is the Dutch braid that shows it off best.
12. The Dutch Braid for Thick Hair
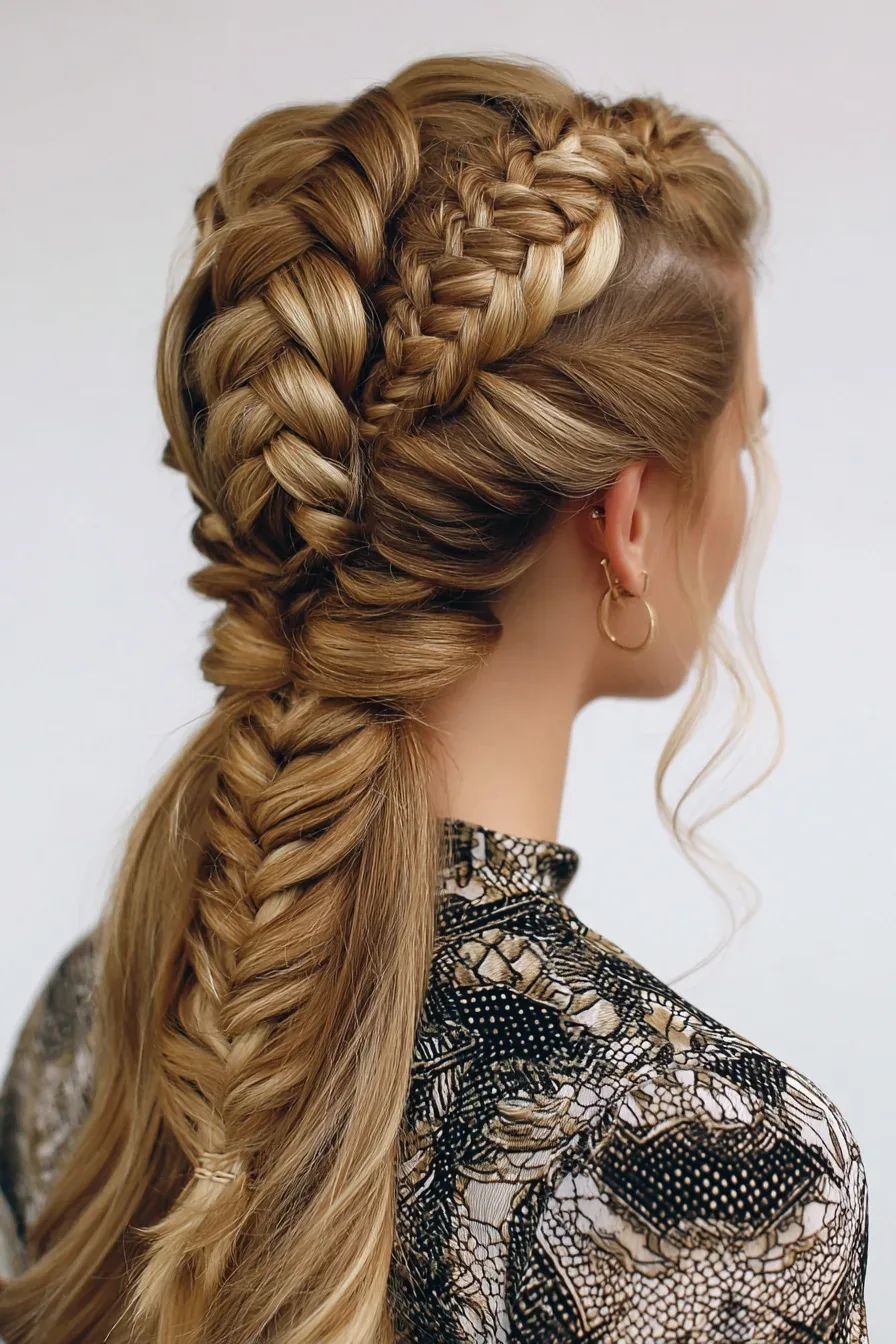
Thick hair makes a Dutch braid look magnificent, because the plait is wide, the pattern is bold, and the braid holds its shape with almost no help. A single Dutch braid on thick hair is a statement on its own — no pancaking needed, no accessories required — and double Dutch braids on thick hair are the most secure braids there are, because the weight of the hair anchors them. It is the hair type the Dutch braid was made for.
The trade-off is effort: thick hair is heavy to braid, the sections are harder to keep even, and your arms will feel it by the end. Work in clean, parted sections, use a strong elastic that will not snap, and take your time — a rushed thick braid goes crooked fast. Time: fifteen to twenty-five minutes for a single braid, longer for doubles. Cost: free at home, though a salon braid is a relaxing treat. Quick verdict: if your hair is thick, the Dutch braid is not just a style, it is your hair showing off.
13. The Dutch Braid for Fine Hair
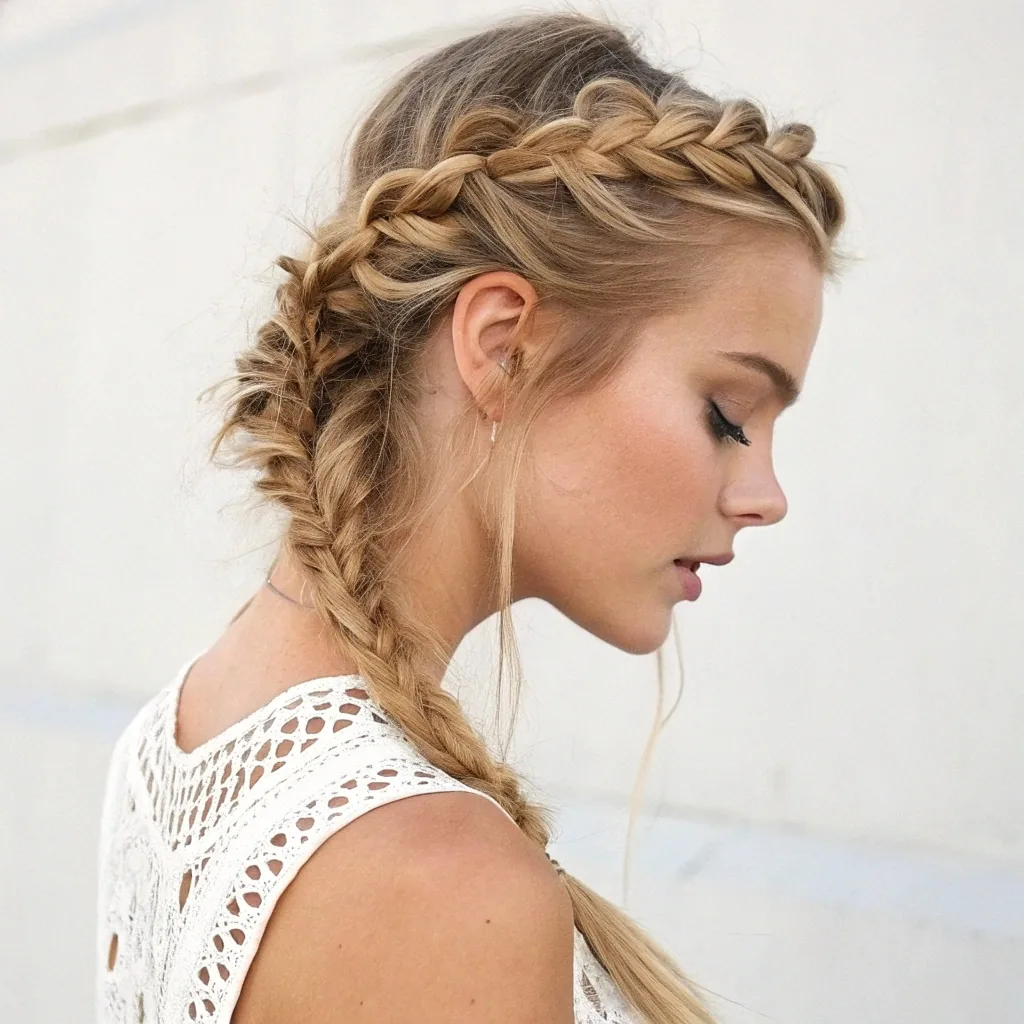
Fine hair is where the Dutch braid earns its reputation, because the raised plait looks thicker than the hair really is — and that is not a small thing for anyone whose braids usually disappear. A Dutch braid on fine hair, pancaked gently after braiding, can look twice as wide as the hair it was made from, and the braid holds better than a French braid on fine hair, because the raised pattern grips rather than sliding. It is the braid that makes fine hair look full.
How to make it work: prep with dry shampoo or volumising mousse, braid a little looser than you think you should, and pancake generously once the braid is tied — pull each loop wider, starting at the bottom. A common mistake is braiding too tightly, which makes a fine-haired braid look thin and stringy; looseness is your friend here. Time: ten minutes, and the style lasts all day. Who should avoid it: no one with fine hair — this is the braid made for you.
14. The Dutch Braid for Curly Hair
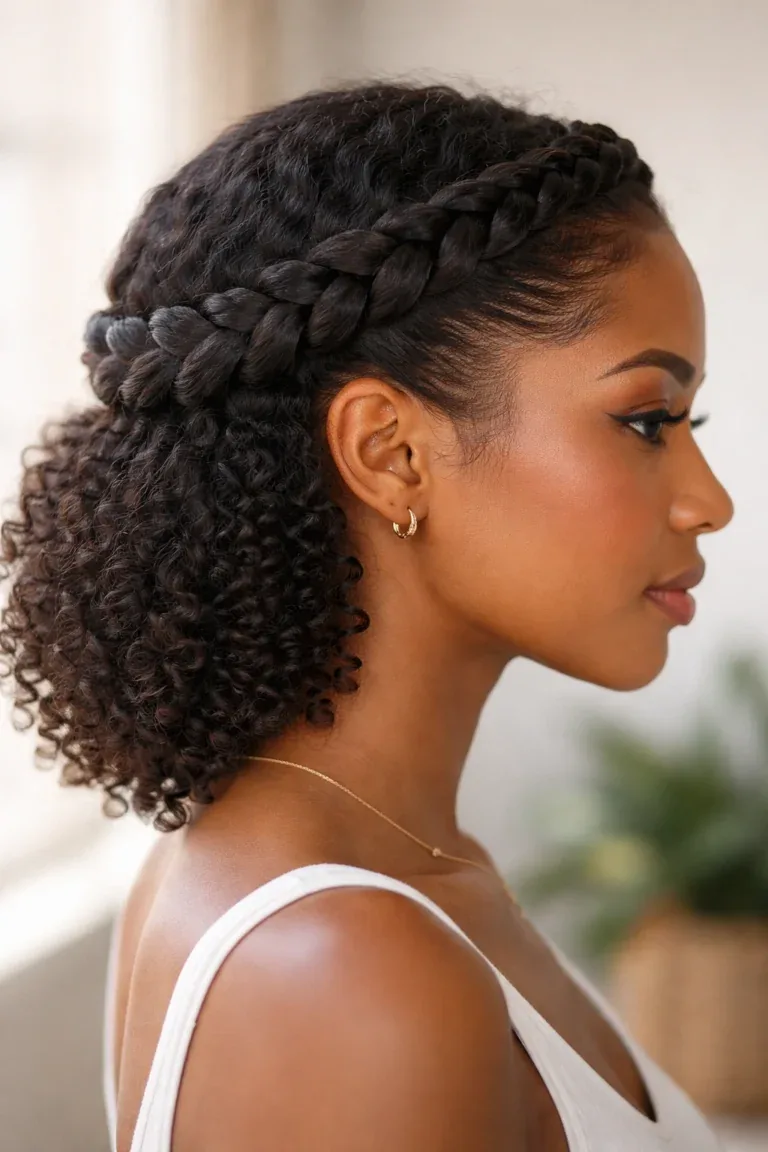
A Dutch braid on curly hair tames the curls into a neat, defined plait while keeping the texture — the braid follows the curl pattern, the raised pattern shows beautifully against the curls, and the style lasts for days without frizzing out. It is one of the best protective styles for curly hair, because the ends are tucked away in the braid and the hair is not being handled all day, and it is also the best way to stretch curly hair without heat.
Braid curly hair while it is slightly damp and smoothed with a little leave-in or curl cream, which keeps the frizz down and the sections clean. Work in larger sections than you would on straight hair, because curly hair is bulkier, and do not fight the curl — let the braid follow it. Time: fifteen to twenty minutes. When you take the braid out after a day or two, you get a bonus: soft, stretched waves. Best for: curly and coily hair of any length, and anyone who wants a braid that doubles as a protective style.
15. The Dutch Braid for Straight Hair
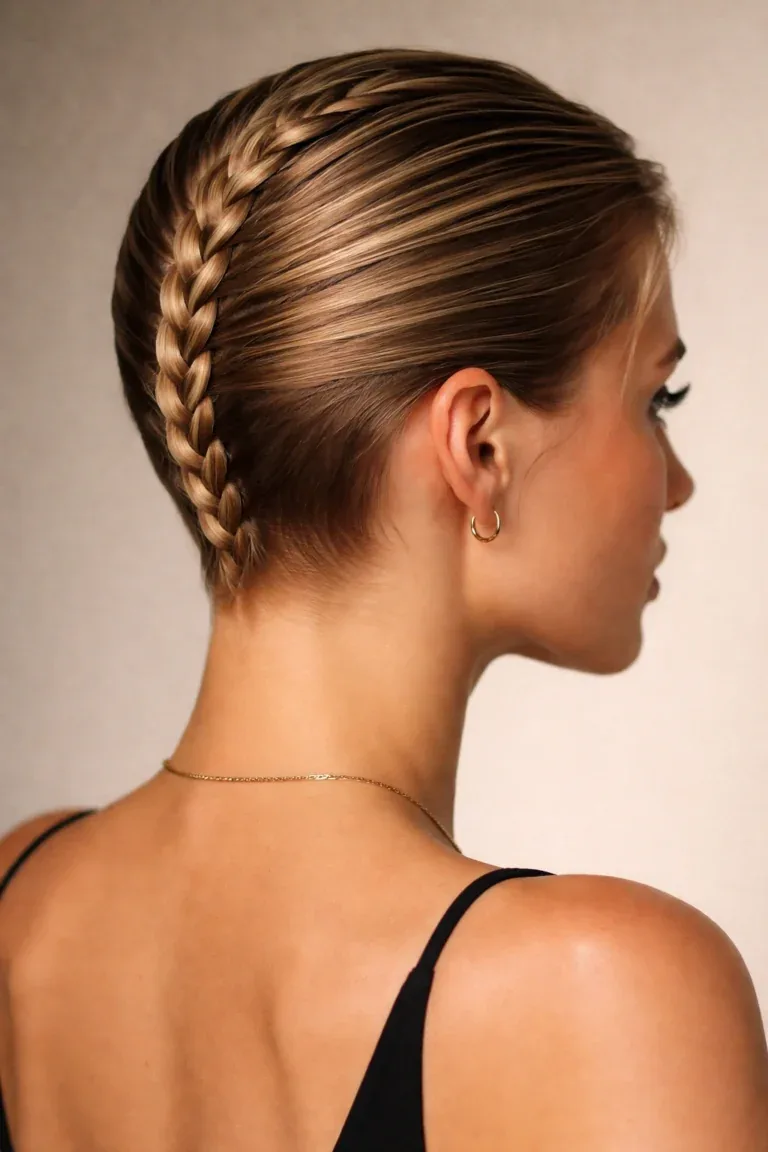
A Dutch braid on straight hair looks sleek and precise, because every cross of the braid is visible against the smooth hair — the pattern is at its clearest on straight hair, and a neat Dutch braid on straight hair looks almost architectural. It is the braid for a polished, put-together day, and it suits work, school and formal occasions, where the clean lines of the braid match the clean lines of the outfit.
The challenge is slip: straight hair slides out of a braid, so texture spray is not optional. Prep with dry shampoo or a texturising spray, braid with firm tension, and mist the finished braid with a light hairspray. A common mistake is starting with freshly washed, conditioner-heavy hair, which is the slipperiest hair there is — second-day hair, or hair with a little product in it, holds a Dutch braid far better. Time: ten to fifteen minutes. Quick verdict: the neatest Dutch braid there is, as long as you prep the hair first.
16. The Dutch Braid Updo
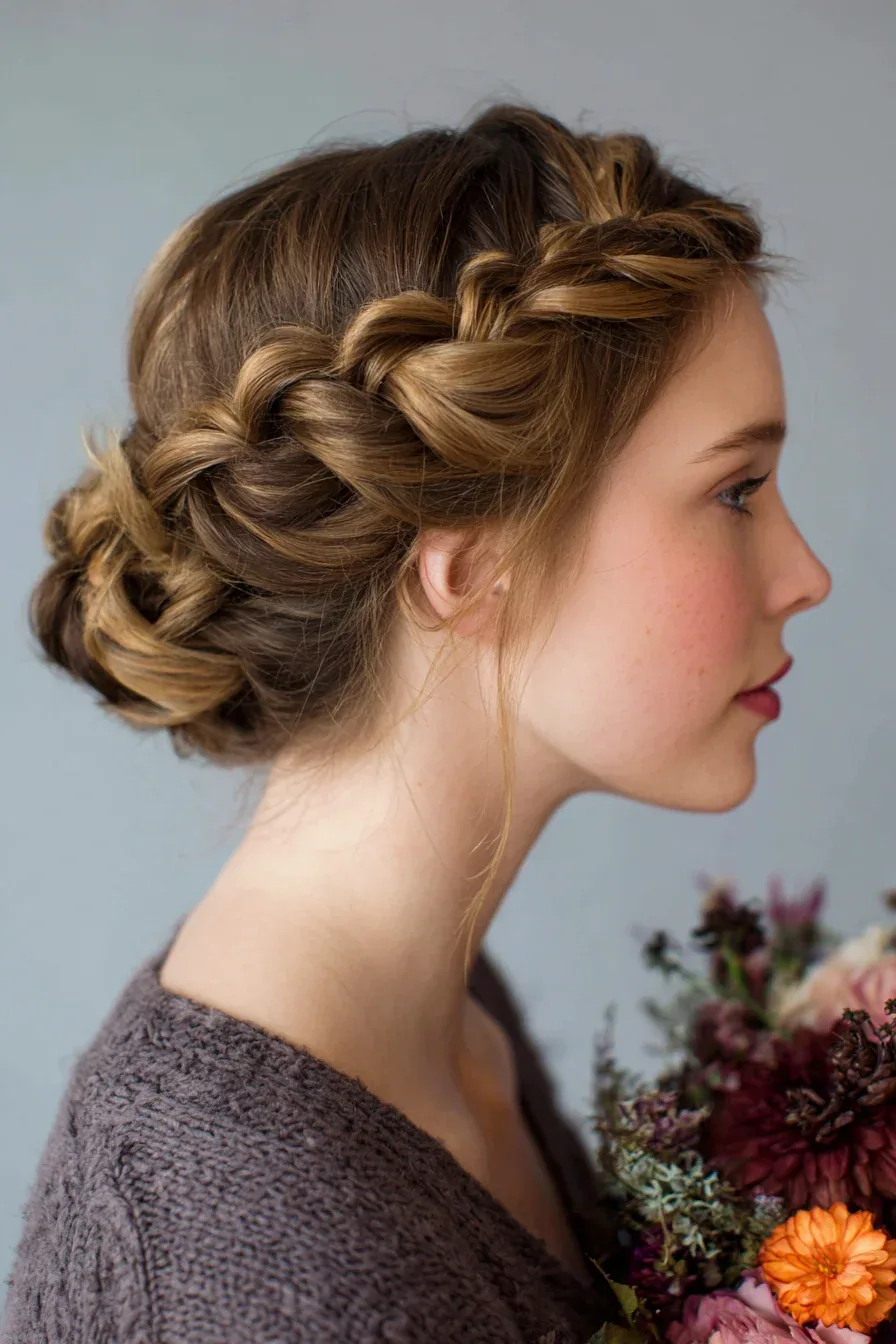
The Dutch braid updo takes the braid off the back and onto the crown: braids woven into a low chignon, a twisted updo, or a pinned-up plait that keeps the hair completely off the neck. It is the formal Dutch braid, the one for a black-tie evening, a graduation or a wedding guest, and it has the structure of an updo with the texture of a braid — which makes it more interesting than either on its own. The braid gives the updo its shape; the updo gives the braid its occasion.
This is a stylist job for most women, because pinning a braided updo neatly on your own head is hard. Expect thirty to forty-five minutes at the salon, and ask for the braid to be pancaked slightly so the updo looks full rather than flat. It holds all evening if the pins are placed well, and it photographs beautifully from the back, which is where the braid shows. Best for: formal events, and anyone who wants an updo that is not a plain bun. Cost: a salon updo price, and worth it for the occasion.
17. The Dutch Braid for a Wedding
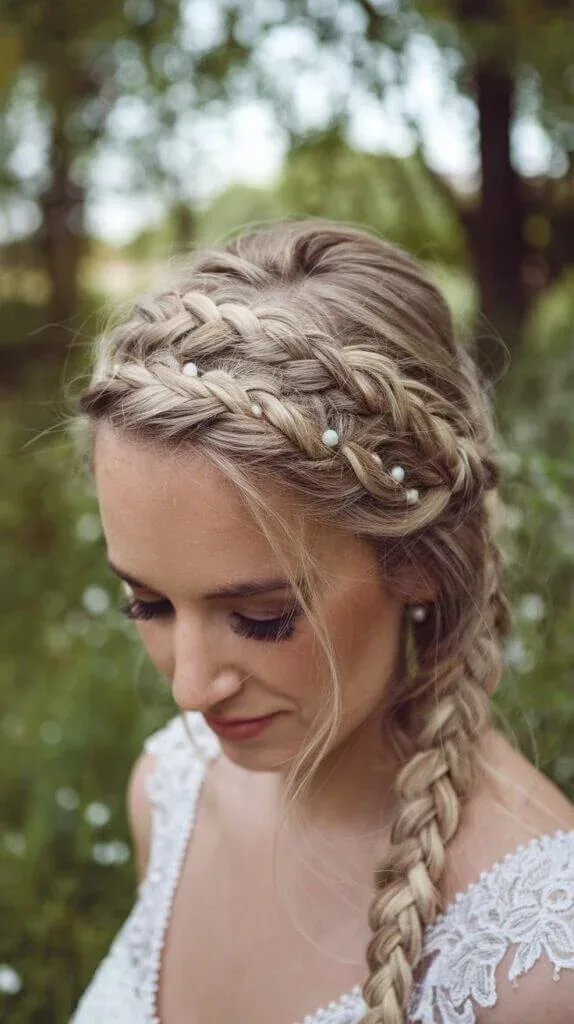
A Dutch braid for a wedding is the braid at its most romantic: a crown braid, a soft pancaked braid woven into a low updo, or a single braid down the back with flowers tucked into the plait. The raised pattern shows up beautifully in wedding photographs, the braid holds all day from the ceremony to the last dance, and it suits every bridal style, from bohemian to classic. Brides love it because it is secure, photogenic and comfortable — no pins digging in, no hair falling in the face.
What to ask your stylist: a trial run at least a month before the wedding, wearing the accessories you plan to use, so you can see how the braid holds over a full day. Add small flowers, pearl pins or a ribbon woven through the braid for the bridal finish, and keep the front soft with a few loose strands. Time on the day: thirty to sixty minutes. Best for: brides, bridesmaids and wedding guests alike — a smaller, softer version of the bridal braid is the perfect coordinated look for the whole party.
18. The Dutch Braid for Work
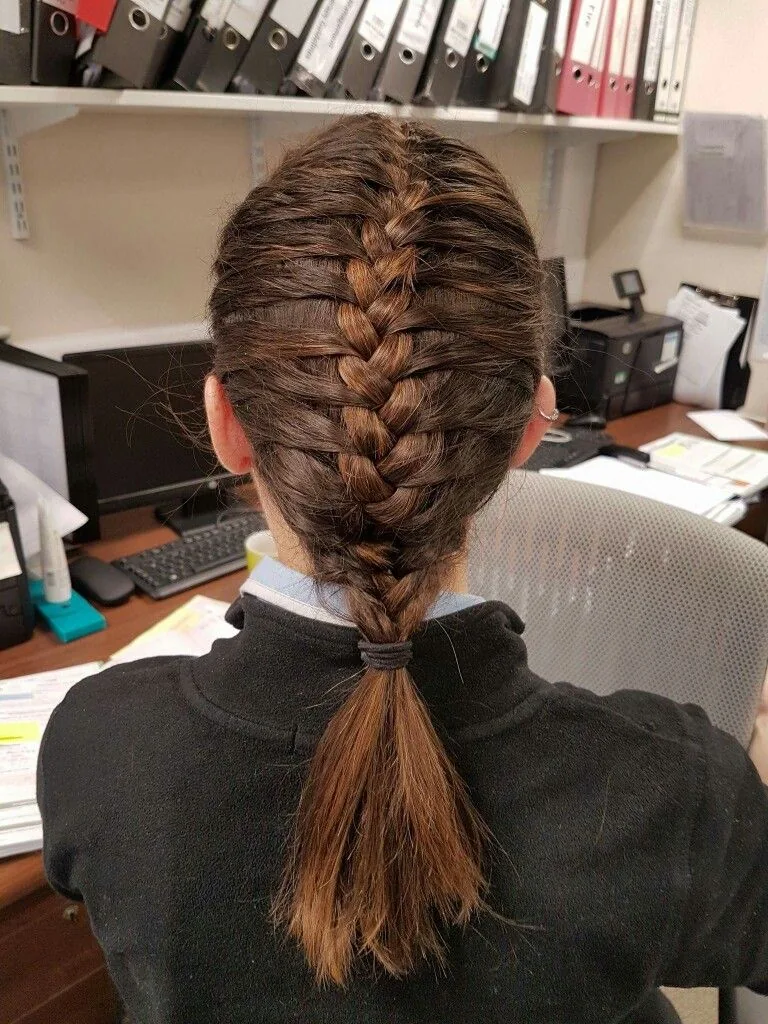
The Dutch braid for work is the neat, tight version of the style: a single braid down the back, or a Dutch braid into a low bun, with the edges smoothed and the pattern even. It reads as deliberate and polished in exactly the way a good haircut does, it keeps the hair off the face and collar through a long day of meetings, and it needs no attention after the morning. It is the braid as a workhorse — practical, comfortable and quietly impressive.
Best for: office days, interviews and any workplace where the hair needs to be out of the way and out of mind. How long it takes: ten to fifteen minutes in the morning, and it holds until the evening without a touch-up. A common mistake is pancaking a work braid too much — a soft, wide braid looks romantic, not professional, so keep the pancaking minimal for work. If your workplace is conservative, the low-bun finish is the safest version. Quick verdict: the most practical Dutch braid there is, and the one that earns its keep every weekday.
19. The Dutch Braid for the Gym
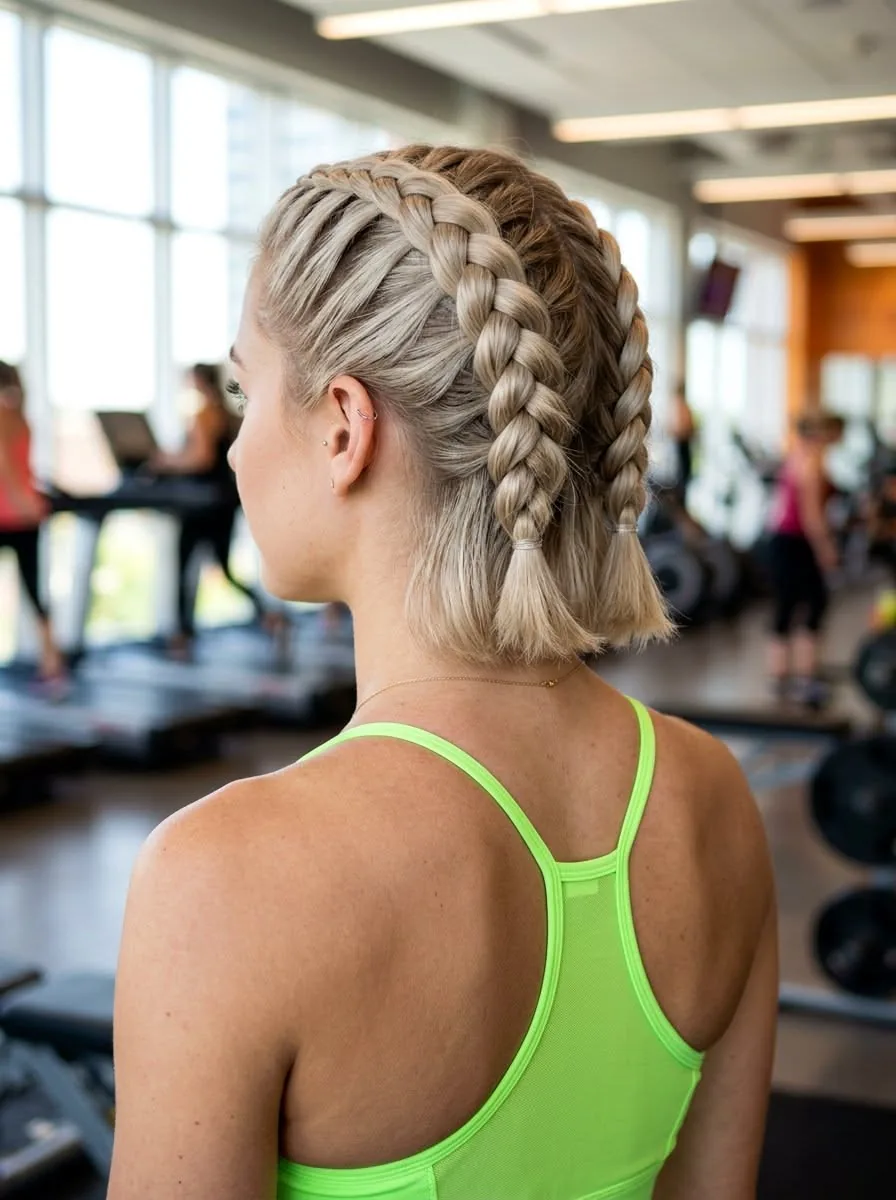
Double Dutch braids are the gym braid: they keep every strand out of the way, they do not bounce the way a ponytail does, they do not loosen with sweat, and they survive a full workout without a single touch-up. A single Dutch braid works too, but doubles are better for exercise, because they distribute the hair evenly and sit flat against the head under a cap or headphones. It is the braid for running, lifting, yoga and swimming — though for swimming, a bun finish keeps the ends dry.
Pros: no hair in the face, no bouncing, no re-tying mid-workout, and the braid doubles as a post-gym style, because taking it out leaves soft waves. Cons: a braid that is too tight will hurt during a long session, so braid firmly but not tightly, and use a soft elastic that will not snap. Time: fifteen minutes before the gym, zero during it. Best for: anyone who works out with long or medium hair. If you only wear Dutch braids for one reason, the gym is a very good reason.
20. The Dutch Braid for School
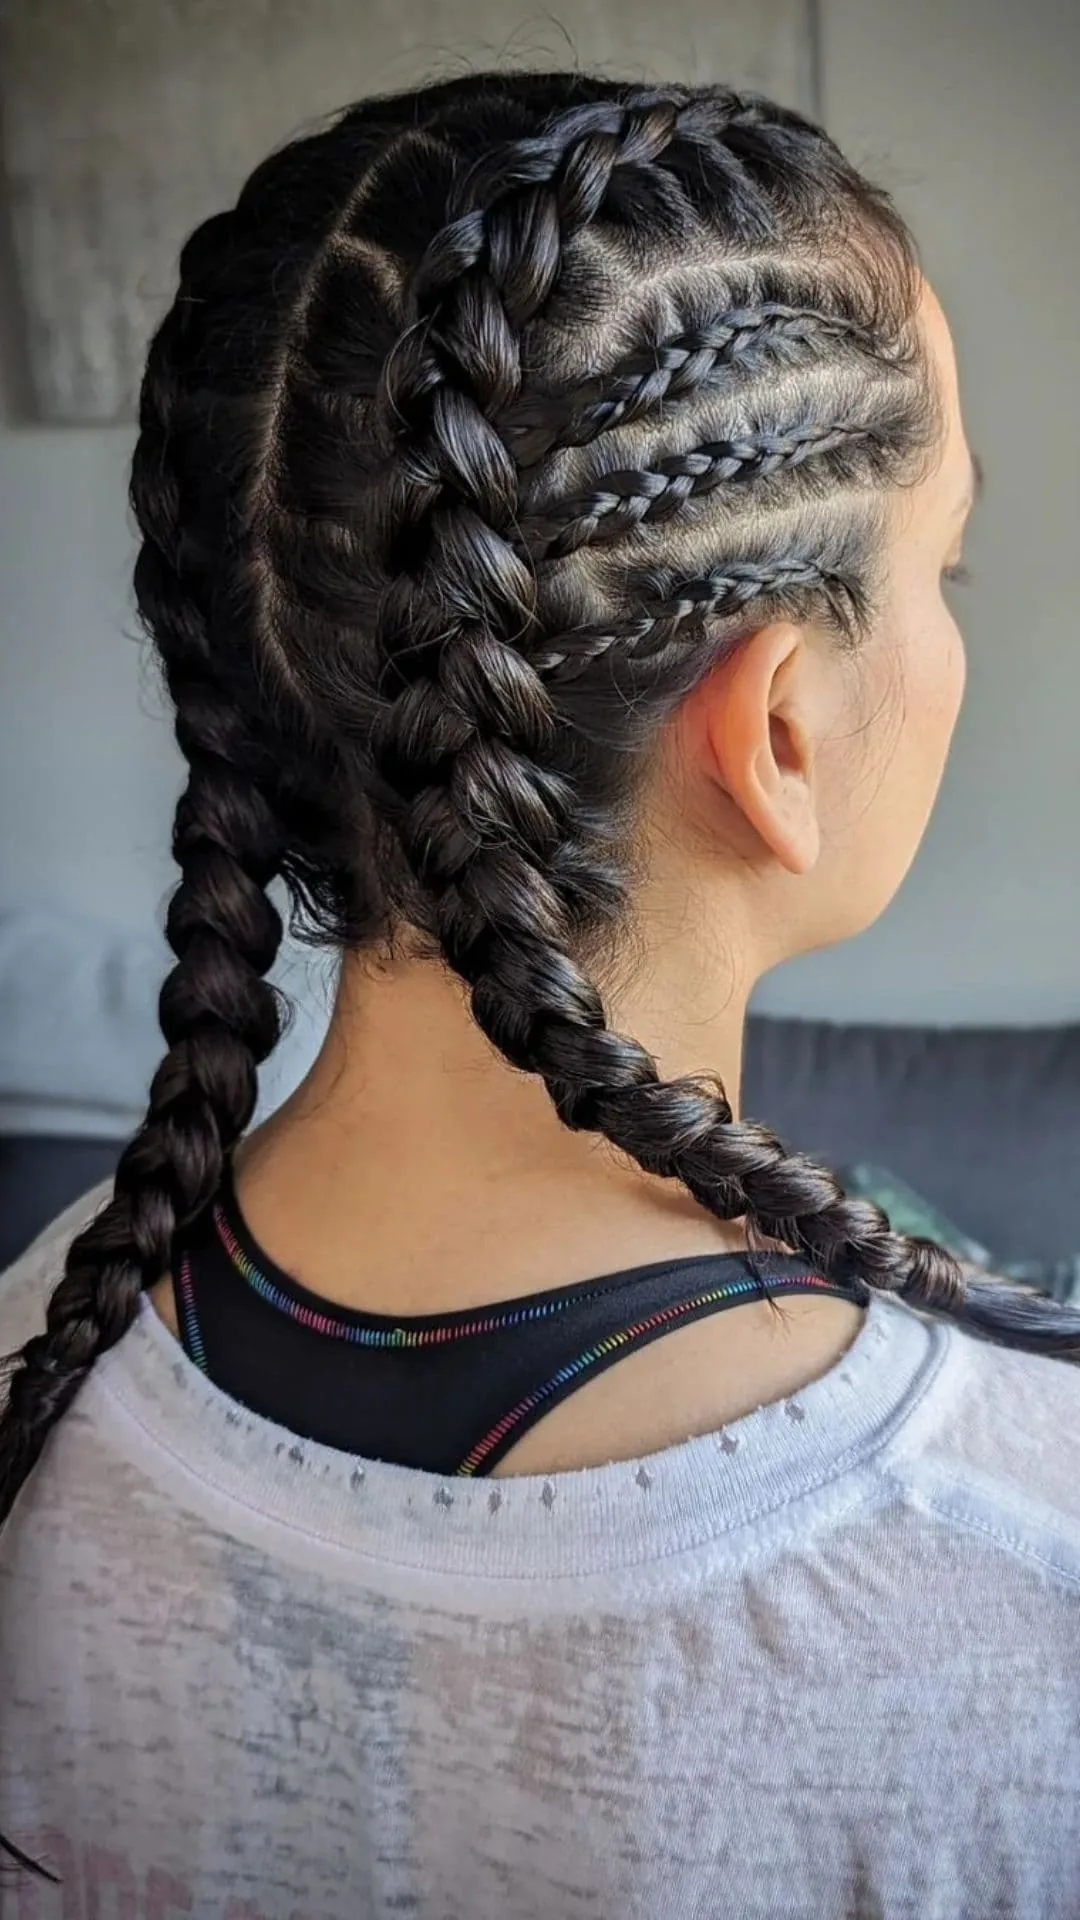
The Dutch braid for school is the everyday version: neat, quick, comfortable, and able to survive a whole day of classes, lunch and after-school activities without falling apart. Double Dutch braids are the classic school style, and a single braid or a half-up Dutch braid are the quicker alternatives for mornings when there is no time for two plaits. It keeps the hair out of the face for studying, it does not need touching up, and it looks neat in every class photo.
How long it takes: ten minutes for a single braid, fifteen for doubles — which makes it a realistic school-morning style, unlike a complicated updo. A common mistake is braiding too tightly in the morning, which hurts by lunchtime; firm is enough. For younger wearers, a ribbon at the end of each braid is the classic finish, and the style works on every hair type. Best for: school, college, and any day when the hair needs to be neat from morning to evening with no help in between.
21. The Dutch Braid with a Ribbon
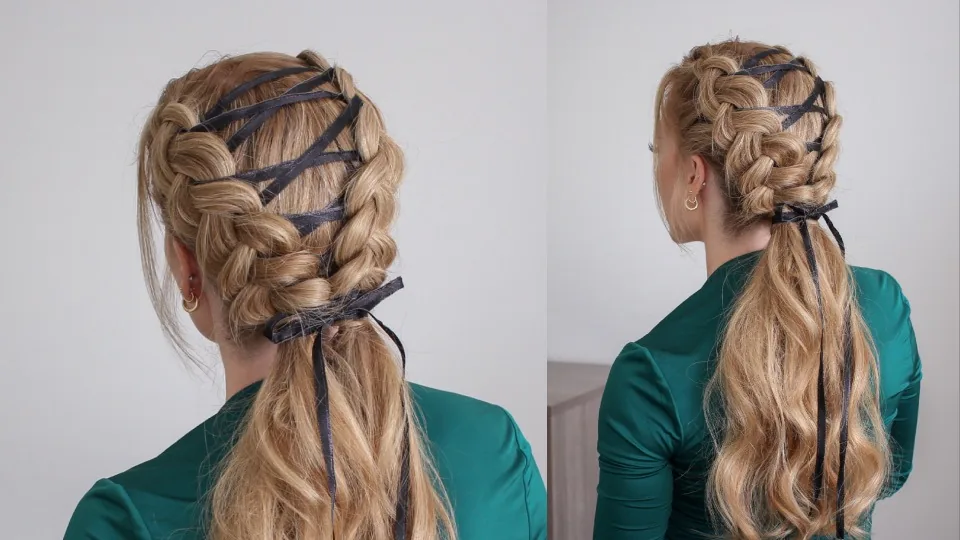
A ribbon woven through a Dutch braid is the softest way to dress the style up: the ribbon follows the plait as you braid, or is threaded through the finished braid, and it adds a line of colour that moves with the hair. A velvet ribbon is the winter choice, a silk ribbon the summer one, and a thin grosgrain ribbon the everyday one — and the colour can match an outfit, a season, or a mood. It suits weddings, festivals, school days and any occasion when the braid should feel a little more special.
How to do it: use the ribbon as one of the three strands from the start, or weave it through the finished braid with a bobby pin as a needle — the second way is easier for beginners. Time: five extra minutes on top of the braid. Cost: the price of a ribbon. A common mistake is choosing a ribbon that is too wide, which overwhelms the braid; a ribbon about as wide as one strand of the braid is right. Quick verdict: the cheapest, prettiest Dutch braid upgrade there is, and the one that changes the whole mood of the braid.
22. The Dutch Braid with Hair Rings and Cuffs
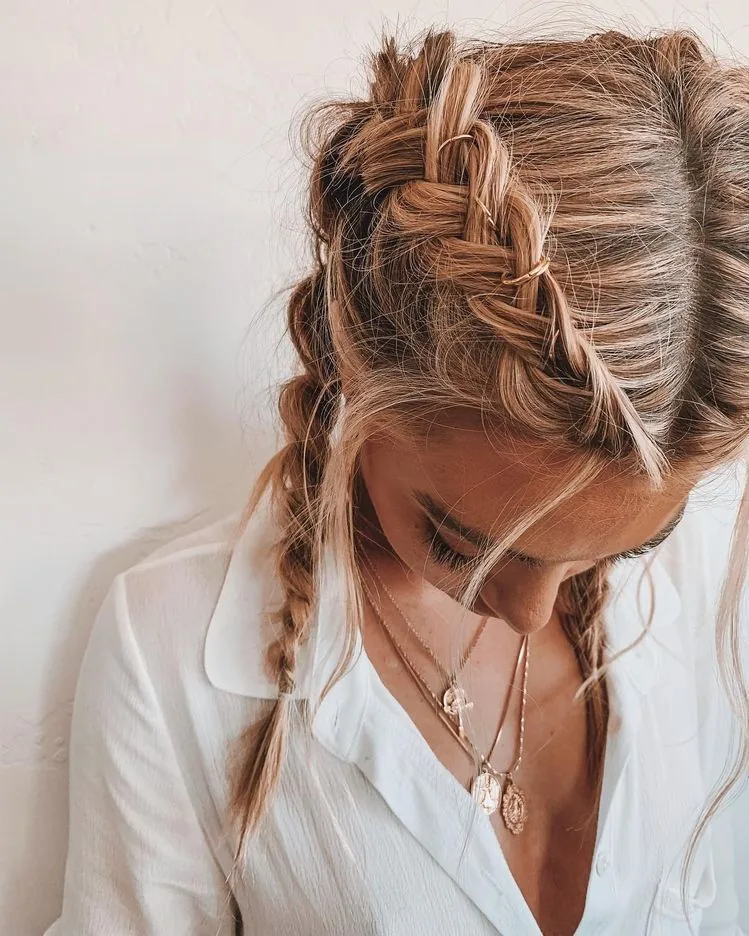
Gold hair rings and cuffs clipped onto a Dutch braid give the style an edge: small metal rings threaded onto the plait at intervals, catching the light every time the head moves. The raised Dutch braid is the perfect base for them, because the plait is visible and three-dimensional, so the rings sit on top of the braid rather than disappearing into it. It suits festivals, parties and photoshoots, and it is the Dutch braid for anyone who wants their hair to look a little bit rebellious.
How to style it: braid first, then slide the rings onto the braid at even intervals — three or four rings is enough, more than that looks cluttered. Time: a few extra minutes, and the rings last for years, so the cost is a one-off. A common mistake is using rings that are too small, which pinch the braid, or too heavy, which drag it down; choose light, smooth rings that slide on easily. Best for: festivals, concerts and nights out. If you want your Dutch braid to look like jewellery, this is the fastest way there.
23. The Dutch Braid with Colour and Highlights
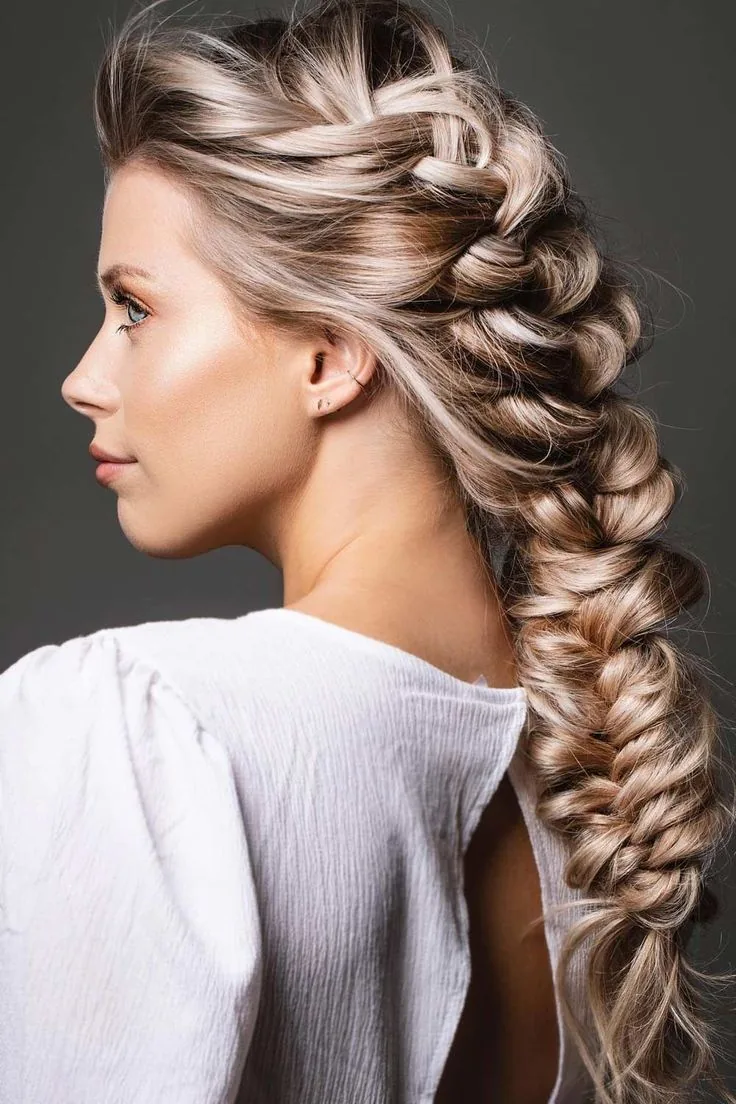
Colour shows up beautifully in a Dutch braid, because the raised plait displays every shade: highlights and balayage look three-dimensional in a Dutch braid, each cross of the braid showing a different tone, and a peekaboo colour underneath appears as the braid curves. A Dutch braid is the best way to show off dimensional colour, because the braid itself creates the dimension — the pattern and the colour work together, and the result is a braid that looks different from every angle.
Best for: anyone with highlights, balayage or a two-tone colour, and anyone thinking about colour who wants a style that will show it off. What to ask your stylist: dimension rather than a single flat shade, with the lighter pieces placed where the braid will cross. Maintenance is the same as any coloured hair — a colour-safe shampoo and a weekly deep-condition — and the braid itself needs no extra care. A common mistake is colouring the hair a single flat shade and expecting the braid to show it; it is the variation in tone that makes the pattern pop.
24. Double Dutch Braids into Space Buns

Double Dutch braids into space buns are the festival version of the style: two Dutch braids run up the back of the head and coil into two buns, one on each side of the crown. It is playful, bold and completely practical — the hair is entirely up, entirely out of the way, and entirely secure, which is why it is the braid for festivals, concerts, holidays and any day when the hair needs to survive dancing. The buns can be neat and small, or pancaked and messy for a softer look.
How to style it: braid each side up toward the crown rather than down the back, tie off, then coil each tail into a bun and pin it. Time: twenty to twenty-five minutes, and it lasts all day and all night. Best for: festivals, parties and holidays, and anyone who wants a Dutch braid with a sense of fun. Who should avoid it: anyone who wants a subtle style — space buns do not do subtle. A few face-framing strands left loose at the front soften the look, and glitter or rings on the braids finish it for a festival.
25. The Dutch Braid into a Messy Bun
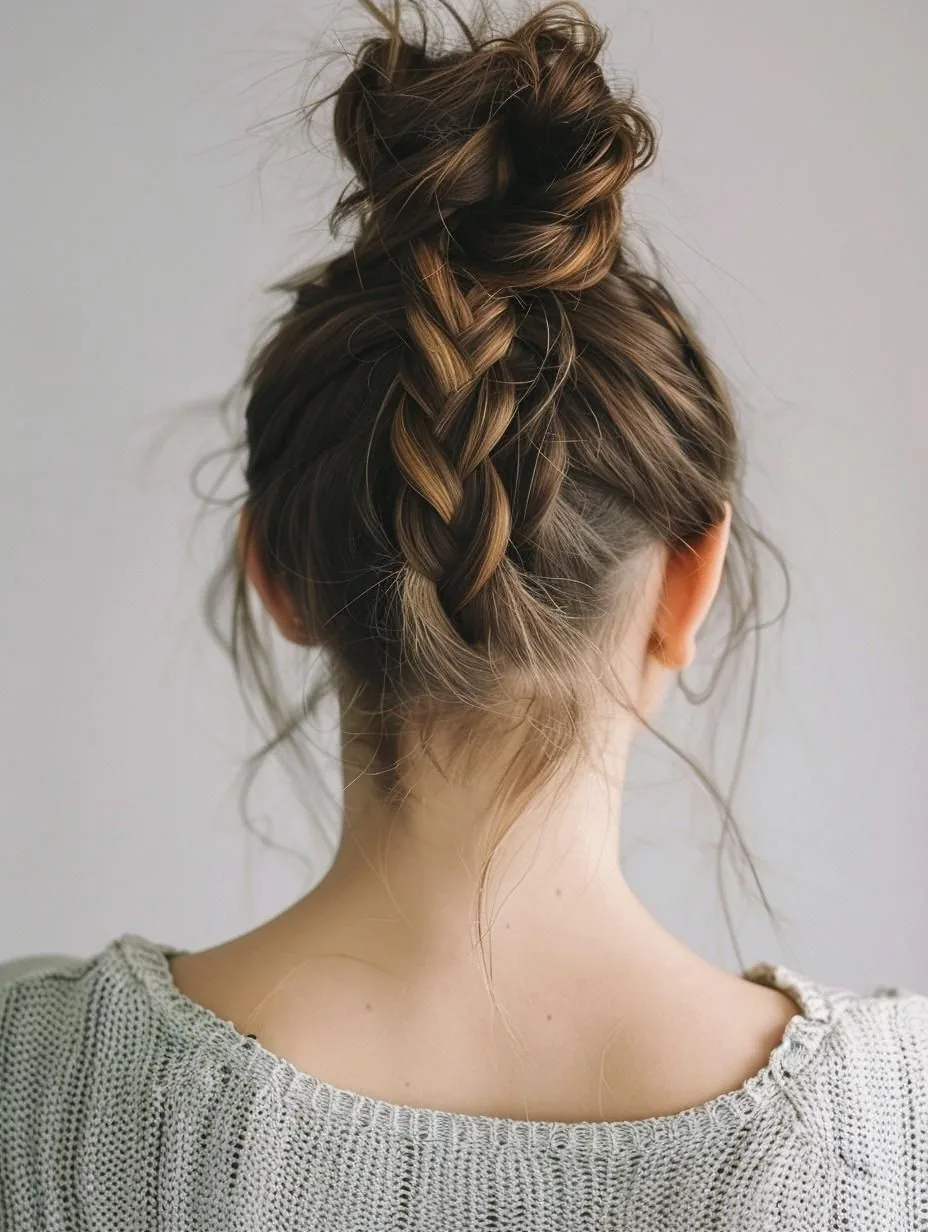
A Dutch braid into a messy bun is the relaxed version of the braided updo: a braid down the back, coiled loosely into a bun that is deliberately undone, with a few strands pulled loose at the front. It is the Dutch braid for a weekend, a brunch, or a day when the hair should look effortless — and it is far more secure than a messy bun on its own, because the braid anchors the bun and keeps it from sliding. The mess is on purpose, but the structure underneath is not.
How to style it: braid loosely, pancake the braid a little, then coil the tail into a bun and pin it loosely, pulling a few pieces free at the front and the nape. Time: fifteen minutes, and it is one of the more forgiving Dutch styles, because a messy finish hides an imperfect braid. A common mistake is making the bun too tight, which defeats the purpose — a messy bun should look like it took thirty seconds, even though the braid took ten minutes. Best for: casual days, and anyone who likes their updos soft rather than severe.
26. The Dutch Braid into a Top Knot
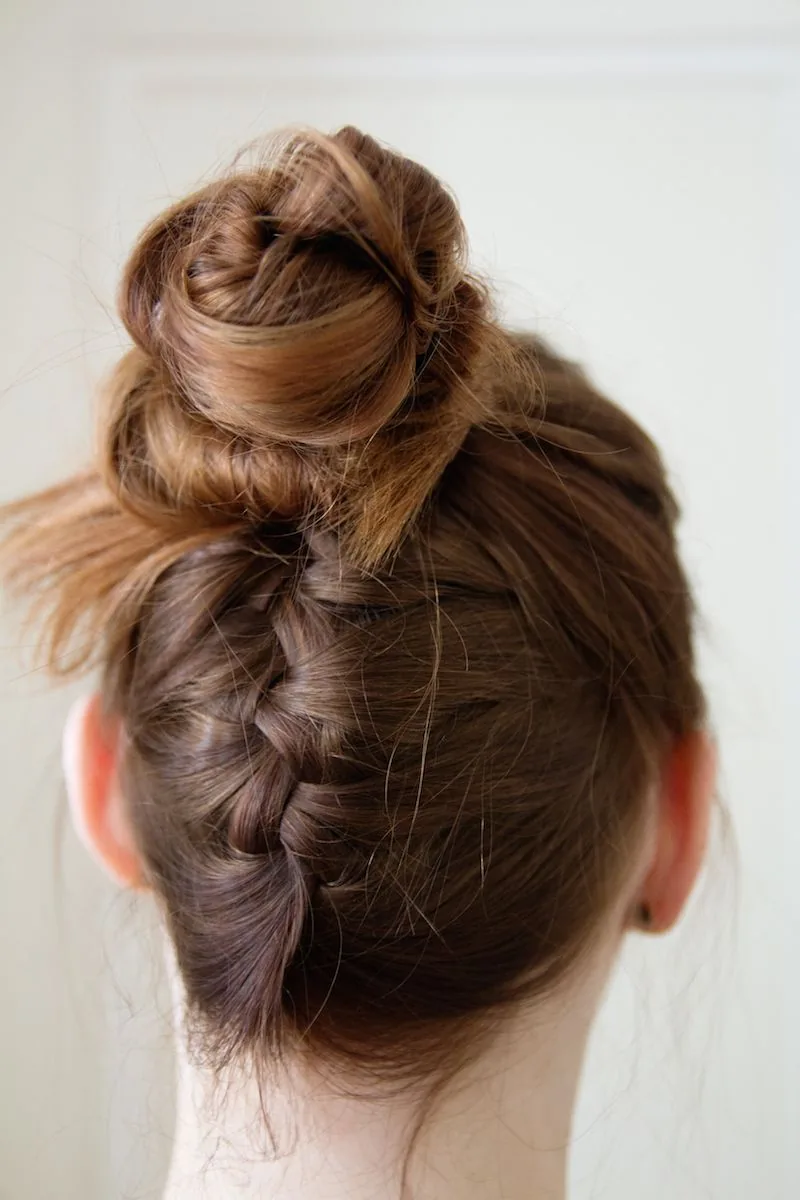
A Dutch braid into a top knot runs the braid up the back of the head — an upside-down braid, braided from the nape upward — and finishes in a knot on top of the crown. It is the most dramatic braided bun in this guide, and it suits a night out, a party, or any day when the hair should be completely up and completely noticed. The upside-down braid is the detail that makes it special: the plait runs up the back where a normal braid runs down, and the top knot sits high and proud on top of it.
This is the hardest Dutch braid to do on yourself, because braiding upward at the back of your own head is awkward — a friend or a stylist makes it much easier. Time: twenty to thirty minutes, and the result lasts all evening. Best for: parties, nights out, and anyone who wants a top knot with more interest than a plain one. A common mistake is starting the braid too high, which makes the knot sit too far forward; start at the nape and work straight up. Quick verdict: the Dutch braid for a statement, and the one that gets the most compliments from behind.
27. The Dutch Braid Headband
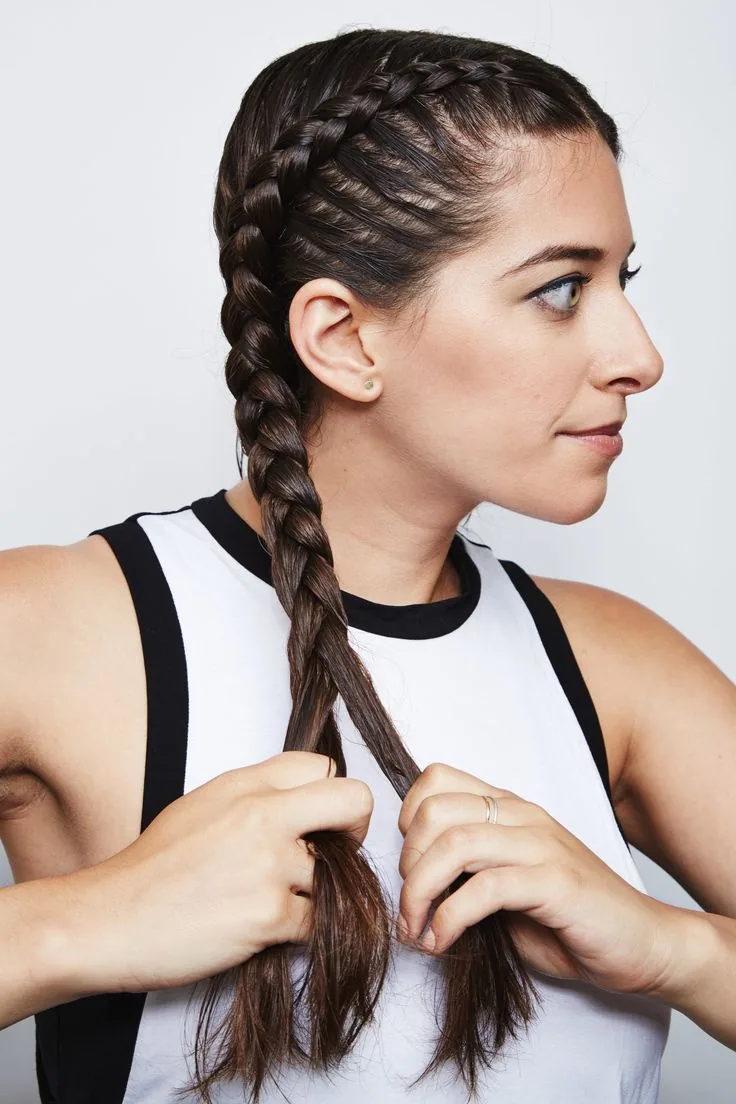
The Dutch braid headband is a single braid that runs along the hairline from one ear to the other, like a headband made of hair — and it is the quickest Dutch braid transformation there is. It keeps the front hair out of the face, it adds a braided detail to loose hair, and it works on almost any length, from a bob to long hair. It suits everyday wear, weddings and any day when the hair should be down but the front should be tidy, and it is the Dutch braid for women who do not want a full plait.
How to style it: take a section at one temple, Dutch braid along the hairline, adding hair only from the front, and pin the end behind the opposite ear. Time: five to ten minutes, and it is one of the easiest Dutch braids to learn, because the braid is short and the line is forgiving. Best for: growing out bangs, keeping the front tidy on a windy day, and anyone who wants a braided detail without a full braid. A common mistake is adding hair from both sides, which turns it into a crown braid — for a headband, add hair only from the hairline side.
28. The Dutch Braid with Bangs
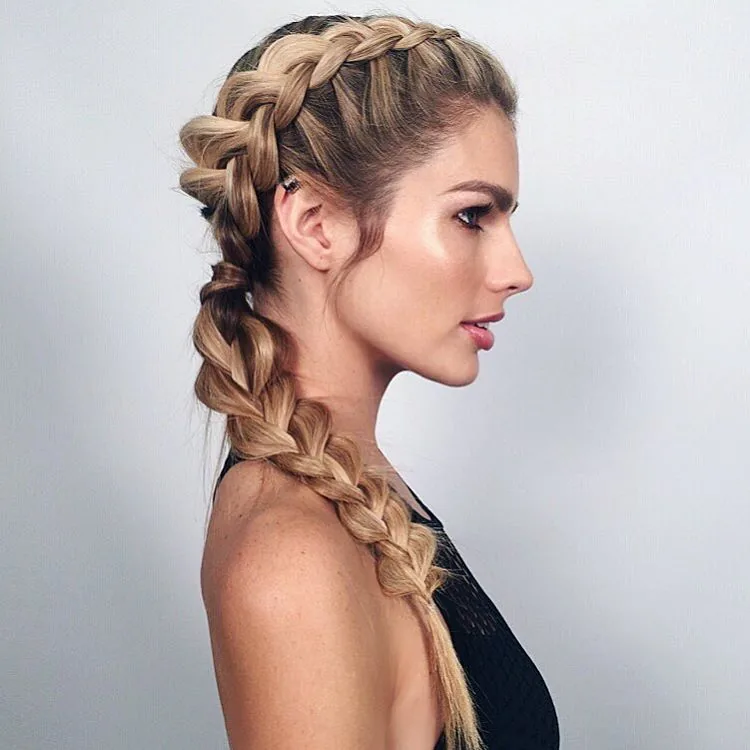
A Dutch braid with bangs pairs a raised plait with a soft fringe, and the combination is softer and more romantic than a Dutch braid on its own. The bangs frame the face, the braid keeps the rest of the hair tidy, and the contrast between the soft fringe and the structured braid is what makes the style work. It suits a half-up Dutch braid, a side braid, or a crown braid, with the bangs left loose at the front while the braid does its work behind them.
Best for: oval, long and heart-shaped faces, where the fringe shortens the forehead and balances the length of the face. Maintenance is the usual braid routine plus a little attention to the bangs, which are the first thing to frizz in humidity — a quick smooth with a little cream in the morning keeps them defined. Time: the braid plus two extra minutes for the bangs. Who should avoid it: no one, though very curly bangs will need a little more smoothing. Quick verdict: the Dutch braid for anyone who loves a fringe, and the softest version of a structured style.
29. The Dutch Braid for Medium Hair
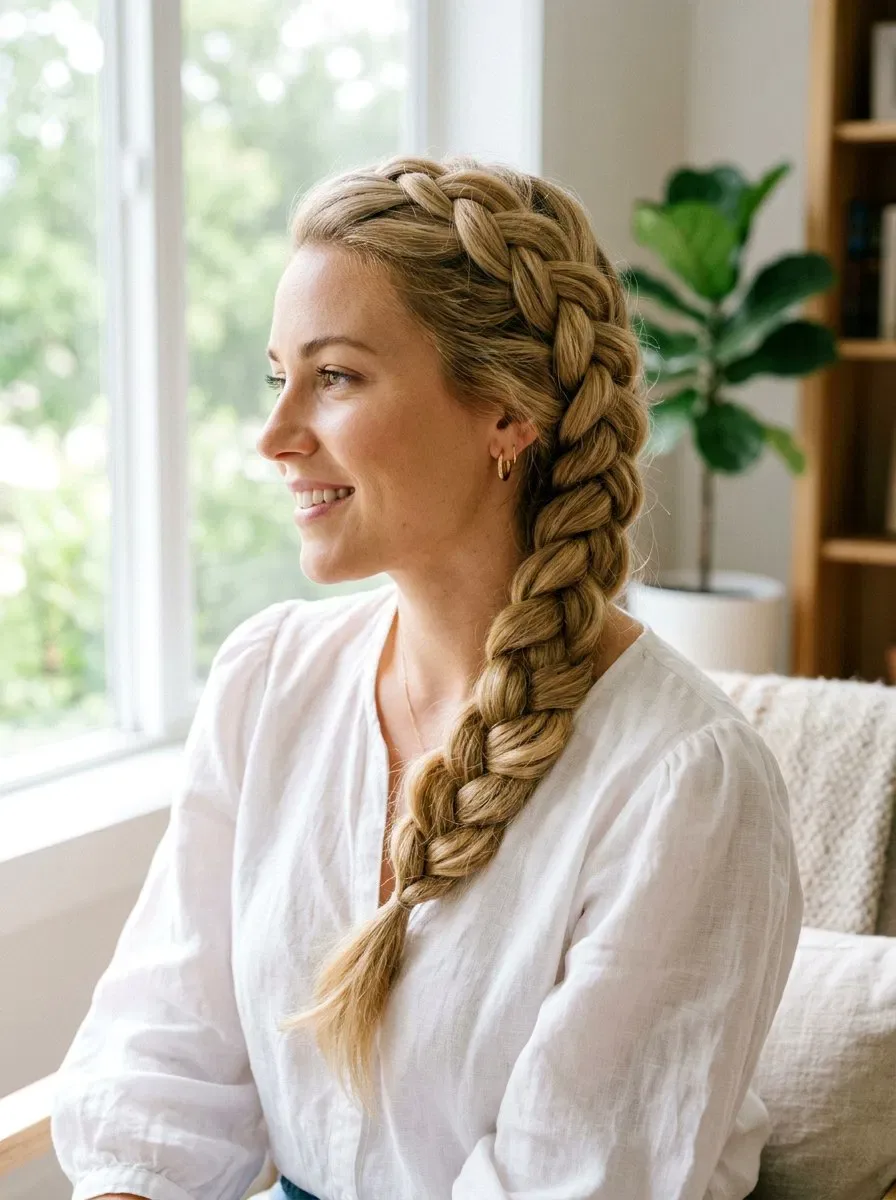
Medium hair — shoulder length, or a long bob — is the easiest length for a Dutch braid, and the length most women live in. It is long enough for a full single braid down the back or double Dutch braids that reach the shoulders, and short enough that your arms do not tire halfway through. A Dutch braid on medium hair is neat, manageable and quick, and it is the length where the braid looks most balanced — not too short to be a stub, not too long to be heavy.
Time: ten to fifteen minutes for a single braid, fifteen to twenty for doubles, which makes medium hair the most practical length for a daily Dutch braid. Best for: everyday wear, work, the gym, and anyone learning to Dutch braid, because the length is forgiving — a mistake is easy to undo, and the braid is easy to reach. Maintenance is minimal: a morning braid, a tie, and the style holds all day. If you are not sure which Dutch braid length is yours, medium hair is the answer — it does everything, and it does it well.
30. The Dutch Braid for a Date Night
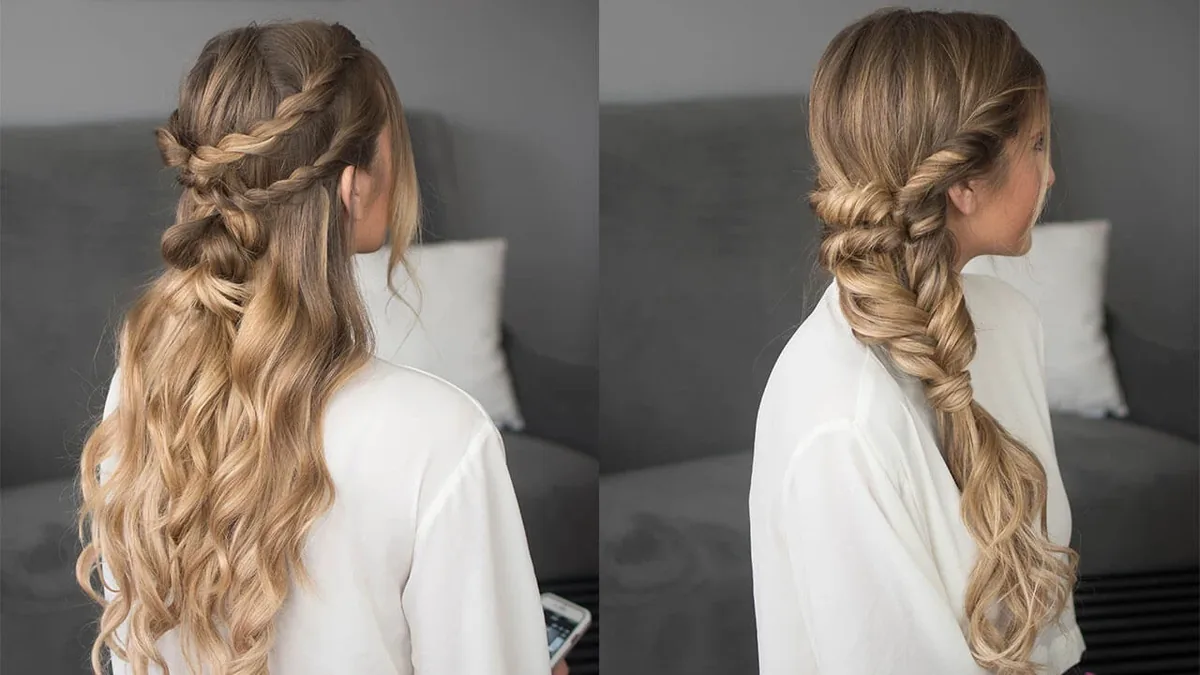
A Dutch braid for a date night is the soft, pancaked version of the style: a side braid or a half-up braid, pulled wide and loose, with a few face-framing strands left free at the front. It is romantic rather than sporty, and it is the braid for an evening when the hair should look done but not overdone. The pancaking is what makes it a date-night braid — a neat, tight braid looks like a gym braid, but the same braid pulled soft and wide looks like an evening style.
How to style it: braid a side Dutch braid, pancake it gently from the bottom up, and pull two thin strands loose at the front to frame the face. Time: fifteen minutes, and it holds all evening. Best for: dates, dinners and evenings out, and anyone who wants a braid that looks soft in candlelight. A common mistake is over-pancaking, which makes the braid fall apart halfway through the evening — pull gently, and mist lightly with hairspray. A ribbon at the end, or a small pearl pin, is the finishing touch.
31. The Dutch Braid for a Festival
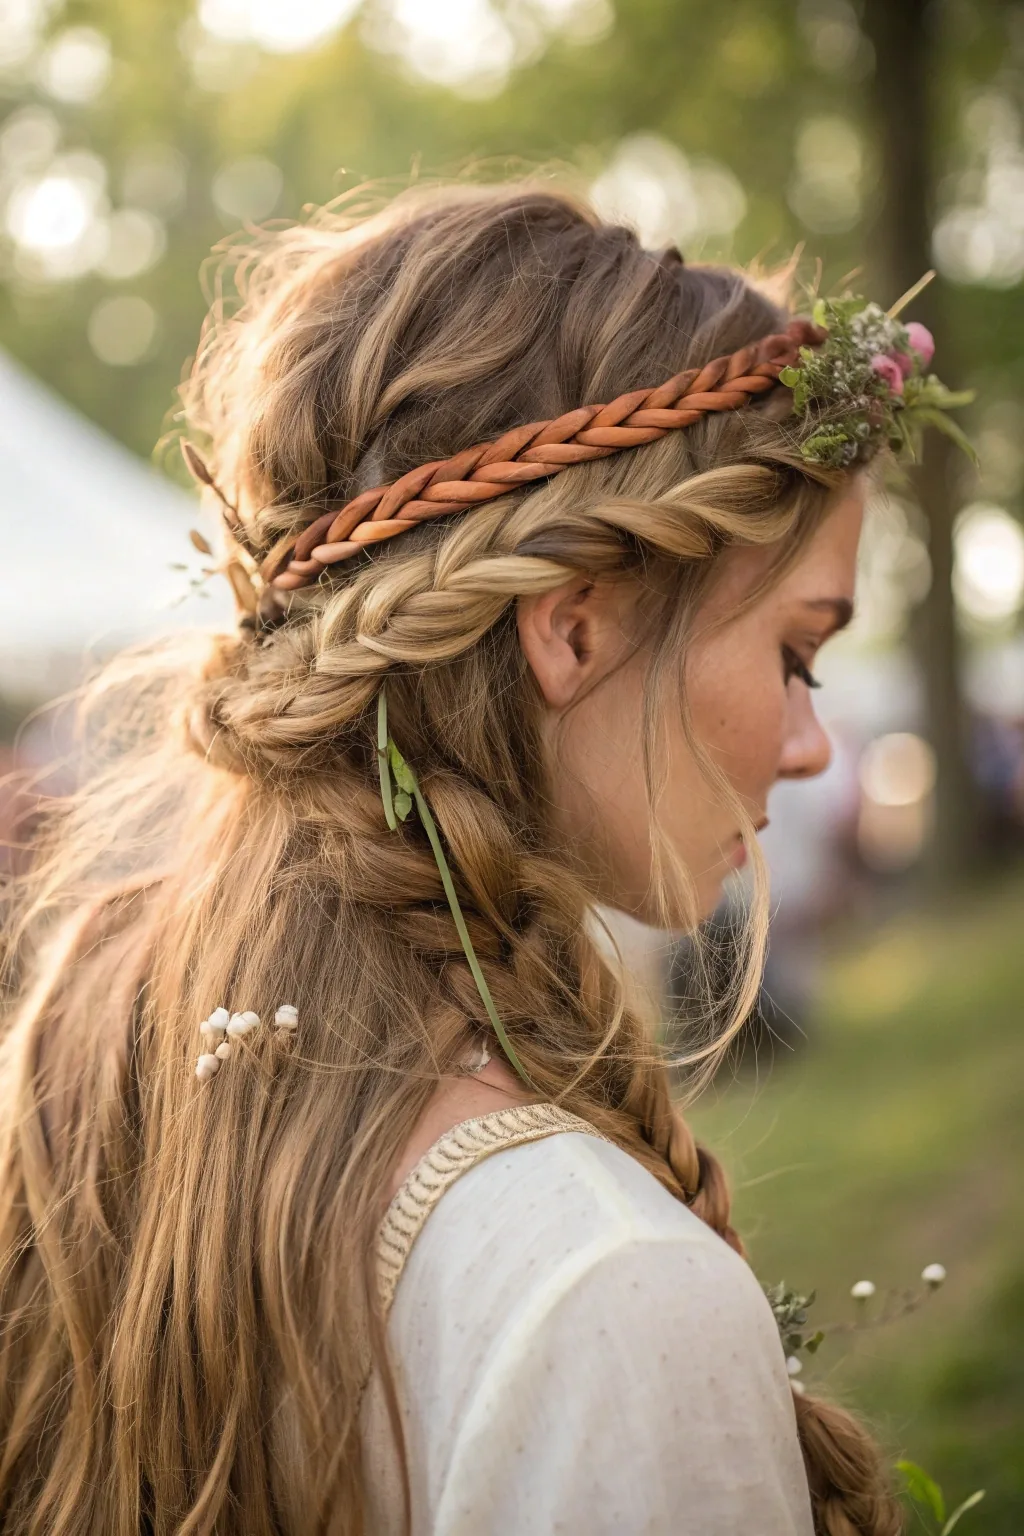
A Dutch braid for a festival is the boldest, most decorated version of the style: double Dutch braids, pancaked wide, with rings, glitter, ribbons or small flowers woven in, and the whole look designed to survive a day of dancing in the sun. Festivals are where Dutch braids earn their keep, because the style is secure, it keeps the hair out of the face in the heat, and it looks better as the day goes on, loosening into a soft, lived-in braid by evening.
How to style it: braid doubles the night before or in the morning, pancake them wide, and add the decorations last — rings on the braid, glitter along the part, or a ribbon at the ends. Time: twenty minutes plus decoration. Best for: festivals, concerts, holidays and outdoor parties. A common mistake is decorating before pancaking, which buries the decorations inside the braid — pancake first, decorate second. Quick verdict: the Dutch braid at its most fun, and the style that looks best when it is a little bit undone by the end of the day.
32. The Dutch Braid for Thin Hair
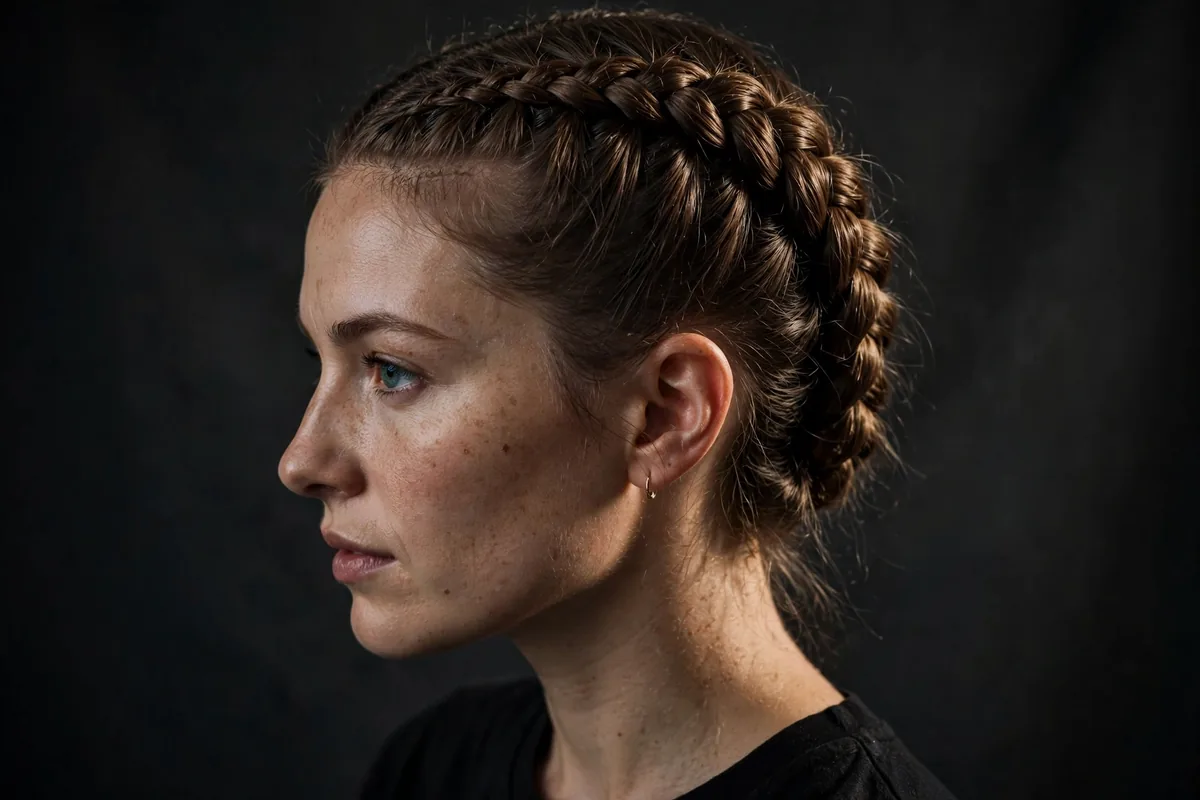
Thin hair is where the Dutch braid is at its most useful, because the raised plait and the pancaking together can make a thin-haired braid look genuinely full. A French braid on thin hair disappears into the hair; a Dutch braid on thin hair sits on top of it, visible and bold, and pancaking can double its apparent width. It is the braid that makes thin hair look like more hair, and that is not a trick — it is the geometry of the inside-out braid doing its work.
How to make it work: prep with volumising mousse or dry shampoo, braid loosely rather than tightly, and pancake generously once the braid is tied — pull each loop wider, starting at the bottom, and do not be shy about it. A common mistake is braiding thin hair too tightly, which makes the braid look stringy; looseness and pancaking are the whole technique here. Time: ten minutes. Best for: anyone with thin or fine hair who has given up on braids — try a Dutch braid, pancake it, and look again.
33. The Dutch Braid for Wavy Hair
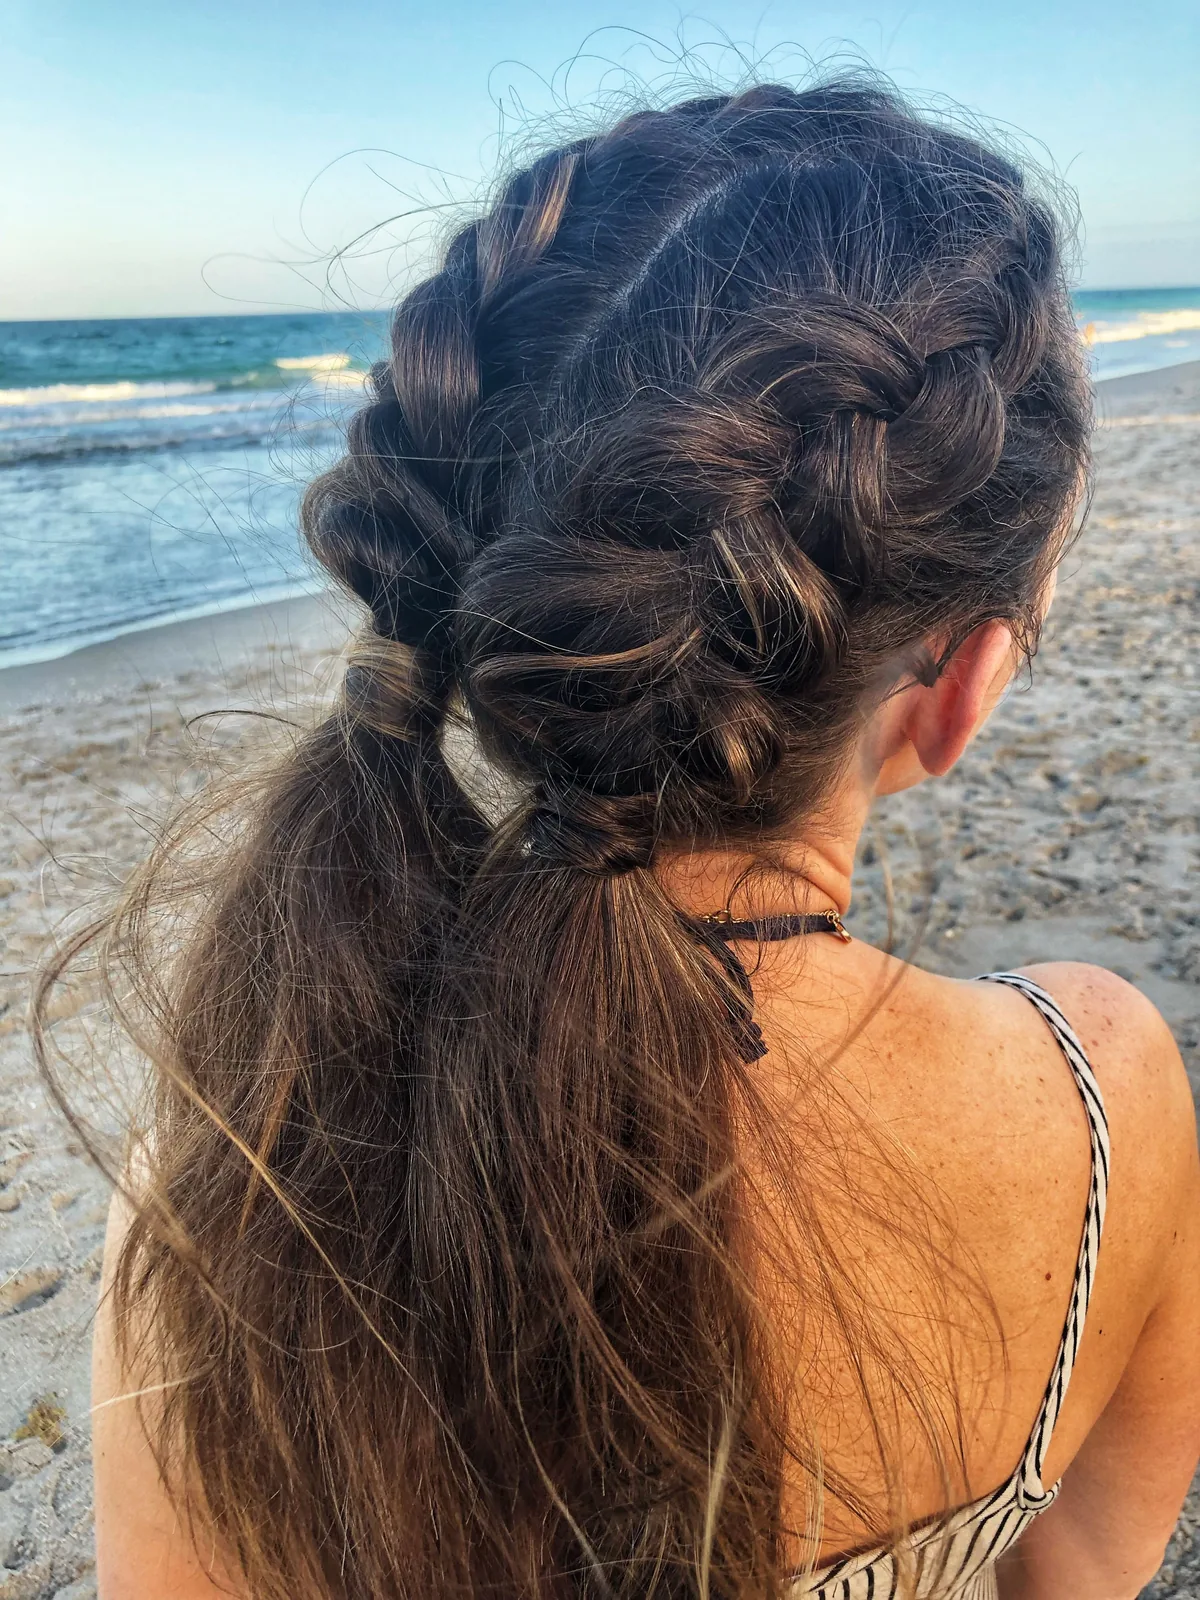
A Dutch braid on wavy hair is the most relaxed version of the style: the braid follows the wave, the raised pattern shows against the texture, and the finished braid has a soft, tousled quality that a straight-haired braid never quite achieves. Wavy hair is the easiest hair to Dutch braid, because the texture gives the braid grip, the waves fill out the plait, and a slightly imperfect braid looks deliberate rather than messy. It is the braid for a beach day, a holiday, or any day when the hair should look easy.
Best for: naturally wavy hair of any length, and anyone who wants a braid that looks good without being perfect. How to style it: braid on second-day hair, or with a little sea-salt spray for texture, and pancake lightly for a soft finish. Time: ten to fifteen minutes. When you take the braid out, you get a bonus: deeper, more defined waves. A common mistake is over-smoothing wavy hair before braiding, which removes the texture that makes the braid work — leave the waves alone, and let the braid follow them.
34. Dutch Milkmaid Braids
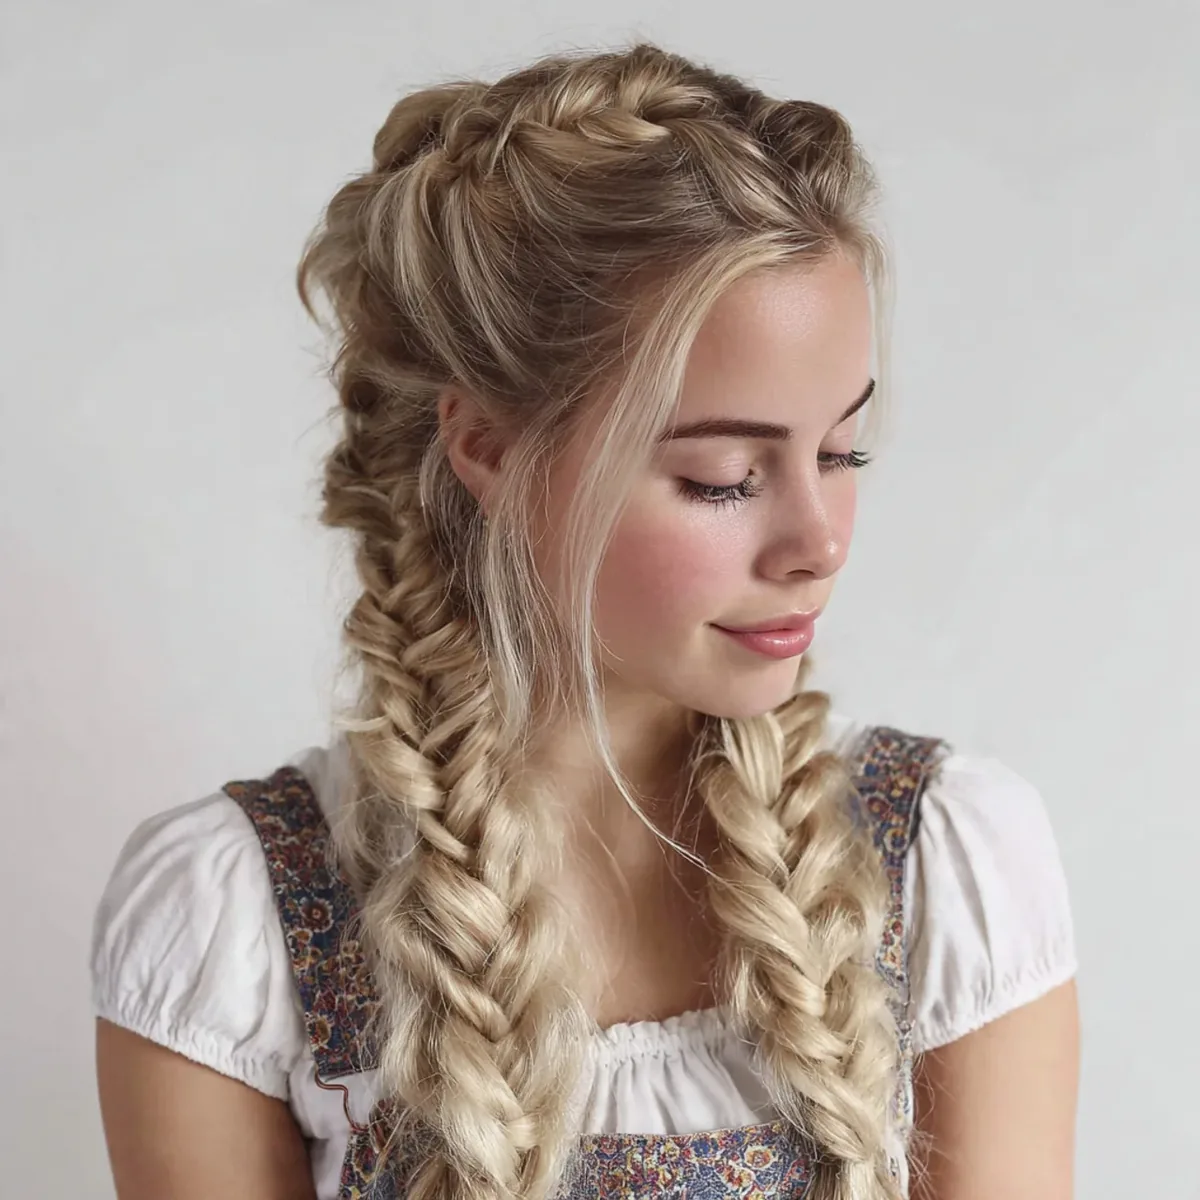
Dutch milkmaid braids are double Dutch braids pinned up across the crown, so the two plaits meet on top of the head like a braided headband that goes all the way around. It is the most romantic Dutch braid in this guide — a style that looks like it belongs in a fairytale, and behaves like a practical updo, because the hair is entirely up and entirely secure. It suits weddings, festivals, summer days and any occasion when the hair should be up, pretty and completely out of the way.
How to style it: braid two Dutch braids, one on each side, then cross them over the top of the head and pin them in place with U-shaped pins, tucking the ends underneath. Time: twenty to twenty-five minutes, and it is a style best done with a mirror or a friend, because pinning the braids evenly on top of your own head is hard to see. Best for: weddings, festivals and summer days. A few loose strands at the front soften the look, and small flowers pinned into the braids finish it. Quick verdict: the Dutch braid as a crown, and the prettiest way to wear your hair entirely up.
What is the difference between a Dutch braid and a French braid?
The difference is the direction of the cross. In a French braid you cross each side section over the middle strand, so the braid sinks into the hair and sits almost flat. In a Dutch braid you cross each side section under the middle strand, so the braid pops out and sits on top of the hair like a raised rope. Same three strands, same adding-in of hair — only the direction changes, and it makes the Dutch braid bolder, more visible and longer-lasting.
How long does a Dutch braid last?
A well-braided Dutch braid lasts all day, and often into the next day. Braid it with firm, even tension on second-day hair or hair with a little dry shampoo, tie it with a snag-free elastic, and it will hold from morning to evening without a touch-up. Double Dutch braids and Dutch braids into buns last the longest, because the hair is anchored in two places. Sleeping in a Dutch braid is fine, and taking it out the next morning leaves soft waves.
Can a beginner do a Dutch braid?
Yes, a beginner can do a Dutch braid — it only feels backwards for the first few tries, because the underhand motion is the opposite of a French braid. Practise on someone else first if you can, because it is easier to learn the motion on another head, then try it on your own hair. Start with a single braid down the back, keep the sections even, and remember the one rule: under, not over. Most people get it within three or four attempts.
Can you do a Dutch braid on short hair?
Yes, you can do a Dutch braid on short hair — a bob or a lob works well, with a single braid along the hairline, a headband braid, or two short double Dutch braids. The ends will need pinning rather than tying, because short hair will not stay in an elastic, so cross two bobby pins in an X over the tail to hold it flat. Very short, pixie-length hair is too short for a Dutch braid, and a twist or a pin will serve better.
Does a Dutch braid hurt?
A Dutch braid should not hurt. If it does, it is braided too tightly, or the sections at the hairline are being pulled too hard. Braid with firm, even tension — enough to keep the braid neat, not enough to pull the scalp — and keep the braid close to the head without yanking it. If a braid hurts by midday, take it out and re-braid it a little looser; a comfortable braid lasts longer than a tight one, because you will not be tempted to pull it out.
How do I make my Dutch braid look fuller?
To make a Dutch braid look fuller, pancake it: once the braid is tied, gently pull at the outer edges of each loop, starting at the bottom and working up, a little at a time, until the braid is as wide as you want it. Prep with dry shampoo or volumising mousse before you braid, and braid a little looser than usual, because a loose braid pancakes better than a tight one. On fine or thin hair, pancaking can double the apparent width of the braid.
Can I sleep in a Dutch braid?
Yes, you can sleep in a Dutch braid — it is one of the best overnight styles there is. A loose Dutch braid, or double Dutch braids, keeps the hair from tangling overnight, protects the ends, and gives you soft waves when you take it out in the morning. Braid it a little looser than you would for the day, tie it with a soft, snag-free elastic, and sleep on a satin pillowcase if you have one, which reduces frizz.
How do I stop my Dutch braid from frizzing?
To stop a Dutch braid from frizzing, smooth a little gel or pomade over the hairline before you braid, braid on slightly damp hair or hair with a little leave-in conditioner, and mist the finished braid lightly with a flexible-hold hairspray. Avoid touching the braid during the day, because handling it loosens the edges and creates frizz. On curly or wavy hair, a little curl cream before braiding keeps the frizz down far better than hairspray afterwards.
Is a Dutch braid good for the gym?
Yes, a Dutch braid is one of the best gym hairstyles: double Dutch braids keep every strand out of the way, they do not bounce the way a ponytail does, and they survive a full workout without loosening. A single Dutch braid works too, but doubles are better for exercise because they distribute the hair evenly. Braid firmly but not tightly, use a strong elastic, and the braid will hold through running, lifting and yoga without a touch-up.
How do you do a Dutch braid on yourself?
To do a Dutch braid on yourself, start with brushed, slightly textured hair, take a section at the front hairline and split it into three equal strands. Cross the right strand under the middle, then the left strand under the new middle, and repeat, adding a little more hair from each side before every cross. Keep the braid close to your scalp, check the line in a mirror every few crosses, and when you run out of hair to add, braid the three strands to the ends and tie off. Pancake the braid gently if you want it fuller.
Conclusion
The Dutch braid is a small change with a big effect: cross under instead of over, and a braid that used to disappear into the hair suddenly sits on top of it, bold, visible and built to last. That is the whole secret of this guide — every style here, from the classic single braid to the crown, the double Dutch and the milkmaid braids, is the same three strands and the same underhand motion, dressed up in a different finish. Learn the motion once, and the rest is a matter of where the braid goes and how you finish it.
Start with the classic single Dutch braid, and give yourself a few tries — the first one will feel backwards, the third one will feel natural, and by the fifth you will wonder why you ever braided any other way. Then try the doubles, try the crown, try a Dutch braid into a bun for work and a pancaked side braid for a night out. The braid will hold, the pattern will show, and the style will last all day. That is what a Dutch braid does best: it stays put, it stands out, and it lets the hair do the talking.