Twists That Last: 36 Two-Strand, Flat and Passion Twist Hairstyles for Women
Twists are the hairstyle that does the most with the least: two strands of hair wrapped around each other, again and again, until a rope of hair appears that holds its shape for weeks, protects the ends, and looks good from the very first day to the very last. No heat, no chemicals, no daily styling — just a twist, a little product, and patience. That is why twists have been worn for generations, and why they keep coming back: they are a protective style and a fashion statement at the same time, and they work on every length, from a short twist-out to waist-length Senegalese twists.
This guide gathers 36 twist hairstyles for women, from the classic two-strand twist to flat twists, passion twists, Senegalese twists and the twist-out — plus mini and jumbo versions, twist bobs and buns, twists with beads and gold cuffs, and looks for work, weddings and holidays. Eight guides cover what twists really are, how the main types differ, how long they last, how to do two-strand twists at home, how to keep them fresh at night, how to get a perfect twist-out, and the mistakes that make twists frizz or fall apart. One honest note before you begin: twists are easy to learn, but they do take time — a full head can take two to four hours — so put on a good playlist, take your time, and enjoy the process.
What Are Twist Hairstyles — And Why Do They Last So Long?
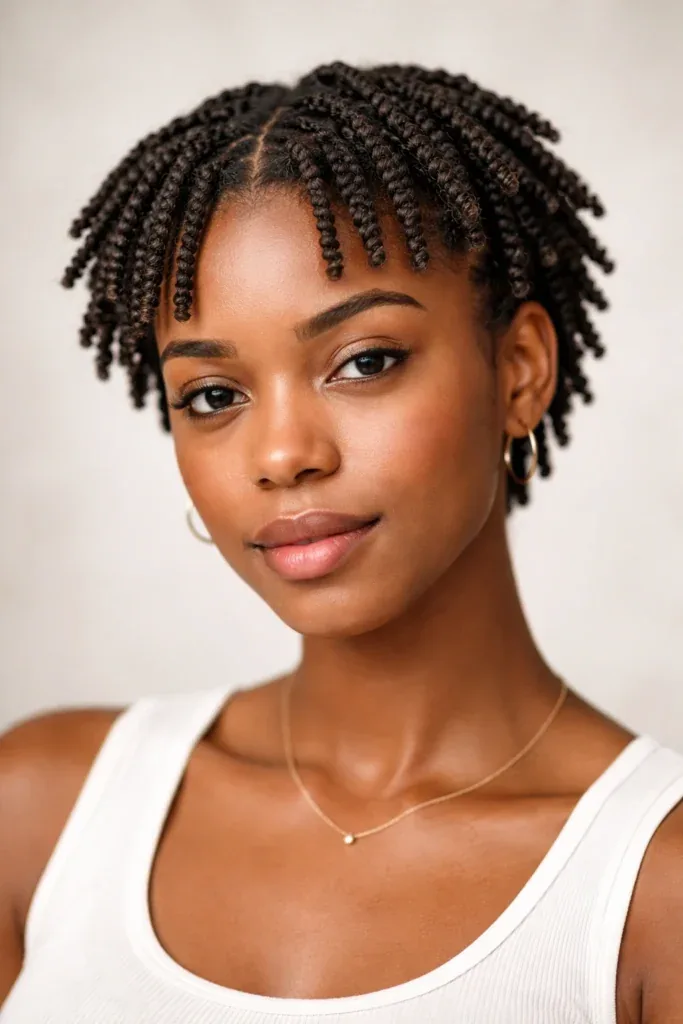
A twist hairstyle is made by taking two strands of hair and wrapping them around each other, over and over, from the root to the tip, so the two strands lock together into a rope. That is the whole technique — and it is the reason twists last so long. Because the hair is wrapped rather than braided, there are no sharp bends in the strand, so the twist holds its shape gently, without pulling at the scalp, and it unravels slowly rather than falling apart all at once. The ends are tucked, coiled or curled so they stay sealed, and the finished twist can last for weeks.
Twists come in many forms, and they all use the same wrapping idea. Two-strand twists use your own hair alone. Flat twists are worked close to the scalp, like a cornrow made of twists. Passion twists and Senegalese twists add hair extensions for length and fullness, and they use a special wavy or silky extension hair that gives a soft, water-wave finish. And a twist-out is what you get when you unravel a set of twists — the hair keeps the twist’s wave pattern and falls into a big, defined, curly afro. Every twist in this guide is a variation on the same simple wrap, and once you can do one, you can do them all.
Two-Strand vs Flat vs Passion vs Senegalese Twists — What Is the Difference?
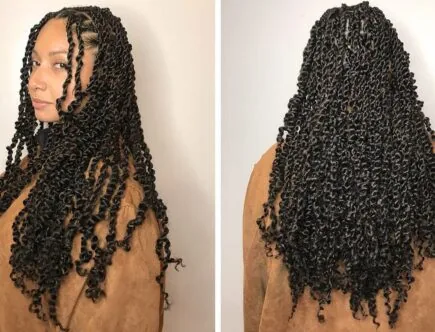
The four main twist types sound similar, and they all use the same wrapping motion, but they look and feel very different. Two-strand twists are the classic: your own hair, divided into sections, each section twisted into a rope. They are the most natural-looking twist and the easiest to do at home. Flat twists are twisted flat against the scalp, picking up hair as you go — like a cornrow, but with twists instead of braids — so they sit close to the head and are often used for updos, crowns and the base of a style.
Passion twists are made with wavy, water-wave extension hair twisted in with your own hair, so they look soft, loose and boho — the twist equivalent of a beach wave. Senegalese twists are made with smooth, silky extension hair, so they look sleek, shiny and defined, like a rope of silk. Passion twists are softer and more romantic; Senegalese twists are sleeker and more polished. Two-strand and flat twists use no extensions at all, so they are the cheapest and the gentlest on the scalp, while passion and Senegalese twists give you length and fullness you could not get from your own hair alone.
How Long Do Twists Last — And How Should You Prepare?
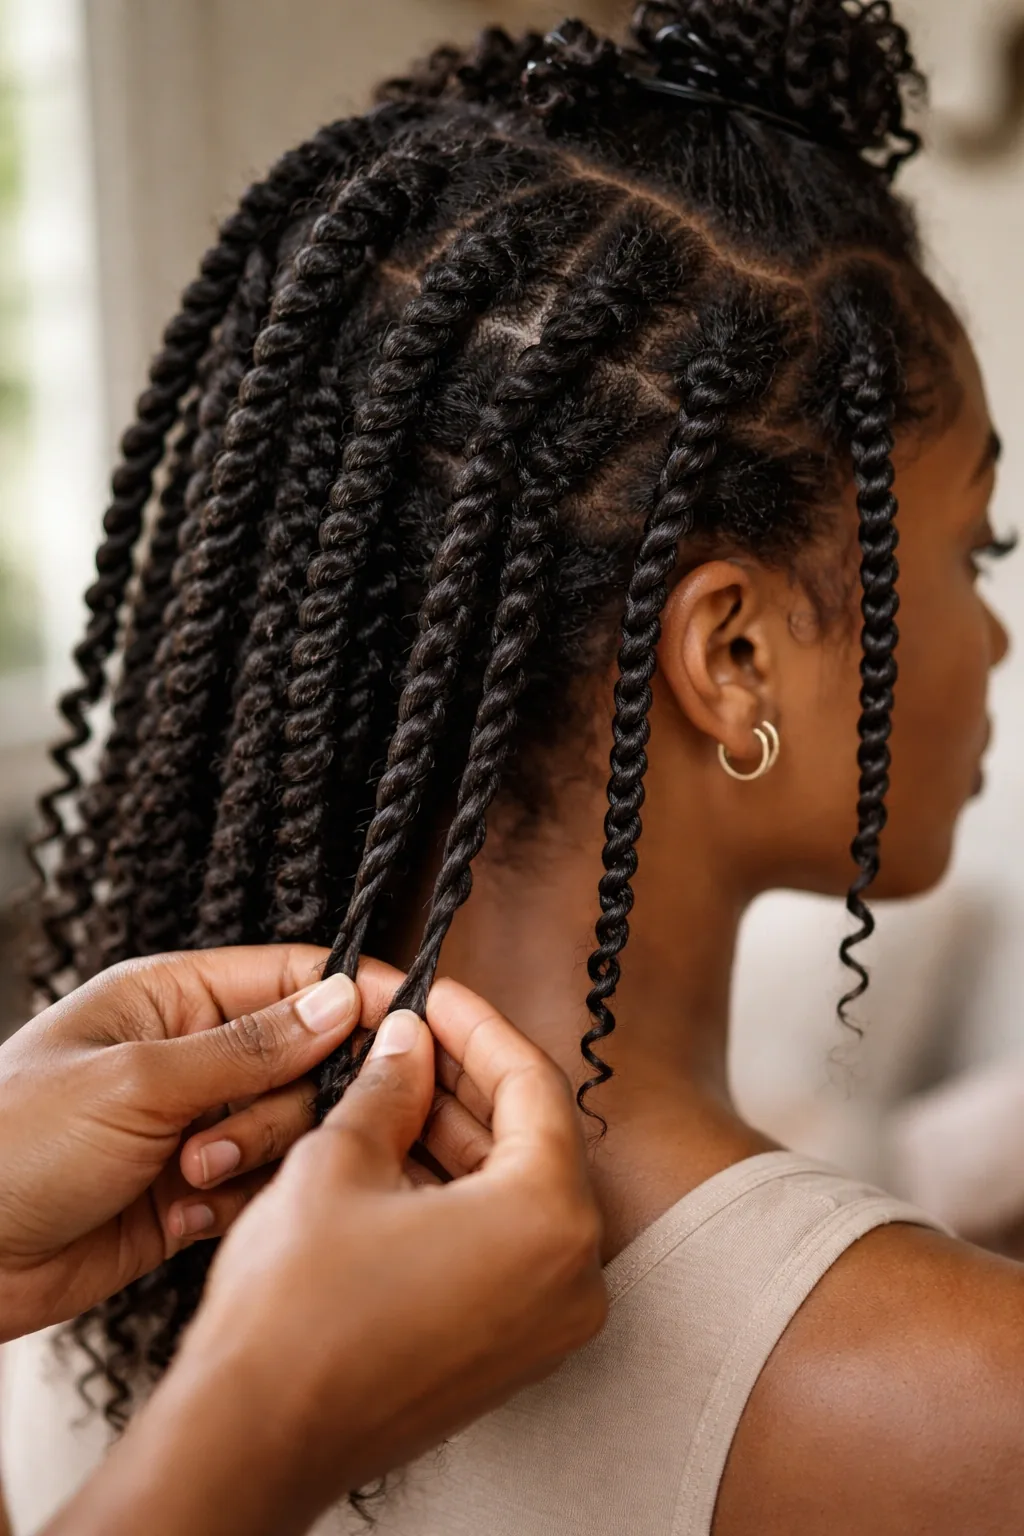
How long twists last depends on the type and on how you care for them. Two-strand twists on your own hair usually last one to two weeks before the roots start to frizz and the new growth shows. Flat twists last about one to two weeks as well, because they sit close to the scalp and the roots show quickly. Passion twists last four to six weeks, and Senegalese twists can last six to eight weeks, because the extension hair holds its shape and the roots are hidden under the twist. A twist-out, by contrast, lasts two to five days — it is a short-lived style, but a beautiful one.
Preparation is simple, and it makes the biggest difference to how long twists last. Start with clean, detangled, slightly damp hair — twists hold best on hair that is moisturised but not soaking wet. Work a leave-in conditioner and a little twisting butter or cream through each section before you twist it, so the hair is smooth and the twist has something to grip. Section the hair neatly before you start, and keep the sections even, because uneven sections make uneven twists. And give yourself time: a full head of two-strand twists takes two to three hours, passion twists take three to five hours at a salon, and rushing is the fastest way to a frizzy, uneven result.
How to Do Two-Strand Twists at Home — Step by Step
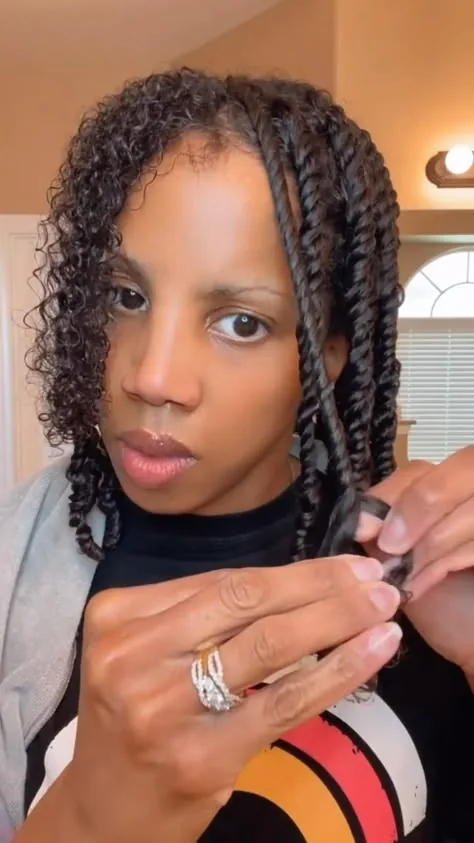
Two-strand twists are the easiest twist to learn, and they are the best place to start. Begin with clean, detangled, damp hair, and work a leave-in conditioner and a twisting cream through it. Part the hair into sections — the size of the section decides the size of the twist — and clip the sections you are not working on out of the way. Take one section, divide it into two equal strands, and twist the strands around each other, always in the same direction, from the root to the tip. Keep the tension even and the twist smooth, and when you reach the end, twirl the tip around your finger so it coils and seals itself.
The details are what make the difference between a neat twist and a messy one. Twist in the same direction every time — if you switch direction halfway, the twist will unravel. Keep the two strands equal in size, because an uneven twist looks lumpy and unravels faster. Do not twist too tightly at the root: a twist that pulls at the scalp will hurt by the second day and will frizz at the root as the hair grows. And finish the ends properly — a little cream on the tip, twirled into a coil, or a small perm rod for a curl — because loose ends are the first thing to unravel. Your first set will take a while, and that is fine: by your third set, your hands will know the motion.
How to Keep Twists Fresh — Night Care, Washing and Refreshing
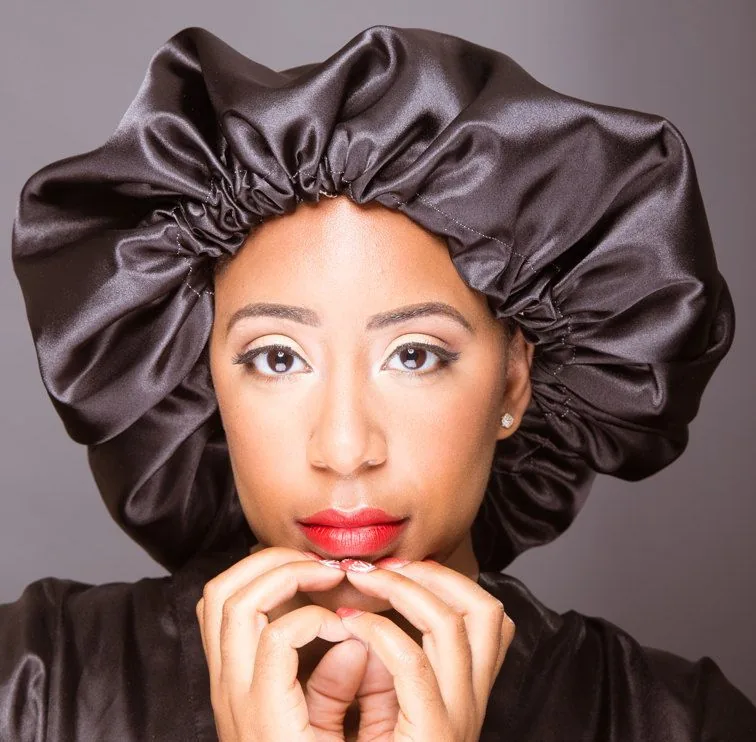
Twists look best when they are looked after, and the care is simple. At night, the rule is silk or satin, always: a satin bonnet or a silk scarf keeps the twists from rubbing against a cotton pillowcase, which is what causes frizz and dryness. Gather the twists loosely into a pineapple — a high, loose ponytail on top of the head — and cover them with the bonnet. Never sleep on twists with nothing covering them if you want them to last more than a few days, and never tie them tightly at night, because a tight tie leaves a dent and pulls at the roots.
Washing twists is easier than most people think. You can wash them — gently — with a diluted shampoo, massaging the scalp with your fingertips and letting the water run through the twists, without rubbing the twists themselves. Rinse well, and dry them thoroughly, because twists that stay damp will smell and can grow mildew. To refresh twists between washes, mist the roots lightly with water and a little leave-in, smooth the frizz with a dab of twisting cream, and re-twist the few twists at the hairline that have started to fuzz. A little oil on the scalp once a week keeps it from drying out. That is the whole routine: bonnet at night, gentle wash, light refresh — and the twists will last their full life.
The Twist-Out — How to Get Big, Defined, Frizz-Free Curls
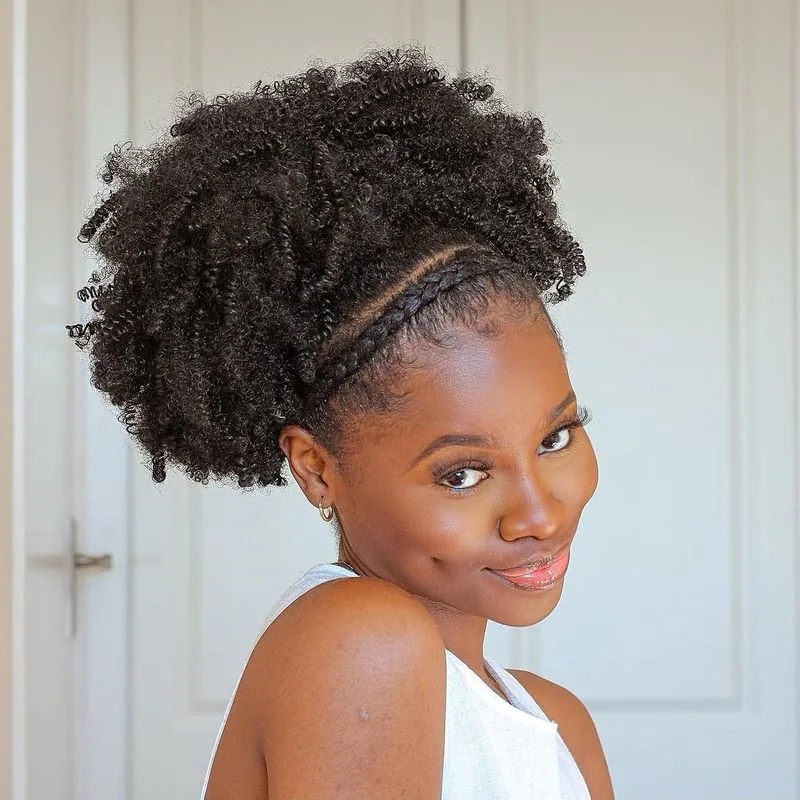
A twist-out is the style you get when you take twists down: the hair keeps the wave of the twist, and it falls into big, defined curls with a soft, full shape. It is one of the most loved natural hairstyles there is, because it gives you curls without heat and without a curling iron. The secret is in the set: the twists you take down decide the curls you get. Small twists make tight, small curls; medium twists make medium curls; large twists make loose, big waves. So if you want a big afro, do large twists; if you want tight definition, do small ones.
Technique matters as much as size. Twist on damp hair with a styling cream or a curl-defining butter, and let the twists dry completely before you take them down — taking them down while they are still damp is the number one cause of frizz. When you unravel them, coat your fingers with a little oil so the hair does not catch, and separate each twist into two or three pieces, gently, without pulling the curl apart. Do not use a brush or a comb on a twist-out; use your fingers, or a wide-tooth pick at the roots for volume. A twist-out lasts two to five days, and the second day is usually the best — the curls relax a little, the volume grows, and the shape settles.
Twists as a Protective Style — What They Do for Your Hair
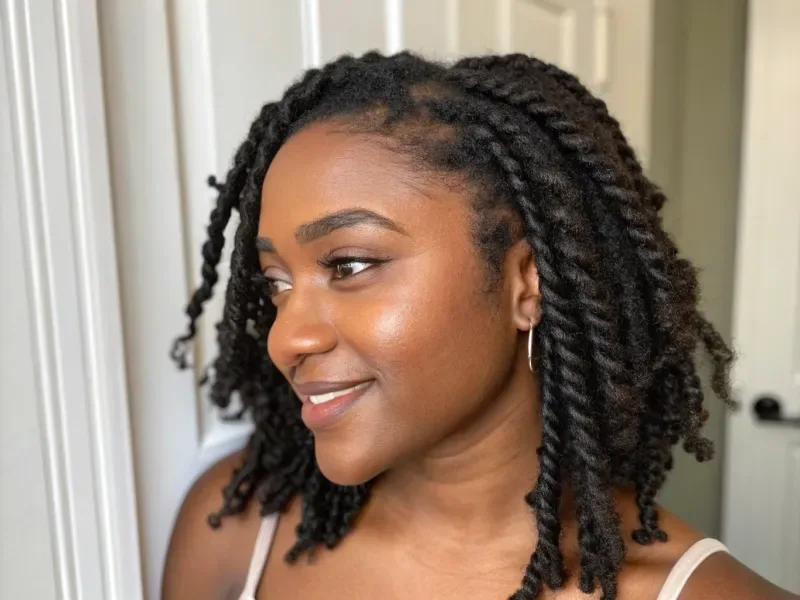
Twists are a protective style, which means they protect the hair from the things that damage it: daily combing, heat styling, friction from clothes and pillows, and the weather. When the hair is twisted up, the ends — the oldest and most fragile part of the hair — are tucked away inside the twist, so they are not rubbing against anything, not catching on anything, and not drying out. That is why so many women wear twists while they are growing their hair out: the hair is left alone to grow, and the length stays because the ends are not breaking off.
The protection only works if the twists are not too tight and not left in too long. Twists that pull at the scalp can cause breakage at the hairline and even traction alopecia if they are worn too tightly for too long, so the roots should never hurt — if they do, the twists are too tight. Twists should also be taken down and the hair properly washed and detangled after six to eight weeks at the most; leaving them in for months lets the hair mat at the roots, and taking matted hair apart causes more breakage than the twists ever prevented. Done right — gentle tension, regular scalp care, and a sensible time limit — twists are one of the kindest styles you can wear, and your hair will thank you for it.
Common Twist Mistakes — And How to Fix Them
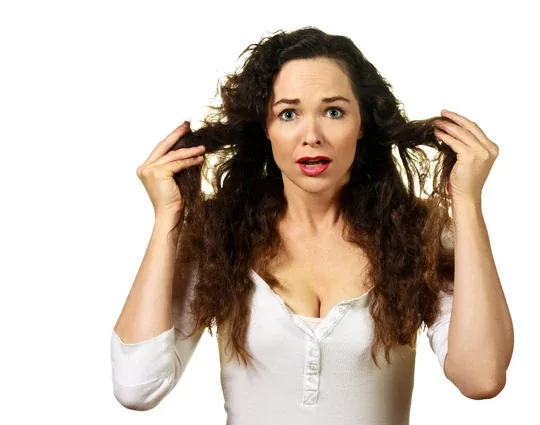
The most common twist mistake is twisting on hair that is too dry. Dry hair has no grip and no slip at the same time: the twist looks rough, the strands catch on each other, and the twist unravels within days. The fix is to twist on damp, moisturised hair, with a leave-in and a twisting cream worked through each section before you twist it. The second mistake is twisting in different directions — if you twist one section clockwise and the next one anticlockwise, the twists will not match, and some will unravel while others hold. Pick one direction and stick to it for the whole head.
The other mistakes are about tension, size and care. Twisting too tightly at the root causes pain, bumps and breakage, and it makes the roots frizz faster as the hair grows — twist firmly but never painfully. Making the sections uneven is another: a head of twists in mixed sizes looks messy, and the small twists unravel while the large ones hold, so keep the sections even. Skipping the satin bonnet at night is the fastest way to frizz, and washing twists roughly — scrubbing the twists instead of the scalp — is the fastest way to unravel them. And the mistake that costs the most is leaving twists in too long: after eight weeks, take them down, wash and detangle properly, and let the hair rest before the next set.
1. The Classic Two-Strand Twist
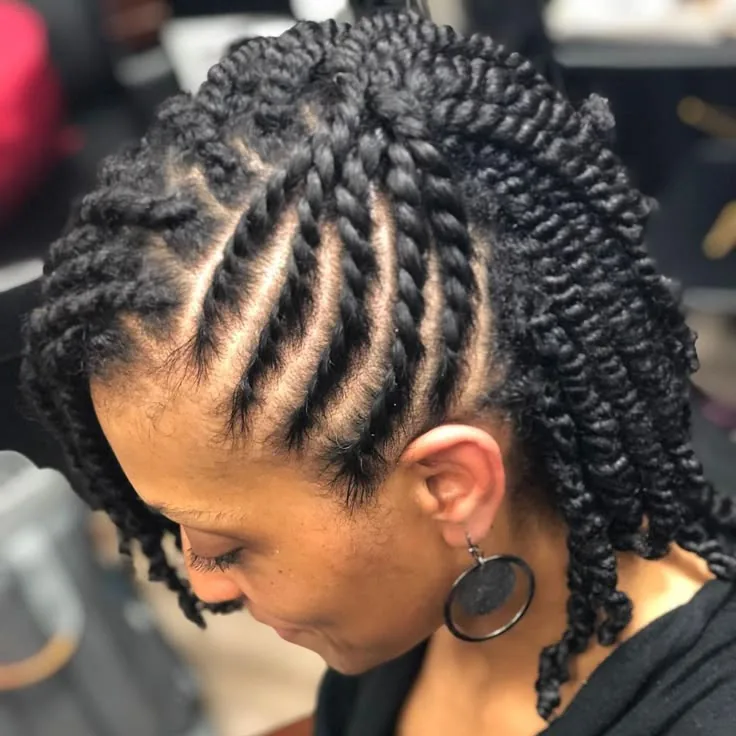
The classic two-strand twist is the original twist: your own hair, divided into sections, each section twisted into a rope that hangs naturally and holds its shape for one to two weeks. It is the simplest twist there is — no extensions, no heat, no salon needed — and it is the foundation every other twist in this guide is built on. The look is soft, natural and effortless, with a gentle rope texture that catches the light, and it works on every hair type, from fine to thick, from short to long.
Best for: anyone starting out with twists, and for natural hair of any length from a few inches upward. How to style it: part the hair into even sections, work a twisting cream through each section, and twist the two strands around each other in the same direction, sealing the ends with a finger coil. Pros and cons: it is cheap, gentle and easy to do at home, but it lasts only one to two weeks, and the roots frizz first. Quick verdict: if you only learn one twist, learn this one — it is the twist every other twist starts from.
2. The Flat Twist
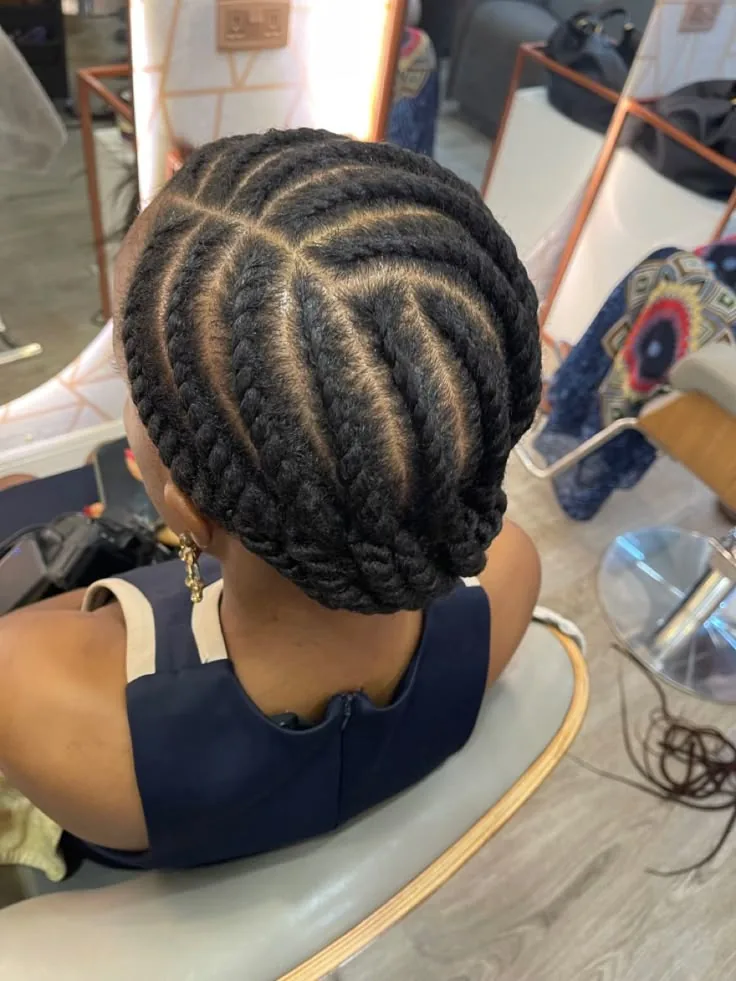
The flat twist is the twist that hugs the scalp: instead of hanging free, the twist is worked flat against the head, picking up hair as it goes, like a cornrow made of twists. The result is a smooth, sculpted pattern on the scalp — straight lines, curves, or a crown shape — with the twists lying flat and neat. Flat twists are often used as the base of an updo or as a style on their own, and they are the twist to choose when you want something close to the head, tidy and deliberate.
Best for: updos, crown styles, and anyone who wants a neat, scalp-hugging twist. How to style it: part the hair where the flat twist will go, take two strands at the hairline, and twist them while picking up a little more hair with each turn, keeping the twist flat against the scalp. Maintenance: flat twists last one to two weeks, and the edges need a little gel to stay smooth. Who should avoid it: flat twists need practice to get even, so if you are new to twisting, start with hanging two-strand twists first. Quick verdict: the neatest twist — sculpted, flat and elegant.
3. The Passion Twist
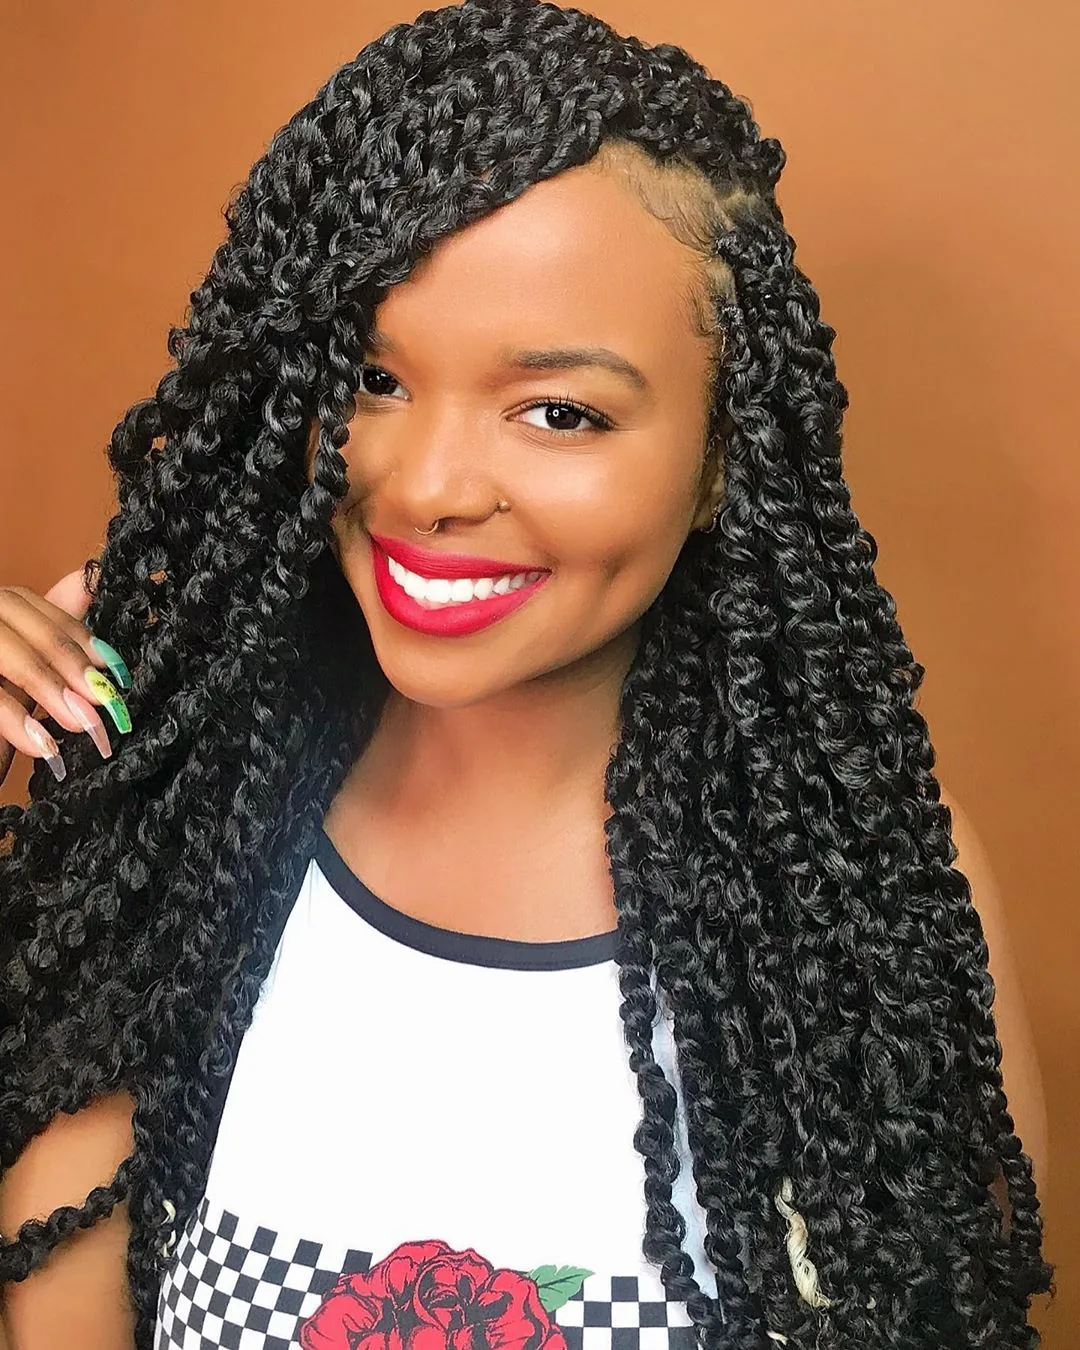
The passion twist is the softest, most boho twist there is: wavy water-wave extension hair is twisted in with your own hair, so the finished twists look loose, fluffy and romantic, with a gentle wave running through them. Passion twists were made for the woman who wants twists that look like beach hair — soft, full and a little bit undone, with movement in every strand. They are the twist that photographs like a dream, and they last four to six weeks, which makes them one of the most popular protective styles around.
Best for: anyone who wants long, full twists with a soft, wavy finish, and for holidays, summer and boho looks. What to ask your stylist for: medium-sized passion twists in a length that sits at or past the shoulders, using water-wave hair. Time and cost: three to five hours at a salon, and the cost of the extension hair on top of the styling. Maintenance: a satin bonnet at night, light oil on the scalp, and no heavy products, which weigh the wave down. Quick verdict: the most romantic twist — soft, wavy and effortlessly pretty.
4. The Senegalese Twist
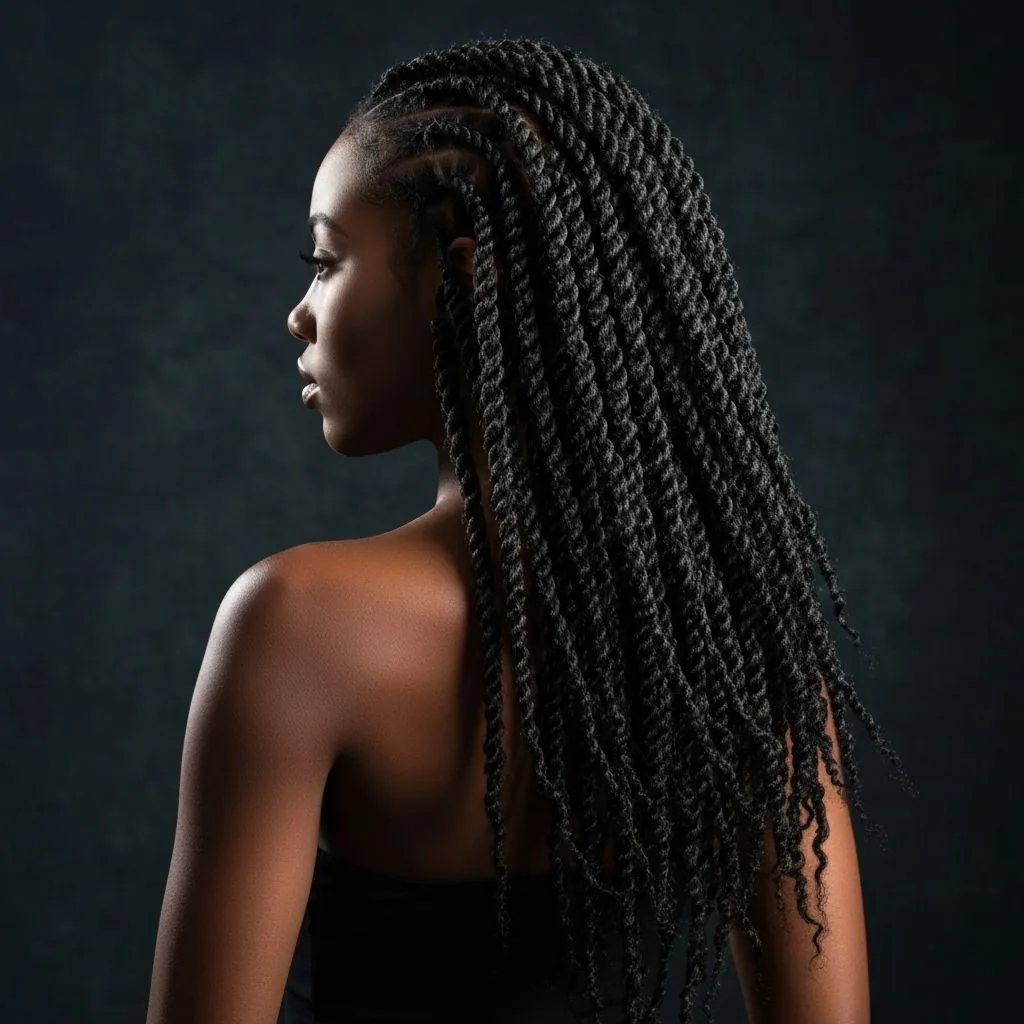
The Senegalese twist is the sleekest twist of all: smooth, silky extension hair is twisted tightly and neatly with your own hair, so the finished twists look like polished ropes — shiny, defined and uniform, with a clean, elegant finish. Where passion twists are soft and wavy, Senegalese twists are smooth and precise, and they are the twist to choose when you want a look that is neat, long-lasting and unmistakably polished. They last six to eight weeks, the longest of any twist in this guide.
Best for: anyone who wants long, sleek twists that stay neat for weeks, and for work, formal occasions and low-maintenance wear. How to style it: at a salon, with silky extension hair twisted in small, even sections, and the ends sealed with hot water or a curl. Pros and cons: they last the longest and look the neatest, but they take the longest to install — four to six hours — and they are heavier than passion twists. Cost: a salon session plus the extension hair. Quick verdict: the most polished twist — sleek, long-lasting and beautifully neat.
5. The Twist-Out
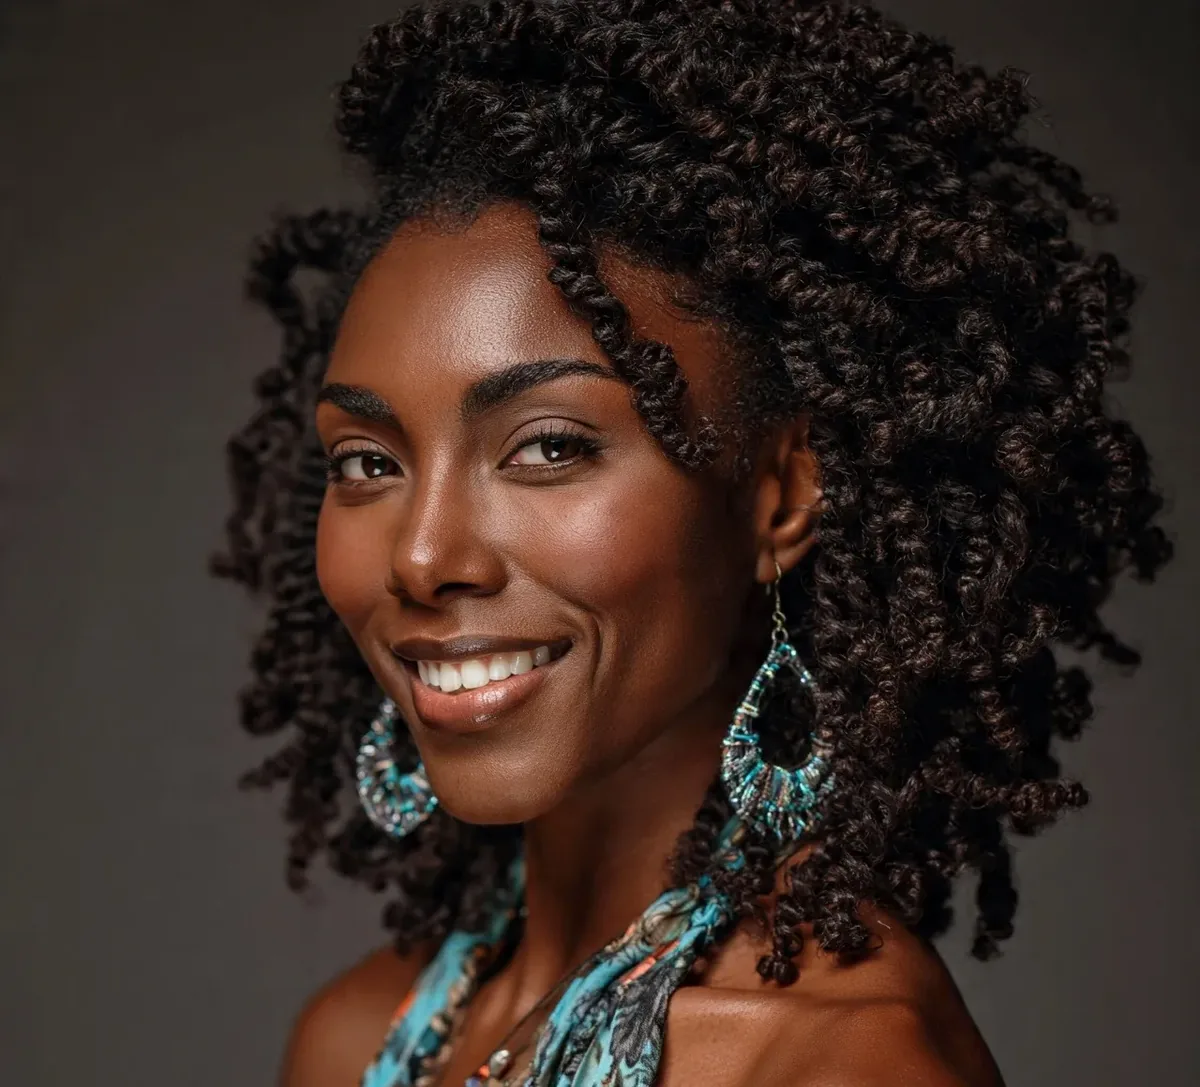
The twist-out is the twist’s second act: you wear two-strand twists for a day or two, then take them down, and the hair keeps the twist’s wave and falls into big, defined, bouncy curls. It is one of the most loved natural hairstyles there is, because it gives you a full, curly afro with no heat and no curling iron — just the shape the twists left behind. The curls are soft, springy and full of volume, and the style looks different on every head, because the curl pattern depends on your own hair.
Best for: natural hair of any length, and for anyone who wants curls without heat. How to style it: twist damp hair with a curl cream, let the twists dry completely, then unravel them with oiled fingers, separating each twist into two or three pieces. Common mistake: taking the twists down while they are still damp — the curls will frizz and fall flat. Let them dry fully first. Maintenance: a twist-out lasts two to five days, and a satin bonnet at night keeps the curls defined. Quick verdict: the twist that becomes curls — no heat, all volume.
6. The Mini Twist
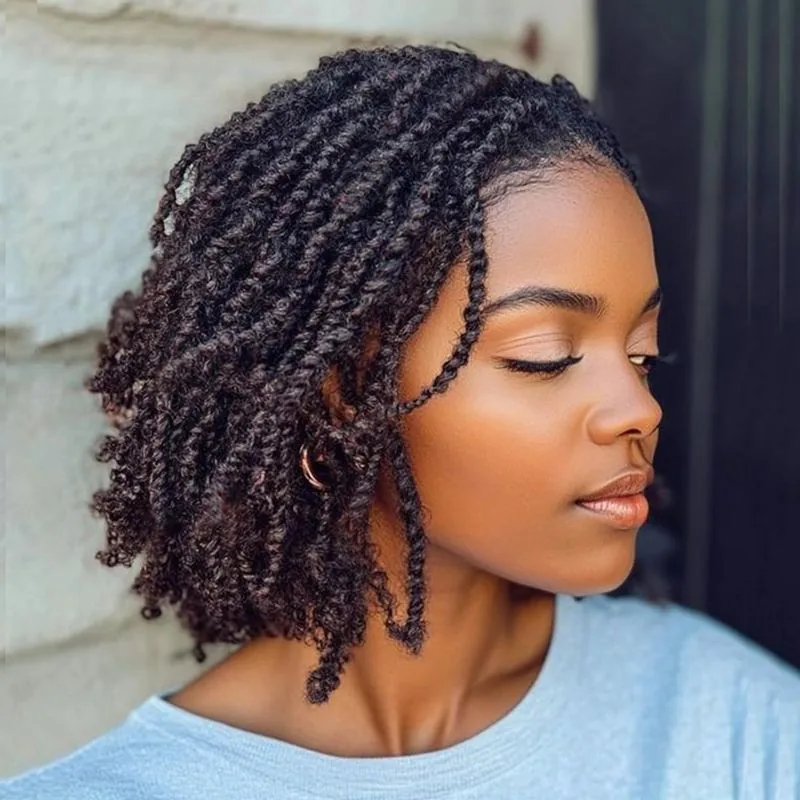
The mini twist is the two-strand twist in miniature: tiny sections, tiny twists, all over the head, so the finished style looks like a head full of fine, delicate ropes. Mini twists are the twist for detail lovers — they take the longest to install, but they give you the most styling options afterwards, because a head of mini twists can be worn loose, pinned up, twisted into a bun, or taken down for the tightest, most defined twist-out there is. They last two to three weeks, longer than regular two-strand twists, because the small twists hold their shape better.
Best for: anyone who wants maximum versatility and a long-lasting natural twist, and for growing hair out. Time and cost: mini twists take four to six hours to install at home, or a full salon session — the time is the price you pay for the versatility. Pros and cons: they last longer and style in more ways than any other natural twist, but the install is slow and fiddly. Maintenance: a satin bonnet at night and light oil on the scalp. Who should avoid it: if you are short on time or patience, choose medium twists instead. Quick verdict: the smallest twist, the biggest payoff.
7. The Jumbo Two-Strand Twist
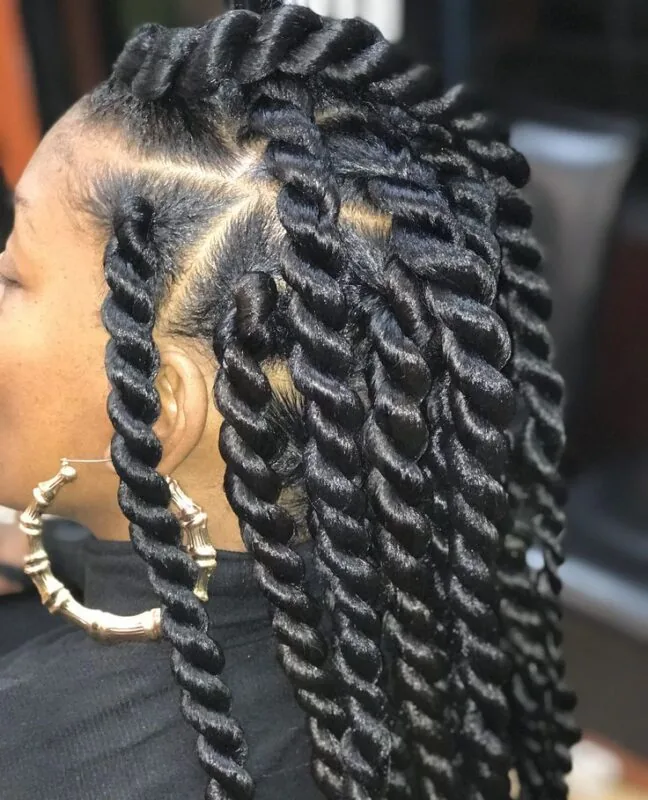
The jumbo two-strand twist is the classic twist made big: large sections, thick ropes, fewer twists across the head, and a bold, chunky finish that makes a statement from across the room. Jumbo twists are the fastest twist to install — a full head can take under an hour — and they are the twist to choose when you want a dramatic look without a long salon session. The thick ropes have a sculptural quality, and they unravel into the biggest, loosest twist-out waves there are.
Best for: thick hair, and anyone who wants a bold twist in the least time. How to style it: part the hair into large, even sections, work a twisting butter through each one, and twist the strands around each other, keeping the tension even so the thick ropes look smooth. Maintenance: jumbo twists last about a week, and the roots frizz first, so keep a little edge control handy. Pros and cons: the install is the fastest of any twist, but the style lasts the shortest time, and the roots show quickly. Quick verdict: the boldest twist, the quickest install.
8. The Medium Two-Strand Twist
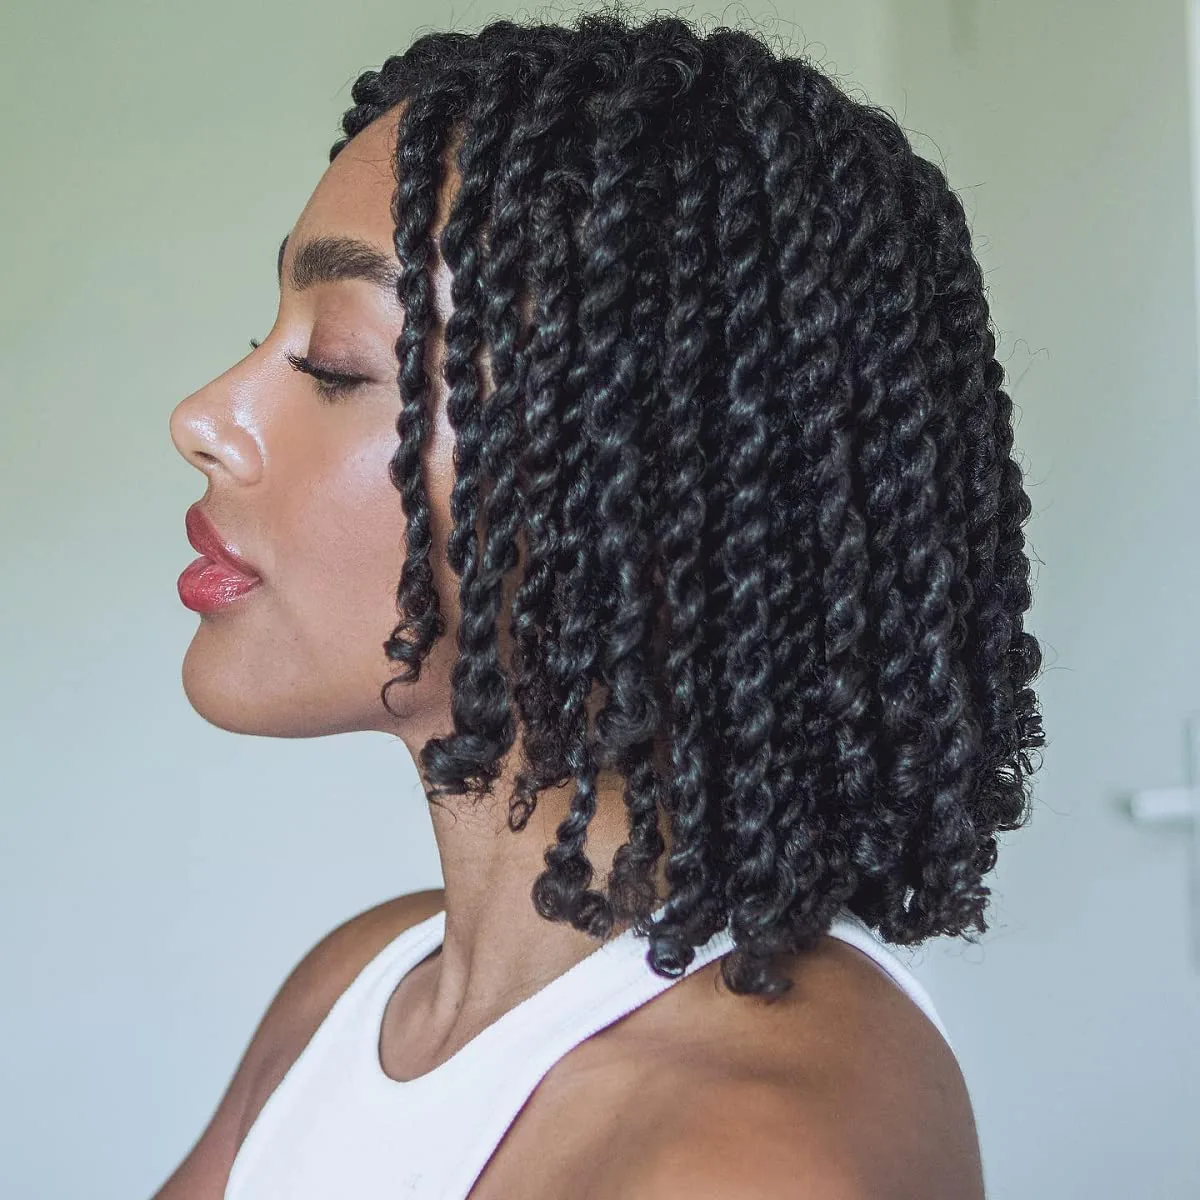
The medium two-strand twist is the sweet spot: not as tiny as mini twists, not as chunky as jumbo twists, just the right size for a neat, versatile, everyday twist that lasts one to two weeks. Medium twists are the size most women choose first, because they are quick enough to install in two hours, neat enough for work, and full enough to look like a real style rather than a stepping stone to a twist-out. They are the twist that does everything well, and they suit almost everyone.
Best for: first-timers, everyday wear, and anyone who wants a twist that balances time, neatness and versatility. How to style it: part the hair into medium sections — about an inch wide — twist each one with a cream, and seal the ends with a finger coil. Time and cost: about two hours at home, no salon needed, just cream and pins. Maintenance: a satin bonnet at night, and a light refresh at the hairline after a few days. Quick verdict: the everyday twist — the size most women end up wearing most often.
9. Two-Strand Twists with Curls at the Ends
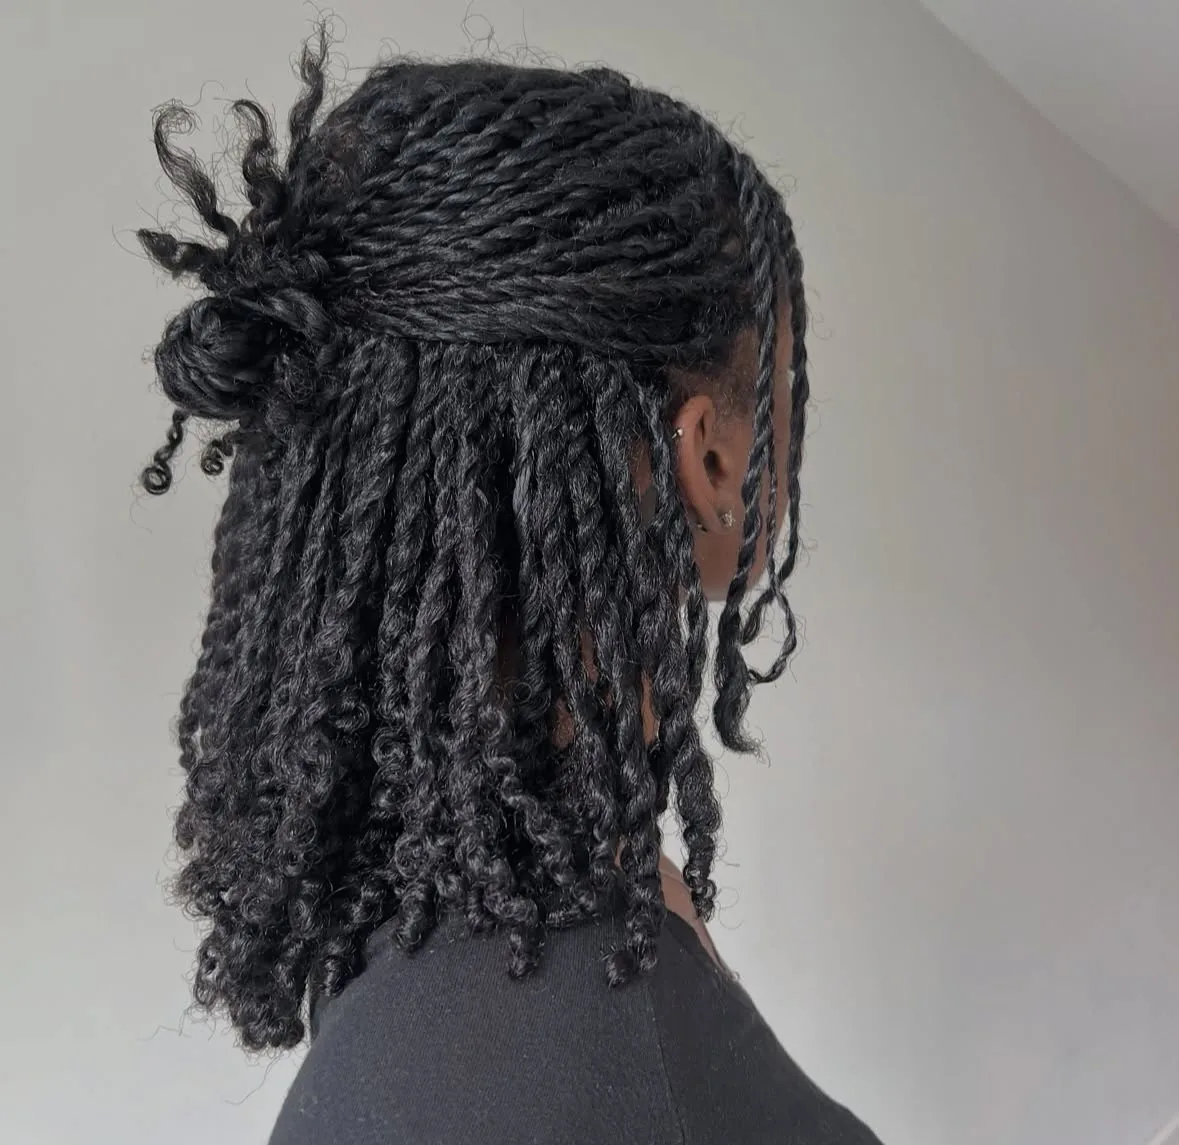
Two-strand twists with curls at the ends are the classic twist with a pretty finish: the twist runs down the length of the hair, and the last inch or two is left untwisted and curled, so each twist ends in a soft, bouncy curl. The curls soften the whole style, they stop the ends from looking blunt, and they give the twists movement — every time the head moves, the curls move with it. It is the twist for women who like their twists neat but never severe.
Best for: medium and long twists, and for anyone who wants a softer, more feminine finish. How to style it: twist each section as usual, then wrap the last inch around a small perm rod or your finger, and let it set — or dip the ends in hot water if you are using extension hair. Pros and cons: the curls are pretty and they seal the ends, but they need re-curling after a wash. Maintenance: a satin bonnet at night keeps the curls from flattening. Quick verdict: the classic twist, finished with a flourish.
10. The Twist Bob
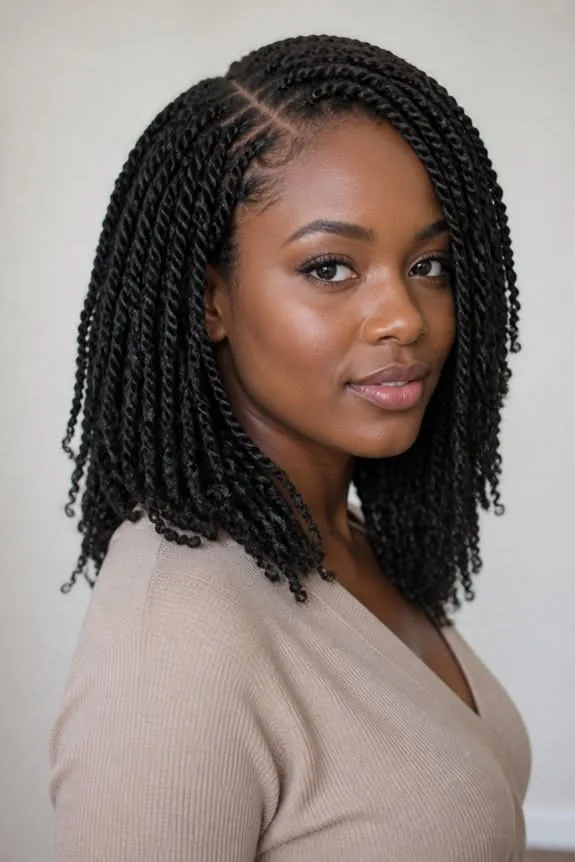
The twist bob is twists cut to chin length: a full head of two-strand or passion twists, shaped into a bob that frames the face, swings when you move, and looks effortlessly chic. The bob shape gives twists a completely different character — instead of long ropes falling past the shoulders, you get a neat, swinging frame around the face, with all the softness of twists and all the polish of a bob. It is the twist for women who love short hair but want the texture and the protective benefits of twists.
Best for: short to medium hair, and for anyone who wants a twist style that frames the face. How to style it: install medium twists, then shape the ends into a bob line at the chin or jaw, and curl the ends lightly for a soft finish. Pros and cons: the bob is light, easy to manage and very flattering, but it shows new growth sooner than longer twists. Maintenance: a satin bonnet at night, and a trim of the ends if they start to look uneven. Quick verdict: twists, but make it a bob — short, swinging and chic.
11. Long Passion Twists
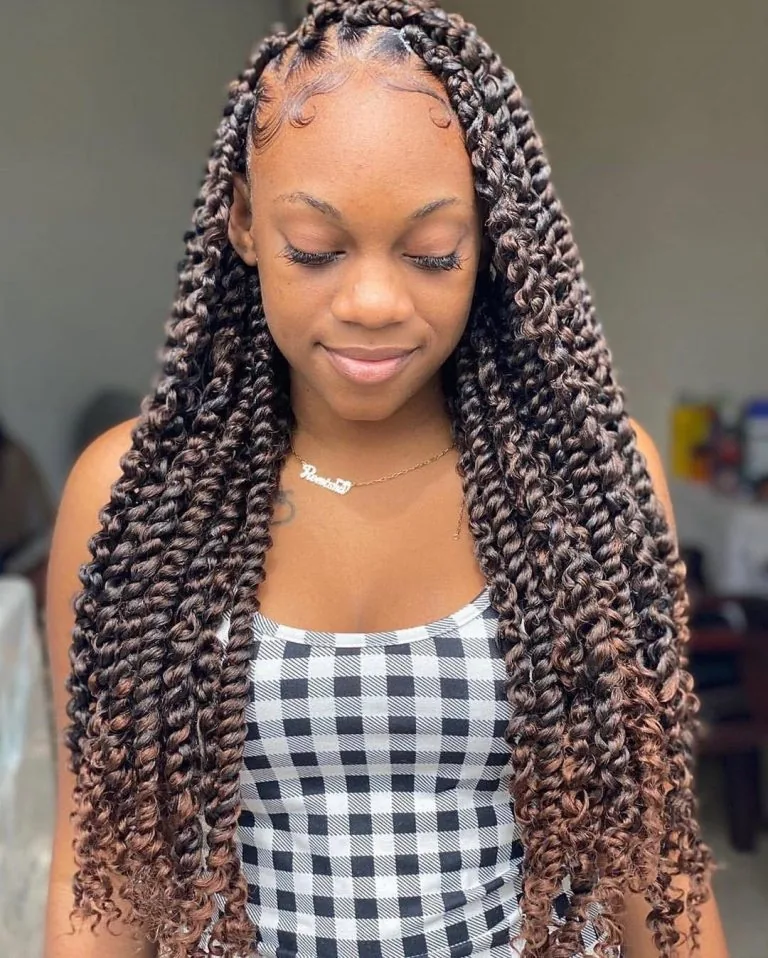
Long passion twists are the boho dream at full length: wavy, fluffy passion twists falling past the shoulders, down the back, sometimes to the waist, with soft movement in every strand. The length is the point — long passion twists have a drama that shorter twists cannot match, and they move like water when you walk. They are the twist for a holiday, a summer, or any time you want your hair to be the main event.
Best for: anyone who wants maximum length and a soft, boho finish, and for holidays and summer. What to ask your stylist for: long passion twists, waist length or mid-back, in a medium size, using water-wave hair. Time and cost: four to six hours at a salon, plus the extension hair — the length adds time and cost. Maintenance: gather the twists into a loose pineapple at night under a satin bonnet, and keep them out of the way when you sit, so they do not get crushed. Who should avoid it: if you find long hair heavy, choose shoulder-length passion twists instead. Quick verdict: the longest, softest twist — pure boho drama.
12. Short Passion Twists
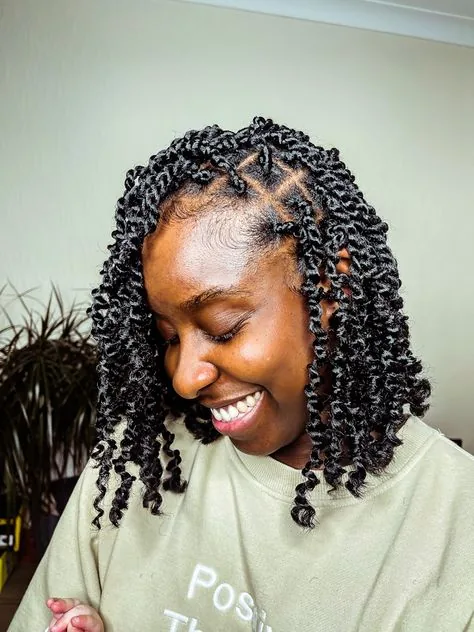
Short passion twists are the same soft, wavy twist in a shorter, lighter package: passion twists cut to the chin or shoulders, with all the fluff and movement of the long version, but none of the weight. Short passion twists are the practical boho twist — they are easy to wash, easy to sleep on, and easy to wear every day, and they frame the face beautifully. They are the twist for women who love the passion-twist look but want a style that fits into a busy life.
Best for: anyone who wants the passion-twist look without the weight or the long salon session. How to style it: at a salon, with water-wave hair in a short length, or at home by trimming longer twists to the length you want. Pros and cons: they are light, quick to install and easy to care for, but they show new growth sooner than long twists. Time and cost: two to three hours at a salon. Maintenance: a satin bonnet at night and light oil on the scalp. Quick verdict: all the boho, half the weight.
13. Boho Passion Twists
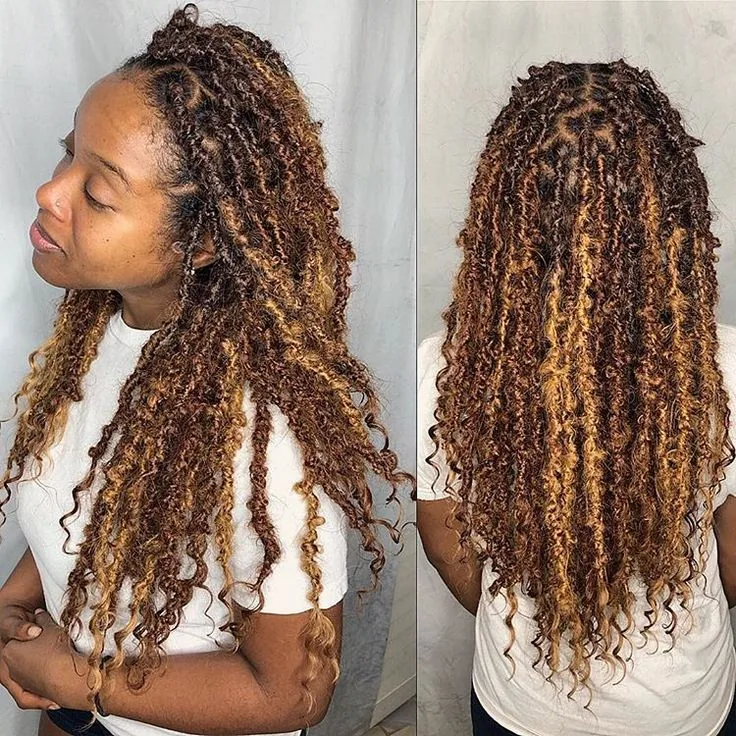
Boho passion twists are passion twists turned up a notch: looser, fluffier, with curls left loose at the ends, a few twists pulled out around the face, and sometimes beads or cuffs woven in. The boho version is deliberately undone — the twists are not meant to look perfect, they are meant to look like you have been on a beach for a week and your hair just happens to look amazing. It is the twist for festivals, holidays, photoshoots and any day when you want to look free and easy.
Best for: festivals, holidays, summer and anyone with a free, relaxed style. How to style it: install medium passion twists loosely, leave the ends curly, pull a few face-framing twists loose, and add a bead or two if you like. Maintenance: boho twists actually improve as they loosen, so there is very little to fix — just a bonnet at night. Common mistake: making boho twists too neat, which defeats the purpose. Keep them loose and let them be messy. Quick verdict: the freest twist — loose, fluffy and full of life.
14. Senegalese Twists with Curly Ends
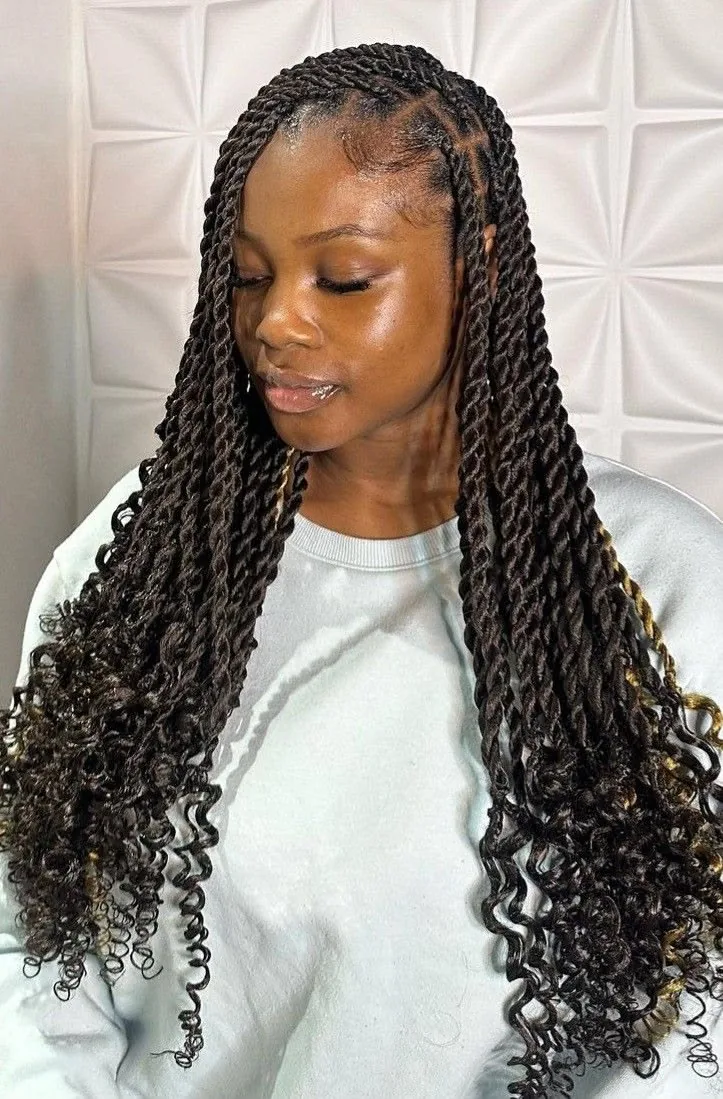
Senegalese twists with curly ends are the sleek twist with a soft finish: the twist runs smooth and defined down its length, and the last few inches are left un-twisted and curled, so each rope ends in a springy curl. The contrast is beautiful — sleek rope, soft curl — and it stops the twists from looking too severe or too uniform. The curls also seal the ends, which is the practical reason for the style, and they give the twists movement and life.
Best for: anyone who loves the Senegalese look but wants a softer finish, and for formal occasions where a little curl adds romance. How to style it: at a salon, with the ends curled on perm rods or dipped in hot water to set the curl. Pros and cons: the curls are pretty and they protect the ends, but they need re-setting after a wash. Time and cost: a salon session, with a little extra time for the curls. Maintenance: a satin bonnet at night, and a light oil on the curls to keep them shiny. Quick verdict: sleek twists, soft ending — the best of both.
15. The Flat Twist Updo
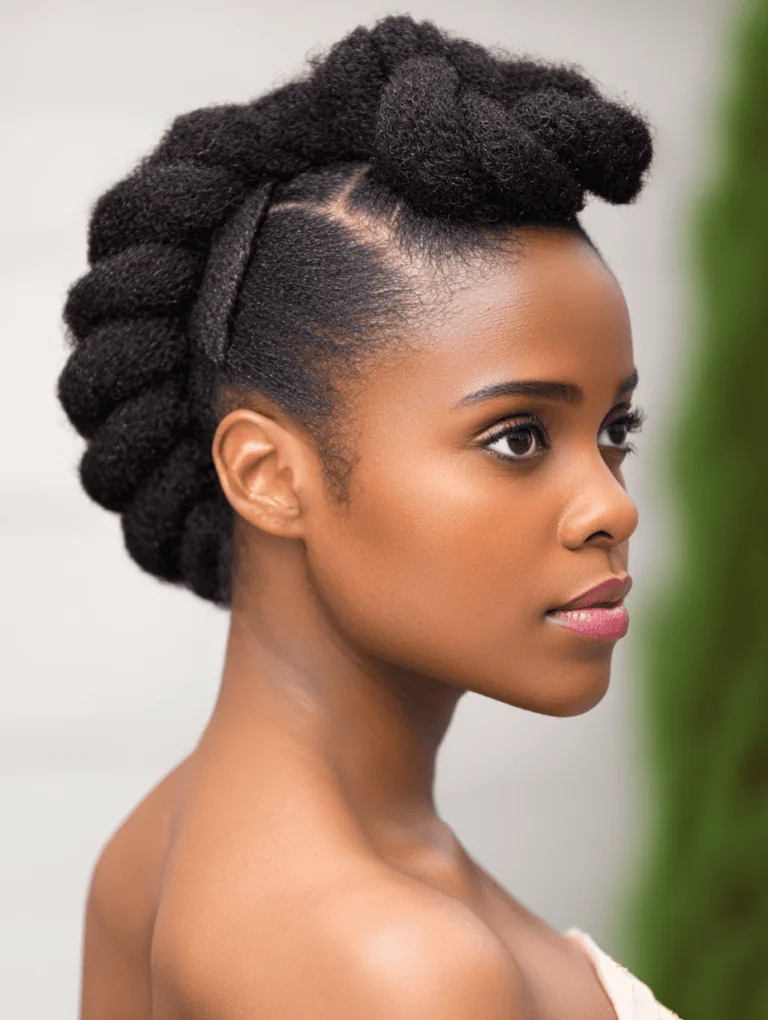
The flat twist updo is twists as sculpture: flat twists worked across the scalp in a pattern — straight back, curved, or spiralled — and gathered into a bun, a crown or a pinned-up shape at the back or the top of the head. The updo is neat, elegant and completely off the face and neck, which makes it the twist to choose for a wedding, a formal evening, or any day when the hair needs to stay put and look deliberate. It is also the twist updo that shows off the pattern: the flat twists themselves are the decoration.
Best for: formal occasions, weddings and work, and for anyone who wants an updo that lasts all day. What to ask your stylist for: a flat twist pattern that suits your face — straight back for a classic look, curved for something softer — gathered into a bun. Time and cost: a salon session of two to three hours. Maintenance: the updo holds well, and a little edge gel keeps the hairline smooth. Who should avoid it: flat twist updos need a stylist’s hands for the best pattern, so this is not the easiest DIY twist. Quick verdict: twists as art — sculpted, neat and elegant.
16. The Flat Twist Crown
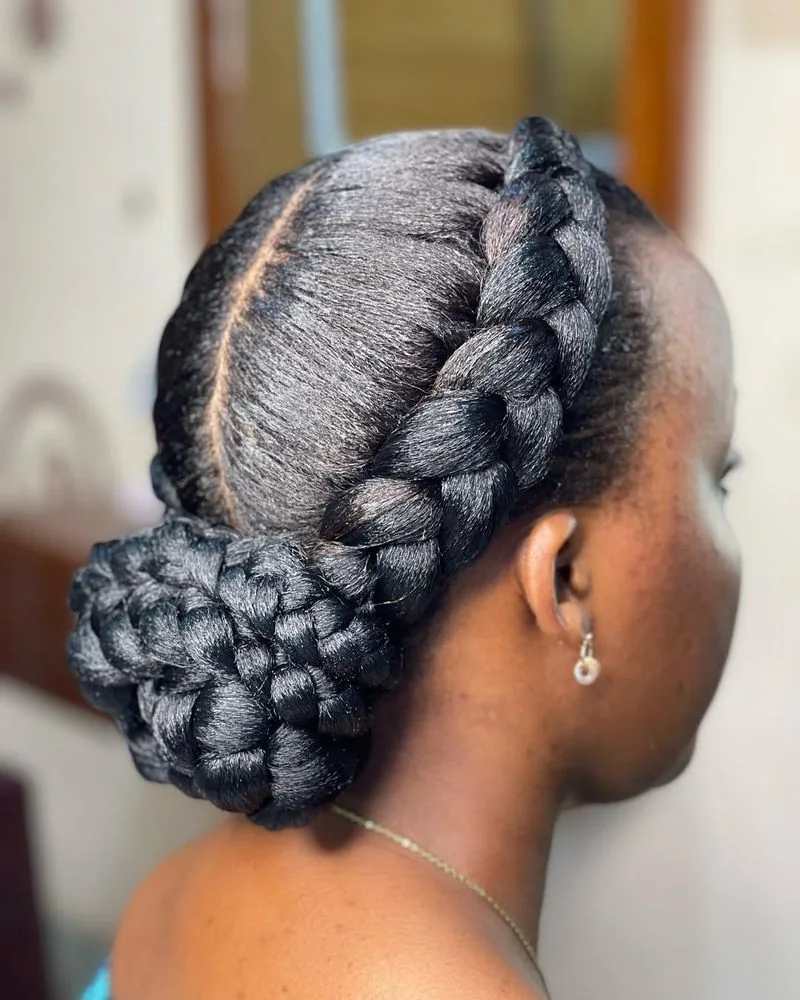
The flat twist crown is the twist version of a halo: flat twists worked around the head, following the hairline, so they form a ring around the crown like a braided crown. The twists sit close to the scalp, the ring frames the face, and the rest of the hair can be left loose, pinned up, or twisted into a bun behind the crown. It is the twist crown for women who love the milkmaid-braid look but want it in twists — softer, more textured, and unmistakably a twist style.
Best for: weddings, garden parties and romantic occasions, and for anyone who wants a crown without a full updo. How to style it: work flat twists around the hairline from one ear to the other, picking up hair as you go, and pin the ends under the opposite side. Pros and cons: the crown is beautiful and it keeps the hair off the face, but it takes practice to get the ring even. Maintenance: a light hairspray finishes it, and the crown holds all day. Quick verdict: a halo made of twists — romantic, neat and unforgettable.
17. The Twist-Out on Natural Hair

The twist-out on natural hair is the classic twist-out: two-strand twists taken down to reveal big, defined, bouncy curls with a full, soft shape. It is the twist-out in its purest form — your own hair, your own curl pattern, shaped by the twists you put in. The result depends on your hair: tight curls give a tight twist-out, looser curls give a looser one, but every twist-out has the same qualities — volume, definition and movement — and it is one of the most flattering styles natural hair can wear.
Best for: natural hair of any length and curl pattern. How to style it: twist damp hair with a curl cream, let the twists dry completely, then unravel with oiled fingers, separating each twist into two or three pieces for volume. Common mistake: using too much product, which weighs the curls down — a light cream is enough. Maintenance: a pineapple and a satin bonnet at night, and a light refresh with water in the morning. Quick verdict: your curls, shaped by twists — the most natural twist-out there is.
18. The Twist-Out on Short Hair
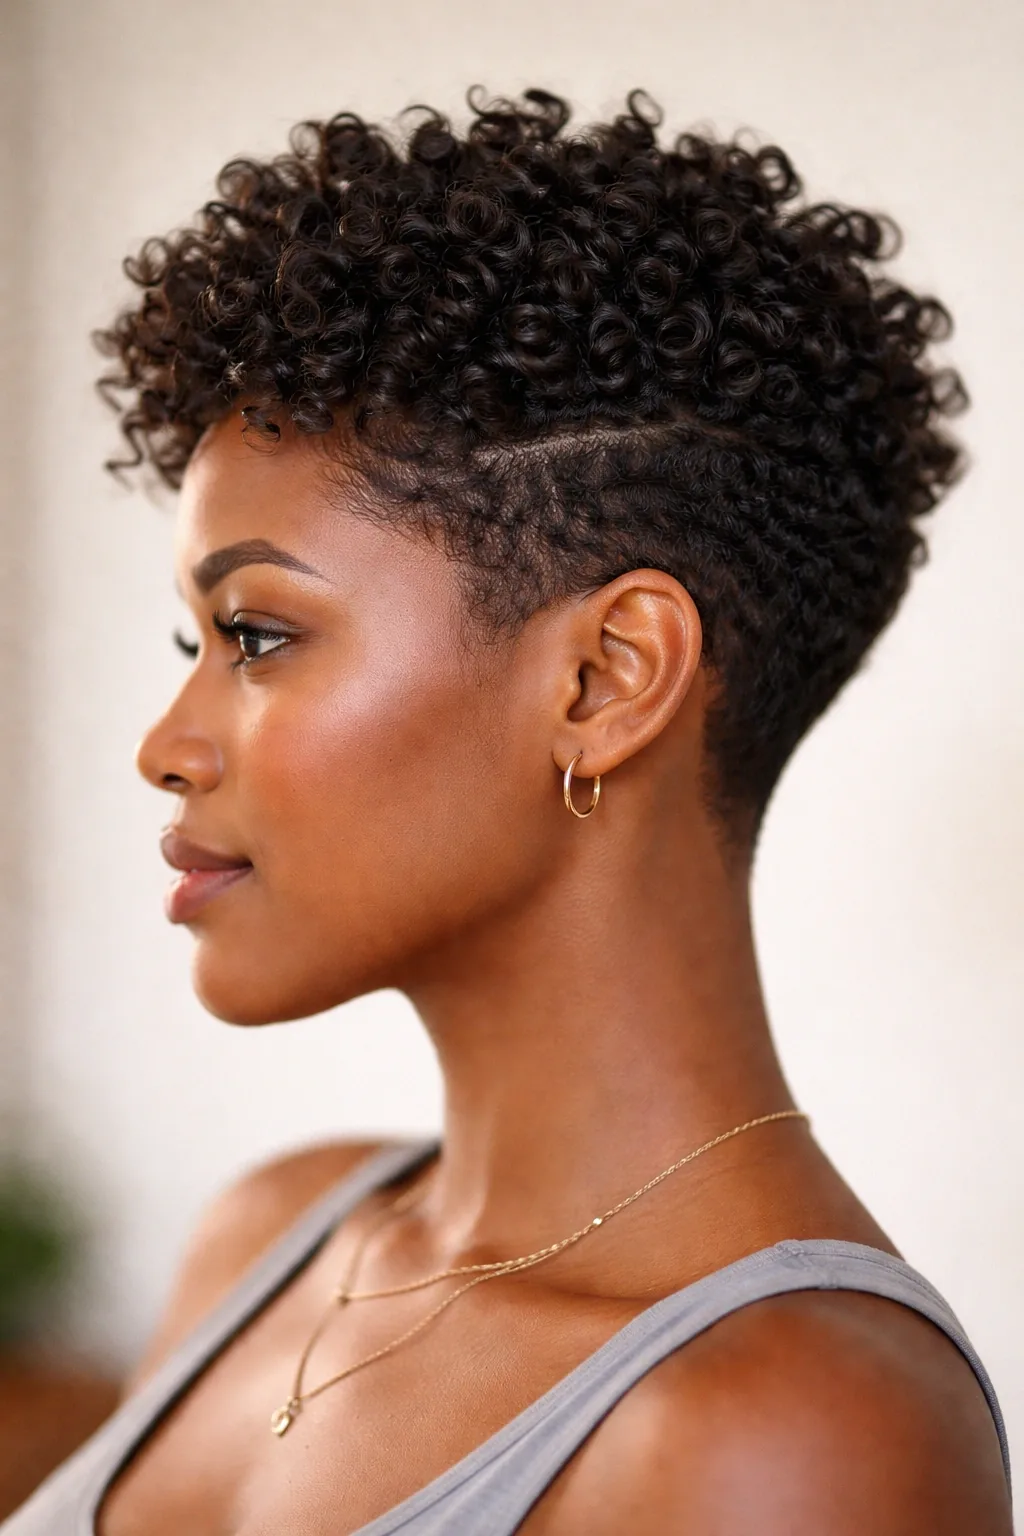
The twist-out on short hair is proof that you do not need length for a great twist-out: small twists taken down on short hair give tight, defined, springy curls that sit close to the head and frame the face beautifully. The short twist-out is neat, bouncy and full of character — a style that looks deliberate and polished, not like a style that is waiting to grow out. It is the twist-out for pixies, short afros and anyone growing their hair out who wants a defined curl now.
Best for: short hair, pixie cuts and growing-out stages. How to style it: do small two-strand twists on damp hair with a curl cream, let them dry fully, then unravel gently with oiled fingers. Pros and cons: the curls are tight and defined, and the style is quick to do, but it lasts only two to three days before the curls relax. Maintenance: a satin bonnet at night and a light mist of water in the morning. Who should avoid it: nobody — short hair and twist-outs are a perfect match. Quick verdict: small twists, big curls — short hair’s best twist-out.
19. The Twist-Out on Long Hair
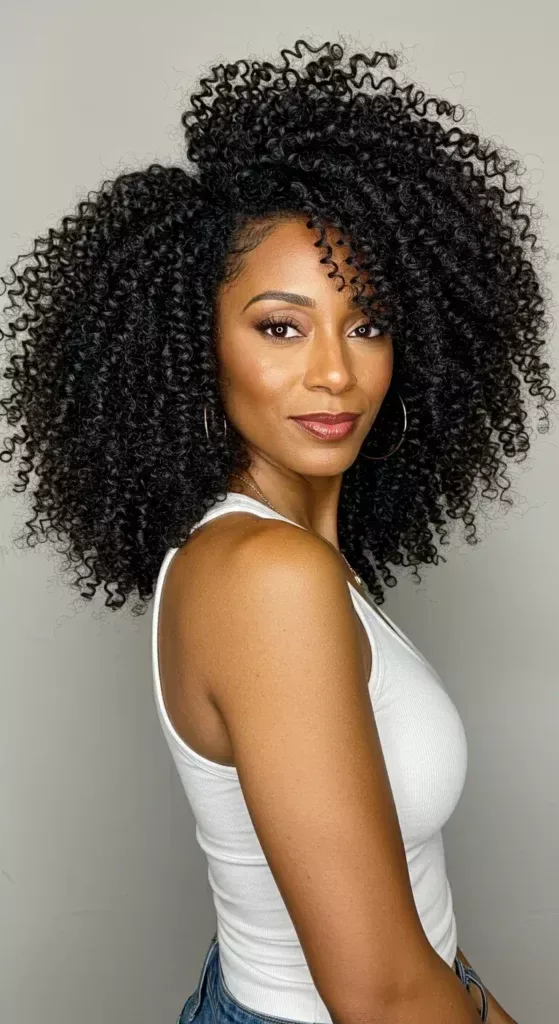
The twist-out on long hair is the twist-out at its biggest: large twists taken down on long hair give big, loose, bouncy curls with enormous volume — a full, flowing afro of defined waves that falls past the shoulders. Long hair gives the twist-out room to move: the curls are longer, looser and more dramatic, and the volume is the kind you can see from across the room. It is the twist-out for a night out, a photoshoot, or any day when you want your hair to be unforgettable.
Best for: long natural hair, and for anyone who wants maximum volume. How to style it: do large two-strand twists on damp hair with a curl cream, dry completely, then unravel with oiled fingers, separating each twist into three or four pieces for fullness. Time and cost: the twists take a couple of hours to install, but the twist-out itself is free. Maintenance: a pineapple at night under a satin bonnet, and a pick at the roots for volume in the morning. Common mistake: separating the curls too much, which turns definition into frizz — separate gently, and stop while the curls still look defined. Quick verdict: the biggest twist-out — long, loose and full of volume.
20. Two-Strand Twists with Beads
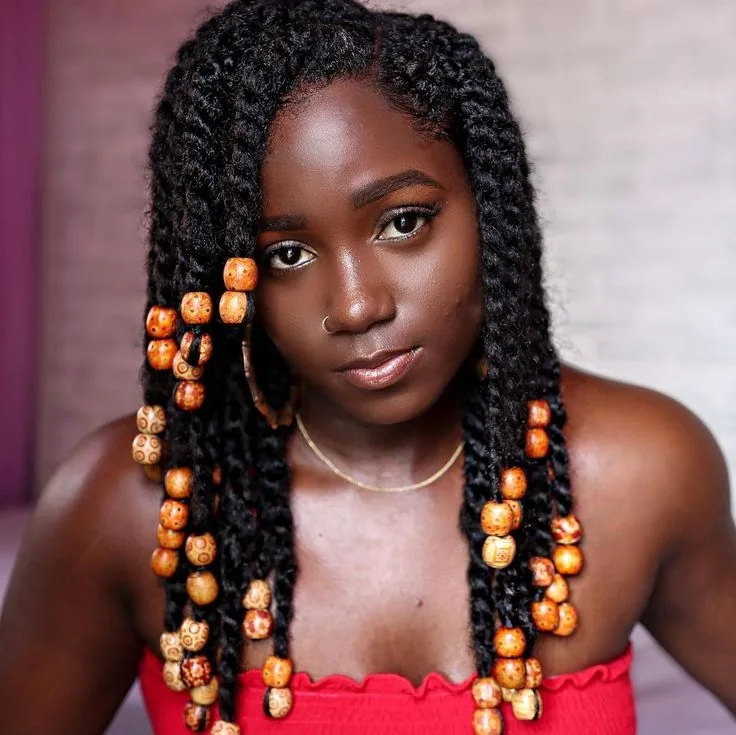
Two-strand twists with beads are the classic twist dressed up: wooden, gold or colourful beads threaded onto the ends of the twists, so each twist ends in a little piece of jewellery that moves when you do. Beads are the oldest twist accessory there is, and they change the whole character of the style — a plain twist becomes playful, cultural and personal, with the colour and the material of the beads saying something about the woman wearing them. Wooden beads are earthy and natural; gold beads are elegant; bright colours are fun.
Best for: anyone who wants to personalise their twists, and for festivals, holidays and celebrations. How to style it: thread the beads onto the ends of the twists after they are done, and secure each bead with a small elastic or a knot so it cannot slide off. Pros and cons: beads are cheap, endlessly variable and easy to change, but they add a little weight to the ends, so keep them light. Maintenance: the beads need nothing beyond a check that they are secure. Cost: a pack of beads costs very little. Quick verdict: the twist with jewellery — small beads, big personality.
21. Two-Strand Twists with Gold Cuffs
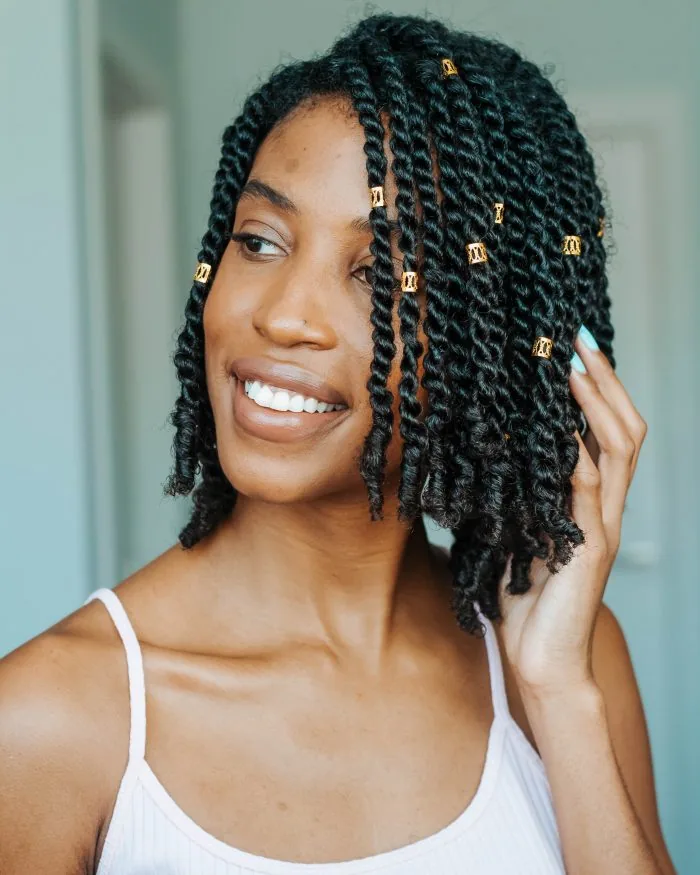
Two-strand twists with gold cuffs are the elegant version of the beaded twist: small gold rings or cuffs clipped around the twists at intervals, catching the light every time the head moves. Gold cuffs are the jewellery of twists — subtle, luminous and sophisticated — and a few cuffs are all it takes, because the gold does the work. They suit a wedding, a formal evening, or any day when you want your twists to feel like an occasion, and they look beautiful against every hair colour.
Best for: formal occasions, weddings and anyone who wants a touch of glamour in their twists. How to style it: clip the cuffs around the twists after they are done, spacing them out — three or four cuffs across the head is the elegant number. Maintenance: the cuffs need nothing beyond a check that they are clipped securely. Common mistake: using too many cuffs, which makes the twists look crowded — space them out and let the gold breathe. Cost: a pack of gold cuffs is inexpensive, and they are reusable for years. Quick verdict: the most elegant twist accessory — a little gold goes a long way.
22. The Twist Bun
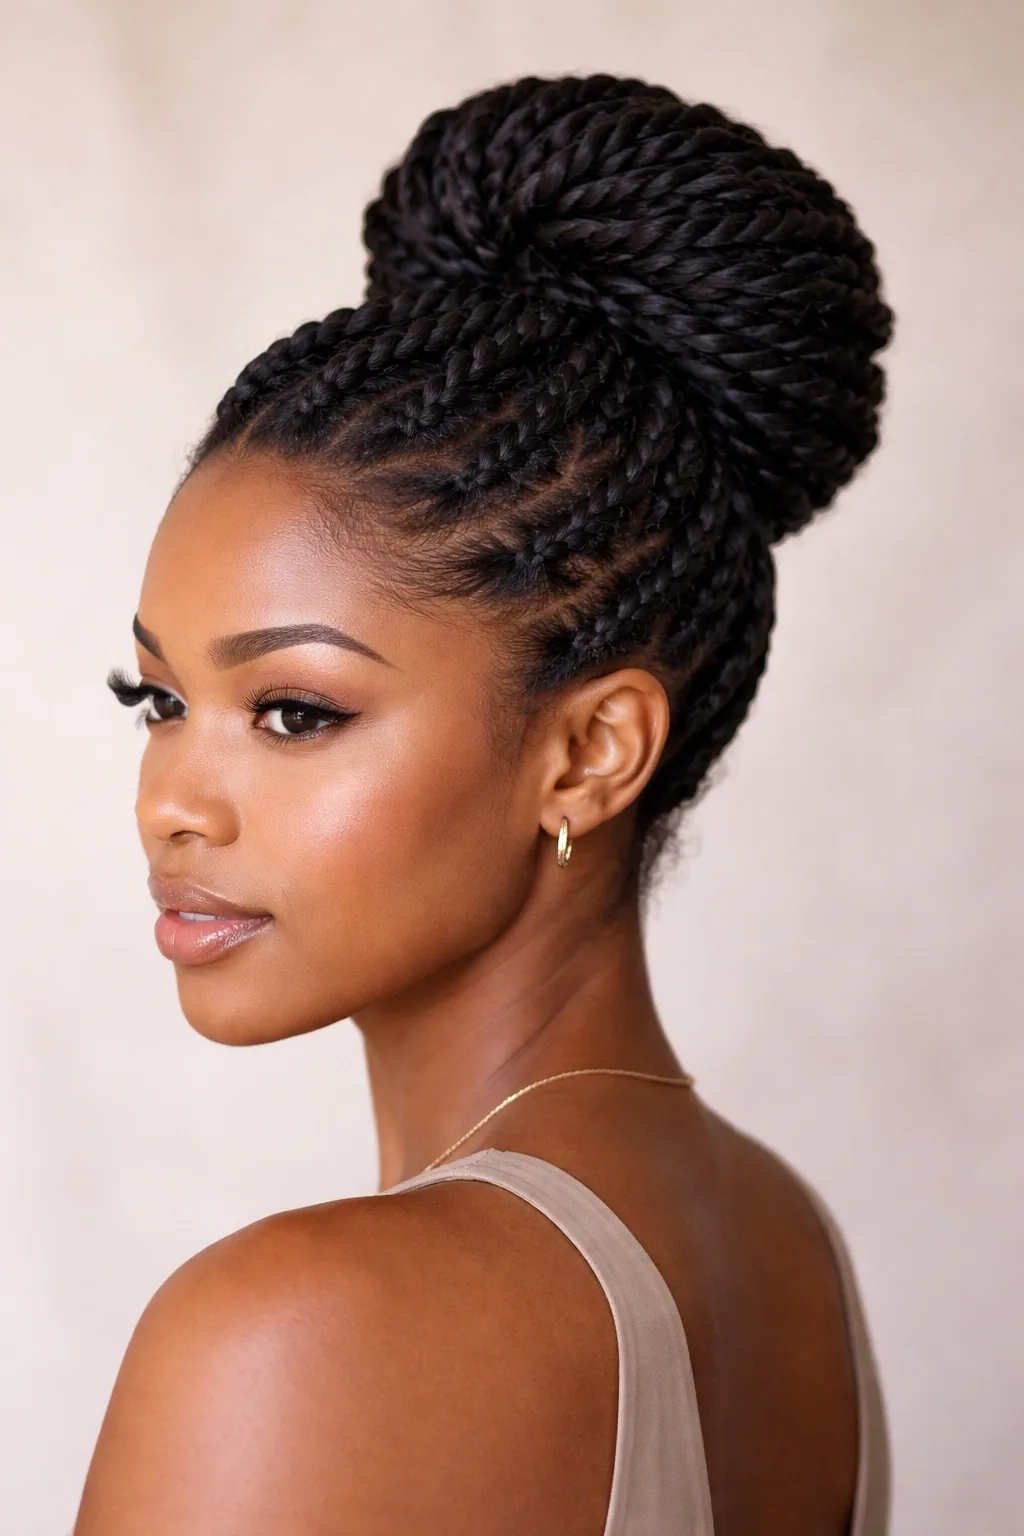
The twist bun is twists gathered up: a full head of two-strand twists, or passion twists, swept up into a high bun on top of the head or a low bun at the nape, so the hair is completely off the face and neck. The bun is neat, practical and elegant, and it is the twist style for hot days, workouts, work and any occasion when the hair needs to be up and out of the way. A high twist bun is playful and bold; a low twist bun is soft and classic — and both are done in a minute once the twists are in.
Best for: hot weather, workouts, work and anyone who wants their twists up and out of the way. How to style it: gather the twists into a ponytail, twist the ponytail around itself into a bun, and pin it securely, letting a few twists fall loose around the face if you like. Pros and cons: the bun is quick, practical and protective, but a heavy bun can pull at the roots, so keep it loose and do not wear it tight every day. Time: a minute to put up, once the twists are installed. Quick verdict: twists, up and away — the easiest twist style of all.
23. Half-Up Twists
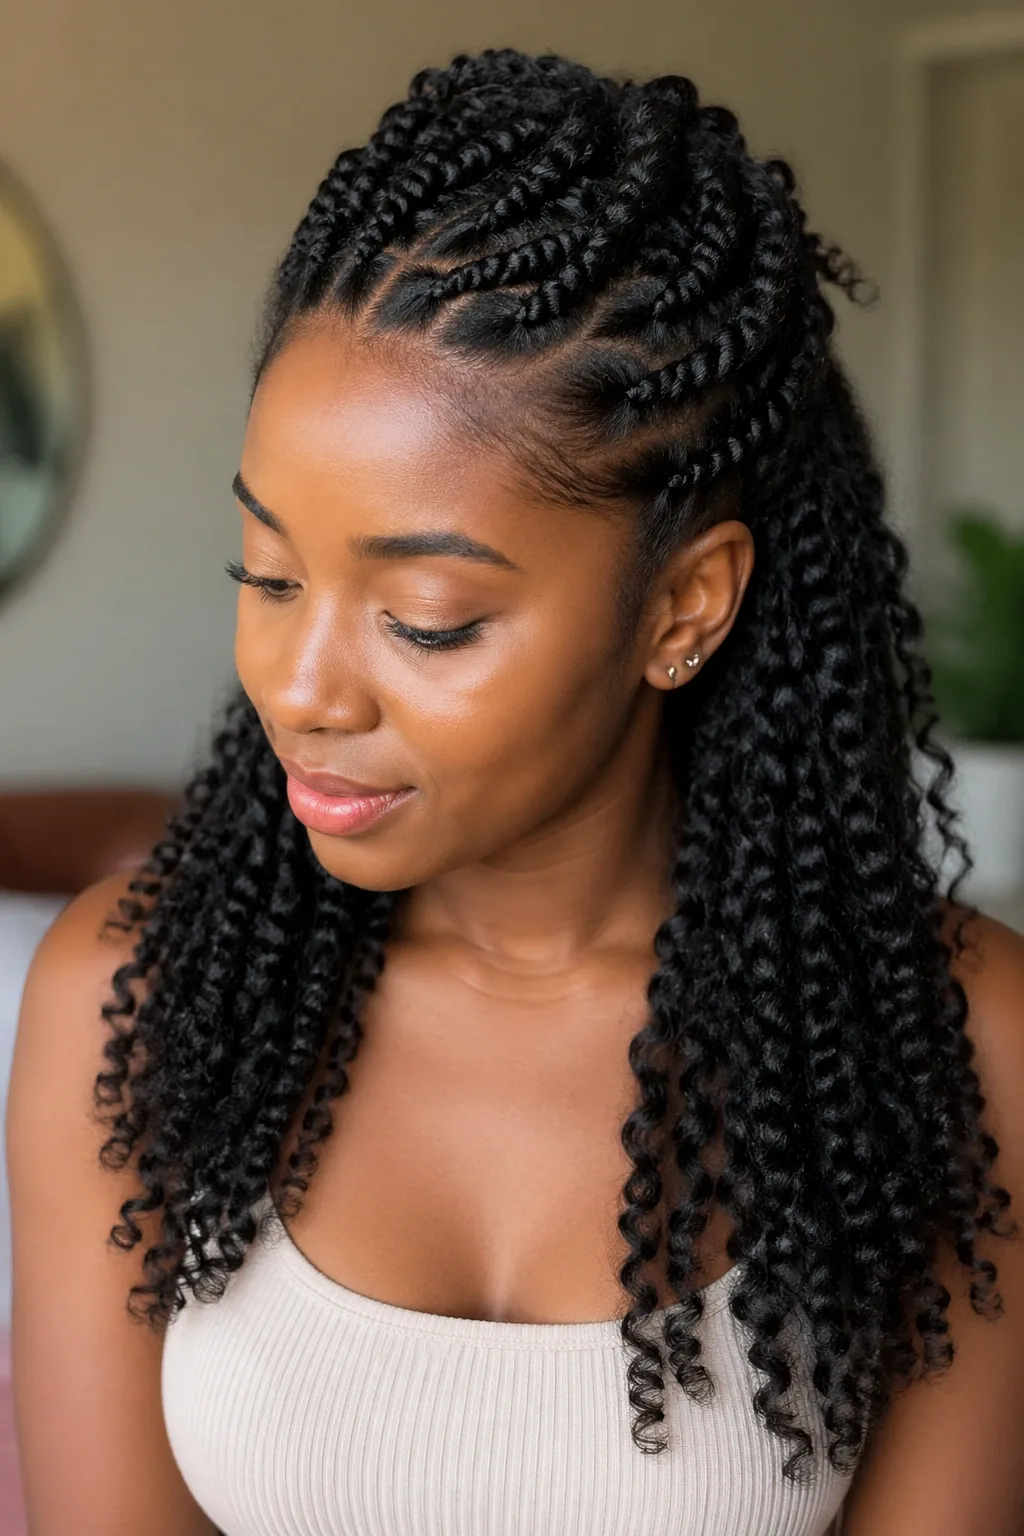
Half-up twists are the best of both worlds: the top half of the twists is gathered up and pinned, and the rest of the twists are left down, so you get the neatness of an updo and the length and movement of loose twists at the same time. It is the twist style for women who love their twists down but want the hair off their face — for a wedding, a date night, or an ordinary day when you want to feel a little bit special. The half-up style is also the most versatile twist look, because the updo part can be a bun, a ponytail or a crown.
Best for: medium and long twists, and for anyone who wants their twists off the face without putting them all up. How to style it: take the top section of twists from each temple, gather them at the crown, and pin or tie them into a small bun or ponytail, leaving the rest of the twists down. Maintenance: the style holds well because the twists are light, and the loose twists can be refreshed with a little oil. Time: five minutes. Cost: a hair tie and a few pins. Common mistake: taking too much hair into the top section, which leaves the loose twists thin — take only the top layer. Quick verdict: twists, half up and half down — the most versatile twist style.
24. Twists with a Side Part
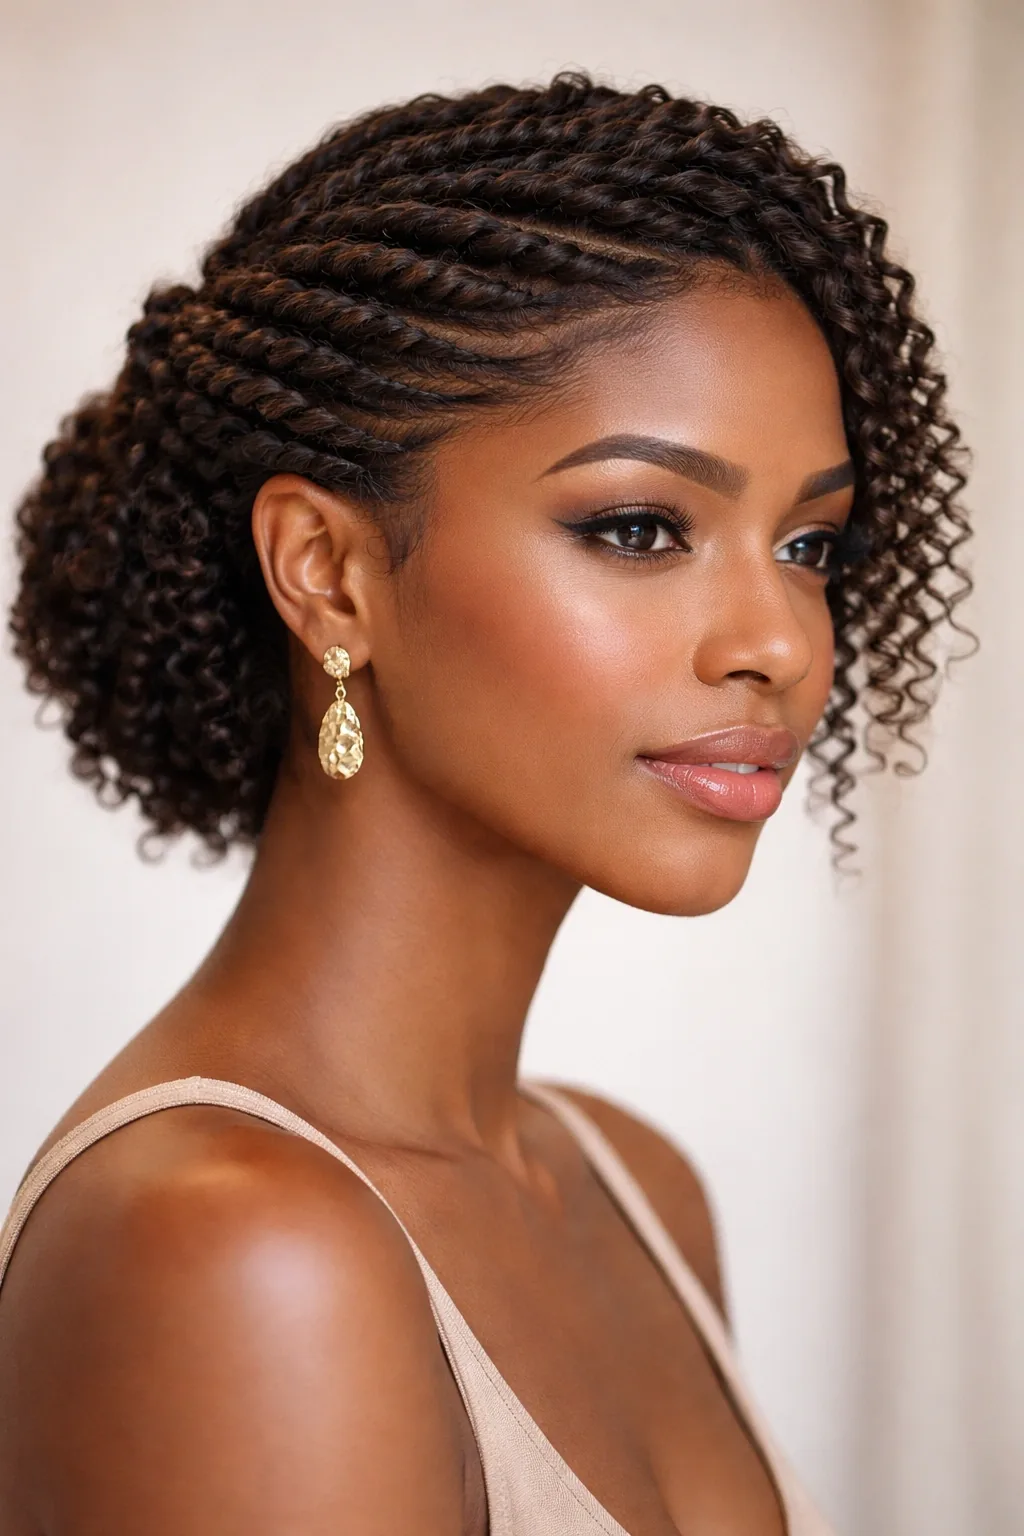
Twists with a side part are the glamorous twist: a deep part on one side sweeps the twists across the forehead, gives the style an asymmetric line, and adds volume on one side — so the whole look feels more dramatic and more polished than a centre-parted twist. The side part changes everything: it creates a sweeping diagonal across the face, it adds height on one side, and it gives twists an old-Hollywood quality that suits an evening out or a formal occasion.
Best for: round and square faces, where the diagonal sweep breaks up the symmetry and softens a strong jaw. How to style it: part the hair deeply on one side while it is damp, then twist each section as usual, keeping the part in place as you work. Pros and cons: the side part is more flattering for most faces than a centre part, but the twists on the two sides will be uneven in volume — embrace that, it is what makes the style look glamorous. Maintenance: a little edge gel keeps the part neat. Quick verdict: if you want your twists to feel instantly more glamorous, part them on the side.
25. Twists with a Centre Part
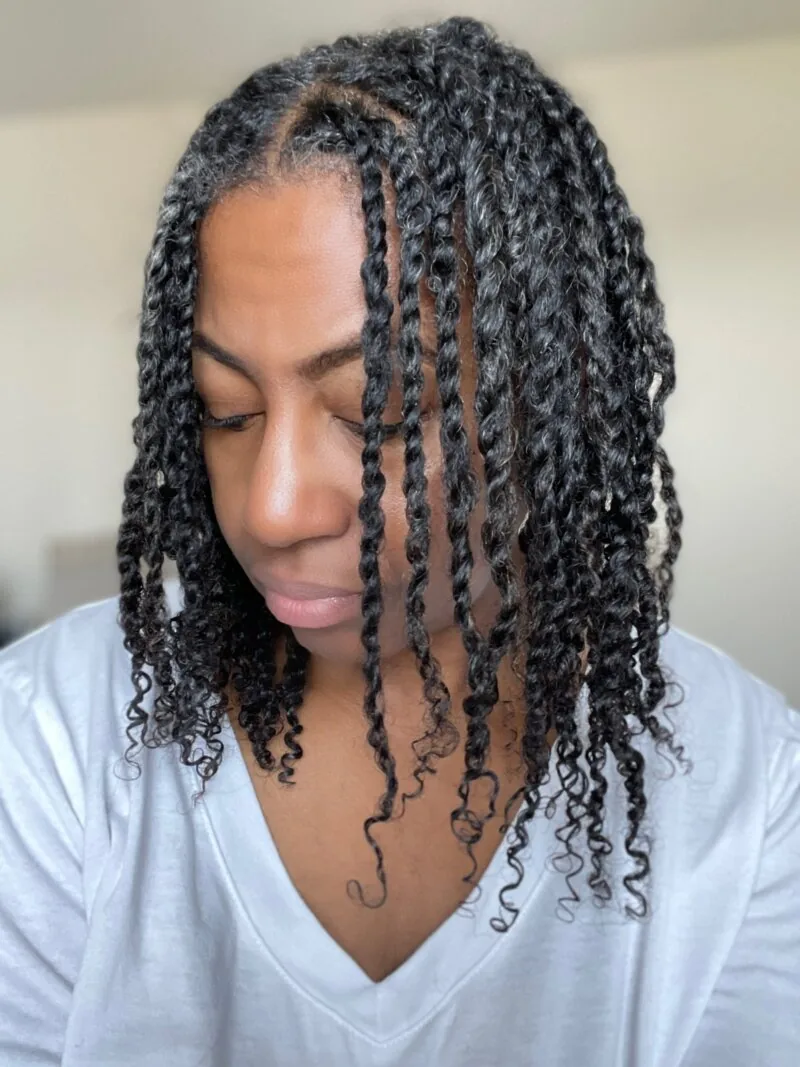
Twists with a centre part are the most symmetrical twist: the hair is parted exactly down the middle, the twists fall evenly on both sides, and the style has a classic, balanced quality that suits the face perfectly evenly. The symmetry is the point — it gives the twists a neat, deliberate, almost regal feel, and it is the parting that shows off the twist pattern best, because the two sides mirror each other. It is the twist as it is most often worn, and for good reason.
Best for: oval and heart-shaped faces, where symmetry flatters the features, and for everyday wear. How to style it: part the hair with the tail of a comb, straight down the middle from forehead to nape, then twist each side identically. Maintenance: the part needs to be set while the hair is damp so it stays straight. Time: no extra time at all — the part is free. Who should avoid it: a centre part can emphasise asymmetry in the face, so if your features are noticeably uneven, a side part will flatter you more. Quick verdict: the classic, balanced twist — neat, even and timeless.
26. Twists for Short Hair
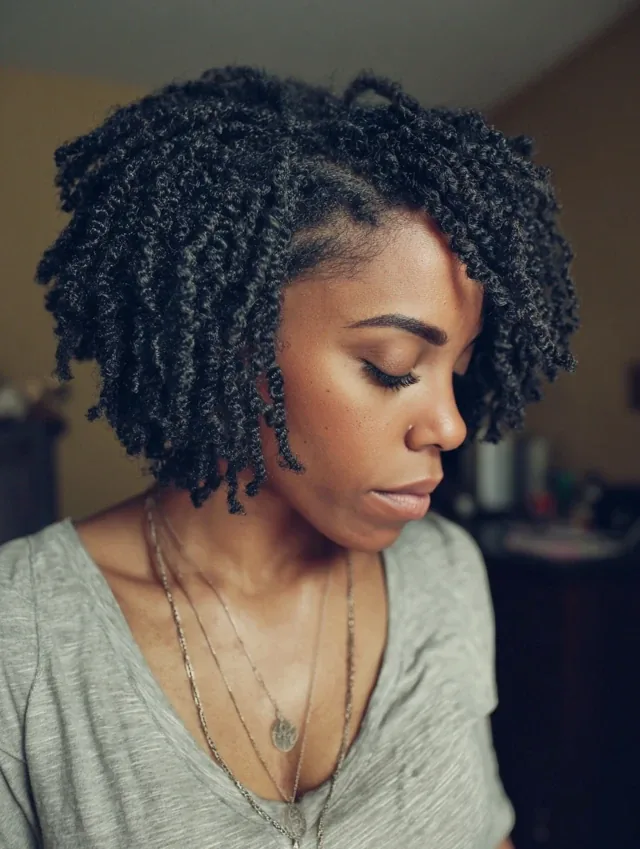
Twists for short hair are the twist for the growing-out stage: small two-strand twists on short hair, a few inches long, that hold their shape, protect the ends, and give short hair a defined, textured style instead of a shapeless in-between phase. Short twists are neat, bouncy and full of character, and they are the style that makes growing your hair out feel like a choice rather than a wait. They also take the least time to install — under an hour — and they unravel into the tightest, most defined twist-out.
Best for: short hair, pixies and anyone growing their hair out. How to style it: do small two-strand twists on damp hair with a twisting cream, keeping the sections even so the twists look neat. Pros and cons: the install is quick and the style is very flattering, but short twists last only about a week before the roots frizz. Maintenance: a satin bonnet at night and light oil on the scalp. Who should avoid it: hair shorter than two inches will struggle to hold a twist — below that, a twist-out on a wash-and-go is the better choice. Quick verdict: short hair can twist too — neat, quick and full of character.
27. Twists for Long Hair
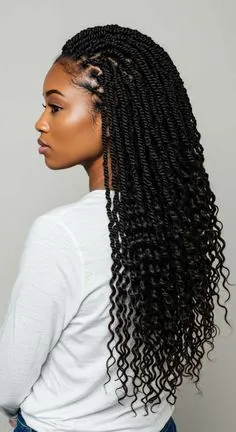
Twists for long hair are the twist at full length: long two-strand twists falling past the shoulders, with weight, movement and drama that shorter twists cannot match. Long twists can be worn loose, gathered into a bun, swept to one side, or pinned up — and every version looks different, because the length gives you options. Long twists are also the twist that shows off the rope texture best: the longer the twist, the clearer the rope, and the more beautiful the pattern.
Best for: long natural hair, and for anyone who wants maximum styling options from one twist set. How to style it: twist long hair in medium sections, keeping the tension even all the way down, and seal the ends with a finger coil so they do not unravel. Maintenance: long twists are heavier, so pin them up loosely at night in a pineapple, and keep them moisturised with a light oil. Time and cost: two to three hours at home, no salon needed. Common mistake: twisting too tightly at the root to support the weight — the roots should never hurt. Quick verdict: long hair was made for twists — dramatic, versatile and beautiful.
28. Twists for Thick Hair
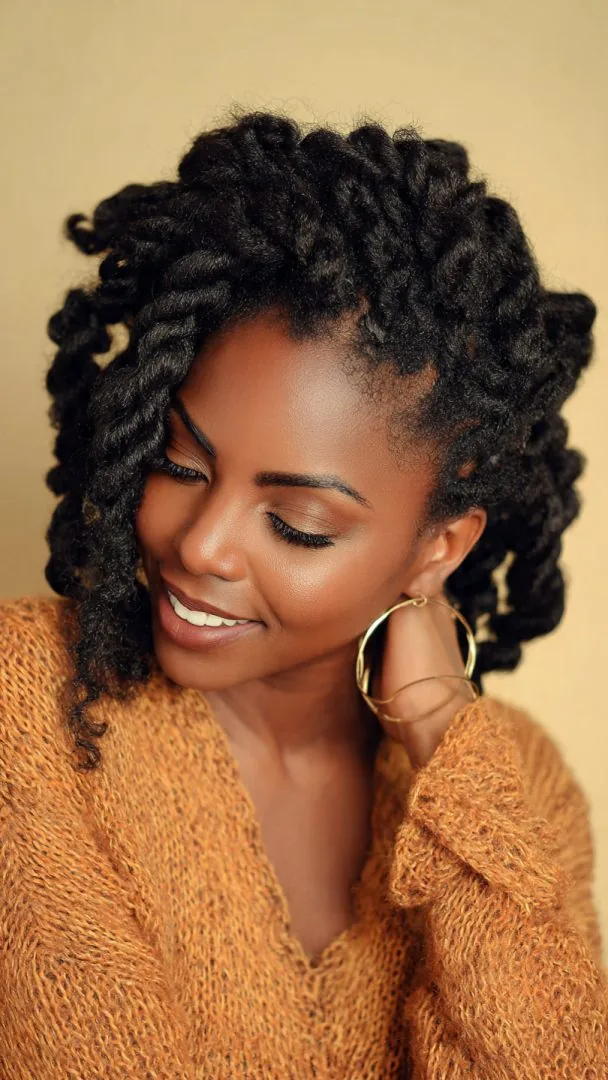
Twists for thick hair are the twist at its fullest: thick hair makes thick twists, and thick twists make a style with real presence — a head of twists you can see from across the room. Thick hair is the easiest hair type for twists, because the twists hold their shape, they look full without any help, and they stay put without slipping. The challenge is not volume but weight and time: a full head of twists on thick hair takes longer to install, and the finished style is heavier than on fine hair.
Best for: thick, dense hair, where the twists are naturally full and dramatic. How to style it: twist in medium sections, keeping the tension even, and use a twisting butter rather than a light cream, because thick hair needs a heavier product to hold the twist. Maintenance: the twists hold well, but check the roots once in the afternoon, because the weight works on them over hours. Time: three to four hours at home, because thick hair takes longer to section and twist. Who should avoid it: nobody — thick hair is the twist’s best friend. Quick verdict: the fullest twist in this guide.
29. Twists for Fine Hair
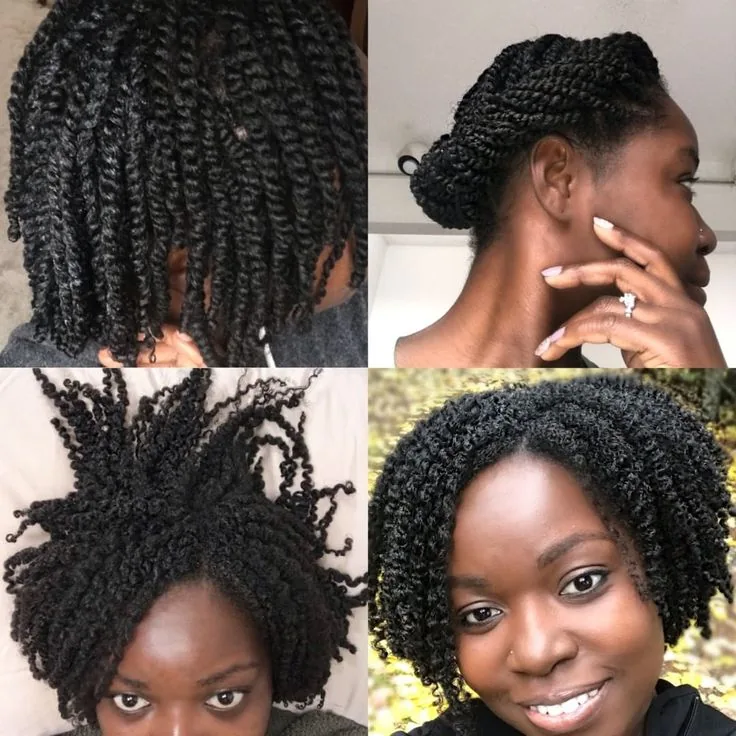
Twists for fine hair are proof that twists are not only for thick hair: with the right preparation, fine hair makes beautiful, delicate twists with their own kind of elegance. The key is texture — fine hair needs grip before it is twisted, or the twists will be thin and will unravel quickly. A little leave-in, a twisting butter rather than a light cream, and a twist that is not pulled too tight will make a fine-hair twist look twice as full as it really is.
Best for: fine, low-density hair, and for anyone who has been told twists will not work for them. How to style it: work a twisting butter through each section, twist loosely, and seal the ends with a finger coil. Pros and cons: the twists are lighter and more comfortable than on thick hair, but they need more product and more care to hold. Common mistake: twisting too tightly, which makes fine twists look like string — twist loosely, and let the butter do the holding. Quick verdict: fine hair can twist — it just needs a little help.
30. Twists for Curly Hair
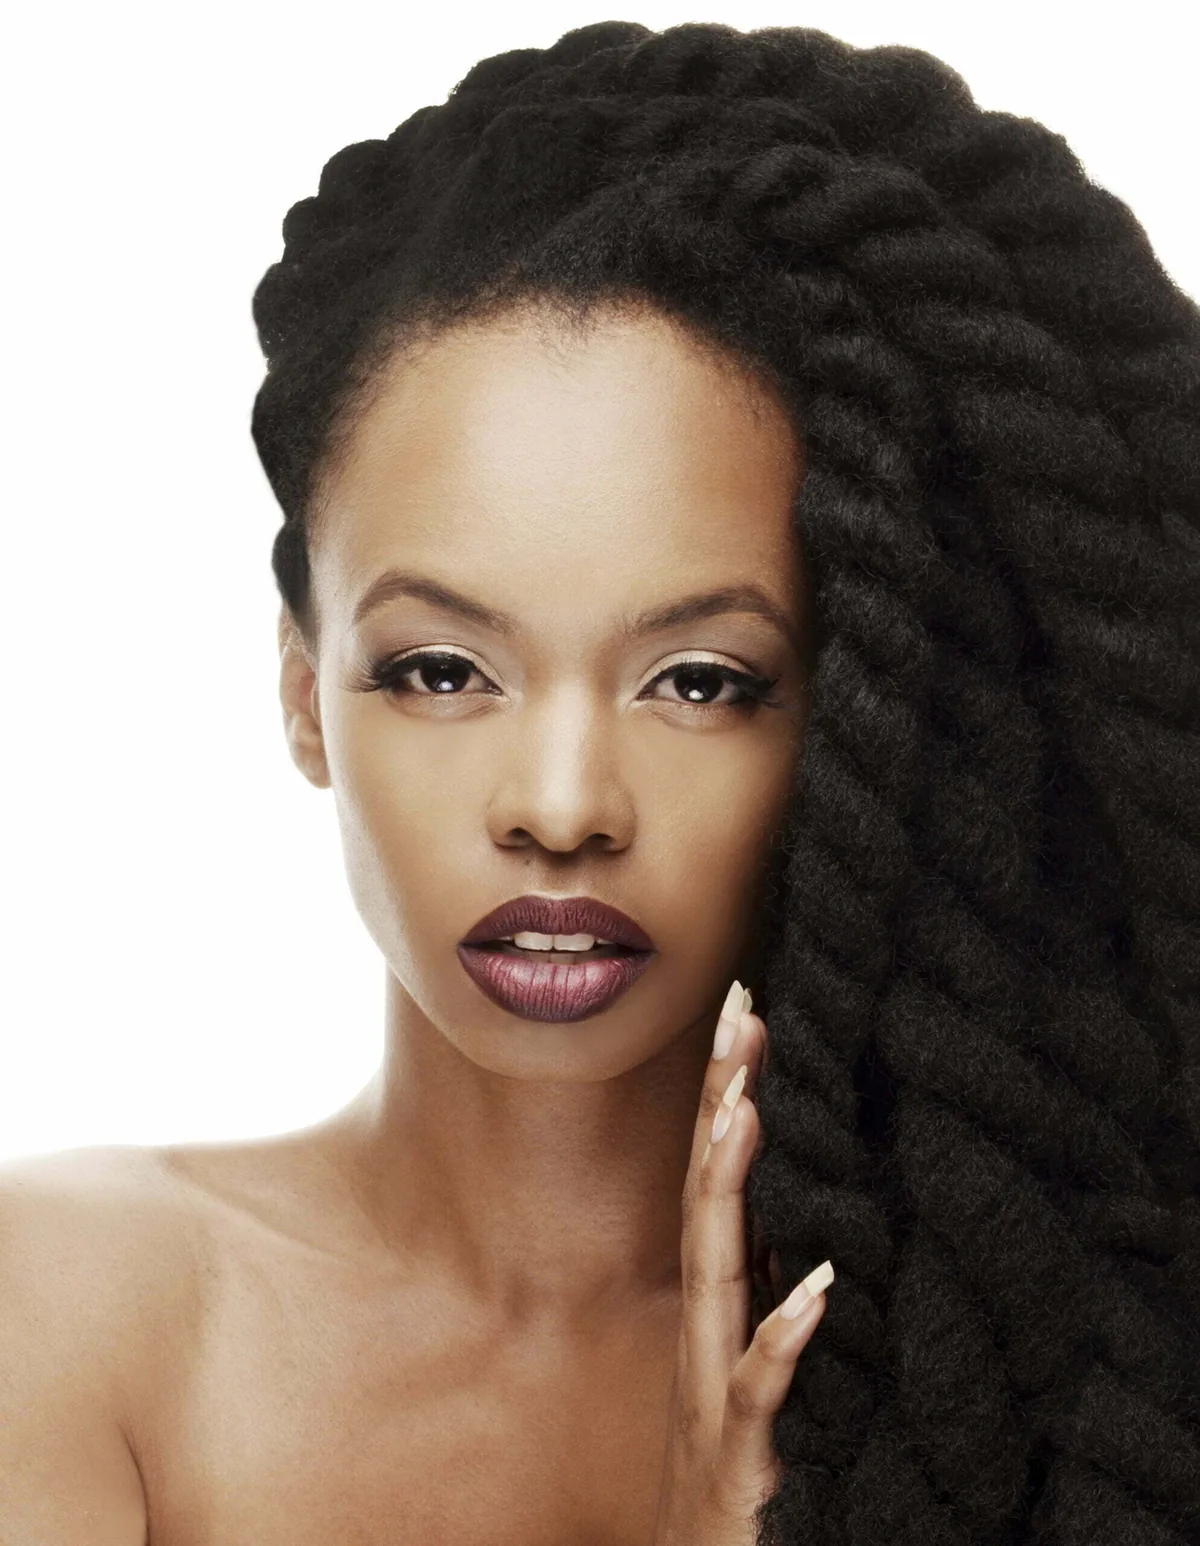
Twists for curly hair are the twist with texture built in: curly hair twisted loosely makes twists with a soft, springy, slightly undone finish, because the curls spring out of the twist and give it a natural fullness that straight hair has to fake with product. The twist looks lived-in from the first minute, it holds its shape well because the curls grip each other, and the twist-out you get when you take them down is one of the most defined curl patterns there is.
Best for: naturally curly and coily hair, where the texture does half the work. How to style it: twist on damp, stretched curls — not freshly washed and wet, which will shrink and pull the twist tight — twist loosely, and seal the ends with a coil. Maintenance: the twists hold well, and a light oil on the scalp is enough to keep them fresh. Pros and cons: the texture is gorgeous and the hold is strong, but curly twists can look uneven if the curl pattern varies — embrace the unevenness, it is what makes the style look natural. Quick verdict: curly hair and twists were made for each other.
31. Twists for Straight Hair
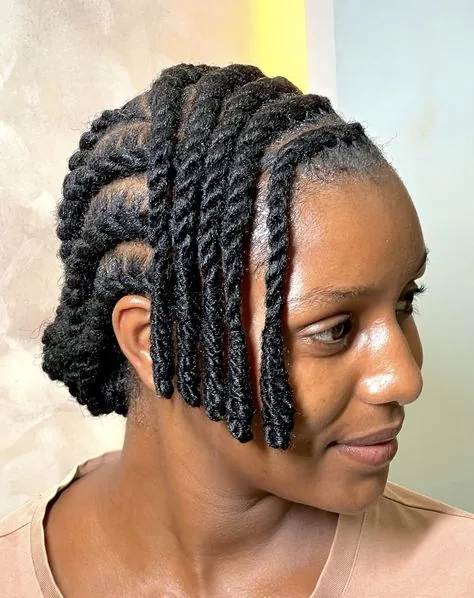
Twists for straight hair are the sleekest twist of all: straight hair twisted neatly makes smooth, defined twists with clean lines and a polished finish, and the rope texture shows up crisply against the smooth hair. The challenge is grip — straight hair is slippery, and twists on straight hair need texture added before twisting, or they will unravel by the second day. With preparation, though, the straight-hair twist is one of the most elegant versions there is.
Best for: straight and slightly wavy hair, and for polished, formal occasions. How to style it: work a texturising cream or a twisting butter through the hair first, twist firmly, and seal the ends with a small elastic or a coil. Common mistake: twisting on freshly washed straight hair with no product — the twists will fall out. Always add product first. Maintenance: check the twists once a day and re-twist any that have loosened. Time: about two hours. Quick verdict: straight hair needs prep, but the result is the sleekest twist there is.
32. Twists with Colour
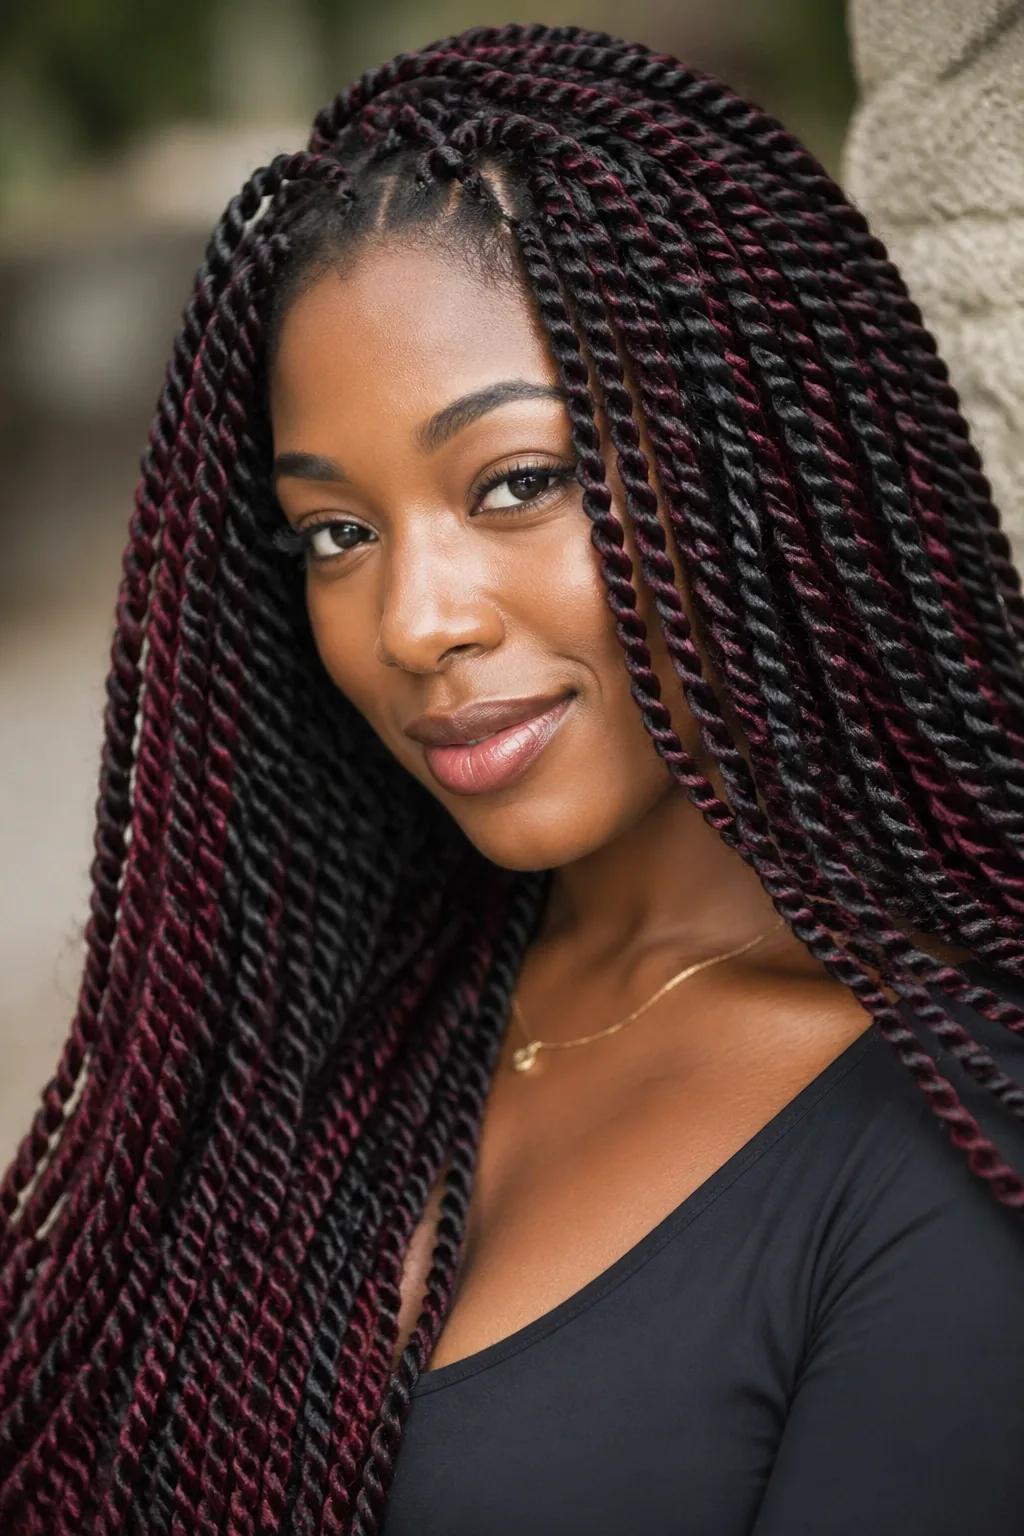
Twists with colour are twists with a statement: the twists themselves are the same, but the hair is coloured — highlights, a full colour, or coloured extension hair — so the rope texture shows off the colour in a way straight hair never could. The twist wraps the colour around itself, so the colour appears in stripes and swirls along the rope, and the effect is richer and more dimensional than colour on loose hair. Burgundy, honey blonde, copper and auburn all look spectacular in twists.
Best for: anyone who wants colour with dimension, and for anyone who wants to try a colour without dyeing all their hair — coloured extension twists give you the colour with no commitment. How to style it: colour the hair first, or use coloured extension hair in passion or Senegalese twists, and twist as usual. Pros and cons: the colour looks richer in twists than in loose hair, but coloured hair needs more moisture, so keep a leave-in handy. Cost: the cost of the colour plus the twists. Maintenance: a satin bonnet at night, and a colour-safe shampoo when you wash. Quick verdict: colour and twists together — the colour looks twice as rich in a rope.
33. Ombre Twists
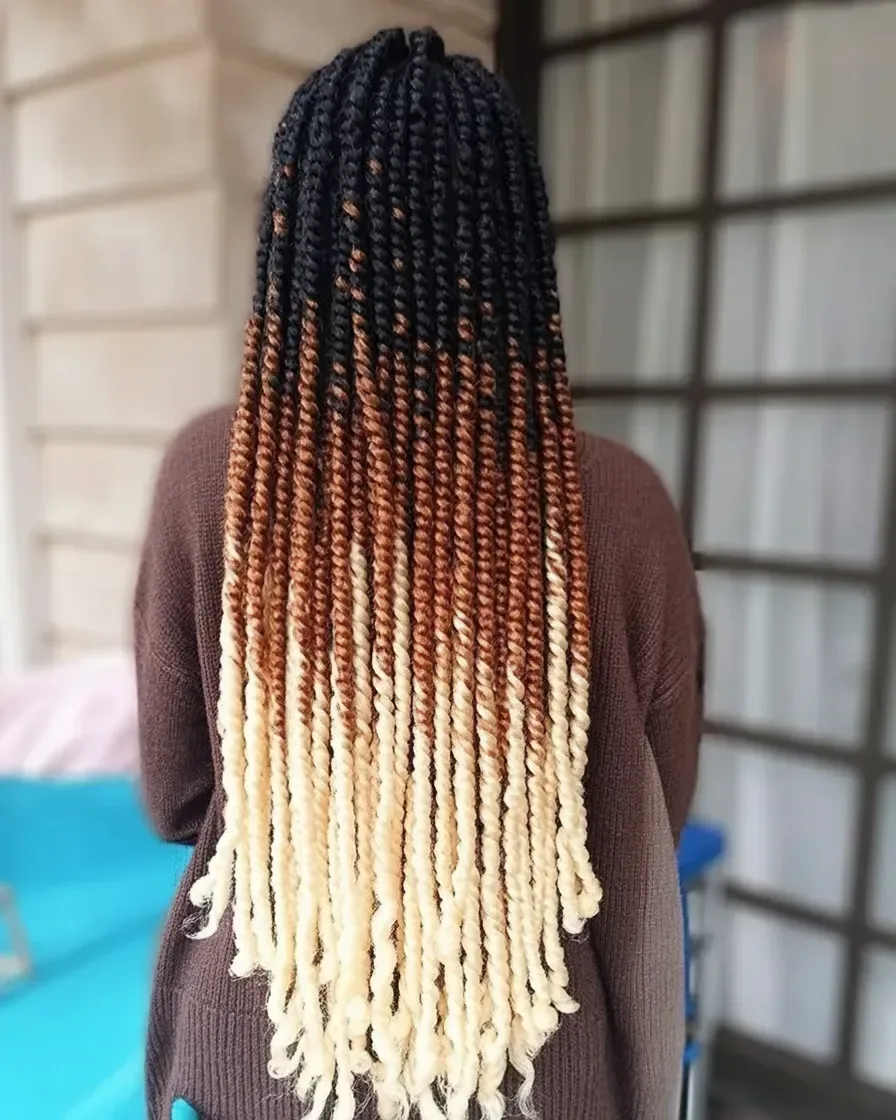
Ombre twists are the gradient twist: the twists start dark at the roots and fade to a lighter colour at the ends — honey, blonde, copper or burgundy — so each twist looks like it is melting from one colour into another. The ombre effect is made for twists, because the rope wraps the gradient around itself and shows it off from every angle, and the style looks expensive and deliberate without being loud. It is the twist for women who want colour, but with a soft, grown-out edge rather than a hard line.
Best for: anyone who wants a colour change that grows out gracefully, and for long twists, where the gradient has room to show. What to ask your stylist for: ombre extension hair in a medium twist, with the colour change starting at mid-length. Time and cost: a salon session, plus the ombre extension hair. Maintenance: the ombre grows out softly, so there is no harsh root line to worry about, and a satin bonnet at night keeps the colour fresh. Who should avoid it: if you want a single, uniform colour, choose a solid colour twist instead. Quick verdict: the gradient twist — dark at the top, light at the ends, beautiful all the way down.
34. Twists for Work

Twists for work are the polished, practical twist: neat, medium-sized twists, with no loose strands, no beads and no glitter, that keep the hair completely off the face and neck through a long day. They are professional without being severe — the twisted texture reads as deliberate and neat in exactly the way a good haircut does — and they are practical, because they do not need touching up between meetings. The work twist is the protective style for women who want their hair out of the way without a ponytail.
Best for: office work, teaching, healthcare and any job where the hair needs to stay put. How to style it: install neat, medium two-strand twists, gather them into a low bun or a neat ponytail, smooth the edges with a little gel, and keep the finish clean. Maintenance: a morning check of the edges is all it needs — the twists hold all day. Time: two hours to install, then a minute a day to style. Cost: cream and pins only, if you do them yourself. Common mistake: leaving loose twists around the face, which looks casual rather than professional — for work, keep every twist in place. Quick verdict: the most practical twist — neat, comfortable and all-day reliable.
35. Twists for a Wedding
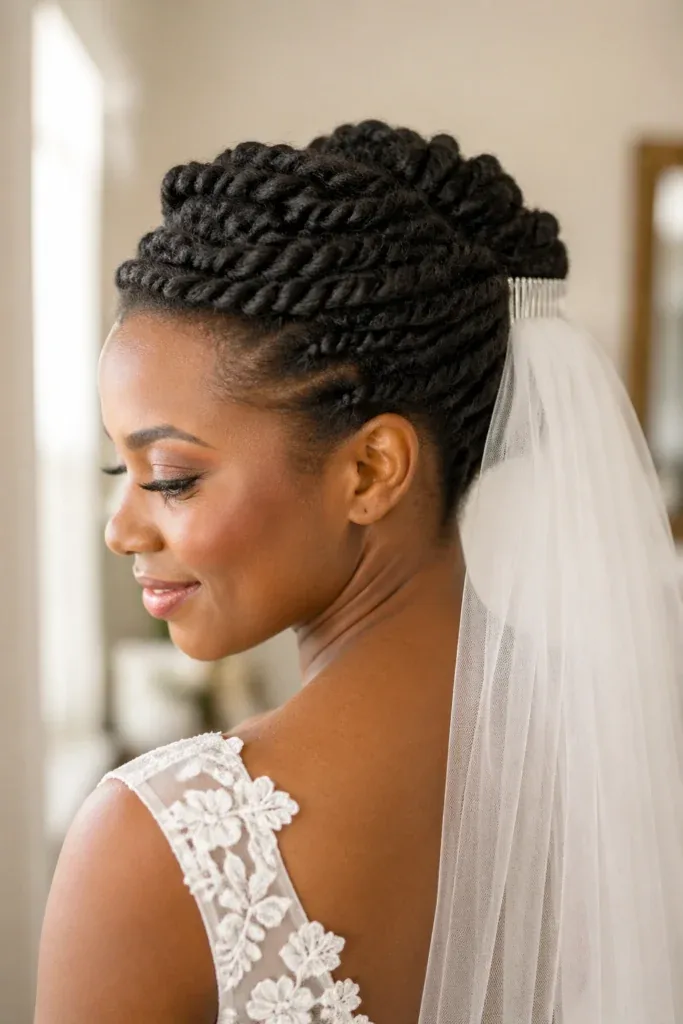
Twists for a wedding are the bridal twist: neat, polished twists, gathered into an updo or worn long and sleek, finished with gold cuffs or small white flowers — a style that looks extraordinary with a gown and photographs beautifully, because the twisted texture frames the face from every angle. Brides love twists because they are practical as well as beautiful: the hair stays completely off the face and neck through a long day, the style holds under a veil, and it does not need touching up between the ceremony and the dancing.
Best for: brides and bridesmaids, and for any formal occasion where the hair needs to last twelve hours. What to ask your stylist for: a neat twist updo with gold cuffs, and a trial run at least a month before the wedding. Time and cost: the styling on the day takes one to two hours, and the cost is a salon styling session — worth it, because a wedding style needs to be perfect from the first photograph to the last dance. Maintenance: a trial run is essential — wear the style for a full day, with the veil, to test how it holds. Quick verdict: twists were made for weddings — neat, romantic and all-day reliable.
36. Twists for a Holiday
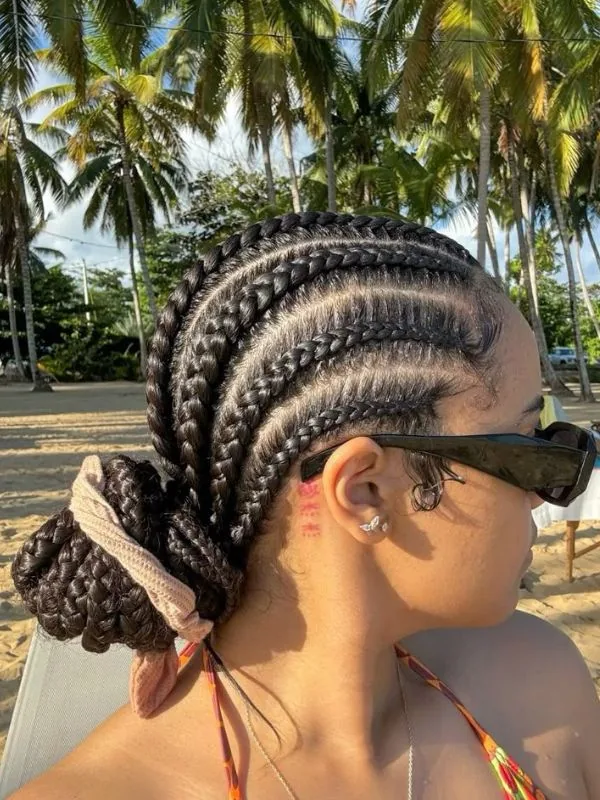
Twists for a holiday are the twist at its most useful: a protective style that survives swimming, sun, sand and humidity, needs almost no daily styling, and still looks good in every photograph. Passion twists and Senegalese twists are the holiday favourites, because they last four to eight weeks, they dry quickly after a swim, and they can be gathered into a bun, worn loose, or pinned up in a minute. It is the style that lets you enjoy the holiday instead of fighting your hair.
Best for: beach holidays, summer trips and anyone who wants a month of no-styling hair. How to style it: install passion or Senegalese twists before you travel, pack a satin bonnet and a light oil, and rinse the twists with fresh water after swimming. Pros and cons: the twists protect the hair from sun and salt, but chlorine and salt water dry them out, so rinse and oil them after every swim. Maintenance: almost none — a bonnet at night and a rinse after the sea. Cost: a salon session before you travel. Quick verdict: the holiday twist — install it, forget it, and enjoy the trip.
What are twist hairstyles?
Twist hairstyles are styles made by wrapping two strands of hair around each other, over and over, so they lock together into a rope. The main types are two-strand twists, which use your own hair; flat twists, which are worked close to the scalp; passion twists, which use wavy extension hair; and Senegalese twists, which use silky extension hair. A twist-out is the curly style you get when you unravel a set of twists.
How long do twist hairstyles last?
Two-strand twists on your own hair last one to two weeks, and flat twists last about the same. Passion twists last four to six weeks, and Senegalese twists last six to eight weeks, because the extension hair holds its shape longer. A twist-out lasts two to five days. How long any twist lasts depends on how neatly it was installed and how well you care for it at night.
How do I do two-strand twists at home?
To do two-strand twists at home, start with clean, detangled, damp hair, and work a leave-in conditioner and a twisting cream through it. Part the hair into even sections, take one section, divide it into two equal strands, and twist the strands around each other in the same direction, from the root to the tip. Keep the tension even, seal the end by twirling it around your finger, and repeat for the whole head. Your first set will take a while — by the third set, your hands will know the motion.
What is the difference between passion twists and Senegalese twists?
Passion twists are made with wavy, water-wave extension hair, so they look soft, loose, fluffy and boho. Senegalese twists are made with smooth, silky extension hair, so they look sleek, shiny, defined and polished. Passion twists are the softer, more romantic option; Senegalese twists are the sleeker, longer-lasting option, at six to eight weeks against four to six for passion twists.
How do I get a good twist-out?
To get a good twist-out, twist damp hair with a styling cream, and let the twists dry completely before you take them down — taking them down while damp is the main cause of frizz. Unravel the twists with oiled fingers, separating each twist into two or three pieces, gently, without pulling the curl apart. Do not use a brush or a comb. Small twists make tight curls, medium twists make medium curls, and large twists make loose waves, so choose the twist size that matches the curl you want.
Can I wash my hair while I have twists in?
Yes, you can wash twists, gently. Use a diluted shampoo, massage the scalp with your fingertips, and let the water run through the twists without rubbing the twists themselves. Rinse well and dry the twists thoroughly, because twists that stay damp can smell and can grow mildew. Focus on the scalp, not the twists, and do not wash them roughly or they will unravel.
How do I stop my twists from frizzing?
To stop twists from frizzing, twist on damp, moisturised hair with a twisting cream, sleep in a satin bonnet or on a silk pillowcase every night, and do not touch the twists during the day. At the hairline, smooth the frizz with a dab of edge control or twisting cream, and re-twist the few twists at the front that have started to fuzz. Frizz at the roots is normal as the hair grows — it is a sign the twists have done their job and it is time to take them down.
Are twists a protective style?
Yes, twists are a protective style. When the hair is twisted up, the ends — the oldest and most fragile part of the hair — are tucked away inside the twist, so they are protected from daily combing, heat, friction and weather. That is why twists help hair grow longer: the length stays because the ends are not breaking off. The protection only works if the twists are not too tight and are not left in for more than six to eight weeks.
How long do passion twists take to install?
Passion twists take three to five hours to install at a salon, depending on the size and length you choose. Small passion twists take longer than medium ones, and long passion twists take longer than short ones. Two-strand twists on your own hair take two to three hours at home, and mini twists can take four to six hours. Give yourself plenty of time, and do not rush the install — rushing is the fastest way to a frizzy, uneven result.
Can I wear twists to work?
Yes, you can wear twists to work. Neat, medium-sized two-strand twists, gathered into a low bun or a ponytail, are professional, practical and all-day reliable, and they keep the hair completely off the face. For a formal workplace, choose a neat finish with no beads or loose strands, smooth the edges with a little gel, and keep the twists in a tidy bun or ponytail. Twists are one of the most work-friendly protective styles there is.
Conclusion
Twists are not the hardest hairstyle — they ask for two strands, a little cream, a satin bonnet and a few hours of patience — but they give back more than they ask for: a style that protects the hair, lasts for weeks, and looks good from the first day to the last. Every style in this guide is a variation on the same simple idea: two strands, wrapped around each other, again and again. Neat or boho, short or waist-length, plain or beaded, for work or for a wedding, for a holiday or for growing your hair out — the twist itself never changes, only the finish does.
Start with the classic two-strand twist, if you are not sure — part the hair into even sections, work a cream through each one, and twist the strands around each other in the same direction. Wear it once, and you will see why twists have lasted for generations: they are practical, they are beautiful, and they suit almost everyone. Then make them yours — try passion twists, add gold cuffs, take them down for a twist-out, or gather them into a bun. The twist is yours to wear however you like. And when someone asks how you got your hair to look like that, tell them the truth: you twisted it, you pinned it up, and you wore it like the crown it is.