Knotless Braids, Zero Tension: 38 Styles That Protect Your Edges and Look Effortless
Knotless braids are the protective style that changed the braid game: instead of starting each braid with a tight knot at the root, the braider begins with your own natural hair and feeds in the extensions gradually, so the braid lies flat, the roots stay soft, and there is no pulling on your scalp. The result is a style that looks like it grew out of your head — lighter, more natural at the parting, and far kinder to your edges than traditional box braids. Women who could never sit through box braids without a headache, or who watched their hairline thin after years of tight styles, switched to knotless and never looked back.
This guide gathers 38 knotless braids hairstyles for women, from the classic knotless box braid to boho knotless braids with curls, the knotless bob, jumbo and small knotless braids, knotless braids with beads, colour and gold cuffs, and versions for weddings, work, the gym, holidays and everyday life. Eight guides cover what knotless braids really are, how they differ from box braids, how long they take and what they cost, how to choose a size, how to prep your hair, how to look after them, how long they last, and the mistakes that ruin them. One honest note before you begin: knotless braids take longer to install than box braids and they usually cost more — but your scalp will notice the difference on day one, and your edges will thank you for it months later.
What Are Knotless Braids — And Why Zero Tension Matters
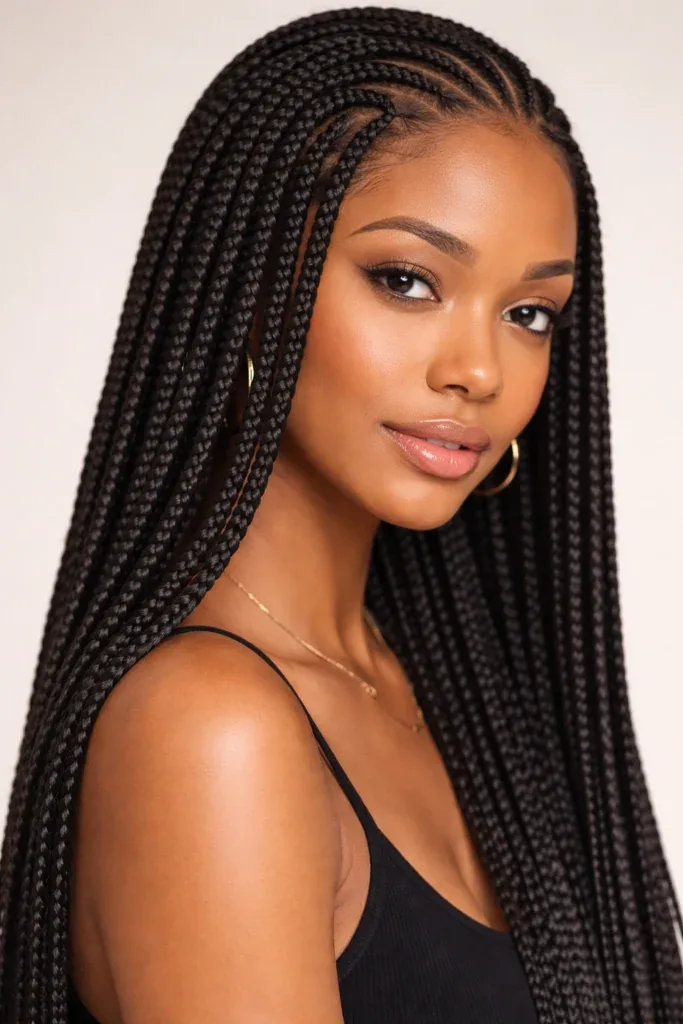
Knotless braids are a type of box braid made without the knot. In traditional box braids, the braider attaches the extension hair to your natural hair with a tight knot right at the root, which is what creates that raised bump at the scalp and the pulling feeling for the first few days. With knotless braids, there is no knot at all: the braider starts braiding with your own hair only, then gradually feeds small pieces of extension hair into the braid as it travels down, so the braid gets thicker as it goes and lies completely flat against the scalp.
That one change makes a real difference. Because nothing is anchored tightly at the root, there is far less tension on the hairline and the scalp, which means less pain, less itching in the first week, and less risk of the traction hair loss that tight braids can cause around the edges. The partings look softer and more natural too — there is no visible knot to give the style away, so knotless braids can be mistaken for hair that simply grows that way. The trade-off is time and price: feeding in the hair takes longer than knotting it, so expect a longer appointment and a higher bill. For most women, that is a fair exchange for a style that feels comfortable from the moment you leave the chair.
Knotless Braids vs Traditional Box Braids — What Is the Difference?
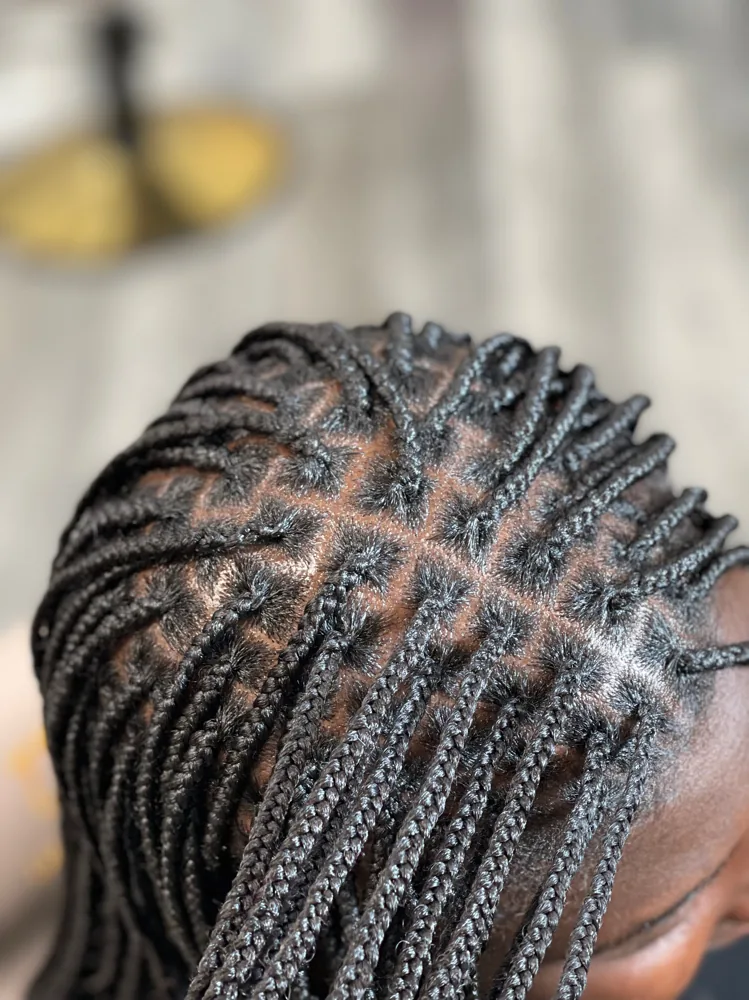
The difference between knotless and traditional box braids comes down to one thing: how the braid starts. A box braid starts with a knot — the extension hair is folded around your natural hair and knotted at the root, which anchors the braid firmly but pulls on the scalp. A knotless braid starts with your natural hair alone and the extensions are fed in gradually, so there is no knot, no bump and no pulling. Everything else — the square partings, the length, the styling options — is essentially the same, which is why the two styles look so similar in photographs.
In practice, the difference is something you feel more than see. Knotless braids are lighter on the head, they move more naturally, and you can put them up in a bun or a ponytail on the very first day without wincing. Box braids are usually cheaper and quicker to install, and because the knot anchors the braid, they can last a little longer before the roots start to look fuzzy. Knotless braids are the better choice if you have a sensitive scalp, fragile edges, or a history of braids causing breakage — and if you have ever taken painkillers after a braiding appointment, knotless is the style you should have been wearing all along. If budget is tight and your scalp tolerates tension well, box braids still do the job.
How Long Do Knotless Braids Take — And What Do They Cost?
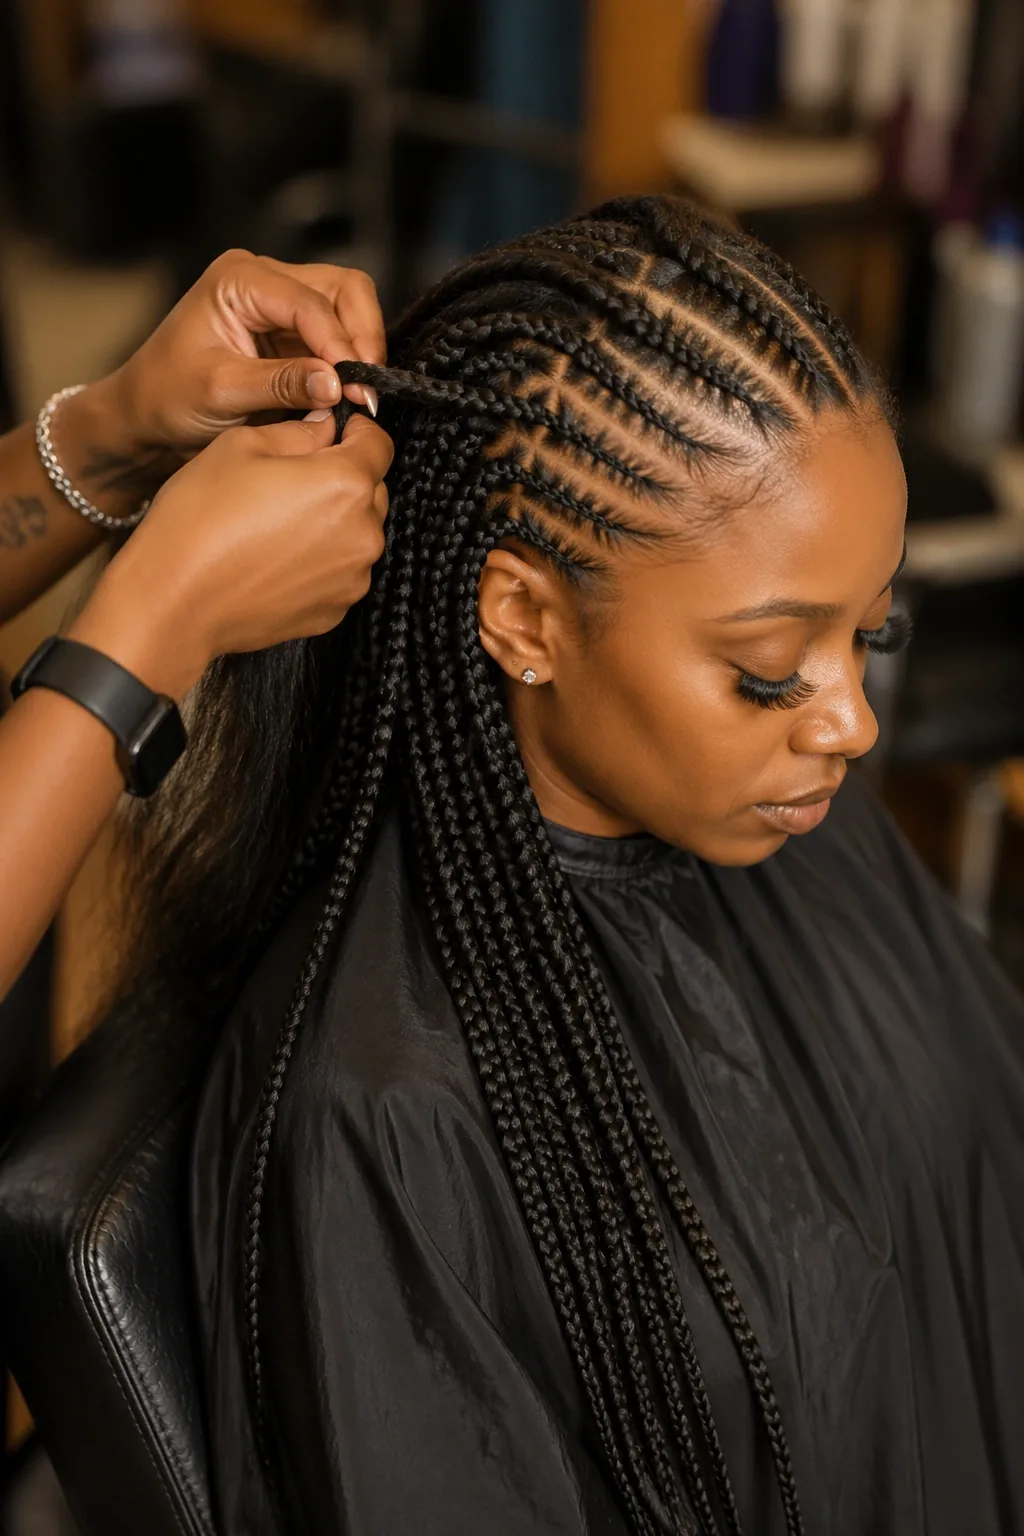
Knotless braids take longer than box braids, and it is worth knowing that before you book, so you can plan your day. A medium-sized, waist-length set takes roughly four to six hours in the chair, depending on the braider’s speed, the size of the braids and the length you choose. Small knotless braids can take six to eight hours, sometimes split across two days, while jumbo knotless braids can be finished in two to three hours. Add an hour or so if you want curly ends, boho curls throughout, or a colour blend, because those extras are hand-finished.
Cost follows time. In the US, a knotless set typically costs around $180 to $350 for medium braids, with small braids running higher — $250 to $450 or more — and jumbo braids lower, around $120 to $200. In the UK, expect roughly £150 to £300, and in Pakistan and other South Asian markets, salon prices are much lower, often a fraction of Western prices, though the technique is the same. Hair is sometimes included and sometimes not, so ask when you book. Pros and cons of the price: knotless costs more than box braids for the same length, but the comfort and the edge protection are what you are paying for. Common mistake: booking a two-hour slot for a full head of small knotless braids. Bring snacks, charge your phone, and clear your whole afternoon.
Choosing Your Size — Jumbo, Medium or Small Knotless Braids?
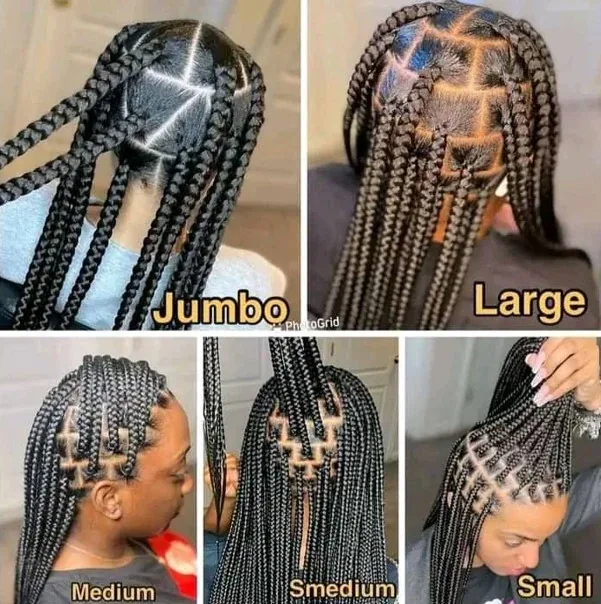
Size is the first decision you make with knotless braids, and it changes everything: how long you sit, how much you pay, how heavy the style feels, and how long it lasts. Jumbo knotless braids are the biggest — roughly six to ten braids across the head — and they are the quickest and lightest in the chair, taking two to three hours. Medium knotless braids are the most popular size, with around twenty to thirty braids, and they are the best all-rounder: versatile to style, not too heavy, and long-lasting. Small knotless braids are the finest, with forty or more braids, and they look the most like natural hair, but they take the longest and cost the most.
Which size should you choose? Pick jumbo if you want a quick, bold, statement look, or if you are trying knotless braids for the first time and do not want a whole day in the chair. Pick medium if you want the classic knotless look that works for work, weddings and everyday life — it is the size most women come back to. Pick small if you love the look of fine, flowing braids and you are willing to sit for six to eight hours and pay more for it. One warning: small braids are heavier overall because there is more hair, and they put more strain on the roots if they are installed too tightly — so with small braids, the knotless technique matters even more. If your hair is fine or your edges are fragile, medium is usually the safer choice than small.
Hair Prep — Washing, Stretching and Products Before You Braid
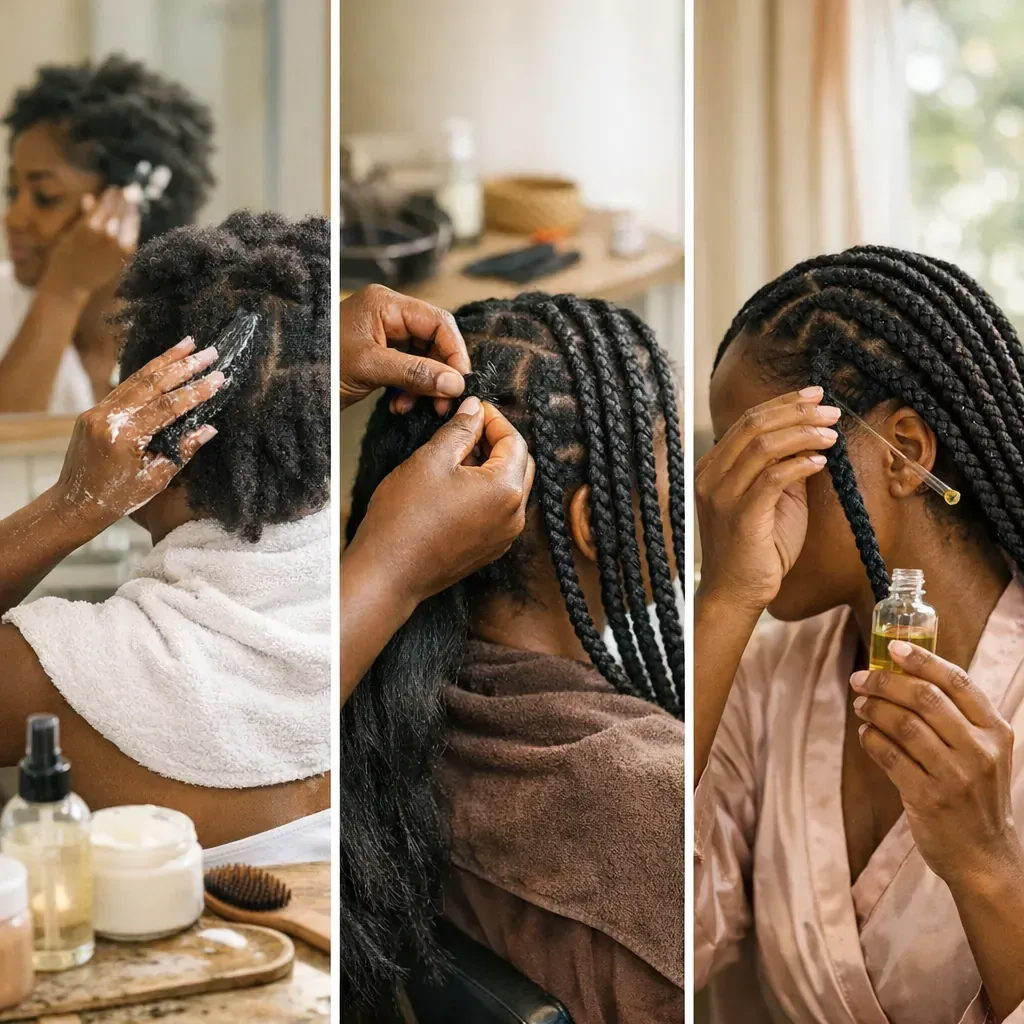
Knotless braids look their best and last their longest when the hair underneath is properly prepared, and that preparation starts a day or two before your appointment. Wash your hair with a clarifying shampoo to remove product build-up, then deep-condition it, because braids lock moisture in — or lock dryness in, if you skip the conditioning. Detangle thoroughly while the conditioner is in, working from the ends upward with a wide-tooth comb, so the braider is not fighting knots at the root. Then stretch the hair: blow-dry it on low heat, or braid it into a few large plaits overnight, so it is straight enough to part cleanly.
On the day, arrive with clean, stretched, product-free hair — no heavy oils or butters at the roots, because they make the hair slippery and the braids will slide. Bring the extension hair if the salon does not provide it, and agree the length, size and colour with your braider before they start parting. What to ask for: clean, neat partings, a size that matches what you discussed, and braids that feel snug but never painful — if a braid hurts, say so immediately, because a painful braid on day one will still be painful on day seven. Maintenance starts here: well-prepped hair means braids that stay neat for weeks instead of frizzing in days.
How to Look After Knotless Braids — Washing, Scalp Care and Sleeping
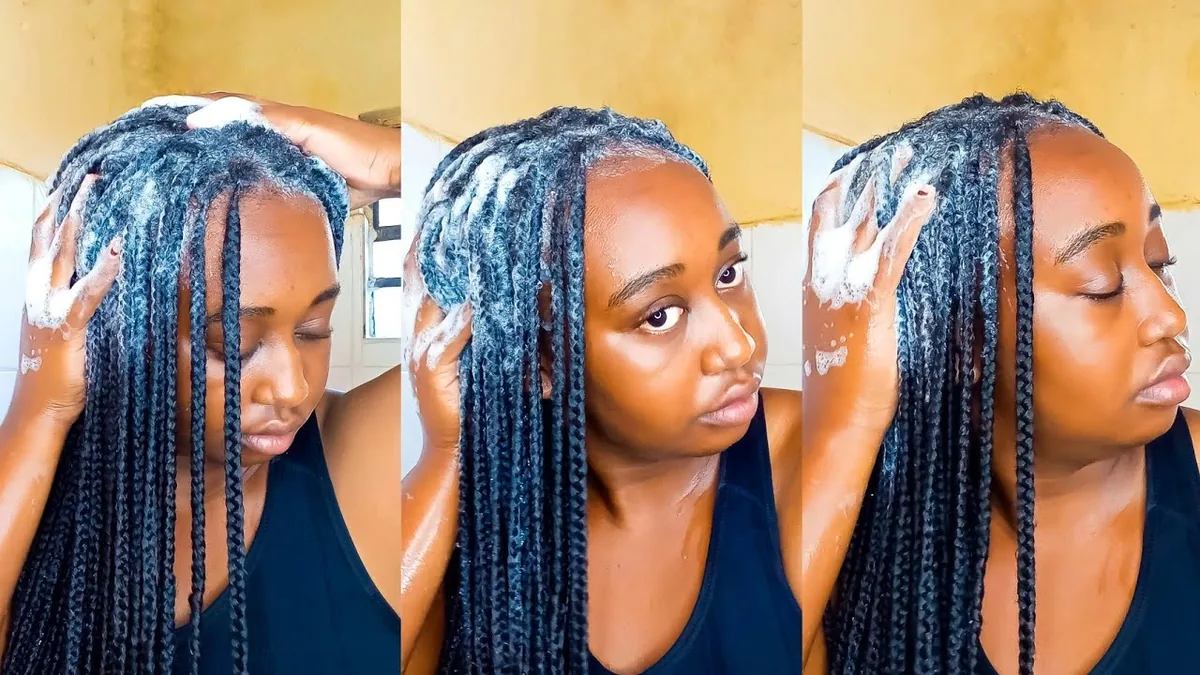
Knotless braids are low-maintenance, not no-maintenance, and a little care goes a long way. Wash them every one to two weeks: dilute shampoo with water in an applicator bottle, apply it to the scalp between the partings, massage gently with your fingertips, and rinse thoroughly without rubbing the braids themselves. Let them air-dry or sit under a hooded dryer — braids that stay damp for hours can develop a musty smell. Between washes, keep the scalp happy with a light oil or scalp spray two or three times a week, focusing on the partings and the edges, and resist the urge to scratch with anything sharp.
At night, protect the braids or they will frizz. Tie them up loosely — a low, loose ponytail or a pineapple on top of the head — and cover them with a silk or satin scarf, bonnet or pillowcase, because cotton pillowcases pull moisture out of the hair and rough up the braids. In the morning, smooth the edges with a little edge control and a soft brush, and mist the lengths with a light leave-in if they look dry. Pros and cons of the routine: it takes about ten minutes a week, and braids that are looked after stay neat for six to eight weeks, while neglected braids start to look tired after three. Who should avoid skipping aftercare: everyone — even the best knotless braids go fuzzy fast without a scarf at night.
How Long Do Knotless Braids Last — And When Should You Take Them Out?
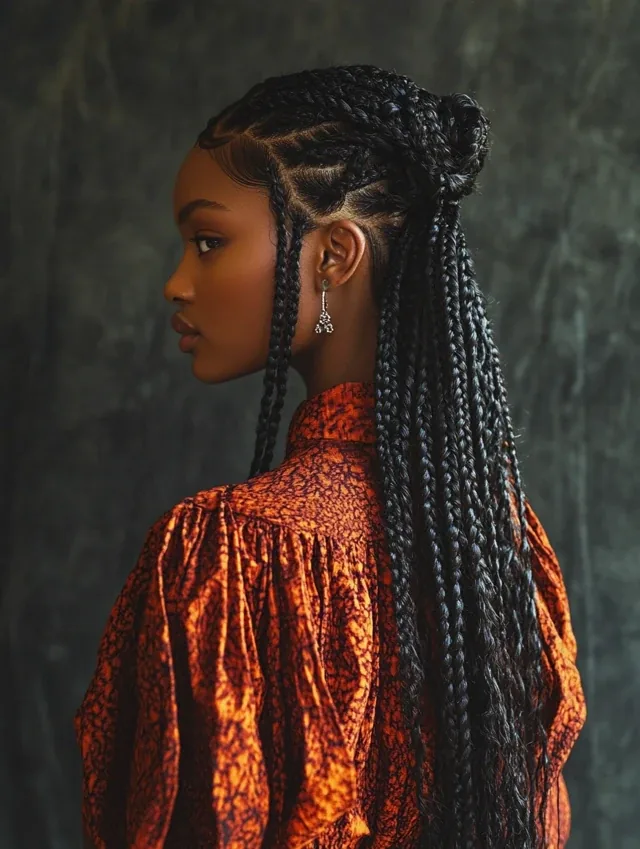
Knotless braids last around six to eight weeks with good care, and that is the sweet spot. The braids themselves can survive longer — the hair is synthetic and does not wear out — but your natural hair keeps growing, and after about six weeks the new growth at the roots starts to show, the partings get fuzzy, and the braids hang looser and heavier on the roots. Leaving them in for ten or twelve weeks is tempting, especially when they still look fine from a distance, but it is also when tangling and matting start at the roots, and taking them out becomes a long, painful detangling session.
The honest rule is to take them out at eight weeks at the latest, and sooner if the roots are matting, the braids feel heavy, or your scalp is itchy despite washing. When you do take them out, do it gently: cut the extension hair a few inches below your natural hair ends first, then unravel each braid slowly, detangling as you go, and wash and deep-condition immediately afterwards. Time and cost: removal takes one to two hours at home, or a salon will do it for a fee. Common mistake: leaving knotless braids in for three months because they still look good. They are a protective style, not a permanent one — the protection only works if you take them out, rest your hair, and let it breathe before the next install.
Common Knotless Braid Mistakes and How to Fix Them
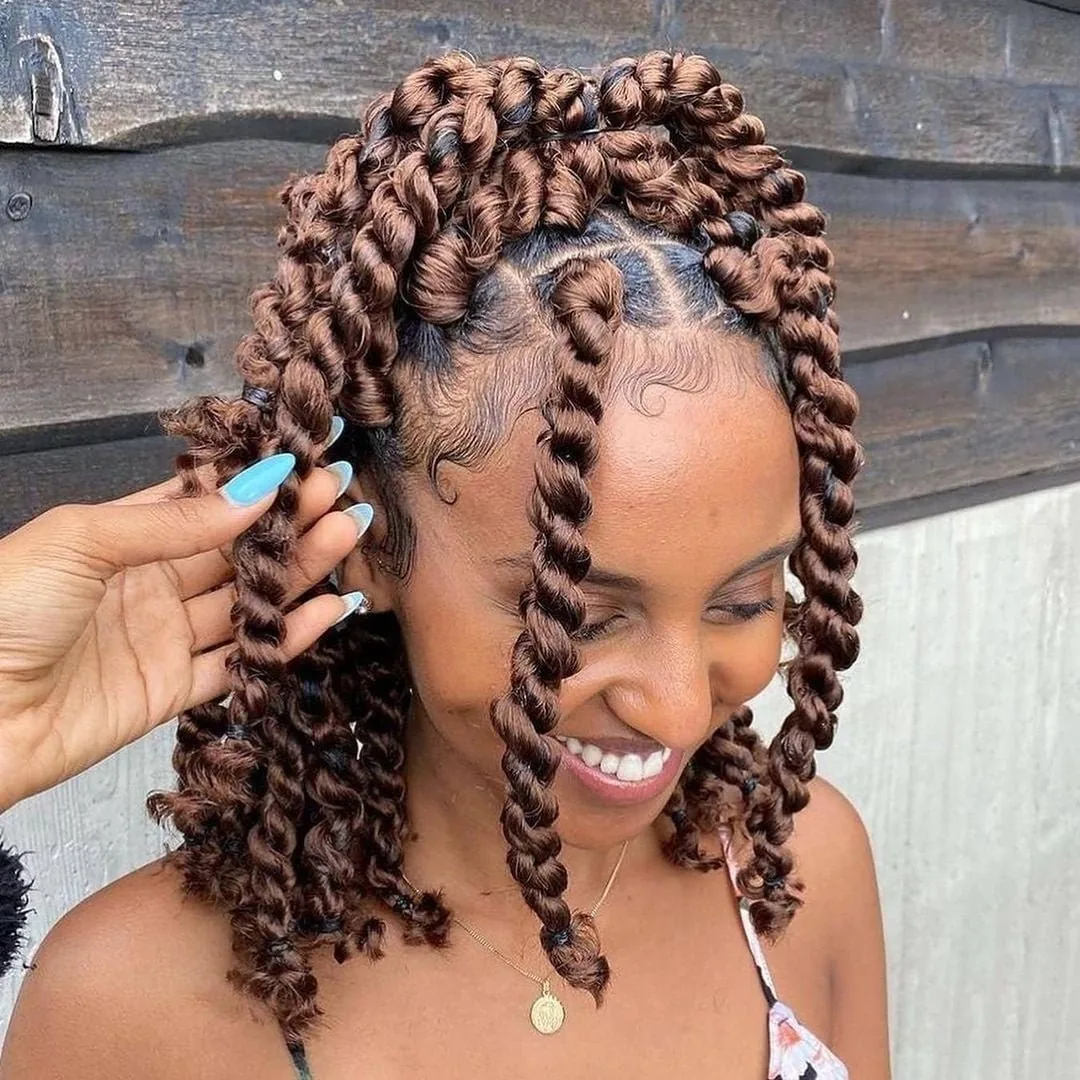
The most common knotless braid mistake is believing that knotless means tension-free no matter what. Knotless braids are gentler than box braids, but a braider can still pull too tightly while feeding the hair in, especially around the hairline. If a braid hurts, if your forehead feels tight, or if you see small bumps at the roots, speak up during the appointment — a braid that hurts on day one will damage your edges by week six. The second mistake is choosing braids that are too small or too long for your hair: tiny braids on fine hair, or waist-length braids on short natural hair, put weight on roots that cannot carry it.
The other mistakes are about care and timing. Skipping the silk scarf at night is the fastest way to make neat braids go fuzzy in a week. Washing with undiluted shampoo rubbed into the braids, instead of diluted shampoo on the scalp, leaves residue and frizz. Leaving the style in for three months invites matting at the roots. And over-styling — tight high buns and slicked ponytails every day — puts the same tension on the edges that knotless braids were supposed to remove, so vary your styles and give the hairline a rest. Quick verdict: knotless braids protect your hair only if the install is genuinely gentle, the size suits your hair, and you take them out on time. Get those three things right and the style does the rest.
1. The Classic Knotless Box Braids
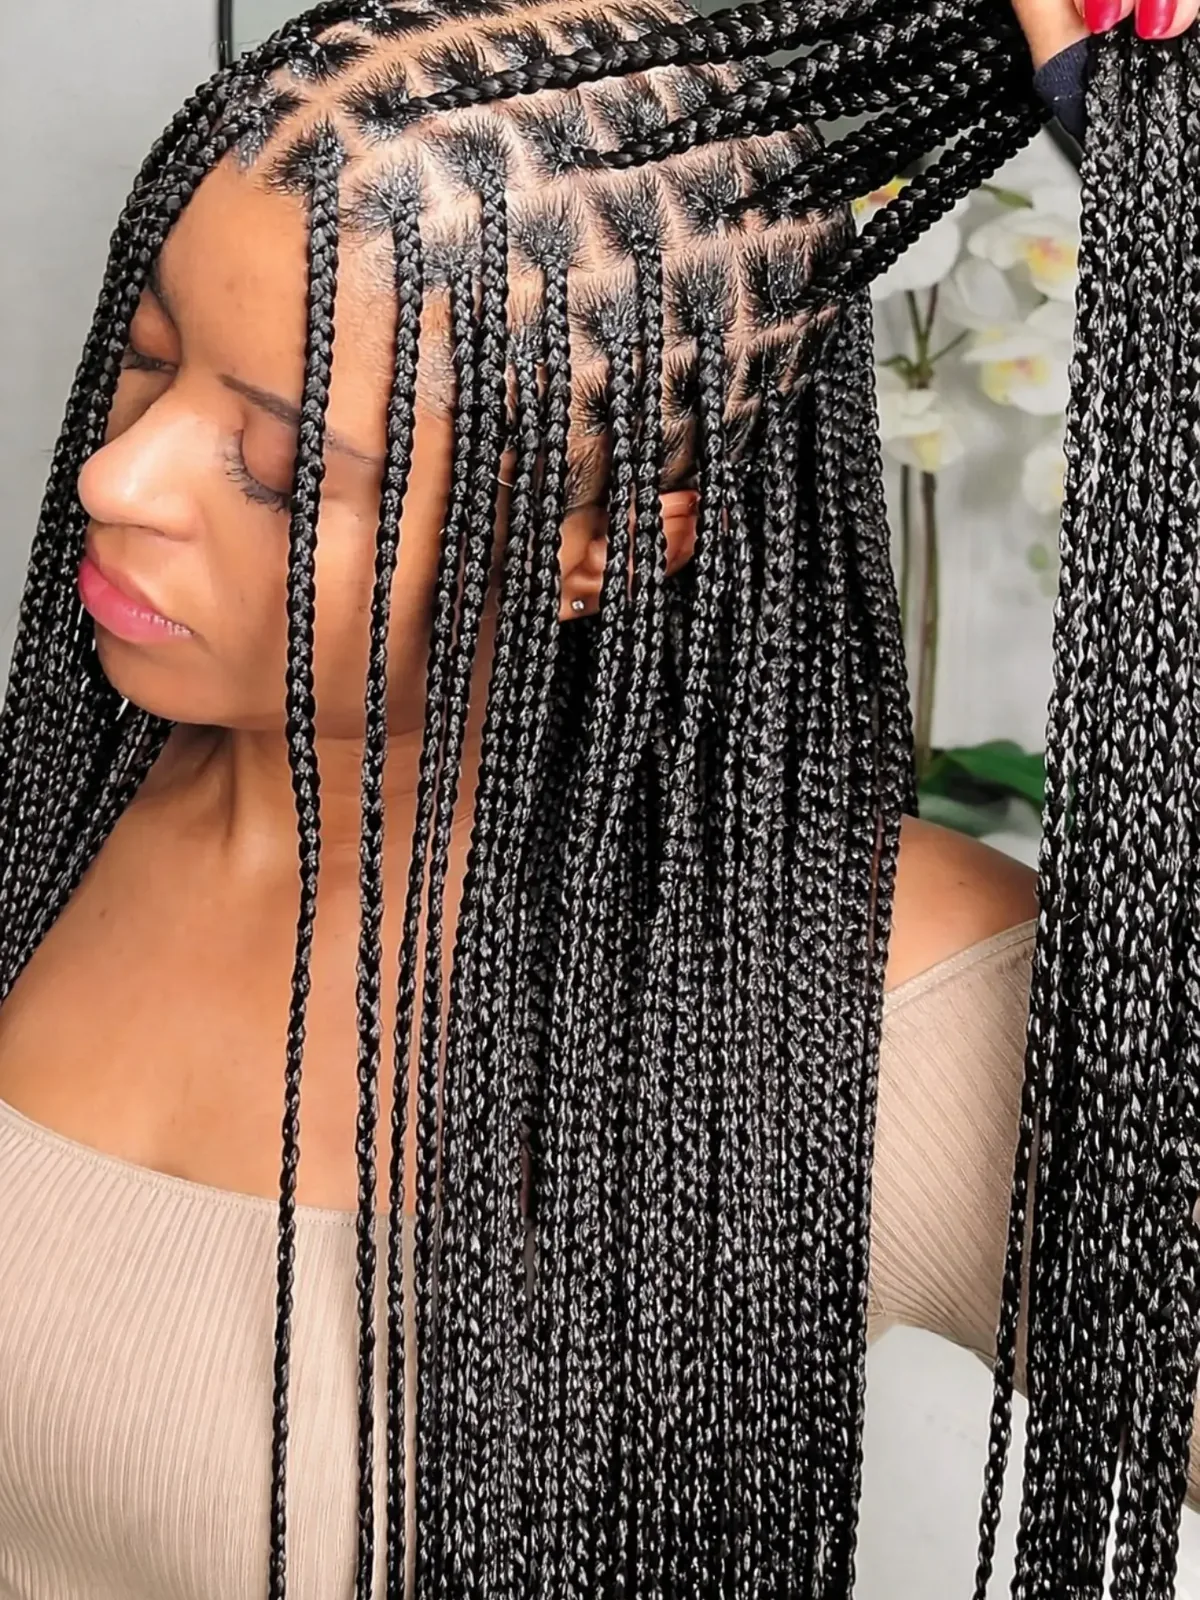
The classic knotless box braid is the style that started it all: neat square partings, medium-sized braids, and a flat, natural-looking root that makes the whole head of braids look as if it grew that way. There is no knot, no bump, and no tell-tale sign that extensions are involved — just clean, even braids falling from a soft hairline. It is the knotless braid in its purest form, and it is the one most women mean when they say they want knotless braids.
Best for: almost everyone, and especially first-timers, because it is the easiest size to live with and the easiest to style. How to style it: wear it down, sweep it to one side, or pull it into a low ponytail — the flat roots make every style sit neatly. Time and cost: four to six hours and a mid-range price, making it the best value knotless set. Quick verdict: if you only try one knotless style, try this one — it is the foundation every other look in this guide is built on.
2. Boho Knotless Braids with Curls
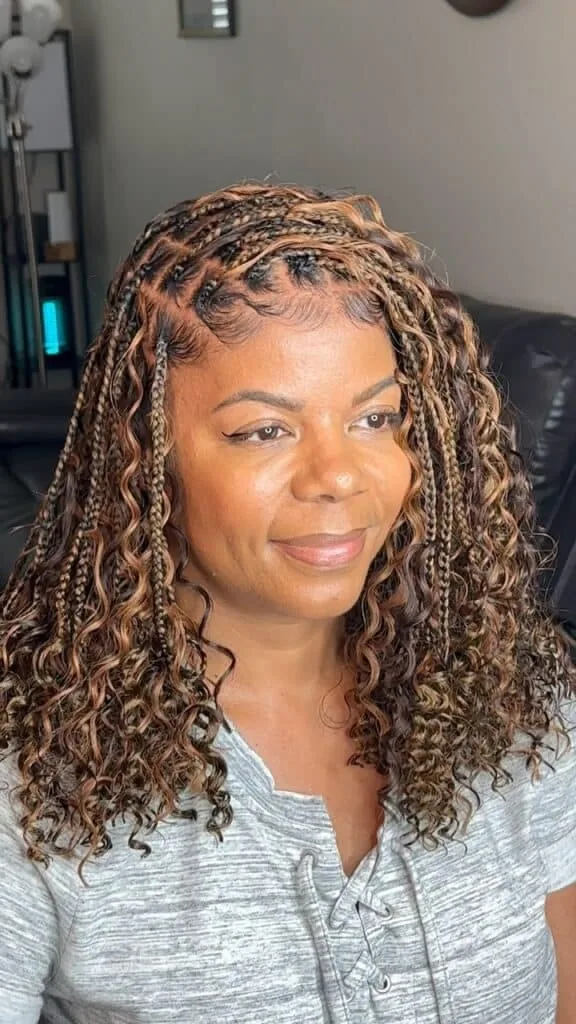
Boho knotless braids are the free-spirited version of the classic: the same flat-rooted braids, but with loose, wavy curls left out along the lengths and at the ends, so the style looks soft, romantic and a little undone. The curls break up the neatness of the braids and give the whole look movement — it is the knotless braid for holidays, festivals and summer, and the one that photographs best in golden light. The boho effect comes from the contrast: structured braids, unstructured curls.
Best for: wavy and curly natural hair, which blends into the loose curls easily, and for anyone who finds plain box braids too severe. How to style it: ask your braider to leave curls out at intervals and to curl the ends, then refresh the curls with a little mousse in the morning. Pros and cons: the look is gorgeous and very on-trend, but the loose curls tangle more easily than braided ends and need detangling every few days. Maintenance: keep the curls moisturised with a light leave-in spray. Quick verdict: the prettiest knotless braid for a soft, effortless finish.
3. The Knotless Bob
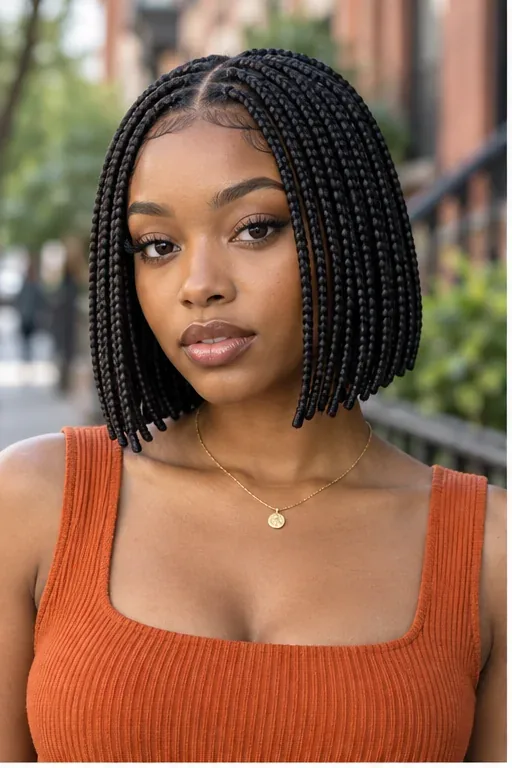
The knotless bob is the short, sharp version of the style: knotless braids cut to chin or jaw length, so they swing around the face like a bob haircut made of braids. It is lighter than long braids, cooler in hot weather, and it frames the face beautifully — the braids end in a neat, blunt line that gives the whole look a deliberate, polished shape. A knotless bob feels modern and confident, and it is the knotless style most likely to get compliments from strangers.
Best for: round and heart-shaped faces, where the bob length frames the cheekbones, and for anyone who wants braids without the weight of long hair. How to style it: wear it straight down with a middle part, tuck one side behind the ear, or add a few gold cuffs near the ends. Time and cost: three to four hours, cheaper than a long set because there is less hair. Common mistake: making the bob too long — a knotless bob works best at chin to shoulder length; longer than that and it stops reading as a bob. Quick verdict: the lightest, freshest knotless braid there is.
4. Jumbo Knotless Braids
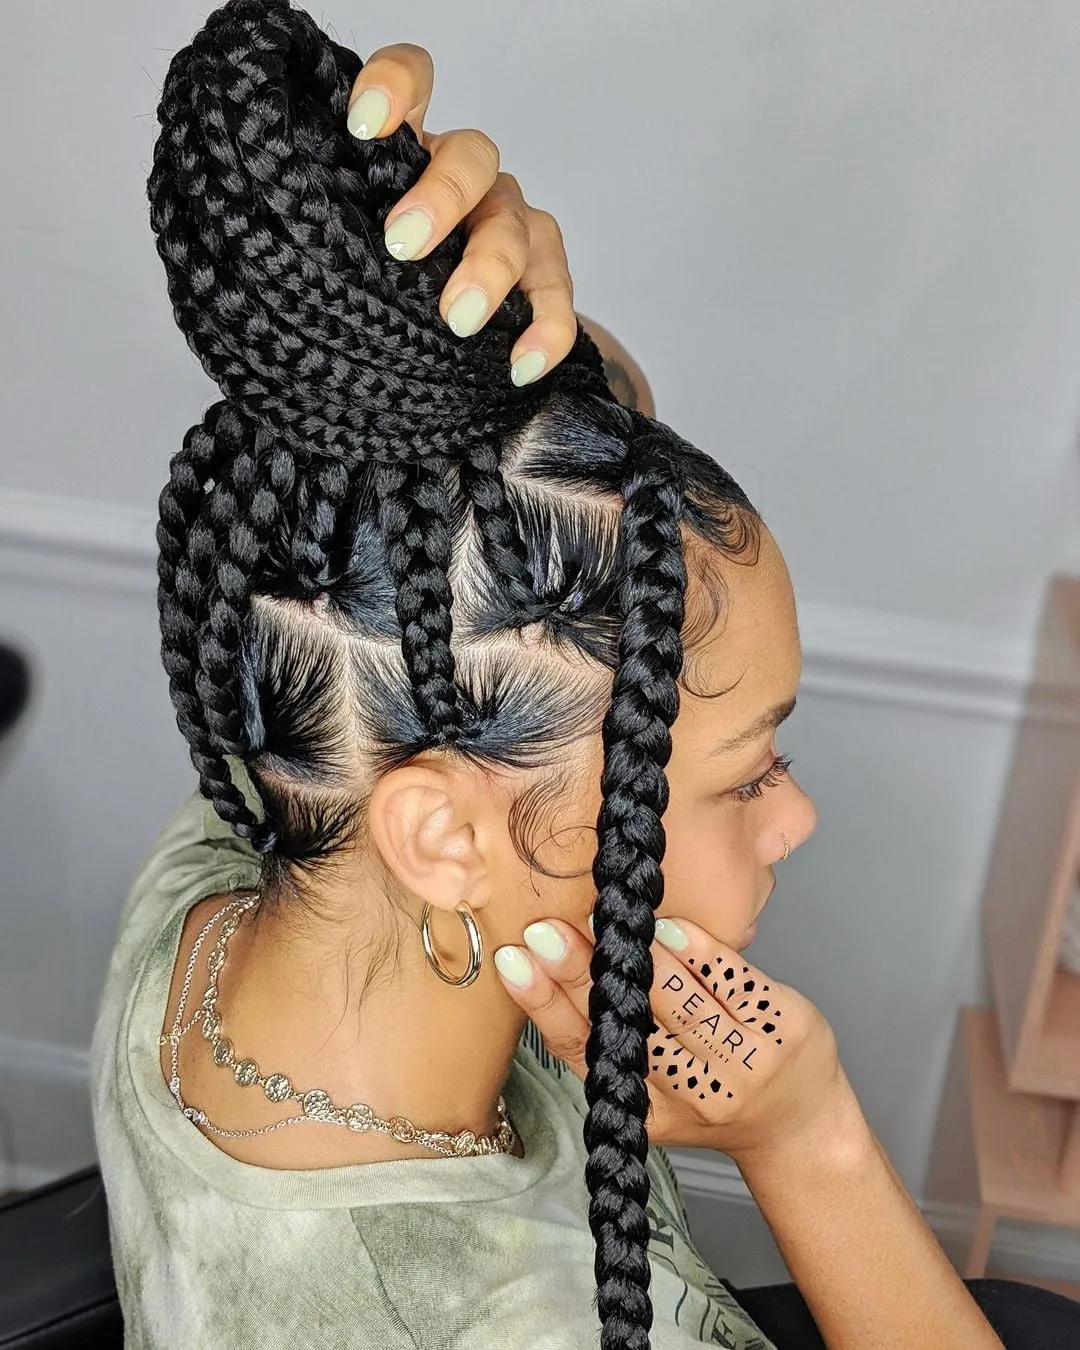
Jumbo knotless braids are the boldest size: big, chunky braids — often just six to ten across the head — that make a statement before you say a word. They are the quickest knotless style to install, taking two to three hours, and the lightest on the scalp, because there are fewer braids pulling at the roots. The look is dramatic and confident, and the large partings show off the knotless technique at its best, with flat, clean roots and no knots in sight.
Best for: thick hair, which can carry the weight of large braids, and for anyone short on time or trying knotless braids for the first time. How to style it: wear them down for maximum impact, or gather them into a high bun — a few big braids make a bun with real presence. Pros and cons: the install is fast and the style is light, but jumbo braids offer fewer styling options than medium ones, and the large partings show new growth sooner. Who should avoid it: if your hair is very fine, jumbo braids can look sparse — medium is a better fit. Quick verdict: maximum impact for minimum chair time.
5. Small Knotless Braids
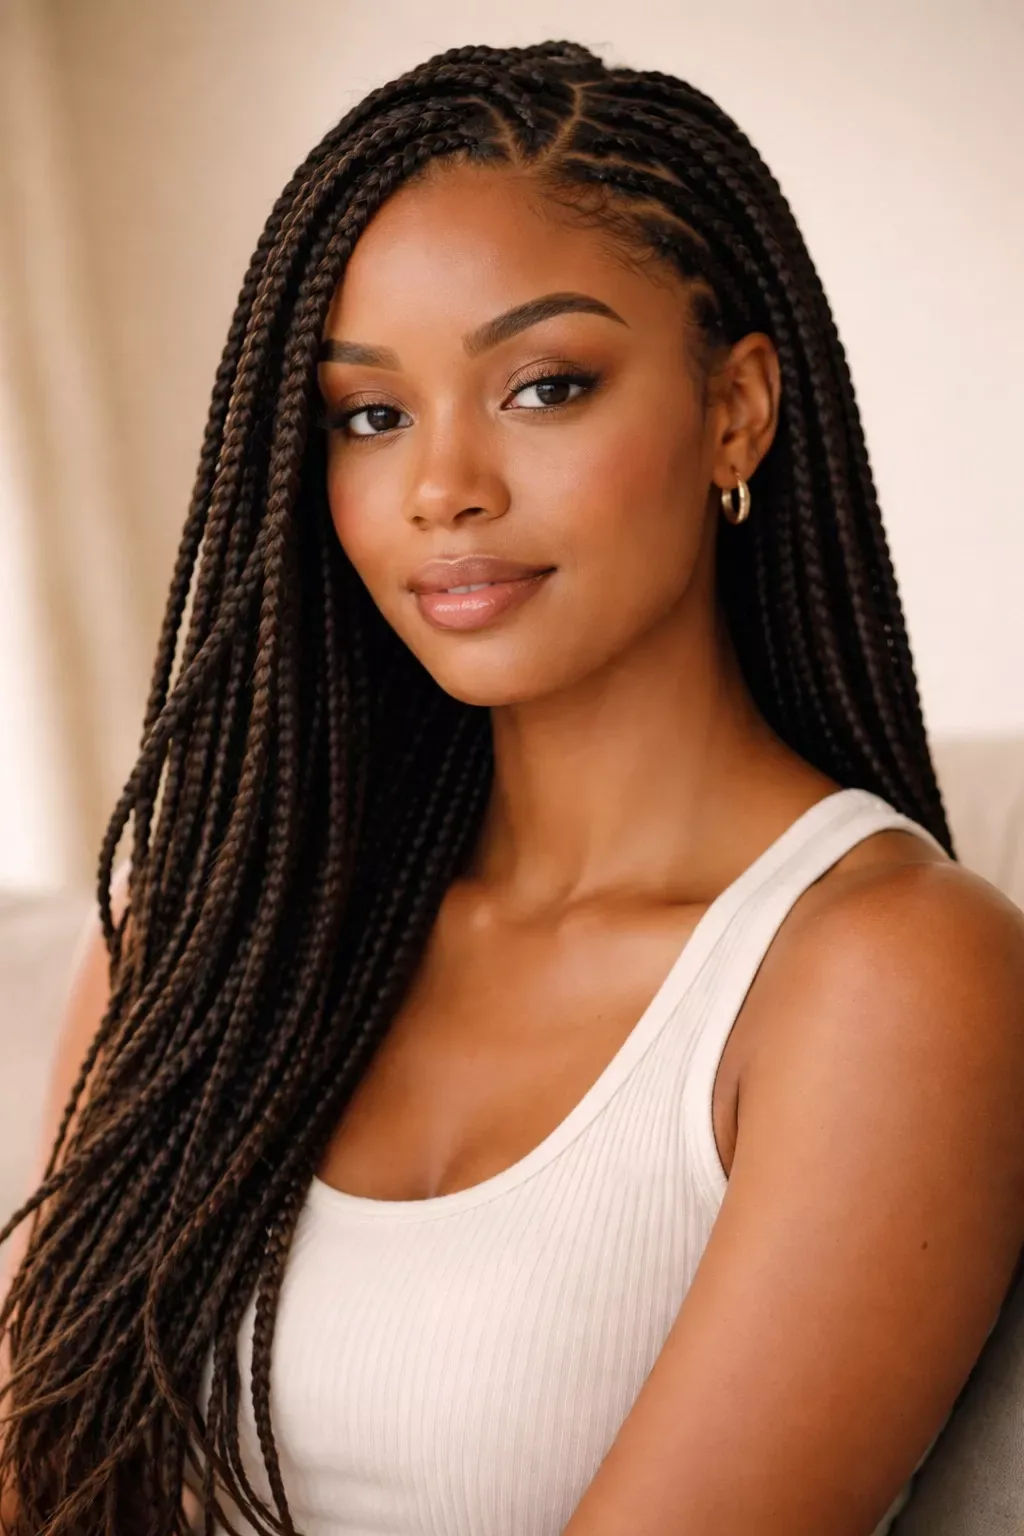
Small knotless braids are the finest, most delicate version of the style: forty or more thin braids that fall like a curtain of hair and move almost like natural hair. They are the closest knotless braids get to looking like your own hair — the partings are tiny, the braids are fine, and the whole head looks soft and flowing rather than structured. Small braids are also the most versatile: they can be styled into almost any updo, bun or ponytail, because there are so many of them to work with.
Best for: women who want the most natural-looking braids and the most styling freedom. How to style it: wear them loose, or try a high ponytail, a top knot, or a braided crown — small braids hold updos beautifully. Time and cost: six to eight hours and the highest price in this guide, so book a full day. Common mistake: choosing small braids on fragile edges — the sheer number of braids adds weight, so make sure your braider keeps the roots genuinely loose. Maintenance: small braids frizz faster at the roots, so a silk scarf at night is essential. Quick verdict: the most beautiful knotless braids, and the biggest commitment.
6. Medium Knotless Braids
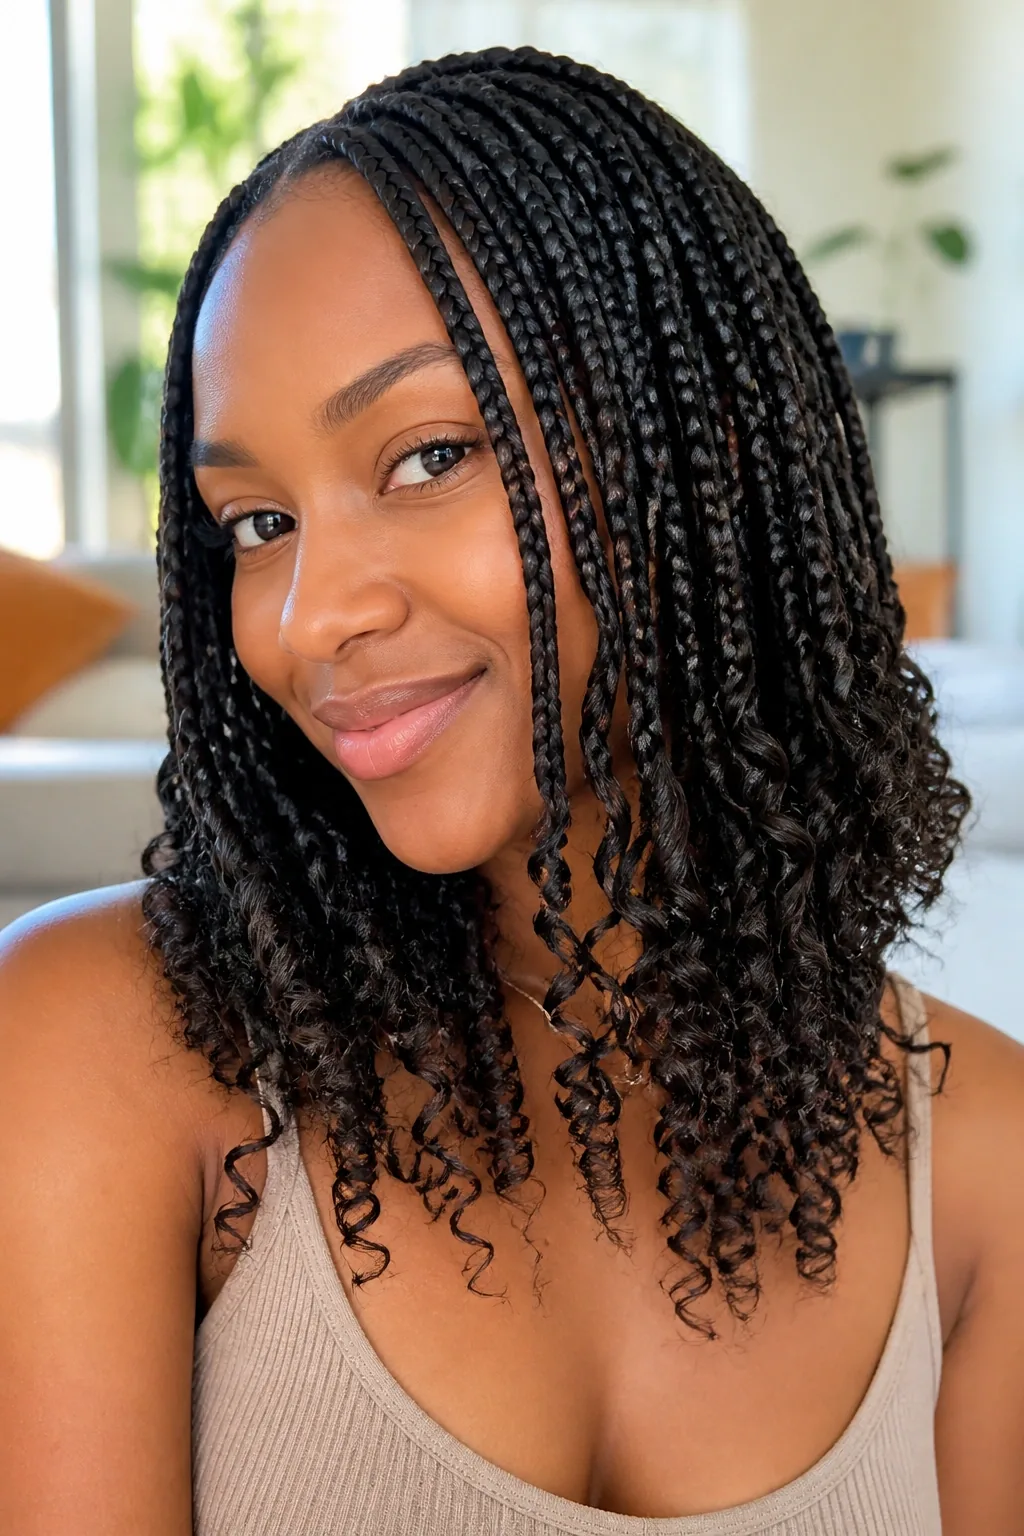
Medium knotless braids are the sweet spot and the most popular size for a reason: around twenty to thirty braids, big enough to install in a reasonable time, small enough to style in almost any way, and light enough to wear comfortably for weeks. They are the size that works for work, for weddings, for the gym and for everyday life — the knotless braid that does everything. If you are unsure which size to choose, medium is almost always the right answer.
Best for: every hair type and every occasion, and especially first-timers who want a reliable result. How to style it: down, in a low ponytail, in a bun, or half-up — medium braids do all of it without complaint. Pros and cons: the balance is the point — not as fast as jumbo, not as delicate as small, but better than either at everyday wear. Time and cost: four to six hours at a mid-range price. Maintenance: a scarf at night and a scalp oil twice a week keeps them neat for six to eight weeks. Quick verdict: the knotless size most women come back to, again and again.
7. Knotless Braids with Curly Ends
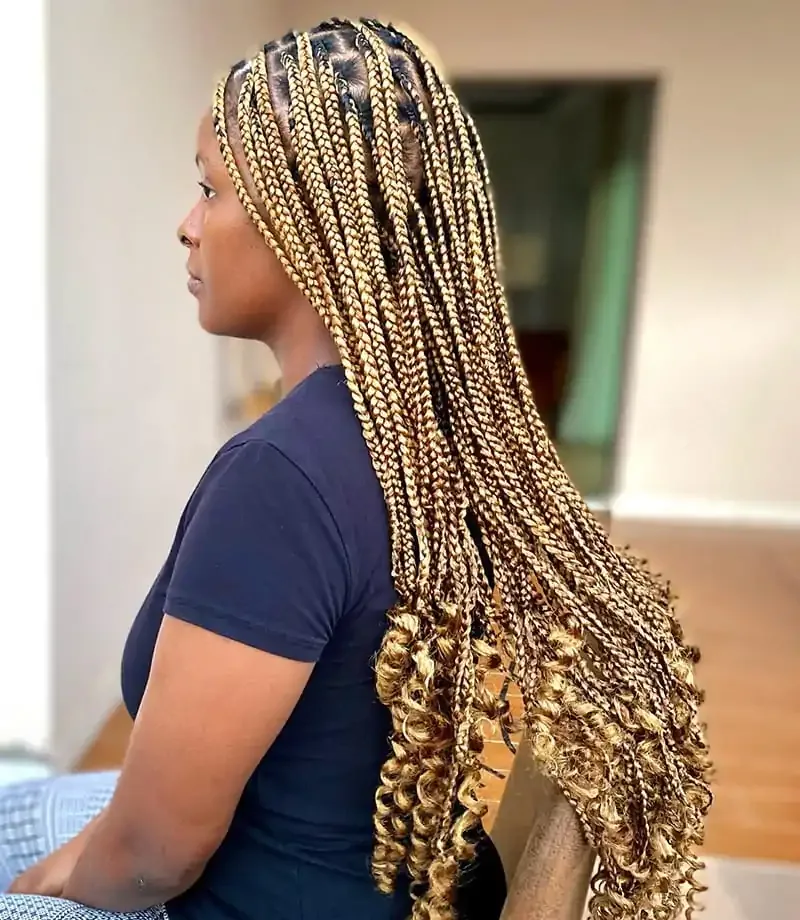
Knotless braids with curly ends are the softest finish you can give a braid: the braids run straight for most of their length, then the last few inches are left unbraided and curled, so the ends bounce and move instead of hanging straight. The curly ends soften the whole style, they stop the braids looking severe, and they give the hair a finished, romantic feel — like braids that were styled, not just installed. It is a small detail that changes the entire mood of the look.
Best for: long knotless braids, where the curly ends have room to show, and for anyone who finds straight braid ends too blunt. How to style it: ask your braider to leave the ends out and curl them with a wand, or use pre-curled extension hair for the same effect. Pros and cons: the ends look beautiful and move naturally, but they tangle more than braided ends and need a quick finger-detangle every day or two. Maintenance: a little leave-in conditioner on the ends keeps the curls defined. Cost: a small extra charge for the curling time. Quick verdict: the easiest upgrade to any knotless set.
8. Goddess Knotless Braids with Curls Throughout
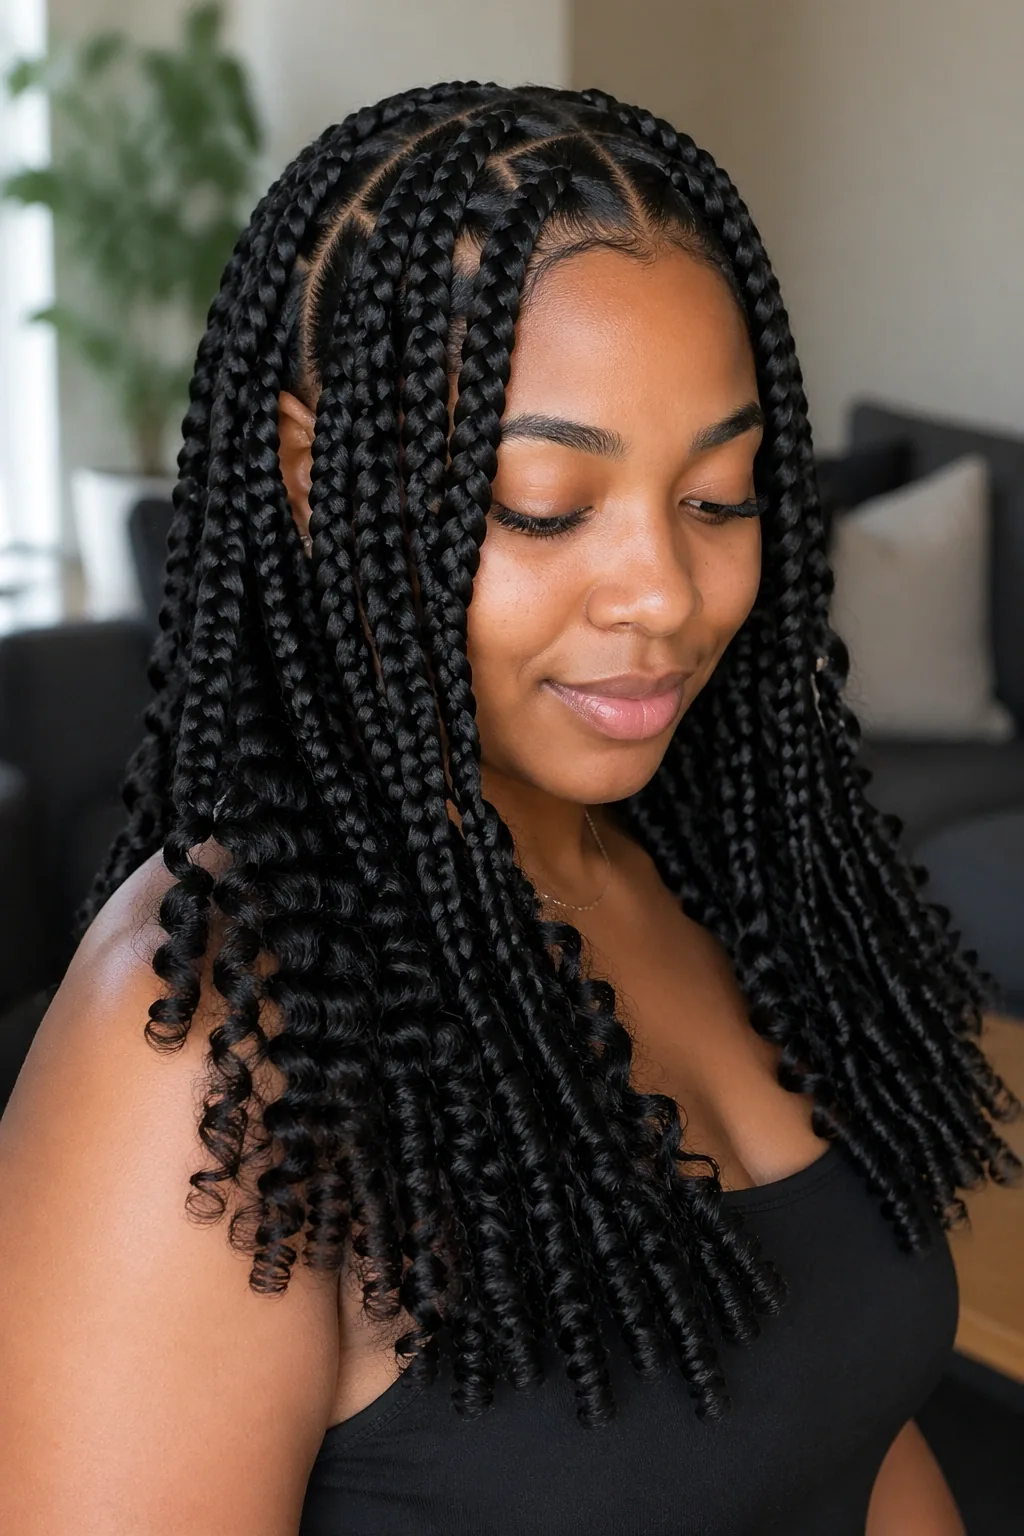
Goddess knotless braids — sometimes called boho goddess braids — take the boho idea further: curls are not just at the ends, they are left out all the way down the braids, so waves and curls spill out between the plaits from root to tip. The result is a full, voluminous, almost mermaid-like head of hair, half braids and half curls, that looks effortless and expensive at the same time. It is the knotless braid for special occasions, holidays and anyone who wants their hair to be the main event.
Best for: long hair and special occasions, and for women who love volume. How to style it: wear it down and let the curls fall — this style needs no updo to impress. Time and cost: an extra hour or two over a plain set, and a higher price, because the curls are hand-placed. Common mistake: using too much product on the curls, which weighs them down — a light mousse is enough. Maintenance: the curls need detangling and moisturising more often than plain braids, so this is a higher-maintenance style. Who should avoid it: if you need a neat, office-ready look every day, the curls may be too much — choose curly ends instead. Quick verdict: the most glamorous knotless braid in this guide.
9. Long Waist-Length Knotless Braids
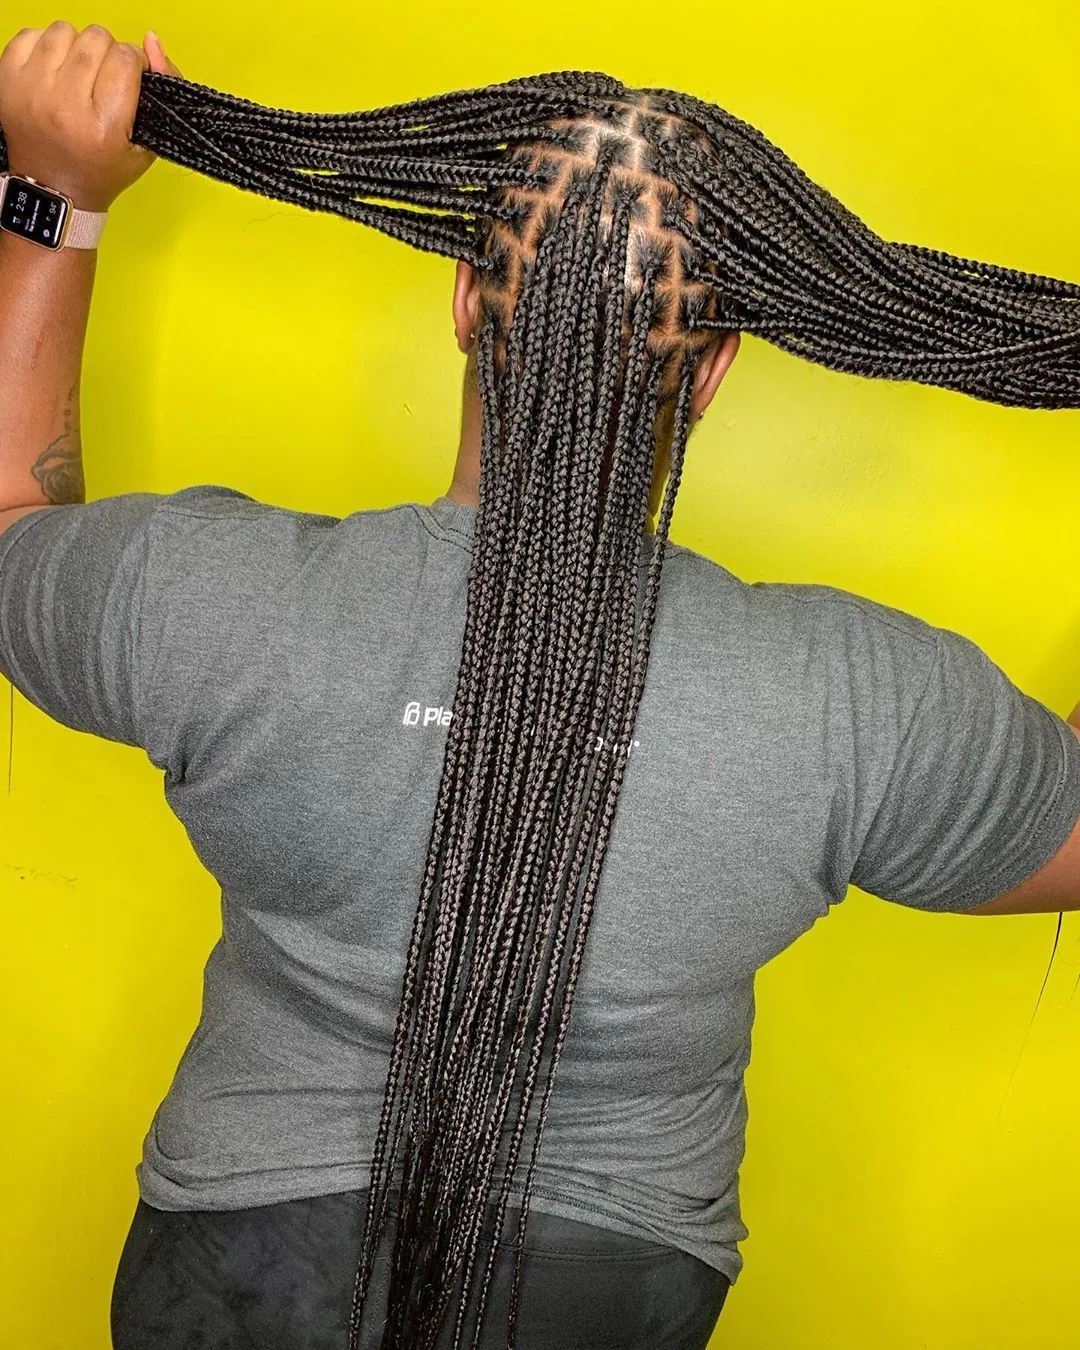
Waist-length knotless braids are drama in its purest form: braids that fall past the waist, moving like a curtain every time you turn your head. Long braids have always been the dream length for protective styles, and knotless makes them wearable, because the flat roots spread the weight instead of concentrating it at a knot. The length gives you endless styling options — long ponytails, thick buns, braids wrapped around the head — and a presence that short styles simply cannot match.
Best for: strong, healthy natural hair that can carry the weight, and for anyone who has always wanted very long hair. How to style it: wear it down for the full effect, or try a long, low ponytail or a thick side braid. Pros and cons: the look is spectacular, but long braids are heavy, they take longer to dry after washing, and they can catch on bag straps and chair backs. Time and cost: five to seven hours and a higher price, because of the extra hair. Maintenance: keep the ends moisturised and tie the braids up loosely at night. Who should avoid it: if your hair is fine or your neck aches easily, a shorter length will be kinder. Quick verdict: the most dramatic knotless braid — wear it when you want to be noticed.
10. Shoulder-Length Knotless Braids
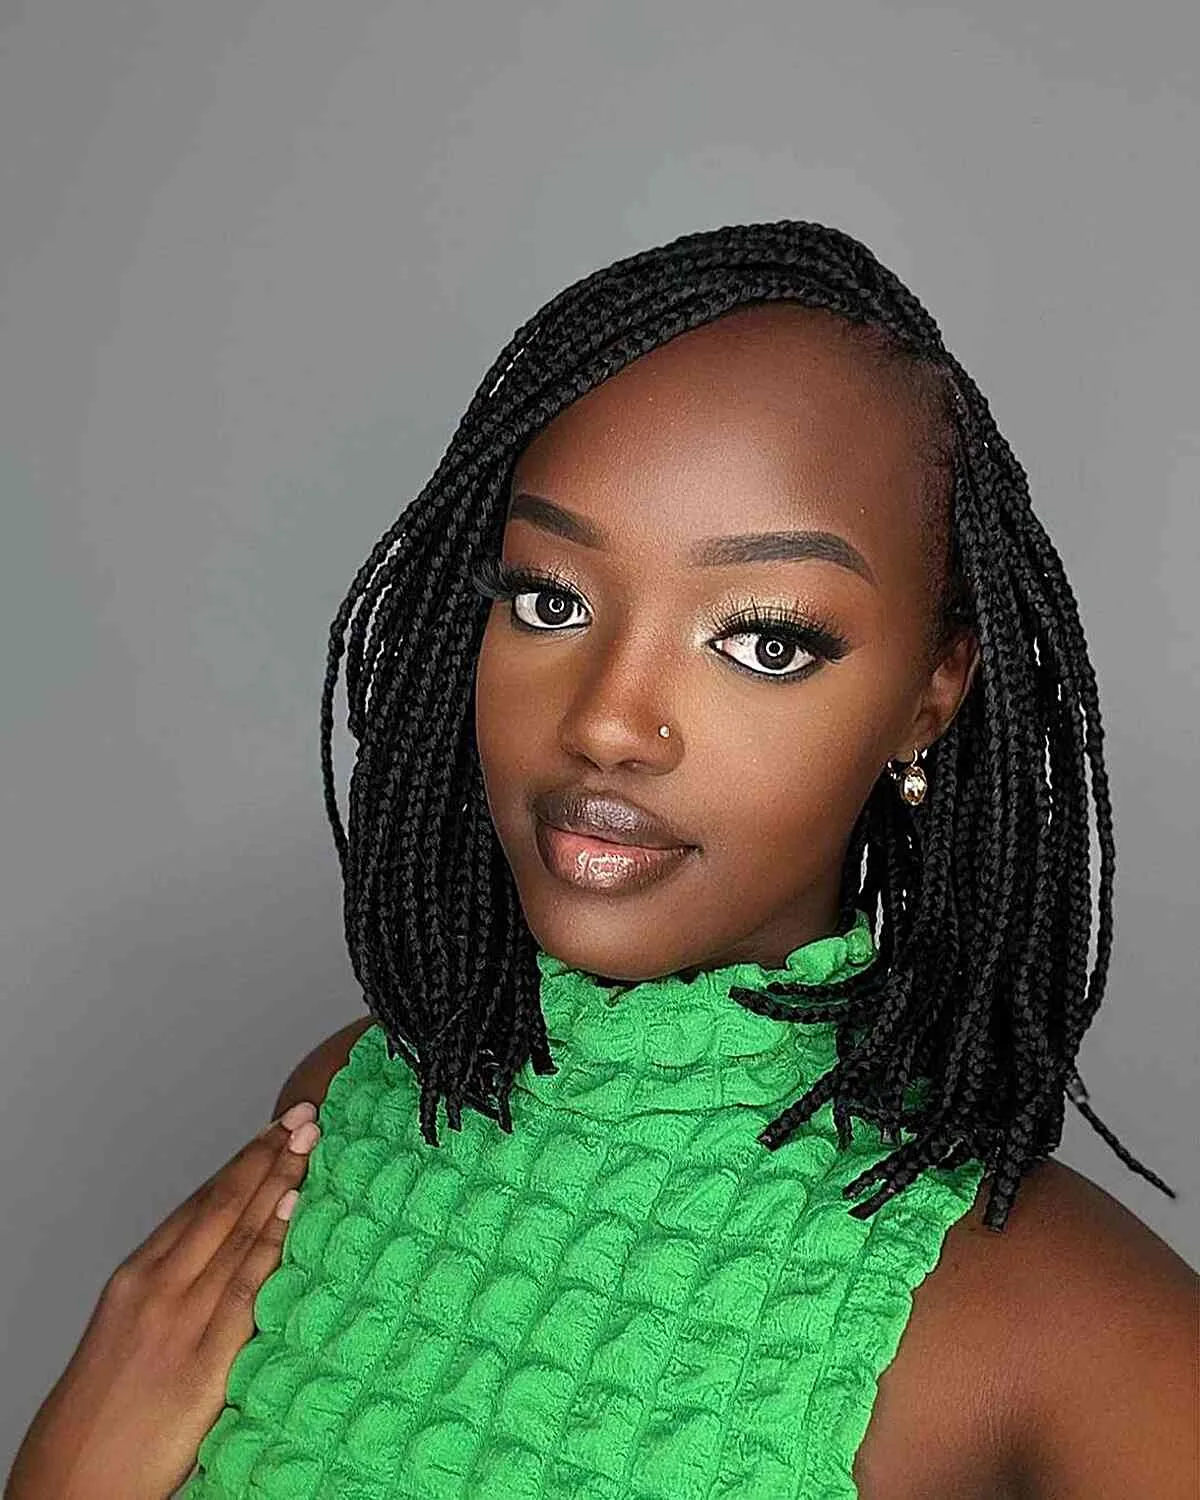
Shoulder-length knotless braids are the practical, everyday length: long enough to tie up, short enough to stay light, and neat enough for any occasion. They sit just on the shoulders, they do not get in the way, and they are the knotless length that suits the most lifestyles — work, the gym, school runs, holidays. It is the length that proves knotless braids do not have to be dramatic to be beautiful.
Best for: busy women, first-timers, and anyone who wants braids they can forget about. How to style it: wear it down with a middle part, or pull it into a small ponytail or a half-up style in seconds. Time and cost: three to five hours at a lower price than a long set. Pros and cons: the style is light, quick to wash and quick to dry, but it offers fewer dramatic updos than longer braids. Maintenance: almost none beyond a scarf at night. Common mistake: cutting the braids too short — shoulder length needs enough length to tie back, so ask for braids that just touch the shoulders. Quick verdict: the easiest knotless braid to live with.
11. Knotless Braids with Beads
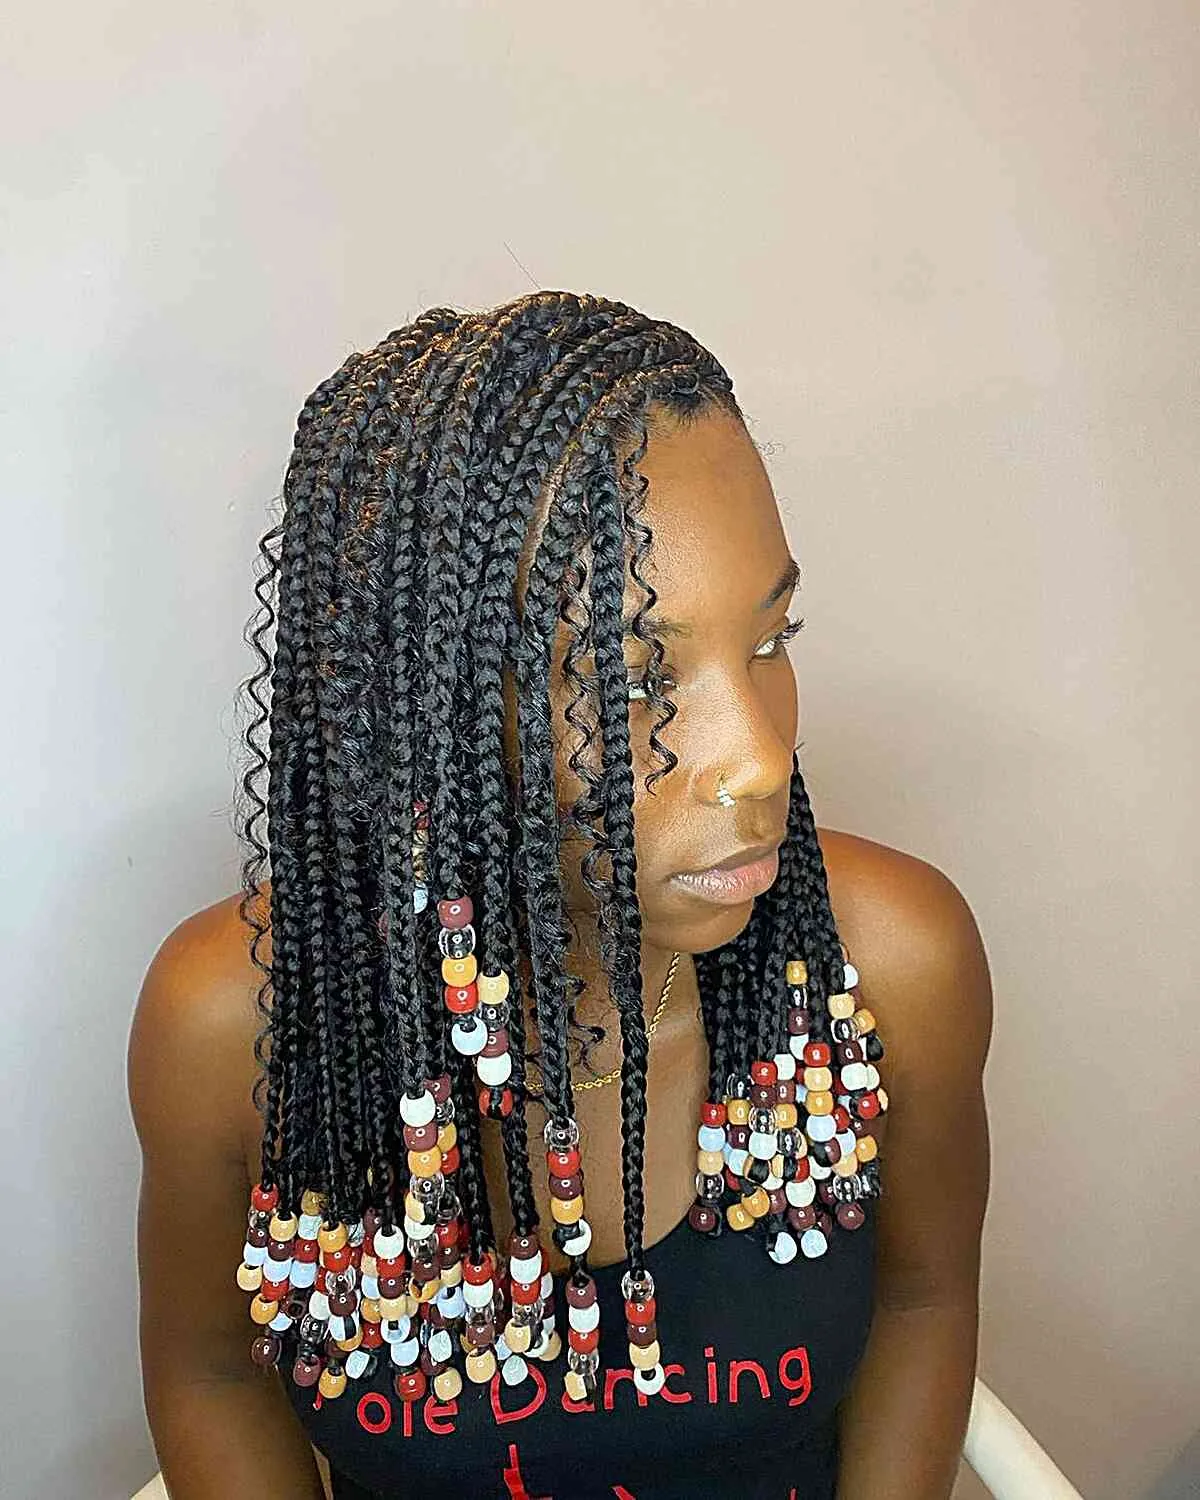
Knotless braids with beads are the playful, cultural classic: wooden, gold or coloured beads threaded onto the ends of the braids, so they click softly when you move and catch the light. Beads have been part of braided hairstyles for generations, and on knotless braids they add personality without adding weight — a few beads at the ends, or beads scattered through the braids, turn a plain set into something personal. The look is joyful, youthful and full of character.
Best for: holidays, festivals, and anyone who wants their braids to feel personal rather than plain. How to style it: ask your braider to add beads to the ends, or thread them on yourself at home — beads with a large enough hole slide on easily and can be secured with a small elastic. Pros and cons: beads are cheap, removable and endlessly customisable, but heavy beads can pull on the braids, so choose light wooden or plastic beads over heavy metal ones. Cost: a pack of beads costs very little. Who should avoid it: if you work in a very formal office, beads may be too casual — save them for the weekend. Quick verdict: the most fun knotless braid accessory.
12. Knotless Braids with Colour — Ombre and Bold Shades
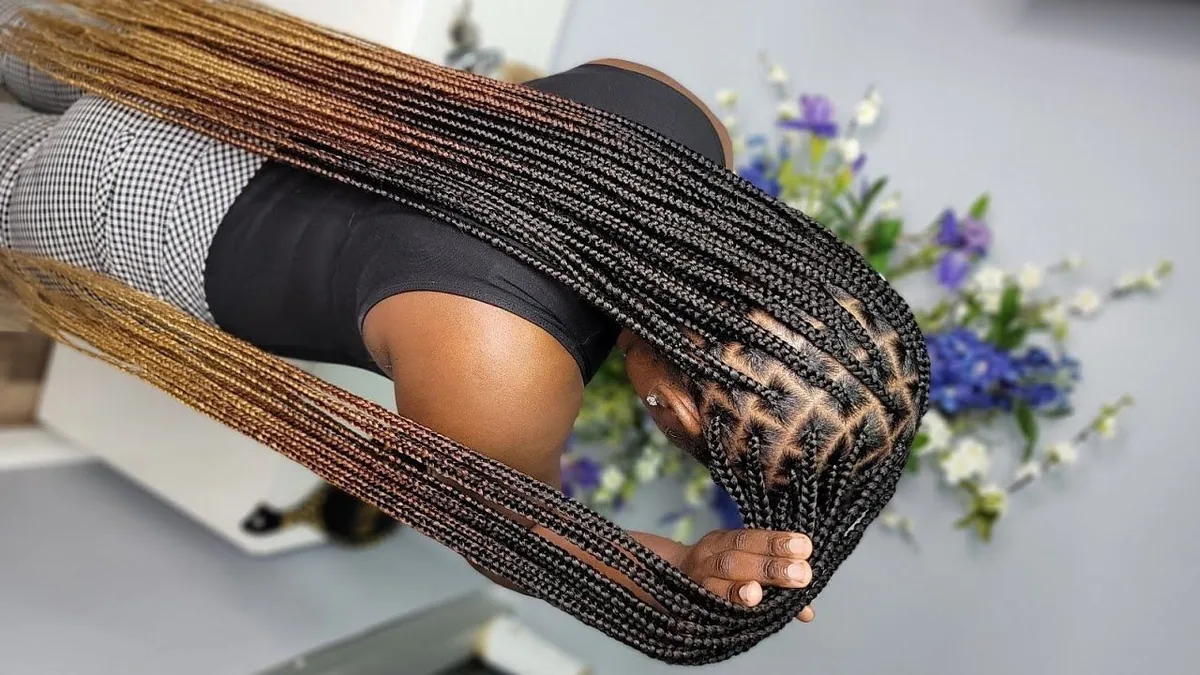
Knotless braids with colour are the easiest way to try a bold shade without touching your natural hair: the colour lives in the extension hair, so your own hair stays untouched. Ombre is the most popular choice — dark roots fading to honey blonde, auburn or burgundy at the ends — because it looks natural and grows out gracefully. But knotless braids also carry bold colour beautifully: burgundy, ginger, blonde, or a full head of copper, all without a drop of dye on your own hair.
Best for: anyone curious about colour, and for women who want a change without the commitment of dyeing their own hair. How to style it: choose an ombre for a natural look, or a solid bold shade for a statement, and agree the colour with your braider before the appointment. Pros and cons: the colour is completely reversible — take the braids out and your natural hair is unchanged — but coloured extension hair can look brassy as it ages, so choose a quality brand. Time and cost: coloured hair costs a little more than black, and blending two shades takes extra time. Common mistake: picking a colour that clashes with your skin tone — ask your braider to hold the hair against your face before you commit. Quick verdict: the safest way to go bold.
13. Knotless Braids with Highlights
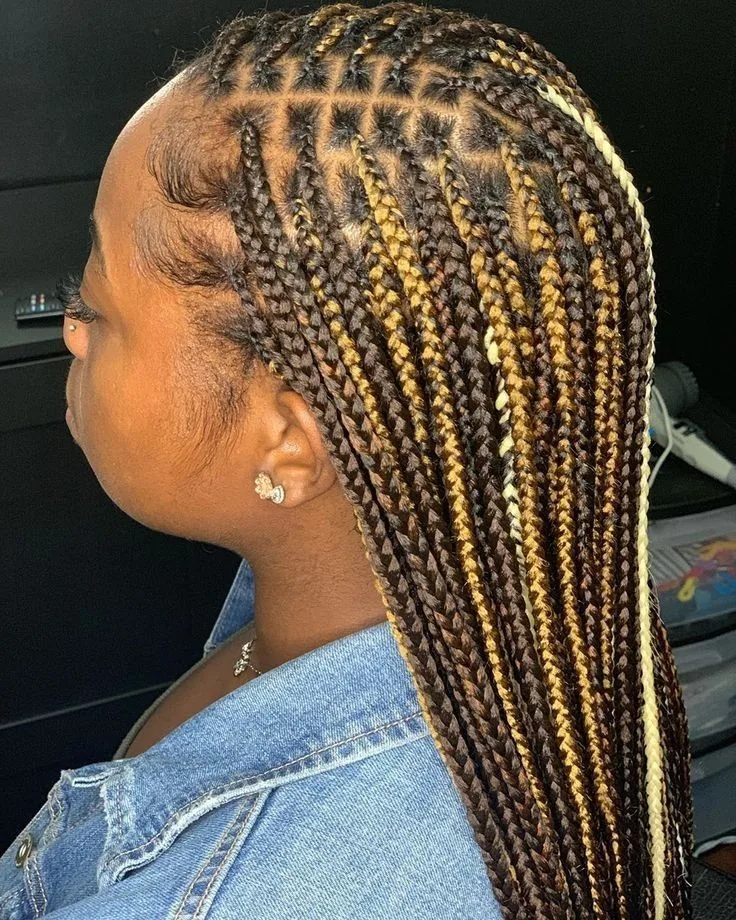
Knotless braids with highlights are the subtle version of coloured braids: instead of a full head of colour, a few braids — usually around the face and on top — are done in a lighter shade, so the whole head looks sun-kissed and dimensional. The highlights frame the face, they catch the light when you move, and they give plain black braids a lift without changing the overall look. It is the knotless braid for women who want colour but do not want to look coloured.
Best for: women who want a natural, dimensional look, and for anyone trying colour for the first time. How to style it: ask for face-framing highlights in honey blonde or caramel, with the rest of the braids in your natural shade. Pros and cons: the effect is soft and flattering, and it grows out invisibly, but the highlights need to be placed carefully — random light braids look patchy, while face-framing ones look deliberate. Maintenance: none beyond normal braid care. Cost: a small extra charge for the second shade of hair. Who should avoid it: if you want a dramatic change, highlights may be too subtle — go for a full ombre instead. Quick verdict: the most natural-looking colour in knotless braids.
14. Knotless Braids in a High Bun
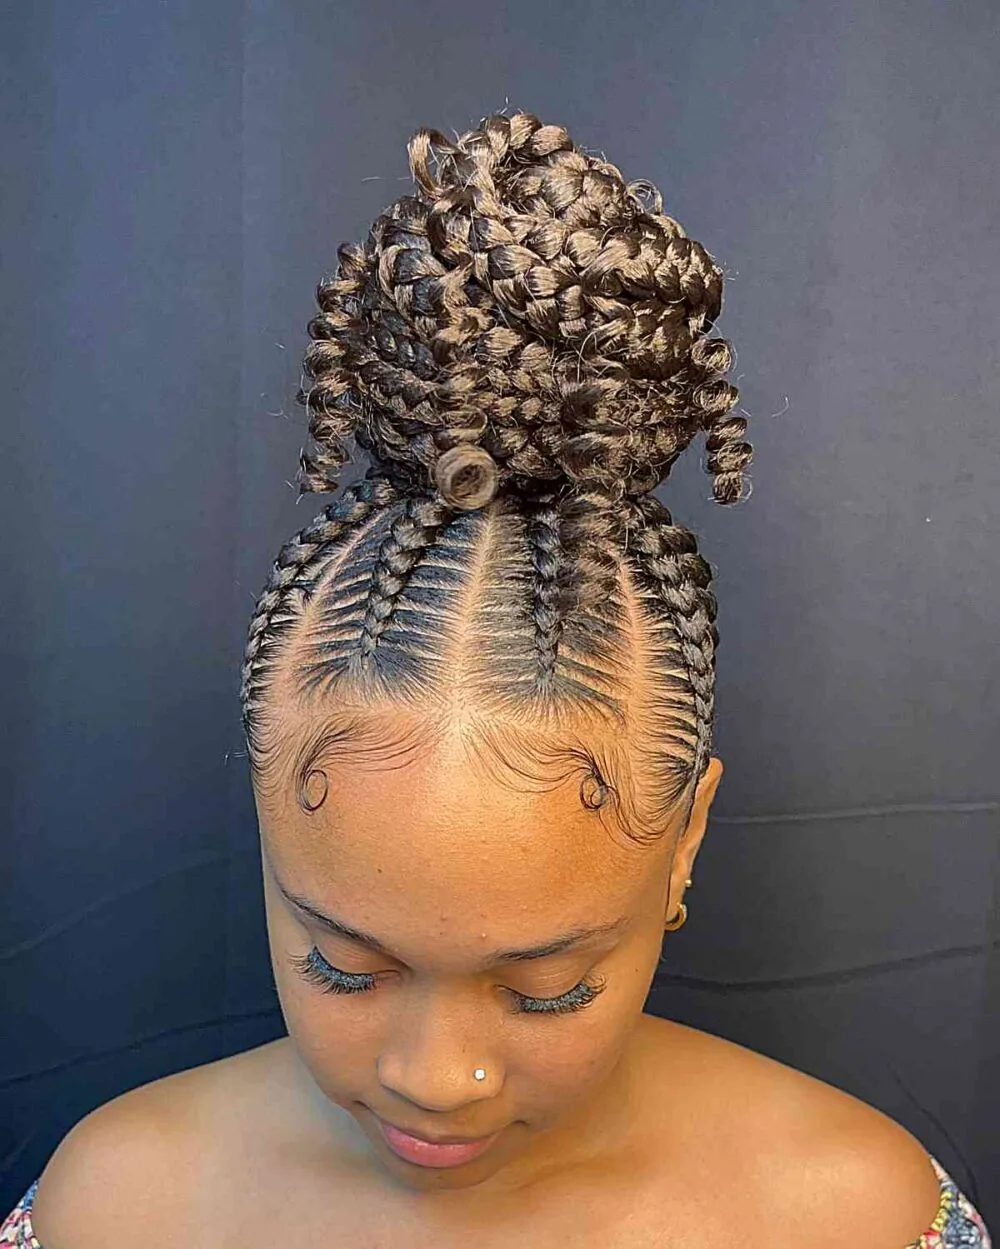
Knotless braids in a high bun are the updo that shows off the knotless technique best: because the roots lie flat with no knots, the braids gather smoothly into a bun without bumps or pulling, and the hairline stays soft and natural. A high bun made of knotless braids has real presence — a thick, sculpted knot on top of the head — and it keeps the hair completely off the neck, which makes it perfect for hot days, workouts and formal occasions alike.
Best for: hot weather, workouts, and formal events, where the hair needs to be fully up. How to style it: gather the braids loosely at the crown, twist them into a bun and pin it — do not pull it tight, because a tight bun defeats the purpose of knotless braids. Pros and cons: the bun is elegant and practical, but wearing it every day puts tension on the same spot, so vary your styles. Time: two minutes once the braids are in. Common mistake: wrapping the bun too tightly and too high every day — give your edges a rest with a low bun or loose braids on alternate days. Quick verdict: the most elegant knotless updo.
15. Knotless Braids Half-Up Half-Down
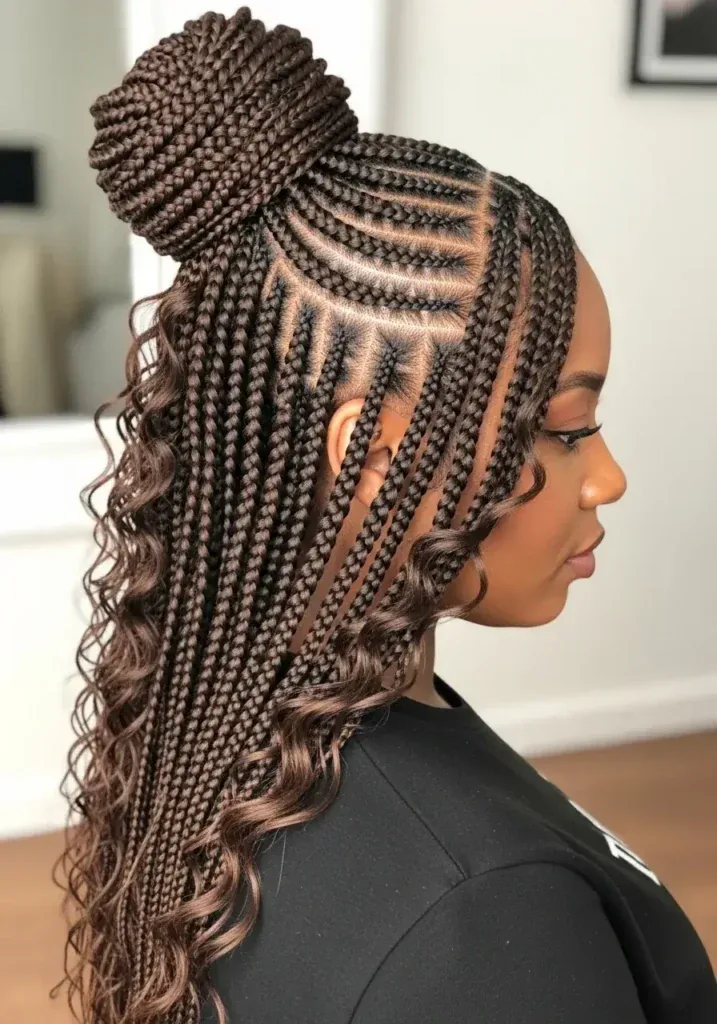
Knotless braids half-up half-down are the best of both worlds: the top half of the braids is gathered up and tied, while the rest falls loose, so you get the polish of an updo and the freedom of wearing your hair down. It is the knotless style for date nights, parties and days when you want to look done without trying too hard — and because the roots are flat, the half-up section sits smoothly with no bumps. The style works at any length, from a bob to waist-length braids.
Best for: date nights, parties, and anyone who loves wearing their hair down but wants it out of their face. How to style it: take the top section of braids from each temple, gather them at the crown and tie with a scrunchie or a gold cuff, leaving the rest loose. Maintenance: the loose braids can be refreshed with a quick shake in the morning. Pros and cons: it is quick, flattering and versatile, but the tie can leave a dent in the braids if it is too tight — use a silk scrunchie. Time: one minute. Quick verdict: the knotless style for when you cannot decide between up and down.
16. Knotless Braids with Laid Edges and Baby Hairs
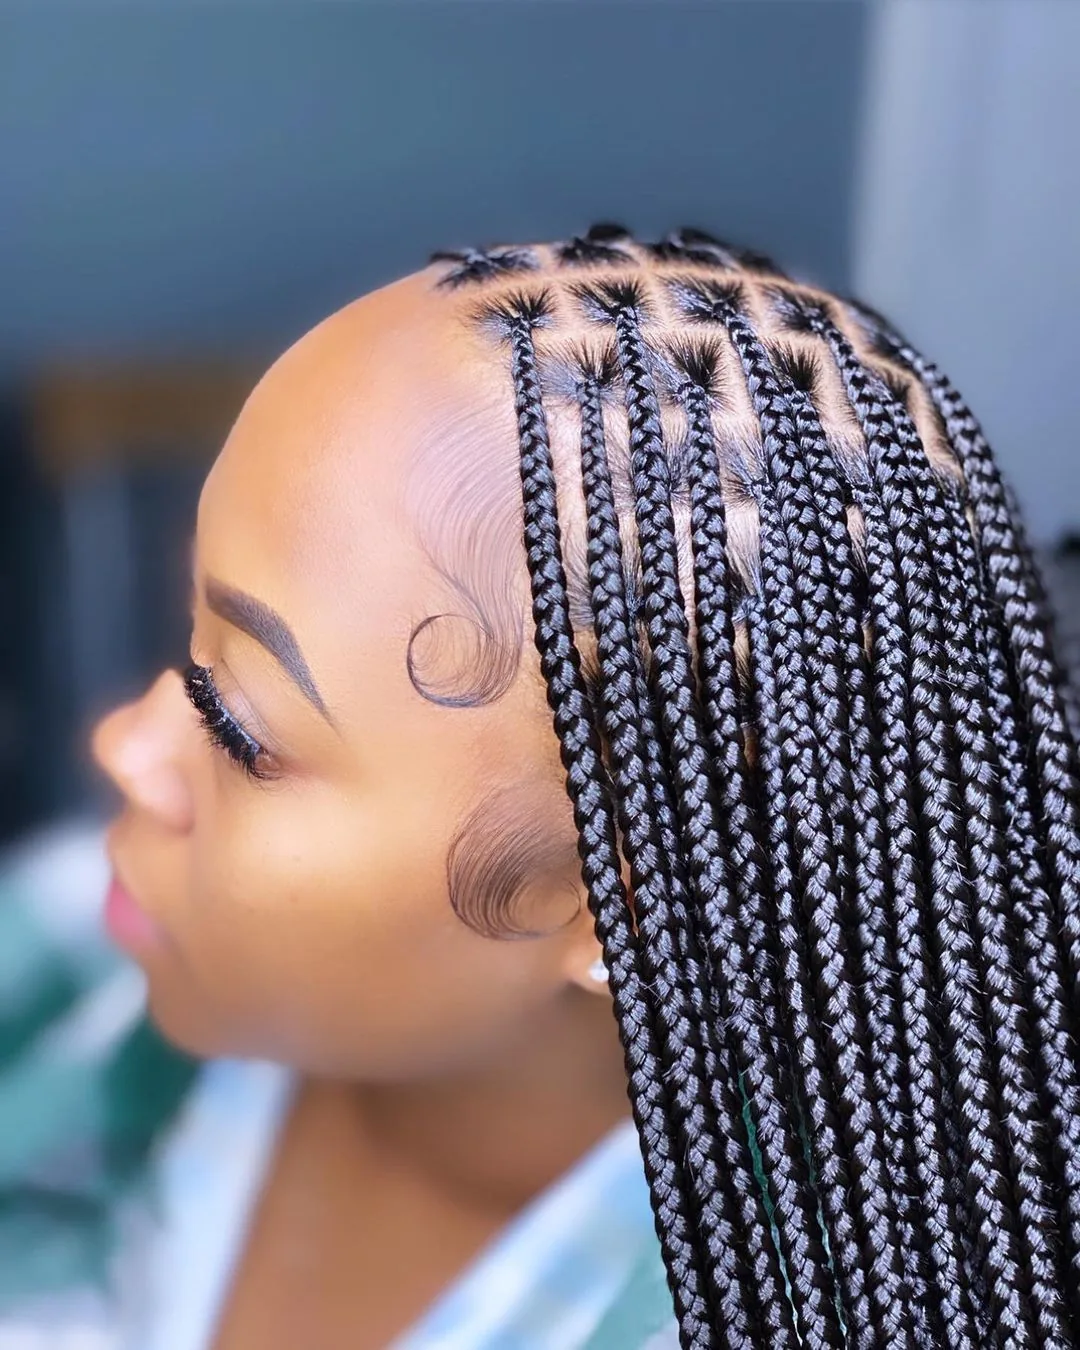
Knotless braids with laid edges are the finishing touch that makes the whole style look polished: the baby hairs around the hairline are brushed into soft swoops and curls with a little edge control, framing the face and softening the parting. The knotless technique already gives a softer hairline than box braids, and laid edges complete the look — the combination is why knotless braids photograph so beautifully from the front. The edges are the frame; the braids are the picture.
Best for: anyone who loves a polished, finished look, and for photographs and special occasions. How to style it: use a small amount of edge control on a soft toothbrush or edge brush, swoop the baby hairs into curves, and tie a silk scarf over the hairline for ten minutes to set them. Pros and cons: laid edges elevate the whole style, but too much edge control causes build-up and can damage the baby hairs — use a pea-sized amount and wash it out regularly. Common mistake: brushing the edges too hard or using gel every day. Who should avoid it: if your edges are fragile or thinning, skip the daily edge control and let the knotless roots speak for themselves. Quick verdict: the finishing touch, not a daily requirement.
17. Knotless Braids for Fine or Thin Hair
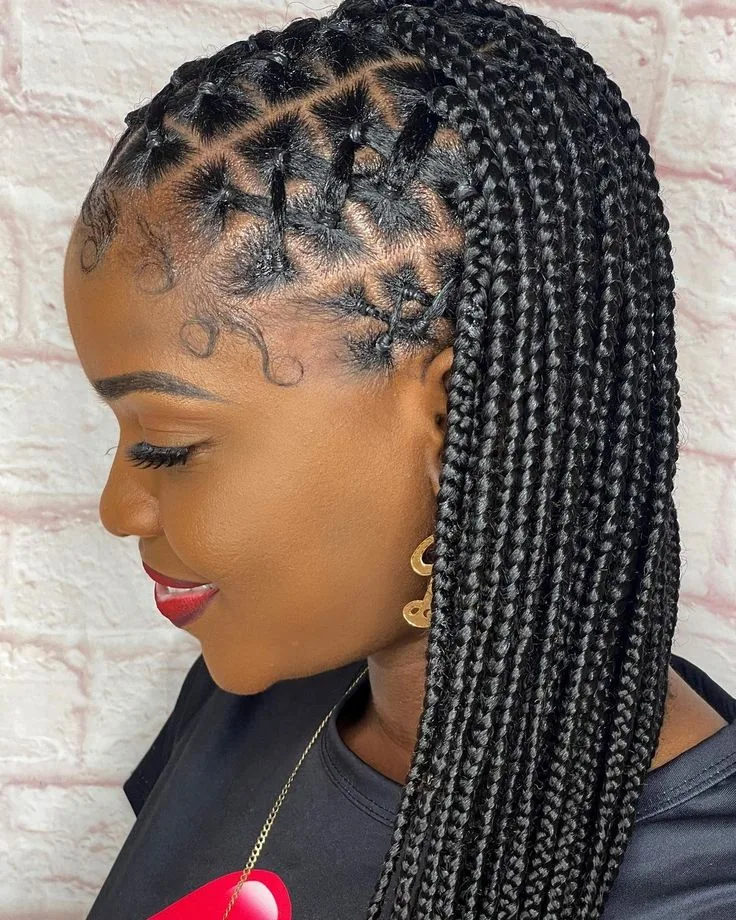
Knotless braids for fine or thin hair are proof that protective styles are not only for thick hair: because there is no knot pulling at the root, knotless braids are actually the safest braided style for fine hair. The key is size and weight — medium braids, not small, and a length that does not drag on the roots. With the right install, fine hair gets the same long, full look as thick hair, and the braids protect the natural hair underneath while it grows.
Best for: fine, low-density hair, and for anyone whose edges have suffered from tight braids in the past. How to style it: ask for medium braids, a shoulder-to-mid-back length, and roots that feel snug but never painful. Pros and cons: the style is light and protective, but fine hair shows the partings more, so neat parting matters — choose a skilled braider. Maintenance: keep the scalp oiled and do not leave the braids in past six weeks, because fine hair tangles at the roots more easily. Common mistake: choosing small, long braids on fine hair — the weight pulls on roots that cannot carry it. Quick verdict: fine hair can wear knotless braids — it just needs the right size.
18. Knotless Braids for Thick Hair
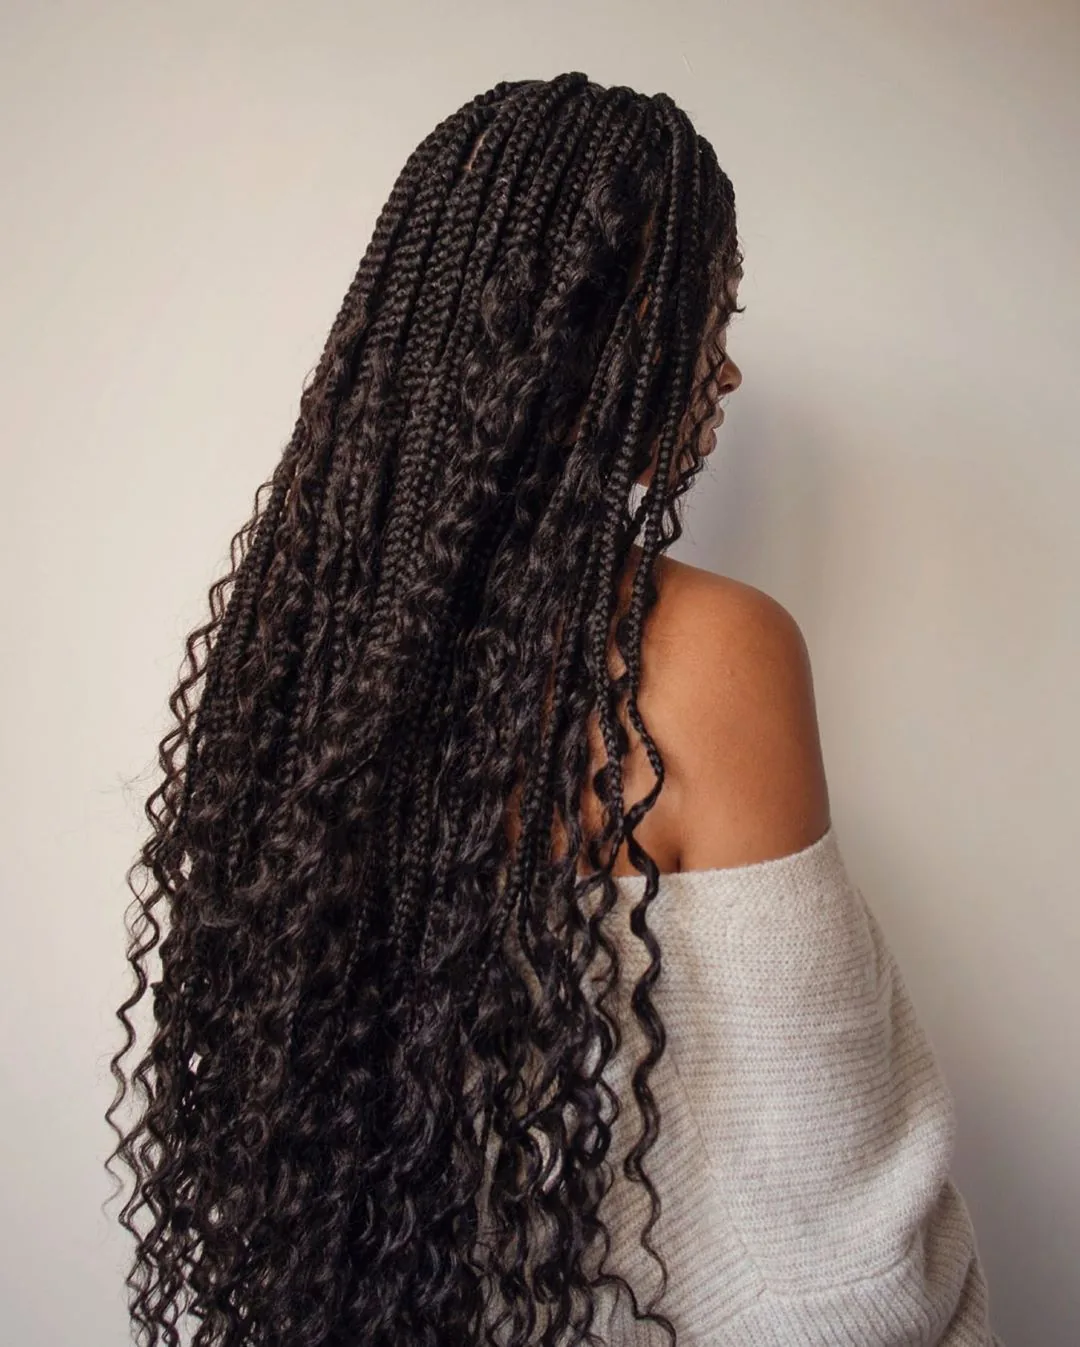
Knotless braids for thick hair are the style at its fullest: thick natural hair makes thick, full braids, and the knotless technique means the crown sits flat even though there is a lot of hair underneath. Thick hair holds knotless braids beautifully — the braids stay neat, the roots stay strong, and the finished head of hair has a volume that fine hair can only dream of. The challenge is not the braids but the weight: a full head of thick knotless braids is heavy, and it needs to be installed with that in mind.
Best for: thick, dense natural hair, where the braids are naturally full and dramatic. How to style it: medium or jumbo braids work best — small braids on thick hair take forever and add unnecessary weight. Pros and cons: the volume is spectacular and the braids last well, but the style is heavy, so vary your updos and do not wear a tight high bun every day. Time: five to seven hours, because thick hair takes longer to part and braid. Maintenance: wash carefully and dry thoroughly, because thick braids hold water. Who should avoid it: nobody — thick hair is knotless braids’ best friend. Quick verdict: the fullest knotless braids in this guide.
19. Knotless Braids for Short Natural Hair
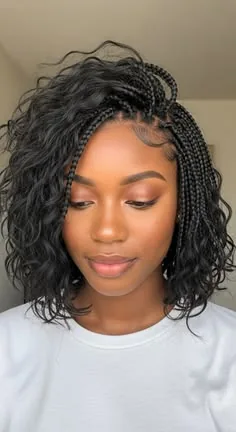
Knotless braids for short natural hair are the style that proves you do not need long hair to wear braids: the braider starts with your short natural hair and feeds in the extensions, so the braids can be any length you like, even if your own hair is only a few inches long. The knotless technique is actually ideal for short hair, because there is no knot to slip off a short root — the braid grips the natural hair from the very start. Short-haired women get the same long, flowing braids as everyone else.
Best for: short natural hair, TWA lengths, and anyone growing out a short cut. How to style it: ask for a bob or shoulder-length set first — long braids on very short hair can feel heavy until you are used to them. Pros and cons: the style is transformative and protective, but the braids need enough natural hair to grip — about two to three inches is the minimum for a secure install. Time and cost: four to five hours at a standard price. Common mistake: choosing waist-length braids on a first install — start shorter and go longer next time. Quick verdict: short hair is no barrier to knotless braids.
20. Knotless Braids for Natural 4C Hair
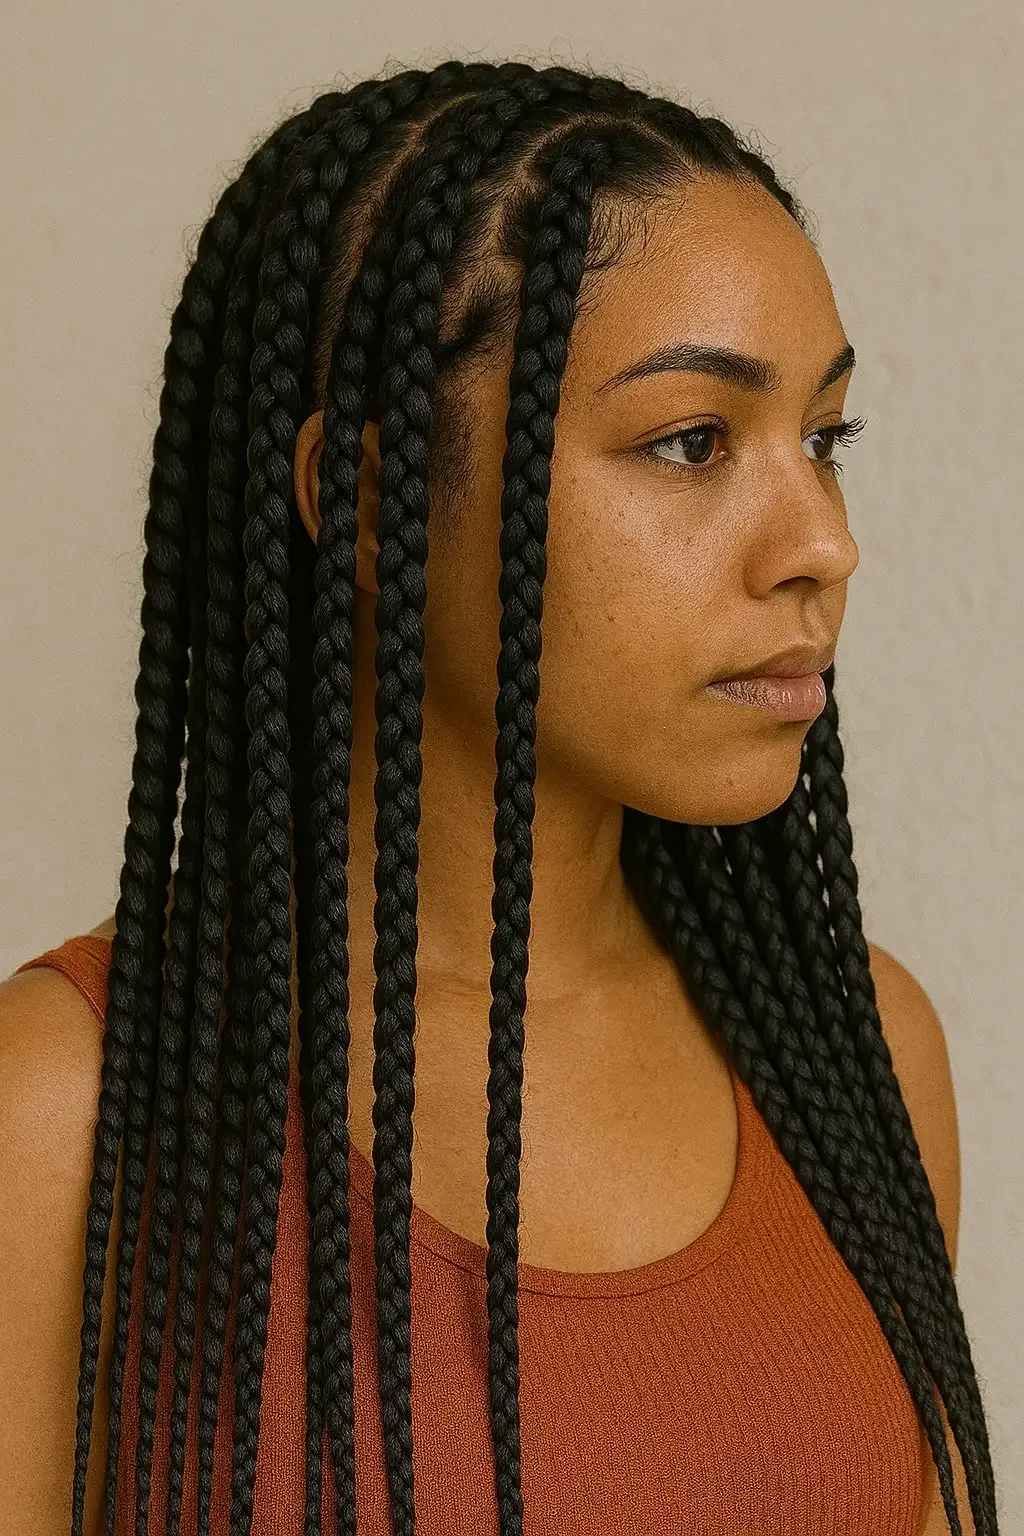
Knotless braids for natural 4C hair are the protective style doing exactly what it was made for: 4C hair is the most fragile hair type, with tight coils that tangle easily and break if they are handled roughly, and knotless braids protect it by keeping it stretched, tucked away and untouched for weeks. The flat roots are especially kind to 4C hair, because there is no knot pulling on the delicate hairline, and the braids give the hair a long rest from daily manipulation, heat and styling.
Best for: 4C and coily natural hair, and for anyone growing out their natural hair. How to style it: prep is everything — wash, deep-condition, detangle and stretch the hair before the appointment, and agree a size that suits your density. Pros and cons: the protection is real — many women retain the most length with knotless braids — but the install takes longer on coily hair, because parting and stretching take time. Maintenance: oil the scalp twice a week and do not leave the braids in past eight weeks. Common mistake: skipping the deep-condition before braiding — braids lock in whatever moisture level you start with. Quick verdict: the protective style 4C hair deserves.
21. Knotless Braids with a Middle Part
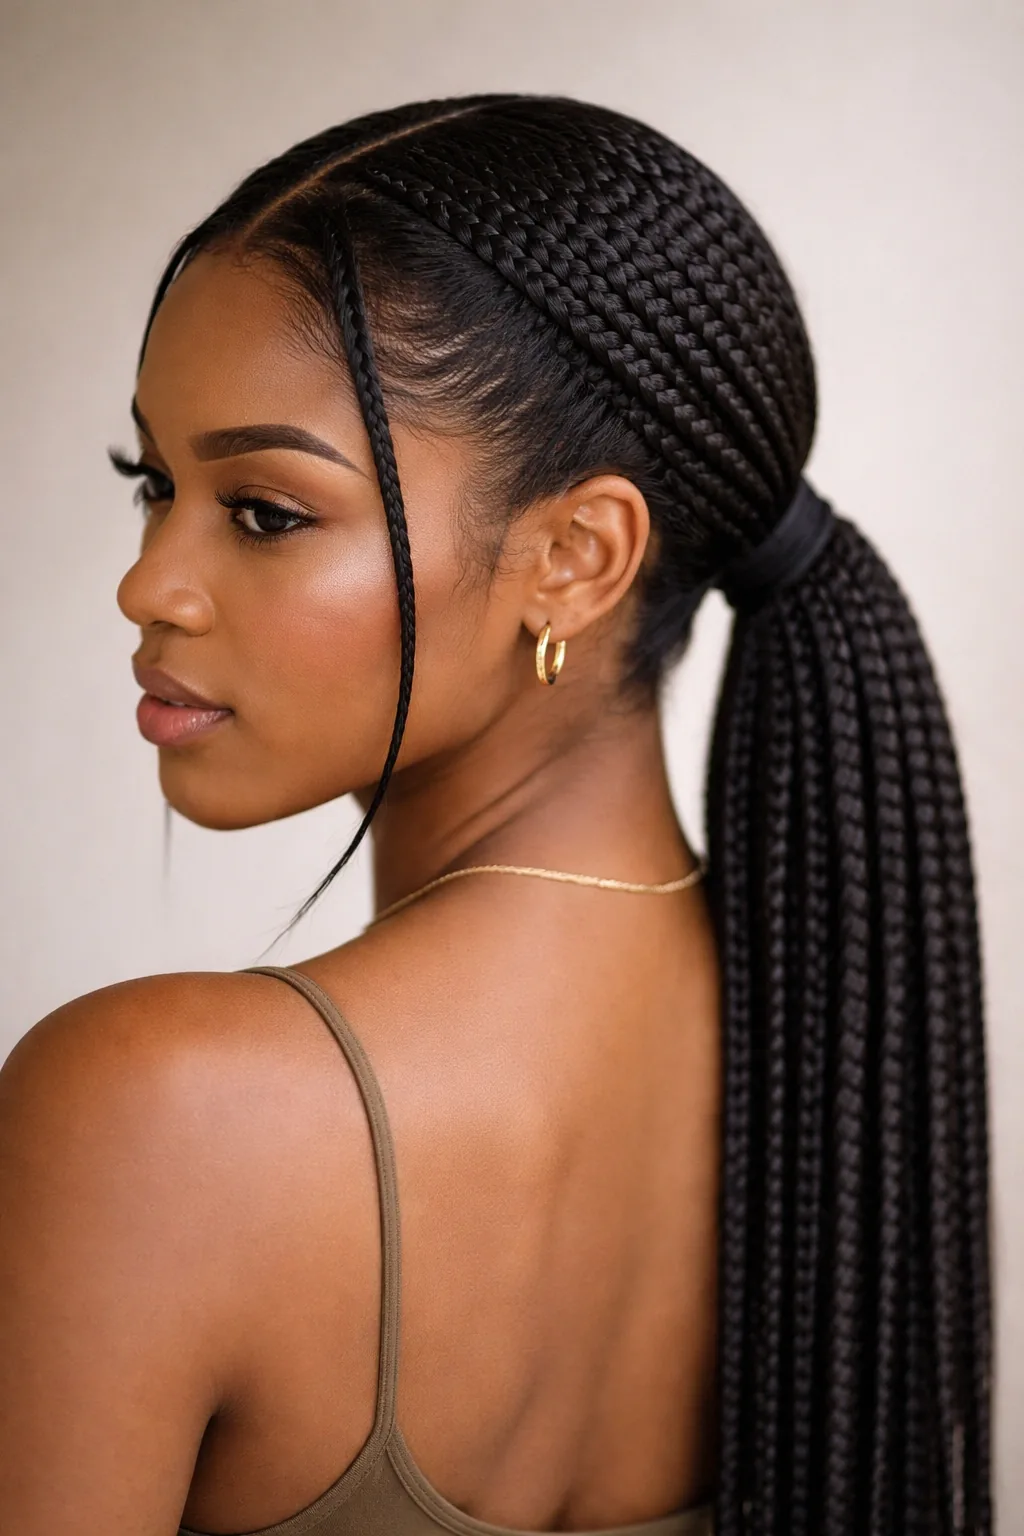
Knotless braids with a middle part are the most symmetrical version of the style: the hair is parted exactly down the centre, the braids fall evenly on both sides, and the whole look has a clean, balanced, almost regal quality. The middle part shows off the knotless roots at their best — flat, neat partings with no knots — and it frames the face evenly, which suits the features perfectly. It is the knotless braid as it is most often photographed, and for good reason.
Best for: oval and heart-shaped faces, where symmetry flatters the features, and for formal occasions. How to style it: part the hair with the tail of a comb, straight down the middle, and ask your braider to keep the centre parting crisp. Maintenance: the part needs to be set while the hair is damp so it stays straight. Time and cost: no extra time — the part is part of the install. Who should avoid it: a middle part can emphasise asymmetry in the face, so if your features are noticeably uneven, a side part will flatter you more. Quick verdict: the classic, balanced knotless braid.
22. Knotless Braids with a Side Part
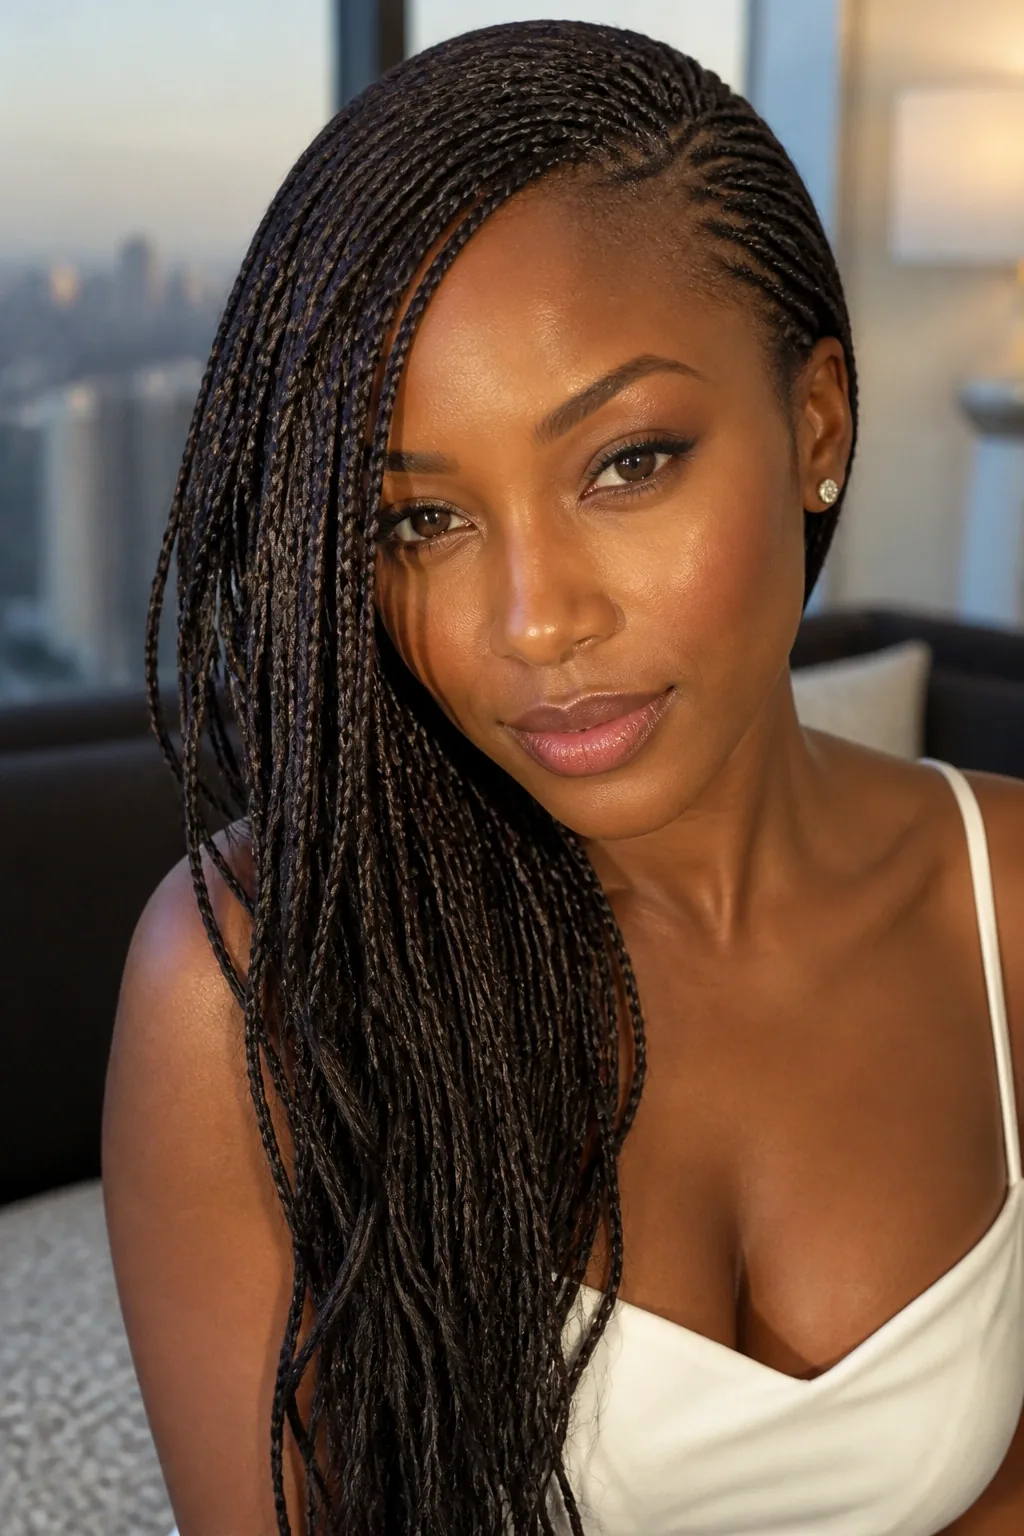
Knotless braids with a side part are the glamorous version of the style: a deep part on one side sweeps the braids across the forehead, gives the look an asymmetric line, and adds volume on one side — so the whole style feels more dramatic and more polished than the symmetrical middle-part version. The side part changes everything: it creates a sweeping diagonal across the face, it adds height on one side, and it gives knotless braids an old-Hollywood quality that suits an evening out.
Best for: round and square faces, where the diagonal sweep breaks up the symmetry and softens a strong jaw. How to style it: ask your braider for a deep side part before they start, and wear the heavier side swept forward over one shoulder. Pros and cons: the side part is more flattering for most faces than a middle part, but the two sides will be uneven in volume — embrace that, it is what makes the style look glamorous. Time: no extra time. Cost: no extra cost. Quick verdict: if you want your knotless braids to feel instantly more glamorous, part them on the side.
23. Knotless Braids with a Fringe
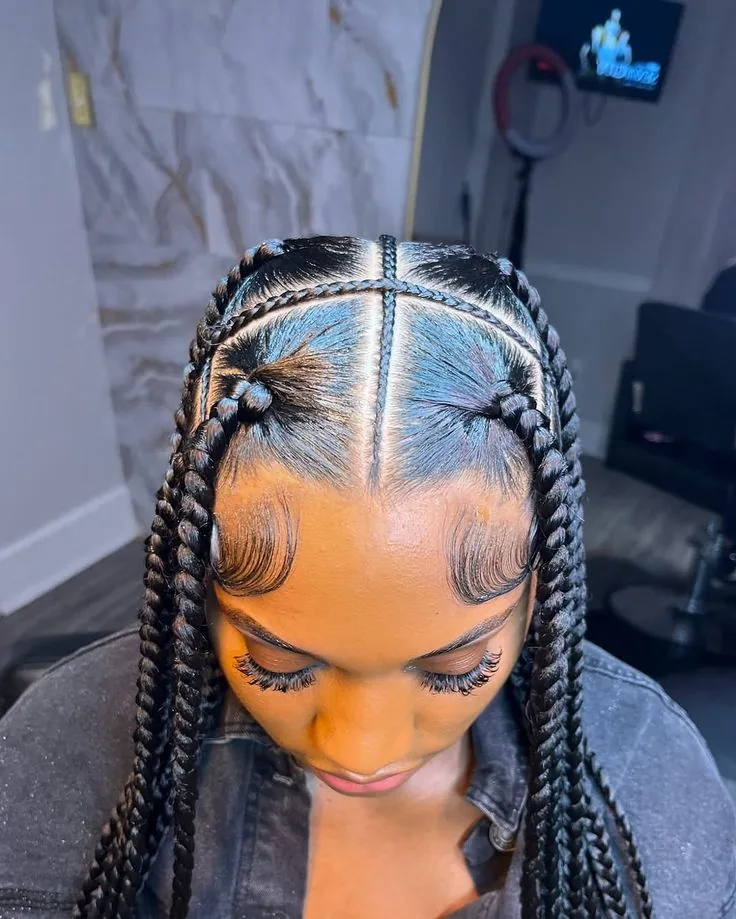
Knotless braids with a fringe are the softest, most youthful version of the style: a fringe of braids — or a few short braids — falls across the forehead while the rest of the braids fall past the shoulders, so the face is framed twice. The fringe breaks up the length of the braids, gives the face a frame, and adds a playful touch that suits almost everyone. It can be blunt and straight across, or swept to one side, blending into the longer braids.
Best for: long and oval faces, where the fringe shortens the forehead and balances the length. How to style it: ask your braider to make the front braids shorter, ending at the eyebrows, and to cut them in a soft, slightly uneven line rather than a hard straight edge. Maintenance: the fringe needs the most attention — it frizzes first in humidity, so a little leave-in in the morning keeps it smooth. Pros and cons: the fringe is flattering and fun, but it limits updos, because the short braids cannot be gathered into a bun. Common mistake: cutting the fringe too short — eyebrow length is the sweet spot. Quick verdict: the most playful knotless braid.
24. Knotless Braids with Triangle Partings
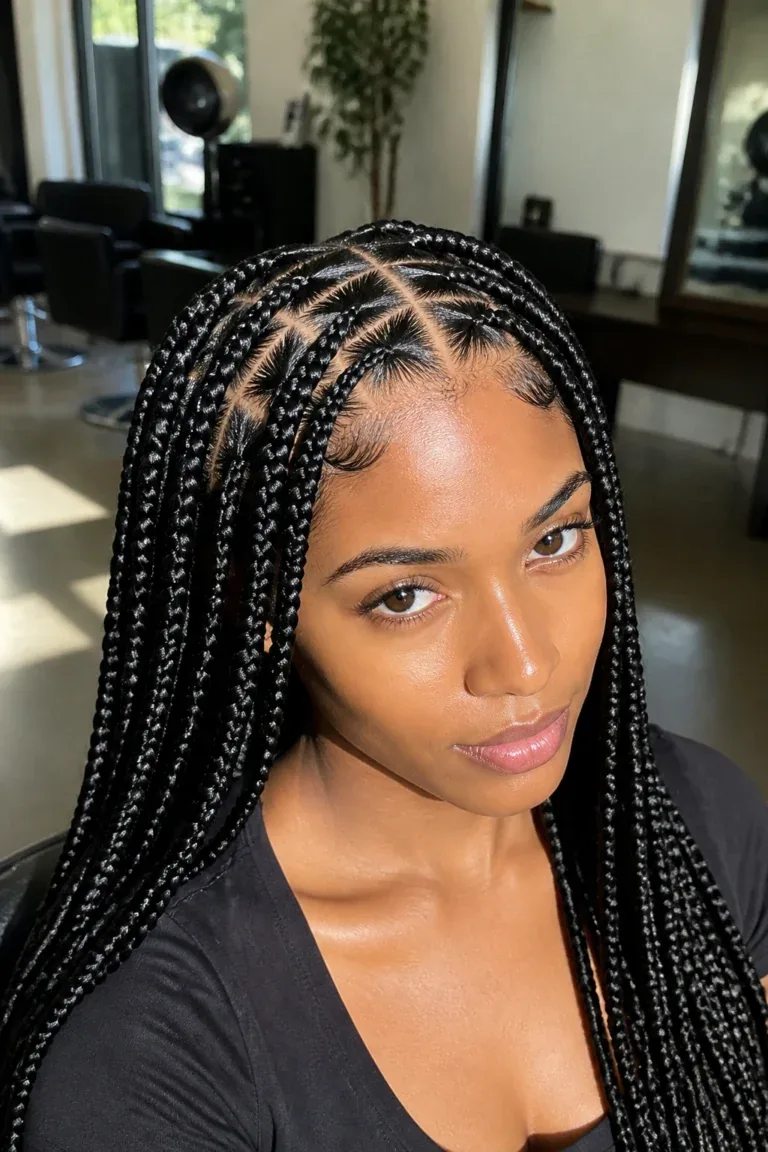
Knotless braids with triangle partings are the geometric, fashion-forward version of the style: instead of square partings, the braider parts the hair into triangles, so the scalp shows a pattern of neat triangles between the braids. The triangle parting turns the roots into a design — it is visible when the braids are pulled up, and it gives the whole style an extra layer of detail that square partings never do. It is the knotless braid for women who notice the details.
Best for: women who love a detailed, intentional look, and for updos, where the triangle pattern is on show. How to style it: ask specifically for triangle partings when you book, because they take longer to part and not every braider offers them. Pros and cons: the pattern is beautiful and unique, but the install takes an extra hour and costs more, because the parting is precise work. Time and cost: five to seven hours at a higher price. Maintenance: the pattern shows new growth sooner than square partings, so the style looks its best for the first four weeks. Quick verdict: the knotless braid for detail lovers.
25. Knotless Braids for a Wedding
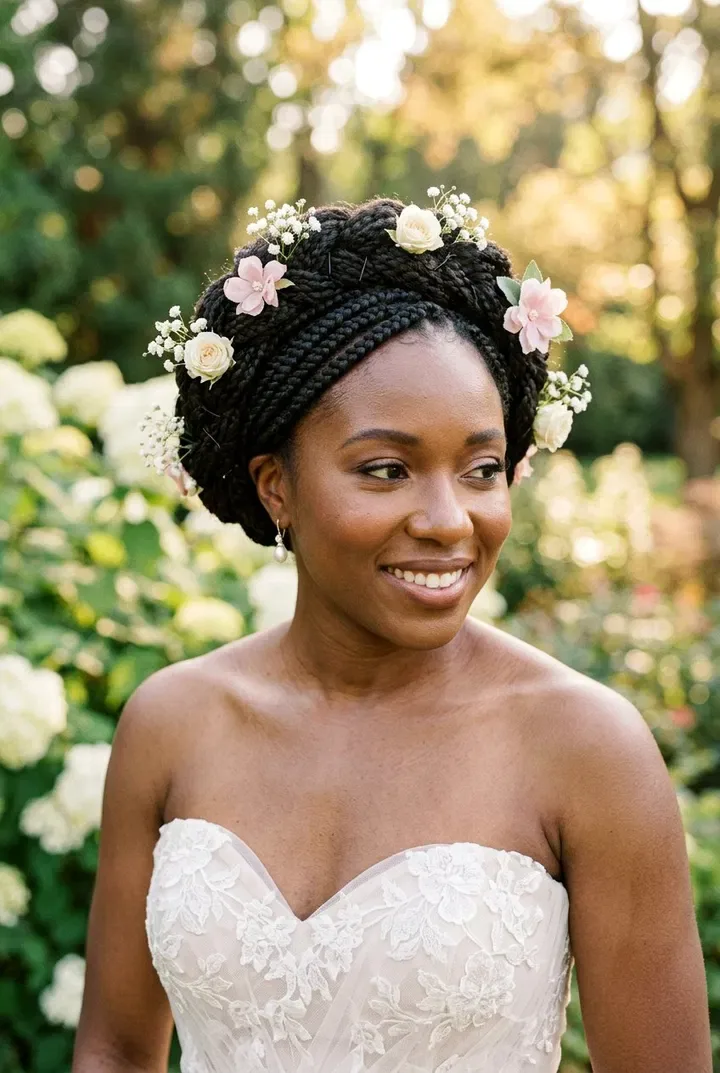
Knotless braids for a wedding are the bridal version of the style: long, neat braids, styled into an elegant updo or worn flowing down the back, with gold cuffs, pearls or fresh flowers woven in. Brides love knotless braids because they are comfortable — no tight knots pulling at the scalp through a twelve-hour day — and because they photograph beautifully, with flat roots and a soft hairline that looks natural in every shot. A bridal knotless style is romantic, practical and completely unforgettable.
Best for: brides and bridesmaids, and for any formal occasion where the hair needs to last all day. What to ask your braider for: a neat, secure install two or three days before the wedding, with the styling done on the day — and a trial run of the updo at least a month before. Time and cost: the install takes five to six hours, and the bridal styling on the day is an extra session. Maintenance: a trial run is essential — wear the style for a full day to test how it holds. Common mistake: getting the braids installed the day before the wedding — give your scalp two days to settle. Quick verdict: the knotless braid was made for weddings.
26. Knotless Braids for Work

Knotless braids for work are the polished, practical version of the style: neat, medium braids, worn down or in a low bun, with no beads, no bright colour and no loose curls — a style that keeps the hair completely off the face and reads as deliberate and neat in exactly the way a good haircut does. It is professional without being severe, and it is practical, because it does not need touching up between meetings. The work knotless braid is the protective style for women who want their hair out of the way without a ponytail.
Best for: office work, teaching, healthcare and any job where the hair needs to stay put. How to style it: choose medium braids in a natural shade, wear them down or in a low bun, and keep the edges smooth. Maintenance: a morning check of the edges is all it needs — the braids hold all day. Time and cost: four to six hours at a standard price. Common mistake: choosing jumbo braids with beads for a conservative office — save the statement styles for the weekend. Quick verdict: the most practical knotless braid — neat, comfortable and all-day reliable.
27. Knotless Braids for a Holiday or the Beach
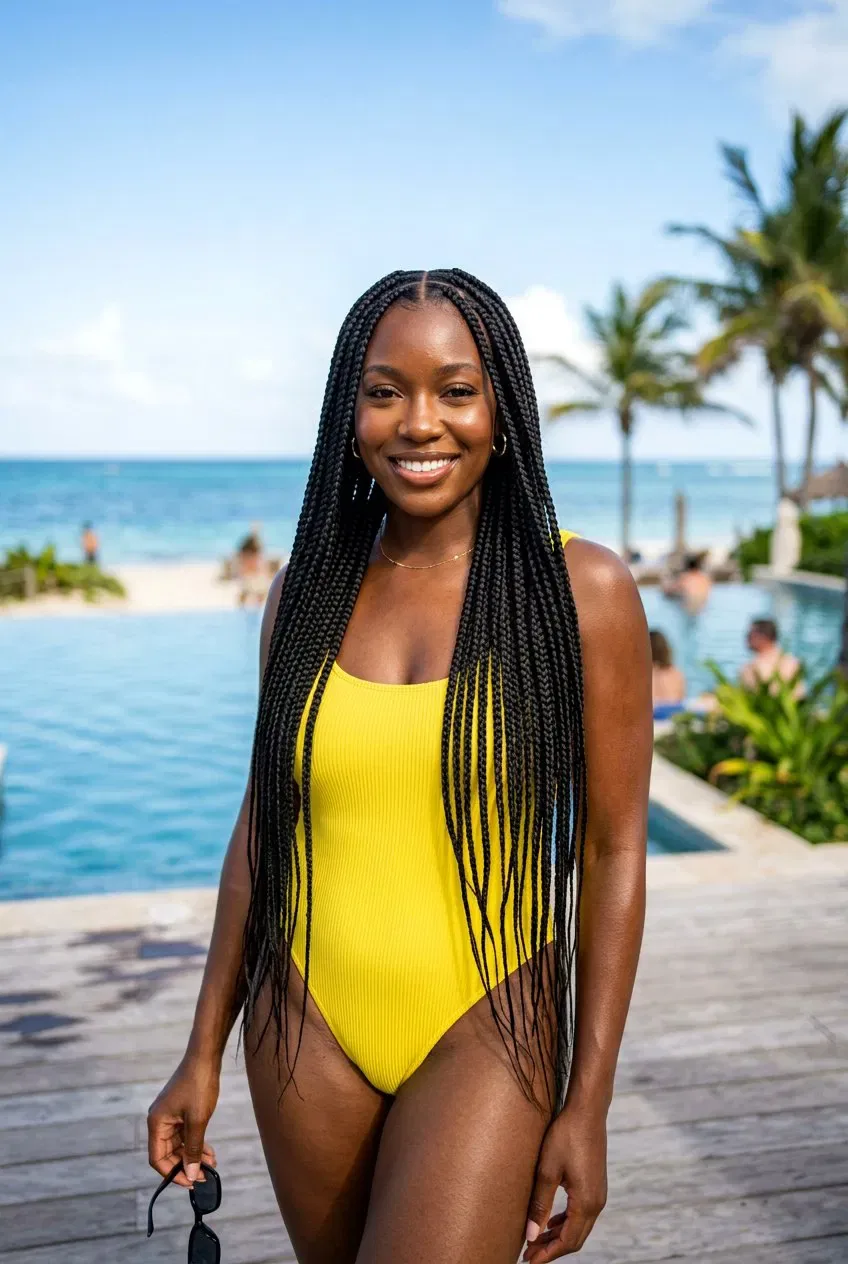
Knotless braids for a holiday are the style that makes a trip easier: the hair is done before you leave, it survives swimming, sun and humidity, and you never have to think about it again until you get home. Knotless braids are the ideal holiday hair because the flat roots do not itch in the heat the way tight box braids can, and the braids dry quickly after a swim. A holiday set in a boho style, with curly ends, looks made for the beach — and it is.
Best for: beach holidays, tropical trips and summer festivals. How to style it: choose a boho or curly-ended set, and wear the braids down or in a loose high bun. Pros and cons: the style survives salt water and sun, but chlorine and salt dry the braids out, so rinse them with fresh water after swimming and moisturise the ends. Maintenance: wash once a week on holiday and always tie the braids up at night. Time and cost: get them installed a few days before you travel, so your scalp has settled. Common mistake: getting braids installed the morning of a flight — the first-day tightness and a long journey do not mix. Quick verdict: the best holiday hair there is.
28. Knotless Braids for the Gym
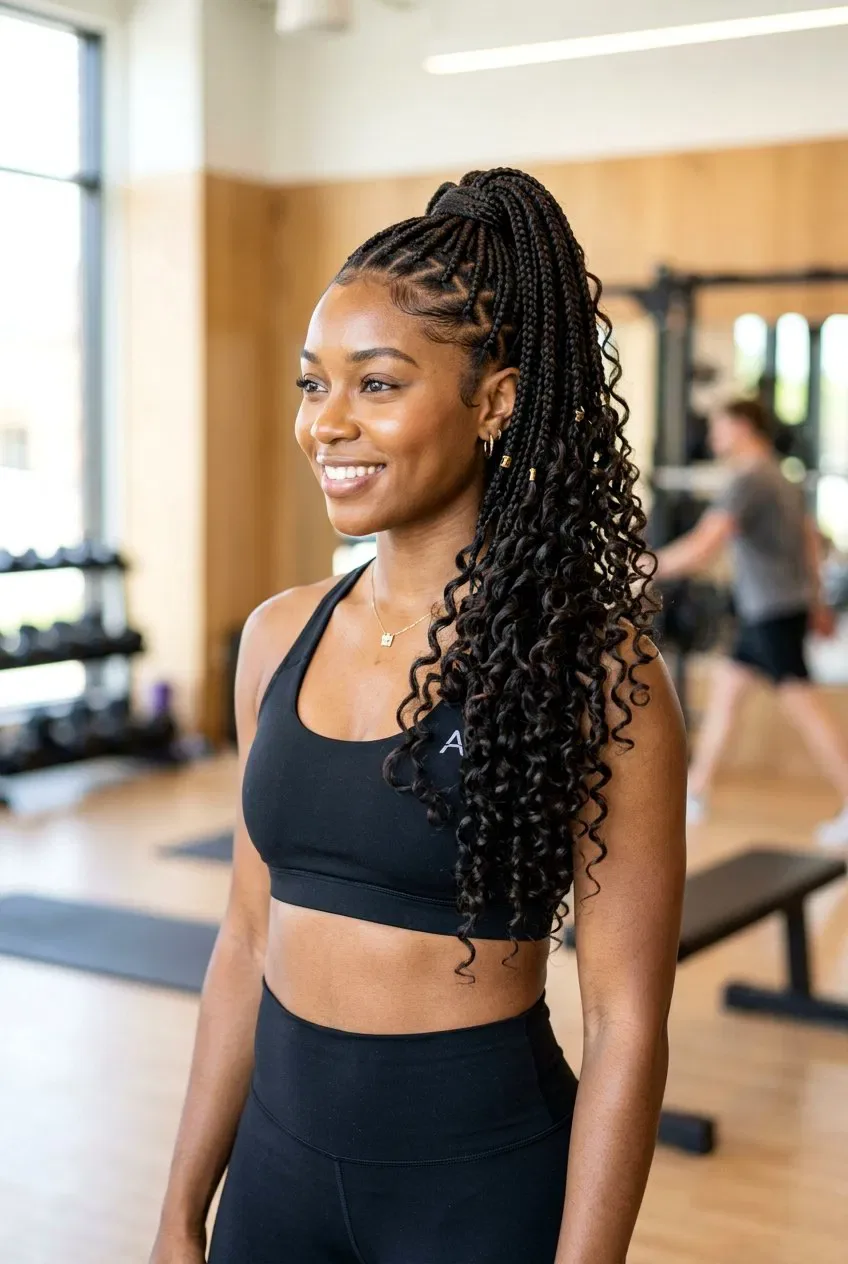
Knotless braids for the gym are the active version of the style: the braids keep the hair completely off the face and neck, they do not come loose when you run or stretch, and they survive sweat far better than loose natural hair. The knotless roots are the advantage here — a tight box braid pulls when you sweat and move, while a knotless braid stays comfortable through a whole workout. It is the protective style for women who train regularly and are tired of re-doing their hair after every session.
Best for: runners, gym-goers, dancers and anyone who exercises several times a week. How to style it: gather the braids into a high bun or a ponytail before you train, using a silk scrunchie that will not dent the braids. Maintenance: after a sweaty workout, wipe the scalp with a damp cloth or a little diluted shampoo, and let the braids dry fully before tying them up again. Pros and cons: the style is practical and durable, but sweat build-up means you should wash weekly rather than fortnightly. Time: the install is standard, four to six hours. Who should avoid it: nobody — but if you swim regularly, rinse the braids after every session. Quick verdict: the knotless braid for an active life.
29. Knotless Braids with a Silk Scarf or Headwrap
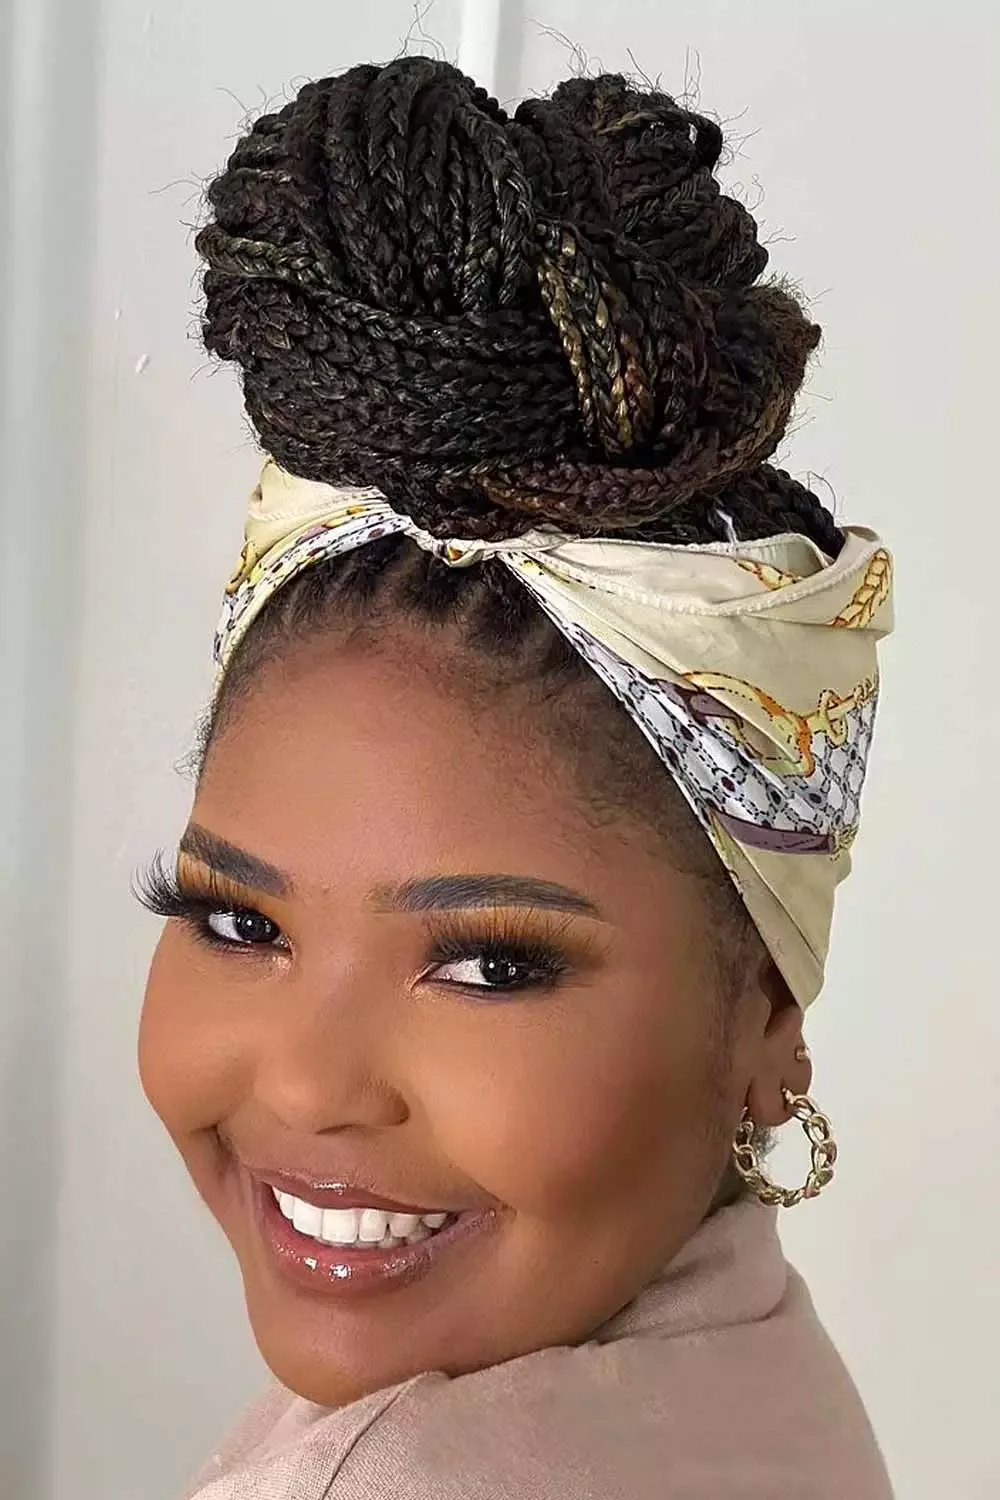
Knotless braids with a silk scarf or headwrap are elegance with a practical streak: a silk scarf tied around the hairline, knotted at the side or the back, adds colour and pattern while protecting the edges and keeping the braids neat. A silk or satin scarf is the right fabric, because it does not absorb moisture the way cotton does, and it glides over the hair instead of creating friction. The scarf can be a thin band across the front, or a full headwrap — and each version gives the same braids a completely different mood.
Best for: bad hair days, holidays, and anyone who wants colour in the look without changing the braids. How to style it: tie the scarf loosely around the hairline, knotting it at the side, and tuck the ends under the braids. Pros and cons: the scarf is cheap, reusable and endlessly variable, but a scarf tied too tightly will flatten the braids and press on the edges — tie it loosely. Time: a minute or two to tie. Cost: the price of a scarf. Quick verdict: the most versatile knotless braid accessory.
30. Knotless Braids with Gold Cuffs and Accessories
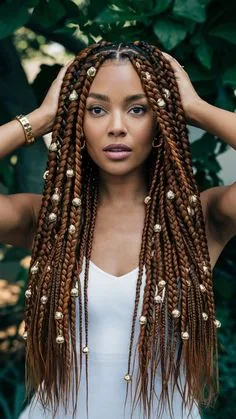
Knotless braids with gold cuffs are the most glamorous way to accessorise the style: small gold rings, cuffs and charms clipped onto a few braids, catching the light every time you move. Gold against dark braids is one of the most beautiful combinations in hairstyling — warm, luminous and completely timeless — and a few cuffs are all it takes, because they do the work. They suit a wedding, a party, a holiday, or any day when you want the braids to feel like jewellery.
Best for: parties, weddings and special occasions, and for every hair colour, because gold suits them all. How to style it: clip three or four cuffs onto braids around the face and one or two further back — space them out, do not cluster them. Maintenance: the cuffs need nothing beyond a quick check that they are secure, and they last for years. Cost: a pack of gold cuffs is inexpensive. Common mistake: using too many cuffs, which makes the braids look crowded and heavy. Three or four, placed with space between them, is the elegant number. Quick verdict: the most glamorous knotless braid accessory.
31. Knotless Braids in a Low Ponytail
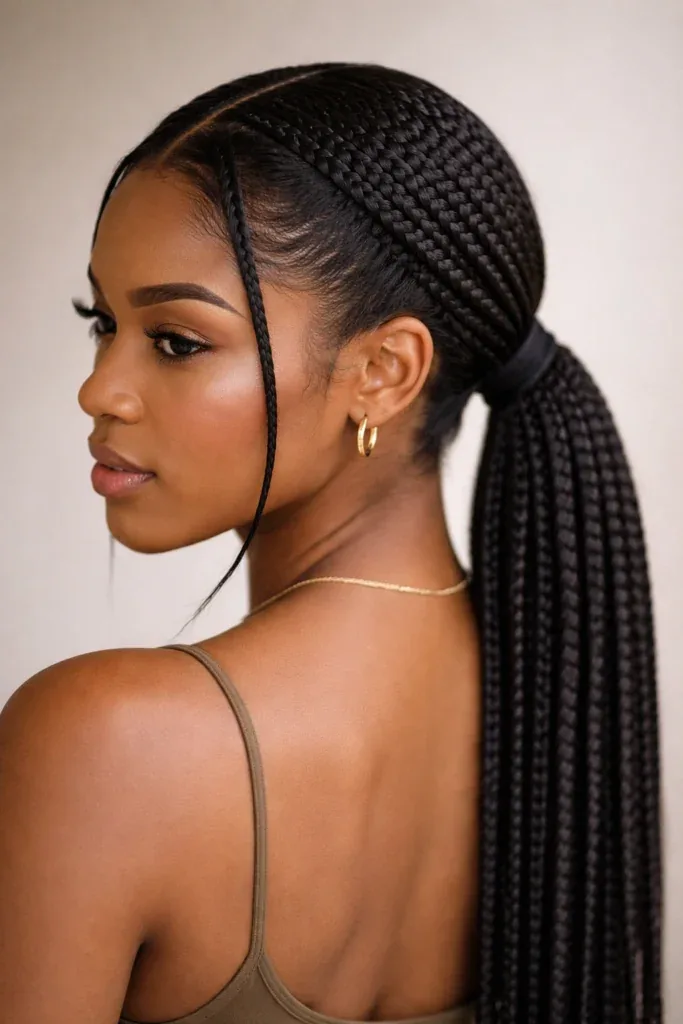
Knotless braids in a low ponytail are the understated, elegant way to wear the style: the braids are gathered loosely at the nape of the neck and tied, so they fall down the back in a thick, smooth tail. The low ponytail is gentler on the edges than a high ponytail, because the hair is not being pulled upward, and it suits almost every occasion — work, a dinner, a day out. It is the knotless braid for women who want their hair up without the drama of a high bun.
Best for: work, formal occasions, and anyone with sensitive edges. How to style it: gather the braids loosely at the nape, tie with a silk scrunchie, and wrap one braid around the tie to hide it. Pros and cons: the style is comfortable, flattering and quick, but it shows the partings less than wearing the braids down — if you love your parting pattern, wear the braids loose instead. Time: one minute. Cost: nothing. Maintenance: vary the position of the ponytail so the same spot is not pulled every day. Quick verdict: the most comfortable knotless updo.
32. Knotless Braids in a Top Knot
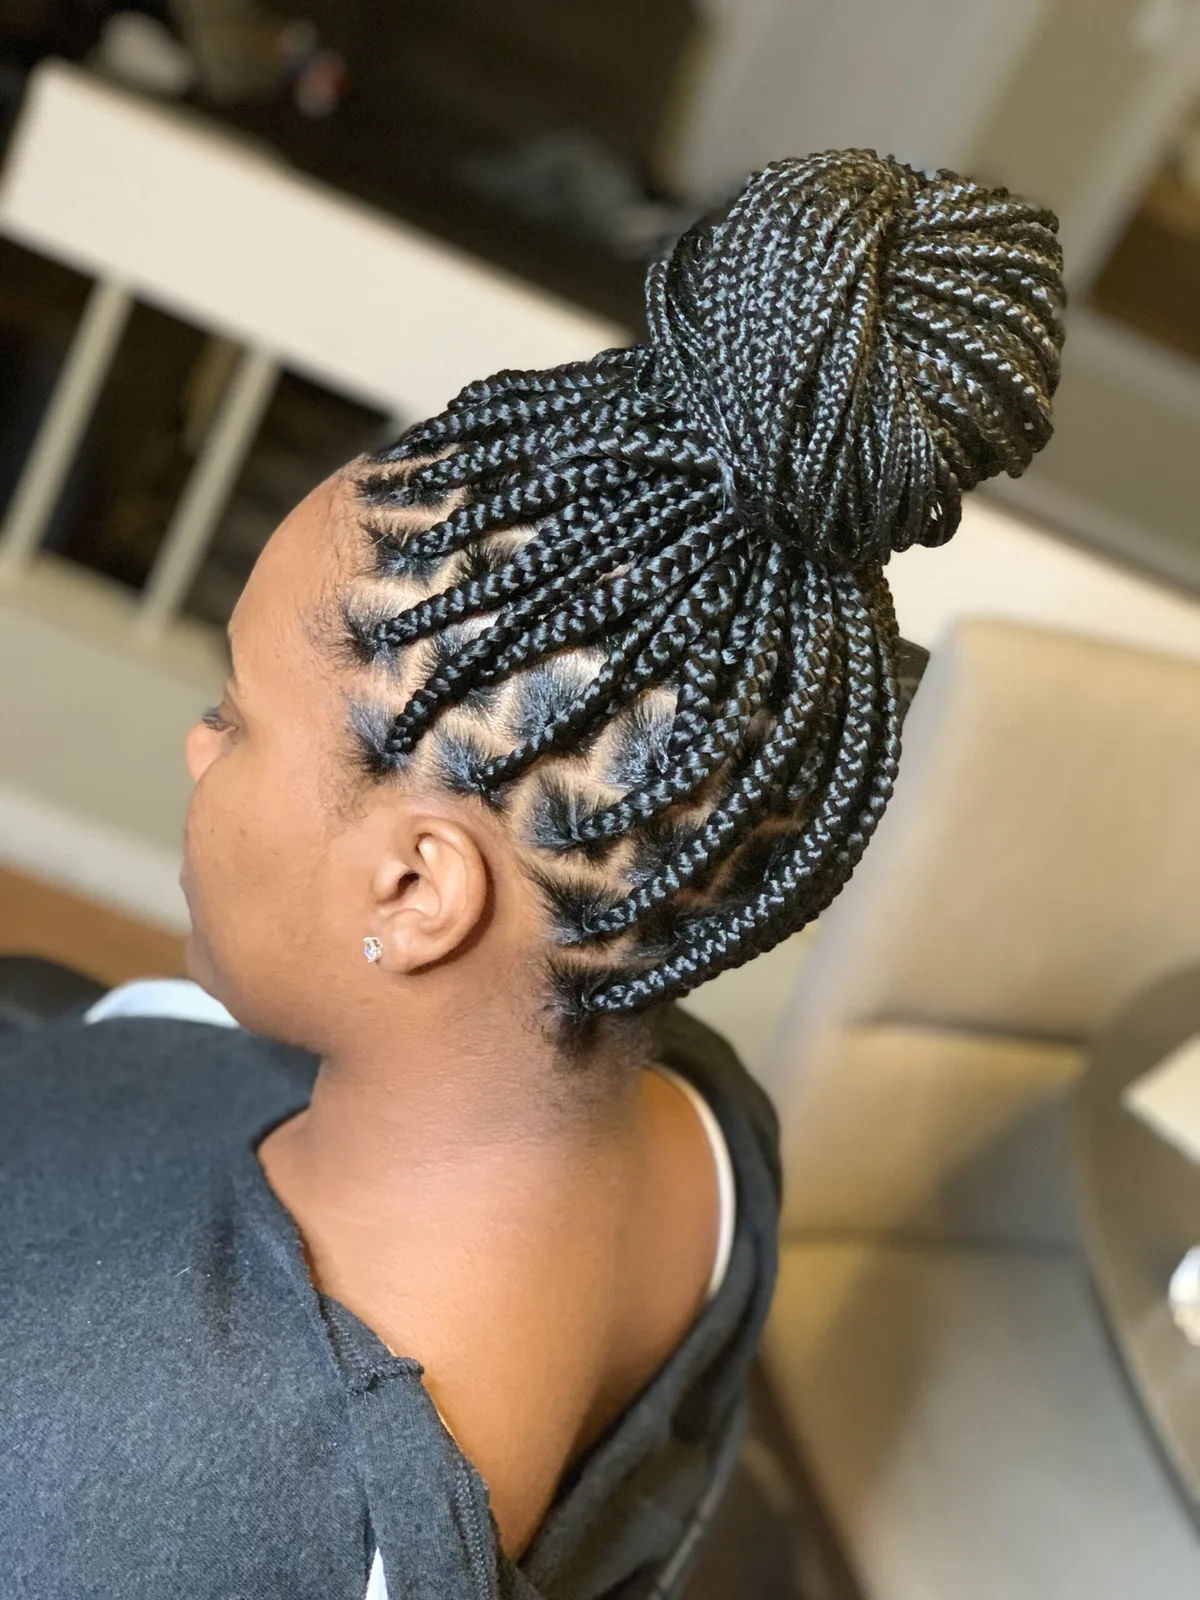
Knotless braids in a top knot are the bold, confident updo: all the braids gathered and twisted into a knot on top of the head, giving height, drama and a long, elegant neck. The top knot shows off the knotless roots at their best, because the flat partings gather smoothly with no bumps, and it keeps the hair completely off the face and shoulders. It is the knotless braid for a night out, a photoshoot, or any day when you want your hair to make a statement.
Best for: nights out, photoshoots and hot days, and for long braids, which make the fullest top knot. How to style it: gather the braids loosely at the crown, twist them into a knot and pin it — do not pull it tight. Pros and cons: the top knot is striking and practical, but it is the heaviest updo in this guide, so do not wear it every day — the weight sits on one spot. Time: three minutes. Common mistake: wearing a tight top knot daily, which puts the same tension on the edges that knotless braids were meant to remove. Who should avoid daily wear: anyone with fragile edges — save the top knot for special days. Quick verdict: the most dramatic knotless updo.
33. Knotless Braids for Teens
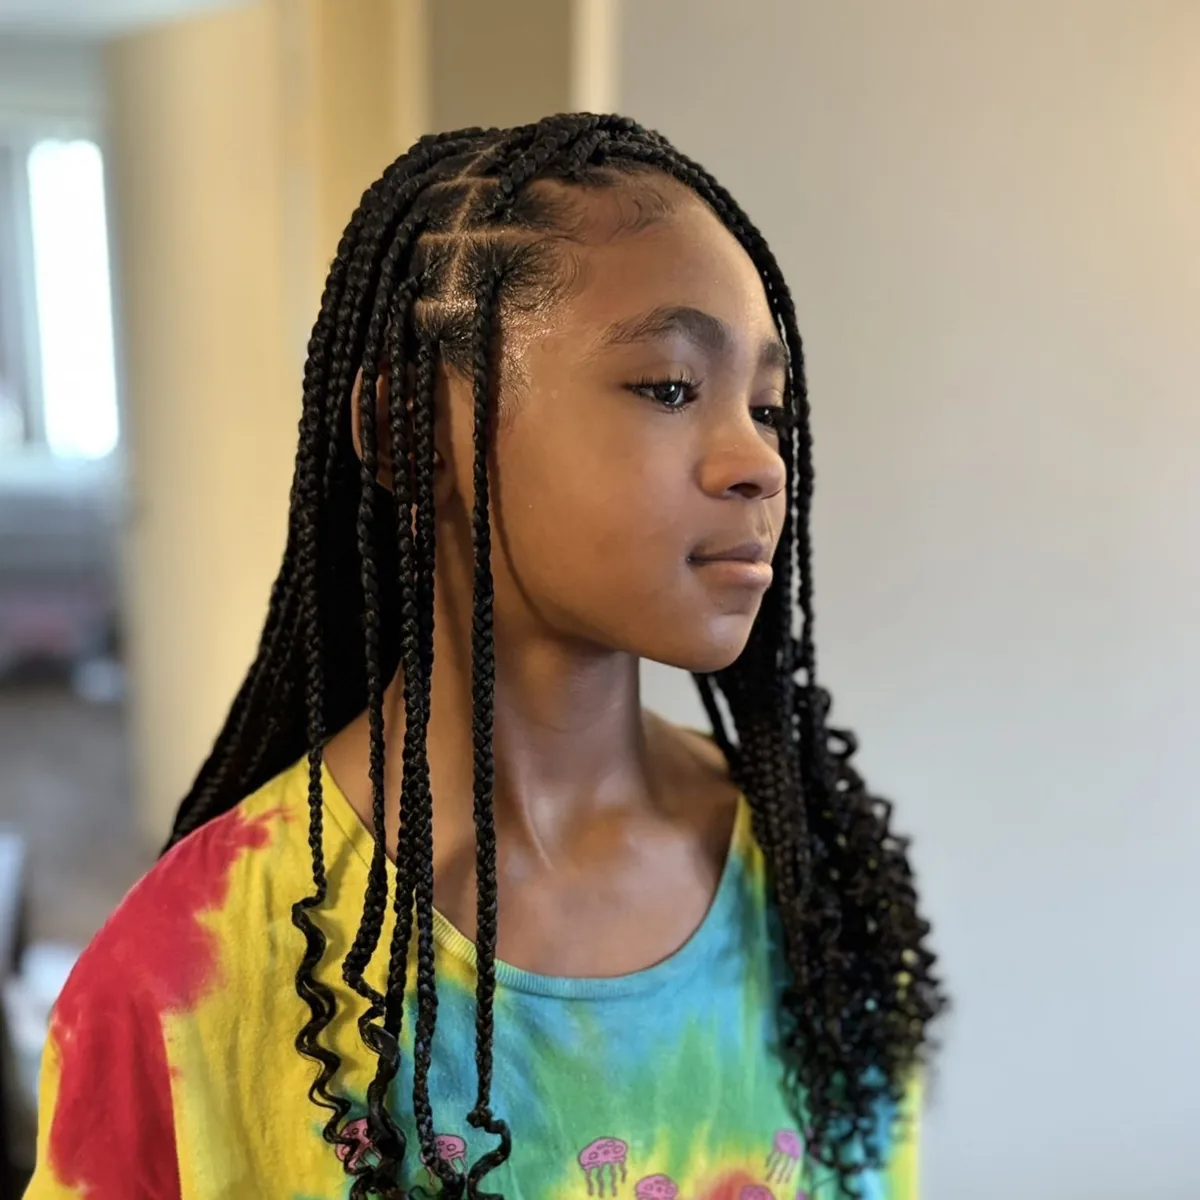
Knotless braids for teens are the style that makes sense for a younger head of hair: the knotless technique is gentler on a developing hairline, the braids are low-maintenance enough for school, and the style lasts long enough to survive a whole term without daily styling. Teens love knotless braids because they look grown-up without trying too hard, and parents love them because the morning routine gets shorter — no more battles with a brush before school.
Best for: teenagers and young women, and for school, sports and social life. How to style it: choose medium braids in a shoulder or mid-back length, with a few beads or cuffs for personality. Pros and cons: the style is practical, protective and age-appropriate, but the install takes four to six hours, which is a long sit for a younger person — bring entertainment and snacks. Time and cost: a standard install, with a lower price for a shorter length. Common mistake: choosing very small, very long braids for a first set — start medium and shorter. Who should avoid it: nobody, but the braider should be told the wearer is a teen, so the roots are kept especially gentle. Quick verdict: the knotless braid that makes school mornings easier.
34. Knotless Braids for Women Over 50
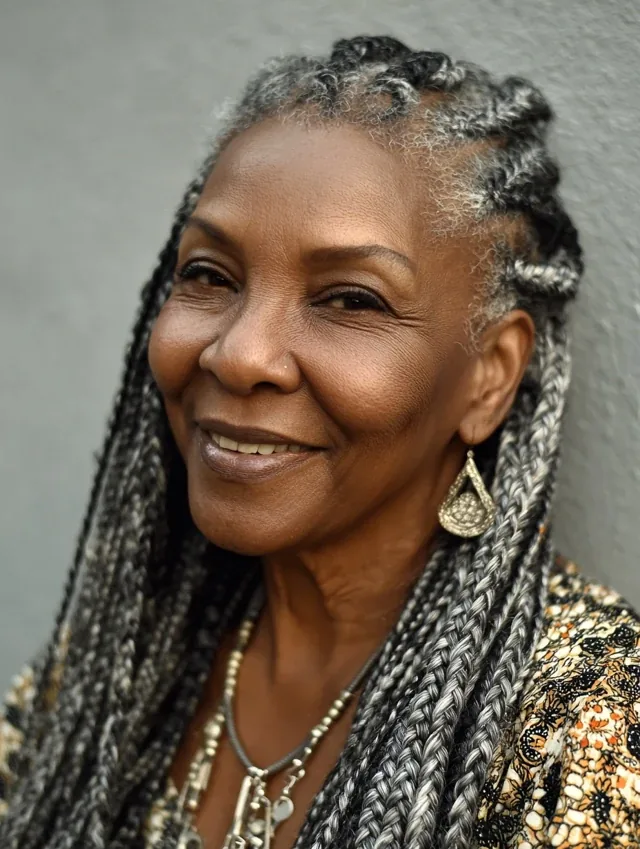
Knotless braids for women over 50 are the style that proves protective braids have no age limit: the knotless technique is the kindest braided style for mature hair, because there is no knot pulling on a hairline that may already be thinning, and the braids give the hair a long rest from heat and daily styling. A neat, medium-length set in a natural shade looks elegant, polished and completely age-appropriate — and the flat roots mean the style looks natural, not like a wig or a weave.
Best for: mature women who want a protective style, and for anyone whose hair has thinned with age. How to style it: choose medium braids in a shoulder-to-mid-back length, in a natural shade, and wear them down or in a low bun. Pros and cons: the style is gentle, low-maintenance and elegant, but the install is long, so book a braider who works efficiently and take breaks if you need them. Maintenance: oil the scalp twice a week and take the braids out at six weeks. Common mistake: choosing very long, very small braids, which are heavy on mature roots — medium and shorter is kinder. Quick verdict: the kindest knotless braid for mature hair.
35. Knotless Braids with Peekaboo Colour
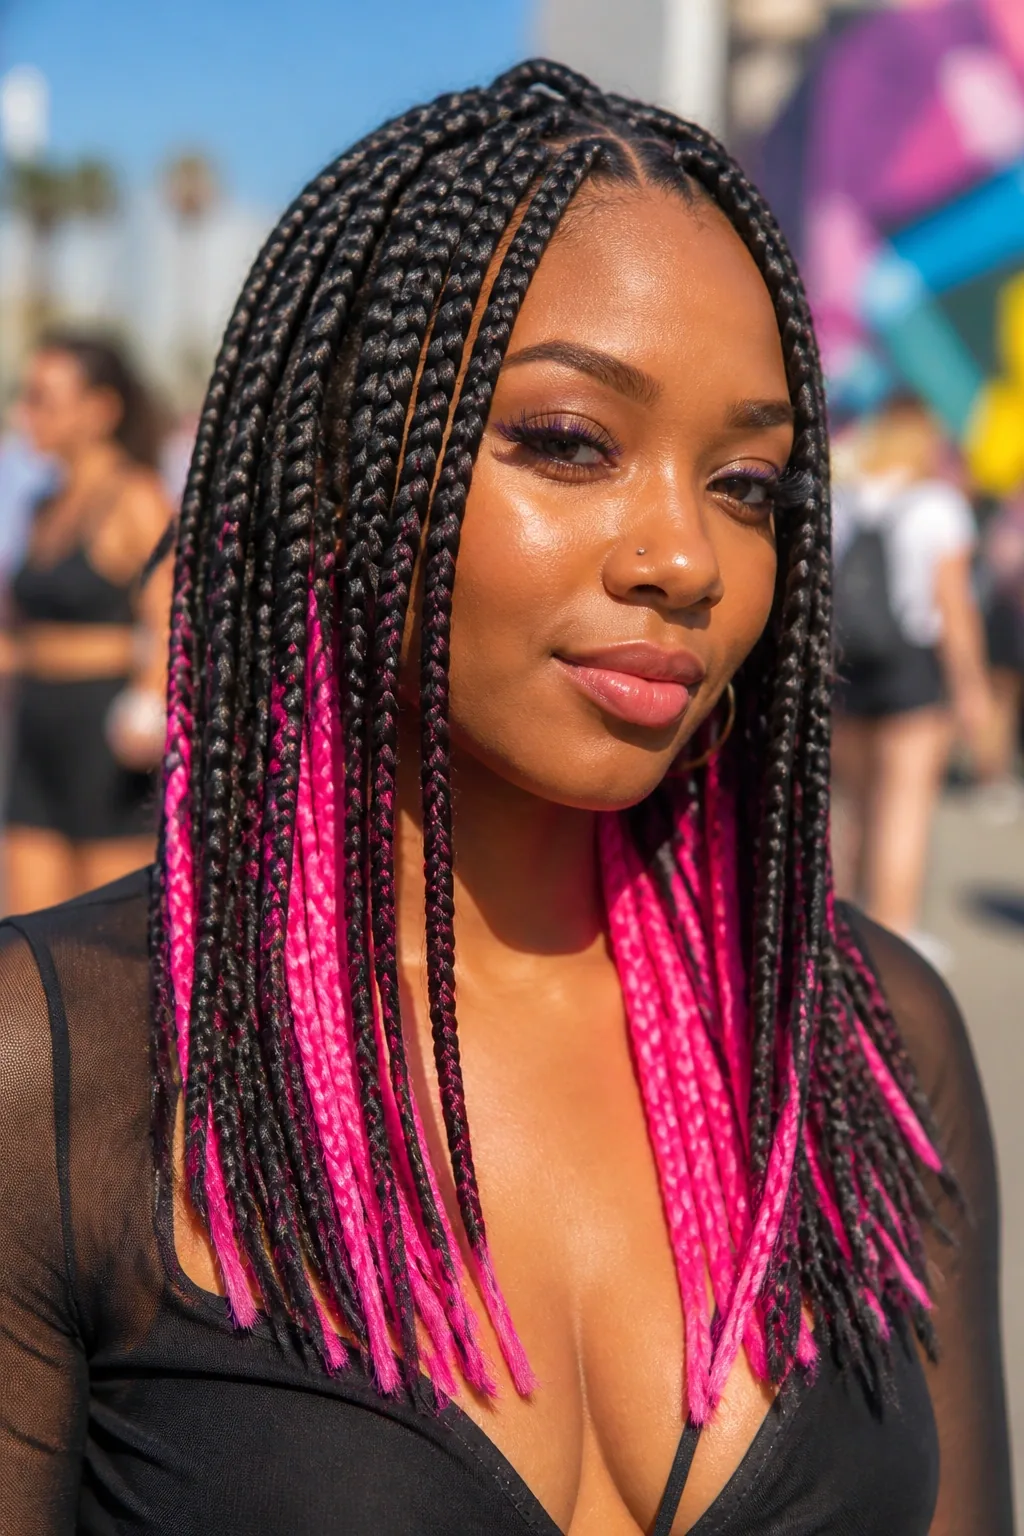
Knotless braids with peekaboo colour are the secret colour: the top layer of braids is your natural shade, but underneath, a few braids are done in a bright or pastel colour — burgundy, blonde, copper, or even pink — so the colour only shows when the braids move, or when you pull them up. It is the knotless braid for women who want colour but also want to keep it quiet: a flash of colour at the nape, a hint of blonde when the braids swing, a surprise when the hair goes up.
Best for: anyone who wants colour without committing to it, and for workplaces where a full head of colour would be too much. How to style it: ask your braider to place the coloured braids underneath and at the back, with the natural shade on top. Pros and cons: the effect is subtle and delightful, and completely reversible, but the coloured braids need to be placed carefully — random colour underneath looks accidental, while a deliberate layer looks designed. Time and cost: a small extra charge for the second shade. Maintenance: none beyond normal braid care. Who should avoid it: if you want colour that everyone sees, peekaboo is too shy — go for a full ombre instead. Quick verdict: the most playful secret in knotless braids.
36. Knotless Braids in a Low Bun
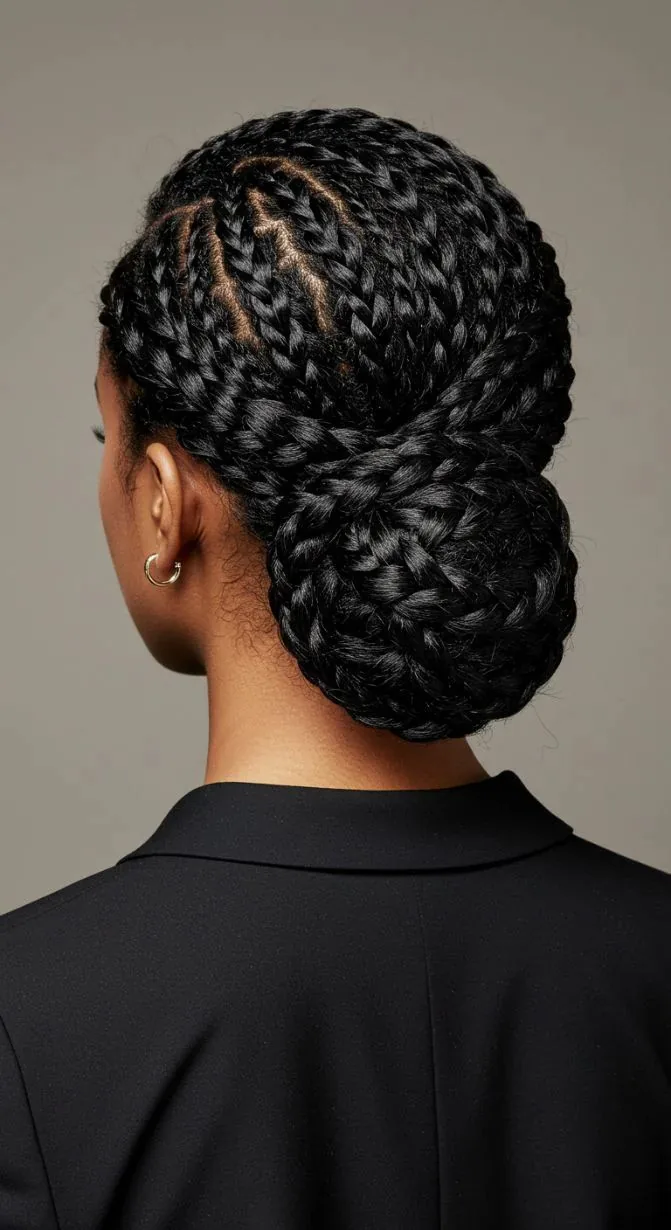
Knotless braids in a low bun are the quiet, elegant updo: the braids are gathered loosely at the nape and twisted into a low, soft bun that sits at the back of the head, giving a polished finish without any pulling. The low bun is the gentlest updo there is, because the hair is not being lifted upward, and it suits formal occasions, work and weddings — anywhere a high bun would feel too much. It is the knotless braid at its most refined.
Best for: formal occasions, work, and anyone with sensitive edges. How to style it: gather the braids loosely at the nape, twist them into a bun and pin it, leaving a few face-framing braids loose if you like. Pros and cons: the bun is comfortable, elegant and kind to the hairline, but it is less dramatic than a high bun or a top knot — choose it when you want polish, not drama. Time: two minutes. Cost: nothing. Maintenance: vary the position so the same spot is not pulled every day. Common mistake: wrapping the bun too tightly — a low bun should feel loose, not pulled. Quick verdict: the most refined knotless updo.
37. Knotless Braids for a Date Night
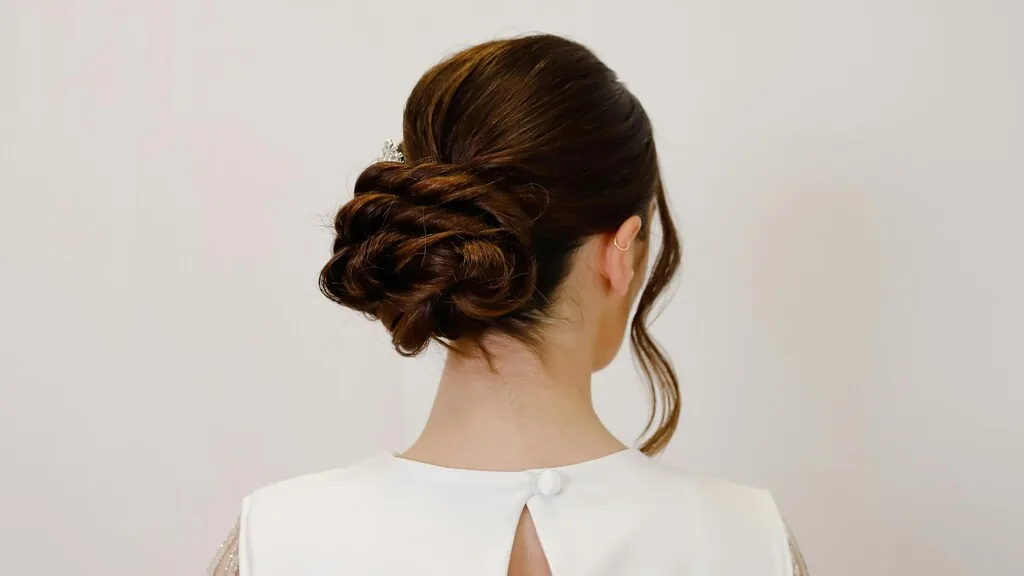
Knotless braids for a date night are the romantic version of the style: long braids with curly ends, or a boho set with loose curls, worn down over one shoulder, with a few gold cuffs and softly laid edges. The look is soft, effortless and confident — hair that looks beautiful without looking like it took hours, even though it did. A date-night knotless style is about movement: braids that swing when you turn your head, curls that catch the light, and a hairline so natural it looks like your own hair.
Best for: date nights, evenings out, and any occasion where you want to look romantic. How to style it: choose a boho or curly-ended set, wear it over one shoulder, and add two or three gold cuffs near the face. Pros and cons: the look is gorgeous and low-effort on the night itself, because the braids are already in — but it needs a fresh install or a recent refresh to look its best, so time your appointment for the week of the date. Time and cost: a standard install, four to six hours. Maintenance: refresh the curls with a little mousse before you go out. Common mistake: over-accessorising — a few cuffs are enough. Quick verdict: the most romantic knotless braid.
38. The Effortless Everyday Knotless Braids
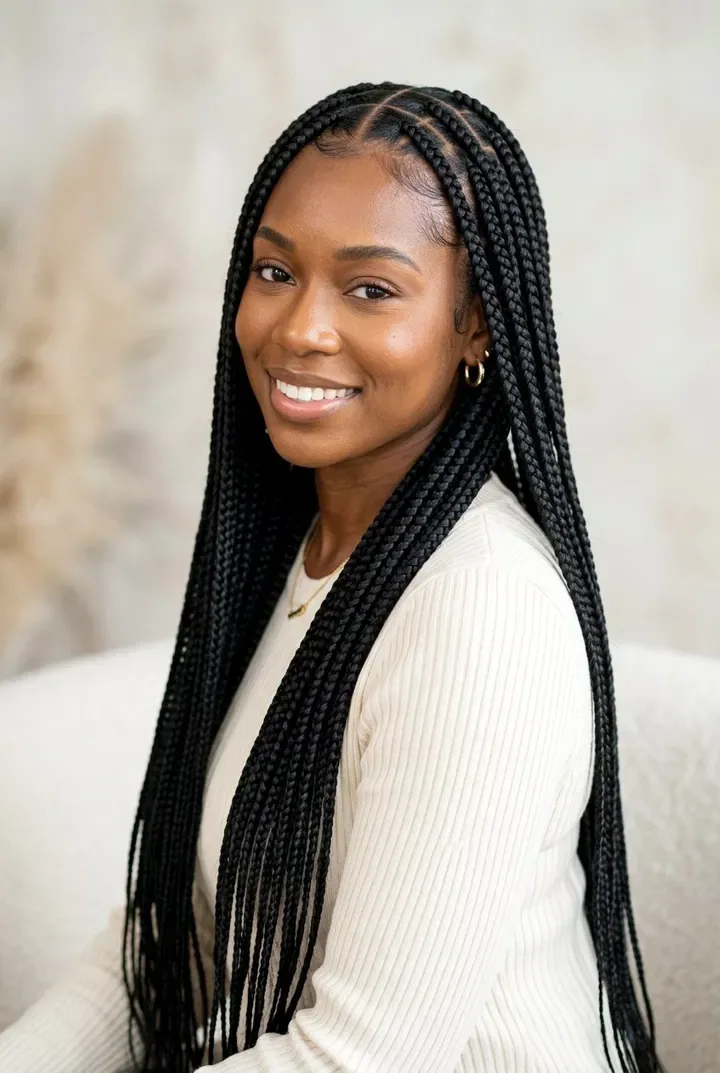
The effortless everyday knotless braid is the style this whole guide is really about: medium braids, a natural shade, a middle or side part, worn down, in a low ponytail or in a loose bun, depending on the day. There is nothing dramatic about it, and that is the point — it is the knotless braid you can wear to work, to the shops, to the gym and to dinner, without changing a thing. It protects your hair, it looks good every day, and it asks almost nothing of you in return.
Best for: everyday life, and for anyone who wants one protective style that does everything. How to style it: keep it simple — down most days, a low ponytail when you are busy, a loose bun when it is hot. Pros and cons: the style is the lowest-maintenance look in this guide, but it can start to feel ordinary after a few weeks — refresh it with a new parting, a scarf, or a few gold cuffs. Maintenance: a scarf at night, scalp oil twice a week, and take them out at eight weeks. Time and cost: a standard install, four to six hours. Quick verdict: the knotless braid you will actually live in — and the one your edges will thank you for.
What are knotless braids?
Knotless braids are a type of box braid made without a knot at the root. The braider starts with your own natural hair and gradually feeds in extension hair as the braid travels down, so the braid lies flat against the scalp with no bump and no pulling. They are lighter, more natural-looking and kinder to the edges than traditional box braids.
How long do knotless braids last?
Knotless braids last around six to eight weeks with good care. After about six weeks, new growth at the roots starts to show and the partings get fuzzy, and by eight weeks the braids hang looser on the roots. Take them out at eight weeks at the latest — leaving them in longer risks matting and tangling at the roots.
Do knotless braids hurt or damage your edges?
Knotless braids should not hurt. Because there is no knot at the root, they put far less tension on the scalp and the hairline than traditional box braids, which makes them one of the safest braided styles for fragile edges. If a braid hurts, tell your braider immediately — a painful braid on day one can still damage your edges by week six, knotless or not.
How long do knotless braids take to install?
A medium, waist-length set of knotless braids takes about four to six hours. Jumbo braids can be finished in two to three hours, while small braids can take six to eight hours, sometimes over two days. Add an hour or so for boho curls, curly ends or a colour blend, and plan your whole afternoon around the appointment.
How much do knotless braids cost?
In the US, knotless braids typically cost around $180 to $350 for medium braids, $250 to $450 or more for small braids, and $120 to $200 for jumbo braids. In the UK, expect roughly £150 to £300. Prices vary by location, braider and length, and hair may or may not be included, so ask when you book.
Can I wash knotless braids?
Yes, you can wash knotless braids every one to two weeks. Dilute shampoo with water in an applicator bottle, apply it to the scalp between the partings, massage gently with your fingertips, and rinse thoroughly without rubbing the braids themselves. Let them air-dry or sit under a hooded dryer — braids that stay damp for hours can develop a musty smell.
Can I get knotless braids on short hair?
Yes, you can get knotless braids on short hair. You need about two to three inches of natural hair for the braider to grip securely, and the extensions make the braids any length you like. The knotless technique is actually ideal for short hair, because there is no knot to slip off a short root. Start with a bob or shoulder-length set on a first install.
What is the difference between knotless braids and box braids?
The difference is how the braid starts. A box braid starts with a knot — the extension hair is knotted at the root, which anchors the braid but pulls on the scalp. A knotless braid starts with your natural hair alone and the extensions are fed in gradually, so there is no knot, no bump and no pulling. Knotless braids are lighter, more natural-looking and kinder to the edges, but they take longer to install and usually cost more.
How do I sleep in knotless braids?
Tie your knotless braids up loosely — a low, loose ponytail or a pineapple on top of the head — and cover them with a silk or satin scarf, bonnet or pillowcase. Cotton pillowcases pull moisture out of the hair and rough up the braids, while silk keeps them smooth. This one habit is the difference between braids that stay neat for eight weeks and braids that go fuzzy in a week.
How do I take knotless braids out?
To take knotless braids out, cut the extension hair a few inches below your natural hair ends first, then unravel each braid slowly, detangling as you go with your fingers and a wide-tooth comb. Do not pull the braids apart roughly. Once they are all out, wash your hair and deep-condition it immediately. Removal takes one to two hours at home, or a salon will do it for a fee.
Conclusion
Knotless braids are not the cheapest protective style, and they are not the quickest — but they are the kindest. No knot at the root, no pulling on the scalp, no headache on the first night, and no thinning edges six weeks later. Every style in this guide is a variation on the same simple idea: start with your own hair, feed the extensions in gently, and let the braids lie flat and natural. Classic or boho, bob or waist-length, jumbo or small, for a wedding or for the gym — the technique never changes, only the finish does.
Start with the classic medium knotless box braid, if you are not sure — it is the size most women come back to, and it will teach you what knotless braids feel like. Wear them for six to eight weeks, look after them with a silk scarf and a little scalp oil, and take them out on time. Then make the style yours — try a boho set with curls, a bob, a splash of colour, a few gold cuffs. Your edges will thank you for the switch, your scalp will notice the difference on day one, and you will wonder why you ever sat through tight, knotted braids at all.