Hairstyles With Hair Extensions, Styled Right: Length, Volume and a Blend Nobody Can Spot
Most hairstyles with hair extensions fail in exactly one place: the blend. The length is there, the colour is close, the curls are beautiful — and then a straight, blunt line of natural hair ends halfway down, or a weft peeks out when the wind catches it, and the whole illusion collapses. Good extensions are not really about buying longer hair. They are about matching texture, cutting the extensions into your own haircut, and choosing a method that suits how you actually live — whether you want them for one evening or for the next three months.
This guide starts with that blending problem and works outward. Eight guides compare clip-in, tape-in, sew-in, halo and keratin-bond extensions, explain colour matching, salon versus DIY fitting, real costs and lifespans, washing and daily care, safe removal, and the mistakes that give extensions away. Then come 33 hairstyles with hair extensions — long layers, sleek straight hair, voluminous curls, high ponytails, beach waves, bobs, braids, buns, wedding updos and everyday volume for thin or fine hair — each one with honest notes on who it suits, how long it takes, what it costs, and what can go wrong.
Clip-In, Tape-In, Sew-In, Halo or Keratin? The Five Extension Types Compared
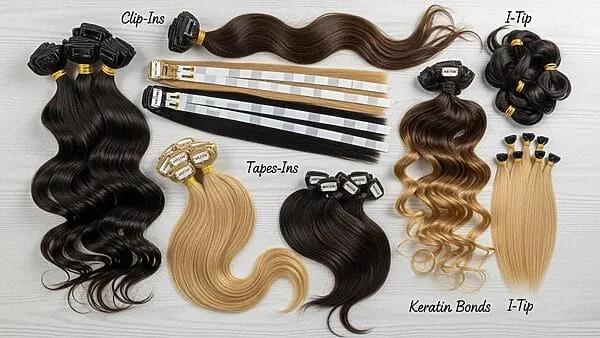
Clip-ins are wefts with small clips that you attach and remove yourself in minutes — the only truly temporary option, and the best place to start if you have never worn extensions. Tape-ins are thin wefts taped to small sections of your own hair, flat and discreet, lasting six to eight weeks with salon fitting. Sew-ins are wefts stitched onto cornrow braids, best for thick or textured hair, and they can last eight to ten weeks. A halo is a single weft on an invisible wire that sits on top of your head like a headband, with no glue, tape or clips at the roots. Keratin-bond extensions are individual strands fused to your hair with a keratin tip, the most natural-looking and the most expensive, lasting three to five months.
Choose by commitment, not by trend. Want them for a wedding or a night out? Clip-ins or a halo. Want everyday length you can wash, swim and sleep in? Tape-ins or keratin bonds. Have thick, curly or coily hair that holds braids well? A sew-in will feel the most secure. Pros and cons in one line: clip-ins are cheapest and kindest to your hair but need daily fitting; tape-ins are discreet but need salon maintenance; sew-ins are durable but heavy; halos are the gentlest but can slip on very fine, straight hair; keratin bonds look the most real but cost the most and take the longest to fit. If you are unsure, try clip-ins first — they teach you what length and weight you actually like before you pay for anything permanent.
The Blending Secret: How to Make Extensions Disappear Into Your Own Hair
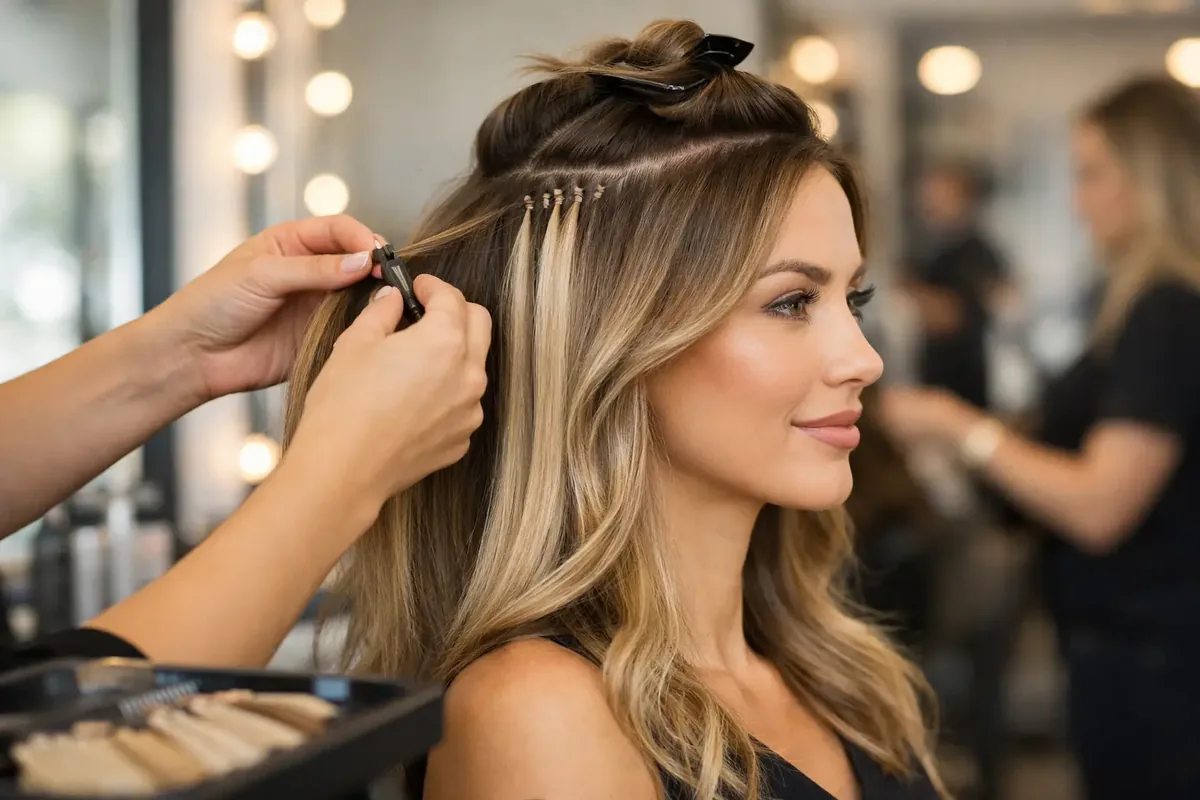
Blending is a haircut, not a purchase. Extensions arrive in one straight, blunt length, and your own hair has layers, a shape and a texture — unless the two are cut together, the join will always show. The fix is to have a stylist cut the extensions after they are fitted, blending the ends into layers, point-cutting the bottom two inches, and matching the front pieces around your face. A second secret is texture: if your hair is naturally wavy, do not wear pin-straight extensions without waving both together, and if your hair is straight, do not expect curly extensions to blend without heat styling. Style the two together, every time, as one head of hair.
The third secret is placement. The topmost weft should sit at least an inch below your parting, and the sides should stop before the hairline, so no weft shows when you tuck hair behind your ears or lift it into a ponytail. A common mistake is placing extensions too high, too close to the crown, where the clips or bonds sit on thin hair and show through. Quick verdict: budget for the cut, not just the hair. Extensions that are fitted and then properly cut in look real; extensions that are simply clipped in and left blunt almost never do — and no amount of expensive hair fixes a bad blend.
Colour Matching: Shade, Tone and Highlights Without a Visible Line
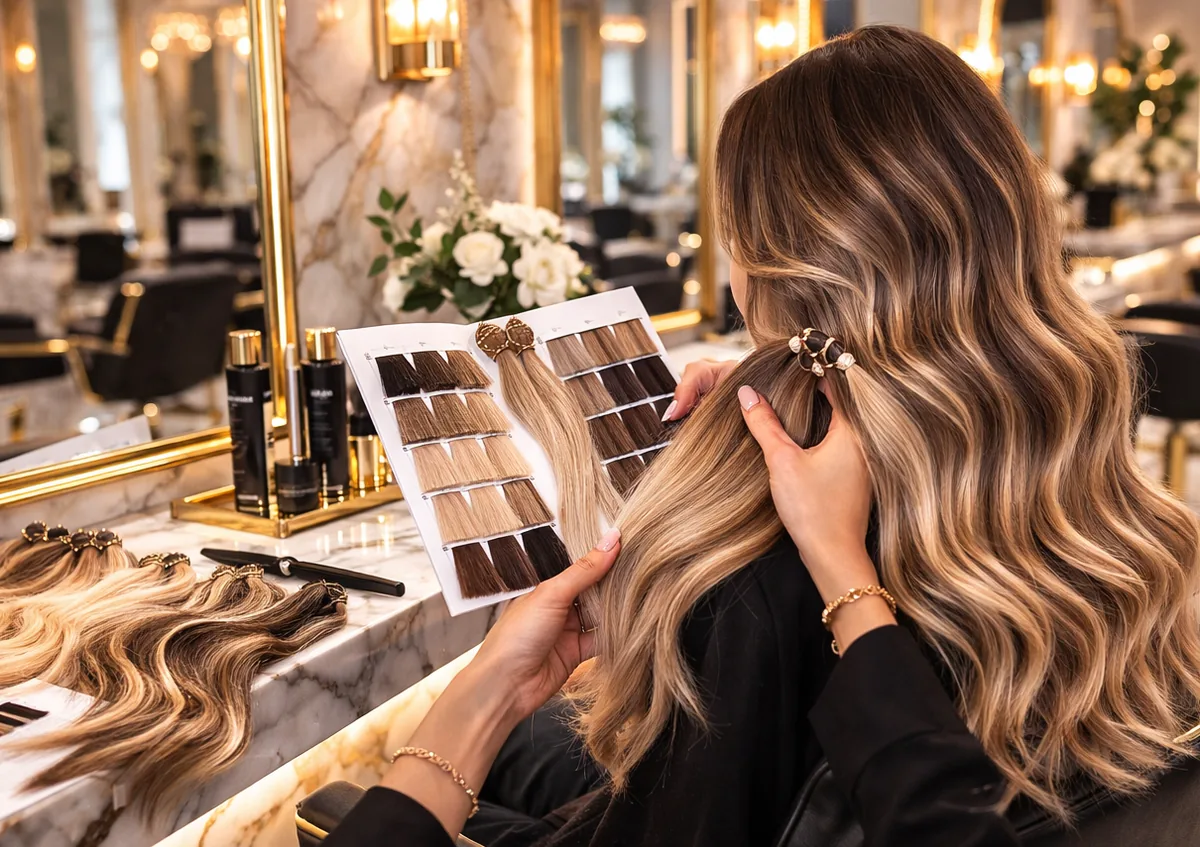
Colour matching fails when people match the roots and forget the ends. Most natural hair is darker at the roots and lighter at the ends, so extensions in a single flat shade will look wrong against it — too dark at the bottom, too light at the top, or the right shade but the wrong tone. Match the mid-lengths and ends of your hair, not the roots, because that is where the extensions will sit. Then check the tone: cool, ashy hair needs cool-toned extensions, and warm, golden hair needs warm ones. A shade that is right in brightness but wrong in tone will still look like a different head of hair in daylight.
If your hair has highlights or balayage, buy blended or multi-tonal extensions, or buy two shades and alternate the wefts — one that matches your base and one that matches your lightest pieces. That mix is what makes balayage extensions look real. When in doubt, go half a shade darker rather than lighter; darker extensions blend more forgivingly than lighter ones, which catch the light and announce themselves. What to ask your stylist: ask them to hold the weft against your hair in natural daylight, not under salon lights, and to check the ends, not just the top of the pack. If you colour your own hair, colour the extensions separately and never bleach them at home — most extension hair is already processed, and bleach will destroy it.
Salon Fitting or DIY? What Installation Really Involves
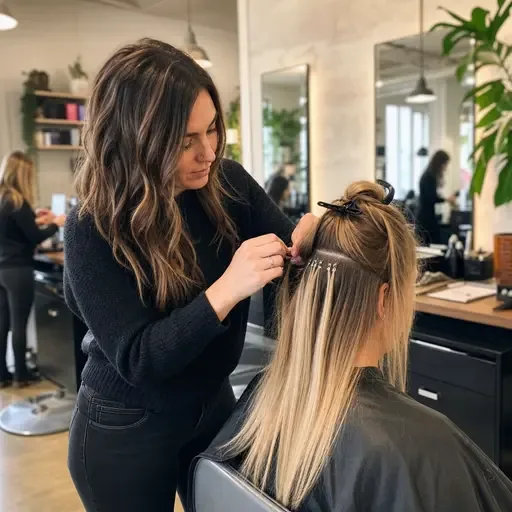
Clip-ins and halos are genuinely DIY: you section your hair, clip or place the weft, blend with a brush and a curling iron, and you are done in ten to fifteen minutes once you have practised. Everything else belongs in a salon the first time. Tape-ins need precise, flat placement or they will show and pull; sew-ins need braiding skill and even tension or they will hurt and damage the hair underneath; keratin bonds need a trained hand, the right heat, and correct sectioning, or the bonds will be lumpy, visible, or placed too close to the scalp. A salon fitting also includes the cut-in, the colour check and a lesson in how to wash and brush them — all of which matter more than the fitting itself.
Time and cost are the trade-off. A salon fitting for tape-ins takes one to two hours, keratin bonds three to four hours, and a sew-in two to three hours. DIY clip-ins cost nothing beyond the hair itself, but you will spend the first few tries learning placement. Who should always go to a salon: anyone with fine, thinning or damaged hair, anyone fitting extensions for the first time, and anyone who wants a semi-permanent method. A useful middle path is to buy clip-ins, take them to your stylist once, and ask them to cut them in and show you the placement — you get a professional blend at a fraction of the cost of a permanent fitting.
What Do Hair Extensions Cost — And How Long Do They Last?
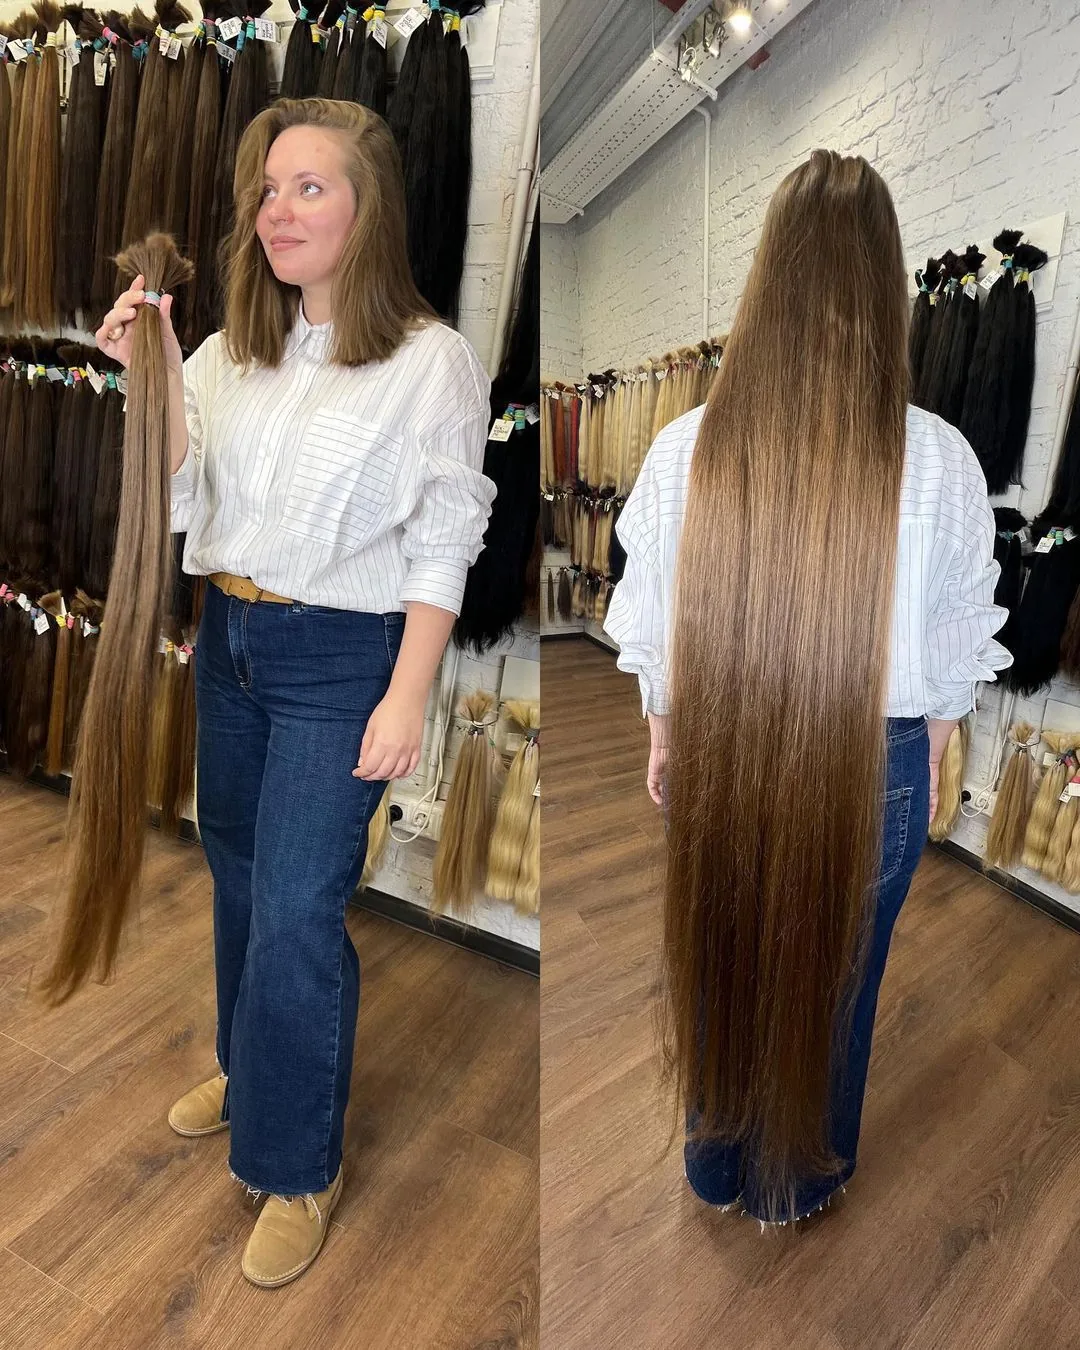
The price of extensions has two parts: the hair and the fitting. Human-hair clip-ins typically cost $100 to $300 for a full set, and a halo $150 to $350. Tape-in hair runs $200 to $600 plus $100 to $200 for fitting, and lasts six to eight weeks before it needs moving up. A sew-in costs $200 to $600 for the hair plus $150 to $300 for fitting, lasting eight to ten weeks. Keratin-bond extensions are the most expensive: $500 to $1,500 or more, including fitting, and they last three to five months. Synthetic hair is far cheaper — often under $50 — but it cannot be heat-styled like human hair and it tangles faster, so it is best for one-off occasions only.
How long they last depends on the hair quality and how you treat it. Remy human hair — where all the cuticles run the same way — lasts longest, often six to twelve months for clip-ins that are worn occasionally, because they are not washed as often. Tape-ins and keratin bonds are worn constantly, so the hair itself usually lasts three to six months before it needs replacing, even though the fitting is moved up sooner. Maintenance costs add up: tape-in move-ups every six to eight weeks at $100 to $200 each, plus sulfate-free shampoo, a good brush and a silk pillowcase. Quick verdict: judge the cost per wear, not the price tag. Clip-ins worn fifty times are cheap; keratin bonds worn every day for four months can be too — but only if you actually keep them that long.
Washing, Brushing and Daily Care: The Routine That Keeps Extensions Looking Real
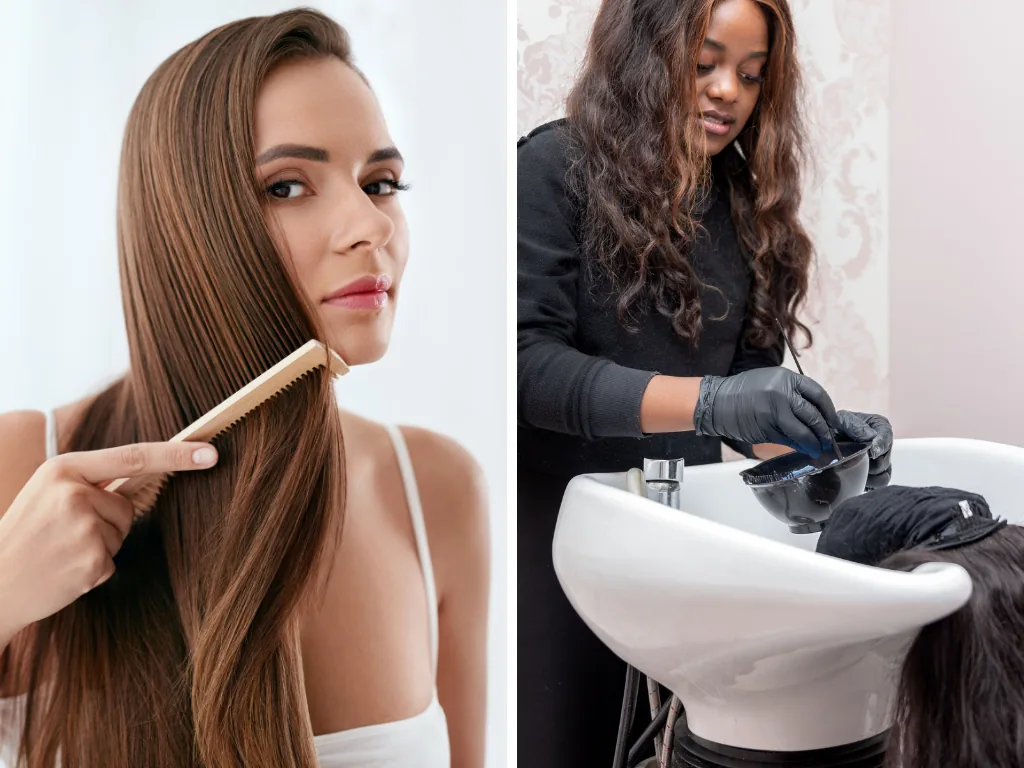
Extensions do not get natural oils from your scalp, so they dry out faster than your own hair — and dry extensions tangle, frizz and give themselves away. Wash them less often than your own hair: clip-ins only when they need it, every ten to fifteen wears, and semi-permanent extensions two or three times a week at most. Use a sulfate-free, extension-safe shampoo, wash in a downward motion rather than piling the hair on top of your head, and always condition the mid-lengths and ends. Never go to bed with wet extensions, and never brush them while they are soaking wet — squeeze out the water, apply leave-in conditioner, and detangle gently from the ends upward.
Brushing is where most damage happens. Use a loop bristle brush or a wide-tooth comb, hold the roots or the bonds with one hand while you brush with the other, and brush two or three times a day to stop tangles forming at the nape — the place extensions mat first. Heat-styling is fine on human hair, but use heat protection every time and keep irons below 180°C. At night, braid the hair loosely or put it in a low, loose plait, and sleep on a silk or satin pillowcase. Maintenance in one sentence: treat extensions like a silk blouse, not like your own hair — gently, downward, and never roughly.
Removal, Hair Health and Regrowth: Taking Extensions Out Safely
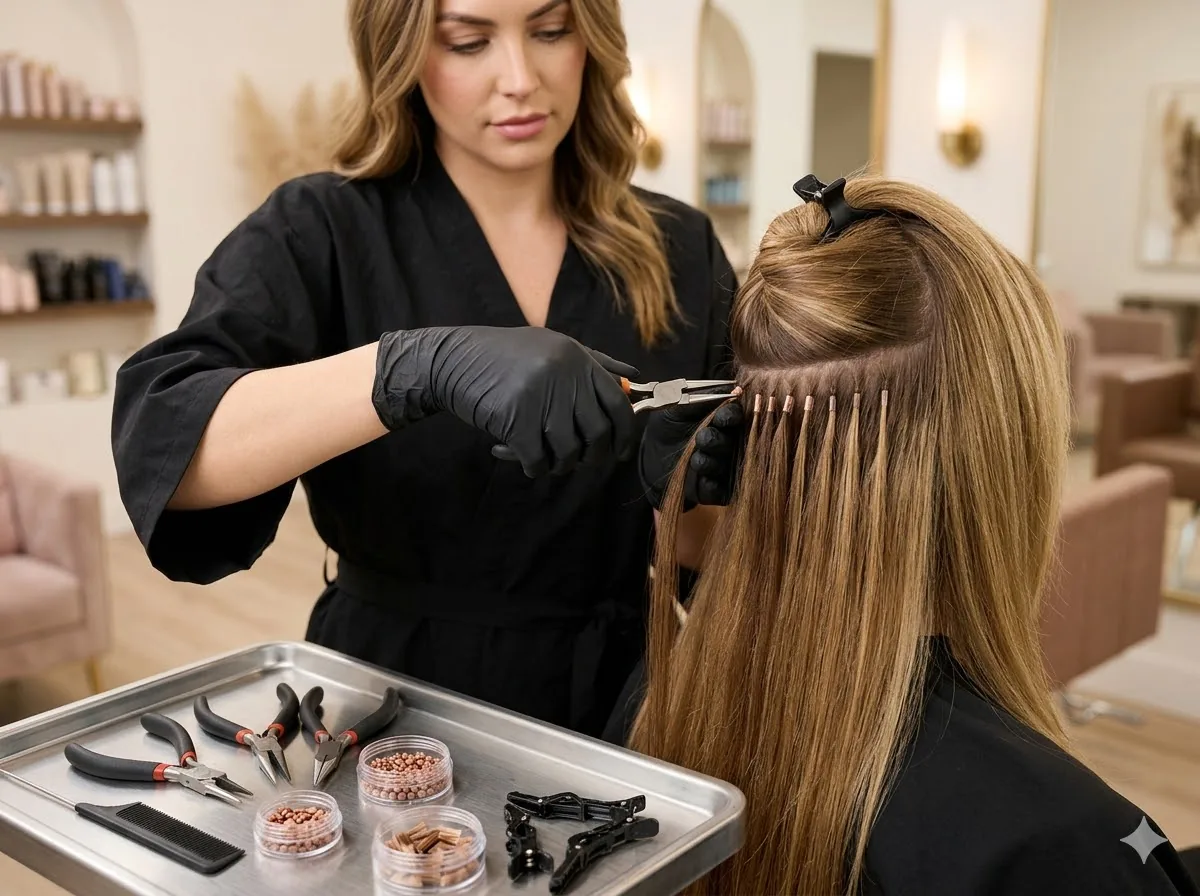
Removal is the part people rush, and it is the part that causes the most damage. Clip-ins and halos come out in seconds — unclip, slide off, done. Tape-ins must be removed with a proper tape remover, never pulled, because pulling takes your own hair with the tape. Keratin bonds need a bond-dissolving solution and a careful cracking of each bond, strand by strand, and a sew-in needs the braids unpicked gently after the wefts are cut out. If any method hurts during removal, stop: pain means your own hair is being pulled, and a few minutes of patience is worth more than a handful of broken hairs.
After removal, give your hair a break. Wash with a clarifying shampoo to remove residue, follow with a deep-conditioning mask, and trim any split ends the extensions were hiding. Most hair recovers fully within a few weeks, but if you notice thinning at the parting, a sore scalp, or patches where bonds sat, wait at least four to six weeks before refitting, and choose a lighter method next time — clip-ins or a halo rather than bonds. Who should take a longer break: anyone whose scalp was sore, anyone who lost noticeable hair during removal, and anyone whose own hair feels thinner than before. Healthy hair can wear extensions for years; the damage comes from never giving it a rest.
Eight Mistakes That Give Extensions Away — And How to Avoid Them
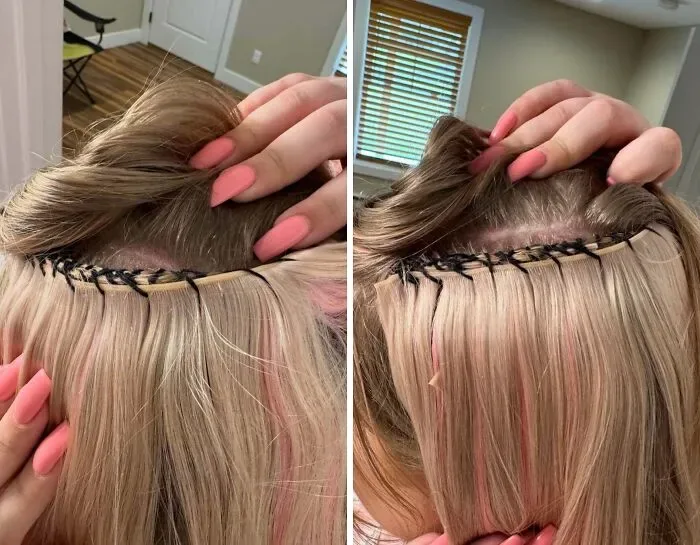
The first mistake is buying the wrong length. Extensions that jump from shoulder-length hair to 24 inches in one go will never blend — the weight, the swing and the ends all look wrong. Go two to four inches longer than your own hair for a first set, and only go longer once you know how the weight feels. The second mistake is the wrong weight: too many grams on fine hair pulls, shows the wefts, and hurts by the end of the day. The third is skipping the cut-in, the fourth is matching the wrong colour, and the fifth is wearing extensions every single day without a break.
The remaining mistakes are care mistakes: washing with sulfate shampoo, brushing from the roots down through the bonds, sleeping with wet hair, and using high heat without protection. All of them shorten the life of the hair and make it look worse week by week. Avoid them all with a simple rule: if you would not do it to a silk dress, do not do it to your extensions. And if something feels wrong — a bond that pulls, a tape that itches, a weft that shows — fix it the same day. Extensions should feel comfortable and look invisible. If they do neither, something about the fit is wrong, and a good stylist will adjust it rather than tell you to get used to it.
Clip-In Long Layers That Move Like Your Own Hair
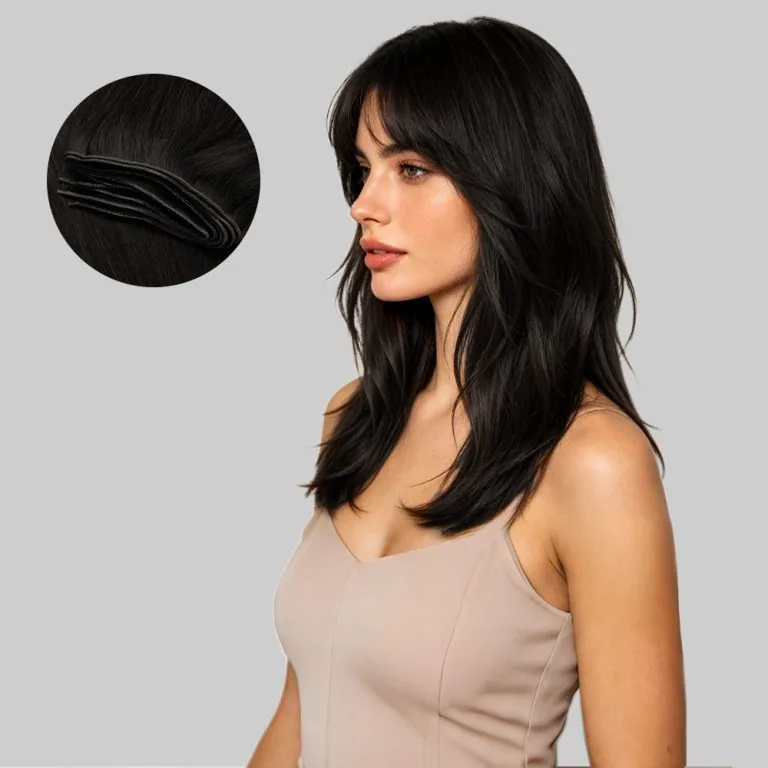
Long layers are the most forgiving first style with clip-ins, because the layers do the blending for you. The extensions add length and fullness, the layers break up the blunt ends, and the finished hair swings and moves like naturally long hair. Ask your stylist to cut the extensions into long layers after fitting, with the shortest layer starting at the collarbone and the longest falling past the chest, so there is no visible step where your hair ends and the extensions begin.
Best for: first-time extension wearers and anyone growing their hair out. How to style it: wave the extensions and your own hair together with a large-barrel curling iron, then brush the waves out softly. Cost and time: clip-ins from about $100, plus a one-off cut-in at the salon. Common mistake: clipping the wefts in too high — keep the top weft below the crown so it stays hidden under your own hair.
Tape-In Sleek Straight Hair, Glossy and Flat-Iron Smooth
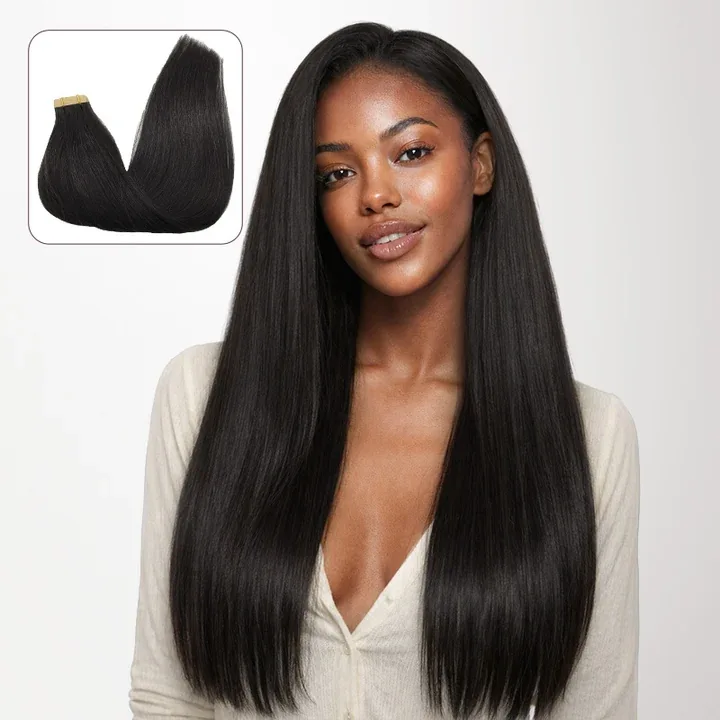
Tape-ins were made for sleek, straight hair. The wefts lie flat against the head, so there is no bulk at the roots, and the hair falls in one smooth, glossy sheet — the kind of finish that takes an hour with a flat iron on natural hair alone. This is the style for women who love a polished, expensive-looking finish and want it every morning without the daily heat styling. The key is a good flat iron and a shine serum on the ends only, never near the tapes.
Pros and cons: the flattest, most discreet semi-permanent option, and it washes and styles like your own hair — but the tapes must be kept dry for 48 hours after fitting, and oily products near the roots will loosen them. Maintenance: brush with a loop brush, avoid oil-based serums at the roots, and book a move-up every six to eight weeks. Who should avoid it: anyone who swims daily or washes their hair every day, because the tapes will not last.
Sew-In Voluminous Curls With Real Bounce
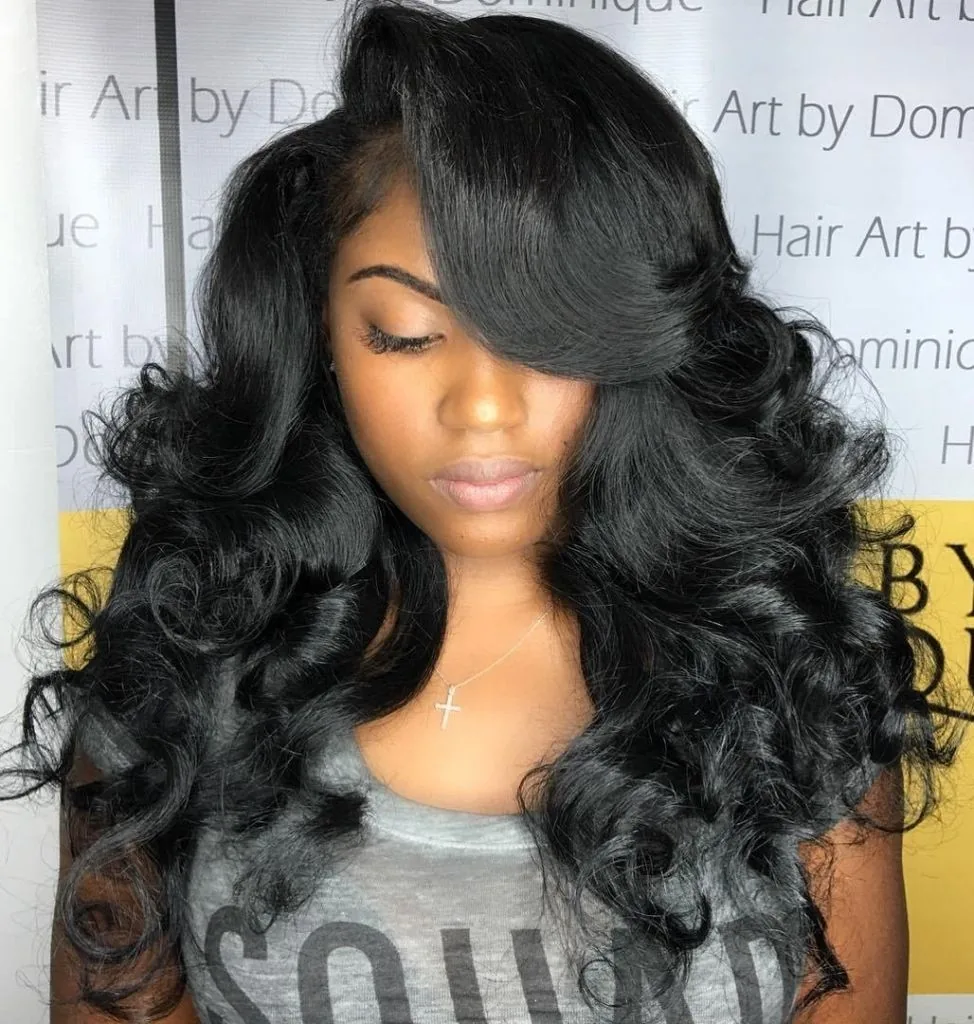
A sew-in with voluminous curls is the most dramatic transformation in this guide: thick, bouncy curls that hold their shape all day, with a fullness that natural hair rarely achieves on its own. The wefts are stitched onto braids, so the base is secure and the curls can be big without the extensions shifting. This style suits thick or textured hair best, because the braided base hides easily under a full head of hair and the weight is distributed evenly.
How to style it: curl with a medium-barrel iron, let the curls cool before touching them, then separate them gently with your fingers. Cost and time: two to three hours to fit, lasting eight to ten weeks. Who should avoid it: anyone with very fine or fragile hair — the braids and the weight can pull. Quick verdict: if you want maximum volume that stays put, a sew-in is the most secure way to get it.
The Halo for Instant Length, With No Glue, Tape or Clips
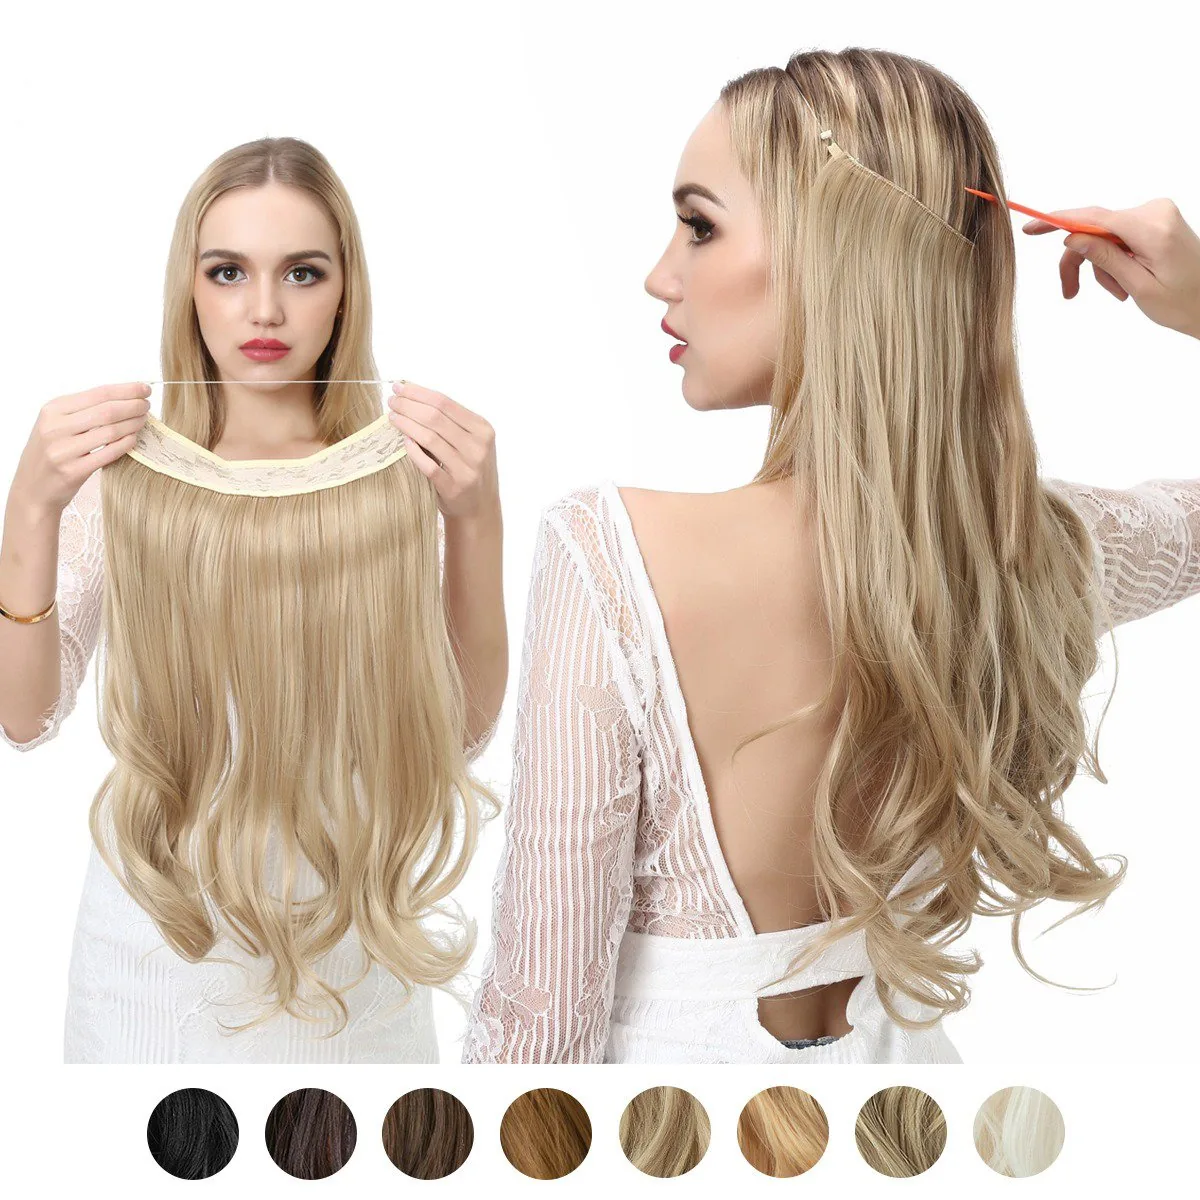
A halo is the kindest extension there is: a single weft on a fine wire that sits on your head, with your own hair pulled over the wire to hide it. There is no glue, no tape, no clips and no damage, and it takes about two minutes to put on. It is the best choice for a special occasion, for trying out long hair before committing to a semi-permanent method, and for anyone whose hair is too fine or fragile for anything attached to it. The wire sits invisibly once your top layer of hair covers it.
Best for: fine or damaged hair, special occasions, and first-timers. How to style it: place the halo, pull your own hair over the wire, then curl or wave everything together so the two blend. Pros and cons: zero damage and instant removal — but on very straight, slippery hair the halo can slide, and it will not stay put for swimming or intense exercise. Maintenance: almost none — wash it only when it needs it, and store it on a hanger or in its box.
Keratin-Bond Extensions That Fall Like Natural Hair
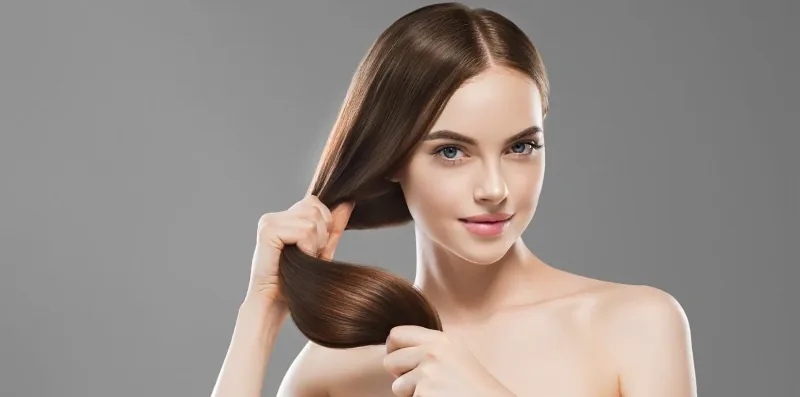
Keratin-bond extensions are the closest thing to natural long hair, because the hair is attached strand by strand rather than in wefts. Each bond is tiny, the strands move independently, and you can wear your hair up, part it anywhere, and tie it back without a weft showing. The finish is soft and natural, with no flat line or bulk at the roots — which is why this is the method celebrities and brides choose when the hair will be photographed from every angle.
Cost and time: the most expensive method, $500 to $1,500 or more, taking three to four hours to fit and lasting three to five months. Maintenance: brush carefully around the bonds, avoid oil-based products at the roots, and never pull at a bond. Who should avoid it: anyone on a tight budget, and anyone who does not want to commit to months of careful maintenance. Quick verdict: the most invisible extension — and the most expensive one to keep that way.
The Clip-In High Ponytail, Full and High
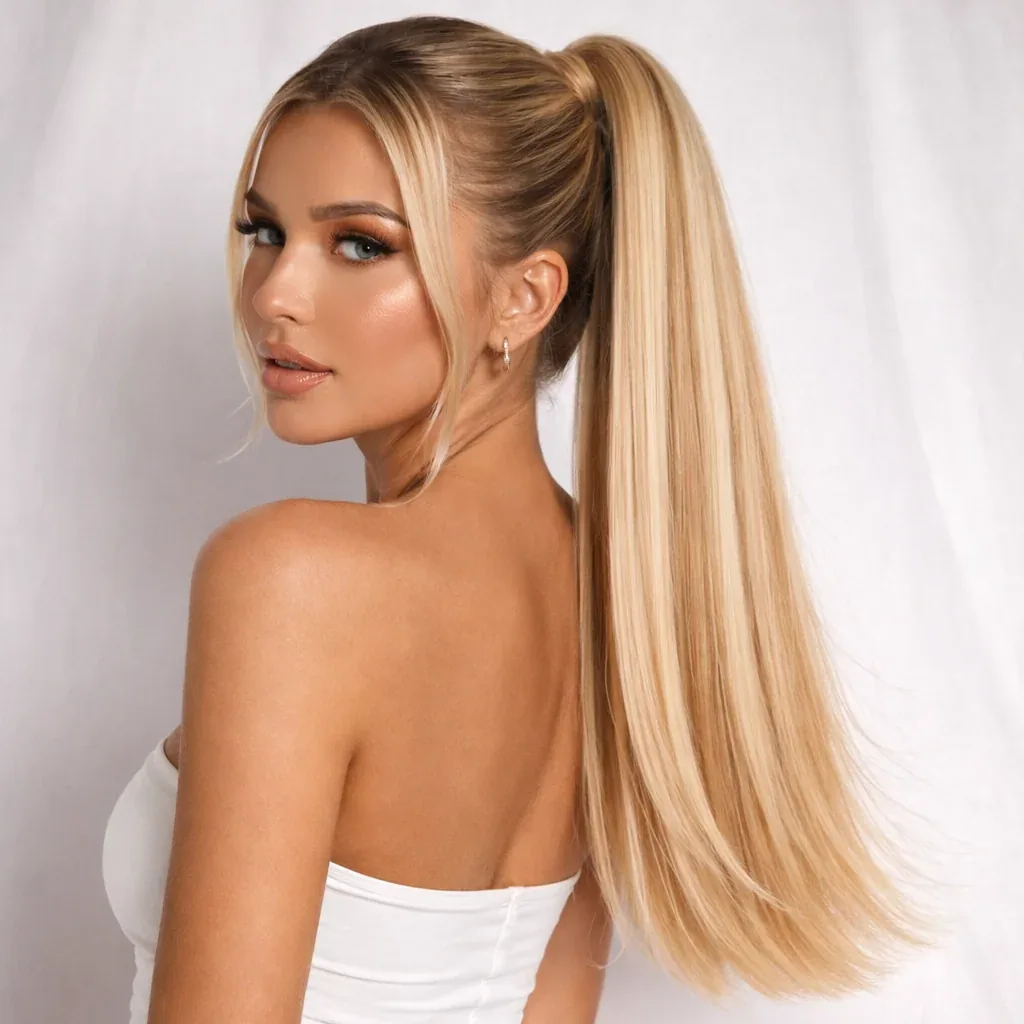
A high ponytail is where extensions earn their keep, because a ponytail shows off length and thickness in a way loose hair does not. Clip-in ponytail pieces — or a few wefts wrapped around your own ponytail — add instant length, swing and drama, and a strand of hair wrapped around the base hides the join completely. This is the style for nights out, gym-to-dinner days, and anyone who loves a snatched, polished ponytail but does not have the thickness to carry one.
How to style it: tie your own hair high, clip the ponytail piece over it, wrap a strand around the base and pin it underneath. Common mistake: placing the ponytail too low or too loose, so the extensions sag by evening — anchor it firmly with two hair ties. Cost and time: a ponytail piece from about $50, fitted in five minutes. Who should avoid it: anyone with very short hair, because the join at the base will be hard to hide.
Tape-In Beach Waves That Look Sun-Kissed
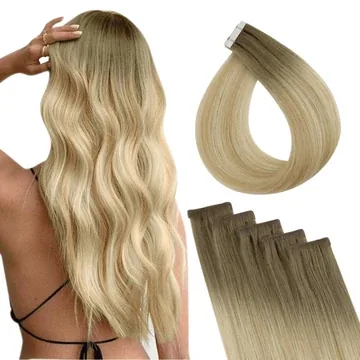
Beach waves and tape-ins are a natural pair: the waves hide the tapes completely, the texture makes the blend forgiving, and the finished hair looks like it dried in sea air rather than in a salon. This is the most relaxed semi-permanent look, and it suits holidays, summer weddings and anyone who wants long hair without looking done. Wave the extensions and your own hair together with a flat iron, alternating the direction of each wave, and the join disappears into the texture.
Best for: holidays, summer, and anyone who wants low-effort long hair. How to style it: salt spray on damp hair, scrunch, and air-dry — or a flat-iron wave for more definition. Maintenance: the waves disguise regrowth, so tape-in move-ups can stretch a little longer than with straight hair. Pros and cons: the most forgiving blend of any semi-permanent style, but the waves will drop faster on very straight, heavy extension hair, so a texturising spray helps.
The Sew-In Bob: Short Hair With Fullness, Not Just Length
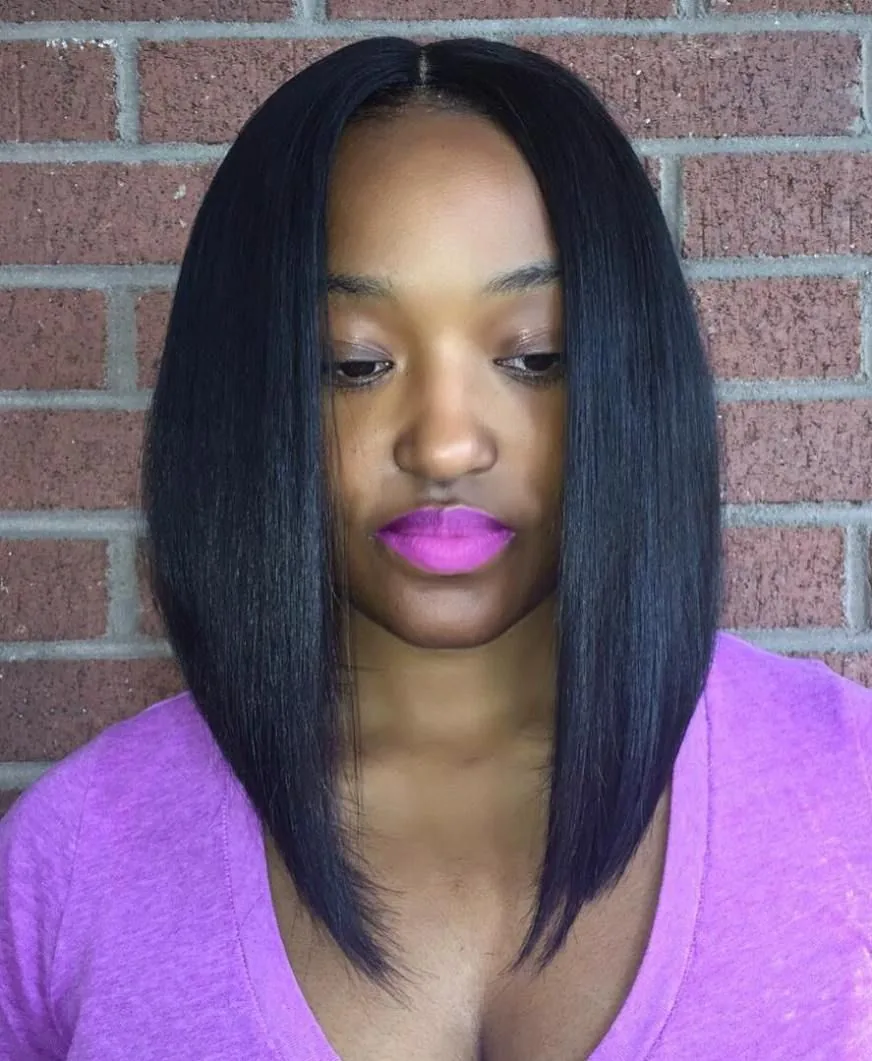
Extensions are not only for long hair. A sew-in bob adds fullness and swing to a chin-length or jaw-length bob, giving it the volume and shape that fine hair alone cannot hold. The wefts are cut into the bob shape, so the ends are blunt and even, and the hair moves as one piece. This is the style for women who love a bob but are tired of it falling flat, and for anyone growing out a pixie who wants a fuller bob while they wait.
How to style it: blow-dry with a round brush, turning the ends under, or wave the ends outward for a French feel. What to ask: ask for the wefts to be cut to the exact bob length, not left longer and trimmed later — a bob lives or dies on its ends. Cost and time: a shorter sew-in is quicker to fit than a long one, usually under two hours. Common mistake: adding too much length — a bob with extensions should look like a better bob, not a long style pretending to be short.
The Halo Half-Up Hairstyle, Romantic and Easy
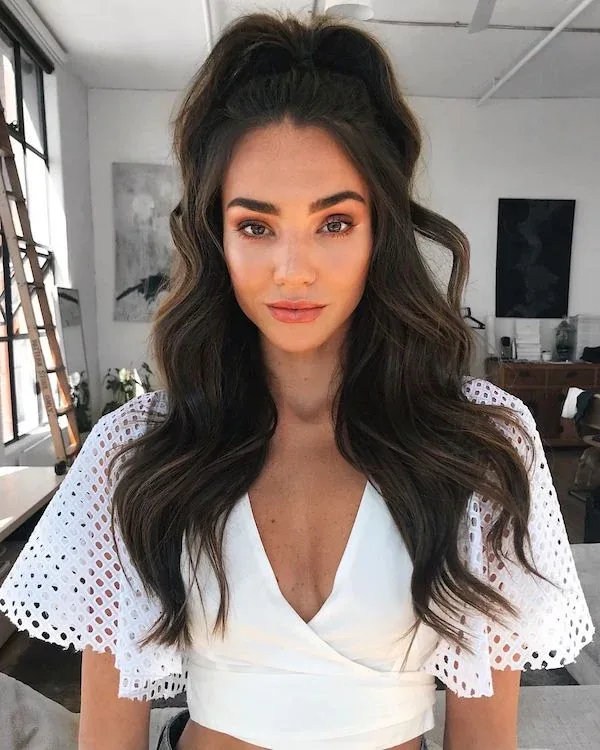
A half-up style is the halo’s best friend, because the top half of your own hair covers the wire completely, and the bottom half shows off the length. Gather the top section, twist or braid it loosely, pin it at the crown, and let the rest fall long and wavy underneath. The result is romantic, soft and effortless — the kind of hairstyle that looks like it took an hour and actually took ten minutes, and it stays secure all day because the halo is held in place by your own pinned hair.
Best for: weddings, dates, and anyone who wants long hair without wearing it all down. How to style it: place the halo first, then gather the top half over it and pin loosely — do not pull it tight, or the wire will show. Pros and cons: the most secure way to wear a halo, and the most flattering half-up style — but it will not work if your own top layer is very short. Quick verdict: the easiest special-occasion style in this guide.
Keratin-Bond Balayage: Colour and Length in One Fitting
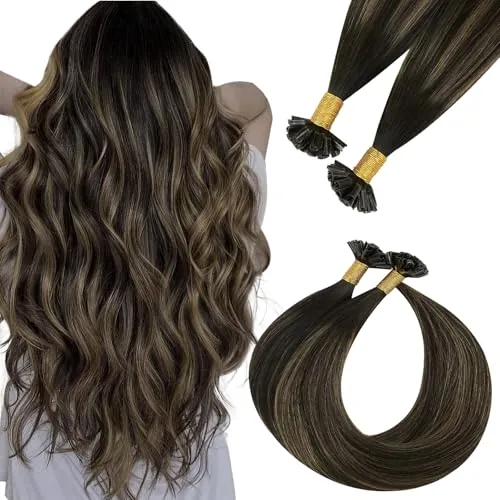
A keratin-bond balayage combines two services at once: the extensions add length, and the hand-painted colour in the extension hair adds the sun-kissed, dimensional balayage that natural hair takes hours to achieve. The bonds are placed to match your own balayage, with lighter pieces at the ends and darker ones at the roots, so the colour and the length grow out together. It is the most expensive style in this guide, and the most photogenic — the colour catches the light in every curl and wave.
Cost and time: expect $800 to $1,500 or more, with three to four hours in the salon. Maintenance: colour-safe, sulfate-free shampoo, a purple toning treatment if the blonde turns brassy, and a weekly mask. Who should avoid it: anyone who wants a low-maintenance style — this one needs regular salon care. Common mistake: matching the balayage to your roots instead of your ends, which leaves a visible colour step halfway down.
Clip-In Mermaid Waves, Long and Flowing
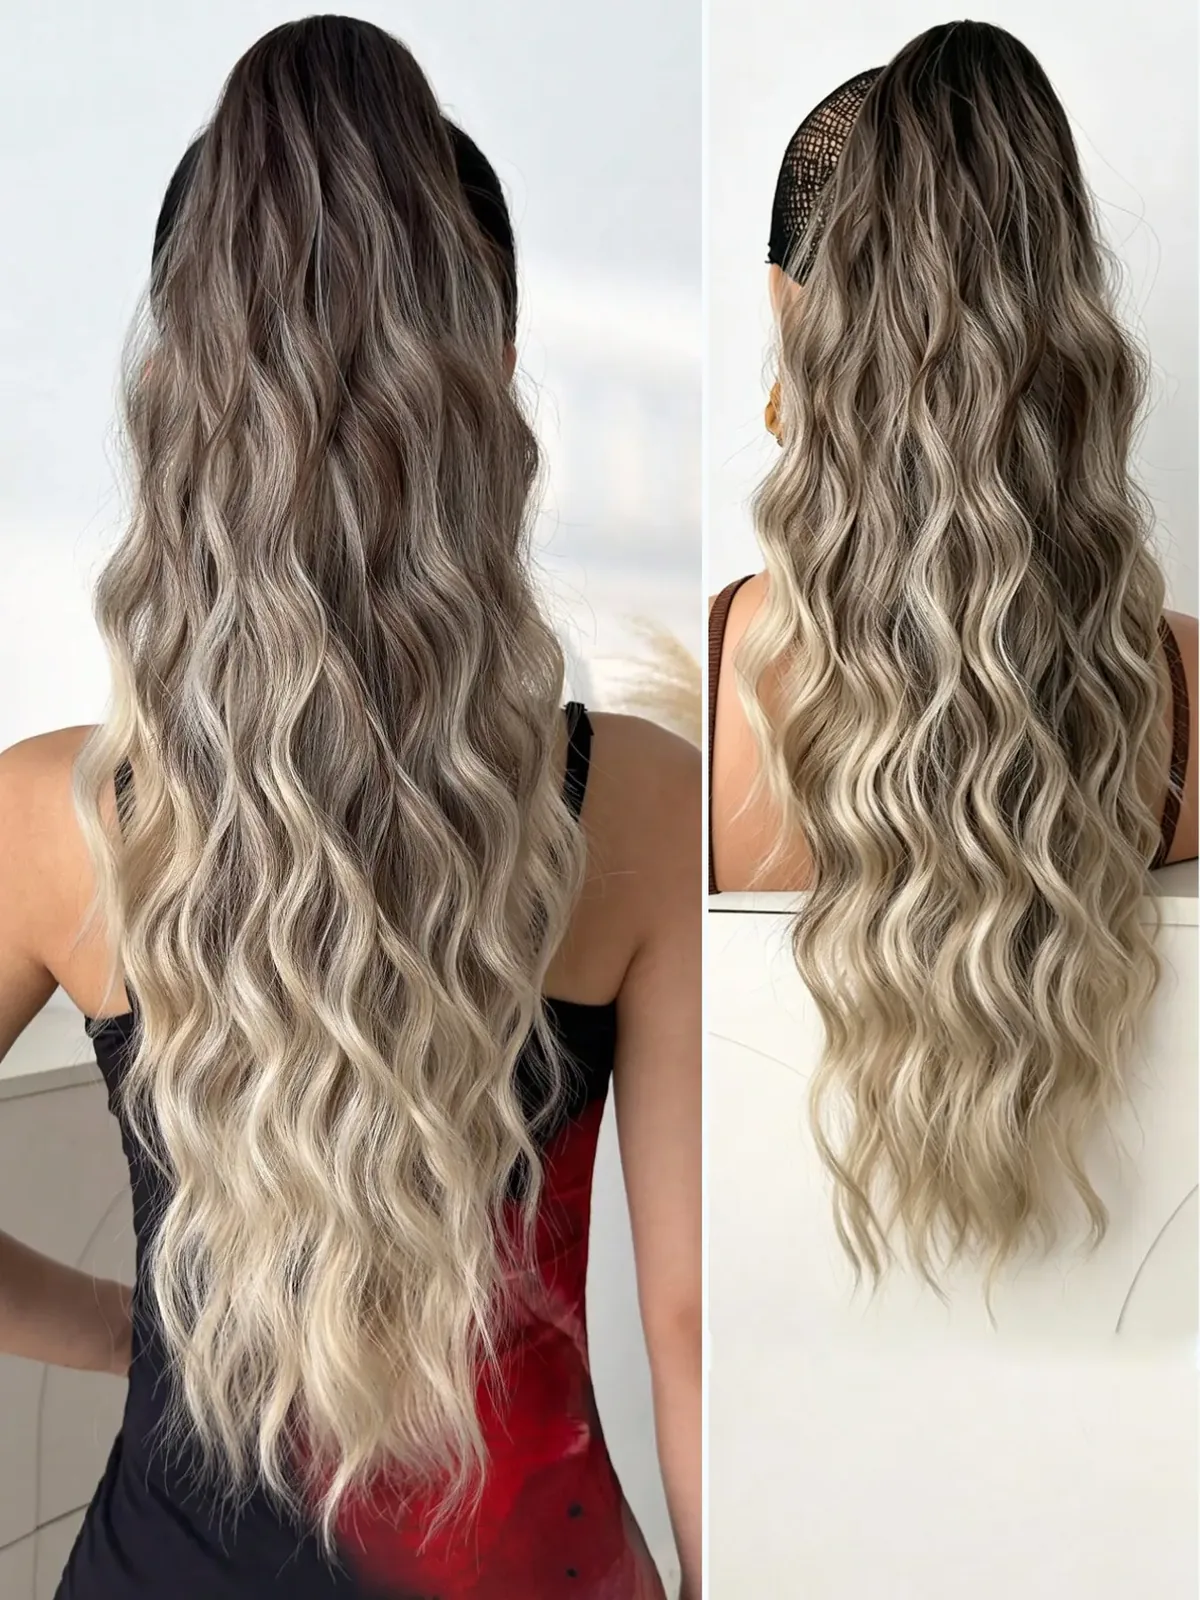
Mermaid waves are long, loose, flowing waves that fall past the chest, and clip-ins are the easiest way to get them without waiting years for your hair to grow. The waves are created with a large-barrel iron, brushed out softly so they look like water rather than curls, and the length does the rest. This is the style for photos, parties and anyone who has always wanted hair that moves when they turn their head. The key is length: mermaid waves need at least 20 inches to read properly, so do not buy a short set and expect the same effect.
Best for: special occasions, photoshoots, and long-hair dreams. How to style it: wave with a large barrel, brush through with a wide-tooth comb, and finish with a light shine spray. Pros and cons: the most dramatic clip-in style, and completely removable at the end of the night — but it is heavy, so it will not suit fine hair for a full day. Maintenance: clip-ins only need washing every ten to fifteen wears.
The Tape-In Low Bun, Sleek and Secure
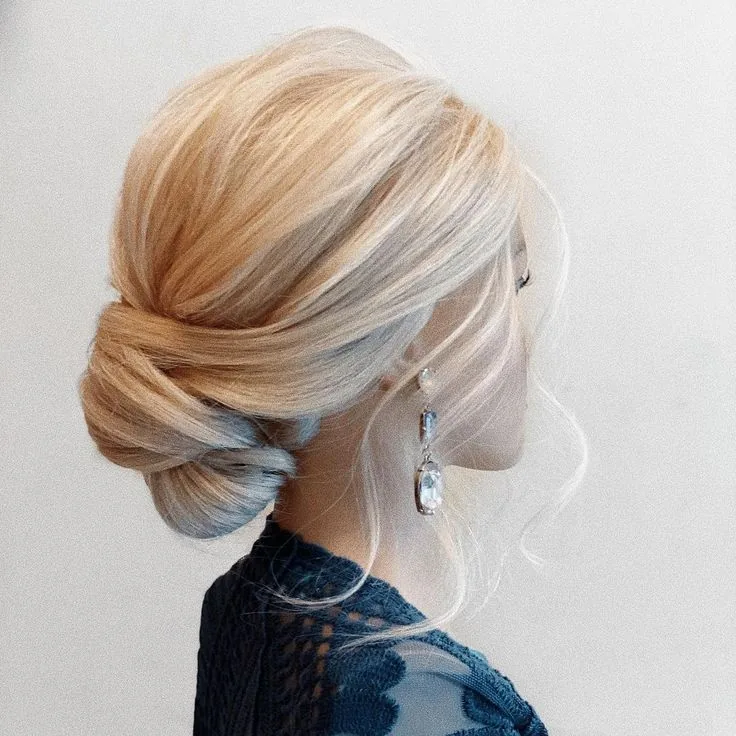
A low bun with tape-ins is the most elegant way to wear extensions up, because the tapes lie flat and the bun sits neatly at the nape without bulk. Gather the hair low, twist it into a bun, pin it securely, and pull out two soft face-framing pieces. The bun stays put all day, the tapes are hidden under the gathered hair, and the finished look is polished enough for work, weddings and formal evenings. It is also the bun that best hides regrowth, because the tapes sit above the bun and the hair is pulled smooth over them.
Best for: work, weddings, and formal occasions. How to style it: smooth the top with a brush and a little gel, twist the lengths into a low bun, and pin with U-shaped pins. Common mistake: pulling the bun too tight, which puts pressure on the tapes and can loosen them. Cost and time: ten minutes to style, once the tape-ins are fitted. Who should avoid it: anyone whose tapes are due for a move-up — loose tapes will show in an updo.
Sew-In Side-Swept Glamour for Evenings Out
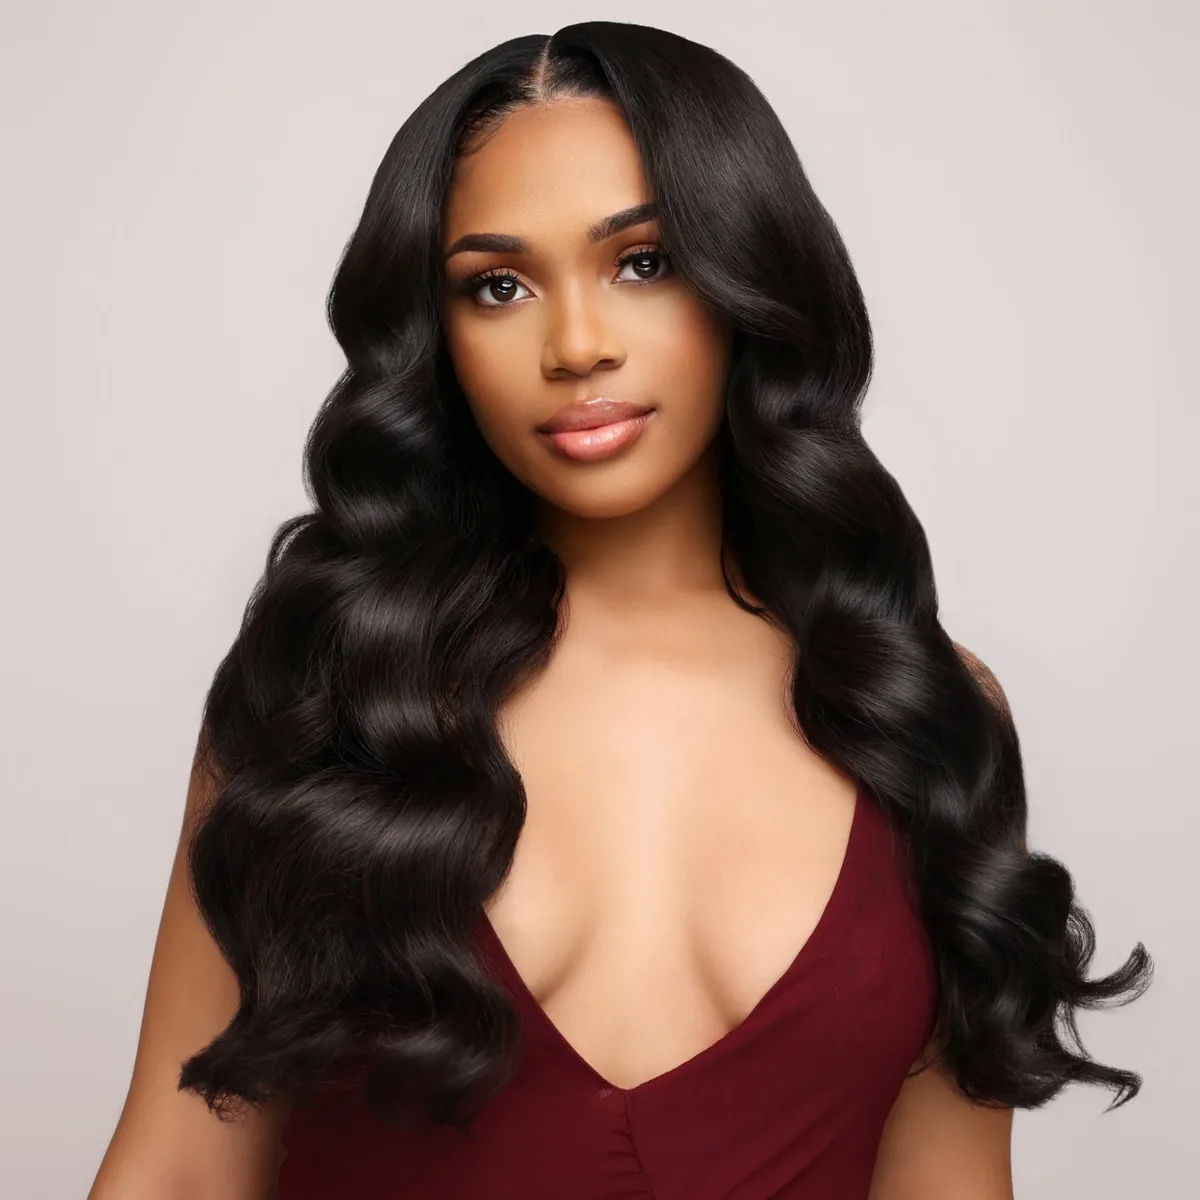
Side-swept hair is the classic evening look, and a sew-in gives it the volume and hold that natural hair often lacks. Sweep all the hair to one side, curl it in large, soft waves, and pin it loosely at the nape so it falls over one shoulder. The weight of the extensions keeps the sweep in place, the curls hold for hours, and the finished look is old-Hollywood glamour without an hour of hot tools. It suits long hair best, where the sweep has room to fall, and it photographs beautifully from the side it falls on.
Best for: evenings, parties, and anyone who wants a glamorous, red-carpet feel. How to style it: curl with a large barrel, sweep to one side, and pin discreetly at the nape. Pros and cons: the most glamorous sew-in style, and very secure — but it is heavy, and you will feel it by the end of the night. Maintenance: a sew-in lasts eight to ten weeks, so book the fitting a week before the event, not the day before.
The Halo Braided Crown, Soft and Boho
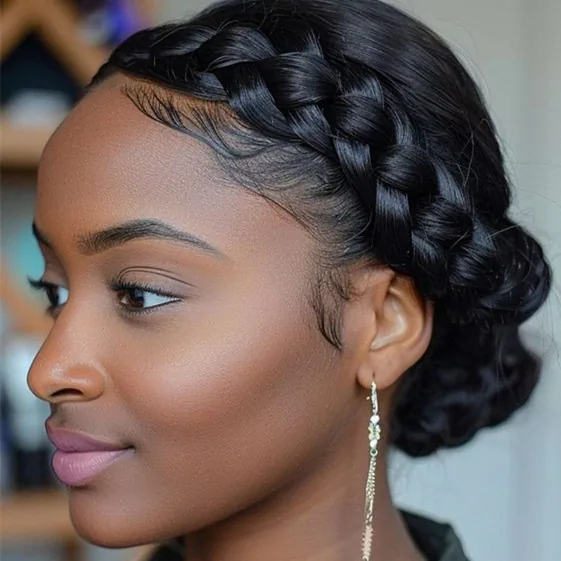
A braided crown with a halo is a soft, boho style that looks intricate and takes minutes. Braid two sections from either side of your head, bring them across the crown, pin them in place, and let the halo length fall underneath. The braids hide the halo wire completely, the length gives the style its drama, and the overall effect is romantic and festival-ready. It is the style for outdoor weddings, summer parties and anyone who loves braids but does not have the length to make them look full.
How to style it: place the halo, braid loosely — tight braids will pull the wire — and pin with bobby pins that match your hair colour. Best for: festivals, outdoor weddings, and boho style. Common mistake: braiding before placing the halo, which leaves the wire visible. Quick verdict: the prettiest way to wear a halo, and the easiest braid in this guide.
Clip-In Volume for Thin Hair, Without the Weight
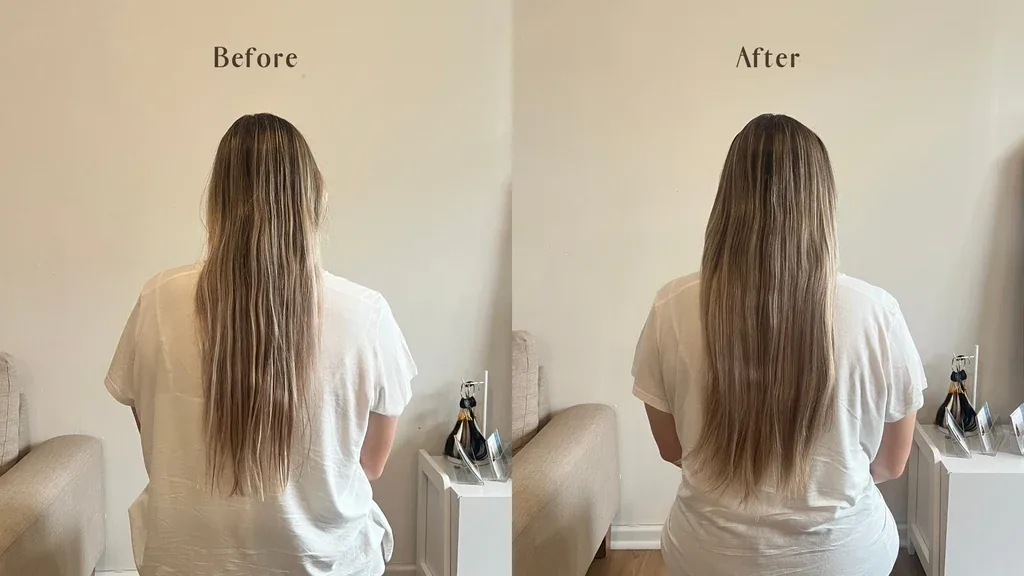
Thin hair is where clip-ins shine, because you control exactly how much weight you add. A single weft at the crown and one on each side can double the visible volume without pulling on fragile hair, and because clip-ins come out at night, there is no constant tension on the roots. The trick is to use fewer, lighter wefts than you think you need, and to backcomb the roots slightly before clipping, so the clips grip and the wefts stay hidden under your own hair.
Best for: thin or fine hair that needs volume, not length. How to style it: backcomb the crown lightly, clip in the wefts, then smooth the top layer over them and add a soft wave. Who should avoid heavy sets: anyone with very fine hair — a full 200-gram set will pull and show. Cost and time: a lightweight set from about $80, fitted in ten minutes. Pros and cons: the kindest volume for thin hair, but it will not give you mermaid length — and that is the point.
Tape-In Face-Framing Layers That Slim the Face
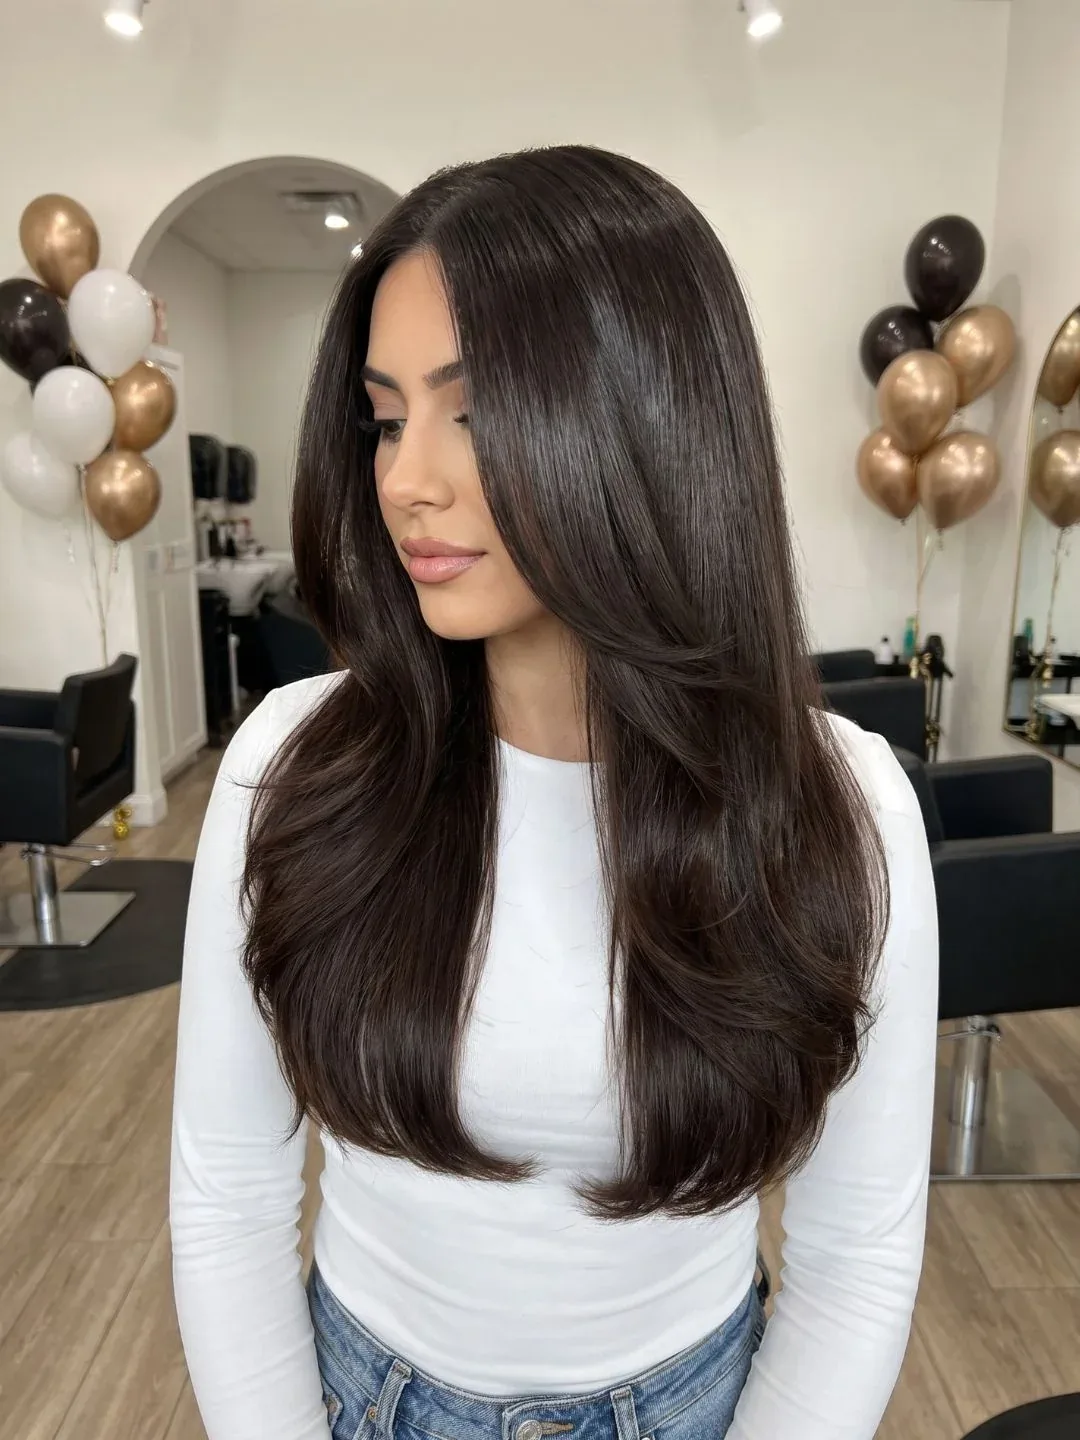
Face-framing layers are the short pieces at the front that fall around the cheeks and jaw, and tape-ins can create them even if your own front pieces are too short or too thin. The stylist places the tapes so the front pieces blend into your own hair, then cuts them to frame your face — longer at the sides, shorter near the cheeks. The result softens the whole face, makes the extensions look custom-cut, and draws attention to the eyes. It is the small detail that makes tape-ins look like they were designed for you.
Best for: anyone who wants their extensions to flatter their face, especially round and square faces. What to ask: ask for the front pieces to be cut after fitting, not before, so the length matches your face. Maintenance: the front pieces grow out fastest, so they need a trim every six weeks. Common mistake: cutting the face-framing pieces too short — the tape-in hair will not grow back, so leave them longer than you think.
The Sew-In Wedding Updo That Lasts All Day
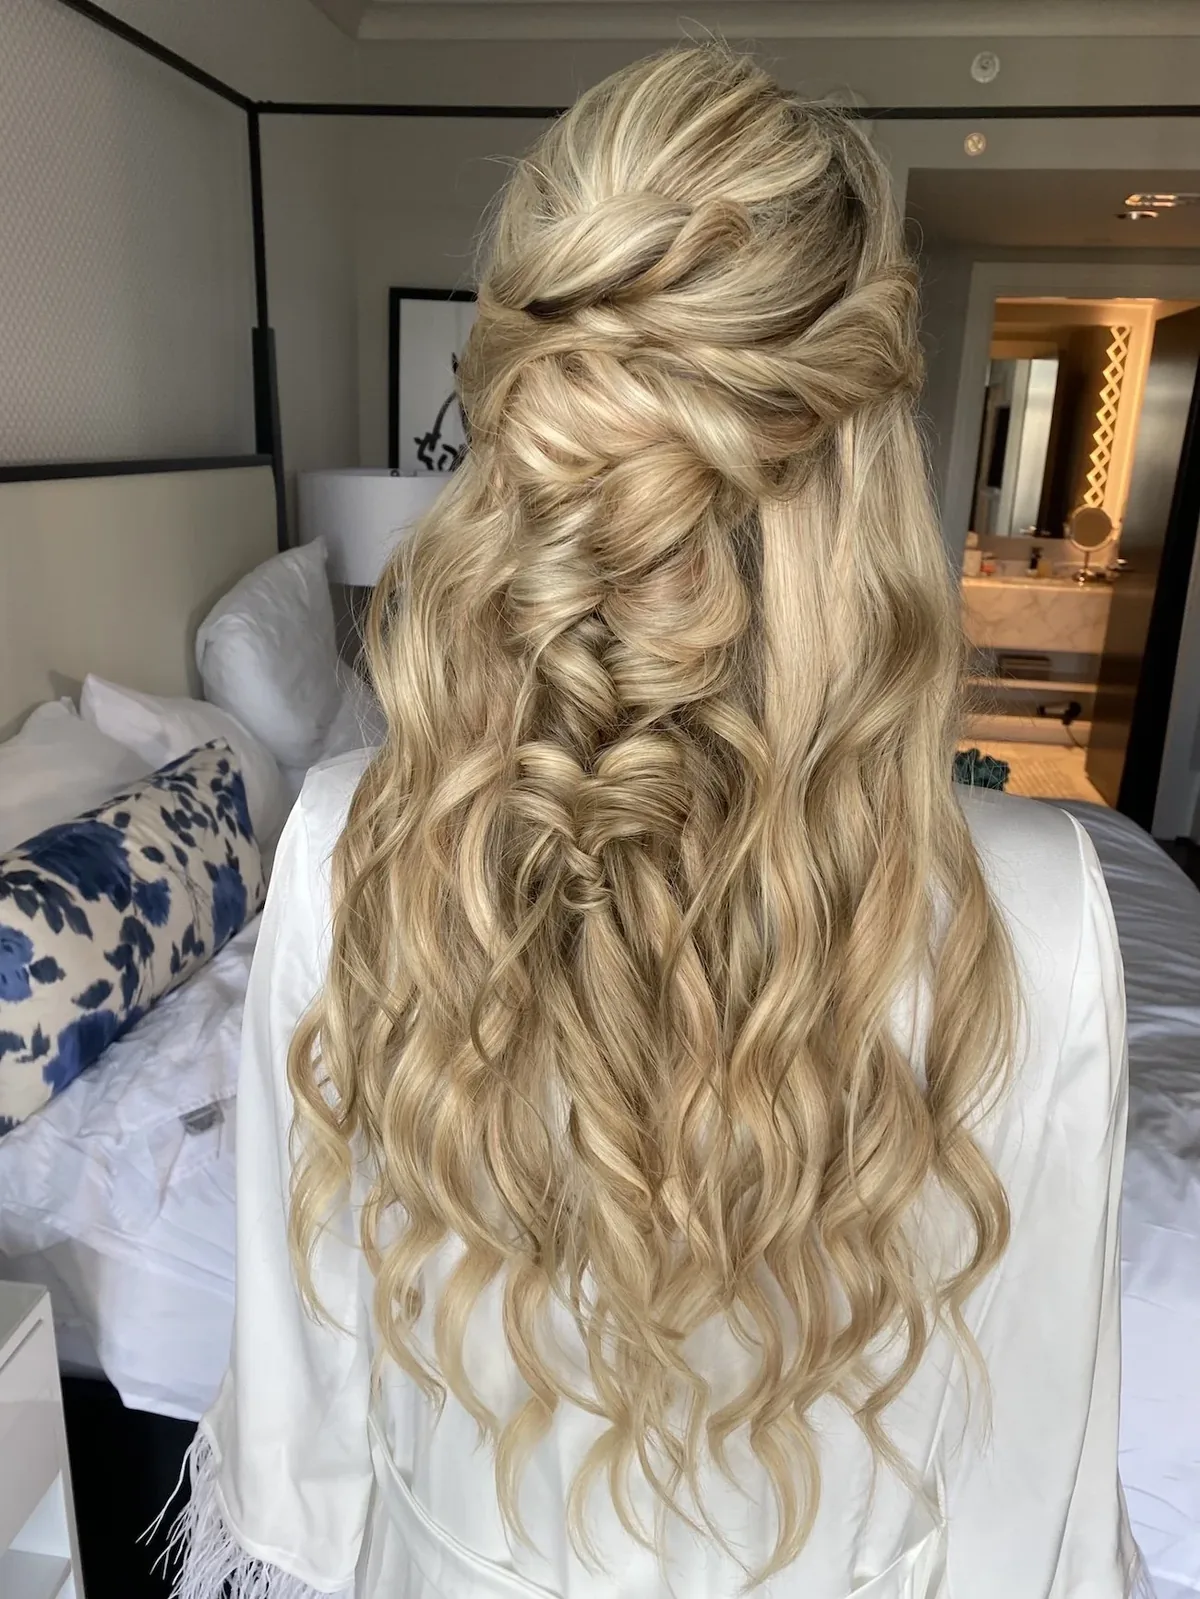
A wedding updo with a sew-in is the most practical bridal hair decision, because the extensions are already secure, the updo will not fall out during the first dance, and the curls will hold from the ceremony to midnight. Book the sew-in a week before the wedding, have a trial run of the updo on the fitted hair, and on the day the stylist can pin, twist and curl without worrying about the base. The extra fullness also means the updo looks bigger, softer and more romantic than it would on natural hair alone.
Best for: brides who want a secure, lasting updo. What to ask: ask for a trial of the exact wedding style on the fitted extensions, and bring your veil or hairpiece to the trial. Cost and time: plan the sew-in, a trial and the wedding-day styling as three separate appointments. Quick verdict: the bridal style that removes the most worry from the day — the hair is done before the morning even starts.
Halo Loose Curls for Date Night
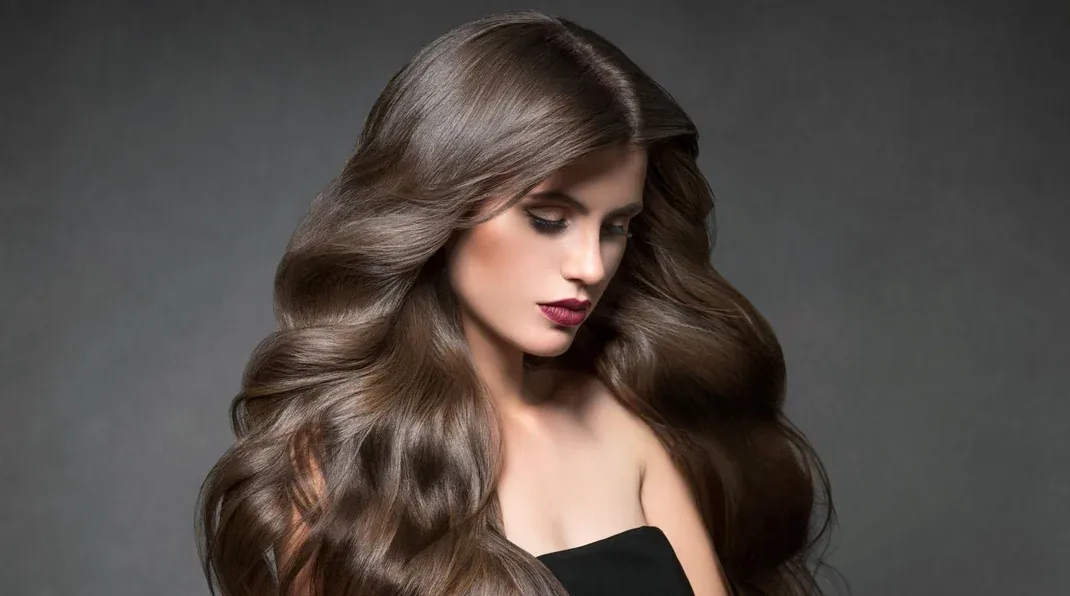
Loose curls and a halo are the easiest date-night combination: the halo adds the length, the curls add the softness, and the whole style takes twenty minutes. Curl the halo and your own hair together with a medium barrel, let the curls cool, then shake them out with your fingers for a soft, touchable finish. The halo is invisible under the curls, the length looks completely natural, and you can take the whole thing off when you get home — no salon visit, no commitment, no damage.
Best for: date nights, dinners, and anyone who wants long, curly hair for one evening. How to style it: curl everything together, not separately, so the two blend. Pros and cons: the quickest glamorous style in this guide, and completely removable — but it will not survive rain or humidity as well as a semi-permanent method. Cost and time: a halo from about $150, plus twenty minutes of styling.
Keratin-Bond Long Straight Hair With Layers
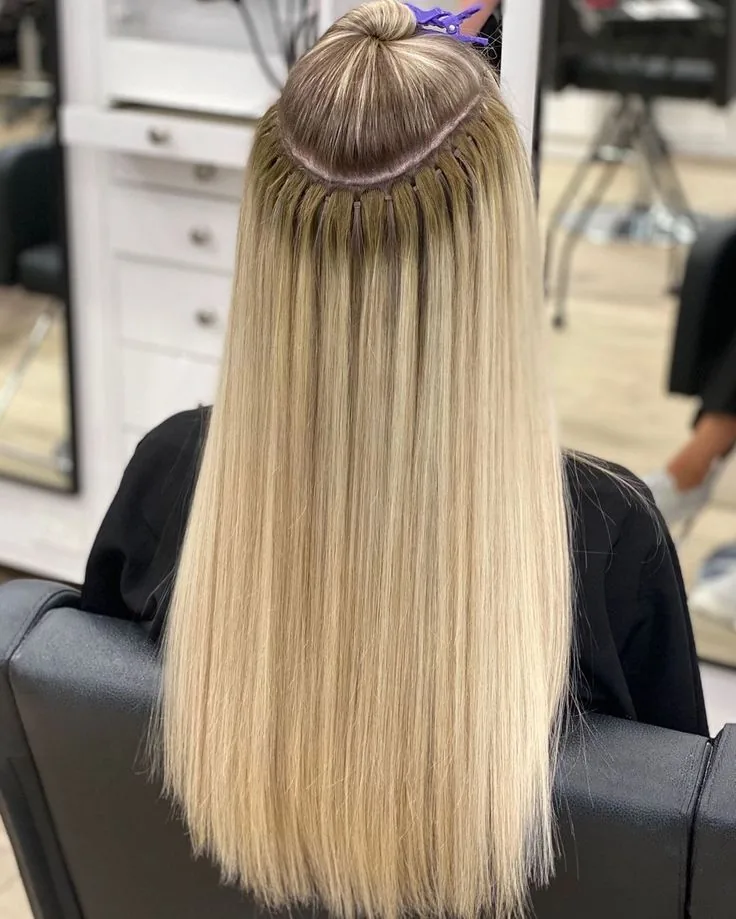
Long, straight, layered hair is the hardest look to fake — and the one keratin bonds do best. Because the strands are attached individually, there is no weft line, no bulk, and the hair falls in one smooth, natural sheet, with layers that move independently. It is the style for women who love straight hair and want it longer, thicker and glossier, without a visible join anywhere. The bonds are tiny and sit flat, so you can wear the hair straight down, part it anywhere, and run your fingers through it without feeling anything.
Maintenance: brush with a loop brush, use heat protection every time you flat-iron, and avoid oil-based products at the roots. Cost and time: $500 to $1,500, lasting three to five months. Who should avoid it: anyone who washes their hair daily with heavy conditioner at the roots — the bonds will slip. Quick verdict: the most natural long, straight hair money can buy, and the hardest to spot in real life.
The Clip-In Messy Bun, Full and Effortless
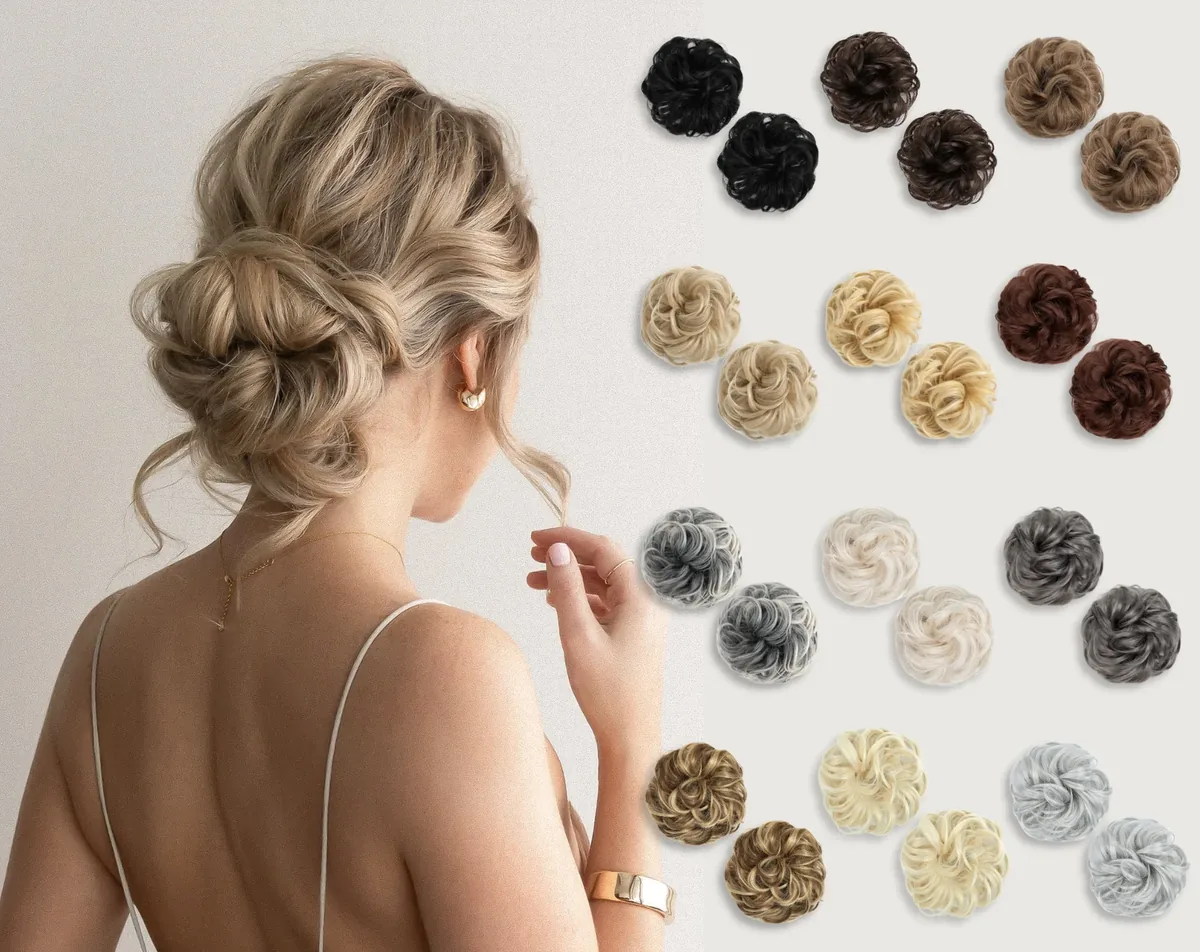
A messy bun is supposed to look effortless, but on thin hair it often looks small and sad. Clip-ins fix that in minutes: add a weft or two at the crown, gather the hair into a high bun, pull out a few loose pieces, and the bun is suddenly full, soft and intentionally messy. The extensions give the bun its size, the loose pieces give it its softness, and the whole style looks like you have naturally thick hair that you just threw up. It is the best everyday use for clip-ins, because it takes five minutes and transforms a basic bun completely.
How to style it: clip in the wefts, gather high, twist loosely, pin, then pull out face-framing pieces and gently tug the bun wider. Common mistake: making the bun too neat — a messy bun needs unevenness to look right. Best for: busy mornings, gym days, and second-day hair. Cost and time: five minutes, with clip-ins you already own. Who should avoid it: anyone whose wefts are too heavy — a heavy bun will sag by lunchtime.
Tape-In Ombre: Dark Roots, Light Ends, No Bleach on Your Own Hair
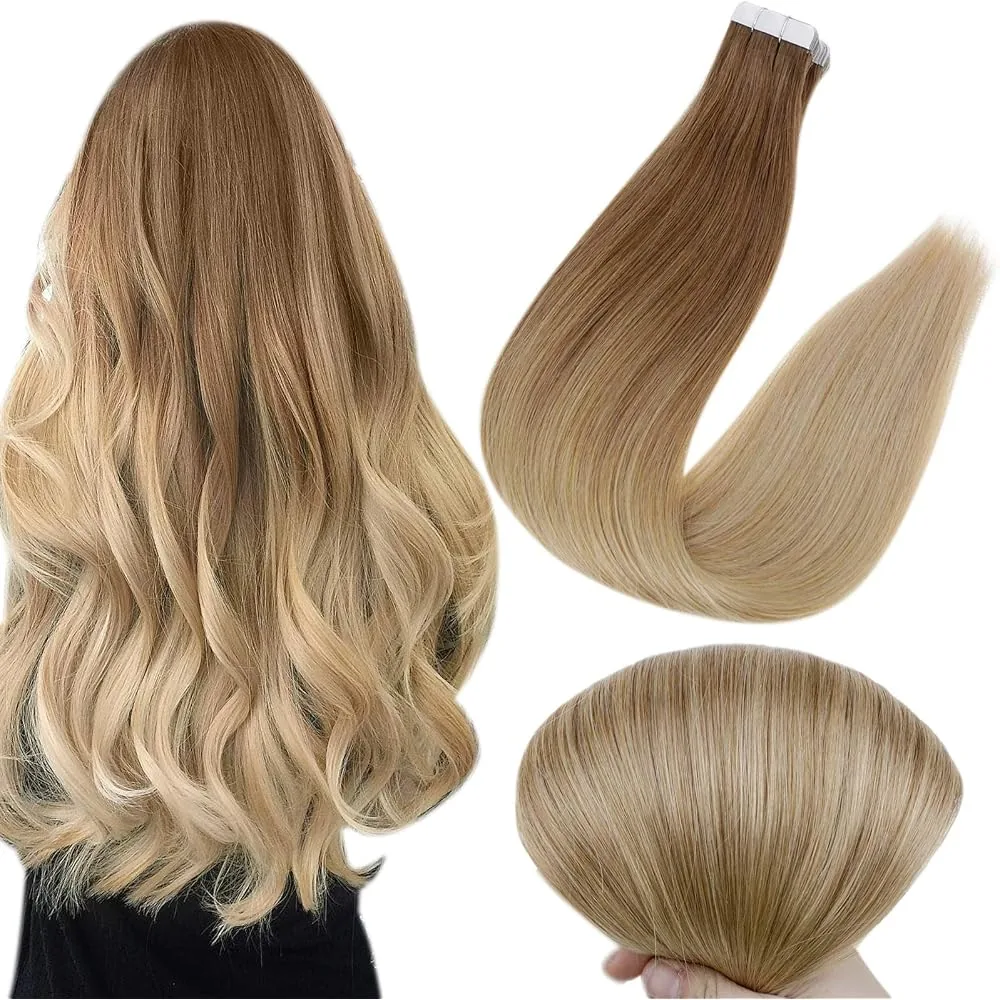
An ombre with tape-ins gives you the colour without the bleach. The extension wefts carry the lighter ends, your own hair keeps its natural roots, and the two blend where the colour changes — so you get the sun-kissed, lived-in ombre look without lightening your own hair at all. It is the smartest way to try a lighter colour, because if you do not like it, the extensions come out and your hair is untouched. The key is a gradual transition, not a harsh line, so choose wefts that blend from your base shade to the lighter shade over several inches.
Best for: anyone who wants to try ombre or lighter ends without bleaching. What to ask: ask for wefts that match your roots at the top and lighten gradually — a sudden colour change will look like a wig. Maintenance: colour-safe shampoo, and a toning treatment if the ends turn brassy. Pros and cons: all of the colour, none of the damage — but the ombre will only look right if the wefts are placed so the colour change falls at the same place on every strand.
Sew-In Deep Side Part, Old-Hollywood Volume
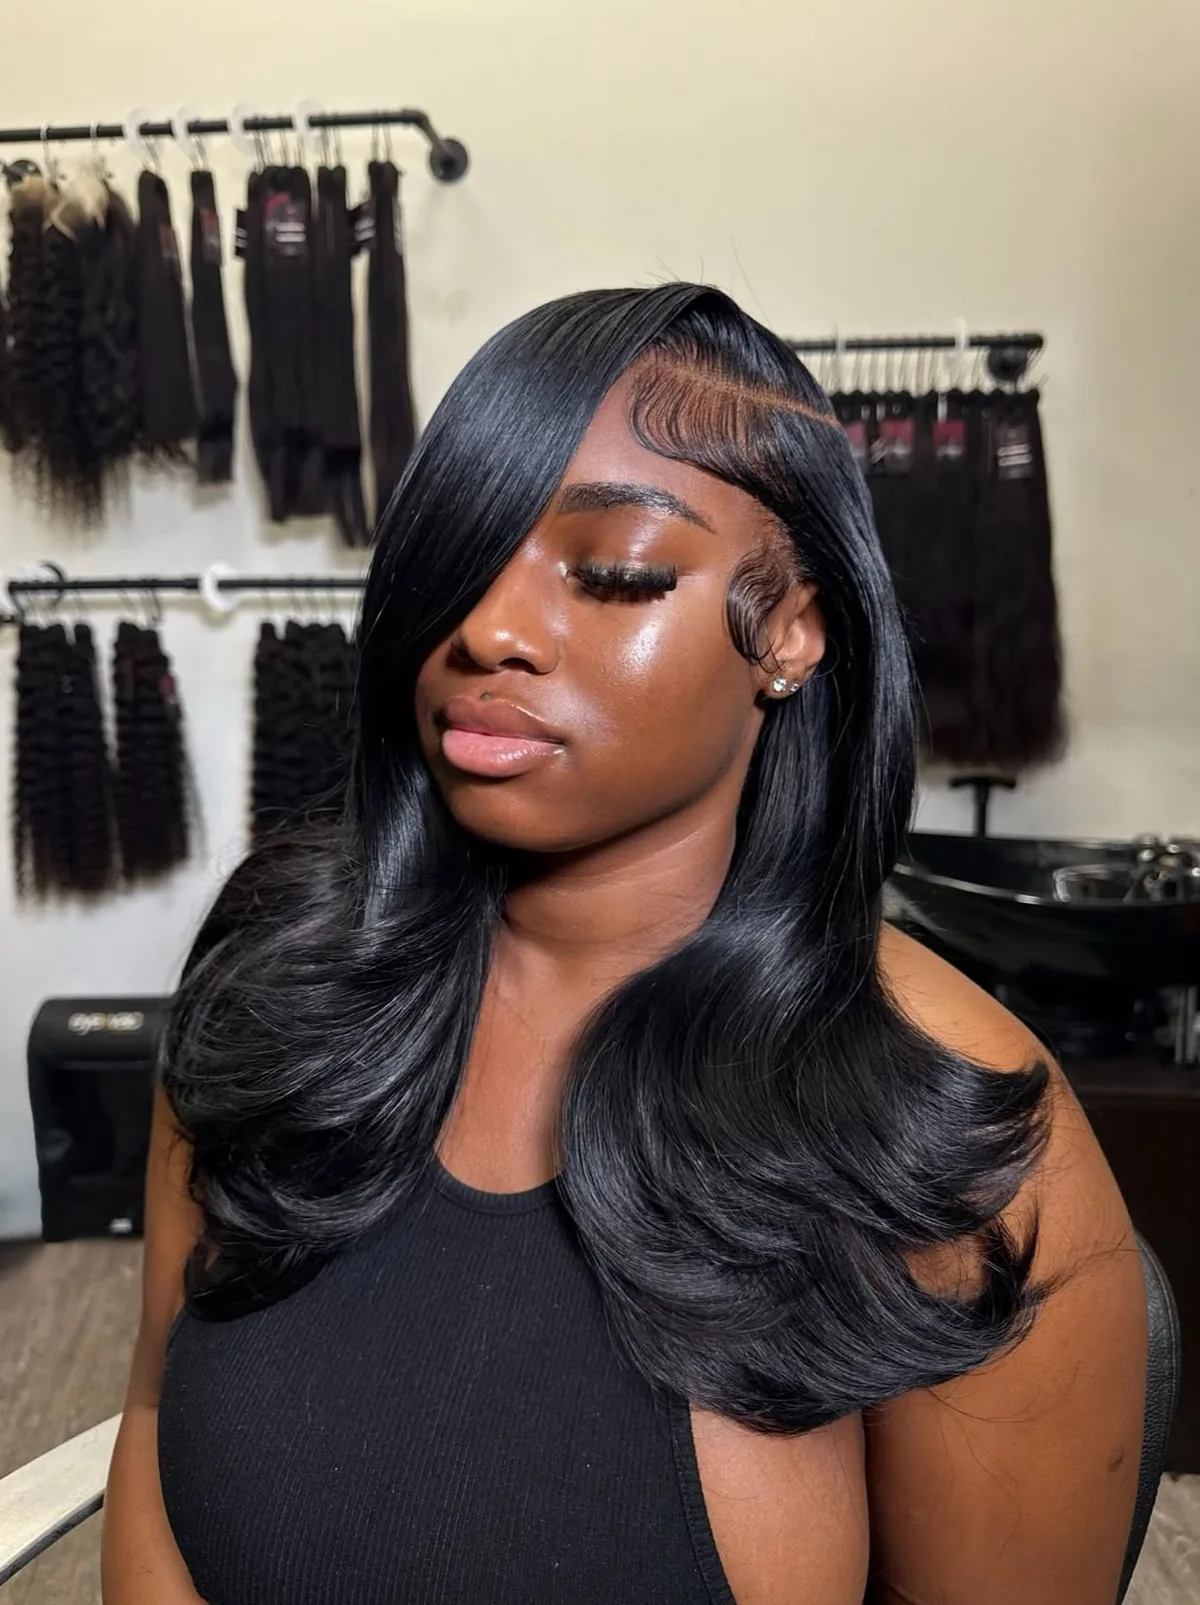
A deep side part changes a sew-in completely: the hair sweeps across the forehead in a dramatic wave, the volume piles up on one side, and the whole style looks glamorous and intentional. The sew-in base is secure enough to hold the sweep all day, and the weight of the extensions keeps the part in place without constant pinning. It is the style for evenings out, for photos, and for women who like a little drama in their hair — and it suits a sew-in particularly well, because the braided base gives the sweep something solid to sit on.
How to style it: part deeply while damp, blow-dry the roots in the direction of the part, and curl the lengths in large waves. Common mistake: switching the part daily — the sew-in sets with a memory of the part it was fitted with, so pick a side and stick to it. Best for: evenings, events, and anyone who wants a glamorous sweep. Maintenance: a little root-lifting spray keeps the volume up all night.
The Halo Wavy Lob, Short Hair With a Little Extra
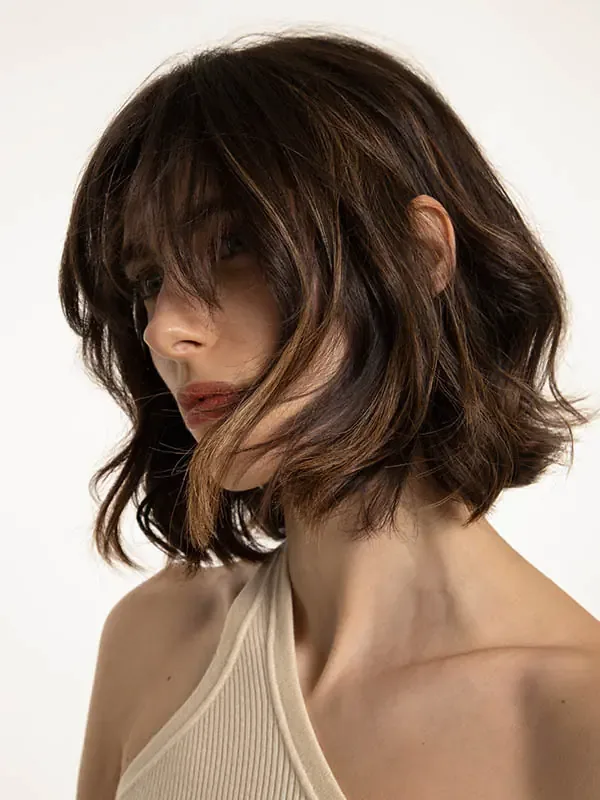
A lob — a long bob — with a halo is the perfect in-between style: not short, not long, just a little extra length and fullness where a bob can look flat. The halo adds a few inches and a lot of movement, the waves give the lob its shape, and the finished hair looks like a better version of your own bob rather than a different hairstyle. It is the style for women who love their lob but want a little more, and for anyone growing out a bob who wants to skip the awkward stage.
Best for: lobs, bobs growing out, and anyone who wants a subtle change. How to style it: place the halo, wave the ends outward with a flat iron, and shake the roots for volume. Pros and cons: the most natural-looking halo style, because the length difference is small — but it will not give you mermaid hair, and that is not the point. Cost and time: a halo from about $150, styled in fifteen minutes.
The Clip-In Braided Ponytail, Long and Detailed
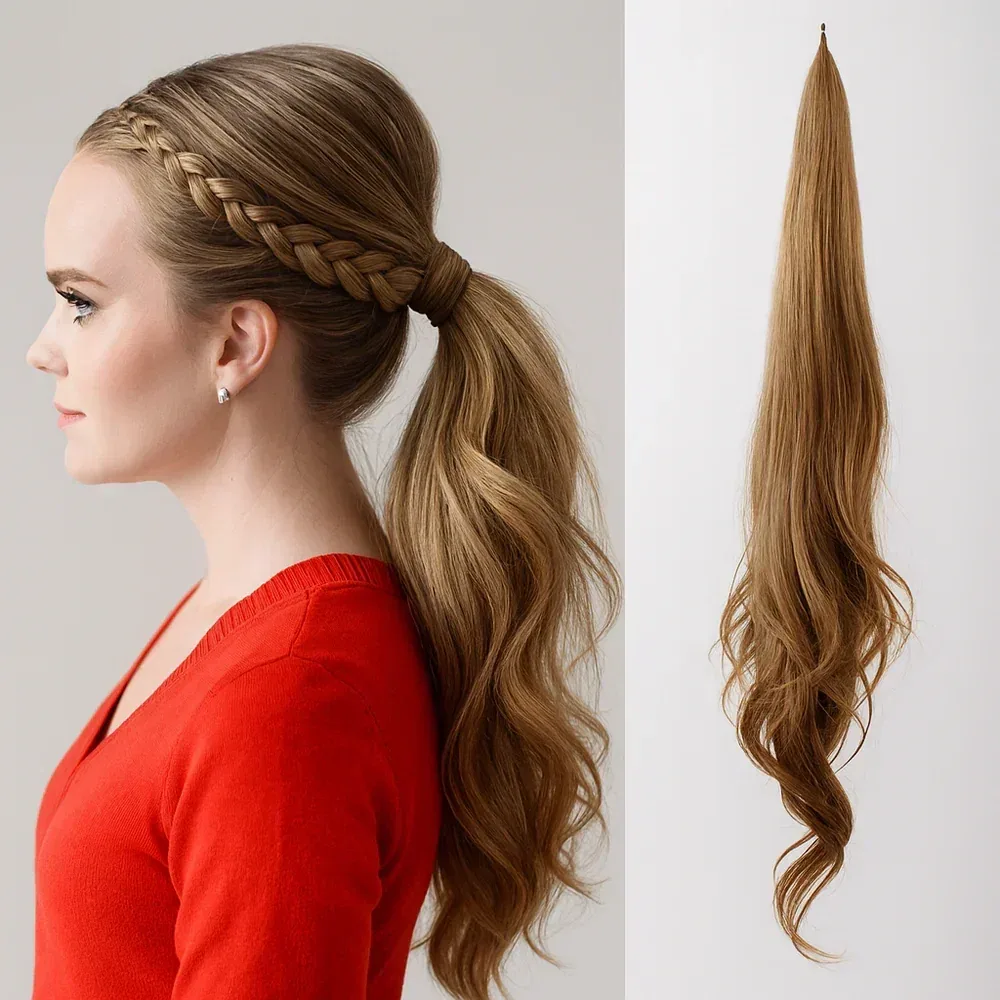
A braided ponytail with clip-ins is the most detailed style in this guide, and the most impressive: a long, thick braid that falls down the back, with a fullness that natural hair rarely achieves. Add clip-in wefts to your ponytail first, braid the whole thing loosely, pancake the braid — gently pull each section wider — and the braid looks twice as thick as it really is. It is the style for festivals, weddings and anyone who loves braids but does not have the length or thickness to make them look full.
How to style it: clip in the wefts, tie a high ponytail, braid loosely, pancake gently, and secure with a clear elastic. Common mistake: braiding too tightly, which pulls the clips and hurts by the end of the day. Best for: festivals, weddings, and long-braid lovers. Maintenance: clip-ins come out at night, so there is no tangling to worry about. Quick verdict: the braid that makes people ask where you got your hair done.
Tape-In Office Sleek Lob, Polished Every Morning
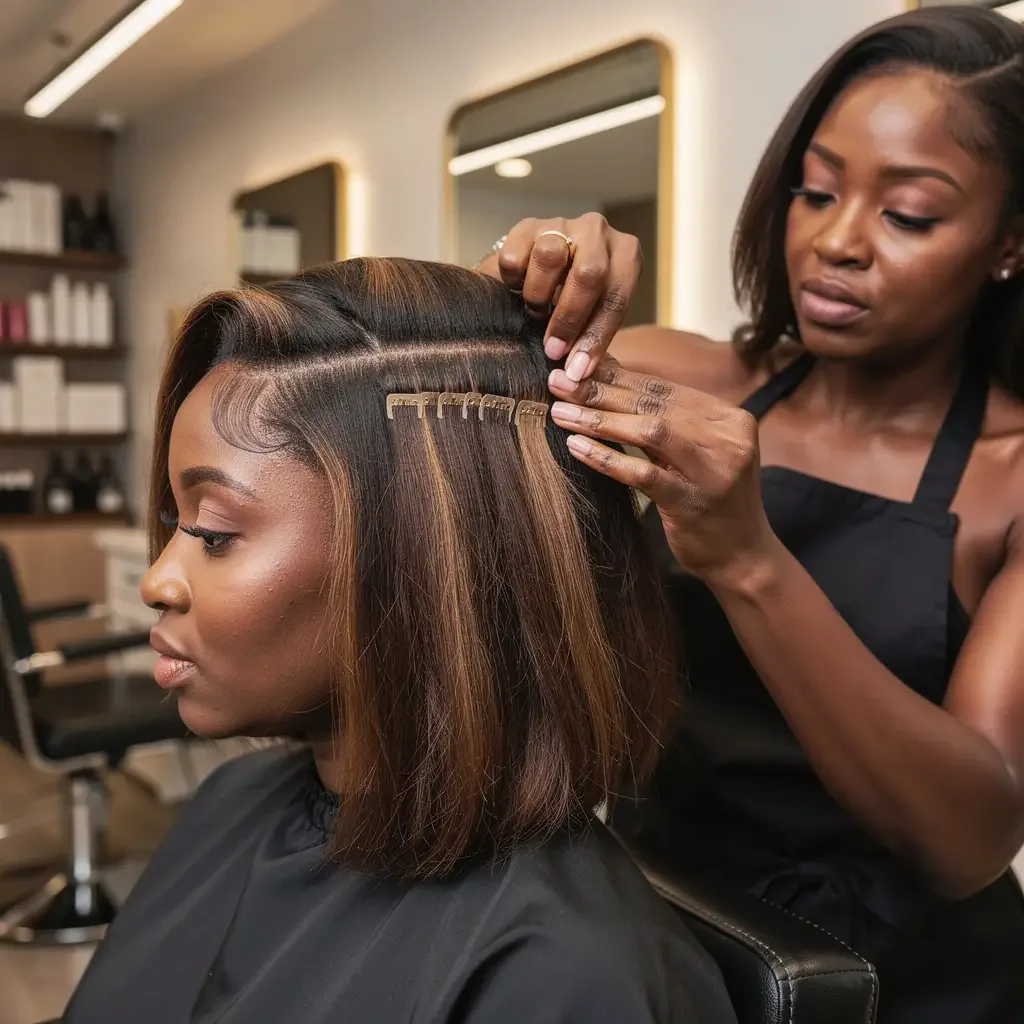
An office lob with tape-ins is the polished, professional use for extensions: a sleek, shoulder-length lob that looks blow-dried every morning, without the daily blow-dry. The tape-ins add the thickness a lob needs to look intentional rather than thin, the ends are blunt and even, and the whole style holds its shape from the morning commute to the evening. A side part and smooth top sections keep it looking deliberate and work-appropriate, and the tapes are completely hidden under the smooth top layer.
Best for: work, professional settings, and women who want a low-effort polished look. How to style it: blow-dry the top sections smooth with a round brush, and let the ends fall straight. Maintenance: a trim every eight weeks keeps the ends neat, and a silk pillowcase keeps the lob smooth overnight. Pros and cons: the most professional-looking extension style, and the biggest time-saver on work mornings — but it does need a blow-dry on the top sections to look its best.
Sew-In Textured Shag With Extensions, Edgy and Full
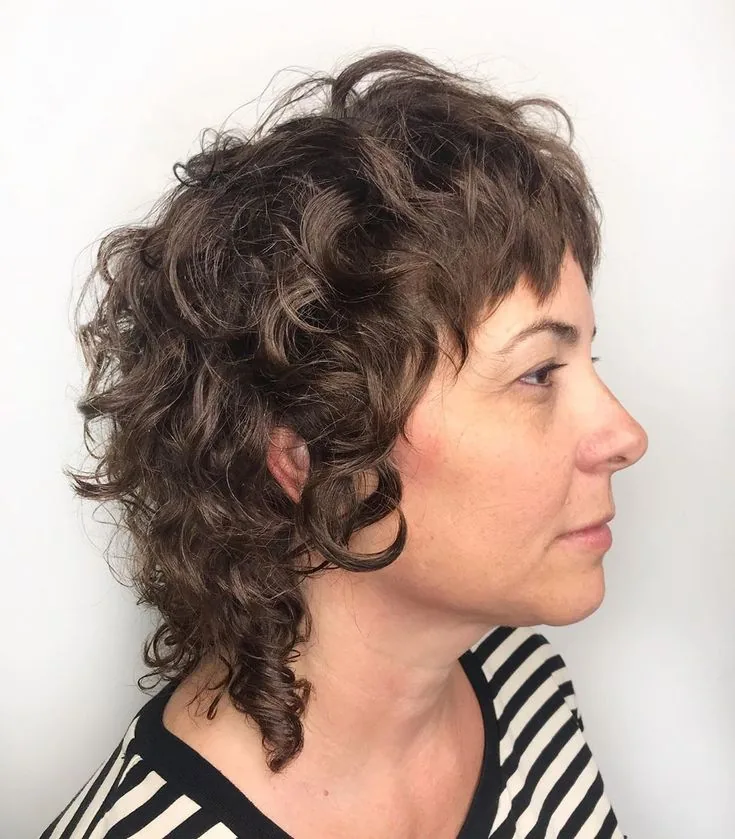
A textured shag with a sew-in is the coolest extension style in this guide: a shag haircut — choppy layers, a textured fringe, lots of movement — with extensions that give every layer extra fullness and length. The result is rock-and-roll hair: messy, textured, full of life, and completely un-boring. The sew-in base is secure enough to hold the shag’s volume, and the layers make the extensions fall in different directions, so the blend is naturally forgiving. It suits women who like an edgy, lived-in look and do not want their hair to look done.
Best for: edgy, textured style and medium-length hair. How to style it: texture spray or salt spray, scrunched into damp hair, and air-dried — the messier, the better. What to ask: ask for a shag cut first, then a sew-in that follows the layers, so the extensions match the cut. Pros and cons: the most characterful extension style, and one of the easiest to maintain — but it is a bold look, and it will not suit a conservative workplace.
The Halo for Short Hair Growing Out, Skipping the Awkward Stage
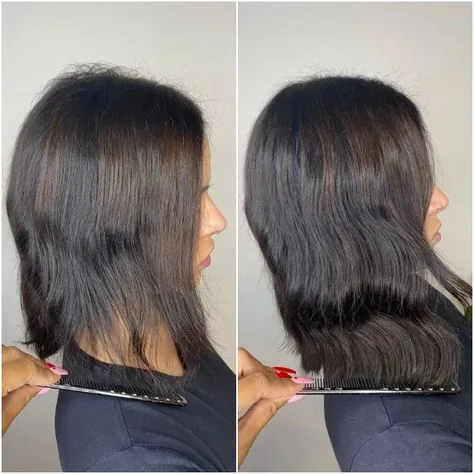
Growing out short hair is the awkward stage every woman dreads: the hair is too long to be short and too short to tie up, and it sticks out in every direction. A halo skips that stage entirely. Place the halo, let your own hair cover the wire, and suddenly you have shoulder-length hair while your own hair grows underneath. It is the kindest way to grow hair out, because there is no damage, no commitment, and you can take it off whenever you want a break — and it means you never have to live through the months of in-between hair.
Best for: anyone growing out a pixie or a bob. How to style it: place the halo, then style your own top layer over it — a soft wave hides the join best. Common mistake: choosing a halo much longer than your own hair, which makes the join obvious — go only a few inches longer at first. Cost and time: a halo from about $150, fitted in two minutes. Quick verdict: the fastest way through the awkward stage, and the only one with no damage at all.
Keratin-Bond Volume for Fine Hair, Strand by Strand
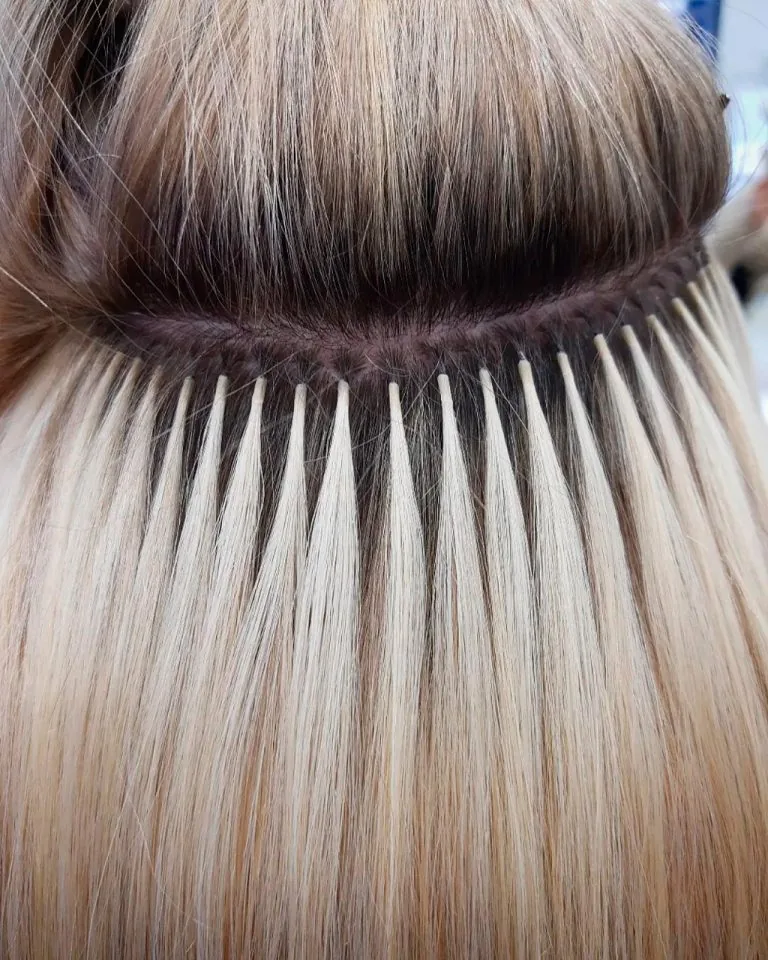
Fine hair needs volume, not weight — and keratin bonds are the only semi-permanent method that adds volume strand by strand, so the stylist can place exactly as much hair as your fine hair can carry, and no more. The bonds are tiny, they sit flat against the head, and they distribute the weight so no single section of your hair is pulled. The result is hair that looks twice as thick, holds a style for days, and moves like your own hair — because, strand by strand, it almost is.
Best for: fine, straight hair that will not hold volume. How to style it: a lightweight mousse at the roots, not a heavy cream, so the volume is not weighed down. Who should avoid it: anyone whose fine hair is also very fragile — get a consultation first, and listen if the stylist says no. Maintenance: brush carefully around the bonds, and book a check-up after four weeks. Cost and time: fewer bonds than a full-length fitting, so expect $300 to $700 for a volume-only set.
Clip-In Holiday Glamour Waves, Big and Festive
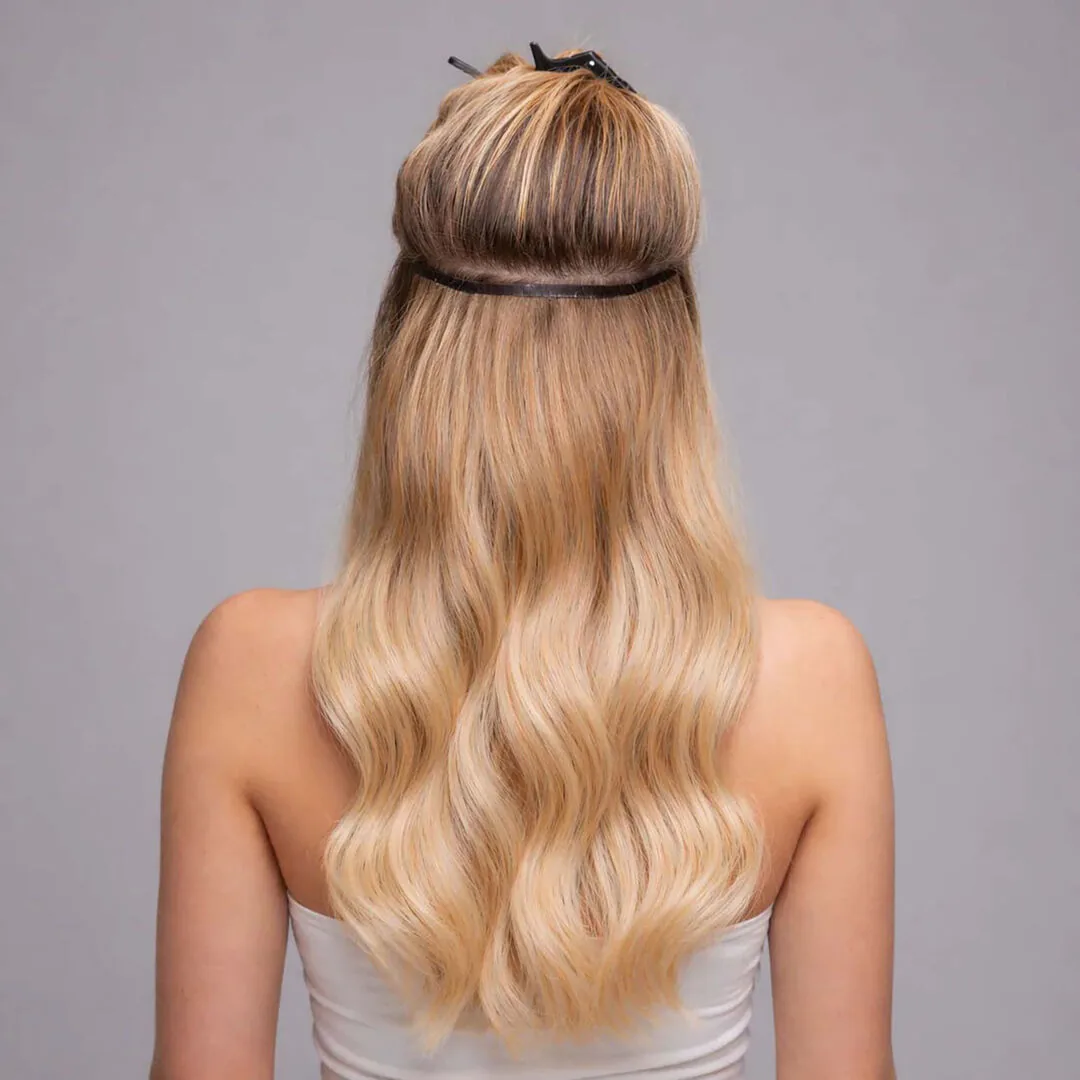
Holiday glamour waves are big, bouncy, festive waves — the kind of hair that belongs at a party, under lights, with a dress that deserves it. Clip-ins are the perfect way to get them, because you can add the length and fullness for one evening, curl it all together, and take it off when you get home. The waves are larger and more defined than everyday waves, the volume is piled high at the crown, and the finished look is unapologetically glamorous. It is the style for New Year’s Eve, holiday parties and any night that calls for more hair than usual.
How to style it: clip in the wefts, curl with a medium barrel, let the curls cool, then brush them out softly and add a little backcombing at the crown. Best for: parties, holidays, and anyone who wants maximum glamour for one night. Pros and cons: the most festive clip-in style, and completely removable — but it is heavy, so it will not suit an all-day event. Cost and time: thirty minutes of styling, with clip-ins you already own.
The Tape-In Low Ponytail With a Hair Wrap
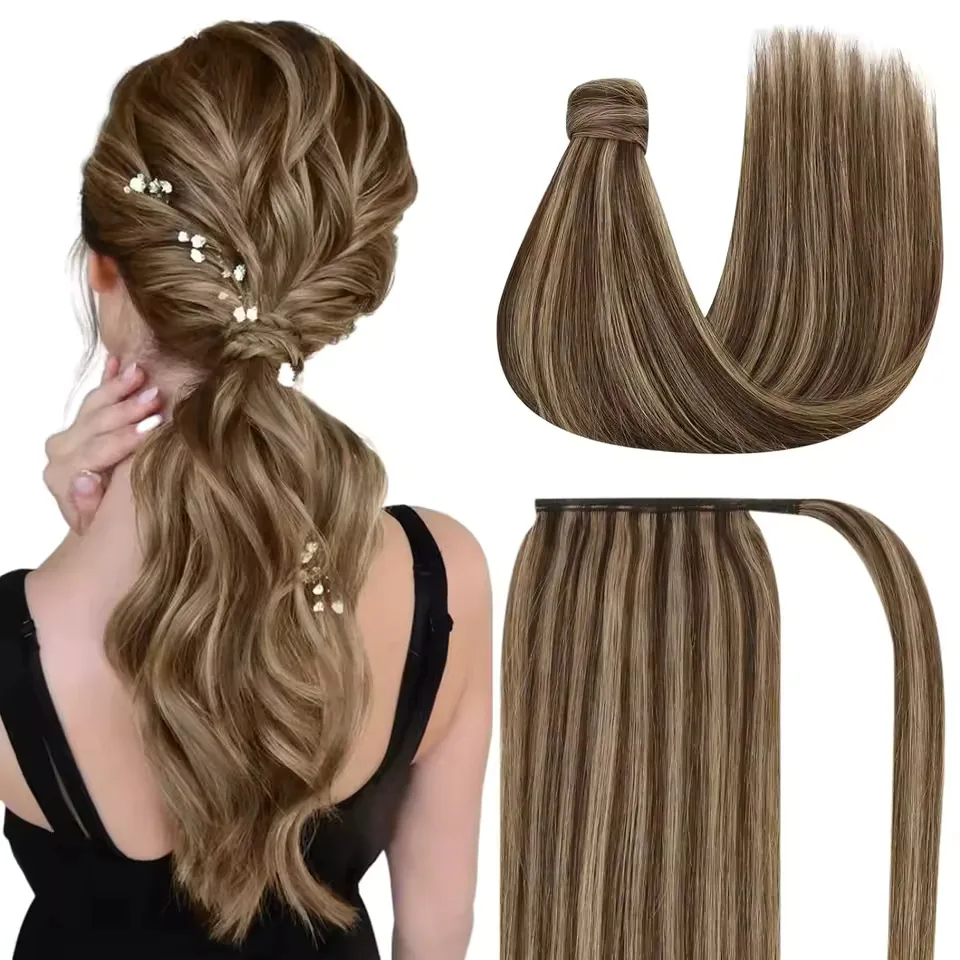
A low ponytail with a hair wrap is the most elegant way to wear tape-ins up: gather the hair low at the nape, secure it, then wrap a strand of hair around the base and pin it underneath, hiding the tie completely. The tapes are hidden under the gathered hair, the ponytail falls smooth and long, and the wrap makes the whole style look expensive and intentional. It is the ponytail for weddings, work events and anyone who thinks a ponytail can be formal — because this one is.
Best for: weddings, work events, and formal occasions. How to style it: smooth the top with a brush, gather low, wrap a strand around the base, and pin underneath. Common mistake: wrapping the strand too loosely, so it slips by evening — pin it in two places. Maintenance: the tapes will need a move-up every six to eight weeks, so time the fitting before the event. Who should avoid it: anyone whose tapes are due for a move-up — loose tapes will show in a smooth ponytail.
Sew-In Extensions for Thick Hair, Big and Secure
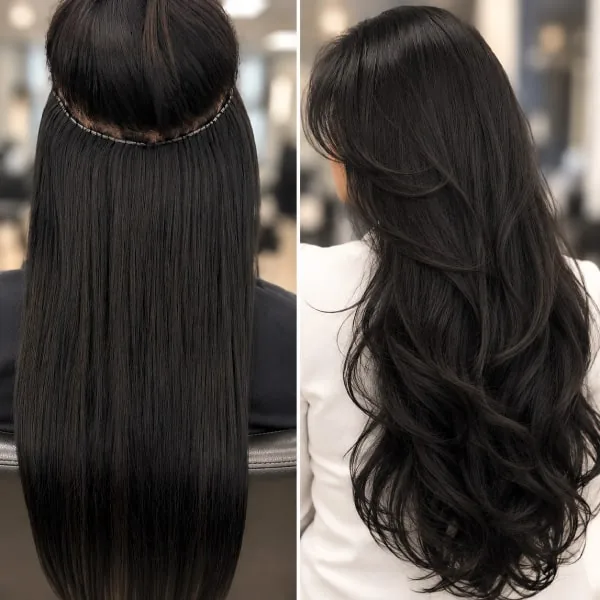
Thick hair takes a sew-in beautifully, because there is plenty of hair to braid, the base is strong, and the weight of the extensions is distributed across a full head of hair. A sew-in on thick hair gives big, bouncy, voluminous hair that holds its shape for weeks — the kind of hair that turns heads. The challenge is time: thick hair takes longer to braid, longer to sew and longer to dry, so plan for a long salon visit. The stylist may also layer the hair first, so the extensions are not weighed down by their own bulk.
Best for: thick, heavy hair that needs shape and movement. How to style it: curl cream and a diffuser, section by section, so every layer dries with definition. Maintenance: thick extension hair drinks conditioner — use a rich mask weekly, and a leave-in cream on the ends daily. Cost and time: expect the longest appointment and the highest fitting price, because of the sheer amount of hair. Quick verdict: the most dramatic transformation for thick hair — it was made for a sew-in.
Halo Soft Curls for Women Over 50, Gentle Volume
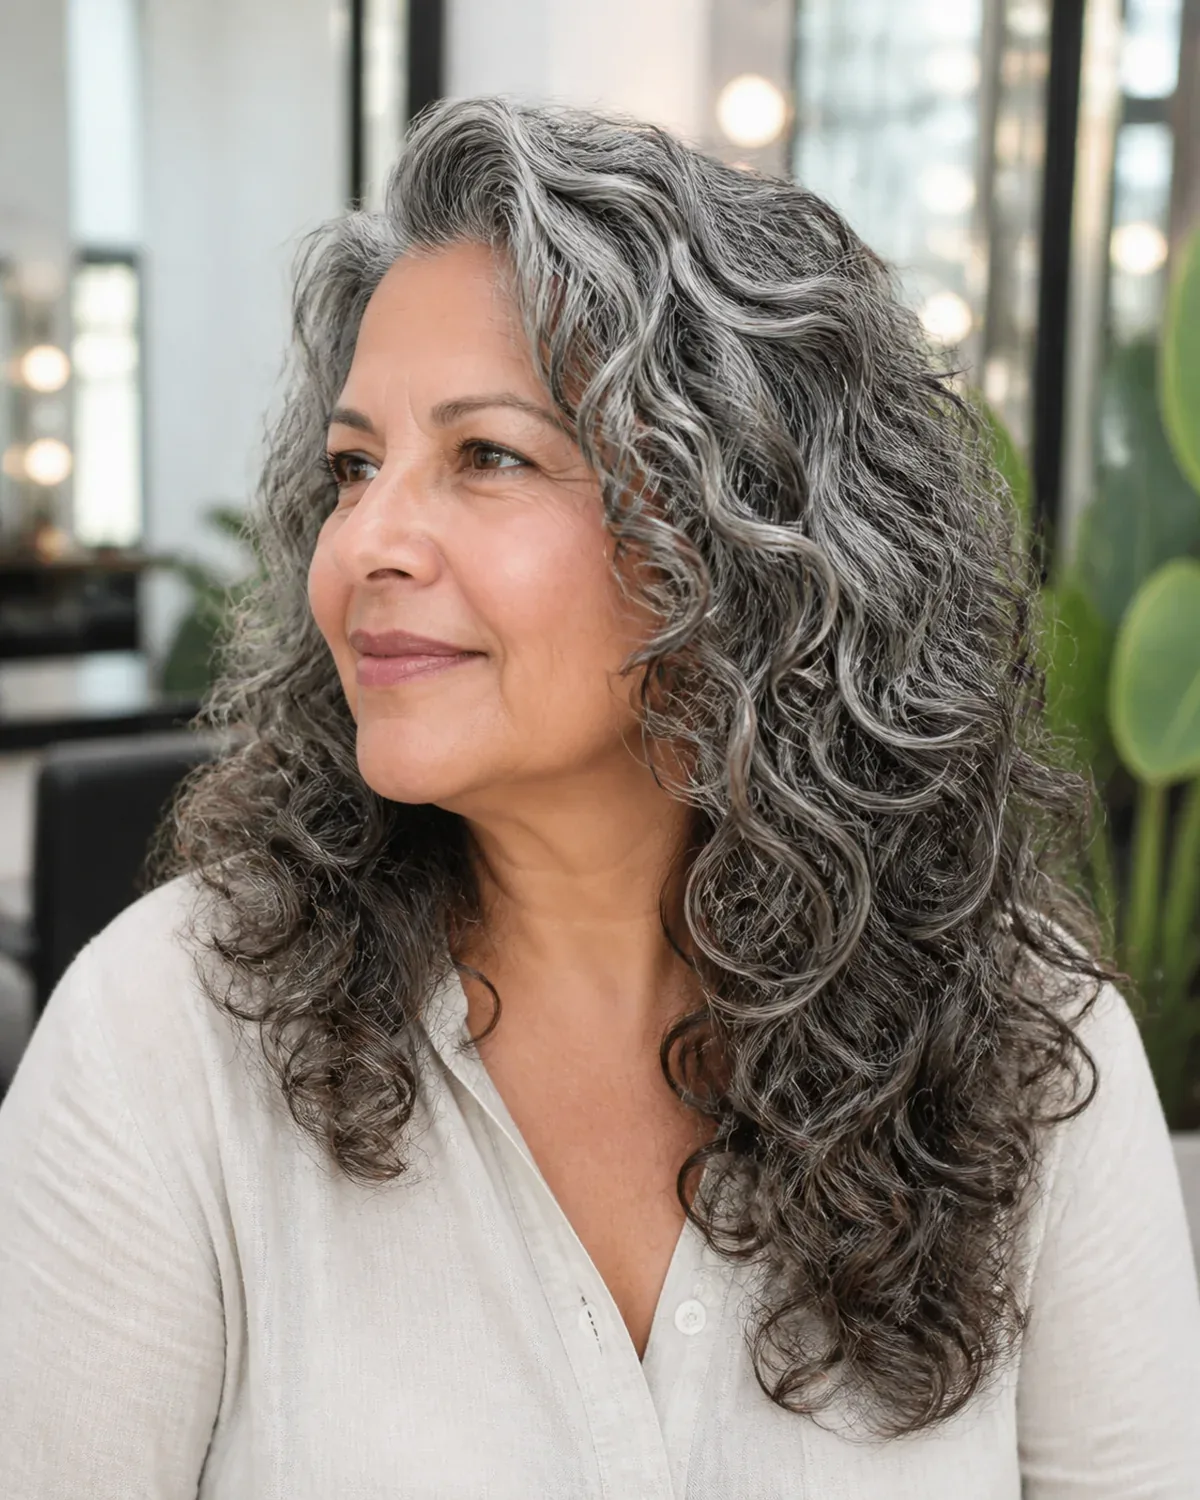
A halo is one of the best extension choices for women over 50, because it adds the volume and softness that hair naturally loses with age — without any glue, tape or tension on hair that may already be thinning. The key is softness: a halo a few inches longer than your own hair, soft curls rather than tight ones, and a length that sits at or above the shoulders. The result looks fresh, youthful and effortless, and it is far easier to maintain than a daily blow-dry. Many women over 50 find that a halo gives them back the body their hair had twenty years ago.
Best for: mature hair that has thinned or lost volume. How to style it: curl cream and a diffuser, or simply air-dry and shake the roots. Maintenance: keep the length manageable — shoulder-length or shorter — and wash the halo only when it needs it. What to ask: ask for the lightest halo available, so it never pulls. Quick verdict: the most flattering volume treatment for mature hair, when it is kept soft and light.
Extensions for Naturally Curly Hair, Matched Curl by Curl
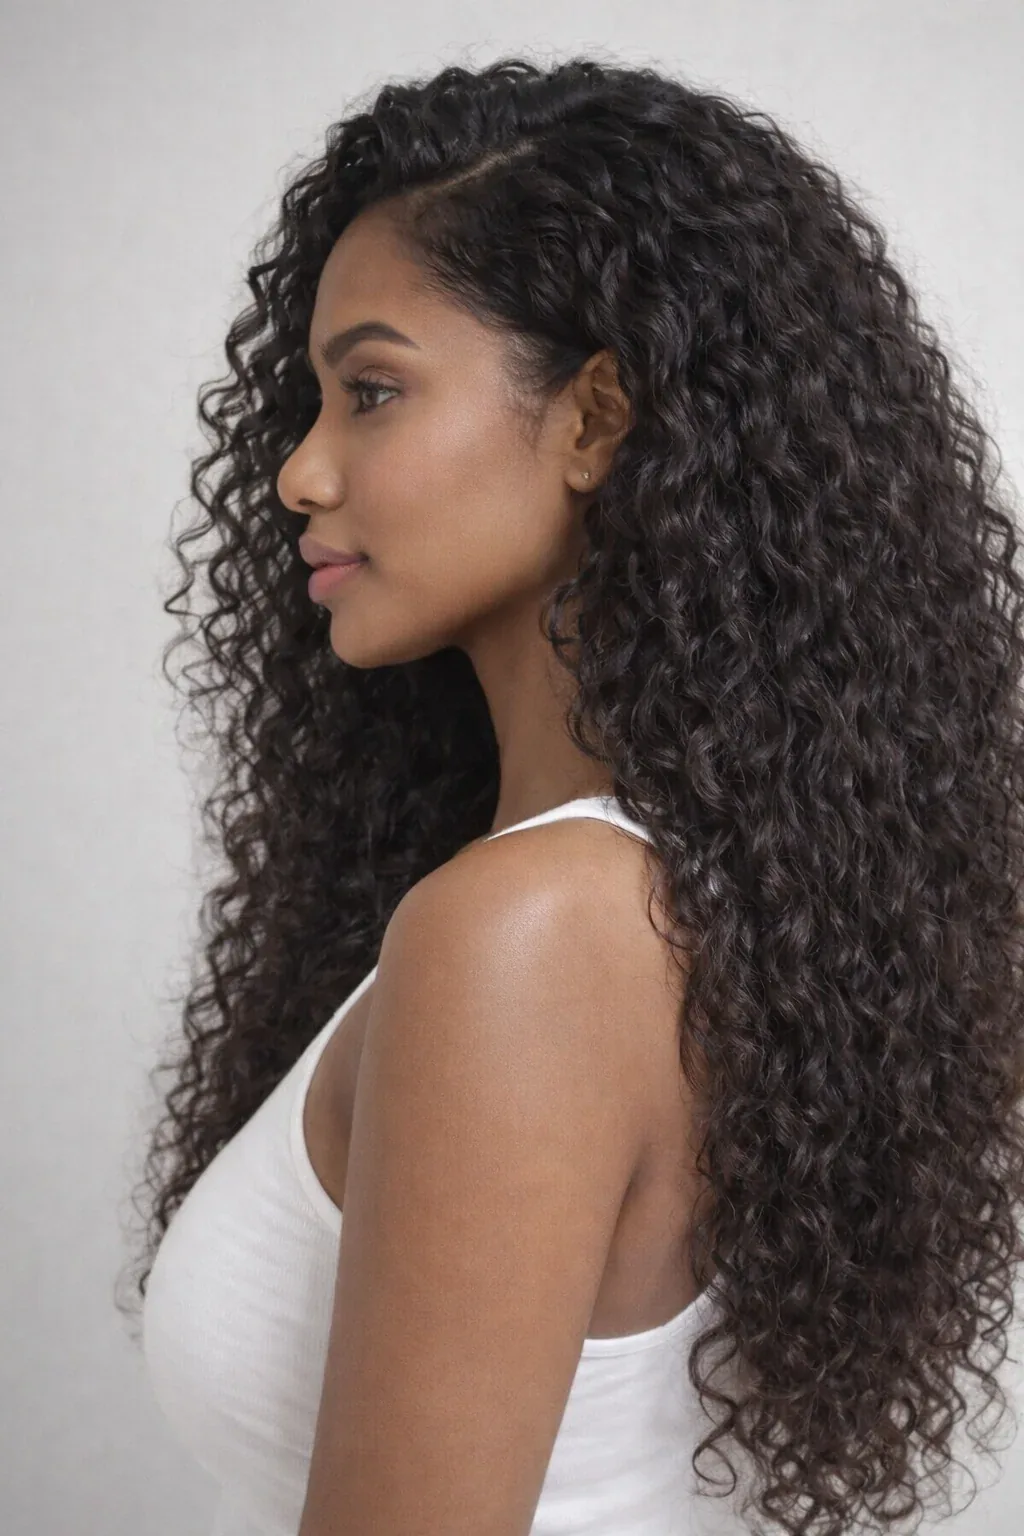
Curly hair needs extensions that match its curl pattern, not just its colour. A straight weft on curly hair will never blend, no matter how well it is cut — the textures will fight each other all day. The answer is to buy extensions in your own curl pattern, or as close as you can get, and to have them cut in while your hair is dry and in its natural curl, so the stylist can see how the two fall together. When the curl matches, the extensions disappear into your own hair, and the result is simply more of the hair you already have — longer, fuller, and just as curly.
Best for: naturally curly and coily hair that wants length or volume. How to style it: style the extensions and your own hair together with the same curl cream, and never brush either one dry. Common mistake: buying straight extensions and hoping a curling iron will make them match — it will not last past the first hour. Maintenance: wash with a sulfate-free shampoo, deep-condition weekly, and detangle gently with your fingers. Quick verdict: the extension style that works best when you stop trying to change your curl and start matching it.
Which type of hair extensions is best for beginners?
Clip-in extensions are the best choice for beginners, because they are temporary, removable, and the cheapest way to learn what length and weight you like. You can put them in and take them out yourself in minutes, there is no salon fitting, no glue or tape, and no damage to your own hair. A halo is the second-best beginner option, for the same reasons. Only move to tape-ins, sew-ins or keratin bonds once you know you like wearing extensions every day.
How do I blend hair extensions with my own hair?
Blend extensions by cutting them into your own haircut after fitting, styling the two together with the same heat tool, and matching the texture — wavy with wavy, straight with straight. Place the top weft at least an inch below your parting, keep the sides away from the hairline, and point-cut the bottom two inches of the extensions so there is no blunt line where your hair ends. A professional cut-in after fitting makes more difference than the price of the hair itself.
How do I match the colour of hair extensions?
Match the mid-lengths and ends of your hair, not the roots, because that is where the extensions will sit. Check the tone as well as the shade — cool hair needs cool-toned extensions and warm hair needs warm ones — and hold the weft against your hair in natural daylight, not under salon lights. If your hair has highlights or balayage, buy blended or multi-tonal extensions, or alternate two shades. When in doubt, go half a shade darker rather than lighter.
How long do hair extensions last?
Clip-in extensions last six to twelve months when worn occasionally, because they are not washed often. Tape-ins last six to eight weeks before they need moving up, and the hair itself lasts three to six months. Sew-ins last eight to ten weeks per fitting. Keratin-bond extensions last three to five months. A halo lasts a year or more with occasional wear. How long any of them last depends on the hair quality — Remy human hair lasts longest — and on how gently you wash, brush and heat-style them.
Do hair extensions damage your hair?
Extensions can damage your hair if they are too heavy, fitted too tightly, or left in too long without a break — but fitted correctly, on healthy hair, with the right method for your hair type, they should not. Clip-ins and halos are the kindest options, because they come out daily. Tape-ins and keratin bonds are safe when fitted and removed by a professional, and dangerous when pulled out at home. The most common cause of damage is never giving your hair a rest between fittings.
Can I wear hair extensions if I have thin or fine hair?
Yes — but choose the method carefully. Clip-ins and halos are the safest for thin or fine hair, because you control the weight and they come out at night. Tape-ins can work if the stylist uses fewer, lighter wefts. Keratin bonds can work strand by strand, adding volume without overloading any one section. Avoid heavy sew-ins on very fine hair, because the braids and the weight can pull. Always get a consultation first, and listen if the stylist says your hair needs a lighter method.
Can I wash, swim and exercise with hair extensions?
You can wash semi-permanent extensions two or three times a week with a sulfate-free shampoo, and you can exercise in them — tie the hair in a loose braid first to stop tangling. Swimming is harder: chlorine and salt water dry extensions out and can loosen tape-ins and keratin bonds, so wet the hair with clean water first, braid it, wear a swim cap if you can, and wash it immediately afterwards. Clip-ins and halos should always be taken out before swimming, because they are not secured for water.
How much do hair extensions cost?
Human-hair clip-ins typically cost $100 to $300, and a halo $150 to $350. Tape-in hair runs $200 to $600 plus $100 to $200 for fitting. A sew-in costs $200 to $600 for the hair plus $150 to $300 for fitting. Keratin-bond extensions cost $500 to $1,500 or more, including fitting. Synthetic hair is far cheaper, often under $50, but it cannot be heat-styled like human hair. Remember to budget for maintenance too — tape-in move-ups, salon check-ups, and sulfate-free products all add to the real cost.
How do I remove hair extensions safely?
Clip-ins and halos come out in seconds — unclip or slide off, and you are done. Tape-ins must be removed with a proper tape remover, never pulled. Keratin bonds need a bond-dissolving solution and careful cracking of each bond, strand by strand. A sew-in needs the wefts cut out and the braids unpicked gently. If removal hurts, stop — pain means your own hair is being pulled. After removal, wash with a clarifying shampoo, use a deep-conditioning mask, and give your hair a break of at least a few weeks before refitting.
Can I sleep in hair extensions?
You can sleep in semi-permanent extensions — tape-ins, sew-ins and keratin bonds are designed for it — but never with wet hair, and always in a loose braid or a low, loose plait, on a silk or satin pillowcase. Clip-ins and halos should always be taken out before bed, because sleeping in them pulls on your own hair and tangles the wefts. If you wake up with matted hair at the nape, that is a sign the extensions need more brushing during the day, or a looser braid at night.
Conclusion
Hairstyles with hair extensions work when the blend works — and the blend is a haircut, a colour match and a method that suits your life, not just a longer head of hair. Clip-ins and halos let you try length for a night with no commitment. Tape-ins and sew-ins give you everyday length that washes and styles like your own hair. Keratin bonds give you the most invisible result of all, for the highest price. Every style in this guide is a variation on the same idea: more length, more volume, and a join that nobody can find.
Start with the least permanent option, not the most expensive one. Try clip-ins, learn what length and weight you actually like, and have them cut in by a stylist who understands blending. Then, if you want extensions every day, choose the semi-permanent method that fits your hair type, your budget and your routine — and give your hair a proper break between fittings. Look after them gently, wash them less, brush them carefully, and they will look after you. And when someone asks how your hair got so long so fast, you can smile and tell them the truth: it did not grow. It was styled — the right way.