Camera-Ready in Minutes: 44 Photoshoot Hairstyles for Women That Look Good From Every Angle
A camera does not see your hair the way your bathroom mirror does. A lens flattens volume, flash picks up every flyaway, wind turns a perfect blowout into a tangle in seconds, and a style that looks lovely in person can disappear completely in a photograph. That is why photoshoot hairstyles for women are a skill of their own — not harder hair, just hair chosen and finished with the camera in mind. The right style frames your face, catches the light in the right places, and still looks like you when the photos come back.
This guide brings together 44 photoshoot hairstyles for women that look good from every angle: sleek buns and polished ponytails for headshots, soft waves and glamour curls for portraits, wind-proof braids for outdoor shoots, and gentle, flattering styles for maternity and family photos. Eight guides first explain how cameras see hair, how to pick a style for studio versus outdoor light, how to wind-proof it, and how to fix shine and flyaways before the shutter clicks. Every style comes with who it suits best, how to style it, what can go wrong, and a quick verdict — so you can walk into any shoot knowing your hair will hold up.
How Cameras See Hair Differently Than the Mirror
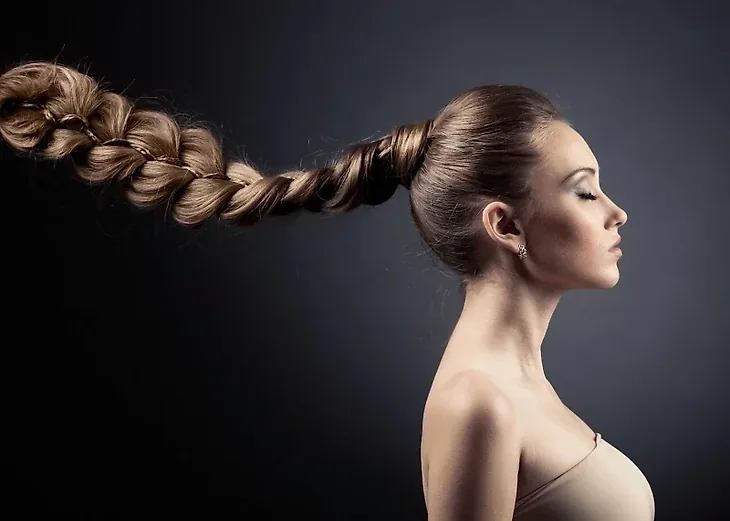
A mirror shows you a moving, three-dimensional view; a camera freezes one flat angle, and that changes everything. Volume at the crown can vanish, layers can blend into one dark mass, and a fringe that looks fine in person can cast a shadow across your eyes in a photo. Flash is even less forgiving: it bounces off oily roots, highlights flyaways like a halo, and can wash out fine, pale hair so it looks thinner than it is. The fix is not more product — it is contrast and shape. A little root lift, a defined parting, and a clear silhouette (a bun, a ponytail, a wave with a visible edge) read far better on camera than soft, shapeless hair.
Before your shoot, take a test photo with your phone — front, three-quarter and profile — in light like the shoot’s. If your hair disappears against a dark background, add shine or a lighter face-framing piece; if it looks flat, backcomb the crown a centimetre and reset the parting. Quick verdict: style for the lens, not the mirror, and let a test photo — not your reflection — be the judge.
Studio vs Outdoor Photoshoots: Choosing the Right Style
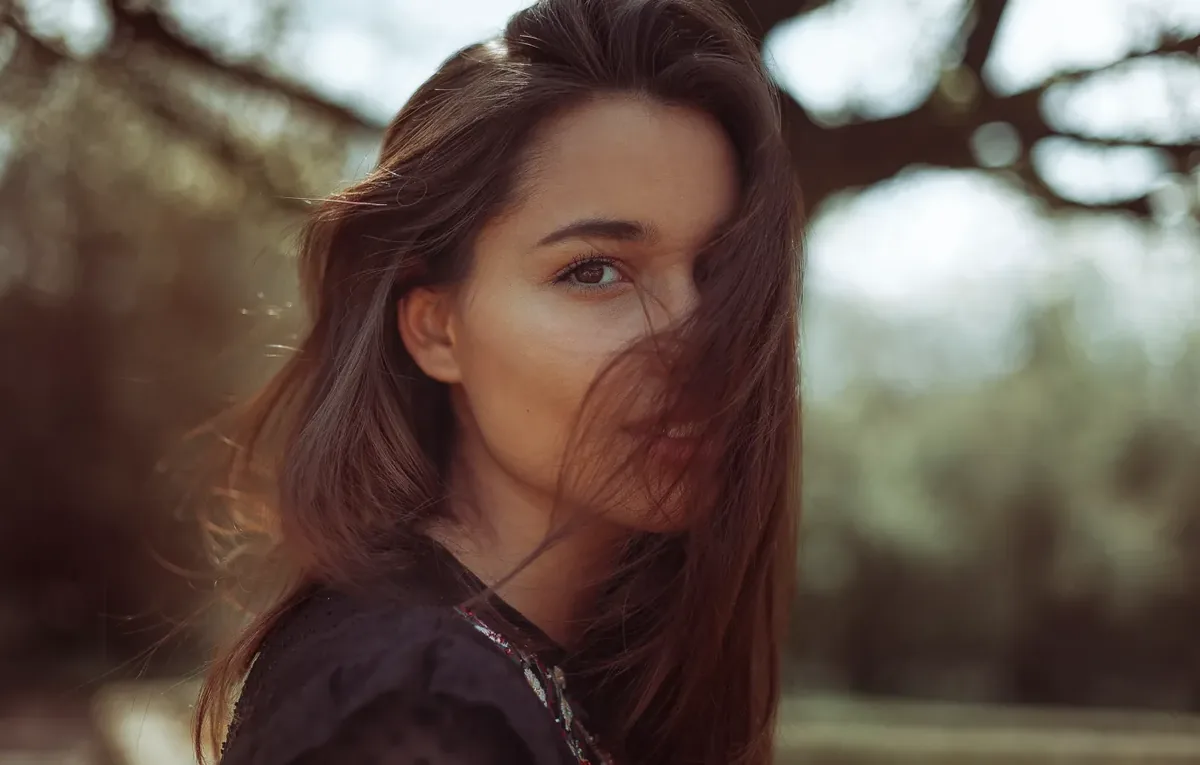
Studio and outdoor shoots ask for opposite things from your hair. In a studio, the light is controlled, the air is still, and the camera is close — so polished, detailed styles shine: sleek buns, glossy waves, precise partings and anything with a clean shape. Outdoors, wind, sun and humidity do the styling for you, so the best looks are the ones that move well: loose braids, textured waves, low ponytails and updos anchored with pins. A perfect studio blowout can look stiff and windswept outside within ten minutes, while a loose outdoor braid can look unfinished under a studio softbox.
Match the style to the setting before you book the stylist. For studio headshots, choose structure — a sleek bun, a polished blowout, a sharp bob. For beach, park or city shoots, choose movement and anchoring — braids, low buns, wrapped ponytails. Pros and cons: studio styles photograph crisply but show every flaw, while outdoor styles forgive flaws but need wind-proofing. Quick verdict: if the shoot moves location, pick a style that works in both, like a low chignon or a textured low ponytail.
Wind-Proofing Your Hairstyle for Outdoor Shoots
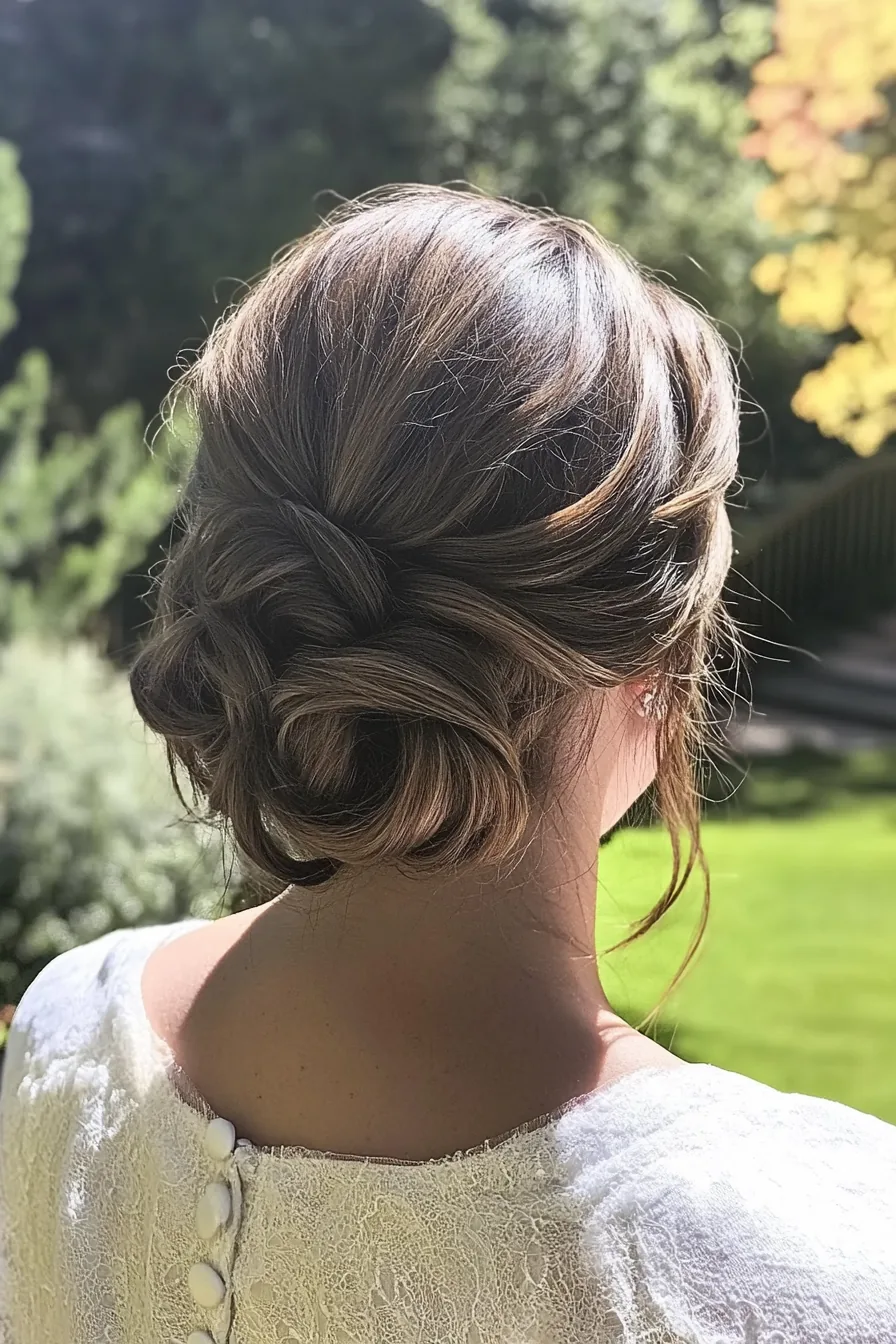
Wind is the number-one enemy of outdoor photoshoot hair, and it beats product almost every time — unless you plan for it. The trick is anchoring: a style held by its structure, not just by spray. Braids, twists and buns anchored with pins at several points survive gusts that flatten a blowout in seconds. Long loose hair is the riskiest choice outdoors; if you love it, keep the front pinned back, add a braid on the windward side, and carry a small brush and a travel-size flexible-hold spray for touch-ups between shots.
Build wind resistance into the style itself. Start with a little texture spray or mousse so the hair grips itself, braid or twist at least one section near the face, and finish with pins placed in a cross — two pins crossing hold far better than one. Common mistake: relying on a heavy coat of strong-hold hairspray, which makes hair look stiff and still snaps in a gust. Maintenance on the day: check the back of your head between set-ups, not just the front — wind tangles where you cannot see it. Quick verdict: structure first, spray second, and always bring pins.
Shine, Flyaways and Flash: The Camera-Ready Finish
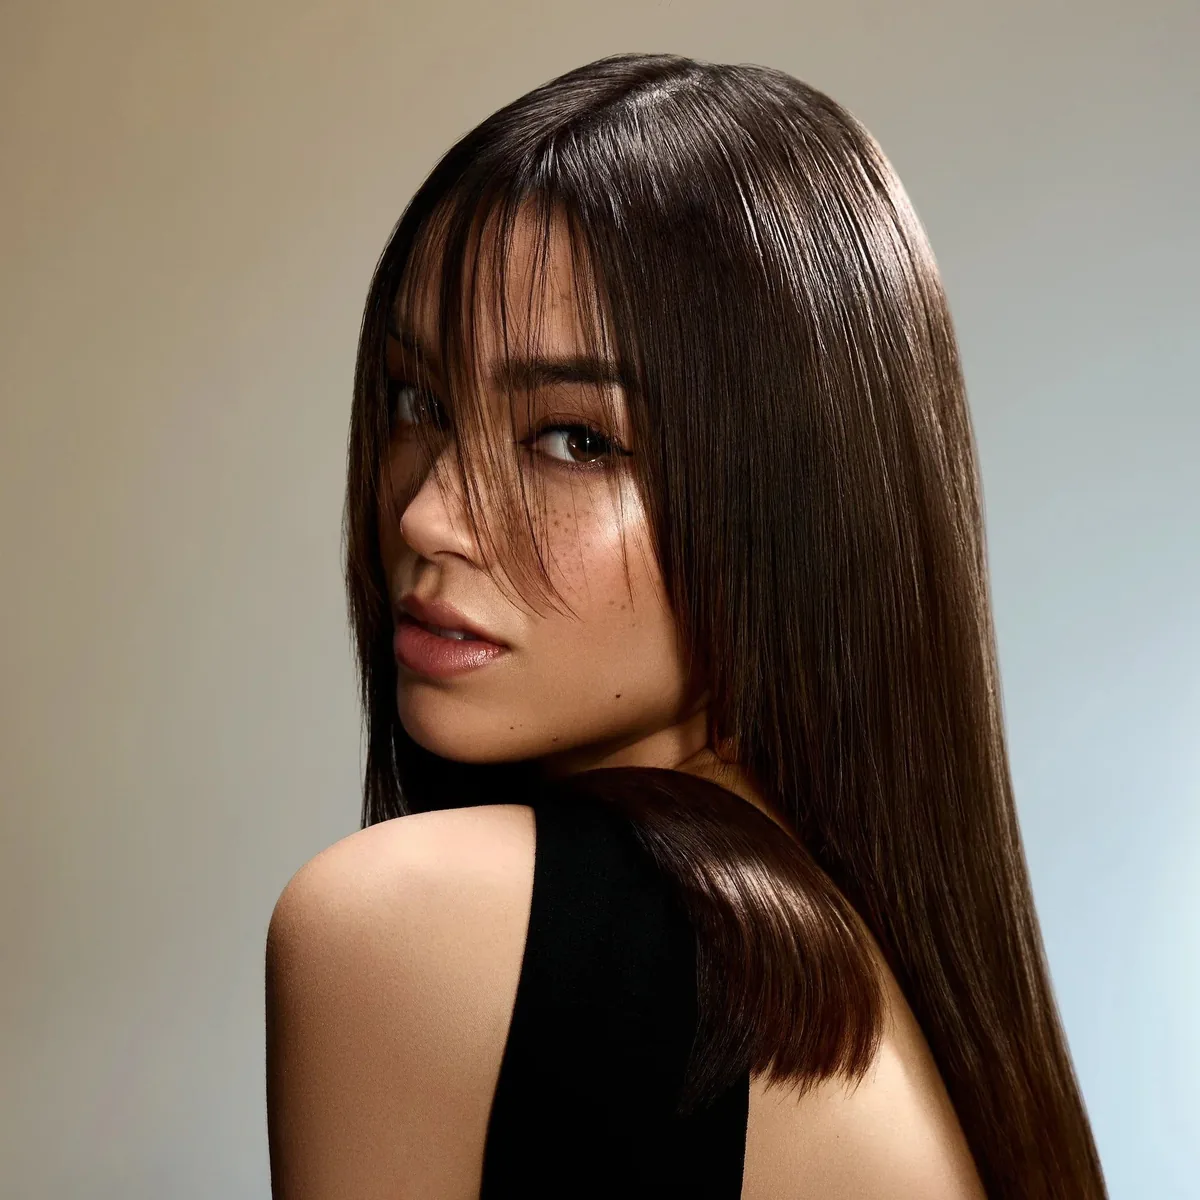
Flash and bright studio lights magnify two things: shine and flyaways. A little shine is beautiful on camera — it gives hair dimension and makes waves look healthy — but too much looks greasy, especially at the roots and along the parting. The balance is simple: shine on the lengths, matte at the roots. A drop of shine serum smoothed only through the mid-lengths and ends, plus a light dusting of dry shampoo or translucent powder at the parting, gives the camera gloss where it flatters and none where it does not.
Flyaways need a different fix. A clean mascara spoolie brushed with a tiny amount of hairspray, run lightly over the crown and hairline, tames strays without flattening the style. Pros and cons: serums add camera-friendly gloss but can look oily if overused, while strong-hold sprays control flyaways but can dull shine. Who should avoid heavy shine products: anyone shooting under direct flash with fine hair — the light will turn every drop into a bright spot. Quick verdict: gloss the ends, powder the roots, and tame flyaways with a spoolie, not your hands.
Hairstyles by Shoot Type: Headshots, Portraits, Maternity and Product
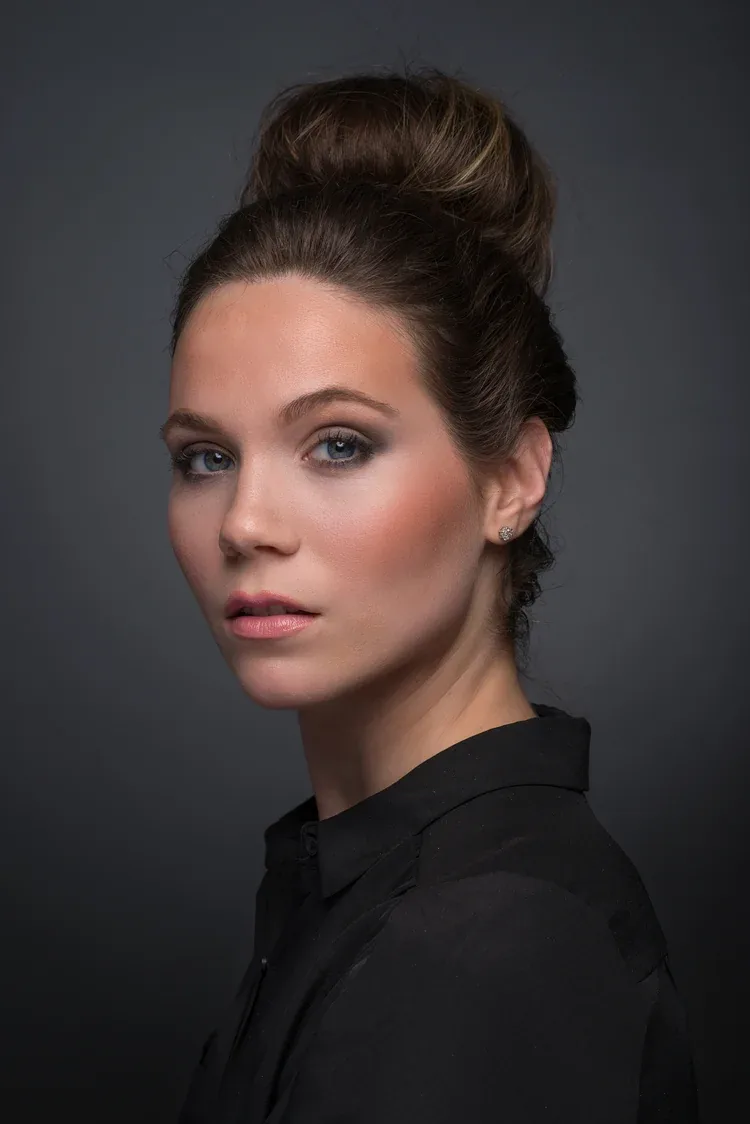
Different shoots want different hair, because the photo has a different job. A headshot needs your face to be the star: hair pulled back or swept to one side, nothing covering the eyes, a clean neckline, and a style that would still look professional on a company website in three years. A portrait or lifestyle shoot is looser — waves, braids and movement are welcome because the photo is about mood, not just identity. Maternity shoots favour soft, romantic styles that frame the bump and the face together, while product and fashion shoots often want hair that does not compete with the clothes or the product.
Choose by the photo’s purpose, not by what is trending. Headshot: sleek bun, polished blowout, neat bob. Family portrait: soft waves, half-up styles, low buns — styles that look the same from the side as from the front, since group photos catch every angle. Maternity: loose curls, braided crowns, half-up twists. Cost and time: a headshot style takes 15 minutes and a few pins; a full glamour portrait look can take an hour with a stylist. Quick verdict: ask what the photo is for, then let that answer pick the hairstyle.
Matching Hair to Outfit, Makeup and Backdrop
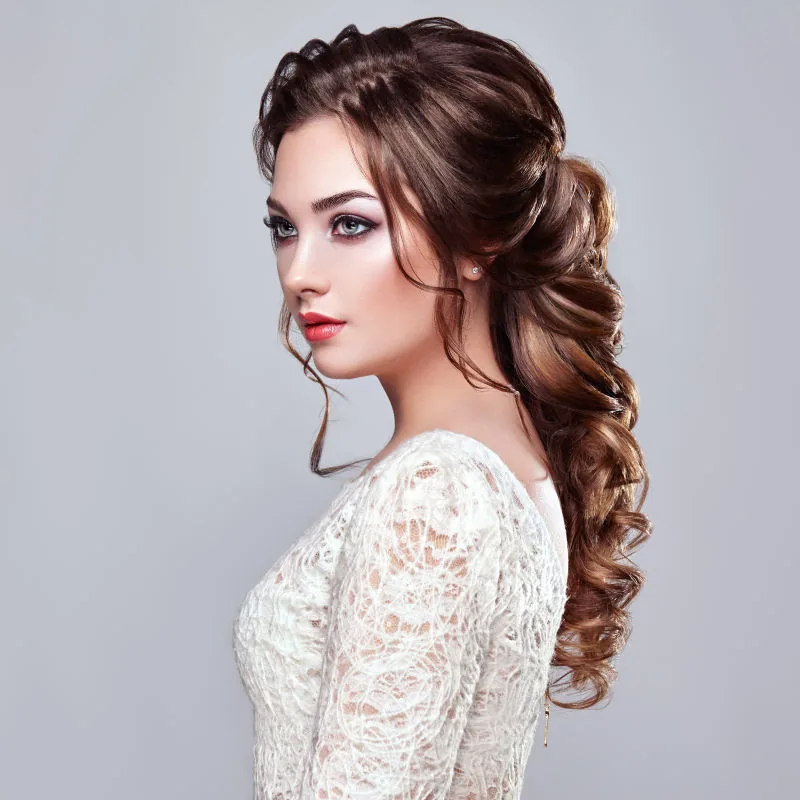
Hair, outfit, makeup and backdrop are one picture, and the best photoshoot hairstyles are the ones that fit the other three. A busy, patterned outfit pairs best with simple hair — a sleek bun or a smooth ponytail — so the photo has one focal point. A plain outfit can carry a dramatic hairstyle: big waves, a beehive, victory rolls. Dark hair against a dark backdrop disappears, so add shine, a lighter accessory, or a style with a clear outline; pale hair against a pale backdrop needs the same treatment in reverse — definition, not blending in.
Makeup matters too. Strong eye makeup pairs well with hair pulled back, which keeps the eyes visible; a bold lip looks best with hair that frames the face rather than covering it. What to ask your stylist: bring a photo of your outfit and tell them the backdrop colour — a good stylist will adjust the style’s height and volume to balance the frame. Common mistake: choosing the hairstyle before the outfit. Quick verdict: pick the outfit first, then let the hair complete it, not compete with it.
Quick Changes: One Base Style, Five Camera Looks
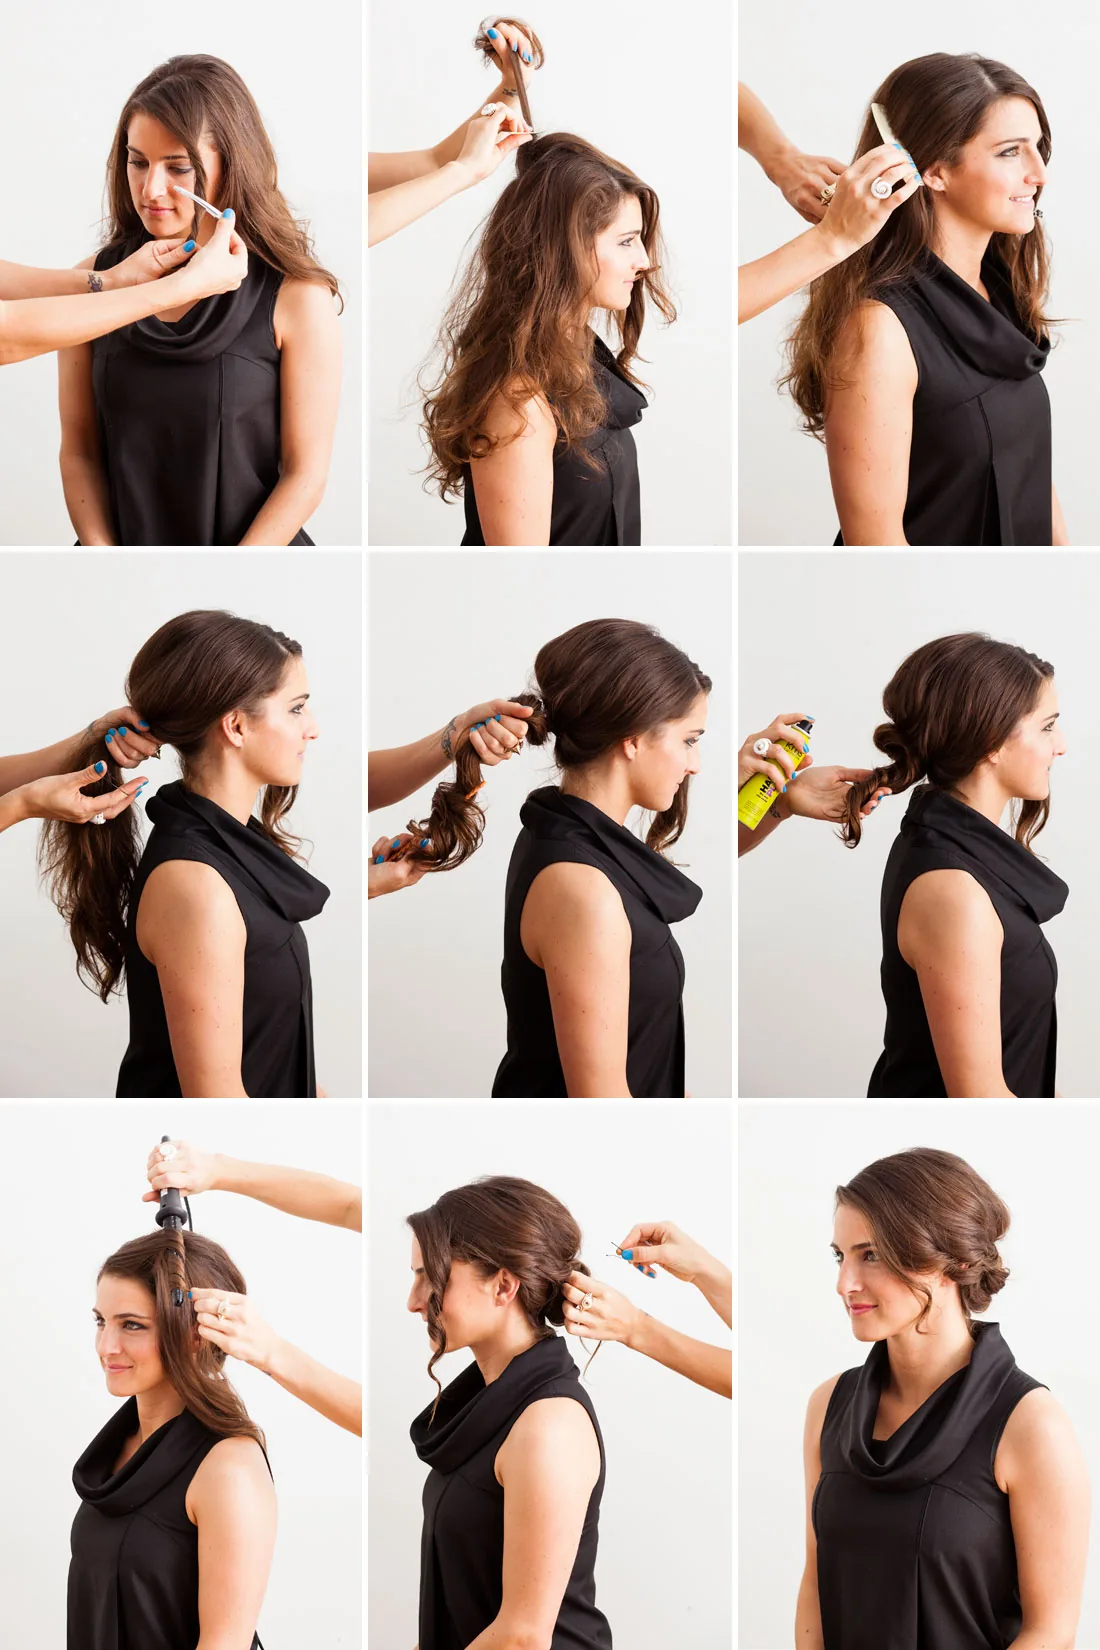
Most shoots need more than one look, and the smartest way to get them is one strong base style that changes in minutes. Start with soft waves or a low bun, then transform it: pull it into a high ponytail for a sharper look, twist it into a chignon for evening glamour, add a braid for a boho feel, or sweep it to one side for a portrait. Each change takes two to five minutes and a few pins, and the camera sees five different hairstyles while your hair stays healthy and unstressed.
Plan the order so the hair only gets more structured, never less: loose waves first, then half-up, then a low ponytail, then a bun, then an updo. Undoing a tight updo back into waves rarely works on set. Best for: engagement shoots, branding sessions, and any shoot with multiple outfits. Maintenance: keep a small kit — pins, elastics, a brush, dry shampoo, shine spray — in your bag, and budget five minutes between looks. Quick verdict: one base, five looks, zero restyling stress.
Common Photoshoot Hair Mistakes — and the 2-Minute Fixes
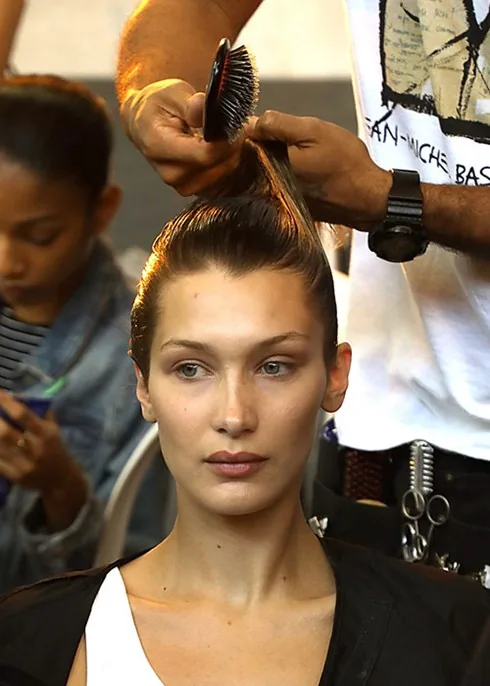
The most common photoshoot hair mistakes are small, and every one of them has a two-minute fix — if you catch it before the shutter clicks. Hair covering one eye looks mysterious in person and like a mistake in a headshot; sweep it back and pin it. A centre part that drifts off-centre makes the whole face look lopsided on camera; reset it with the tail of a comb. Over-styled, helmet-stiff hair reads as dated in photos; break it up with your fingers and a little texture spray. And the classic: a style that looked perfect at home but fell flat by the time you arrived — always bring pins and a travel spray.
The real fix is a checklist, not talent. Before the first shot: check the parting, check both sides match, check the back in a mirror, check for flyaways in a test photo, and check the hair against the outfit. Pros and cons: a checklist feels fussy, but it catches in seconds what retouching cannot fix naturally. Who should avoid over-checking: nobody — even professionals do a hair check between set-ups. Quick verdict: two minutes of checking saves hours of wishing you had.
1. The Sleek Low Bun
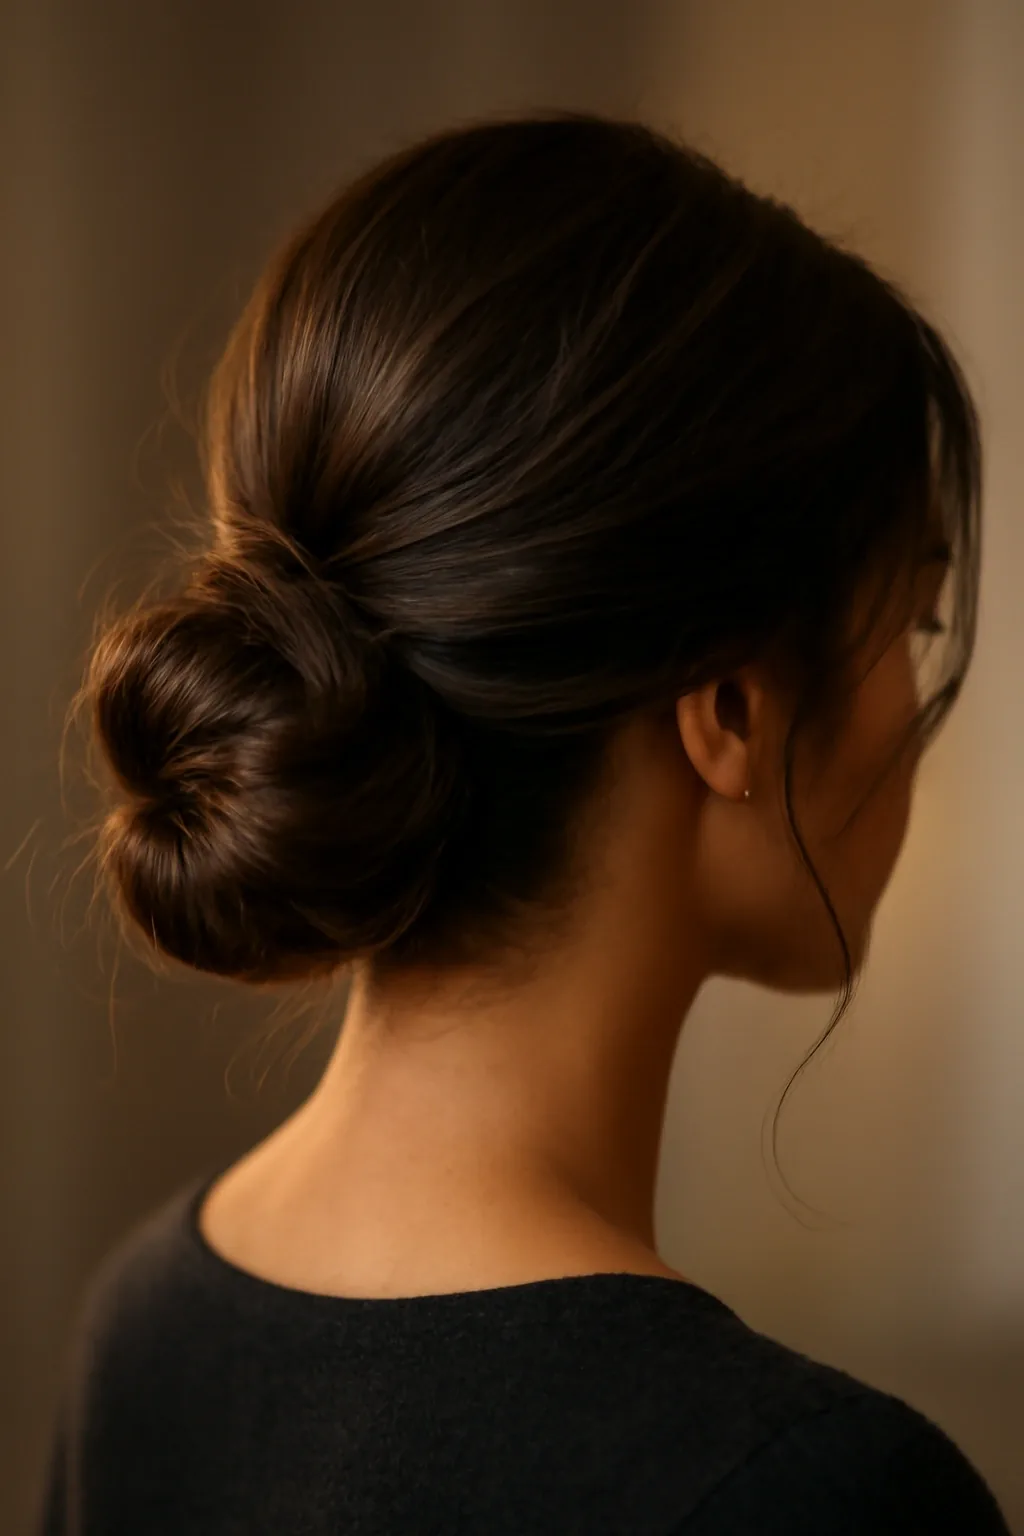
The sleek low bun is the headshot photographer’s favourite for a reason: it opens up the whole face, shows the neckline and jawline cleanly, and looks the same from the front, the side and the back — which matters in group and three-quarter shots. Gather the hair low at the nape, smooth it with a brush and a little serum, twist or coil it into a neat bun, and pin it flat. No flyaways, no distractions, nothing competing with your face.
Best for: headshots, corporate portraits, and formal shoots. How to style it: part the hair in the middle or to one side, smooth with a boar-bristle brush, and secure the bun with pins placed in a cross. Pros and cons: it is timeless, fast and wind-proof, but it can feel severe on very angular faces — soften it with one loose face-framing strand. Quick verdict: if you only need one safe, camera-perfect style, this is it.
2. The Polished High Ponytail
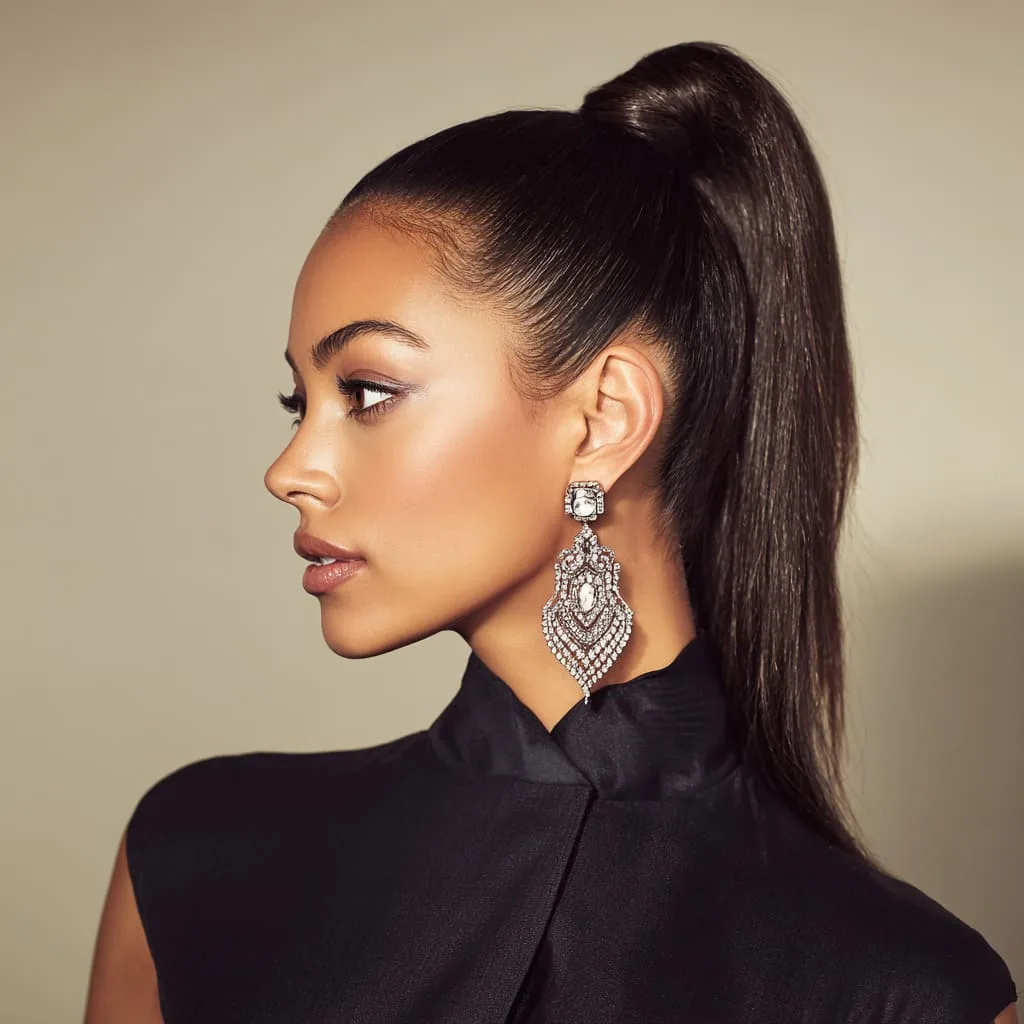
A high ponytail lifts the whole face on camera — it pulls the eyes up, defines the cheekbones, and gives a portrait an instant sense of energy. The photoshoot version is polished, not gym-ready: the hair is smooth at the crown, the ponytail itself is full and glossy, and the elastic is hidden under a wrapped strand of hair. It photographs beautifully from the side, where the ponytail’s shape adds drama to an otherwise simple frame.
Best for: fashion shoots, beauty portraits, and confident, modern looks. How to style it: gather the hair high, smooth the crown with a brush and a little gel, and wrap a strand around the base. Common mistake: placing the ponytail too low, which flattens the lift, or too tight, which pulls the face. Cost and time: ten minutes, one elastic, a few pins. Quick verdict: instant lift, instant polish — the ponytail, grown up.
3. Soft Hollywood Waves
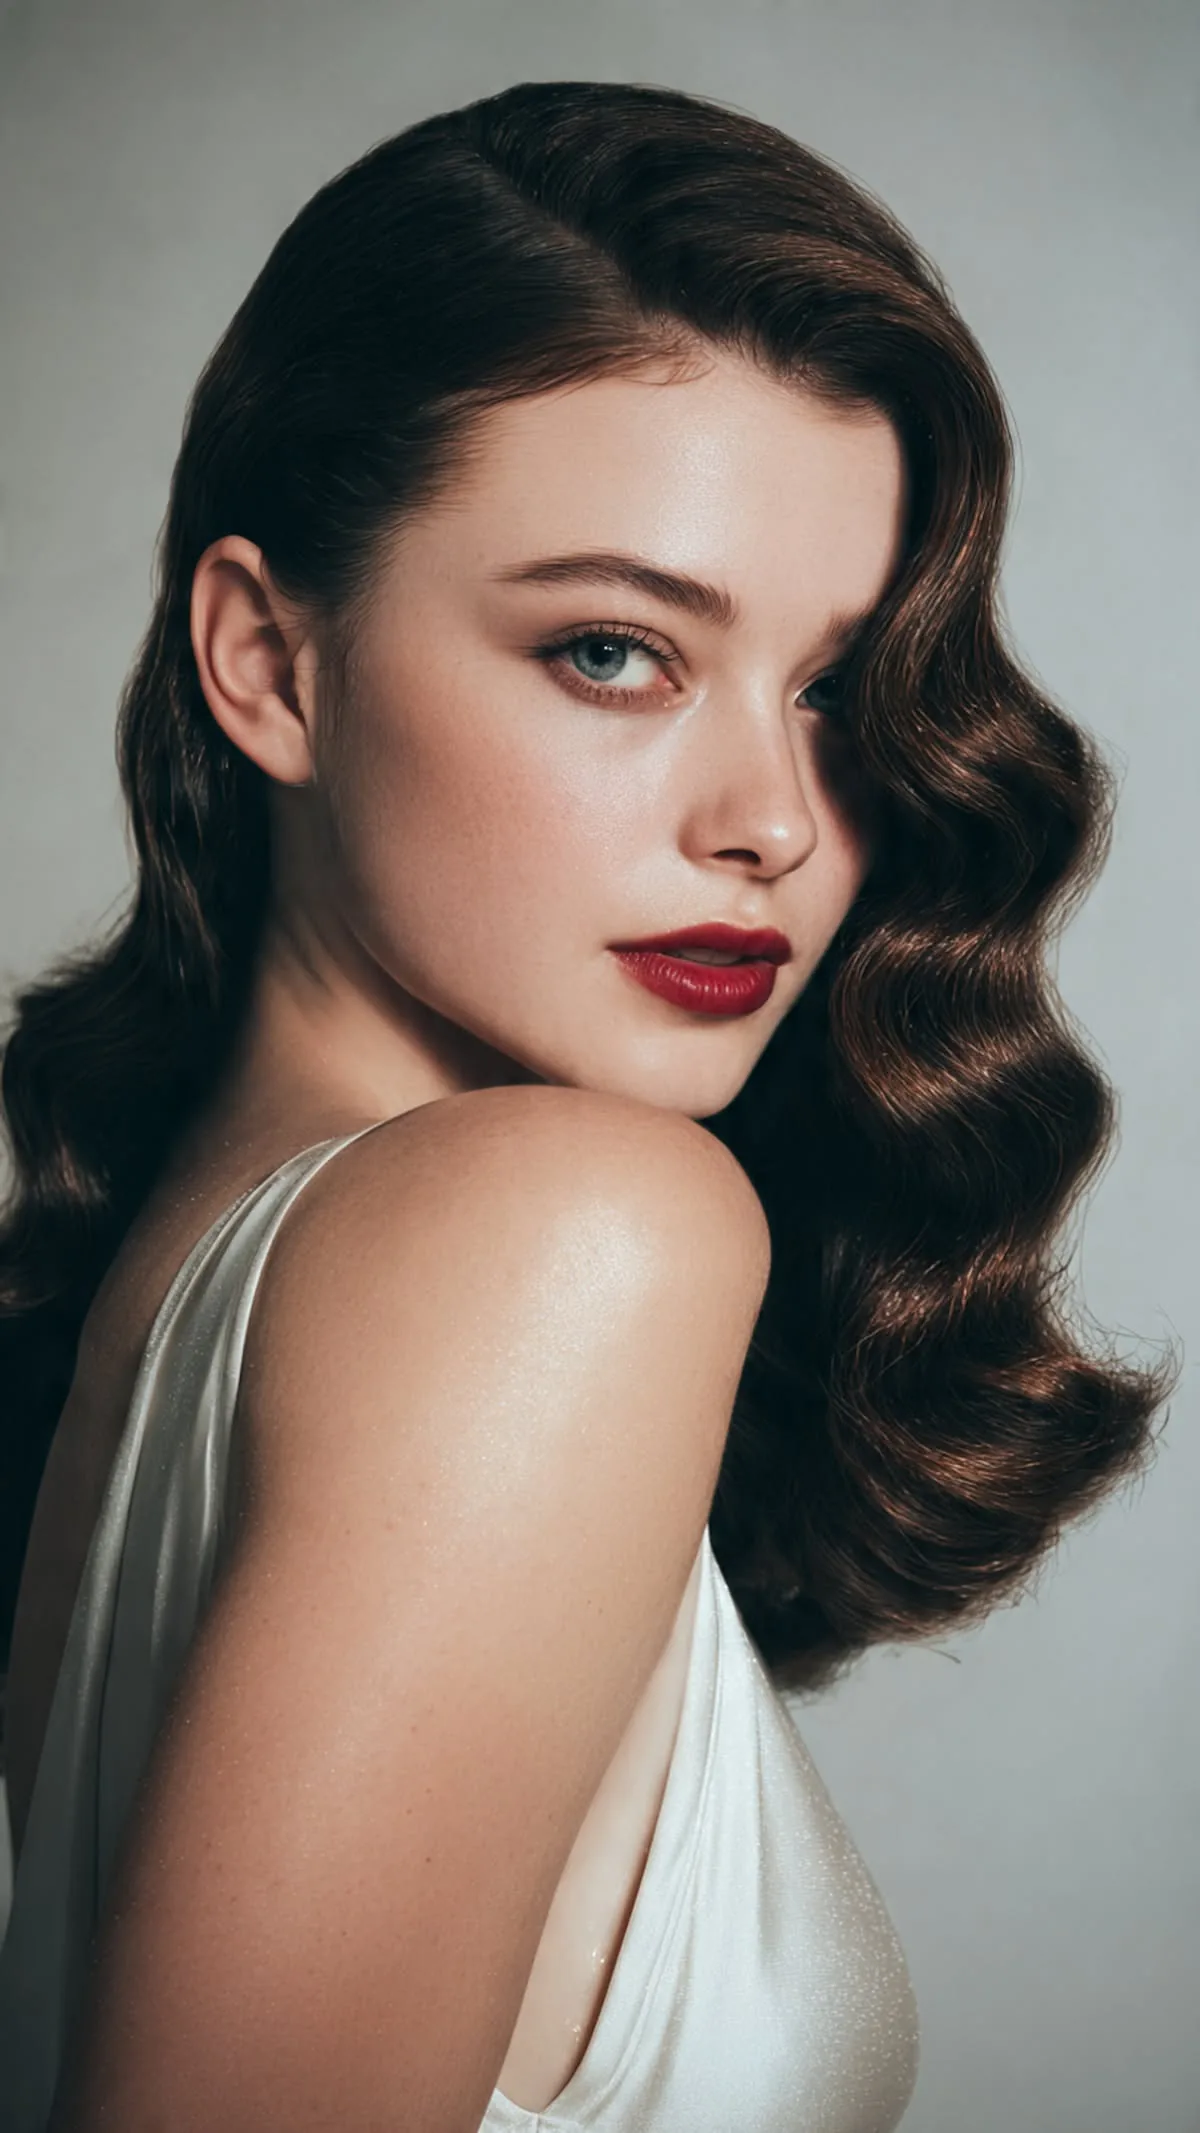
Soft Hollywood waves are the classic portrait hairstyle: deep, glossy, side-parted waves that catch the light in ribbons and make every photo look like it belongs in a magazine. They suit almost every face shape and every age, and they photograph with movement and shine that flat hair simply cannot match. The key is uniformity — waves that all fall in the same direction, brushed out soft, with a shine serum on the lengths.
Best for: portraits, engagement shoots, and evening glamour. How to style it: curl with a large-barrel iron in one direction, let the curls cool, then brush through gently and set with a light-hold spray. Pros and cons: they look expensive and timeless, but they take time and can drop in humidity — set them well and carry pins. Maintenance: a quick brush and a touch of serum between set-ups. Quick verdict: the most photogenic waves there are.
4. The Classic Blowout with Volume
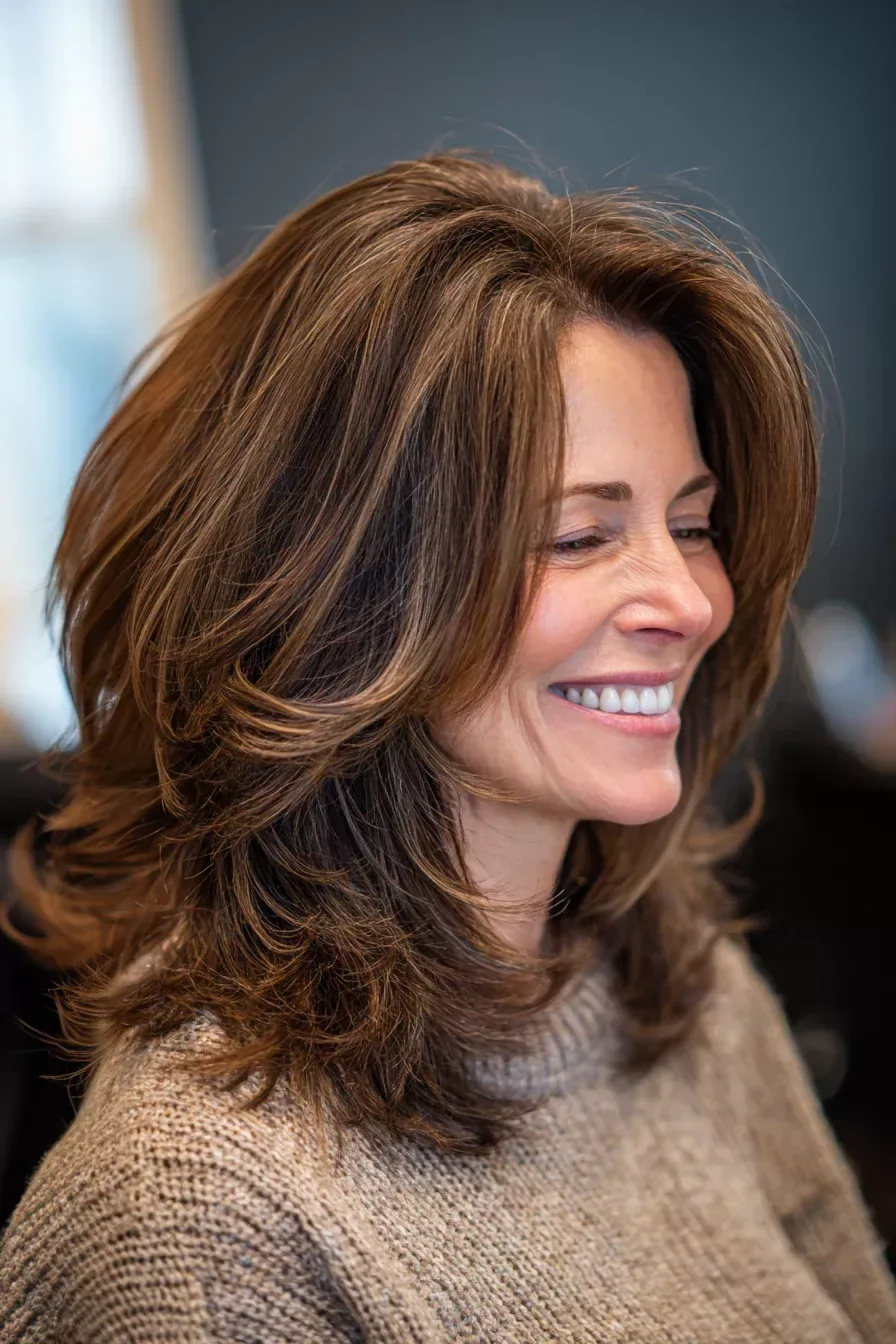
A classic blowout — smooth, bouncy, full of movement — is the most versatile photoshoot hairstyle of all, because it looks natural in every kind of photo, from headshots to full-length lifestyle shots. The volume at the roots gives the face a lift, the smooth lengths catch the light, and the ends curve just enough to frame the jaw. It is the style that says healthy, polished and effortless all at once.
Best for: branding shoots, lifestyle portraits, and anyone who wants to look like the best version of themselves. How to style it: blow-dry with a round brush, lifting at the roots, and finish with a cool shot and a drop of serum. Who should avoid it: outdoor shoots on very windy days — volume is the first thing wind takes. Common mistake: overloading the roots with product, which weighs the blowout down before the shoot starts. Quick verdict: the reliable all-rounder every shoot needs.
5. The Low Chignon
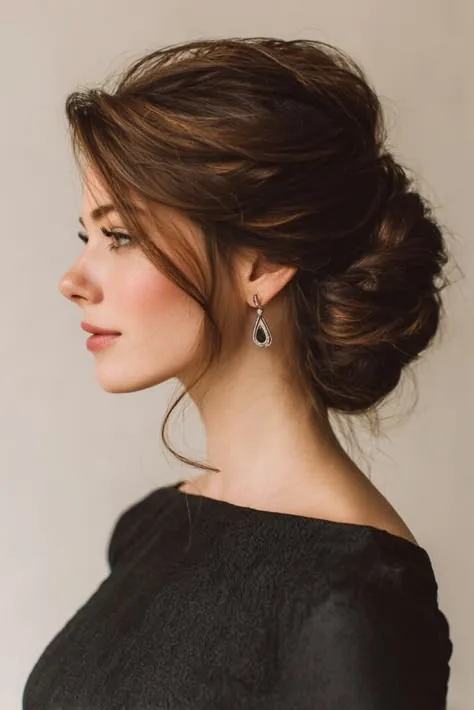
The low chignon is a rolled, tucked bun at the nape — quiet, elegant, and one of the most flattering shapes a camera can see. It keeps the neckline long, the profile clean, and the focus on the face, which is why it appears in so many wedding, maternity and formal portrait galleries. Unlike a high bun, it never competes with the outfit, and unlike loose hair, it never hides the face in a side profile.
Best for: weddings, maternity shoots, and formal portraits. How to style it: gather the hair low, roll it upward into a soft coil, and pin it in place, leaving the surface smooth. What to ask your stylist: for a little height at the crown if your face is round, or a side part if your face is long. Pros and cons: it holds for hours and survives wind, but a too-tight chignon can look severe — keep it soft. Quick verdict: understated elegance that never dates.
6. The Half-Up Twisted Crown
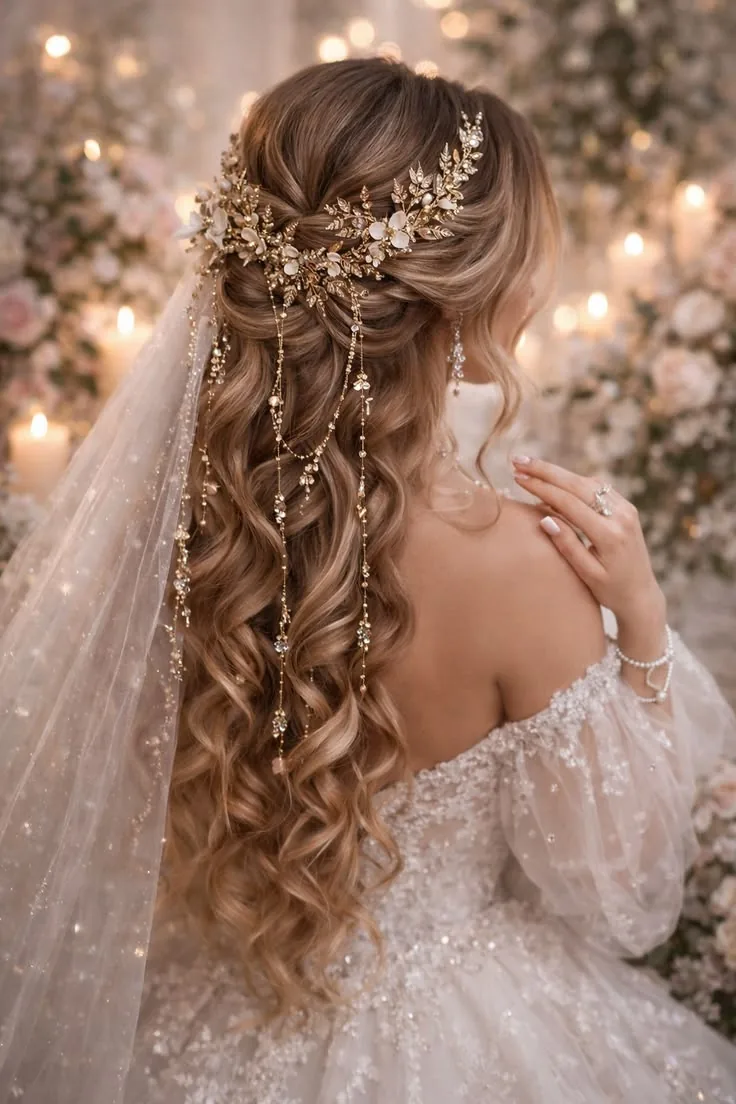
The half-up twisted crown takes the top sections of hair, twists them back from each side, and pins them together at the back — leaving the rest of the hair loose and flowing. It is romantic without being fussy, and it photographs beautifully because it shows the face clearly while keeping the hair’s length and movement in the frame. It works on straight, wavy and curly hair, and it is one of the best styles for outdoor shoots, where the twist anchors the front.
Best for: engagement shoots, outdoor portraits, and boho-inspired sessions. How to style it: take a section from each temple, twist toward the back, cross them, and pin. Maintenance: check the pins between shots — twists loosen faster than braids. Common mistake: twisting too tightly, which pulls the face and looks tense; keep the twist soft. Quick verdict: the best of both worlds — face open, hair down.
7. Sleek Straight Hair with a Centre Part
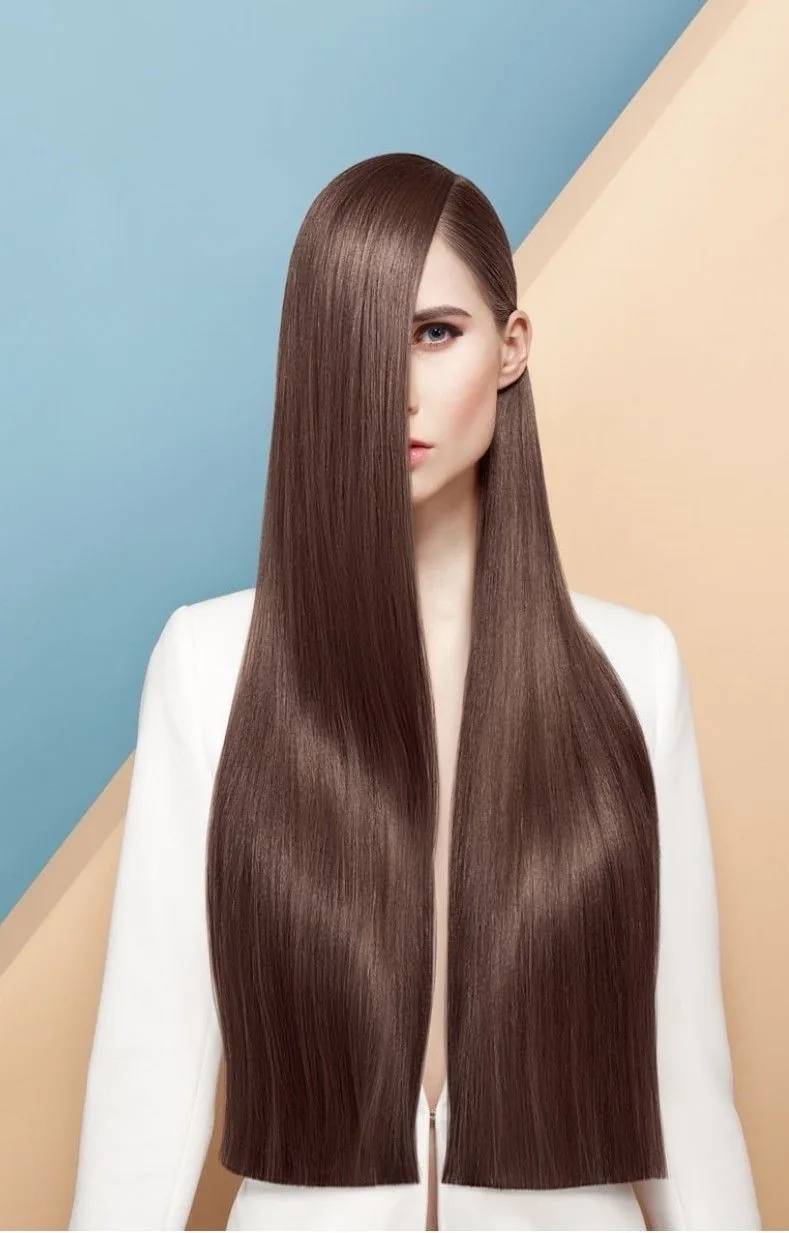
Sleek, straight, centre-parted hair is the most modern photoshoot look there is — minimal, sharp, and completely about the face. On camera it reads as confident and editorial, especially in studio light, where the glossy lengths create clean vertical lines that lengthen the frame. The style only works if the hair is genuinely smooth: frizz, kinks and uneven ends all show up under studio lights.
Best for: studio portraits, fashion editorials, and strong, modern branding photos. How to style it: flat-iron in small sections, smooth a drop of serum through the lengths, and set the parting with the tail of a comb. Pros and cons: it is striking and simple, but it shows every flaw and can look flat on fine hair — add root lift or choose another style. Who should avoid it: very humid outdoor shoots. Quick verdict: minimal hair, maximum face.
8. The Textured Low Ponytail
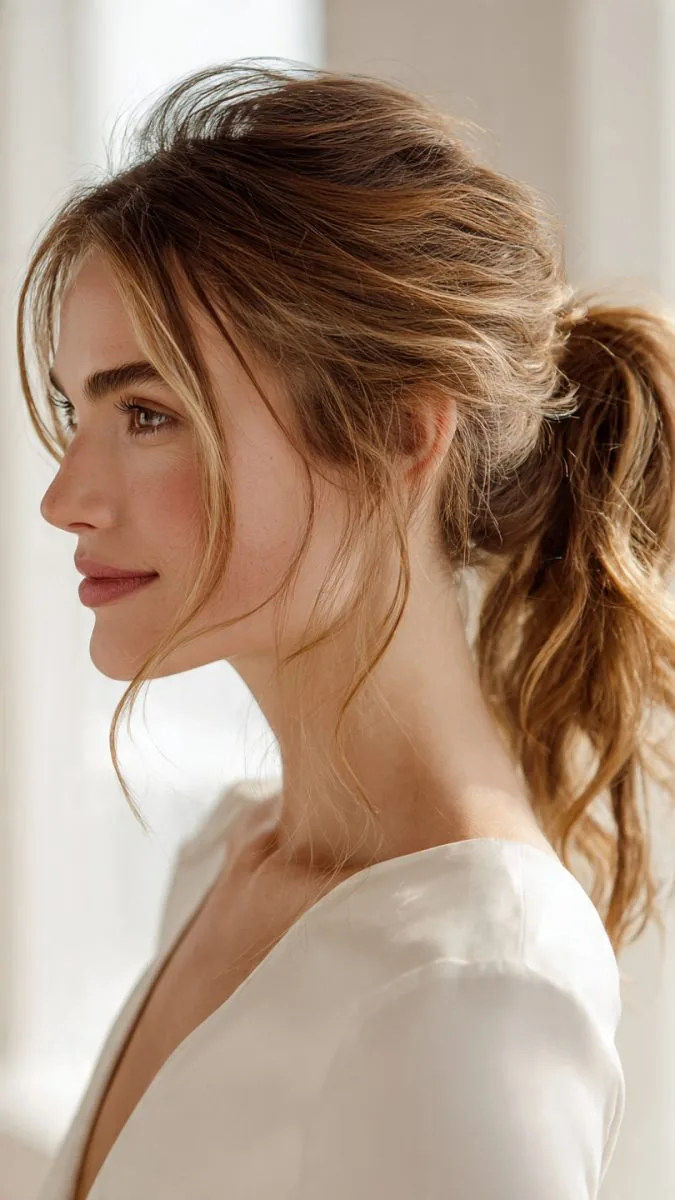
A textured low ponytail is the relaxed cousin of the polished ponytail: the hair is gathered low, the texture is left in, and a few soft pieces frame the face. It photographs as effortless and natural, which is exactly what lifestyle and family shoots want, and it is one of the most wind-friendly styles — the texture hides tangles, and the low placement keeps the hair from whipping across the face.
Best for: family portraits, lifestyle shoots, and outdoor sessions. How to style it: add texture spray, gather loosely at the nape, and pull out a few strands at the front. Cost and time: five minutes, one elastic. Common mistake: making it too neat — the charm of this style is its softness. Maintenance: a quick finger-comb between shots is all it needs. Quick verdict: the ponytail that looks like you did nothing, in the best way.
9. Romantic Loose Curls
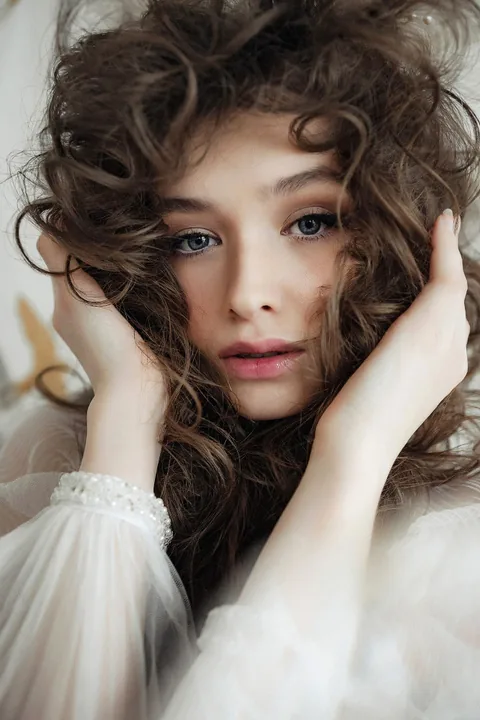
Romantic loose curls are soft, touchable, and full of movement — the kind of hair that makes a portrait feel warm rather than staged. The curls are large and loose, brushed out so they blend into waves, and they frame the face gently from every angle. They suit maternity shoots, couple portraits and golden-hour outdoor sessions especially well, because the curls catch warm light beautifully.
Best for: maternity, engagement, and golden-hour portraits. How to style it: curl with a medium barrel, alternate directions for a natural fall, then brush through lightly. Pros and cons: they look soft and romantic, but they can drop in heat or humidity — use a light-hold spray and avoid touching them too much. What to ask your stylist: for curls that start at eye level, not at the roots, so the face stays open. Quick verdict: warmth and softness, in hair form.
10. The French Twist
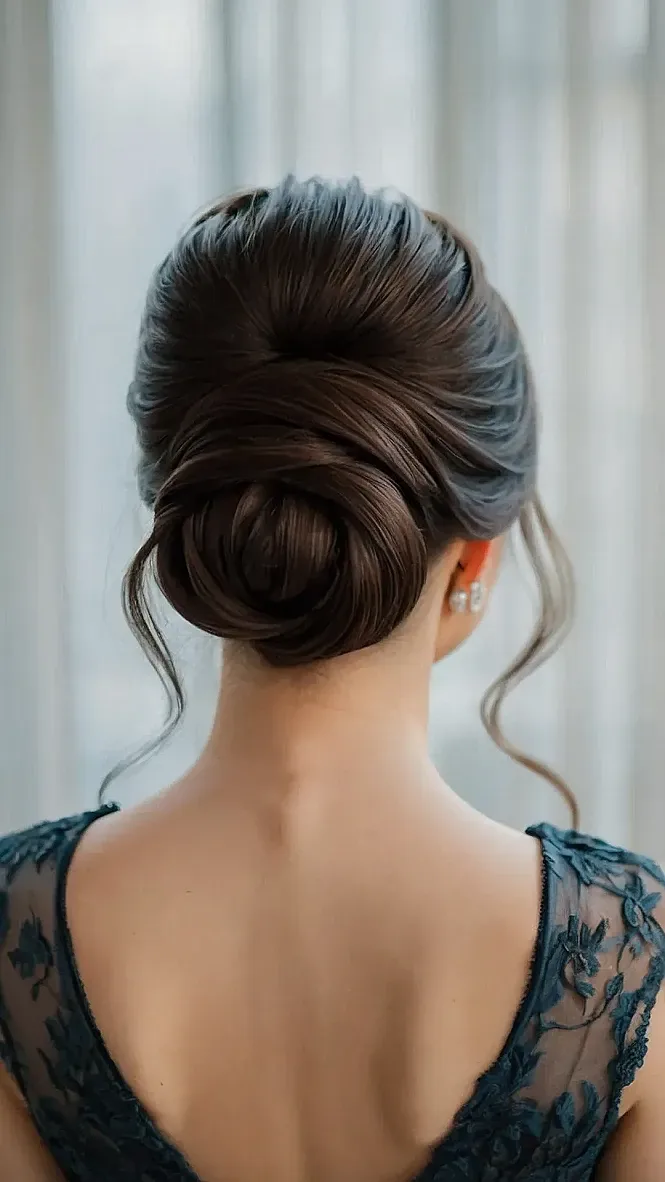
The French twist is the most sculptural updo in this guide: the hair is swept up, folded into a vertical roll, and pinned along the back of the head, creating a clean, elegant line from every angle. It is the style of black-tie portraits and formal events, and it photographs with a drama that a bun cannot match — the profile shot, in particular, is striking. It needs length and pins, but it holds for hours.
Best for: black-tie shoots, formal portraits, and vintage-inspired sessions. How to style it: sweep the hair to one side, roll it inward, and pin along the fold, finishing with a light mist of spray. Pros and cons: it is elegant and long-lasting, but it is a stylist’s job for most people — do not attempt it for the first time on shoot day. Common mistake: a twist that leans — check the profile in a mirror. Quick verdict: the most dramatic updo you can wear.
11. Side-Swept Waves
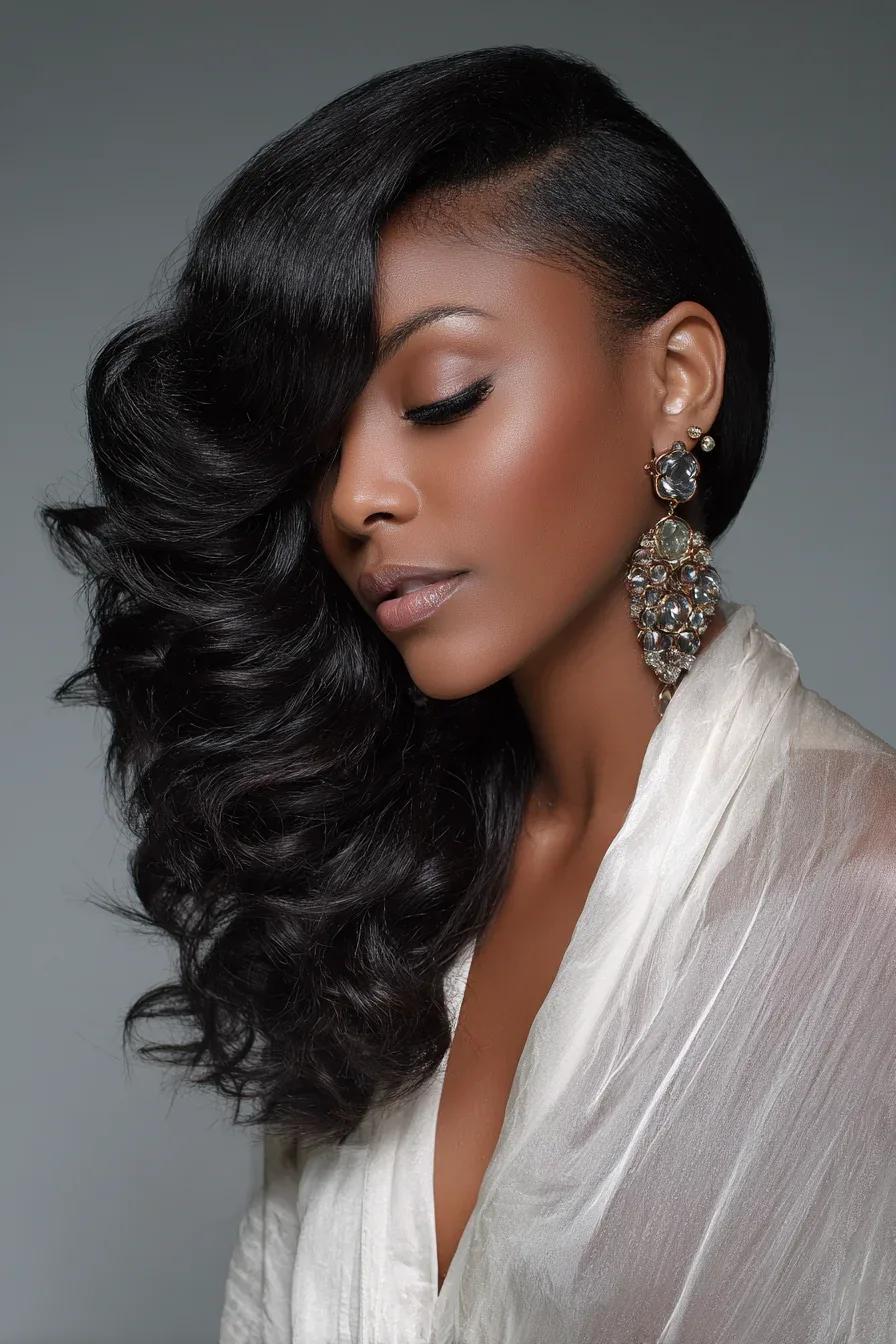
Side-swept waves — all the hair brought over one shoulder in soft, glossy waves — create a beautiful diagonal line across the frame that flatters the neck and shoulders. They photograph wonderfully in three-quarter and profile shots, and they are a favourite for engagement and beauty portraits, where the hair becomes part of the composition rather than just a frame. A deep side part is what makes the sweep work.
Best for: engagement shoots, beauty portraits, and shoulder-baring outfits. How to style it: part deeply to one side, curl the lengths, and sweep everything over the opposite shoulder, pinning behind one ear. Maintenance: check the sweep between shots — it drifts. Who should avoid it: very windy outdoor shoots, unless the sweep is pinned. Quick verdict: one sweep, instant glamour.
12. The Braided Crown
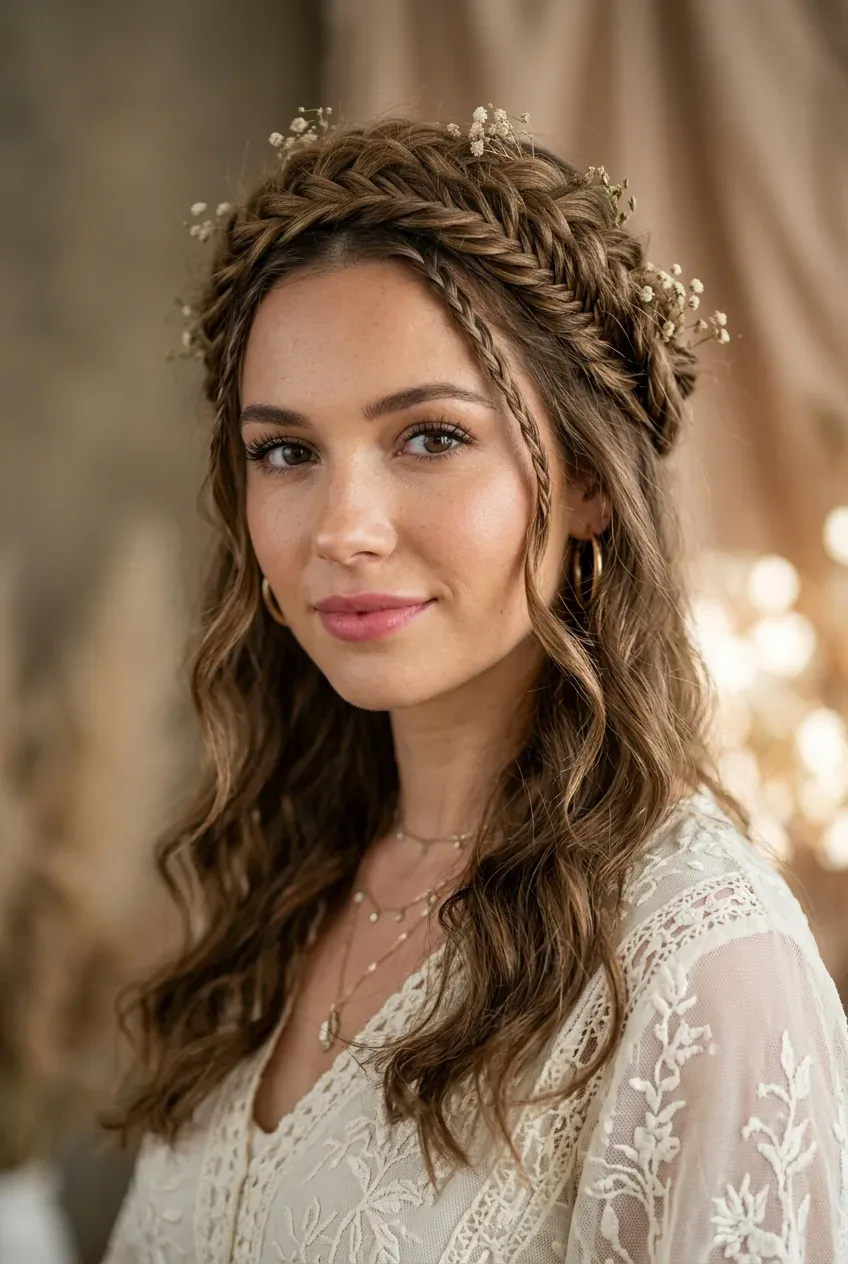
A braided crown wraps a braid around the head like a halo, keeping every strand off the face while adding texture and interest that a plain updo cannot match. It is a favourite for outdoor, boho and festival-style shoots because it is genuinely wind-proof — the braid is the anchor — and it photographs with a soft, romantic detail that reads beautifully in close-ups and wide shots alike.
Best for: outdoor, boho, and festival-style photoshoots. How to style it: braid two sections from behind each ear, bring them across the crown, and pin them in place. Pros and cons: it holds all day and looks intricate, but it takes practice and a mirror. Common mistake: braiding too tightly, which can look severe — pull the braid edges out slightly for softness. Quick verdict: a halo of hair that never blows away.
13. The Messy Bun, Camera-Ready
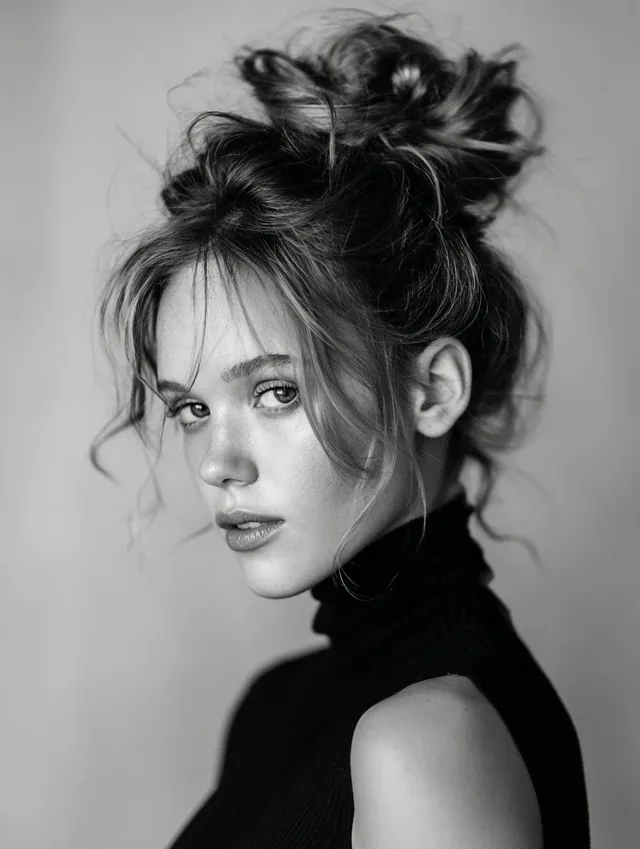
A messy bun can look effortless on camera — or just messy. The camera-ready version is deliberate: the bun is full and textured, a few face-framing pieces are placed on purpose, and the crown has volume, so the mess reads as style rather than accident. It is a great choice for lifestyle and candid-style shoots, where a too-perfect updo would look out of place.
Best for: lifestyle shoots, casual portraits, and at-home sessions. How to style it: gather the hair high or mid-height, twist loosely, pin, then pull out a few strands and add texture spray. Pros and cons: it is fast and forgiving, but it can look unfinished in a formal headshot — save it for relaxed shoots. Maintenance: almost none; the looser it gets, the better it can look. Quick verdict: messy on purpose, not by accident.
14. The Sleek Top Knot
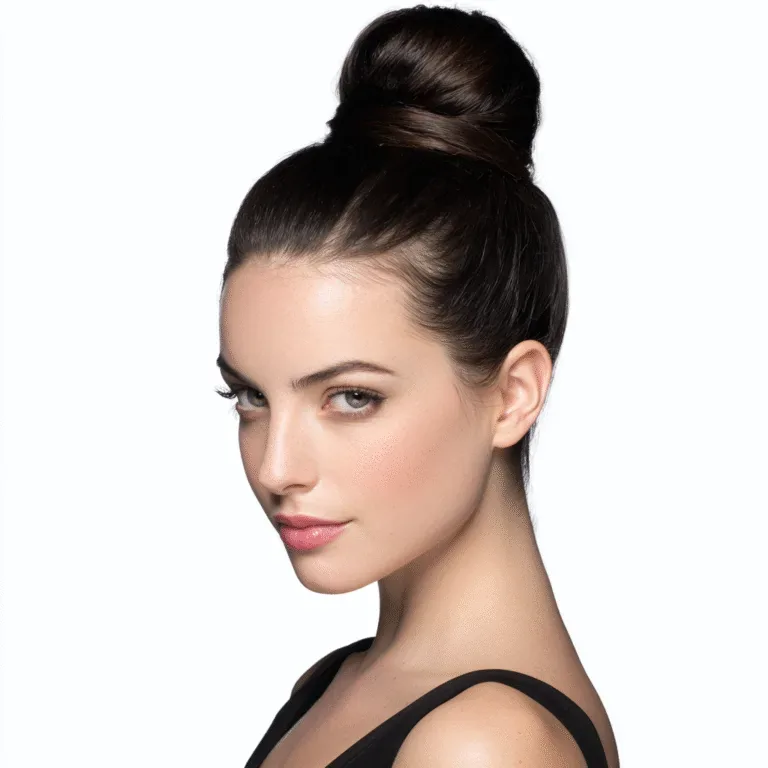
A sleek top knot pulls the hair straight up into a smooth, polished bun on the crown, lengthening the neck and opening the face completely. On camera it is bold and modern — it works beautifully in studio portraits, fashion shoots and beauty close-ups, where the clean lines of the knot balance strong makeup. It also photographs well from the side, where the knot’s height adds drama to the silhouette.
Best for: studio portraits, fashion shoots, and beauty close-ups. How to style it: brush the hair up smoothly, secure high, wrap into a bun, and smooth flyaways with a spoolie and spray. Who should avoid it: anyone with a very long face, since the height can lengthen it further — a mid-height knot flatters better. Common mistake: a knot that sits too far back, which disappears in front-facing photos. Quick verdict: bold, clean, and unmistakably modern.
15. Old Hollywood Finger Waves
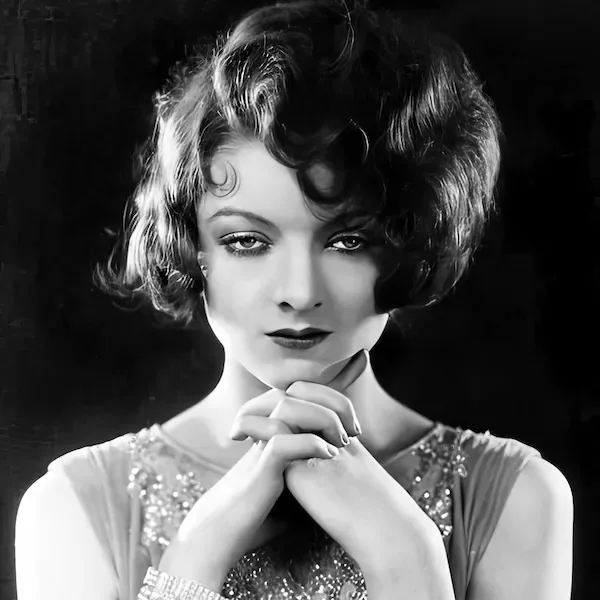
Old Hollywood finger waves — sculpted, glossy, S-shaped waves that hug the head — are the most glamorous vintage style you can wear to a shoot. They photograph with a shine and a precision that modern loose waves cannot match, and they suit themed shoots, anniversaries and black-and-white portraits especially well. The waves are set close to the head, so the face is the focus and the hair becomes jewellery.
Best for: vintage-themed shoots, anniversaries, and black-and-white portraits. How to style it: set with gel and finger-wave clips, or use a small iron and pin each wave to cool. Pros and cons: the result is stunning and timeless, but it takes a stylist and time — budget an hour. Maintenance: do not brush them out; a light mist of shine spray is all they need. Quick verdict: pure glamour, straight from the golden age.
16. Defined Natural Curls
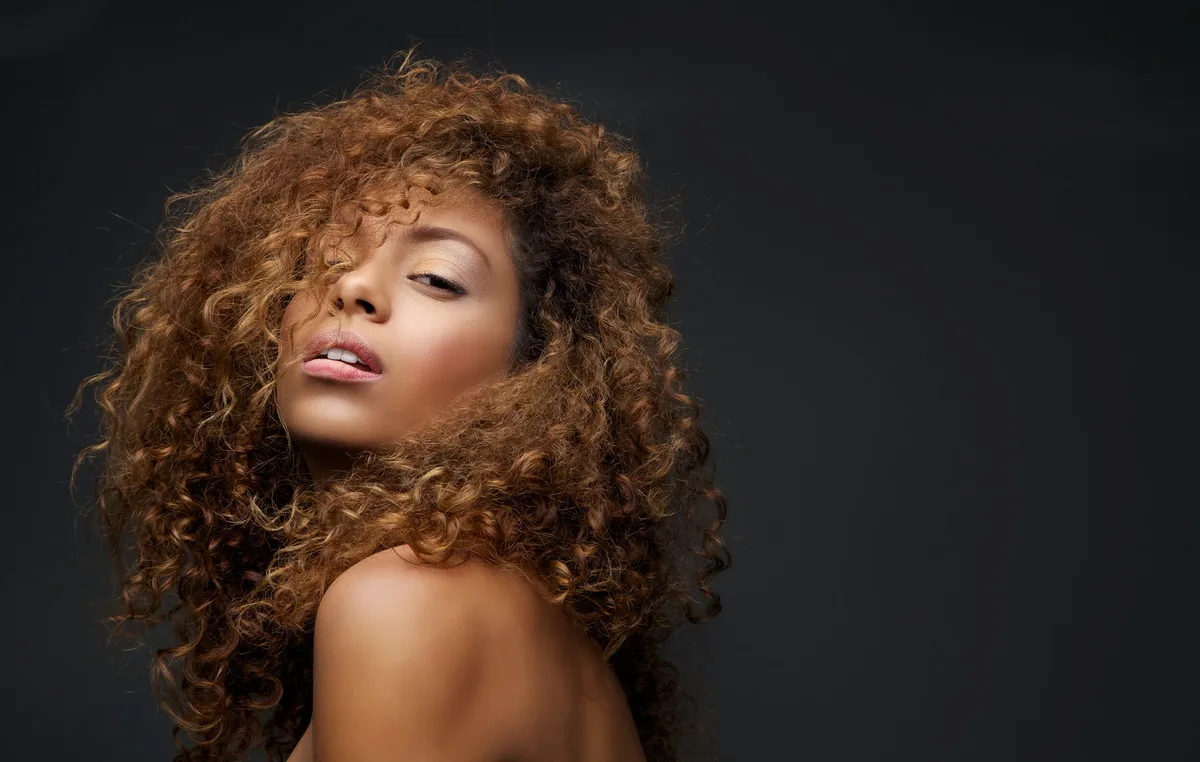
Defined natural curls photograph beautifully because the camera loves texture — each curl catches light and shadow, giving the photo depth that straight hair cannot match. The key for a shoot is definition without frizz: curls that are moisturised, separated, and shaped, with a clear parting and a silhouette that frames the face. A little curl cream and a diffuser do more for the photo than any amount of hairspray.
Best for: portraits, lifestyle shoots, and anyone who wants their natural texture to be the star. How to style it: define curls with cream while damp, diffuse on low heat, and separate gently with oiled fingers. Pros and cons: the texture is stunning on camera, but humidity can expand the shape — a light gel cast holds it. Common mistake: brushing curls dry, which creates frizz the flash will magnify. Quick verdict: your curls, defined and camera-ready.
17. Long Layers with Face-Framing Pieces
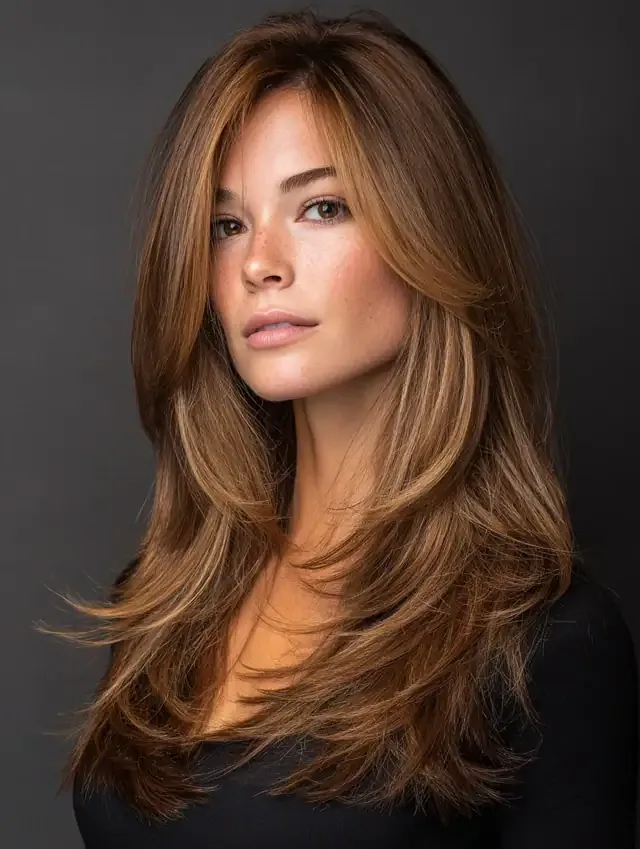
Long layers with face-framing pieces are the most forgiving long-hair photoshoot style: the layers keep the hair from looking like a flat curtain, and the shorter pieces around the face draw the eye to your features in every shot. They move beautifully outdoors, photograph with natural dimension, and suit almost every face shape — which is why they appear in so many portrait galleries.
Best for: portraits, lifestyle shoots, and long hair that needs shape. How to style it: blow-dry the face-framing pieces forward and under, and add a soft bend to the layers. Maintenance: a quick brush between shots keeps the layers separated. Who should avoid it: nobody — but very fine hair may need a little root lift so the layers do not fall flat. Quick verdict: long hair, with a shape the camera can see.
18. The Wavy Lob
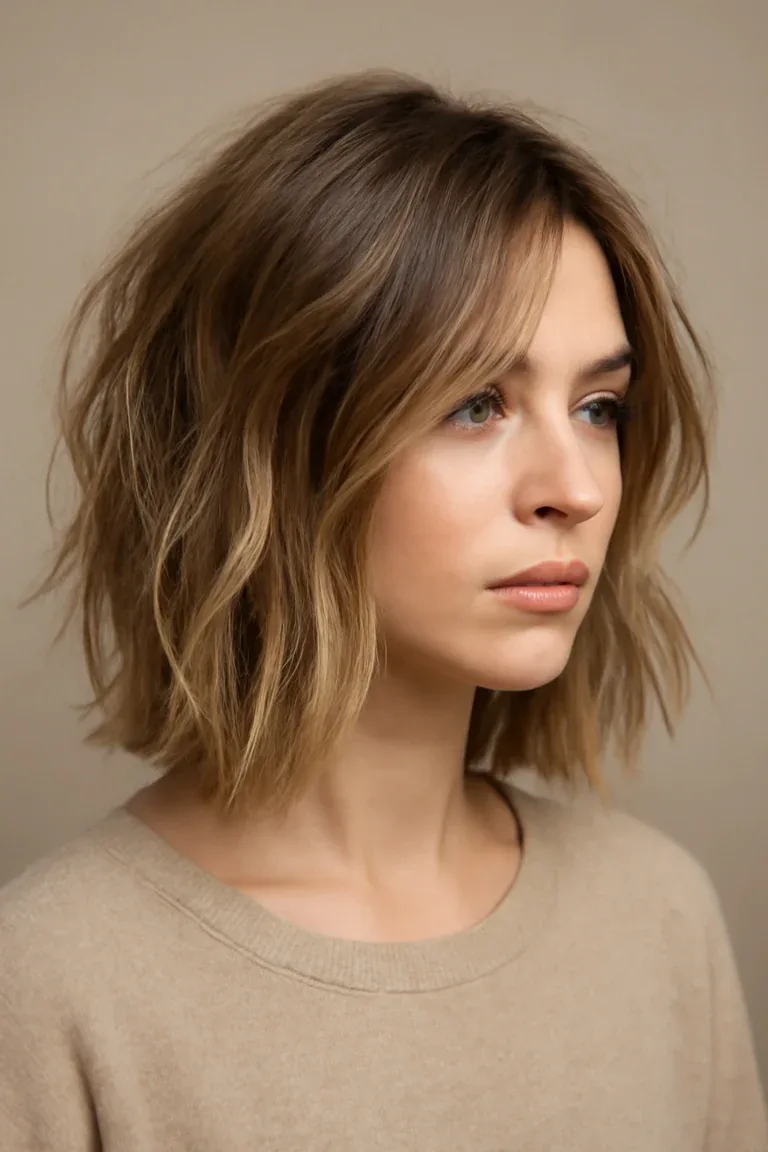
The wavy lob — a long bob with soft, tousled waves — is the modern portrait cut: it is long enough to move, short enough to hold its shape, and it photographs with a casual polish that suits branding, lifestyle and editorial shoots alike. The waves give it life, the length keeps it feminine, and the cut itself frames the face without hiding it. It is also one of the easiest styles to refresh between set-ups.
Best for: branding shoots, lifestyle portraits, and medium-length hair. How to style it: curl the mid-lengths with a flat iron, leave the ends straight, and break the waves up with your fingers. Pros and cons: it is versatile and low-maintenance, but the waves can drop in humidity — a texture spray helps. Cost and time: a good cut plus ten minutes of styling. Quick verdict: the haircut that does the styling for you.
19. The Sleek Bob
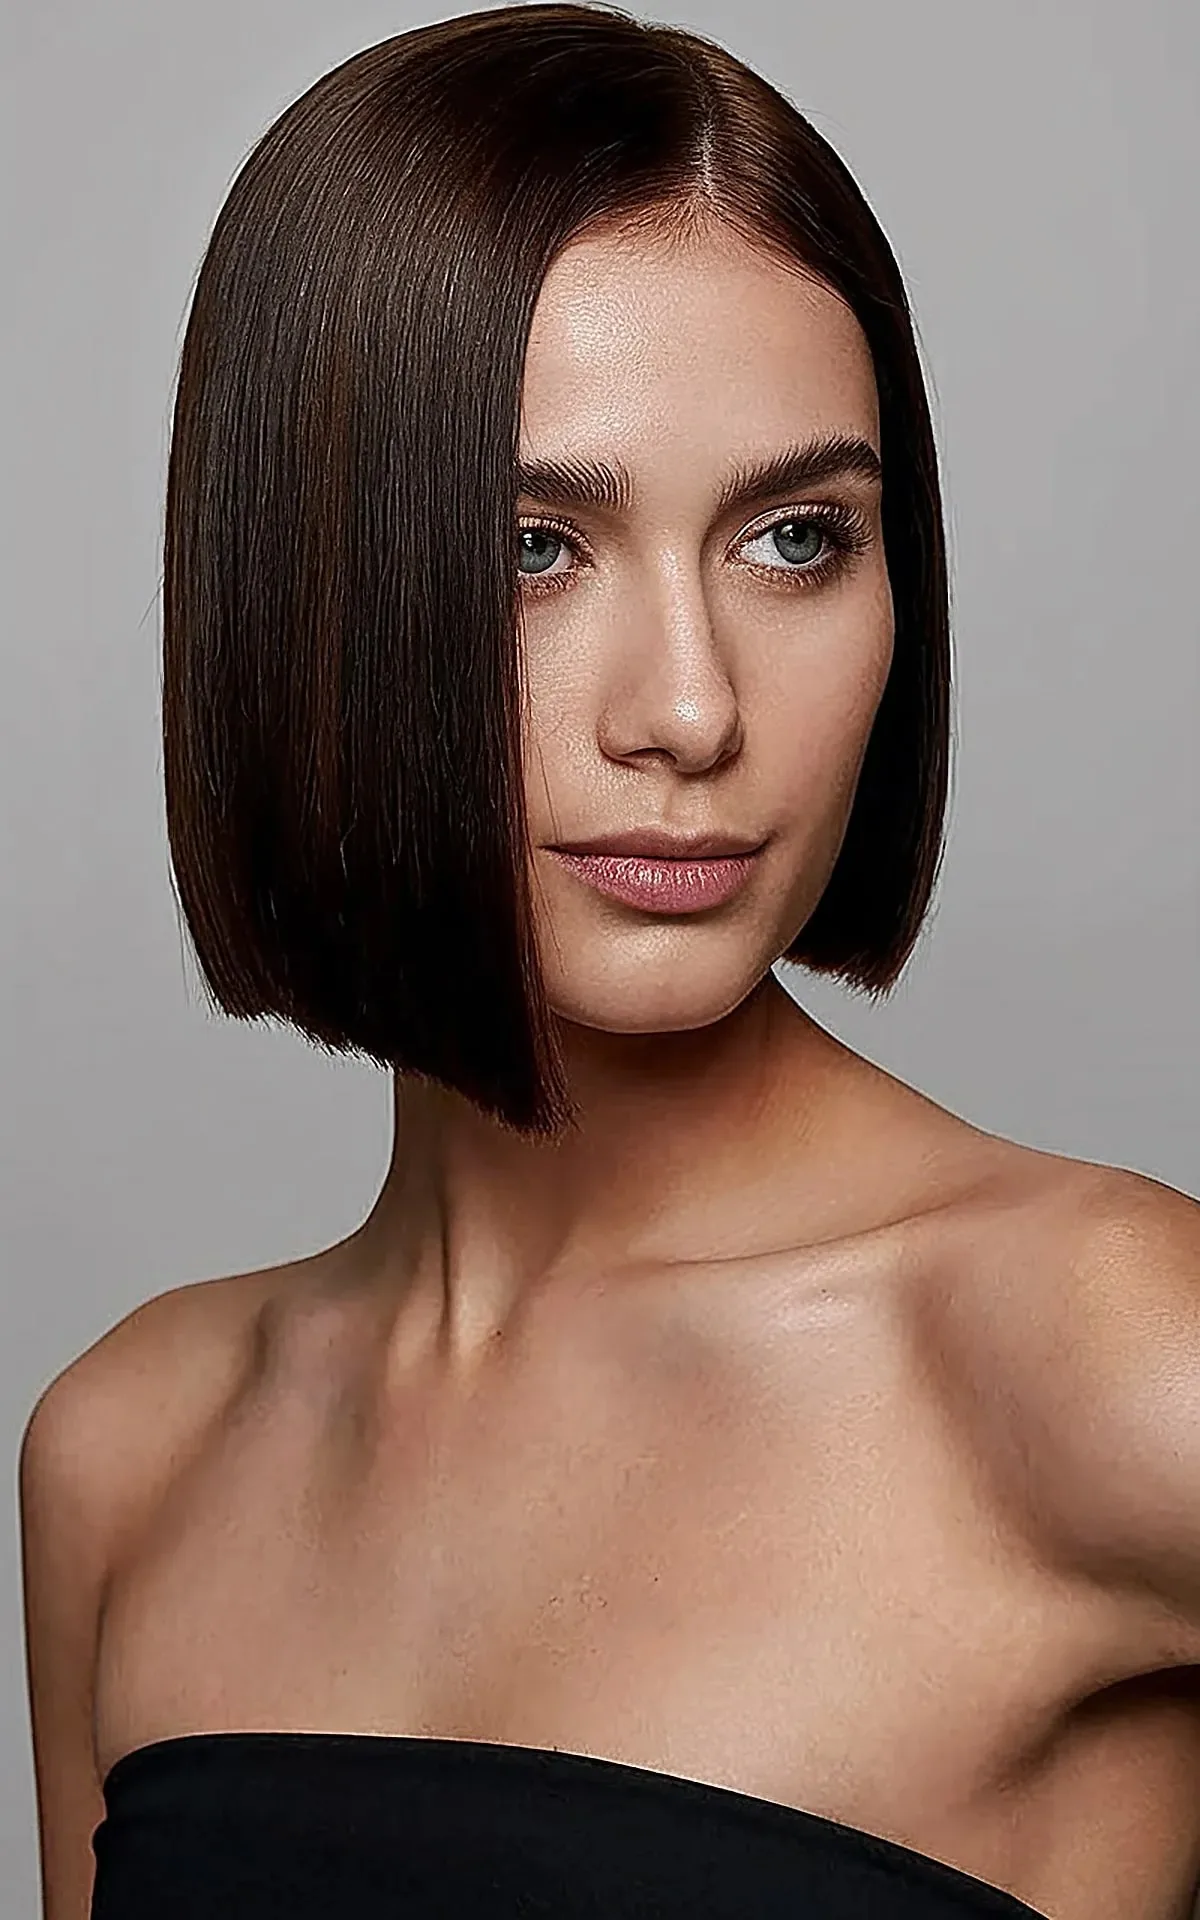
A sleek bob is a statement in itself: sharp, glossy, and graphic, it creates a clean frame around the face that the camera loves. In studio light, the bob’s smooth surface reflects light evenly, and its strong outline makes the portrait feel modern and intentional. It suits straight and slightly wavy hair best, and it is a favourite for headshots where the hair needs to look finished without any fuss.
Best for: headshots, studio portraits, and editorial shoots. How to style it: flat-iron in sections, tuck one side behind the ear for asymmetry, and finish with serum. Common mistake: letting the ends flip out unevenly — check both sides in a mirror. Who should avoid it: very curly hair, unless the bob is cut and styled for curls. Quick verdict: sharp, simple, and impossible to ignore.
20. The High Bun with Face-Framing Tendrils
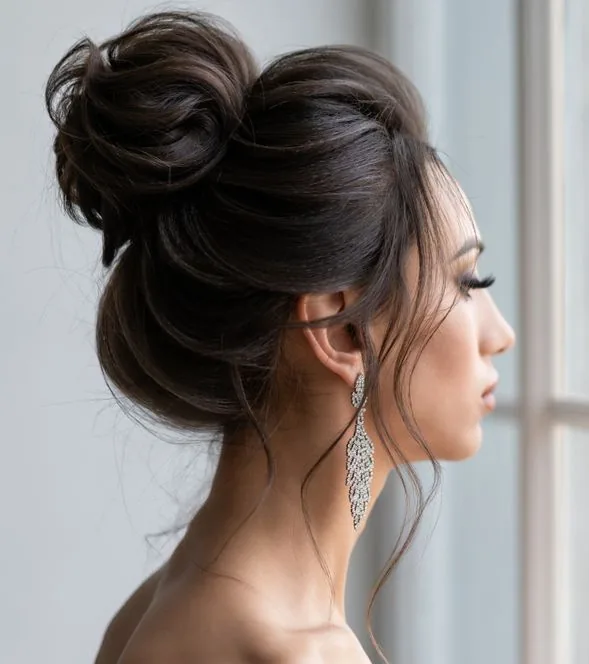
A high bun with soft tendrils left out at the front is the softer sister of the sleek top knot: the bun gives height and polish, while the tendrils keep the look romantic and the face framed. It photographs beautifully from the front and the side, and it is a favourite for engagement and formal portraits, where the tendrils add movement that a fully pulled-back style lacks.
Best for: engagement shoots, formal portraits, and romantic sessions. How to style it: pull the hair high, leave two front sections out, curl the tendrils lightly, and pin the bun. Pros and cons: it is elegant and flattering, but the tendrils can blow across the face outdoors — pin one side back on windy days. Maintenance: a quick curl refresh between looks. Quick verdict: polish in the back, softness in the front.
21. The Fishtail Braid Over One Shoulder
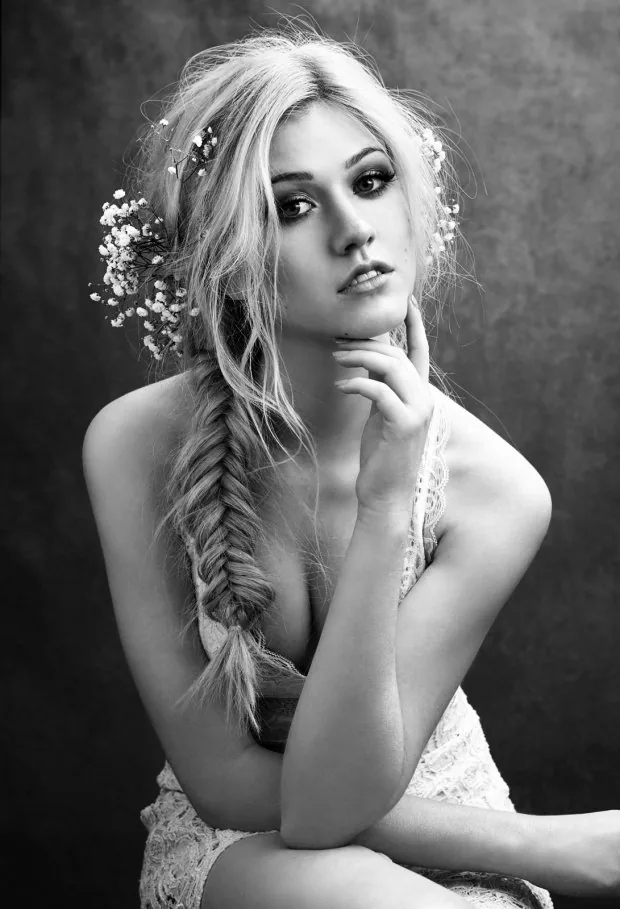
A fishtail braid draped over one shoulder is one of the most photogenic braids there is: the intricate, woven texture shows up beautifully in close-ups, and the diagonal line across the chest adds composition to a portrait. It is also practical — the braid keeps long hair contained and wind-proof while still showing off its length. It suits outdoor, boho and lifestyle shoots especially well.
Best for: outdoor shoots, boho portraits, and long hair. How to style it: sweep the hair to one side, fishtail-braid loosely, and pull the edges out for fullness. Common mistake: braiding too tightly, which hides the fishtail’s woven detail. Cost and time: ten minutes with practice. Quick verdict: the braid that looks complicated and feels easy.
22. Double Dutch Braids
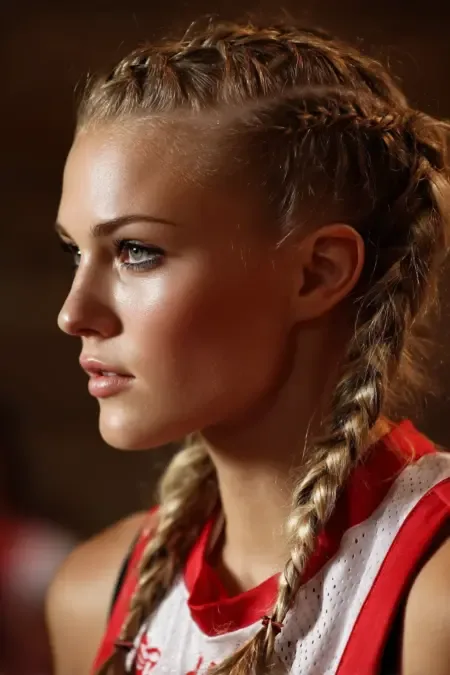
Double Dutch braids — two raised braids running from the hairline to the nape — are sporty, youthful and completely wind-proof, which makes them a smart choice for active, outdoor and adventure-style shoots. On camera they add symmetry and texture, and they keep every strand off the face, so the photographer can shoot from any angle without hair blowing into the frame.
Best for: outdoor, adventure, and active lifestyle shoots. How to style it: part down the middle, Dutch-braid each side, and secure at the nape or leave the ends loose. Pros and cons: they hold all day in any weather, but they are a bold, casual look — not for formal headshots. Who should avoid it: anyone who wants a soft, romantic portrait. Quick verdict: the most practical braid in this guide.
23. Glossy Mermaid Waves
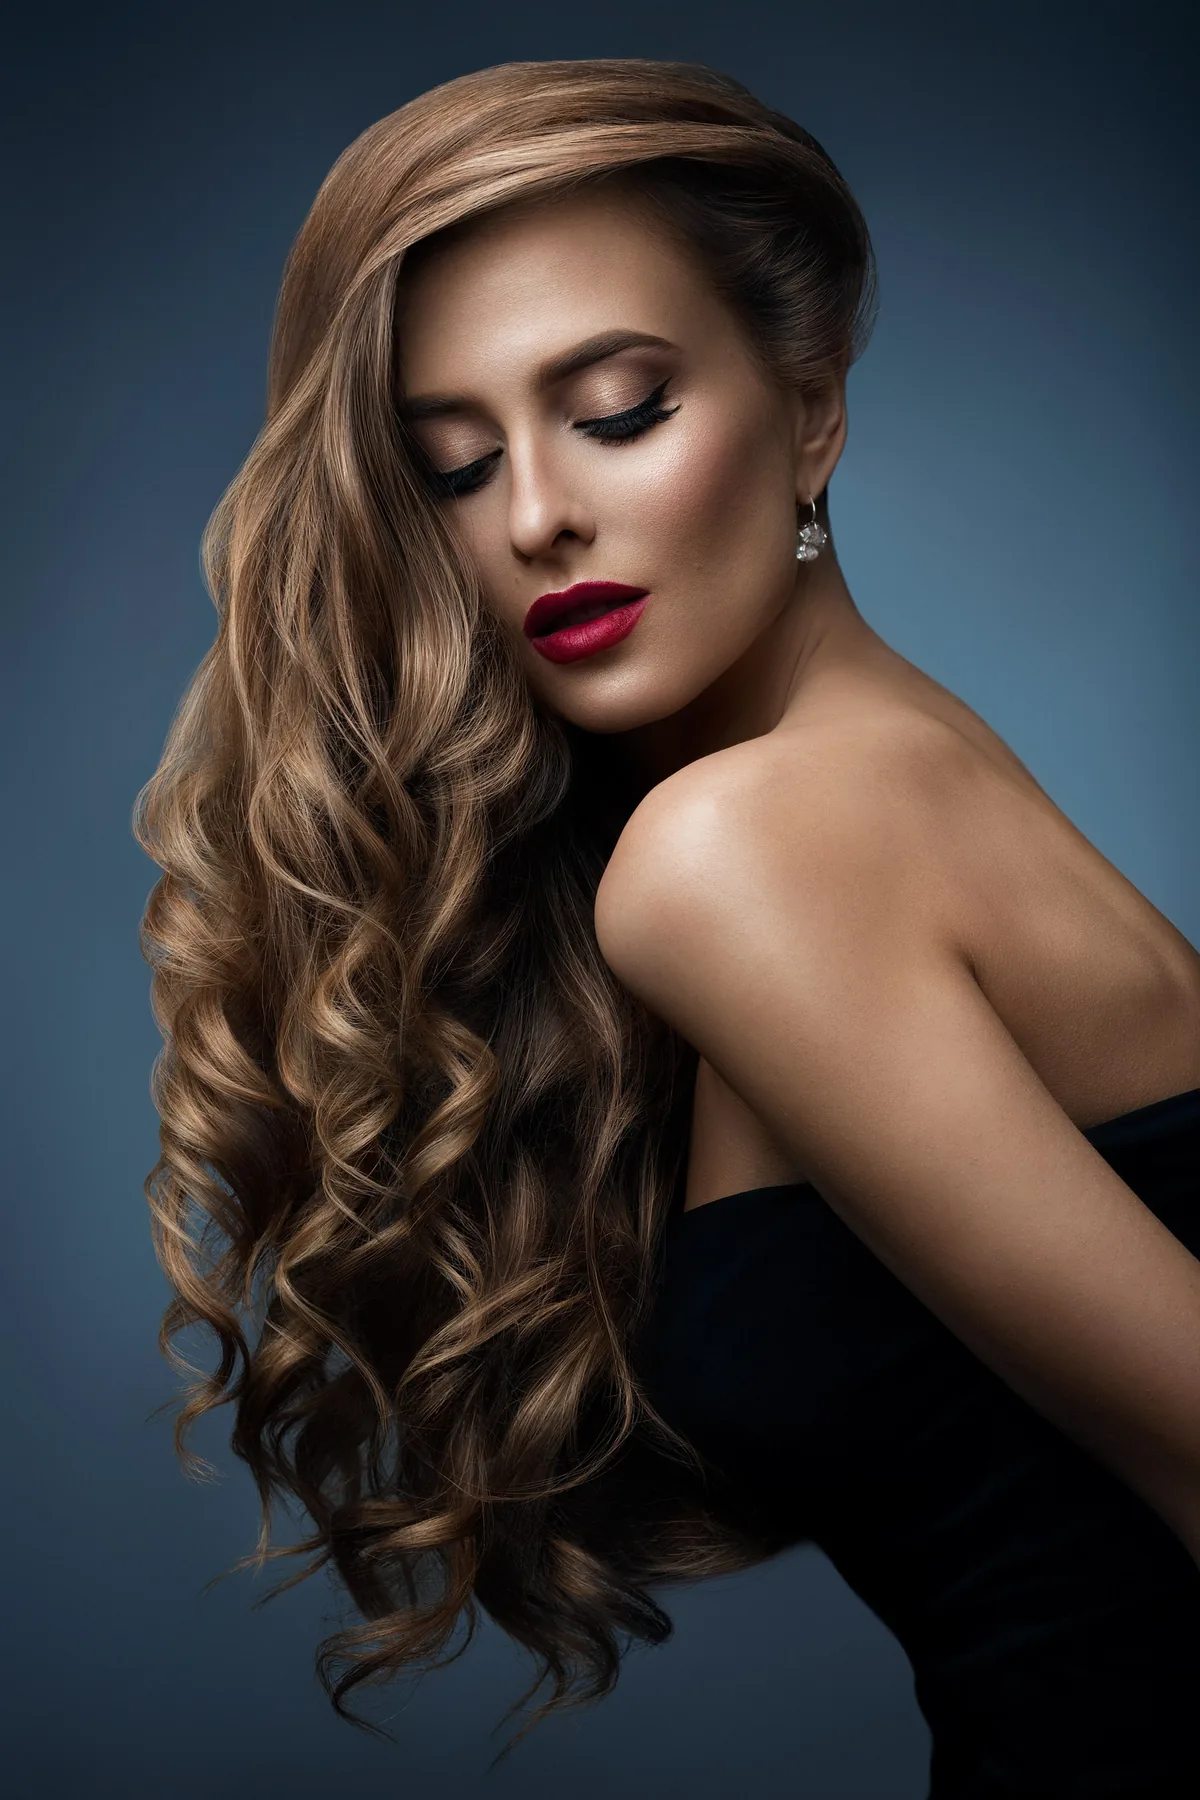
Glossy mermaid waves are long, flowing, uniform waves with a high shine — the hair equivalent of a red-carpet look. They photograph with a liquid, light-catching quality that makes every portrait feel luxurious, and they suit long hair best, where the waves have room to fall. The gloss is the point: without shine, the waves look flat, so a serum and a shine spray are essential.
Best for: glamour portraits, fashion shoots, and long hair. How to style it: curl in large sections in one direction, brush through, and finish with shine spray. Pros and cons: the result is stunning, but it takes time and drops in wind — best for studio or calm days. Maintenance: brush gently between shots and reapply serum to the ends. Quick verdict: long, glossy, and unapologetically glamorous.
24. Vintage Victory Rolls
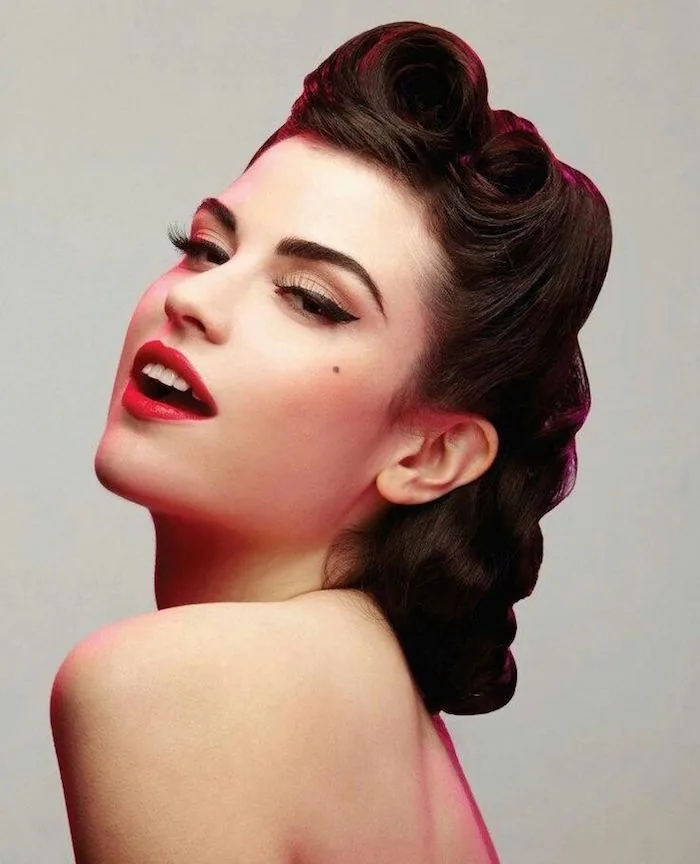
Victory rolls — the rolled, pinned curls of 1940s pin-up style — are pure theatre on camera: bold, sculptural, and instantly recognisable. They suit themed shoots, vintage weddings and retro portraits, and they photograph with a graphic shape that stands out in any gallery. The rolls frame the face symmetrically and keep the hair completely off the forehead, so the eyes and the makeup take centre stage.
Best for: vintage-themed shoots, retro portraits, and themed weddings. How to style it: roll sections around your fingers, pin at the base, and set with spray — a stylist’s job for most people. Pros and cons: the look is unforgettable, but it is time-consuming and needs strong pins. Common mistake: rolls that are uneven in size — measure the sections. Quick verdict: the boldest retro style you can wear.
25. The Low Side Bun
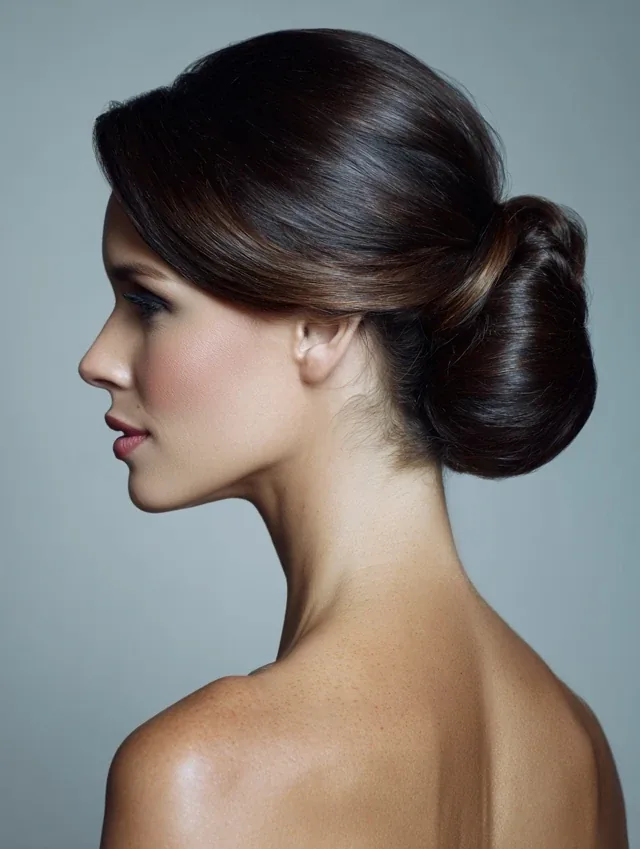
A low side bun sits at the nape on one side, creating an asymmetric shape that photographs beautifully in three-quarter shots — the angle most portraits use. It is softer than a centred bun and more interesting than a plain ponytail, and it works with a side part and a few loose strands to frame the face. It is a favourite for wedding guests, maternity shoots and romantic portraits.
Best for: maternity, wedding, and romantic portraits. How to style it: part to one side, gather the hair low on the opposite side, twist into a soft bun, and pin. What to ask your stylist: for a little volume at the crown on the fuller side, to balance the asymmetry. Pros and cons: it is elegant and flattering, but it can slip if the pins are not crossed — use two. Quick verdict: asymmetry that flatters every angle.
26. The Textured Pixie with Volume
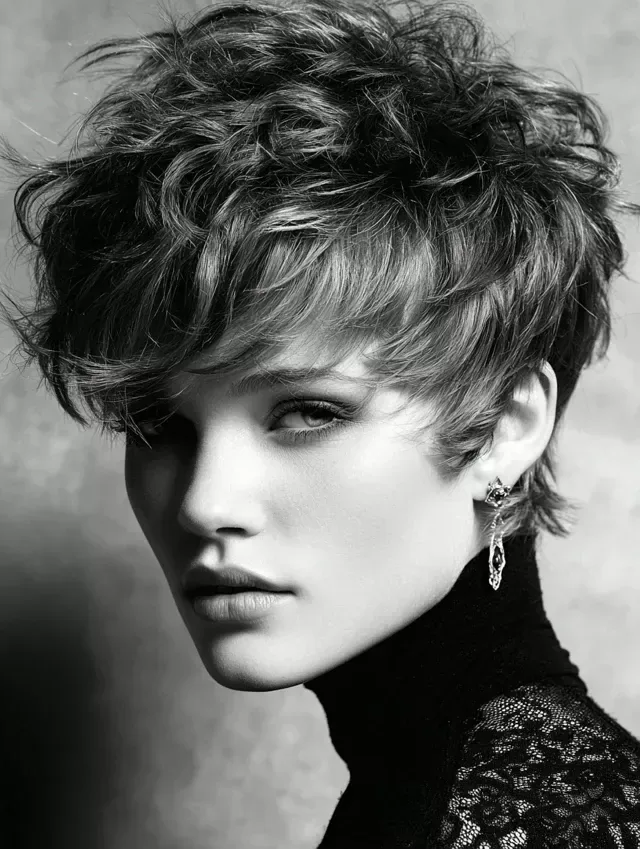
A textured pixie with volume on top is one of the most photogenic short hairstyles: the camera sees the face completely, the texture adds interest, and the volume gives the portrait height and shape. It suits headshots and editorial shoots especially well, because nothing hides the eyes or the bone structure. A little texture paste and a quick finger-style are all it needs.
Best for: headshots, editorial shoots, and short hair. How to style it: add texture paste to damp hair, lift the top with your fingers, and let the pieces fall naturally. Common mistake: over-smoothing a pixie, which removes the texture that makes it photogenic. Cost and time: five minutes. Quick verdict: short hair, big impact.
27. The Curly Half-Up Puff
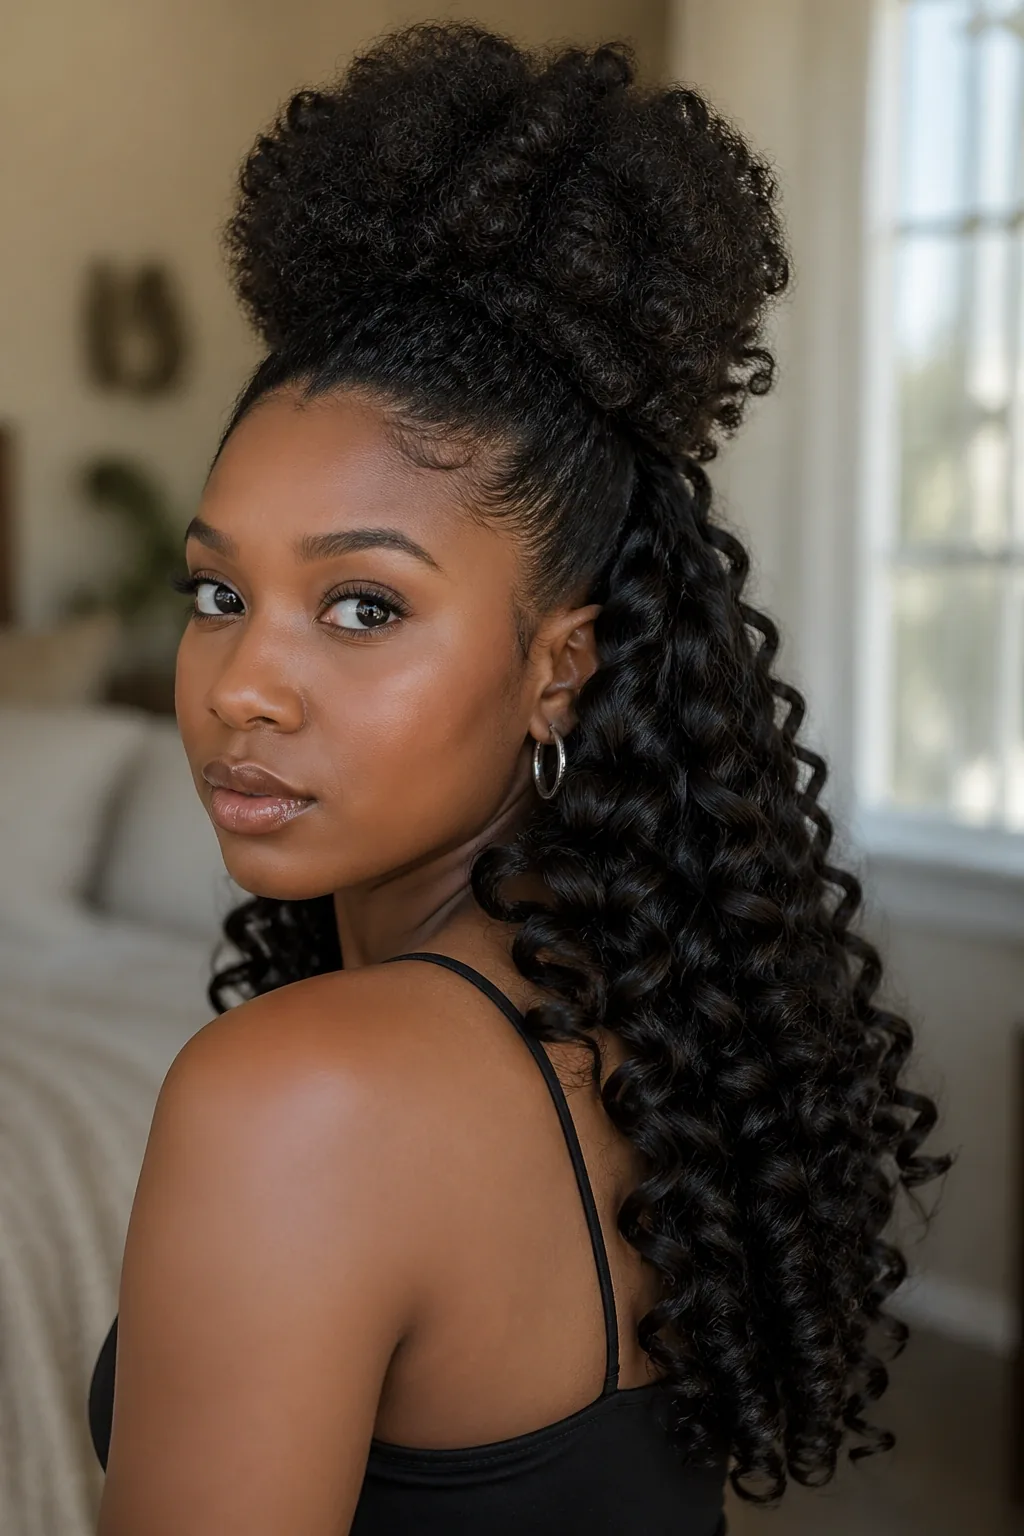
The curly half-up puff gathers the top half of curly hair into a soft, rounded puff while the rest falls free — a style that celebrates curls while keeping them off the face for the camera. It photographs with beautiful volume and shape, and it suits family portraits, lifestyle shoots and any session where natural texture is the point. The puff’s height also lengthens the face in photos.
Best for: family portraits, lifestyle shoots, and natural curly hair. How to style it: gather the top section loosely, secure with a soft elastic, and fluff the puff gently. Pros and cons: it is joyful and flattering, but the puff can flatten in humidity — a little gel at the roots helps. Maintenance: a quick fluff between shots. Quick verdict: curls up, curls down, face open.
28. The Waterfall Braid
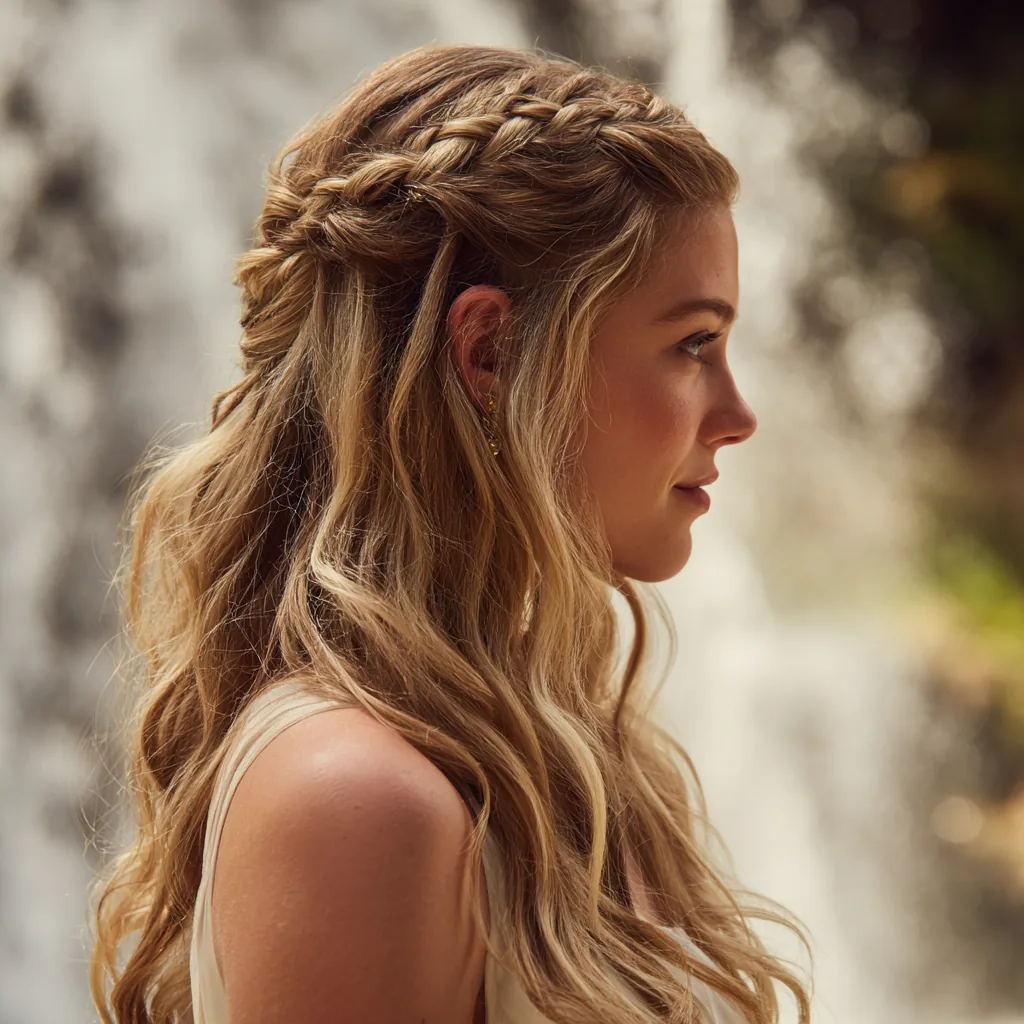
A waterfall braid lets strands cascade down through the braid like water over a ledge, creating a delicate, romantic detail that the camera picks up beautifully in close-ups and side profiles. It works best on long, wavy or straight hair, and it is a favourite for engagement and outdoor portraits, where the falling strands add movement to the frame.
Best for: engagement shoots, outdoor portraits, and romantic sessions. How to style it: braid across the back of the head, dropping the bottom strand each time and picking up a new one. Pros and cons: it looks intricate and delicate, but it loosens faster than a standard braid — pin the ends well. Common mistake: starting the braid too high, which pulls the face. Quick verdict: the prettiest detail braid in this guide.
29. The Slicked-Back Wet Look
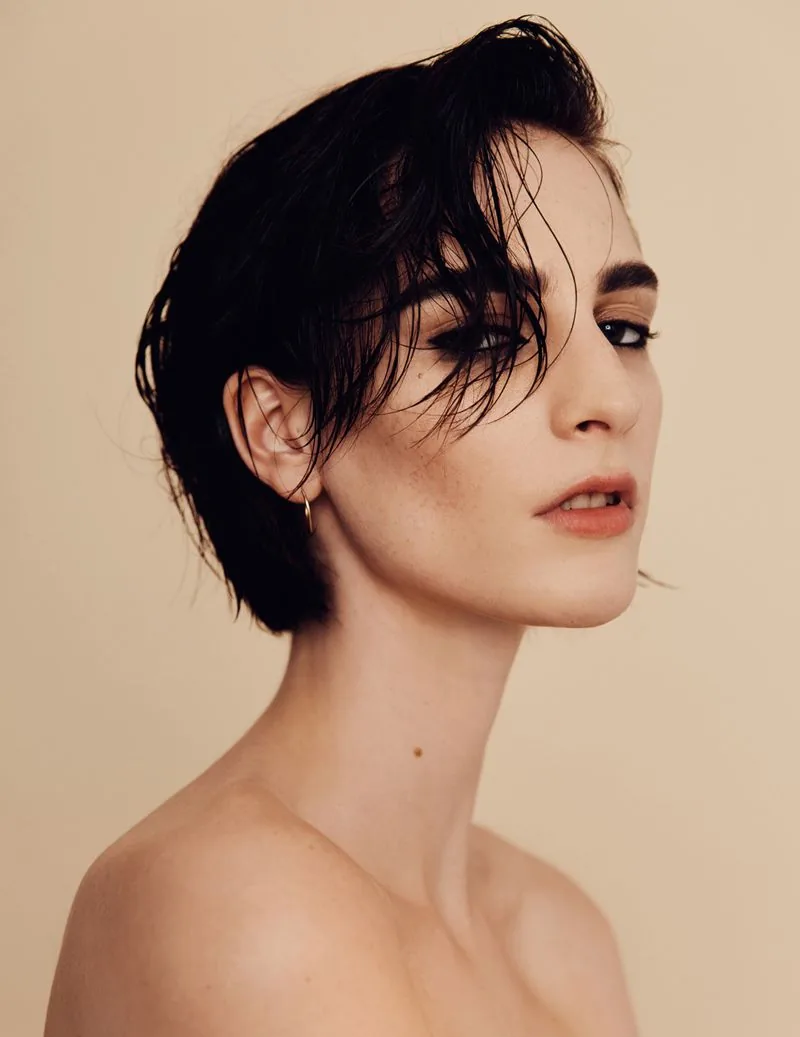
The slicked-back wet look — hair combed straight back with a glossy, damp finish — is the most editorial style in this guide: bold, modern, and completely about the face. It photographs with a high-fashion edge, especially in studio light, where the shine creates a sculptural surface. It needs confidence and a strong gel or pomade, and it suits fashion shoots and beauty close-ups best.
Best for: fashion editorials, beauty close-ups, and studio shoots. How to style it: apply gel to damp hair, comb straight back, and smooth flyaways with a fine-tooth comb. Who should avoid it: anyone who wants a soft, romantic portrait — this is the opposite. Pros and cons: it is striking and wind-proof, but it shows the hairline completely. Quick verdict: fearless hair for fearless photos.
30. Bouncy Blowout Curls
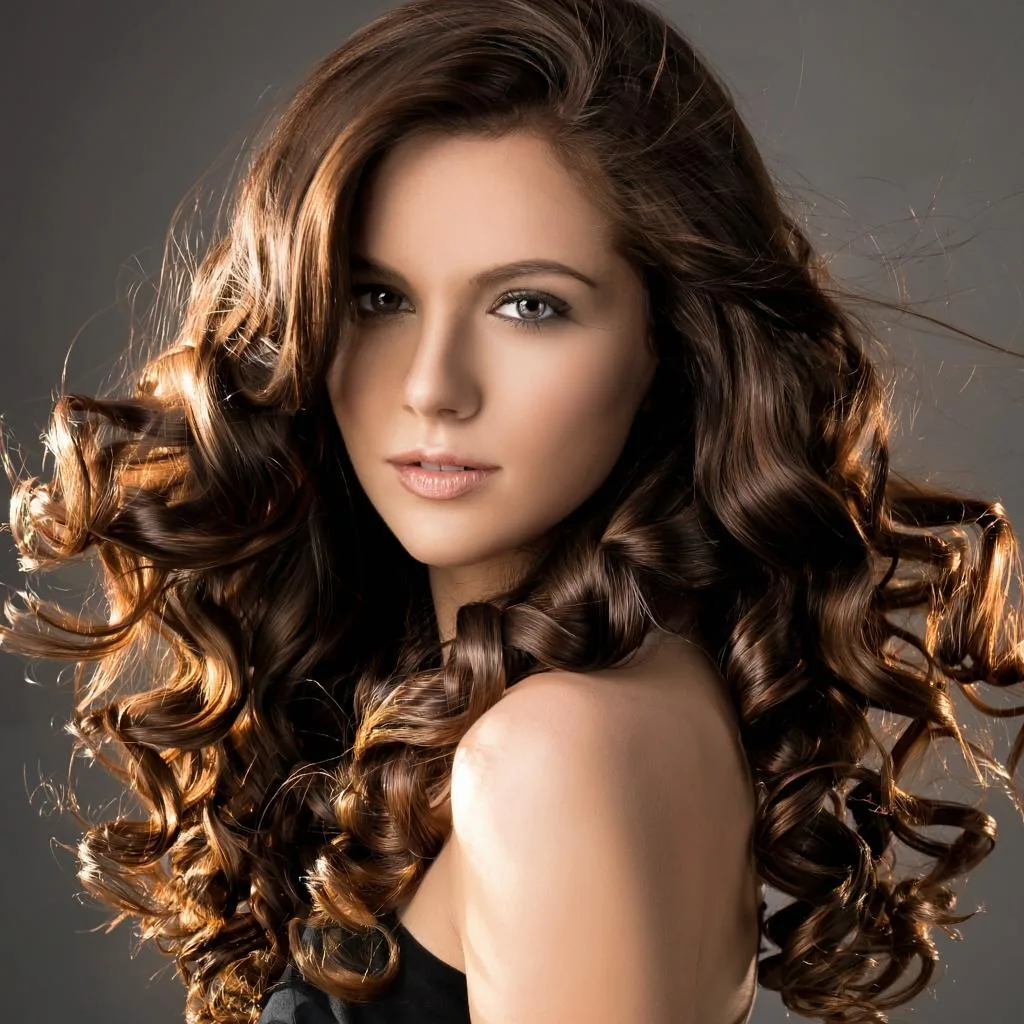
Bouncy blowout curls are big, soft, brushed-out curls with volume at the roots and movement at the ends — the hair of magazine covers and morning television. They photograph with energy and health, and they suit portraits, branding shoots and any session where the mood is upbeat. The bounce is the point: curls that move when you do, and catch the light as they turn.
Best for: branding shoots, portraits, and upbeat lifestyle sessions. How to style it: blow-dry with a round brush, then set large sections with rollers or a large iron and brush through. Maintenance: a quick shake and a touch of spray between shots. Common mistake: curls that are too tight — brush them out until they bounce, not coil. Quick verdict: volume, movement, and joy.
31. The Elegant Updo with Twists
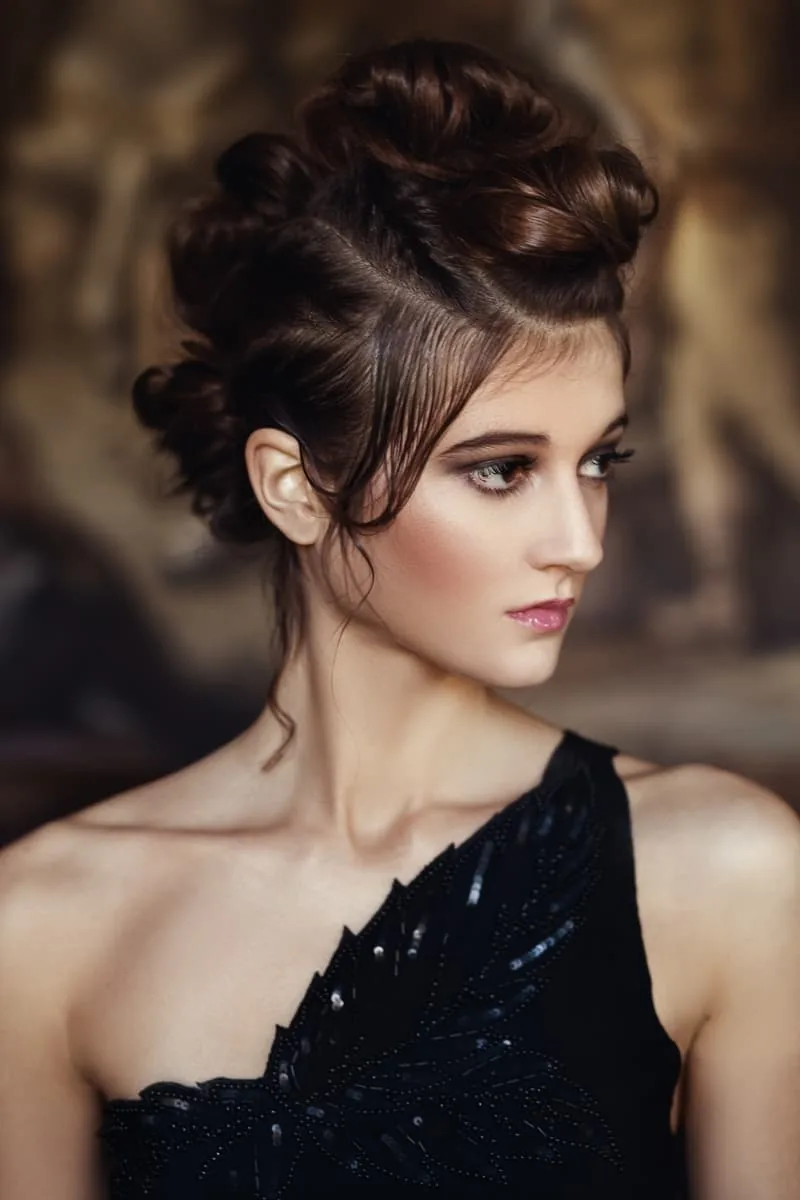
An elegant updo built from twists — sections of hair twisted and pinned into a soft, sculptural shape — is more forgiving than a structured chignon and more interesting than a plain bun. The twists create texture the camera can see, the shape stays soft, and the style holds for hours. It is a favourite for formal portraits and wedding-related shoots, where the updo needs to look effortless even though it is carefully built.
Best for: formal portraits, wedding shoots, and evening events. How to style it: twist sections back from the face, pin them loosely at the crown and nape, and leave the ends tucked. What to ask your stylist: for twists that are soft, not tight — tight twists look severe in photos. Pros and cons: it is elegant and long-lasting, but it is a stylist’s job. Quick verdict: twists that look effortless, because they are built to.
32. Side Part Sleek Waves
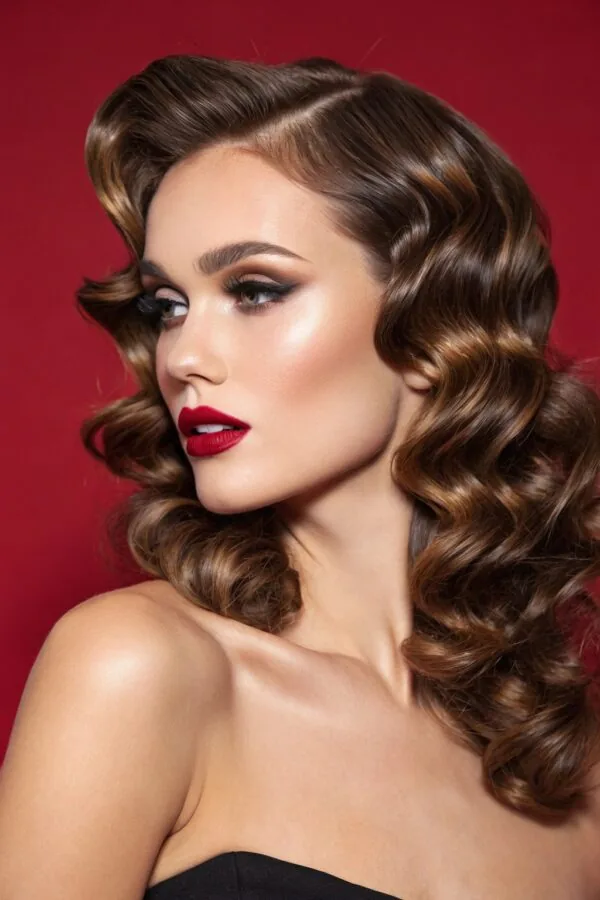
Side-part sleek waves combine the polish of straight hair with the movement of waves: a deep side part, smooth roots, and waves that start at cheek level and fall in one direction. The asymmetry flatters most face shapes, the waves catch the light, and the style photographs with a classic, red-carpet feel. It is a strong choice for portraits where the hair needs to look finished but not stiff.
Best for: portraits, red-carpet-style shoots, and formal sessions. How to style it: part deeply, smooth the roots with a flat iron, and wave the lengths with a large barrel. Common mistake: waves that start too high, which add width at the cheeks. Maintenance: a light brush and serum between shots. Quick verdict: classic glamour with a modern parting.
33. The Boho Loose Braid
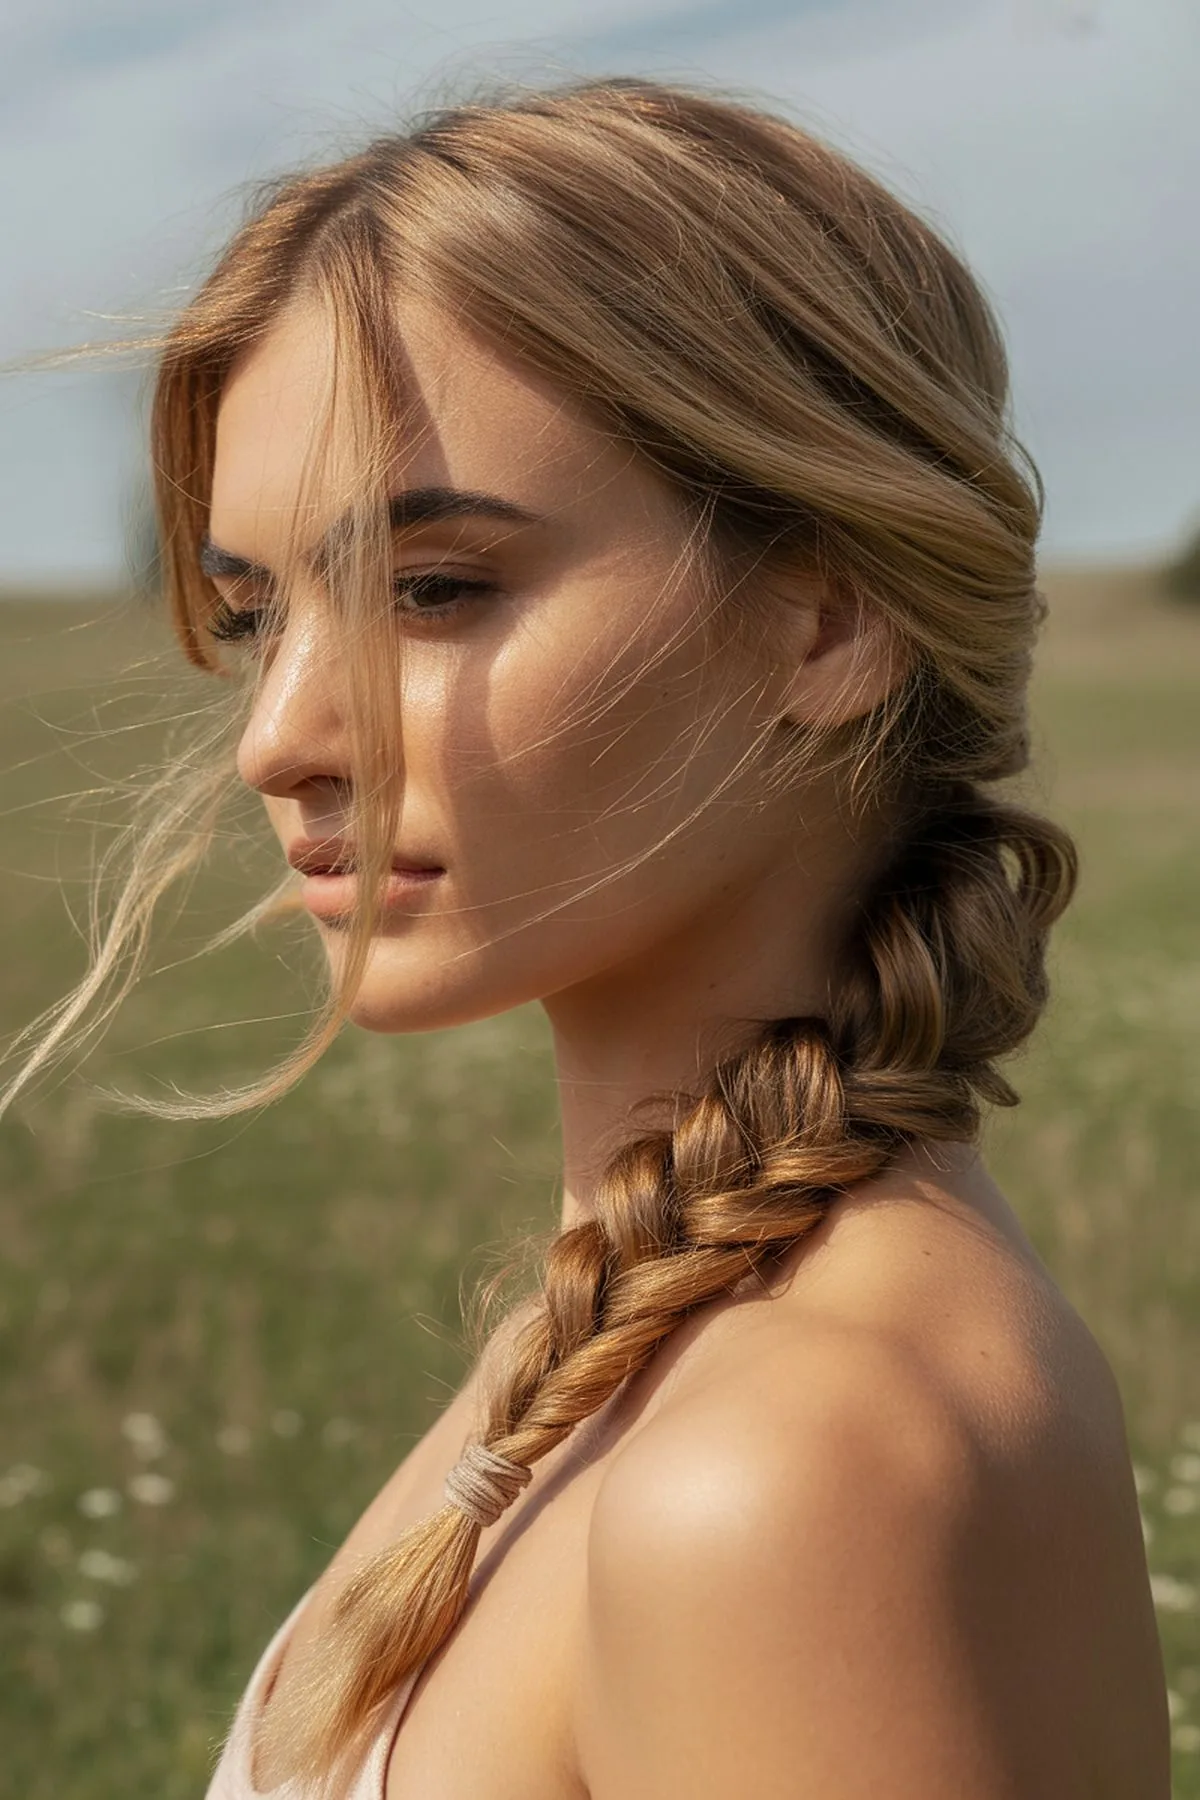
A boho loose braid is soft, slightly undone, and full of texture — the braid of festival shoots, beach sessions and golden-hour portraits. It is braided loosely, with pieces pulled out for fullness and a few strands left free around the face, so it looks relaxed rather than precise. On camera, the looseness reads as movement and ease, and the braid itself keeps the hair contained in wind.
Best for: beach, festival, and golden-hour shoots. How to style it: add texture spray, braid loosely over one shoulder, and pull the edges out gently. Pros and cons: it is relaxed and wind-friendly, but it can look unfinished in a formal headshot. Cost and time: five minutes. Quick verdict: the braid for days when the photo should feel like a holiday.
34. The Modern Beehive
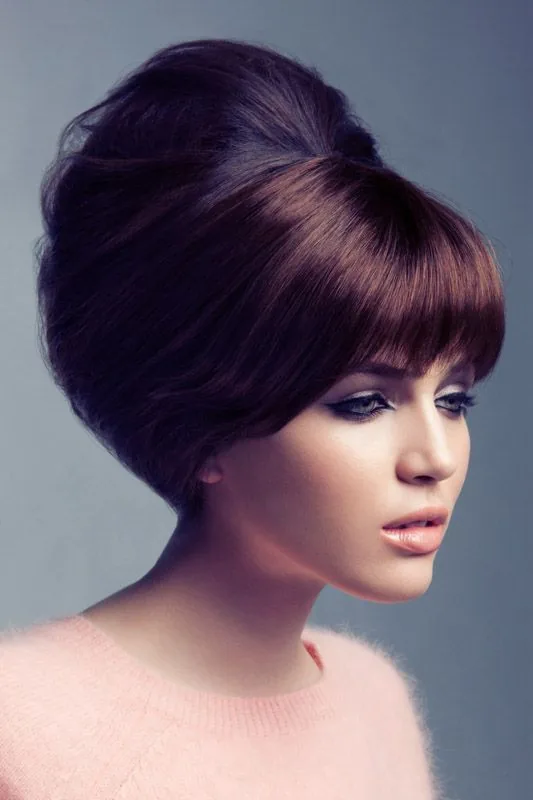
The modern beehive keeps the height of the 1960s original but softens everything else: the volume is at the crown, the surface is smooth, and the rest of the hair falls in soft waves or a low ponytail. It photographs with drama and height, which is why it suits themed shoots, anniversaries and editorial portraits. The height also lengthens the face and the neck in photos.
Best for: themed shoots, anniversaries, and editorial portraits. How to style it: backcomb the crown, smooth the surface, and pin the shape in place. Pros and cons: the height is striking, but it needs backcombing and strong pins. Who should avoid it: anyone with a very long face — the added height can lengthen it further. Quick verdict: retro height, modern softness.
35. The Soft Updo for Maternity Shoots
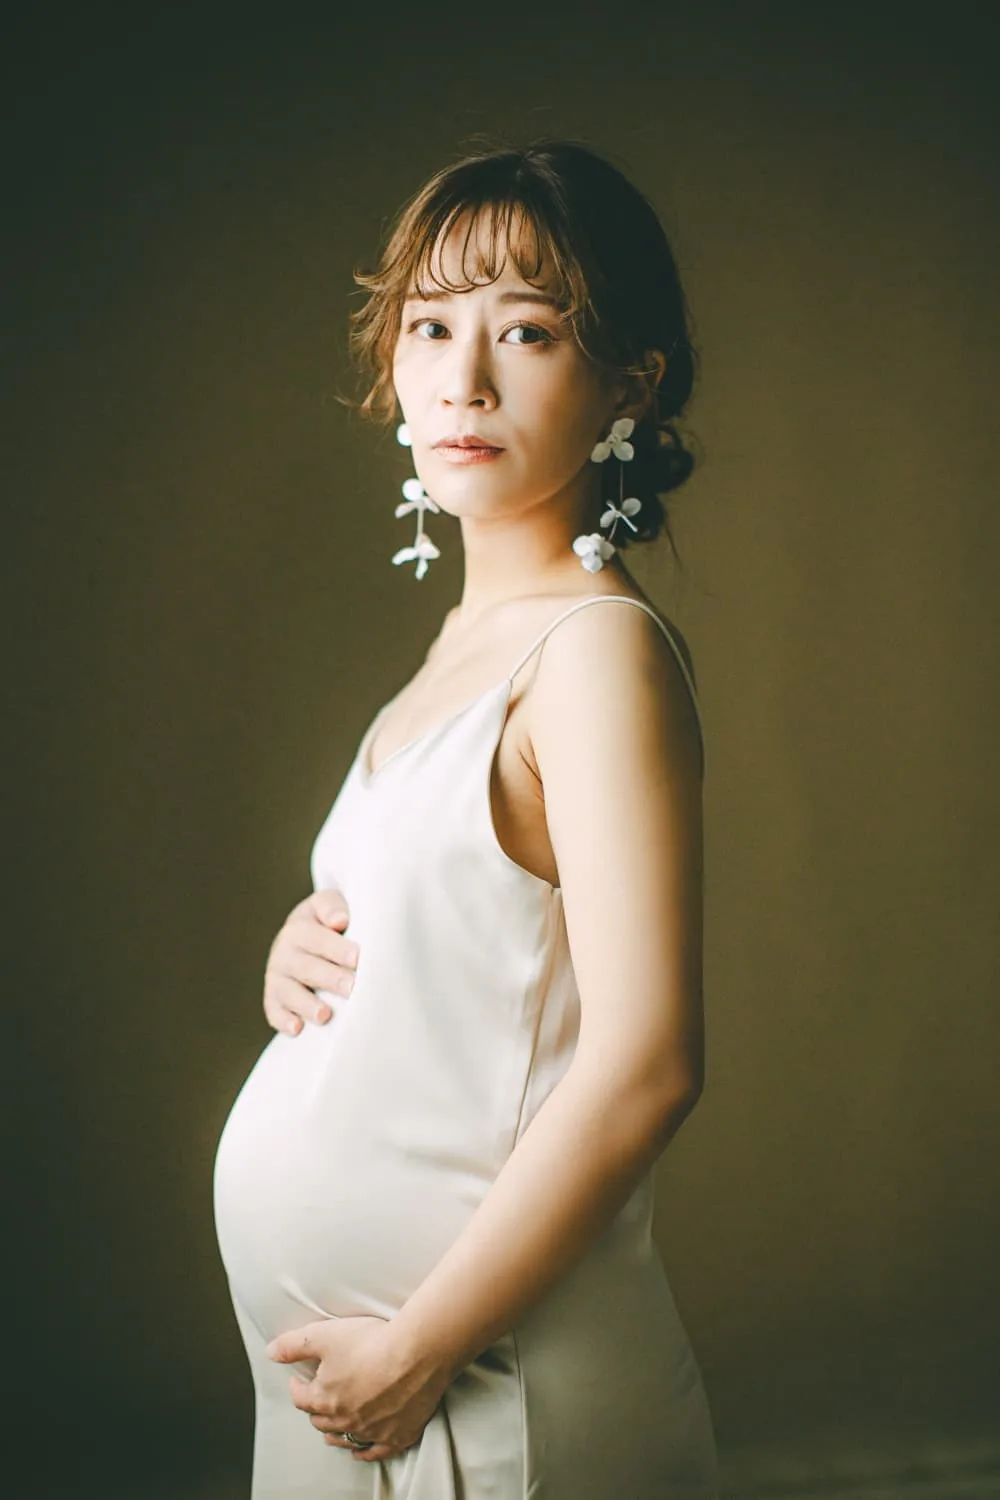
Maternity shoots call for softness: the hair should frame the face gently, never compete with the bump, and look comfortable — because the mother needs to feel comfortable too. A soft updo, with loose twists or a low bun and a few curls around the face, does exactly that. It keeps the neckline open, photographs well from the side, and leaves the focus where it belongs: on the mother and the moment.
Best for: maternity shoots and gentle, romantic portraits. How to style it: build a low, loose bun or twisted updo, pull out soft face-framing curls, and keep the pins comfortable. Common mistake: a tight, severe updo, which looks tense next to the softness of a maternity portrait. Maintenance: check comfort between set-ups — pins should never pull. Quick verdict: soft hair for a soft, powerful moment.
36. The Headshot-Ready Short Bob
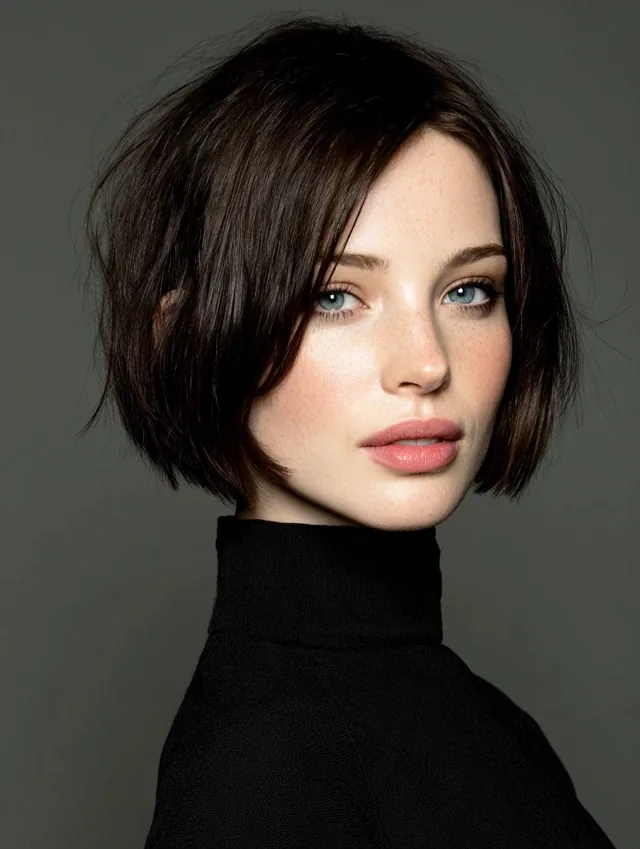
A short bob, cut to sit just below the ears or at the jaw, is one of the best headshot hairstyles for short hair: it frames the face cleanly, shows the neckline, and needs almost no maintenance during the shoot. With a little volume at the crown and a smooth finish, it photographs as sharp and professional, and it looks the same from the front and the side — which is exactly what a headshot needs.
Best for: headshots, corporate portraits, and professional branding. How to style it: blow-dry with a round brush for volume, smooth the ends under, and finish with a light spray. Pros and cons: it is fast, flattering and low-maintenance, but it shows growth quickly — get the cut close to the shoot date. Cost and time: a cut plus five minutes. Quick verdict: short, sharp, and shoot-ready.
37. Long Straight Hair with Subtle Layers
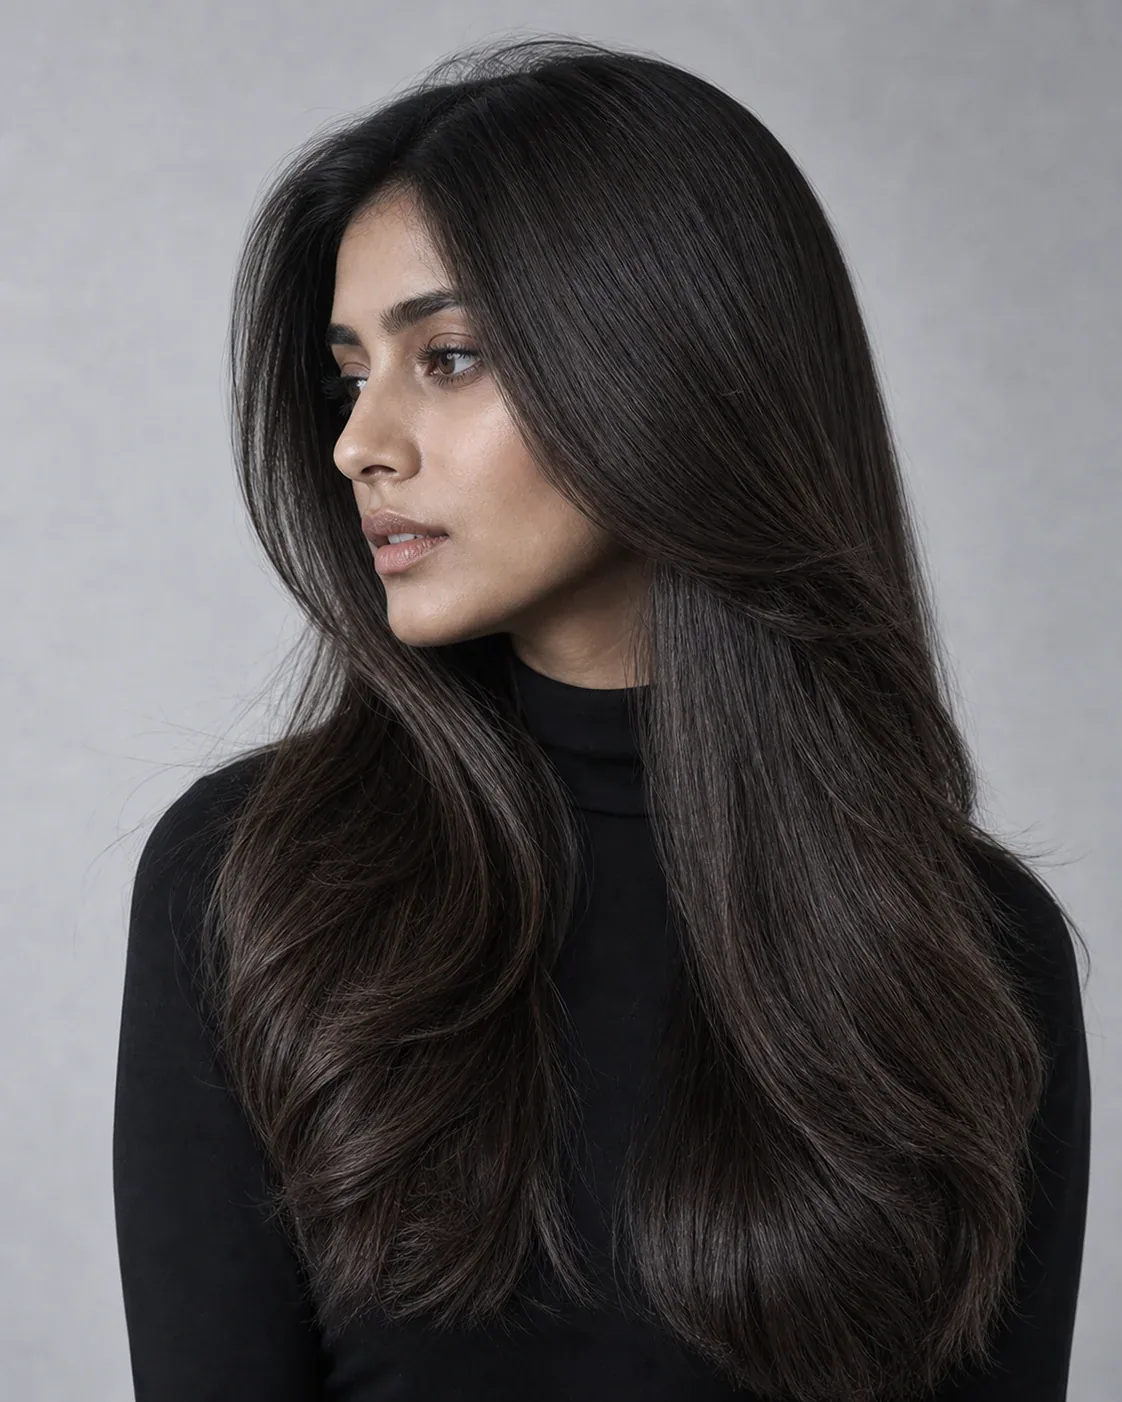
Long, straight hair with subtle layers is the quietest style in this guide — and one of the most photogenic, because the layers stop the hair from looking like a single flat sheet while keeping its sleek, glossy character. The layers add movement at the ends and shape around the face, and the shine of straight hair reflects studio light beautifully. It suits portraits, branding shoots and any session where the look should be natural and polished.
Best for: portraits, branding shoots, and long straight hair. How to style it: flat-iron in sections, add a slight bend at the ends, and smooth serum through the lengths. Common mistake: layers that are too short, which create a choppy outline in photos. Maintenance: a quick brush and serum touch-up. Quick verdict: straight hair, with just enough shape to photograph.
38. Romantic Milkmaid Braids
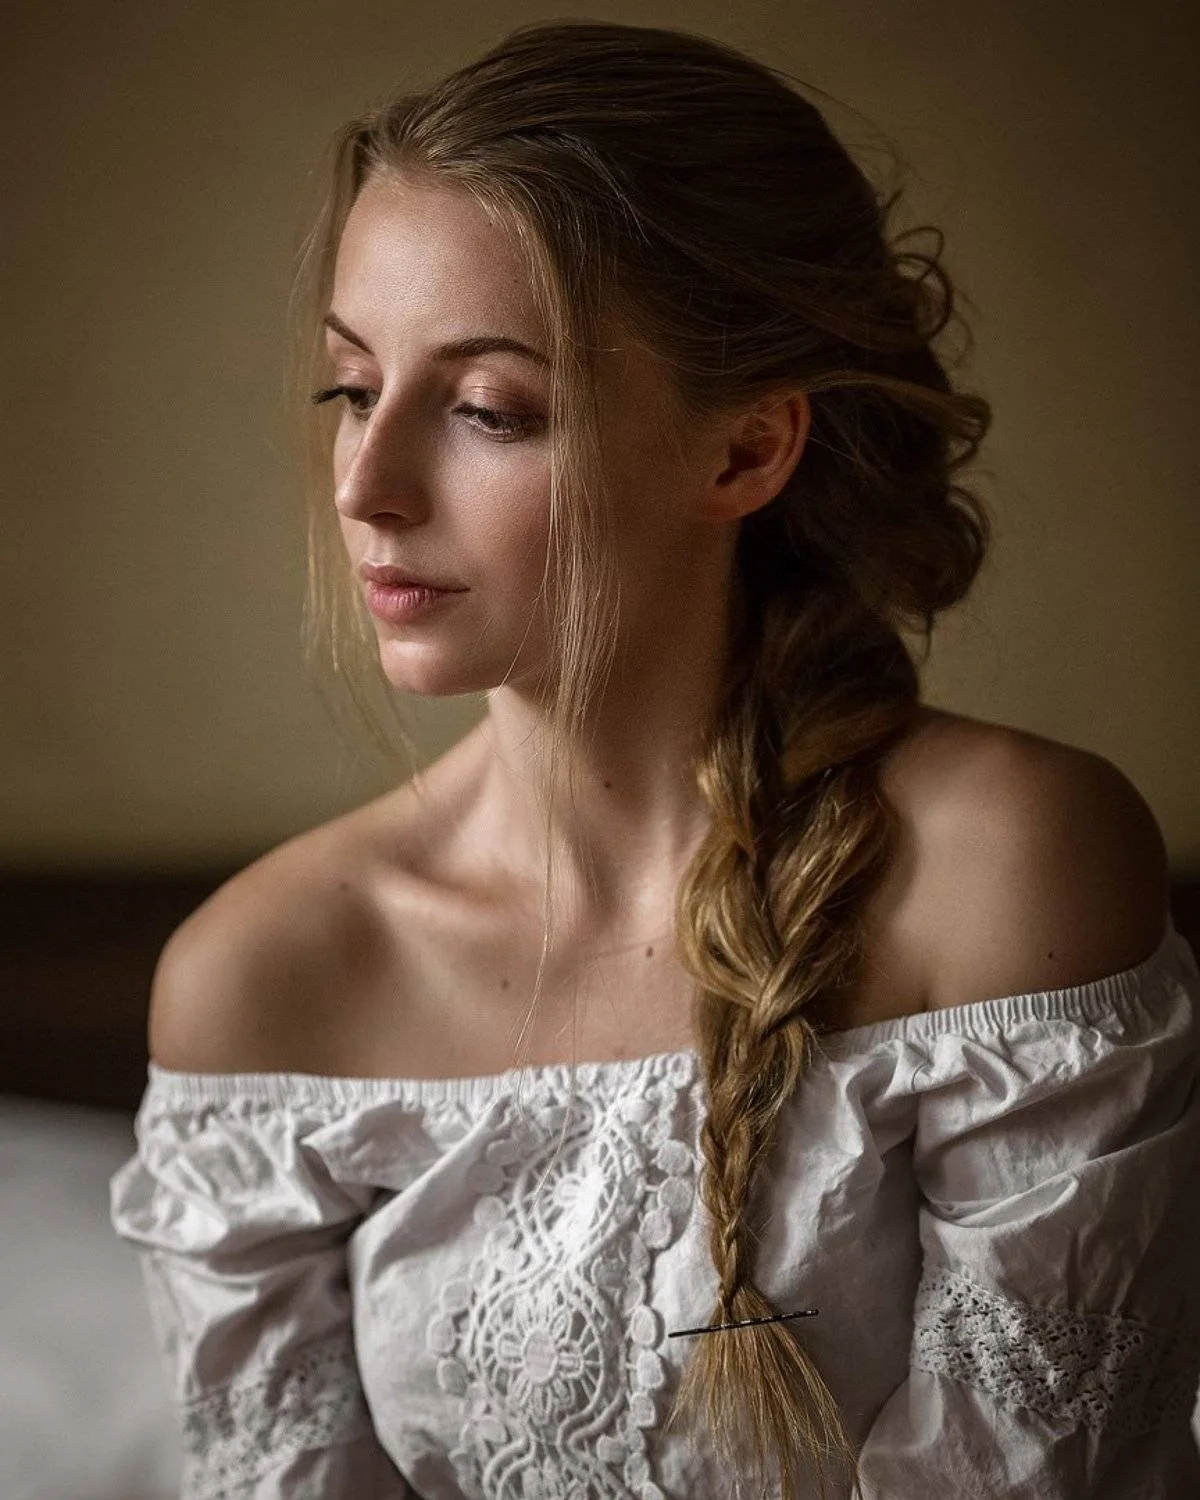
Milkmaid braids — two braids wrapped over the crown like a headband — are romantic, soft, and completely practical: they keep every strand off the face and survive wind, heat and long shoot days. They photograph with a folk-tale charm that suits outdoor, boho and rustic shoots, and the braided crown adds a detail that reads beautifully in close-ups.
Best for: outdoor, boho, and rustic photoshoots. How to style it: braid two low pigtails, bring them over the crown, and pin them in place. Pros and cons: they hold all day and look charming, but they need length and a little practice. Who should avoid it: very short hair — the braids need enough length to cross the crown. Quick verdict: a braided crown, straight from a storybook.
39. The Low Ponytail with a Wrapped Base
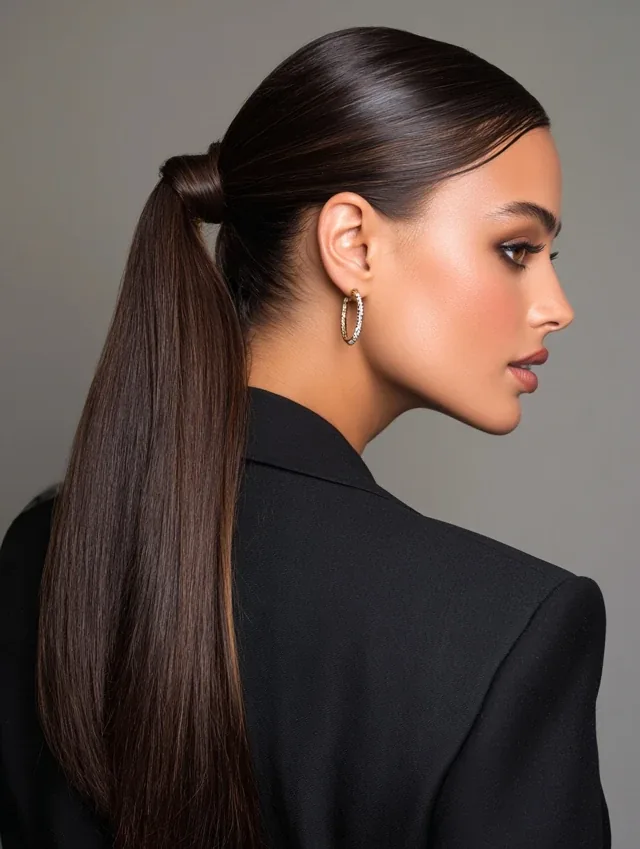
A low ponytail with a wrapped base is the simplest upgrade in this guide: take a low ponytail, wrap a strand of hair around the elastic, and pin it underneath. The result looks polished and intentional, photographs cleanly from every angle, and works for headshots, family portraits and formal shoots alike. It is also one of the most comfortable styles to wear for a long shoot day.
Best for: headshots, family portraits, and formal shoots. How to style it: gather low, smooth the crown, wrap a strand around the base, and pin underneath. Cost and time: five minutes, one elastic, one pin. Common mistake: a wrap that is too thin — use a generous strand so it covers the elastic fully. Maintenance: none. Quick verdict: the smallest change, the biggest polish.
40. Tousled Beach Waves, Studio-Safe
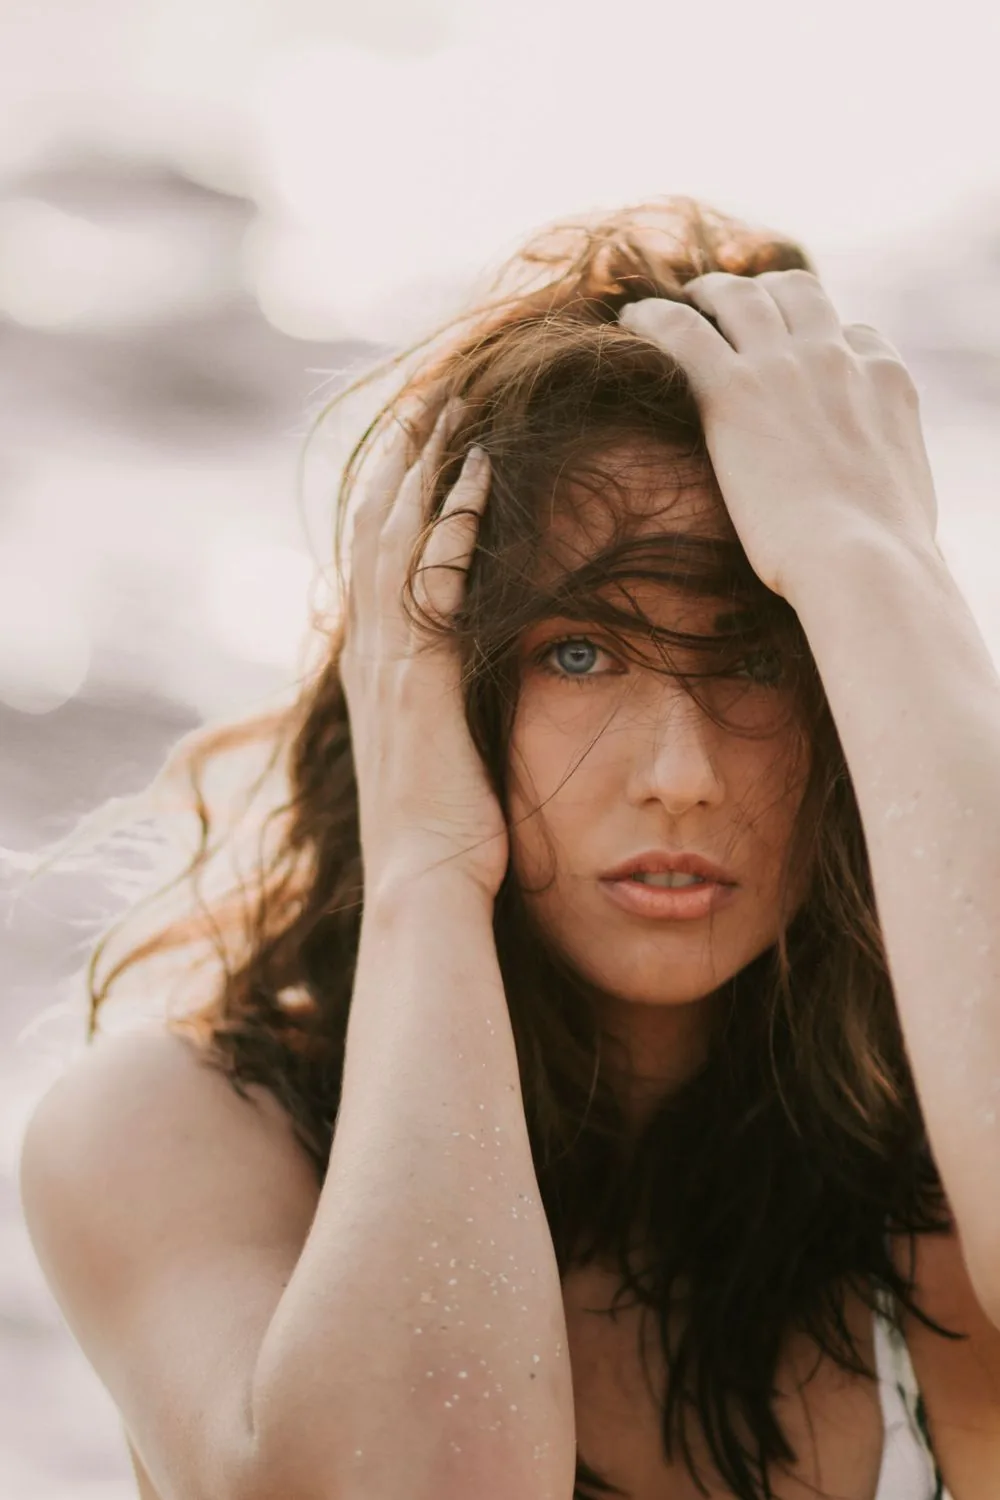
Tousled beach waves are the relaxed, sun-kissed look of holiday photos — but the studio-safe version is set properly, so the waves hold their shape under lights and in front of the camera. The texture is built with salt spray or a curling wand, the waves are broken up with fingers, and the finish is matte rather than glossy. The result looks effortless in the photo, even though it was carefully built.
Best for: lifestyle shoots, beach sessions, and relaxed portraits. How to style it: curl loosely, break up with fingers, and finish with texture spray. Pros and cons: it looks natural and relaxed, but it can fall flat in humidity — set it with a light spray. Who should avoid it: formal headshots. Quick verdict: beach hair, built to last the whole shoot.
41. Pin-Curl Inspired Glamour Waves
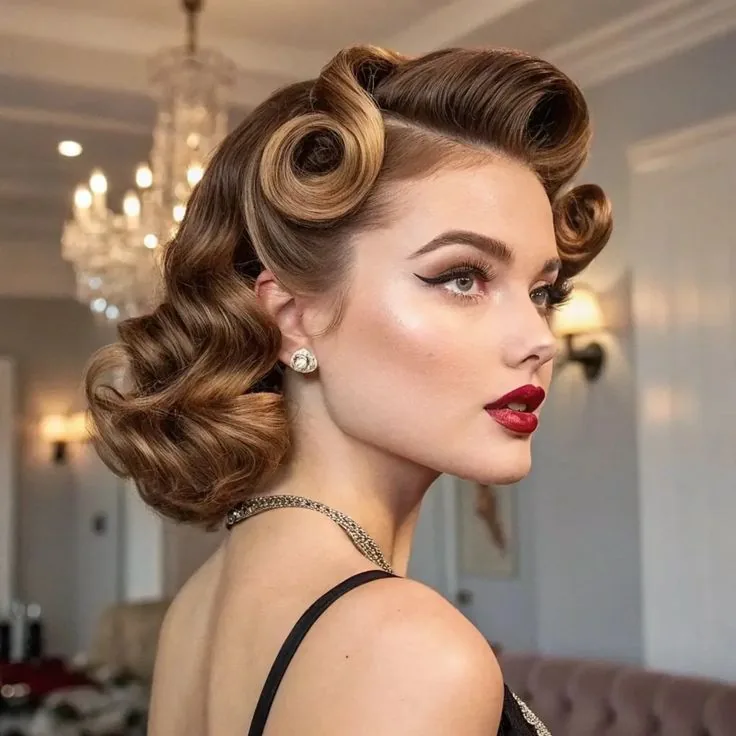
Pin-curl inspired waves take the tight, sculpted curls of the 1940s and brush them out into soft, glamorous waves with a vintage silhouette. They photograph with a richness and a shape that modern loose waves do not have — the waves are defined, the shine is high, and the overall effect is pure old-Hollywood glamour. They suit themed shoots, anniversaries and black-tie portraits.
Best for: vintage-themed shoots, anniversaries, and black-tie portraits. How to style it: set small sections with a curling iron, pin each curl to cool, then brush through gently. Pros and cons: the result is gorgeous and long-lasting, but it takes time and patience. Maintenance: do not over-brush — a few strokes are enough. Quick verdict: vintage curls, brushed into modern glamour.
42. The Sleek Ponytail with a Middle Part
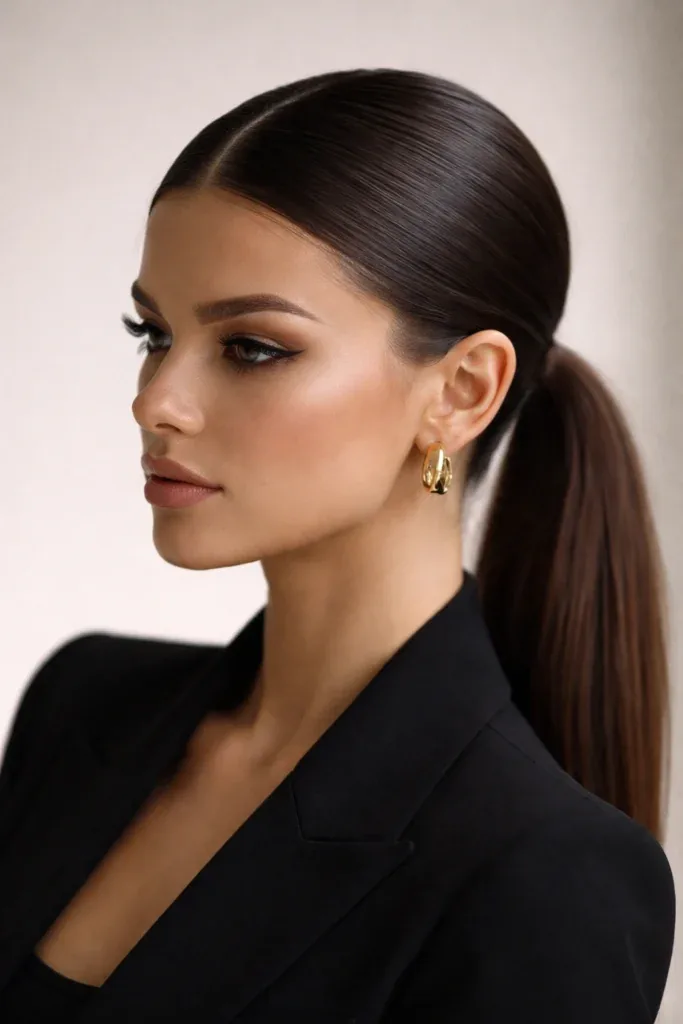
A sleek ponytail with a middle part is the most modern ponytail in this guide: the centre parting gives it symmetry and sharpness, the smooth crown gives it polish, and the ponytail itself adds length and movement. It photographs with a clean, editorial quality, and it suits studio portraits, fashion shoots and branding sessions where the look needs to feel current.
Best for: studio portraits, fashion shoots, and modern branding. How to style it: part in the middle, smooth both sides with a brush and gel, and secure the ponytail at mid-height. Common mistake: a parting that drifts — check it with a comb before the first shot. Who should avoid it: anyone with a very round face, where a side part flatters more. Quick verdict: symmetry, shine, and a thoroughly modern ponytail.
43. The Voluminous Top Knot for Full-Length Shots
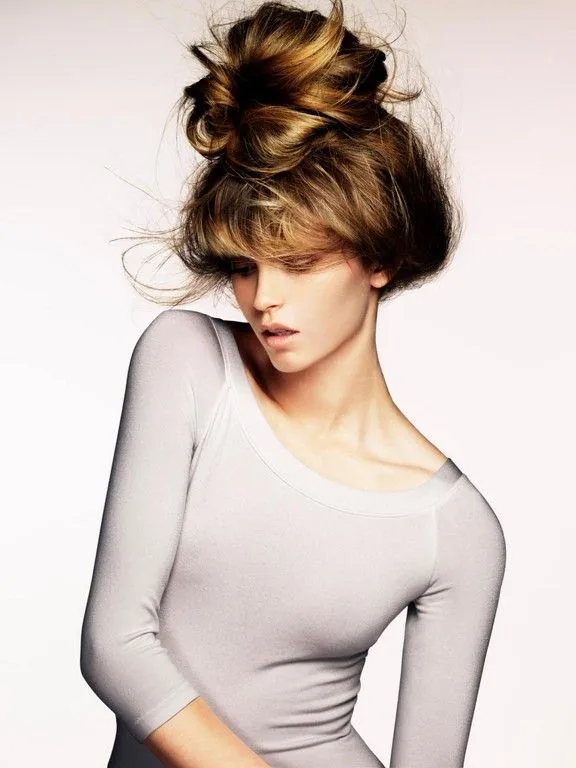
In full-length shots, the hair needs to hold its own against the outfit and the frame — and a voluminous top knot does exactly that. The knot is big, soft and textured, sitting high on the crown, and it adds height and drama to the silhouette. It photographs beautifully from a distance, where smaller styles can disappear, and it keeps the hair completely out of the way for outfit-focused shots.
Best for: full-length fashion shots, editorial sessions, and outfit-focused portraits. How to style it: backcomb the ponytail lightly, wrap it into a large, soft knot, and pin generously. Pros and cons: it is dramatic and practical, but it needs volume — fine hair may need a bun filler. Maintenance: check the pins between set-ups. Quick verdict: big hair for big frames.
44. The Glamorous Side Bun
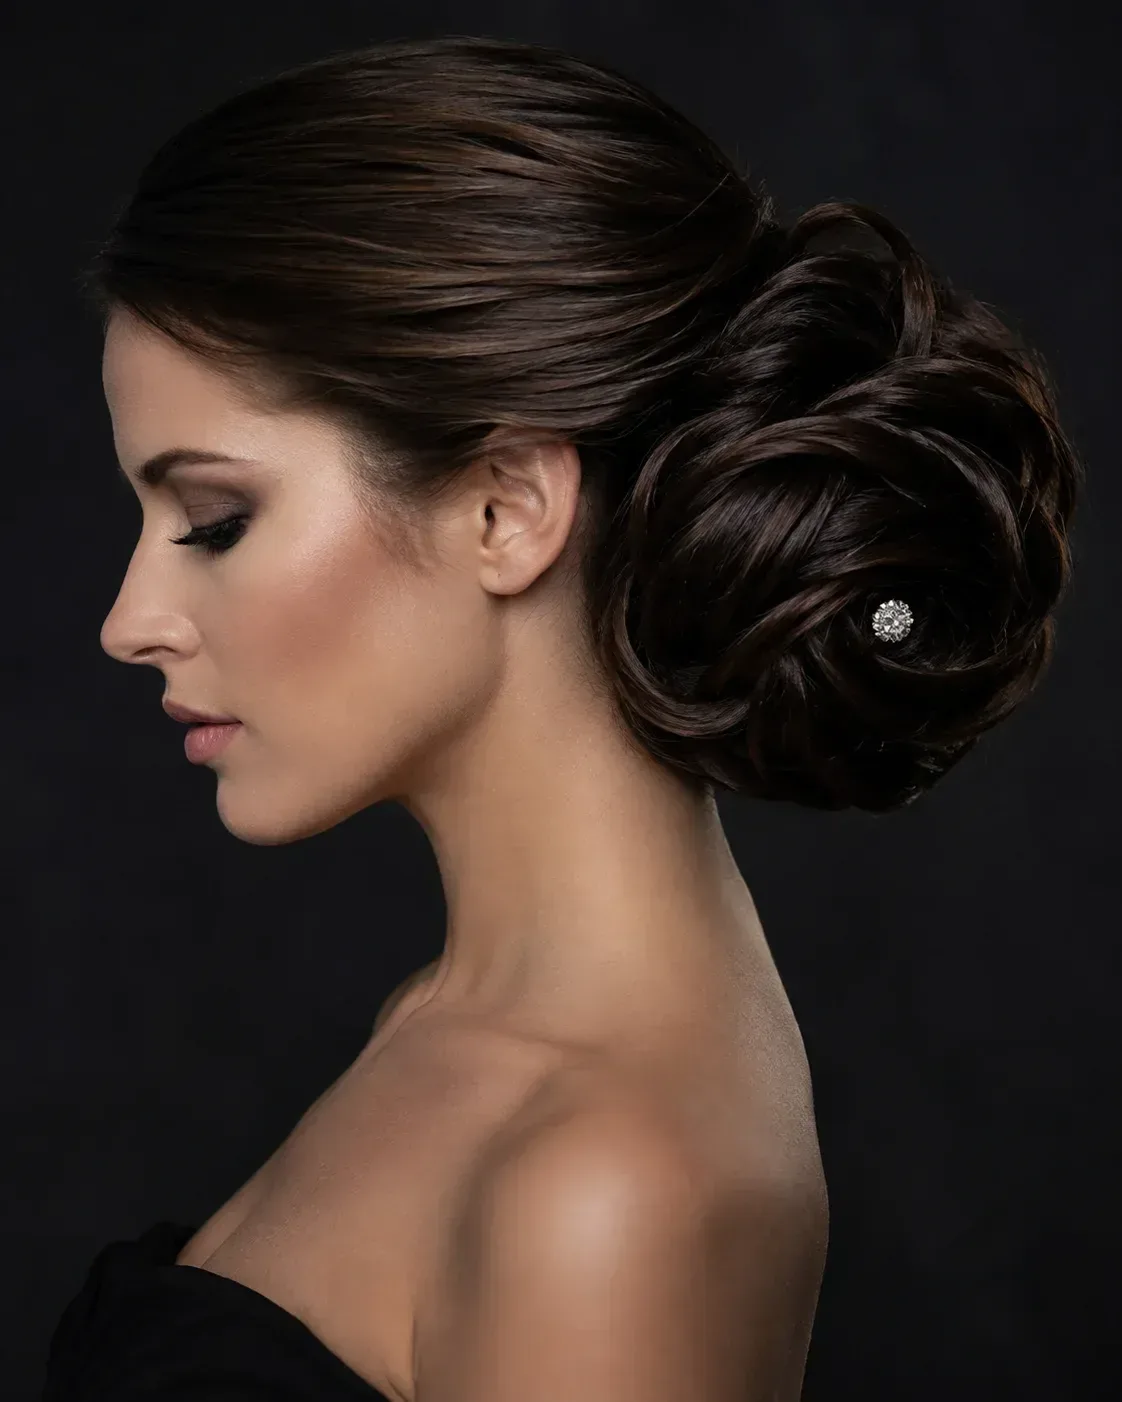
The glamorous side bun is the final style in this guide and one of the most photogenic: a full, soft bun sitting low on one side, with waves or curls feeding into it and a few loose pieces framing the face. It creates a beautiful asymmetric shape that flatters the neck and shoulders, and it photographs with elegance from the front, the side and the back. It is a favourite for evening portraits, weddings and any shoot where the hair should look like an occasion.
Best for: evening portraits, weddings, and formal sessions. How to style it: curl the hair first, gather it low to one side, twist into a soft bun, and pin, leaving a few curls loose. What to ask your stylist: for the bun to sit at the jawline or lower, so it flatters the neck. Pros and cons: it is elegant and romantic, but it needs pins and a little volume. Quick verdict: the side bun that ends the shoot in style.
What is the best hairstyle for a photoshoot?
A sleek low bun or a polished blowout is the safest choice for most photoshoots, because both frame the face clearly, hold their shape, and look good from every angle. For outdoor shoots, a braid or a low ponytail is better, since it is wind-proof. The best style depends on the shoot type — headshots need the face open, while portraits can carry more movement and drama.
How should I wear my hair for a headshot?
Wear your hair pulled back or swept to one side for a headshot, with nothing covering your eyes and a clean neckline. A sleek low bun, a polished blowout, or a neat bob all work well. Avoid styles that cover one eye, add too much volume at the sides, or need constant fixing — the camera should see your face first.
What hairstyles are best for outdoor photoshoots?
Braids, low buns, low ponytails and twisted updos are best for outdoor photoshoots, because they are anchored by their structure and survive wind. Loose, voluminous hair looks beautiful outdoors but blows across the face, so pin the front sections back and carry pins and a brush for touch-ups between shots.
How do I stop flyaways from showing in photos?
Smooth flyaways with a clean mascara spoolie brushed with a tiny amount of hairspray, run lightly over the crown and hairline. Avoid heavy gel, which looks stiff on camera. A little shine serum on the lengths also helps, since smooth hair reflects light evenly and flyaways stand out less.
Should I get my hair done professionally before a photoshoot?
Yes, if the shoot matters — a professional stylist knows how hair behaves under studio lights and on camera, and can build a style that holds for hours. If you style it yourself, do a trial run, take test photos in similar light, and bring pins, elastics, a brush and a travel-size spray to the shoot.
How far in advance should I wash my hair before a photoshoot?
Wash your hair the day before the shoot, not the morning of it. Second-day hair has more grip, holds curls and updos better, and is less likely to look flat or flyaway on camera. Use dry shampoo at the roots on shoot day if you need freshness, and avoid heavy oils or serums before styling.
What hairstyle photographs best from every angle?
A low chignon or a sleek low bun photographs best from every angle, because the shape is clean from the front, the side and the back. Soft waves also work well, since they look similar from most angles. Avoid styles that only look good from the front, like a heavy fringe or a one-sided sweep, if the shoot includes profile shots.
Can I wear my hair down for a photoshoot?
Yes — hair down photographs beautifully, especially soft waves and glossy straight hair. The key is control: keep the front off your face with a pin or a twist, make sure the parting is clean, and check the back in a mirror, since the camera will see it. For windy outdoor shoots, choose a half-up style instead of fully loose hair.
What should I bring to a photoshoot for hair touch-ups?
Bring bobby pins, hair elastics, a small brush or comb, dry shampoo, a travel-size flexible-hold hairspray, and a shine serum. A small mirror helps too. These cover almost every on-set problem — flyaways, a slipping style, flat roots, or wind tangles — in under two minutes.
How do I choose a photoshoot hairstyle for my face shape?
Match the style to your face shape: add height at the crown for round faces, add width at the sides for long faces, soften the jaw with waves or a side part for square faces, and keep the balance even for oval faces. The simplest rule is to frame the face without hiding it — if the style covers your cheekbones or your eyes, it is working against the photo.
Your Hair, Ready for Its Close-Up
The best photoshoot hairstyle is not the most complicated one — it is the one that lets the camera see you. A sleek low bun for a headshot, soft waves for a portrait, a braid for a windy outdoor shoot, a glamorous side bun for an evening session: each style in this guide earns its place by looking good from every angle, holding its shape, and letting your face do the talking. Pick the style that fits your shoot, your outfit and your hair, do a test photo before the day, and pack your pins. Then forget about your hair completely — and let the camera do the rest.