Snow, Candlelight and ‘I Do’: 37 Winter Wedding Hairstyles That Stay Flawless in the Cold
A winter wedding has a kind of magic no other season can copy: snow falling outside the windows, candlelight on the tables, velvet and faux fur, and photographs that look like a film still. But winter is also the hardest season for hair. Cold air dries it out, hats and coats flatten it, static makes it fly, and damp snow can undo a morning of curling before the ceremony even starts. The secret is not more hairspray — it is choosing a style that works with winter instead of fighting it, and these hairstyles for a winter wedding do exactly that.
This guide gathers 37 winter wedding hairstyles, from snow-proof chignons and candlelit Hollywood waves to braided crowns, velvet bows, faux-fur-friendly updos and short-hair styles that look stunning under a crystal headband — plus looks for brides, bridesmaids and guests. Eight guides first explain why winter hair behaves differently, which products actually hold in the cold, how to plan for coats, veils and outdoor photos, and the mistakes that ruin winter wedding hair. Whether your wedding is in a snowy chapel, a candlelit barn or a city hotel, you will find a style here that still looks flawless at midnight.
Why Winter Hair Behaves Differently — And What to Do About It
Cold air is dry air, and dry air pulls moisture out of hair. That is why winter hair feels rougher, tangles more easily, and loses its shine — and why curls that hold beautifully in June can fall flat by December. Add a wool coat collar rubbing the nape, a hat pressing the crown, and the sudden switch from freezing outdoors to overheated indoors, and you have the perfect recipe for frizz, static and a style that looks tired by the first dance. Understanding this is the first step: winter wedding hair is not about fighting the season, it is about planning for it.
The fixes are simple and they start weeks before the wedding. A deep-conditioning treatment once a week in the month before the day restores the moisture winter steals, and a leave-in cream on the morning itself seals the cuticle so the cold cannot rough it up. On the day, build the style on hair with a little grip — second-day hair or hair prepped with texture spray holds far better than freshly washed, slippery hair. Quick verdict: treat winter as a styling condition, not an inconvenience, and the cold stops being the enemy.
The Snow-Proof Styling Kit: Products That Actually Hold in the Cold
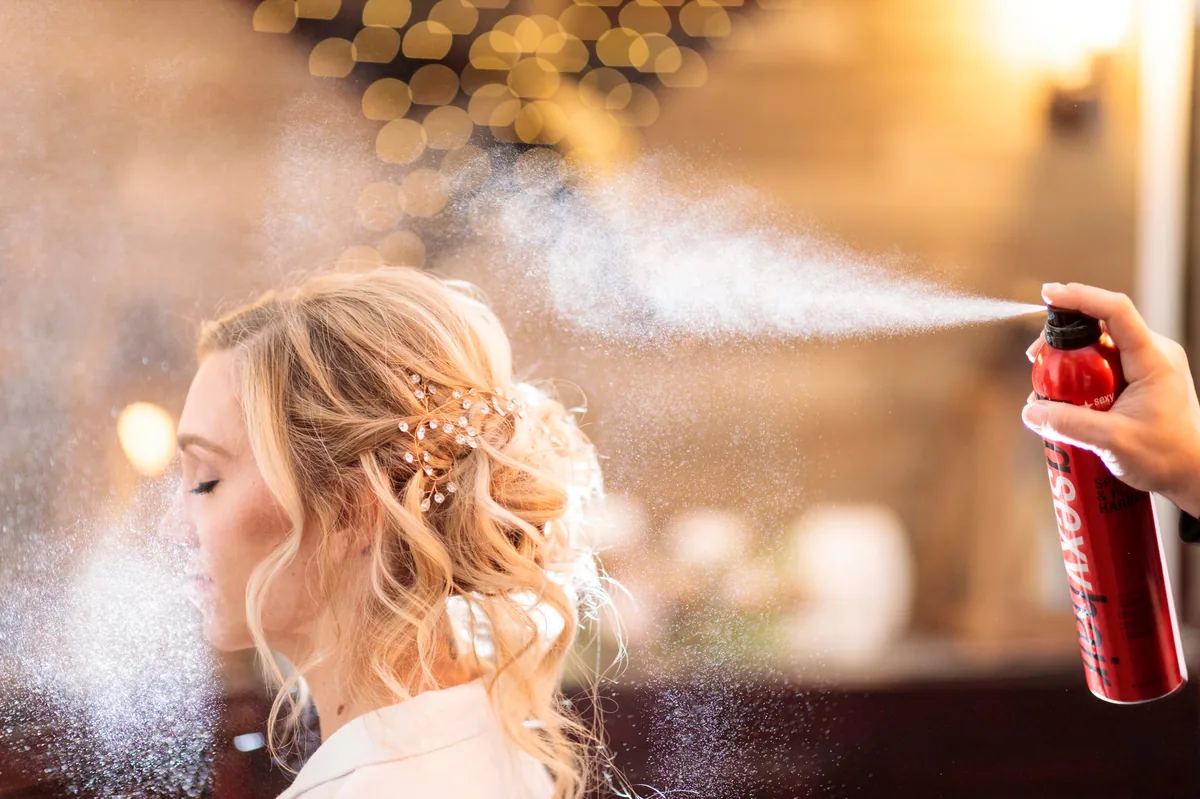
A winter wedding needs a different product kit from a summer one. The heroes are a strong-hold but flexible hairspray that does not go stiff in the cold, a lightweight anti-static serum, a texture spray for grip, and a few extra bobby pins in your clutch. Skip heavy oils on the day — they weigh curls down and make hair look greasy under indoor lighting — and skip anything that promises ‘touchable hold’ if your style needs to survive snow, wind and six hours of dancing.
What to pack in the bridal emergency kit: a travel hairspray, two bobby pins, a small comb, a blotting paper for the hairline, and a mini anti-static spray. Pros and cons: strong-hold spray keeps an updo locked through a snowstorm, but it can look crunchy in close-up photos if overused — spray from 30 cm away in short bursts instead. Cost and time: the whole kit costs less than one salon blow-dry and takes five minutes to assemble. Common mistake: trying a brand-new product on the wedding morning — test everything at the trial, in cold air if you can.
Updos vs Hair Down in Winter: What Survives a Coat, a Hood and the Snow
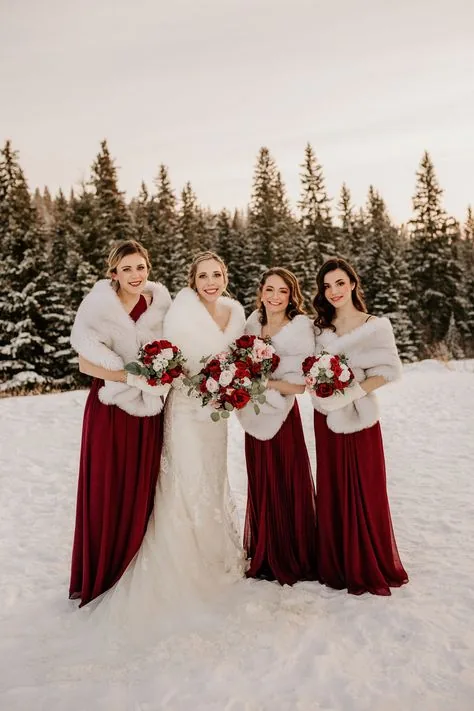
The biggest winter decision is up or down, and the honest answer is that updos win in winter more often than they lose. A low chignon or a sleek bun sits above the coat collar, stays clear of the faux-fur stole, and does not get flattened by a hood or a car headrest. Hair down looks gorgeous in photos, but every layer of winter clothing rubs against it — collars, scarves, coat hoods and seatbelts all leave their mark, and damp snow weighs loose curls down faster than anything else.
That does not mean hair down is off the table. If your heart is set on loose waves, ask your stylist for a half-up style: the top is pinned away from the collar and the lengths still flow. Or choose a style with the hair swept to one side, so the coat collar only touches one side. Who should avoid fully-down hair: anyone with very fine hair in a snowy outdoor ceremony, because fine hair loses its shape fastest in damp cold. Quick verdict: up for snow, half-up for the best of both worlds, and down only if the ceremony and photos are mostly indoors.
Veils, Capes and Faux Fur: Choosing Accessories That Flatter the Style
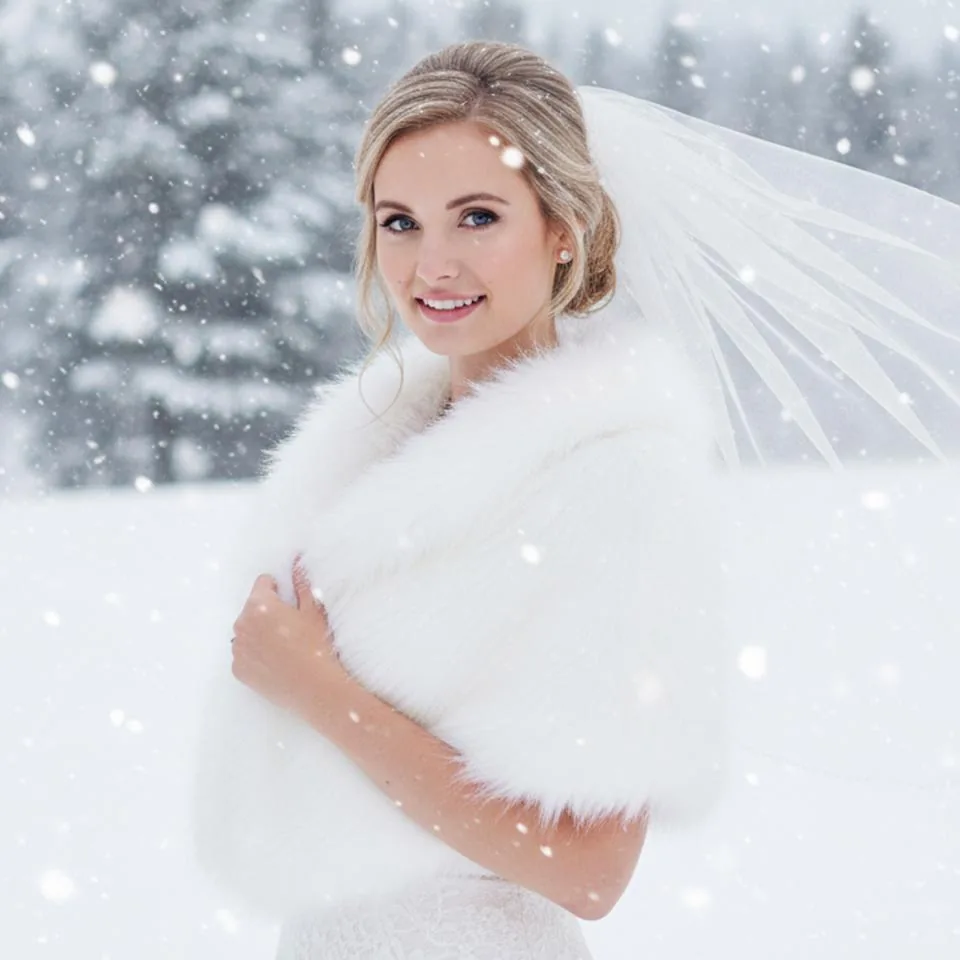
Winter is the one season where a cape, a faux-fur stole or a long veil is not just beautiful — it is practical. But accessories and hairstyles have to be planned together, because a heavy veil pulls on an updo, a cape hides a low bun, and a fur collar can crush the back of a style you spent an hour building. The rule is simple: decide the accessory first, then build the hair around it, not the other way round.
A cathedral veil needs a secure anchor — a low bun or a twist gives it something solid to pin into, while loose hair lets it slip. A faux-fur stole suits a high or side-swept style that stays visible above the fur. A crystal hair vine or a velvet ribbon works with almost anything and photographs beautifully in candlelight. What to ask your stylist: bring every accessory to the trial, including the coat you will actually wear outside, and have the stylist pin the veil in while you are wearing it. Cost and time: a good hair vine costs less than the bouquet and takes two minutes to place. Common mistake: choosing the hairstyle before the veil — always fit them together.
The Winter Wedding Hair Timeline: Trial, Colour and the Week-Of Plan
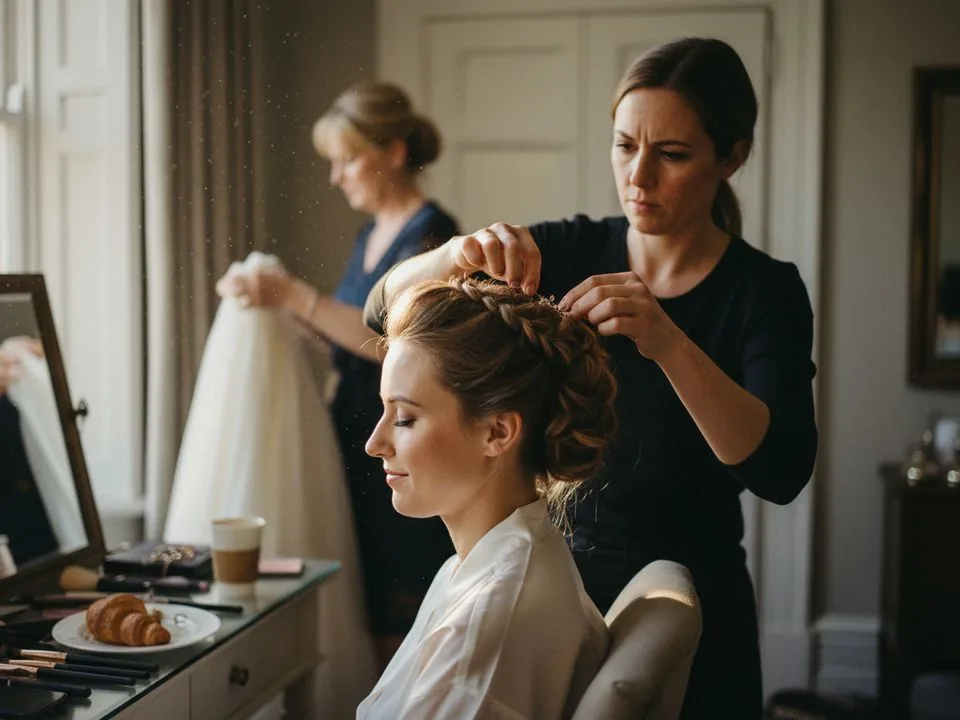
Winter wedding hair rewards a timeline, because cold-weather hair needs time. Book the trial six to eight weeks before the wedding, and do it on a cold day if you can — a style that holds in a heated salon may behave very differently in January air. Bring photos, your veil and your coat, and wear a top with a similar neckline to your dress, because the neckline changes how a style looks. Take photos from every angle, including the back, because that is the angle your guests see most.
Colour should be done two weeks before the day, never the week of, so it has time to settle and any brassiness can be corrected. The final trim should be a week before, and a deep-conditioning treatment three days before gives shine without the slippery feeling a same-day treatment leaves. Maintenance: in the last week, wash less often, sleep on a silk pillowcase, and avoid hot tools the day before the trial and the wedding. Quick verdict: the timeline is the difference between a style that survives the day and one that gives up by the speeches.
Indoor Photos, Outdoor Photos: Planning Hair for Both
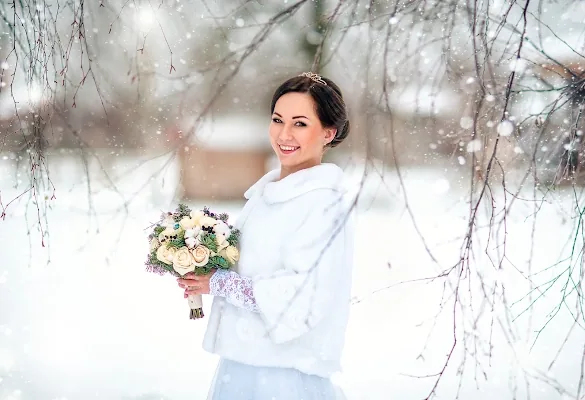
A winter wedding usually means two kinds of photos: warm, candlelit portraits indoors and a few breathtaking shots in the snow. The problem is that the two ask for different hair — indoor lighting loves shine and soft movement, while snow demands hold and structure. The solution is a style with a strong foundation and a soft finish: a secure updo with a few loose, face-framing pieces, or curls set firmly and then brushed out softly so they look loose but are built to last.
Plan the photo order with your photographer: do the outdoor shots first, while the hair is freshest, then move inside where you can do a quick touch-up. Bring a small mirror, a travel hairspray and a few pins for the five-minute fix between locations. Pros and cons: outdoor snow photos are the ones you will frame, but they are also the hardest on hair — ten minutes in falling snow is fine, thirty minutes will test any style. Common mistake: scheduling outdoor portraits at the end of the day, when the hair has already been through hours of dancing. Quick verdict: shoot the snow early, touch up inside, and the album will look flawless from both angles.
Hair by Length: Short, Medium and Long Winter Wedding Styles
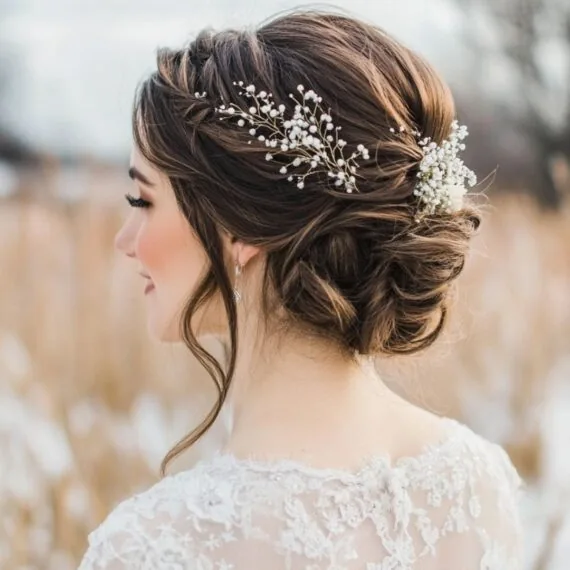
Winter flatters every length, but each length has its own strengths. Short hair is the easiest winter length: a pixie or a bob sits above the coat collar, never gets flattened by a hood, and looks stunning with a crystal headband or a velvet bow — and it is the length least affected by snow. Medium hair is the most versatile: it holds a low bun, a half-up twist and soft waves equally well, and it is long enough for a braid but short enough to stay out of the way.
Long hair gives the most drama in photos, especially in the snow, but it is also the most vulnerable — it catches on coat collars, gets weighed down by damp air, and takes the longest to restyle if it falls. The fix is structure: a braided crown, a low chignon or a half-up style keeps the length visible while giving it an anchor. What to ask your stylist: if your hair is very long, ask how much of it will be pinned up — a style that looks loose but is secretly anchored will survive the day. Quick verdict: short for ease, medium for choice, long for drama — with an anchor.
Mistakes That Ruin Winter Wedding Hair — And How to Avoid Them

The most common winter wedding hair mistake is washing your hair on the morning of the wedding. Freshly washed hair is slippery, static-prone and refuses to hold a curl — and in winter it is worse, because cold air makes it fly away even more. Wash the night before, or use dry shampoo at the roots, and your stylist will thank you. The second mistake is skipping the trial in winter conditions: a style tested in a warm salon in October is not the same style in a snowy December.
Other easy mistakes: wearing a wool hat over a finished style, which flattens the crown and leaves a hat line; forgetting anti-static spray, which is the single cheapest fix in winter hair; and choosing a style that only looks good from the front, when winter coats and veils mean the back is on show all day. Who should avoid what: anyone with very fine hair should avoid heavy oils and over-conditioning on the day, because weight is the enemy of volume in cold air. Quick verdict: wash the night before, trial in the cold, pack anti-static spray — and check the back in the mirror before you leave.
1. The Classic Low Chignon Under a Faux-Fur Stole
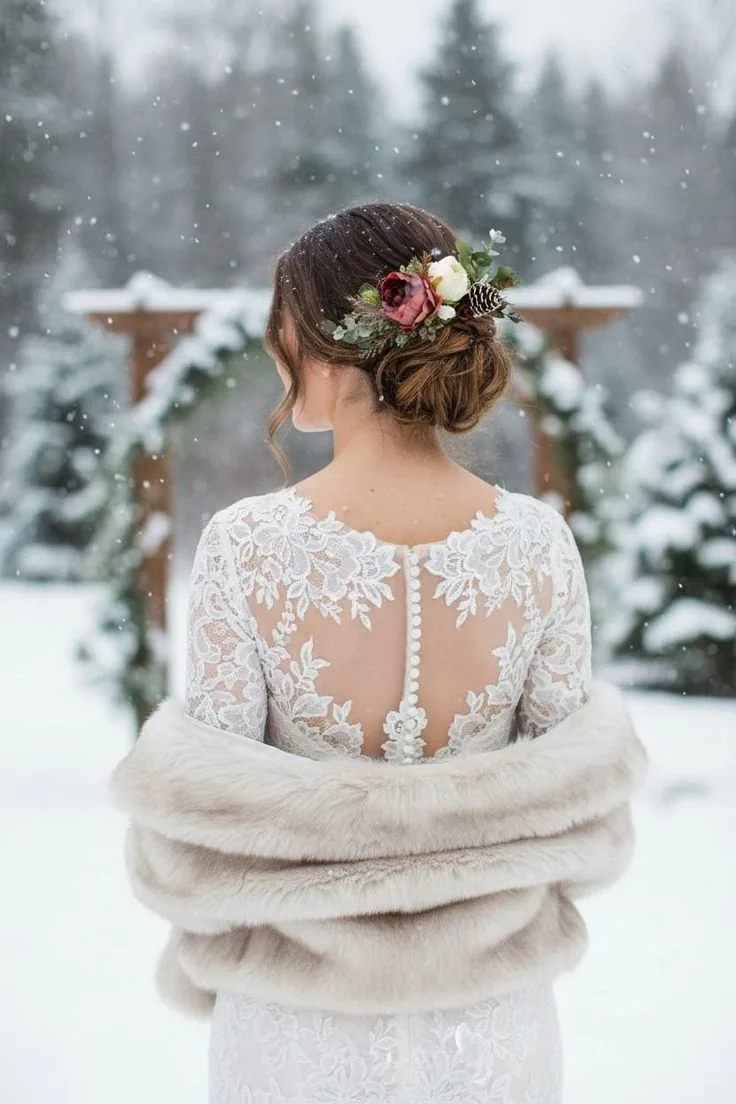
The low chignon is the winter bride’s best friend: hair swept smoothly back and rolled into a neat bun at the nape, sitting just above the coat collar and well clear of a faux-fur stole. It is the style that looks equally at home in a snowy chapel and a candlelit ballroom, and it photographs beautifully from the back — the angle your guests see most during the ceremony. A few soft tendrils at the front keep it romantic rather than severe, and a crystal pin or a sprig of winter greenery turns it from classic to unforgettable.
Best for: brides, bridesmaids and guests who want a style that survives the whole day. How to style it: build it on second-day hair for grip, pin it in at least four places, and set it with a strong-hold spray. Pros and cons: it is the most reliable winter style there is, but it needs a skilled hand to look soft rather than scraped-back — ask for texture at the crown. Cost and time: about 30 minutes with a stylist, or 15 at home with practice. Quick verdict: if you only remember one winter wedding hairstyle, make it this one.
2. Soft Hollywood Waves With a Velvet Ribbon
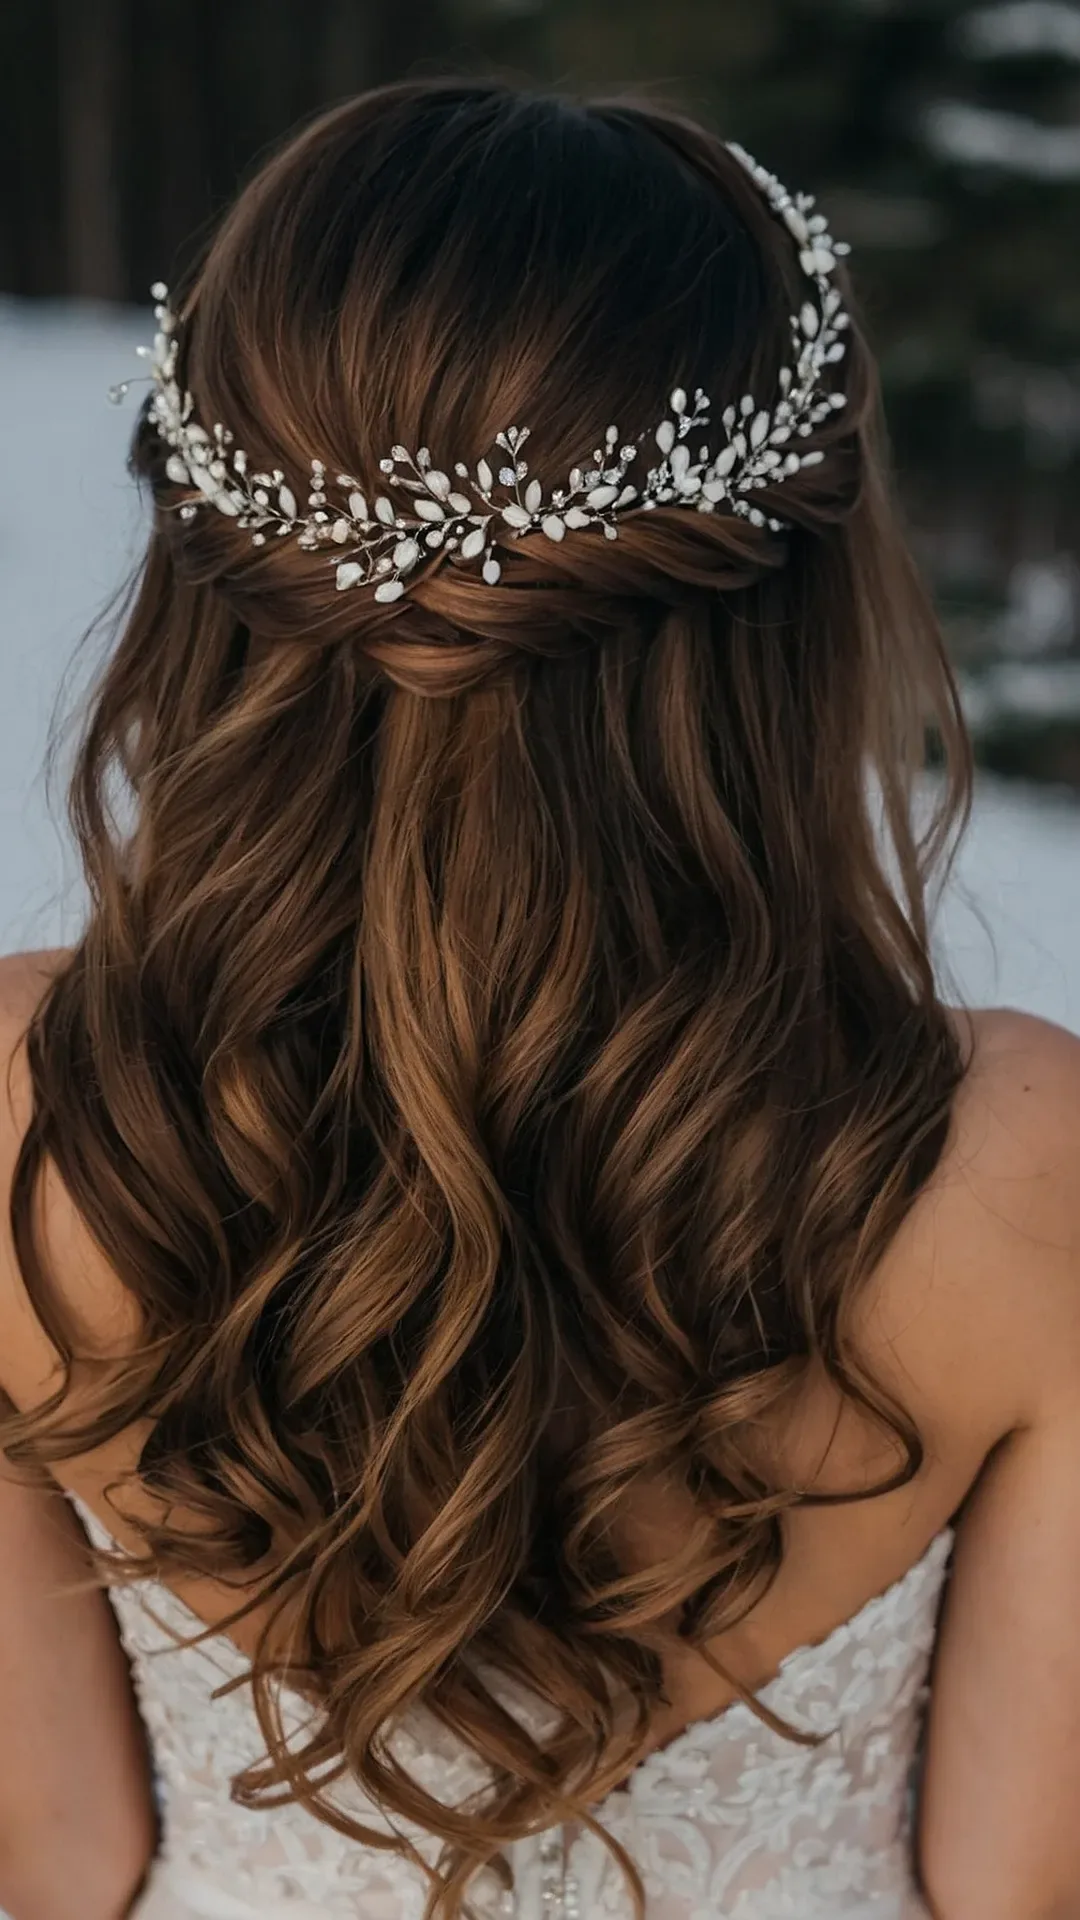
Old Hollywood waves never go out of fashion, and in winter they look even better — the deep, glossy waves catch candlelight like nothing else, and a velvet ribbon tied at the nape adds the season’s signature texture. The trick is setting the waves firmly: curl each section, pin it to cool, then brush it out into soft, sculpted waves that look loose but are built on a strong foundation. The velvet ribbon does double duty, hiding the pins and adding a rich winter colour.
Best for: brides and guests with medium to long hair, and mostly indoor weddings. How to style it: use a large-barrel curling iron, set with strong-hold spray, and finish with a shine serum on the ends only. Common mistake: brushing the waves out too early, before they have cooled — that is how Hollywood waves turn into a fluffy mess. Maintenance: carry a travel spray and re-pin one or two sections after the outdoor photos. Who should avoid it: anyone spending a long time in falling snow, because damp air will loosen even the firmest waves. Quick verdict: candlelight’s favourite hairstyle.
3. The Snow-Proof Sleek Low Bun
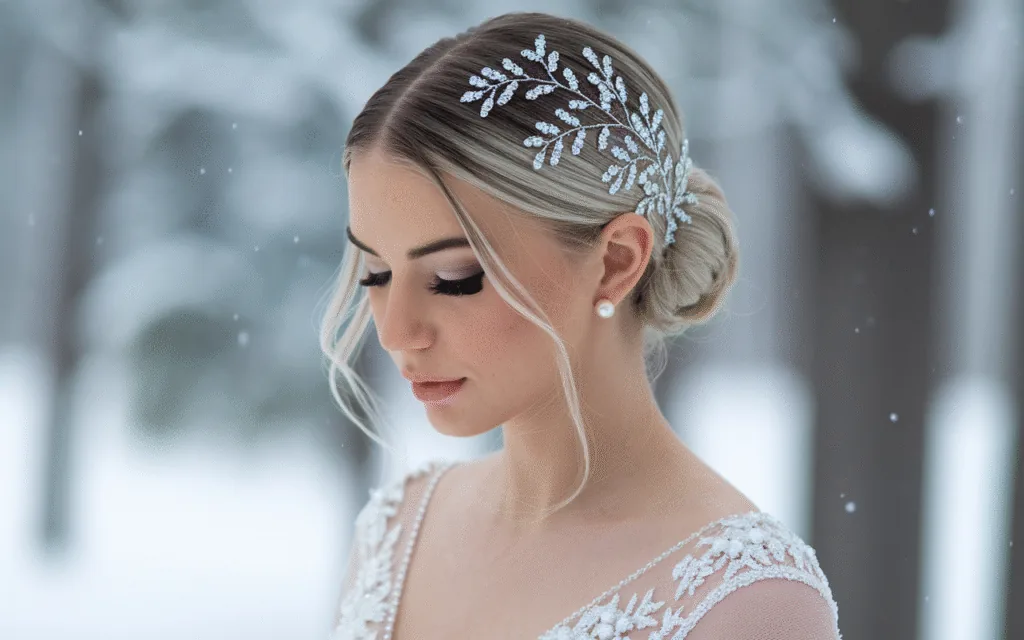
If the forecast says snow, this is the style to choose. The sleek low bun is hair brushed perfectly smooth, gathered low at the nape and twisted into a tight, polished bun that wind, snow and a coat hood simply cannot disturb. It is the most weatherproof wedding hairstyle there is, and it looks strikingly elegant with a high-necked winter dress or a dramatic veil. A centre part keeps it modern; a side part makes it softer and more romantic.
Best for: snowy outdoor ceremonies and brides who want zero hair worries. How to style it: smooth with a boar-bristle brush and a little gel, secure with a strong elastic, and pin the bun in a circle so it cannot shift. Pros and cons: nothing holds better in bad weather, but the sleekness shows every flyaway — a little anti-static serum is essential. Cost and time: 20 minutes, one elastic, a handful of pins. Quick verdict: the blizzard-proof bride’s choice.
4. Romantic Half-Up Twist With Pearl Pins
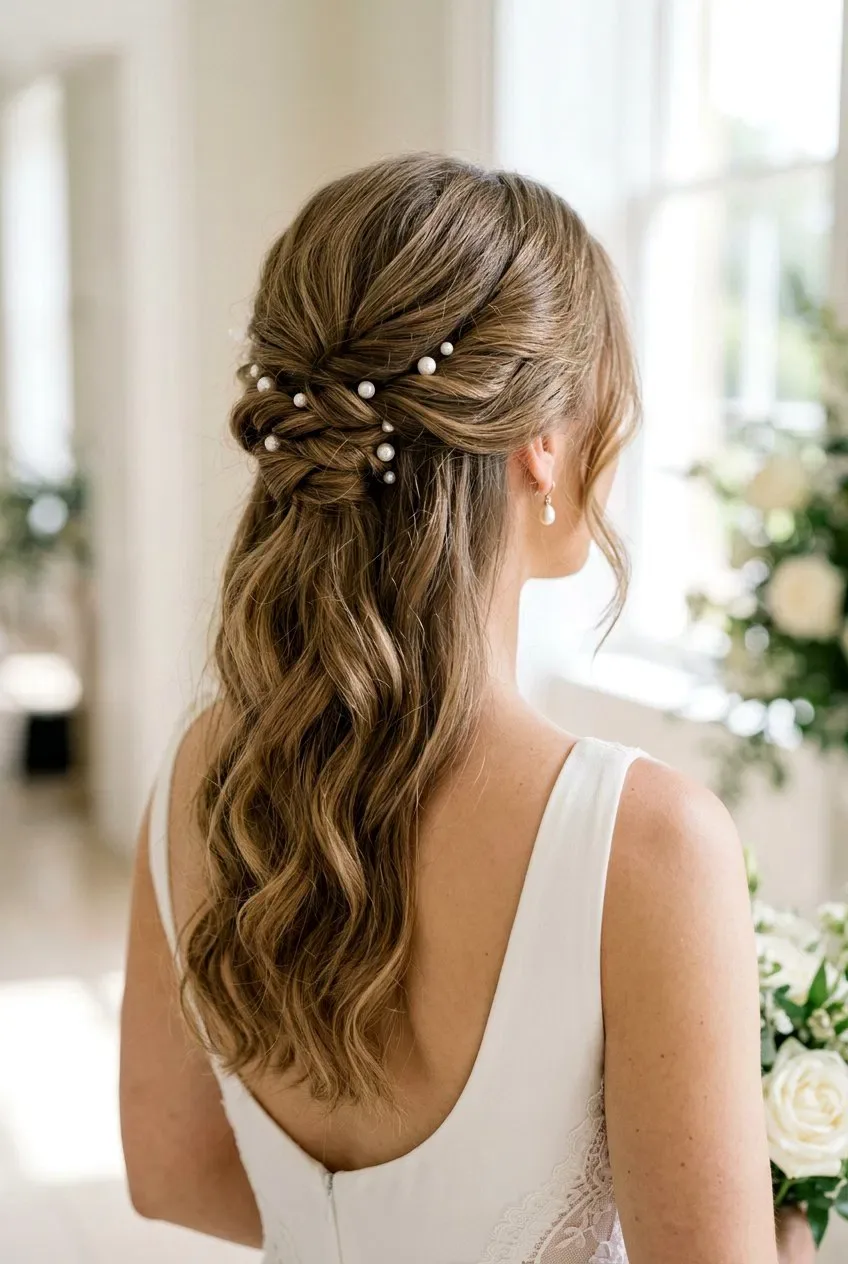
The half-up twist is the perfect compromise for a winter wedding: the top half is pinned up and away from the coat collar, while the rest falls in soft waves below. Pearl pins scattered through the twist catch the light like frost, and the style works with a veil, a cape or a faux-fur stole without any of them fighting each other. It is romantic, practical and one of the most photographed winter bridal looks.
Best for: brides who want their hair down but need it to behave. How to style it: twist the top sections back from each temple, cross them at the back and pin, then place three to five pearl pins along the twist. What to ask your stylist: ask for the twist to be anchored with two crossed pins, not one, so it survives the outdoor photos. Maintenance: a quick check in the mirror after taking your coat off — the twist can shift under a hood. Cost and time: about 25 minutes, plus a set of pearl pins. Quick verdict: the best of both worlds, with pearls.
5. The Frosted French Twist
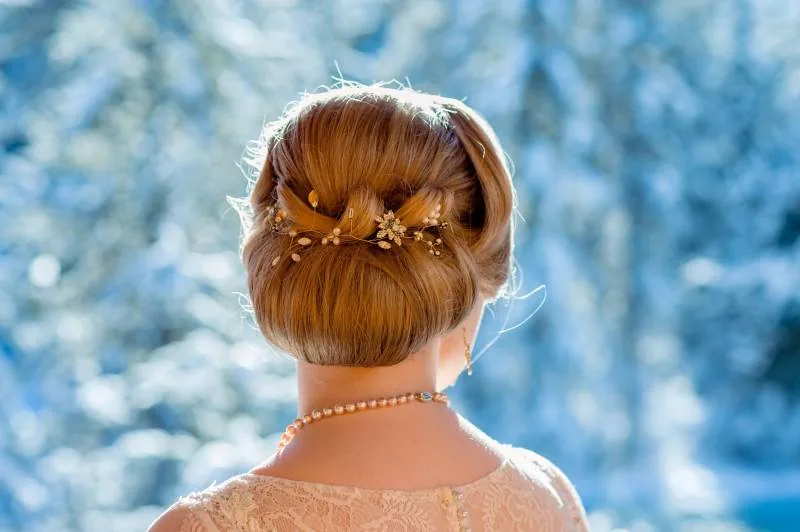
The French twist is pure elegance — hair swept up and tucked into a vertical roll at the back of the head — and in winter it earns the name ‘frosted’ with a dusting of crystal pins or a light shimmer spray along the roll. It lifts the neck, flatters a high collar or a fur stole, and stays completely clear of coats and veils. It is also one of the most secure updos: once pinned, a French twist does not move.
Best for: formal winter weddings, black-tie receptions and brides who love vintage glamour. How to style it: backcomb the crown lightly for height, sweep the hair to one side, roll it up and pin along the seam. Pros and cons: it is supremely secure and looks expensive, but it is hard to do on yourself — book a stylist. Common mistake: making it too tight, which looks severe in photos; leave a little softness at the front. Who should avoid it: very short hair, which cannot form the roll. Quick verdict: the most elegant updo in this guide.
6. Loose Curls Under a Bridal Cape
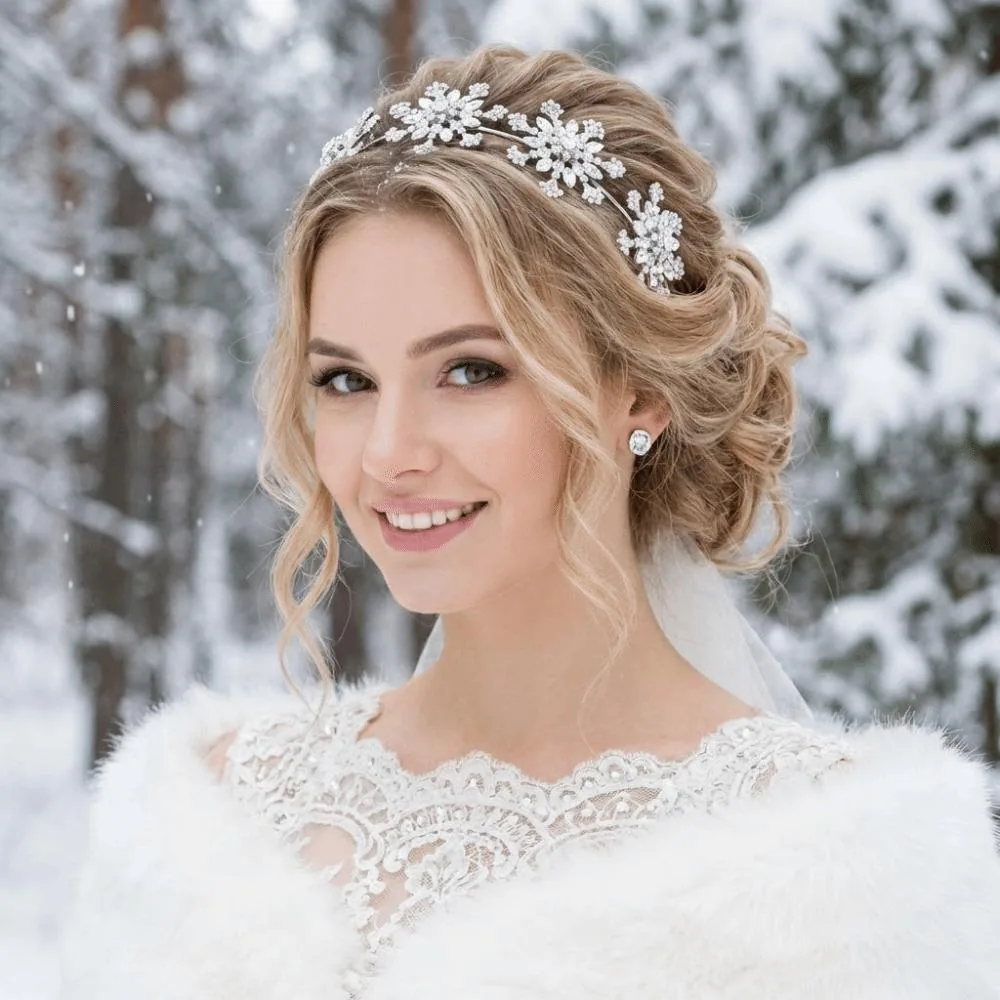
A bridal cape is winter’s most dramatic accessory, and loose curls underneath it create a beautiful contrast — structure on top, softness below. The key is keeping the curls below the shoulders, so the cape sits over the top of the hair rather than crushing it, and setting the curls firmly enough that they survive the cape coming on and off. The result looks like a winter fairytale, especially in outdoor snow photos.
Best for: brides wearing a cape or a long veil, and outdoor winter portraits. How to style it: curl with a medium barrel, pin each curl to cool, then brush out gently for soft, defined waves. What to ask your stylist: ask for the curls to be set with a strong-hold spray before the cape goes on, and for a quick touch-up kit in the car. Maintenance: lift the cape carefully, never drag it over the hair. Cost and time: 40 minutes for a full curl set. Quick verdict: the fairytale winter look.
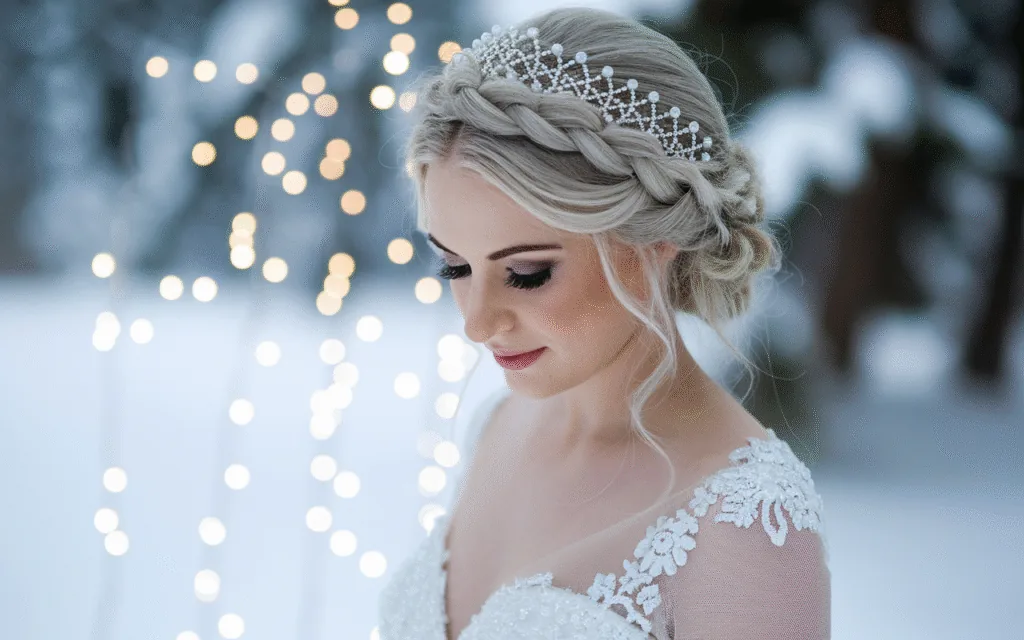
7. The Winter Braided Crown
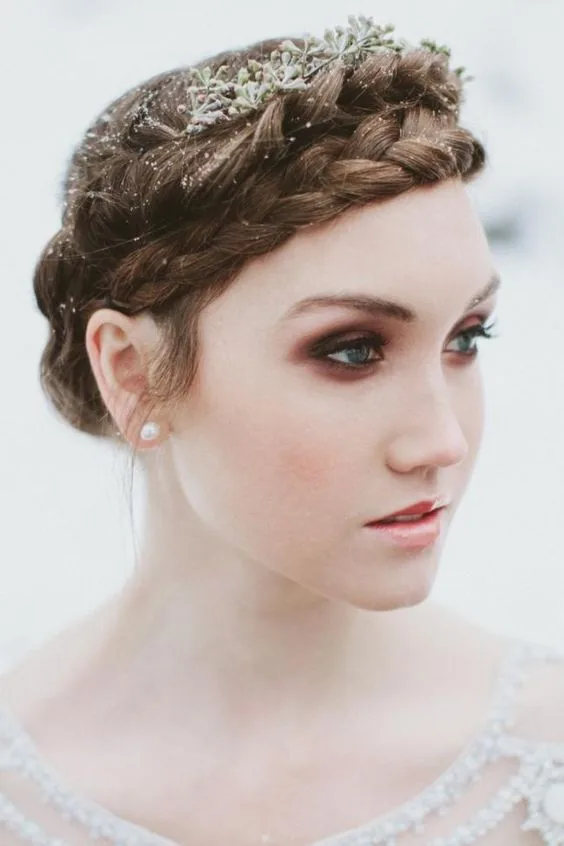
A braided crown circles the head like a halo, and in winter it is one of the most practical bridal styles: it keeps every strand off the face, survives wind and snow, and looks stunning with a veil pinned underneath or a crystal headband on top. Add a few sprigs of baby’s breath or winter greenery woven into the braid and it looks like it was made for the season. It is a favourite for rustic barn weddings and snowy garden ceremonies alike.
Best for: outdoor winter ceremonies, boho brides and anyone who hates hair in their face. How to style it: braid from one side around the head, pin the end under the start, and pull the edges gently for fullness. Pros and cons: it is the most secure style in this guide and photographs beautifully, but it needs medium to long hair and a patient stylist. Common mistake: braiding too tightly, which causes a headache by the reception — keep it firm but comfortable. Quick verdict: a halo that holds through a snowstorm.
8. Elegant High Bun With a Crystal Hair Vine
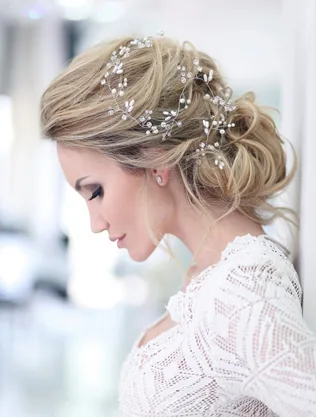
A high bun lifts the whole face and shows off the neckline of a winter dress, and a crystal hair vine wrapped around its base catches the light like frost on a window. It is the style for brides who want drama and height, and it works beautifully with a veil pinned below the bun or a tiara above it. The bun itself is secure and simple; the vine does the talking.
Best for: brides with a dramatic neckline or a statement veil. How to style it: smooth the hair into a high ponytail, twist it into a bun, pin it in a circle, then wind the vine around the base and secure the ends. What to ask your stylist: ask for the bun to be pinned in at least six places — a high bun is heavy and gravity is not your friend. Maintenance: a spare pin or two in your clutch, and a quick check after dancing. Cost and time: 30 minutes plus the vine. Who should avoid it: anyone with a very long face, as height on top can lengthen it further. Quick verdict: frost, worn as jewellery.
9. The Textured Low Ponytail With a Velvet Bow
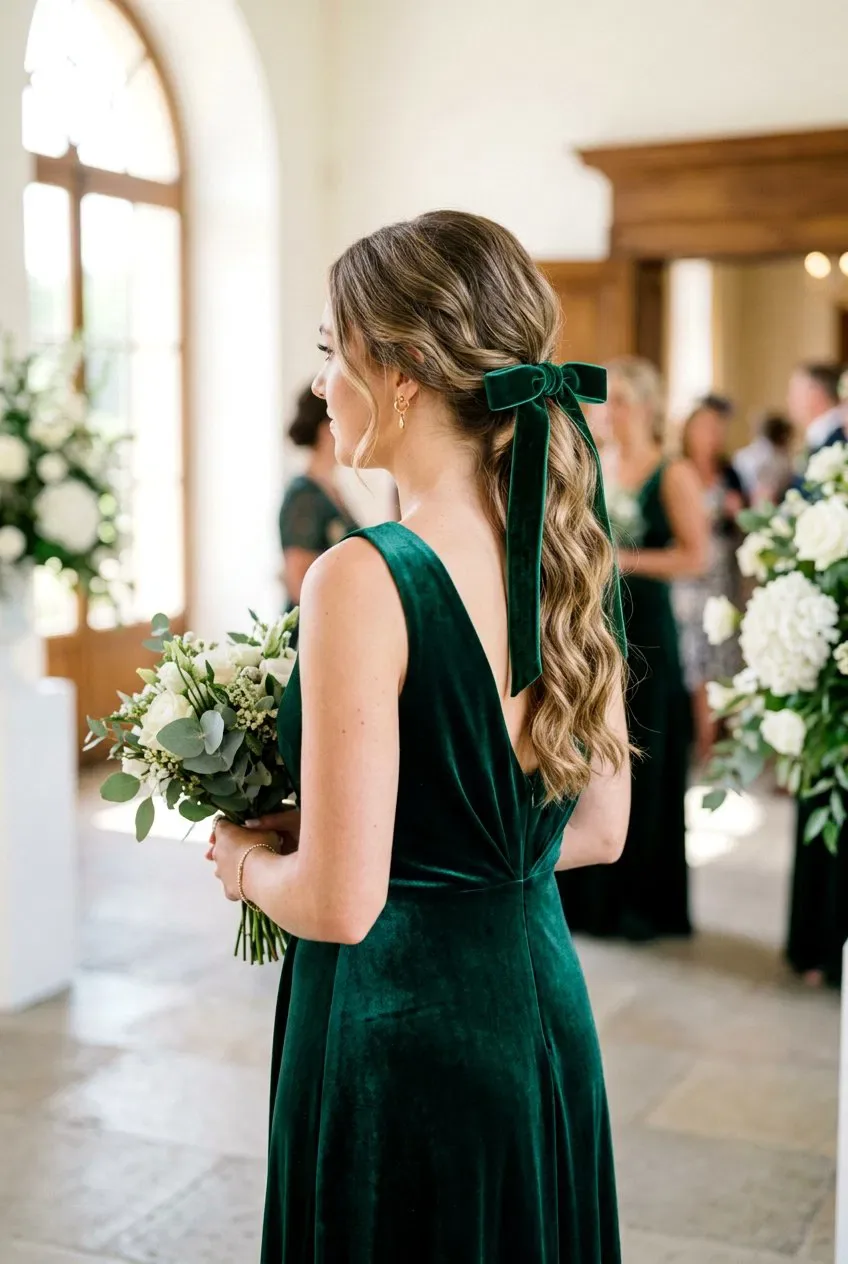
The low ponytail is the quiet achiever of winter wedding hair: textured, slightly tousled, tied low at the nape and finished with a big velvet bow. It looks effortless, survives a coat and a car journey, and suits bridesmaids and guests just as well as brides. The velvet bow is the winter detail — rich, soft and seasonal — and it hides the elastic completely.
Best for: bridesmaids, wedding guests and relaxed winter weddings. How to style it: add texture spray, gather low, secure with an elastic, wrap a strand of hair around the base, then tie the bow on top. Pros and cons: it is quick, comfortable and very forgiving, but it can look too casual for a very formal ceremony — keep the bow neat and the texture controlled. Common mistake: tying the ponytail too high, which makes it look sporty rather than elegant. Cost and time: 15 minutes, one elastic, one velvet bow. Quick verdict: effortless, with a velvet finish.
10. Side-Swept Waves With a Snowflake Clip
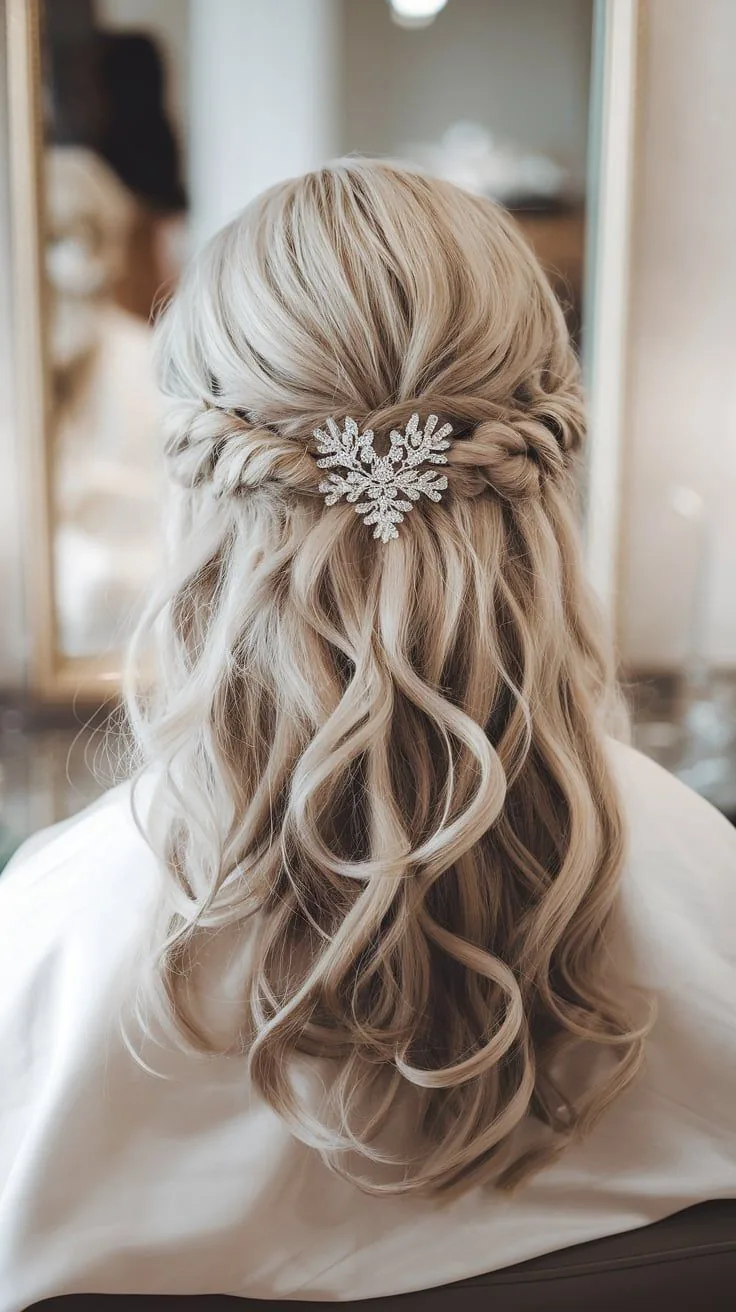
Sweeping the hair to one side is one of the most flattering winter wedding moves: it keeps the hair off the coat collar on one side, shows off an earring, and creates a beautiful diagonal line in photos. A snowflake-shaped clip or a crystal pin holds the sweep in place and adds a playful winter detail that guests will notice. The waves themselves should be soft and brushed out, not tight curls.
Best for: brides and guests with medium to long hair, and anyone wearing statement earrings. How to style it: curl the hair, brush it out, sweep it all to one side and secure it behind the ear with the clip. What to ask your stylist: ask for the sweep to be pinned in two hidden places, not just the clip, so it does not fall forward during the ceremony. Maintenance: a quick re-sweep after the coat comes off. Common mistake: sweeping the hair so far that it covers the face in photos — keep the face clear. Quick verdict: one side, one clip, endless compliments.
11. The Vintage Finger Wave Bob
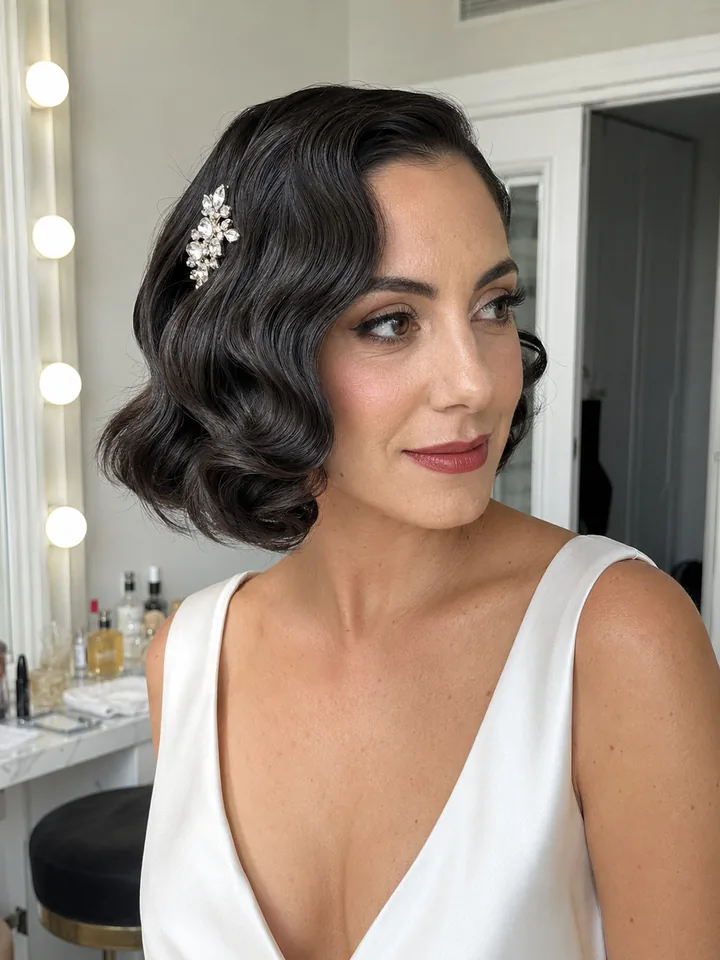
Finger waves are pure 1920s glamour, and a short bob set in sculpted waves is one of the most striking winter wedding looks — especially under a crystal headband or a birdcage veil. The waves sit close to the head, so a coat, a hood or a fur collar cannot disturb them, and they look exquisite in candlelight. This is the style for a bride who wants vintage drama without a veil getting in the way.
Best for: short to medium hair, vintage-themed weddings and brides who love old Hollywood. How to style it: set the waves with a fine-tooth comb, gel and clips, then let them dry fully before removing the clips. Pros and cons: nothing photographs more elegantly, but it takes a skilled stylist and cannot be rushed — allow an hour. Who should avoid it: anyone who wants a low-effort morning; finger waves are a commitment. Cost and time: 45–60 minutes with a stylist. Quick verdict: the most glamorous short-hair winter look.
12. The Glamorous Old-Hollywood Side Part
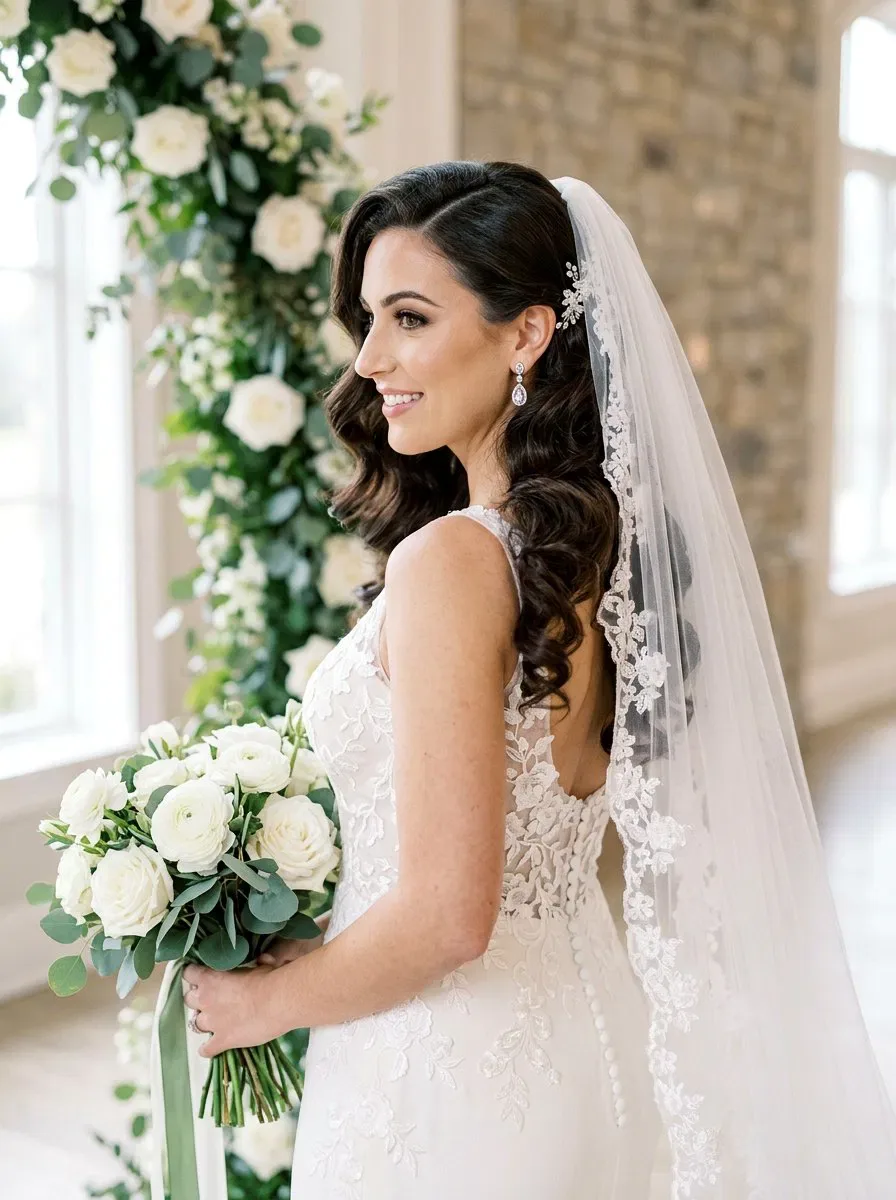
A deep side part with glossy, sculpted waves on one side is the most cinematic winter wedding hairstyle there is. It frames the face, shows off one earring, and looks incredible in black-and-white photographs — which is why so many winter brides choose it for their album shots. The deep part also adds instant volume at the crown, which helps counter the flattening effect of hats and hoods.
Best for: brides who love drama, and anyone with a strong jawline or cheekbones to show off. How to style it: part deeply on one side, curl away from the face, pin to cool, then brush into a smooth wave and set firmly. Common mistake: using too much shine serum, which looks greasy under flash photography — a little goes a long way. Maintenance: a travel spray and a small comb for the part. What to ask your stylist: ask for the wave to be set with a strong-hold spray, not a flexible one, so it survives the evening. Quick verdict: the red-carpet winter bride.
13. Braided Low Bun With Winter Greenery
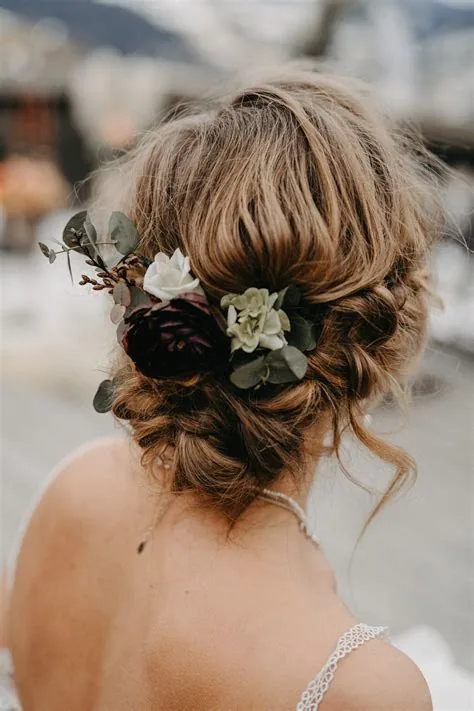
A low bun with a braid wrapped around its base is already lovely; weave in a few sprigs of eucalyptus, rosemary or pine and it becomes unmistakably winter. The greenery adds scent, texture and a natural colour that no crystal can copy, and it ties the hairstyle to the season’s decorations. It is a favourite for rustic, woodland and garden winter weddings.
Best for: rustic and woodland winter weddings, and brides who love natural details. How to style it: braid a section of hair, wrap it around the bun’s base, pin it, then tuck small sprigs of greenery into the braid. Pros and cons: it is beautiful, fragrant and cheap, but fresh greenery wilts after a few hours — ask your florist for hardy sprigs, and keep spares. Maintenance: check the greenery after the outdoor photos and replace any wilted sprigs. Cost and time: 30 minutes plus a few sprigs from the florist. Quick verdict: the forest, in your hair.
14. The Romantic Messy Updo With Loose Tendrils
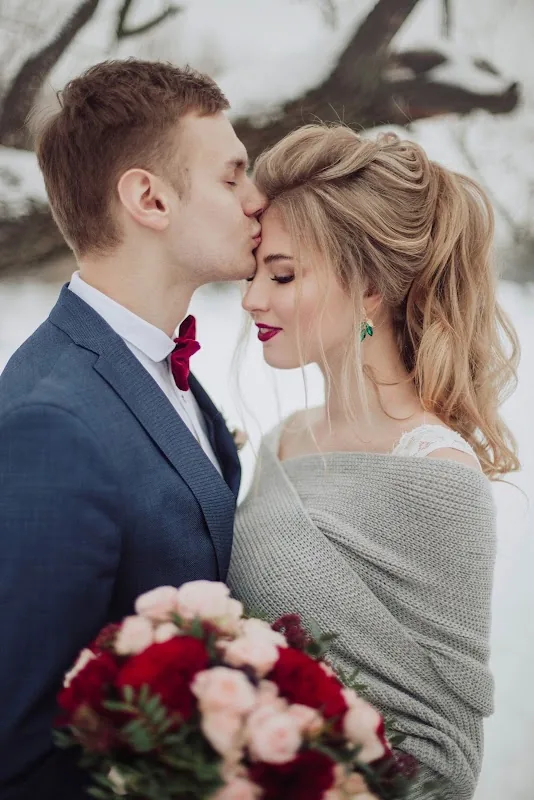
The romantic messy updo is the style that looks like it took five minutes and actually took forty: hair loosely pinned up with soft tendrils escaping around the face and at the nape. In winter it works beautifully, because the looseness hides any flattening from a coat or a hat, and the tendrils soften the whole look in candlelight. It is the updo for brides who want to look romantic rather than perfect.
Best for: brides who hate the scraped-back look, and relaxed winter weddings. How to style it: curl the hair first, then pin it up loosely, pulling out tendrils around the face and leaving the shape soft. What to ask your stylist: ask for the tendrils to be curled and set, so they do not go straight in the cold. Common mistake: pinning it too loosely — it should look effortless, not fall apart by the first dance. Maintenance: a few spare pins and a quick mirror check after the coat comes off. Quick verdict: perfectly imperfect.
15. Sleek Centre-Part Low Bun With a Tiara
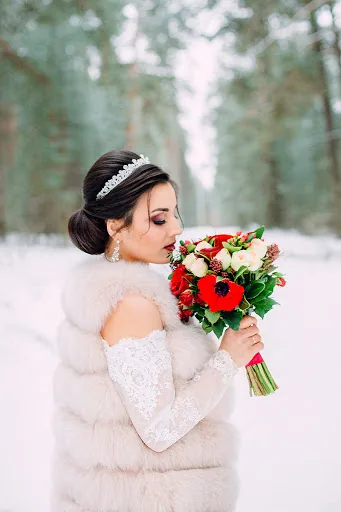
A centre part, hair swept smoothly back into a low bun, and a tiara — this is the royal winter wedding look. It is clean, symmetrical and regal, and it suits a cathedral veil pinned beneath the bun or a long, dramatic train. The centre part keeps it modern, while the tiara adds the sparkle that winter light loves. It is also one of the most secure styles: nothing moves, nothing falls, nothing needs fixing.
Best for: formal and royal-inspired winter weddings, and brides wearing a tiara. How to style it: part in the centre, smooth with a brush and serum, gather low, twist into a bun, then place the tiara at the crown. Pros and cons: it is supremely elegant and weatherproof, but a centre part suits oval and heart-shaped faces best — round faces may prefer a side part. Cost and time: 25 minutes plus the tiara. Who should avoid it: anyone who dislikes a severe, pulled-back feeling. Quick verdict: the queen of winter weddings.
16. The Fishtail Braid Draped Over One Shoulder
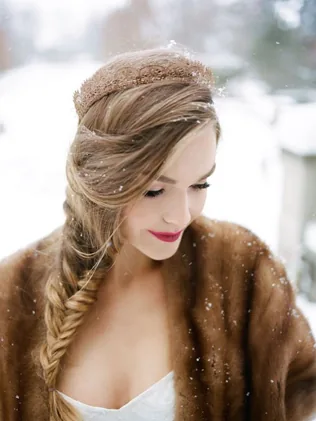
A fishtail braid draped over one shoulder is soft, romantic and surprisingly winter-proof: the braid keeps the hair contained and out of the coat collar, while the loose, pulled-apart texture looks effortless in photos. Add a velvet ribbon at the end or a few pearl pins along the braid and it becomes a bridal style rather than an everyday one. It is also one of the few down styles that genuinely survives a winter day.
Best for: brides and bridesmaids with long hair, and boho winter weddings. How to style it: braid loosely, pull the edges out gently for fullness, tie the end with a ribbon, and pin it over one shoulder. What to ask your stylist: ask for the braid to be started high at the crown, so it sits over the shoulder rather than sliding behind it. Maintenance: a quick re-pin after taking your coat off. Common mistake: braiding too tightly, which makes it look severe — a fishtail should look soft. Quick verdict: the braid that behaves like an updo.
17. Voluminous Curls That Survive the Cold
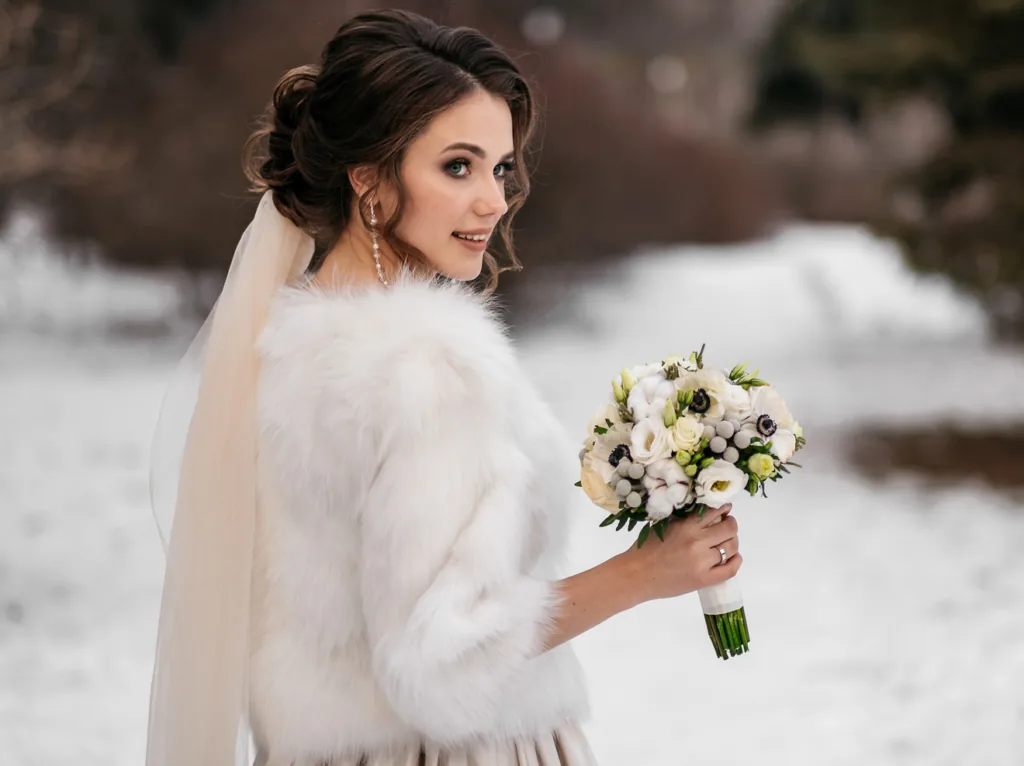
Big, bouncy curls are a winter wedding dream — but only if they are built to last. Cold, damp air is the enemy of volume, so the trick is layering: a volumising mousse at the roots, curls set with a medium barrel and pinned to cool, then a strong-hold spray and a gentle brush-out. The result is curls that look soft and full but are secretly armoured, and they look magnificent against a velvet dress or a fur stole.
Best for: brides with naturally wavy or curly hair, and anyone who wants volume. How to style it: work in small sections, pin each curl to cool completely, then brush out with your fingers, not a brush. Pros and cons: the volume is spectacular in photos, but it takes time — allow a full hour. Who should avoid it: very fine hair in a snowy outdoor ceremony, because fine curls drop fastest in damp air. Cost and time: 45–60 minutes, plus a volumising mousse. Quick verdict: volume with a backbone.
18. The Elegant Top Knot With a Crystal Comb
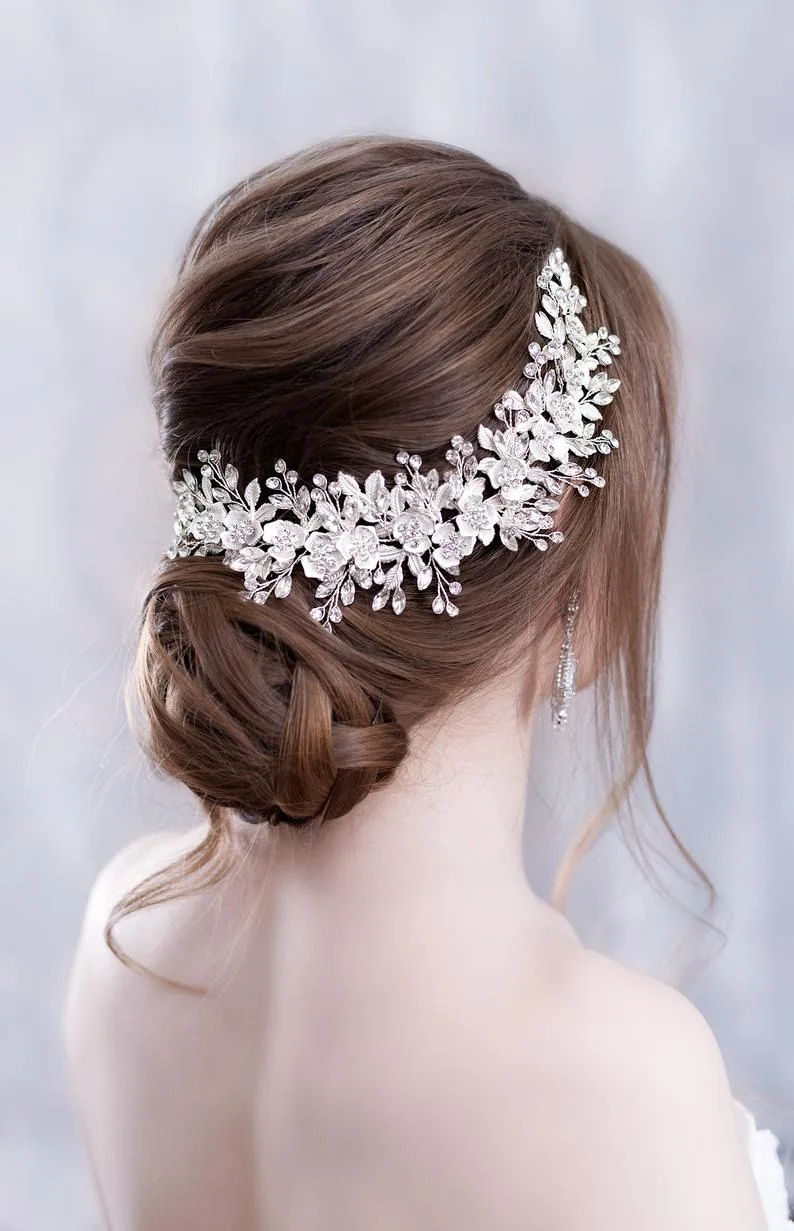
A top knot is the most practical winter wedding updo: the hair is completely out of the way, clear of coats and collars, and it stays put through hours of dancing. Dress it up with a crystal comb slid into the base and it transforms from a gym style into a bridal one. It is also the best choice for brides who want to show off a high neckline or statement earrings.
Best for: modern winter weddings, and brides who want height and drama. How to style it: smooth the hair into a high ponytail, twist it into a knot, pin it in a circle, then slide the comb in at the front of the bun. What to ask your stylist: ask for the knot to be pinned in two places, not one, because a top knot is heavy. Maintenance: a spare pin in your clutch. Common mistake: placing the knot too far forward, which looks like a unicorn horn — it should sit at the crown. Quick verdict: the most practical glamorous updo.
19. Half-Up Waterfall Braid With Candlelight Shine
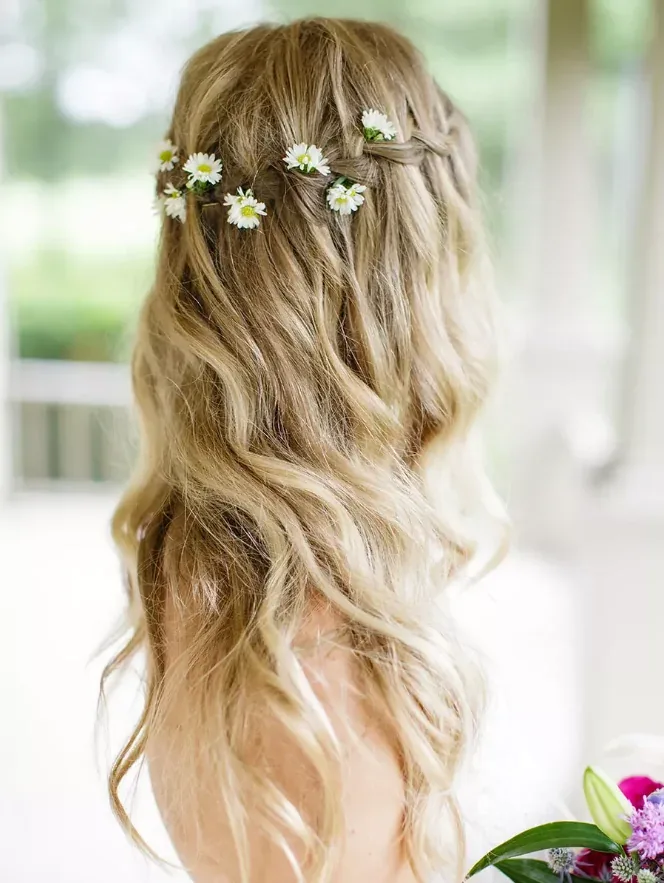
The waterfall braid is the prettiest half-up style: a braid that runs across the back of the head, letting strands fall through it like water. In winter it looks magical in candlelight, because the falling strands catch the light as they move. It keeps the front hair out of the face while leaving the lengths free, and it works with a veil pinned underneath the braid.
Best for: romantic winter weddings, and brides with medium to long hair. How to style it: braid from one temple to the other, dropping a strand at each twist and picking up a new one, then pin the end behind the ear. Pros and cons: it is beautiful and unique, but it is a technical braid — practise it before the day or book a stylist. Who should avoid it: very short hair, which cannot form the braid. Cost and time: 30 minutes with a stylist. Quick verdict: the waterfall, frozen in candlelight.
20. The Classic Ballerina Bun, Winter Edition
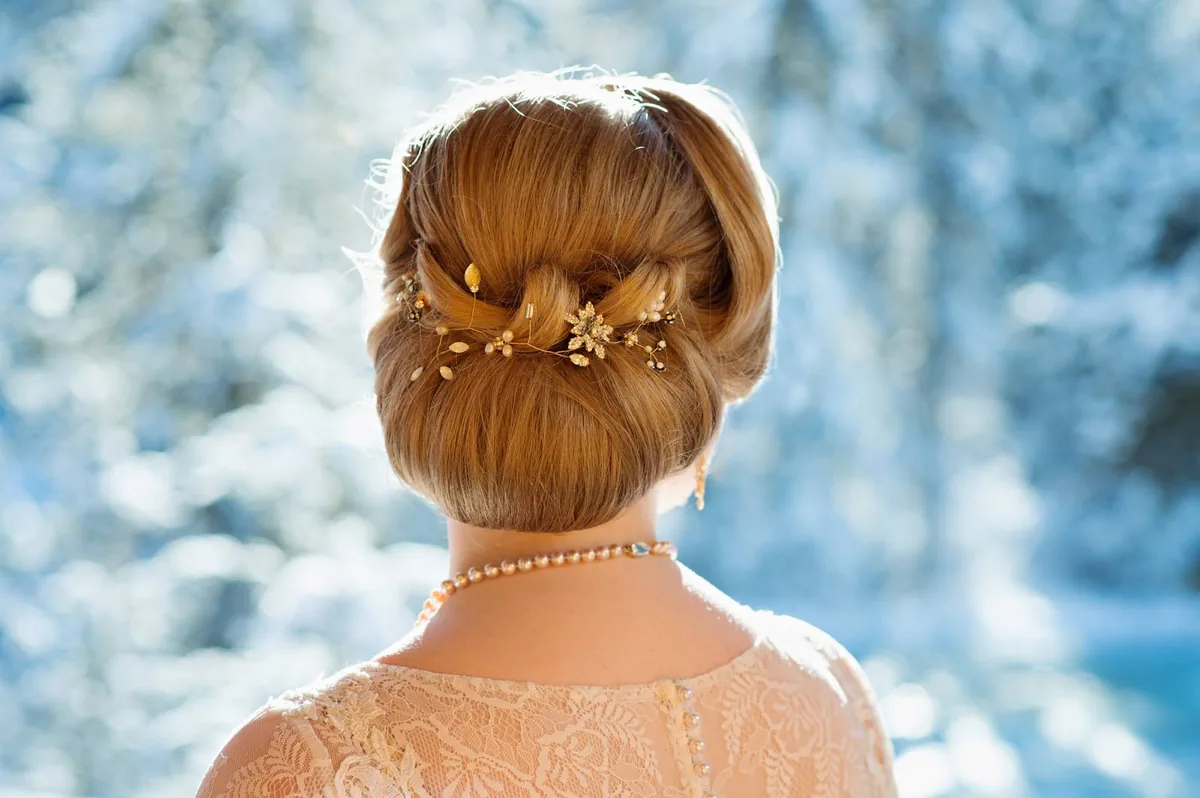
The ballerina bun is the cleanest, most classic updo of all: hair swept smoothly up into a neat, round bun at the crown. The winter edition adds a velvet ribbon around the base or a crystal pin, and a little more softness at the front so it does not look severe in candlelight. It is the style for brides who love ballet, minimalism, or simply want a style that will never, ever move.
Best for: minimalist winter weddings, and brides who want a timeless look. How to style it: smooth the hair back with a brush and gel, secure a high ponytail, twist it into a bun and pin in a circle. What to ask your stylist: ask for a doughnut form inside the bun if your hair is fine — it gives a perfect round shape. Maintenance: none — this is the lowest-maintenance style in the guide. Common mistake: making it too high, which can look harsh; the crown, not the very top, is the sweet spot. Quick verdict: timeless, with a velvet twist.
21. Winter Berry and Pine Hair Crown
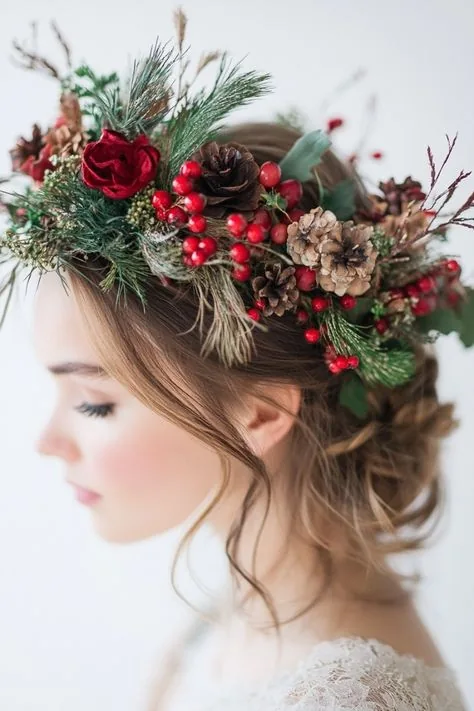
A crown of winter berries, pine and eucalyptus is the most seasonal hair accessory a winter bride can wear, and it works with almost any hairstyle — a low bun, loose waves or a braided crown. The deep red berries against dark green pine look stunning in photographs, especially in the snow, and the crown ties the hair to the rest of the wedding’s winter decorations. Ask your florist to make it the morning of the wedding so it stays fresh.
Best for: woodland, rustic and garden winter weddings. How to style it: have the florist wire the crown to fit snugly, then place it over your finished style and pin it in two hidden places. Pros and cons: it is breathtaking and completely seasonal, but fresh berries and greenery wilt — keep the crown cool until the ceremony and have spare sprigs. Cost and time: a florist-made crown costs about the same as a small bouquet. Who should avoid it: anyone allergic to pine or eucalyptus — ask your florist about alternatives. Quick verdict: the season, worn on your head.
22. The Sophisticated French Roll
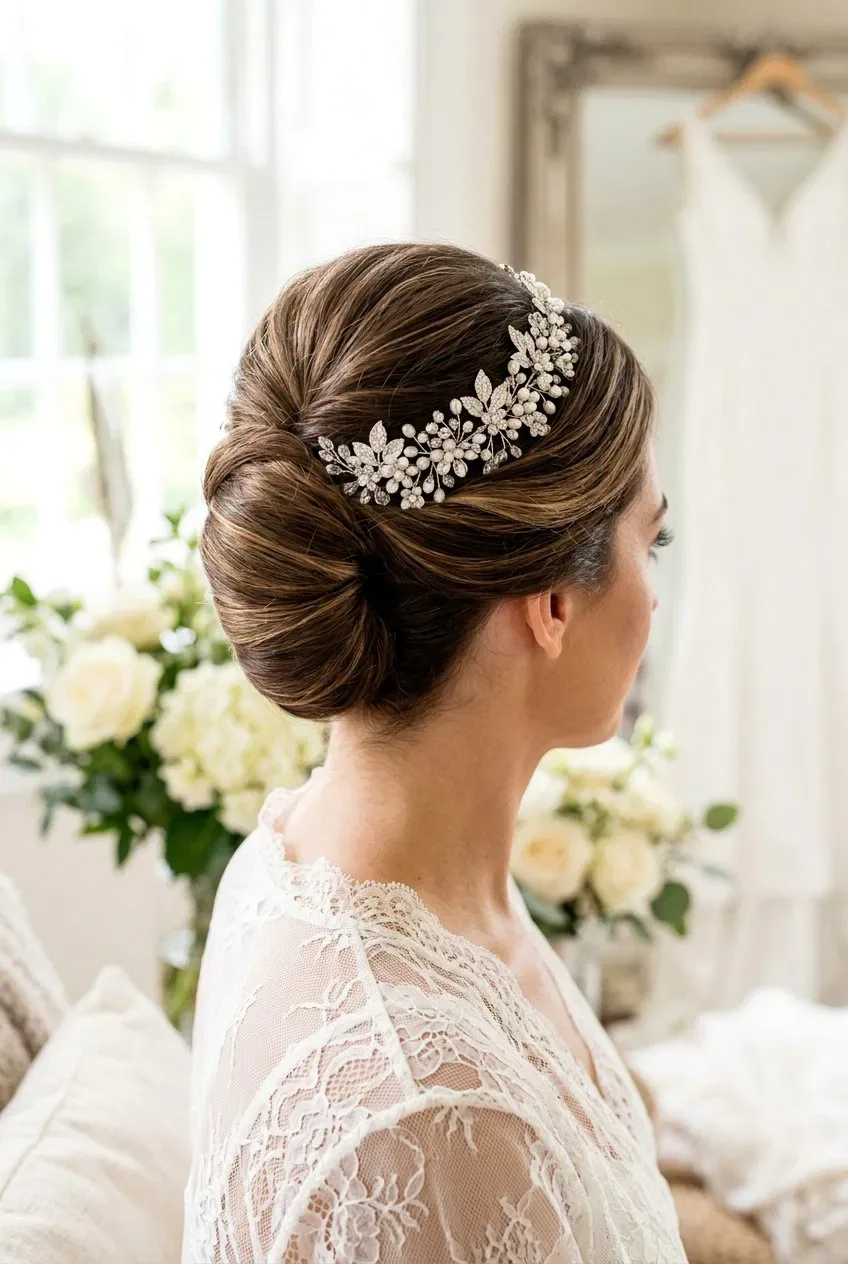
The French roll is the French twist’s softer sister: hair rolled and tucked into a smooth vertical shape, but with a looser, more textured finish and a few soft pieces at the front. It is sophisticated without being stiff, and it sits beautifully under a veil or a fur stole. In winter it is a smart choice because the rolled shape is naturally secure — wind and snow cannot undo it.
Best for: elegant winter weddings, and brides who want a classic updo with softness. How to style it: backcomb the crown, sweep the hair to one side, roll it up and pin along the seam, then loosen a few face-framing pieces. What to ask your stylist: ask for the roll to be pinned along its whole length, not just at the top and bottom. Maintenance: a quick check in the mirror after the coat comes off. Common mistake: rolling it too loosely, which unravels by the reception — it should feel firm. Quick verdict: classic, with a softer edge.
23. Side Braid With Velvet Ribbon Woven In
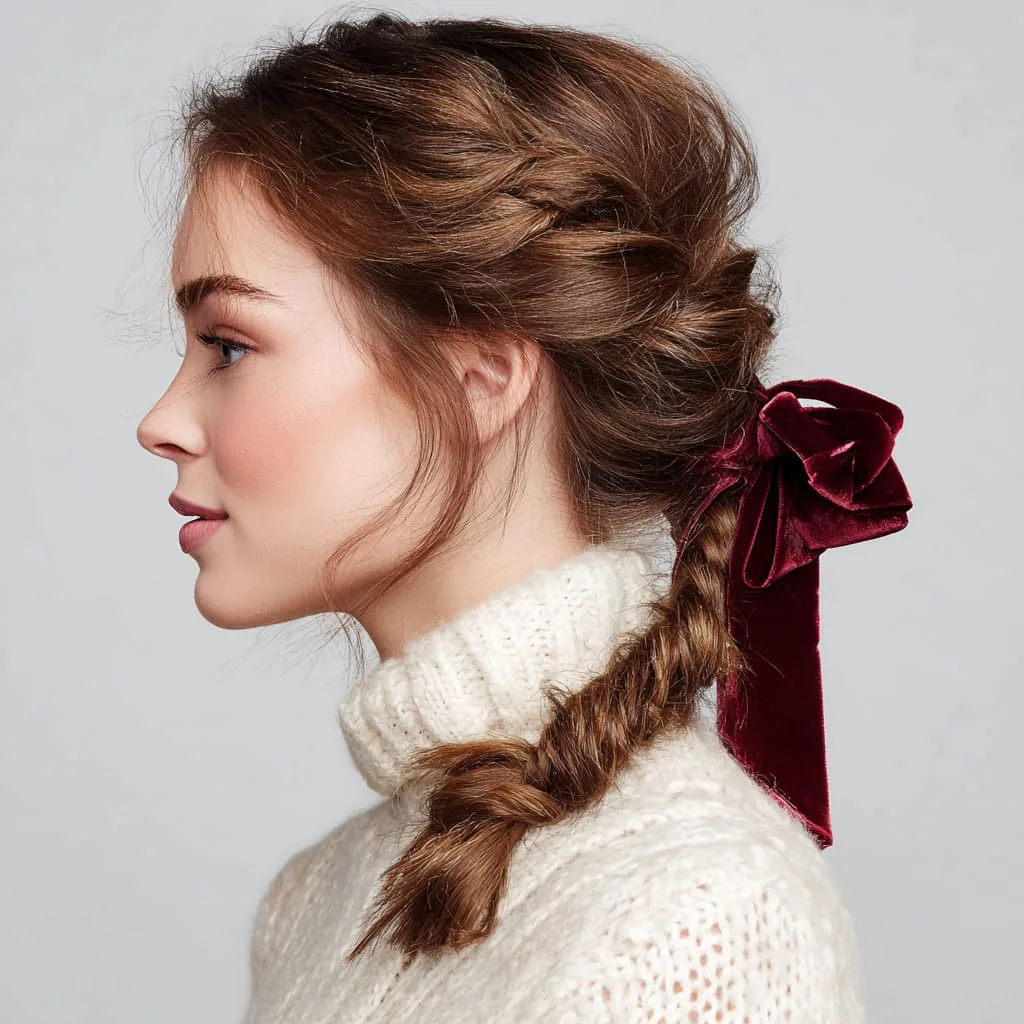
A side braid with a velvet ribbon woven through it is the winter version of a classic romantic braid: the ribbon adds colour, texture and a seasonal touch, and it grips the braid so it holds longer. The braid sits over one shoulder, clear of the coat collar, and the ribbon’s ends can be tied in a small bow at the bottom. It is a beautiful choice for bridesmaids as well as brides.
Best for: bridesmaids, boho brides and anyone with long hair. How to style it: tie the ribbon at the top of the braid, then weave it through as one of the three strands, and finish with a bow. Pros and cons: it is pretty, practical and cheap, but weaving a ribbon takes a little practice — do a trial run. Who should avoid it: very short hair, which cannot hold a side braid. Cost and time: 20 minutes, one velvet ribbon. Quick verdict: the braid, dressed for winter.
24. The Glossy Straight Blowout Under a Veil
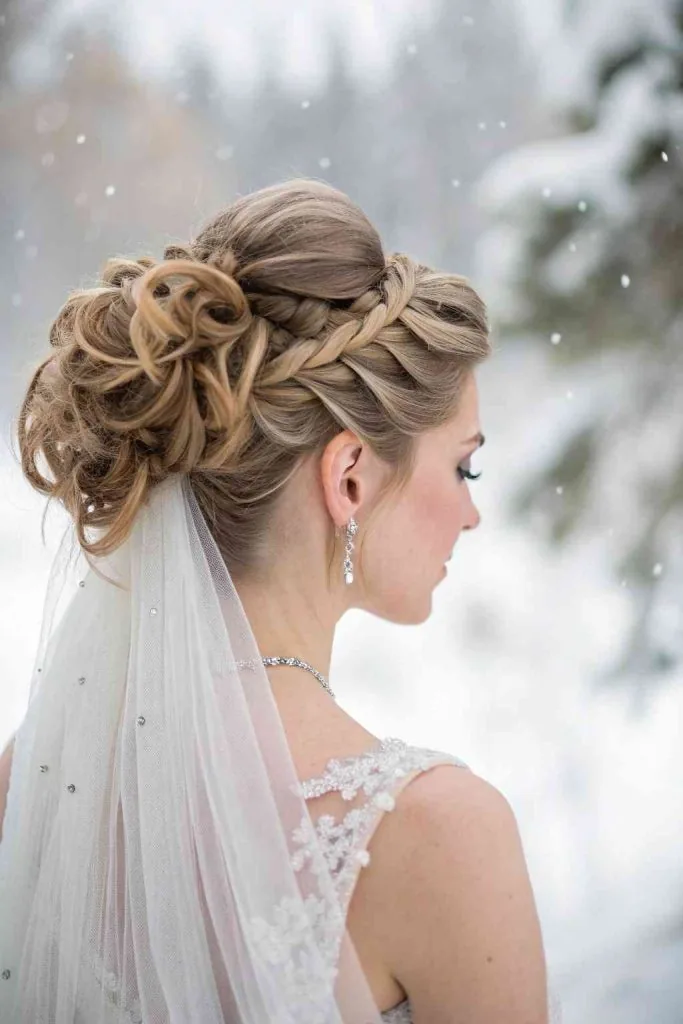
Sometimes the simplest style is the most striking: a glossy, perfectly straight blowout worn under a veil. In winter it works because the veil protects the hair from the cold and the damp, and the sleek, shiny finish looks incredible in candlelight and flash photography. The key is a smoothing serum and a flat iron, plus a veil that is pinned securely so it does not slide and flatten the crown.
Best for: brides who love sleek, modern hair, and indoor winter weddings. How to style it: blow-dry smooth with a round brush, flat-iron in sections, finish with a shine serum on the ends only. Common mistake: over-conditioning on the day, which makes straight hair look limp — use a light serum, not a heavy oil. Maintenance: a small comb and a travel spray for the part. What to ask your stylist: ask for the veil to be pinned in a way that lifts, not flattens, the crown. Quick verdict: sleek, shiny and simple.
25. The Textured Updo That Hides a Hat Line
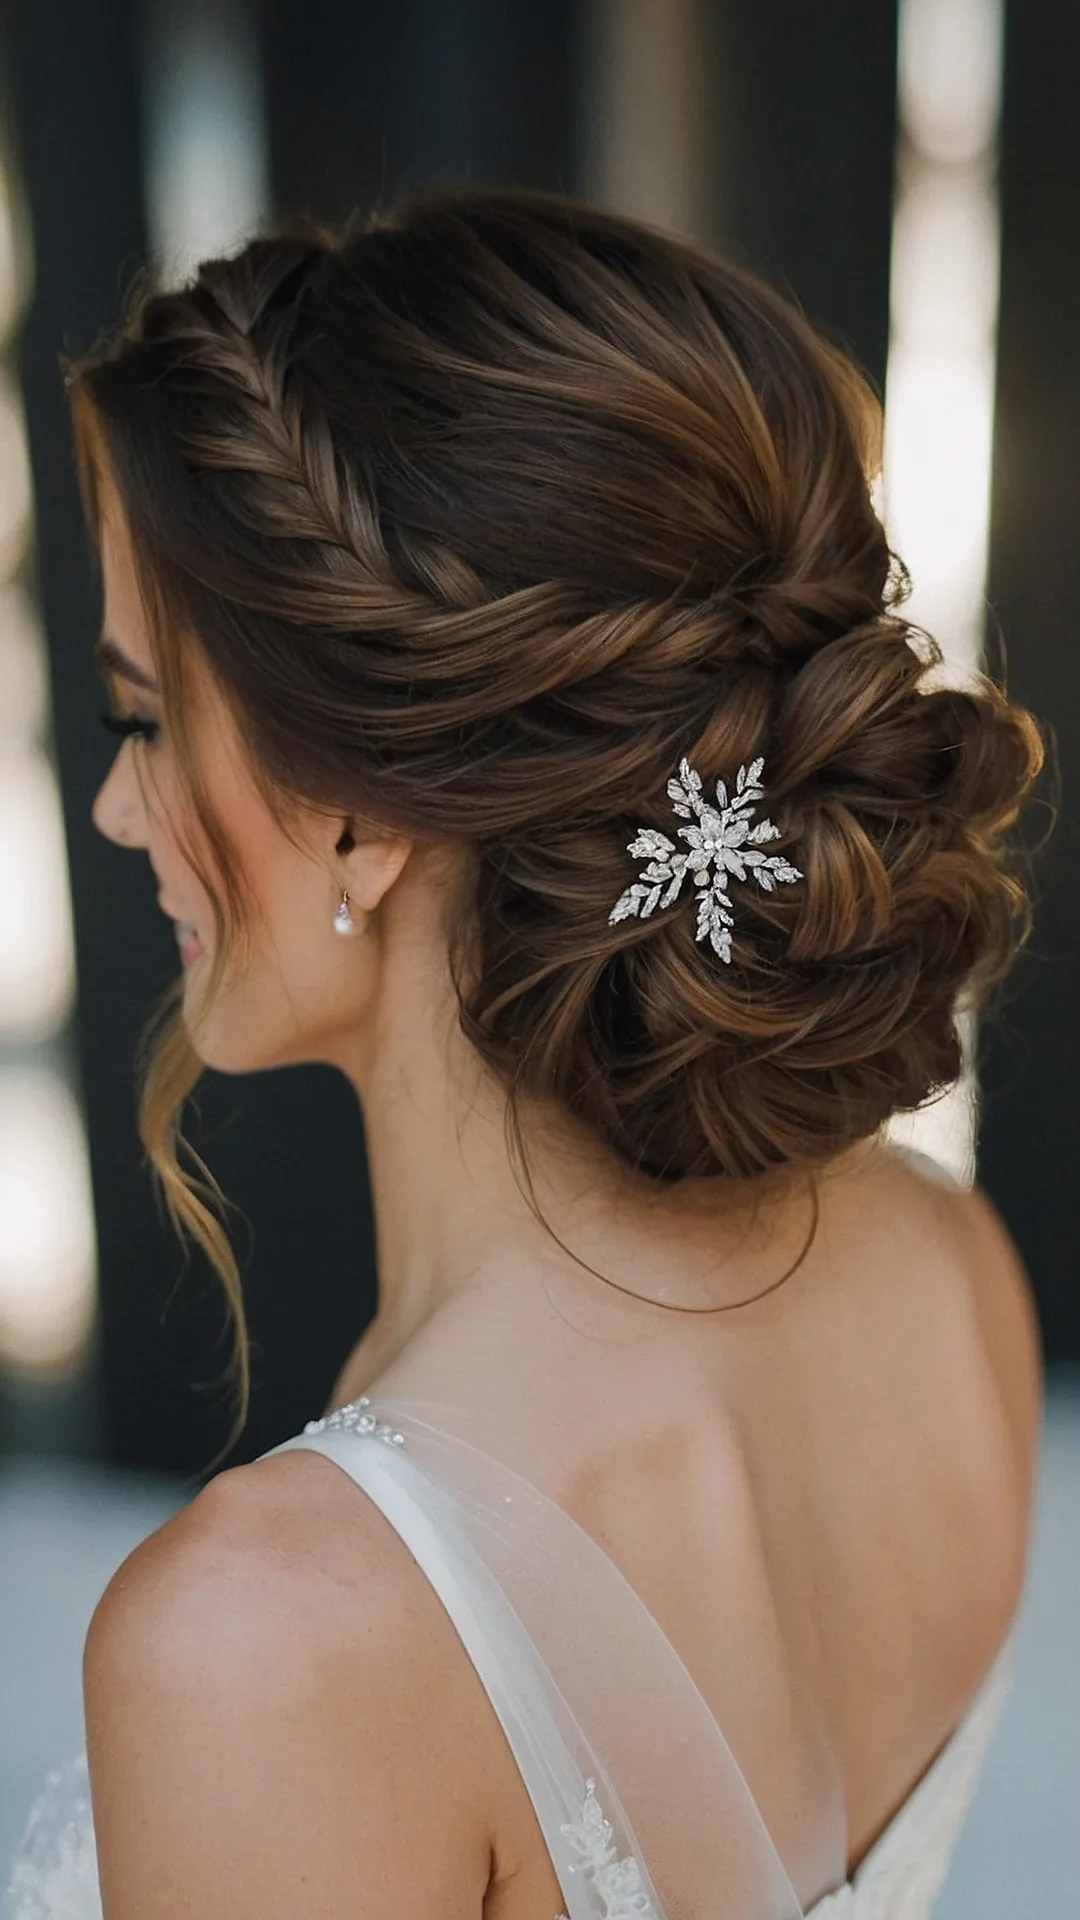
Every winter bride knows the hat-line problem: you arrive in a hat or a hood, take it off, and there is a dent across your crown. The textured updo solves it by design — the hair is pinned up in soft, tousled sections with volume built in, so any flattening just blends into the texture. It is the style for brides who will actually be outside in the cold, not just posing in it.
Best for: outdoor winter weddings, and brides travelling between venues. How to style it: add texture spray, curl loosely, then pin the hair up in soft sections, leaving the crown deliberately tousled. Pros and cons: it is the most forgiving style in this guide, but it needs a stylist who understands texture — a too-neat version defeats the purpose. Maintenance: shake it out gently and re-pin one section if needed. Cost and time: 35 minutes. Quick verdict: the updo that expects the hat.
26. The Romantic Low Bun With a Lace Veil
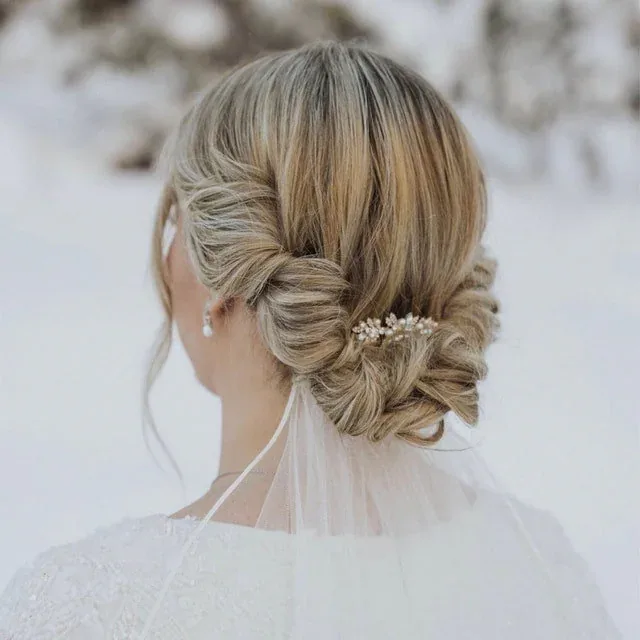
A low bun with a lace-edged veil is the most traditional winter bridal look, and for good reason: the bun gives the veil a solid anchor, the lace softens the whole silhouette, and the combination looks timeless in every photograph. The bun should sit low and soft, not tight, so the veil drapes naturally over it rather than pulling it flat. A few loose tendrils at the front keep it romantic.
Best for: traditional and church winter weddings, and brides wearing a lace veil. How to style it: build a soft low bun, pin it securely, then pin the veil just above the bun so it drapes over it. What to ask your stylist: ask for the veil to be tried on with the finished bun at the trial — the placement matters more than you think. Common mistake: pinning the veil too high, which pulls the bun apart. Maintenance: a spare pin for the veil. Cost and time: 30 minutes plus the veil. Quick verdict: the classic, done right.
27. Curly Updo With Gold Hair Pins
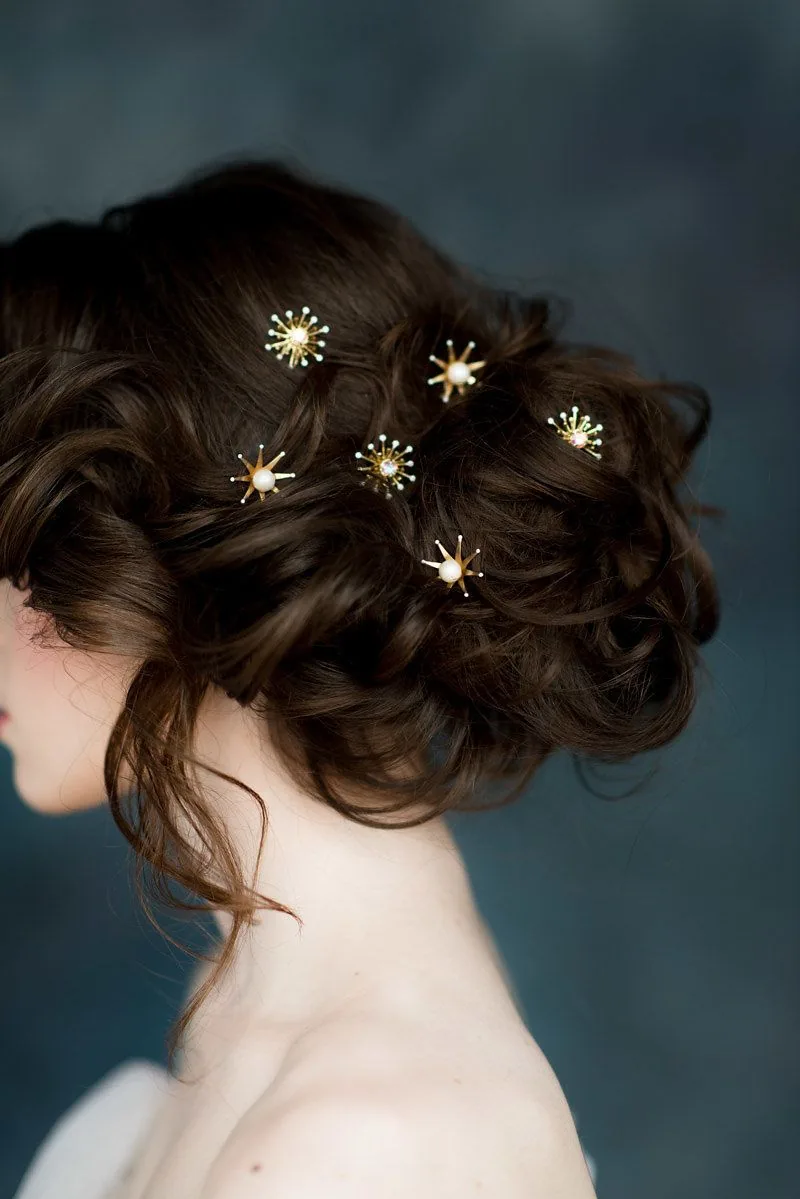
Curly hair makes the most beautiful winter updos, because the curls themselves provide the texture and volume that straight hair has to fake. Gather the curls loosely into a low or mid-height updo, pin them in soft clusters, and add gold hair pins that catch the candlelight like tiny stars. The gold warms up the whole look and contrasts beautifully with a white or ivory dress.
Best for: brides with naturally curly or coily hair. How to style it: define the curls with a curl cream, gather them loosely, pin in clusters rather than one tight bun, then place the gold pins along the shape. Pros and cons: the texture is naturally gorgeous and the style holds well, but curly hair needs moisture in winter — a leave-in cream before styling is essential. Who should avoid it: nobody with curls — this style is made for them. Maintenance: a little curl cream on your fingertips for any frizz. Quick verdict: curls, crowned in gold.
28. The Retro Victory Roll Updo
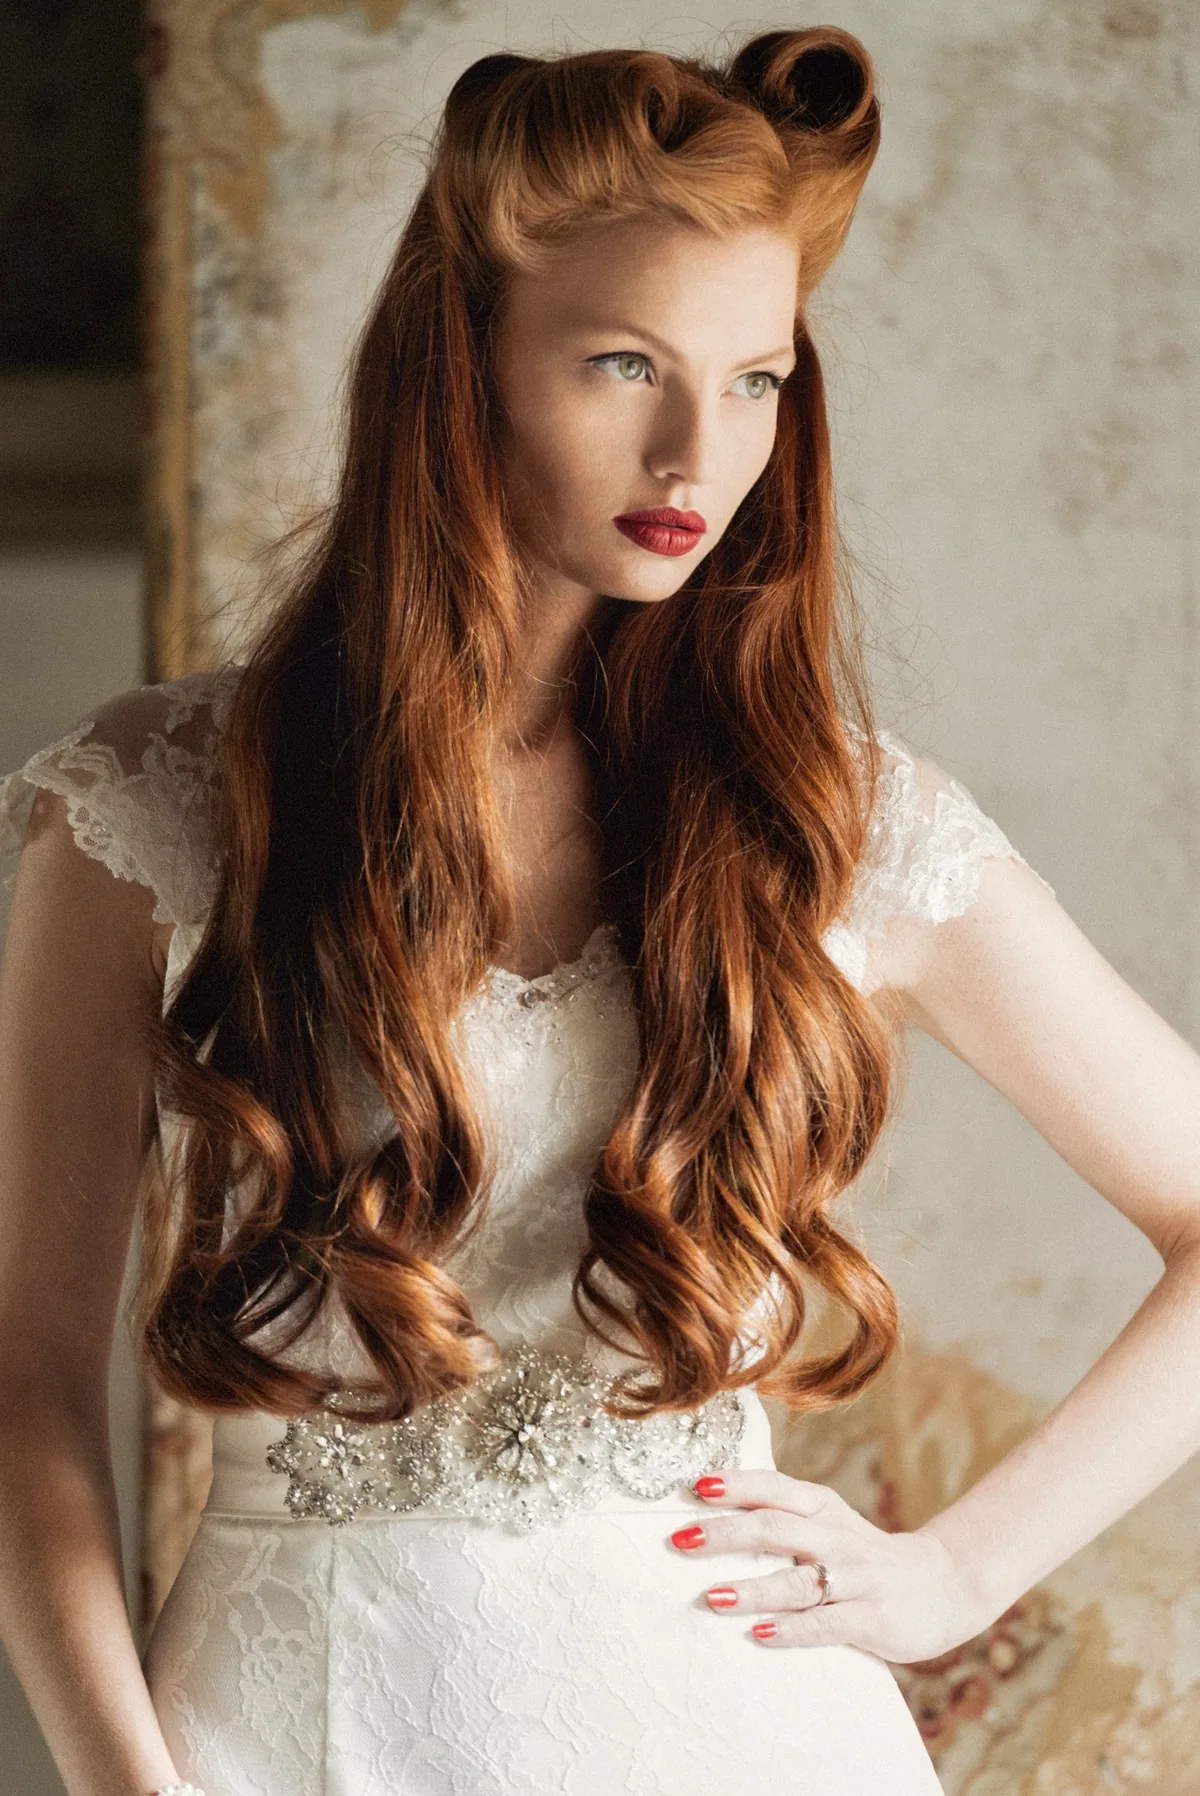
Victory rolls are pure 1940s glamour: two sculpted rolls of hair on top of the head, with the rest pinned up or left in waves. In winter they are a brilliant choice, because the rolls are set firmly and sit high above coats and collars, and they look spectacular with a red lip and a faux-fur stole. This is the style for a vintage-loving bride who wants to be remembered.
Best for: vintage-themed winter weddings, and brides who love retro glamour. How to style it: section the front hair, roll each section around your fingers, pin it, and set with strong-hold spray. What to ask your stylist: ask for a trial — victory rolls take practice and look best when they are symmetrical. Common mistake: making the rolls too small, which looks like a mistake rather than a style — they should be bold. Cost and time: 45 minutes with a stylist. Quick verdict: the most dramatic vintage winter look.
29. Sleek High Ponytail With a Crystal Wrap
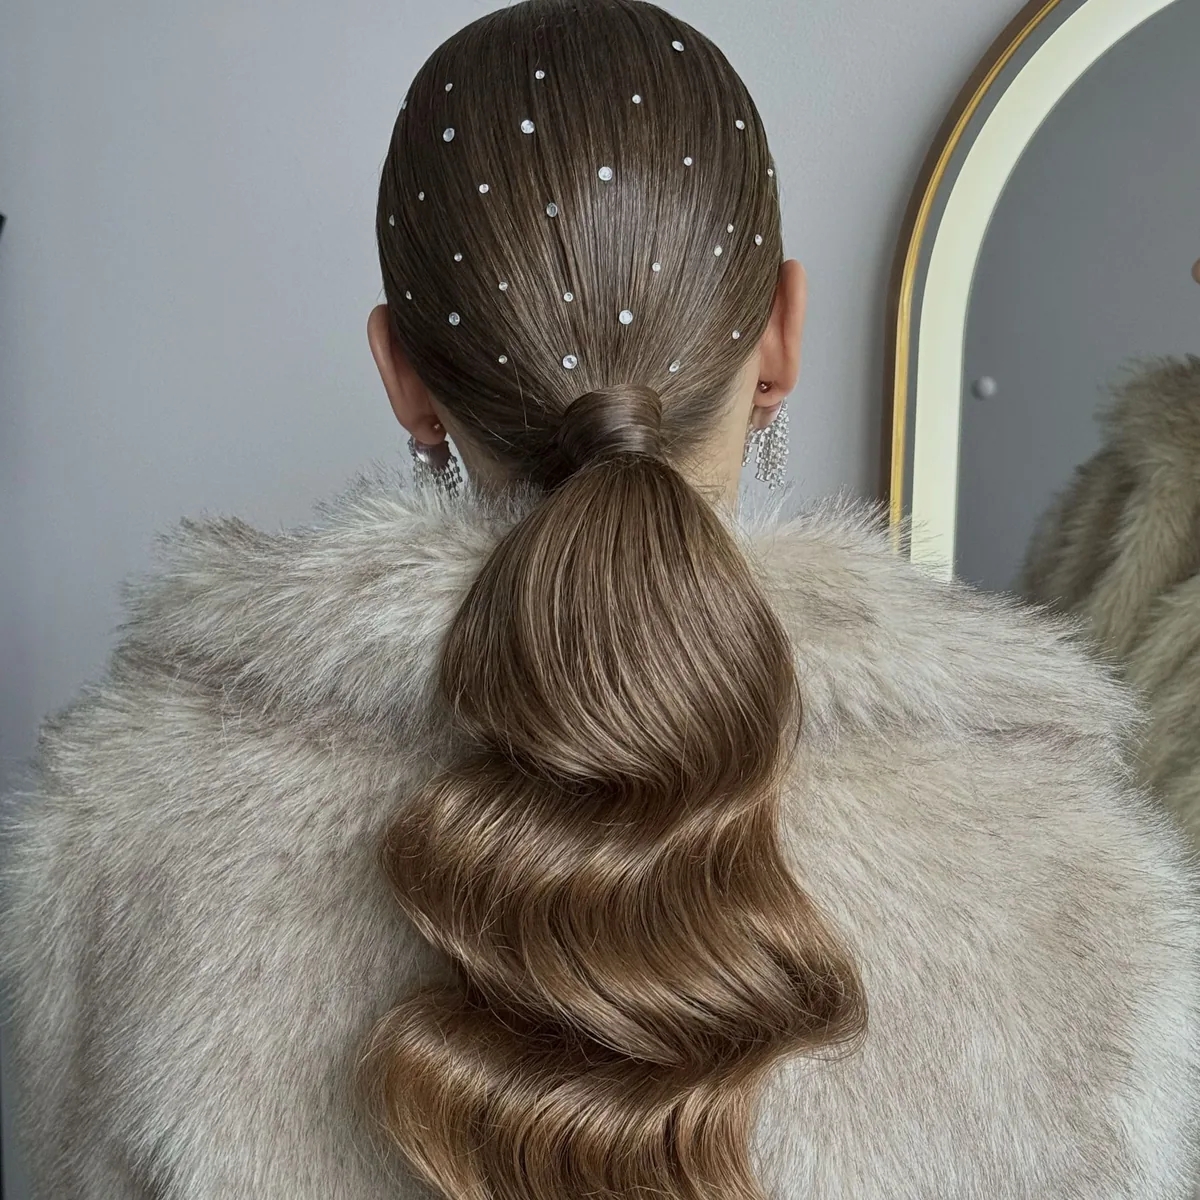
A sleek high ponytail is bold, modern and surprisingly bridal when it is finished with a crystal wrap around its base. It lifts the face, shows off the shoulders and neckline, and stays completely clear of a coat or a fur stole. It is also one of the most secure styles: a tight, smooth ponytail does not move, no matter how much dancing happens. For a winter wedding it is the modern bride’s answer to the updo.
Best for: modern winter weddings, and brides with long, thick hair. How to style it: smooth the hair back with gel and a brush, secure it high, wrap a strand around the base, then wind the crystal wrap around it. Pros and cons: it is striking and practical, but it can pull at the hairline — keep it firm, not tight. Maintenance: a quick smoothing with your hands and a little serum. Who should avoid it: anyone with very fine hair, which may not hold the height. Cost and time: 20 minutes plus the crystal wrap. Quick verdict: the ponytail, grown up and sparkling.
30. The Dreamy Mermaid Waves
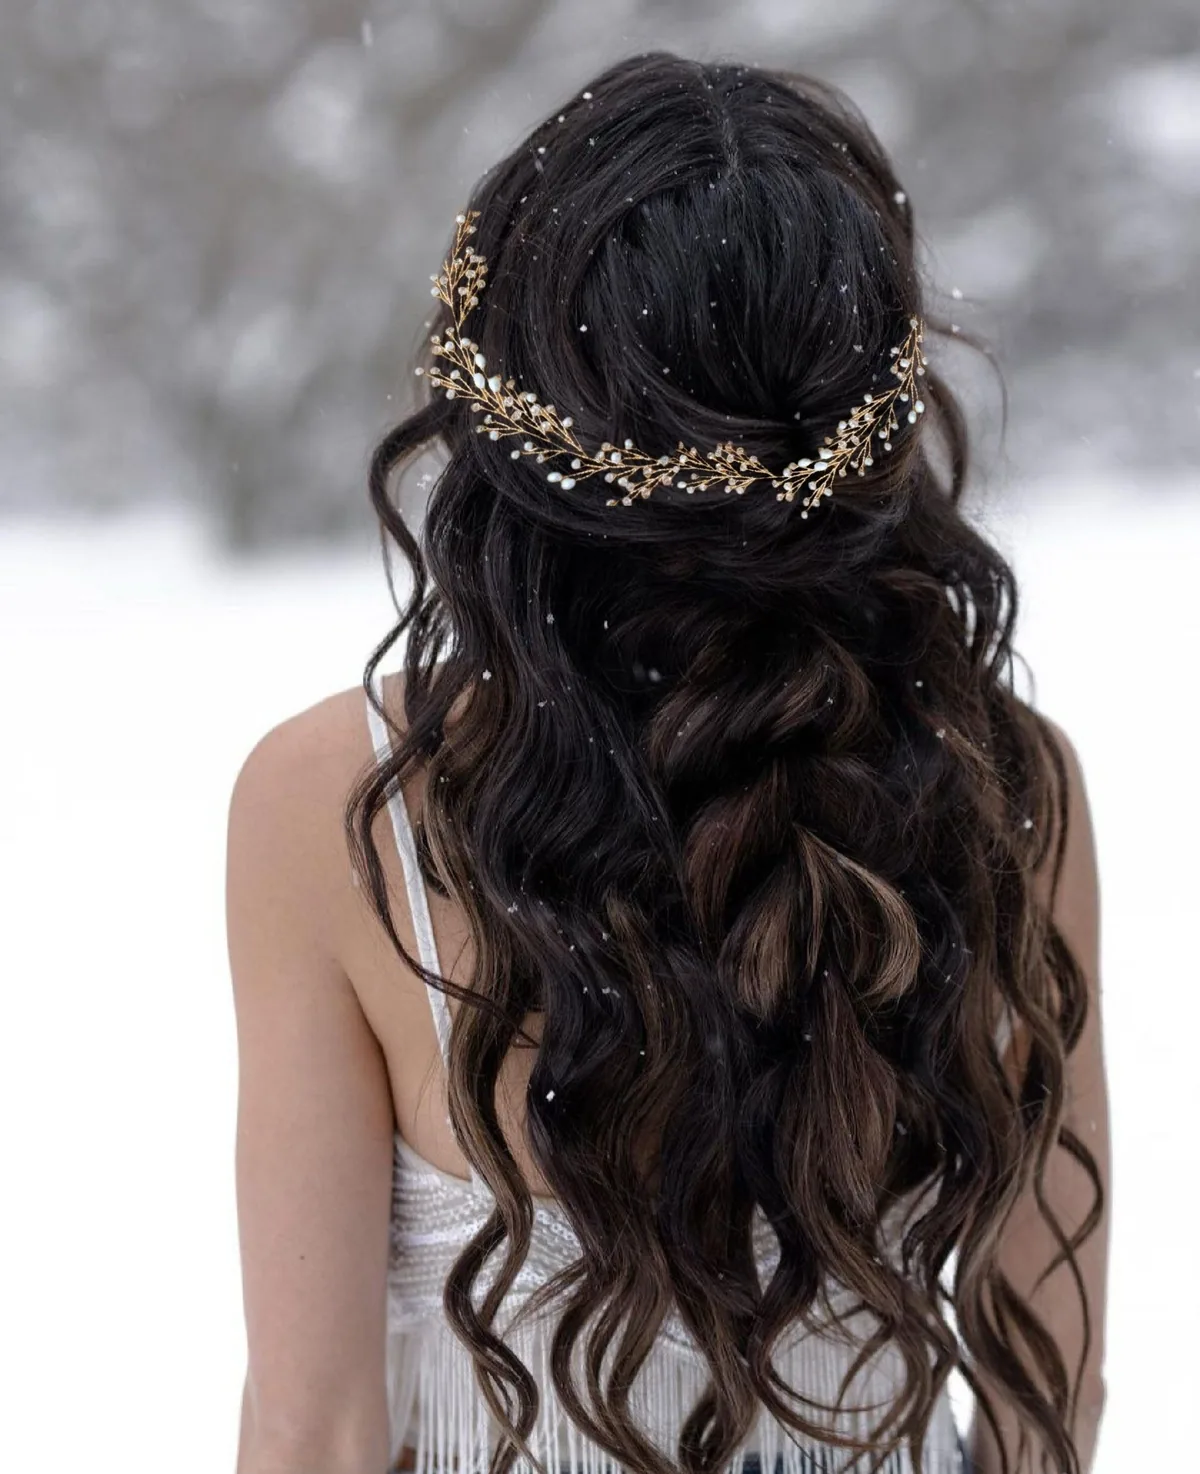
Mermaid waves are long, soft, flowing waves that fall past the shoulders like water, and in winter they look dreamy against a velvet dress or a snowy backdrop. The secret is setting them firmly: use a large-barrel iron, pin each wave to cool, and finish with a flexible-hold spray so the waves move without falling. The result is hair that looks like it belongs in a fairytale — and photographs like one too.
Best for: brides with long hair, and mostly indoor winter weddings. How to style it: curl in large sections away from the face, pin to cool, then brush out gently with your fingers. Common mistake: curling the hair too tightly, which makes it look like ringlets rather than waves — the barrel should be large. Maintenance: a travel spray and a wide-tooth comb. What to ask your stylist: ask for the waves to be set with a strong-hold spray at the roots, so they do not drop. Quick verdict: the fairytale, in waves.
31. Low Chignon With a Faux-Fur Headband
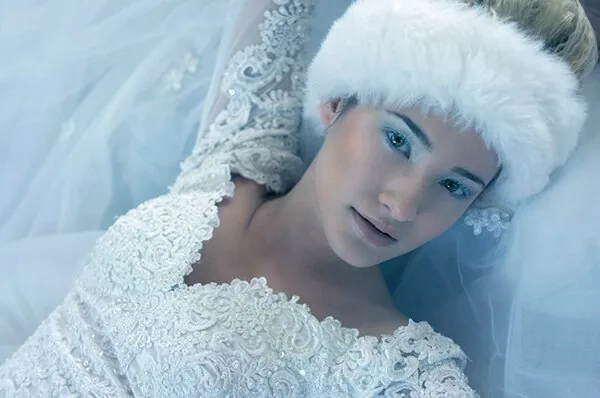
A low chignon with a faux-fur headband is winter’s coziest bridal look: the chignon keeps the hair neat and secure, while the soft fur band adds warmth, texture and a touch of old-world glamour. It is the style for a bride who wants to look like she stepped out of a snow globe, and it works beautifully with a high-necked dress or a cape. Choose a fur band in a tone that matches your stole or your coat for a pulled-together look.
Best for: snowy outdoor ceremonies, and brides who love cozy winter textures. How to style it: build the chignon first, then place the fur band across the crown and pin it behind the ears. Pros and cons: it is warm, soft and very photogenic, but the band can flatten the crown — build a little height at the front before placing it. Cost and time: 30 minutes plus the headband. Who should avoid it: anyone who dislikes the feeling of a band across the forehead. Quick verdict: the snow-globe bride.
32. The Braided Halo With Frosted Baby’s Breath
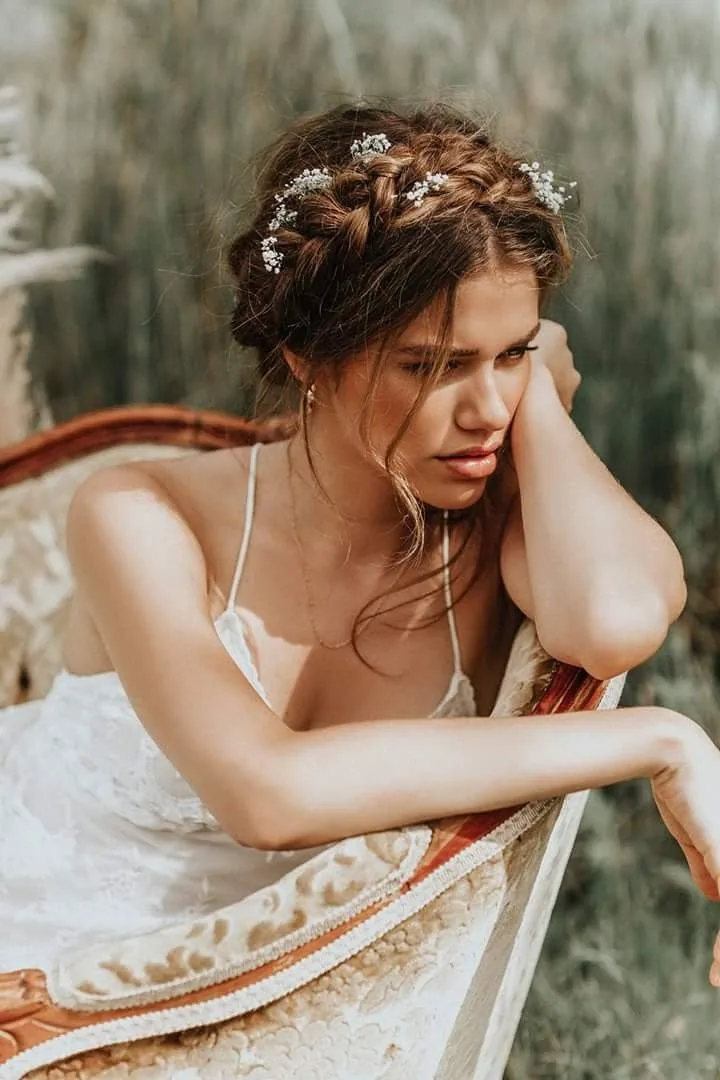
A braided halo with frosted baby’s breath woven through it is one of the most romantic winter wedding hairstyles: the braid circles the head, the tiny white flowers look like frost, and the whole style glows in candlelight. It is a favourite for garden and greenhouse winter weddings, where the flowers echo the decorations. Ask your florist to frost the baby’s breath with a little shimmer spray for the full effect.
Best for: romantic and garden winter weddings, and brides with medium to long hair. How to style it: braid around the head, pin the end under the start, then tuck small sprigs of baby’s breath into the braid. What to ask your stylist: ask for the braid to be pulled apart gently for fullness, so the flowers show. Maintenance: check the flowers after the outdoor photos and replace any that have wilted. Common mistake: using too many flowers, which hides the braid — a little goes a long way. Quick verdict: frost, in flower form.
33. Elegant Twisted Updo With Pearl Accents
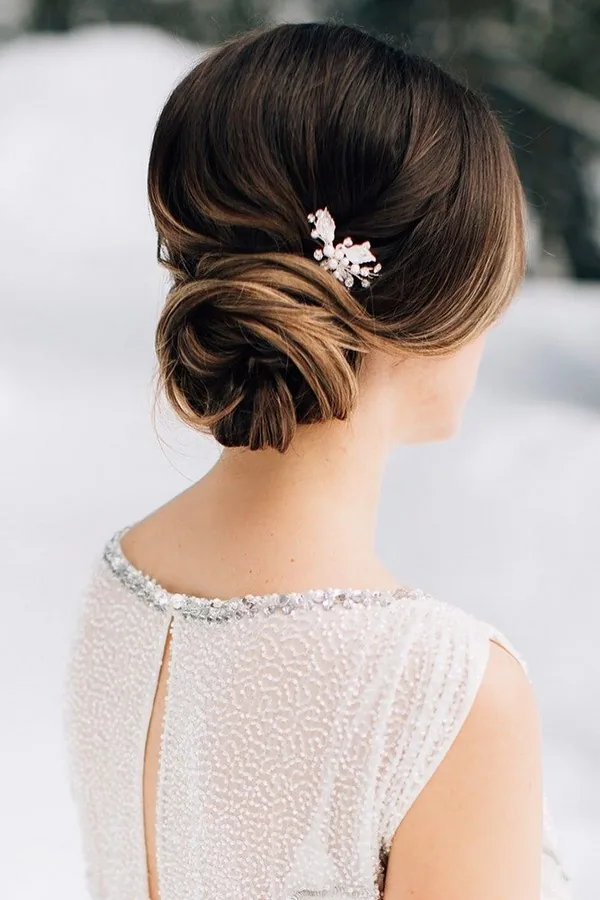
A twisted updo is elegance without effort: sections of hair twisted and pinned into a soft, sculpted shape, with pearl accents placed along the twists. It is less formal than a chignon and softer than a French twist, which makes it perfect for brides who want a polished look that still feels romantic. The pearls catch the light like snow, and the twists hold beautifully in cold air.
Best for: brides who want a soft, polished updo, and anyone wearing pearls. How to style it: twist sections of hair back from the face, pin them in overlapping layers, then place pearl pins along the twists. Pros and cons: it is secure, flattering and easy to touch up, but it needs enough hair to twist — very short hair will struggle. Cost and time: 35 minutes plus pearl pins. Maintenance: a spare pin and a quick mirror check after dancing. Quick verdict: twists, pearls and candlelight.
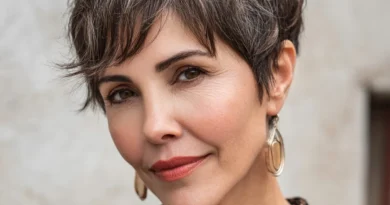
34. The Winter Pixie With a Crystal Headband
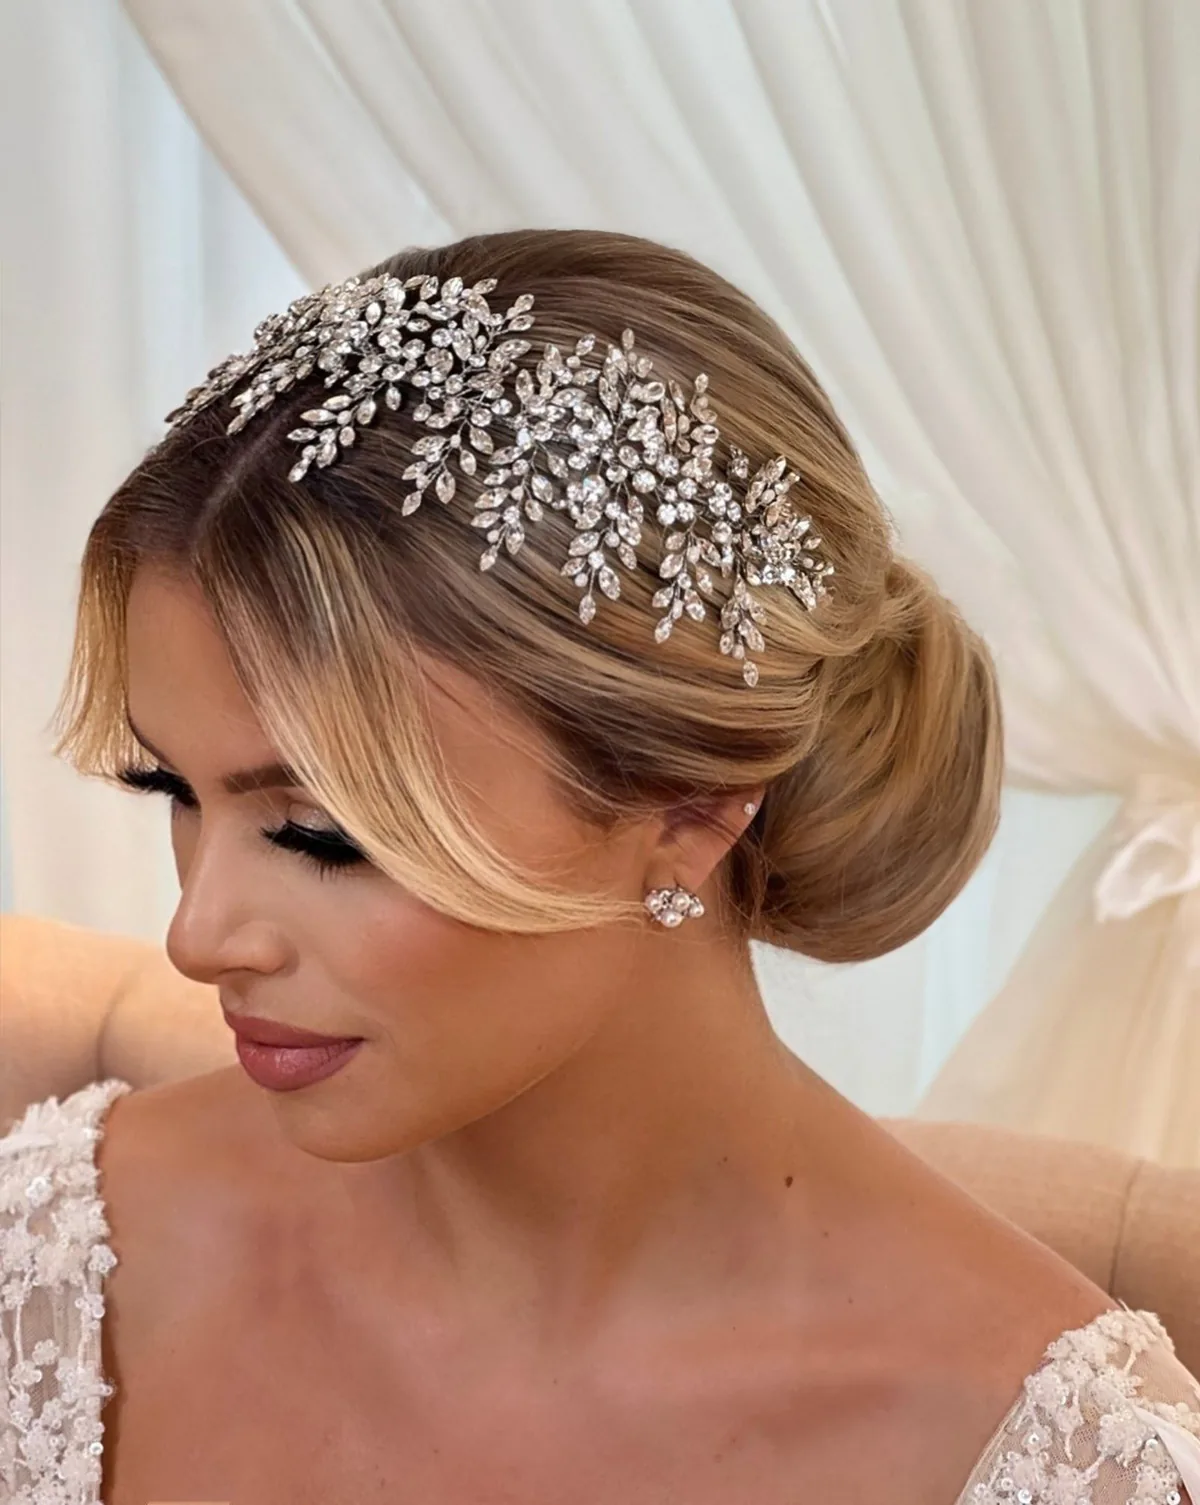
Short hair is the easiest winter wedding length, and a pixie with a crystal headband proves it: the pixie sits above the coat collar, never gets flattened by a hood, and the crystal band adds all the sparkle a longer style would need pins and veils to achieve. It is chic, modern and completely practical — and it photographs beautifully, because the face is the focus.
Best for: brides with pixies and short bobs, and anyone who wants a low-maintenance day. How to style it: add texture cream, style the pixie with your fingers, then place the crystal headband just behind the hairline. What to ask your stylist: ask for a little extra texture at the crown, so the headband has something to sit against. Common mistake: placing the headband too far back, which makes it disappear — it should sit just behind the front pieces. Cost and time: 15 minutes plus the headband. Quick verdict: short hair, maximum sparkle.
35. Long Layers With a Soft Winter Blowout
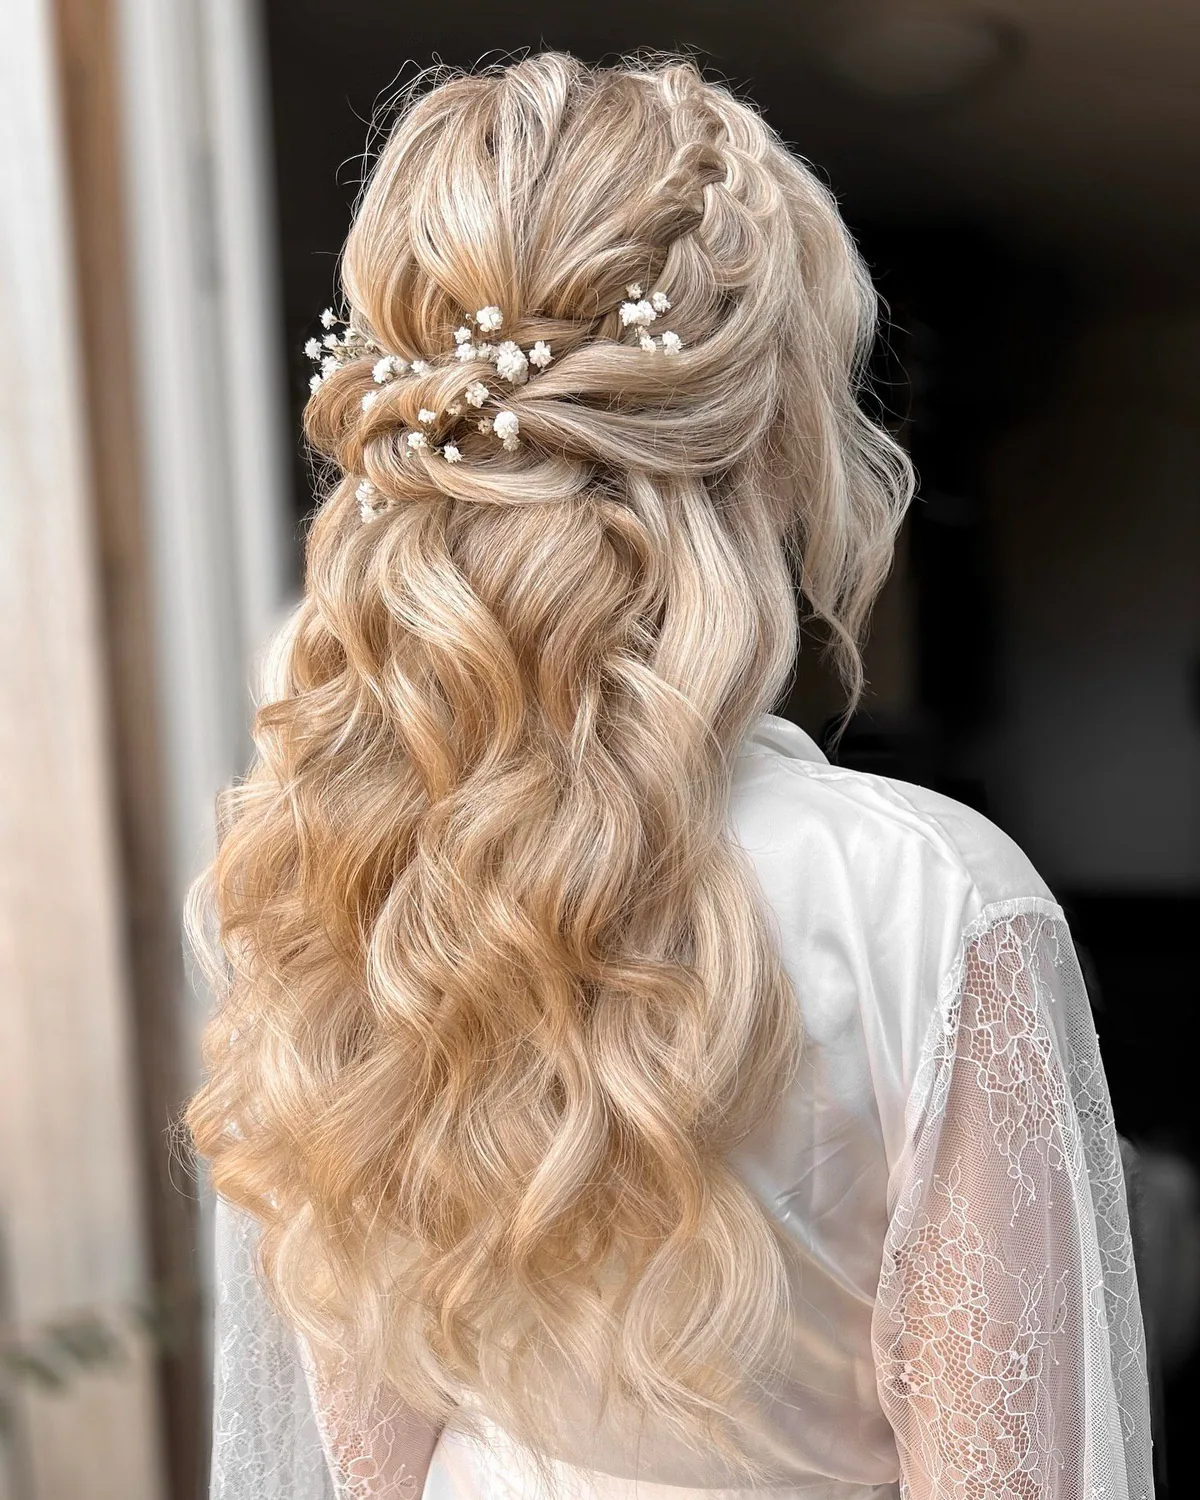
Long, layered hair with a soft blowout is the winter wedding look for brides who want their hair down but still want it to behave. The layers give movement, the blowout gives shine, and the softness looks wonderful in candlelight. The trick is a volumising mousse at the roots and a round brush, so the blowout has body that survives the coat and the car journey. It is the style for brides who love their long hair and refuse to pin it up.
Best for: brides with long, layered hair, and indoor winter weddings. How to style it: blow-dry with a large round brush, flick the ends out slightly, and finish with a light-hold spray. Pros and cons: it is gorgeous and natural-looking, but it is the most vulnerable style to winter weather — save it for mostly indoor days. Who should avoid it: anyone with very fine hair in a snowy ceremony. Maintenance: a travel spray and a quick brush. Cost and time: 40 minutes. Quick verdict: long hair, at its best.
36. The Statement Side Bun
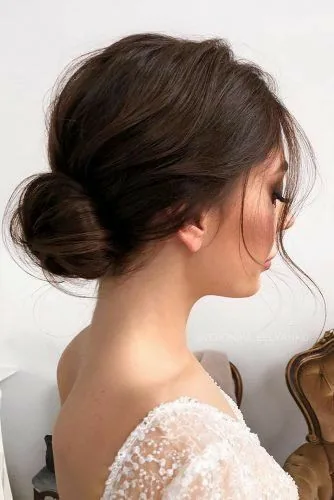
A side bun is the asymmetric answer to the classic chignon: hair swept to one side and pinned into a soft, full bun at the nape, leaving the other side of the neck bare for earrings and a bare shoulder. In winter it is a smart choice, because the bun sits clear of the coat collar on one side and looks stunning from the front in photographs. Add a crystal pin or a velvet ribbon and it becomes a statement.
Best for: brides who love asymmetry, and anyone wearing statement earrings. How to style it: sweep the hair to one side, gather it at the nape, twist it into a bun and pin it, then leave a few face-framing pieces loose. What to ask your stylist: ask for the bun to be pinned in at least four places, because a side bun is heavier on one side. Common mistake: placing the bun too high, which makes it look like a side ponytail. Maintenance: a quick check after the coat comes off. Quick verdict: the chignon, with a twist.
37. The Snow Queen Braided Updo
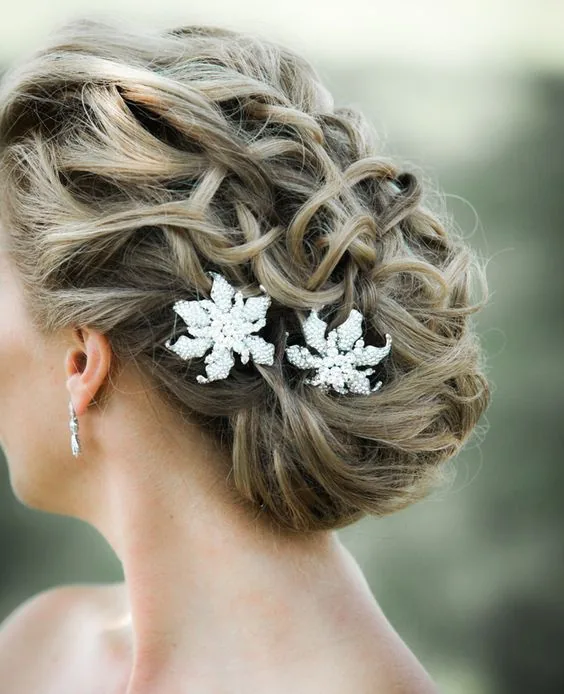
The Snow Queen braided updo is the showstopper of this guide: multiple braids woven together and pinned into a sculpted updo, finished with crystal pins that sparkle like ice. It is the most intricate style here, and the most secure — once pinned, it will not move through snow, wind or a night of dancing. It is the style for a bride who wants her hair to be a talking point, and for a winter wedding that deserves a little drama.
Best for: brides who want a statement style, and formal winter weddings. How to style it: braid several sections — a crown braid, a fishtail, a Dutch braid — then weave and pin them together into an updo, and finish with crystal pins. Pros and cons: it is unforgettable and utterly secure, but it takes a skilled stylist and at least an hour — book a trial. Who should avoid it: anyone short on time on the morning; this is not a DIY style. Cost and time: 60–75 minutes with a stylist. Quick verdict: the crown jewel of winter wedding hair.
How do you keep wedding hair from falling flat in cold weather?
Build the style on hair with grip — wash the night before, not the morning of — and use a texture spray at the roots, a strong-hold hairspray, and plenty of pins. Updos hold far better than loose hair in the cold, and a quick touch-up kit with travel spray and pins will save the style after the outdoor photos.
Should I wear my hair up or down for a winter wedding?
Up is the safer choice in winter: an updo sits above the coat collar, survives hats and hoods, and does not get weighed down by damp snow. Half-up styles give you the best of both worlds. Hair down works best when the ceremony and photos are mostly indoors.
How do I stop static in my hair at a winter wedding?
Static comes from dry winter air, so start with a moisturising treatment in the weeks before the wedding, use a leave-in conditioner on the day, and carry a small anti-static spray or a dryer sheet in your clutch — running a dryer sheet lightly over the hair tames flyaways instantly. Avoid wool hats directly on finished hair.
Can I wear a veil with an updo in winter?
Yes — updos are actually the best base for a veil, because the bun or twist gives the veil comb something solid to grip. A low chignon or a French twist works best with a long veil, and a high bun suits a shorter veil or a birdcage veil. Always try the veil on with the finished style at your trial.
What hairstyles work best under a faux-fur stole or cape?
Styles that sit above the shoulders work best: a low chignon, a sleek bun, a half-up twist or a high bun all stay visible above a stole. Avoid very long, loose hair under a stole, because the fur will crush it and tangle it. A crystal hair vine or a velvet ribbon also shows up beautifully above fur.
How far in advance should I book a winter wedding hair trial?
Book the trial six to eight weeks before the wedding, and do it on a cold day if possible, so you can see how the style behaves in real winter air. Bring your veil, your coat and a top with a similar neckline to your dress, and take photos from every angle, including the back.
Will snow ruin my wedding hairstyle?
Light snow for a few minutes is fine for most styles, especially updos — just shake it off gently and do a quick touch-up indoors. Heavy, wet snow is harder on loose curls and waves, which is why updos and firmly set styles are the safest choice for outdoor winter photos. Keep outdoor portraits short and do them early, while the hair is fresh.
What hair accessories suit a winter wedding?
Velvet ribbons and bows, crystal hair vines and combs, pearl pins, faux-fur headbands, and crowns of winter berries or frosted baby’s breath all suit the season. Gold pins warm up candlelit photos, while silver and crystal echo snow and ice. Choose one statement accessory rather than several, so the style is not crowded.
How do I keep curls from dropping in cold, damp air?
Curl in small sections, pin each curl to cool completely before brushing it out, and set with a strong-hold spray. A volumising mousse at the roots helps, and a little texture spray gives the curls grip. Avoid heavy oils on the day, because they weigh curls down — and carry a travel spray for a quick refresh indoors.
Do winter wedding hairstyles work for short hair?
Yes — short hair is actually the easiest winter wedding length, because it sits above the coat collar and never gets flattened by a hood. A pixie with a crystal headband, a finger wave bob, or a short bob with soft waves all look stunning, and a velvet bow or a crystal clip adds the bridal finishing touch.
Conclusion
Winter is the most romantic season to get married in — snow outside, candlelight inside, velvet and fur and sparkle everywhere — and your hair should be part of that magic, not a worry. The 37 styles in this guide prove that winter wedding hair does not have to be a compromise: snow-proof chignons, candlelit waves, braided crowns, velvet bows and crystal vines all look flawless in the cold, as long as the style is chosen for the season and not against it.
Start with the guides: wash the night before, trial your style in real winter air, pack the anti-static spray, and bring your veil and your coat to the trial. Then pick the style that fits your dress, your venue and your weather — a low chignon for snow, Hollywood waves for candlelight, a braided crown for the garden, a pixie with crystals for pure ease. Whatever you choose, remember the winter bride’s rule: anchor it, pin it, and check the back in the mirror before you walk down the aisle. The snow will fall, the candles will glow, and your hair will still look flawless at midnight.