Hair Up, Apron On: 33 Hairstyles for a Cooking Class That Keep Every Strand Out of the Sauce
Picture the scene: you are halfway through a cooking class, hands dusted in flour, a pan sizzling on the stove, and a loose strand of hair drifts down across your cheek — and then, worse, toward the food. Nobody signs up for a cooking class to spend the afternoon tucking hair behind their ears. The best hairstyles for a cooking class are chosen before you tie on the apron: they keep every strand off your face and out of the food, they survive heat and steam, and they still look good when the class photo is taken at the end.
These 33 hairstyles for a cooking class cover every hair length and texture, from low buns and French braids to claw-clip updos, cornrows and headband-friendly short styles. Eight guides first walk you through the practical side of cooking-class hair: hygiene, heat and steam, comfort through a long lesson, aprons, hairnets and scarves, and quick fixes between dishes. Each style includes honest notes on how it holds up through the class, who should skip it, and a quick verdict, so you can focus on the recipe instead of your hair.
Keeping Hair Out of the Food: The Hygiene Basics
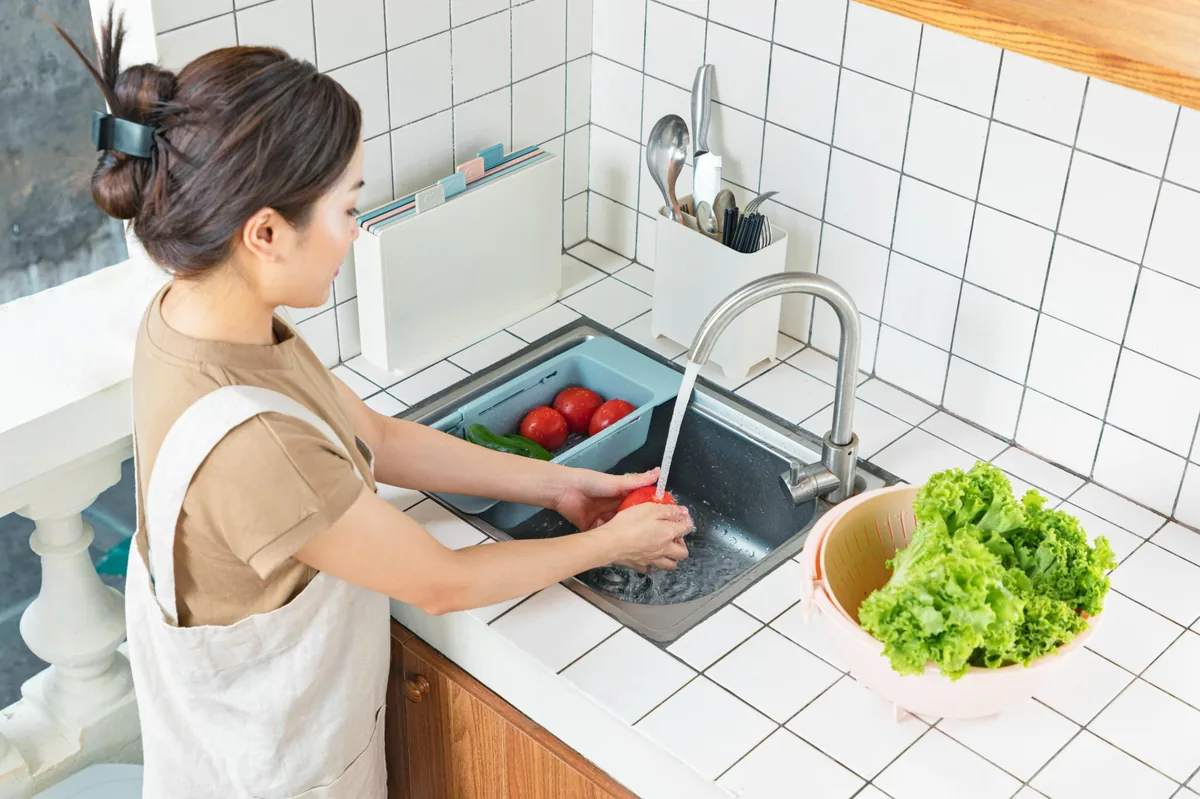
Every professional kitchen has the same rule: hair up, hair contained, no exceptions. A stray hair in a dish is the fastest way to ruin a meal you worked hard on, and in a shared cooking class the stakes are higher because other people are eating what you make. The fix is simple but non-negotiable — choose a style that pulls all of your hair away from your face and neck, and anchor it in at least two places so nothing works loose while you chop, stir and taste.
Loose layers around the face are the usual culprits. If you have face-framing pieces, braid them back, pin them with flat bobby pins, or tuck them under a scarf or bandana. A style that looks secure in the mirror at home can still shed strands once you start moving, bending and reaching across a counter, so do a quick shake test before class: bend forward, shake your head gently, and check that nothing falls forward.
Quick verdict: if any strand can reach your face when you lean over a pot, the style is not class-ready. Fix it before the apron goes on, not after the sauce is served.
Heat, Steam and the Stove: What Your Hair Is Up Against
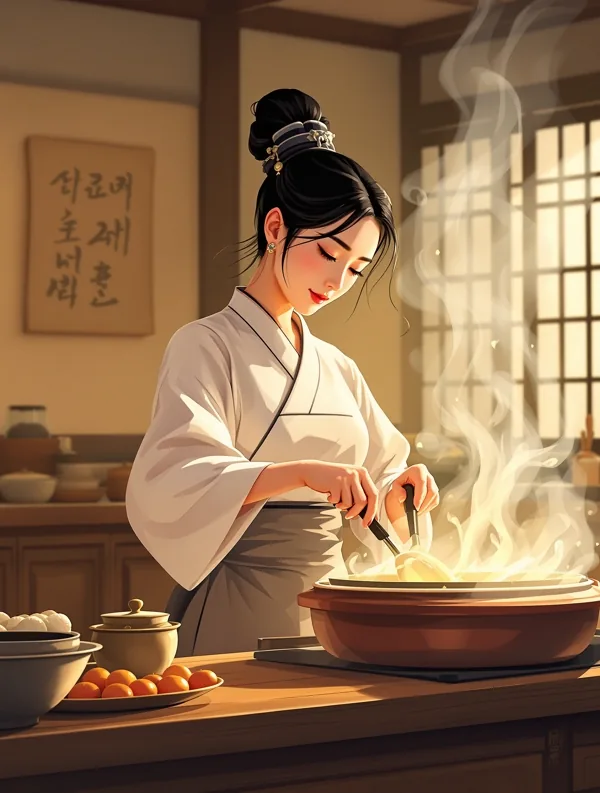
A cooking class is a surprisingly hostile environment for hair. Steam from boiling pots softens styling products, heat from the oven dries out ends, and the constant warmth makes your scalp sweat — all of which loosen elastics, flatten volume and unravel anything held together by hairspray alone. Styles that rely on a perfect curl or a soft, airy finish will not survive the first simmering pot.
The styles that hold up are the ones with structure: braids, twisted buns and ponytails anchored at more than one point. Braiding locks the hair in sections, so even if the surface softens in the steam, the shape stays. A light mist of flexible-hold spray helps, but it is a backup, not the plan — the structure of the style should do the heavy lifting.
Who should be extra careful: anyone with fine, silky hair, which slips out of elastics faster in humidity. Use textured elastics, a few extra pins, and a braid as your base layer. Quick verdict: if your style needs a curling iron to exist, leave it for dinner out, not the cooking class.
Long Classes and Comfort: Hair That Does Not Give You a Headache
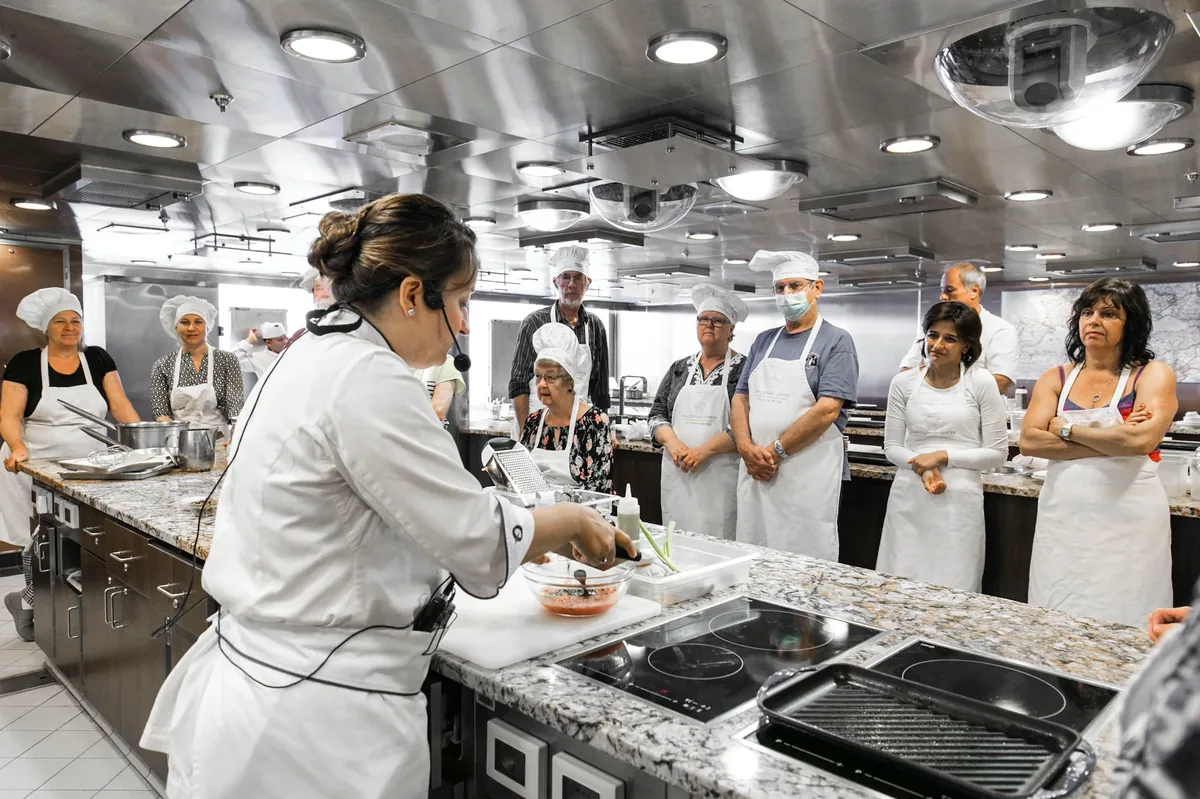
Most cooking classes run two to three hours, and some stretch to a full afternoon. A style that feels fine for the first twenty minutes can turn into a pounding headache by hour two if it pulls too tightly at one point. The culprit is usually a single tight elastic carrying the whole weight of your hair, or pins pressing into the same spot on your scalp for hours.
Spread the weight. A low bun or a braided ponytail anchored at two points is far kinder than a high, tight ponytail pulling from one spot. If you love a top knot, keep it loose at the roots and let the pins — not the elastic — do most of the holding. And test the style the way you will wear it: sit with it for an hour at home before class, not just five minutes in front of the mirror.
Maintenance through the class: none needed if you get the tension right at the start. Quick verdict: comfort beats drama every time — the prettiest style is worthless if you are counting the minutes until you can take it down.
Aprons, Necklines and Collar Clashes
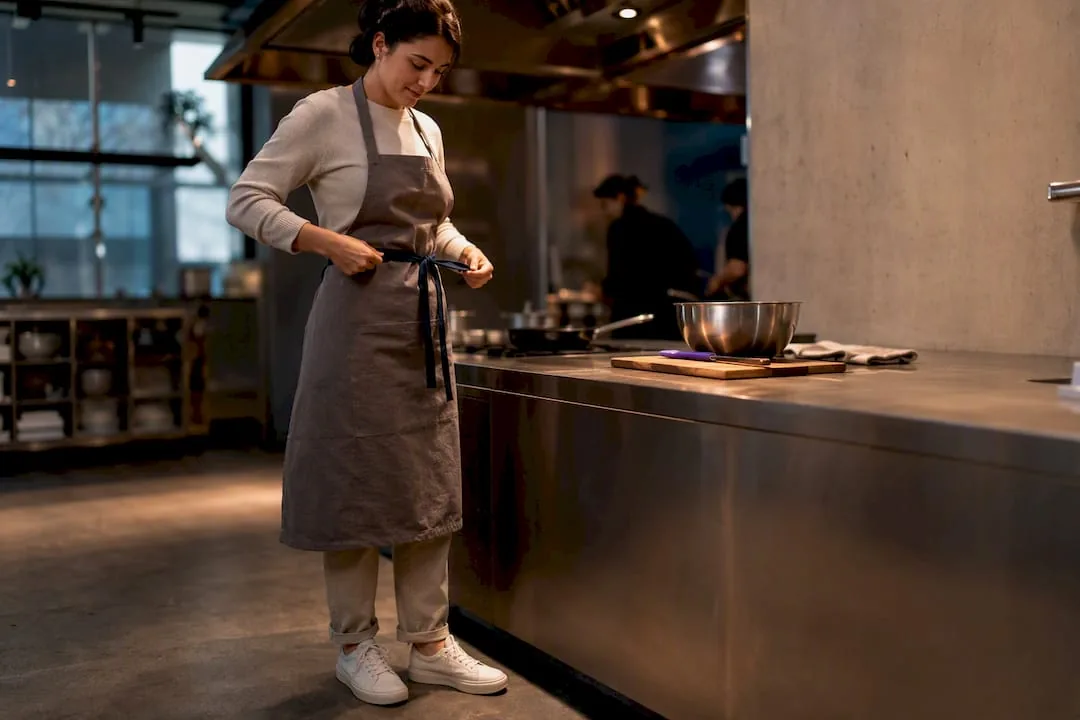
An apron changes how a hairstyle behaves. The straps sit across your neck and shoulders, the neckline of your top is usually covered, and anything that hangs low — a long ponytail, a loose braid — will swing forward the moment you lean over a chopping board and land on the apron strings or, worse, in the food. A style that works beautifully with an open-neck top can become a nuisance under an apron.
Low buns and short braids are the apron-friendly champions: they sit above the apron straps and never compete with the ties. If you love a ponytail, keep it high or braid it so it stays compact, and avoid styles that rest on the back of your neck where the apron knot sits. A quick check before class: tie on the apron, lean forward over a counter, and see where your hair goes.
Who should avoid it: anyone whose style depends on hair resting on the shoulders — a low, loose ponytail will spend the whole class tangled in apron ties. Quick verdict: if the apron and the hairstyle fight for the same space, the apron wins and the hair goes up.
Hairnets, Scarves and Caps: When Covering Up Is the Smart Move
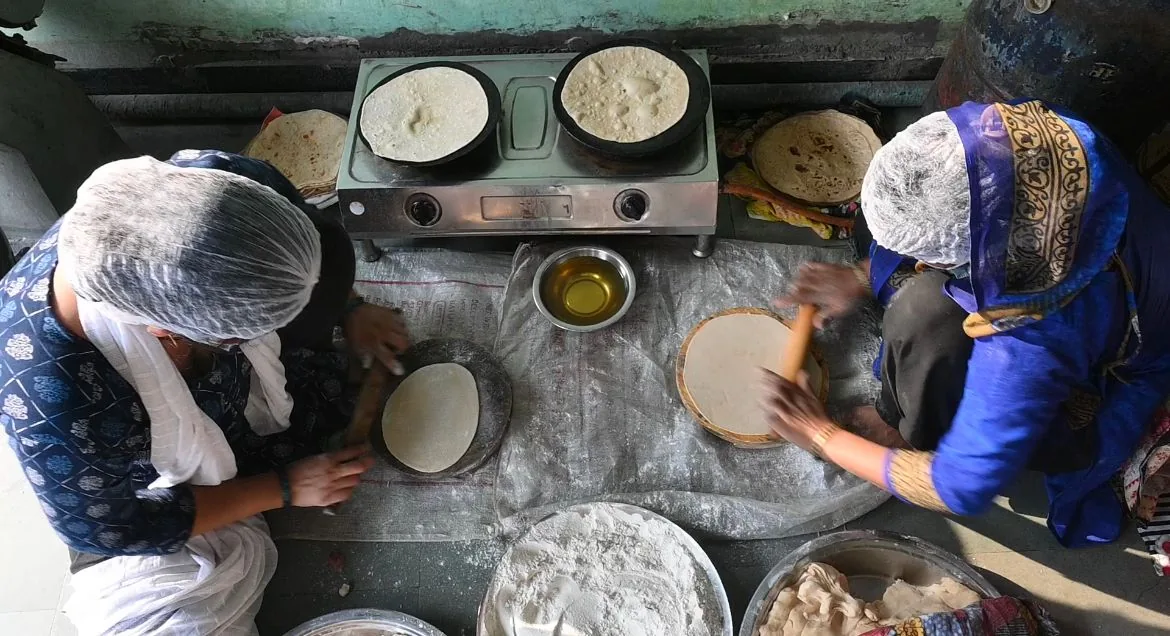
Some cooking classes — especially professional or bakery-focused ones — ask students to wear a hairnet, and a few require it. Even when it is not required, a scarf, bandana or cap is one of the smartest moves you can make. It catches the wispy strands no style fully controls, it keeps flour and oil splashes off your hair, and it adds a touch of classic kitchen style at the same time.
The trick is pairing the covering with the right base style. A low bun or flat braids sit neatly under a scarf, while a high top knot will push a hairnet out of shape and a bulky bun will make a cap ride up. If you wear a bandana, fold it into a triangle, tie it at the nape, and tuck the ends under your bun — it stays put for hours and looks intentional rather than improvised.
Maintenance through the class: almost none — a scarf only needs one quick re-tie if it slips. Quick verdict: when in doubt, cover it. A bandana over a bun is the most forgiving combination in this whole post.
Styles That Survive Bending Over the Stove
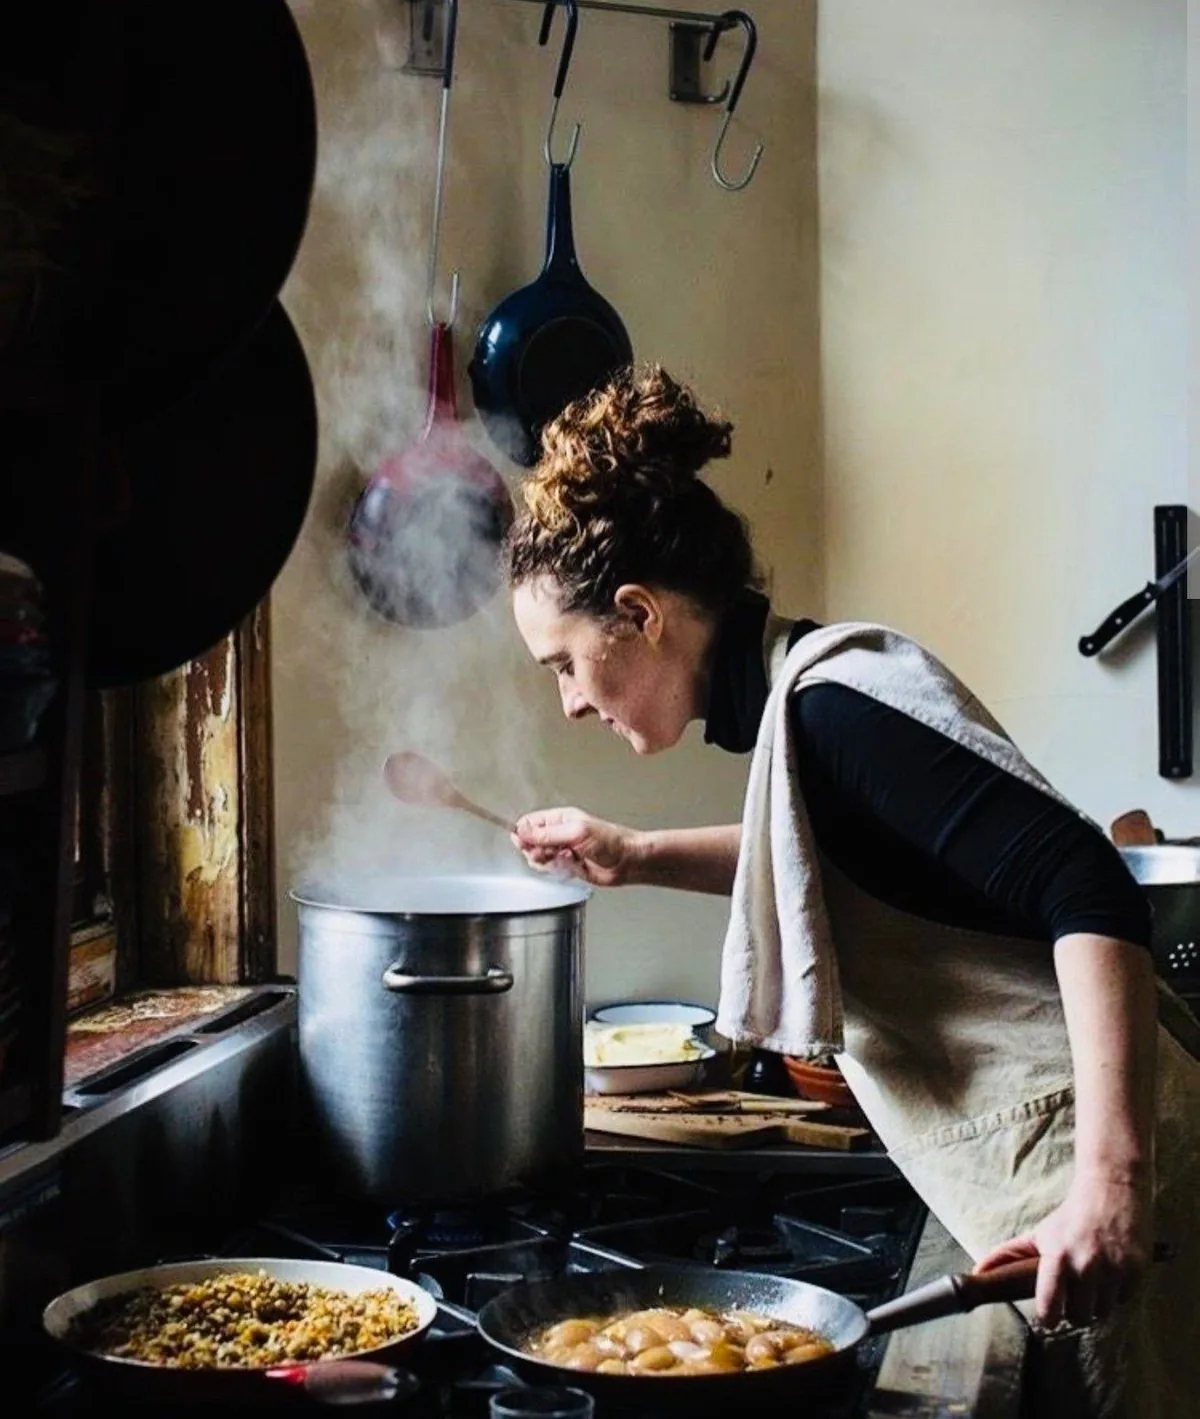
Cooking is a full-body activity. You bend over the stove to check a simmer, lean across the counter to reach the salt, and duck into a low oven to pull out a tray. Every one of those movements tests your hairstyle from a different angle, and gravity is not on your side: anything that hangs will swing forward, and anything loosely pinned will slide.
The styles that survive are the ones that are close to the head and anchored low or flat. A braided crown, a low chignon or a tucked-under bun barely moves when you bend, because there is nothing hanging to swing. A high ponytail is the opposite — it flips forward over your shoulder the moment you lean, and a long braid can dip into a pot if it is not pinned up.
Quick verdict: do the bend test at home. Lean forward until your head is below your shoulders and shake gently — if anything moves more than a centimetre, re-pin it or choose a flatter style for class day.
Accessories That Stay Put (and Ones That Will Not)
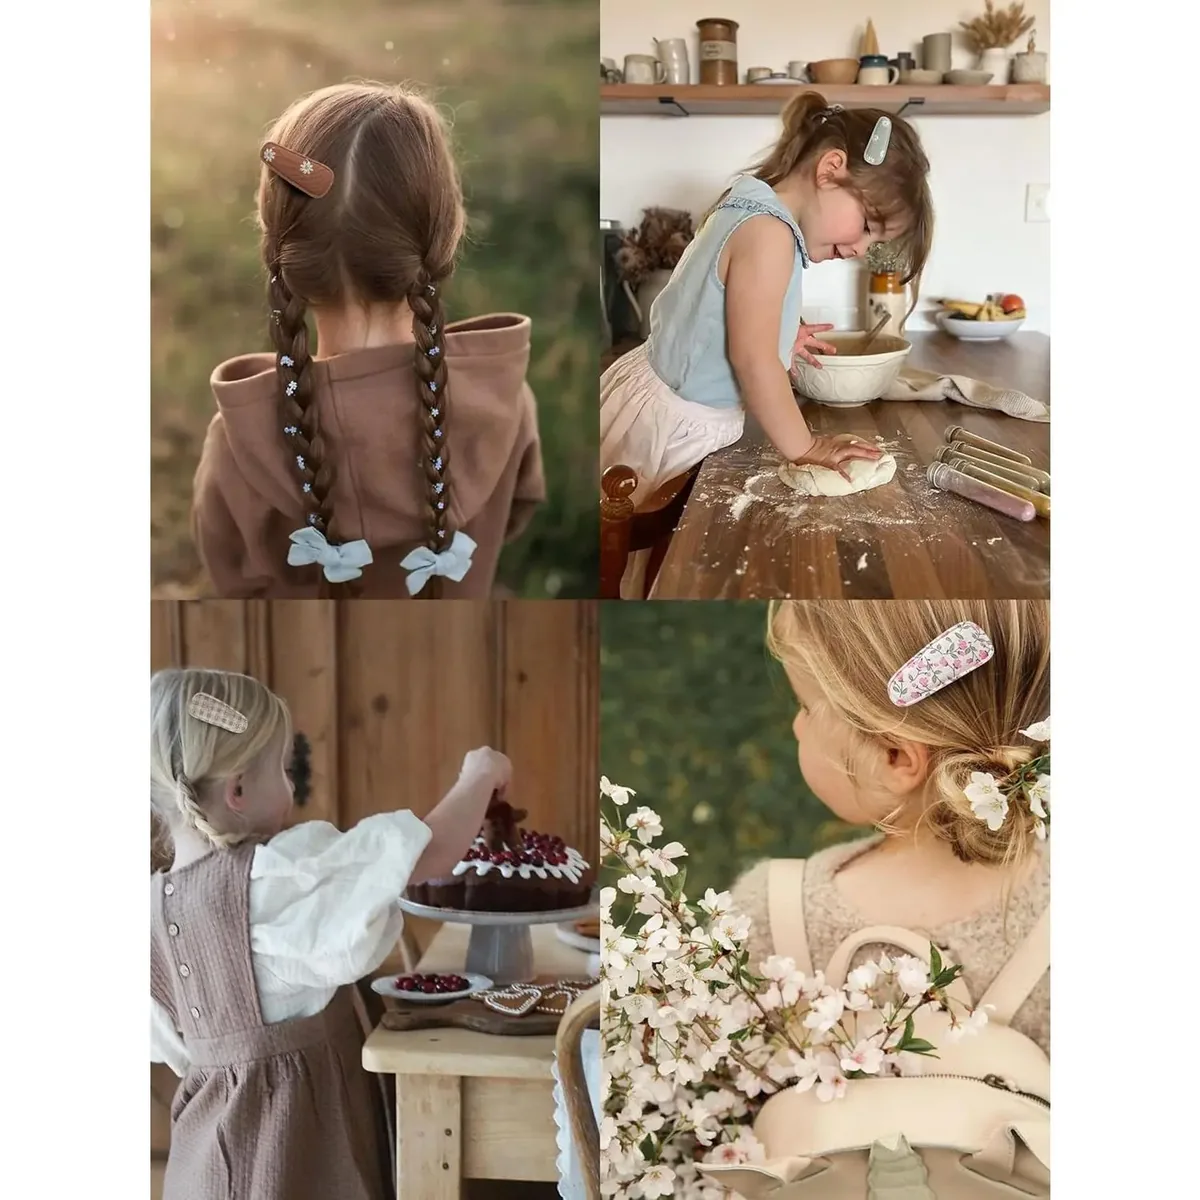
Not all hair accessories are kitchen-safe. A heavy decorative clip will slide out as your hair warms up and softens in the steam, a single flimsy elastic will stretch and give up by the second hour, and anything with dangling parts — beads, chains, long tassels — is a hazard near food and open flames. The best accessories for a cooking class are the boring, reliable ones.
Stock up on these: thick, snag-free elastics that grip without breaking hair; flat bobby pins that slide in against the scalp and stay there; a sturdy claw clip for thick hair; and a fabric scrunchie, which holds well and doubles as a wrist spare. Avoid metal clips with teeth that snag, oversized statement pieces, and anything you would cry about losing into a pot of soup.
Who should avoid it: anyone tempted to wear a favourite delicate clip to class — save it for the dinner party afterwards. Quick verdict: if an accessory cannot survive three hours of heat, steam and bending, it does not belong in the kitchen.
Quick Fixes Between Dishes: The Two-Minute Hair Rescue
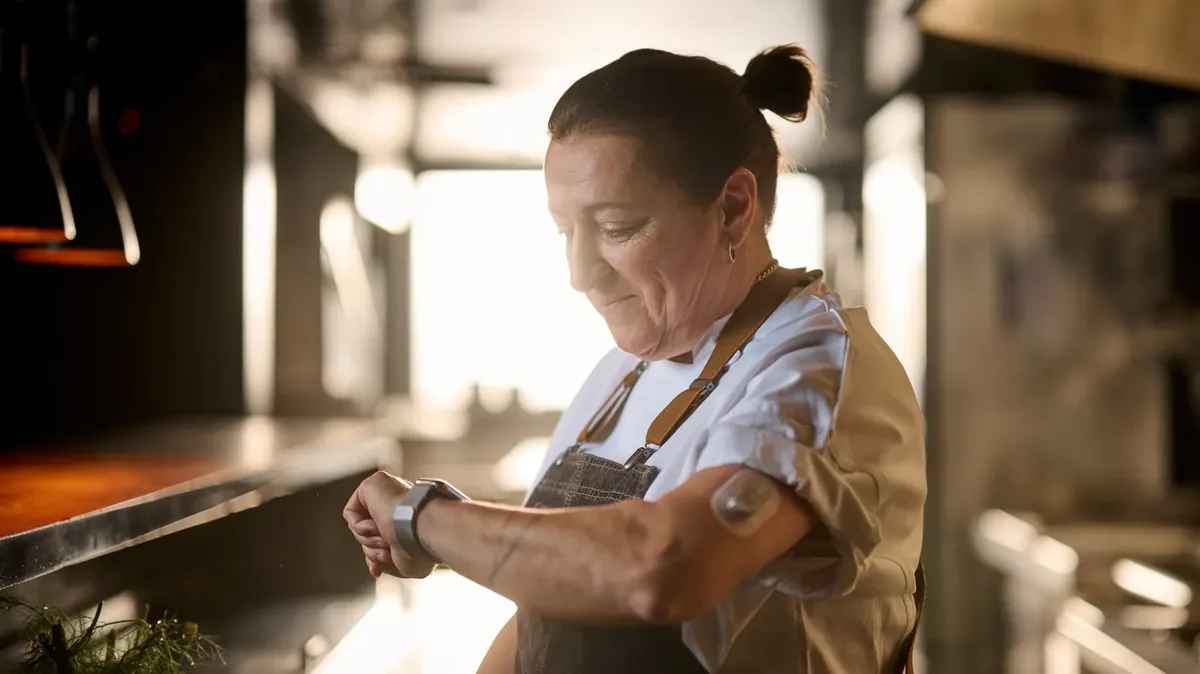
Even the best style needs a small rescue sometimes — a wisp escapes while you are whisking, a pin works loose during the bake, or your bun sags after two hours over a hot stove. Cooking classes have natural pauses — while something bakes, simmers or rests — and those two-minute gaps are your chance to reset without missing anything.
Keep a tiny kit in your apron pocket: two bobby pins, one spare elastic, and a small scrunchie on your wrist. The fastest fix is the twist-and-pin: gather the loose section, twist it back, and pin it flat against the scalp. For a sagging bun, re-wrap the elastic once and push two pins in at opposite angles. Never try a full restyle mid-class — patch the style you have and save the redo for home.
Maintenance through the class: one quick check at each natural pause is plenty. Quick verdict: the best quick fix is the one you can do without a mirror, in under a minute, with your hands still slightly floured.
1. The Classic Low Bun
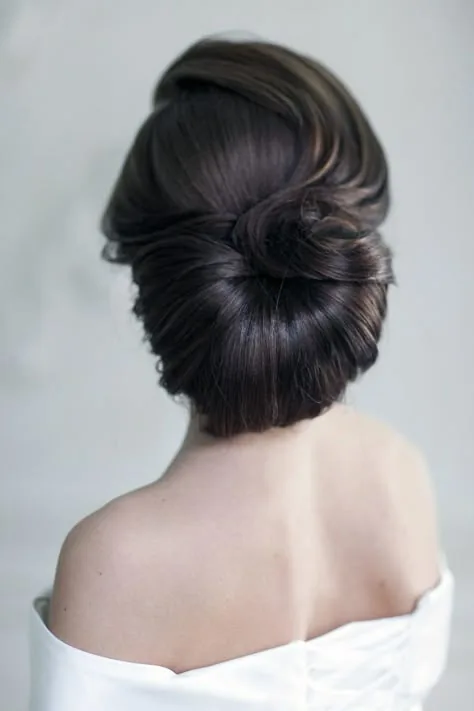
The classic low bun is the cooking-class default for a reason: it pulls every strand away from the face, sits neatly above the apron knot, and never swings forward when you bend over a pot. Gather the hair at the nape, twist it into a coil, wrap it into a bun and pin it in four places. It takes about three minutes and looks tidy enough for the end-of-class photo.
Maintenance through the class: excellent. A low bun barely moves over three hours — the only thing to watch is the nape, where sweat can loosen the first pins. Push two pins in at opposite angles and you will not need to touch it again. Who should avoid it: nobody, really — but if your hair is very short, you may need a small donut form or a few extra pins to catch the layers. Quick verdict: the safest, simplest choice in this post. If you cannot decide, pick this one.
2. The French Braid
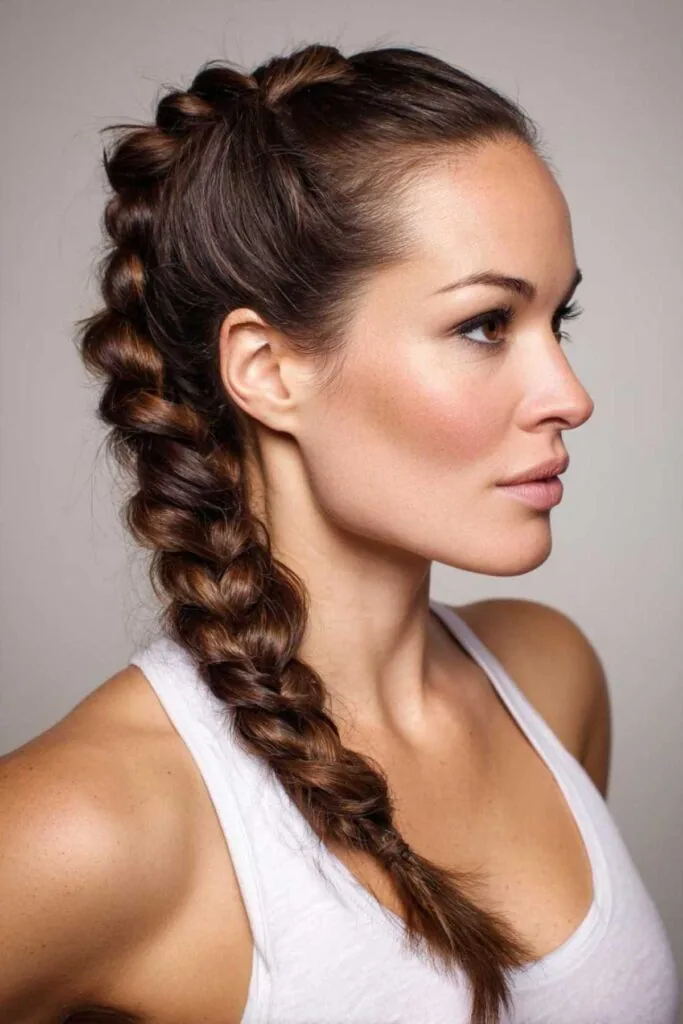
A French braid is the workhorse of kitchen hair. It locks the hair down from the crown to the nape in one continuous structure, so there are no loose sections to fall into food and nothing to swing. It also handles steam beautifully — even if the surface softens, the braid keeps its shape. Braid it straight down the back and tuck the tail under with a pin, or wrap the tail into a small bun for total containment.
Who should avoid it: anyone who cannot braid their own hair yet — a wobbly braid that unravels mid-class is worse than a simple bun. Practise twice at home first. Maintenance through the class: close to zero, which is the whole point. A well-braided French braid looks the same at the end of class as it did at the start. Quick verdict: the best braid for a first cooking class — secure, comfortable and forgiving.
3. The Dutch Braid
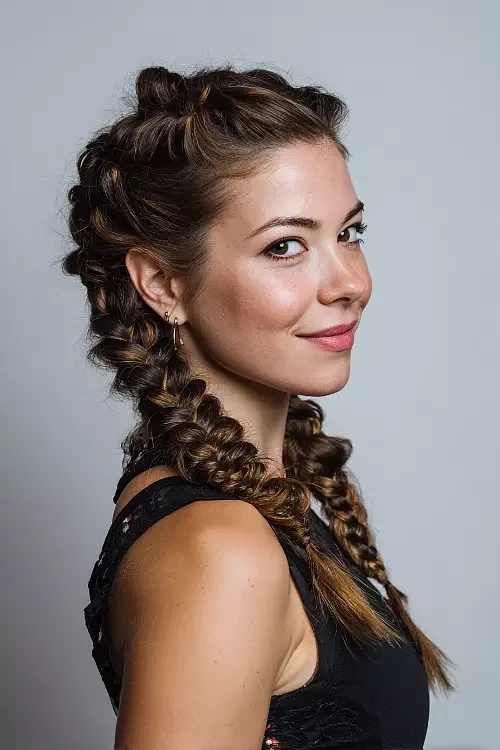
The Dutch braid — the French braid’s inside-out cousin — sits raised on the surface of the hair, which makes it even better at gripping thick or slippery hair. The raised ridge also gives the style more grip on itself, so it loosens more slowly in heat and steam than a flat braid. Wear it as a single braid down the back, pinned under at the nape, and it will survive a whole afternoon of stirring and tasting.
Maintenance through the class: minimal. The raised braid is easy to check at a glance — if a section loosens, you can see it and smooth it in seconds. Who should avoid it: anyone with very fine hair that slips easily, unless you add a little texture spray first. Quick verdict: pick the Dutch braid over the French if your hair is thick, heavy or stubbornly smooth.
4. The High Ponytail
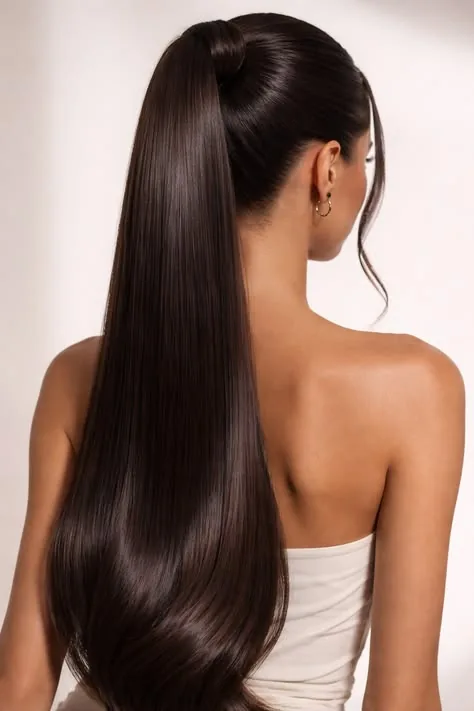
A high ponytail keeps hair off the neck and out of the way, and it looks energetic and polished — but in a cooking class it needs a few adjustments. The classic problem is swing: lean forward and the tail flips over your shoulder toward the food. The fix is to braid the tail, or to anchor the ponytail at two points with a second elastic halfway down, which kills the swing almost completely.
Maintenance through the class: moderate. Expect to re-tighten once, around the halfway mark, as the elastic stretches in the warmth. Who should avoid it: anyone with a long class and a heavy head of hair — a high ponytail carrying all that weight from one point is the fastest route to a headache. Quick verdict: great for a short, fun class if you braid the tail; risky for a three-hour session unless you double-anchor it.
5. The Low Ponytail
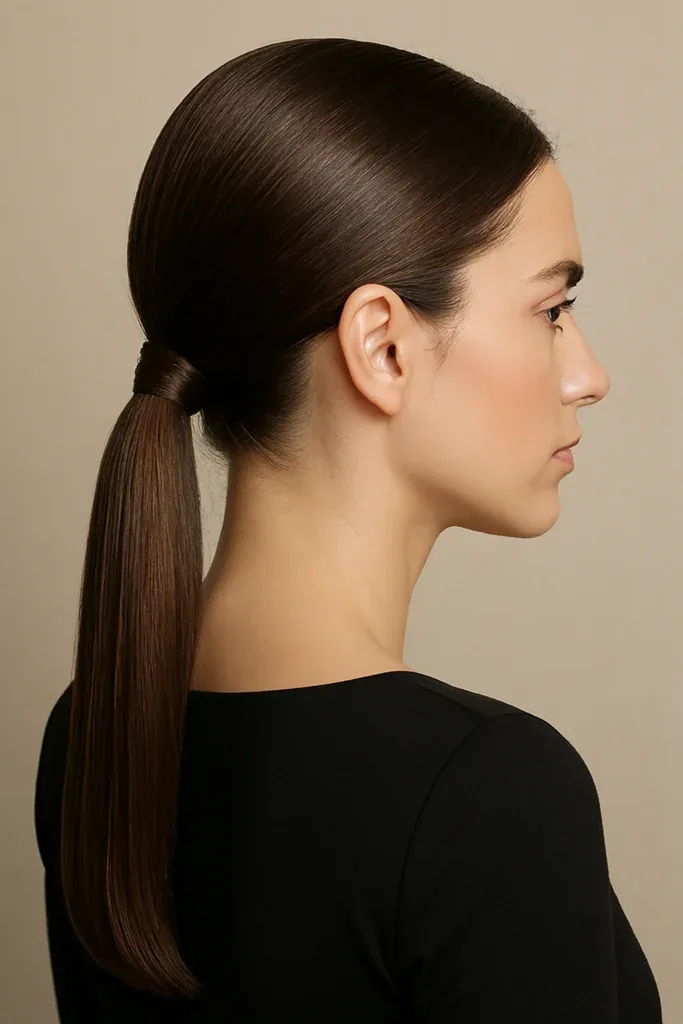
The low ponytail is the high ponytail’s calmer, kinder sibling. It sits at the nape, so it never swings forward when you bend, it spreads its weight low on the head, and it stays comfortable for hours. Wrap a small section of hair around the elastic to hide it and you have a style that looks deliberate rather than rushed — a five-minute job that holds all afternoon.
Who should avoid it: anyone whose hair is layered, because short layers at the nape will slip out of a low ponytail within the hour. Pin the nape layers up first, or choose a braid instead. Maintenance through the class: one quick re-tighten at the halfway point is usually all it needs. Quick verdict: the comfortable, low-drama ponytail — and the one most teachers wear themselves.
6. The Messy Top Knot
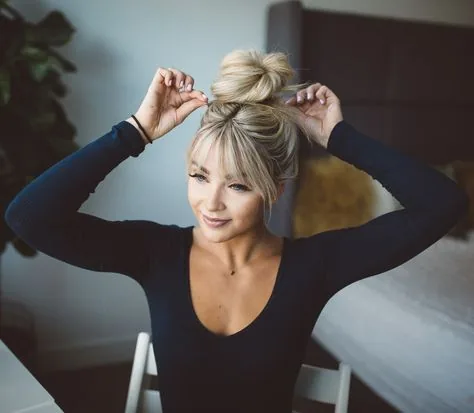
The messy top knot is the style most of us reach for at home — and with a few tweaks it works in class too. Gather the hair high, twist it loosely, wrap it into a knot and pin it. The key word is “secured messy”: the texture can look relaxed, but the pins must be doing real work. Use at least four pins, pushed in at different angles, and keep the knot compact rather than tall and wobbly.
Maintenance through the class: fair. A top knot is the most likely bun to sag in the steam, so check it at the first natural pause and re-pin if it has dropped. Who should avoid it: anyone with very heavy hair — a high knot carrying all that weight will pull at the roots by hour two. Quick verdict: charming and quick, but treat it as a two-hour style, not an all-afternoon one.
7. The Sleek Ballerina Bun
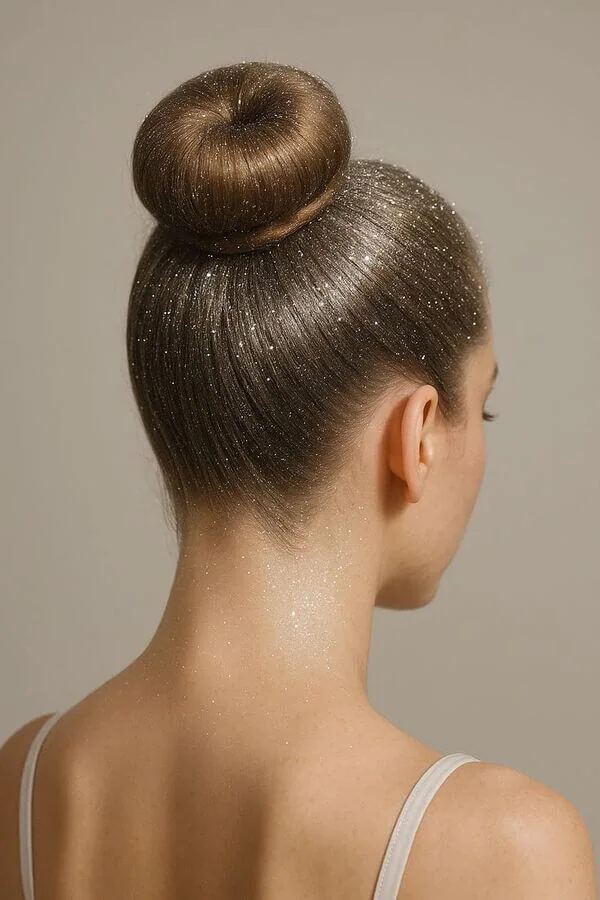
The sleek ballerina bun is the polished cousin of the top knot: every strand smoothed back, the bun tight and high, not a wisp out of place. It is the style to choose when your cooking class ends with a tasting dinner or a group photo you actually want to be in. Smooth the hair back with a brush and a little gel, twist it into a firm bun, and pin it flat against the crown.
Who should avoid it: anyone who dislikes tight styles — a ballerina bun pulls firmly, and three hours of it can ache. It is also a poor choice for very thick hair, which needs a bigger, softer bun to hold comfortably. Maintenance through the class: superb if you used gel — steam will not undo a gel-set bun. Quick verdict: the most elegant option here, best saved for shorter classes or special occasions.
8. The Bubble Ponytail
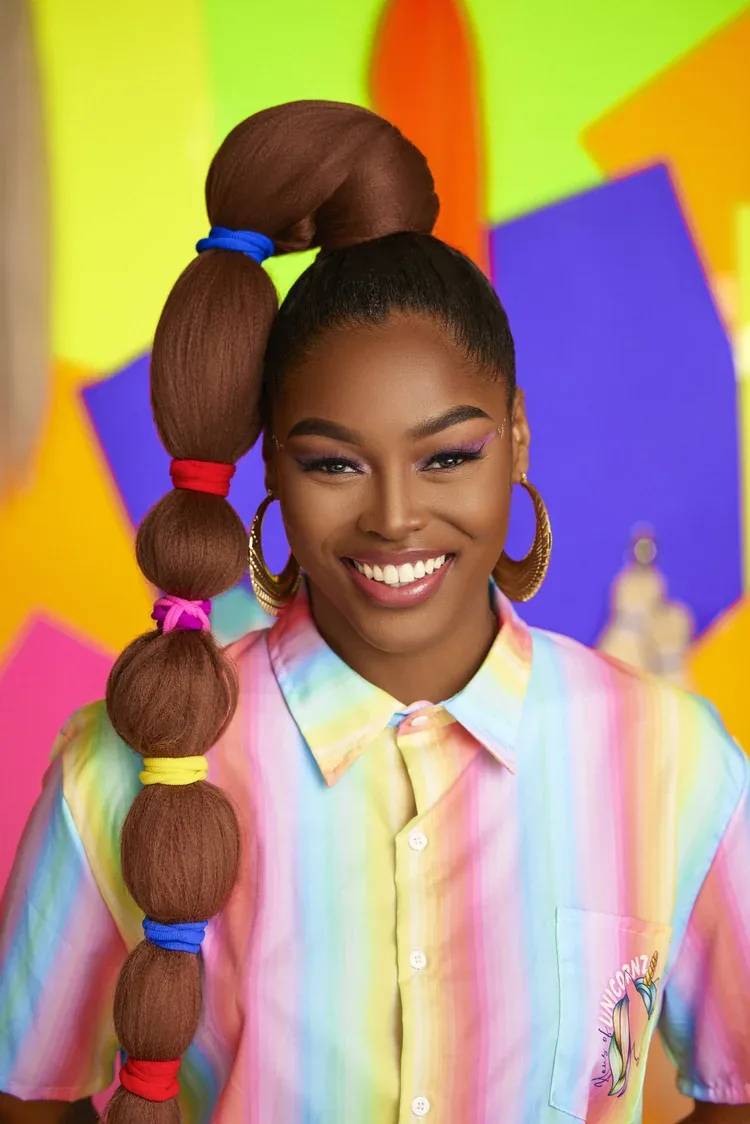
The bubble ponytail turns a plain ponytail into something playful: secure a high or mid ponytail, then add elastics every few inches down the tail and gently puff out the sections between them. It looks fun, it photographs beautifully, and — surprisingly — it is practical in a kitchen, because the extra elastics keep the tail compact and stop it swinging wildly.
Maintenance through the class: good, with one caveat — the bubbles near the bottom can flatten in steam, so puff them up again at the break if you care about the look. Who should avoid it: anyone with very short hair, which cannot form proper bubbles, and anyone working with open flames, since the ponytail still hangs. Quick verdict: the fun pick — secure, cheerful and much more practical than it looks.
9. The Fishtail Braid
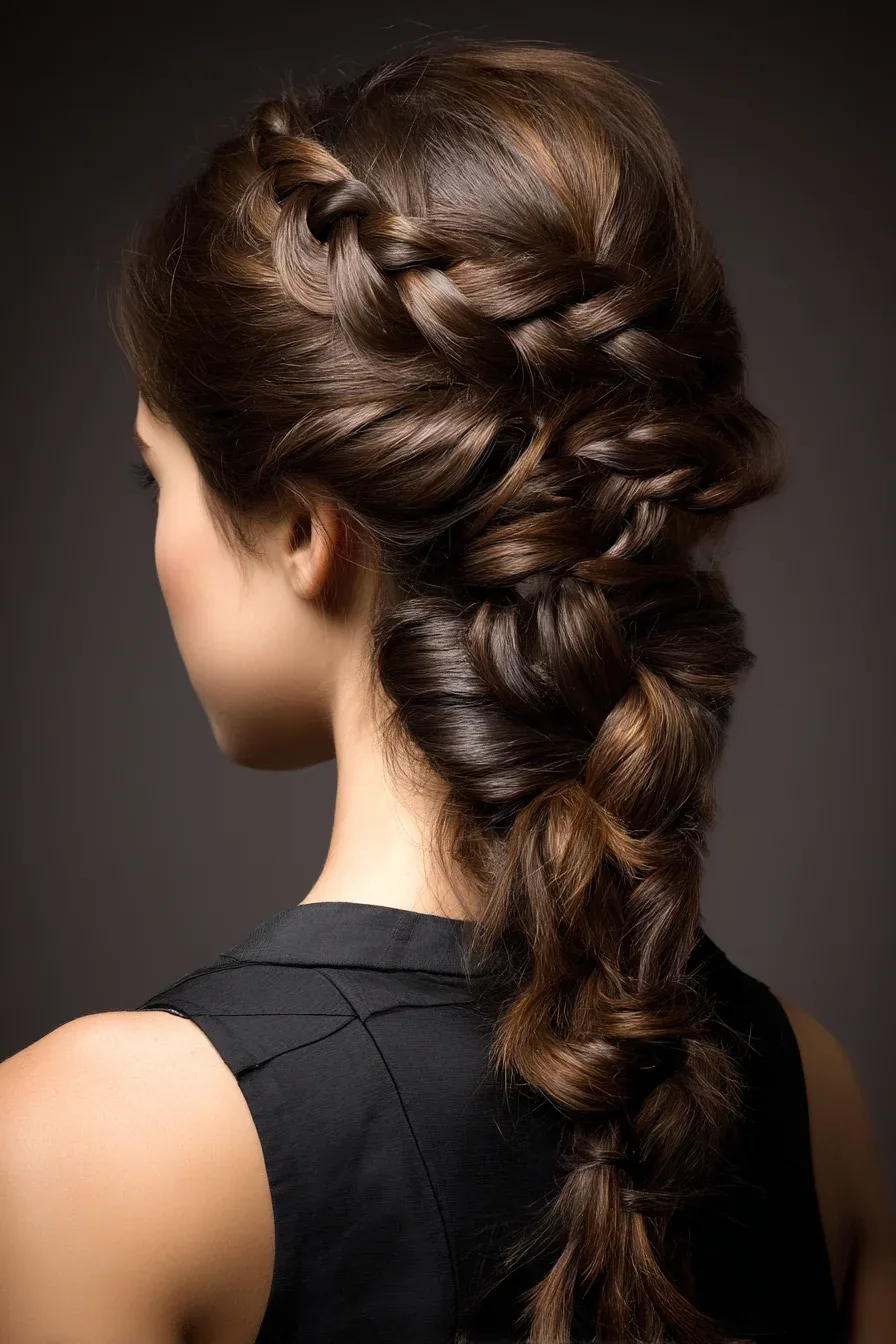
The fishtail braid looks intricate — fine, interlocking strands that seem far harder than they are — but it is really just two sections crossed over each other, again and again. That tight, interlocking structure is exactly why it works in a kitchen: it grips itself, it barely loosens in steam, and it keeps every strand contained from crown to tip. Wear it down the back or swept to one side and pinned.
Who should avoid it: beginners on a tight morning — a fishtail takes longer than a regular braid, so practise it the night before, not ten minutes before class. Maintenance through the class: outstanding. Of all the braids here, the fishtail loosens the slowest. Quick verdict: if you can fishtail, this is the braid that will look the same at the final tasting as it did at the start.
10. The Braided Crown
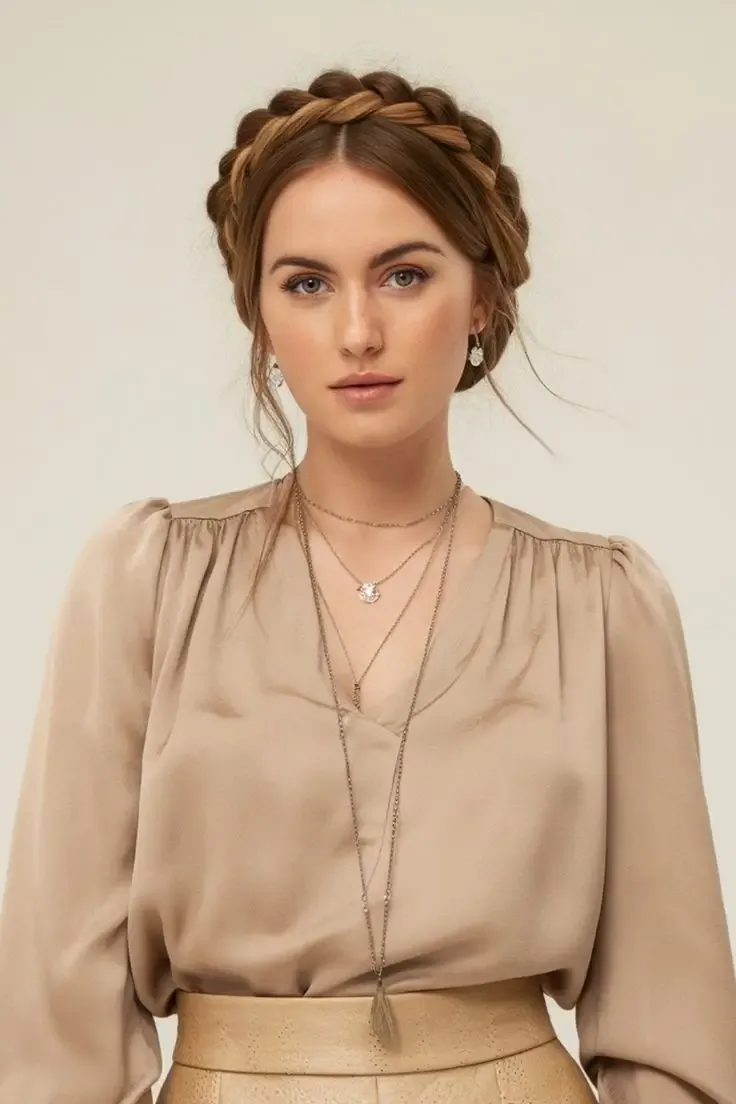
The braided crown — also called a milkmaid braid — wraps two braids around the head like a halo, pinning every strand flat against the skull. It is arguably the most kitchen-proof style in this post: nothing hangs, nothing swings, nothing can fall forward, and it looks romantic enough for a class that ends with a shared meal. Braid two sections, cross them over the crown, and pin the ends underneath.
Maintenance through the class: none. A braided crown is essentially locked in place for the whole session. Who should avoid it: anyone with short hair that cannot reach around the head in a braid — you need at least shoulder length — and anyone short on time, since it takes ten to fifteen minutes. Quick verdict: the gold standard for hygiene and security, if you have the length and the time.
11. The Half-Up Claw Clip Twist
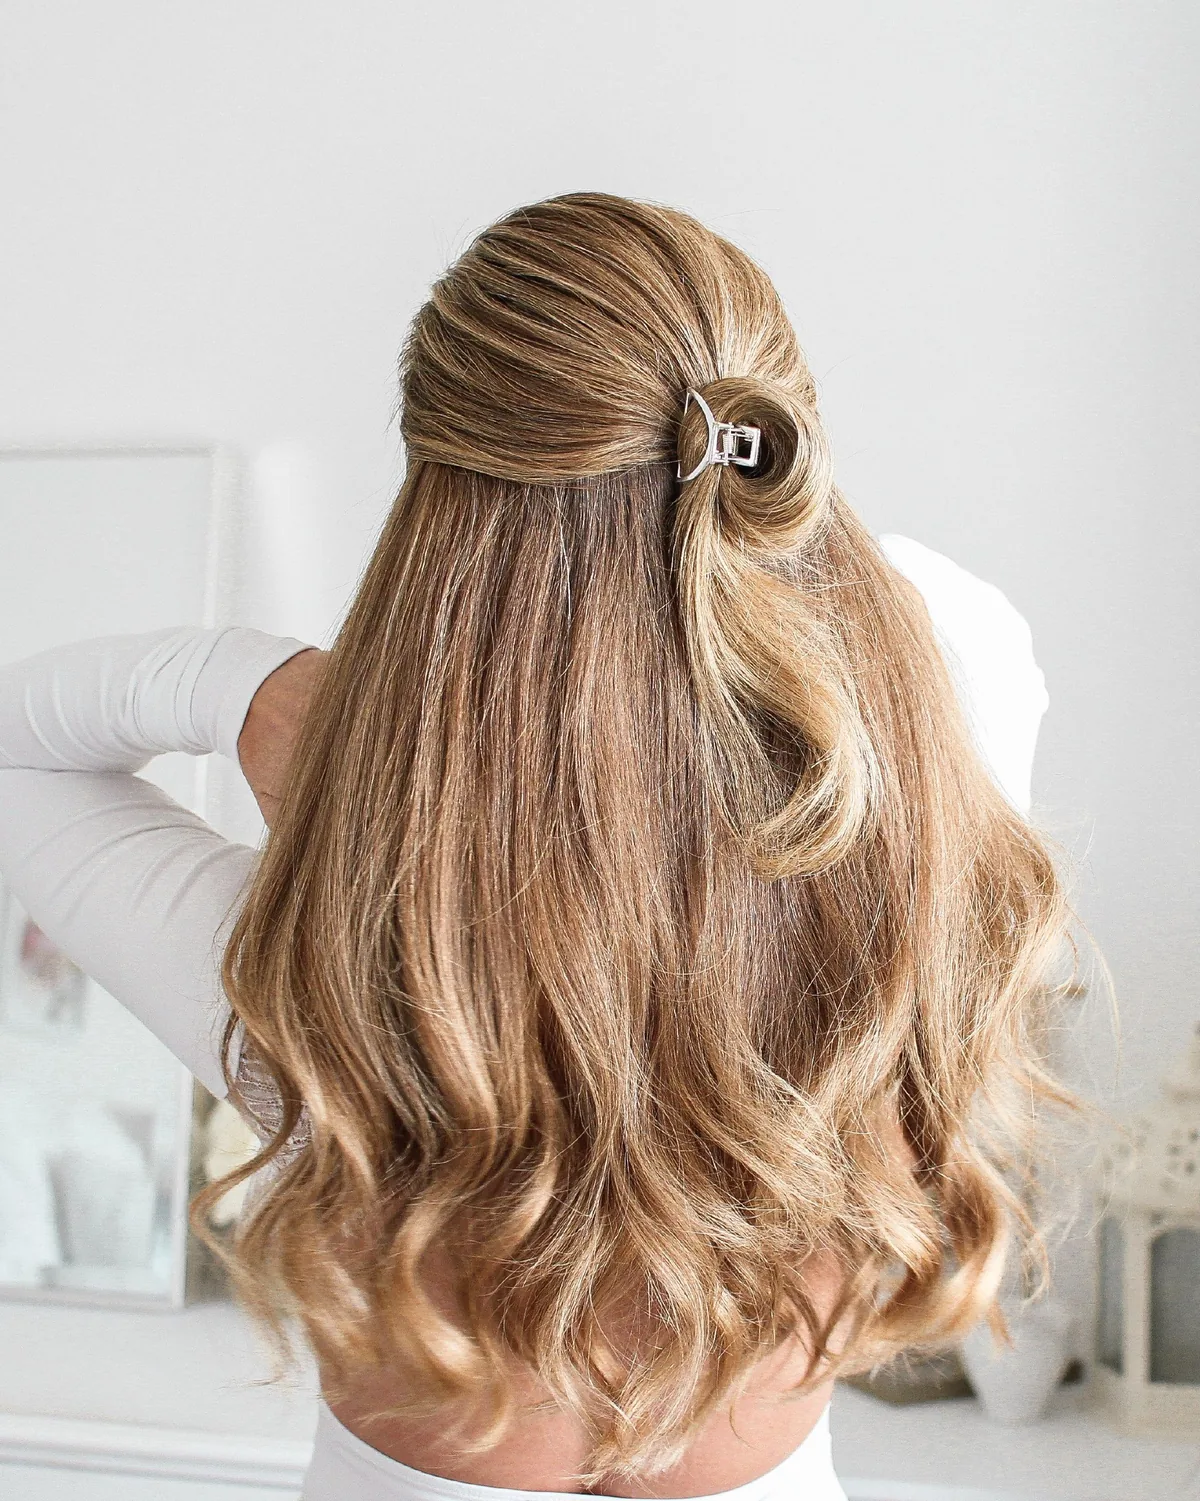
The half-up claw clip twist is the fastest style on this list: gather the top half of your hair, twist it once, and clip it up. It keeps the front sections off your face while the rest hangs down — which is exactly why it comes with a warning. In a cooking class, hanging hair is a liability, so this one works only if the lower half is short, or if you wear it for a tasting-focused class where you are mostly standing upright rather than leaning over pots.
Who should avoid it: anyone with long hair in a hands-on class — the loose lower half will end up over your shoulder and toward the food. Maintenance through the class: the twist itself holds well, but you will be tucking the loose hair back constantly. Quick verdict: lovely for a short demo or wine-and-cook evening; not the pick for a full hands-on session.
12. The Low Chignon
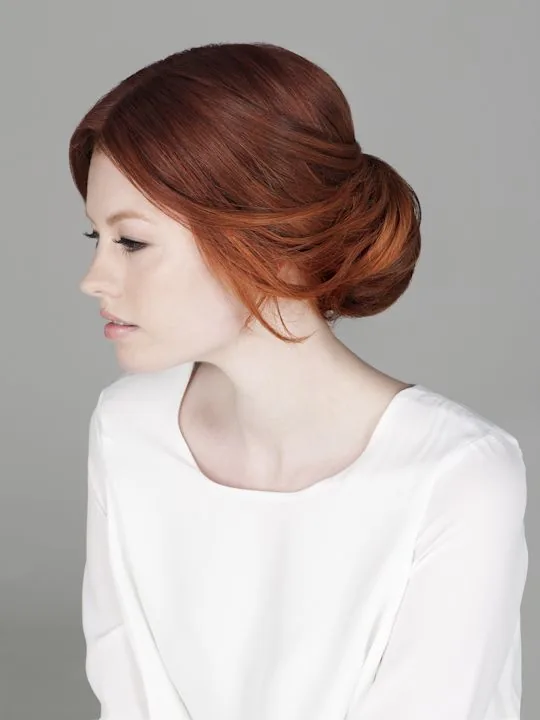
The low chignon is a rolled, tucked bun that sits at the nape — elegant, flat and completely out of the way. Unlike a round bun, a chignon is rolled inward and pinned, which makes it lie close to the head and resist the pull of gravity when you bend forward. It takes five minutes, needs only a few pins, and looks far more polished than the effort suggests.
Maintenance through the class: excellent. The rolled shape holds its own structure, and a chignon rarely sags. Who should avoid it: anyone with very thick hair, which can make the roll bulky and hard to pin flat — try a low bun instead. Quick verdict: the quiet, elegant choice. Perfect for a class at a beautiful venue or one that ends with dinner.
13. Two French Braids (Boxer Braids)
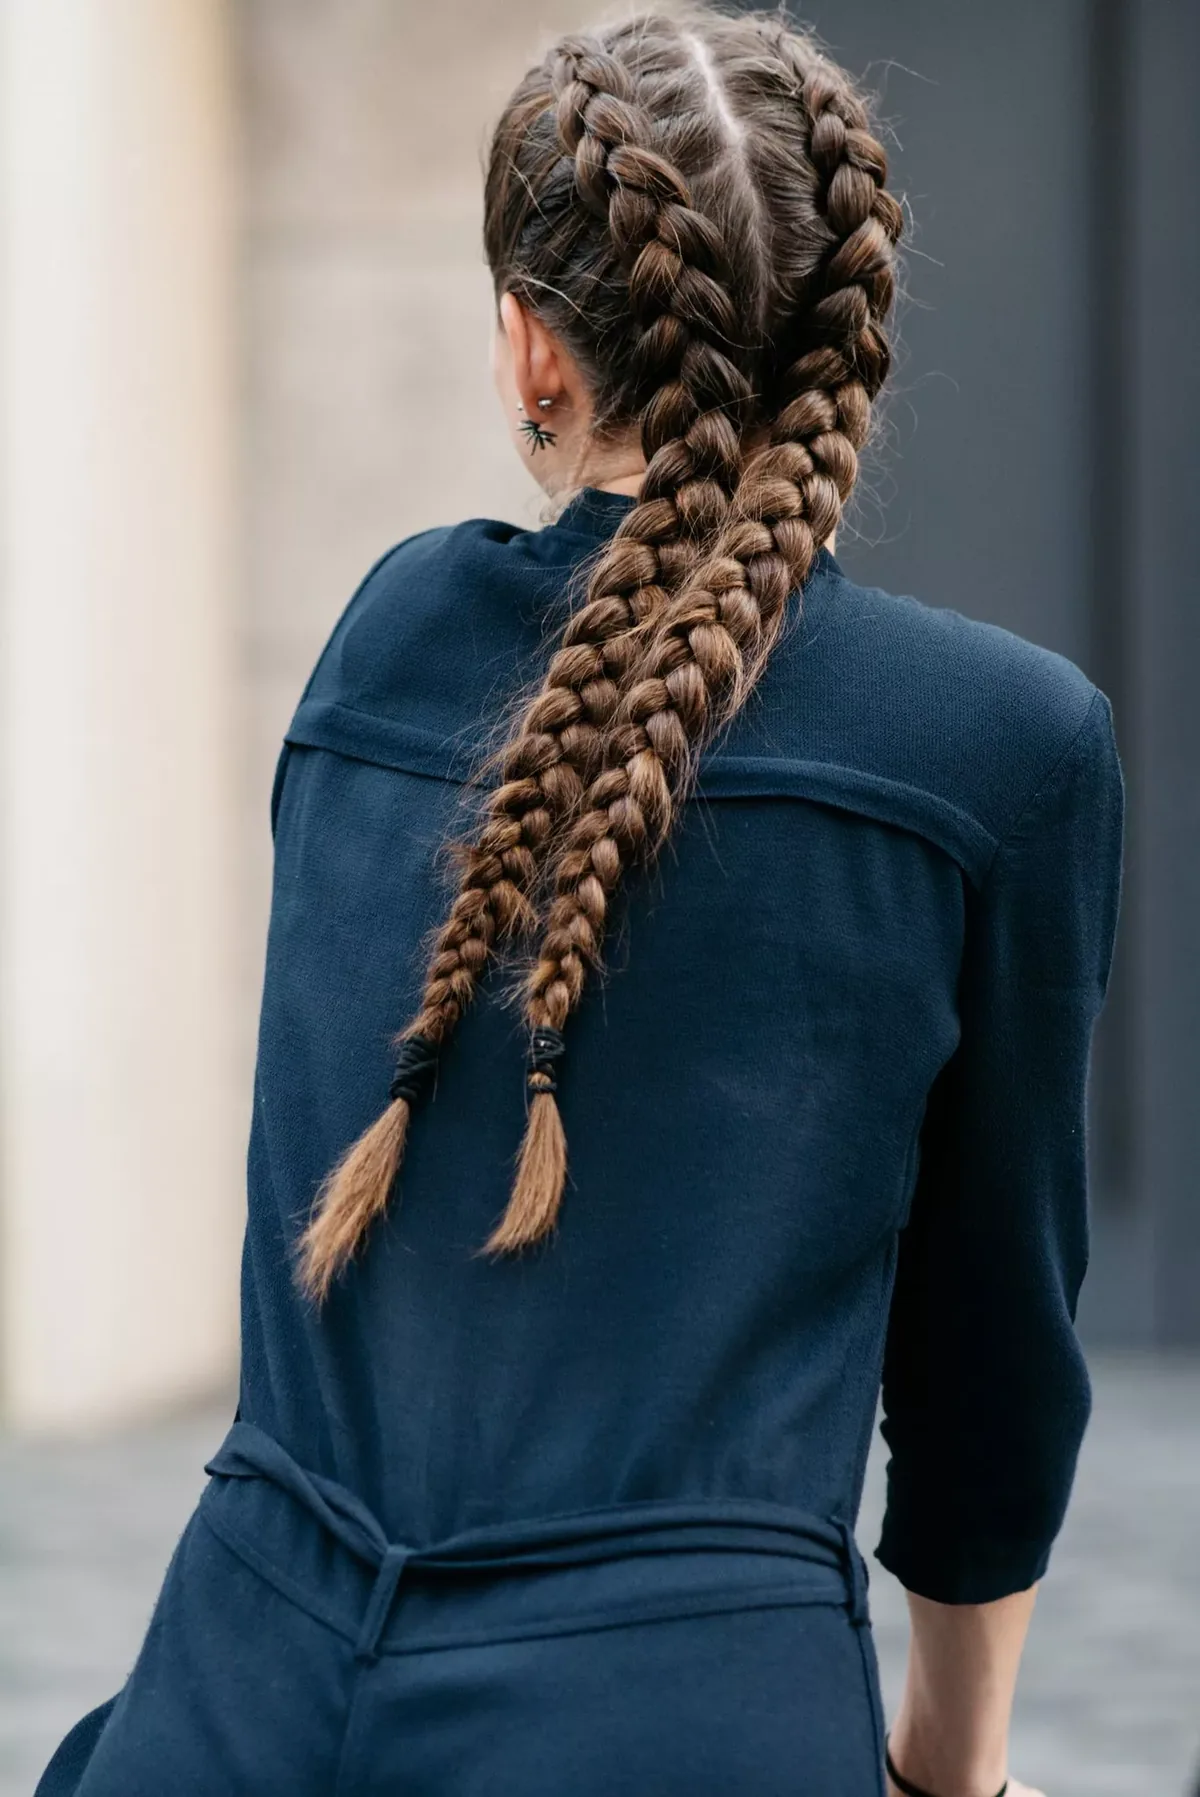
Two French braids — boxer braids — split the hair down the middle and braid each side from the crown to the nape. Splitting the hair in two halves the weight each braid carries, which means less pull, less loosening and a style that stays balanced for hours. It is one of the most secure styles in this post, and it looks sporty and neat under a bandana or hairnet.
Who should avoid it: anyone in a hurry — two braids take twice the braiding time, around ten minutes. Maintenance through the class: practically zero. The symmetry also makes it easy to spot if one side loosens. Quick verdict: the most secure braid option here, and the best choice for very long or very heavy hair.
14. The Twisted Low Bun
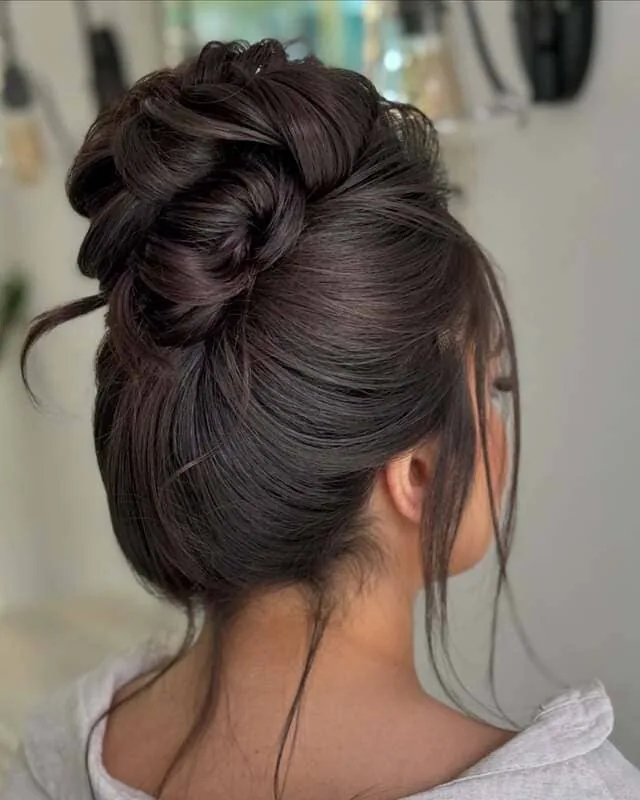
The twisted low bun is the low bun’s softer, prettier sister: instead of a plain coil, you twist two or three sections of hair around each other before wrapping them into the bun. The twists add grip — the hair holds itself — and they give the bun a lovely rope-like texture that looks intentional even when it is slightly undone. It suits medium to long hair and takes about five minutes.
Maintenance through the class: very good. The twists resist loosening better than a plain coil, though you may want to re-pin once after the first hour. Who should avoid it: anyone with very fine hair, which can slip out of twists unless you add texture spray first. Quick verdict: the low bun, upgraded — same security, more charm, barely more effort.
15. The Donut Bun
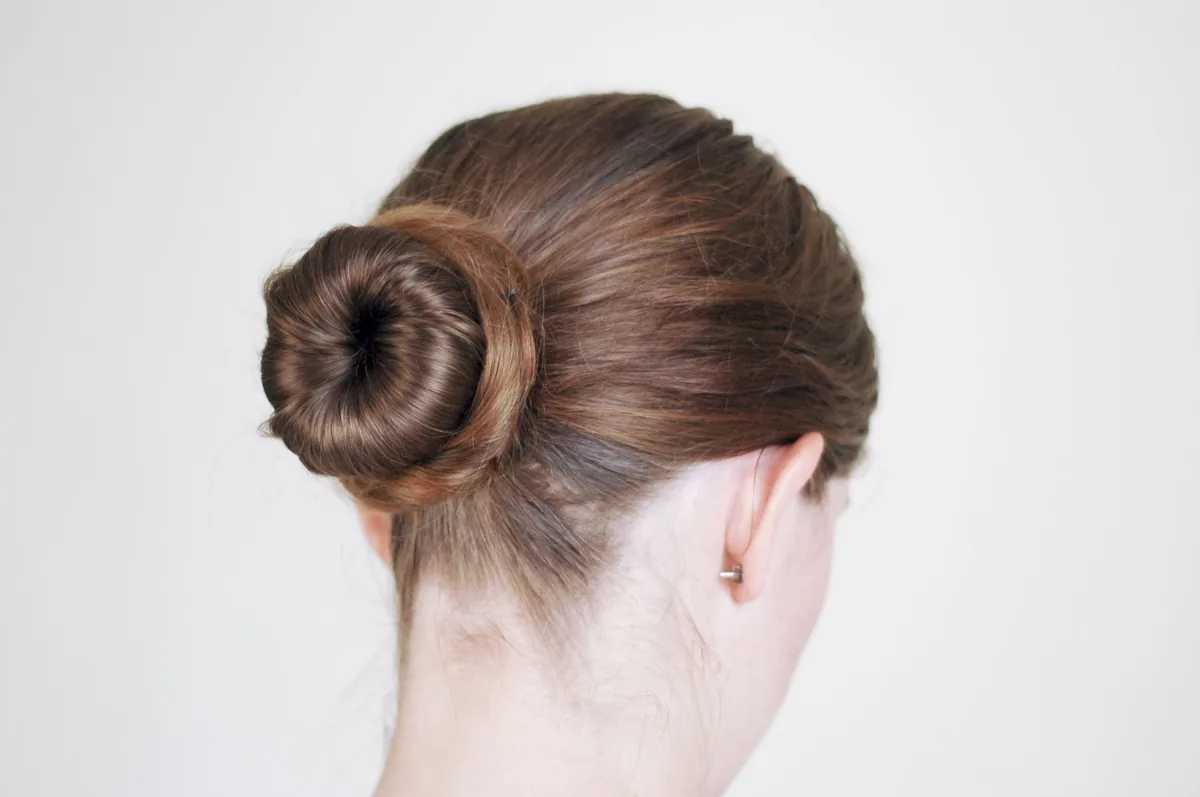
The donut bun uses a foam ring to create a perfectly round, full bun — the kind that looks like it took a stylist, but actually takes four minutes. Pull the ponytail through the ring, spread the hair over it, and pin the ends underneath. The ring gives the bun structure, so it holds its shape through heat and steam far better than a free-form bun, and it keeps every strand contained.
Who should avoid it: anyone who dislikes the feeling of a firm bun — the ring makes the style quite rigid — and anyone with very short hair that cannot cover the ring. Maintenance through the class: superb. The ring does the holding, so the pins have very little work to do. Quick verdict: the best-looking bun for the least effort. Keep a donut ring in your kitchen drawer.
16. The Side Braid
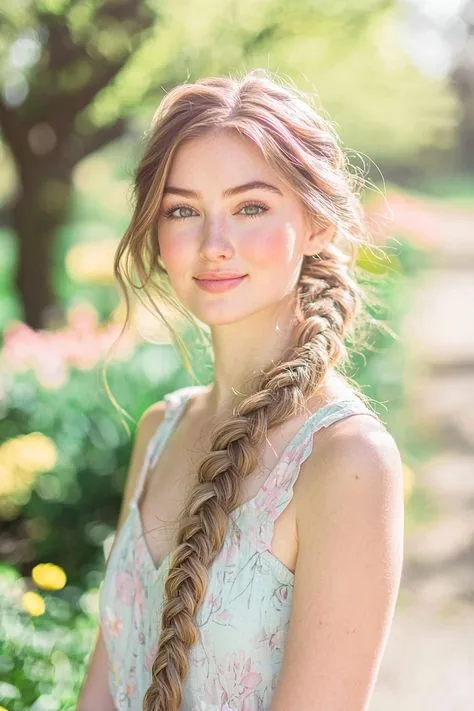
The side braid sweeps all the hair over one shoulder and braids it down, keeping it visible, tidy and — importantly — on one side. It is a good choice if you want a braid but dislike the feeling of hair against the back of your neck, and it looks lovely in class photos. The trick for kitchen safety is to keep the braid short and pin the tail to your shoulder or tuck it into your apron strap, so it cannot swing forward.
Maintenance through the class: moderate. The braid itself holds well, but you will need to keep it draped over the same shoulder. Who should avoid it: anyone who leans over pots constantly — a side braid is always one careless lean away from the food. Pin it up or choose a back braid for a hands-on class. Quick verdict: pretty and practical in a demo class; pin it in place for a hands-on one.
17. The Braided Ponytail
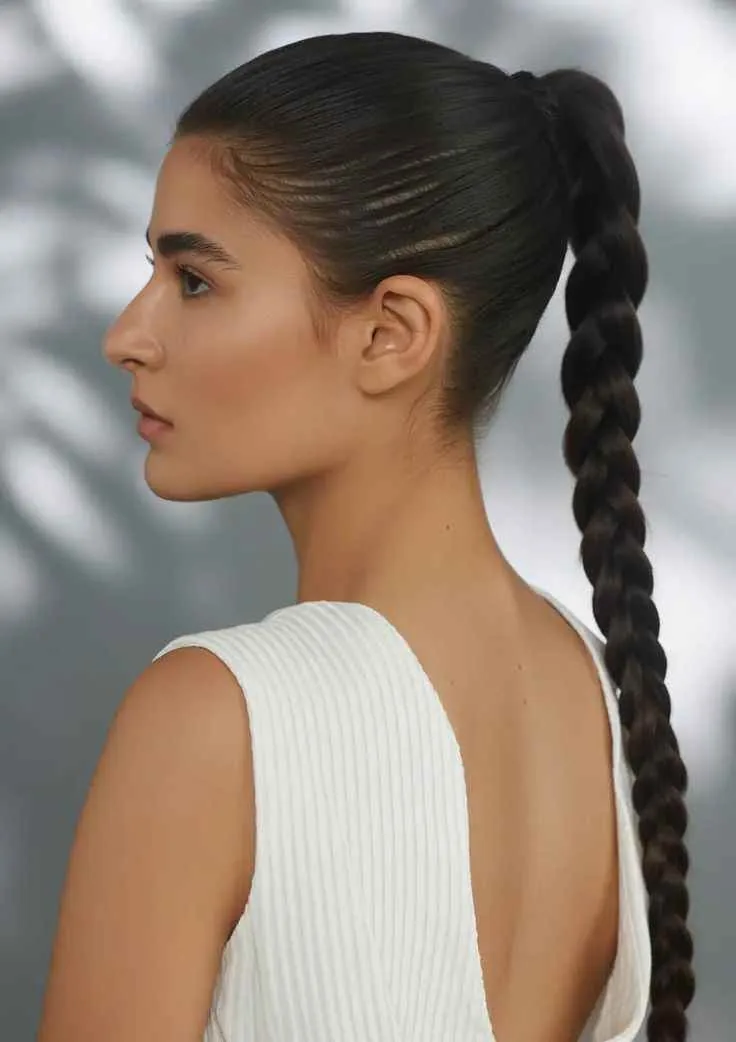
The braided ponytail fixes the high ponytail’s biggest problem — swing — by braiding the tail itself. Start with a secure ponytail, braid the length, and tie off the end. The braid adds weight in a controlled way and stops the tail whipping around when you move, which makes it far more kitchen-friendly than a loose ponytail while keeping the same lifted, energetic look.
Who should avoid it: anyone with very short hair, which cannot form a proper braid from a ponytail. Maintenance through the class: good — the braid keeps its shape in steam, and the ponytail base only needs one re-tighten. Quick verdict: the ponytail, made kitchen-safe. If you love ponytails, this is the version to wear to class.
18. The Curly Pineapple Updo
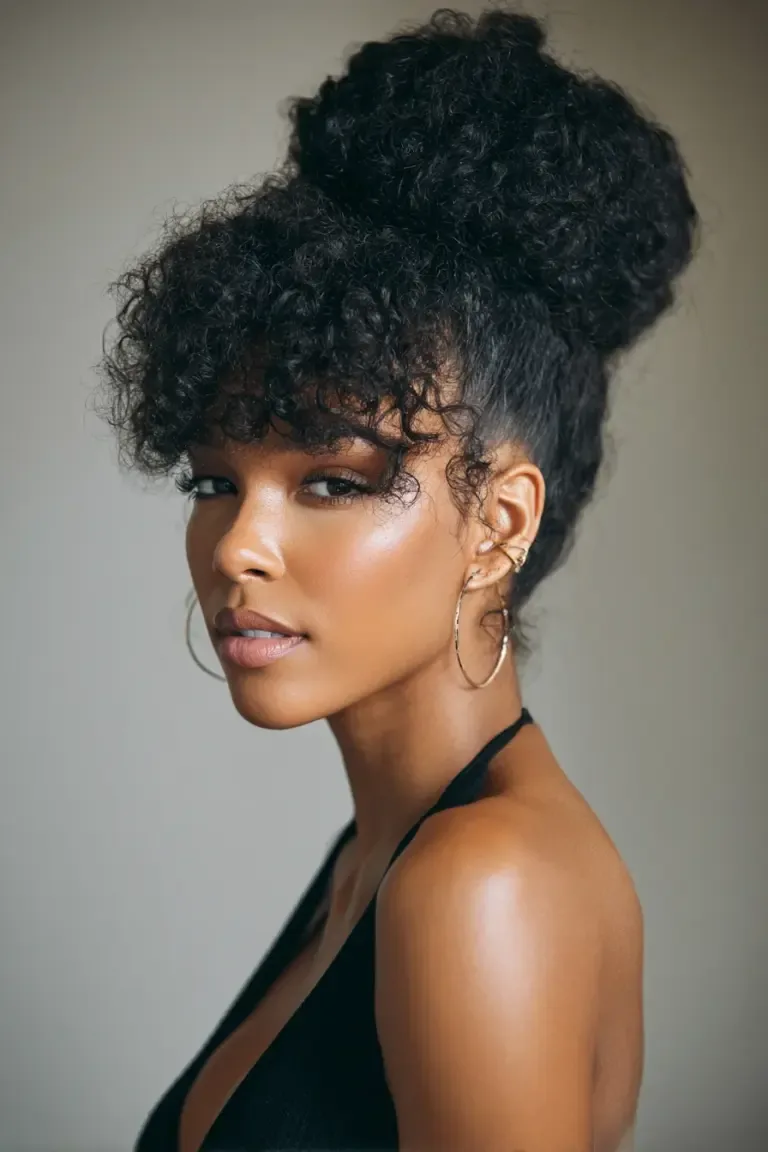
Curly hair needs a style that respects the curls while keeping them contained — and the pineapple updo does exactly that. Gather the curls loosely on top of the head and secure them with a scrunchie, letting the curls fall forward like a pineapple top. The loose gathering protects the curl pattern, while the scrunchie keeps everything off the neck and out of the food.
Maintenance through the class: fair. Steam will loosen curls and add frizz, so a light smoothing cream at the start helps, and you may need to re-gather once. Who should avoid it: anyone with very long curls, which can still flop forward when you bend — pin the front curls back or choose a braided style instead. Quick verdict: the best updo for curly hair, as long as you pin the front section too.
19. The French Twist
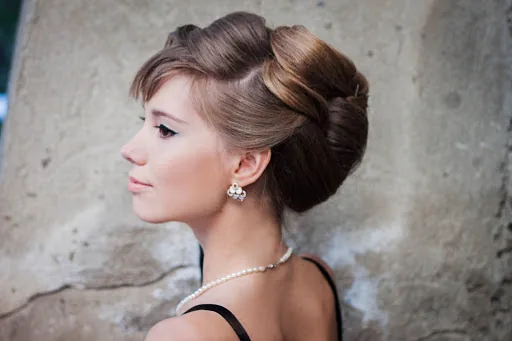
The French twist is the classic updo: the hair is swept up, twisted into a vertical roll, and pinned along the back of the head. It is elegant, it keeps every strand off the neck, and it sits flat enough that it never swings or catches on an apron. It looks like it belongs in a Parisian cooking school — and it practically does.
Who should avoid it: anyone who has never done a French twist before — it takes practice and a lot of pins, so rehearse it at home first. It is also a poor choice for very thick hair, which can make the roll too heavy to pin securely. Maintenance through the class: excellent once pinned properly, since the roll is held by a whole row of pins. Quick verdict: the most sophisticated style here, and surprisingly practical — if you have the skill and the pins.
20. The Rope Braid Ponytail
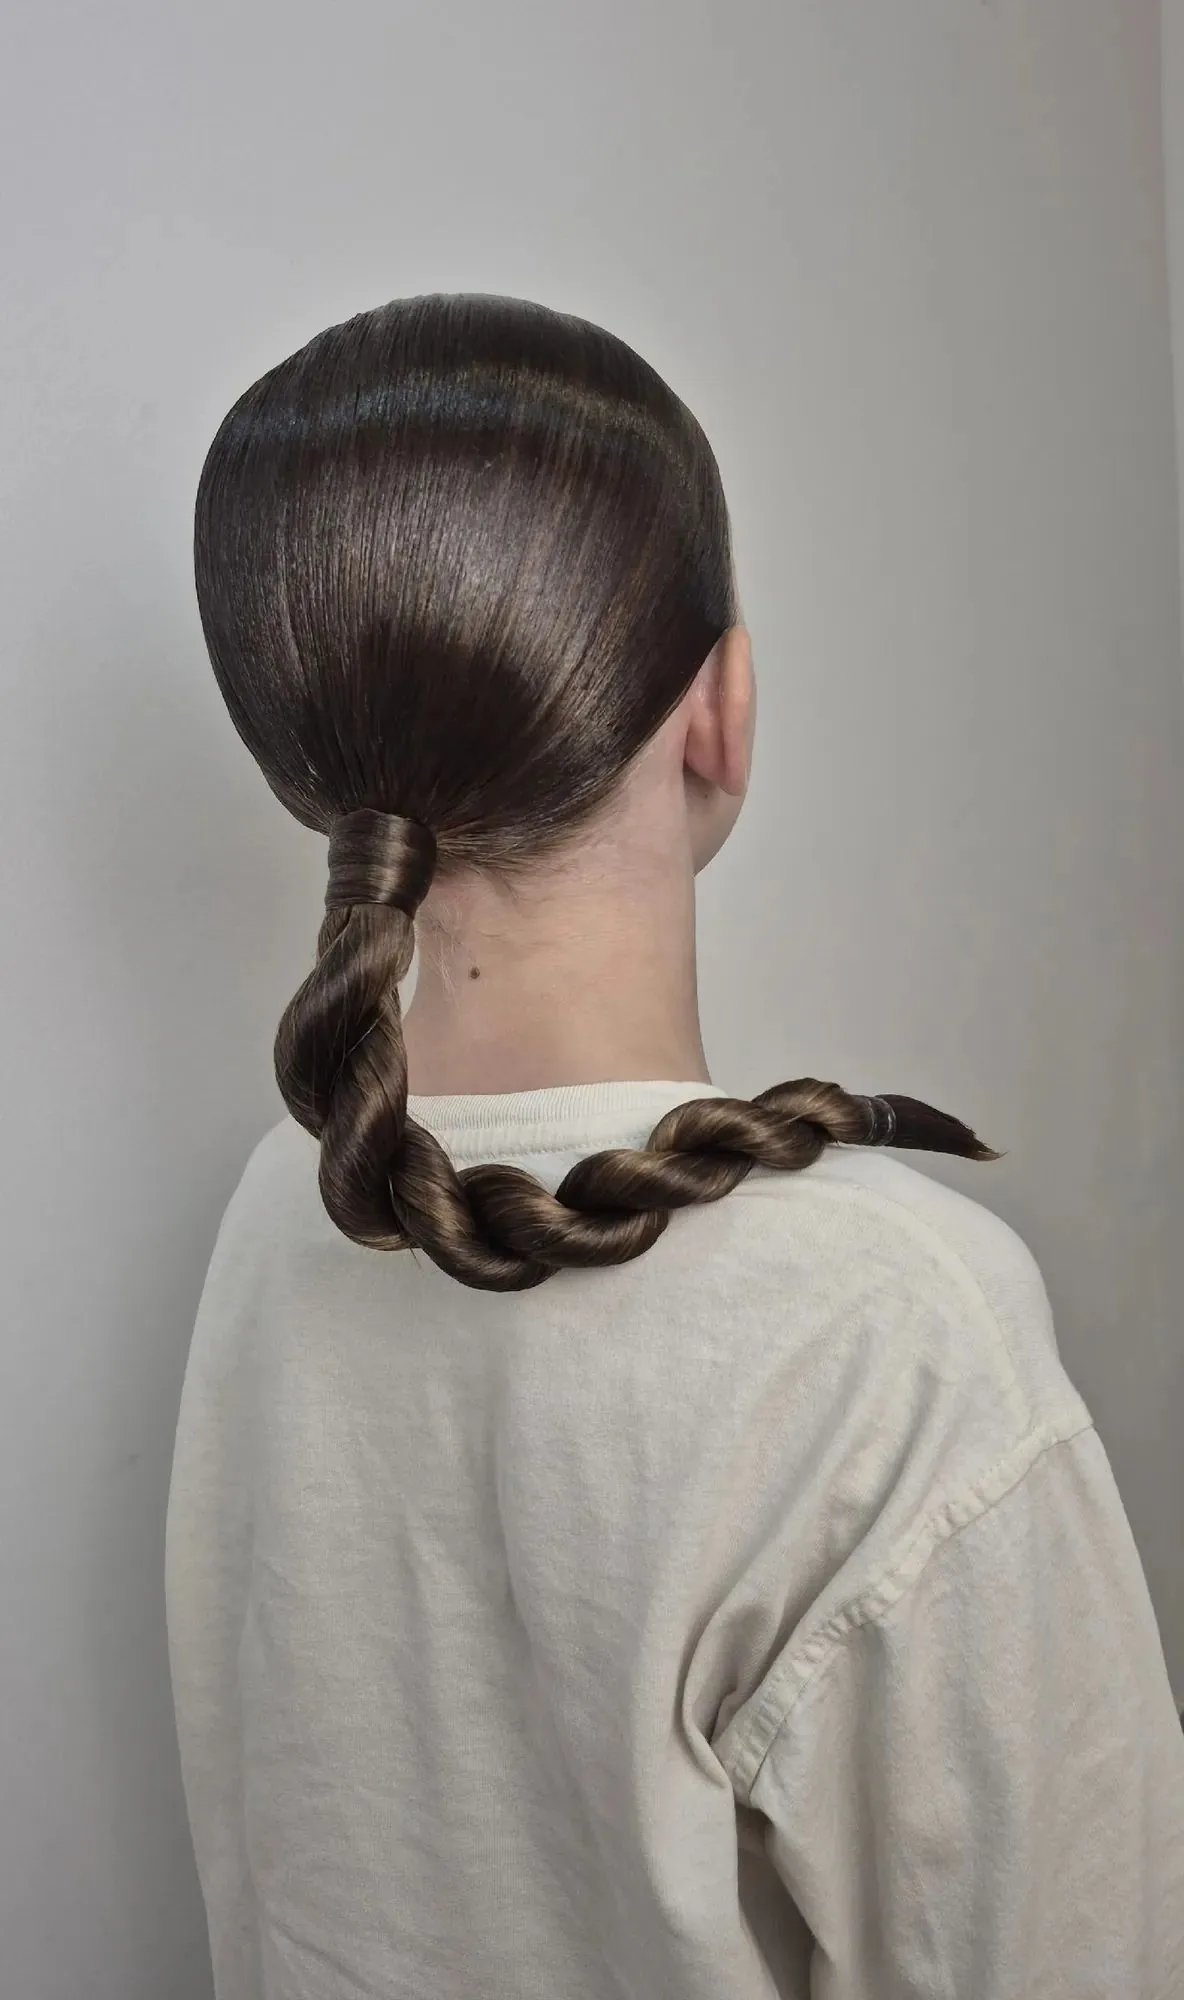
The rope braid ponytail is the fastest braid in this post: divide the ponytail into two sections, twist each one in the same direction, then twist them around each other in the opposite direction and tie off. The opposing twists lock together, so the braid holds itself without constant re-doing — and it looks like a beautiful rope. It takes about two minutes once you know the trick.
Maintenance through the class: very good. The rope structure grips tightly and resists steam loosening. Who should avoid it: anyone with very fine hair, which can unravel from a rope braid unless you add a little texture spray. Quick verdict: the quickest secure braid here — learn it once and you will use it every time you cook.
21. Double Buns (Space Buns)
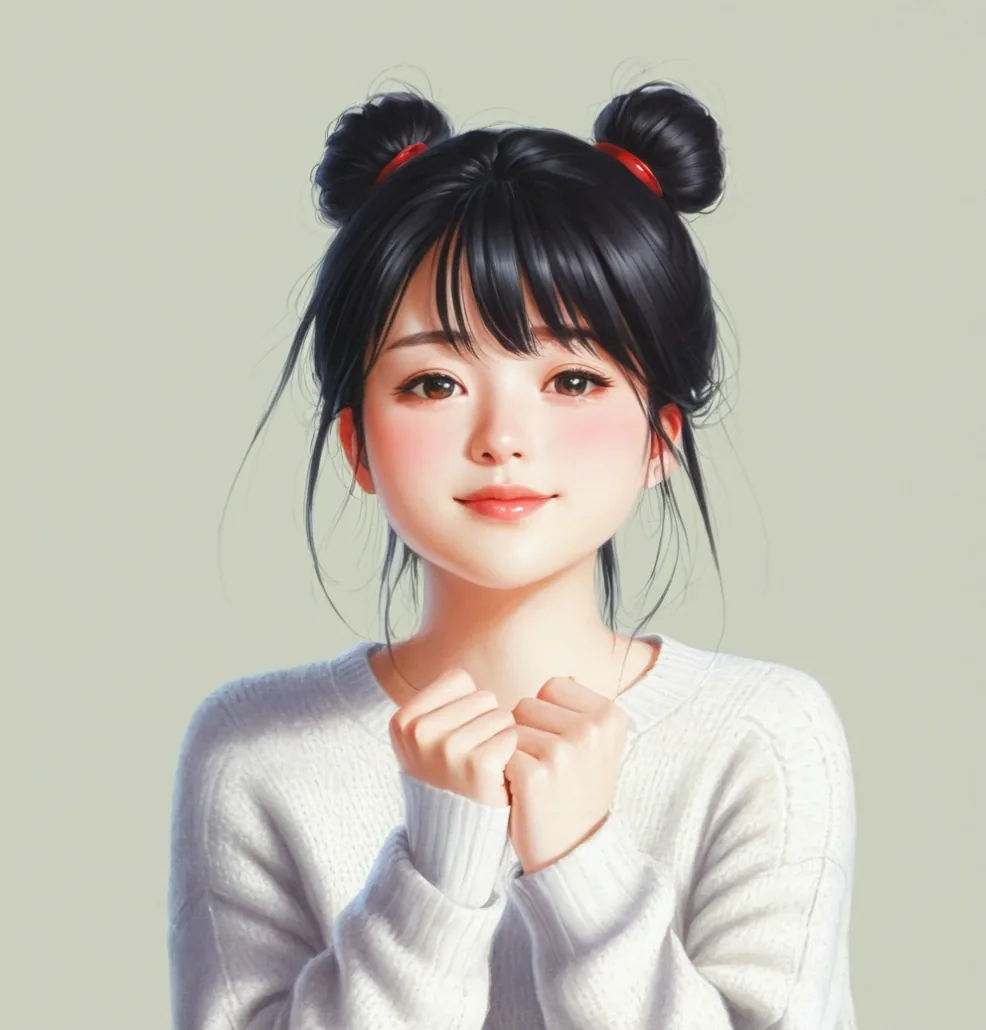
Double buns — space buns — split the hair into two small buns on either side of the head. They are playful, they are very secure, and they solve the weight problem beautifully: each bun carries only half the hair, so nothing pulls. They also sit high and compact, well clear of aprons, pots and steam. Braid the hair first and then wrap it into buns for extra security.
Who should avoid it: anyone heading to a formal or professional class — space buns are fun, not formal. Maintenance through the class: good. Two small buns are easier to keep tight than one big one. Quick verdict: the fun, secure choice for a casual class, a baking class with friends, or a class with kids.
22. The Pixie with a Headband
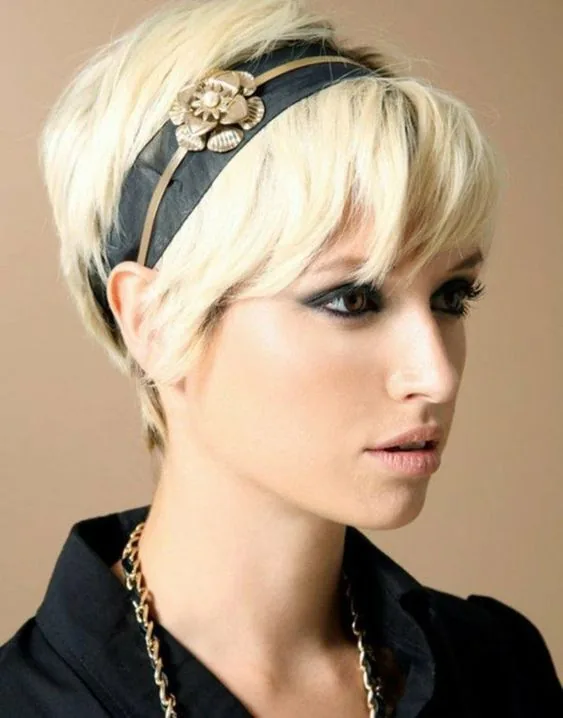
Short hair is not automatically kitchen-safe — a pixie cut has short layers that fall forward onto the forehead and into the face, especially when you lean over a pot. The fix is a headband: a wide fabric band or a slim grip band pushes every strand back and holds it there. Choose a band with silicone grip on the inside so it does not slide in the steam.
Maintenance through the class: minimal. Put the band on and forget it — though keep a spare in your bag in case it stretches. Who should avoid it: anyone whose pixie is grown out at the nape, where the band cannot reach — pin those nape strands up with small clips. Quick verdict: short hair plus a grip headband is one of the easiest cooking-class combinations there is.
23. The Short Bob with a Headband
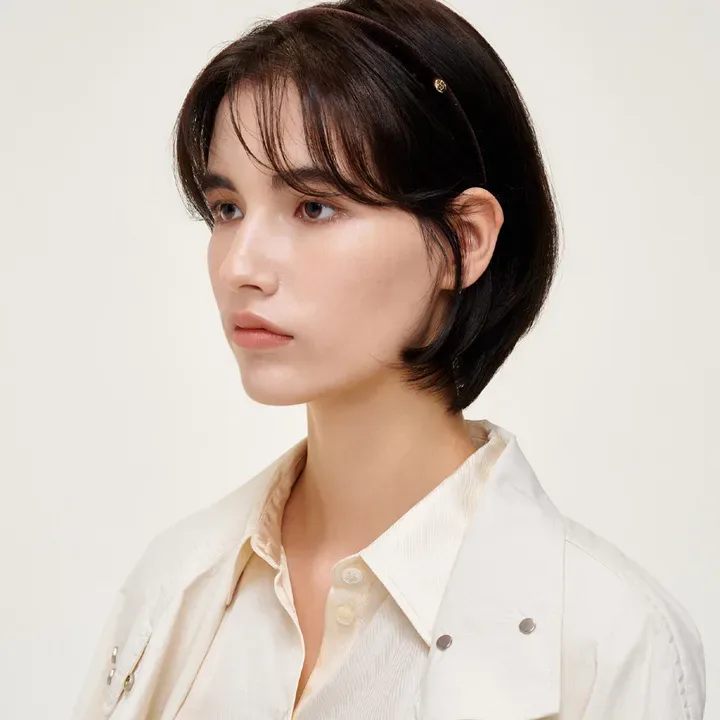
A short bob is a lovely length — until you lean over a chopping board and the front sections fall forward into your face and toward the food. A headband solves it in seconds: push the front hair back, settle the band behind the ears, and the bob stays put. A wide fabric band works best, since it covers more hair and grips better than a thin one, and a bandana tied as a band gives the same hold with more style.
Who should avoid it: anyone whose bob is long enough to reach the shoulders — at that length, a headband alone is not enough, and you need a low ponytail or a braid as well. Maintenance through the class: very good. The band may need one push back into place after the first hour. Quick verdict: the simplest fix for bob-length hair, and it looks charming too.
24. The Claw Clip Updo
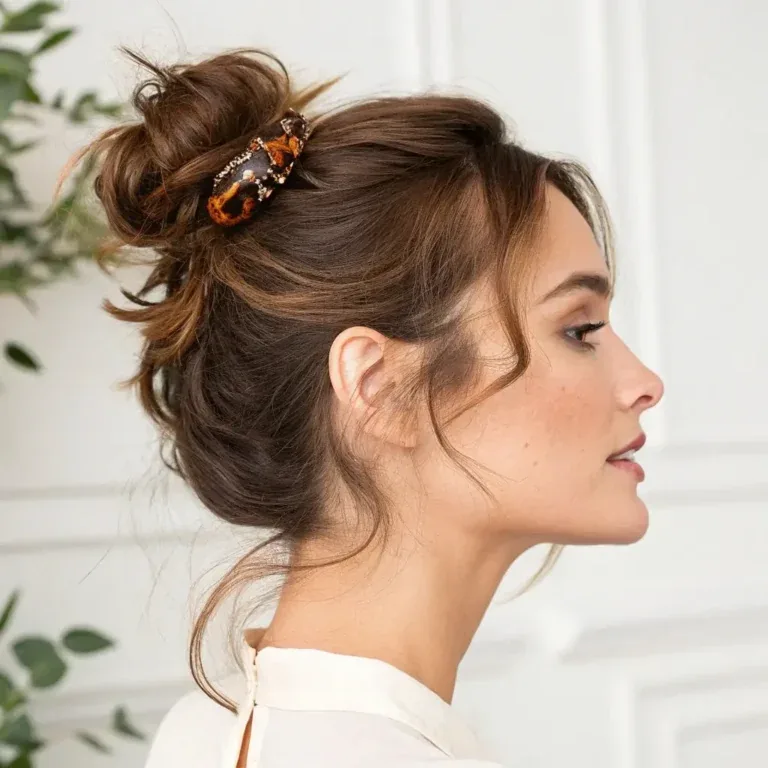
The claw clip updo is the thirty-second miracle: twist the hair up, fold it, and clip it. It holds thick hair comfortably, it spreads the weight across the clip instead of a single elastic, and it looks effortlessly polished. For a cooking class, choose a large, sturdy clip — not a decorative one — and twist the hair tightly before clipping so nothing works loose in the steam.
Maintenance through the class: good for medium hair, fair for very thick hair, which may need a second clip or a few pins as backup. Who should avoid it: anyone with very fine, slippery hair — a claw clip can slide out of it within the hour unless you braid the hair first. Quick verdict: the fastest updo here, and genuinely comfortable — just test the clip’s grip at home first.
25. The Braided Headband Half-Up
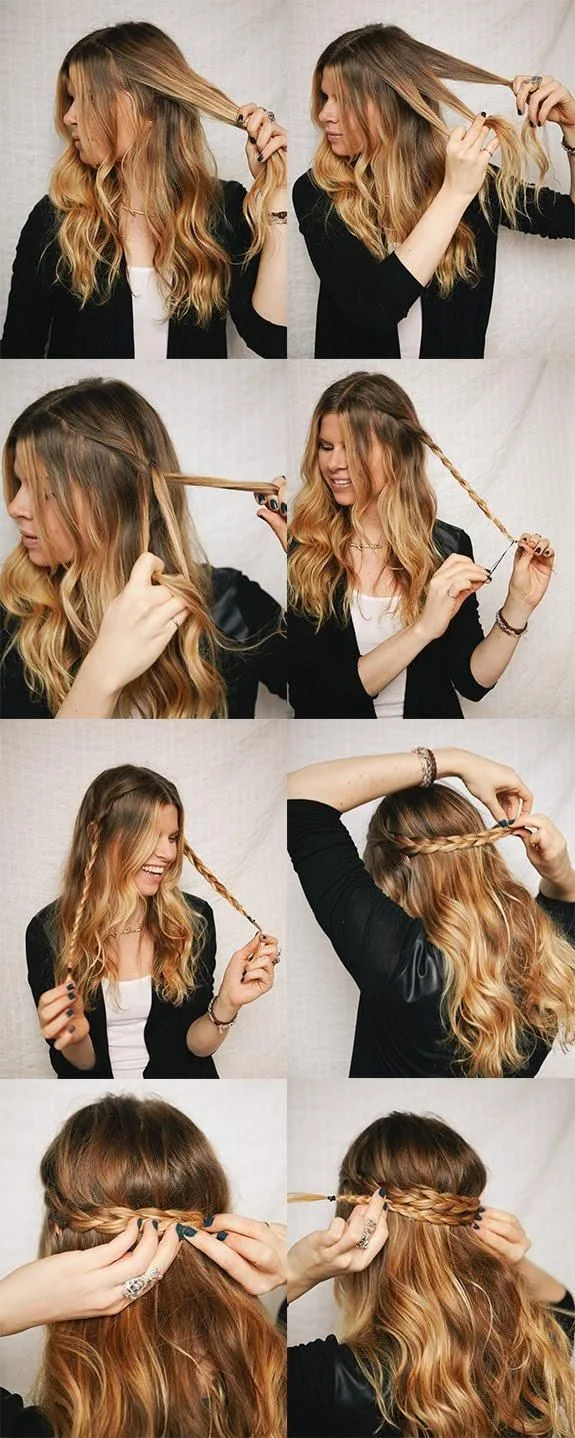
The braided headband half-up style braids a small section from each side of the head and pins them across the crown like a headband, holding the front hair back while the rest falls behind. It looks romantic and handmade, and it keeps the face-framing strands — the ones most likely to fall into food — neatly out of the way. The catch is the same as every half-up style: the hair left down must be managed.
Who should avoid it: anyone with long hair in a hands-on class, unless you gather the lower half into a low ponytail or braid as well. Maintenance through the class: the braided band itself holds beautifully; the loose hair is the part that needs watching. Quick verdict: a beautiful front fix, best paired with a ponytail or bun for the back.
26. The Low Ponytail with a Wrapped Braid
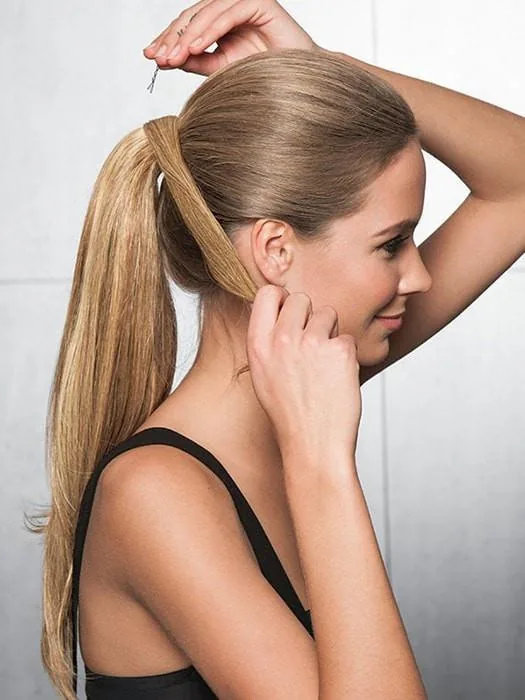
This style takes the humble low ponytail and finishes it with a braid wrapped around the base, hiding the elastic and adding a second anchor point. The wrapped braid does real work, not just decoration: it tightens the ponytail, stops it sagging, and gives the style a polished, finished look that suits a class ending with a shared meal. It adds about a minute to a low ponytail and a lot of charm.
Maintenance through the class: excellent. The double anchor means the ponytail stays high and tight far longer than a plain one. Who should avoid it: anyone with very short hair, which cannot spare a section to wrap around the base. Quick verdict: the low ponytail, dressed up — same comfort, better looks, better hold.
27. Cornrows
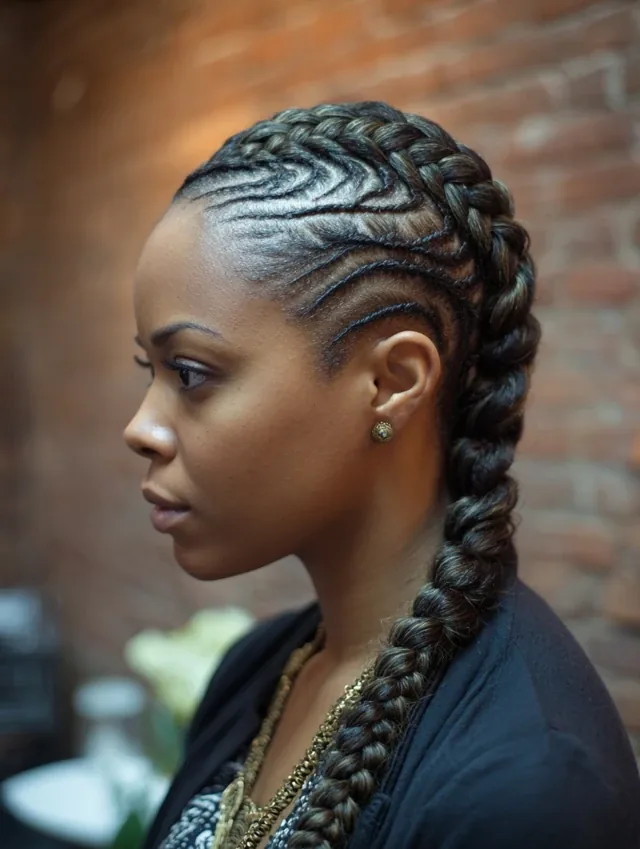
Cornrows are braided flat against the scalp in neat rows, and for cooking-class purposes they are close to perfect: nothing hangs, nothing falls, nothing can reach the food, and the style lasts for days rather than hours. They are also completely unaffected by steam — there is nothing to loosen. Wear them straight back, or gather the ends into a low bun for total containment.
Who should avoid it: anyone who has not had cornrows done before class — they take time and skill, so book them a day or two ahead, not the morning of the class. Maintenance through the class: zero. Cornrows need no attention at all during the session. Quick verdict: the longest-lasting, lowest-maintenance style in this post — ideal if you cook often.
28. The Slicked-Back Low Ponytail
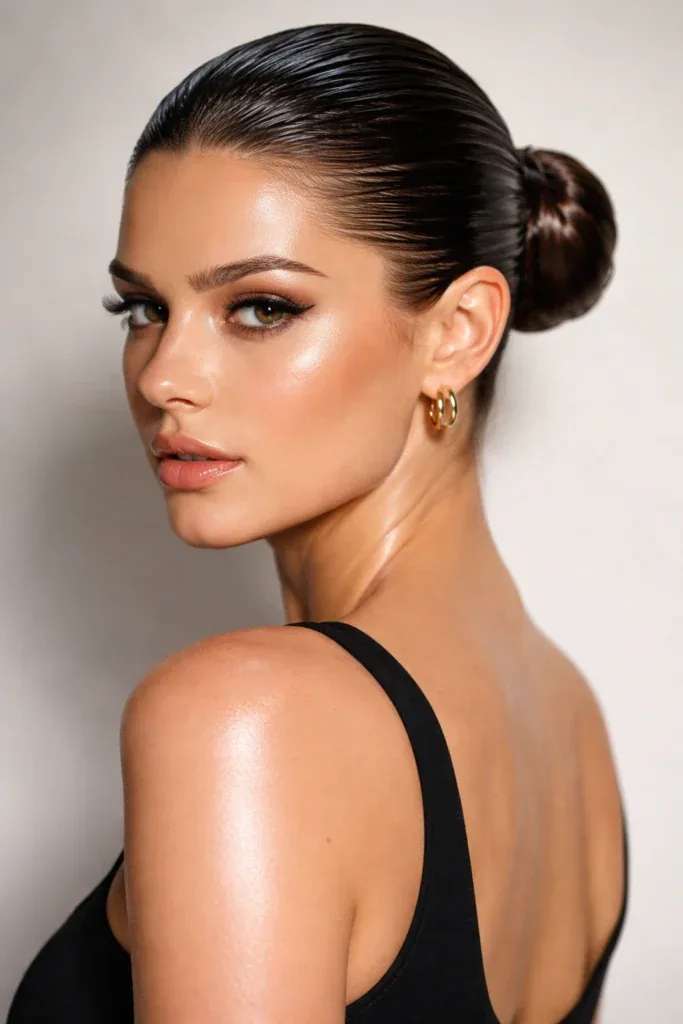
The slicked-back low ponytail is the low ponytail with attitude: every strand brushed back with gel or smoothing cream, the ponytail low and tight, not a single wisp escaping. It is the style to wear when you want to look sharp and stay completely contained — and it is one of the most steam-proof styles here, because gel-set hair barely moves in humidity. Brush it back, secure it low, and smooth the crown once more.
Who should avoid it: anyone who dislikes the feeling of gel, or whose scalp is sensitive to tight pulling — the slicked finish needs firm tension. Maintenance through the class: outstanding. Steam will not undo gel. Quick verdict: the sharpest, most contained ponytail here — perfect for a class with a dress code or a camera.
29. The Braided Top Knot
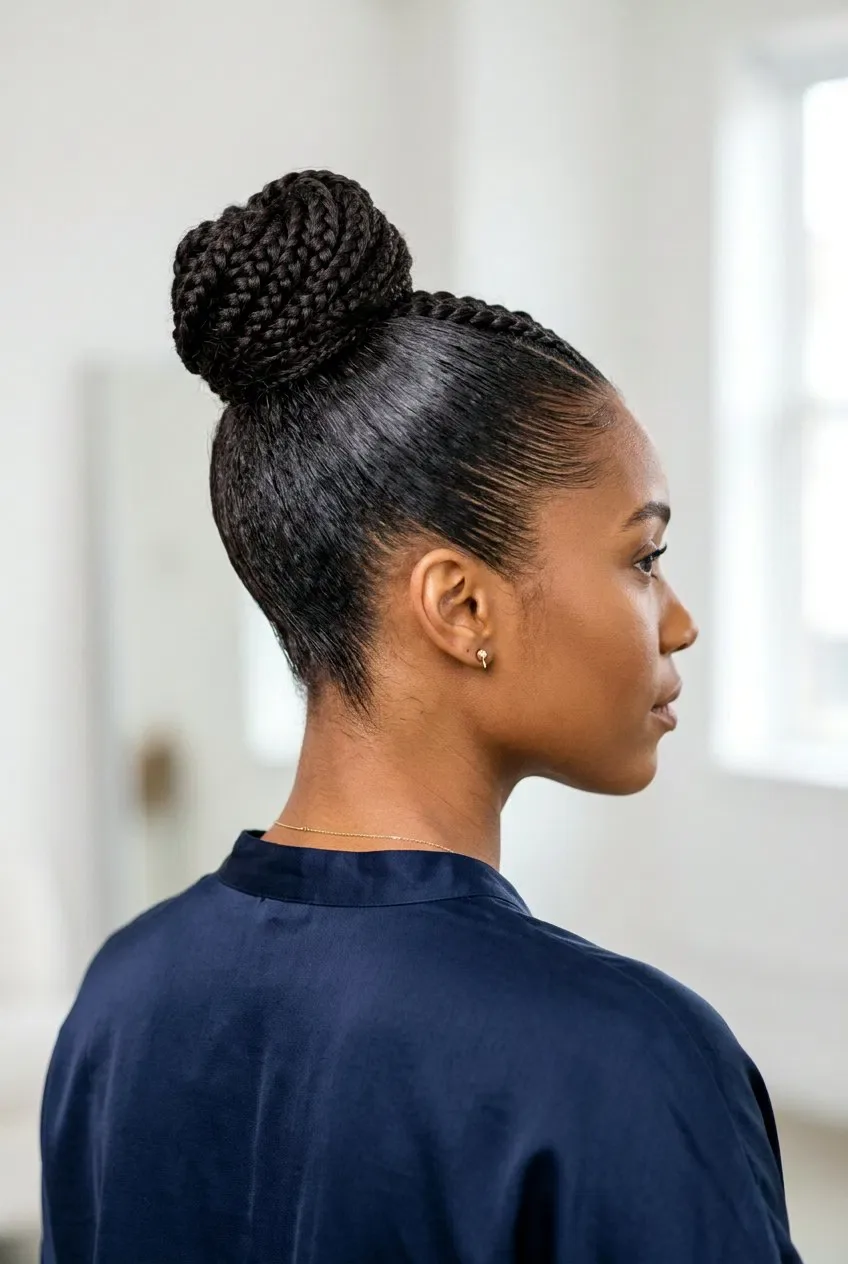
The braided top knot combines a braid and a bun: braid the ponytail first, then wrap the braid into a knot on top of the head and pin it. The braid inside the bun acts like scaffolding — it stops the knot from collapsing, keeps the shape through hours of steam, and looks beautifully textured. It is sturdier than a plain top knot and far prettier than a plain bun.
Maintenance through the class: very good. The braided structure holds its shape long after a plain knot would have sagged. Who should avoid it: anyone with very heavy hair — a high knot is still a high knot, and the weight will pull by hour two. Quick verdict: the top knot, fixed — if you like high buns, this is the version that actually survives a class.
30. The Side-Swept Low Bun
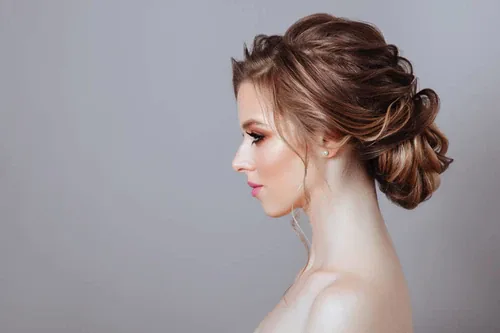
The side-swept low bun gathers the hair to one side at the nape and coils it into a soft bun. It is asymmetric, romantic and a little softer than a centred bun, which makes it a lovely choice for a class that ends with dinner. The side placement also keeps the bun clear of the apron knot at the centre of the neck, which is a small but real comfort win.
Who should avoid it: anyone who moves around a lot while cooking — a side bun can shift if you turn your head sharply again and again, so pin it well. Maintenance through the class: good, with one re-pin at the break if needed. Quick verdict: the romantic low bun — secure enough for class, pretty enough for the dinner afterwards.
31. The Twisted Crown Updo
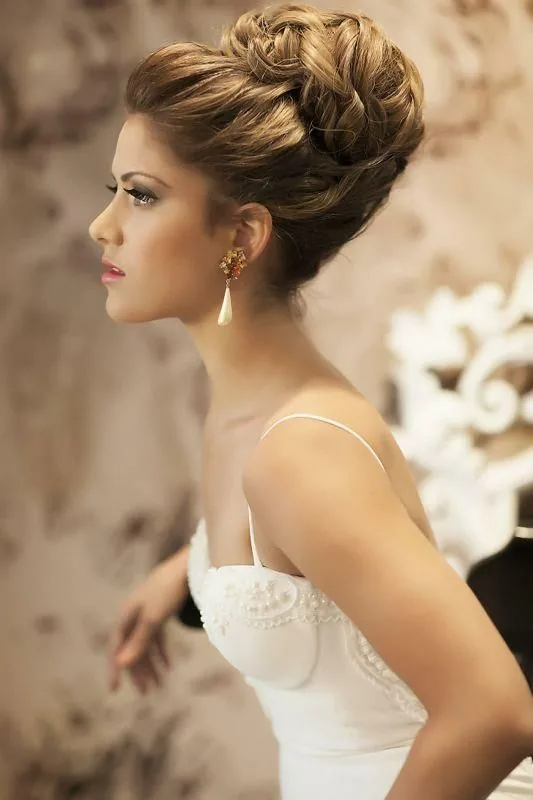
The twisted crown updo twists sections of hair around the head and pins them into a halo, gathering the rest into a low bun at the back. It is the braided crown’s easier cousin — twists are quicker than braids and more forgiving if your sections are uneven. The result is a style that holds everything flat against the head and looks like you spent far longer on it than you did.
Maintenance through the class: very good. Twists locked with pins hold well in steam, and the low bun at the back anchors the whole style. Who should avoid it: anyone with very short hair, which cannot twist around the crown. Quick verdict: the crown style for people who cannot braid — all of the security, half of the skill.
32. Bubble Braids Pigtails
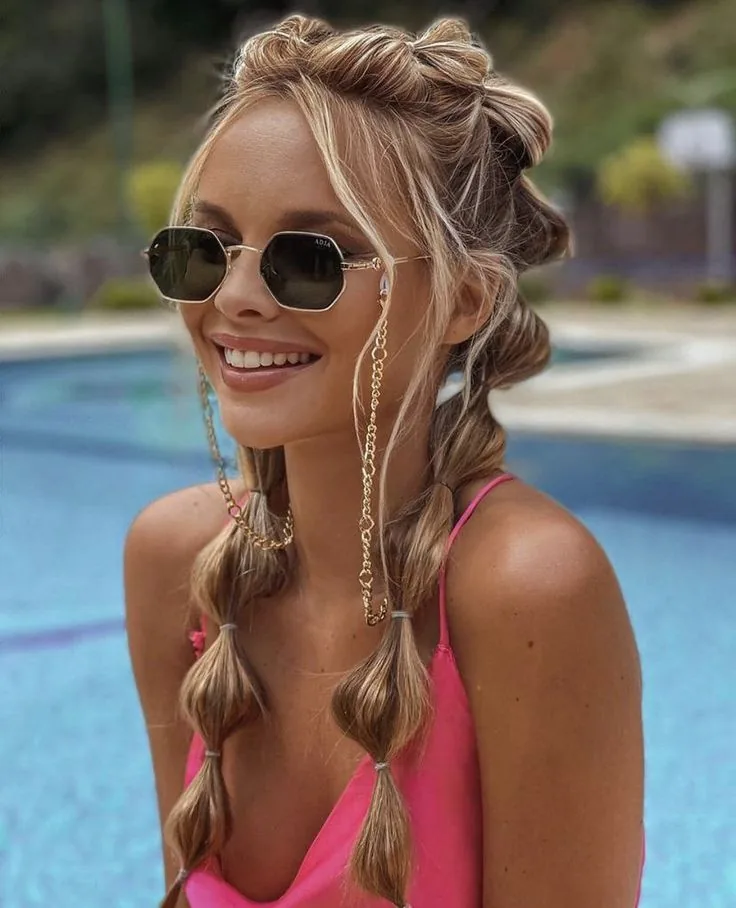
Bubble braids pigtails split the hair into two sides, tie each side into a ponytail, and add elastics down the length to create bubbles. They are fun, youthful and surprisingly secure — each side carries only half the hair, and the extra elastics keep both tails compact. They are a great choice for a casual baking class, a class with children, or a themed cooking party.
Who should avoid it: anyone in a formal class — this is a playful style, not a professional one — and anyone working with open flames, since the tails still hang. Maintenance through the class: good. The bubbles may flatten in steam, so puff them again at the break. Quick verdict: the most fun style in this post, and more practical than it looks.
33. Two-Strand Twists into a Bun
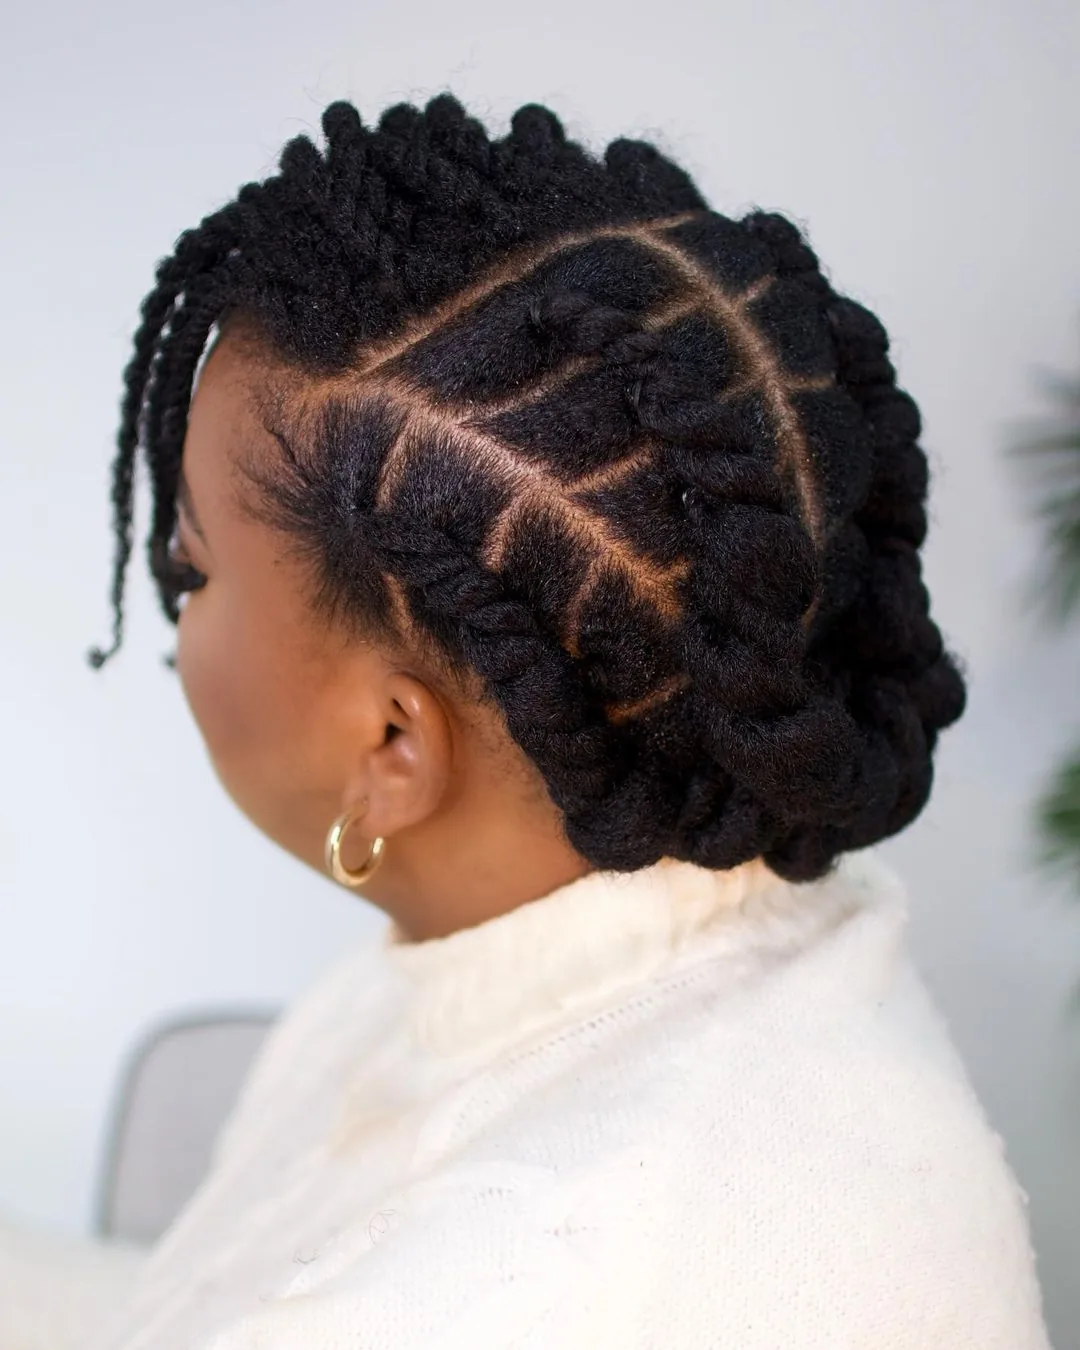
Two-strand twists into a bun is a gentle, protective style: divide the hair into sections, twist each pair of strands around each other, then gather all the twists into a low bun. The twists protect the hair from heat and steam damage, they hold their shape for hours, and the finished bun is full, textured and completely contained. It works beautifully on natural and textured hair.
Maintenance through the class: excellent. The twists barely move once set, and the bun needs no attention at all. Who should avoid it: anyone short on time — the twists take a while to do, so prepare them the night before class. Quick verdict: the protective, all-day choice — do it the evening before and your class hair is already sorted.
Can I wear my hair down in a cooking class?
No — hair down is not a good idea in a cooking class. Loose hair falls forward when you lean over a pot or chopping board, and it can end up in the food. Always wear your hair fully up and contained, even if the class does not require it. A low bun, a braid or a pinned-up style keeps the food safe and your hair out of the way.
Do I need a hairnet for a cooking class?
It depends on the class. Professional and bakery classes often require a hairnet, while casual classes usually do not. Check with the organiser before the day. Even when a hairnet is not required, wearing one — or a scarf or bandana — is a smart extra layer that catches wispy strands and keeps flour and oil off your hair.
What is the best hairstyle for a long cooking class?
For a class lasting three hours or more, choose a style that spreads the weight and needs no maintenance: a low bun, two French braids, a braided crown or cornrows. Avoid high, tight ponytails, which can cause headaches after a couple of hours, and avoid any style that relies on hairspray alone, which steam will undo.
How do I keep my hair from falling into food while cooking?
Choose a style that pulls all of your hair away from your face and anchors it in at least two places — for example, a braid tucked under at the nape, or a bun pinned in four places. Pin back any face-framing layers, do a bend test before class by leaning forward and shaking your head gently, and wear a bandana or hairnet as a backup layer.
Will steam ruin my hairstyle in a cooking class?
Steam softens styling products and loosens anything held together by hairspray alone, but it will not undo a structured style. Braids, twisted buns and gel-set styles hold up well in steam because their shape comes from the structure of the hair, not from products. If your hair is fine or silky, use textured elastics and a few extra pins for insurance.
What hairstyle works best with an apron?
Low buns, low chignons and short braids work best with an apron, because they sit above the apron straps and never tangle with the ties. Avoid long ponytails and loose braids that rest on the back of your neck, where the apron knot sits — they will swing forward when you lean over a counter and tangle in the straps.
Can I wear a claw clip in a cooking class?
Yes, if it is a large, sturdy clip and the hair is twisted tightly before clipping. A claw clip updo is comfortable and quick, and it holds thick hair well. Avoid small or decorative clips, which can slide out in the steam, and avoid clips with dangling parts. For very fine hair, braid the hair first and then clip it up for extra grip.
How do I keep short hair out of my face while cooking?
Use a wide fabric headband with a silicone grip, or a bandana tied as a band, to push short layers back from your forehead. Pin any nape strands up with small flat clips. Short hair is actually easier than long hair in a cooking class — there is less of it to contain — as long as the front sections are held back.
What should I pack in a cooking class hair kit?
Pack two bobby pins, one spare elastic, a scrunchie for your wrist, and a small bandana or headband. That is all you need for a quick fix between dishes. A few pins can rescue a loose section, a spare elastic can re-secure a sagging bun, and a bandana covers any wisps that escape in the steam.
Is a messy bun okay for a cooking class?
Yes, as long as it is a secured messy bun — the texture can look relaxed, but the pins must be doing real work. Use at least four pins at different angles, keep the knot compact, and check it at the first natural pause in the class. A loose, wobbly bun that sheds strands is not okay, but a well-pinned messy bun is perfectly fine.
Conclusion
The best hairstyles for a cooking class are the ones you forget about the moment the lesson starts — the one that keeps every strand out of the food, off your face and away from the stove, while you focus on the recipe in front of you. Whether you choose a classic low bun, a French braid, a braided crown or a simple claw clip updo, the rules are the same: contain everything, anchor it twice, test it with a bend before class, and keep a couple of pins in your apron pocket just in case.
These 33 hairstyles for a cooking class prove that practical hair can still be beautiful. Pick the style that suits your hair length, your comfort and the kind of class you are taking, practise it once at home, and then walk into the kitchen knowing your hair is sorted. Hair up, apron on — now go and cook something wonderful.