Glide, Spin, Stay Stunning: 36 Hairstyles for Ice Skating That Survive the Rink
There is a moment, halfway through a spin, when every skater finds out whether her hair plan actually worked. The bun that looked perfect in the mirror is sliding sideways, loose strands are whipping across her face, and the ponytail she loved at home is bouncing with every push of the blade. The best hairstyles for ice skating are chosen before you step onto the rink — they are built to survive spins, jumps, cold air, falls and hours under a hat or helmet, and they still look beautiful in rink photos afterwards.
These 36 hairstyles for ice skating cover every hair length and texture, from the classic figure skater bun and French braid crowns to boxer braids, space buns and helmet-friendly short styles. Eight guides first walk you through the practical side of the rink: hats, earmuffs and headbands, cold air and static, sweat under a hat, and what to pack in a rink-side emergency kit. Each style includes honest notes on how long it takes, what it costs, who it suits best and what can go wrong, so you can glide, spin and land with your hair exactly where you left it.
Hats, Earmuffs and Headbands on the Ice
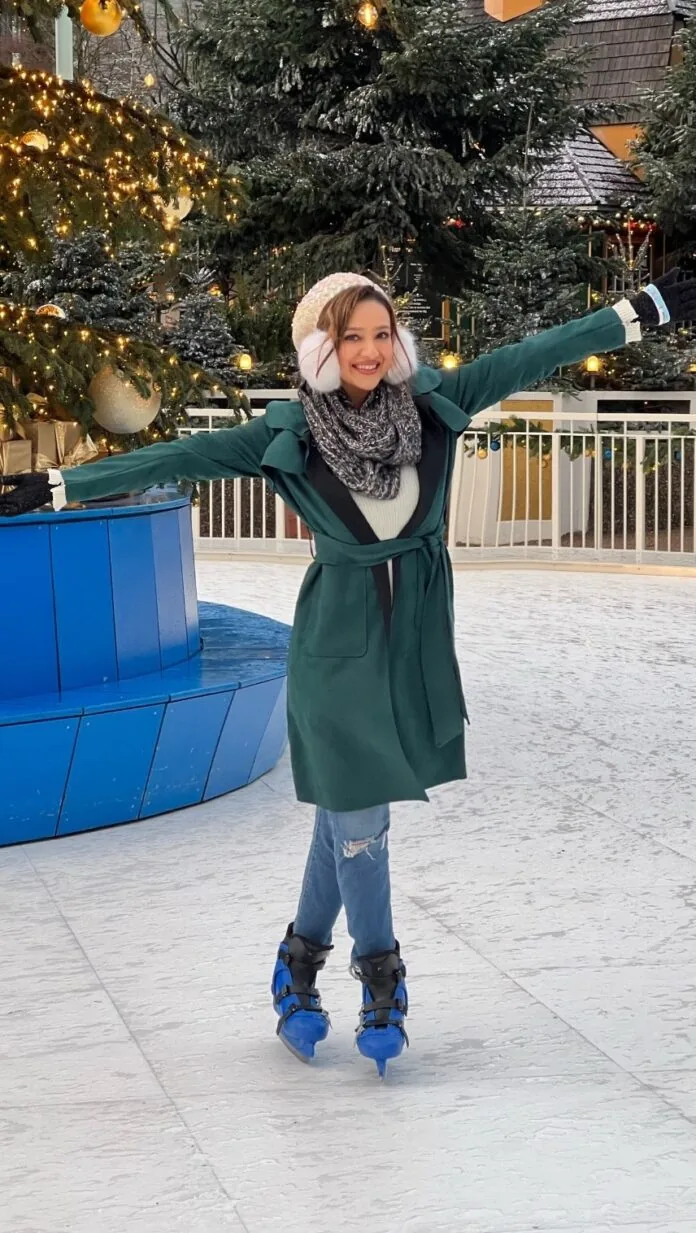
A hat, earmuffs or a headband changes everything about a rink hairstyle, because whatever sits on your head has to work with the style underneath it, not against it. Low buns, low ponytails and flat braids are the safest partners for winter headwear — anything piled high on the crown will get squashed, shifted or pulled loose the moment a beanie goes on. If you love a high bun, wear a headband or earmuffs instead of a full hat, so the bun stays clear of the band.
Best for: casual skaters, outdoor rinks and anyone who feels the cold the moment they step on the ice. Cost: nothing extra if you already own a headband; a fleece-lined band costs a few dollars. Common mistake: pulling a tight beanie over a high ponytail and wondering why the style collapsed — keep the bulk low and let the headwear sit flat. Quick verdict: choose the headwear first, then build the hairstyle around it, not the other way round.
Cold Air and Static: Keeping Hair Smooth at the Rink

Cold rink air is dry air, and dry air plus wool hats plus movement equals static — flyaways that stand straight up in every photo. The fix starts before you leave home: a pea-sized drop of leave-in conditioner or a light hair oil smoothed over the lengths keeps the cuticle sealed and the static down. A wooden or boar-bristle brush helps too, because plastic brushes build up the charge that makes hair fly.
Best for: fine or long hair, which shows static worst. Cost: a few dollars for a travel-size leave-in. Common mistake: loading on hairspray to fight flyaways — it makes hair stiff and brittle in the cold, and it flakes when you take a hat off. Quick verdict: moisturise lightly, brush with the right tool, and keep a dryer sheet in your skate bag for a quick smoothing pass between sessions.
Sweat Under a Hat: What to Do After Skating
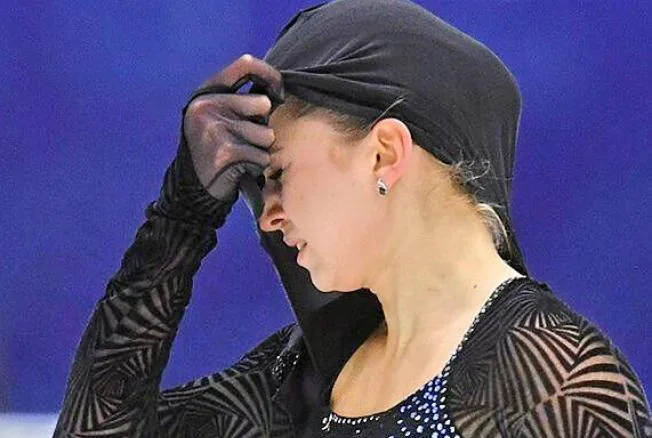
Skating is a real workout, and a warm hat traps all of that sweat against your scalp — the result is flat roots, damp strands and a style that has given up by the time you reach the car. The trick is to take the hat off as soon as you come off the ice and let the air get to your roots for a few minutes before you re-style. A quick blast of dry shampoo at the roots lifts the flatness and absorbs the dampness without a full wash.
Best for: anyone who skates hard or wears a helmet or beanie for the whole session. Cost: a travel dry shampoo costs a few dollars and lasts for weeks. Common mistake: re-braiding or re-bunning sweaty hair straight away — it dries in a strange shape and smells stale by the evening. Quick verdict: air it out first, dry shampoo second, and only then decide whether the style needs a rebuild.
Staying Secure Through Spins, Jumps and Falls
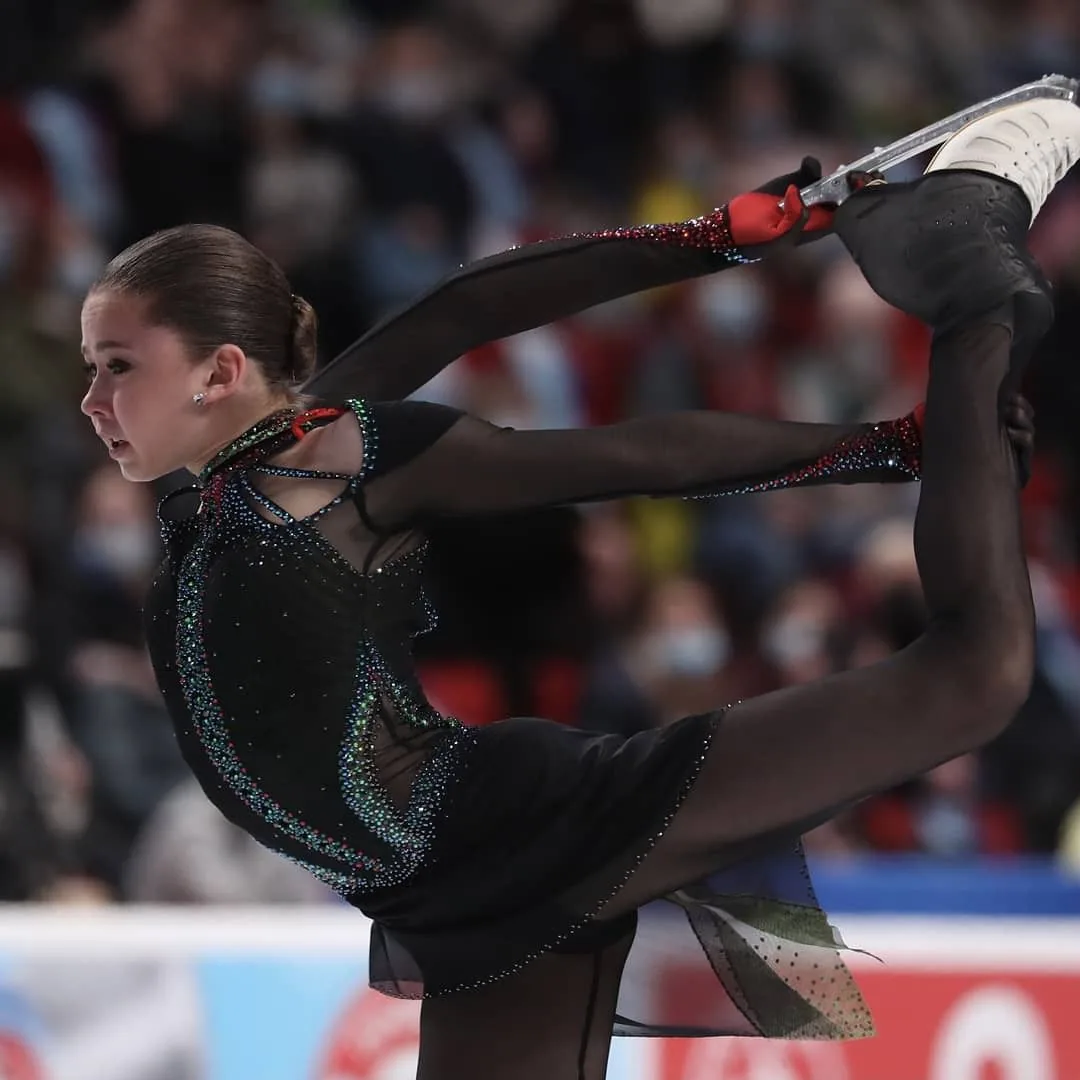
A style that survives a gentle glide can still fall apart on a spin, because spinning throws the hair outward and a jump landing jars every pin at once. The styles that hold are the ones anchored at two or more points: a braid that feeds into a bun, a ponytail secured with two elastics, or a bun pinned with a hair net over the top. One elastic and good intentions are not enough for a sit spin, and a fall will test every bobby pin you own.
Best for: figure skaters, competitive skaters and anyone learning spins or jumps. Cost: a hair net and a pack of bobby pins cost almost nothing. Common mistake: pinning a bun with pins all facing the same way — criss-cross them so they lock against each other, and use a net for competitions. Quick verdict: if the style survives ten practice spins without a wobble, it will survive the real thing.
Rink Photos: Hairstyles That Look Good on Camera
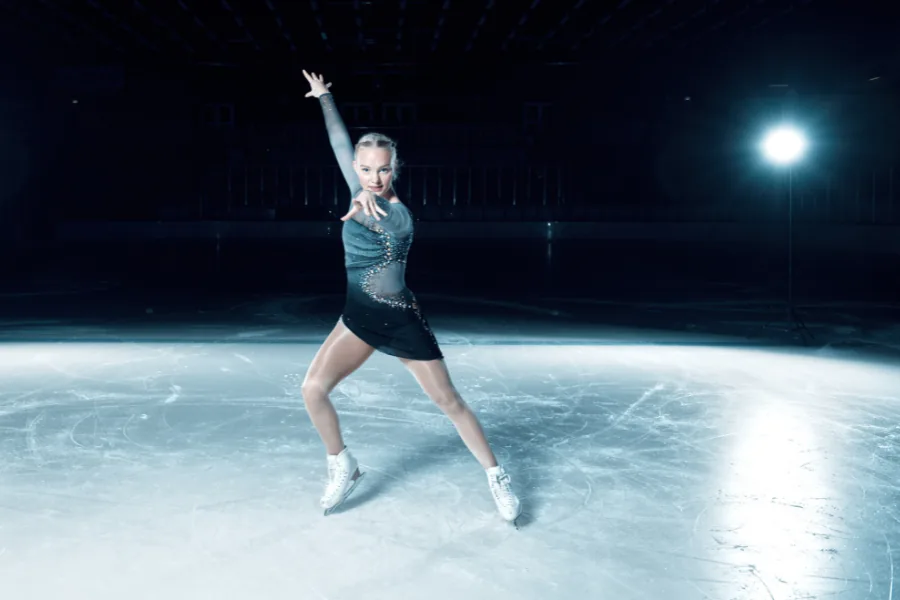
Rink light is bright, white and unforgiving, and it washes out soft styles while making neat ones shine. Styles with clean lines — a sleek bun, a polished braid, a smooth low ponytail — photograph beautifully against the ice, while loose, wispy styles can look messy in the glare. A few face-framing strands softened with a curling iron add warmth in photos without risking the structure of the style itself.
Best for: competitions, holiday skate photos and anyone who wants rink pictures worth framing. Cost: nothing beyond your usual styling tools. Common mistake: choosing a style that looks great in the bathroom mirror under warm light but disappears completely under bright rink lights — test it in daylight first. Quick verdict: go a touch neater than you think you need, and let one or two soft strands do the pretty work.
Matching Your Hairstyle to Your Skating Outfit
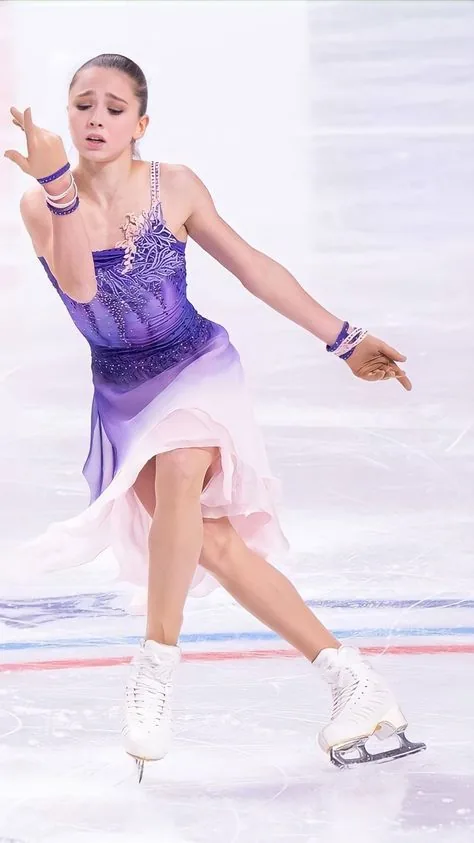
A skating outfit and a hairstyle are one look, not two — a sparkly competition dress calls for a polished bun or a crown braid, while a cosy sweater and leggings suit a relaxed braid or a low ponytail. The neckline matters most: a high collar or a scarf needs the hair up and clear, while an open neckline can carry a half-up style or a side braid. Colour helps too — a ribbon or scrunchie that picks up a colour from the outfit ties the whole look together.
Best for: competition days, themed skates and holiday rink outings. Cost: a matching ribbon or scrunchie costs a dollar or two. Common mistake: pairing a dramatic, glittery dress with an equally dramatic hairstyle — one star per look is enough. Quick verdict: let the outfit lead and the hair follow, and match one small accessory to the outfit for a finished look.
Hair Under a Helmet for Beginners
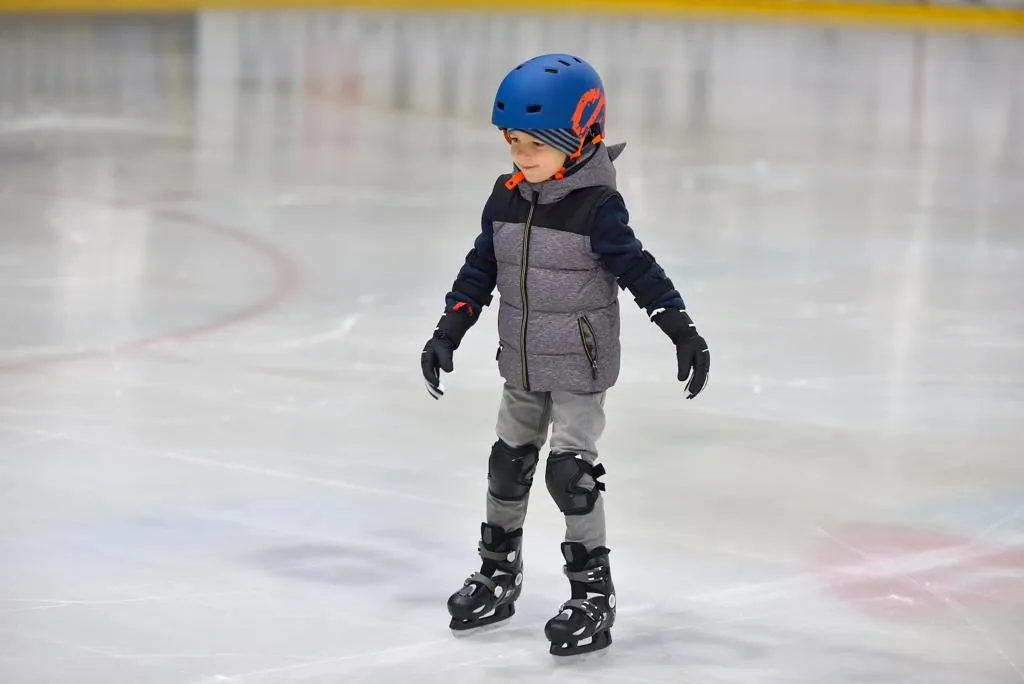
Beginners wear helmets, and a helmet changes the rules completely: nothing bulky on top, nothing that shifts when the helmet goes on, and nothing that makes the helmet sit crooked. The winners are low braids, low ponytails and flat two-strand twists that sit close to the head, with the helmet fitting snugly over the top. A high bun under a helmet pushes the helmet up and leaves a gap at the forehead, which defeats the whole point of wearing one.
Best for: first-time skaters, children and anyone learning to skate. Cost: nothing — the helmet is the only equipment you need. Common mistake: putting the hair in a high ponytail and then forcing the helmet over it, which hurts, slips and leaves the helmet loose. Quick verdict: braid it low, keep it flat, and check the helmet fit before you step on the ice.
Quick Fixes Rink-Side: Your Emergency Hair Kit
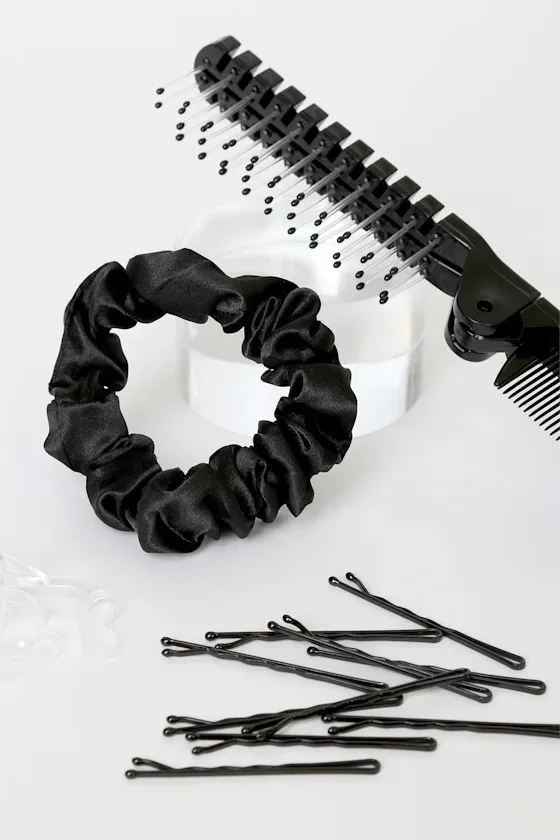
Every skater needs a tiny rink-side kit, because a style that breaks mid-session cannot wait until you get home. Pack three spare elastics, six bobby pins, two small clips, a mini brush and a travel dry shampoo in a zip bag that lives in your skate bag permanently. A spare scrunchie doubles as an emergency wristband, and a silk scarf can rescue a completely failed style by wrapping it into a chic low bun in under a minute.
Best for: every skater, from first-timers to competitors. Cost: under five dollars for the whole kit. Common mistake: bringing only one elastic and discovering it snapped halfway through a lesson. Quick verdict: pack the kit once, leave it in your bag, and you will never have to skate with a half-fallen hairstyle again.
The Classic Figure Skater Bun That Never Lets You Down
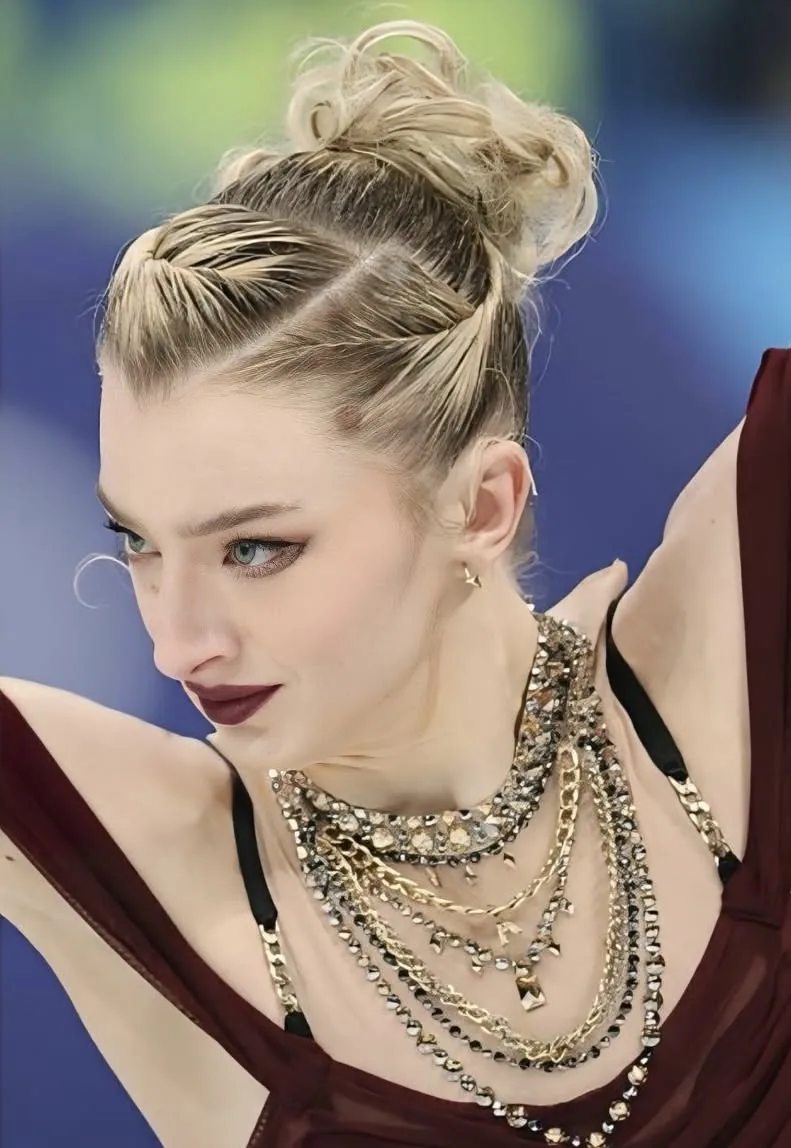
The classic figure skater bun is the gold standard for a reason: it is neat, balanced, completely out of the way, and it photographs beautifully from every angle. Pull the hair into a high ponytail, twist it around the base, pin it flat and finish with a hair net for a finish so smooth it looks carved. Judges love it because nothing distracts from the skating, and skaters love it because it simply does not move.
Time: 5–10 minutes once you have practised it. Cost: a few dollars for elastics, pins and a net. Best for: competitions, tests and performances of any level. Common mistake: building the bun too loose and relying on hairspray alone — pin the twist at four points and add the net, or a spin will pull it apart. Quick verdict: if you only learn one rink style, make it this one.
French Braid Crown for Spins That Stay Picture-Perfect
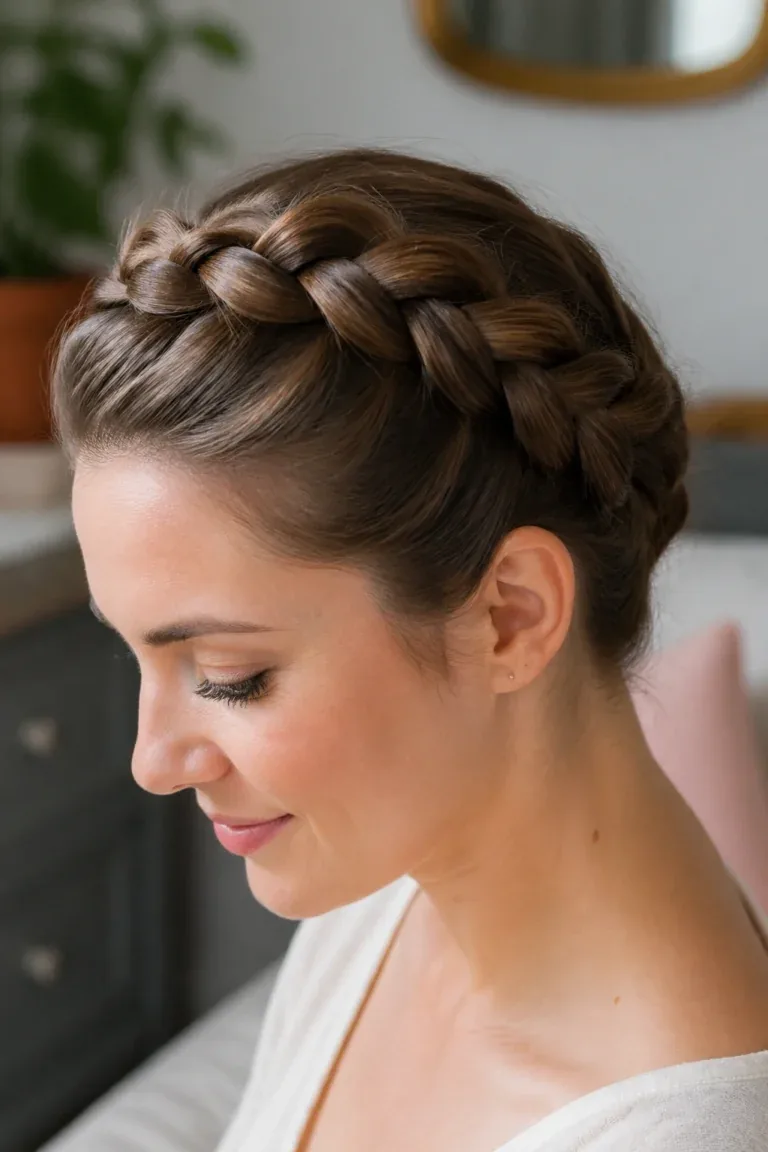
A French braid crown wraps the hair around the head like a halo, which means there is no tail to fly around during a spin and nothing to catch the wind on a fast glide. Braid from one ear around the back of the head to the other, tuck the ends in, and pin as you go so the braid sits flat against the scalp. It is romantic, secure and surprisingly comfortable for hours on the ice.
Best for: long or medium hair, performances and anyone who finds a bun uncomfortable. Time: 10–15 minutes. Cost: just elastics and pins. Common mistake: braiding too loosely at the nape, where the braid loosens first — keep the tension even and pin the ends underneath. Quick verdict: the prettiest way to keep every strand locked down through a whole routine.
Low Braided Ponytail: Simple, Secure and Rink-Ready
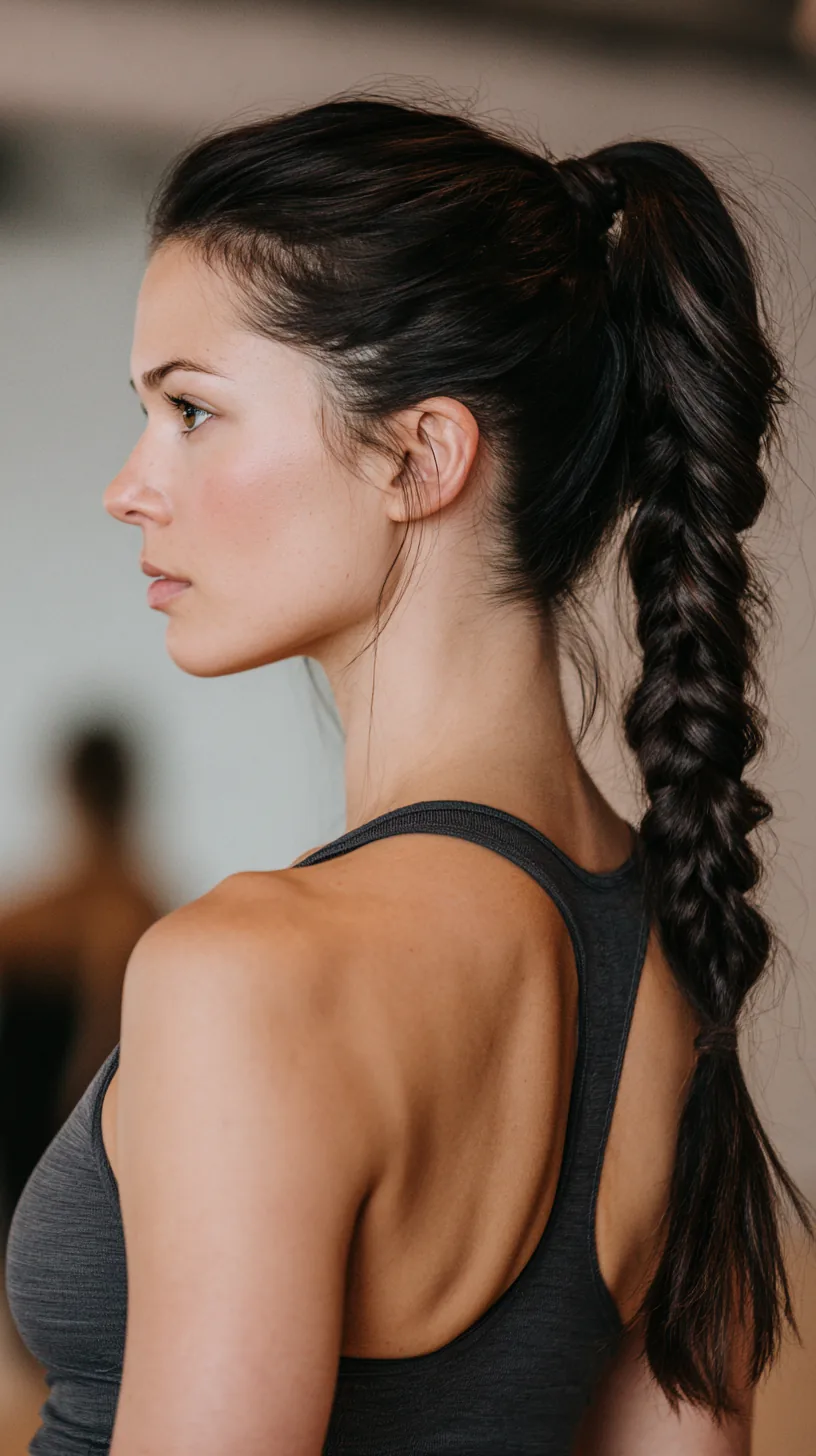
A low braided ponytail is the workhorse of rink hairstyles — quick, comfortable and far more secure than a plain ponytail because the braid itself stops the swing. Gather the hair at the nape, braid it down, and secure the end with a second elastic for insurance. It sits happily under a beanie or a helmet, and it never bumps against a high collar.
Time: 3–5 minutes. Cost: two elastics, nothing more. Best for: beginners, casual skates and helmet wearers. Common mistake: leaving the braid too loose at the top, which lets it flop during a turn — start the braid tight at the nape and relax it only towards the ends. Quick verdict: the fastest genuinely secure style on this list.
Double Dutch Braids That Hold Through Every Jump
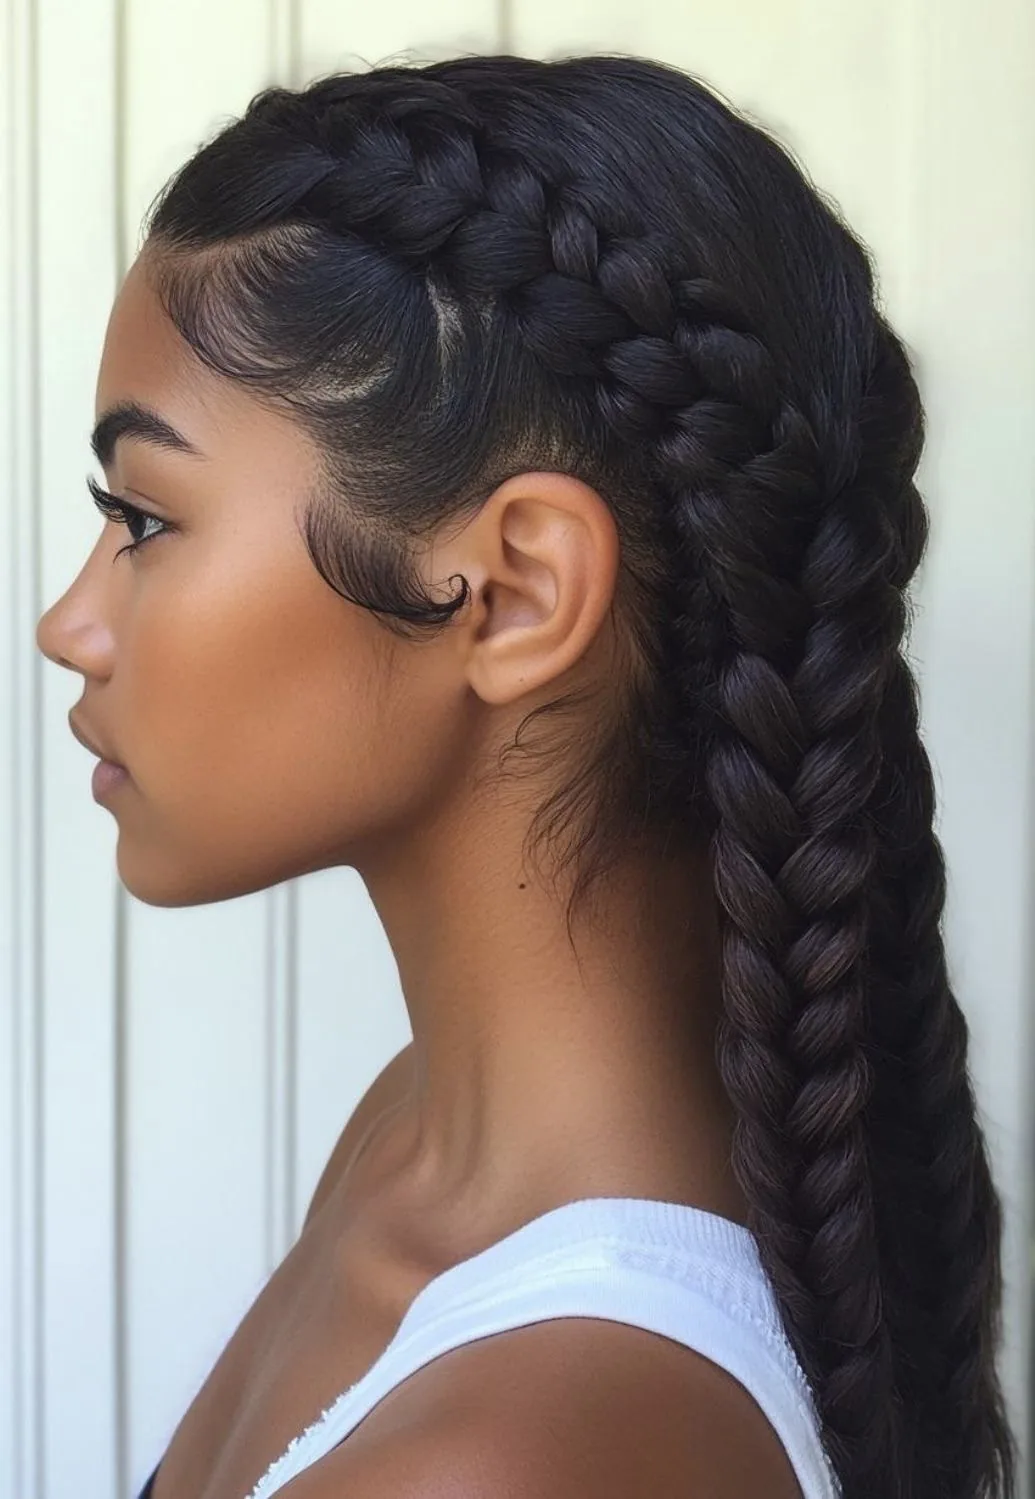
Double Dutch braids are two braids that sit on top of the hair instead of inside it, which makes them grip tighter and hold longer than a single braid. Part the hair down the middle, Dutch-braid each side from the hairline to the nape, and either leave the tails loose or coil them into two small buns. The style distributes the weight evenly, so there is no single anchor point to fail.
Best for: thick or heavy hair, jump practice and long sessions. Time: 10–15 minutes. Cost: elastics and pins only. Common mistake: parting the hair unevenly — a crooked centre part shows up in every photo, so take an extra minute with a comb. Quick verdict: maximum hold for minimum fuss, and it looks sporty and fun at the same time.
Bubble Braid Ponytail: Playful, Secure and Photo-Friendly
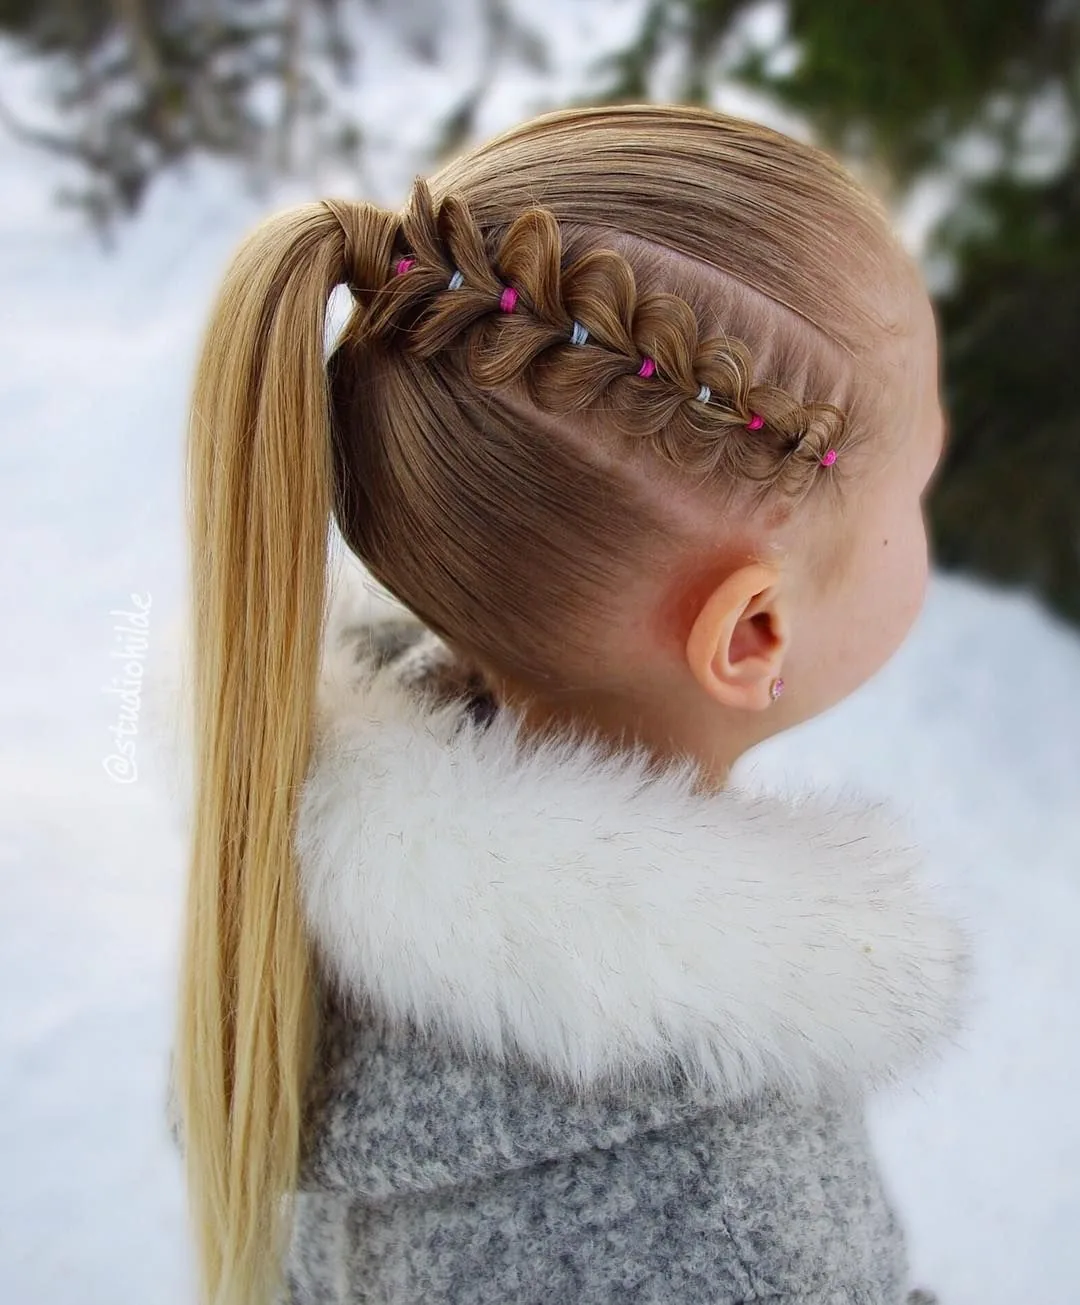
A bubble braid ponytail looks elaborate but takes minutes: tie a high ponytail, add elastics every few inches, and gently pull each section out to form soft bubbles. The elastics at intervals act like extra anchors, so the style barely swings during spins, and the bubbles give it a playful shape that stands out in rink photos. It works best on medium to long hair with a bit of texture.
Time: 5–8 minutes. Cost: a handful of small elastics. Best for: casual skates, themed sessions and skaters who want something fun without the fuss. Common mistake: pulling the bubbles out too aggressively, which loosens the elastics — tug gently and evenly. Quick verdict: the easiest way to look like you spent half an hour on your hair when you spent five minutes.
High Ponytail With a Twist for a Sleek Rink Look
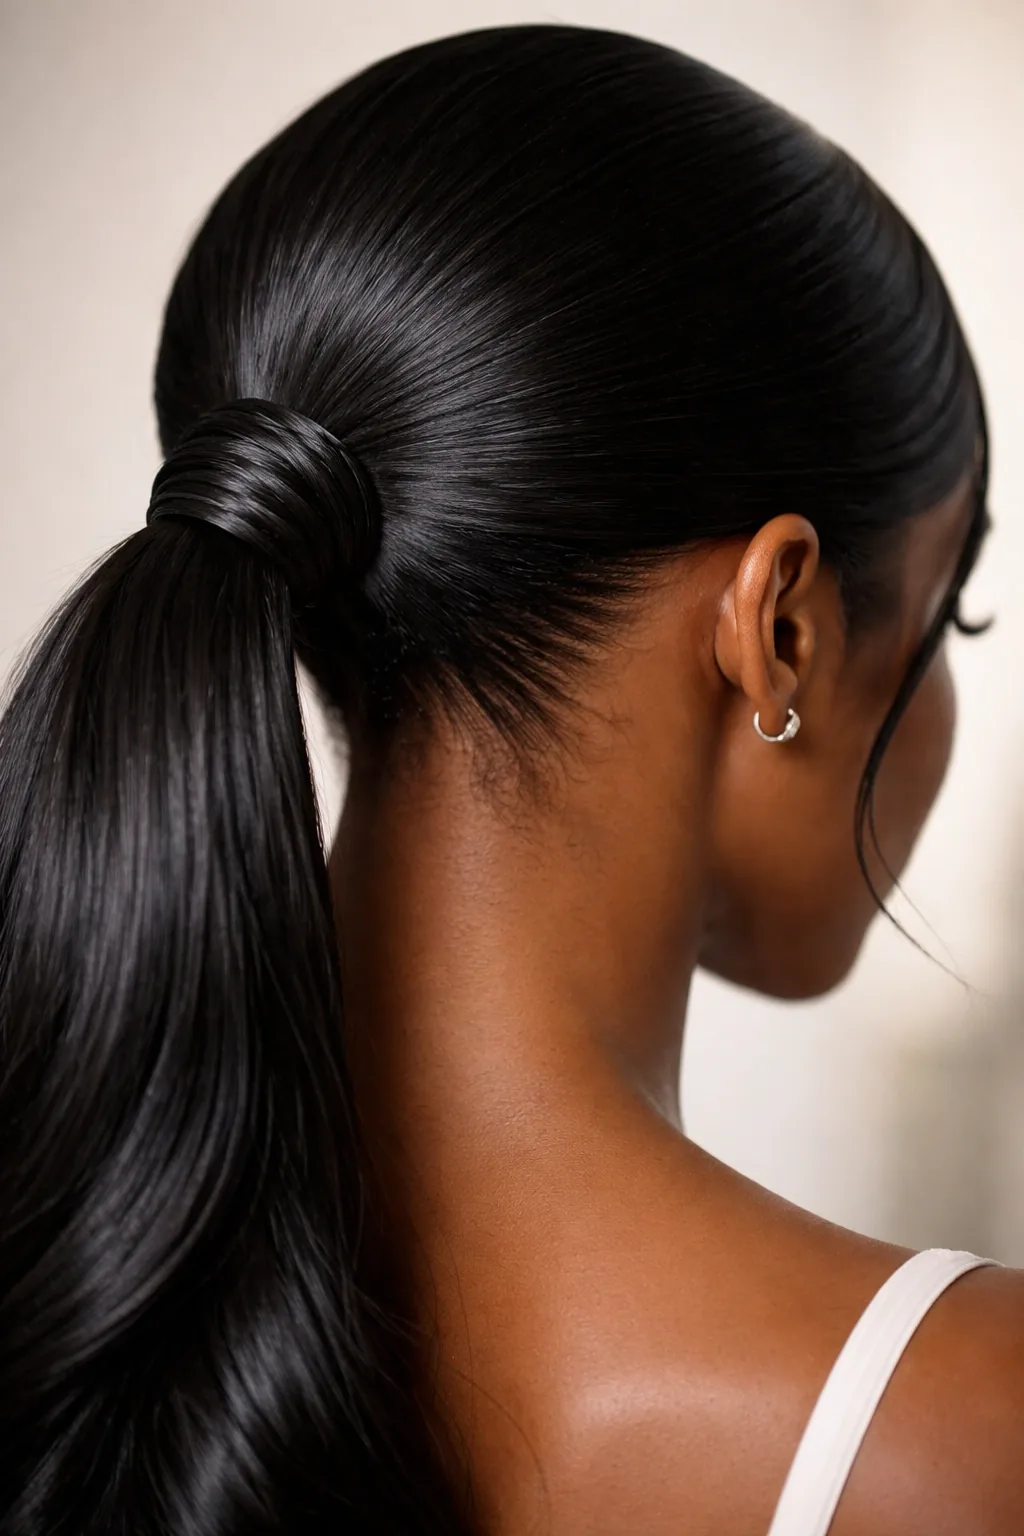
A high ponytail with a twist takes the classic ponytail and locks it down: wrap a small section of hair around the elastic to hide it, then twist the tail itself and pin the twist so it cannot whip around. The twist adds weight and structure, which cuts the bounce that makes ordinary high ponytails so distracting on the ice. A spritz of light-hold spray keeps the flyaways in line without freezing the hair stiff.
Best for: medium-length hair and skaters who want a ponytail with polish. Time: 5 minutes. Cost: one elastic and two pins. Common mistake: tying the ponytail too tight at the hairline, which causes a headache by the end of the session — keep the front soft. Quick verdict: a ponytail that behaves like a bun but feels like a ponytail.
Sleek Ballerina Bun for a Polished Competition Finish
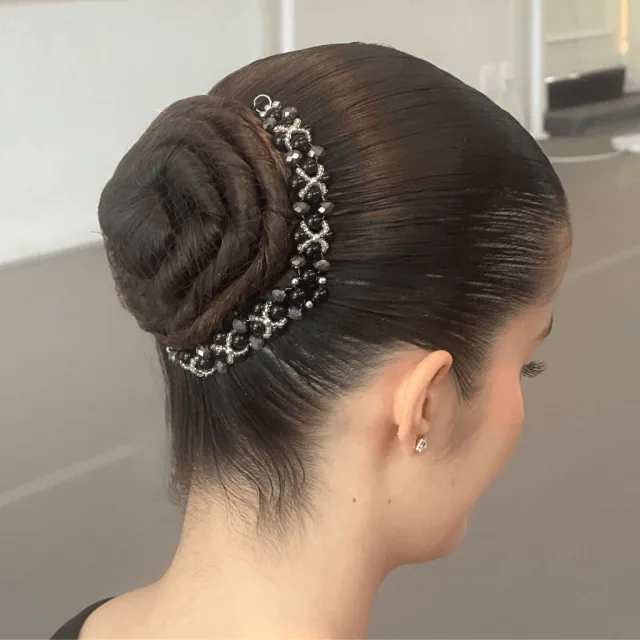
The sleek ballerina bun is the figure skater bun’s more polished cousin — brushed completely smooth, with not a single flyaway in sight. Brush the hair back with a smoothing brush and a little gel, gather it high, twist it tight and pin it into a neat round bun. A hair net and a light mist of spray finish a look that reads as pure elegance from the stands.
Time: 8–12 minutes. Cost: gel, pins and a net — a few dollars total. Best for: competitions, recitals and performances where the look matters as much as the skating. Common mistake: using too much gel, which goes flaky in cold air — a pea-sized amount is enough. Quick verdict: the most elegant style on the rink, and one of the most secure.
Messy Bun That Actually Holds on the Ice
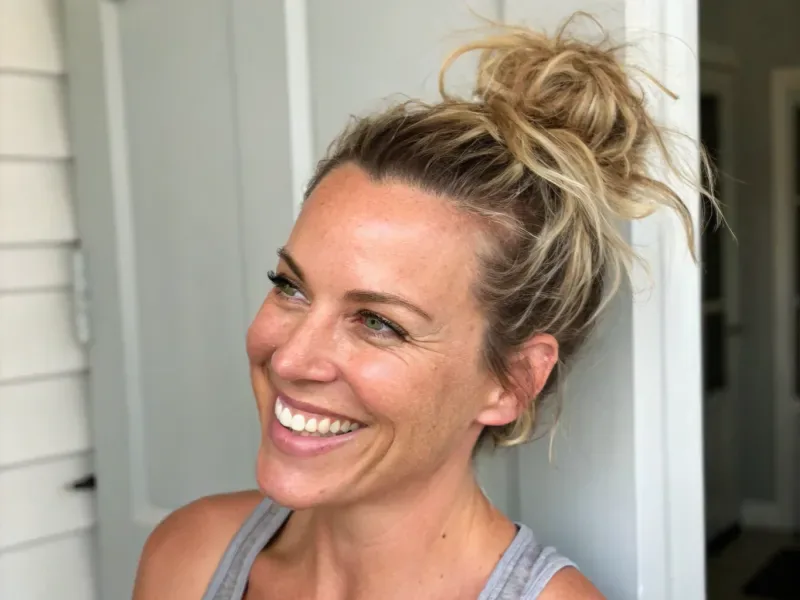
A messy bun sounds like the worst idea for the rink, but a properly built one — twisted, pinned at four points and finished with a net — holds just as well as a neat bun while looking softer and more relaxed. The trick is to make the messiness deliberate: pull out two face-framing strands on purpose, but keep the base of the bun tight and anchored. It is the ideal style for a casual skate when you still want to look put together.
Best for: casual skates, coffee-after-skating outings and days when a polished bun feels too formal. Time: 5 minutes. Cost: elastics and pins. Common mistake: calling a bun messy and skipping the pins — a messy bun with no pins is just a bun waiting to fall out. Quick verdict: relaxed on the surface, engineered underneath.
Side Braid for Competition Day and Rink Photos
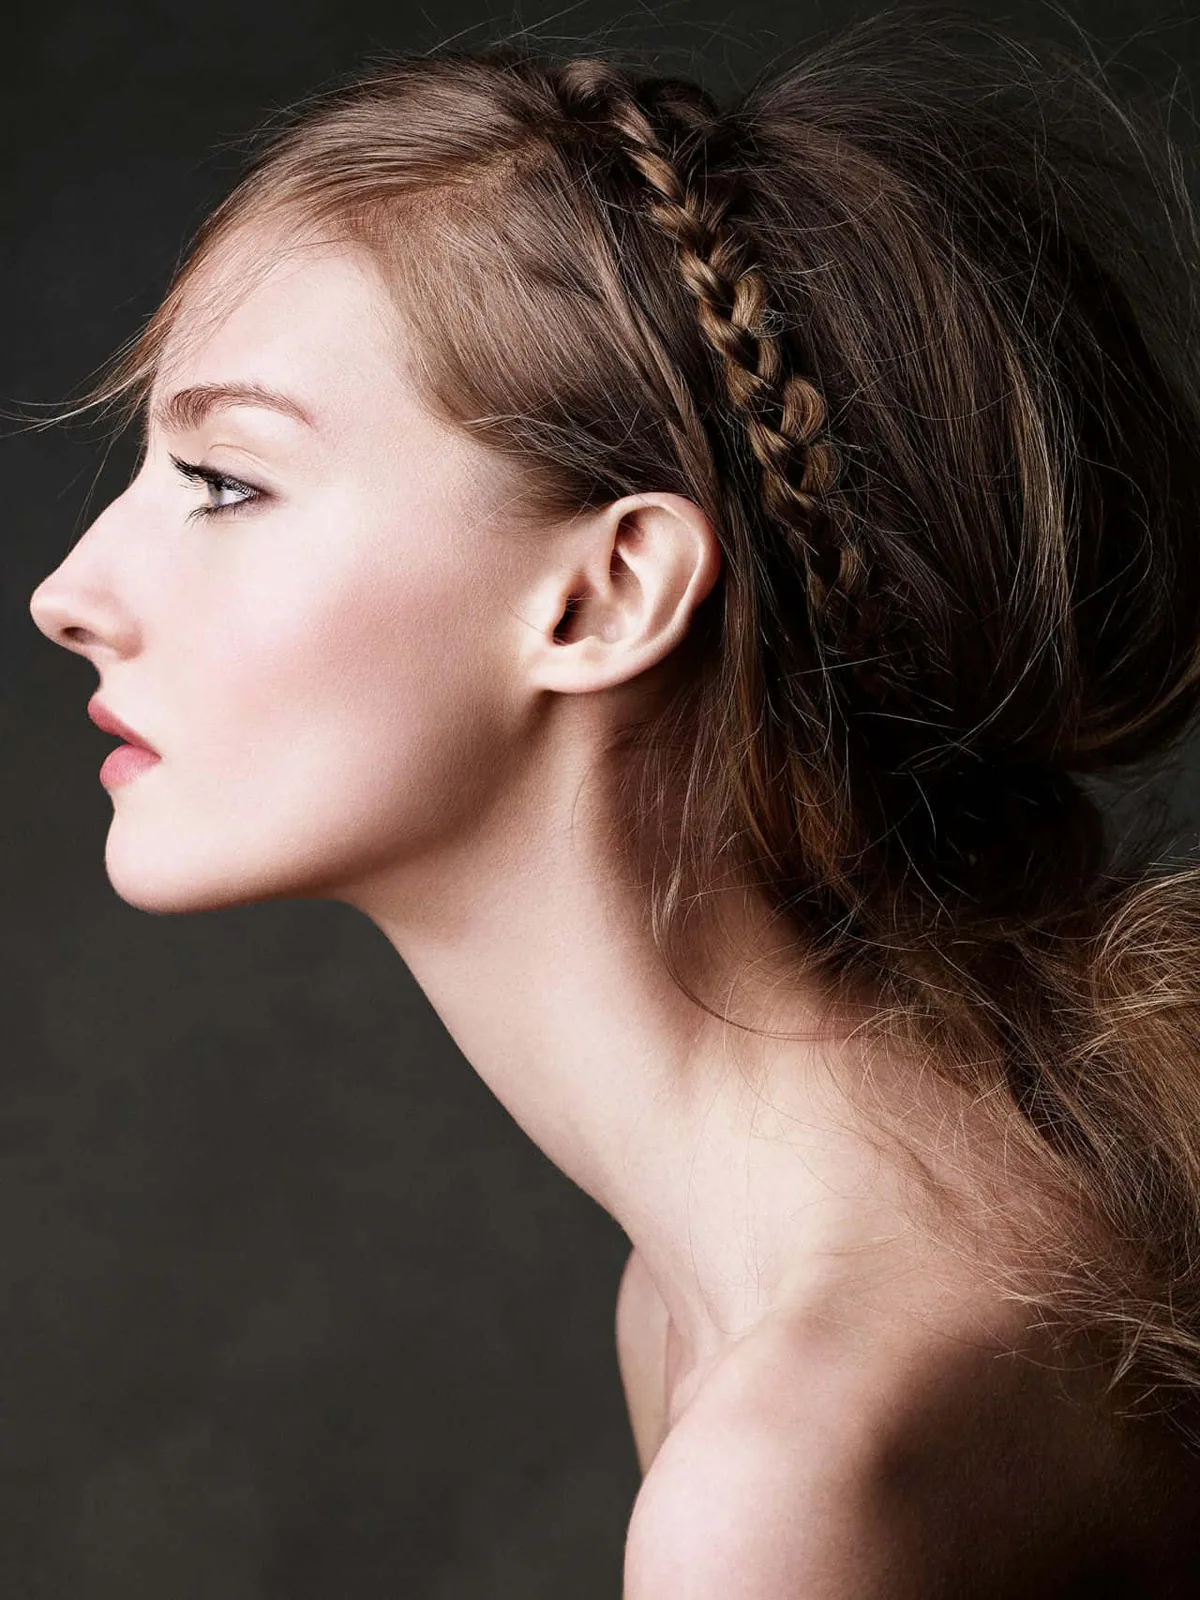
A side braid sweeps all the hair over one shoulder, which keeps it clear of your back and out of the way during spins while giving you a beautiful line in photos. Braid from behind one ear, work across the nape and let the braid fall over the opposite shoulder, securing it with a ribbon that matches your outfit. It is softer than a crown braid and easier to do on yourself than it looks.
Time: 8–10 minutes. Cost: an elastic and a ribbon. Best for: performances, photos and skaters with very long hair. Common mistake: starting the braid too high, which pulls at the hairline during turns — start low behind the ear. Quick verdict: the most photogenic braid on this list, and a favourite for competition day.
Fishtail Braid: Intricate, Secure and Surprisingly Simple
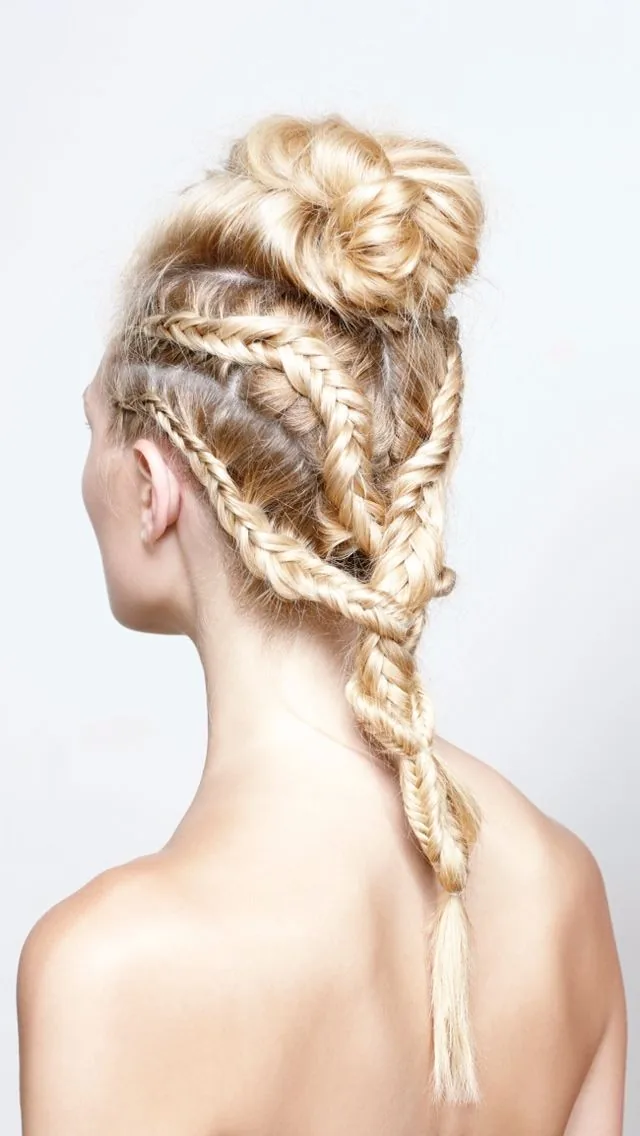
A fishtail braid looks intricate — fine, woven strands that catch the light beautifully — but it is just two sections crossed over each other again and again. The fine weaving makes it one of the most secure braids for the rink, because there are no big sections to slip. It holds through spins, sits flat under a hat, and looks far more impressive than the effort it takes.
Best for: long hair, performances and skaters who want a braid with a wow factor. Time: 10–15 minutes. Cost: one elastic. Common mistake: pulling the fishtail apart too much for volume, which weakens the weave — keep it snug on the ice and loosen it only for photos. Quick verdict: maximum beauty for minimum difficulty.
Half-Up Twisted Crown for a Soft Rink Look
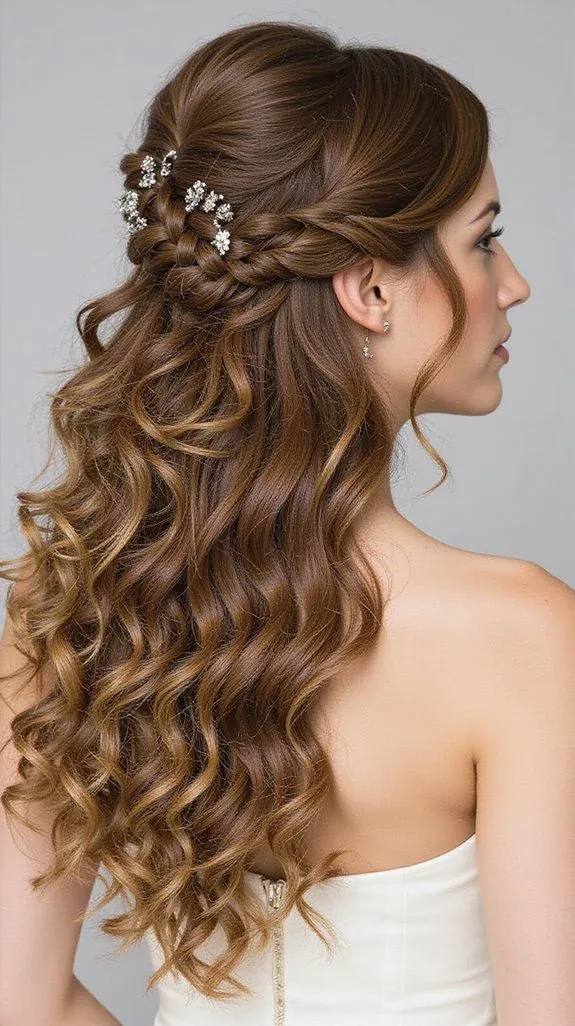
A half-up twisted crown pulls the front sections back into two twists that meet at the back, keeping hair out of your face while leaving the rest loose — perfect for a gentle skate when you are not spinning at full speed. Twist each side back, secure them together with a clip or small elastic, and let the loose hair fall over a cosy sweater. It is soft, romantic and very easy to refresh rink-side.
Time: 5 minutes. Cost: a clip or two elastics. Best for: gentle skates, beginners and outdoor rinks where a relaxed look fits the mood. Common mistake: wearing it for a jump lesson — loose hair and fast spins do not mix, so save this one for easy sessions. Quick verdict: lovely for a slow skate, wrong for a spin class.
Low Chignon: Understated Elegance for the Rink
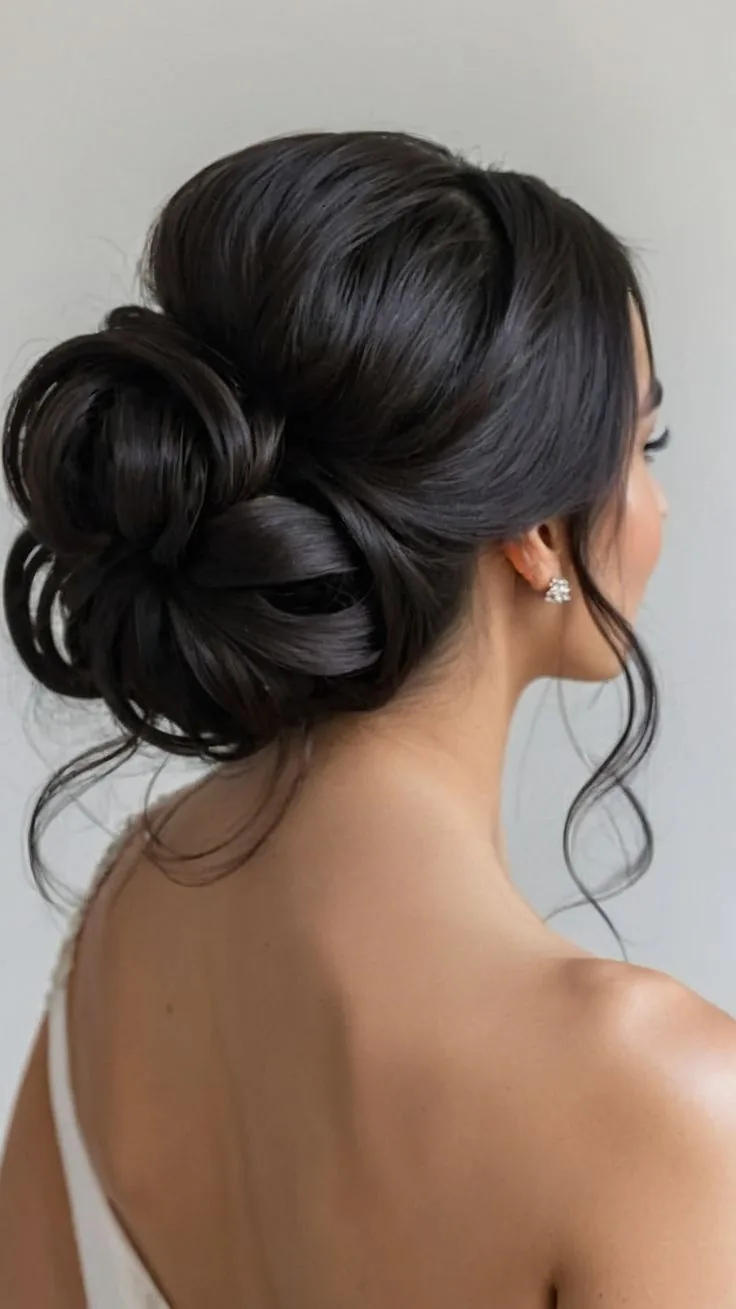
A low chignon sits at the nape, rolled and pinned into a soft knot that is as elegant as it is practical. Because it sits low, it works under hats and helmets, it never bumps a collar, and it keeps the hair completely contained through spins. It suits older skaters and anyone who prefers a classic look over a sporty one, and it pairs beautifully with a wool coat off the ice.
Time: 8–10 minutes. Cost: pins and one elastic. Best for: adult skaters, elegant outfits and formal rink events. Common mistake: rolling the chignon too loosely so it sags after half an hour — roll it tight and pin through the centre, not just the edges. Quick verdict: quiet, classic and completely dependable.
Two French Braids Into a Bun: Double Security
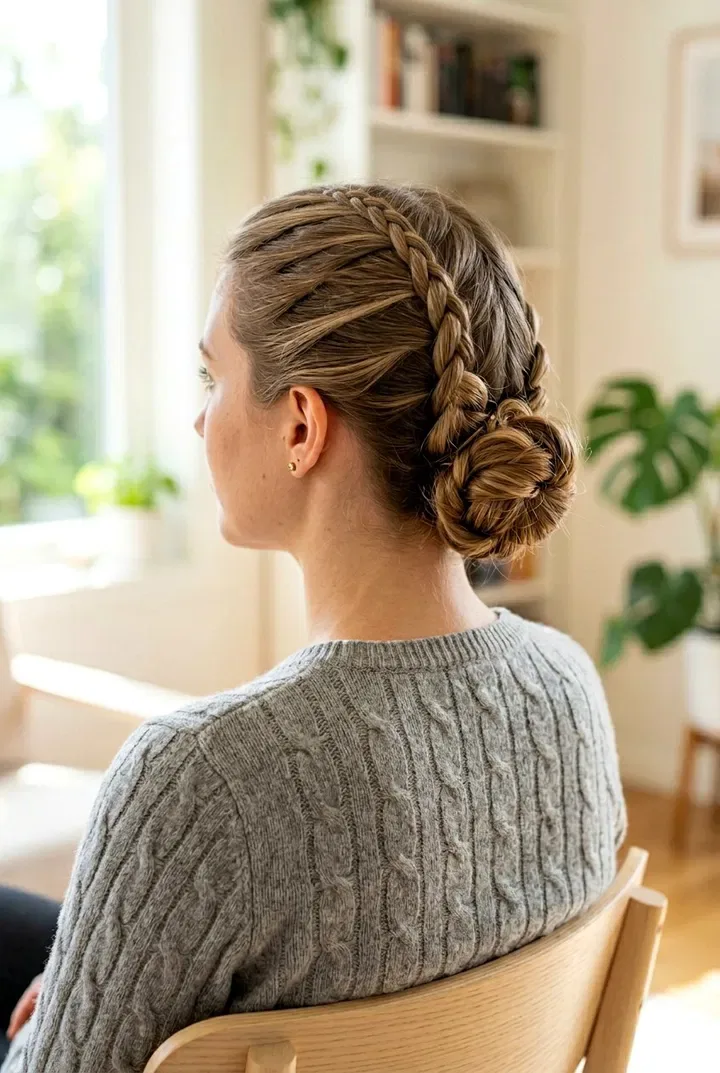
Two French braids feeding into a single bun is the belt-and-braces approach to rink hair: the braids lock the front and sides down, and the bun contains the rest. French-braid each side from the hairline to the nape, gather both braids together, and twist them into a bun. Nothing moves, nothing flies, and the style survives spins, jumps and the occasional fall.
Best for: competitions, jump practice and thick hair that defeats simpler styles. Time: 15–20 minutes. Cost: elastics and pins. Common mistake: making the braids too tight at the hairline, which hurts after an hour — keep the first few crosses gentle. Quick verdict: the most secure style in this whole list, worth the extra minutes.
Rope Braid Ponytail That Refuses to Unravel
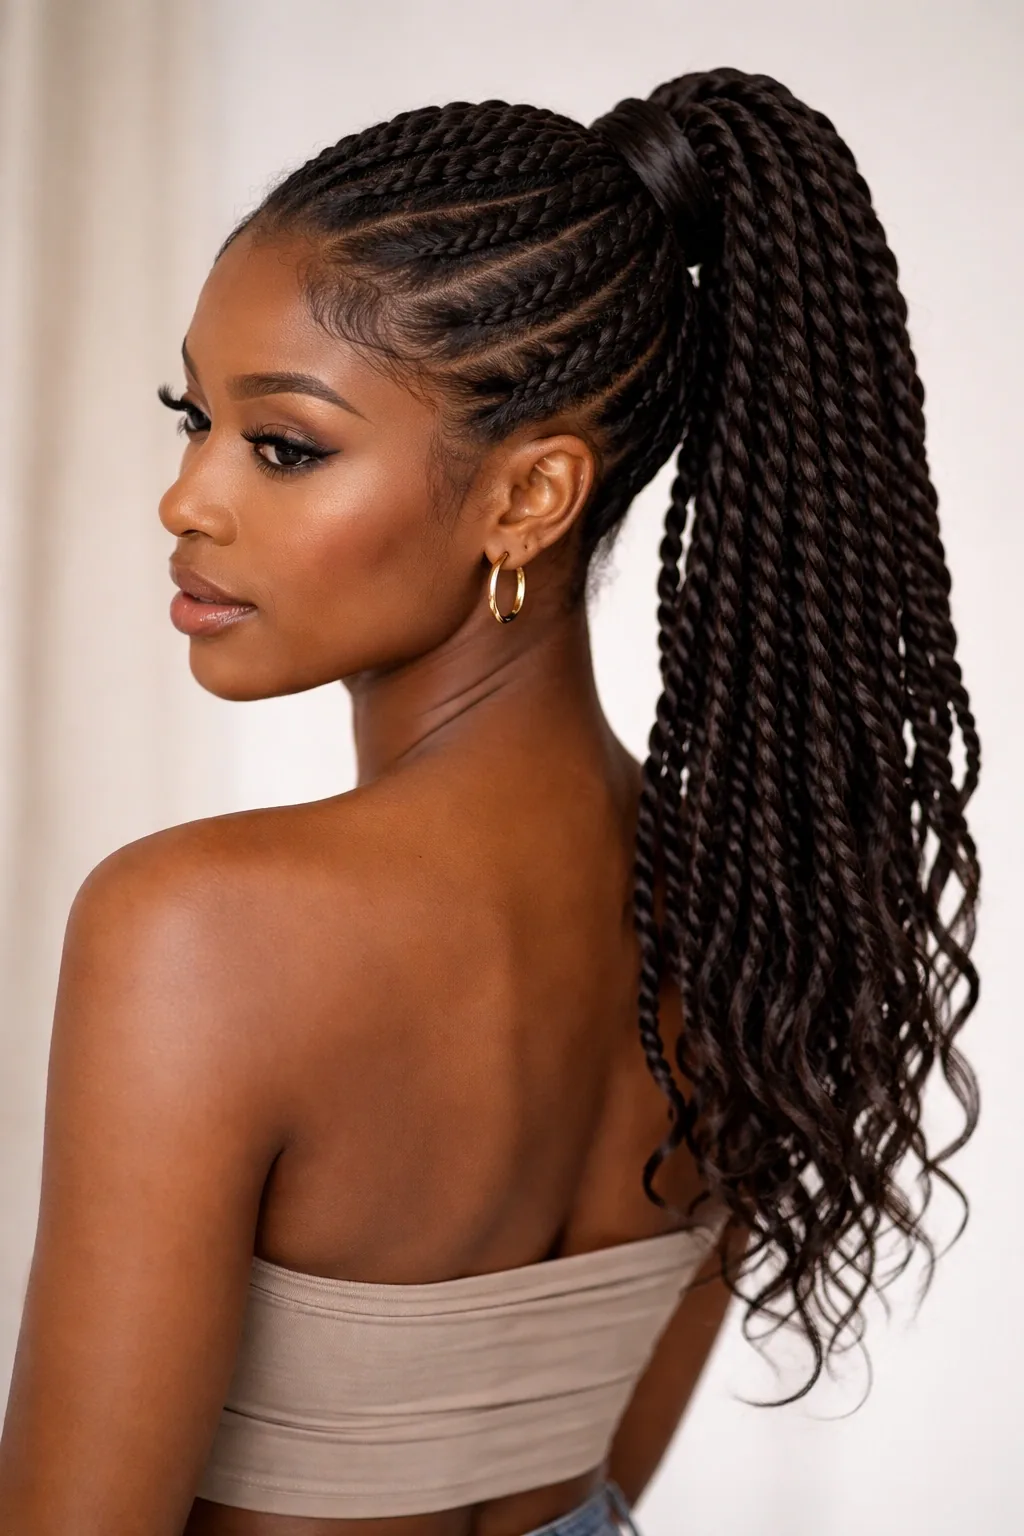
A rope braid is made by twisting two sections around each other, and the twist tightens itself the more it moves — which makes it almost impossible to unravel on the ice. Tie a low or mid ponytail, split it in two, twist each section the same way, then wind them around each other and secure the end. The result is a sleek, rope-like tail that barely swings.
Time: 5–7 minutes. Cost: two elastics. Best for: long hair, fast skating and anyone whose braids usually fall apart. Common mistake: twisting the two sections in opposite directions, which makes the rope unwind — twist both the same way, then wind them together the other way. Quick verdict: the braid that gets stronger the harder you skate.
Boxer Braids Under a Beanie for Cold Outdoor Rinks
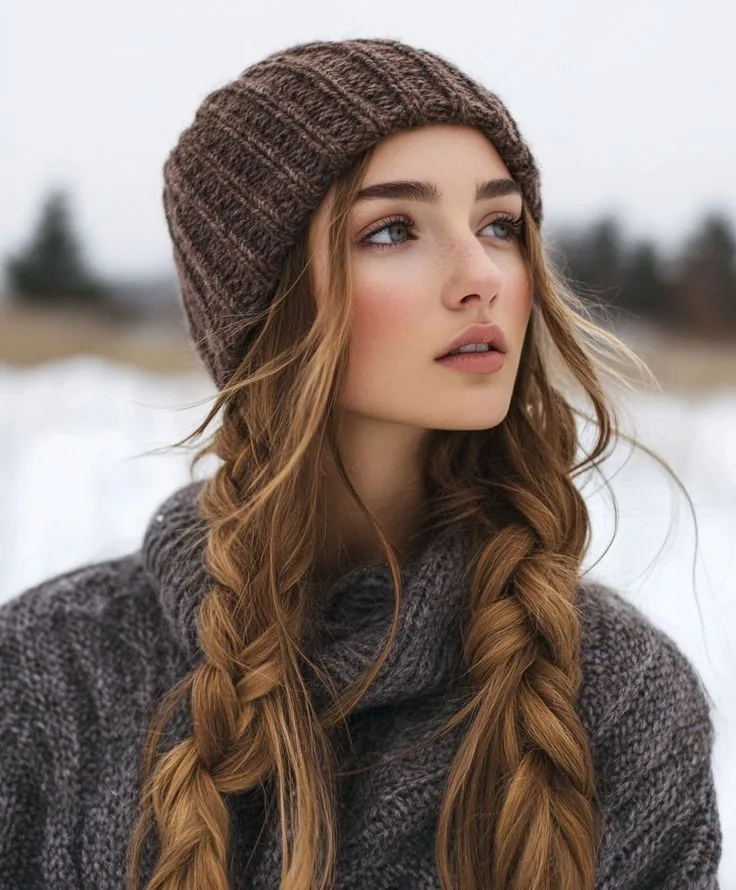
Boxer braids — tight Dutch braids that sit close to the scalp — are made for beanies. They lie flat, they do not bunch up under a hat, and they keep every strand contained through a whole outdoor session. Braid two Dutch braids from the hairline to the nape and secure them, then pull the beanie on over the top. When the hat comes off, the braids still look perfect, with no hat-hair at all.
Best for: outdoor rinks, cold days and anyone who lives in a beanie all winter. Time: 10–15 minutes. Cost: two elastics. Common mistake: leaving the braid tails too long so they poke out under the beanie and get caught on a scarf — tuck them up or coil them. Quick verdict: the best hat-compatible style there is.
Braided Headband Half-Up for a Pretty, Practical Skate
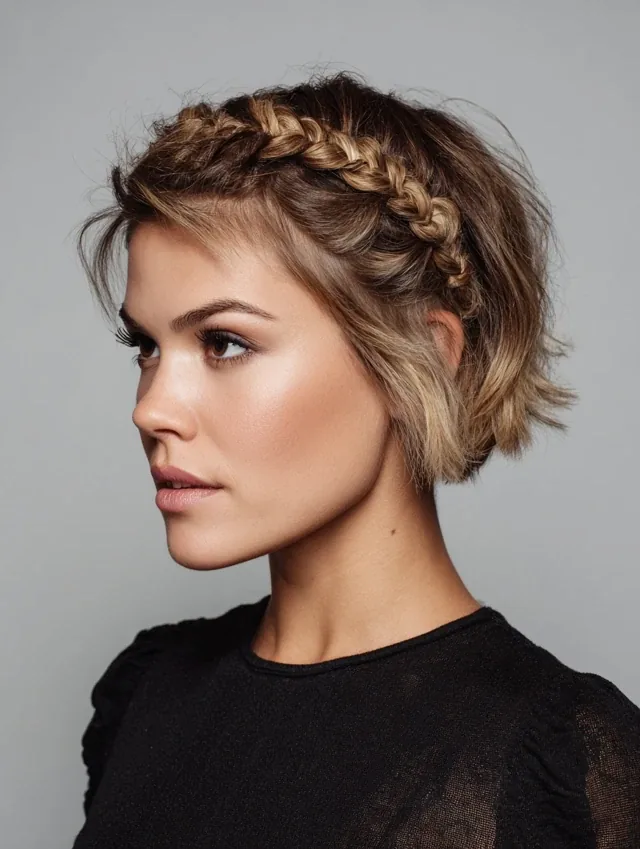
A braided headband uses a thin braid across the hairline to hold the front back, like a headband made of your own hair. Braid a small section from behind one ear across the forehead to the other side, pin it in place, and leave the rest of the hair in a low ponytail or a loose braid. It keeps the front out of your eyes without any accessories to lose on the ice.
Time: 8–10 minutes. Cost: a few pins. Best for: medium hair and skaters who dislike headbands but need the front controlled. Common mistake: braiding the headband too thin, so it slips — take a generous section and pin it at both ends. Quick verdict: a built-in headband that never falls off mid-spin.
Curly Pineapple Updo That Protects Your Curls
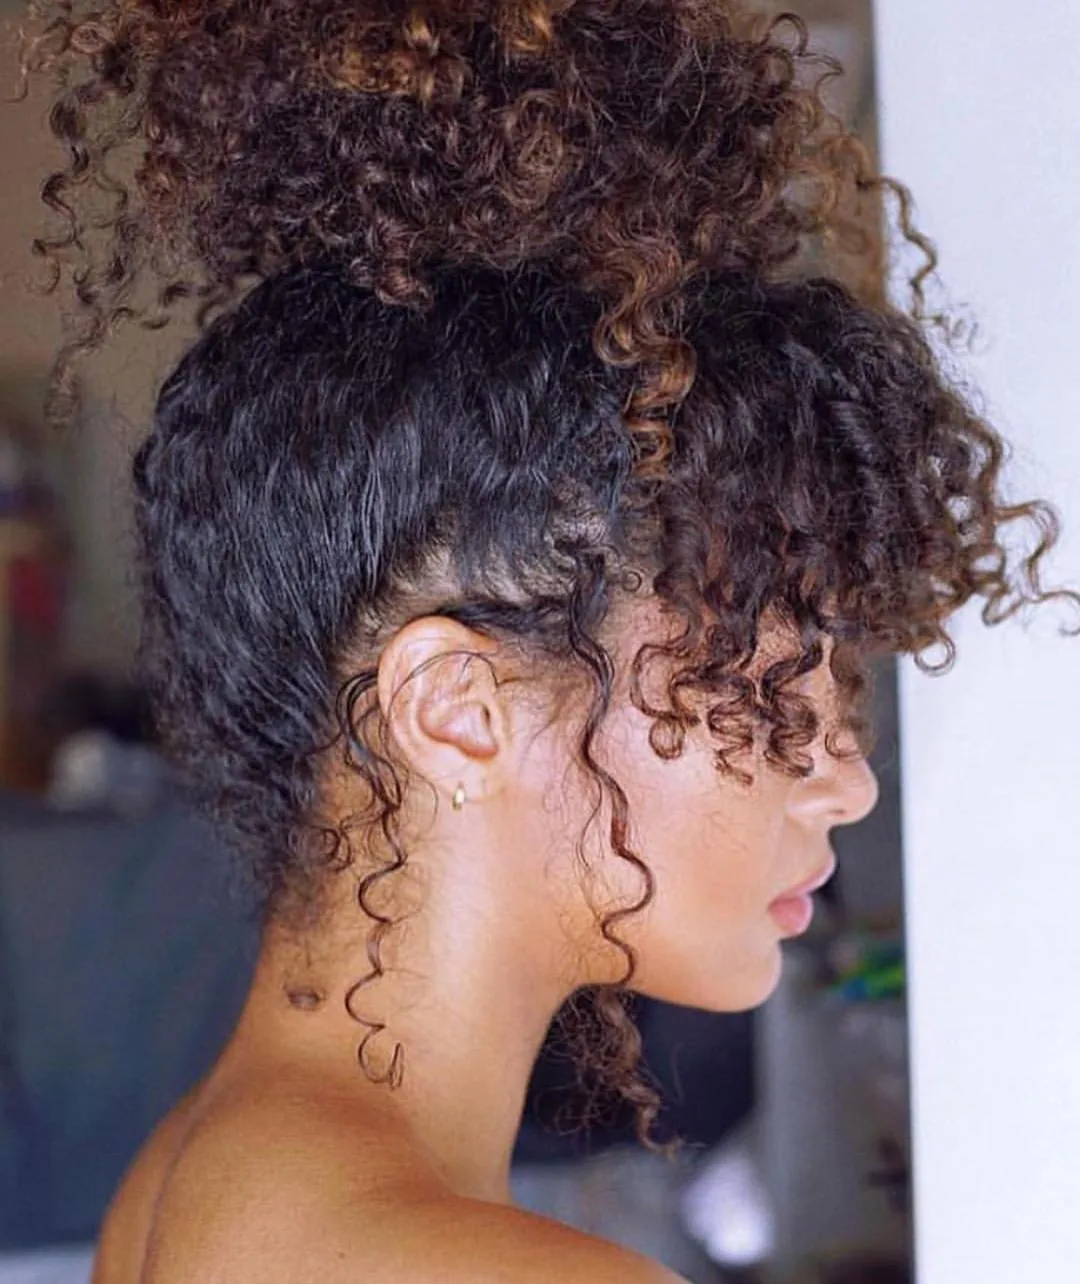
Curly hair needs a style that protects the curl pattern while keeping the hair contained, and the pineapple updo does exactly that: gather the curls loosely on top of the head with a satin scrunchie, letting them fall forward like a pineapple top. It keeps the curls off the neck, stops them tangling in a scarf, and preserves the shape for after the skate. A silk-lined hat or a satin scrunchie is worth the small investment to stop frizz.
Best for: curly and coily hair of any length. Time: 3 minutes. Cost: a satin scrunchie. Common mistake: using a tight elastic, which crushes the curls and leaves a dent — keep it loose and high. Quick verdict: the kindest style for curls, and one of the quickest too.
Short Bob With a Headband for Effortless Rink Style
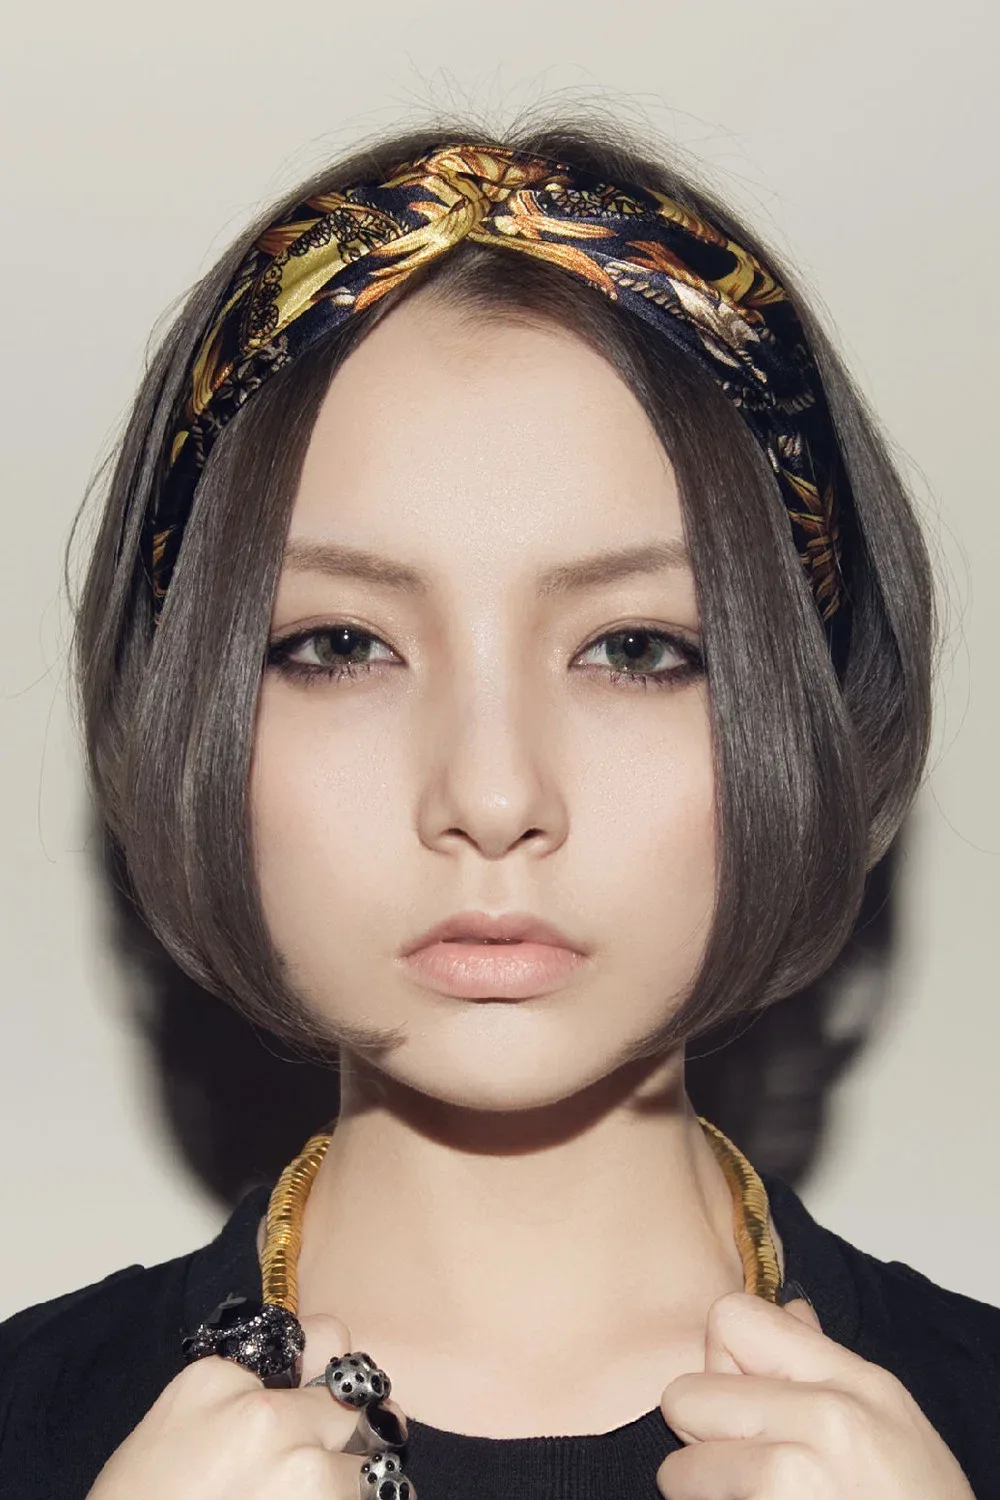
A short bob is already a rink-friendly length — it cannot swing into your face or catch on a scarf — and a headband finishes the job by keeping the front pieces back. Add a wide, non-slip headband or a knit band, tuck the sides behind your ears, and you are done. The bob’s natural swing looks lively on the ice without ever getting in the way.
Time: 2 minutes. Cost: a headband. Best for: short hair, beginners and anyone who wants zero morning effort. Common mistake: choosing a smooth, slippery headband that slides off during a spin — look for a velvet-lined or silicone-grip band. Quick verdict: the easiest style on this list, and proof that short hair is a rink advantage.
Pixie With a Knit Headband for Cold Rink Days
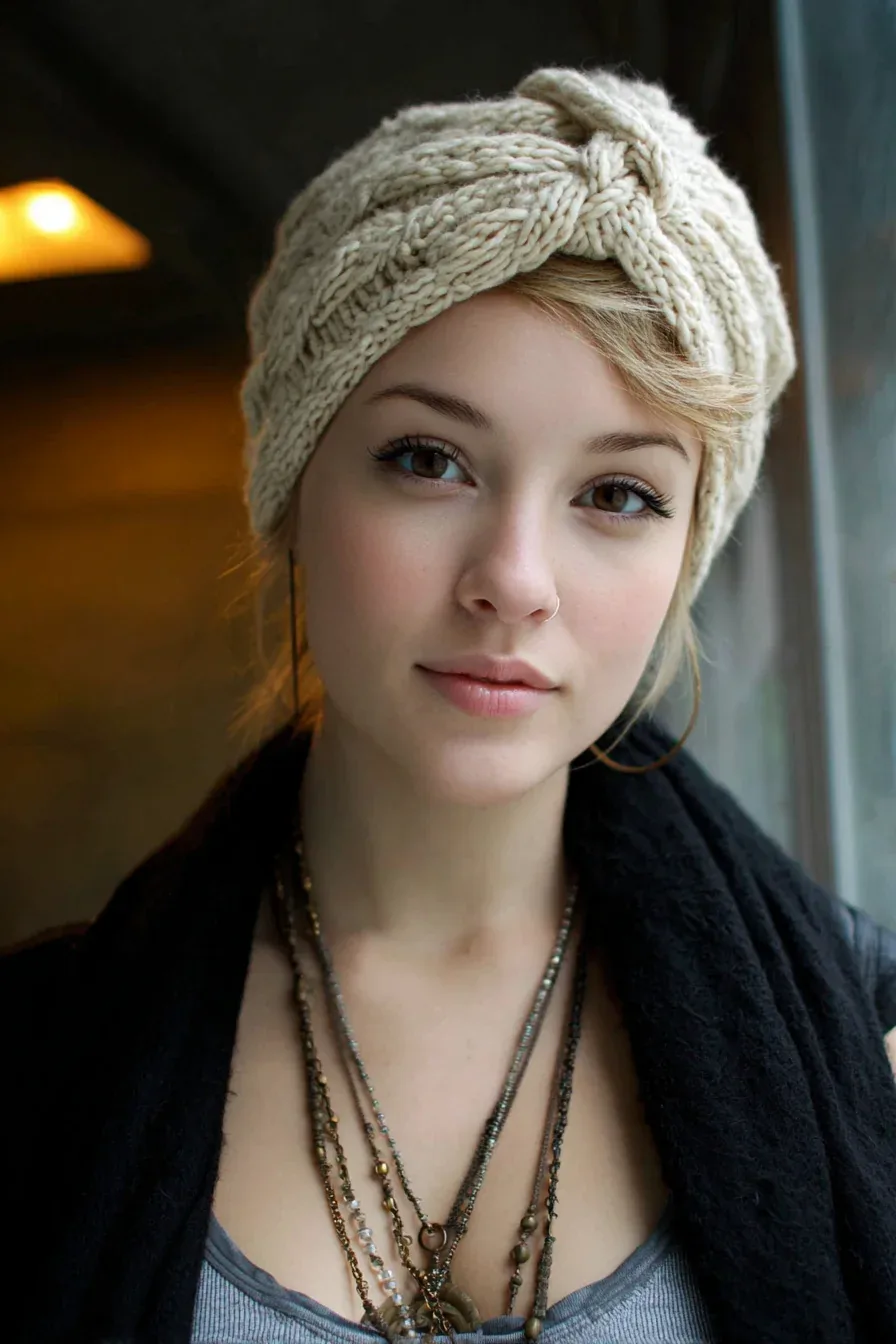
A pixie cut is the ultimate low-maintenance rink hairstyle — there is nothing to tie, braid or pin — and a knit headband adds warmth and a finished look at the same time. Smooth the pixie with a little pomade, settle the headband just behind the hairline, and skate. The headband also stops cold air from hitting the ears, which is a real comfort on an outdoor rink.
Time: 1 minute. Cost: a knit headband. Best for: very short hair and outdoor rinks. Common mistake: pushing the headband too far back so it slides off — sit it just behind the hairline where it grips. Quick verdict: one minute, done, and warm ears included.
Waterfall Braid for a Romantic Skate
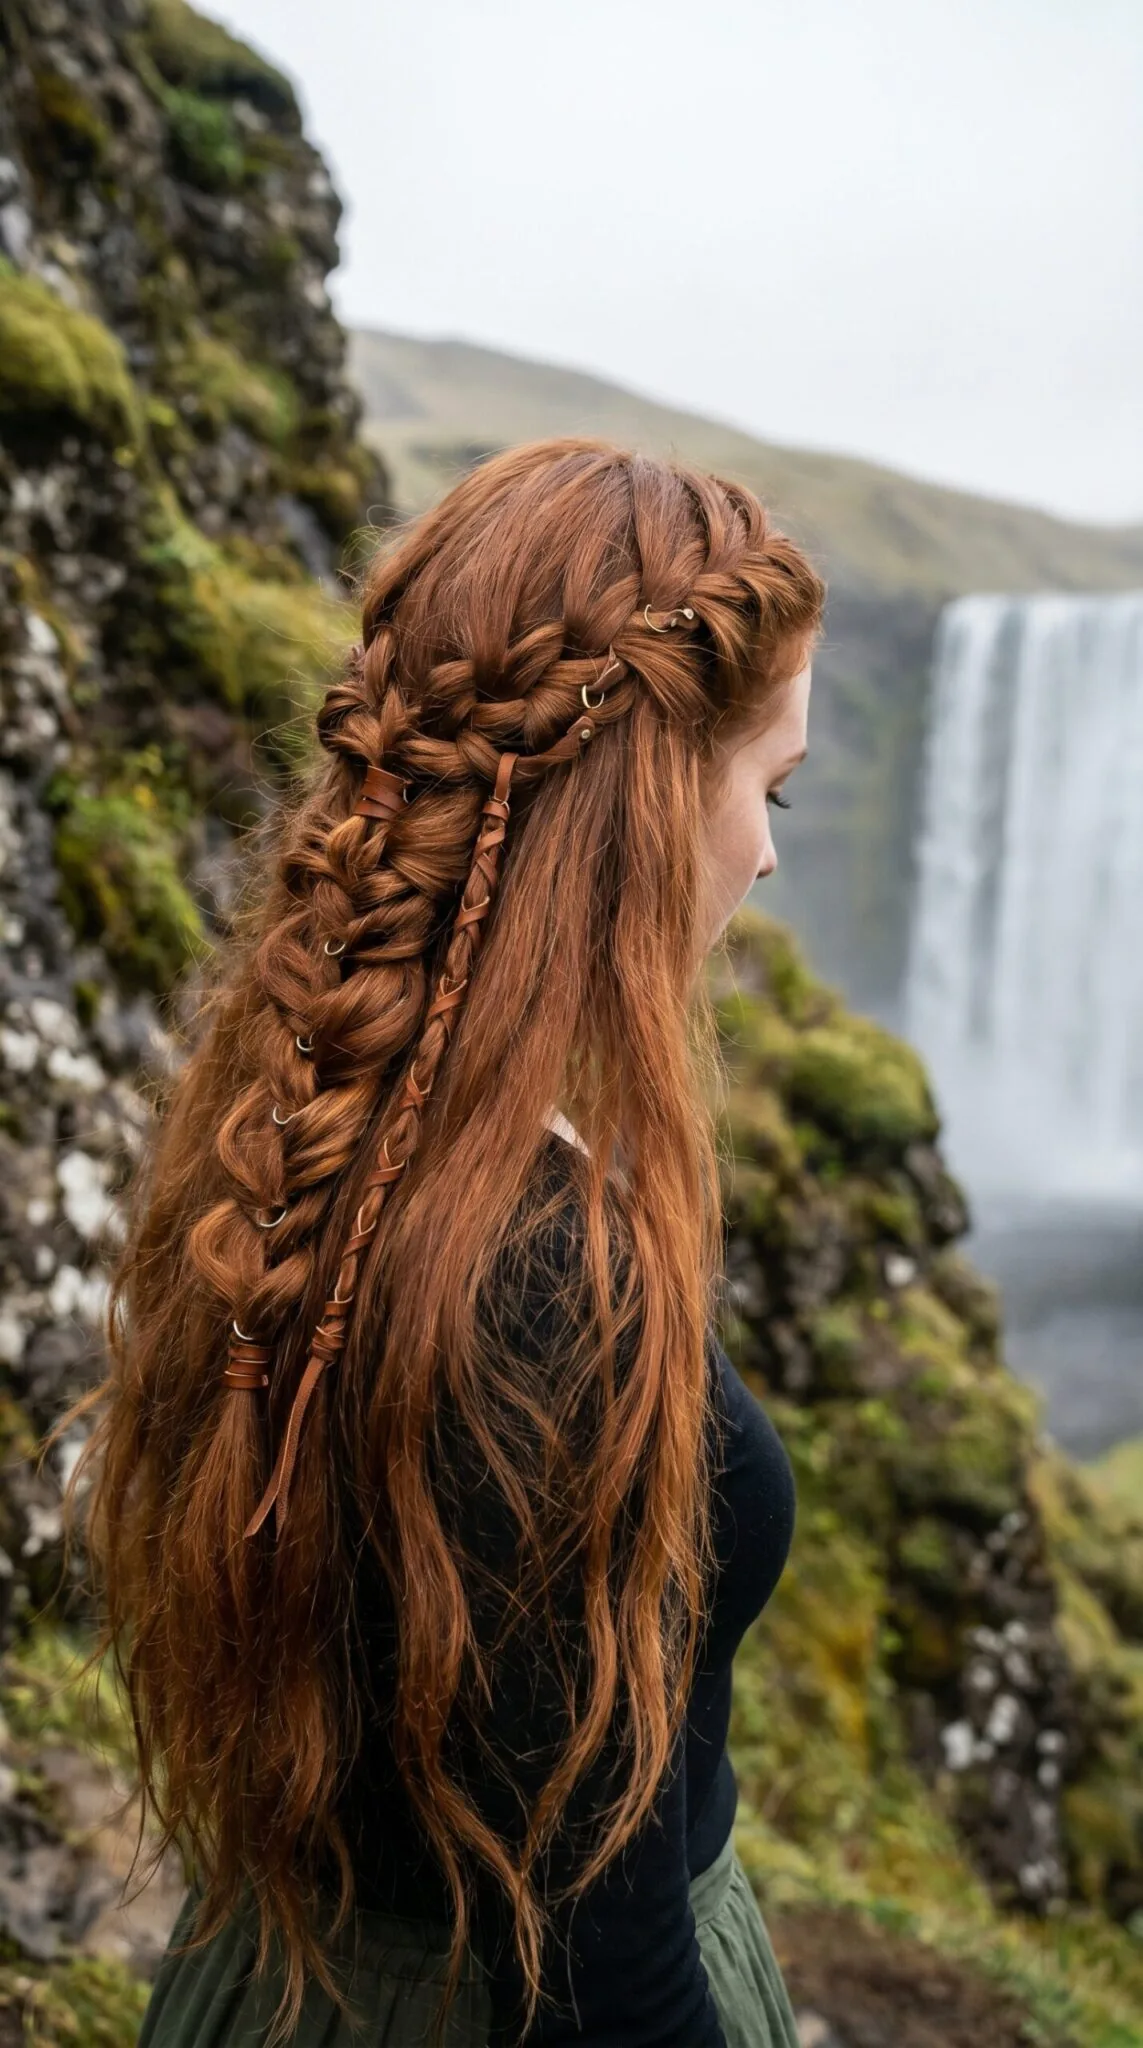
A waterfall braid lets strands fall through the braid like water, creating a cascading effect that looks magical against the ice. Braid across the back of the head, dropping the bottom strand each time and picking up a new one, so the loose hair falls in soft waves below. It is best for gentle skates and photos rather than fast spins, because the loose strands will move — but for a slow, romantic skate, nothing beats it.
Time: 12–15 minutes. Cost: a few pins and one elastic. Best for: date skates, holiday rink photos and long wavy hair. Common mistake: wearing it for a spin lesson — the falling strands whip across the face at speed. Quick verdict: the most romantic braid here, saved for slow, pretty skates.
Dutch Braid Pigtails for a Fun, Sporty Session
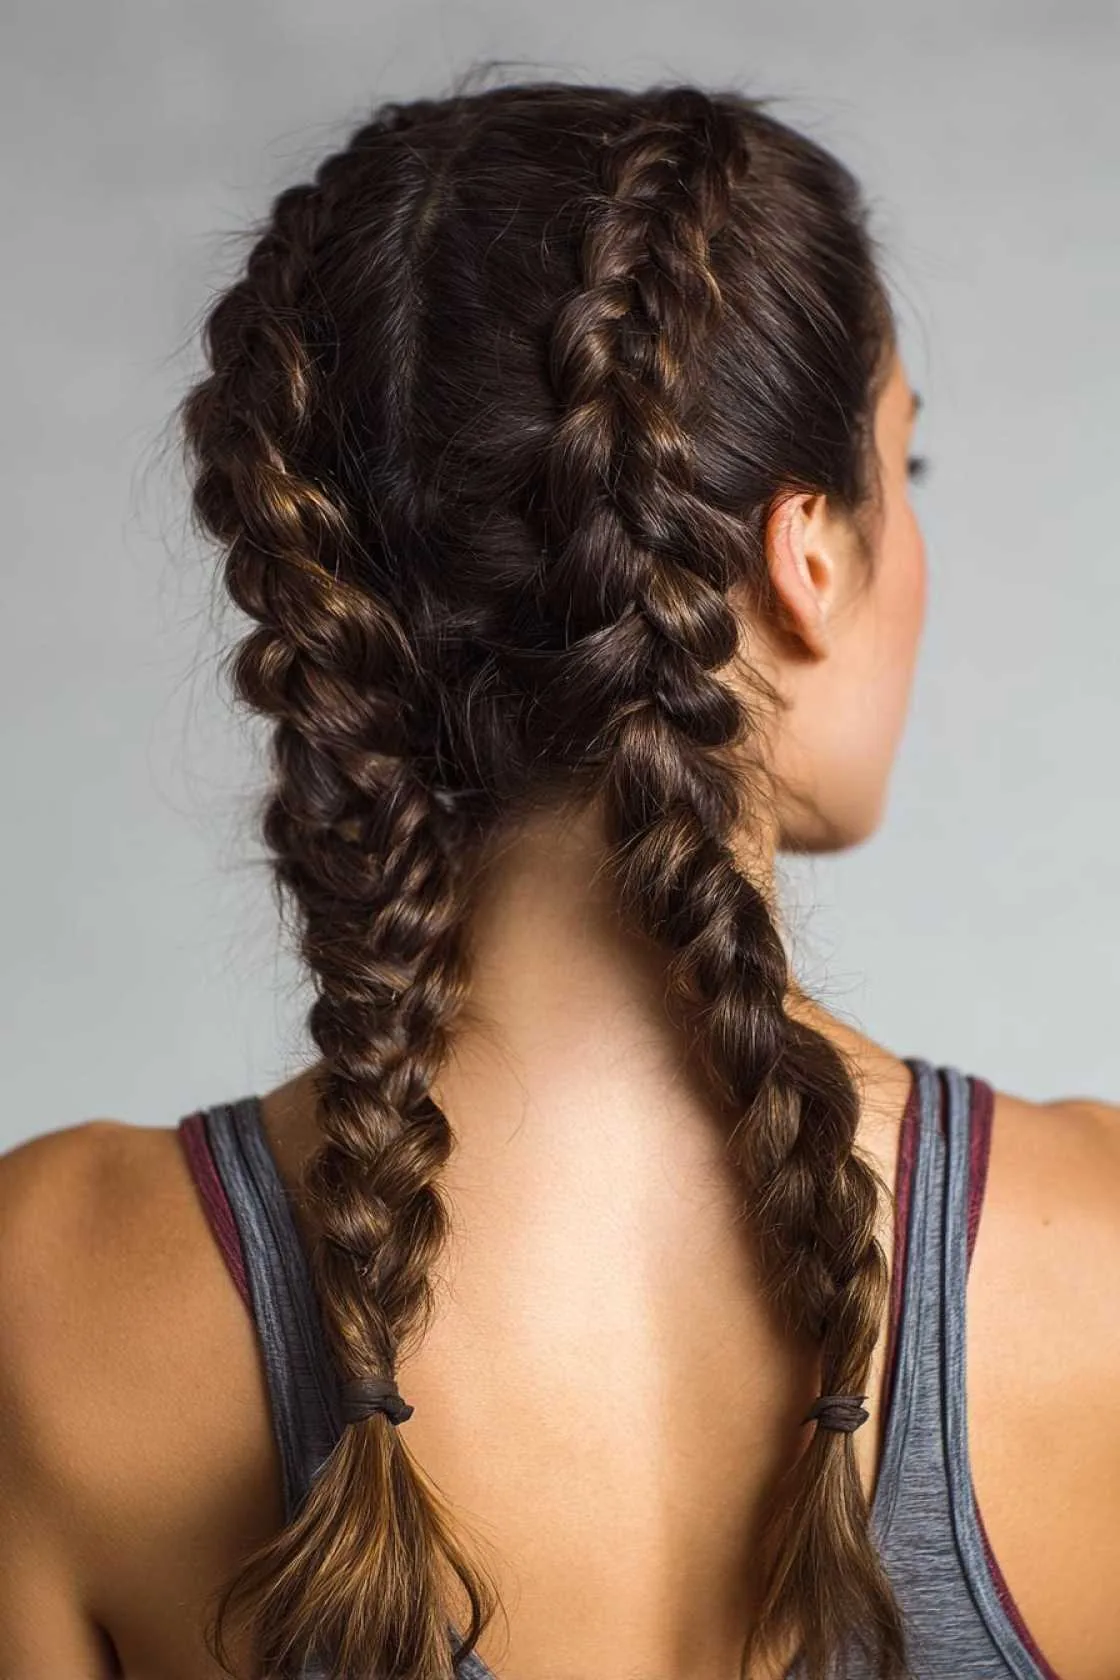
Dutch braid pigtails are playful, secure and young at heart — two raised braids that keep the hair completely contained while adding a sporty bounce to the look. Part the hair down the middle, Dutch-braid each side, and secure the ends. They hold through jumps, they sit flat under a beanie, and they look cheerful in every rink photo.
Time: 10–12 minutes. Cost: two elastics. Best for: casual skates, themed sessions and younger skaters. Common mistake: making the braids uneven — use a mirror or a friend to check the part is straight. Quick verdict: fun, fast and far more secure than loose pigtails.
Twisted Low Bun for a Quick Elegant Fix
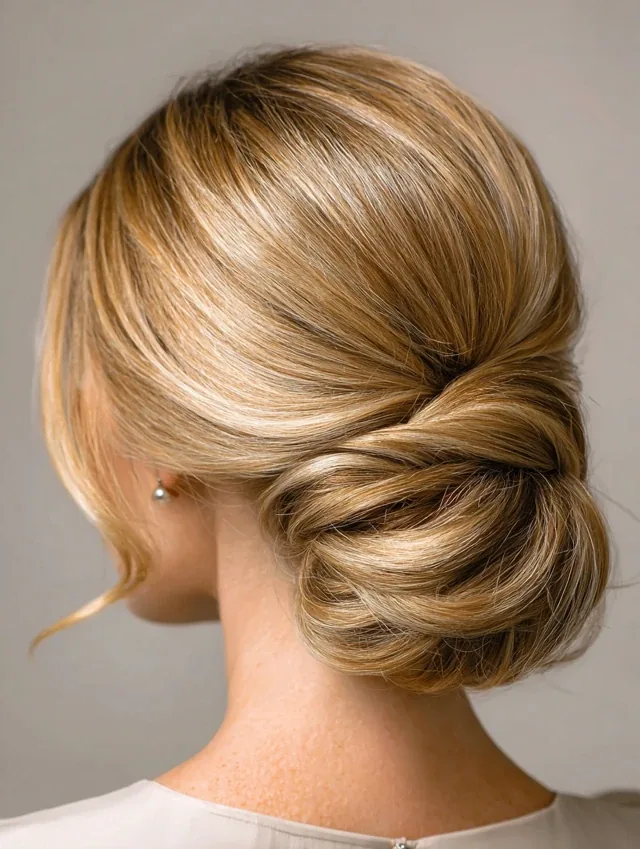
A twisted low bun takes two minutes longer than a ponytail and looks twice as elegant: split the hair into two sections, twist each one, wind them around each other at the nape and pin. The twist gives the bun a beautiful texture that reads as deliberate and polished, and the low position keeps it comfortable under hats and helmets. It is the style to reach for when you have five minutes and a dinner booking after the rink.
Time: 5–7 minutes. Cost: pins and one elastic. Best for: adult skaters, after-skate plans and anyone short on time. Common mistake: twisting too loosely so the bun sags — twist firmly and pin through the centre of the bun. Quick verdict: five minutes to a style that looks like a salon did it.
Braided Bun With a Ribbon for Competition Sparkle
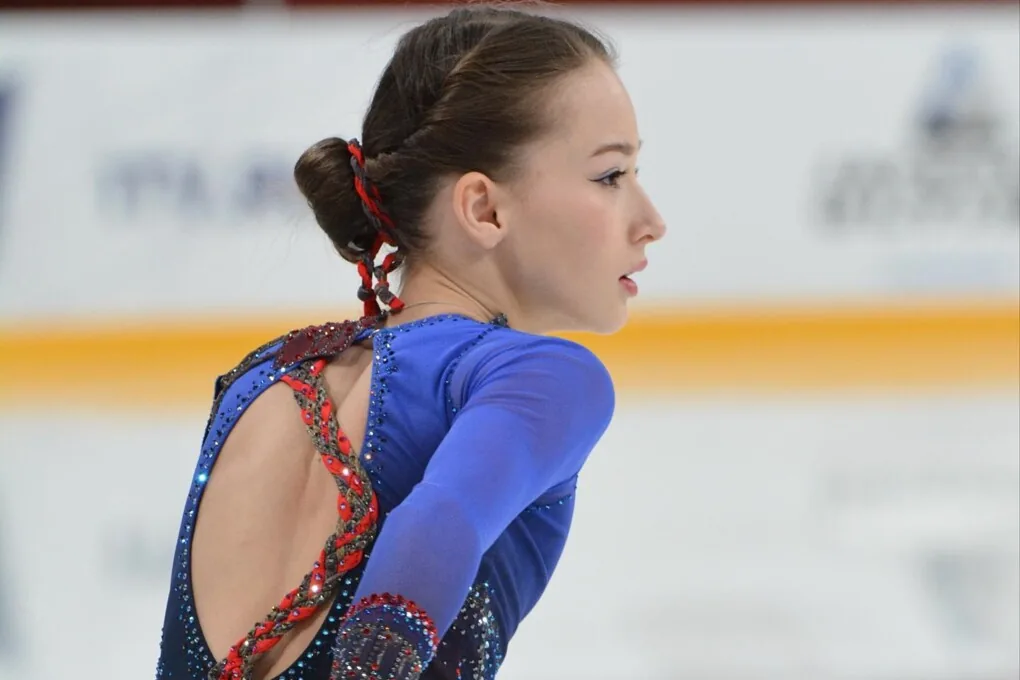
A braided bun with a ribbon is the competition classic: braid the ponytail first, coil it into a bun, then wind a ribbon around the base and tie it in a small bow. The ribbon adds colour and sparkle that catches the light from the stands, and it also hides the pins and the elastic for a flawless finish. Match the ribbon to your dress and the whole look comes together.
Time: 10–12 minutes. Cost: a ribbon, elastics and pins. Best for: competitions, recitals and performances. Common mistake: tying the bow too big, so it flops during a spin — keep it small and pin it flat. Quick verdict: the prettiest competition bun, and the ribbon is doing real work, not just decoration.
Slicked-Back Low Ponytail for a Clean, Modern Look
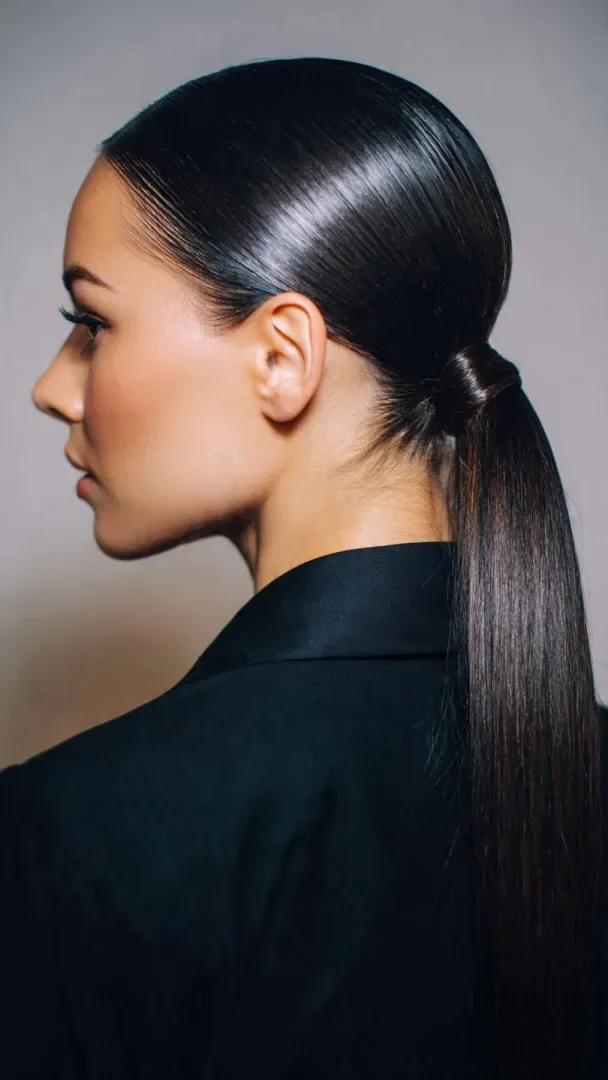
A slicked-back low ponytail is the modern, minimal rink style: brush everything back smoothly, secure it low at the nape, and wrap a strand around the elastic for a clean finish. It keeps every hair out of your face, it works under any hat, and it looks sharp with both sporty and elegant outfits. A little gel at the hairline keeps the flyaways down without making the hair crunchy.
Time: 5 minutes. Cost: gel and an elastic. Best for: straight or fine hair, modern outfits and skaters who like a clean look. Common mistake: using too much gel in cold air, where it flakes — a small amount smoothed with a brush is plenty. Quick verdict: minimal effort, maximum polish.
Double Bubble Pigtails for a Playful Rink Day
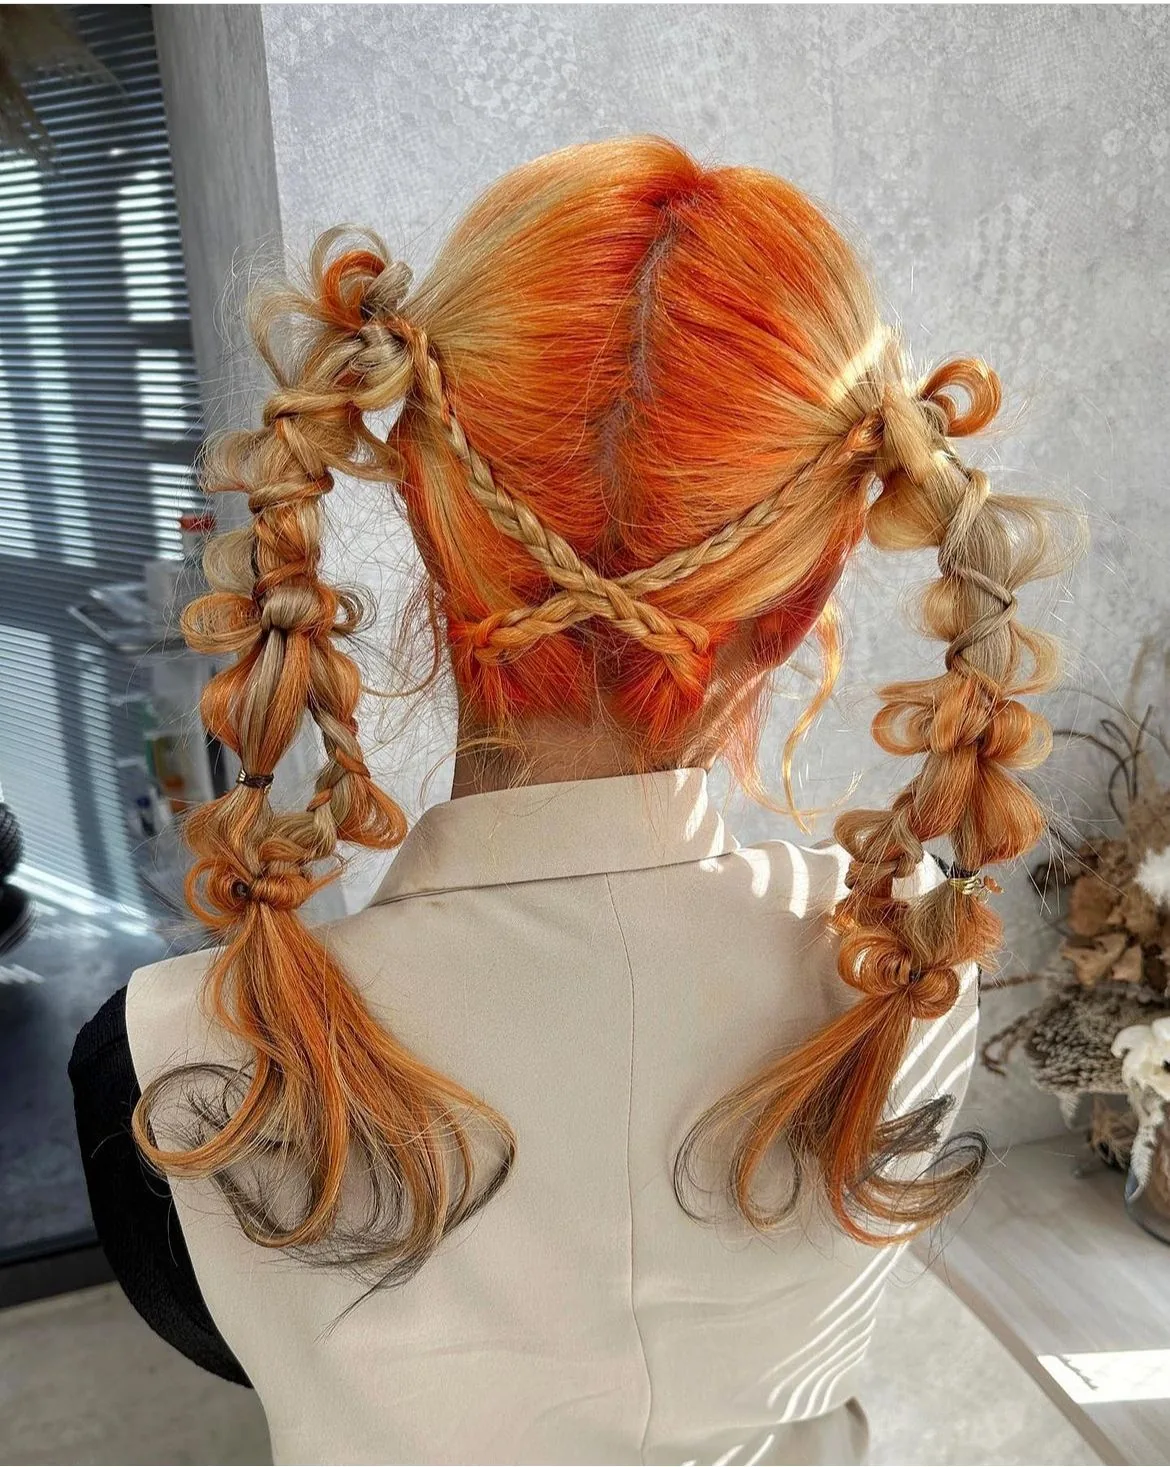
Double bubble pigtails split the hair into two bubble braids, one on each side, for a look that is twice as fun as a single bubble ponytail and twice as secure. The elastics spaced down each side act as anchors, so the style holds through spins, and the bubbles give it a cheerful shape that photographs wonderfully. It is a favourite for themed skates and holiday rink sessions.
Time: 8–10 minutes. Cost: small elastics. Best for: casual skates, themed sessions and skaters with medium to long hair. Common mistake: making the bubbles uneven — count the elastics on each side so they match. Quick verdict: the most fun style on this list, and surprisingly practical.
Crown Braid That Keeps Every Strand in Place
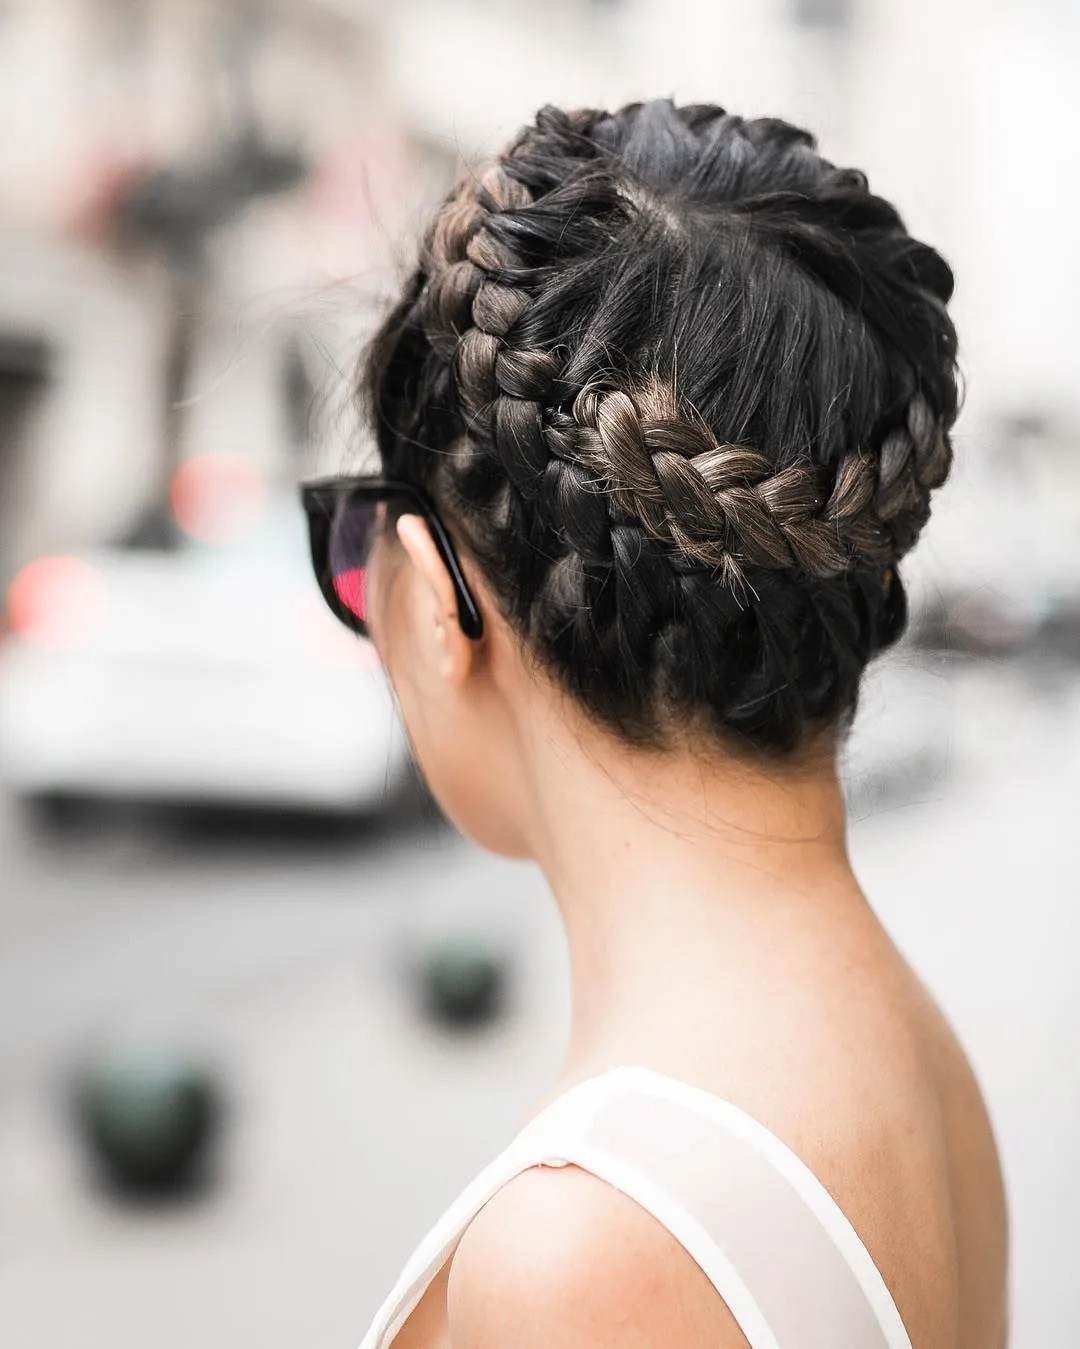
A crown braid circles the whole head, which means there is no tail, no loose end and nothing to come undone — the braid is its own anchor. Braid around the hairline from one side to the other, tuck the end under the start, and pin all the way round. It is regal, romantic and one of the most secure styles a skater can wear, holding through spins and jumps without a wobble.
Best for: long hair, performances and special occasions on the ice. Time: 15–20 minutes. Cost: elastics and pins. Common mistake: leaving a gap at the back where the braid meets itself — overlap the ends and pin them flat. Quick verdict: a halo of hair that simply refuses to move.
French Twist for Timeless Rink Elegance
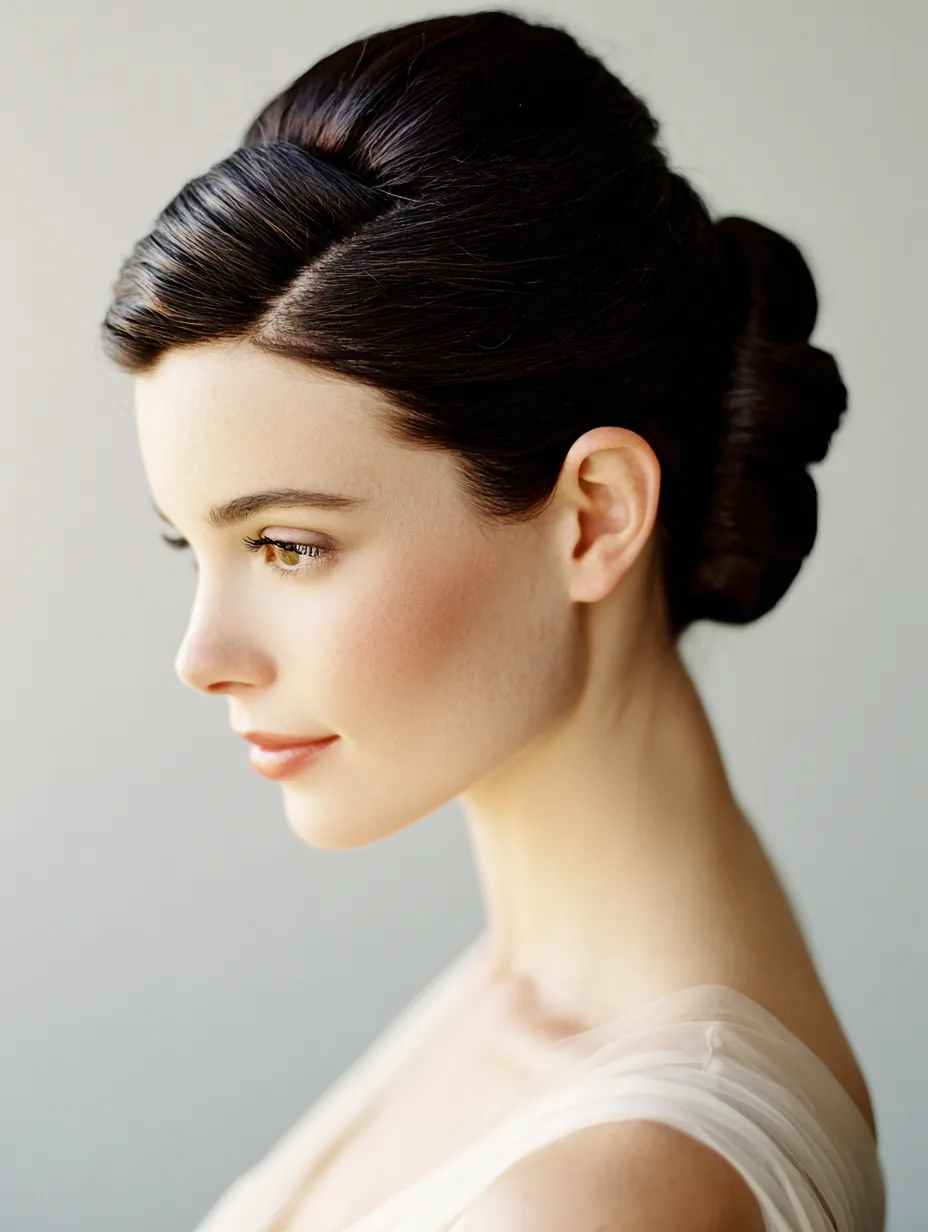
The French twist is timeless: gather the hair to one side, twist it up along the back of the head and pin it into a smooth vertical roll. It is elegant enough for a competition, secure enough for a spin, and it keeps the hair completely off the neck — a blessing on a cold rink. A few pins and a light spray are all it needs, and it looks just as good under a coat afterwards.
Time: 8–10 minutes. Cost: pins and one comb. Best for: medium to long hair, elegant outfits and formal rink events. Common mistake: twisting in the wrong direction and fighting the hair — twist towards the hand you write with and the hair cooperates. Quick verdict: old Hollywood elegance that works perfectly on the ice.
Textured Low Ponytail for Effortless Volume
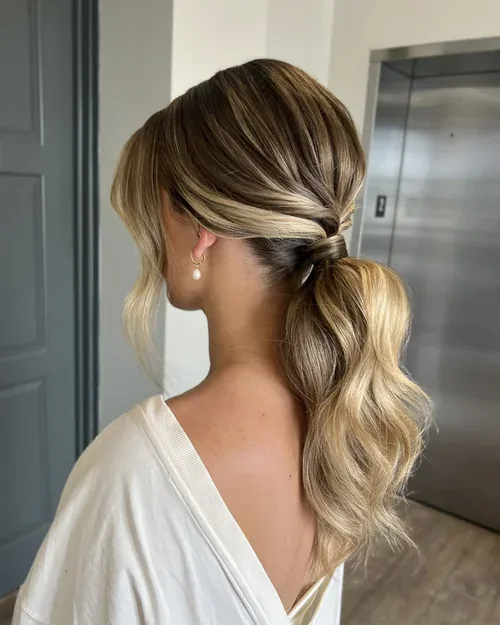
A textured low ponytail is the relaxed cousin of the slicked-back version: add a little texture spray or a few loose waves first, then gather the hair low and let the texture do the talking. It has movement and volume without any loose strands flying around, and it looks natural in rink photos. The low position keeps it comfortable under a hat, and the texture hides any hat-lines afterwards.
Time: 7–10 minutes. Cost: texture spray and an elastic. Best for: wavy or fine hair that needs a little help with volume. Common mistake: overdoing the texture spray, which makes the hair sticky in the cold — one light mist is enough. Quick verdict: volume and ease in one simple style.
Cornrows for the Rink: Weeks of Secure Style
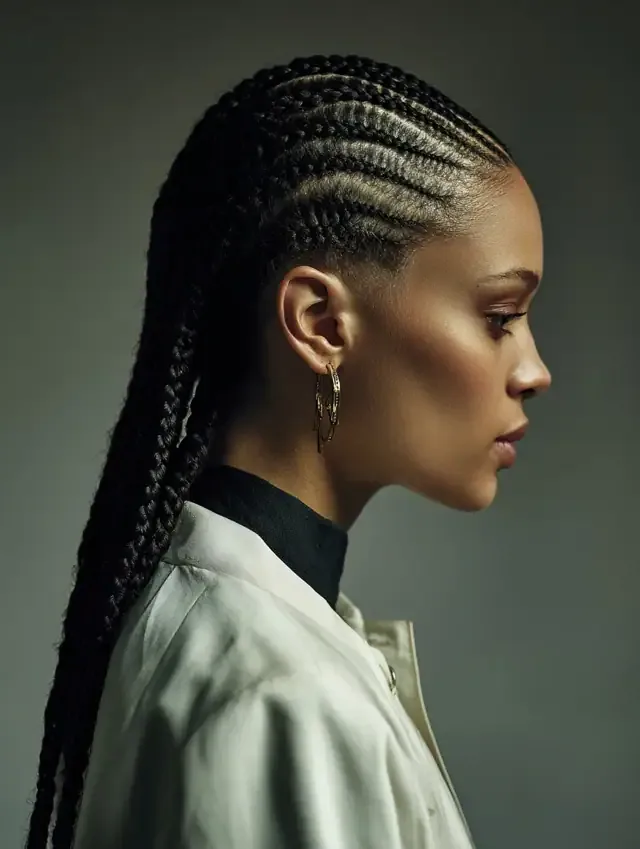
Cornrows are the longest-lasting style on this list — neat rows braided tight to the scalp that can hold for weeks with care. They keep every strand locked down through spins, jumps, hats and helmets, and they protect the hair from cold, dry rink air at the same time. They take a while to install, so book a braider or set aside an evening, but the payoff is a style you never have to think about before a skate.
Time: 1–3 hours to install, then zero daily styling. Cost: a braider’s fee or your own time. Best for: protective styling, long rink seasons and anyone who wants a fit-and-forget style. Common mistake: braiding too tightly at the edges, which causes breakage and headaches — tension should be firm, never painful. Quick verdict: the hardest-working hairstyle in this list, and the most protective too.
Space Buns for a Bold, Fun Rink Look
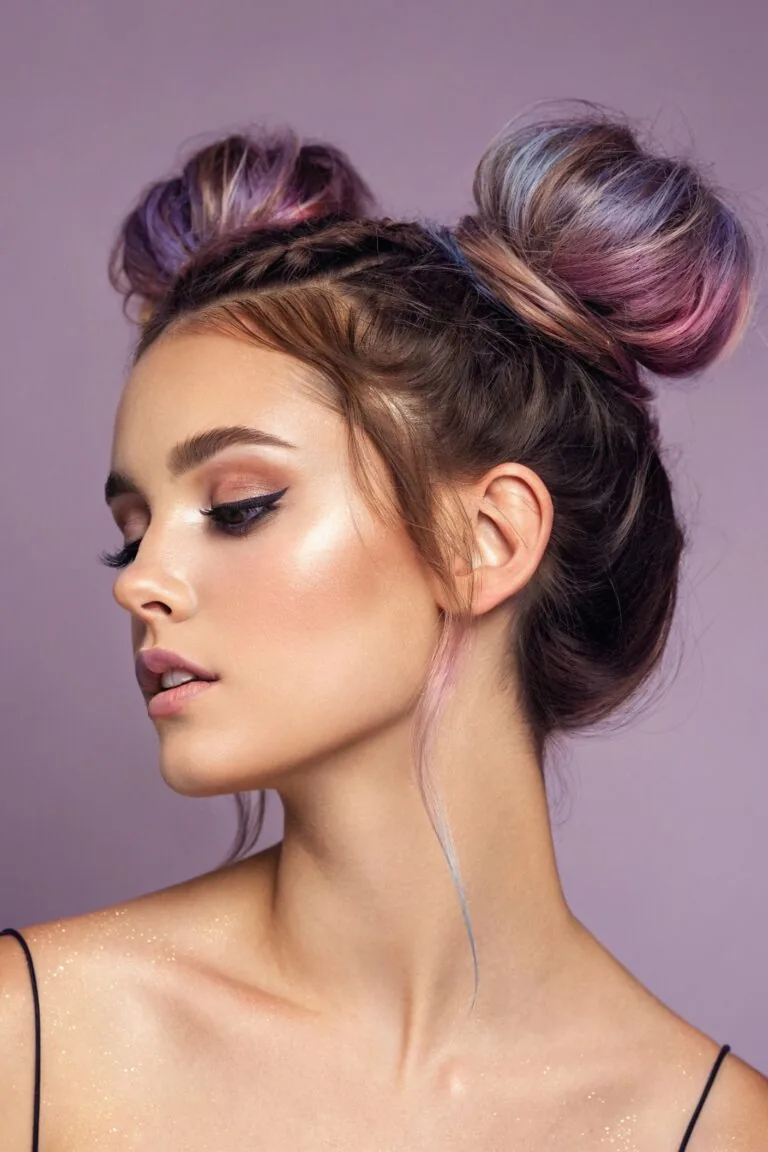
Space buns — two buns, one on each side — are bold, fun and surprisingly secure, because each bun anchors half the hair. Part the hair down the middle, twist each side into a bun and pin both firmly. They hold through spins, they clear a helmet better than one big bun, and they look fantastic in rink photos. Add glitter or a ribbon for a themed skate and they become a whole outfit.
Time: 8–10 minutes. Cost: elastics and pins. Best for: themed skates, casual sessions and skaters who like to stand out. Common mistake: placing the buns too high, where they bump a helmet — keep them at the sides, not the crown. Quick verdict: two buns, double the fun, and a style that genuinely stays put.
Braided Ponytail With a Scarf Wrap for Winter Warmth
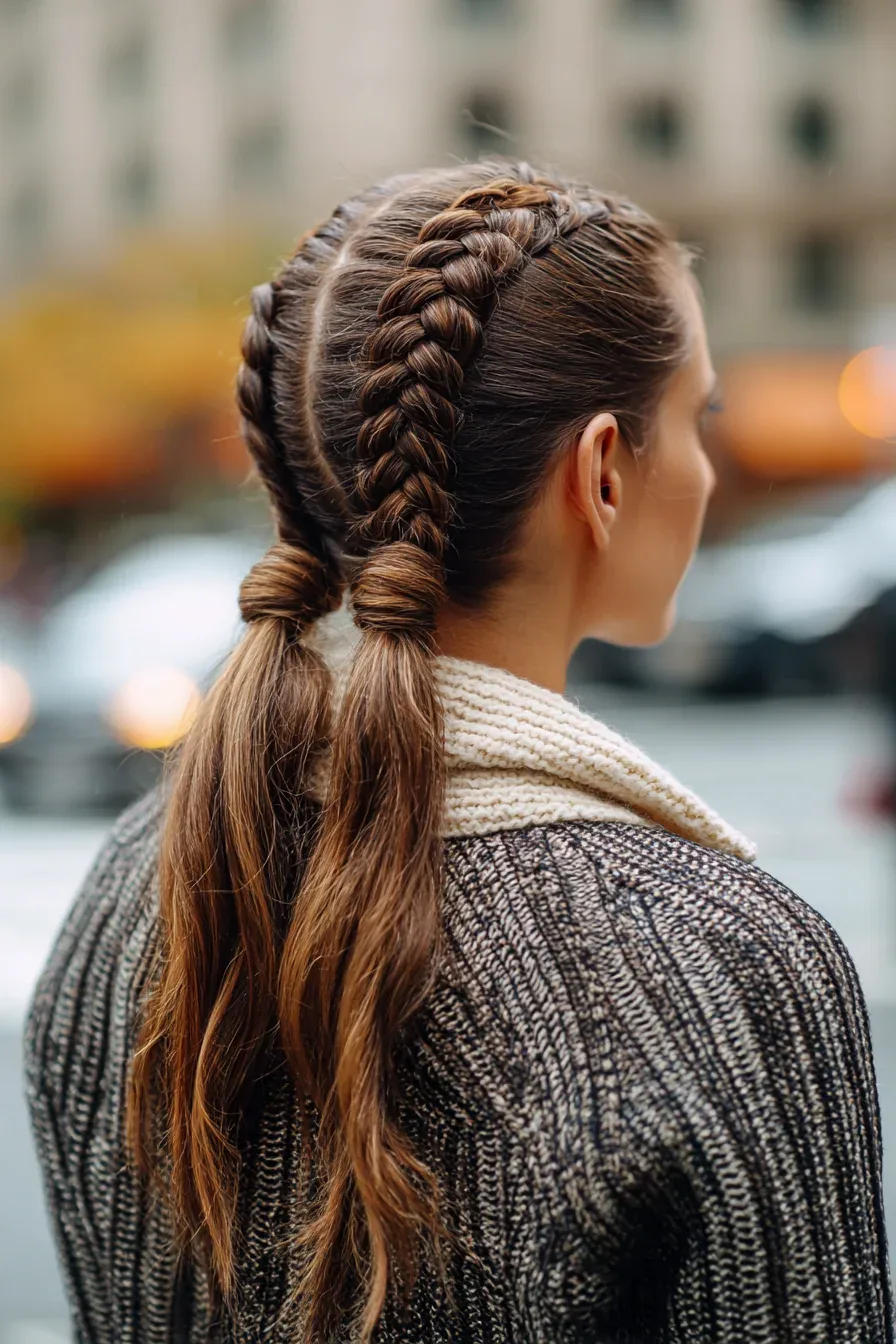
A braided ponytail wrapped with a silk scarf is warmth and style in one move: braid a low ponytail, then wind a slim scarf around the braid and tie it at the end. The scarf protects the braid from cold air and static, adds a splash of colour, and stops the braid from catching on a coat collar. Choose a silk or satin scarf, which slides smoothly and will not frizz the hair the way wool does.
Time: 8–10 minutes. Cost: a slim scarf. Best for: outdoor rinks and cold days. Common mistake: using a thick wool scarf, which creates frizz and static — silk is the right fabric. Quick verdict: a scarf that is doing a job, not just looking pretty.
Low Ponytail With a Wrapped Braid for a Polished Finish
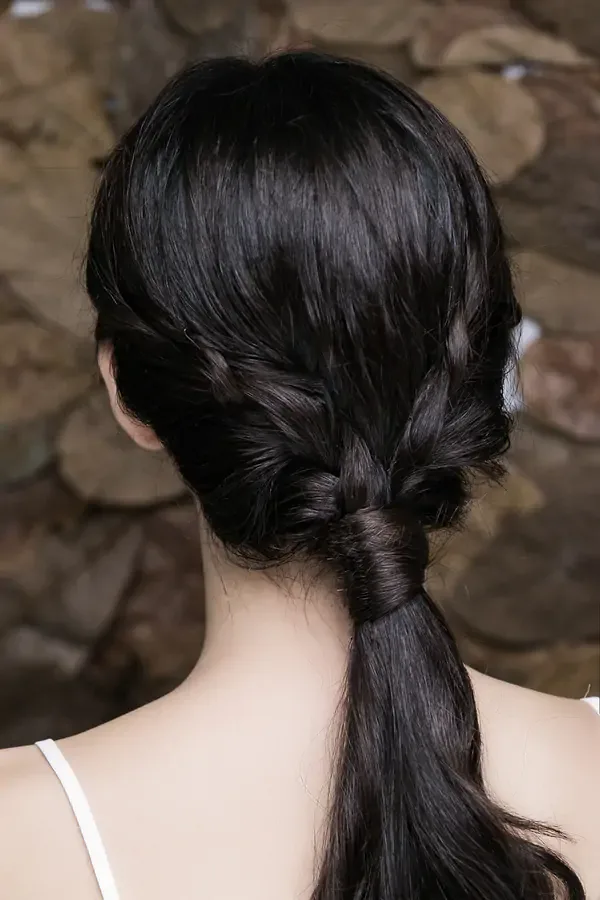
A low ponytail with a wrapped braid hides the elastic and adds a crafted detail that makes a simple ponytail look finished. Tie a low ponytail, take a thin section from underneath, braid it, and wrap it around the base to cover the elastic, pinning the end underneath. The wrap also stops the ponytail from slipping down during a skate, which is a quiet practical bonus.
Time: 7 minutes. Cost: an elastic and one pin. Best for: everyday skates and skaters who want a ponytail with polish. Common mistake: wrapping the braid too loosely so it slides off — wrap it snug and pin through the elastic. Quick verdict: a tiny detail that makes a plain ponytail look intentional.
Side-Swept Braided Updo for a Show-Stopping Skate
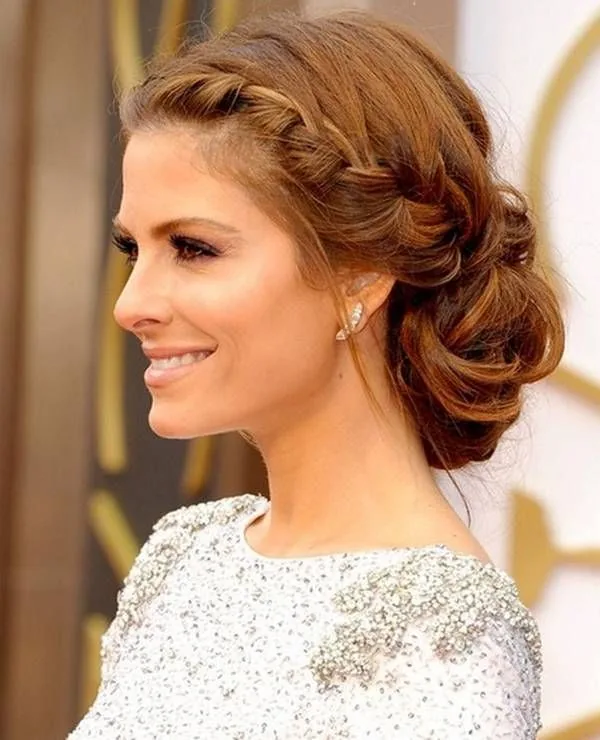
A side-swept braided updo sweeps everything to one side and pins it into a soft, textured shape — dramatic from the front, secure from every angle. Braid sections from each side, sweep them across the back, and pin them into a low side bun with a few strands left soft around the face. It photographs beautifully and holds through a whole routine, making it a favourite for performances.
Time: 15–20 minutes. Cost: elastics and pins. Best for: performances, competitions and special rink occasions. Common mistake: leaving too many loose strands, which fly during spins — keep the soft pieces to two at most. Quick verdict: drama and security in the same style.
Two-Strand Twists Into a Bun for Natural Hair
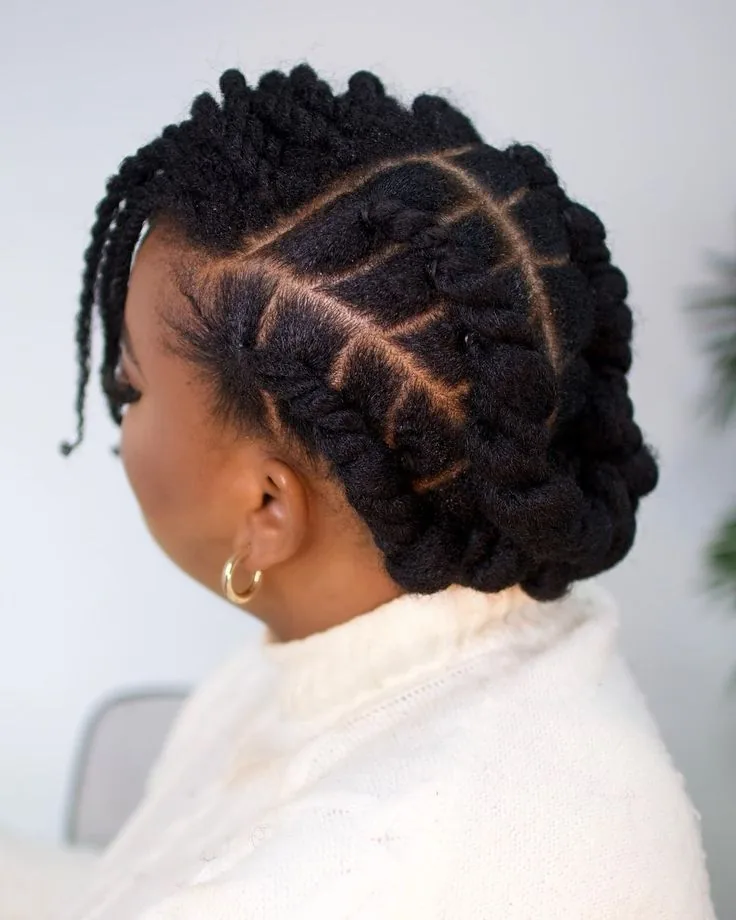
Two-strand twists are a gentle, protective way to gather natural hair into a bun: twist sections of hair around each other from the front to the back, then coil the twists into a low bun. The twists protect the ends from cold rink air, they hold without tight pulling, and they unravel into beautiful twist-out waves after the skate. It is a style that cares for your hair while you skate.
Best for: natural, curly and coily hair. Time: 20–30 minutes to twist, then quick to bun. Cost: a moisturiser or twisting cream. Common mistake: twisting on dry hair, which causes frizz and breakage — twist on damp, moisturised hair. Quick verdict: protective, pretty and kind to your curls.
Goddess Braids for a Regal Rink Presence
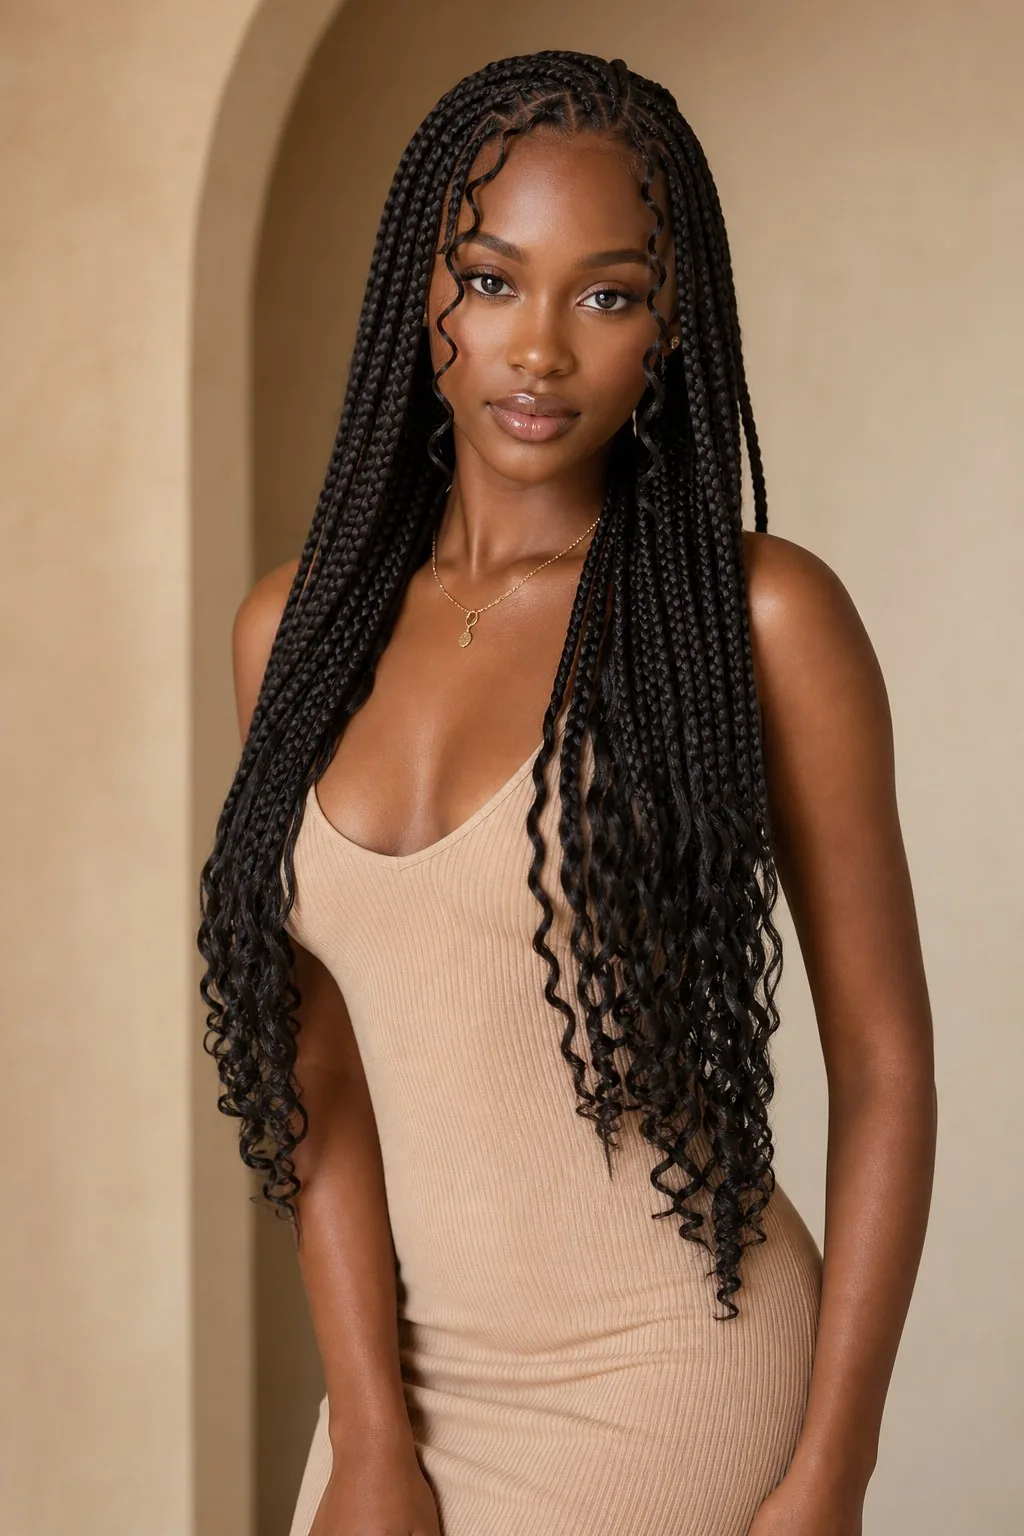
Goddess braids are large, raised braids — usually two to four — that sit proudly on the scalp and make a real statement on the ice. They are secure, long-lasting and protective, holding for days or weeks, and they look regal in competition photos. They take time to install, so they are best done the day before a big skate, but once they are in, you can forget about your hair entirely and focus on the skating.
Time: 1–2 hours to install. Cost: a braider’s fee or your own time. Best for: protective styling and competition weekends. Common mistake: making the braids too heavy with added hair, which pulls during spins — keep the added hair light. Quick verdict: a crown-worthy style for skaters who want to be remembered.
Wavy Half-Up With Clips for a Carefree Skate
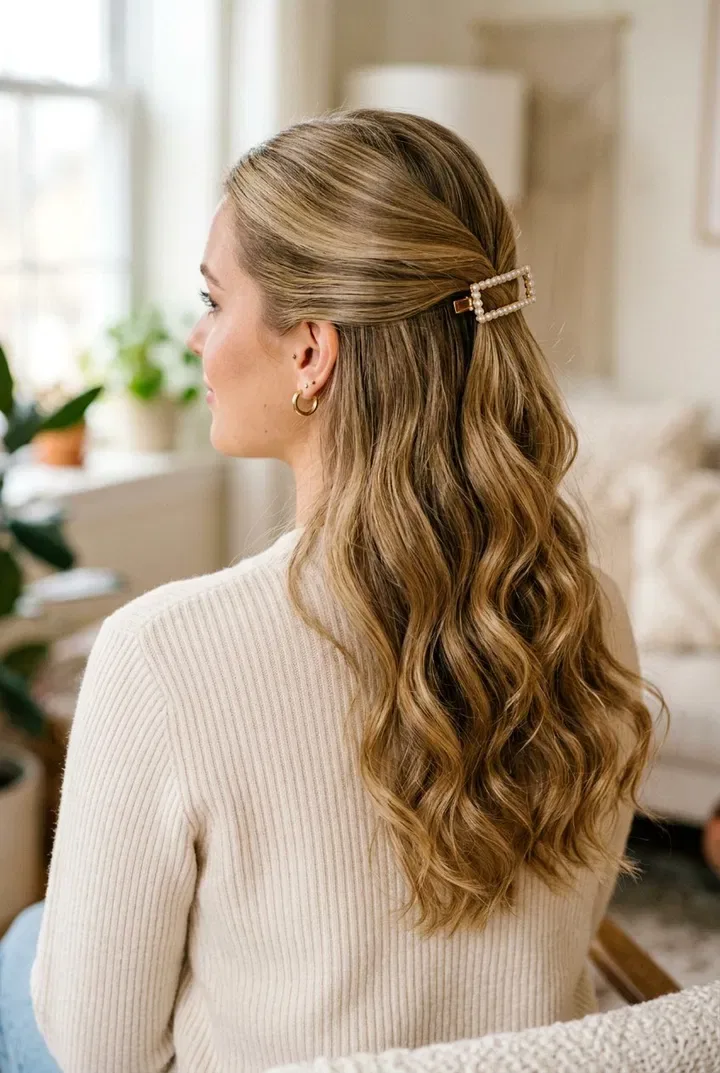
A wavy half-up style with clips is the most carefree look on this list: let your natural waves fall loose, pull the front sections back and secure them with two pretty clips, and skate. The clips keep the hair out of your face while the waves move freely, which looks lovely gliding across the ice. Save it for gentle skates and photos rather than spin practice, and carry a spare clip in your pocket just in case.
Time: 5 minutes. Cost: two clips. Best for: wavy hair, gentle skates and outdoor rink photos. Common mistake: using clips with no grip, which slide out at the first turn — choose clips with teeth or a strong spring. Quick verdict: the easiest pretty style here, perfect for a slow, sunny skate.
What is the best hairstyle for ice skating?
The classic figure skater bun is the best all-round hairstyle for ice skating, because it keeps every strand contained, survives spins and jumps, and looks elegant in photos. For beginners or helmet wearers, a low braided ponytail or double Dutch braids are just as secure and easier to do.
How do I keep my hair from falling out while ice skating?
Anchor your style at two or more points: braid the hair before bunning it, use two elastics on a ponytail, criss-cross your bobby pins, and finish with a hair net for competitions. Test the style with ten practice spins before a performance — if it wobbles in practice, it will fail on the ice.
Can I wear my hair down when ice skating?
You can wear your hair down for a gentle, slow skate, but it is not a good idea for spins, jumps or lessons. Loose hair whips across your face, catches on scarves and collars, and can block your vision at speed. A half-up style or a loose braid is a safer middle ground.
What hairstyle should I wear under a skating helmet?
Wear a low braid, a low ponytail or flat two-strand twists under a helmet, because anything bulky on top pushes the helmet up and leaves it loose. Keep the style flat against the head and check the helmet fits snugly before you step onto the ice.
How do I stop static in my hair at the ice rink?
Smooth a pea-sized drop of leave-in conditioner or hair oil over the lengths before you skate, brush with a wooden or boar-bristle brush, and keep a dryer sheet in your skate bag for a quick smoothing pass. Avoid heavy hairspray, which goes stiff and flaky in cold air.
Do figure skaters have to wear their hair in a bun?
No, figure skaters do not have to wear a bun, but most choose one because it is the most secure and elegant option. Braids, low ponytails and crown braids are all accepted in competition as long as the hair is neat, secure and does not distract from the skating.
What hair accessories are safe for ice skating?
Soft elastics, bobby pins, hair nets, scrunchies, ribbons and flat clips are all safe for the rink. Avoid hard, sharp or dangling accessories — heavy metal clips, dangling earrings and anything that could fall onto the ice and become a hazard for other skaters.
How do I keep my hair from getting sweaty under a hat while skating?
Take the hat off as soon as you come off the ice and let the air reach your roots for a few minutes before re-styling. A quick spray of dry shampoo at the roots lifts flatness and absorbs dampness, and a silk-lined hat or a satin scrunchie reduces sweat and frizz in the first place.
What hairstyle is best for short hair on the ice?
A short bob with a non-slip headband is the best short hairstyle for ice skating, because the length cannot swing into your face. A pixie cut with a knit headband is even easier, and both styles work perfectly under a helmet with no adjustment needed.
How do I fix my hair quickly at the rink?
Keep a small kit in your skate bag: spare elastics, bobby pins, two clips, a mini brush and travel dry shampoo. Most rink-side failures can be fixed in under a minute by re-tying into a low ponytail or a twisted bun, and a silk scarf can rescue a completely failed style by wrapping it into a low bun.
Your Turn to Shine on the Ice
The right hairstyle does more than keep hair out of your face — it lets you forget about your hair entirely and focus on the skating. Whether you choose the classic figure skater bun, a crown of braids or a simple low ponytail under a beanie, the best hairstyles for ice skating are the ones that hold through spins, survive the cold and still look beautiful in the photos afterwards.
Pick one style from this list, practise it at home before your next skate, and pack your rink-side kit so a loose pin never ruins a session. Then lace up, step onto the ice and enjoy the glide — your hair is taken care of.