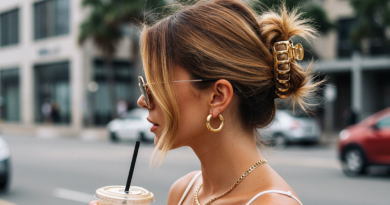
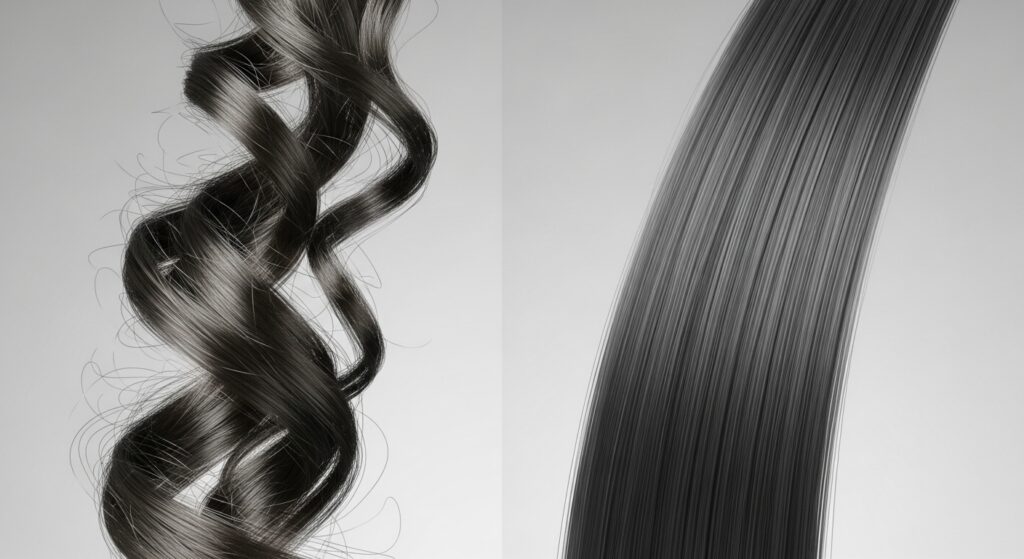
Hair Diffuser: Essential for Curl Definition
If you have curly or wavy hair, you know the struggle is real. You step out of the shower with what could be the most beautiful, springy coils, only to be met with a frustrating aftermath: a frizzy, undefined, and often shrunken mess. You’ve tried every cream, gel, and mousse on the market, but something still feels missing. What if the secret weapon to unlocking your hair’s full potential isn’t a product you apply, but a tool you attach?
Enter the hair diffuser. This humble attachment for your hairdryer is far more than just a plastic bowl with prongs; it’s a game-changer, a curl’s best friend, and the key to achieving the definition, volume, and health you’ve been craving. This guide will dive deep into why a diffuser is absolutely essential for anyone looking to embrace and enhance their natural texture.
What Exactly Is a Hair Diffuser and How Does It Work?
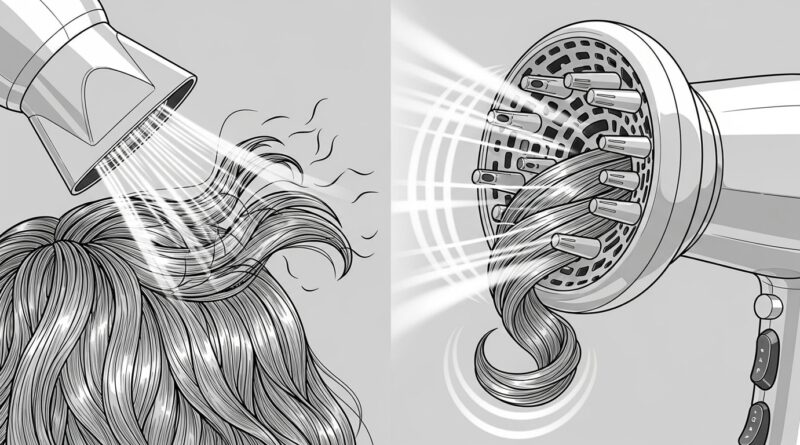
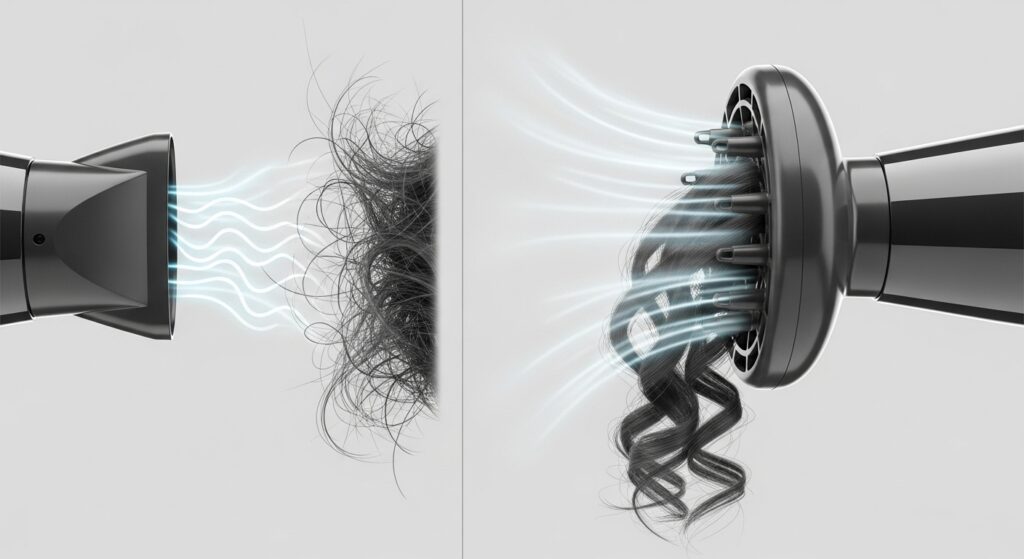
Before we champion its benefits, let’s understand what we’re dealing with. A hair diffuser is an attachment that fits onto the nozzle of a standard hairdryer. Its design is intentionally different from a concentrator nozzle. Instead of focusing a high-velocity, direct stream of hot air onto one section of hair, a diffuser has a wide, often pronged, bowl-like head.
The magic lies in its function. A diffuser works by:
Dispersing the Airflow: It breaks up the powerful, direct blast from your dryer into a gentler, wider, and more distributed flow of air. This prevents your delicate curl clumps from being blown apart and creating frizz.
Reducing Heat Intensity: By spreading the air over a larger surface area, the heat is also diffused, making it less aggressive on your hair cuticle. This is crucial because high, direct heat is a primary culprit for dryness and damage.
Cradling the Curls: The prongs or fingers on many diffusers allow you to lift your hair at the roots and “cup” your curl sections. This enables you to dry your curls in their natural formation, encouraging them to set with memory and bounce from root to tip.
In essence, a diffuser respects the integrity of your curl pattern while drying it, rather than fighting against it.
The Science of Curls: Why Diffusing is a Game-Changer
To truly appreciate the diffuser, you need to understand a bit of curl science. Curly hair is inherently drier and more fragile than straight hair. Its spiral shape makes it difficult for the natural oils produced by the scalp to travel down the hair shaft. Furthermore, the hair cuticle—the outer protective layer—is often more raised, making it susceptible to moisture loss and environmental damage.
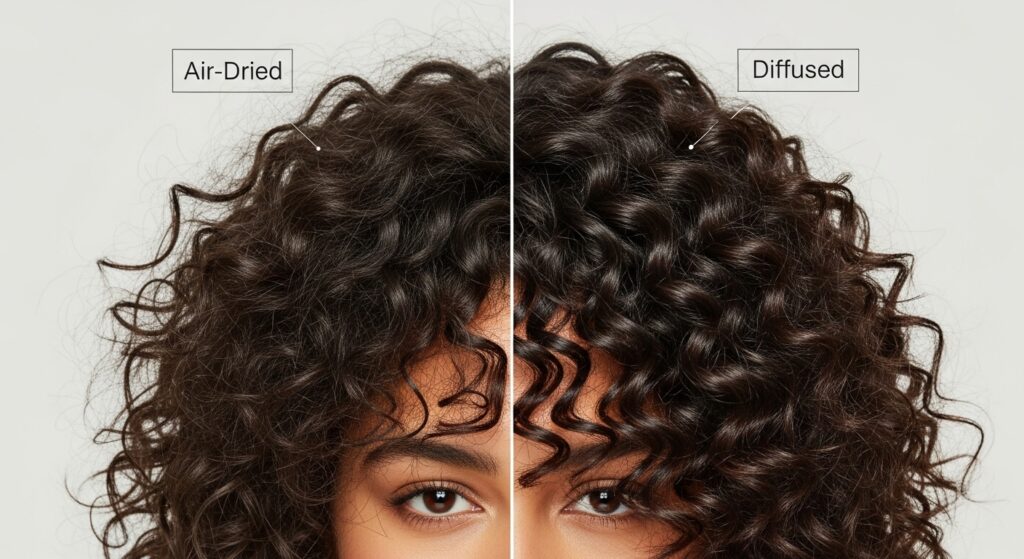
When you air-dry your curls, they are in a vulnerable, wet state for a long time. The prolonged exposure to water can swell and weaken the hair shaft. As it dries unevenly, the outer layers dry first while the inner layers remain damp, leading to tension and, you guessed it, frizz.
Using a regular hairdryer without a diffuser is like using a hurricane to dry a delicate silk scarf. The forceful air ruffles the cuticle, creating friction and chaos, which manifests as a frizzy halo. The high, concentrated heat can also bake the moisture right out of your strands.
A diffuser solves these problems systematically. By using gentle, indirect heat and airflow, it helps the cuticle dry smoothly, locks in the moisture from your styling products, and preserves the clumped-together formation of your curls that you carefully crafted in the shower.
Top 5 Reasons a Diffuser is Essential for Curl Definition
Now, let’s get into the tangible benefits you’ll experience by making diffusing a part of your routine.
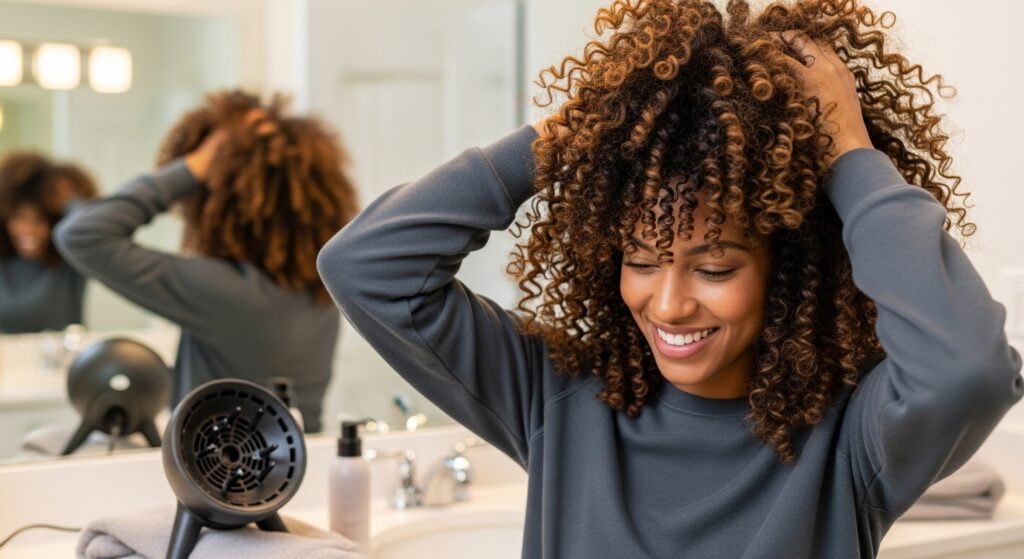
1. Unbeatable Definition and Enhanced Curl Pattern: This is the star of the show. By drying your curls in their natural clumps without disturbing them, a diffuser sets the curl pattern in place. The “cupping” technique encourages spirals to form more tightly and uniformly, reducing straggly ends and creating a more cohesive, defined look from root to tip.
2. Significant Frizz Reduction: Frizz is essentially hair that has been separated from its curl clan and decided to do its own thing. The diffuser’s gentle airflow prevents this rebellion. It dries the hair cuticle smoothly instead of ruffling it, leading to a shinier, sleeker, and far less frizzy finish.
3. Incredible Volume at the Roots: One common complaint among curlies is flat roots. When you air-dry, gravity pulls your wet, heavy curls down, flattening your crown. A diffuser allows you to flip your head upside down and gently place your roots into the diffuser bowl, lifting them as they dry. This creates lasting, root-to-tip volume that air-drying simply cannot achieve.
4. Faster Drying Time with Less Damage: While air-drying seems like the healthiest option, leaving your hair wet for hours can be detrimental. A diffuser offers the perfect middle ground. It dramatically cuts down drying time compared to air-drying, which means less time for your hair to be in a vulnerable state, all while using far less damaging heat than a traditional blow-dry.
5. Maximizes Your Styling Products: You spent good money on that leave-in conditioner and curl cream. A diffuser helps you get the most out of your investment. By locking in the moisture and forming a cast with your gels or mousses more effectively, it ensures your hard work in the shower doesn’t go to waste, leading to longer-lasting styles.
How to Use a Hair Diffuser Like a Pro
Owning a diffuser is one thing; using it correctly is another. Follow these steps for flawless results every time.
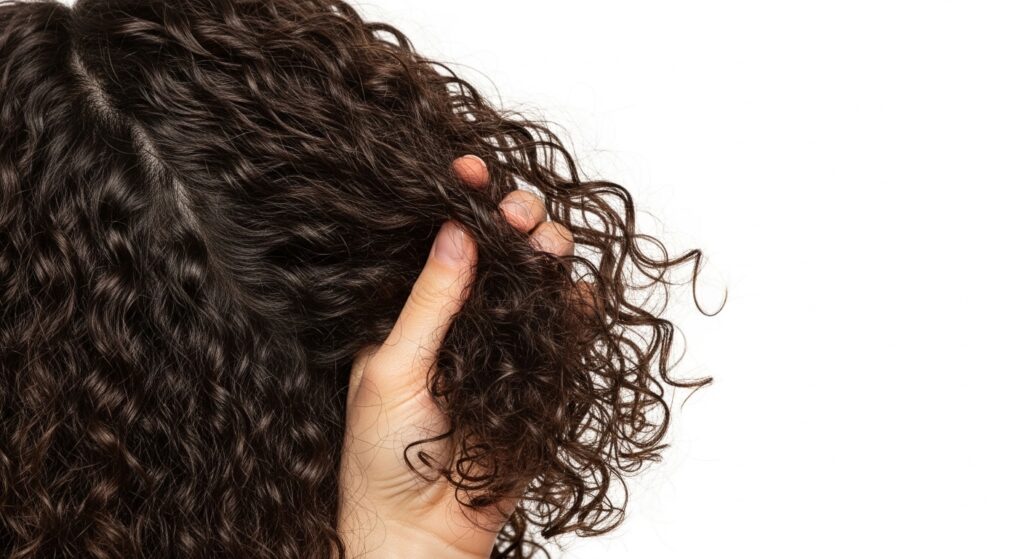
Step 1: Preparation is Key. After washing, gently scrunch out excess water with a microfiber towel or an old cotton t-shirt (avoid terrycloth towels, which cause frizz). Apply your preferred leave-in conditioner, curl cream, and a hold product like gel or mousse to soaking wet or damp hair, using techniques like “praying hands” or “raking and scrunching” to encourage clumps.
Step 2: Set Your Dryer Correctly. Attach your diffuser. Start with the lowest heat and speed settings. High heat can create a “flash dry” effect, where the outside of the curl is dry but the inside is still wet, leading to frizz later. The goal is a slow, gentle dry.
Step 3: The Techniques.
The Cupping Method: Gather a section of curls into the diffuser bowl, using the prongs to gently lift your roots. Hold the diffuser in place against your scalp for 30-60 seconds, then move to the next section.
Hovering: For a even more gentle approach or for very delicate hair, simply hover the diffuser around your head without touching your hair, allowing the dispersed air to do its work.
Pixie Diffusing: For ultimate volume, start by diffusing your roots upside down using the cupping method until they are about 50% dry, then flip right-side up and continue.
Step 4: Know When to Stop. Your hair does not need to be 100% bone-dry. In fact, stopping when your hair is about 90% dry and allowing the last bit to air-dry can help prevent overdrying. Once fully dry, you can “scrunch out the crunch” from any gel cast with a tiny drop of hair oil on your palms.
Choosing the Right Diffuser for Your Curl Type
Not all diffusers are created equal. The best one for you depends on your hair’s density and curl pattern.
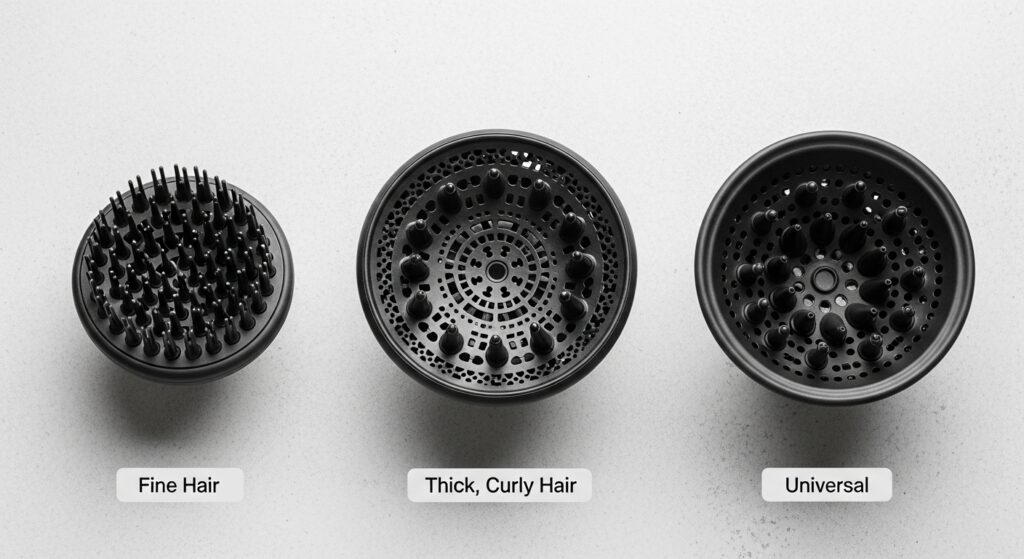
For Fine, Low-Density, or Wavy Hair: Look for a diffuser with shorter, more numerous prongs or a smooth, bowl-like design. You want something that won’t weigh your hair down or create too much separation. The goal is to enhance your wave without breaking up your pattern.
For Coarse, High-Density, or Tightly Curly/Coily Hair: You need a diffuser with longer, more flexible prongs and a deep, wide bowl. This design is necessary to accommodate your voluminous hair, reach your roots effectively, and cup larger, tighter curl clumps without causing tangles.
Universal Features to Look For: A universal adapter is a must to ensure it fits your hairdryer model. A diffuser that is heat-resistant and has a comfortable handle will make the process much easier.
Common Diffuser Mistakes to Avoid
Even with the best intentions, small mistakes can hinder your results.
Mistake 1: Using Too Much Heat or Speed. Patience is a virtue in the curly world. High settings will cause frizz and defeat the purpose of the diffuser. Stick to low and cool settings.
Mistake 2: Moving the Diffuser Too Much. A common error is constantly moving the diffuser around like a regular dryer. The key is to place it, hold it, and then move it. Constant motion creates airflow chaos.
Mistake 3: Not Using Enough Hold Product. A diffuser works best when it’s helping to dry and set a style. If you skip the gel or mousse, your curls may not have enough structure to hold their definition as they dry.
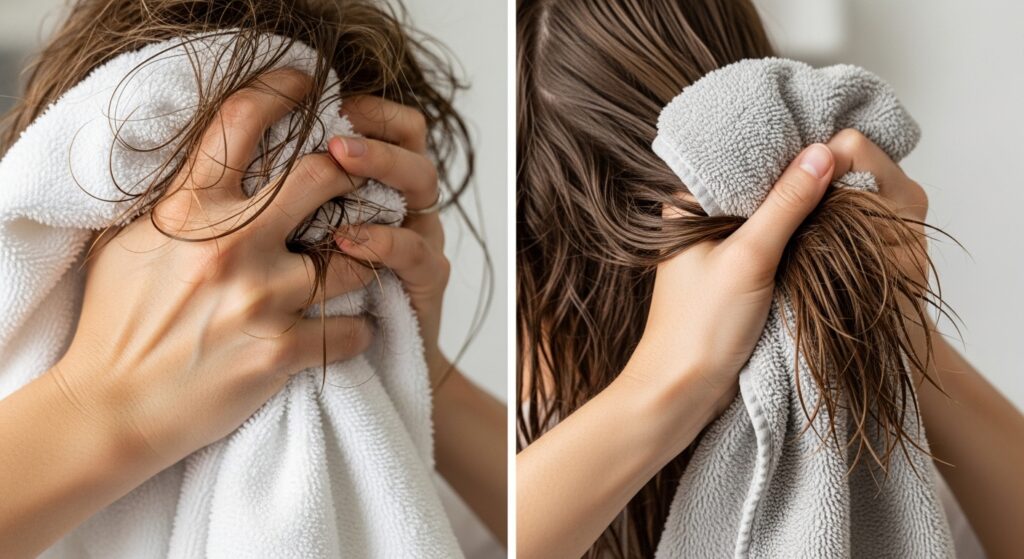
Mistake 4: Rubbing Your Hair with a Towel. This is a pre-diffuser sin, but it’s worth repeating. Rubbing creates massive frizz. Always scrunch or plop with a microfiber towel or t-shirt.
Embrace Your Curls, Empower Your Routine
The journey to embracing your natural hair is filled with experimentation, but some tools are simply foundational. A hair diffuser is one of them. It’s not just an accessory; it’s a transformative tool that bridges the gap between the hair you have and the hair you want—defined, voluminous, healthy, and vibrant.
By understanding how it works, choosing the right one, and mastering the technique, you can say goodbye to frustrating wash days and hello to consistently beautiful curls. Stop fighting your texture and start working with it. Your diffuser is waiting to become your new best friend.
[A final, empowering image of a diverse group of people with different curl types (wavy, curly, coily) all smiling confidently and showing off their beautifully diffused hair.]