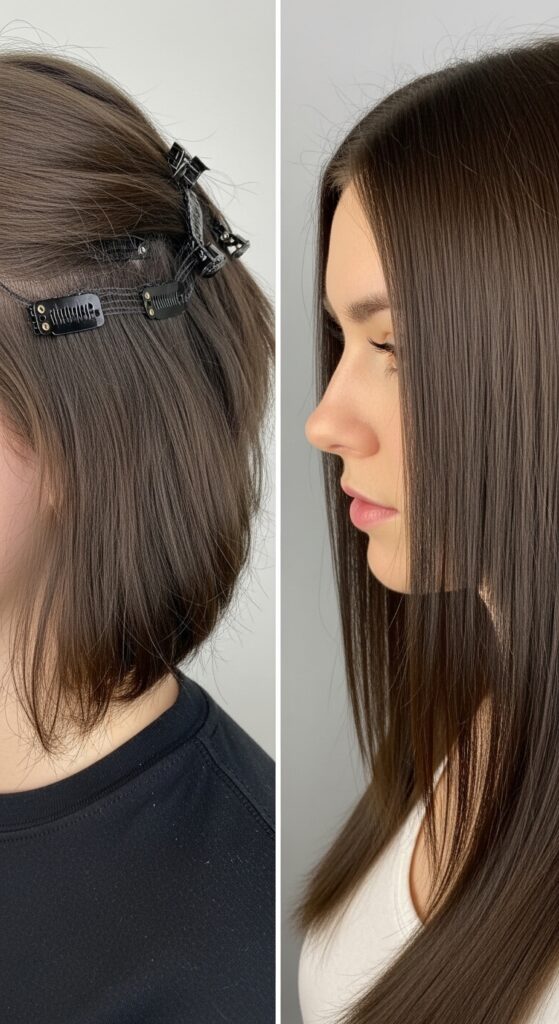
Glam 27 Remy Human Clip-Ins Blending Undetectably with Owns
Okay, let’s be real. We’ve all seen those hair tutorials where the clip-ins look like a separate, sad little animal perched on someone’s head. You want that instant volume and length, but you also want it to look like it grew out of your own scalp. I get it. That’s the dream.
For years, I struggled with extensions that felt fake or matched poorly. It was frustrating and expensive. Then I found my holy grail: the Glam 27 Remy Human Clip-Ins. They changed my hair game completely.
This isn’t about a dramatic, obvious transformation. It’s about a secret. It’s about adding that perfect, undetectable boost for a quiet luxury bob or extra body for those 2026 hairstyles you’re eyeing. I’m going to walk you through exactly how to make them blend so seamlessly, no one will know your secret but us.
Why Glam 27 Clip-Ins Are My Ride-Or-Die

Not all human hair extensions are created equal. After trying countless brands, I settled on Glam 27 for a few non-negotiable reasons. First, the hair is 100% Remy human hair, meaning the cuticles are intact and aligned. This prevents tangling and keeps the hair shiny, just like your natural hair.
Second, the color range is incredible. They have all those tricky, nuanced shades—think ash browns, beige blonds, and rich chocolates—that actually match real hair. This is the foundation for that undetectable blend. If the color is off, nothing else you do will matter.
The Golden Rule: Color Matching Is Everything
This is the most important step. Ordering online can be tricky, so here’s my foolproof method. Always match the weft to the hair at your crown, about two inches from your roots. Your ends are usually lighter from sun exposure.
- Snap a picture of your hair in direct sunlight.
- Compare it to the brand’s color chart on your computer screen.
- If you’re between two shades, go for the darker one. It’s easier to lighten extensions slightly than to darken them.
Prepping Your Natural Hair For Success
Don’t clip into silky-smooth, freshly washed hair. It creates a slippery base, and the wefts will slide right out. I always prep my hair a day after washing, or I use dry shampoo at the roots for some grit.
Style your natural hair exactly how you want it before clipping in. Curled, waved, or straight. This helps the extensions fall into place and blend from the get-go. A light-hold texturizing spray is your best friend here for creating a grip.
The Sectioning Strategy For Invisible Layers
You can’t just start clipping willy-nilly. Strategic sectioning hides the wefts and creates natural volume from within. I use a simple three-layer system.
- Create a horizontal part from ear to ear, clipping the top section up. This is your top layer.
- From the bottom section, create another horizontal part about two inches up. Clip that middle section. You’re left with the very bottom hair.
- This bottom section is where you’ll place your first and widest weft.
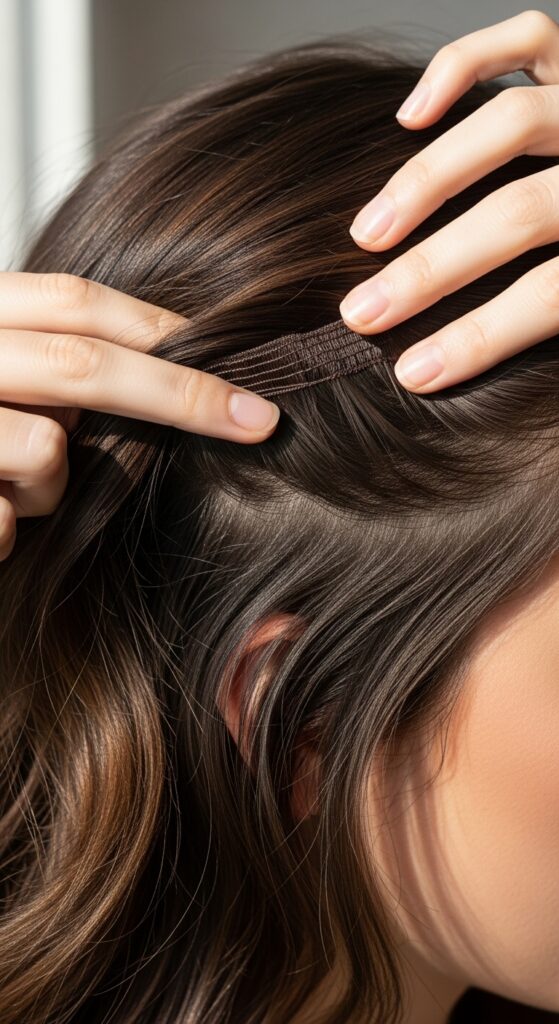
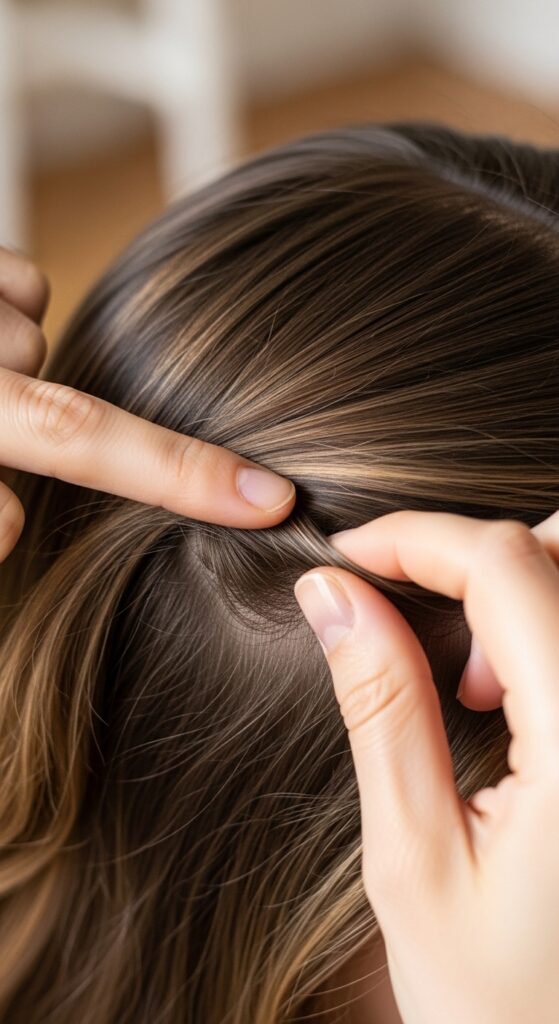
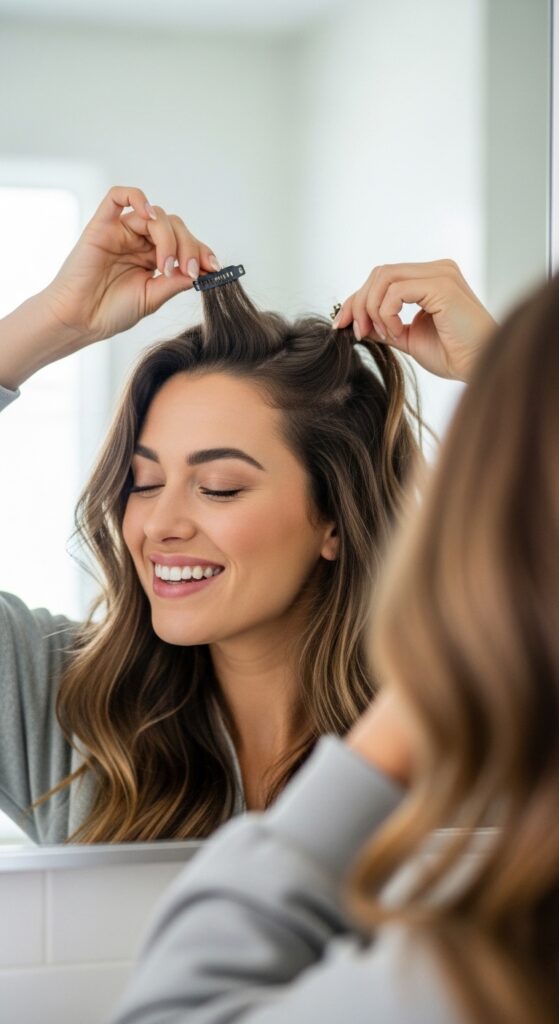
Clipping In The First (And Most Important) Weft
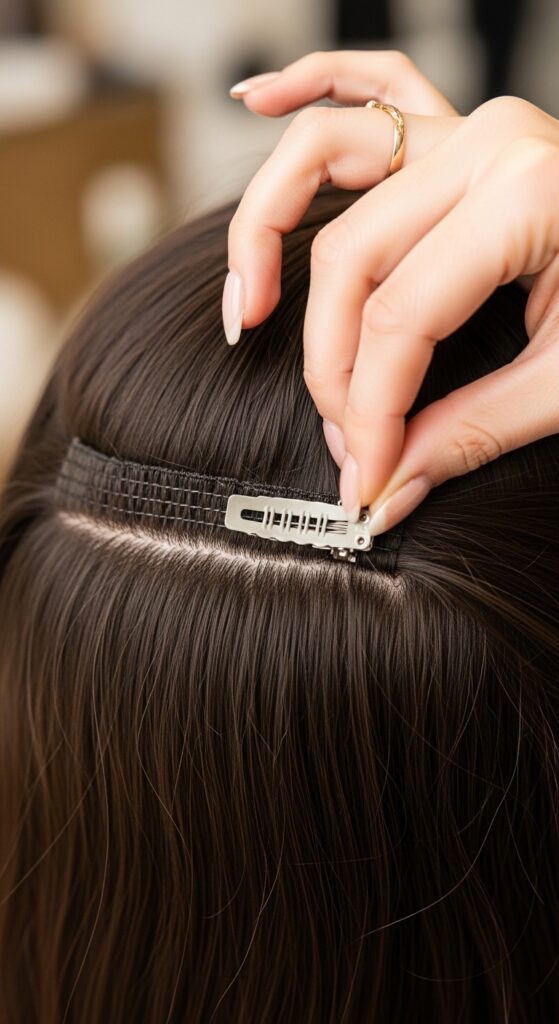
Take your widest clip-in weft. Apply it to that bottom section of your hair, as close to your roots as possible without touching your scalp. Snap all clips securely into place.
Once it’s secure, release the middle section of hair you had clipped up. Gently comb it down over the first weft. See? It’s already hidden. This layer of your natural hair acts as the perfect camouflage for the top of the extension weft.
Building Volume From The Bottom Up
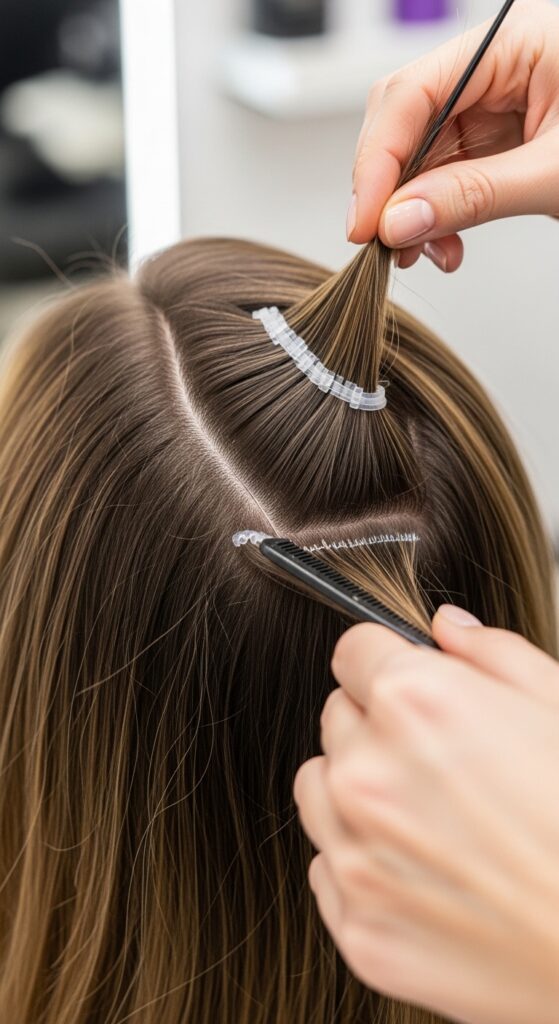
Now, take a slightly thinner weft. Apply it to that middle section of hair, again close to the roots. Snap the clips shut. This layer builds the mid-shaft volume that makes hair look incredibly thick and healthy.
Before you release the top section, run your fingers through the extensions and your natural hair together. Gently tease at the roots where they meet for an even smoother transition. The goal is no harsh lines.
Securing The Top Layer For Full Coverage
Finally, release that top section of hair you’ve had clipped up. For this layer, I often use the two smallest wefts. Place them slightly further back from your hairline, near the crown, to avoid any bulky feeling at your part.
This top layer is key for adding lift at the roots and ensuring that when you move your hair, no tracks are visible from above. It’s the final piece of the security blanket.
Blending The Extensions With Your Own Hair
Now that everything is clipped in, it’s time to become one. Gently comb through everything with your fingers or a wide-tooth comb. Do not aggressively brush from the roots, as this can displace the wefts.
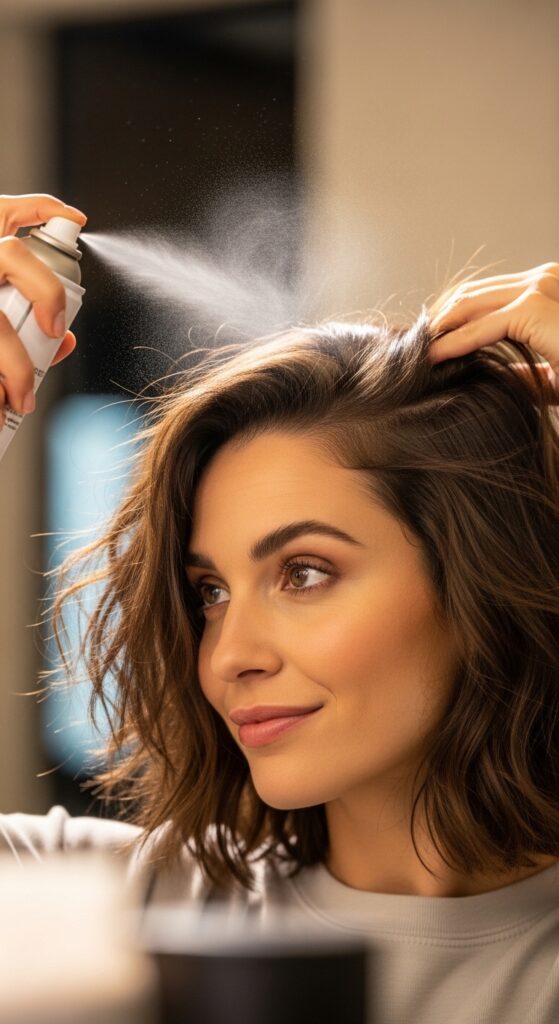
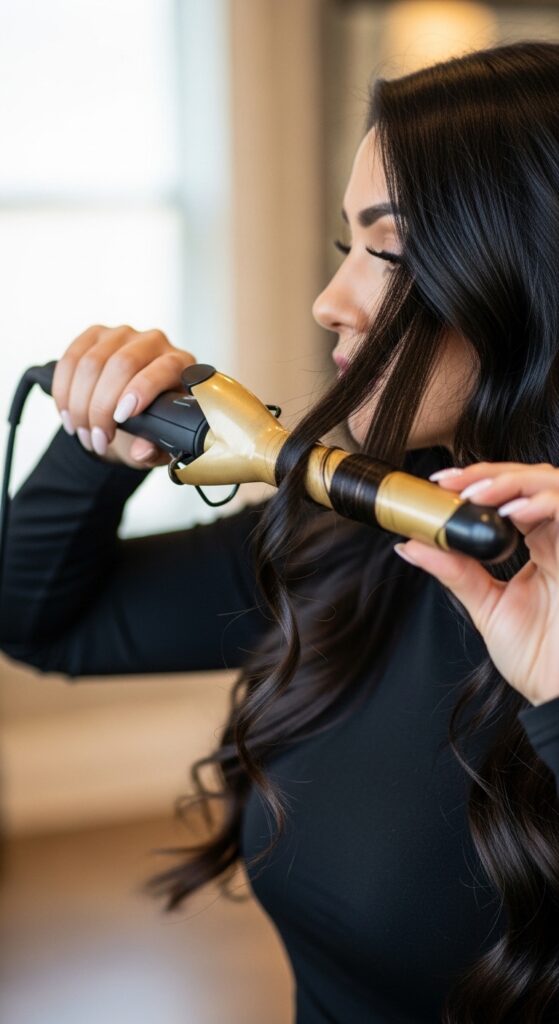
If you curled or straightened your natural hair beforehand, now run your styling tool over the extensions and your natural hair together. This blends the textures and seals the deal. A light hairspray over everything sets the union.
Creating A Natural, Undetectable Part
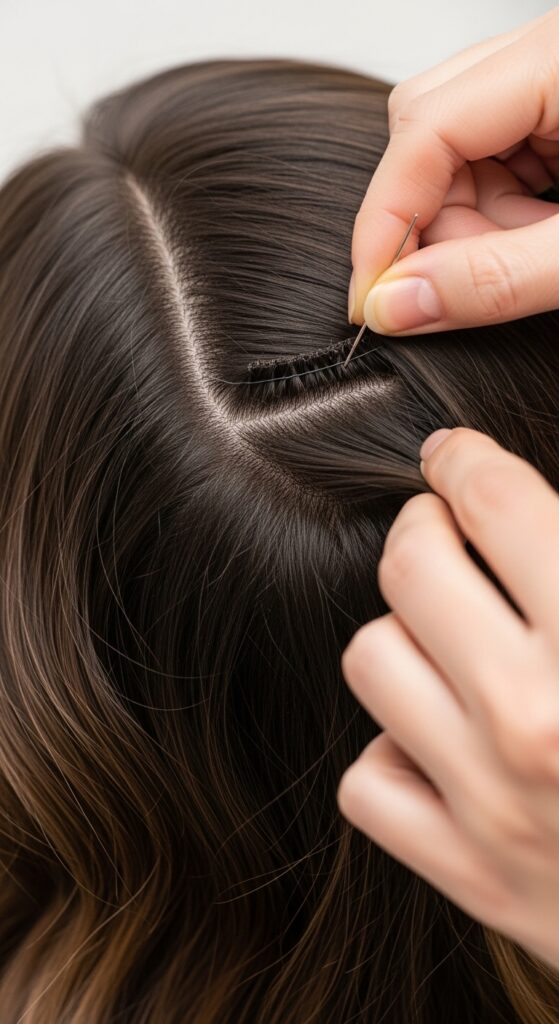
A perfect, scalpy part is a dead giveaway. To make it look real, you need to break it up. Use the tip of a tail comb or your fingernail to gently pull out a few tiny hairs from the front of your part.
Pull out a few baby hairs or finer pieces around your face and temples. This softens the hairline and makes everything look organic. It’s that old money hair vibe—effortless and not overly perfected.
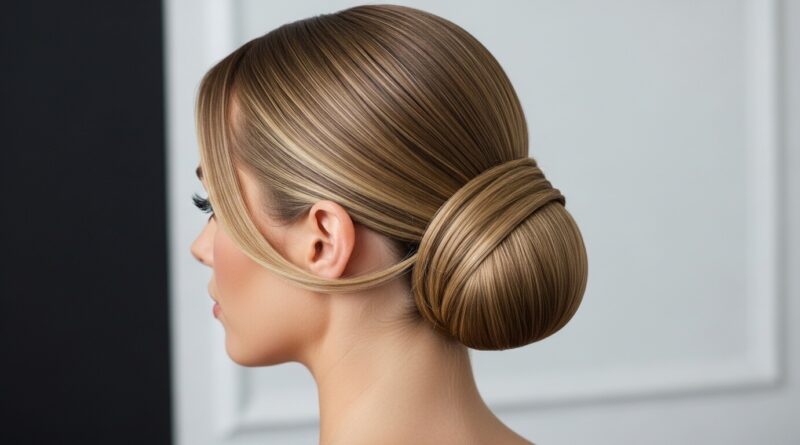
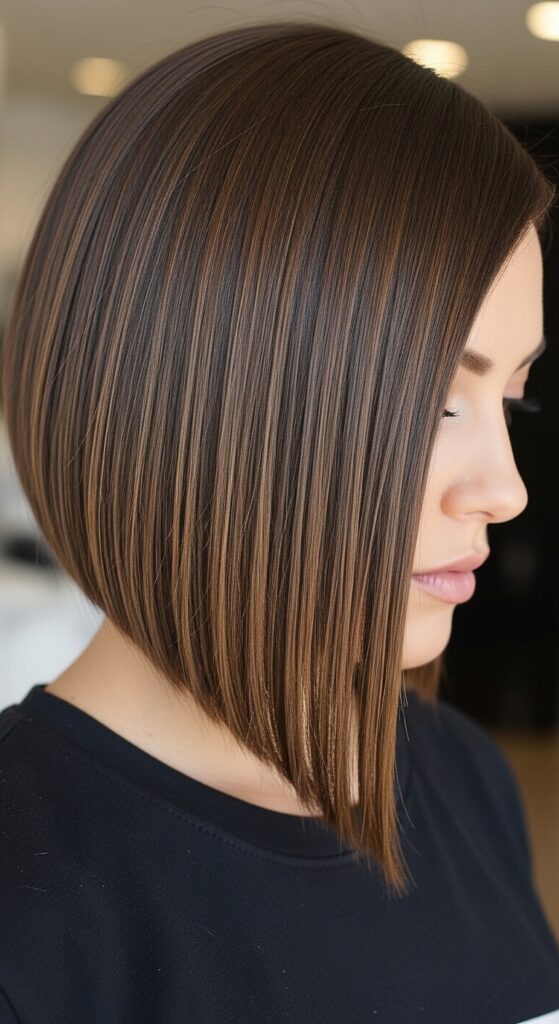
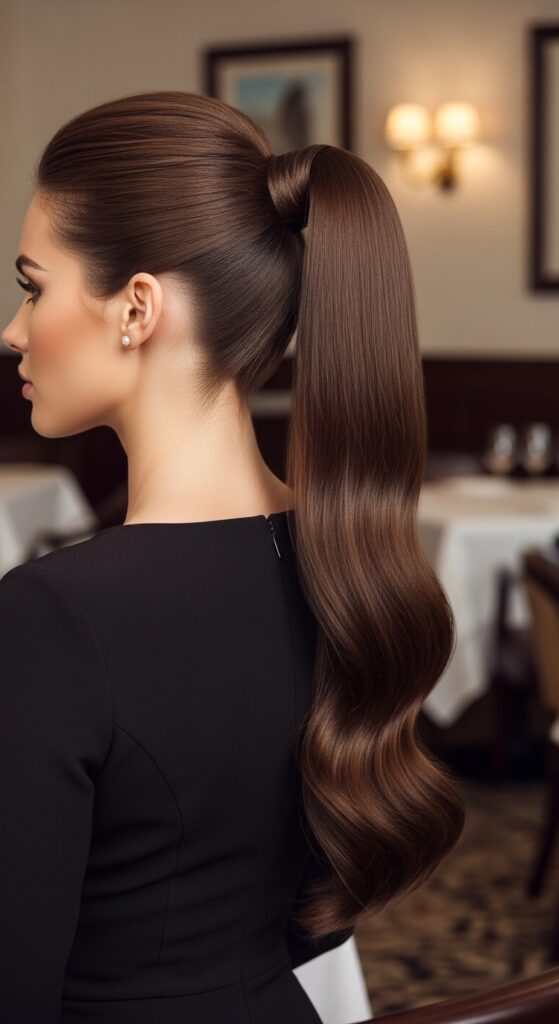
Styling For A “Quiet Luxury” Vibe
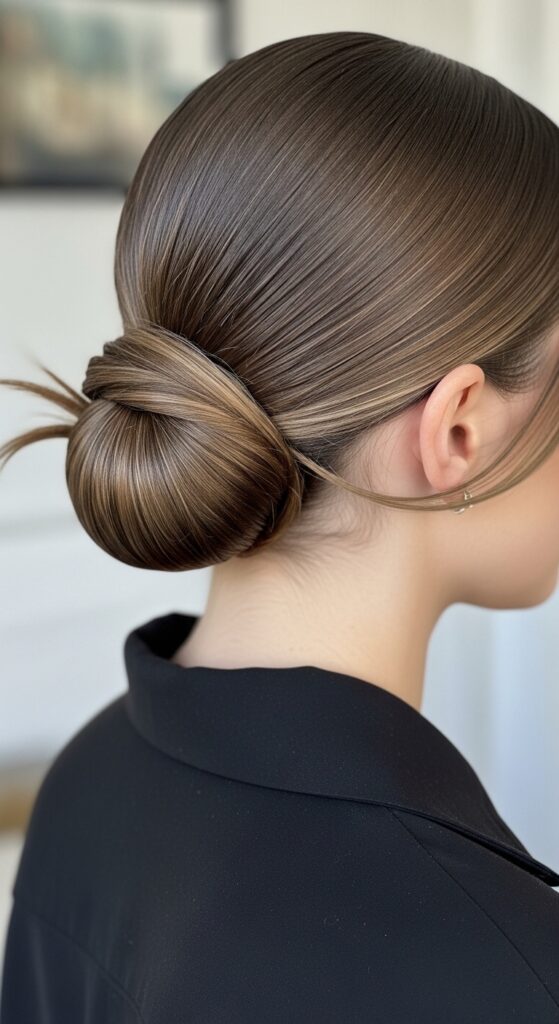
With your perfectly blended clip-ins, a quiet luxury bob or a chic ponytail is so easy. The hair just looks inherently thicker and healthier. For that vibe, aim for sleek, polished styles.
Think low, smooth buns, deep side parts with soft waves, or a perfectly straight asymmetrical lob. The quality of the hair does the talking. It’s not loud; it’s just impeccably good.
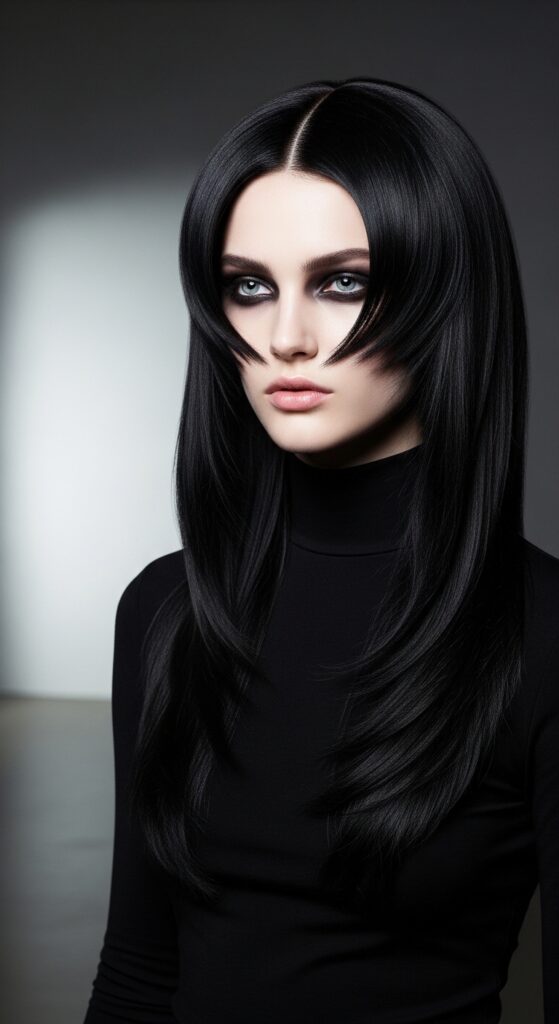
Getting Edgy With Romantic Goth Styles
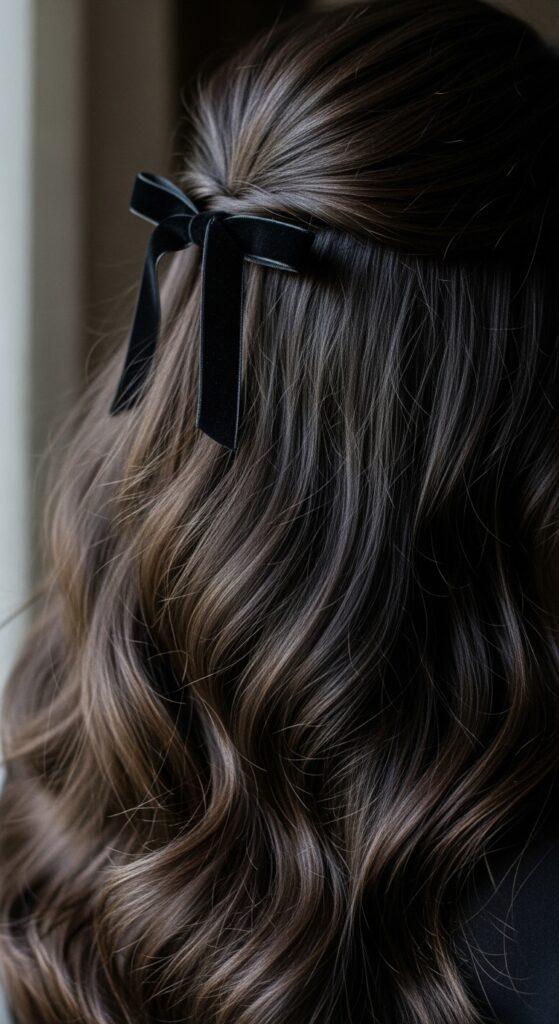
This is where it gets fun. Your new length and volume are perfect for romantic goth hairstyles. Think dramatic victory rolls, long braids with ribbons woven in, or half-up styles with lots of texture.
The Remy hair holds style beautifully, so you can create those soft, cascading waves or intricate looks that define the aesthetic. It’s perfect for adding drama to a vampire haircut shape.
Experimenting With Glitchy Glam Texture
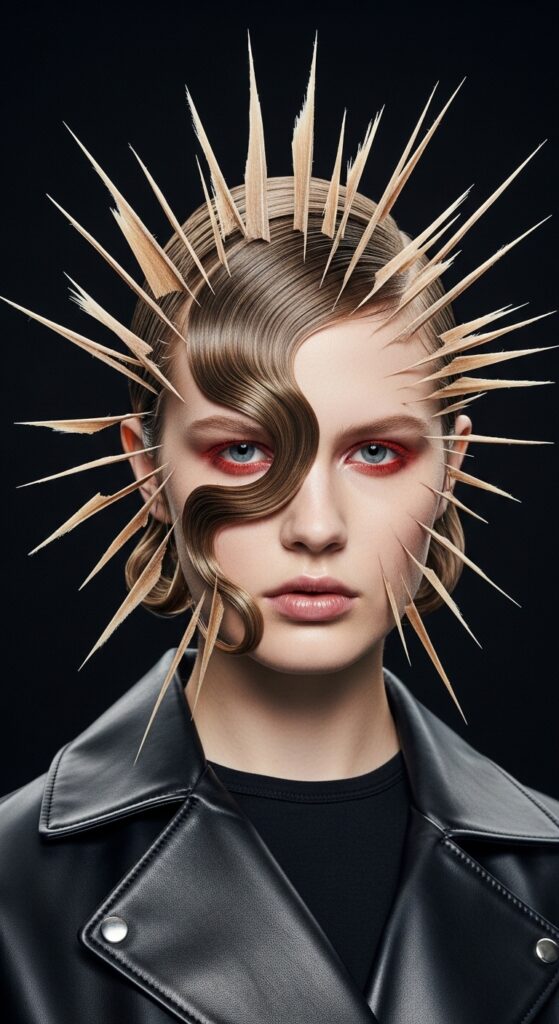
Glitchy glam hair is all about intentional imperfection and texture. With your clip-ins, you can create this by styling sections differently. Leave some pieces straight, curl others in opposite directions, and add a strong-hold texturizing paste.
Backcomb lightly at the roots of the extensions for a lived-in, deconstructed feel. The blend is so good, you can play with these edgy 2026 hairstyles without worrying about exposing your secret.
Mastering The Asymmetrical Lob
An asymmetrical lob is a stunning cut, but it requires great hair density to look right. Clip-ins give you that density instantly. Style it with a flat iron for a sharp, geometric look.
Because you can place wefts strategically, you can add extra weight to the longer side if needed. It lets you “try on” this bold cut without the commitment of shearing off your own hair.
Channeling The Vampire Haircut Trend
The vampire haircut is all about long, heavy layers and dramatic face-framing. Clip-ins are a vampire’s best friend (pun intended). They add the serious length and volume needed for those sweeping layers.
Concentrate the wefts around your face to emphasize those framing pieces. Style with a shine serum for that iconic, supernatural gleam. It’s dark, romantic, and so much fun.
Trying The Hime Cut For A Bold Change
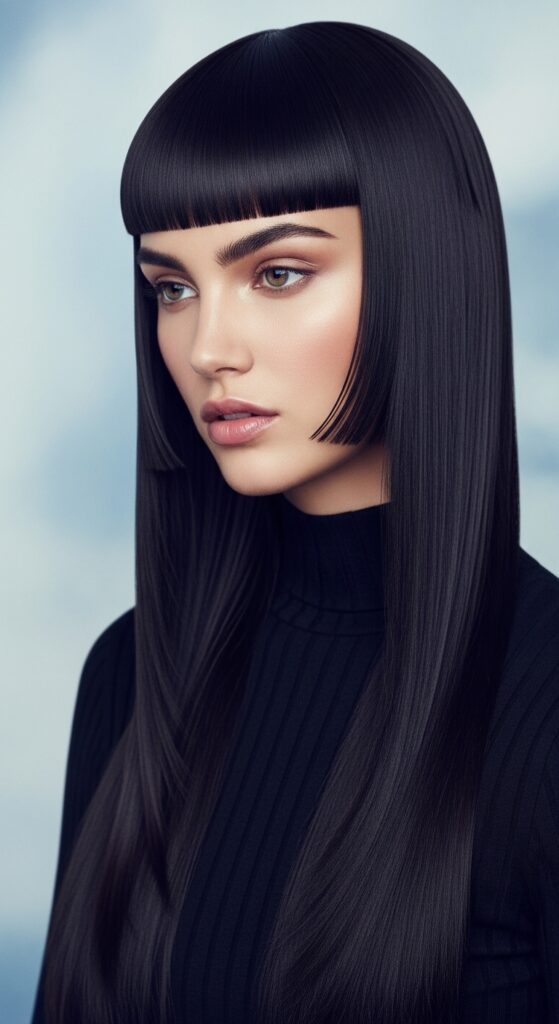
The hime cut is a dramatic Japanese style with blunt, face-framing sections and long back hair. This is another style that relies on super blunt, thick ends. Clip-ins provide the perfect density.
You can style the front pieces separately for that bold, graphic look. It’s a fantastic way to experiment with an artistic, statement haircut for a night out or a photoshoot.
Daily Maintenance & Care Tips
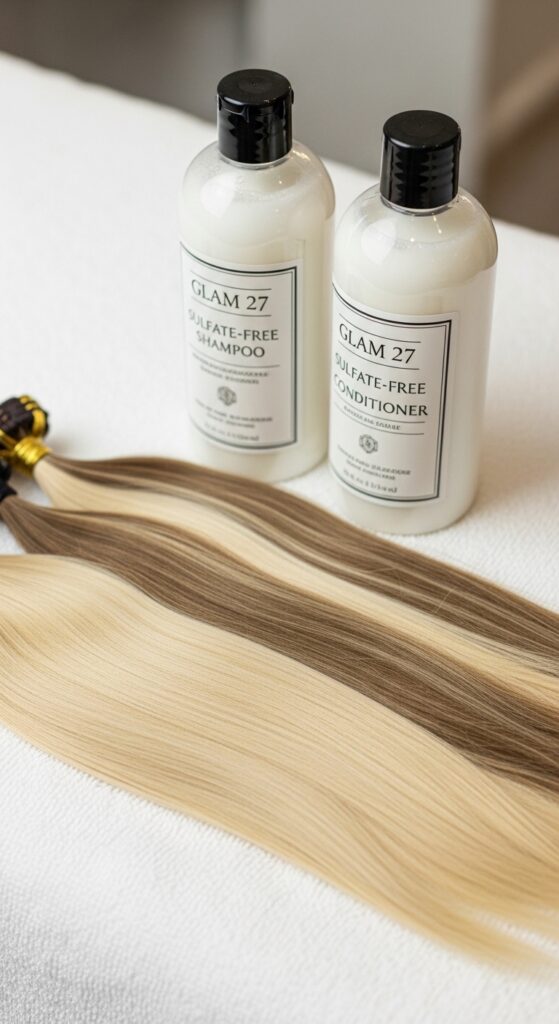
To keep your investment looking new, care is key. Always brush gently before and after wearing, starting from the ends. Use sulfate-free shampoo and conditioner, just like you should on your own hair.
Let them air dry on a towel. Minimize heat styling when possible, and always use a heat protectant. Store them flat in the provided pouch, never tangled in a drawer.
How To Hide The Wefts In Updos
Yes, you can wear updos! The trick is to create a ponytail or bun with your natural hair first, leaving the extensions down. Then, wrap the extension hair around the base to conceal the band.
Or, clip them in and then create a loose, textured updo. The layers and texture will hide any tracks. A few well-placed bobby pins secure any stray wefts underneath.
Troubleshooting Common Blending Issues
If the color feels slightly off, use a colored dry shampoo or a light dusting of eyeshadow at the roots of the extensions to tweak it. If the texture is too shiny, a light texturizing spray will mute it to match your hair.
If clips are poking out, you likely placed them too high on a thin section. Re-section and ensure each clip is anchored on a thick piece of your natural hair.
Why They’re Better Than Tapes or Sew-Ins
For me, clip-ins win because of control and hair health. You can put them in and take them out in minutes. There’s no salon appointment, no glue, and no commitment.
You give your natural hair a break, and you can apply them exactly where you need volume. It’s the most flexible, least damaging way to get major hair transformation.
My Final Verdict On Glam 27
After two years of consistent use, my Glam 27 set is still going strong. They’ve survived countless weddings, date nights, and lazy days where I just wanted better hair. The investment is 100% worth it.
They’ve allowed me to play with every trend, from old money hair to glitchy glam, without damaging my natural hair. That’s the ultimate win in my book.
So there you have it—my complete, no-secrets guide to making clip-in extensions look like they’re yours. It might seem like a lot of steps at first, but after one or two tries, it becomes a five-minute routine. The confidence boost is absolutely priceless.
Remember, great hair is about playing, experimenting, and feeling like the best version of yourself. Whether you’re after a subtle boost or a full-on transformation, you have the tools now to make it look incredibly real.
Save this post to Pinterest so you can always find these steps when you need them! And I’d love to know—what’s the first hairstyle you’re going to try with your new secret weapon? Tell me in the comments!
All my love,
Hailey & Team