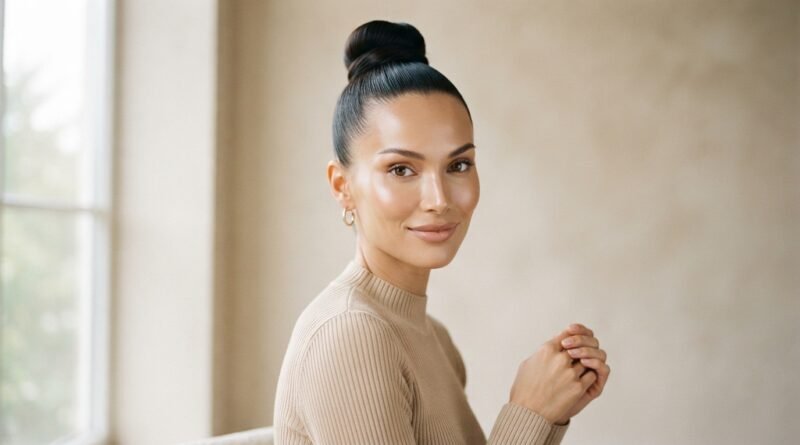
27 Sleek Top Knot Tutorials For Instant Face Lifting Effects
There’s a reason the sleek top knot never leaves my rotation. You pull your hair up, smooth the front, and suddenly your cheekbones show up. Your jaw looks sharper. Your eyes look more awake. It’s the closest thing to a free face lift we have.
So I rounded up 27 sleek top knot tutorials, from the old money version to the romantic goth hairstyles I keep saving on my phone. Some take thirty seconds. Some take five minutes. Every single one lifts.
You don’t need a stylist or a drawer full of products. You need a brush, a strong tie, and a mirror.
Let’s get into it. Pick one, try it tomorrow morning, and text me when you get the compliments.
Why a Sleek Top Knot Lifts Your Face Instantly
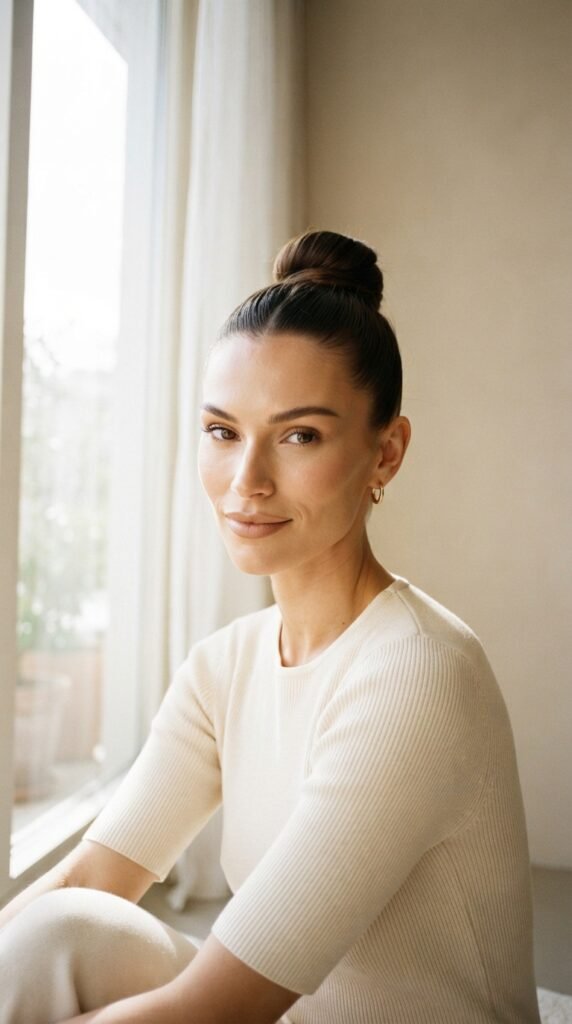
Here’s the simple truth. When your hair goes up and back, the eye travels upward. That upward line is what makes a face look lifted.
Nothing hangs beside your jaw, so your face shape reads cleaner and sharper. It’s contour, but free.
Three things happen at once:
- Your cheekbones catch the light
- Your jawline looks more defined
- Your neck looks longer
That’s why stylists call it an instant face lift. It takes seconds, and it works on almost every hair type.
Find Your Perfect Knot Height
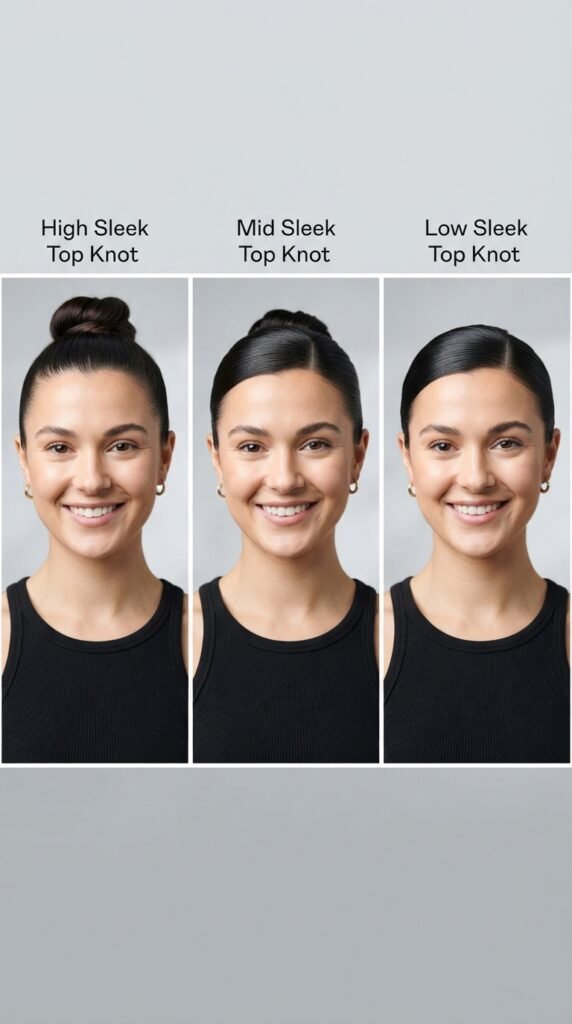
Height is everything here. The higher the knot, the more lift you get. But too high can look severe, so let’s find your sweet spot.
Quick guide:
- High knot: two inches above your crown. Biggest lift. Best for round and square faces.
- Mid knot: level with the top of your ears. Softest lift. Great for long faces.
- Low knot: at the nape. Elegant, no lift, perfect for hooded eyes.
Try each in the mirror. The one that makes your eyes pop is yours.
The Sleek Top Knot Kit You Actually Need
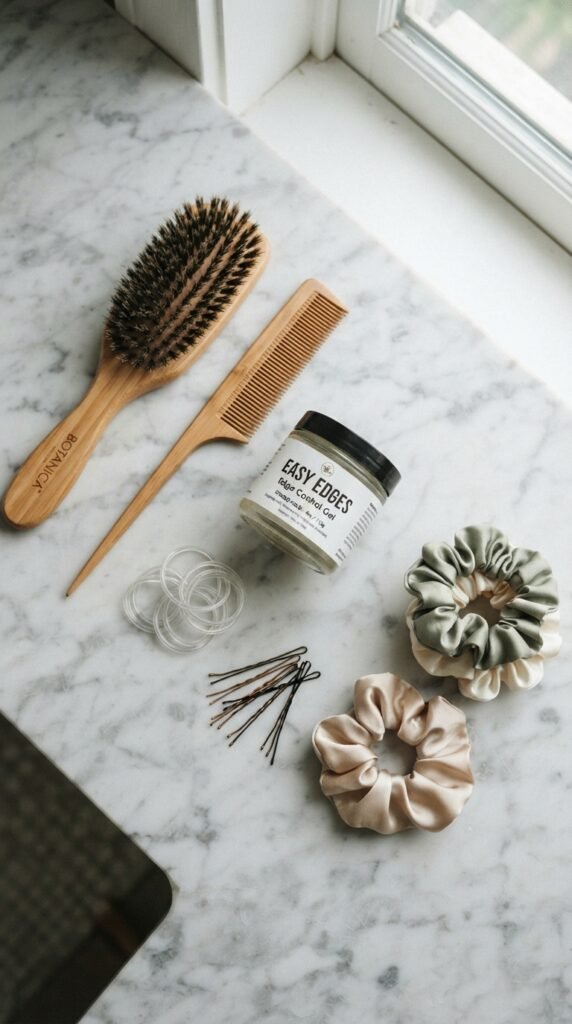
You don’t need much. I’ve tested a lot of products over the years, and these are the ones that earn their spot.
- A firm boar bristle brush for smoothing
- A fine-tooth comb for the hairline
- Strong clear elastics that don’t snap
- Bobby pins that match your hair color
- Edge control or light gel for flyaways
- A silk scrunchie for sleeping or low knots
- Flexible hold hairspray
Skip anything heavy and sticky. Sleek doesn’t mean crunchy.
Tutorial 1: The Classic High Top Knot
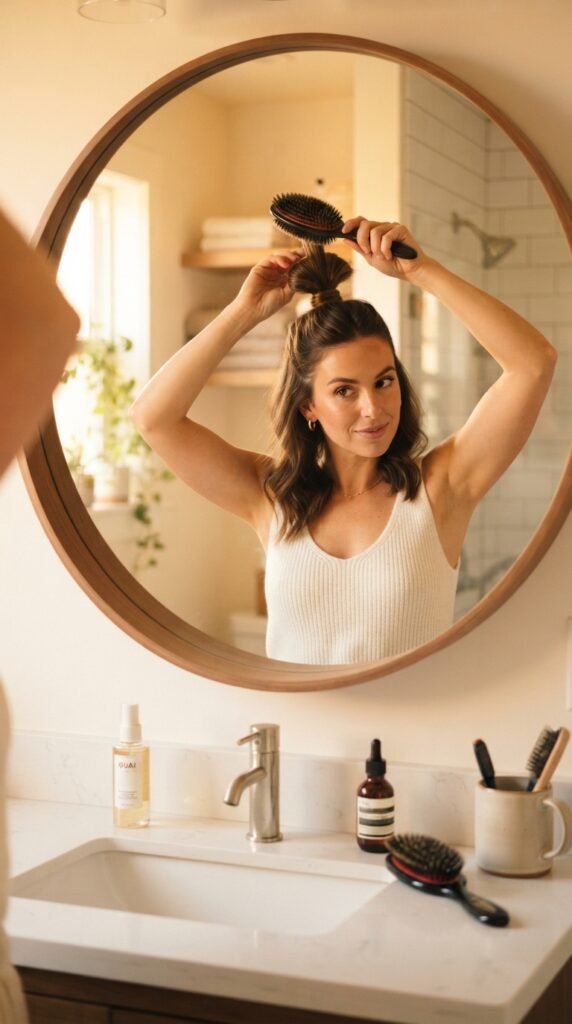
This is the one I do on days I have ninety seconds and still want to look put together.
- Brush everything up into a high ponytail.
- Smooth the sides with a fine-tooth comb and a little gel.
- Wrap the ponytail around the base into a knot.
- Pin the ends underneath.
- Pull one small section at the crown for softness.
Keep your ponytail tight but not painful. If your scalp hurts, it’s too tight and it will flatten your face by the afternoon.
Tutorial 2: The Old Money Top Knot
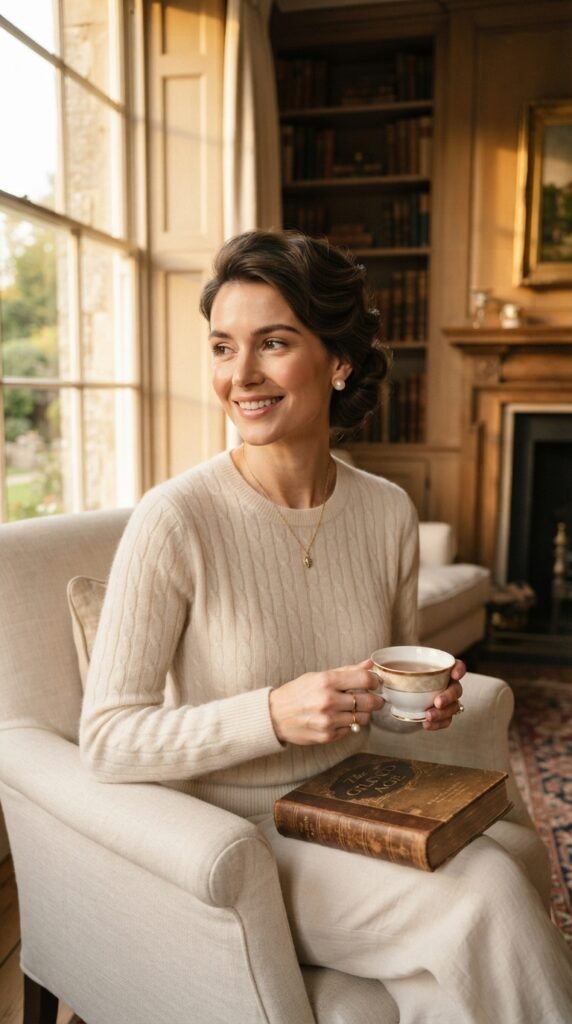
Old money hair is never trying hard. It’s smooth, simple, and a little bit imperfect on purpose.
- Use a low-to-mid knot, not a high one.
- Leave the front completely smooth, no parted bangs.
- Wrap the hair loosely so the knot looks generous.
- Let two or three fine pieces fall near your ears.
Pair it with a silk scarf or small gold hoops. No glitter, no clips. The whole point is that it looks effortless and expensive.
Tutorial 3: The Quiet Luxury Bob Half Knot

If you have a quiet luxury bob, you already have the hardest part done. Now add a tiny knot on top.
- Section off the top third of your hair.
- Smooth it back into a small ponytail.
- Make a mini knot and pin it flat.
- Smooth the rest of your bob with a brush.
This gives you lift at the crown without losing the sharp bob line. It’s my favorite trick for growing-out bobs and blunt cuts.
Tutorial 4: The Two-Strand Tension Trick
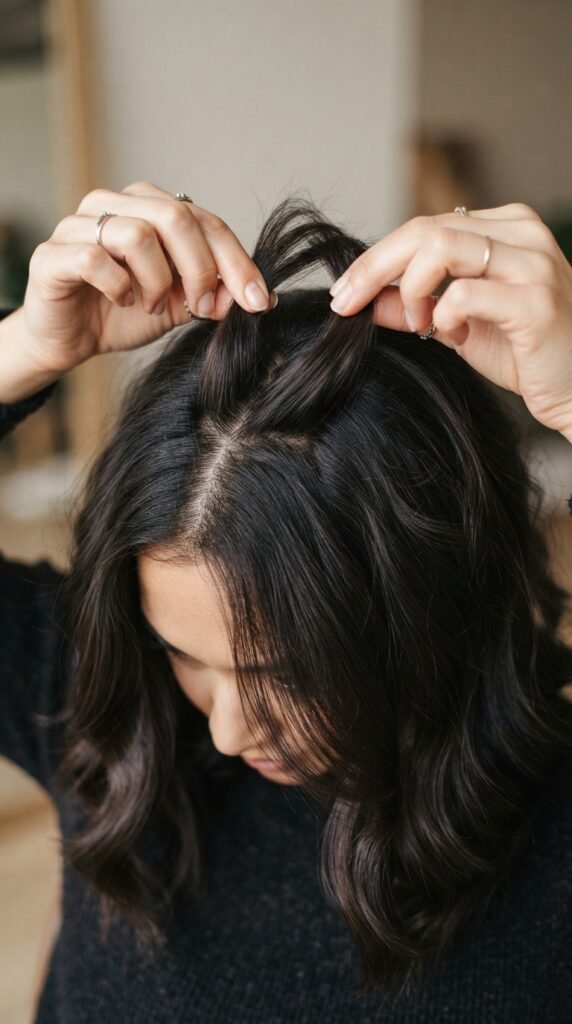
This is the smallest change that makes the biggest difference. Most people skip it, and their knot falls flat by noon.
- Make your top knot as usual.
- Take a small section of hair right above your forehead.
- Pull it gently upward, then pin it under the knot.
- Repeat on the other side of your part.
You just created hidden lift at the roots. Your forehead looks shorter and your whole face reads brighter. It takes ten extra seconds. Do it every time.
Tutorial 5: The Braided Base Top Knot
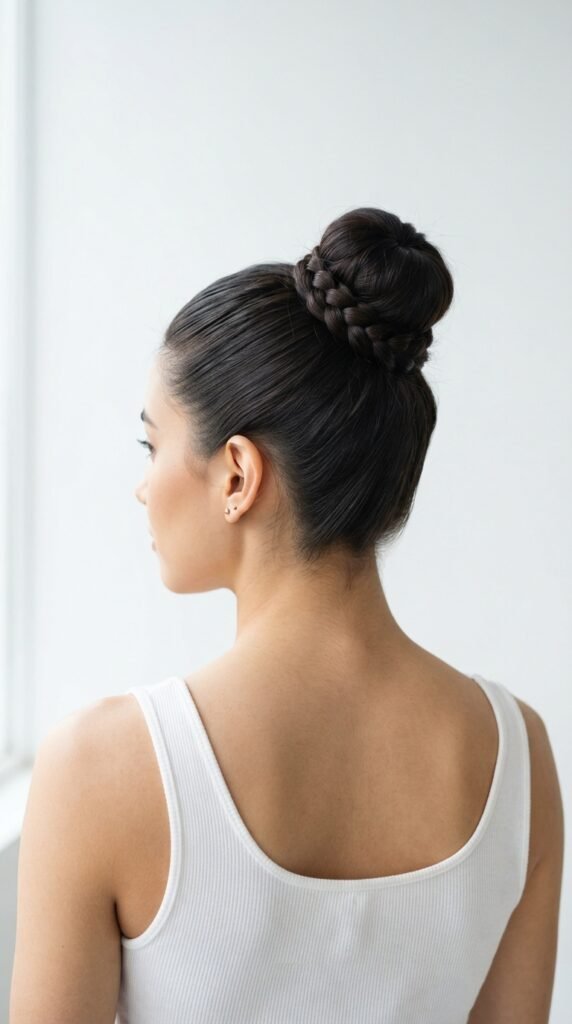
A braid at the base hides elastics and adds a little texture without breaking the sleek look.
- Make a high ponytail.
- Take a one-inch section from underneath and braid it.
- Wrap the braid around the elastic base.
- Pin the end and finish your knot on top.
This one holds better than anything else I’ve tried, which makes it great for long days, workouts, or humid weather. It also looks way more expensive than it is.
Tutorial 6: The Bubble Top Knot
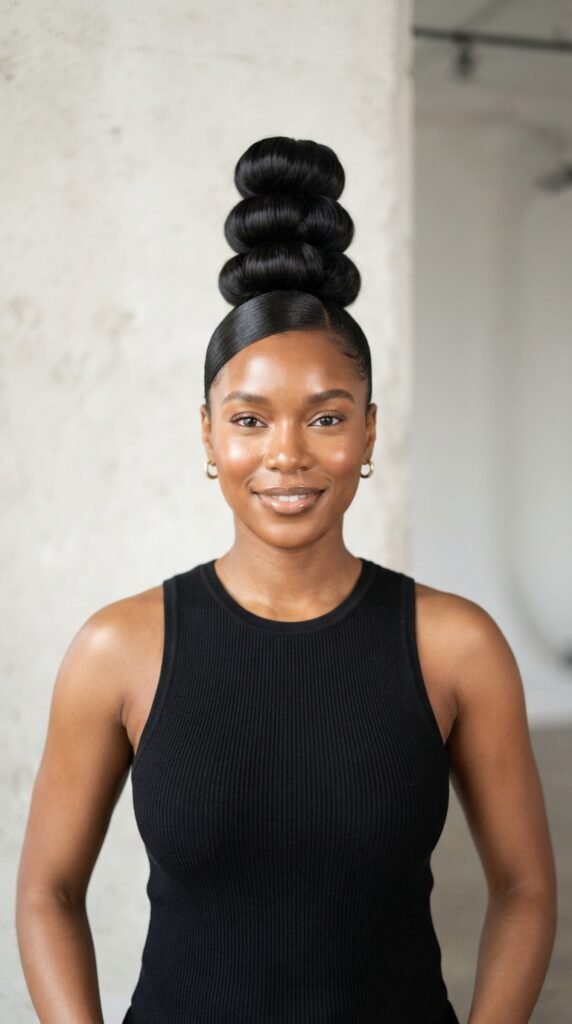
Bubble knots are everywhere in 2026 hairstyles, and they happen to lift your face beautifully because they add height in sections.
- Make a high ponytail.
- Tie small elastics down the length, about two inches apart.
- Gently pull each section outward into a bubble.
- Wrap the last bubble into a small knot and pin.
Keep the front completely smooth so it still reads sleek, not childish. One or two bubbles is plenty for daytime.
Tutorial 7: The Hime Cut Top Knot
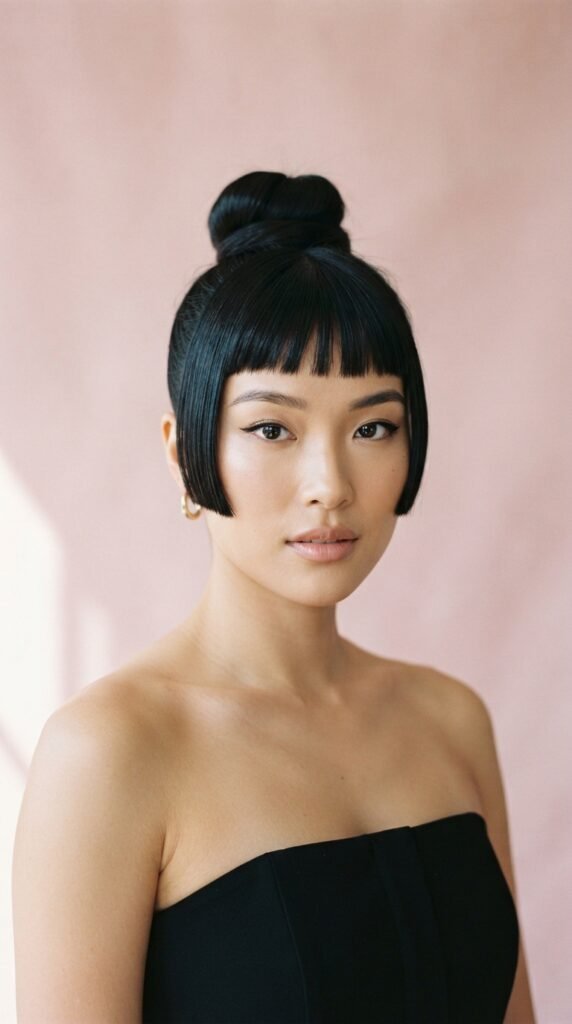
The hime cut has straight blunt pieces framing the face with the rest pulled back. Combine it with a top knot and you get drama plus lift.
- Leave two straight sections in front, cut blunt and chin length.
- Pull everything else into a high knot.
- Flat-iron the front pieces so they lie perfectly straight.
- Keep the knot tight and small.
This is the look for anyone who wants a bold, clean, slightly mysterious vibe. The straight pieces soften the lift so it never looks harsh.
Tutorial 8: The Asymmetrical Lob Side Knot
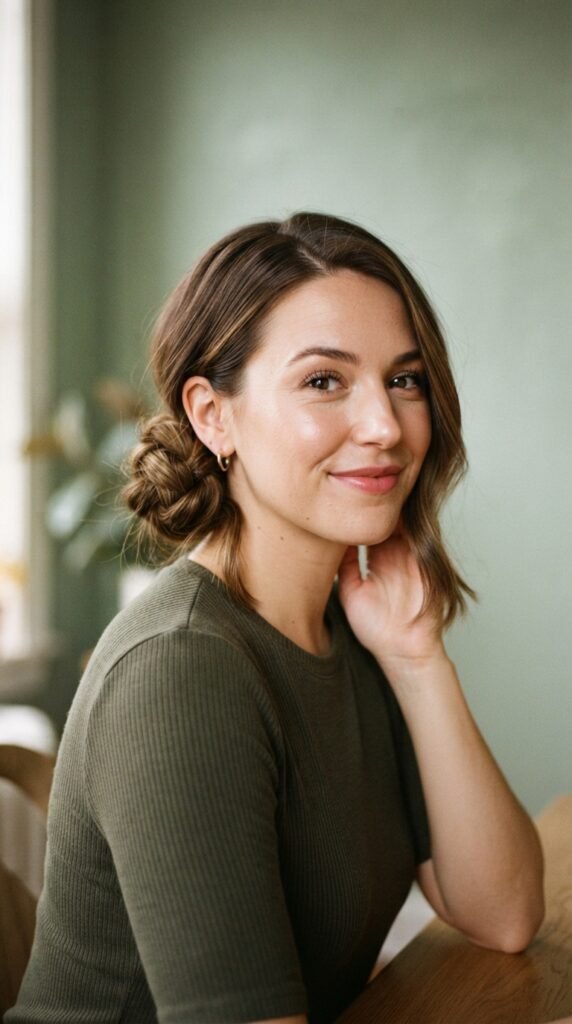
An asymmetrical lob is already a statement. A side knot makes it look intentional instead of just short.
- Part your hair deeply on one side.
- Gather everything low and off-center at the nape.
- Make a small knot and pin it.
- Leave the longer side loose and smooth.
The uneven lines do the work here. Your face looks longer and your jaw looks sharper, and the whole thing reads modern and cool.
Tutorial 9: The Vampire Haircut Top Knot
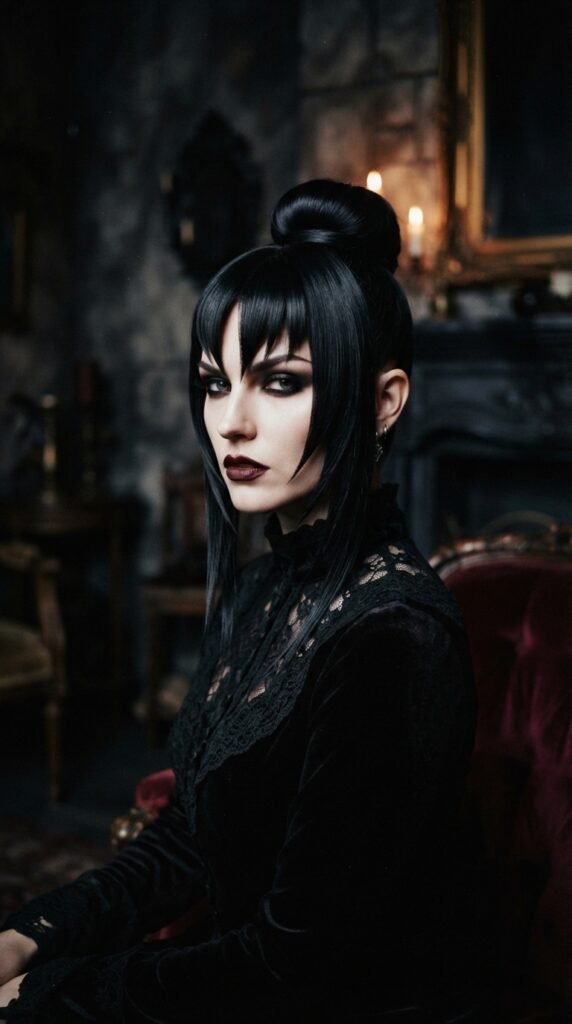
The vampire haircut is all about long, sharp layers and a moody feel. A sleek top knot makes it feel elegant instead of costume-y.
- Leave long pieces framing your cheeks.
- Pull the rest up into a tight high knot.
- Keep the framing pieces straight and glossy.
- Finish with a shine spray, not hairspray.
Wear it with dark lips and a simple black top. It’s dramatic in the best way, and the lift at the crown makes the whole shape read sharper.
Tutorial 10: The Glitchy Glam Hair Knot

Glitchy glam hair is one of my favorite 2026 hairstyles. It’s sleek, wet-looking, and slightly imperfect on purpose.
- Use gel or a wet-look pomade on damp hair.
- Pull everything into a high knot.
- Pull out three or four random thin strands.
- Leave them messy. Do not fix them.
The contrast between polished and undone is the whole point. It’s the coolest way to do a top knot right now, and it still gives you that instant face lift.
Tutorial 11: The Romantic Goth Ribbon Knot
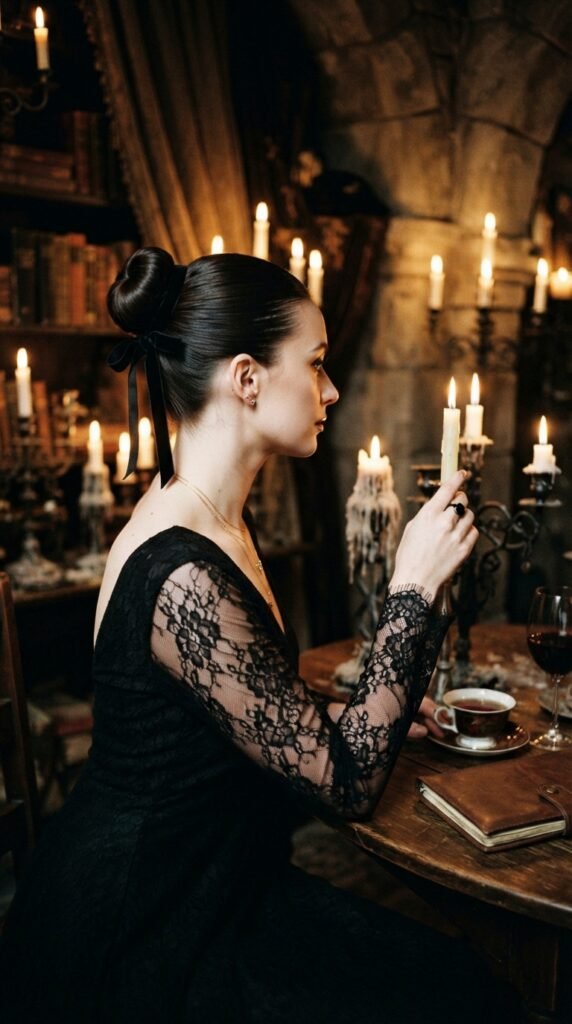
Romantic goth hairstyles are soft and dark at the same time. A ribbon turns a plain top knot into something special.
- Smooth your hair into a mid-height knot.
- Tie a velvet or satin ribbon around the base.
- Leave the ribbon tails long at the back.
- Keep the front sleek with no visible part lines.
Black, deep red, or charcoal all work beautifully. It’s the easiest way to make a simple updo feel intentional and a little bit romantic.
Tutorial 12: The Low Slick Knot for Round Faces
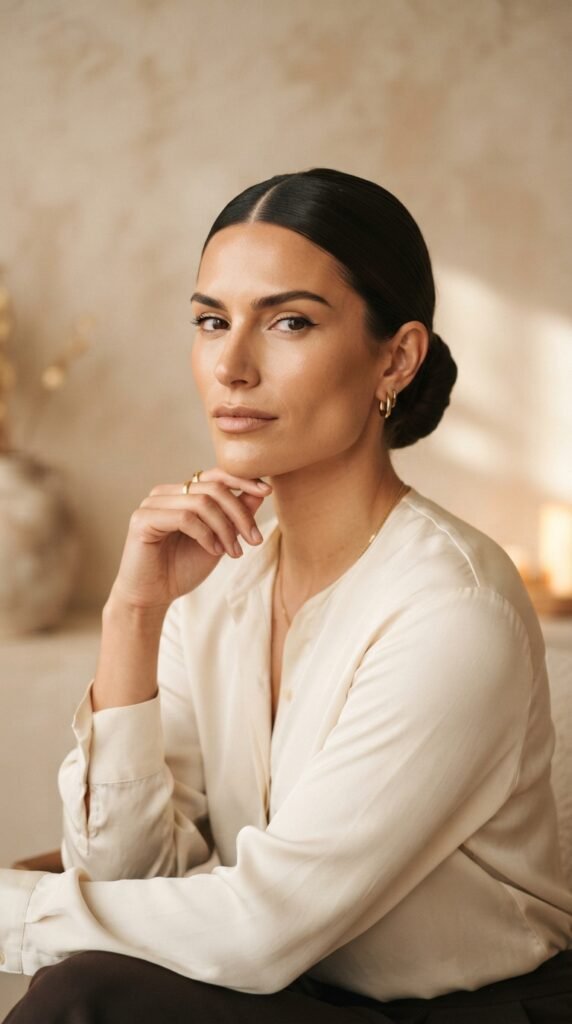
If you have a round face, a low knot with height at the front actually lifts more than a high knot does. Here’s why.
- Part your hair down the middle.
- Pull it back low and smooth.
- Make a flat knot at the nape.
- Push the front sections up slightly before pinning.
You get vertical length instead of width. Your face looks longer and your cheekbones pop. Add small earrings to finish it.
Tutorial 13: The Fine Hair Volume Knot
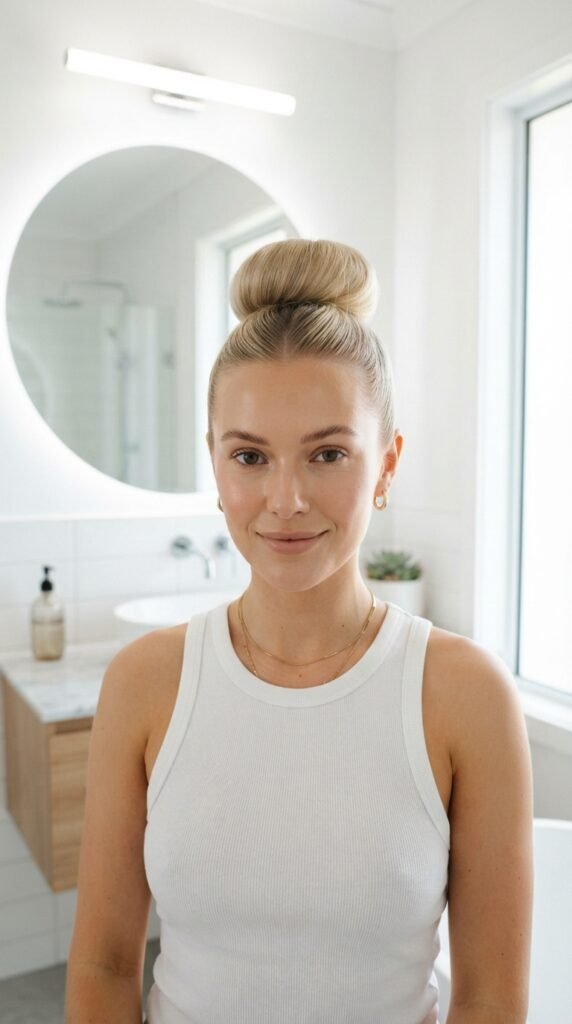
Fine hair can absolutely do a sleek top knot. You just need to fake the density first.
- Spray dry shampoo or texture spray at the roots.
- Flip your head upside down and brush upward.
- Make your ponytail and tease the base lightly.
- Use two elastics for grip.
Don’t over-smooth with heavy gel, because that’s what makes fine hair look flat. Smooth only the front and sides, and leave a bit of texture in the knot itself.
Tutorial 14: The Thick Hair Twist Knot
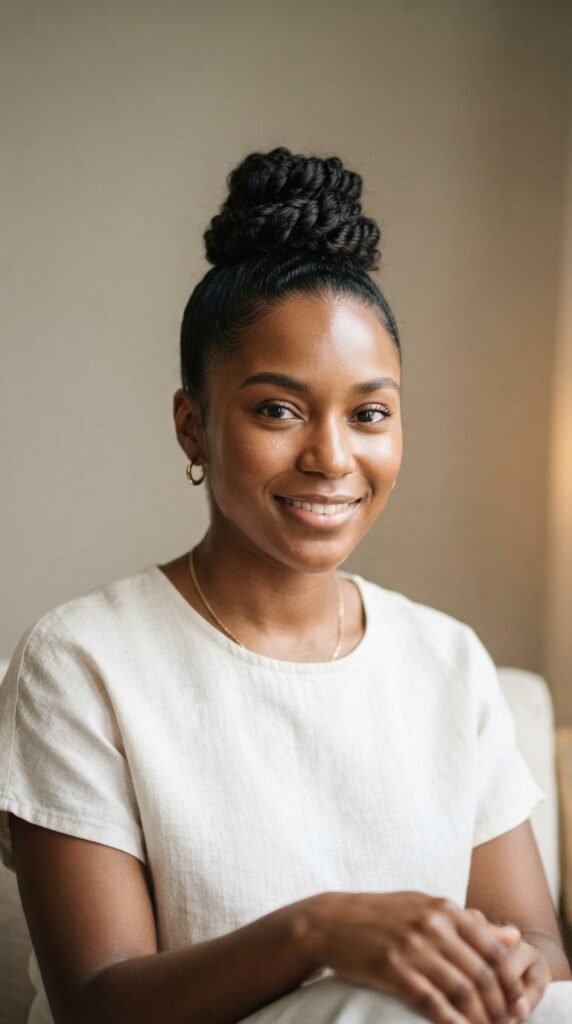
Thick hair is a gift, but it can make a top knot look like a helmet. The twist method fixes that.
- Pull your hair into a ponytail, but don’t force it too high.
- Split the ponytail into two sections.
- Twist them around each other.
- Coil the twist around the base and pin generously.
Use four to six pins and skip the elastic if you can. The twist holds on its own and keeps the knot flatter against your head, which looks far more elegant.
Tutorial 15: The Curly Sleek Knot
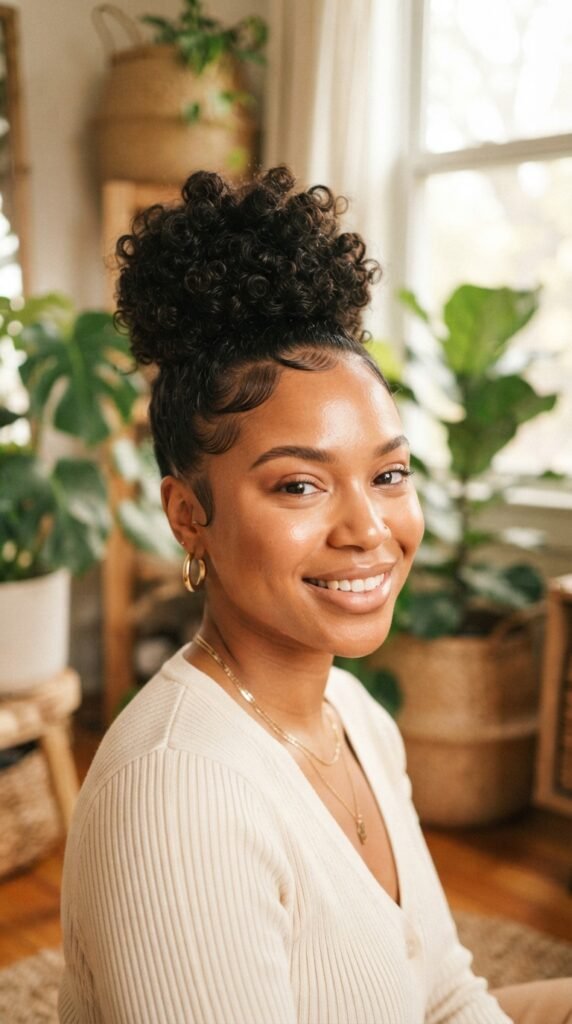
Sleek and curly can live together. You just have to decide which parts stay smooth and which parts stay curly.
- Wet only your edges and front hairline.
- Apply gel and brush those sections smooth.
- Gather the rest into a high knot without disturbing the curls.
- Let the ponytail stay curly.
The contrast is gorgeous. Smooth front, bouncy knot. It gives you all the lift of a sleek style while keeping your texture intact.
Tutorial 16: The Short Hair Mini Knot
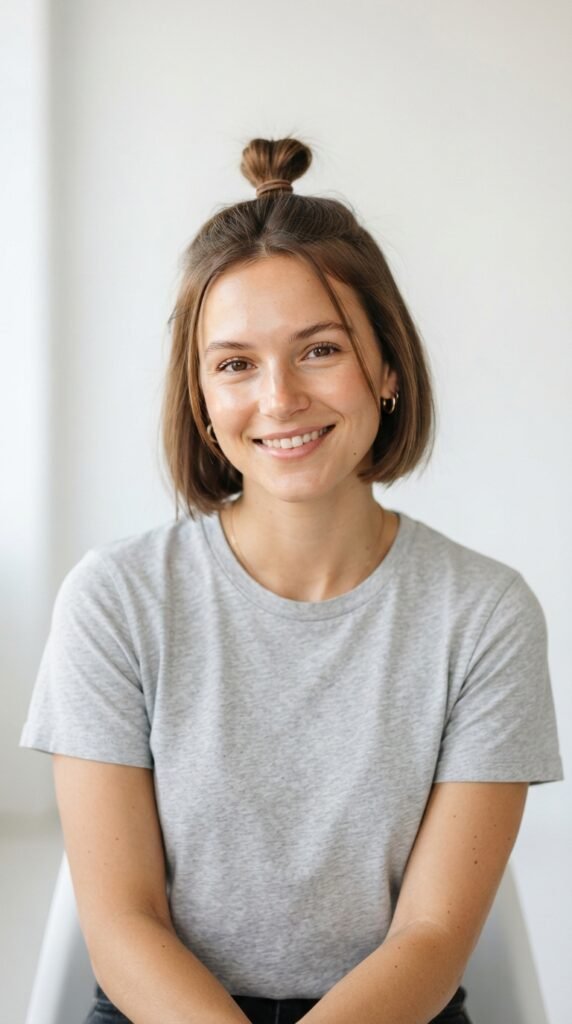
Short hair can still do a top knot. It’s just a smaller, cuter version, and honestly it might be my favorite.
- Use a strong gel on damp hair.
- Gather the top half into a tiny ponytail.
- Twist it into a small knot and pin tightly.
- Smooth the sides with a brush.
You get lift at the crown without needing length. It works on bobs, lobs, and even pixies if you have a few inches up top. Add a small clip if pins won’t hold.
The 30-Second Baby Hair Trick
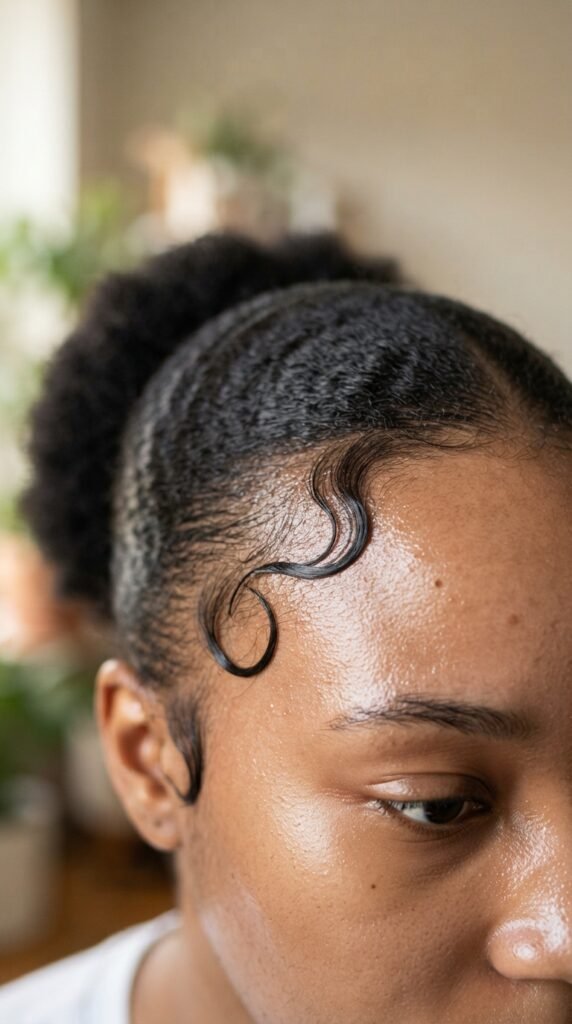
Baby hairs are optional, but they soften a sleek knot beautifully. They keep the look from feeling too tight or severe.
- Take one small strand near your temple.
- Apply a dot of edge control.
- Sweep it into a soft curve with your finger.
- Repeat on the other side.
Two is plenty. Five starts to look busy. Keep them thin, soft, and close to the hairline so the sleek effect stays intact.
Products That Won’t Flake or Crunch
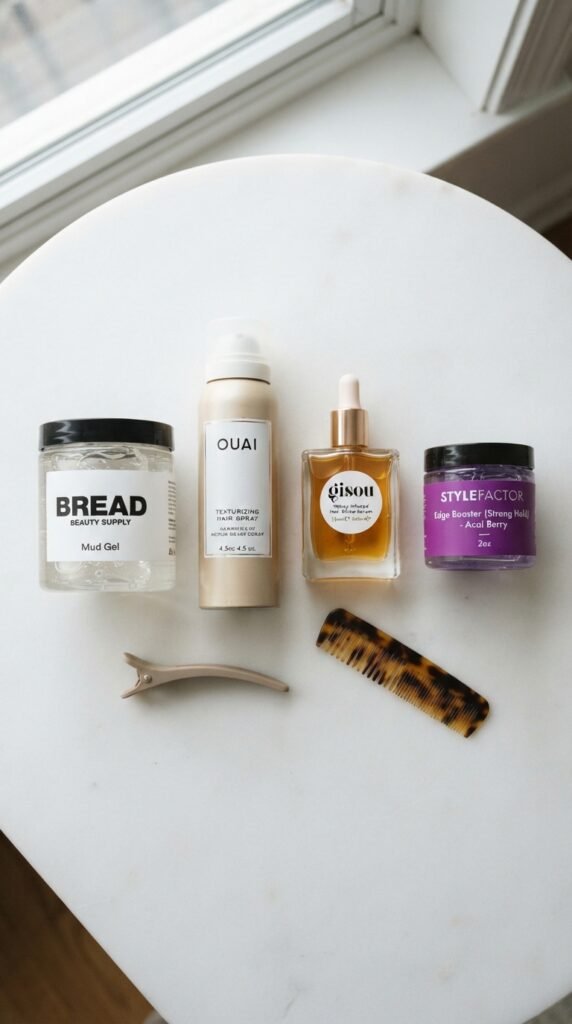
Nothing ruins a sleek top knot faster than white flakes on dark hair. I’ve learned this the hard way.
- Clear gel for hold without residue
- Texture spray for grip at the roots
- Shine serum for the finishing touch
- Edge control for the hairline only
Apply gel to damp hair, not dry. And never layer gel on top of hairspray, because that’s what causes flaking. One hold product per style is usually enough.
How to Stop the Headache

A tight top knot should not hurt. If your scalp is throbbing by lunch, the style is working against you.
- Use a seamless elastic, not a thin rubber band
- Move the knot an inch if one spot hurts
- Loosen the sides, not the front
- Take it down every six hours
You can get lift without tension. The trick is smoothing the front and keeping the back slightly less tight. Your face will still look lifted, and your head will thank you.
How to Make It Last 12 Hours
Nothing is more annoying than a top knot that sags by two in the afternoon. Here’s how I make mine last.
- Start with day-old hair, not freshly washed.
- Use dry shampoo at the roots for grip.
- Pin the knot in four directions, not two.
- Spray only the front, not the whole head.
If it starts dropping, cross two bobby pins at the base. That single trick buys you another five hours. Keep two pins in your bag and you’re set.
Mistakes That Flatten Your Face
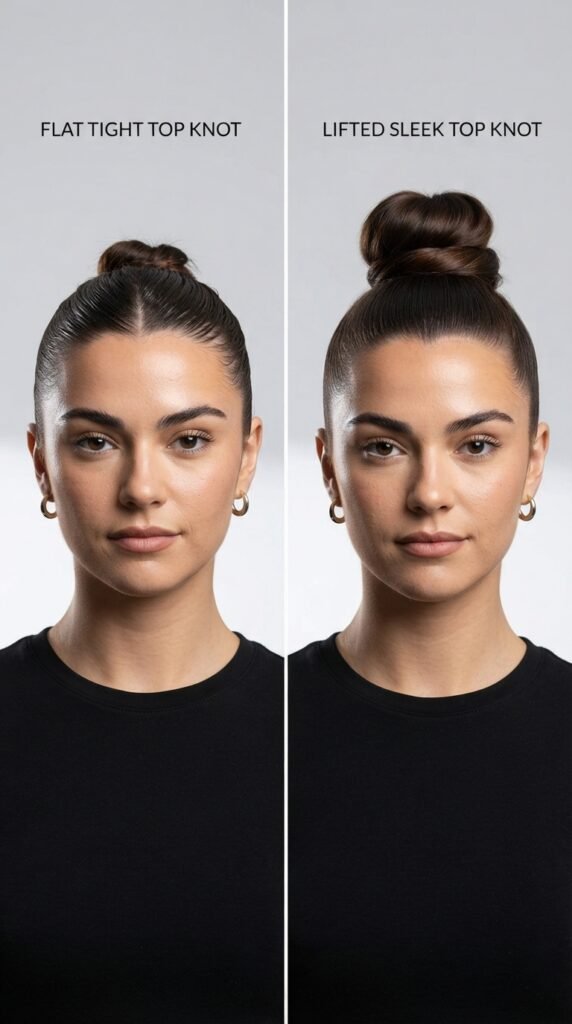
I made all of these for years before I figured out what was wrong. Learn from me.
- Pulling the knot too low when you want lift
- Slicking everything with heavy gel so roots lie flat
- Skipping the crown lift trick
- Using a middle part when a side part would lift more
- Making the knot too big, which drags the whole shape down
Fix one of these and you’ll see a difference in the mirror immediately.
Night Out, Work, and Gym Versions

Same base, three moods. A sleek top knot is the most flexible style I own.
- Work: low smooth knot, middle part, small studs
- Night out: high glossy knot, pulled-out strands, statement earrings
- Gym: braided base, tight elastic, no pins
Change the height, the finish, and the accessories, and it reads completely different. That’s the whole magic of this style.
Pick Your Knot, Then Go
That’s 27 sleek top knot tutorials, and honestly, you only need two or three in your rotation. Find your height, learn the crown lift trick, and you’re set for every morning that starts too fast.
These styles work with an old money top knot, a quiet luxury bob, an asymmetrical lob, or a hime cut. The lift is the same. The vibe just changes with your mood.
Start with the classic high knot tomorrow. It’s the easiest win, and it’s the one people always ask about.
Save This and Tell Me Which One You Try
Save this post to Pinterest so you have all 27 tutorials ready the next time you’re standing in front of the mirror with five minutes and no plan.
Then come back and tell me in the comments which knot you tried first. I read every single one, and I love knowing what worked for your hair type.