Pack Light, Style Right: 41 Hairstyles for a Girls Trip That Survive Flights, Beaches and Late Nights
The group chat has already decided the outfits. Someone has made a spreadsheet for the restaurants, someone else has pinned eleven versions of the same sunset, and at least one friend has asked whether a third pair of shoes really counts as overpacking. Hair is the part nobody plans — until the first morning, when four people, one mirror and a suitcase full of heat tools collide. The best hairstyles for a girls trip are the ones that pack as light as your suitcase: styles you can do sitting on a hotel bed, redo in a taxi, and still trust in every single photo.
This guide is built for real trip days, not salon days. It starts with the practical stuff — what to pack, how to beat humidity, which styles survive a flight and how to go from beach to dinner without a full restyle — and then walks through 41 hairstyles for a girls trip, from beachy waves and braids that last two days to buns, ponytails and updos that look deliberate even when they took four minutes. Every style comes with its honest pros and cons and one packing or travel tip, so you can choose before you zip the case shut.
Pick three or four favourites before you leave and practise each one once at home. That is the whole secret. A style you have already done twice is a style you can do half-asleep before breakfast, in a beach hut, or in the back of a car — and that is exactly when a girls trip needs it most.
Pack a Hair Kit That Fits in One Small Pouch
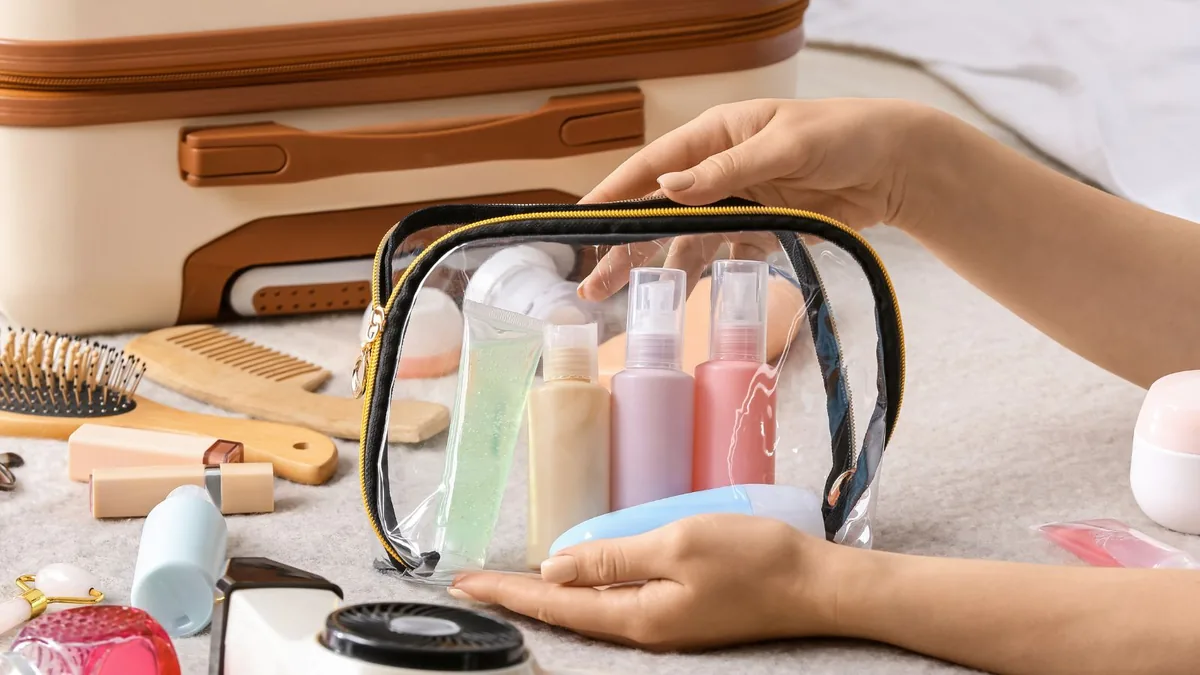
A girls trip hair kit is not a salon in miniature. It is one small pouch with the few things that actually save a style: five snag-free hair ties, ten bobby pins in your hair colour, two claw clips, a folding brush or wide-tooth comb, a travel-size dry shampoo, a small bottle of leave-in conditioner and one multi-use product such as a light serum or a salt spray. That is the whole list.
Pack the pouch in your hand luggage, not the checked case, so a delayed bag never leaves you with nothing. Share the bulky items between friends before you leave — one person brings the mini straightener, another brings the diffuser, a third brings the good hairspray — and write it in the group chat so nobody duplicates it. Decant products into small labelled bottles and keep the pouch where you can reach it without unpacking the whole suitcase.
Packing rule: if you have not used a product in the last month at home, leave it behind. Your trip kit should be the greatest hits, not the experiments.
Humidity-Proofing Your Hair Before You Even Land
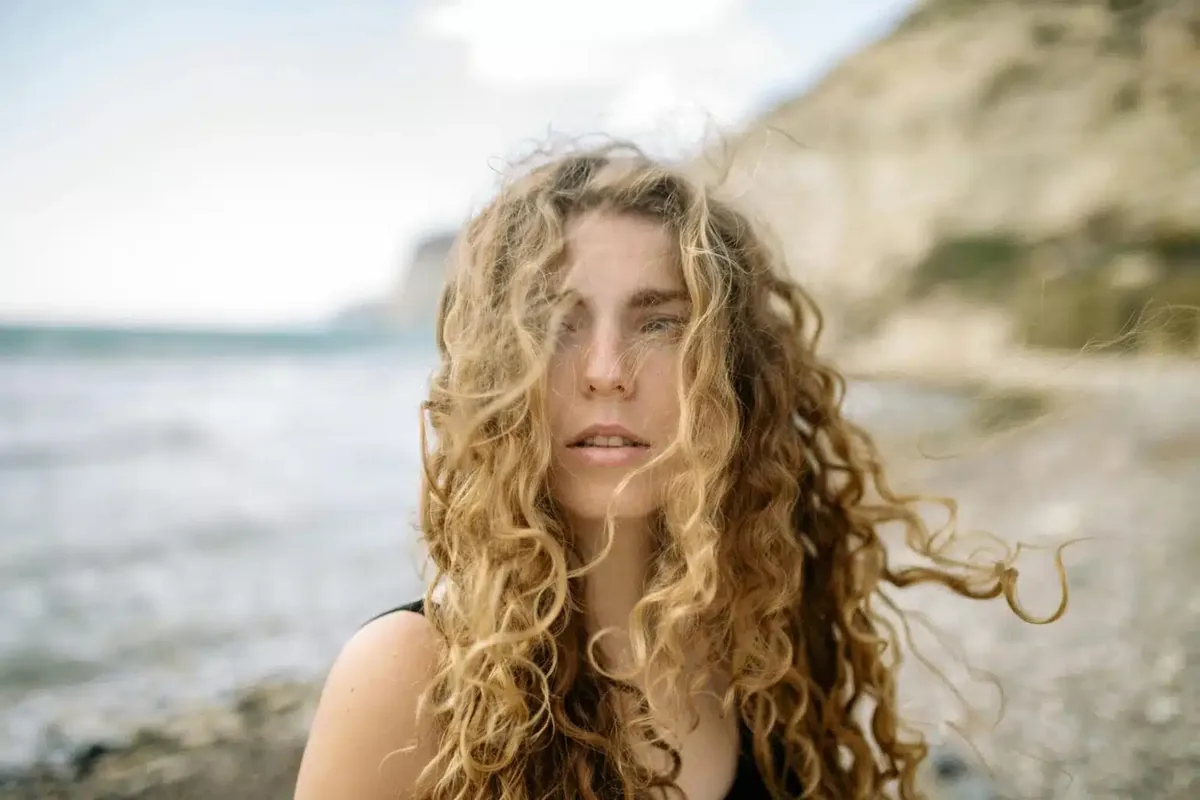
Humidity is the enemy of sleek hair and the best friend of texture, so the trick on a girls trip is to pick a side before you land. If your hair frizzes, stop fighting for a glass-smooth finish and choose styles that use the moisture instead: braids, textured waves, buns and twists all look better slightly undone, and a little frizz reads as volume in photos.
Start the night before you fly. Wash with a moisturising shampoo, use a leave-in conditioner, and let your hair dry in a loose braid so it wakes up with a wave instead of a halo. On the trip, apply serum to damp hair with your palms rather than brushing it through dry hair, which only ruffles the cuticle and invites more frizz. A silk scarf over your hair on a humid walk protects the style and looks intentional doing it.
Quick verdict: moisturised hair frizzes far less than dry hair, so the leave-in conditioner matters more than any styling product you pack. Fix the moisture first and the humidity mostly stops being a problem.
Styles That Survive a Flight (and the Nap That Comes With It)
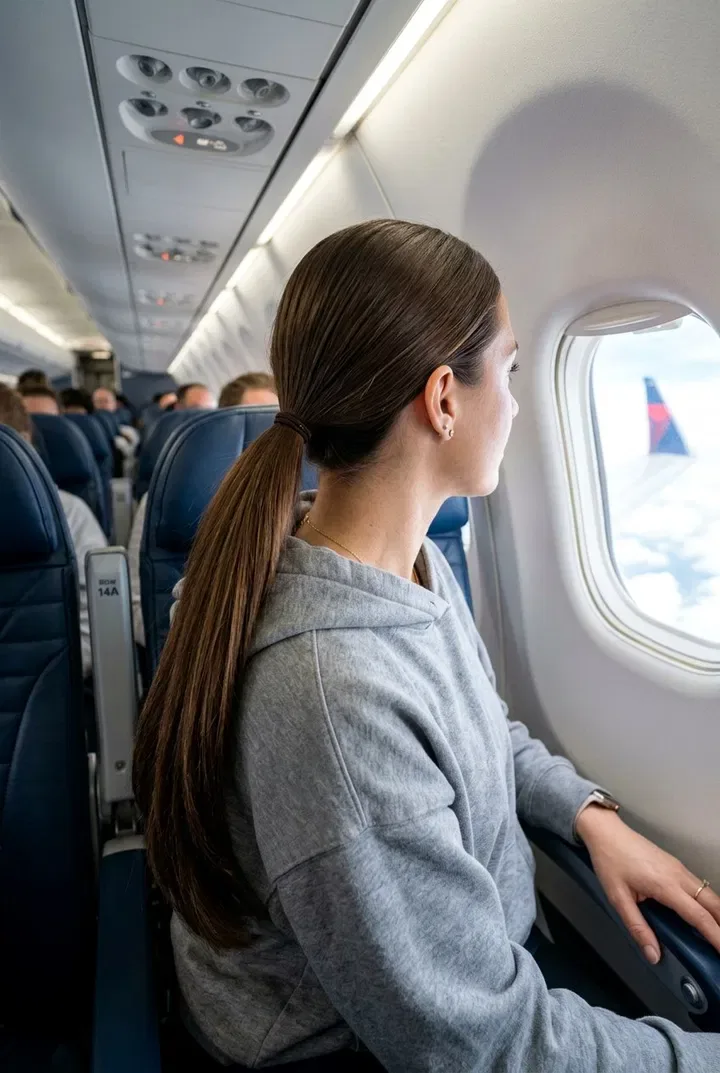
The best flight hairstyle is the one you forget you are wearing. A low loose braid, a low bun or a soft low ponytail sits below the headrest, does not press against the seat, and survives a nap without flattening into a strange shape. High buns and tight ponytails look great at the gate and terrible by landing, because hours of pressure crease the hair and pull at the roots.
Braid loosely rather than tightly, and secure the end with a fabric-covered tie instead of a thin elastic, which leaves a dent. If you want waves on arrival, sleep in two loose braids and take them out at the hotel; the cabin air dries them into soft texture while you do nothing at all. Keep a claw clip in your pocket for the moment you land and want your hair up and out of the way while you queue for a taxi.
Travel tip: never board with freshly washed, wet hair. It dries flat against the headrest and picks up every crease. Wash the night before, braid it loosely, and arrive with hair that already has a shape.
Beach to Dinner: One Style, Two Looks, No Full Restyle
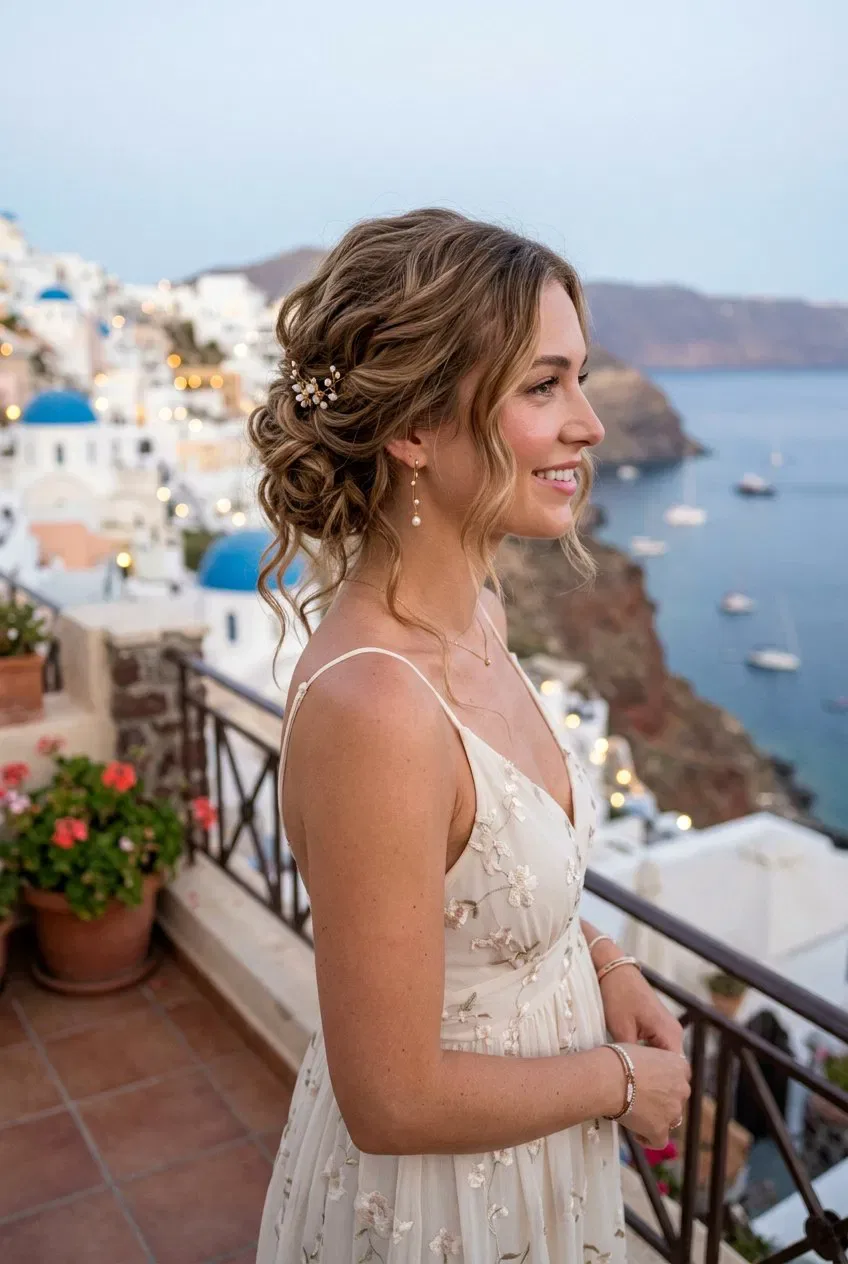
The beach-to-dinner change is the hardest restyle on a girls trip, because you have about twenty minutes, a shared bathroom and hair full of salt and sun cream. The styles that handle it are the ones with a second act built in: a braid that becomes loose waves when you take it out, a low bun that becomes a textured ponytail, or a half-up style that becomes a full updo with two more pins.
At the beach, rinse with fresh water if you can and let your hair dry in a loose braid or a low bun. Before dinner, shake it out, add a little dry shampoo at the roots, smooth a drop of serum over the lengths, and change one thing — a side part, a scarf, a pair of earrings, a clip. That single change is what makes the same hair read as evening hair in photos, and it takes less than five minutes.
Common mistake: trying to wash and fully restyle between the beach and dinner. You will run out of time, the bathroom will be crowded, and damp hair never dries the way you want it to. Work with the texture the beach gave you instead.
Group Photos: Hair That Looks Good From Every Angle

Group photos are where trip hairstyles earn their keep, and the styles that photograph best are the ones with shape from the side and the back, not just the front. A braid, a half-up twist, a textured ponytail or a low bun with soft pieces all give the camera something to see when you are turned sideways laughing at a friend.
Before the big photo, do a two-minute check together: smooth the flyaways at the hairline with a drop of serum, pull out one soft piece at each temple, and make sure nobody has a clip showing. Stand so the light falls on your faces rather than behind you, and take the photo at golden hour if you can — late afternoon light makes every hairstyle look softer and more expensive. If one friend is taller, a low style keeps the group line even; if you are all sitting, a side braid photographs beautifully.
Photo tip: practise your group-photo style at home in front of a mirror turned sideways. If it looks good from the side and the back, it will look good in the photo — and in every candid your friends take without telling you.
Heat Styling Without Your Full Toolkit
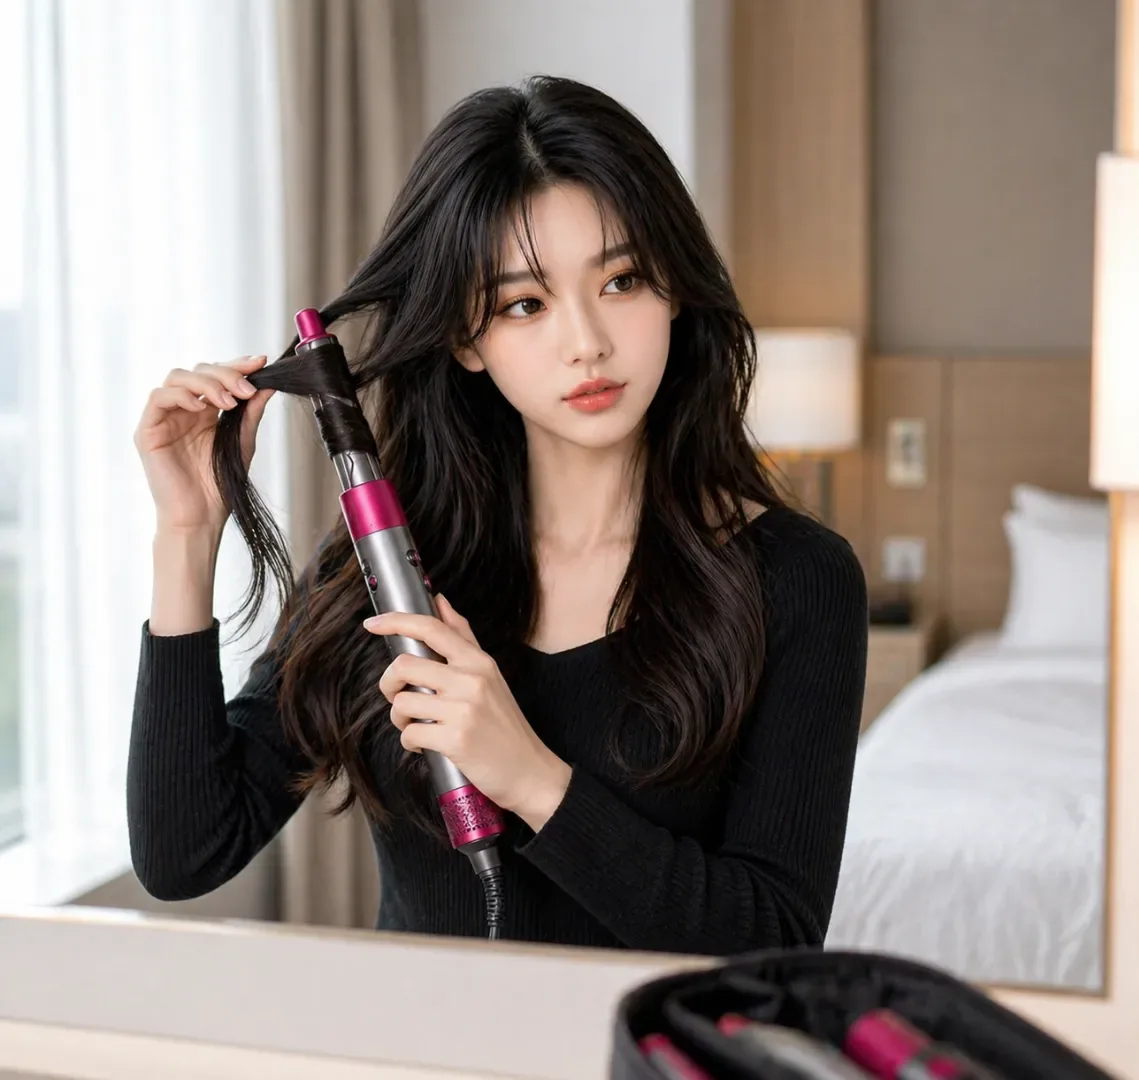
Nobody packs a full toolkit on a girls trip, and nobody needs to. One small multi-use tool — a mini straightener that can also curl, or a compact curling wand — covers almost every style in this guide, and the hotel hairdryer covers the rest.
Always use a heat protectant, even on the lowest setting, because hotel dryers run hotter than yours and trip hair is already dealing with sun, salt and chlorine. Work in small sections at the front, let each curl cool for ten seconds before you touch it, and finish with a light spray rather than a heavy one so the style can move. If you share one tool between four people, agree a time slot each morning so nobody is still styling when the taxi arrives.
Packing rule: one shared heat tool per group is enough. Spend the saved suitcase space on good hair ties and dry shampoo instead — they get used every single day, and a cheap elastic never does.
Quick Fixes on the Go: The Five-Minute Rescue Kit
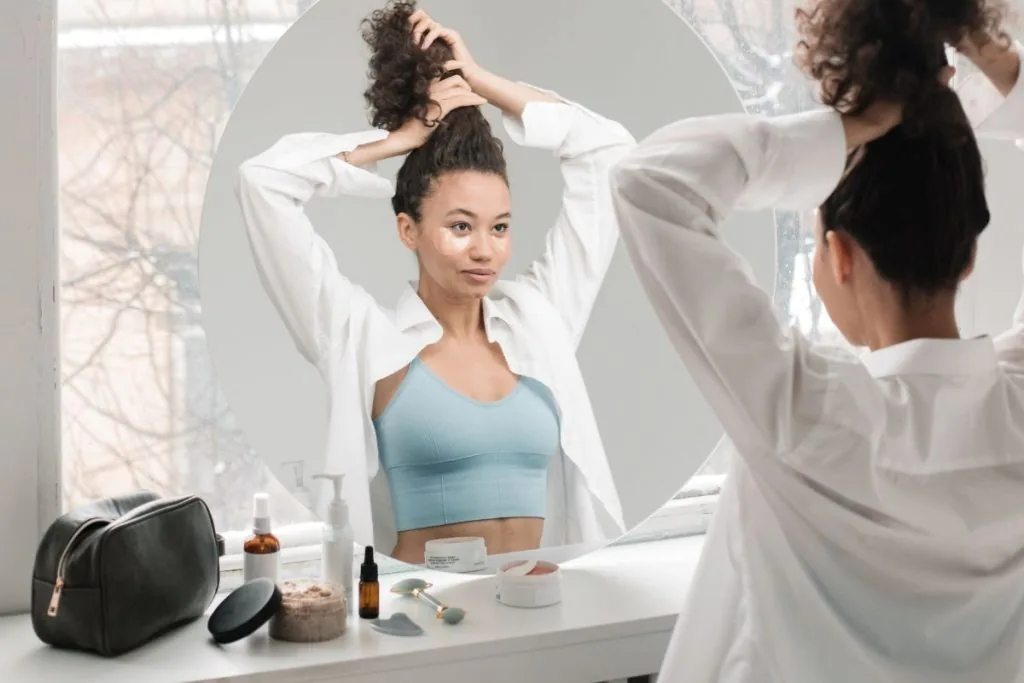
Every girls trip has a moment when a hairstyle gives up halfway through the day — a bun loosens at lunch, a braid frizzes in the heat, a ponytail slides down during a walk. The fix is not a restyle; it is a rescue. Keep a tiny kit in your day bag: three bobby pins, two hair ties, a mini dry shampoo or a small pot of texture powder, and a folded silk scarf.
Learn three rescues before you leave. A slipping ponytail becomes a bubble braid by adding ties down its length. A frizzy braid becomes a textured side braid by loosening it and pulling out soft pieces. A flat bun becomes a chic low knot by re-twisting it lower and wrapping a scarf around the base. None of these needs a mirror, a plug socket or a second pair of hands — just pins, a tie and a little confidence.
Travel tip: the scarf is the most powerful item in the rescue kit. It covers a bad hairline, holds a loose bun, dresses up a plain ponytail and protects your hair from sun and wind, all while weighing almost nothing.
Washing, Drying and Day-Two Hair on a Trip
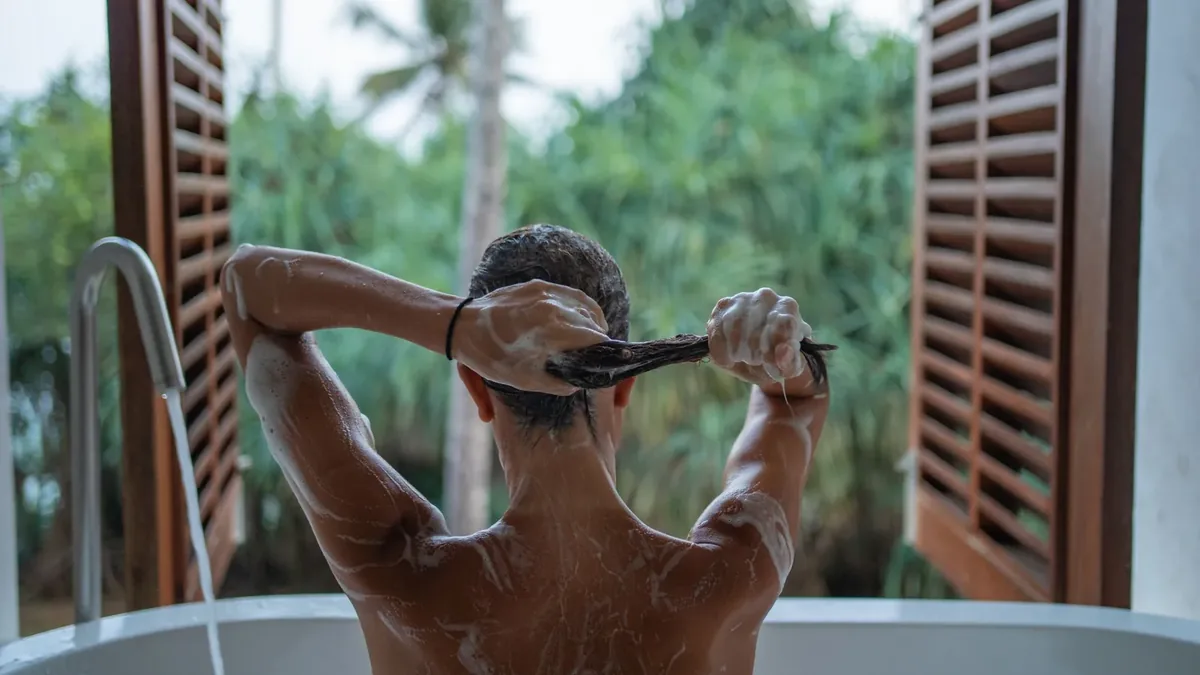
On a girls trip, washing your hair every day is a waste of the morning. Most trip hairstyles look better on day-two hair anyway — it holds a braid, grips a pin and keeps a wave far longer than freshly washed hair.
When you do wash, use the hotel shampoo sparingly and bring your own conditioner or a small leave-in, because hotel products are often harsh and drying. Rinse with lukewarm water, squeeze the water out gently instead of rubbing with a towel, and let your hair air-dry in a loose braid or twist while you get ready. Dry shampoo at the roots on day two, brushed through after a minute, brings back volume without a full wash.
Common mistake: washing your hair in the morning and then trying to style it while it is still damp. Damp hair never holds a style the way dry hair does. Wash at night, sleep in a loose braid, and wake up with hair that is already halfway styled.
Beachy Waves That Dry Themselves
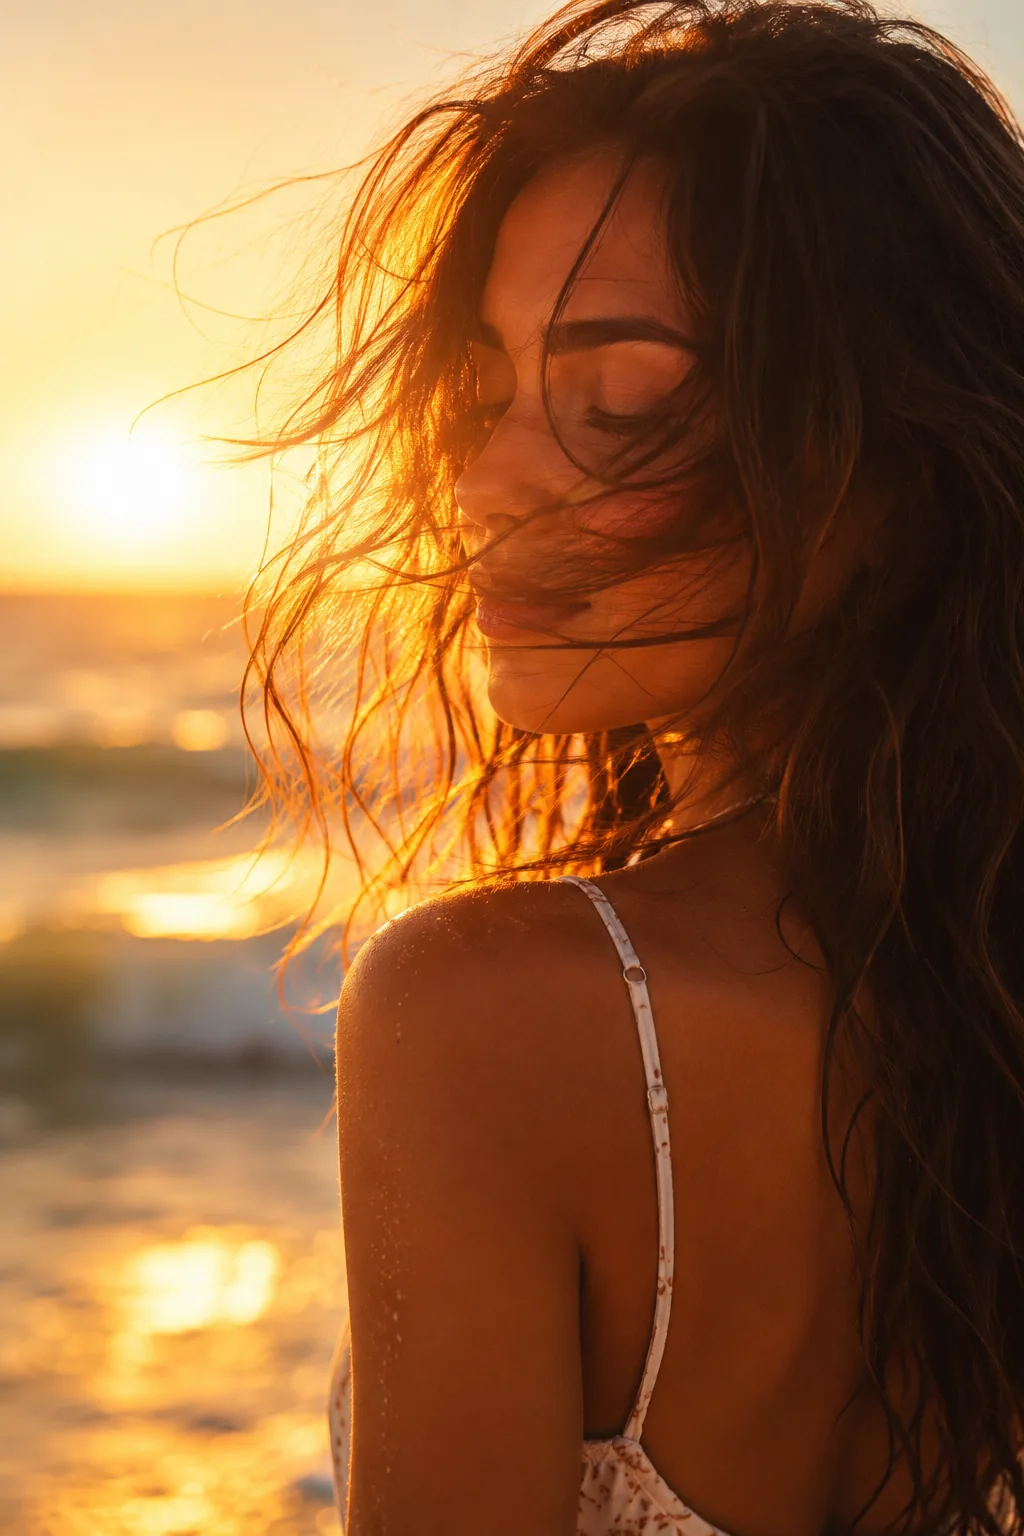
Beachy waves are the signature style of any girls trip, and the best version is the one the sea and the sun do for you. Salt water, warm air and a loose braid while you swim create soft, lived-in texture that no curling iron can quite copy.
Braid your damp hair loosely into one or two braids before you go out, and take them out once your hair is mostly dry. Scrunch a little salt spray or leave-in conditioner through the lengths, and leave the top smooth so the style keeps its shape. This suits long and medium hair best, and it works on straight hair too — the braid creates the wave, so your natural texture does not matter much.
Pros: zero heat, lasts all day, and looks better as the day goes on. Cons: can go frizzy in strong humidity, and very fine hair may need a little texture spray to hold the wave. Travel tip: pack a travel-size salt spray — it weighs nothing and turns flat post-swim hair into beach waves in thirty seconds.
The Low Messy Bun for the Airport
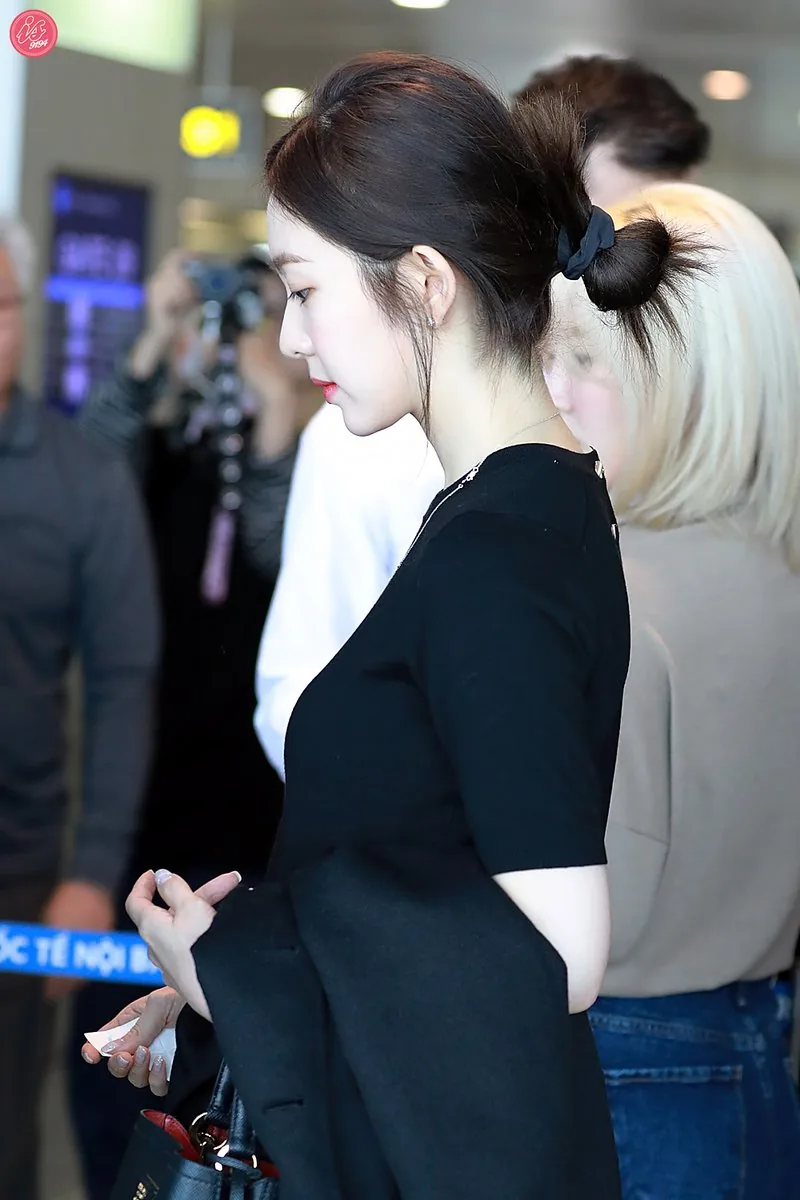
The low messy bun is the airport hairstyle that every frequent traveller swears by, and for good reason. It sits below the headrest, survives a nap, keeps your hair out of your face through security and boarding, and still looks put-together when you land.
Gather your hair low at the nape, twist it loosely, and pin it with a claw clip or a fabric tie, leaving a few soft pieces around your face. Pull gently at the crown for a little volume so it looks deliberate rather than rushed. It works on almost every length from a lob upwards, and it is forgiving — the messier it gets on the flight, the more it looks like the style you meant to wear.
Pros: comfortable for hours, no heat, and easy to redo in your seat. Cons: can flatten on one side if you sleep on it, and very slippery hair may need two pins. Travel tip: use a claw clip instead of an elastic for the flight — it leaves no dent and you can take your hair down and redo it in seconds at baggage claim.
The High Ponytail With a Silk Scarf
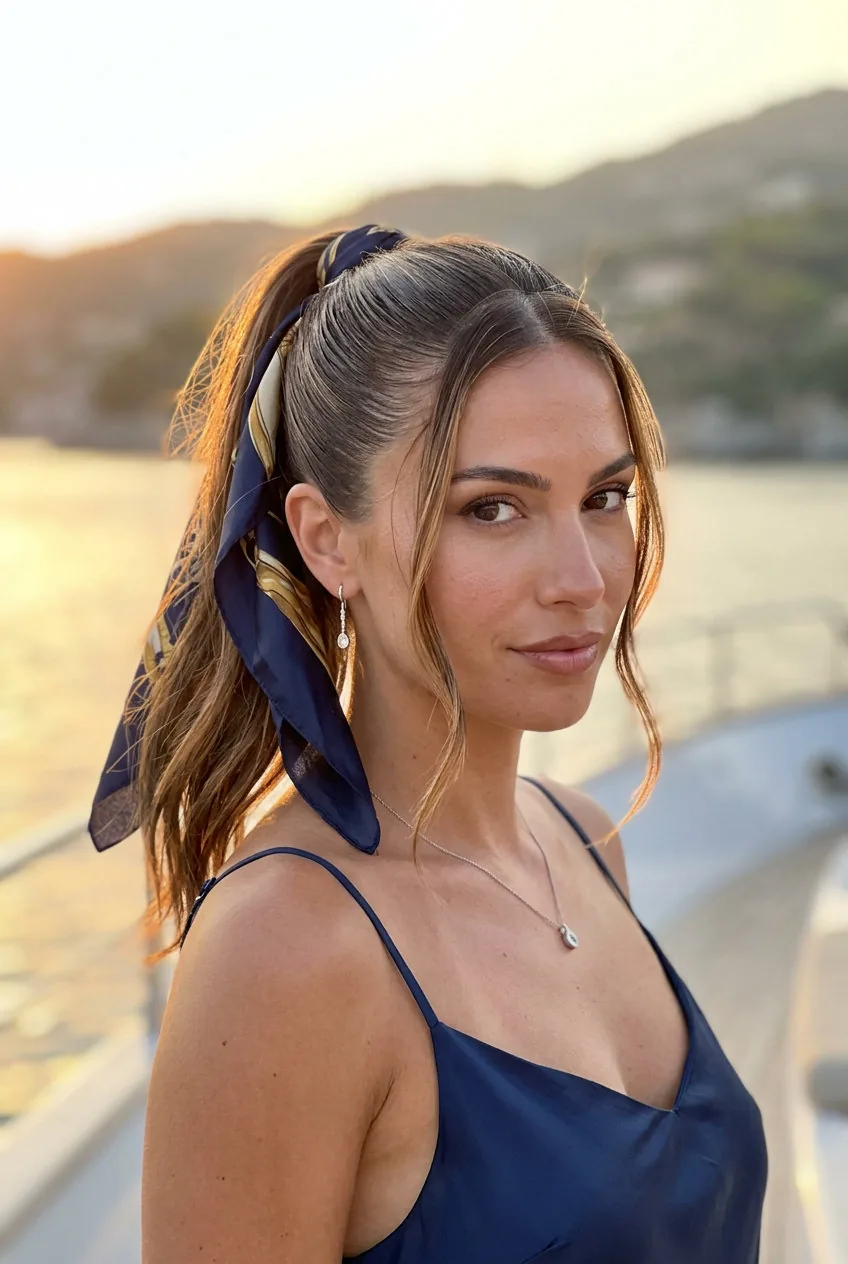
A high ponytail is already the most energetic hairstyle on a trip, and a silk scarf turns it into a look. The scarf adds colour, covers the hair tie, and moves when you do, which makes the whole style feel holiday-ready rather than gym-ready.
Brush your hair up high and secure it firmly, then wrap a small silk scarf around the base and knot it, leaving the ends to fall with the ponytail. Smooth the top with a little serum so the style looks polished from the front. This suits medium and long hair, and it is especially good on day-two hair, which grips better and holds the height longer.
Pros: lifts the face, photographs beautifully, and hides a greasy hairline completely. Cons: a heavy ponytail can pull by evening, and the scarf can slip if it is not knotted firmly. Travel tip: pack two scarves in different colours — they weigh nothing, match different outfits, and double as a hair rescue when a style fails.
Two French Braids for the Beach
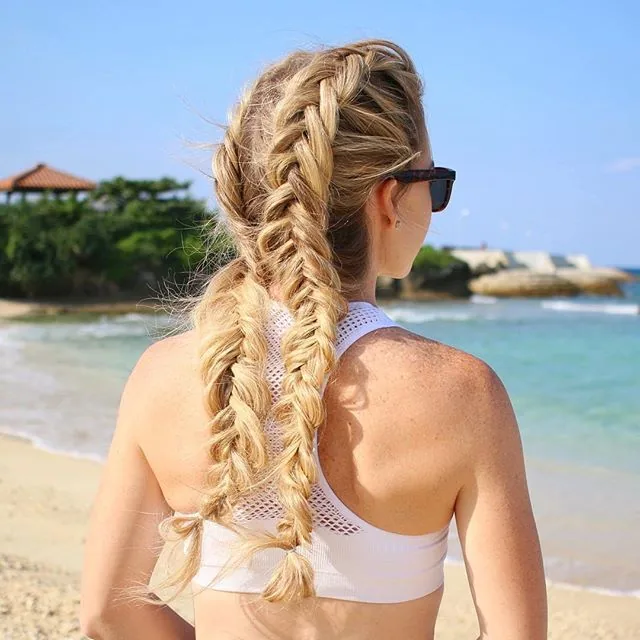
Two French braids are the most practical beach hairstyle ever invented. They keep every strand out of your face while you swim, they do not tangle in the wind, and when you take them out at dinner you are left with soft, even waves.
Part your hair down the middle and braid each side from the hairline to the nape, keeping the sections even and the tension firm but not tight. Secure the ends with small snag-free elastics and tuck them under if you are going in the water. This suits long and medium hair, and it is one of the best styles for thick hair, which can feel heavy and hot loose on a beach day.
Pros: stays put through swimming, wind and dancing, and gives you free waves later. Cons: takes ten minutes to do well, and uneven parts show in photos. Travel tip: braid the night before a beach day and sleep in them — you wake up with the waves already done and the braids ready to redo in two minutes.
The Half-Up Claw Clip Twist
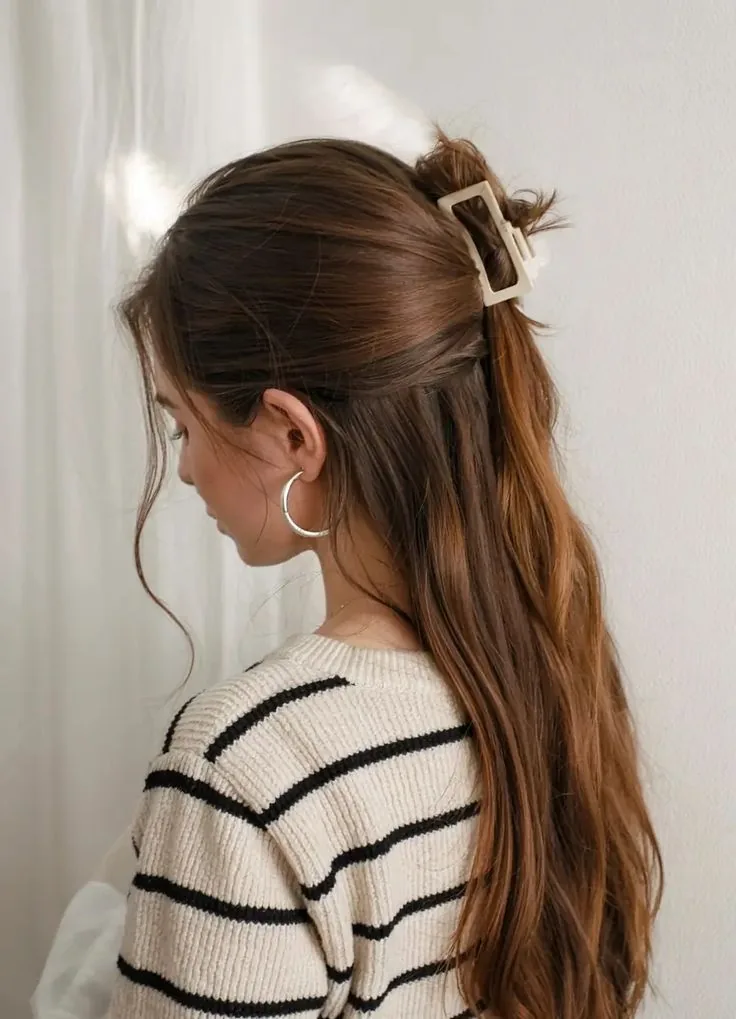
The half-up claw clip twist is the style that made claw clips famous again, and on a girls trip it is pure gold. It takes thirty seconds, keeps the front of your hair out of your face while the rest falls loose, and looks effortlessly put-together in every photo.
Take the top half of your hair, twist it once, and clip it at the back of your crown with a medium claw clip, leaving the ends loose or tucked. Pull out two soft pieces at the front and let the rest fall naturally. It works on medium and long hair, straight or wavy, and it is one of the few styles that looks just as good on day-two hair as on freshly washed hair.
Pros: the fastest style in this guide, no heat, and endlessly redoable. Cons: a heavy clip can slide on very fine or slippery hair, and it loosens in strong wind. Travel tip: carry a spare claw clip in your day bag — it is your backup plan for every other style in this guide too.
The Loose Fishtail Braid
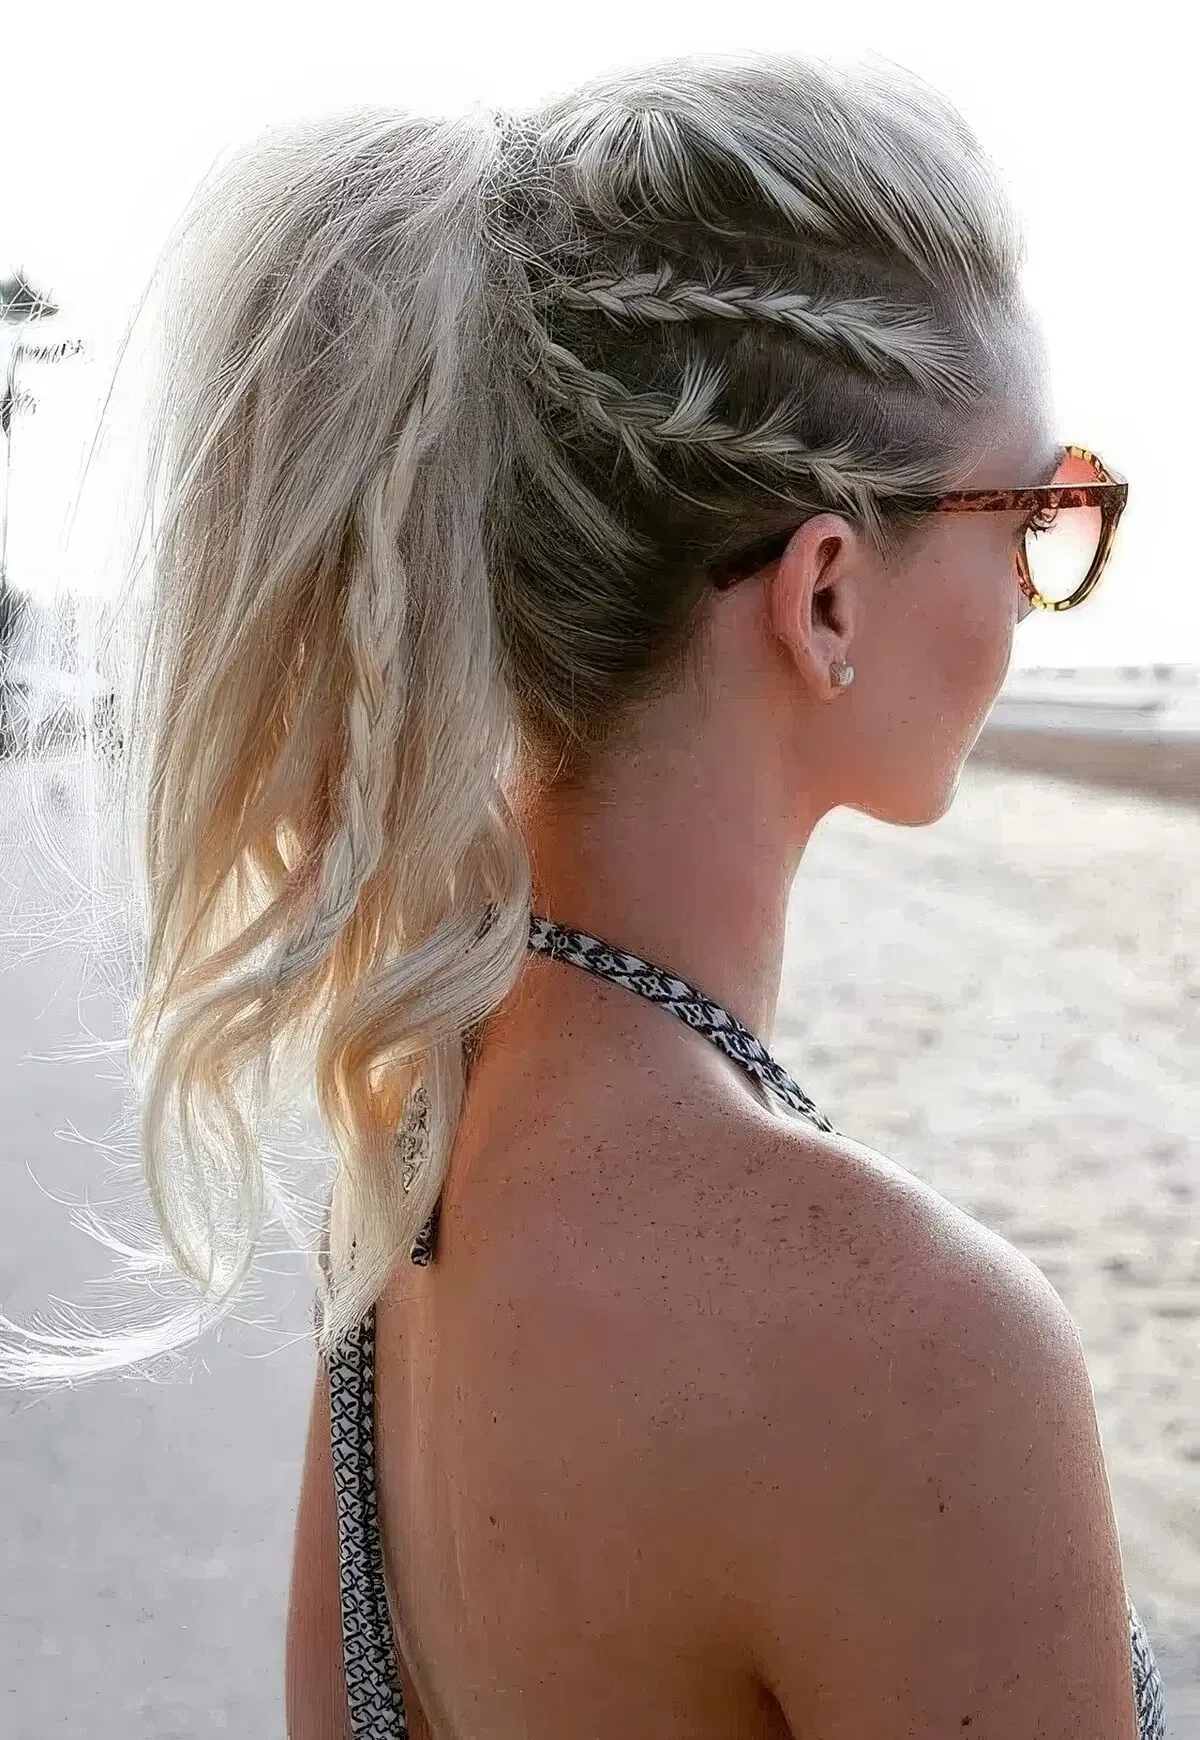
A loose fishtail braid looks far more complicated than it is, which is exactly why it photographs so well on a girls trip. The woven pattern catches the light, the loose finish keeps it relaxed rather than formal, and worn over one shoulder it frames the face beautifully in photos.
Gather your hair to one side and split it into two sections, then cross small pieces from the outside of each section to the inside of the other, working your way down. Keep the pieces small and the tension loose, then gently pull the braid wider once it is tied so it looks full and soft. It suits long hair best, and it is lovely on highlighted hair, where the weaving shows off the colour.
Pros: looks intricate with very little effort, and holds well in wind. Cons: takes longer than a normal braid, and very short layers will poke out. Travel tip: do the fishtail on day-two hair — the extra grip keeps the small pieces from slipping out while you are out all day.
The Sleek Low Ponytail for Dinner
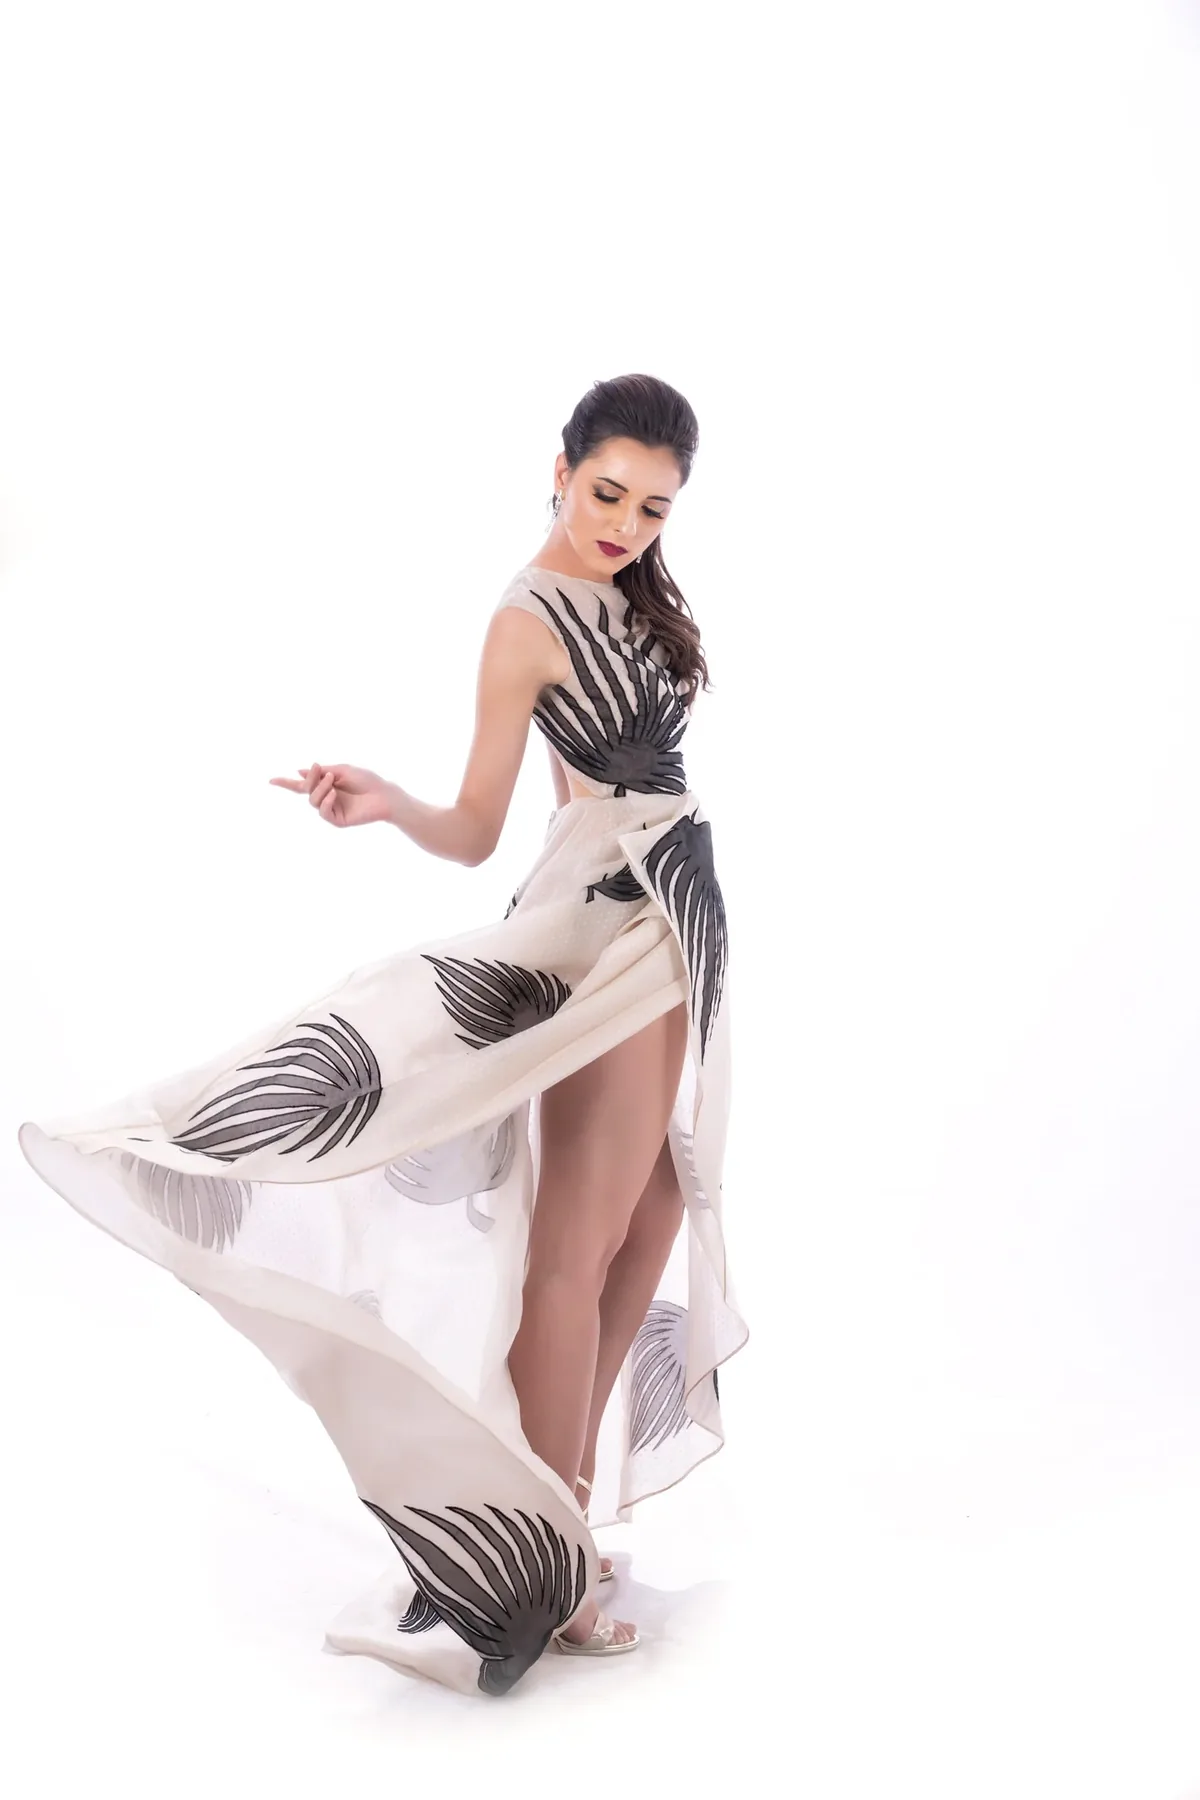
Some nights on a girls trip call for something sharper, and the sleek low ponytail answers every time. It is polished, elegant and quietly expensive-looking, it shows off earrings and a good neckline, and it takes less time than any updo.
Brush your hair back smoothly with a little serum or smoothing cream, part it in the middle or to one side, and secure it low at the nape. Wrap a small section of hair around the elastic to hide it, and pin it underneath. This suits straight and wavy hair, and it is especially flattering on long hair, where the smooth fall of the ponytail does all the talking.
Pros: elegant, fast, and photographs beautifully from every angle. Cons: shows every flyaway, so it needs serum, and it can feel severe if it is pulled too tight. Travel tip: keep a toothbrush-sized spoolie and a dab of serum in your clutch — one quick smooth at the hairline before photos makes the whole style look freshly done.
The Bubble Braid Ponytail
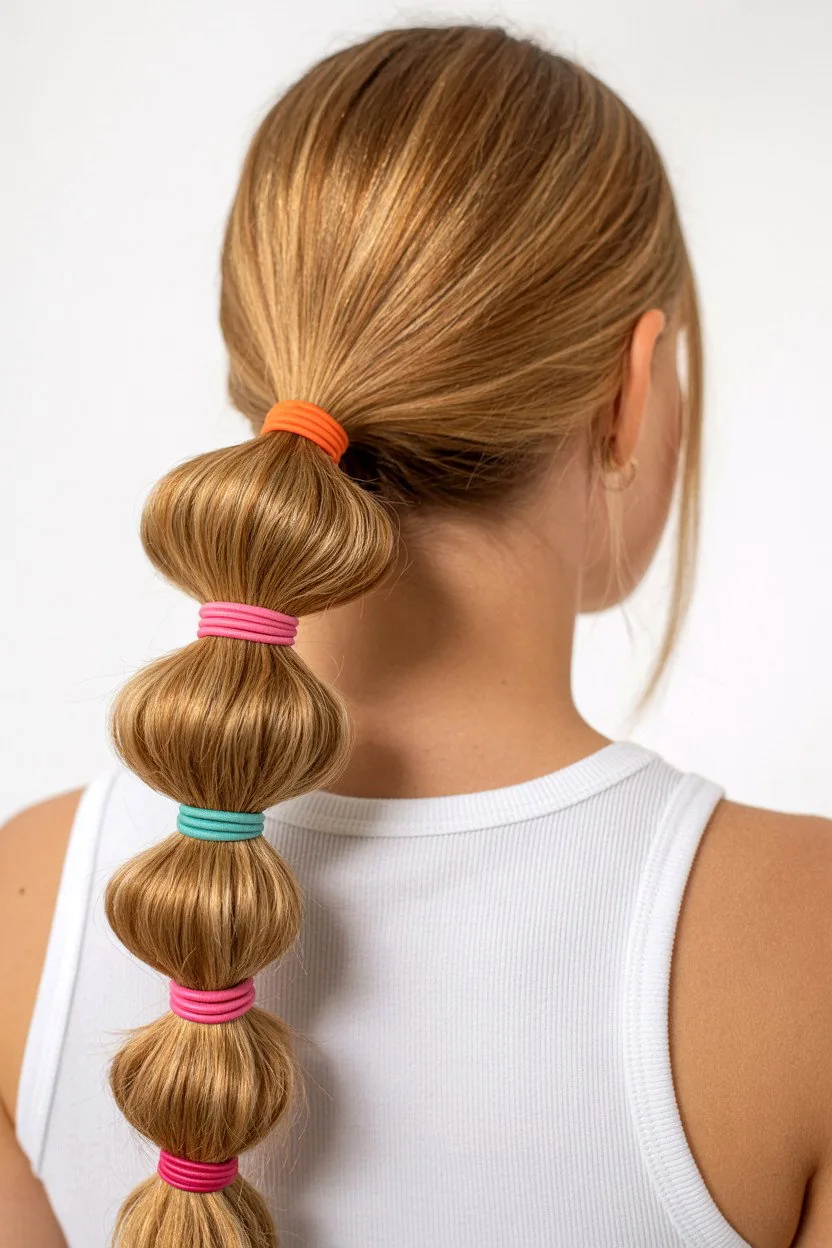
The bubble braid ponytail is the most fun hairstyle on this list, and girls trips are exactly where fun hairstyles belong. It turns an ordinary ponytail into something playful and photogenic, it holds up through dancing and walking, and it takes almost no skill — just a ponytail and a few extra hair ties.
Make a high or mid ponytail, then add small elastics down its length every few inches, gently pulling each section wider to form a bubble. Use clear or matching elastics so the bubbles read as the style rather than the hardware. It works best on medium to long hair, and it looks wonderful on thick hair, where the bubbles stay full and round all night.
Pros: playful, secure, and genuinely easy to do on yourself. Cons: needs several elastics, and the bubbles can flatten if your hair is very fine. Travel tip: pack a strip of small clear elastics in your clutch — they weigh nothing and they turn a tired ponytail into a bubble braid in two minutes, right at the table.
The Textured Lob, Travel Edition
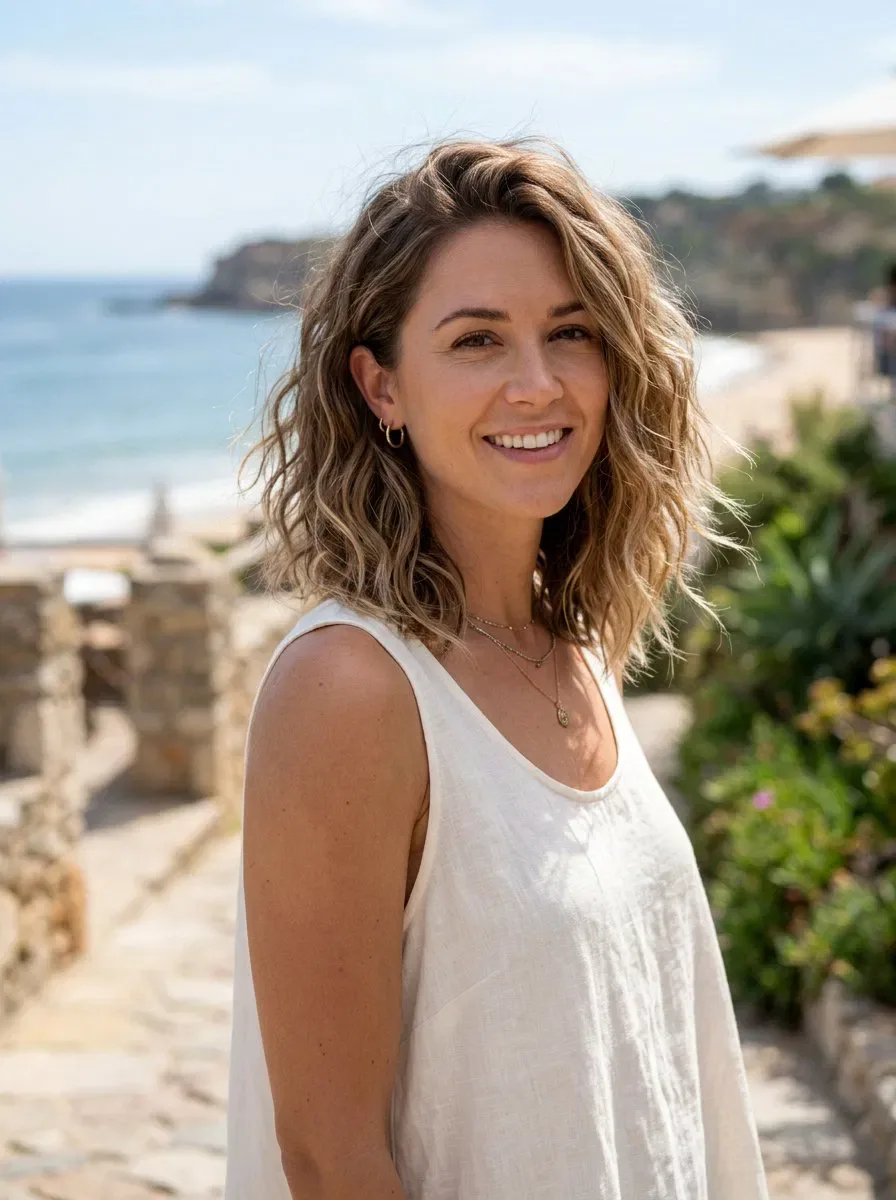
If you have a lob, a girls trip is where it earns its keep. The textured lob dries fast, needs almost no styling, and looks good slightly messy — which is exactly how hair looks after a day of sun, sea and walking.
Scrunch a little texturising spray or salt spray through damp hair and let it air-dry, tucking one side behind your ear for a relaxed finish. A few loose waves with a flat iron on the front pieces add polish for the evening, but the lob does not need them. This suits fine and medium hair especially well, because the texture makes it look thicker than it is.
Pros: dries in minutes, looks good messy, and needs no tools. Cons: the ends can flip out in humidity, and it needs a trim to keep its shape. Travel tip: a lob is the best haircut for a trip with no hairdryer — it air-dries into a style, while longer hair just air-dries into a tangle.
Curtain Bangs and a Breezy Blowout
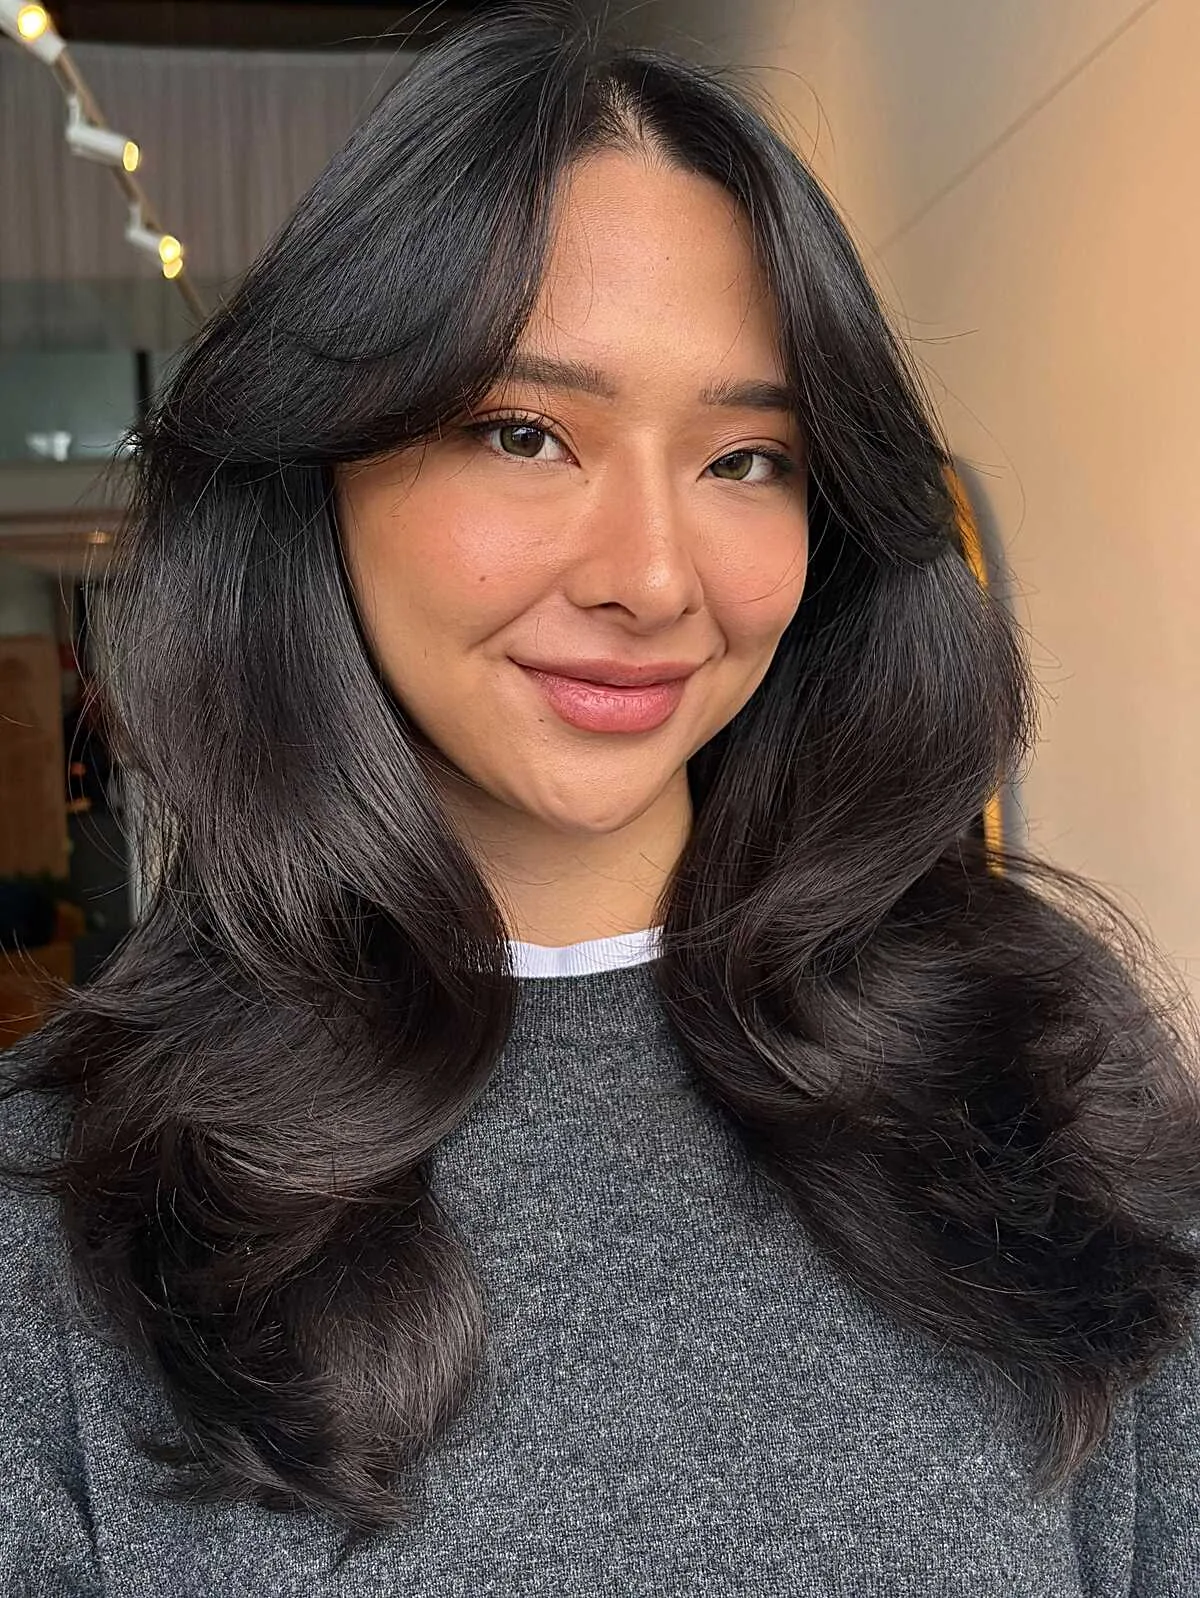
Curtain bangs with a breezy blowout are the most flattering style on this list for photos, because the bangs frame the face and the blowout gives the hair movement in every direction. It is soft, open and full of life — the hair equivalent of a good mood.
Blow-dry with a round brush or the hotel dryer, lifting at the roots and curling the ends under, then let the bangs fall naturally on either side of your face. Let everything cool before you touch it, because that is what locks in the volume. A little volumising mousse at the roots helps the shape survive a warm afternoon and a sea breeze.
Pros: frames every face shape, looks great in photos, and grows out gracefully. Cons: bangs can go flat in humidity, and the blowout needs a dryer. Travel tip: if the bangs go limp by lunch, twist them back with two pins for a half-up look — it takes ten seconds and looks completely deliberate.
The Braided Crown for Group Photos
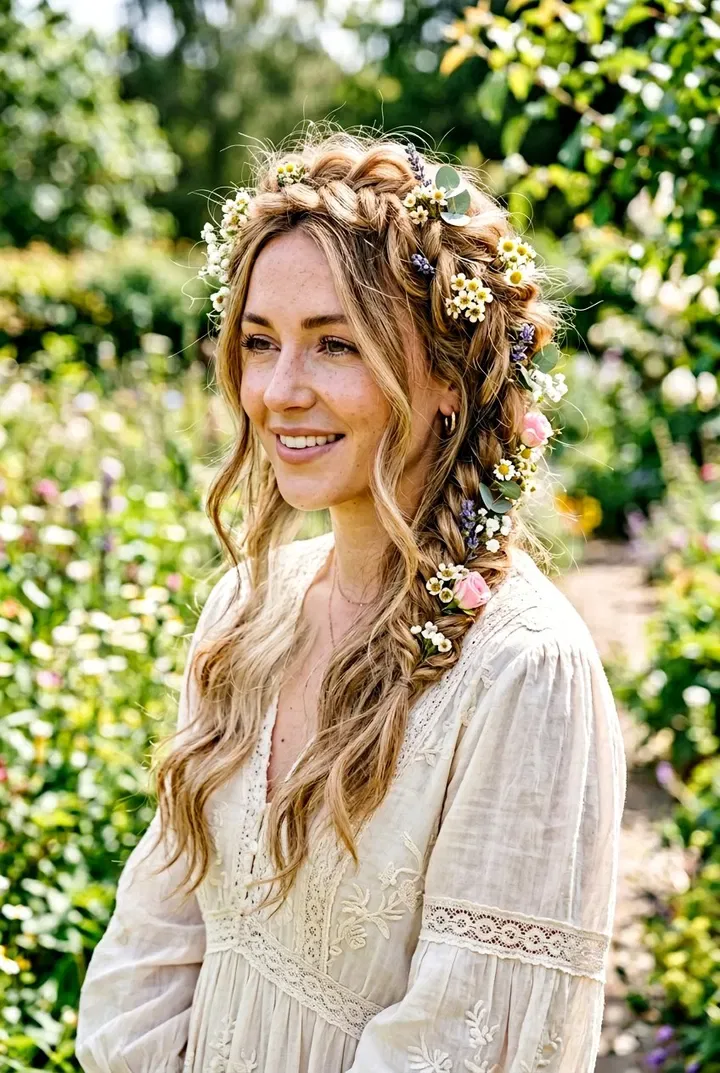
A braided crown is the group-photo hairstyle. It gives you shape from the front, the side and the back, so no matter where the camera is — or which friend is taking the candid — your hair looks intentional.
Braid two sections from behind each ear, bring them across the top of your head like a headband, and pin them where they meet, tucking the ends underneath. Loosen the braids gently so they look soft rather than tight, and pull out a few face-framing pieces. It suits medium and long hair, and it is especially beautiful on wavy or curly hair, where the texture fills out the crown.
Pros: photographs from every angle and stays put all day. Cons: needs a few pins and a mirror to get even, and very short hair cannot reach across. Travel tip: practise the crown once at home with a hand mirror — after one practice run you can do it by feel in a hotel bathroom in five minutes.
The Messy Top Knot for Late Nights
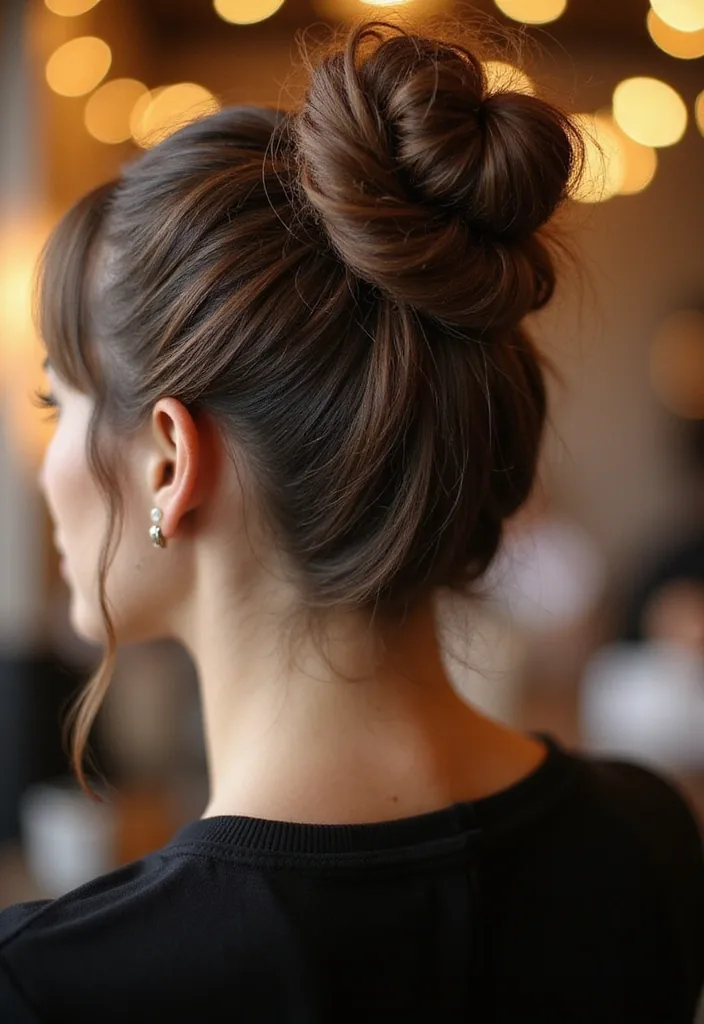
The messy top knot is the late-night hero of a girls trip. It keeps your hair off your neck when you are dancing, it survives heat and humidity, and it somehow looks better at 1am than it did at 9pm.
Gather your hair high, twist it loosely, and wrap it into a knot, pinning it where it feels secure and pulling out soft pieces around the face and at the nape. Do not aim for neat — the charm of this style is that it looks like you did it in a taxi, because you probably did. It works on medium and long hair, and it is a lifesaver for thick hair on a hot night.
Pros: cool, comfortable, and gets better as it loosens. Cons: a heavy knot can ache by the end of the night, and it needs a strong tie. Travel tip: keep a spiral hair tie on your wrist all evening — it is your escape route from any style that stops working, and it leaves no dent when you take it out.
Side-Swept Waves for a Night Out
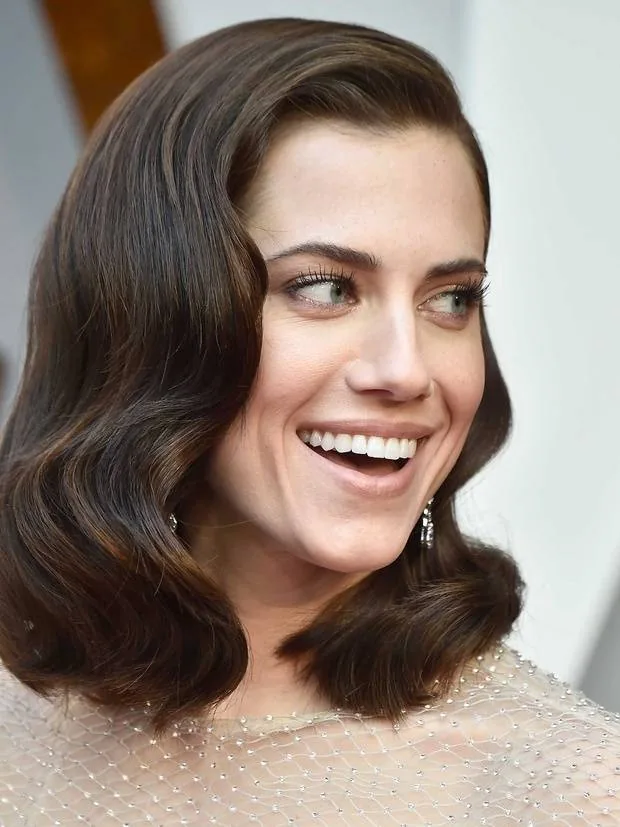
Side-swept waves are old-Hollywood glamour made trip-friendly. Sweeping all your hair to one side shows off your shoulders and your earrings, gives the style drama without height, and photographs like a red-carpet moment even when you are just going to a rooftop bar with your friends.
Create a deep side part, curl the lengths in large sections all in the same direction, and brush them through so they fall as one smooth wave over one shoulder. Pin the other side flat behind your ear with two crossed pins so the shape holds. This suits long and medium hair, and it is stunning on hair with highlights, where the wave shows off the colour.
Pros: glamorous, elegant, and made for photos. Cons: needs a curling tool and a little patience, and wind will undo the sweep. Travel tip: do the curls at the hotel and pin the sweep in place before you leave — once the shape is set, a light spray keeps it in place for hours, even in a taxi with the windows down.
The Dutch Braid Into a Low Bun
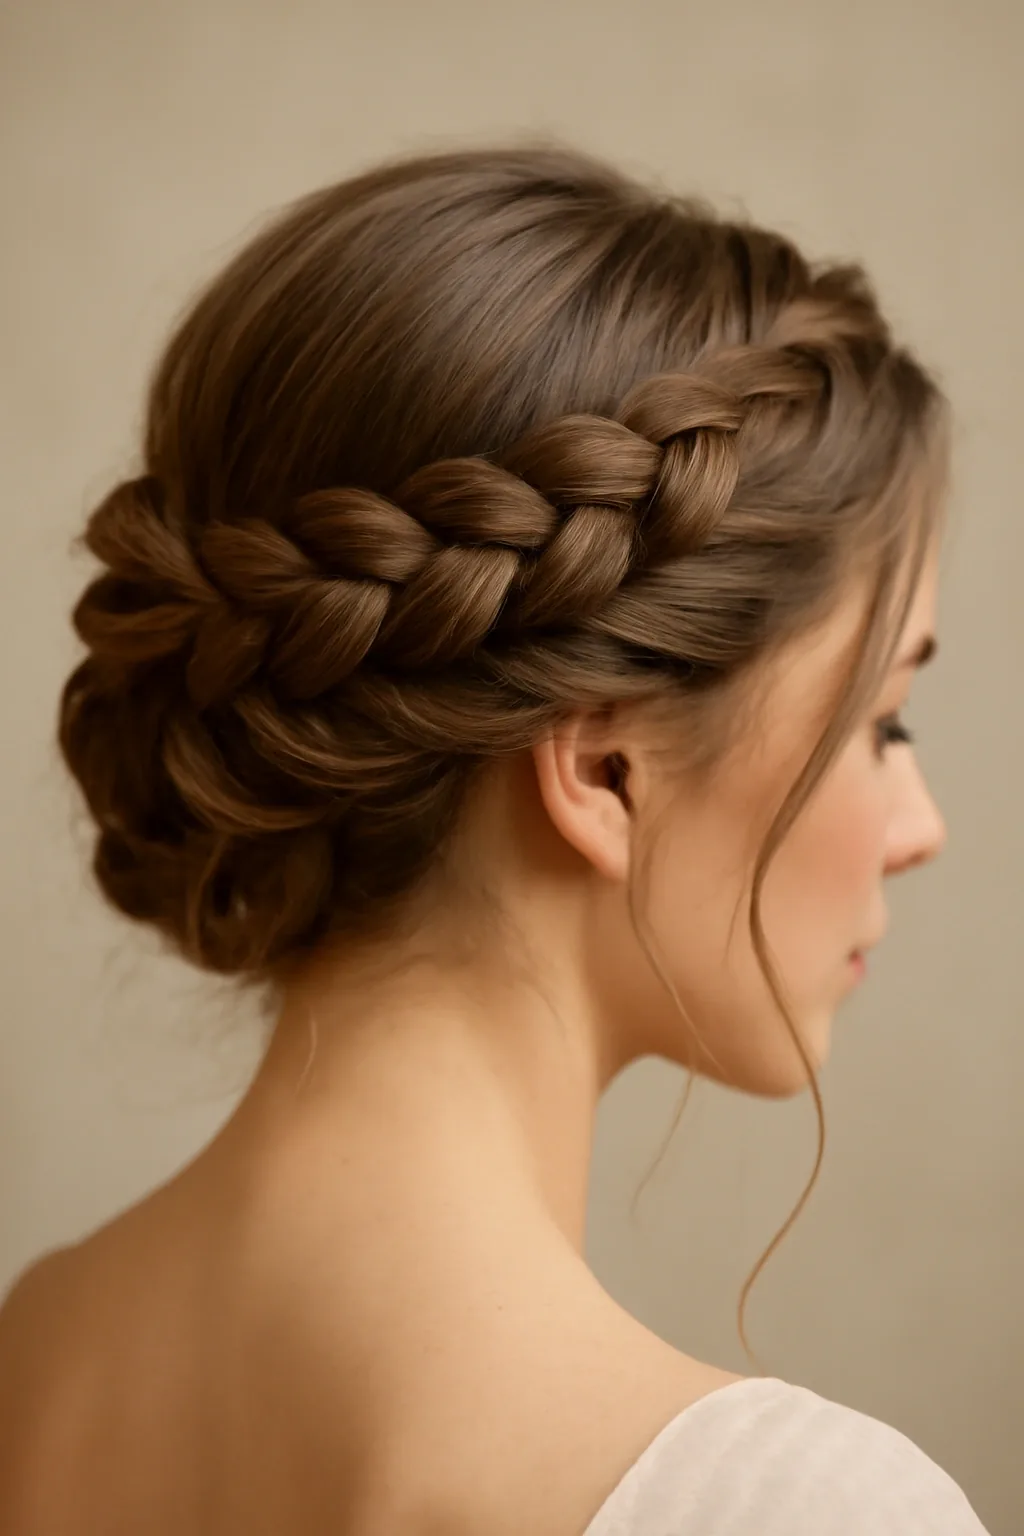
A Dutch braid into a low bun is the most secure elegant style on this list. The braid holds the front, the bun holds the back, and together they survive wind, dancing, dinner and a long walk home.
Start a Dutch braid at the hairline on one side, working it back and down, then gather everything into a low bun at the nape and pin it firmly. Loosen the braid slightly for softness and pull out two small pieces at the front. It suits medium and long hair, and it is one of the best styles for thick hair, which can overwhelm a simple bun on its own.
Pros: extremely secure, elegant, and lasts from lunch to late night. Cons: needs a mirror and some braiding practice, and it is hard to do on very layered hair. Travel tip: this is the style to choose for the windiest day of the trip — a boat trip, a clifftop walk or a rooftop in a breeze — because it simply does not move.
The Pineapple Puff for Curly Hair
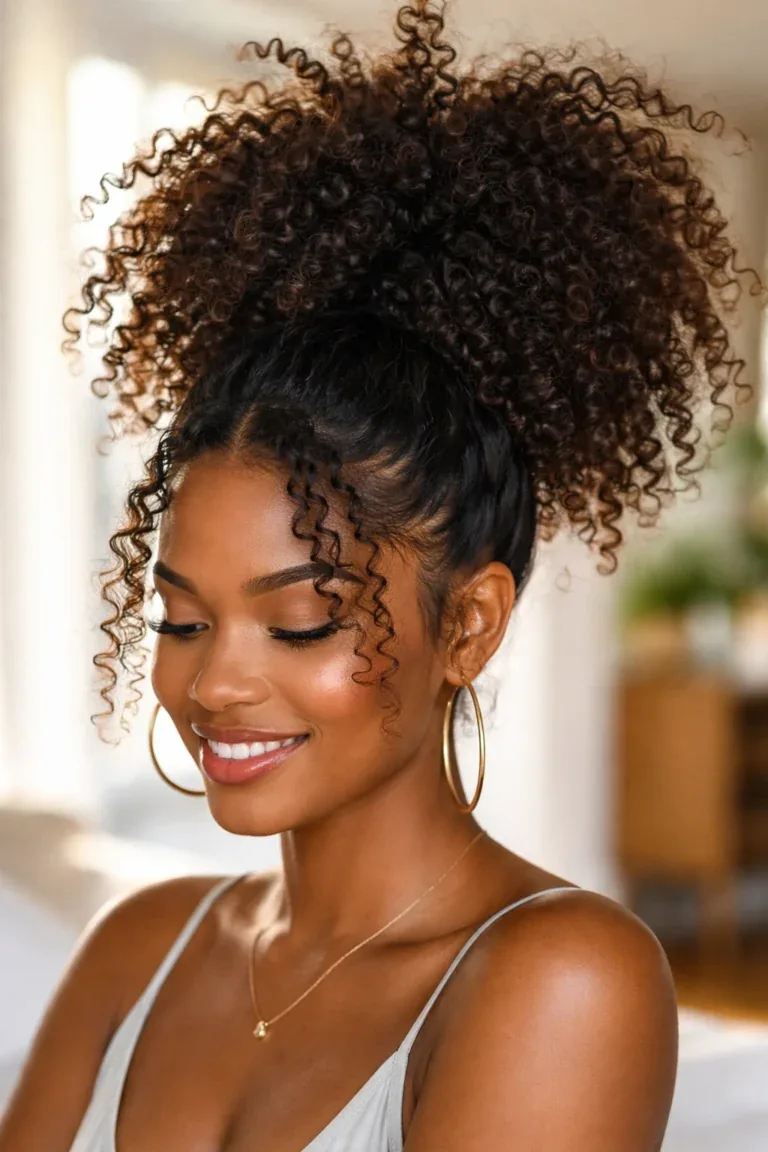
The pineapple puff is the curly-haired traveller’s best friend. It piles the curls high on top of the head, keeps them off the neck on a hot day, shows off the curl pattern at its best, and takes about a minute to do.
Flip your head forward, gather the curls loosely at the very top of your head, and secure them with a soft fabric tie or a silk scrunchie, leaving the curls to fall forward like a pineapple top. Do not pull it tight — the looseness is what keeps the curls full and bouncy. This suits curly and coily hair of medium to long length, and it doubles as a sleep style that protects curls overnight.
Pros: fast, protects curls, and keeps you cool. Cons: can feel heavy by evening on very thick hair, and the front can flatten. Travel tip: pack a silk scrunchie, not a plain elastic — it holds the puff without denting the curls, and you can sleep in it too.
The Slicked-Back Bun for Humid Days
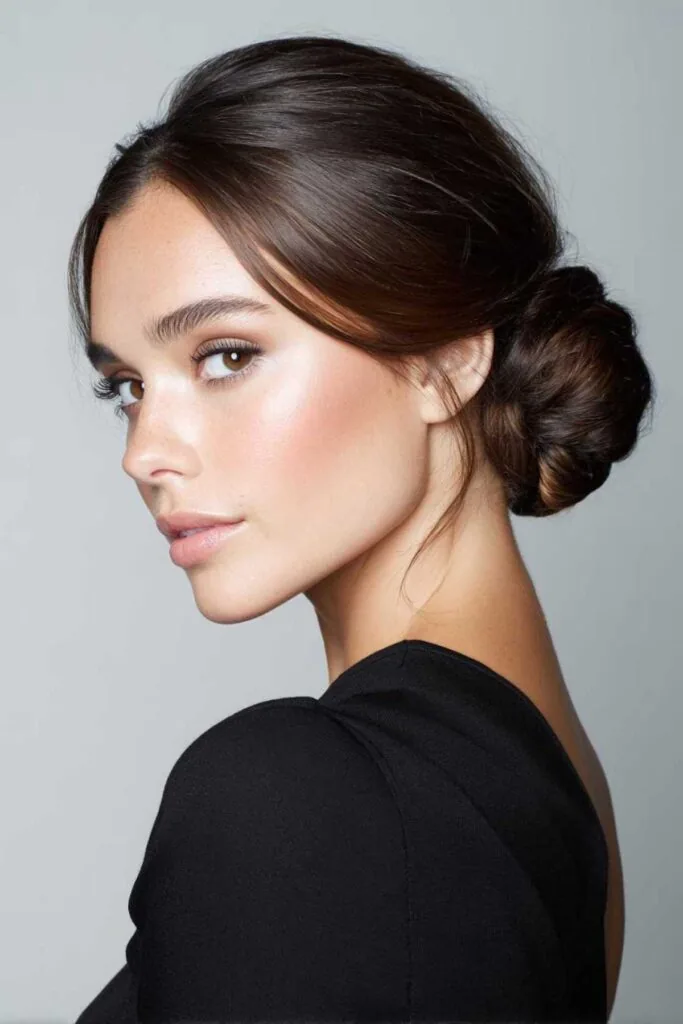
On a truly humid day, the smartest move is to stop fighting the weather and go slick. A slicked-back bun uses the moisture instead of resisting it, keeps every strand in place, and looks sharp and intentional in photos — especially with sunglasses and a bold lip.
Smooth a little gel or strong smoothing cream through damp hair, brush it straight back, and secure it low or mid-height in a neat bun, wrapping the ends and pinning them flat. Finish with a shine spray for gloss. This suits all hair types, and it is especially good for thick or coarse hair, which can feel unmanageable loose in humidity.
Pros: completely humidity-proof, elegant, and very fast. Cons: shows the hairline and the face, so it is not for everyone, and it can feel tight after hours. Travel tip: a travel-size gel is the one product worth the space in your liquids bag on a humid trip — it rescues more styles than any spray.
The Twisted Half-Up for Brunch
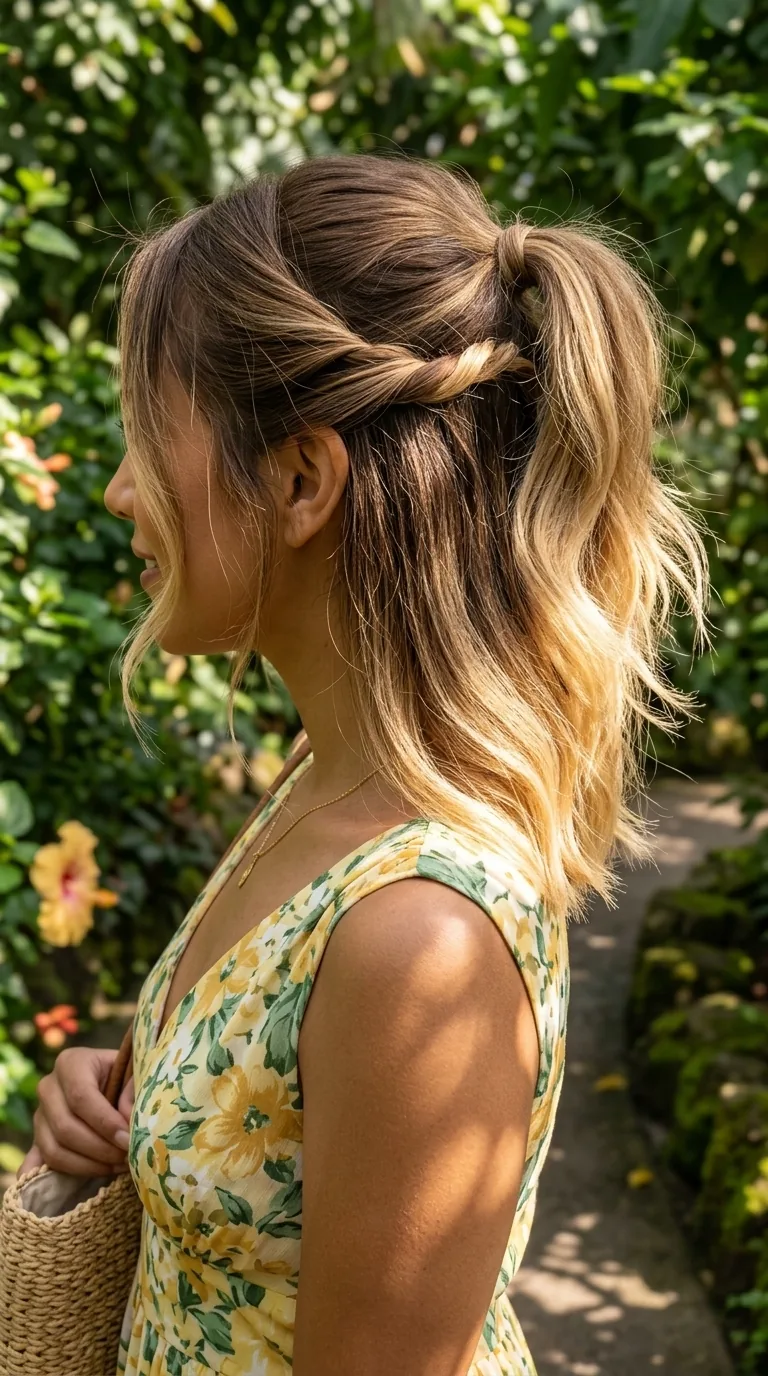
The twisted half-up is the brunch style: pretty, relaxed and just polished enough for a nice table and a round of photos. It keeps the hair out of your food and your face while the rest falls soft and loose, and it takes about two minutes with no tools at all.
Take two sections from the front, twist each one back towards the crown, and join them with a small elastic or a decorative pin, letting the twists sit softly. Pull out a few pieces at the temples so it looks relaxed rather than severe. It works on medium and long hair, straight or wavy, and it is lovely on hair with layers, which give the twists something to catch.
Pros: quick, pretty, and works on day-two hair. Cons: can loosen by the afternoon, and very fine hair may need a pin or two extra. Travel tip: this is the ideal second-day style for hair that was curled the night before — the leftover wave makes the half-up look twice as good with half the effort.
The Rope Braid Ponytail
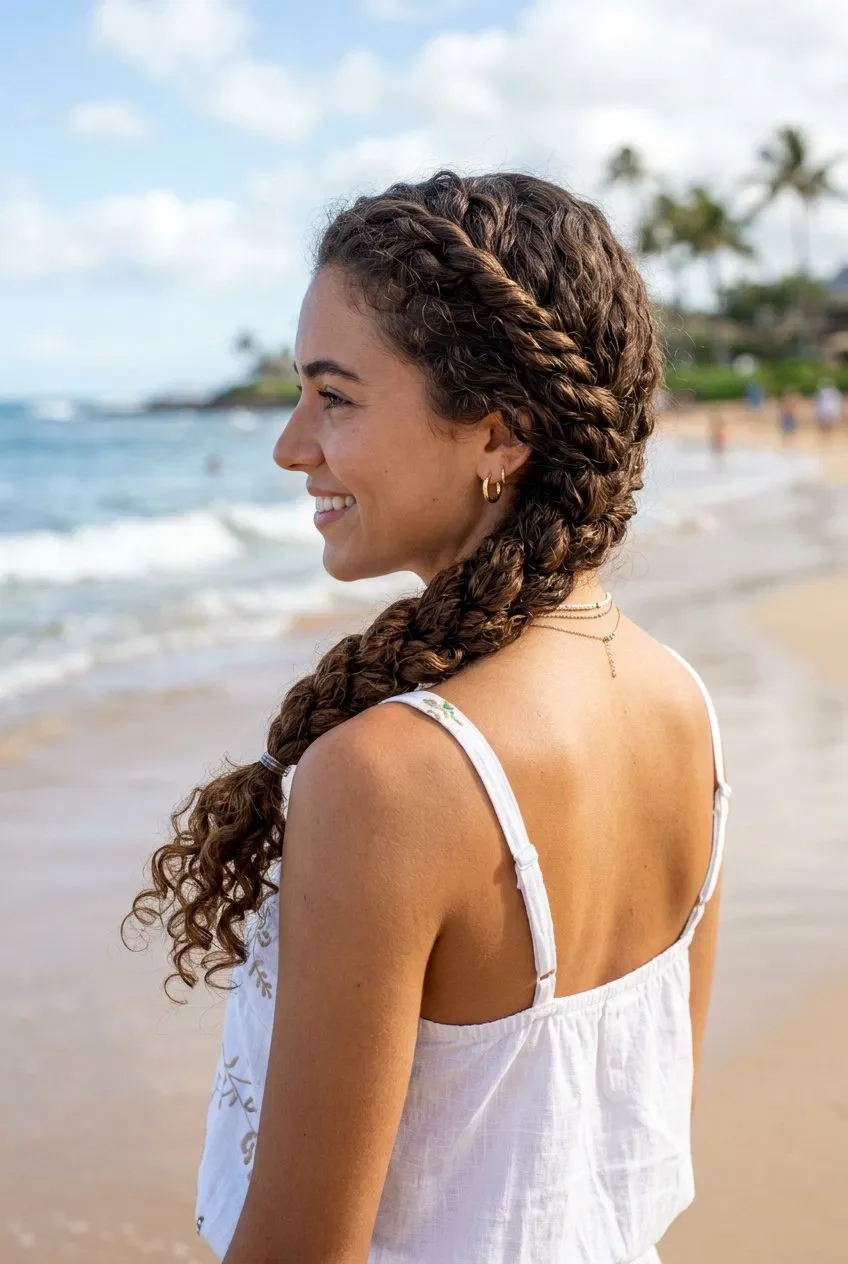
A rope braid ponytail is the braid for people who think they cannot braid. It uses just two twisted sections, so it is far easier than a French or fishtail braid, and it still looks polished and a little bit special.
Make a ponytail, split it into two sections, twist each section in the same direction, then twist the two sections around each other in the opposite direction and tie the end. The opposing twists lock each other in place, which is why it holds so well. It suits long hair best, and it is a great choice for straight hair, where the clean twist shows beautifully.
Pros: very easy, very secure, and looks far harder than it is. Cons: needs length to show the twist, and the end can unravel if it is not tied firmly. Travel tip: use a small clear elastic at the end and wrap a strand of hair around it — the braid will survive a whole day of walking, wind and photos.
Soft Curls With a Mini Iron
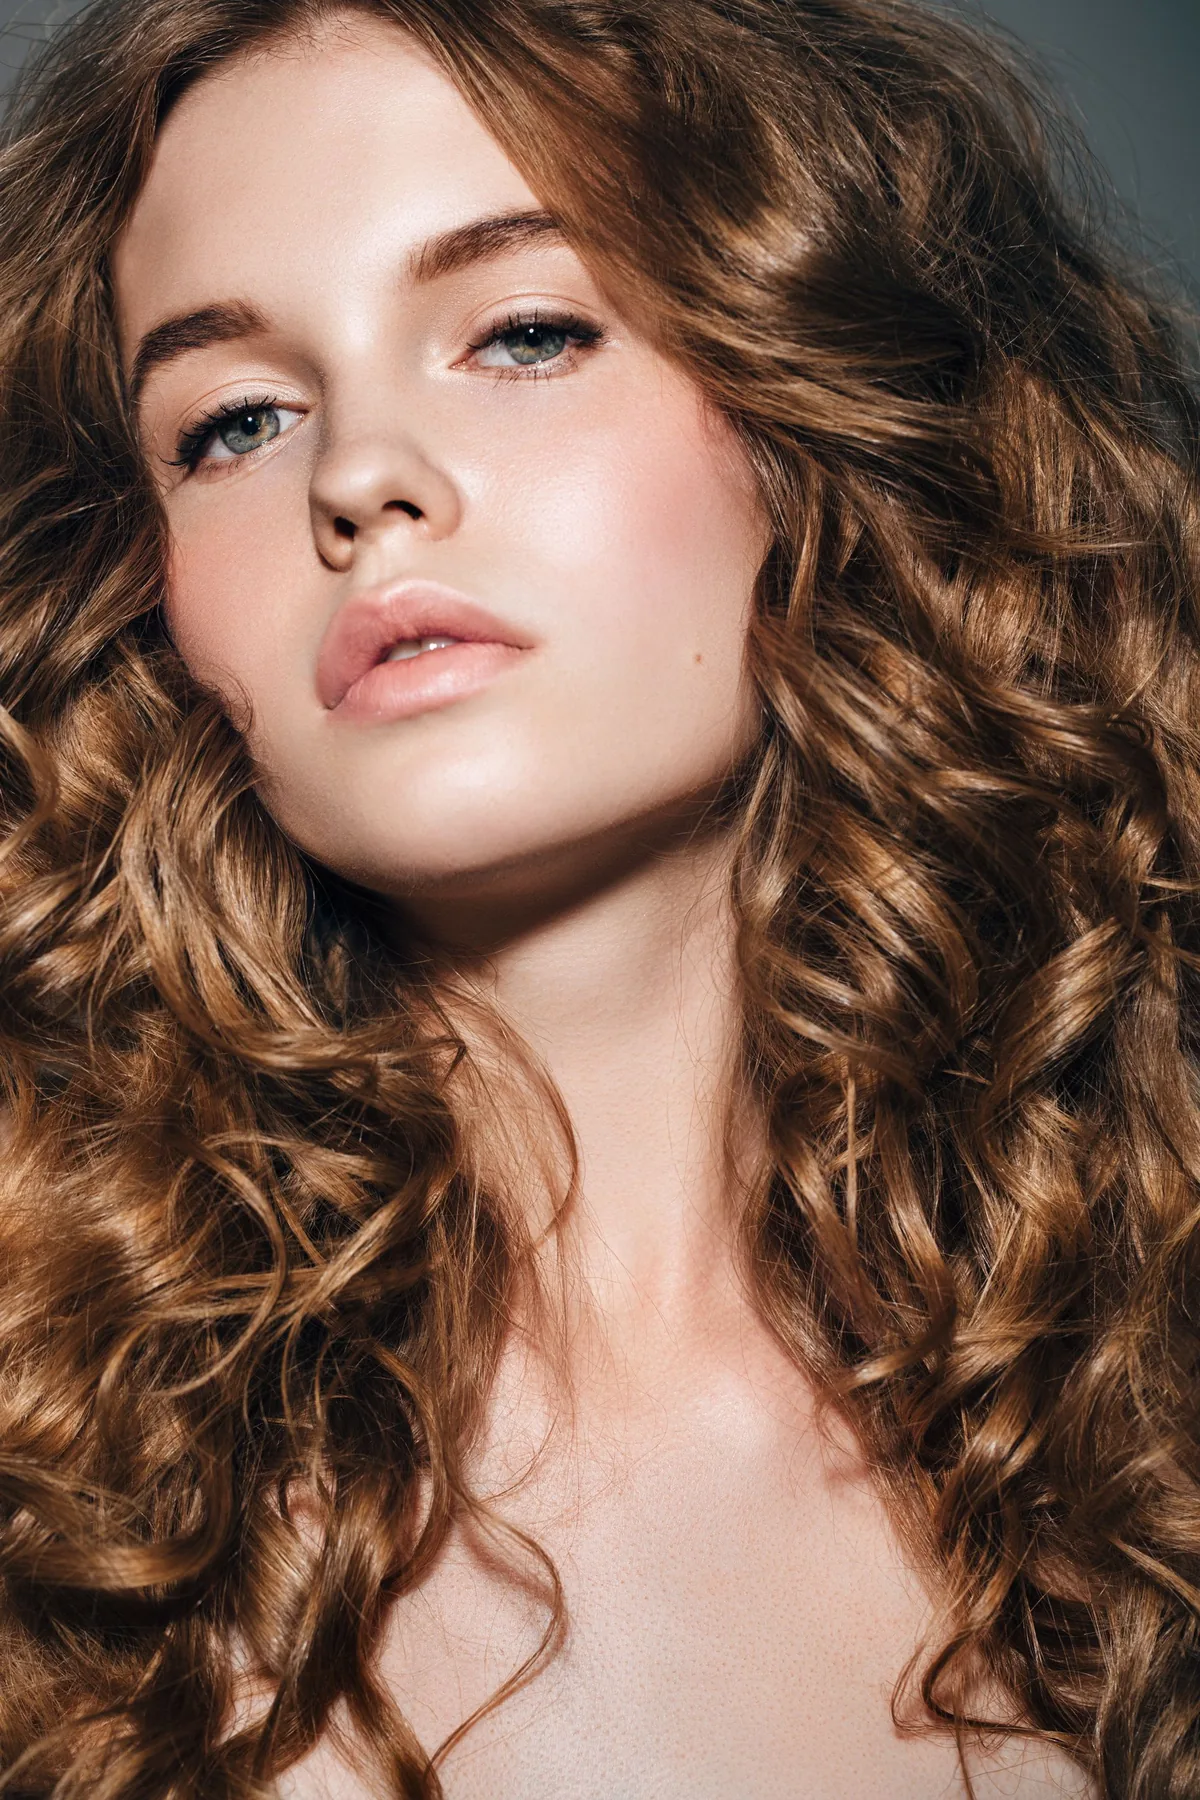
Soft curls are the evening upgrade that never fails, and on a girls trip the mini iron is the tool that makes them possible. A travel-size curling iron or a mini straightener used as a curler gives you loose, touchable waves in about fifteen minutes, and the curls soften beautifully as the night goes on.
Curl in large sections, always away from the face, and let each curl cool for a few seconds before you touch it. Brush through gently with your fingers so the curls fall into one soft shape, and finish with a light spray. This suits medium and long hair, and it works on hair that was straight all day — the contrast between the daytime straight style and the evening curl is the whole point.
Pros: romantic, photogenic, and suits almost everyone. Cons: needs a hot tool and fifteen minutes, and humidity will soften the curls. Travel tip: curl only the front sections and the ends if you are short on time — the pieces around your face and the ends are what the camera sees, and they make the whole style read as curled.
The Low Chignon With Face-Framing Pieces
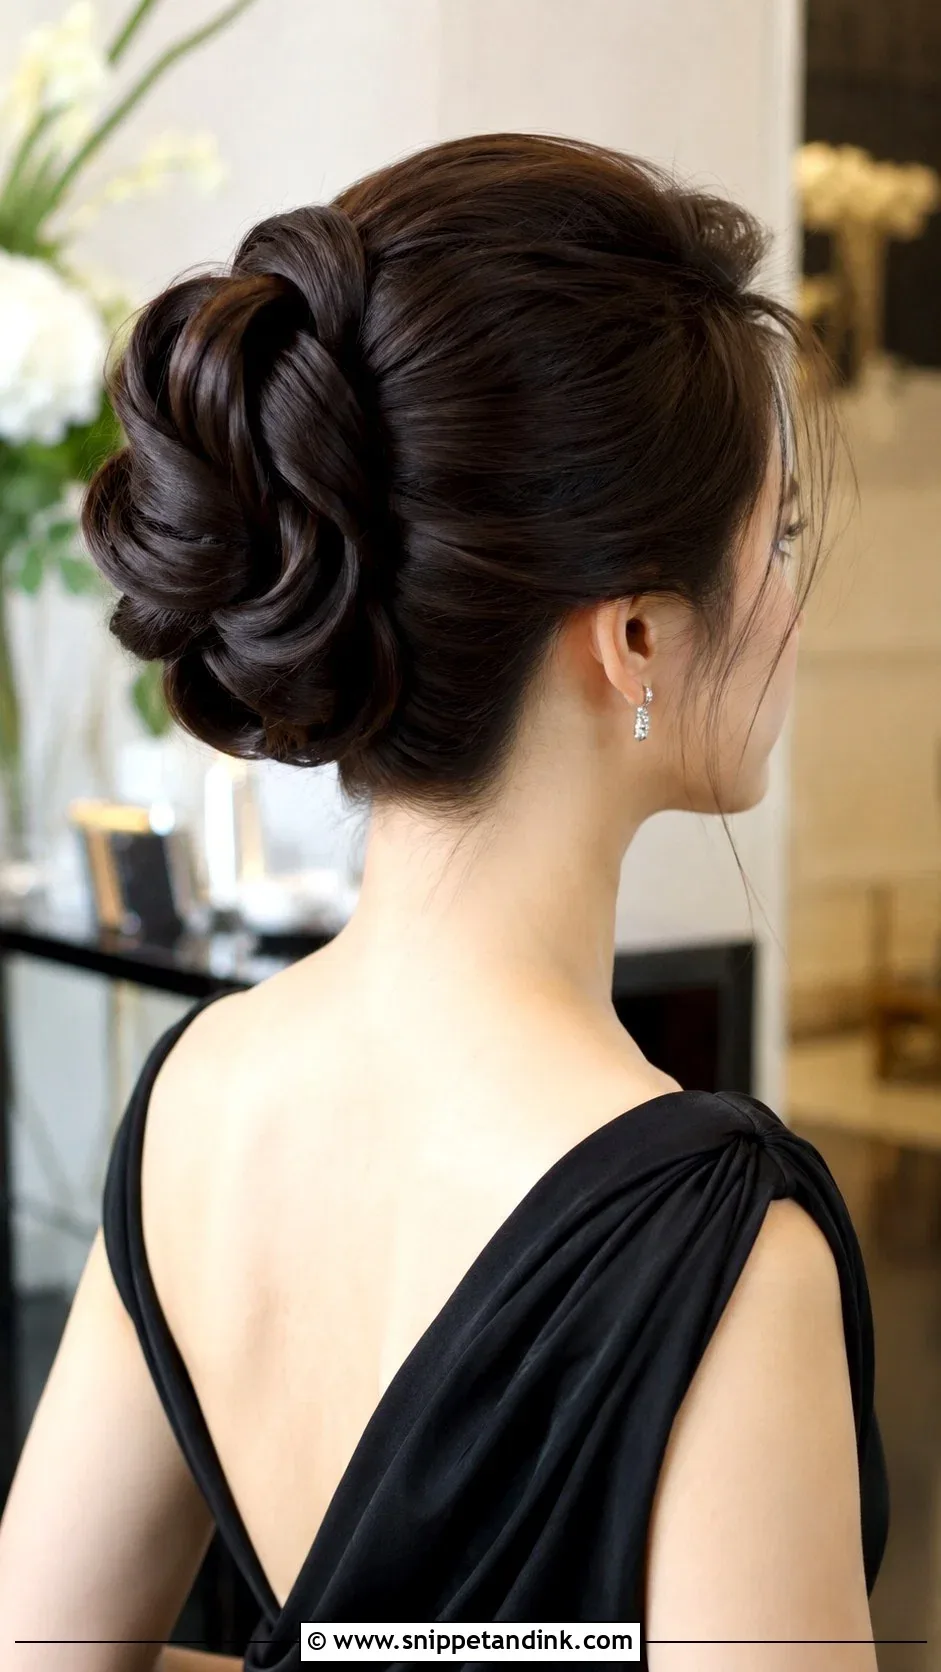
A low chignon is the quiet classic of trip hairstyles: low, soft and elegant, with face-framing pieces that keep it from looking severe. It suits a nice dinner, a rooftop drink or a group photo where everyone is dressed up, and it is far easier than it looks.
Gather your hair low at the nape, twist it into a soft roll, and pin it in place, leaving the front soft with a middle or side part and two tendrils around your face. Add one small detail — a pearl pin, a slim ribbon or a tiny flower — and finish with a flexible spray. It suits medium and long hair, and it is flattering on every face shape because the soft pieces do the framing.
Pros: elegant, comfortable, and lasts all evening. Cons: needs pins and a mirror, and very thick hair may need extra pins. Travel tip: build the chignon on hair that was braided during the day — the leftover wave gives the roll natural texture and grip, so it needs fewer pins.
Space Buns for a Festival Night
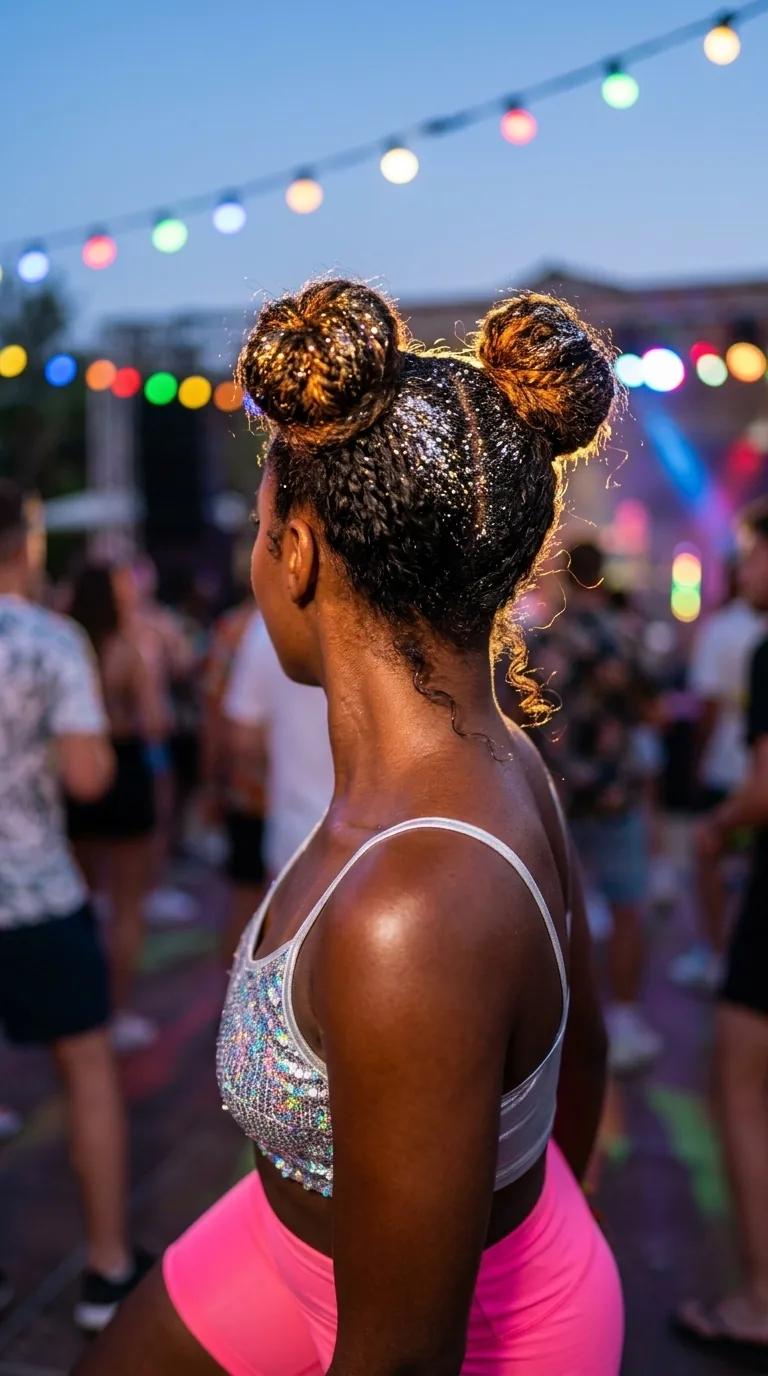
Space buns are the most playful style on a girls trip, and a festival night or a themed party is exactly where they belong. They are fun, they photograph brilliantly, they keep your hair completely out of the way while you dance, and they make the whole group look like a team when everyone wears them together.
Part your hair down the middle, make two high pigtails, twist each one into a bun and pin it, leaving a few pieces loose at the front if you like. Add braids into each bun for extra detail, or keep them plain and let the shape do the work. They suit medium and long hair, and they are wonderful on thick hair, where the buns stay full and round.
Pros: fun, secure, and brilliant for dancing. Cons: not for a formal night, and they can ache if they are pulled too tight. Travel tip: pack glitter, small clips or tiny braids-in accessories for festival nights — they weigh nothing and they turn plain space buns into the photo everyone keeps.
The Headband Tuck for Bad Hair Days
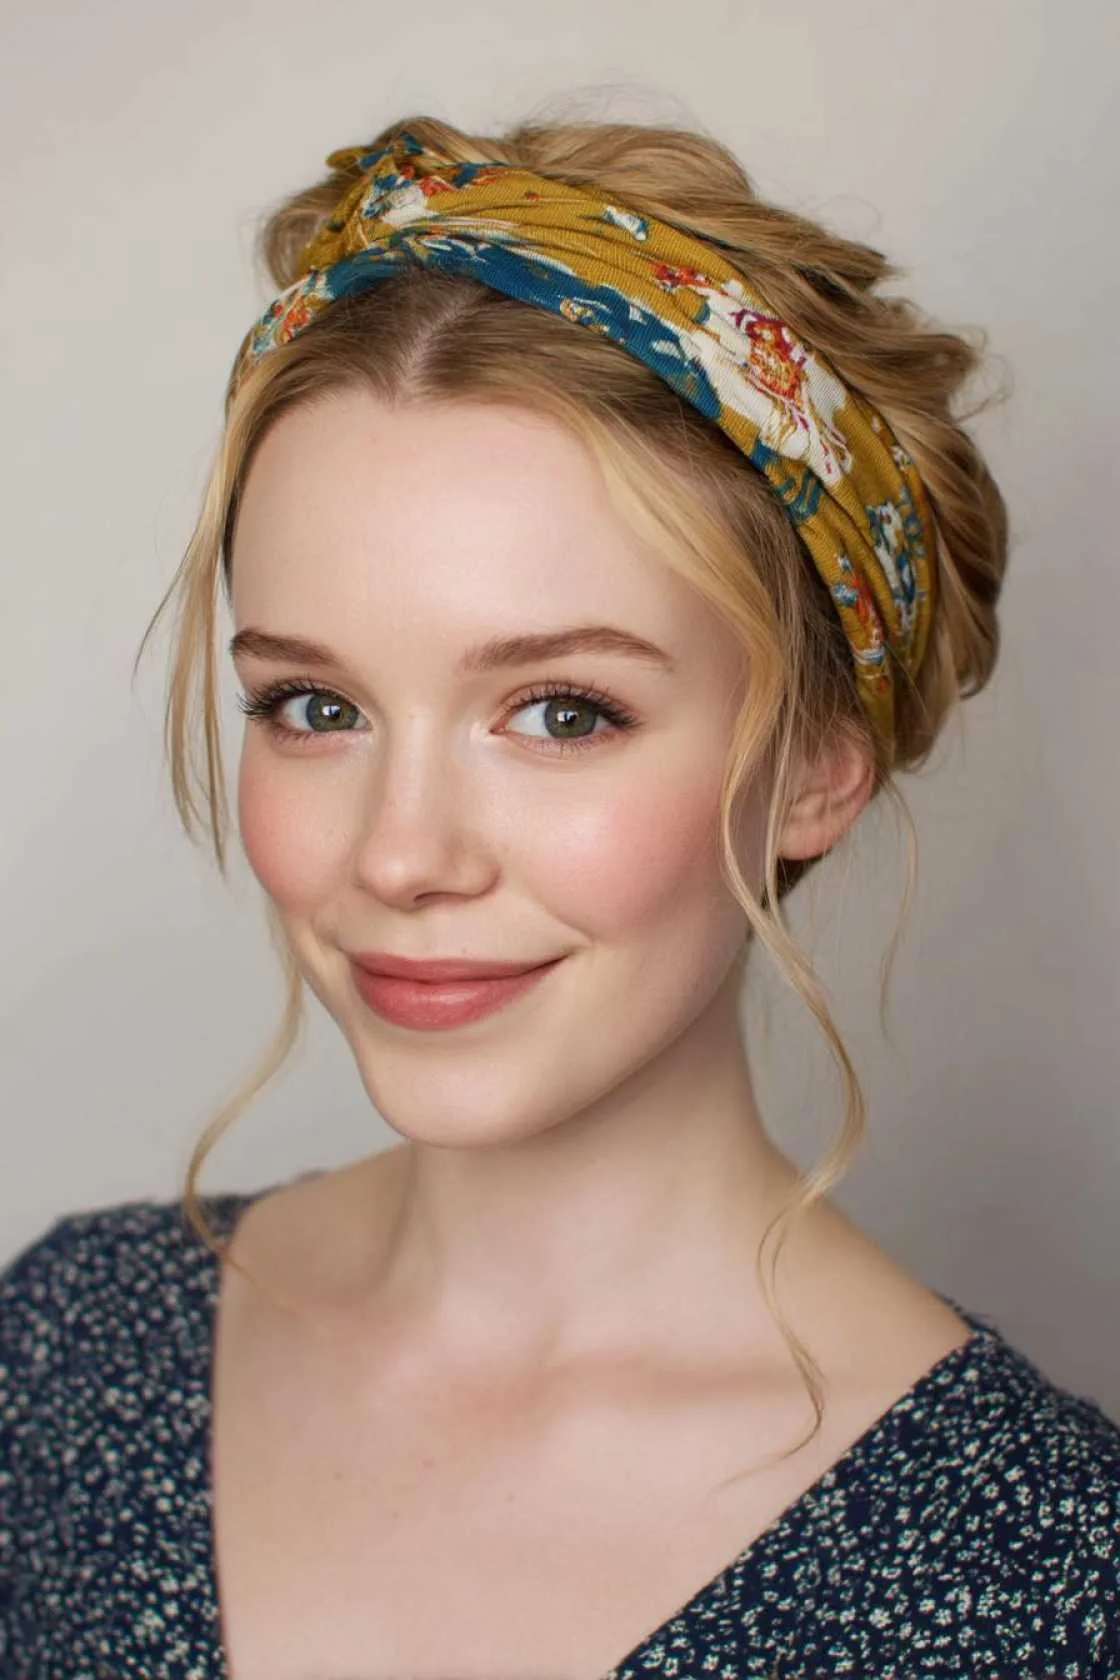
Every girls trip has a bad hair day, usually on the morning after the best night. The headband tuck is the rescue for that morning: it hides the hairline, gives the style a shape, and looks like a deliberate vintage-inspired look rather than a cover-up.
Place a stretchy or fabric headband over your hair, then tuck the lengths up and under the band at the back, rolling the hair until it sits in a soft tucked shape. Pull out a few pieces at the front for softness. It works on medium and long hair, and it is especially good on day-three hair, when the natural oils give the tuck grip it would not have on clean hair.
Pros: hides everything, needs no heat, and looks vintage and pretty. Cons: can slip on very fine hair, and the tuck loosens over hours. Travel tip: pack one wide fabric headband in a neutral colour — it is a style, a rescue and a sun shield in one, and it takes up no space at all.
The Scarf-Wrapped Ponytail
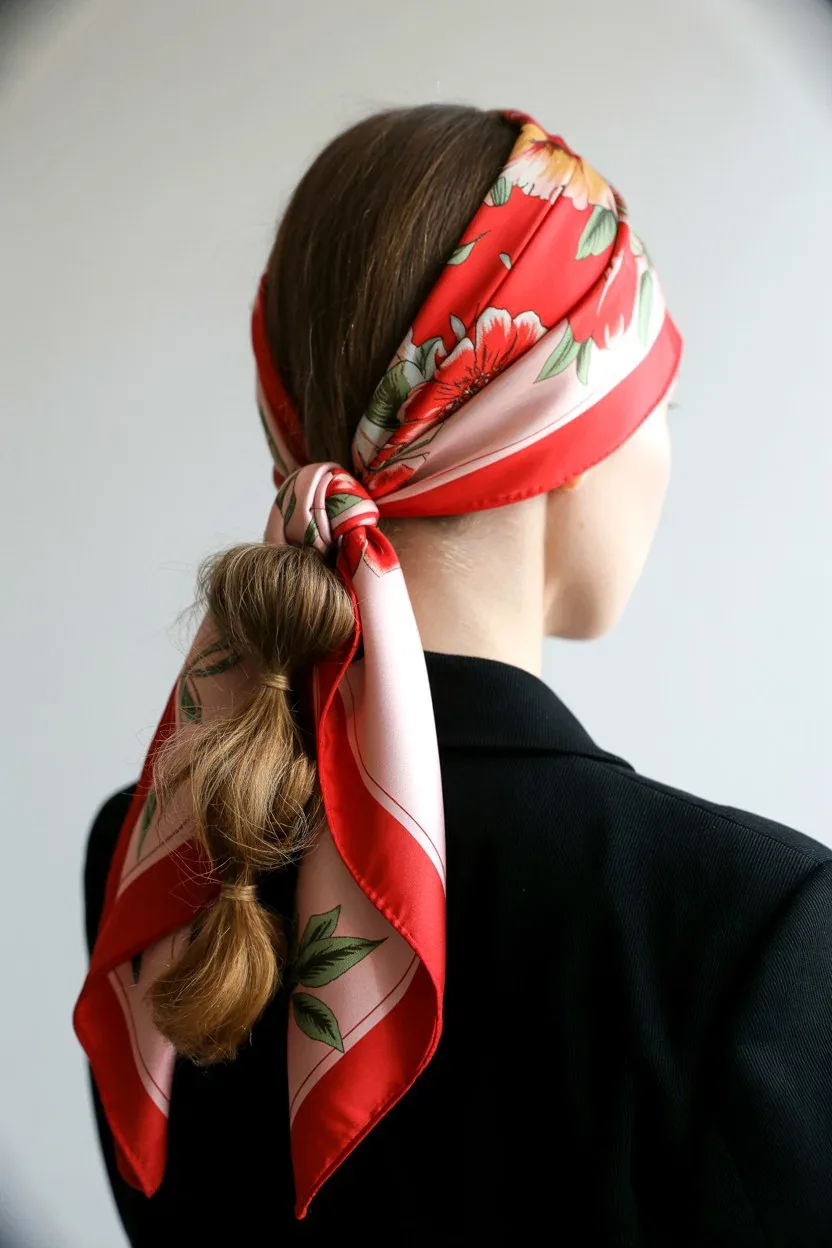
A scarf-wrapped ponytail is the high ponytail’s more polished sister. Instead of a knot at the base, the scarf wraps around the ponytail itself, adding colour and pattern all the way down. It looks like a stylist did it, and it takes about a minute with a scarf you already own.
Make a mid or high ponytail, then wrap a long thin scarf around its base and wind it down the length, tucking the end under the elastic. Use a scarf that matches your outfit or your bag for a coordinated look. This suits medium and long hair, and it is a brilliant way to hide a ponytail that is a day old and a little flat at the roots.
Pros: colourful, fast, and hides a tired ponytail completely. Cons: the scarf can loosen in wind, and it adds a little weight to the ponytail. Travel tip: a long thin scarf is the most useful accessory you can pack — it is a hair wrap, a belt, a bag tie and a beach cover-up, all in one small square of fabric.
The Waterfall Braid Half-Up
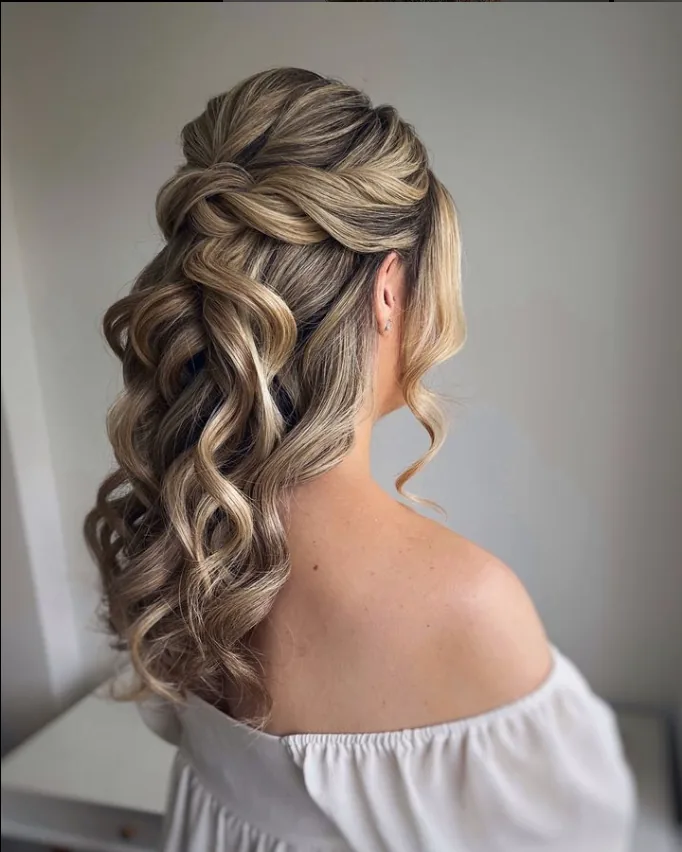
A waterfall braid looks like water falling through your hair, and it is the prettiest half-up style on this list. Strands drop through the braid as it crosses the back of your head, so the style has movement and softness from every angle.
Start a braid at one temple, dropping the bottom strand each time and picking up a new one, working across to the other side, then pin the end behind your ear. Keep the braid loose so the falling strands have room to move. It suits medium and long hair, and it is gorgeous on wavy hair, where the dropped strands fall in natural waves.
Pros: romantic, holds the front back, and looks intricate. Cons: takes practice and a mirror, and short layers will slip out of the braid. Travel tip: learn the waterfall braid on a friend before the trip — it is much easier to do on someone else first, and then you can take turns doing each other’s hair all week.
Curly Wash-and-Go Waves
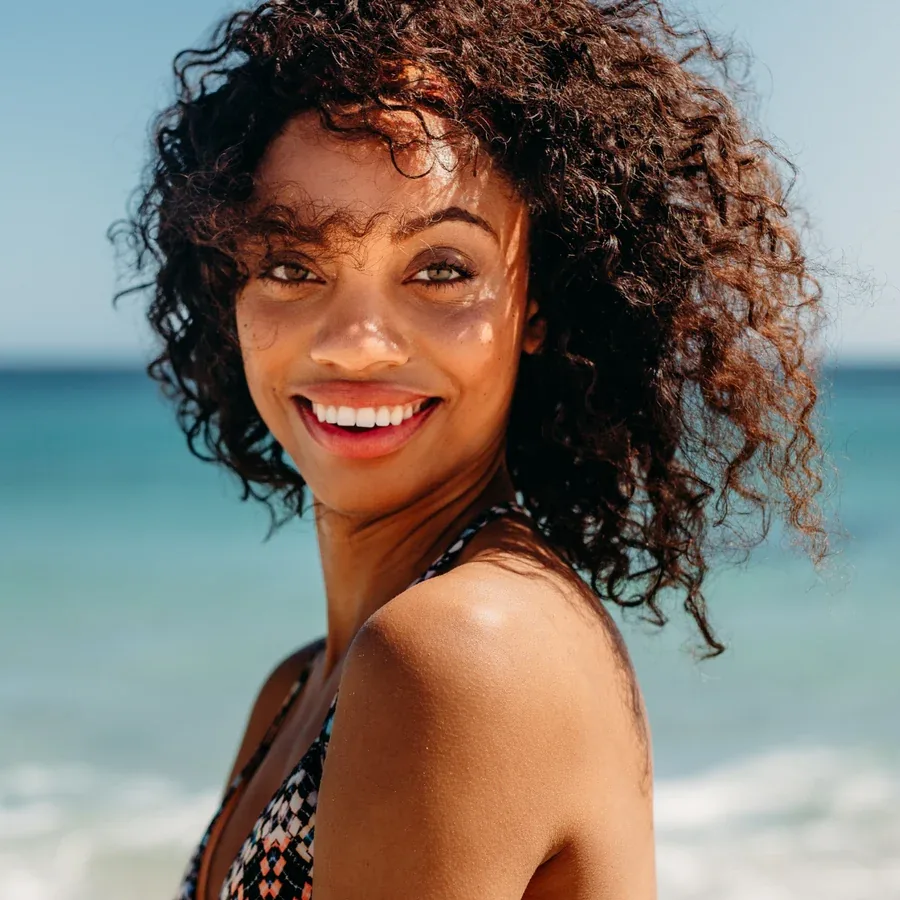
For curly hair, the wash-and-go is the ultimate trip style: wash, add product, and let your curls do what they do best. No heat, no tools, no fighting your natural texture — just defined, bouncy curls that look better in holiday light than they ever do at home.
On damp hair, apply a leave-in conditioner and a curl cream or gel, scrunching upwards so the curls form in clumps, then let your hair air-dry completely before you touch it. Do not brush it once it is dry — that breaks the curl pattern and creates frizz. This suits curly and wavy hair of any length, and it is the kindest style on this list for hair that is tired from sun and salt.
Pros: no heat, no tools, and shows off your natural curls. Cons: needs drying time, and humidity can change the curl pattern. Travel tip: bring your own curl cream in a travel bottle — hotel products are made for straight hair and will not define curls the way yours does.
Straight and Sleek With a Middle Part
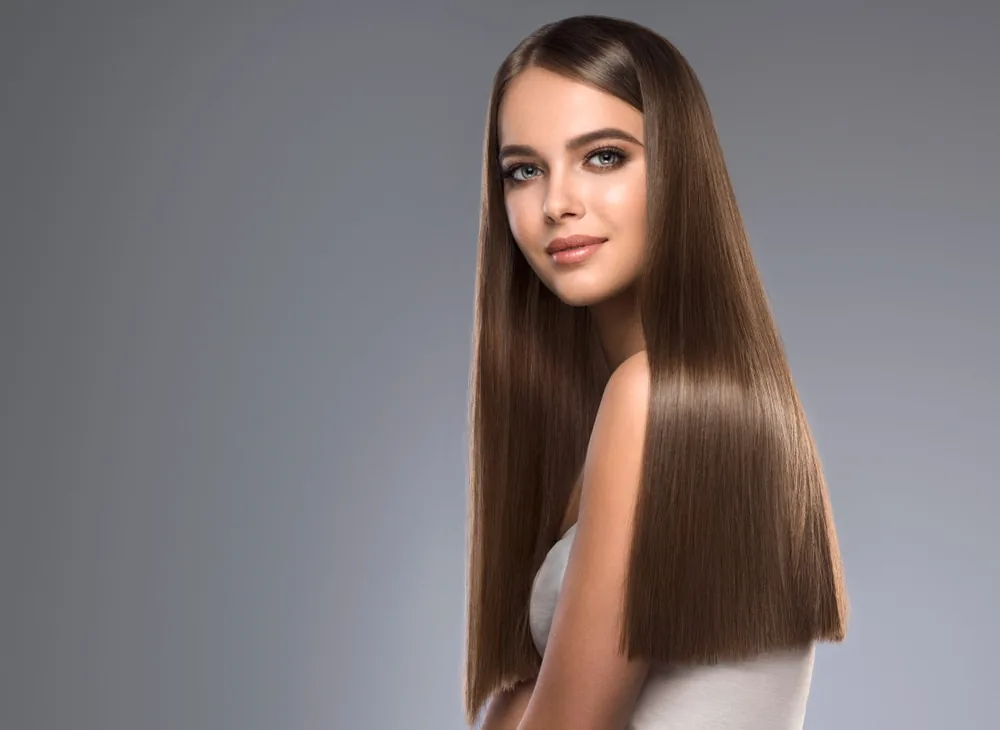
Straight and sleek with a middle part is the minimalist statement of a girls trip. It is clean, modern and quietly confident, it shows off shine and healthy ends, and it pairs with absolutely everything — a sundress, a blazer, a swimsuit cover-up.
Straighten in sections with a flat iron or a mini straightener, using a heat protectant first, and finish with a drop of serum smoothed over the surface for shine. A middle part keeps the style symmetrical and modern. This suits straight and slightly wavy hair, and it is especially striking on long hair, where the sleek fall is the whole point of the style.
Pros: clean, versatile, and makes hair look healthy and shiny. Cons: shows oil quickly, and humidity will undo the sleek finish. Travel tip: save this style for the driest day of the trip and a mostly indoor evening — it is a fair-weather style, and it deserves fair weather.
Braided Pigtails, the Grown-Up Version
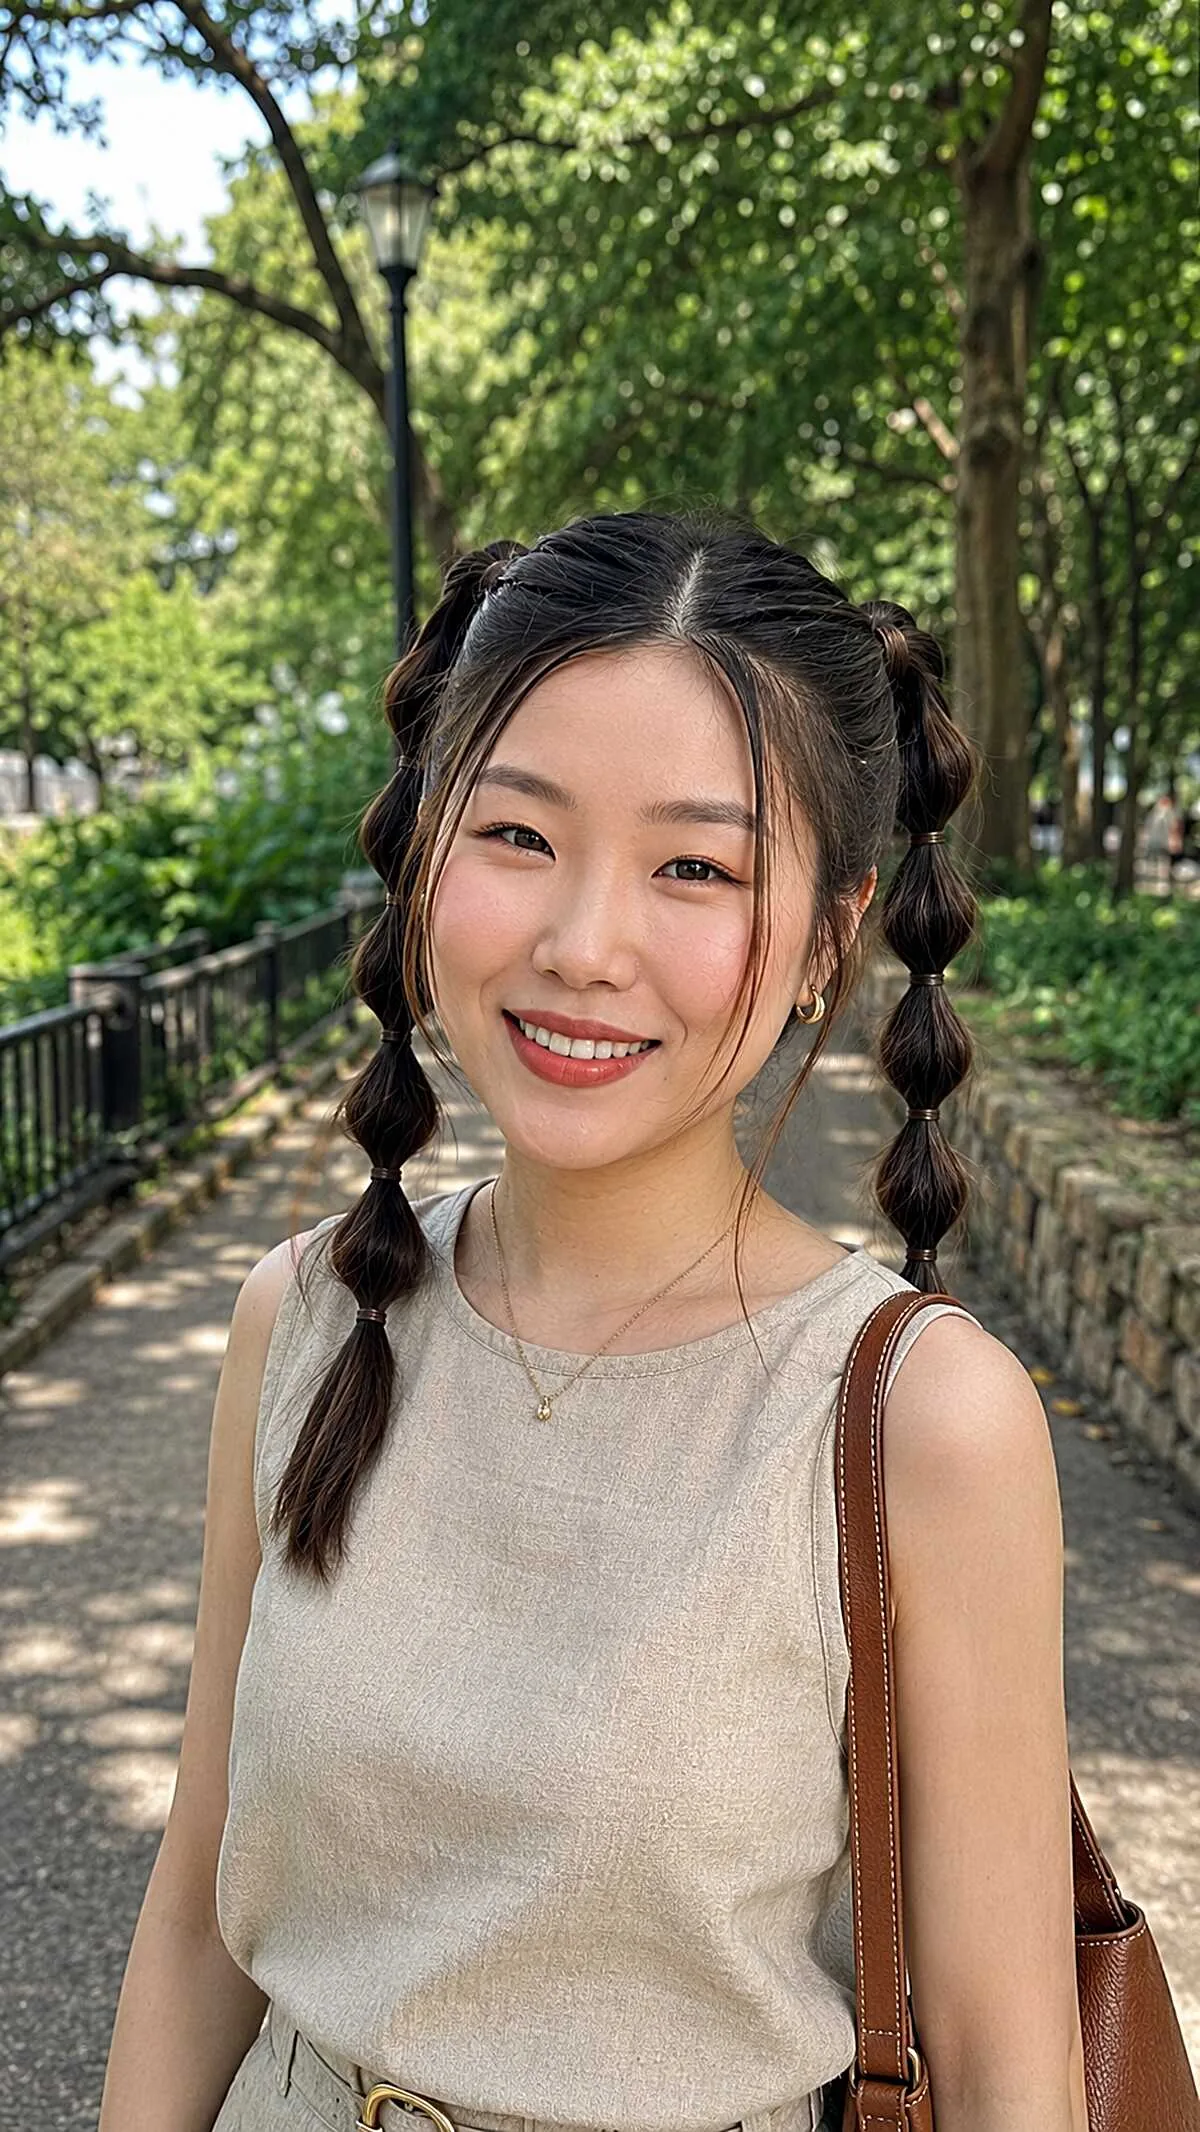
Braided pigtails are not just for children, and the grown-up version proves it. Worn low and loose, with soft pieces at the front and a little texture, they are playful without being childish — the style for a theme park day, a bike ride or a casual lunch where everyone is in a good mood.
Part your hair down the middle and braid each side low and loose, starting at the nape rather than the crown, and tie the ends with small elastics. Pull the braids gently wider so they look soft, and leave a few pieces out at the front. This suits medium and long hair, and it is one of the best styles for keeping thick hair comfortable on a hot, active day.
Pros: comfortable, secure, and keeps hair out of the way all day. Cons: can read young if it is too tight or too high, so keep it low and loose. Travel tip: low braided pigtails are the best style for a day with a helmet, a hat or a lot of wind — nothing moves, nothing tangles, and you can take the hat on and off freely.
The Voluminous Blowout That Lasts Two Days
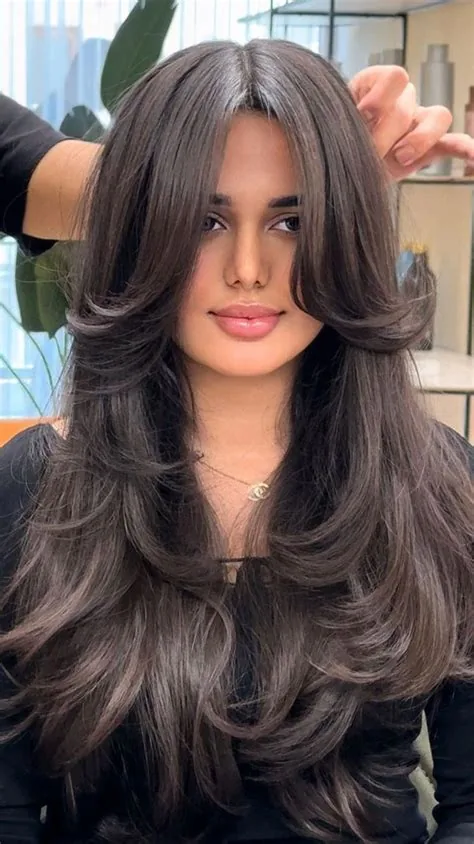
A voluminous blowout is the investment style of a girls trip: you spend twenty minutes on it once, and it pays you back for two days. Day one is big, bouncy and glossy; day two is softer, lived-in and just as good with a little dry shampoo at the roots.
Blow-dry in sections with a round brush, lifting at the roots and curling the ends under, then let each section cool before you move on. Sleep with your hair in a loose high bun or a silk scarf to protect the volume overnight. This suits medium and long hair with some layers, which give the blowout its bounce and movement.
Pros: two days of great hair from one styling session, and very photogenic. Cons: needs a dryer and twenty minutes, and humidity shortens its life. Travel tip: plan the blowout for the first full day of the trip, when you have the most energy and the best mirror — day-two hair then carries you through the second day for free.
The French Twist for a Fancy Dinner
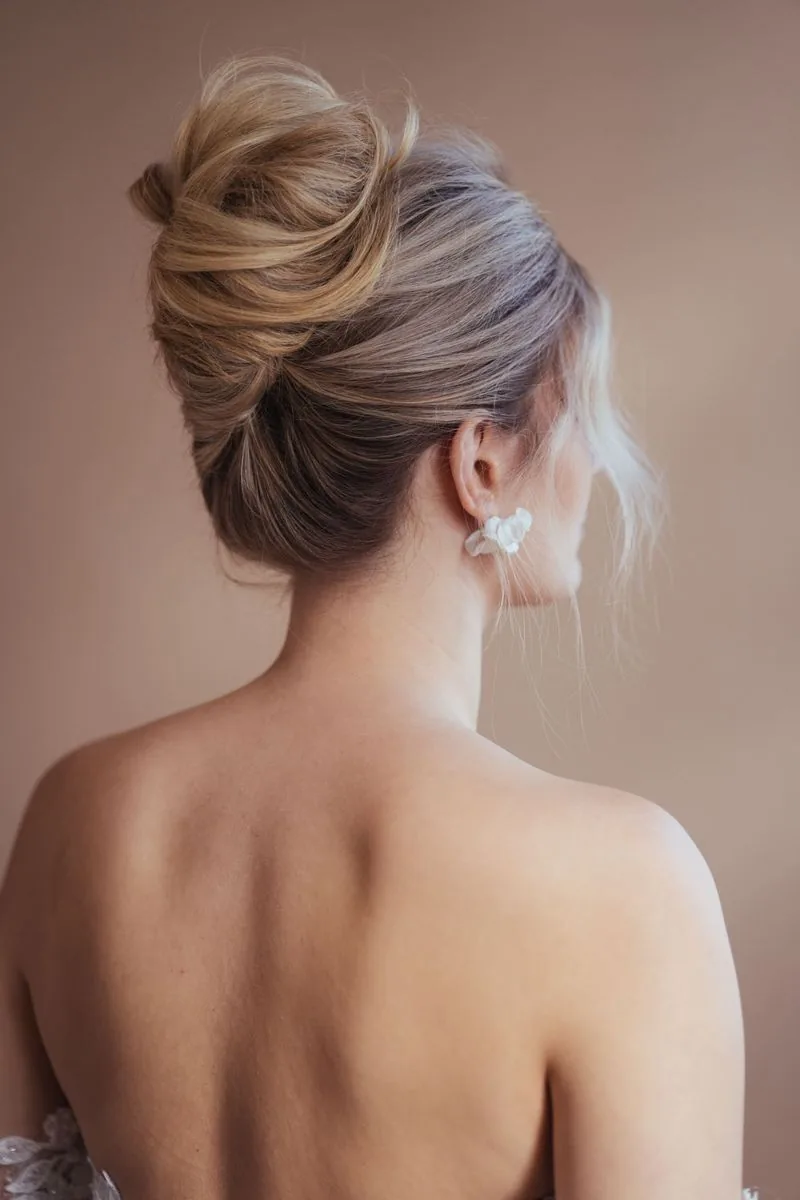
A French twist is the most elegant style on this list, and it earns its place on the fanciest night of the trip. It is sculpted, timeless and quietly dramatic, it shows off the neck and shoulders, and it pairs with a dress that deserves a real updo.
Gather your hair to one side, twist it up along the back of your head, and tuck the ends inside, pinning along the twist so it holds its shape. Smooth the surface with a little serum and leave one soft piece at the front. It suits medium and long hair, and it is best on hair that is not freshly washed, because day-old hair grips the pins far better.
Pros: timeless, elegant, and built to last all evening. Cons: needs pins, practice and a mirror, and it is not a style to rush. Travel tip: do the French twist after a day of wearing your hair in a braid — the texture gives the twist grip, and you will need far fewer pins than on slippery clean hair.
The Beach Braid With Shell Clips
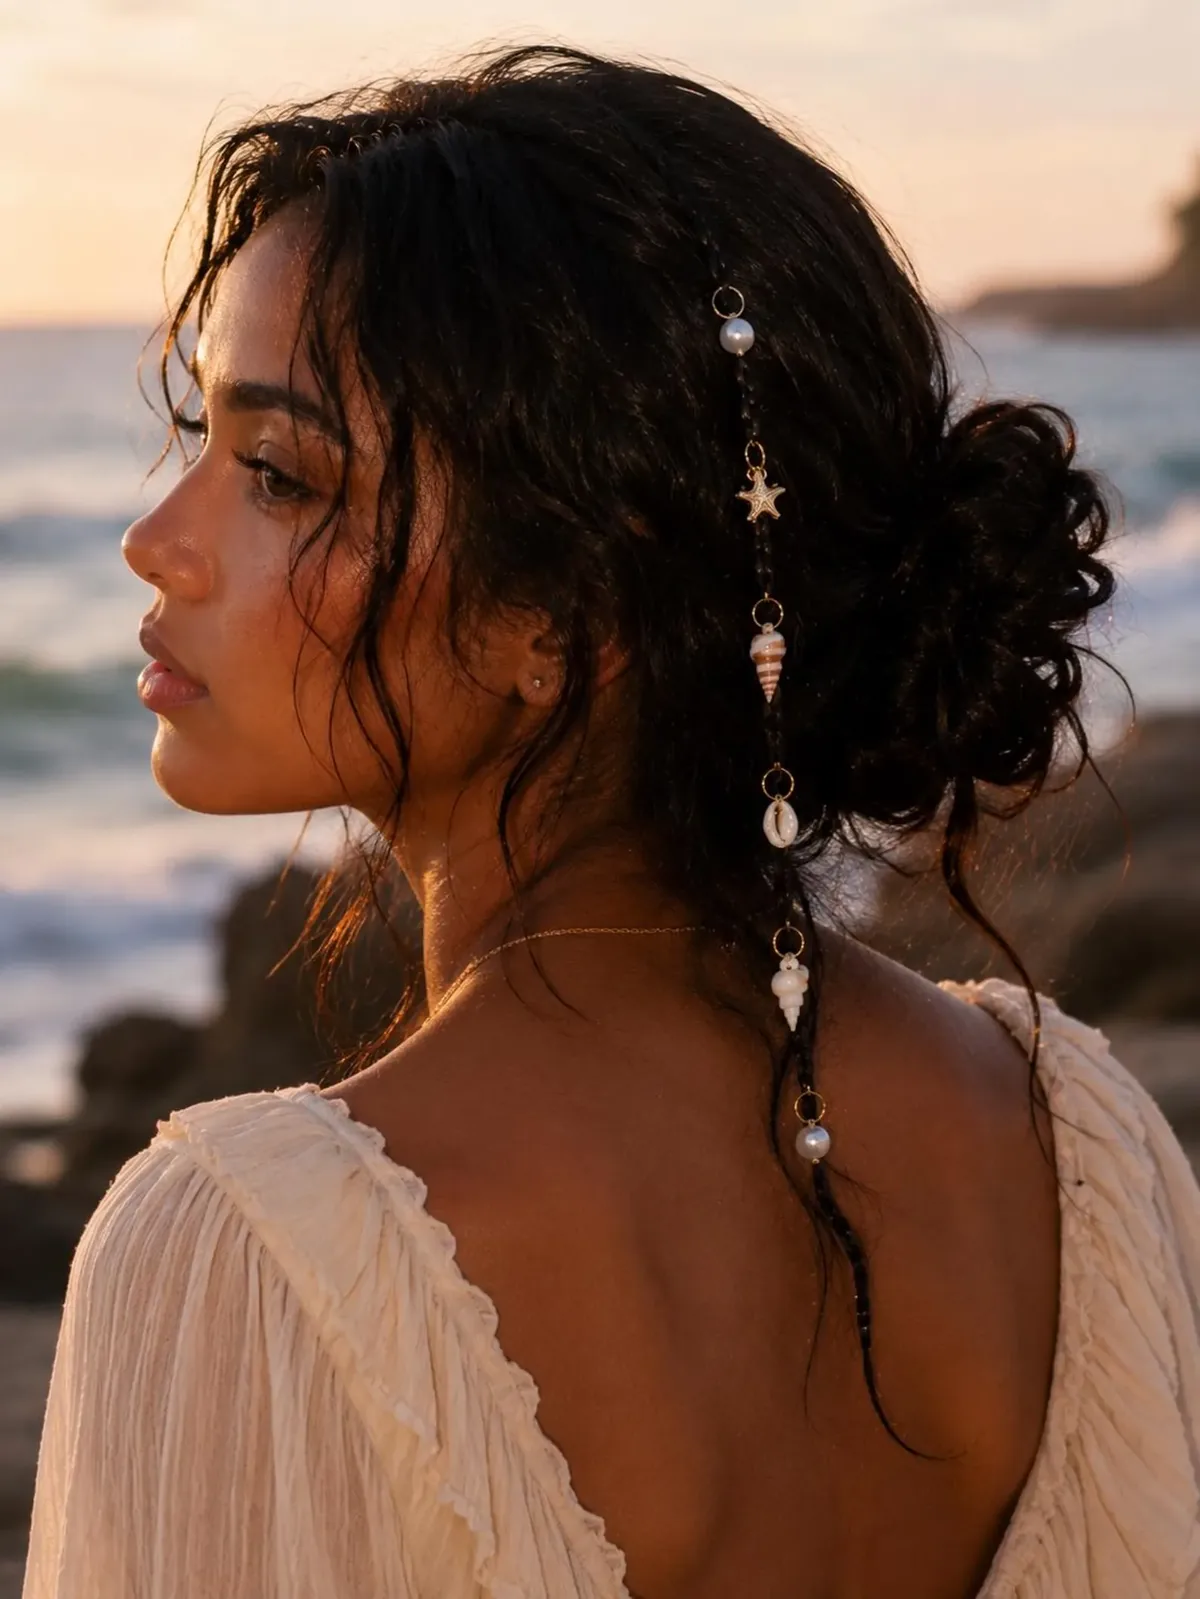
A beach braid with shell clips is the souvenir style of a girls trip — small, pretty and unmistakably holiday. The braid keeps your hair under control at the beach, and the clips add a touch of seaside charm that photographs beautifully against the sand and the sea.
Braid your hair loosely to one side or down the back, then add two or three small shell, starfish or pearl clips along the braid, spacing them evenly. Keep the braid soft so the clips sit naturally rather than looking stuck on. This suits medium and long hair, and it is lovely on wavy hair, where the braid and the clips both show to their best.
Pros: pretty, practical, and a ready-made holiday souvenir. Cons: clips can slide out in water, so save them for dry beach time. Travel tip: buy the clips at the destination rather than packing them — beach markets sell them for almost nothing, and wearing something you bought that morning is half the fun.
The Loose Low Pigtail Braid
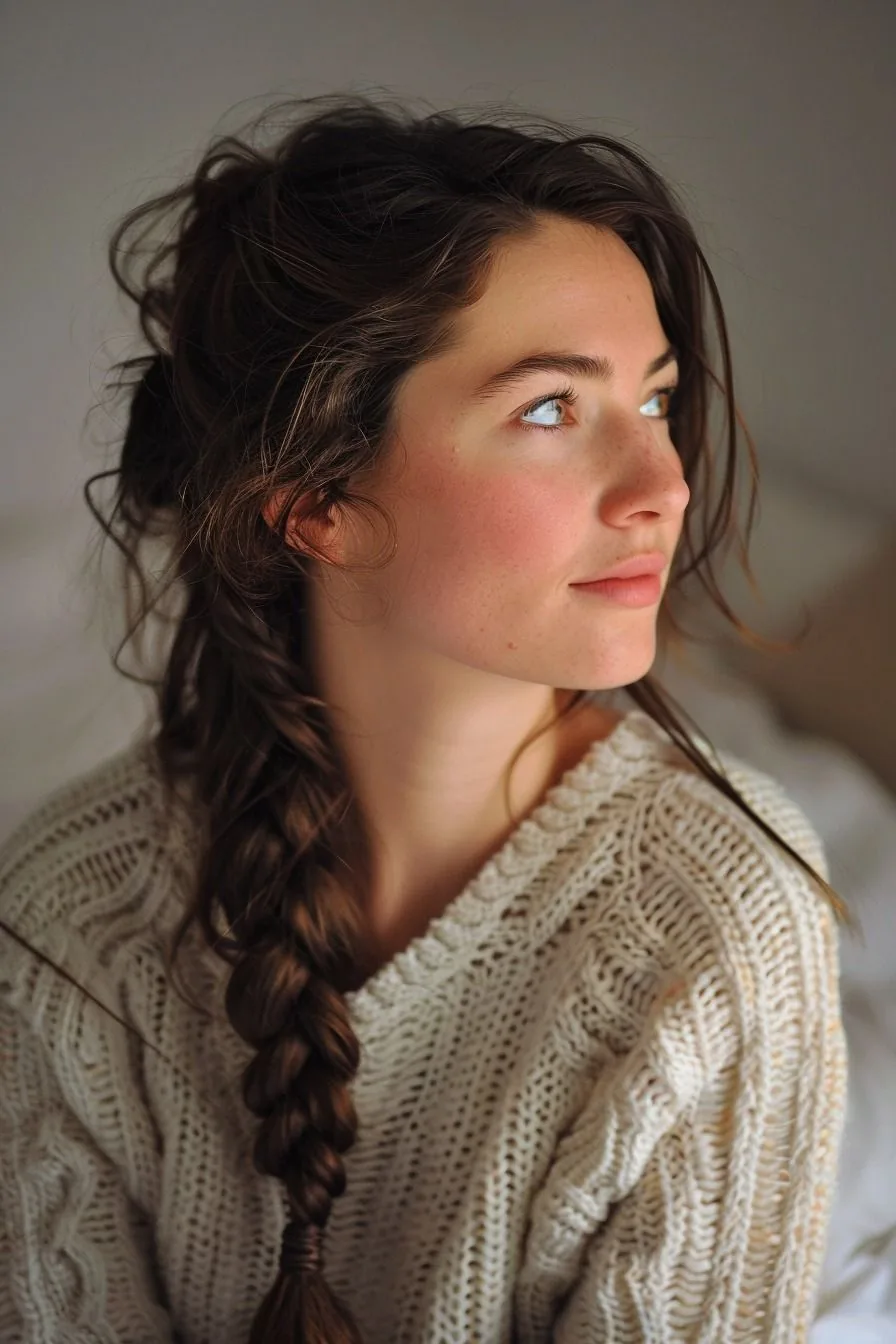
The loose low pigtail braid is the relaxed cousin of the side braid: worn low over one shoulder, soft and a little undone, it is the style for a slow day of walking, shopping and long lunches.
Gather your hair over one shoulder and braid it loosely, tying the end with a small elastic and gently pulling the braid wider so it looks full. Leave a few soft pieces around your face and let the braid sit forward where you can see it. It suits medium and long hair, and it is especially good for fine hair, because the loosened braid looks thicker than a tight one.
Pros: comfortable all day, easy to redo, and flattering on everyone. Cons: can loosen by evening, and very short layers will escape. Travel tip: this is the best style for a long travel day between destinations — it survives cars, trains and planes, and you can redo it in thirty seconds without a mirror.
The Pixie With Textured Pieces
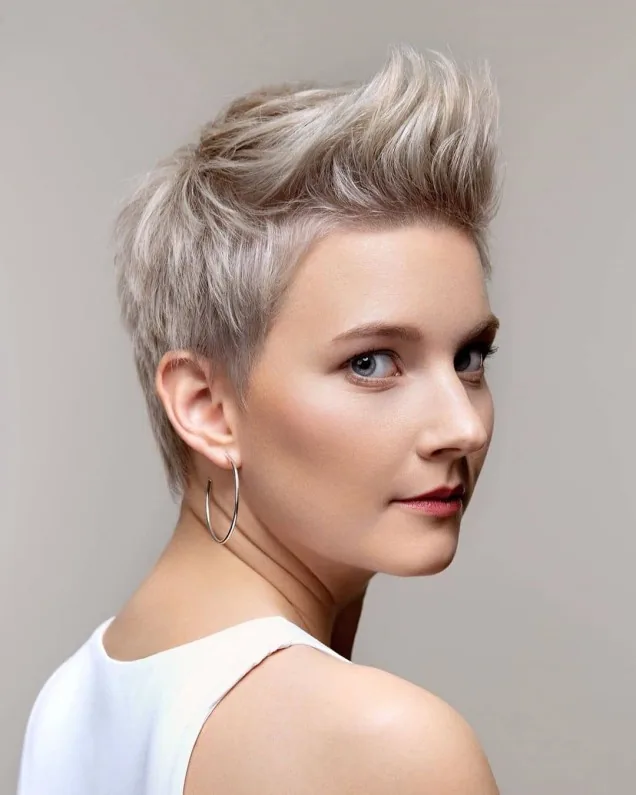
A pixie is the ultimate pack-light haircut, and on a girls trip it is pure freedom. No ties, no pins, no braids, no drying time — just wash, add a little texture product, and go.
Work a pea-sized amount of texturising paste or light wax through damp or dry hair, piece by piece, pushing the front up or to one side for shape. The texture is the style, so do not over-smooth it. This suits short hair of almost any texture, and it is especially good for fine hair, which looks thicker and more deliberate in a textured pixie than in a longer cut.
Pros: the fastest hair on this list, cool in heat, and dries instantly. Cons: needs a little product every day, and it cannot be tied back on a bad day. Travel tip: a pixie plus a silk scarf is the complete trip hair plan — the scarf is your bad-hair-day backup, your sun shield and your evening accessory, all in one.
Long Layers With a Middle Part
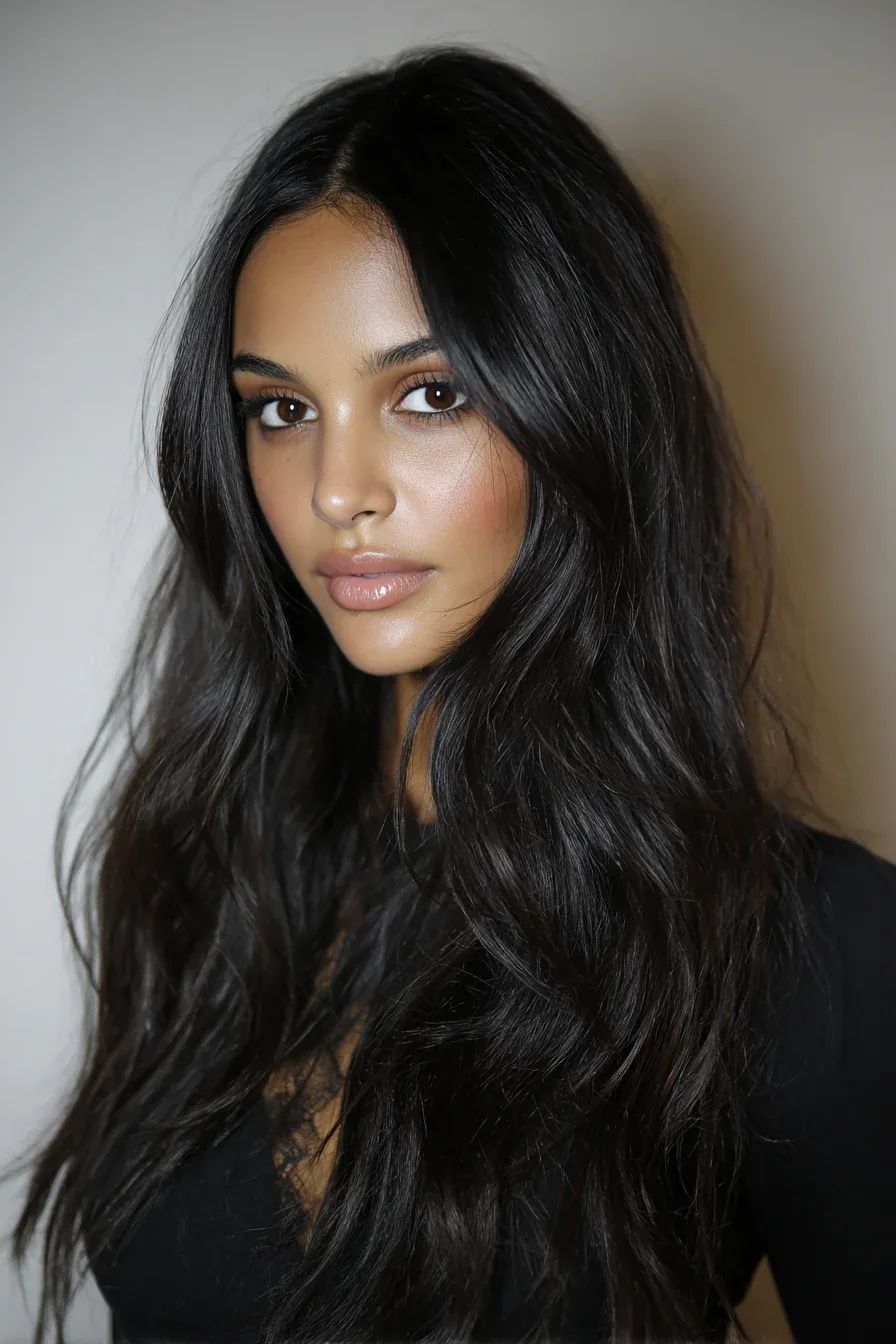
Long layers with a middle part are the effortless classic of trip hair: the layers give the hair movement, the middle part keeps it modern, and the whole style looks good with almost no styling at all.
Let your hair air-dry in a loose braid for soft waves, or blow-dry just the front layers for a little polish, and let the rest fall naturally. A drop of serum on the ends keeps the layers looking healthy. This suits long hair with layers, and it is one of the most forgiving styles on this list, because the layers hide frizz, uneven waves and day-two texture.
Pros: effortless, flattering, and needs almost no styling. Cons: long hair is heavy in heat, and the ends need serum to stay healthy. Travel tip: long layers are the best cut for a trip where you will swim every day — the layers dry faster than one-length hair and they hide salt-water texture beautifully.
Boho Braided Bangs
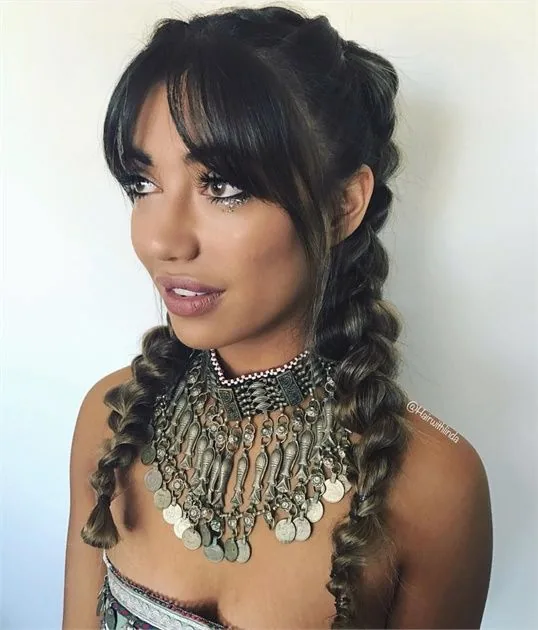
Boho braided bangs are the festival detail that turns an ordinary hairstyle into a look. Two small braids at the front, woven into the rest of your hair or left to hang, add texture and personality without committing to a full braid.
Take a small section at each temple, braid it loosely, and either pin it back into the rest of your hair or let it hang with the ends tied. Keep the braids small and soft so they read as a detail rather than the whole style. This suits medium and long hair, and it works on straight, wavy and curly hair alike, because the braids are small enough to suit any texture.
Pros: quick, pretty, and adds personality to any style. Cons: the small braids can unravel, and they need tiny elastics. Travel tip: pack a strip of tiny clear elastics — they are the smallest, lightest item in your kit and they unlock braided bangs, bubble braids and a dozen other details.
The Sleek High Bun for Rooftop Photos
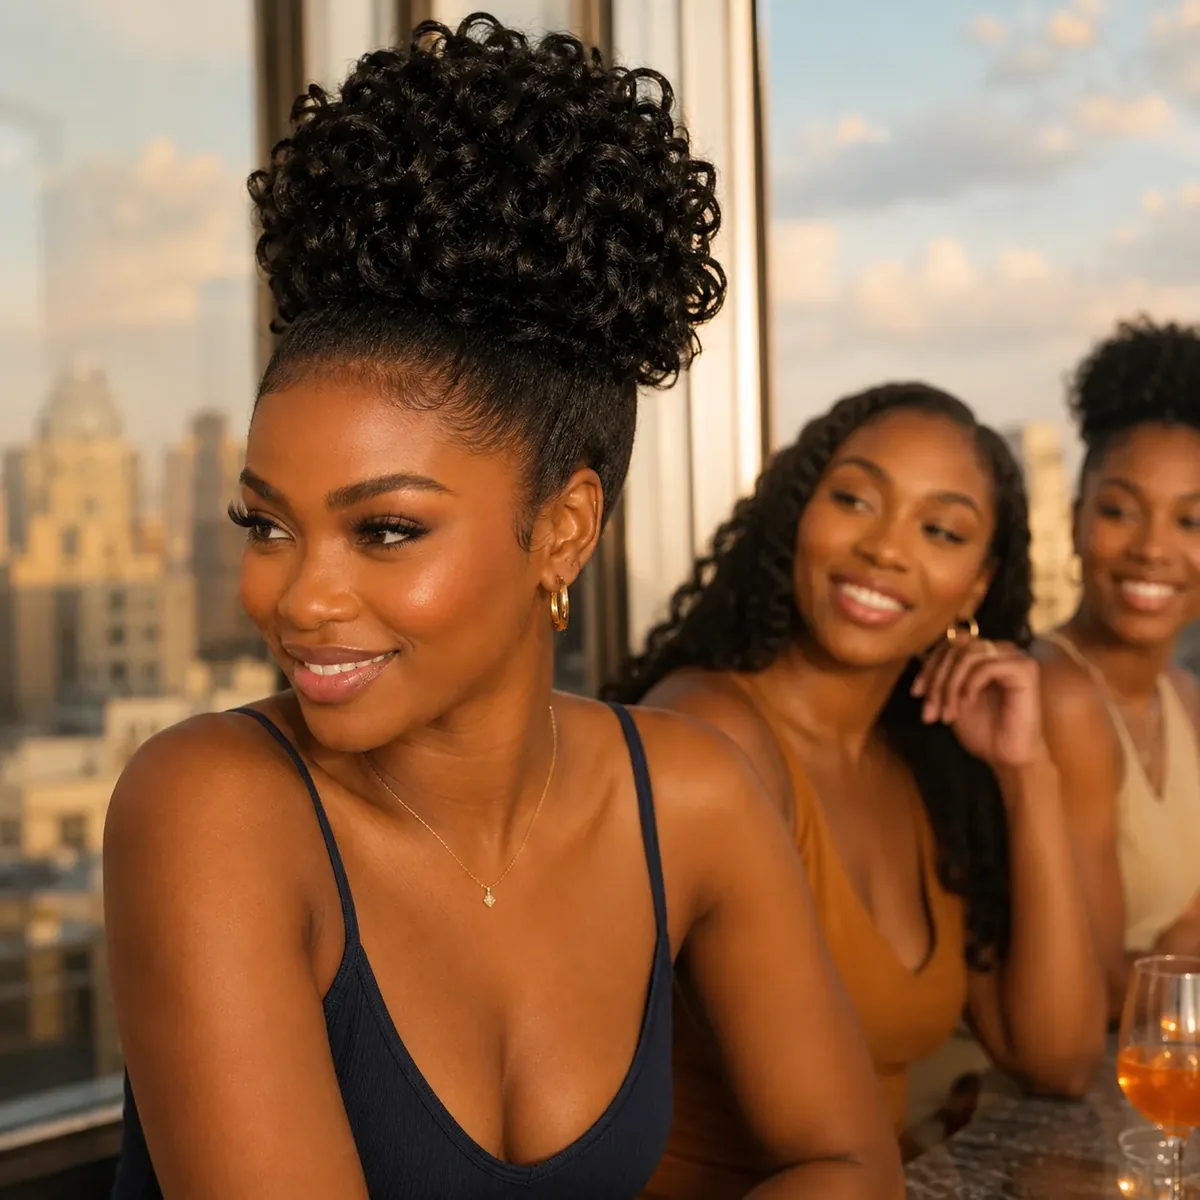
A sleek high bun is the rooftop style: sharp, statuesque and made for golden-hour photos against a skyline. It lifts the face, lengthens the neck, and keeps your hair completely out of the way while you are up high in the wind.
Brush your hair up high and smooth, secure it firmly, twist it into a neat bun and pin it, smoothing the surface with serum so it looks polished from every angle. A middle part or a fully swept-back finish both work. This suits medium and long hair, and it is especially flattering with statement earrings, which the high bun shows off perfectly.
Pros: elegant, wind-proof, and made for photos. Cons: can pull and ache by late night, and it shows the hairline. Travel tip: build the high bun on hair that was in a ponytail all day — the ponytail crease hides inside the bun, and the hair already has the grip to hold the shape.
The Wavy Bob With a Side Part
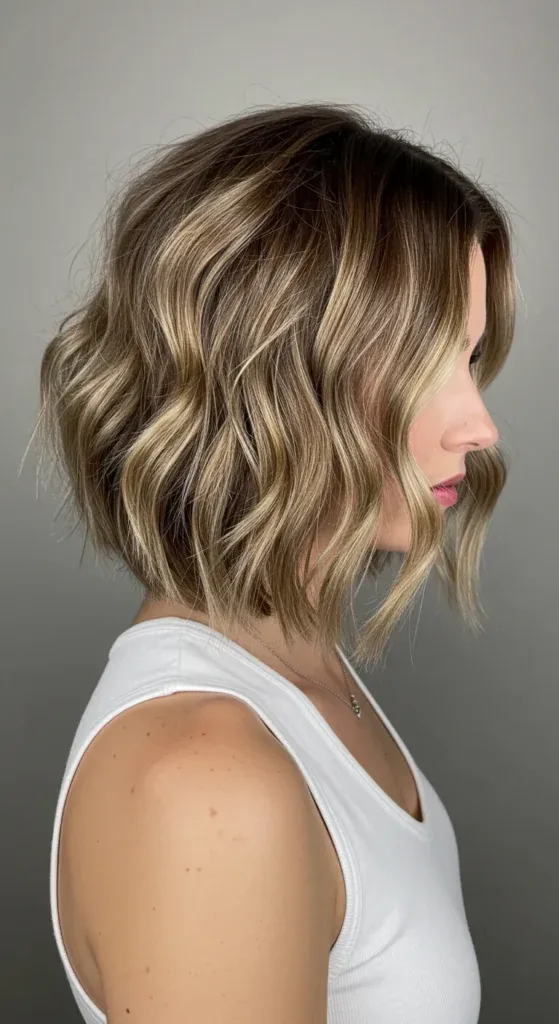
A wavy bob with a side part is the short-hair style that does the most with the least. The waves give it movement, the side part gives it shape, and the length keeps it cool and easy on a hot trip day.
Scrunch a little salt spray or mousse through damp hair and let it air-dry, or curl a few sections with a mini iron for a more polished wave. A deep side part adds volume at the crown and keeps the style from looking flat. This suits short to medium hair, and it is wonderful on naturally wavy hair, which needs almost no help to look like this.
Pros: dries fast, looks polished with little effort, and suits almost everyone. Cons: can go frizzy in humidity, and the waves need a little product to hold. Travel tip: a wavy bob is the best short style for a beach trip — salt water and sun are its natural styling products, and it only gets better as the day goes on.
Twist-Out Curls for the Dance Floor
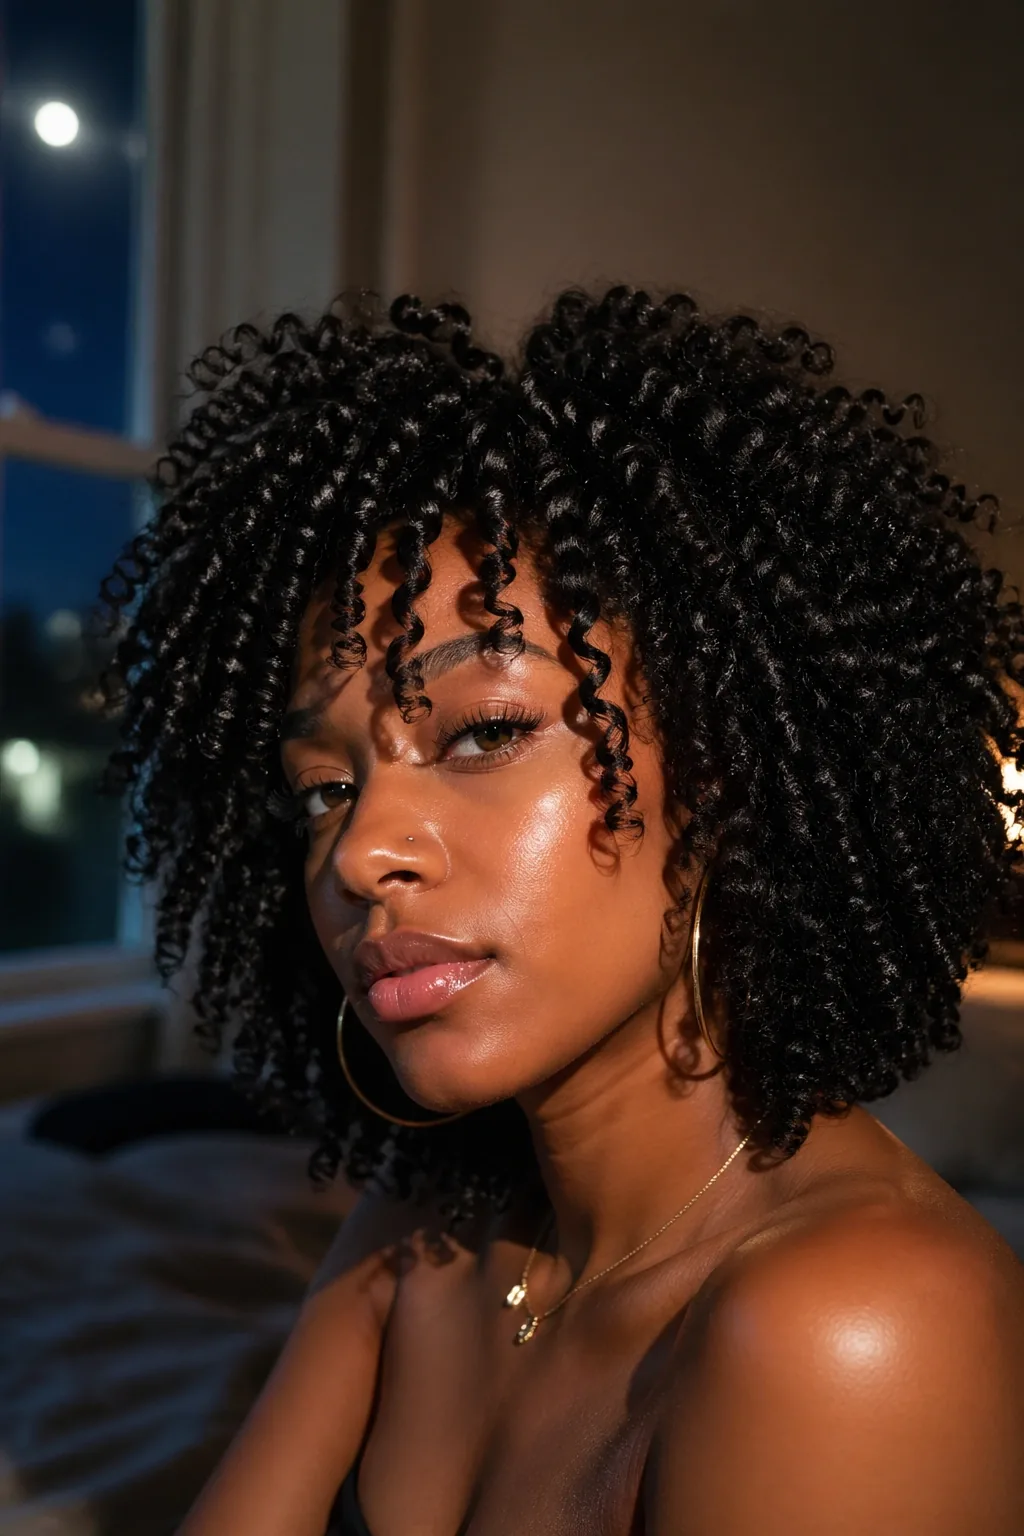
Twist-out curls are the dance-floor style for curly hair: defined, bouncy and full of movement, they hold their shape while you dance and they look better in motion than standing still.
The night before, twist damp hair into sections with a little curl cream, and sleep in the twists. In the morning, undo them gently, separate the curls with oiled fingers, and shake them out for volume. Do not brush them. This suits curly and coily hair of medium length, and the definition lasts all evening, even in heat and humidity.
Pros: defined, voluminous, and made to move. Cons: needs overnight preparation, and the curls can frizz if they are touched too much. Travel tip: do the twists on the night before the big night out, not the morning of it — the overnight set is what gives the curls their definition, and the morning is for sleeping in.
The Side Braid Into Loose Waves
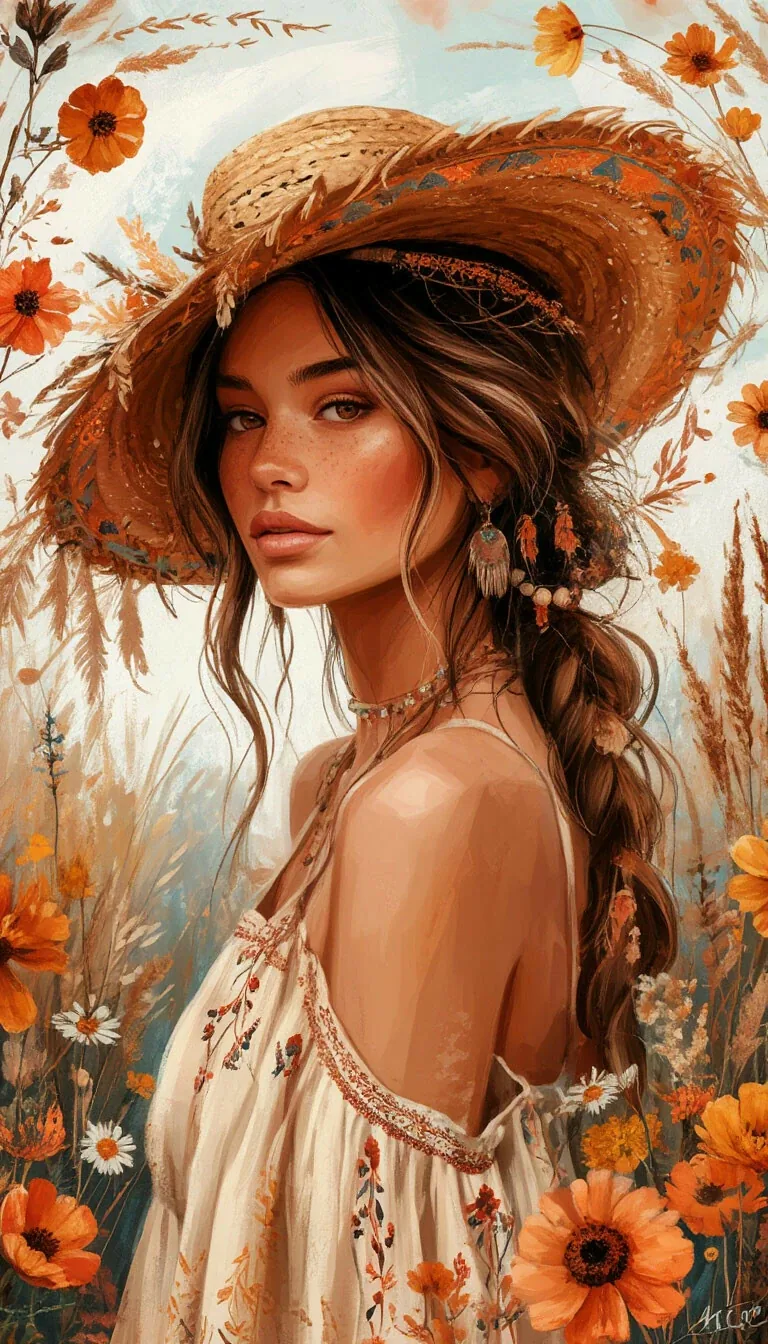
A side braid into loose waves is the best of both worlds: the braid gives you structure and keeps the front tidy, and the waves give you softness and movement for the rest of the hair.
Braid a section from one temple down towards the back, then let it blend into loose waves, either natural or created with a loose braid earlier in the day. Secure the braid end inside the waves with a pin so it disappears. This suits medium and long hair, and it is lovely on highlighted hair, where the braid shows off the colour against the waves.
Pros: romantic, versatile, and holds the front back all day. Cons: the braid can loosen by evening, and it needs a mirror to start neatly. Travel tip: this is the ideal style for a day that starts at the beach and ends at dinner — loosen the braid at dinner, shake out the waves, and you have an evening style without restyling.
The Knotted Low Ponytail
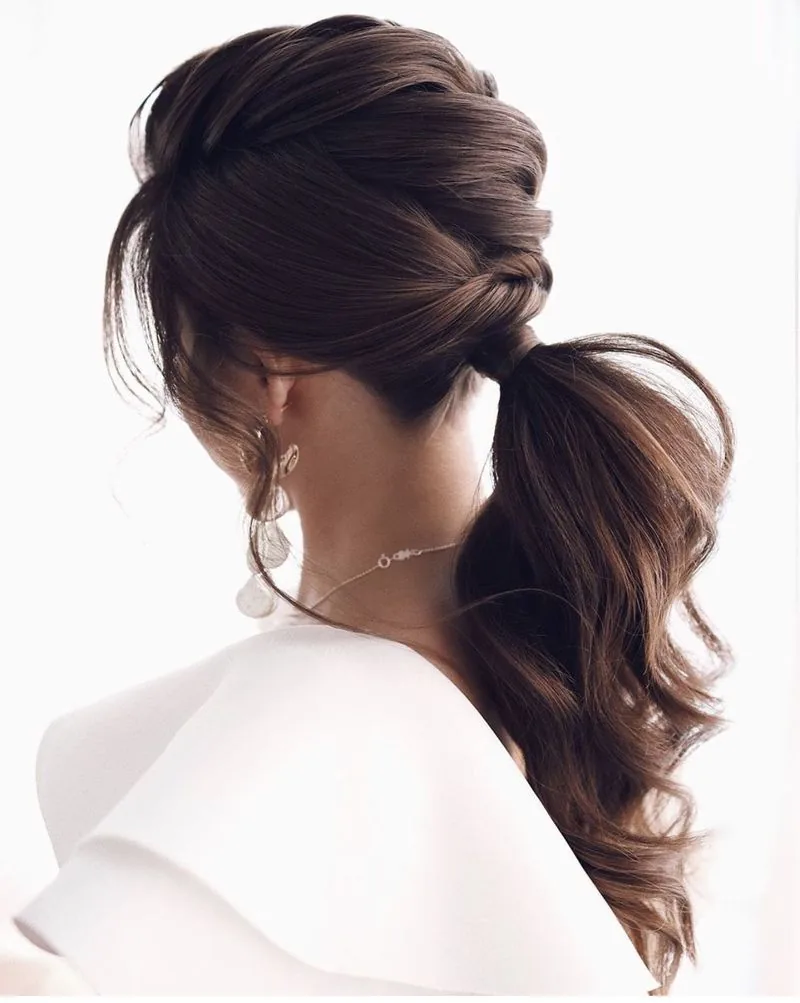
A knotted low ponytail is the clever twist on a classic: instead of an elastic, the hair is knotted around itself, which looks sculptural and deliberate while being surprisingly easy.
Gather your hair low, split the ponytail into two sections, tie them in a simple knot, and secure the knot with a small elastic hidden underneath, letting the ends fall loose. Smooth the top with serum for a polished finish. This suits medium and long hair, and it is especially good on thick hair, where the knot holds its shape beautifully.
Pros: unusual, elegant, and surprisingly secure. Cons: needs length to make the knot, and it can slip on very fine hair. Travel tip: practise the knot once at home — it takes one try to learn and then you can do it in a taxi mirror in under a minute.
The Halo Braid for Sunset Photos
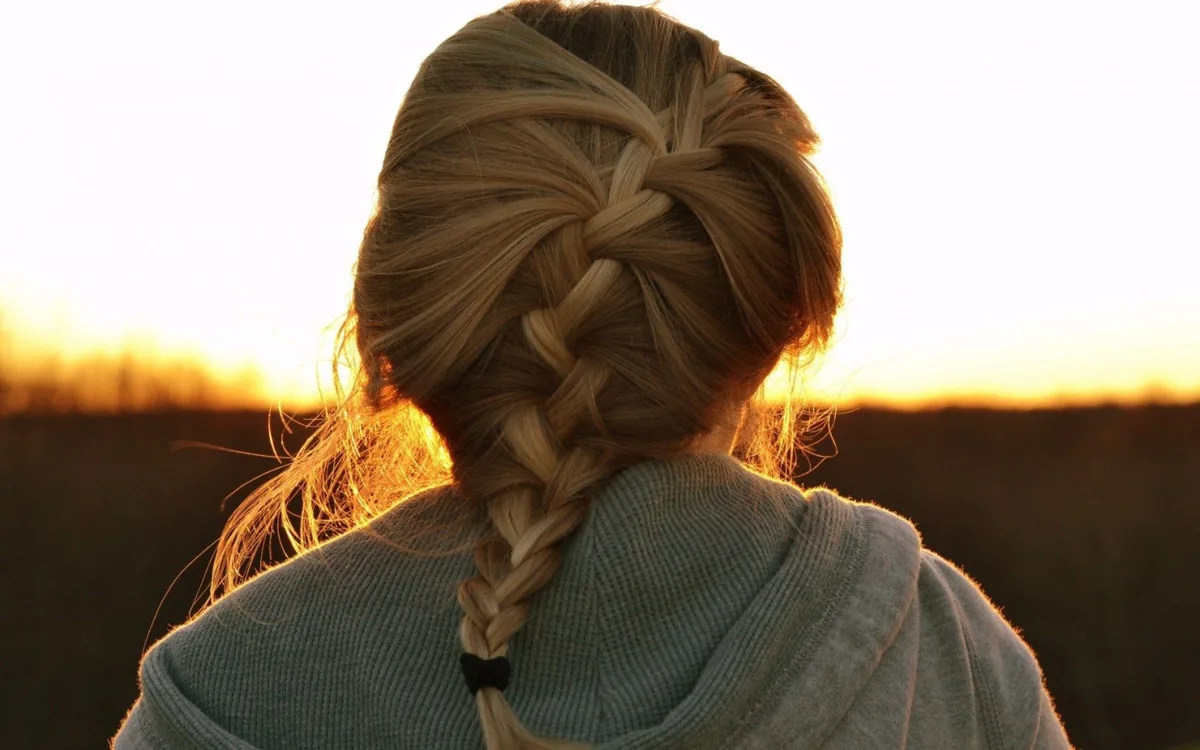
A halo braid is the sunset-photo style. It circles the head like a crown, it looks beautiful from every angle, and in golden light it turns an ordinary evening into a photograph you will keep.
Braid your hair around the head in a circle, starting at one ear and working around, pinning as you go, then tuck the end underneath and pin it flat. Loosen the braid gently for softness and pull out a few pieces at the front. It suits medium and long hair, and it is especially beautiful on wavy hair, where the texture fills out the halo.
Pros: stunning in photos, secure, and romantic. Cons: needs time, pins and a mirror, and it is hard to do on very short hair. Travel tip: save the halo braid for the last evening — by then you have practised braiding all week, your friends can help with the back, and the sunset will do the rest.
Wet-Look Waves Straight From the Pool
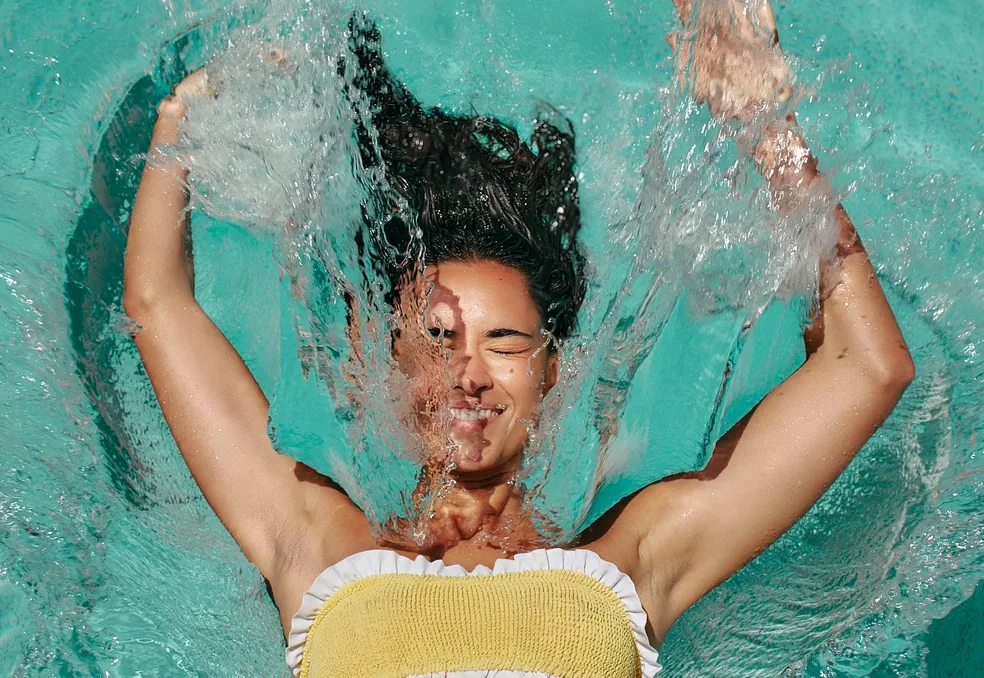
Wet-look waves are the pool-day style that turns a swim into a look. Instead of fighting wet hair, you style it wet: smooth, glossy and swept back, with the waves falling naturally as it dries.
After swimming, rinse with fresh water, smooth a little leave-in conditioner or a light gel through the lengths, and comb the hair back with your fingers, letting the waves fall where they want to. Do not brush it dry — the wet look is the point. This suits medium and long hair, straight or wavy, and it is the kindest style for hair that has been in chlorine or salt all day.
Pros: no drying time, looks glamorous wet, and protects hair from the sun. Cons: only works while the hair is damp, and it needs product to keep the shine. Travel tip: keep a small bottle of leave-in conditioner in your pool bag — it is the difference between wet hair that looks styled and wet hair that just looks wet.
What are the best hairstyles for a girls trip with no heat tools?
The best hairstyles for a girls trip with no heat tools are braids, buns and air-dried waves — two French braids, a loose fishtail braid, a low messy bun, a half-up claw clip twist and beachy waves dried in a braid. All of them need only hair ties, pins and a clip, and they look better slightly undone, which is exactly how trip hair behaves.
How do I keep my hair looking good in humidity on a girls trip?
Keep your hair looking good in humidity by moisturising first with a leave-in conditioner, using a drop of anti-humidity serum on damp hair, and choosing anchored styles such as braids, buns and twists rather than sleek blowouts. Avoid brushing dry hair, which creates frizz, and carry a small serum for touch-ups at the hairline.
Which hairstyles survive a long flight?
The hairstyles that survive a long flight are a low loose braid, a low messy bun and a soft low ponytail, because they sit below the headrest, do not press against the seat and survive a nap. Avoid high buns and tight ponytails, which crease the hair and pull at the roots over several hours.
Can I go from the beach to dinner without washing my hair?
Yes, you can go from the beach to dinner without washing your hair. Rinse with fresh water, let it dry in a loose braid or low bun, then shake it out, add dry shampoo at the roots and a drop of serum on the lengths. Change one thing — a side part, a scarf or a clip — and the same hair reads as evening hair.
What should I pack for hair on a girls trip?
Pack five snag-free hair ties, ten bobby pins, two claw clips, a folding brush, travel-size dry shampoo, a small leave-in conditioner and one multi-use serum or salt spray. Share bulky items between friends — one mini straightener, one diffuser, one hairspray — so nobody carries duplicates.
How do I make my hairstyle last all day on a girls trip?
Make your hairstyle last all day by starting on day-two hair, which grips pins and braids far better than clean hair, and by choosing anchored styles with several fixing points, such as braids, buns and twists. Finish with a light flexible spray, and carry two pins and a tie in your day bag for a two-minute fix.
What is the best hairstyle for group photos on a girls trip?
The best hairstyle for group photos is one with shape from the side and the back as well as the front, such as a braided crown, a halo braid, a side braid or a textured ponytail. Before the photo, smooth flyaways with serum, pull out one soft piece at each temple, and take the photo in late-afternoon light if you can.
How do I style curly hair on a girls trip?
Style curly hair on a girls trip with a wash-and-go using your own leave-in conditioner and curl cream, letting it air-dry completely without brushing. For evenings, try a pineapple puff, a twist-out prepared the night before, or a braided style that protects the curls from wind, sun and humidity.
What hairstyles work for short hair on a girls trip?
Short hair works beautifully on a girls trip with a textured pixie, a wavy bob with a side part, or a textured lob, all of which air-dry into a style with a little salt spray or mousse. Add a scarf, a headband or a clip for variety, and use the hotel dryer only on the front pieces for a quick evening polish.
How many hairstyles should I plan for a girls trip?
Plan three or four favourite hairstyles for a girls trip and practise each one once at home before you leave. A small set you can do half-asleep beats a long list you have never tried, because trip mornings are short, mirrors are shared, and the styles you already know are the ones that survive flights, beaches and late nights.
Conclusion
The best hairstyles for a girls trip are not the most complicated ones. They are the ones that fit in a small pouch, survive a flight, a swim and a late night, and still look good in the photo your friend takes without warning. Whether you choose beachy waves, two French braids, a low messy bun, a slicked-back bun for the humidity or a halo braid for the last sunset, the goal is the same: hair that lets you enjoy the trip instead of managing it.
Pack light, practise your three favourites before you leave, and agree with your friends who brings what. Then forget about your hair completely — the group chat did the planning, the suitcase is shut, and the trip is waiting. Your hair is ready, and so are you.