Long Hair, Every Day: 44 Easy Hairstyles for Long Hair That Actually Work on Real Mornings
Long hair is a commitment that shows up every single morning. It takes longer to wash, longer to dry, longer to detangle, and it has opinions about wind, humidity and pillowcases that shorter hair never develops. Yet most everyday advice for long hair still assumes you have forty minutes and a salon to hand, which is why so many long-haired mornings end in the same rushed ponytail.
This guide takes a different approach. It collects 44 everyday hairstyles for long hair — loose styles, cuts, braids, buns and ponytails that genuinely work on ordinary days — and judges each one honestly: how long it takes, who it suits, what it costs in maintenance, and what usually goes wrong. Eight short guides cover the foundations underneath all of them: how long hair behaves, washing and drying, detangling without breakage, safe heat styling, second-day rescue, trims and the mistakes that quietly cost you length. No wedding or prom styles here — these are the styles for work, errands, weekends and everything in between.
How Long Hair Actually Behaves (and Why That Changes the Style)
Long hair is heavier, slower to dry and far more likely to tangle than shorter hair, and every style in this guide is judged against that reality rather than against a salon photo. Weight pulls curls straighter, loosens buns faster and makes a ponytail ache by lunchtime if it is tied too tightly in one spot. Knowing that up front saves you from blaming your hair when a style that looked easy online falls apart by 10 a.m.
Length also changes what a style needs to survive the day. Loose styles need grip at the roots, updos need more than one anchor point, and braids need a finish that will not slide off smooth ends. Keep those three facts in mind and you can adapt almost any style here to your own thickness, texture and morning time budget.
Your Everyday Long Hair Toolkit: Less Than You Think
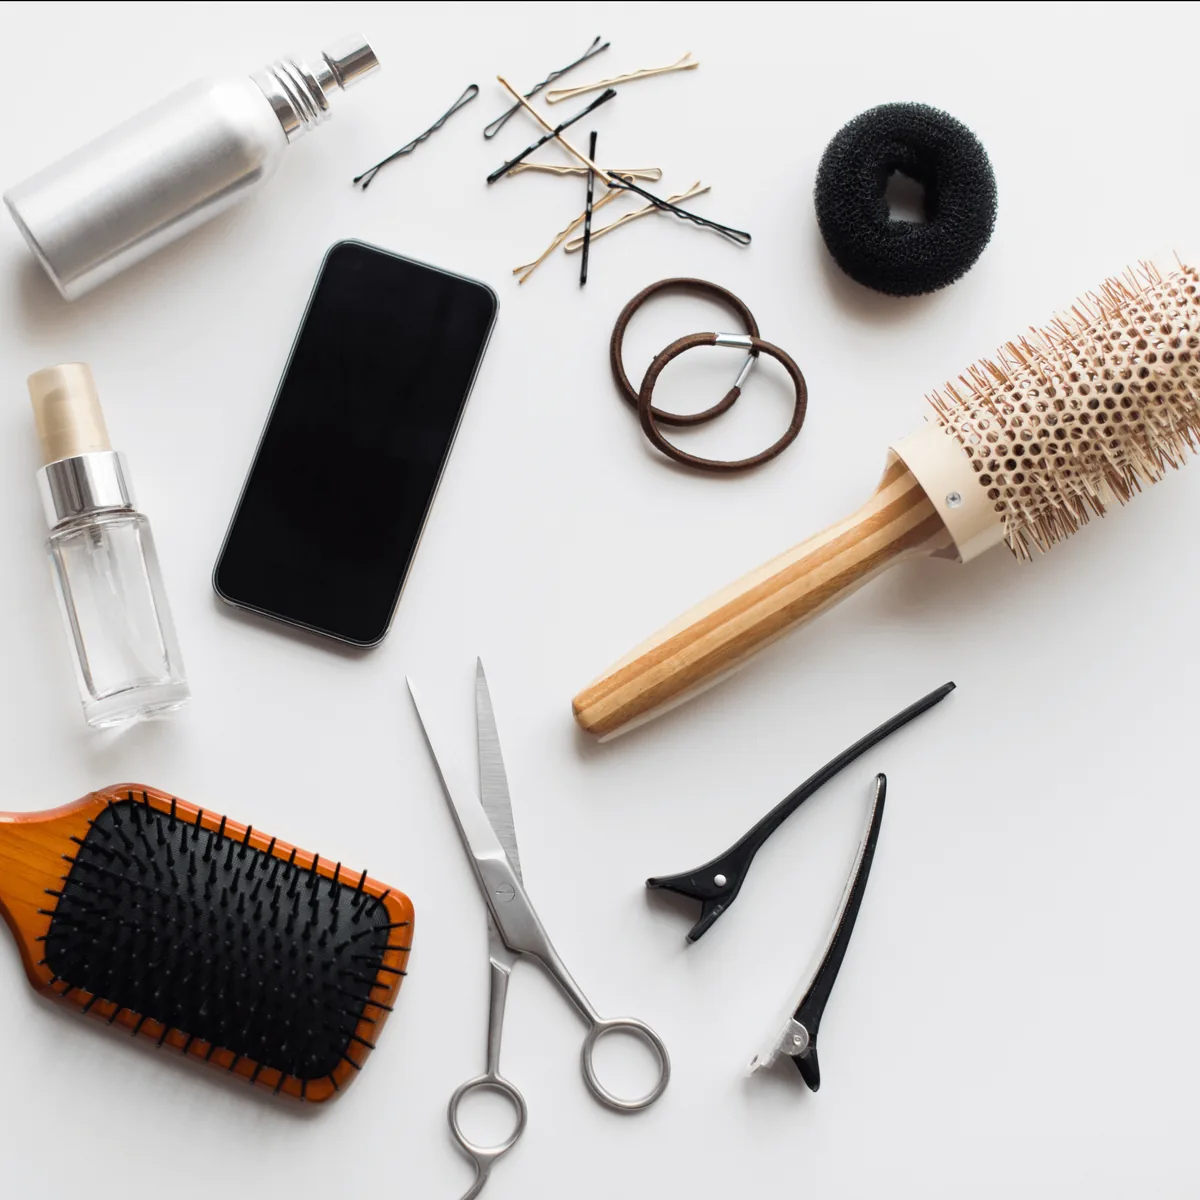
You do not need a drawer full of gadgets. The kit that covers all 44 styles is a wide-tooth comb, a paddle brush, snag-free ties, two claw clips in different sizes, a pack of bobby pins that match your hair colour, a small bottle of leave-in conditioner and one silk scrunchie for sleeping. Add a heat protectant only if you actually use heat most weeks, and a dry shampoo only if second-day hair is part of your routine.
Keep the kit where you style your hair, not scattered across bags and bathrooms. The difference between a five-minute style and a fifteen-minute one is almost never skill — it is hunting for a missing pin, a tie that has lost its stretch, or a brush left in another room. Replace stretched ties monthly; they are the cheapest fix in haircare.
Sleek and Straight, Worn Down Without the Salon Finish
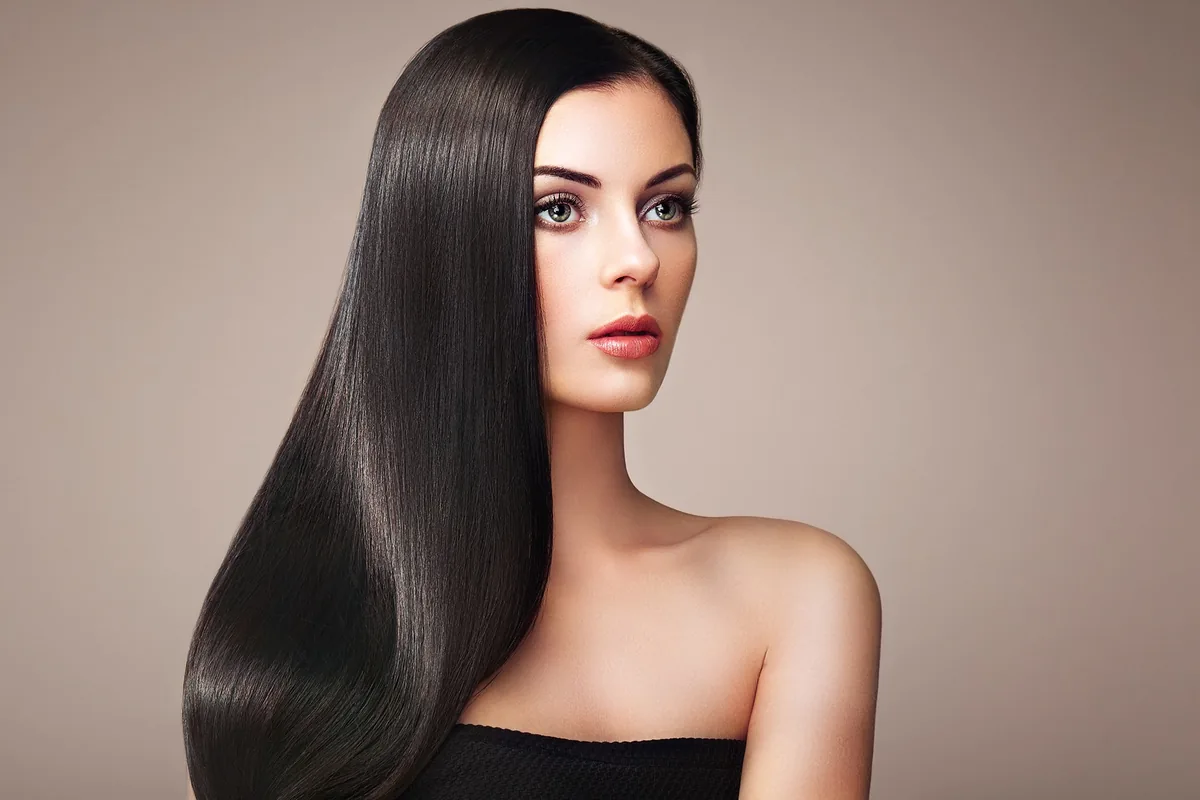
Straight long hair worn down is the simplest everyday style there is, and it only looks effortless when the ends are healthy and the roots are not flat. Blow-dry in sections with a paddle brush, or straighten in slow passes over heat protectant, and finish with a tiny amount of oil smoothed over just the ends, never the roots.
Best for: straight or slightly wavy hair, and for days when you want to look polished with no accessories at all. Time: 15 to 25 minutes with heat, or zero if your hair dries straight on its own. Ask your stylist for blunt or lightly layered ends so the length reads as one clean line rather than straggling away.
Soft Waves That Look Like You Did Nothing (You Did a Little)
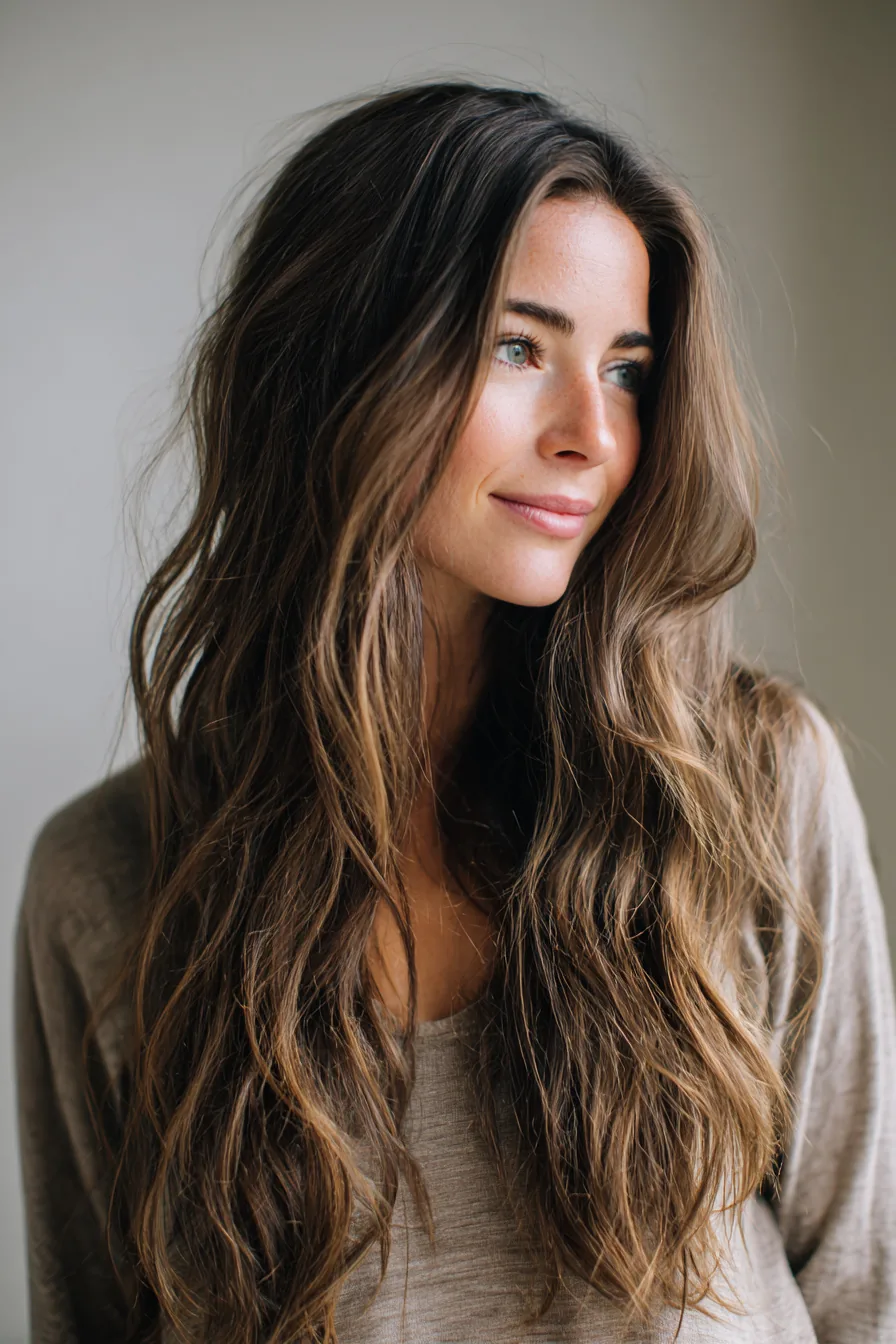
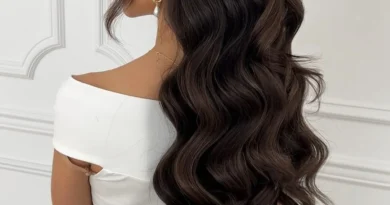
Soft waves are long hair’s most forgiving everyday look: they hide uneven layers, survive a commute, and look better slightly undone than freshly curled. Curl large sections away from the face with a wide-barrel iron or a large round brush, let each section cool completely, then break the curls up with your fingers instead of a brush.
Pros: works on almost every texture, photographs well, and lasts into a second day as loose texture. Cons: fine hair may need texture spray at the roots, and very heavy hair can pull waves out by evening. A light flexible-hold spray, not a stiff one, keeps the movement without the crunch.
Loose Curls, Left Long and Unfussy
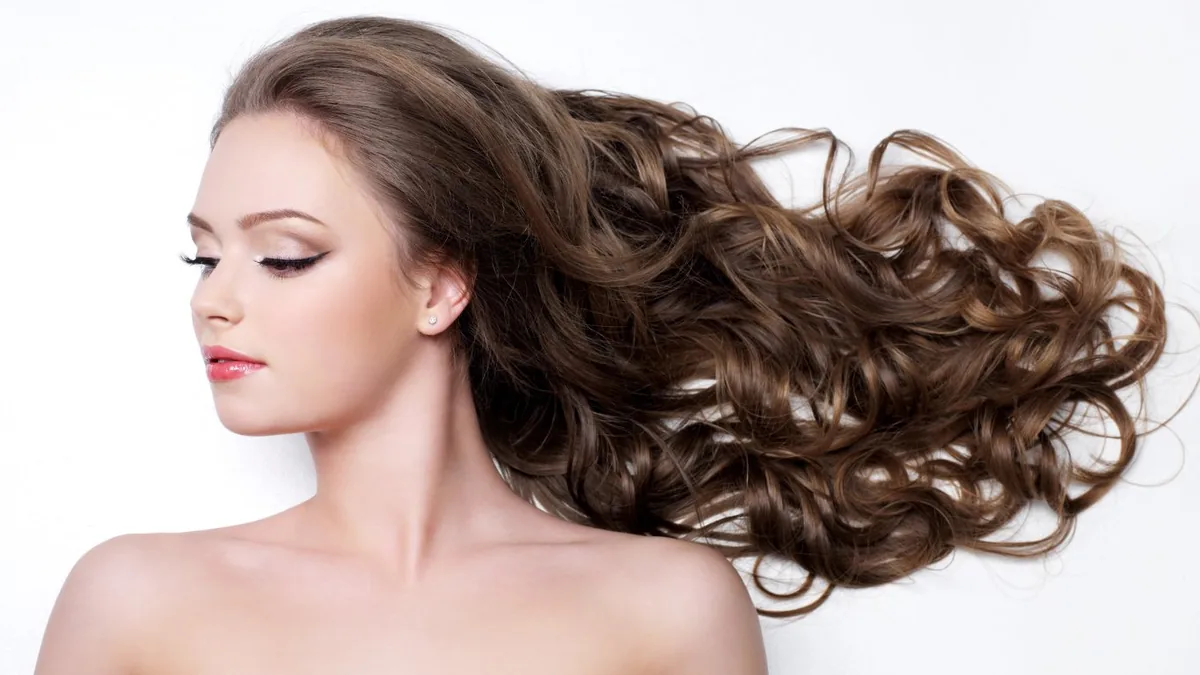
Loose curls on long hair should look like hair, not like a set of identical ringlets. Use a large barrel, curl in alternating directions, and leave the last inch of each section uncurled so the ends stay soft. Scrunch in a little curl cream while the hair is still warm and then leave it alone — touching curls while they cool is what turns definition into frizz.
Common mistake: curling every section the same way, which makes long hair look like a single sheet of uniform waves. Alternate directions, vary the section sizes, and the result reads as natural volume rather than a styling session. Who should skip it: anyone in a rush — this one genuinely needs twenty minutes.
Long Curtain Layers That Move When You Do
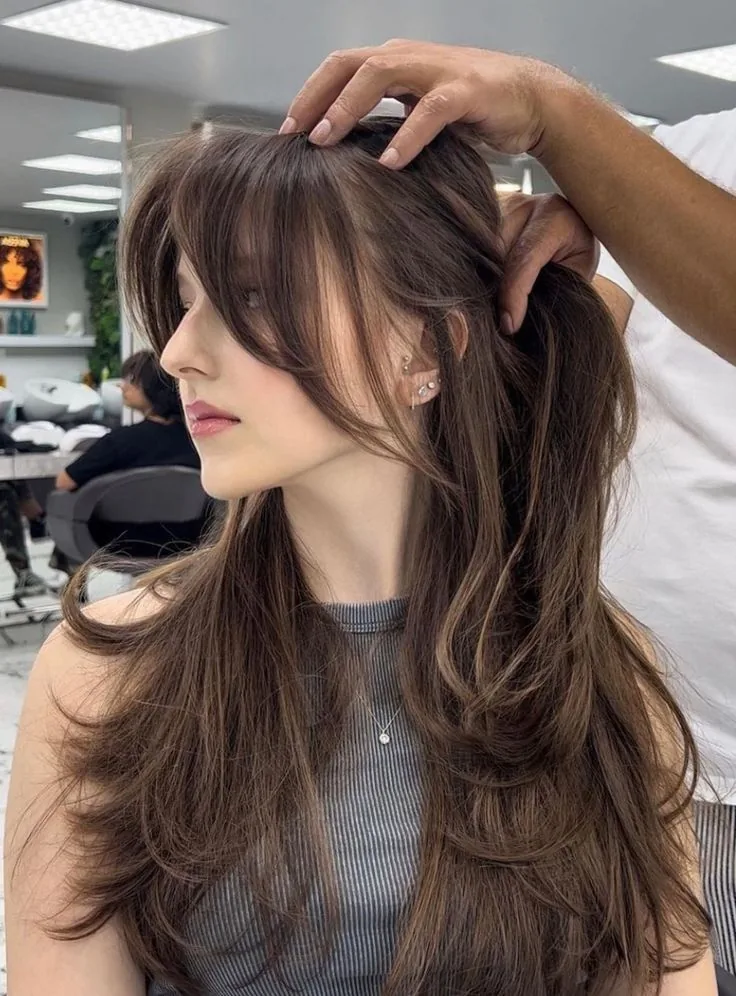
Curtain layers are long layers that open away from the face like curtains, giving long hair shape without taking length. The shortest layers sit around the cheekbones and jaw, and the rest fall long behind them, so the hair moves in sections instead of hanging as one heavy curtain.
Maintenance: a trim every ten weeks keeps the face layers from growing into shapeless bulk. Cost: a standard layered cut, no colour or extra service needed. Quick verdict: the best low-effort cut in this guide if your long hair currently feels like a single heavy sheet.
Face-Framing Layers for an Instant, No-Heat Lift
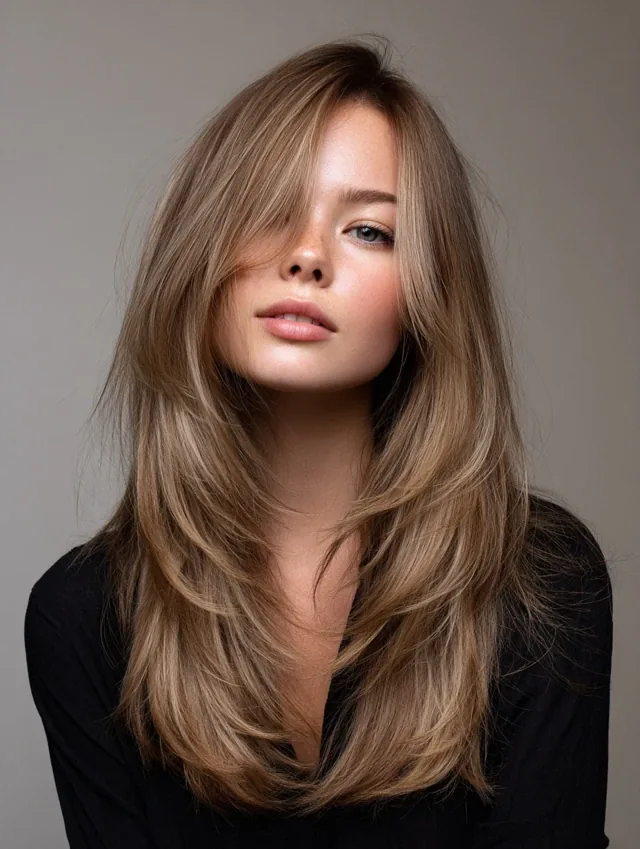
Face-framing layers are shorter pieces cut around the face while the back stays long, and they are the fastest way to make long hair look styled when the rest of it is simply air-dried. Blow-dry just the front sections forward and outward, or let them dry naturally around the face, and the whole style looks intentional.
How to style it: part your hair where you normally wear it, dry the front pieces first, and tuck them behind the ears if they misbehave — the layers still soften the face even tucked. What to ask: for layers that start at the chin or cheekbone, not above it, unless you want a much shorter-looking front.
The V-Cut: Length at the Back, Shape From Behind
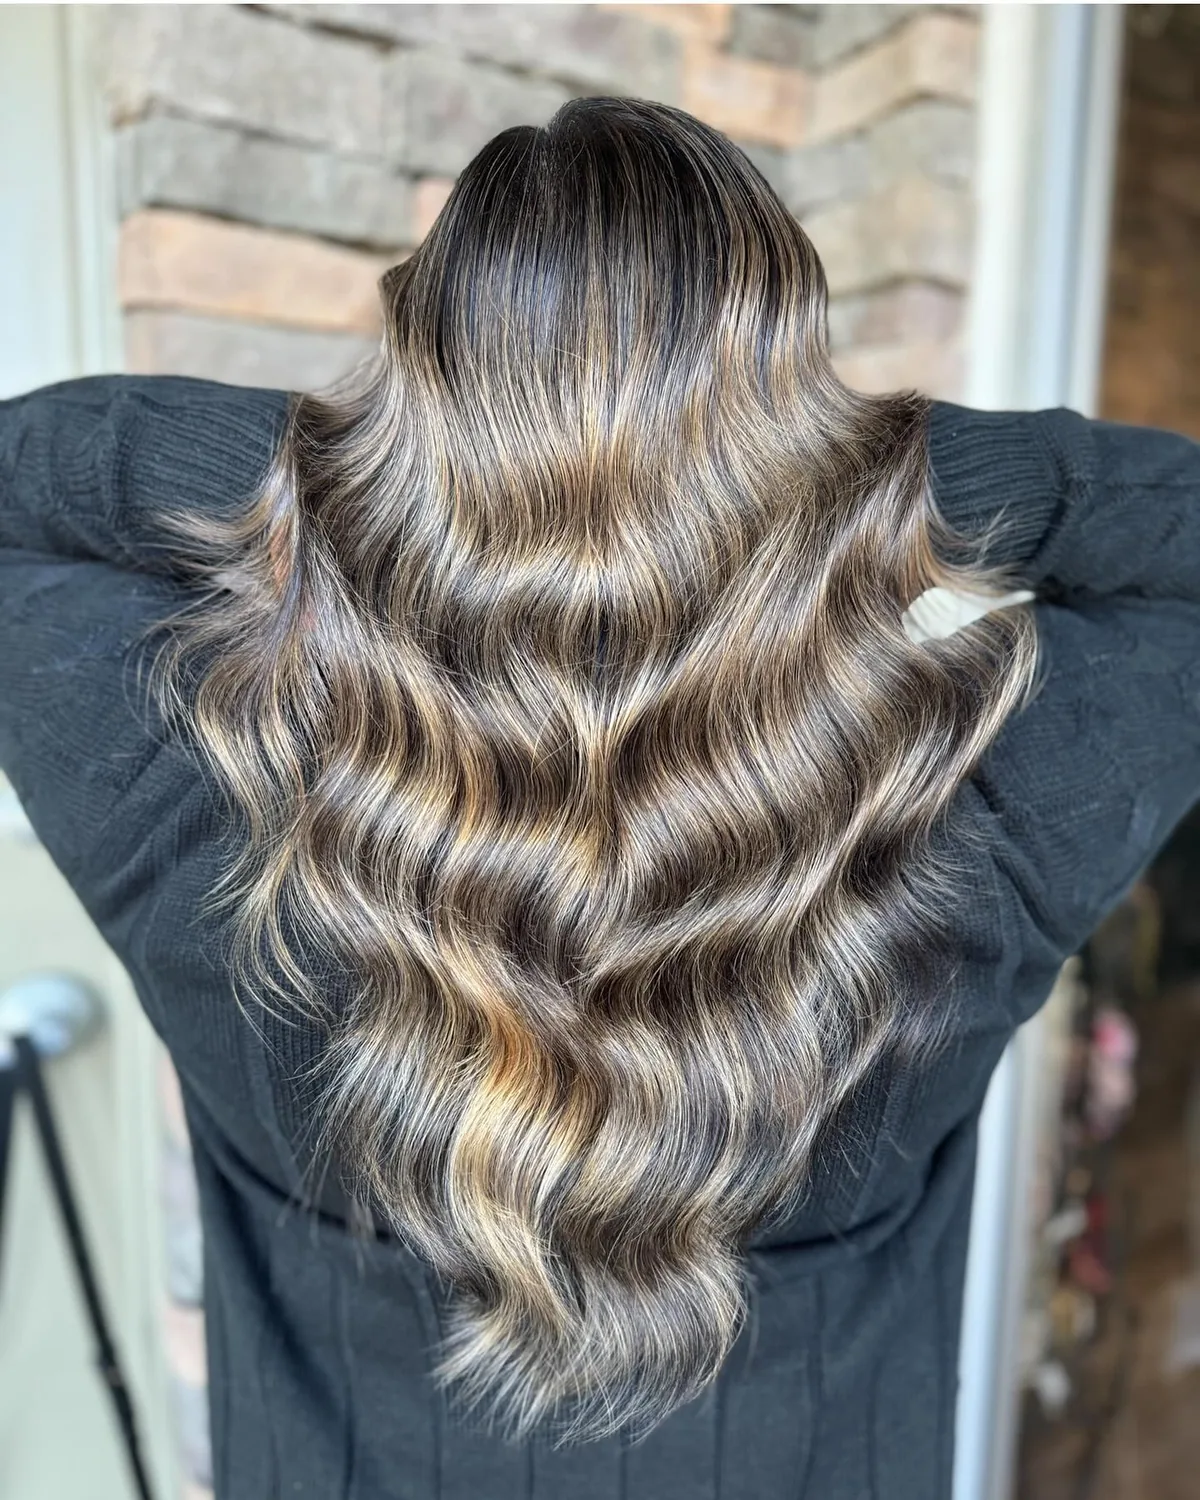
A V-cut keeps the longest point at the centre back and angles upward toward the sides, so long hair has a definite shape from behind instead of a blunt horizontal edge. It suits hair worn down most of the time, because the V is the detail people actually see when you walk away.
Best for: thick or very long hair that feels heavy in a blunt cut, since the angled sides remove bulk without losing the longest length. Who should avoid it: anyone who wears their hair up most days, because the V disappears entirely in a bun or ponytail and the shorter sides can escape.
The U-Cut: The Softer, More Forgiving Shape
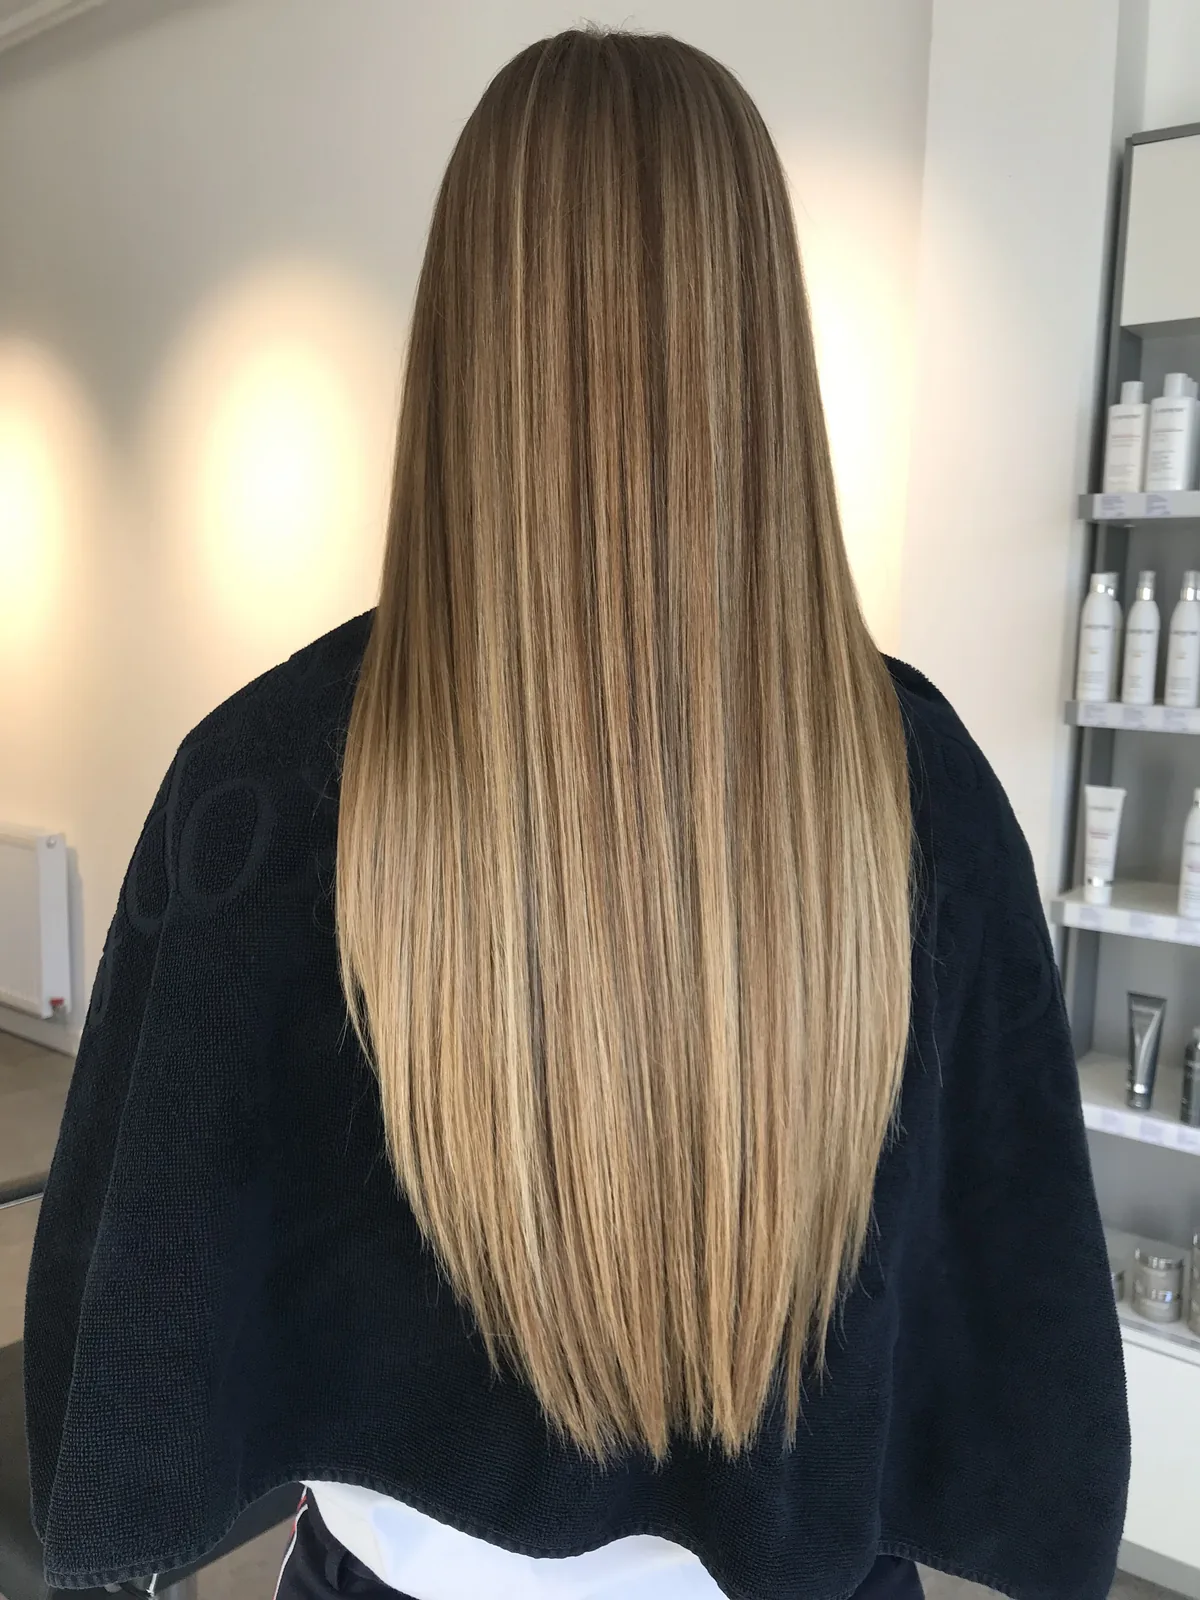
A U-cut rounds the ends into a gentle curve, longest at the centre and softly shorter at the sides, which makes long hair look thicker at the ends than a V-cut does. It is the shape most stylists reach for when a client says they want to keep their length but lose the straggly ends.
Pros and cons: the U-cut is more forgiving as it grows out and sits beautifully in a low ponytail, but it shows split ends more plainly than a V, so trims matter. Time in the chair is the same as any long cut, and it needs no special styling at home — the curve does the work.
Blunt Long Hair: One Clean Line, Maximum Impact
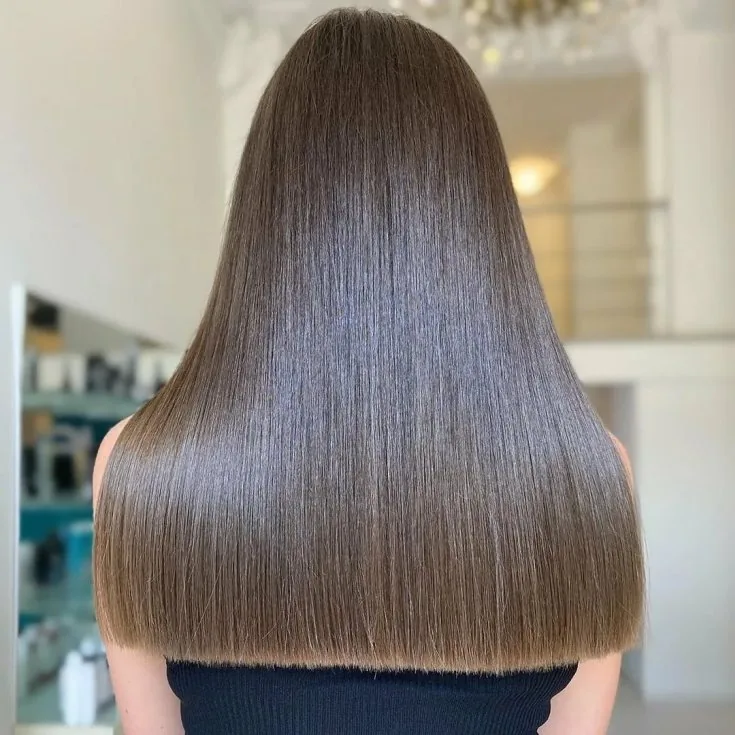
Blunt long hair is cut straight across at one length with no layers, and it makes fine or medium hair look dramatically thicker. The clean edge is the whole point, so this cut lives or dies on the health of its ends: split, wispy ends undo the effect in a week.
Maintenance is the honest trade-off here. Expect a trim every six to eight weeks to keep the line sharp, and protect the ends from heat and rough brushing. Common mistake: asking for blunt ends and then layering them away at home with thinning shears — leave the line alone between appointments.
The Long Shag: Layers, Texture and Built-In Movement
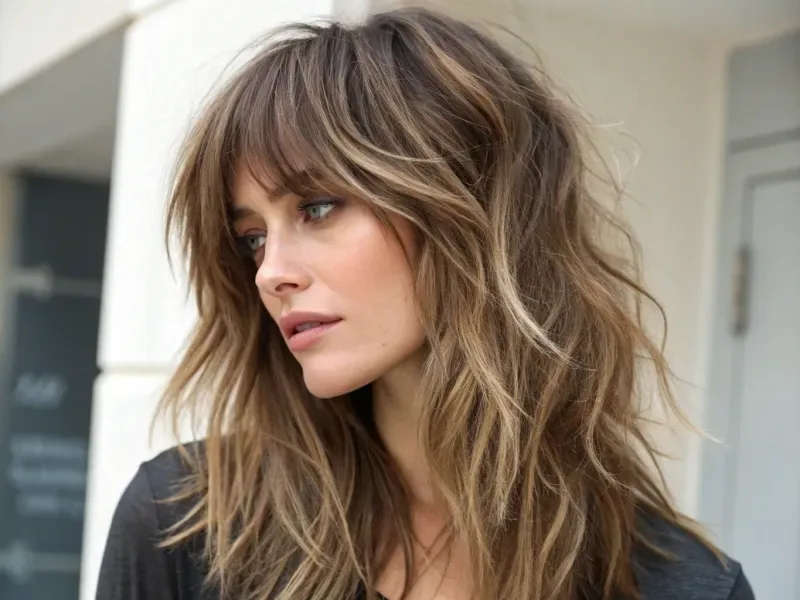
A long shag layers the hair throughout, with shorter pieces on top and longer ones underneath, so long hair gains texture and movement instead of weight. It air-dries into shape better than almost any other long cut, which makes it a genuine low-effort option rather than just a fashionable one.
Quick verdict: brilliant for wavy or thick hair, and for anyone who hates blow-drying. Less good on very fine, straight hair, where the layers can make the ends look thin. Ask for soft, blended layers rather than choppy ones if you still want to wear your hair sleek sometimes.
Feathered Layers: The Retro Cut That Came Back Quietly
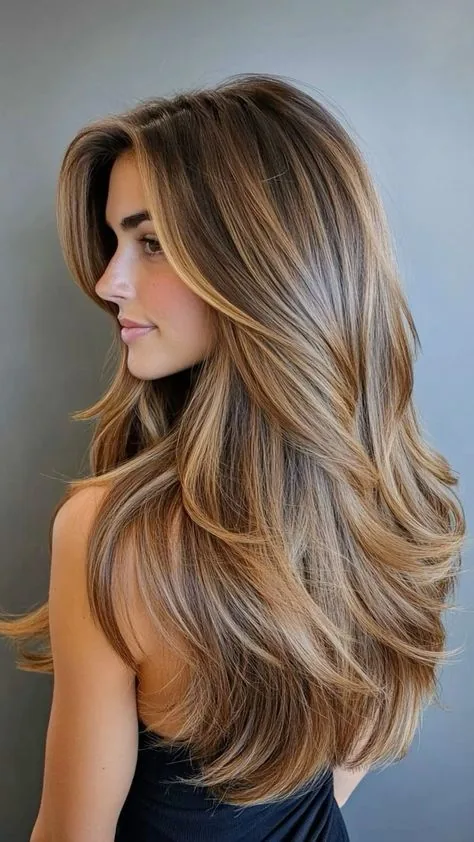
Feathered layers are fine, wispy layers cut so the ends flick outward and inward in soft pieces, giving long hair lightness at the ends without visible steps. The effect is softer than a shag and more textured than plain layers, and it works beautifully with a blowout that turns the ends under or out.
Best for: medium to thick hair that feels heavy and flat. Time to style: about ten minutes with a round brush, or air-dry with a little cream scrunched into the ends. Who should skip it: very fine hair, where feathering can thin the ends too much — ask for fewer, longer layers instead.
Curtain Bangs With Long Hair: The Fringe That Grows Out Gracefully
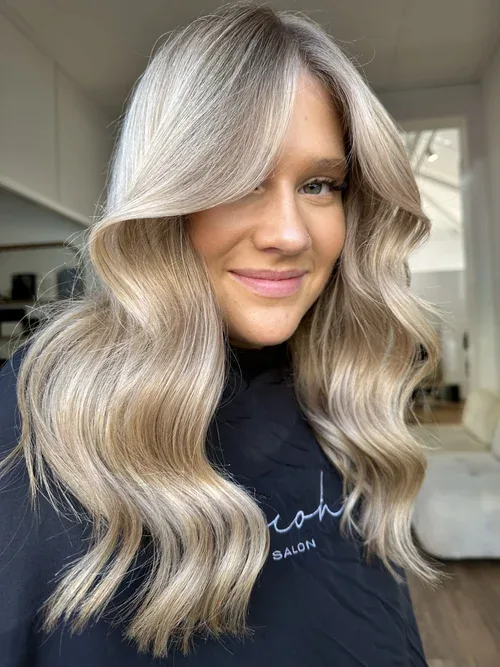
Curtain bangs part in the middle and sweep to each side, framing the face while the rest of the hair stays long. They are the lowest-commitment fringe for long hair because they grow out into face-framing layers instead of into an awkward in-between stage.
How to style it: blow-dry the bangs forward and then sweep each side outward with a round brush, or simply part them in the middle and let them dry naturally. Cost: usually a small addition to a regular cut, and a free fringe trim between appointments at many salons — ask when you book.
Washing and Drying: The Routine That Saves Your Mornings
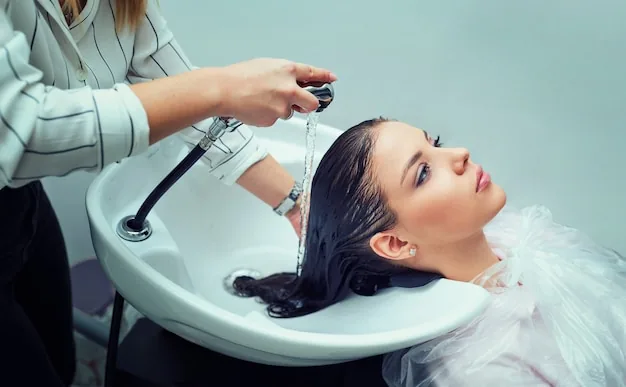
Long hair takes longest to wash and dry, so the smartest everyday move is to stop washing it every day. Most long hair does perfectly well washed two or three times a week, with the scalp shampooed properly and the lengths treated gently. Focus shampoo on the roots, let the rinse run through the ends, and condition from mid-length down — the ends are the oldest, driest part of your hair and they need the most help.
Drying is where mornings are won or lost. Towel-dry by squeezing, never rubbing, then let hair air-dry for at least twenty minutes before any heat styling, or wash it the night before and braid it loosely for sleep. A rough-dry with a dryer on a medium setting is faster than trying to style soaking-wet hair, and it leaves far less frizz behind.
Side-Swept Bangs for Long Hair That Needs Softening
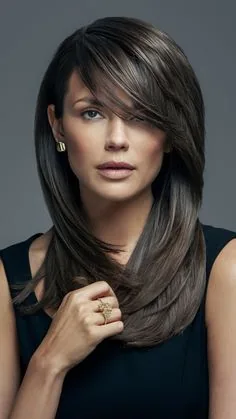
Side-swept bangs fall diagonally across the forehead and soften a strong jaw, a high forehead or a very long face shape, while keeping the rest of the hair long and simple. They also give you something to do with the front of your hair on days when the back is simply tied up.
Pros: instantly changes the face without changing the length, and hides a growing-out fringe beautifully. Cons: they need a quick blow-dry or a pin on humid days, or they fall into the eyes. Maintenance: a trim every four to six weeks keeps the sweep at the right length.
Wispy Bangs: The Lightest Way Into a Fringe
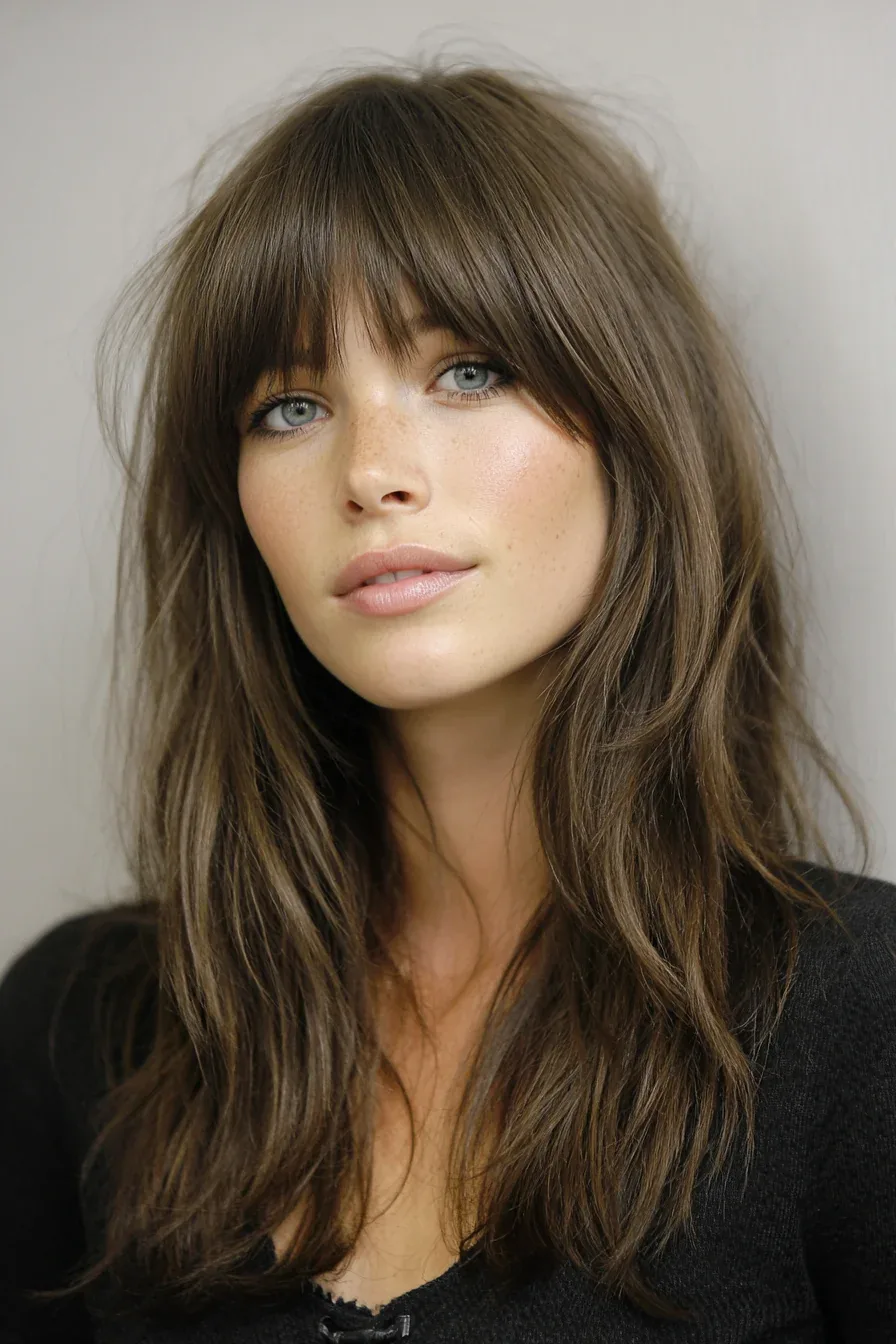
Wispy bangs are thin, feathery pieces across the forehead rather than a solid block of fringe, so they suit long hair without making the whole style feel heavy. They soften the face, draw attention to the eyes, and are forgiving if they are slightly uneven — the wispy texture hides it.
Who should avoid them: anyone with very curly or very fine hair that frizzes at the hairline, because wispy pieces are the first to misbehave in humidity. Quick verdict: try them if you want a fringe but fear commitment — they grow out in weeks, not months, and a few snips restore them.
The Middle Part: Simple, Striking, and Surprisingly Demanding
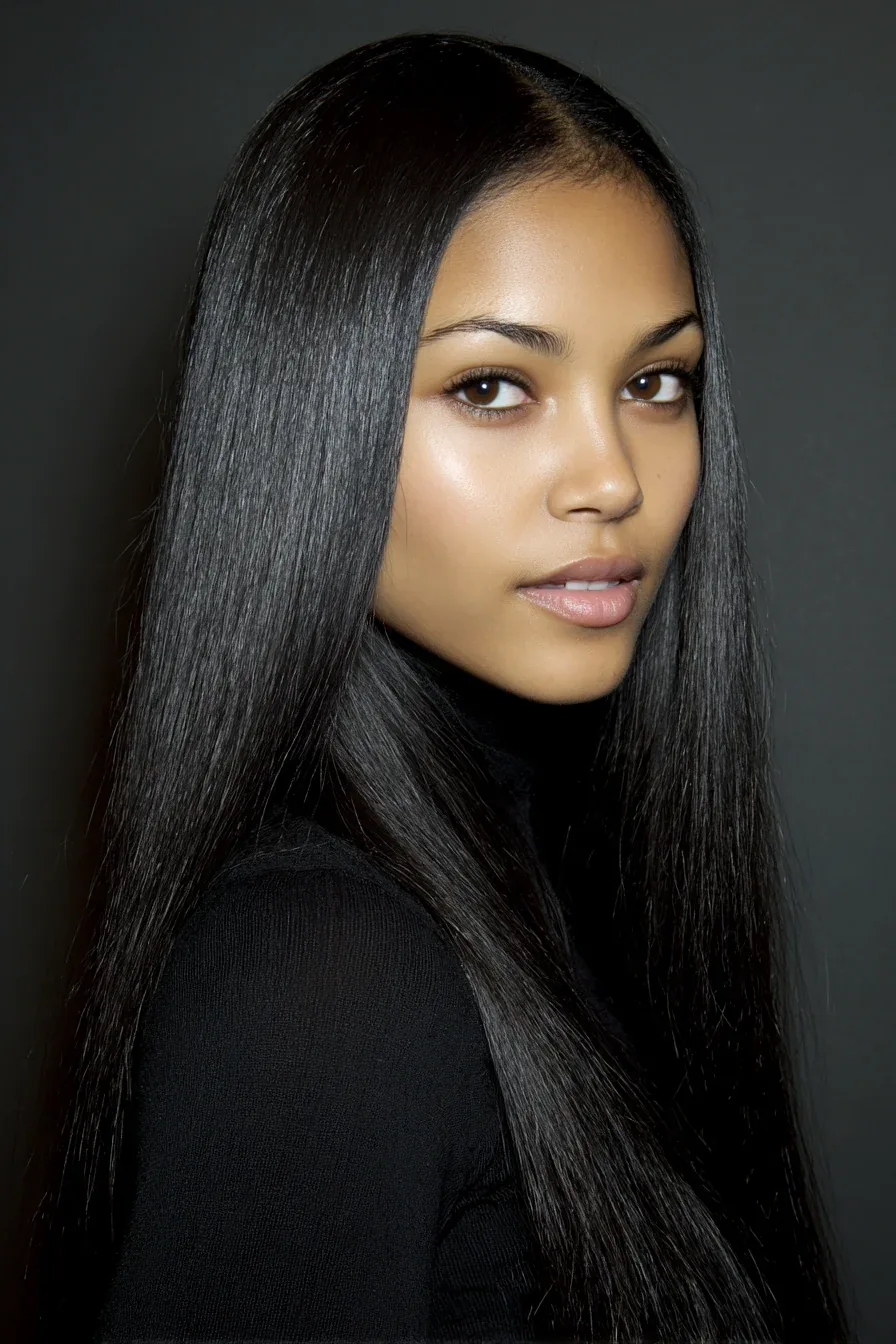
A middle part with long hair looks clean, modern and symmetrical, and it shows off face-framing layers better than any other parting. It also shows up uneven growth, a cowlick or an off-centre hairline more plainly than a side part does, so it suits hair that parts naturally in the middle.
Common mistake: forcing a middle part on hair that wants to fall to one side, then fighting it all day with pins and spray. If your hair resists, a slightly off-centre part gives almost the same look with far less effort. Best for: oval and round faces, and for sleek straight styles.
The Deep Side Part: Instant Volume Without Any Product
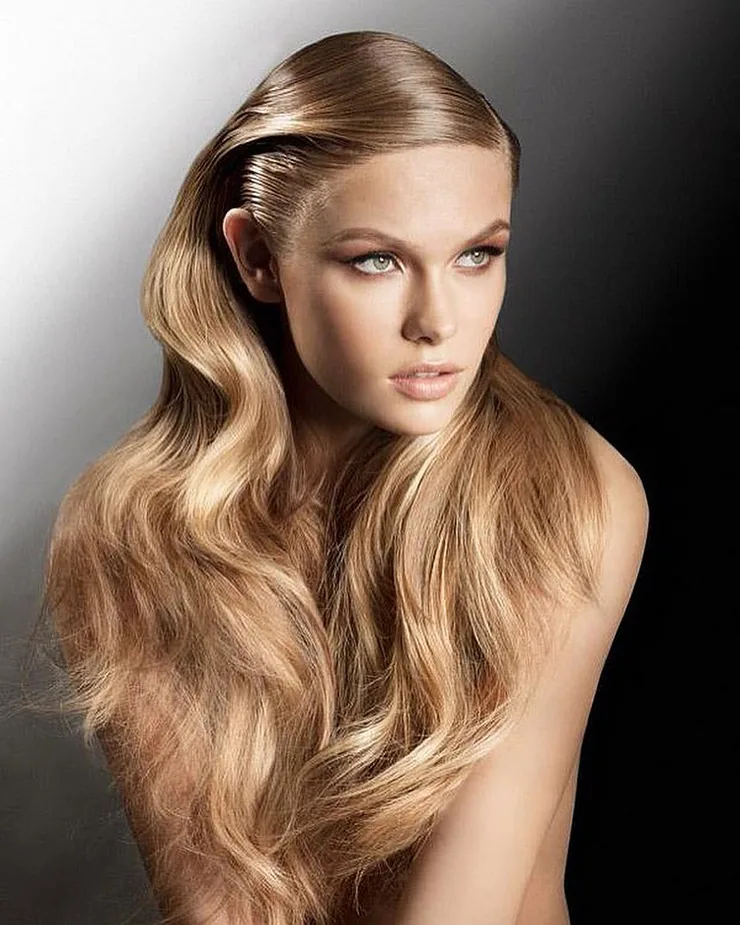
Moving your part deep to one side is the fastest volume trick for long hair: the heavier side gains lift at the roots and the sweep across the forehead adds shape that a centre part never will. It costs nothing, takes seconds, and turns yesterday’s waves into something that looks freshly styled.
Time: under a minute, with a tail comb for a clean line and one pin to hold the lighter side if needed. Pros: works on every texture and length past the shoulders. Cons: in strong wind it can blow back toward the middle, so pin it on blustery days rather than relying on spray alone.
The Low Ponytail: The Everyday Style That Deserves More Respect
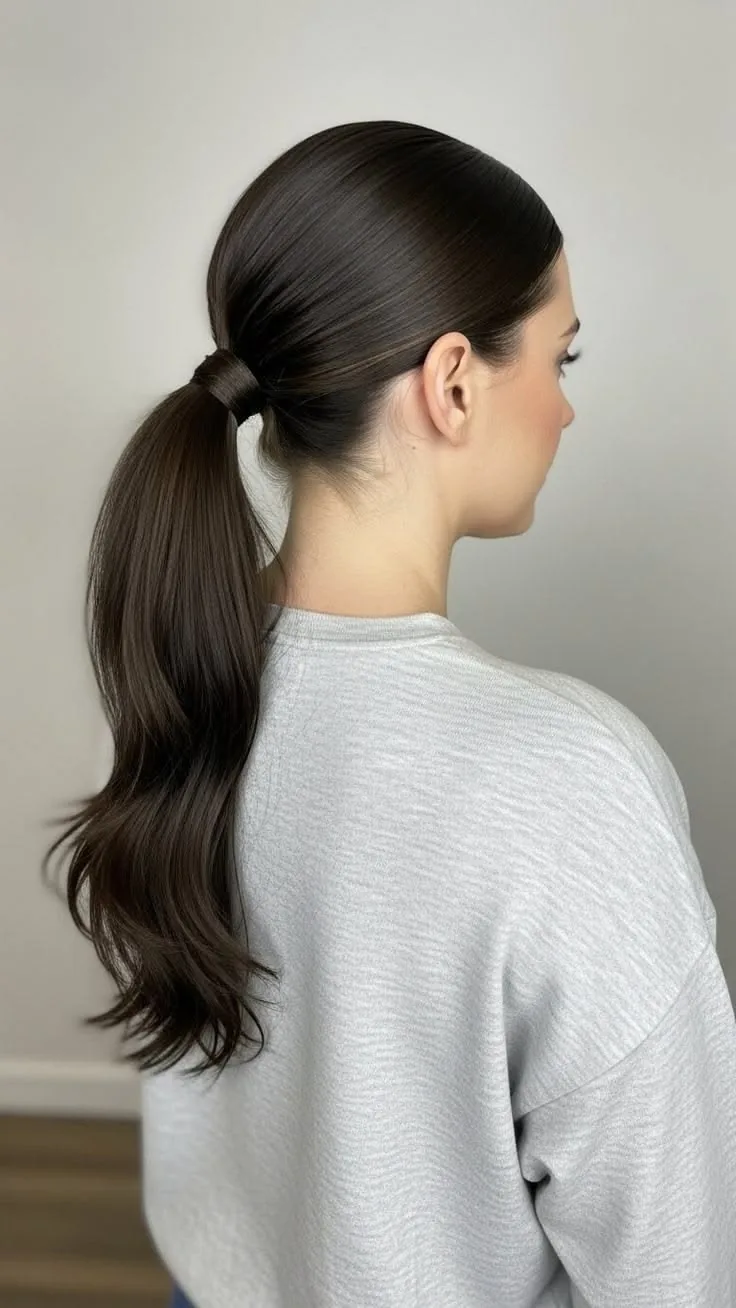
A low ponytail at the nape is the most worn everyday long hairstyle for a reason: it is comfortable, it keeps hair out of the way, and it suits every face shape. The difference between a tired low ponytail and a good one is tension — smooth the top with a brush, keep the nape soft rather than scraped tight, and leave two small pieces loose around the face.
Best for: workdays, errands and second-day hair. Time: two minutes. Common mistake: tying it in exactly the same spot every day, which breaks hair in one place — move it up or down by an inch and switch to a snag-free tie.
The High Ponytail: Lift, Length and a Little Drama
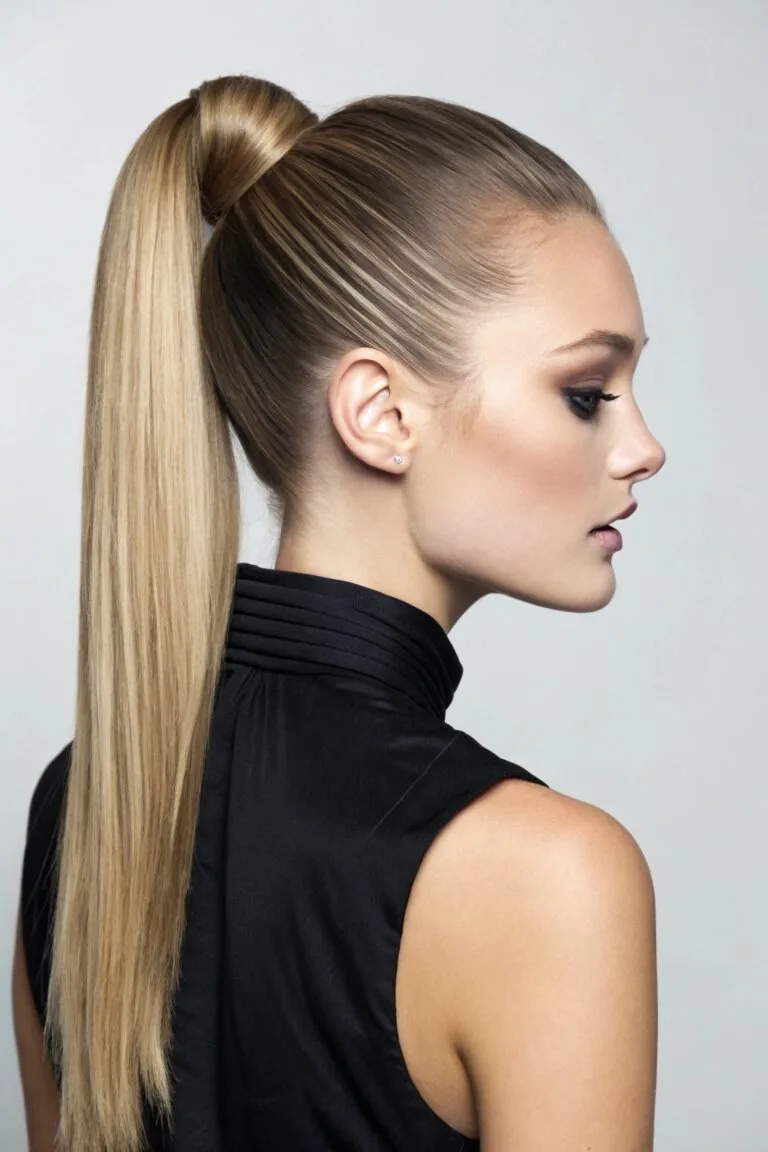
A high ponytail lifts long hair off the neck and shows off its full length down the back, which is why it reads as energetic rather than merely practical. Gather hair at the crown, not the very top of the head, brush it smooth, and secure it with two ties crossed over each other if one alone slips under the weight.
Pros: instant lift and a longer-looking neck. Cons: a very tight high ponytail can ache by afternoon and stress the hairline, so keep it firm but not pulled. Who should skip it on a daily basis: anyone with a sensitive scalp or thinning at the temples — alternate with low styles.
The Bubble Ponytail, Worn Casually Instead of Dressed Up
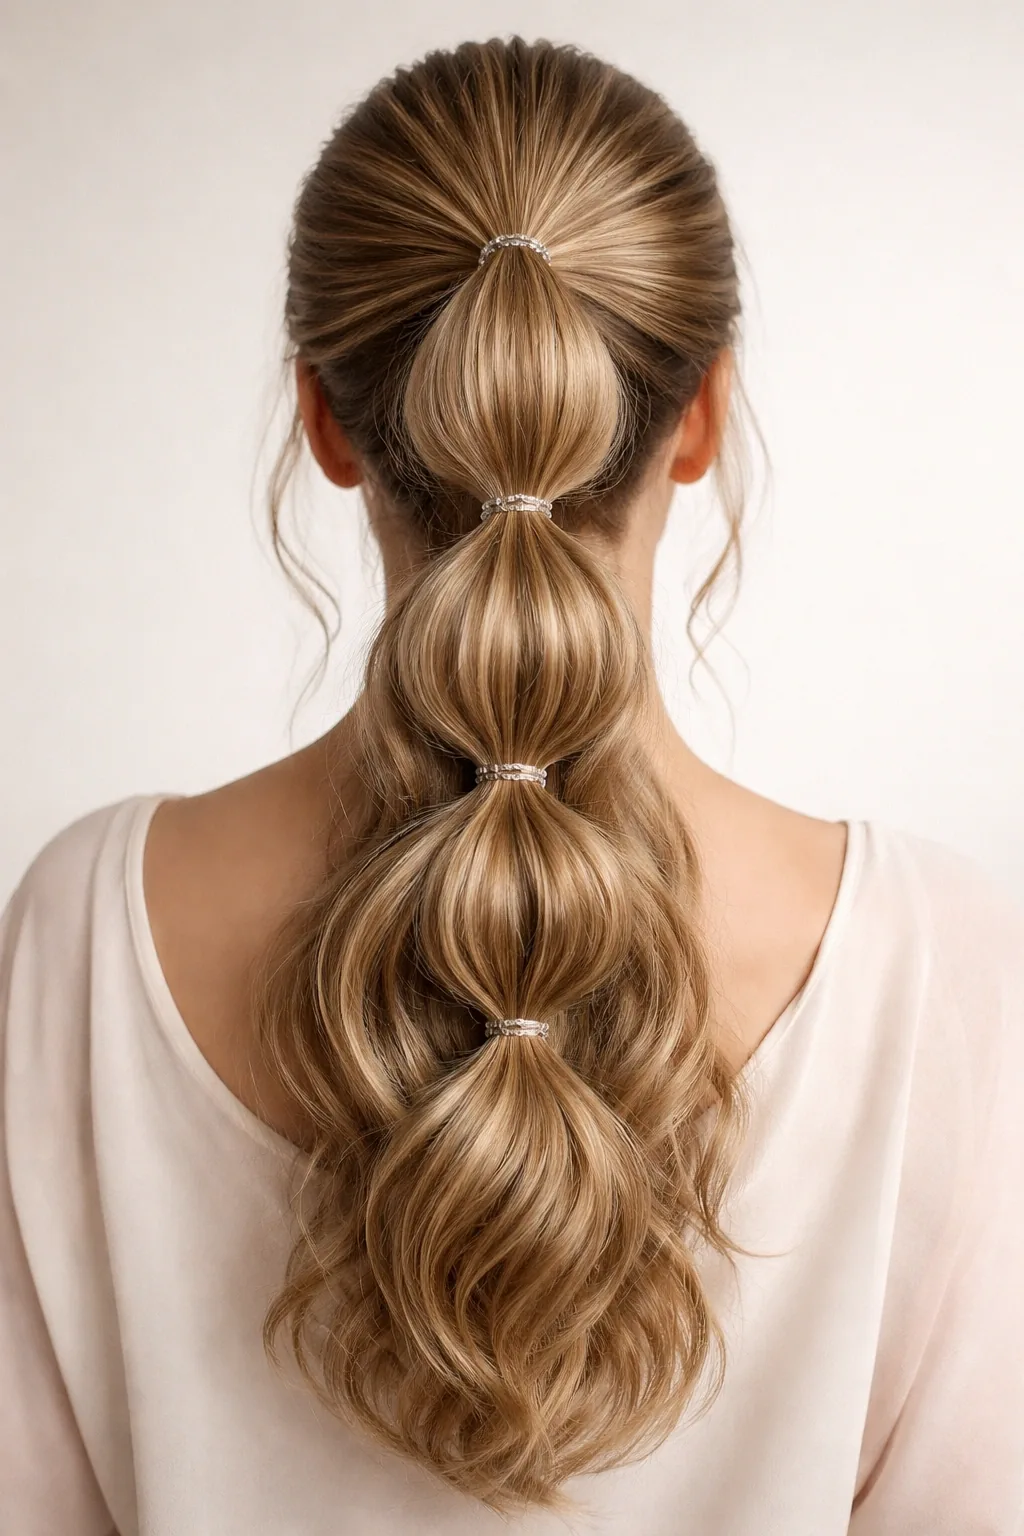
A bubble ponytail divides a regular ponytail into puffed sections with small elastics spaced down its length, and worn loosely on long hair it looks playful rather than formal. Tease each section gently before tying the next elastic, then pull the sides of each bubble out slightly for volume.
How to style it: start with a normal ponytail, add elastics every few inches, and do not aim for identical bubbles — slightly uneven ones look more natural. Time: about five minutes. Maintenance: none beyond extra small elastics in your bag, because one snapped elastic deflates the whole style.
The Messy Bun: The Five-Minute Style Everyone Actually Wears
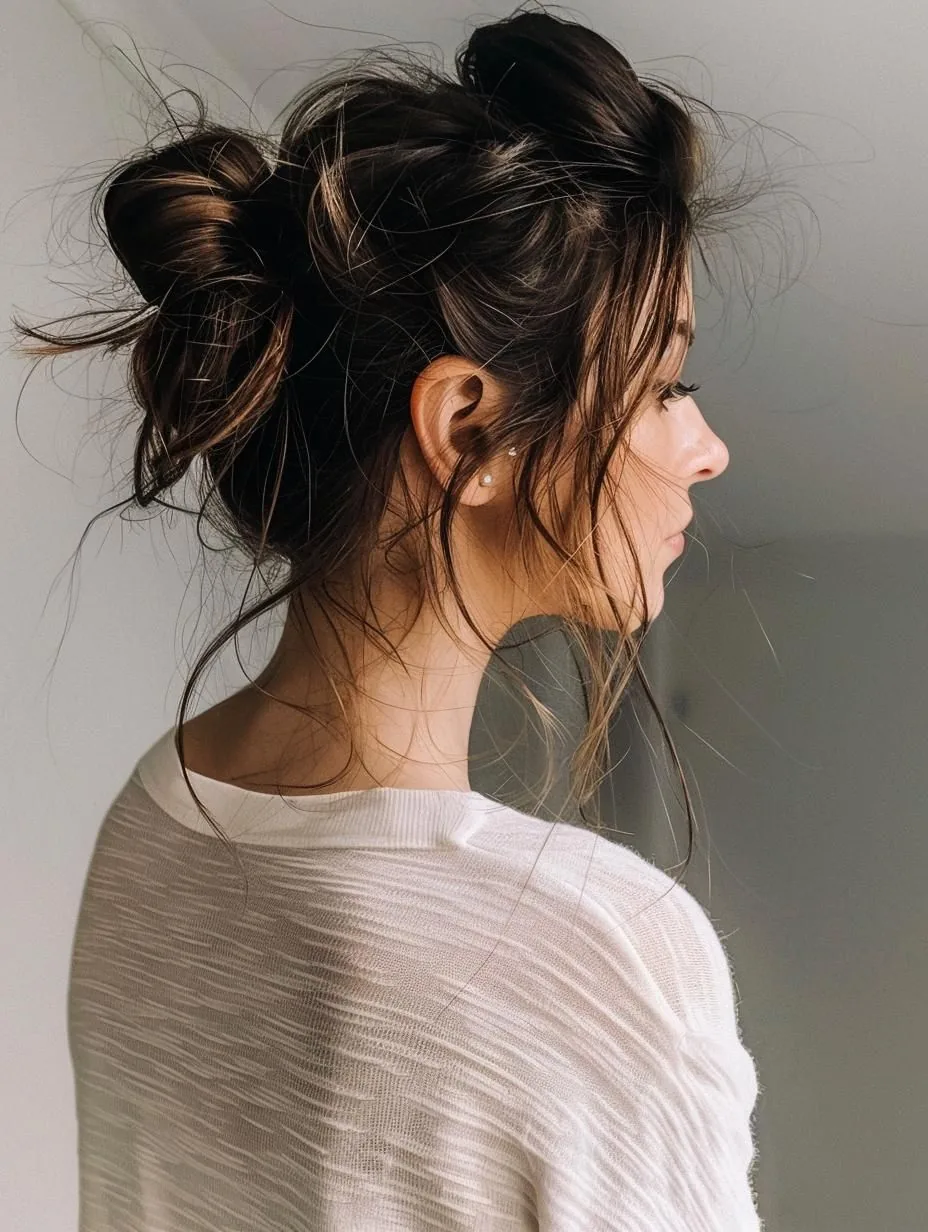
A messy bun on long hair is twist, wrap, pin, and pull a few pieces loose — and the secret is that the messier you allow it to be, the better it looks. Gather hair high or low, twist it loosely, wrap it around its own base, and pin it in three or four places rather than trying to make it neat.
Quick verdict: the best emergency style in this guide, and genuinely flattering on long hair because the length gives the bun real size. Common mistake: wrapping it too tightly, which makes it look like a ball rather than a bun — keep the twist loose and let the ends poke out a little.
The Low Chignon, for Ordinary Days That Need a Little Polish
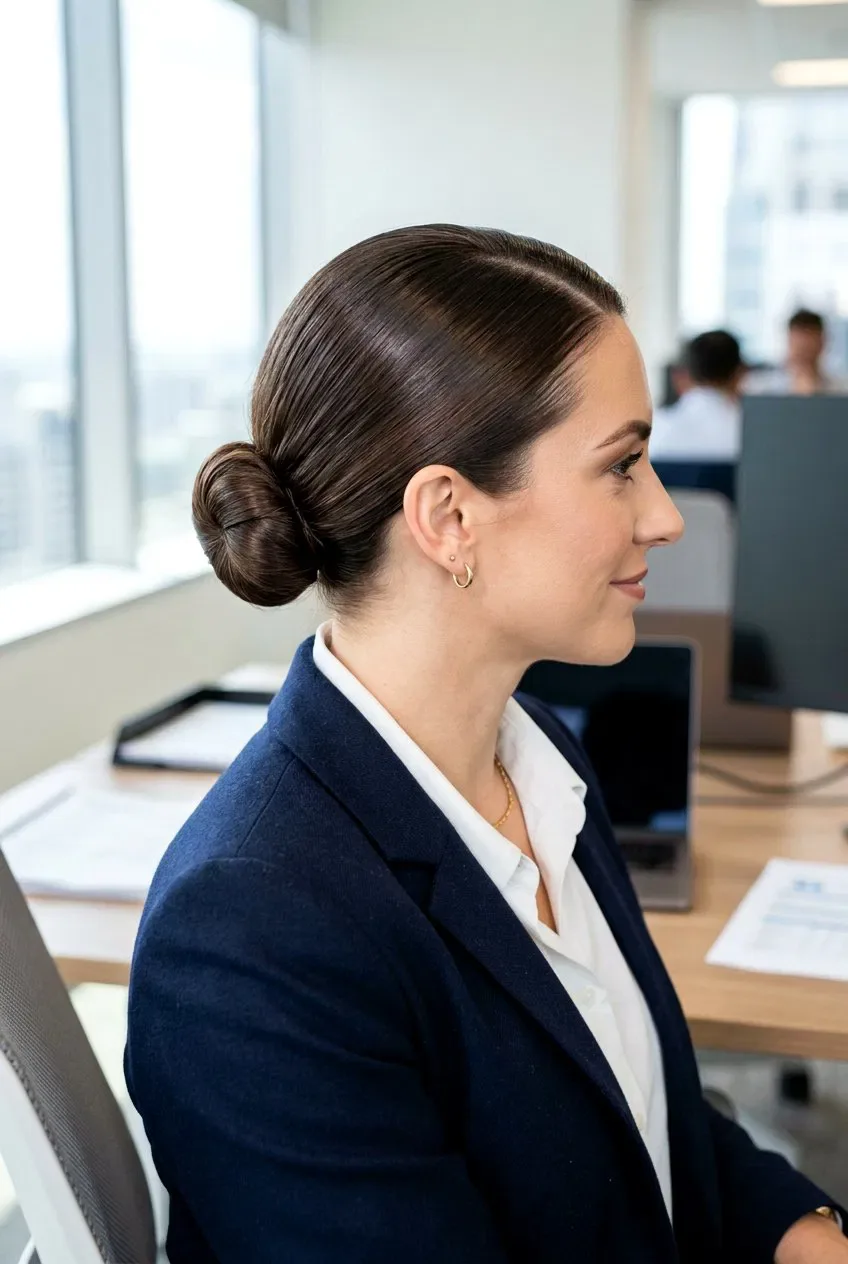
A low chignon is a smooth, twisted bun at the nape, and it is far too good to save only for occasions. For everyday wear, keep it soft: twist the ponytail loosely, coil it flat, pin it, and leave the front relaxed rather than scraped back. It reads as polished at work and takes about four minutes.
Best for: office days, video calls and any day you want to look put-together without heat. Time and cost: free, and faster than a blowout by a long way. Who should avoid the sleek version: anyone whose hair slips out of pins easily — the soft, slightly messy version holds better on slippery hair.
The Top Knot: Hair Off Your Face, Length on Show
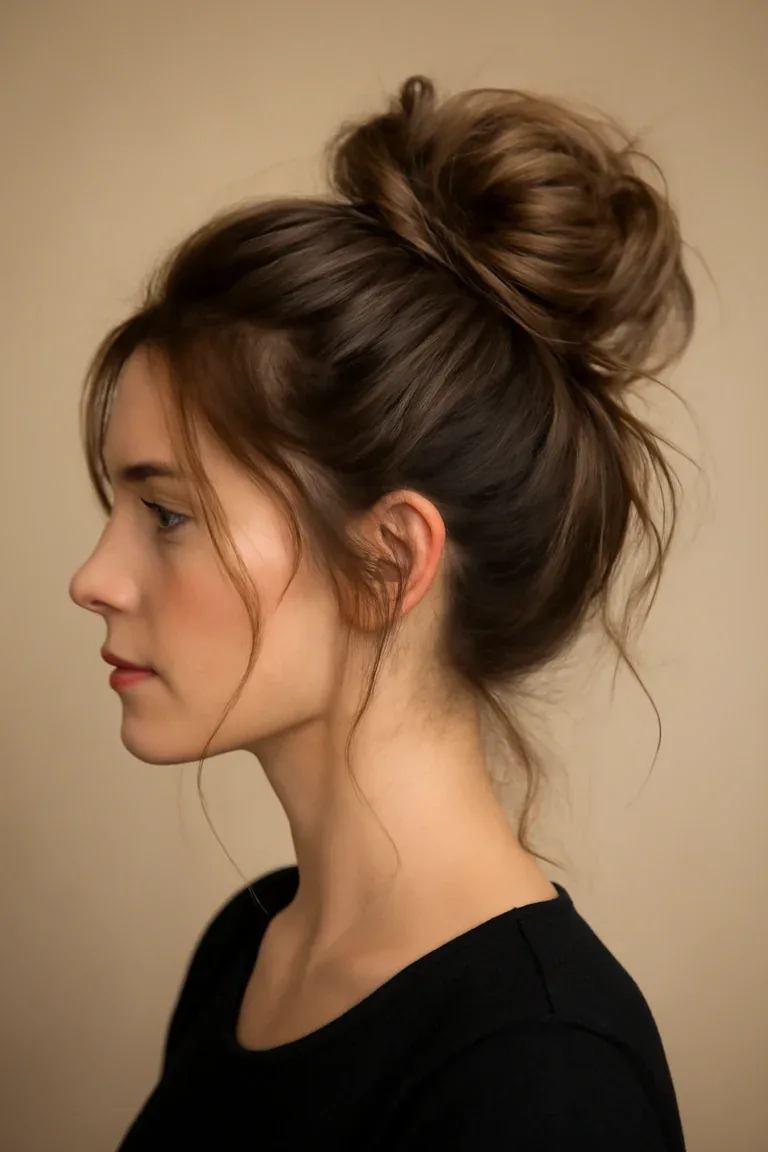
A top knot gathers all the hair into a bun on top of the head, keeping it completely off the face and neck while the bun itself shows off how much hair you have. It suits hot days, workouts that are not too vigorous, and mornings when washing is not happening.
Pros and cons: it is the coolest updo for summer and the quickest way to look intentional, but a top knot worn tight every day stresses the hairline, so alternate it with low buns. How to style it: use a scrunchie or a large clip for grip, and wrap the bun around its base twice if your hair is very long.
Half-Up, Half-Down: The Compromise That Actually Works
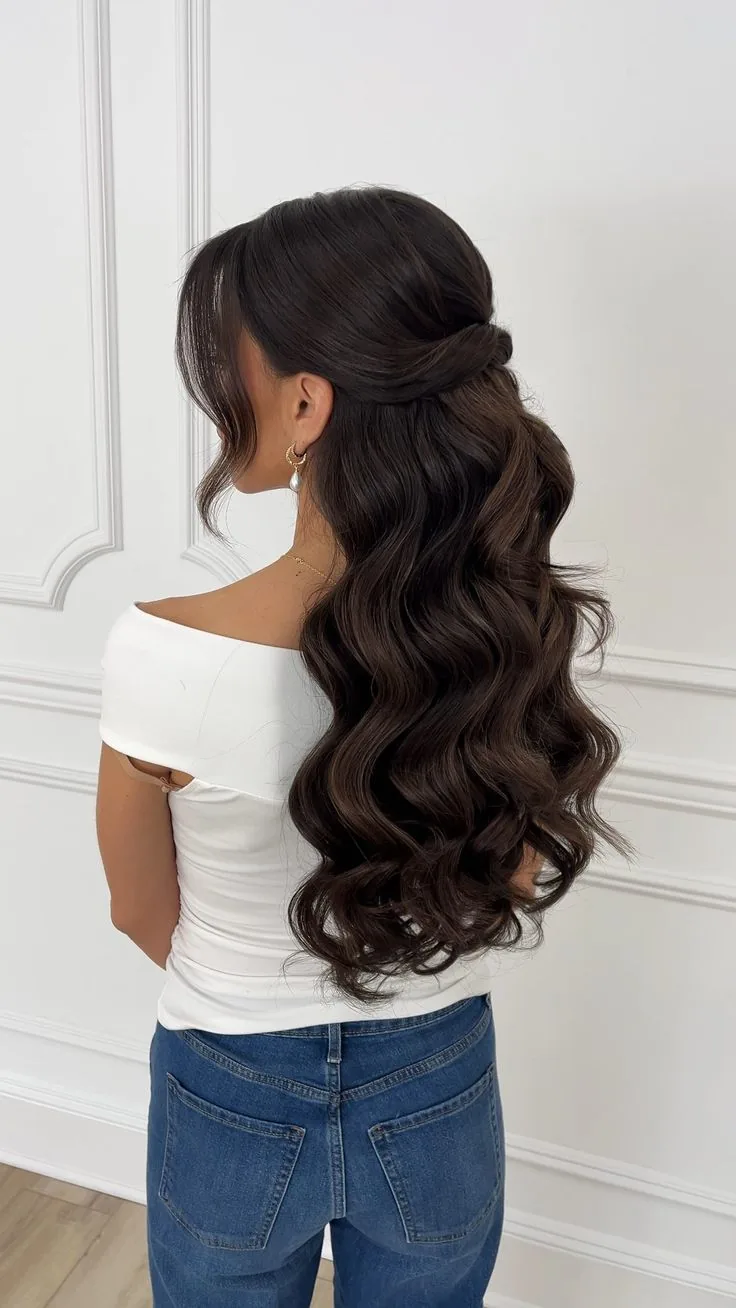
Half-up, half-down takes the top section of long hair back and leaves the rest down, so you get hair off your face and length on show at the same time. It is the style to reach for when a full updo feels too severe and fully loose hair keeps falling forward.
Best for: medium to very long hair, and for days when you want to look styled with almost no effort. Time: three minutes. Maintenance: one tie or clip, and a quick check that the top section is not pulling — if it aches, you have taken too much hair into it.
Detangling Without Breakage: Ends First, Always
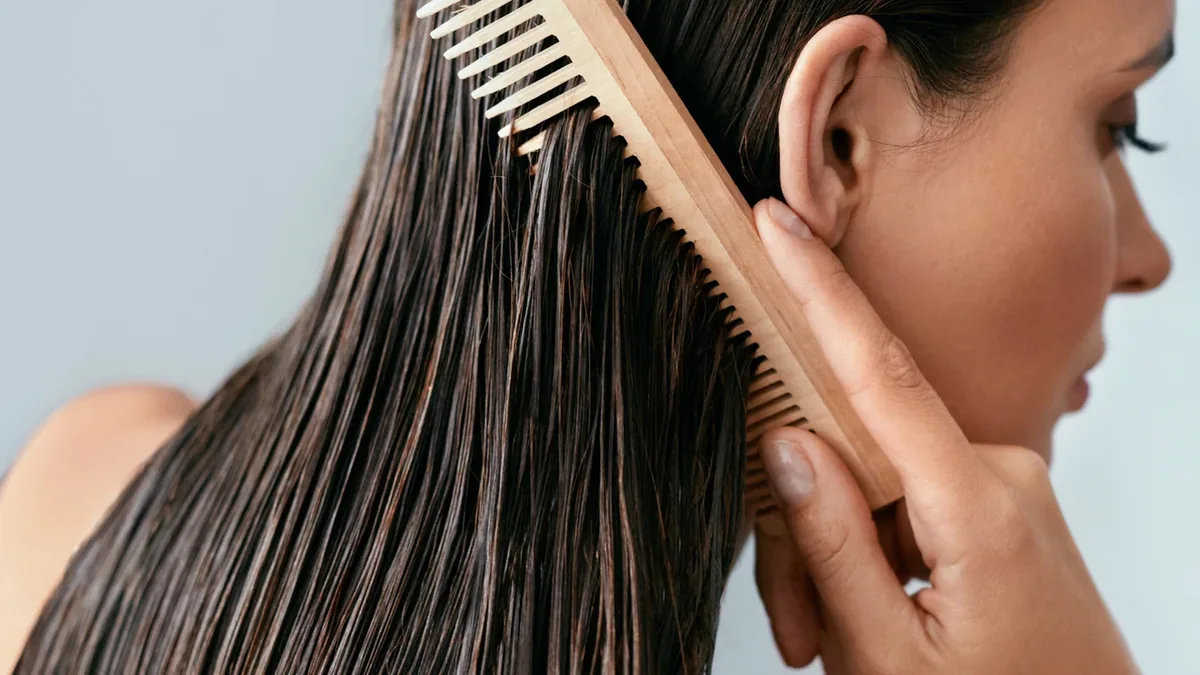
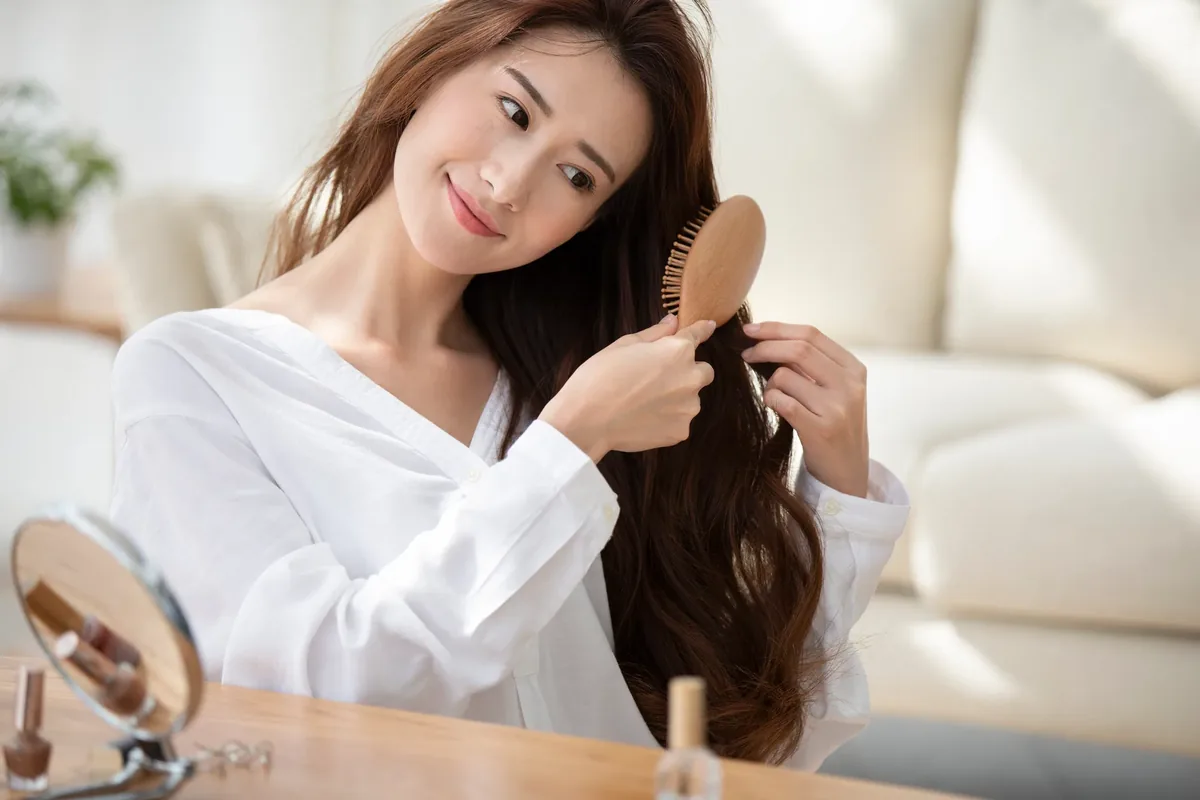
Every tangle in long hair is a breakage risk, and the order you detangle in matters more than the product you use. Start at the very ends, work upward in short sections, and only run a comb through the full length once the ends are clear. Starting at the roots pushes every knot downward into one tight, snapping mat — the single most common cause of broken long hair.
Detangle wet hair with conditioner or a detangling spray and a wide-tooth comb, and dry hair with a brush designed for detangling, gently and in sections. Never rip through a knot: hold the hair above it so you are not pulling on the scalp, tease the knot apart with your fingers, and trim it out only as a last resort. Five patient minutes here protects months of growth.
The Half-Up Claw Clip: One Minute, No Crease, No Damage
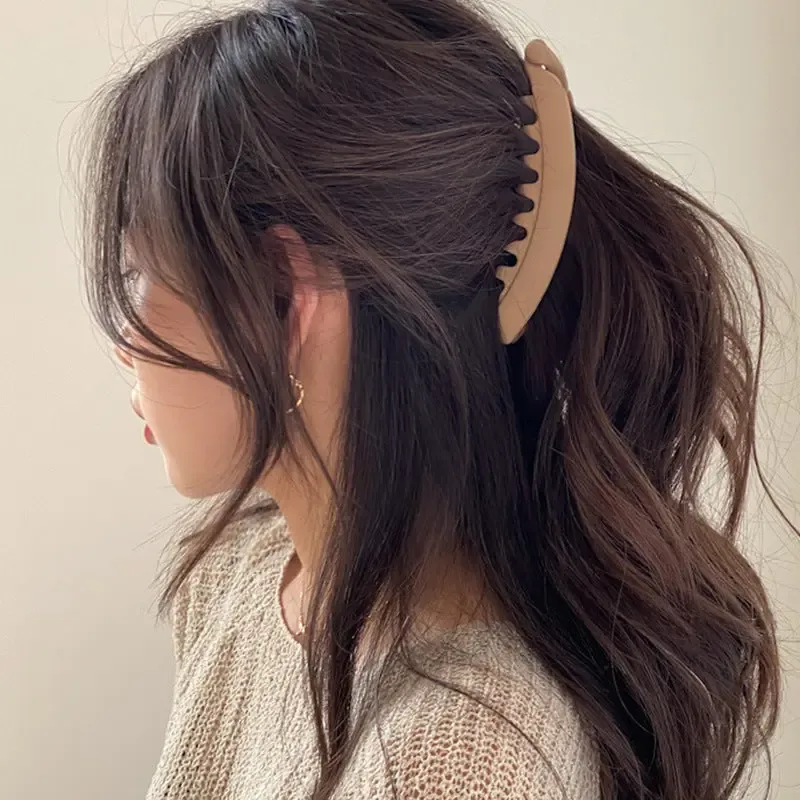
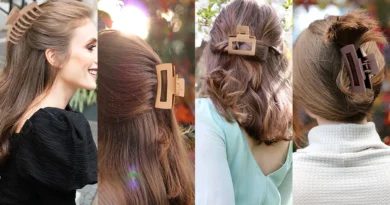
Twist the top half of long hair back, fold it up and clip it with a claw clip, and you have a style in under a minute that leaves no elastic crease behind. Damp or second-day hair grips a clip better than freshly washed hair, so this is a particularly good day-two rescue.
Who should avoid tiny clips: anyone with thick or very long hair, where a small clip will pop open by lunchtime. Buy one large, strong clip and one medium one, and keep the spare in your bag. Quick verdict: the single most useful accessory for long hair, full stop.
The Half-Up Twist: Softer Than a Braid, Tidier Than Loose
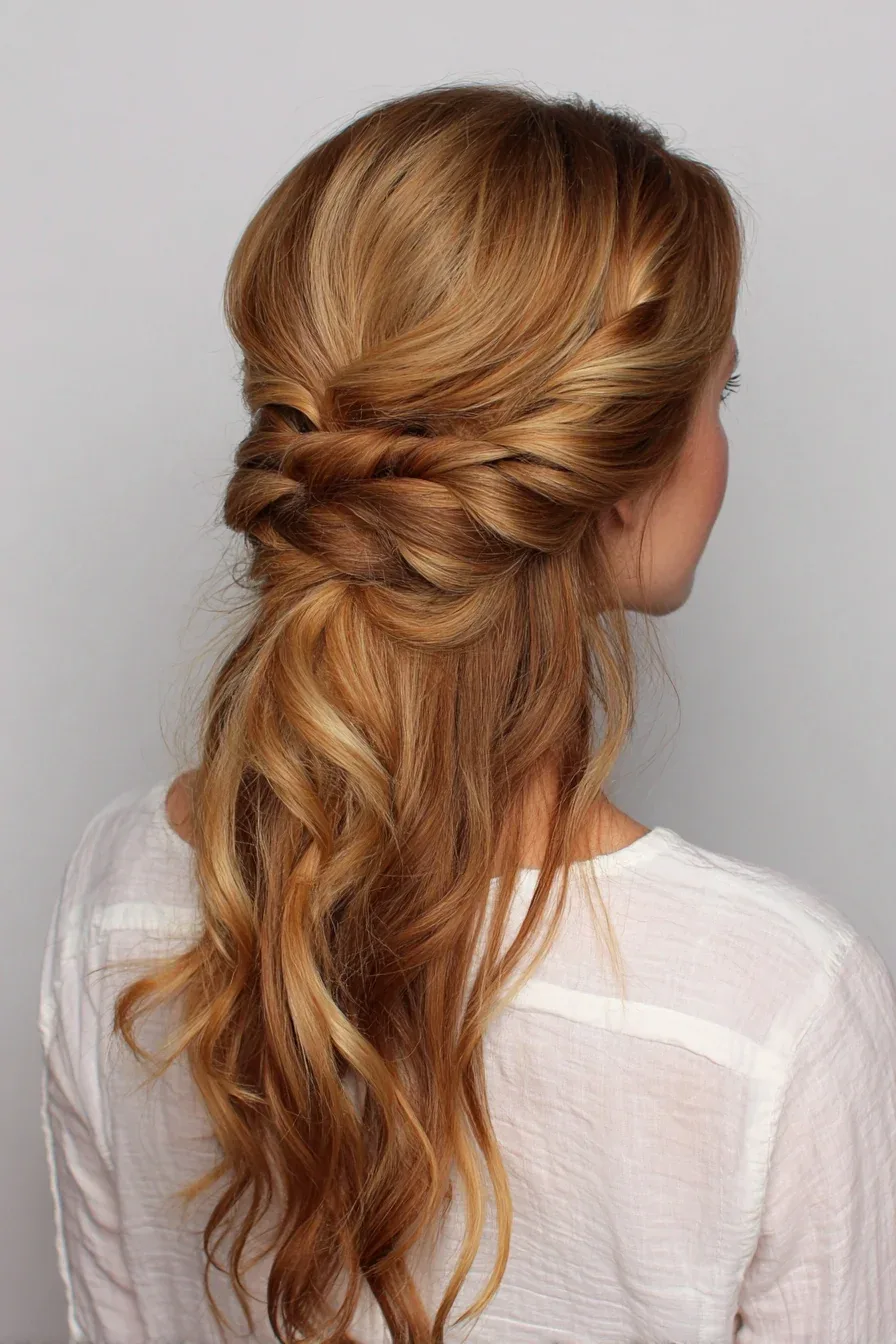
A half-up twist takes two front sections, twists each one back along the hairline, and pins them where they meet. It needs no braiding skill, keeps the front tidy, and looks softer than a half-up ponytail because the twists themselves add texture.
Common mistake: twisting both sections in opposite directions, which makes them unwind against each other. Twist both the same way, cross them at the back, and pin through the crossing point. Time: about four minutes, and it holds better on slightly textured or second-day hair.
The French Braid: The Everyday Braid That Never Goes Wrong
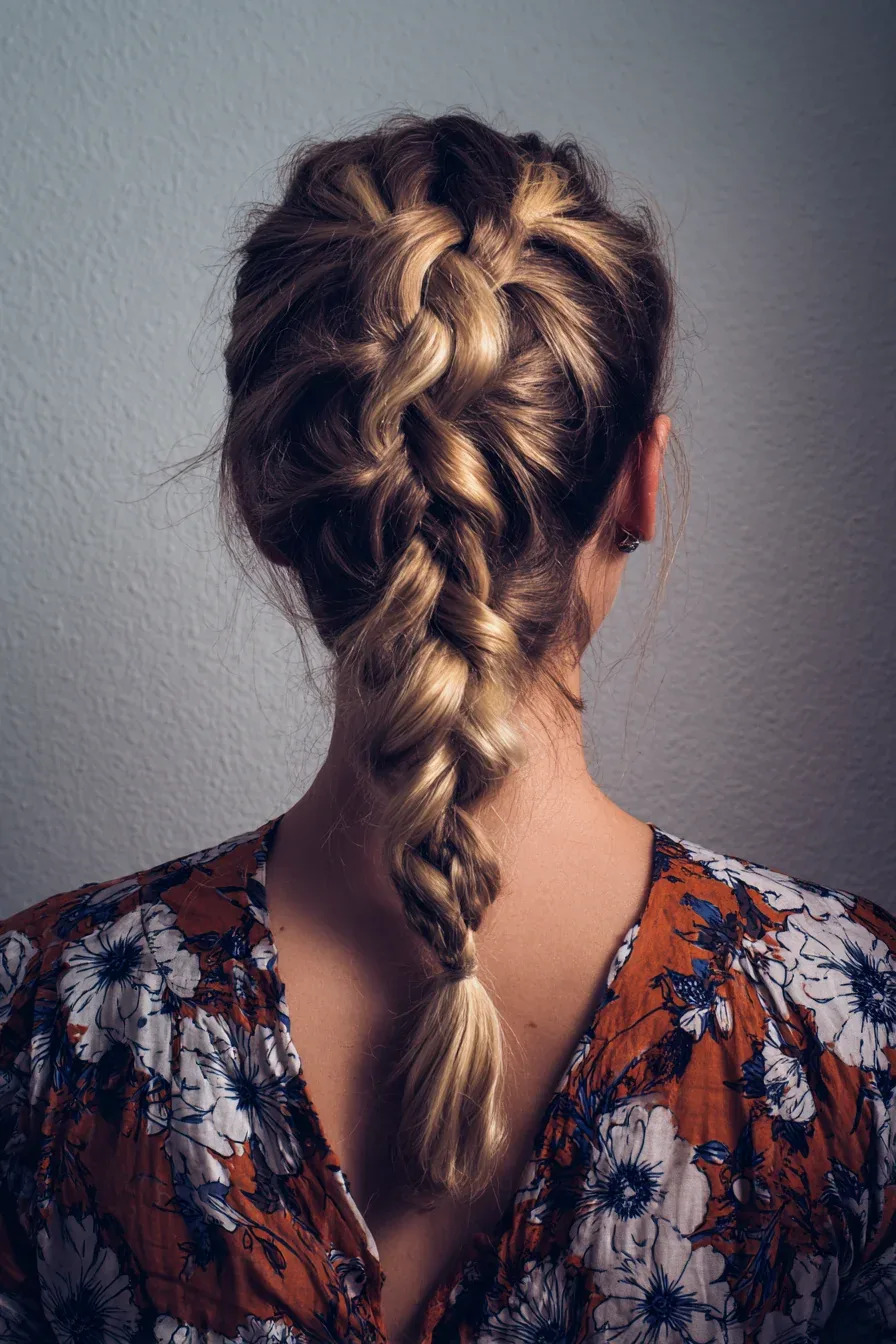
A French braid gathers hair from the hairline down, adding sections as it goes, and it keeps every layer of long hair contained from top to ends. Done loosely it looks relaxed and everyday; done neatly it looks polished enough for work. Keep the tension even rather than tight, and braid over a little cream if layers keep escaping.
Best for: days when hair needs to stay put — busy workdays, windy days, and days between washes. Time: five to ten minutes with practice. Pros: it doubles as an overnight wave set when undone the next morning.
The Dutch Braid: Bolder, Grippier, and Better on Layers
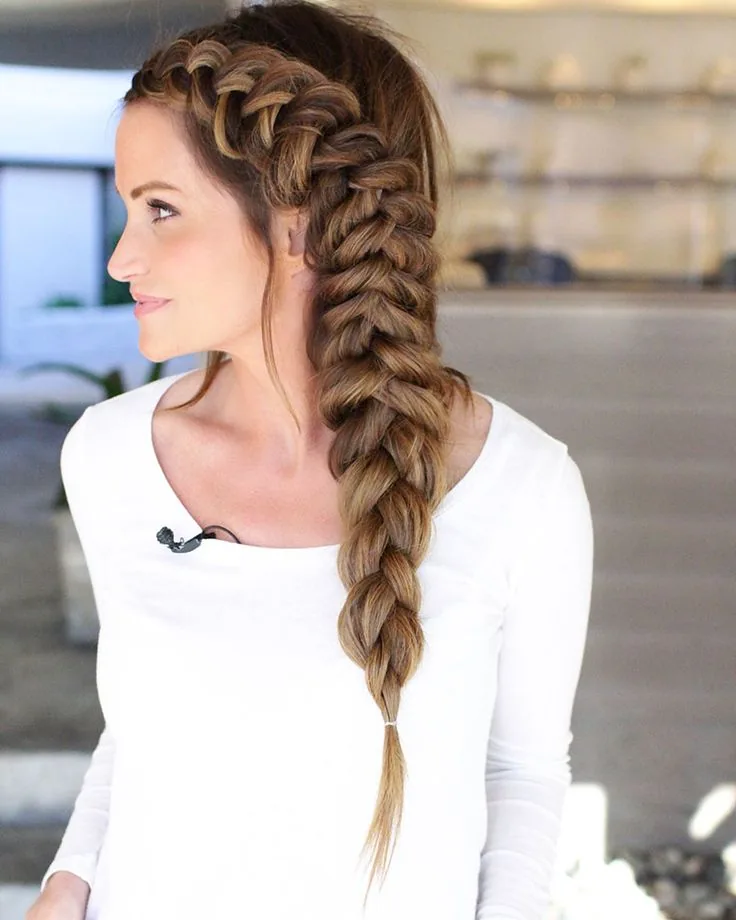
A Dutch braid crosses sections under rather than over, so the plait sits on top of the hair and grips more firmly than a French braid. That extra grip is exactly why it suits layered long hair, where shorter pieces slip out of a French braid within an hour.
How to style it: start at the crown, keep the sections small and even, and pull the braid apart gently at the end for volume. Who should skip it: anyone who finds French braiding fiddly, because Dutch braiding is the same skill turned inside out — practise on a side braid first.
The Fishtail Braid: Intricate-Looking, Surprisingly Simple
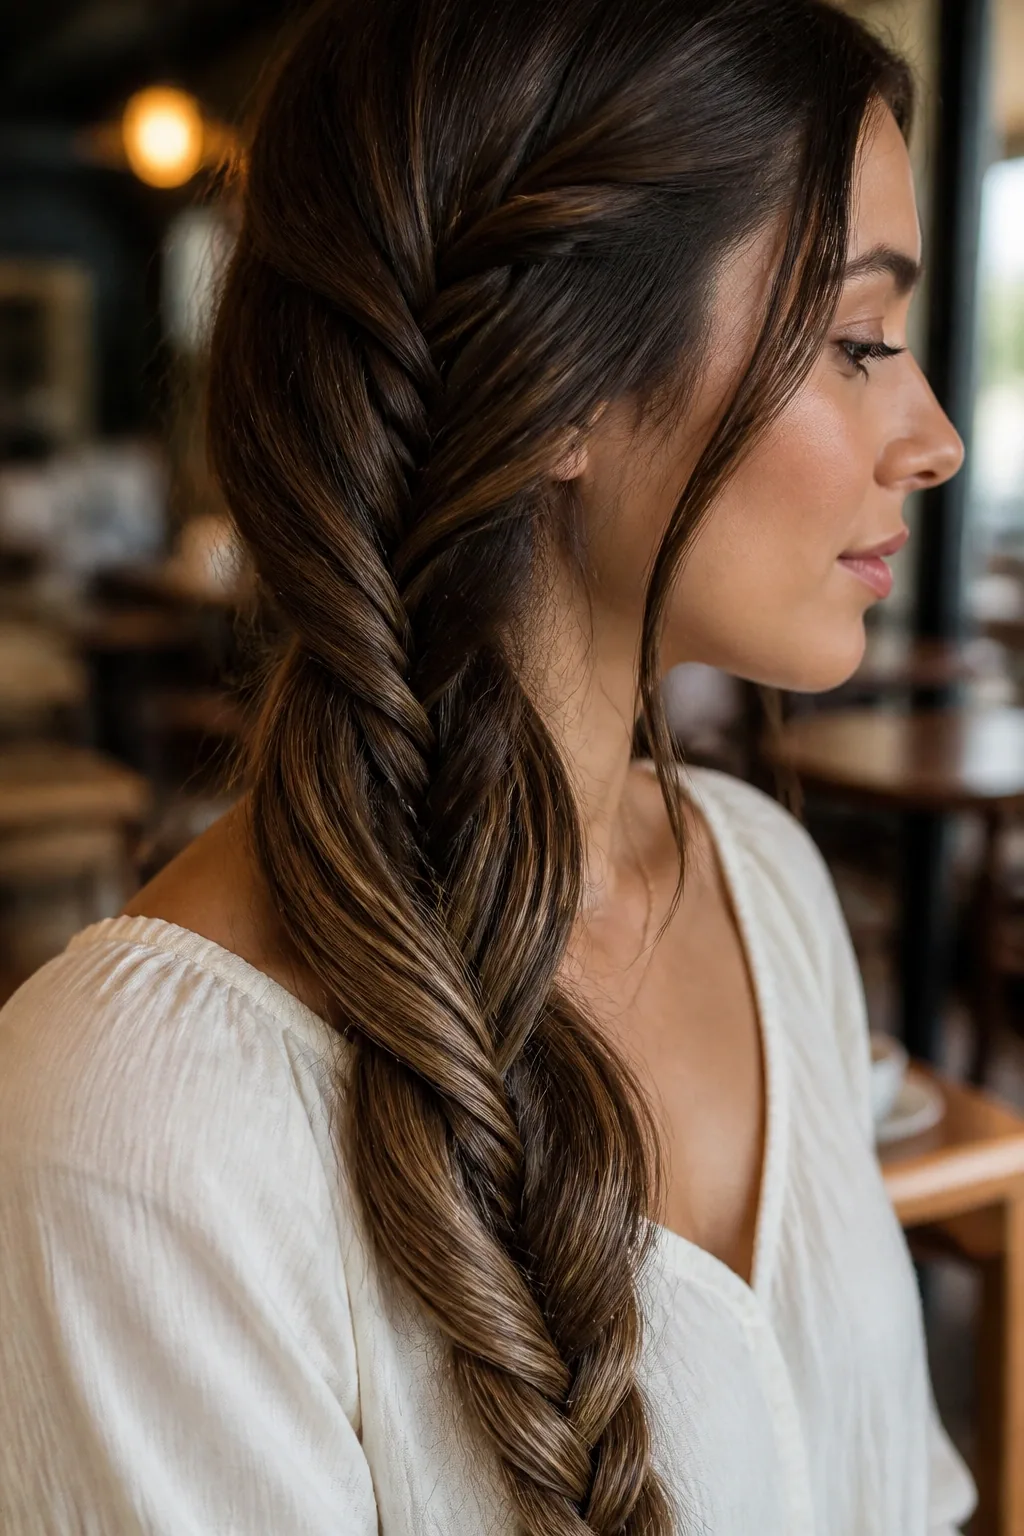
A fishtail braid uses only two sections, crossing small pieces from each side to the other, and it looks far more complicated than it is. Done loosely and pulled apart afterwards, it has a relaxed, textured feel that suits long hair worn over one shoulder.
Time: ten minutes at first, five once you know it. Common mistake: taking pieces that are too large, which makes it look like an ordinary braid — small pieces are what create the fishtail pattern. Maintenance: one clear elastic and a few pins at the top, where the first sections loosen first.
The Side Braid: Long Hair Over One Shoulder
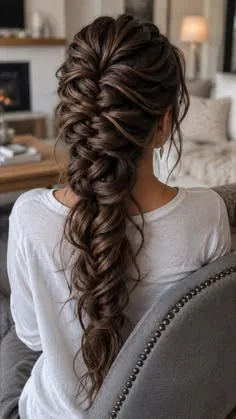
A side braid sweeps all the hair over one shoulder and braids it there, so the length is visible from the front instead of hidden down the back. It is flattering, comfortable, and far easier to braid than a braid behind your head, because you can see what you are doing.
Best for: anyone learning to braid, and for long hair that is too heavy for a centre braid to sit comfortably. Pros: shows off length and layers beautifully. Cons: it can slip forward off the shoulder, so pin the top discreetly or start the braid slightly behind the ear on the opposite side.
The Rope Twist Ponytail: Two Sections, Zero Braiding
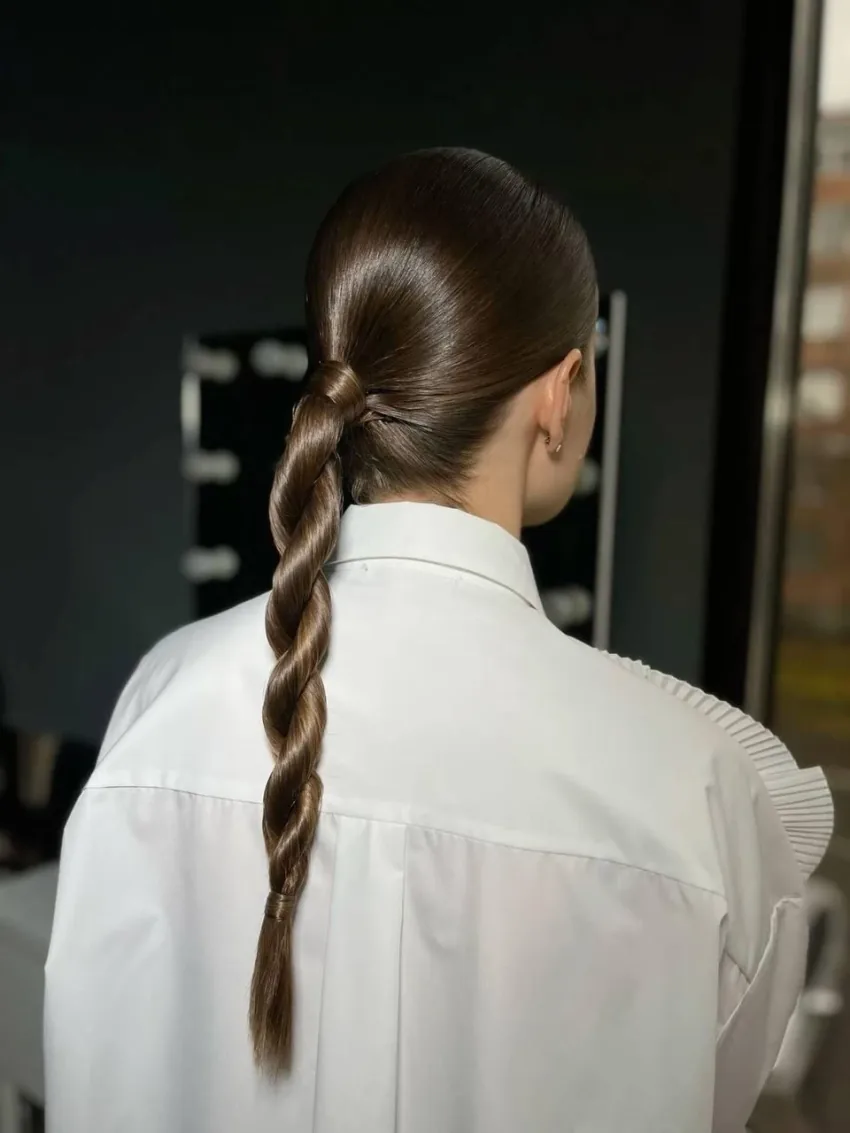
A rope twist divides a ponytail into two sections, twists each one the same way, then winds them around each other the opposite way, which locks the twist in place. It looks polished, takes three minutes, and holds better than a plain ponytail because the twist itself provides grip.
Quick verdict: the best no-braid braid in this guide. Time: three minutes. Who should avoid it: very layered hair, where short pieces escape the twist — smooth a little gel through the lengths first, and the layers stay put.
The Braided Low Bun: Two Styles in One, All Day Long
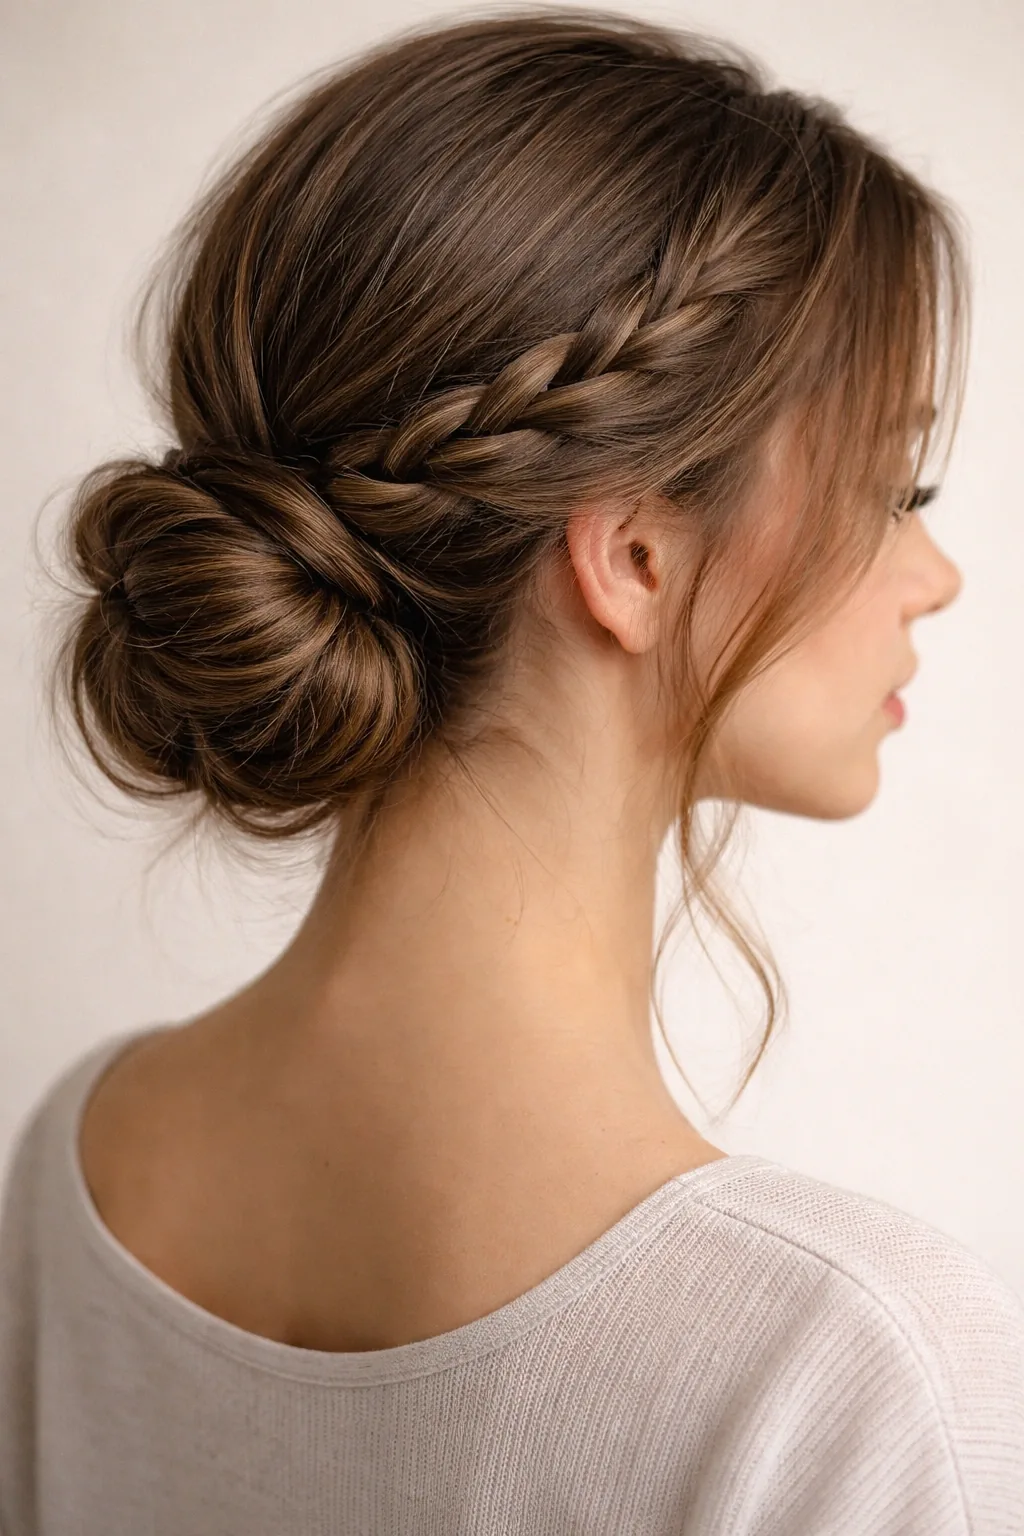
Braid a low ponytail first, then wrap the braid into a bun and pin it. The braid gives the bun texture and grip, so it holds far better than a bun made from loose hair, and it looks finished without any extra effort — the ideal all-day style for long hair.
Maintenance: six or more pins, because a braided bun is heavier than it looks. Best for: long workdays and days when you cannot restyle at lunch. Common mistake: wrapping the braid too tightly, which flattens the texture — wrap it loosely and pin as you go.
The Waterfall Braid: Loose Hair, Held Back
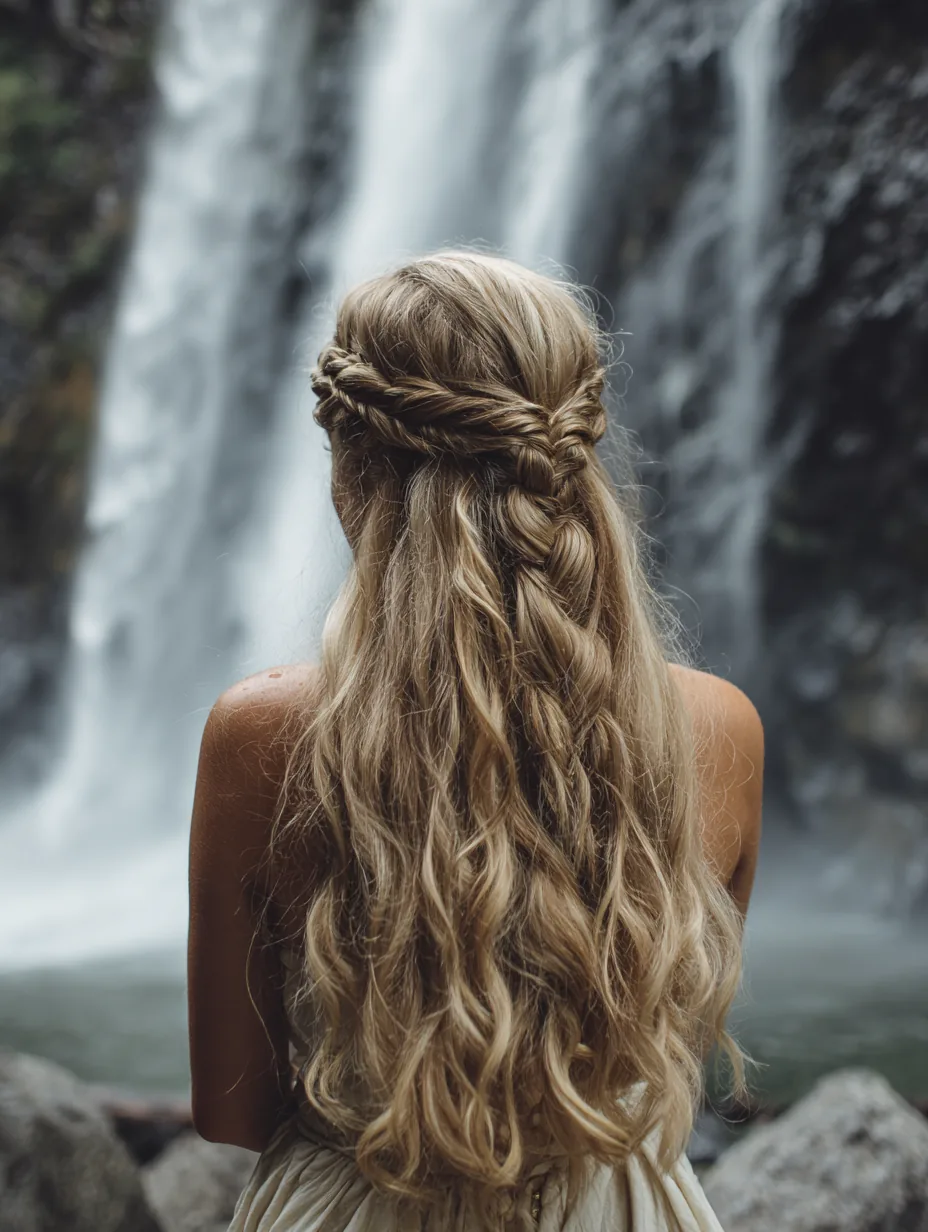
A waterfall braid lets strands fall through the plait as it goes, so you keep the movement of loose long hair with a braid holding the front back. It is prettier than a plain half-up style and far more secure than loose hair on a windy day.
Best for: wavy or curly long hair, where the falling strands already have texture. Time: about eight minutes. Who should skip it: very straight, slippery hair on a first attempt — practise with a little texture spray for grip, or the falling strands will slide straight out.
The Crown Braid: Your Own Hair as a Headband
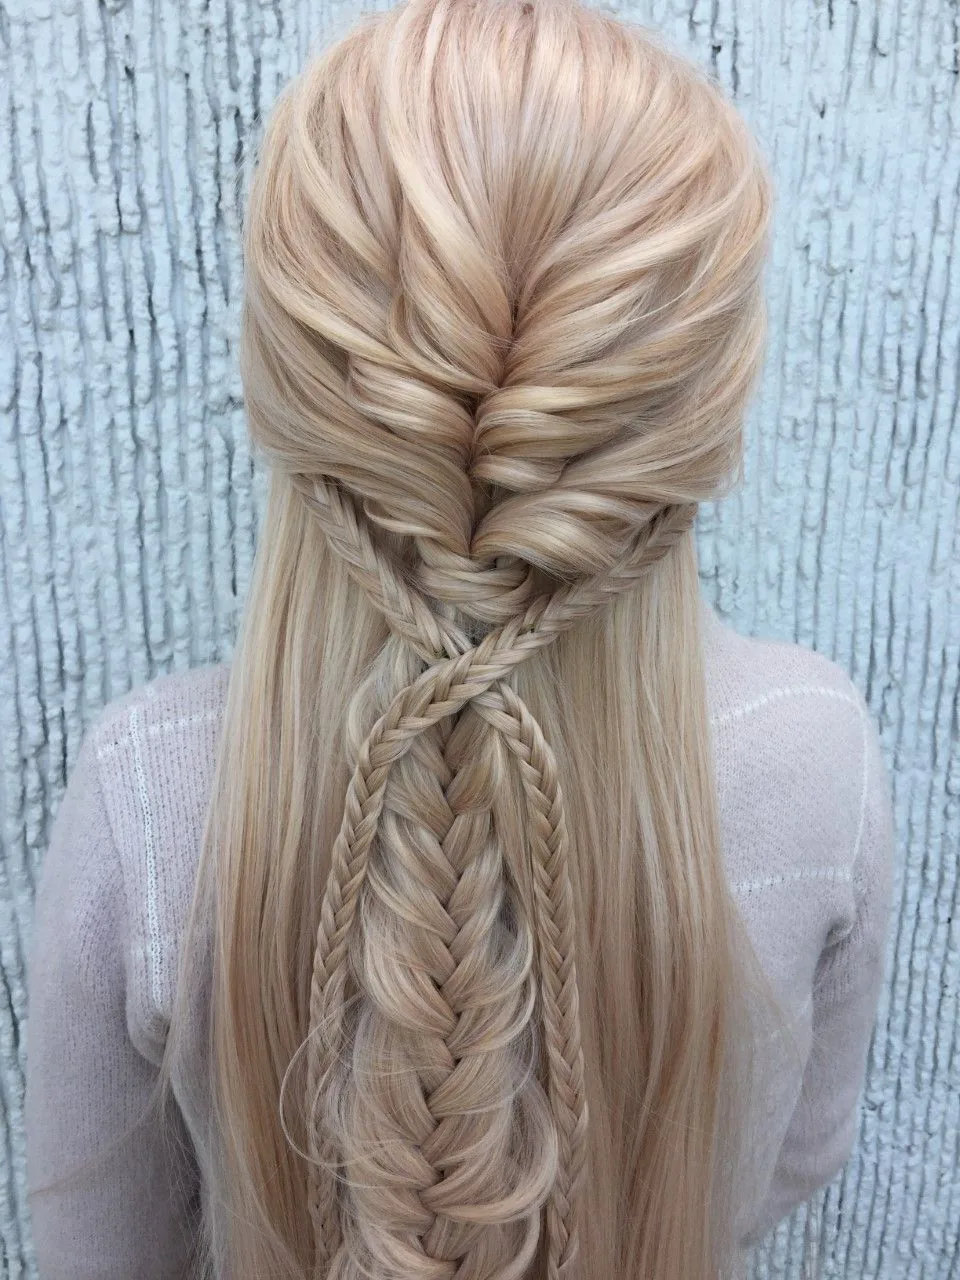
A crown braid runs around the head like a headband made of your own hair, keeping every strand off your face and neck. Braid from one side, across the front, and pin it around to the other side, tucking the end underneath. It looks romantic and stays cool, and it never needs adjusting.
Best for: hot days and long hair that will not stay behind the ears. Time: ten to fifteen minutes, less with practice. Pros: doubles as a protective style for the lengths, which are fully contained. Cons: it needs a lot of pins, so keep spares in your bag.
Double Braids: The Most Secure Everyday Style There Is
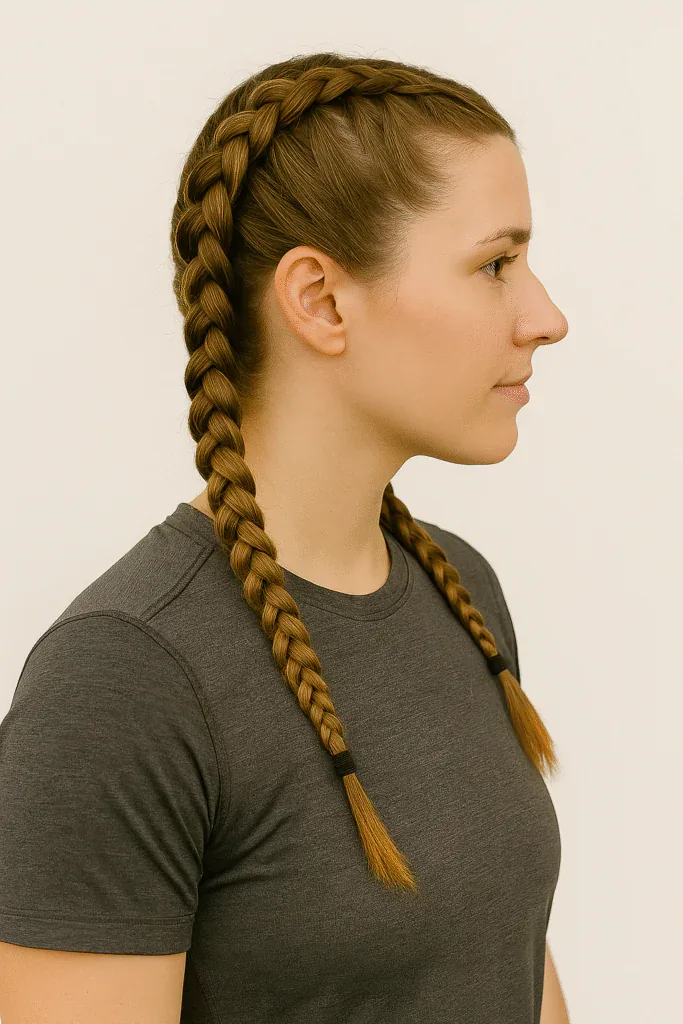
Two braids, one on each side, divide long hair so no section is too heavy, keep every strand off the face, and stay comfortable all day in a way a single thick braid sometimes does not. They suit casual days, active days and second-day hair equally well.
How to style it: part down the middle with a comb, braid each side the same way, and finish both at the same length or the asymmetry will show. Quick verdict: unglamorous, completely reliable, and the style to choose when you need your hair to simply stay put until bedtime.
Heat Styling, Safely: Temperature, Protection and Rest Days
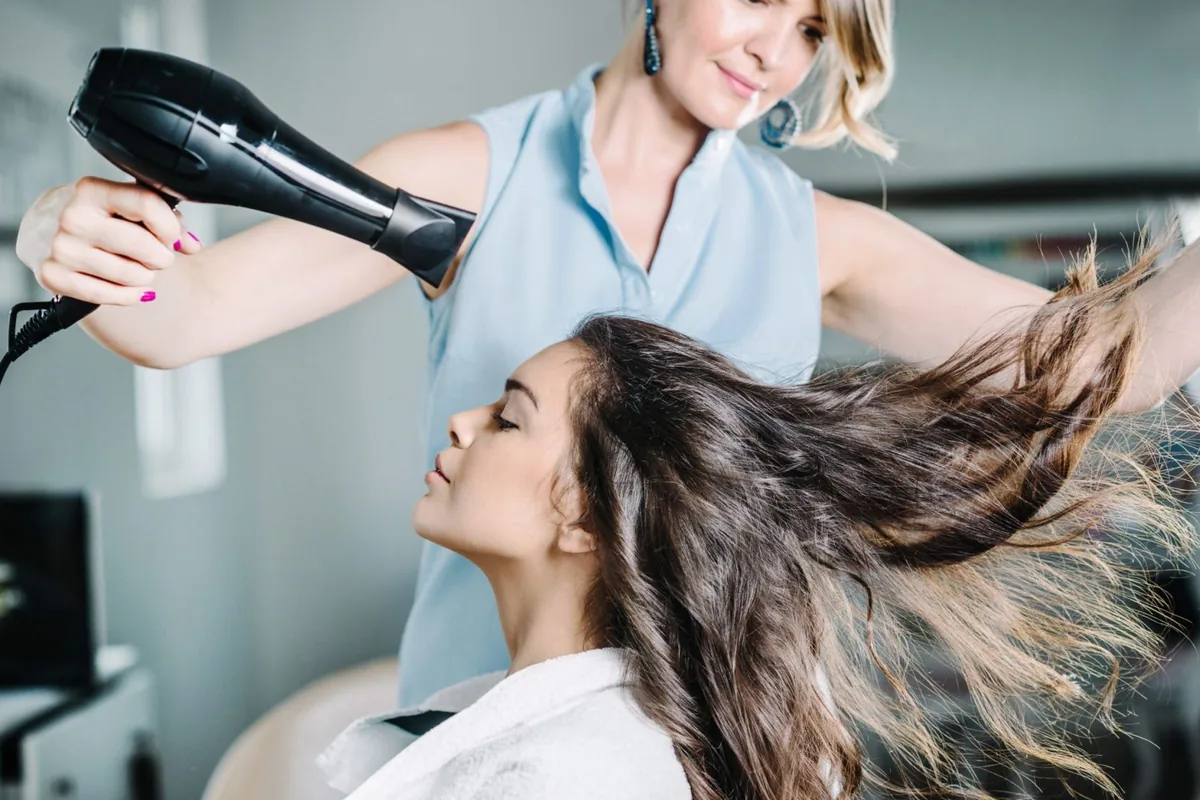
Heat is not the enemy of long hair, but daily high heat with no protection is. Use a heat protectant every single time, keep a dryer on medium rather than maximum, and keep straighteners and curling irons at the lowest temperature that actually holds your style — usually far lower than the dial’s top setting. One slow, even pass beats three rushed, scorching ones.
Give long hair at least two or three heat-free days a week, and rotate in the heatless styles in this guide — overnight braid waves, air-dried waves and twisted ponytails — so your ends get a genuine break. If your ends feel rough, catch on each other or split no matter what you do, that is your hair asking for a trim, not for a stronger serum.
The Low Side Ponytail: Soft, Asymmetric, Easy
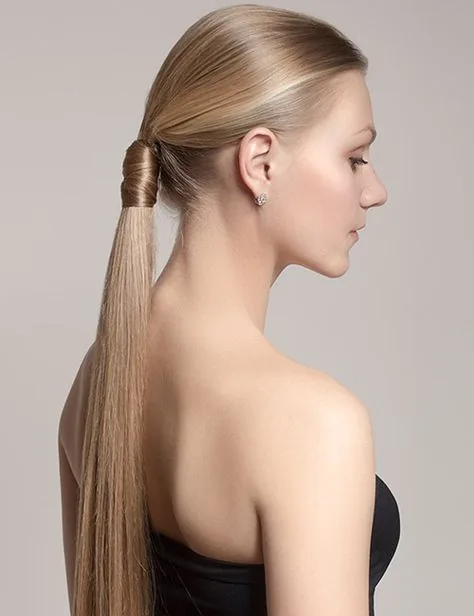
A low side ponytail gathers long hair behind one ear and lets it fall over one shoulder, soft and slightly asymmetric. It suits hair that has already dried into waves, because the texture does the work, and it looks deliberately relaxed rather than unfinished.
Best for: evenings at home, casual lunches and days when a centre ponytail feels too severe. Time: two minutes. Common mistake: tying it too high on the side, which pulls the face — keep it low, behind the ear, and let the front pieces fall naturally.
The Wrapped-Base Ponytail: The Upgrade That Costs Nothing
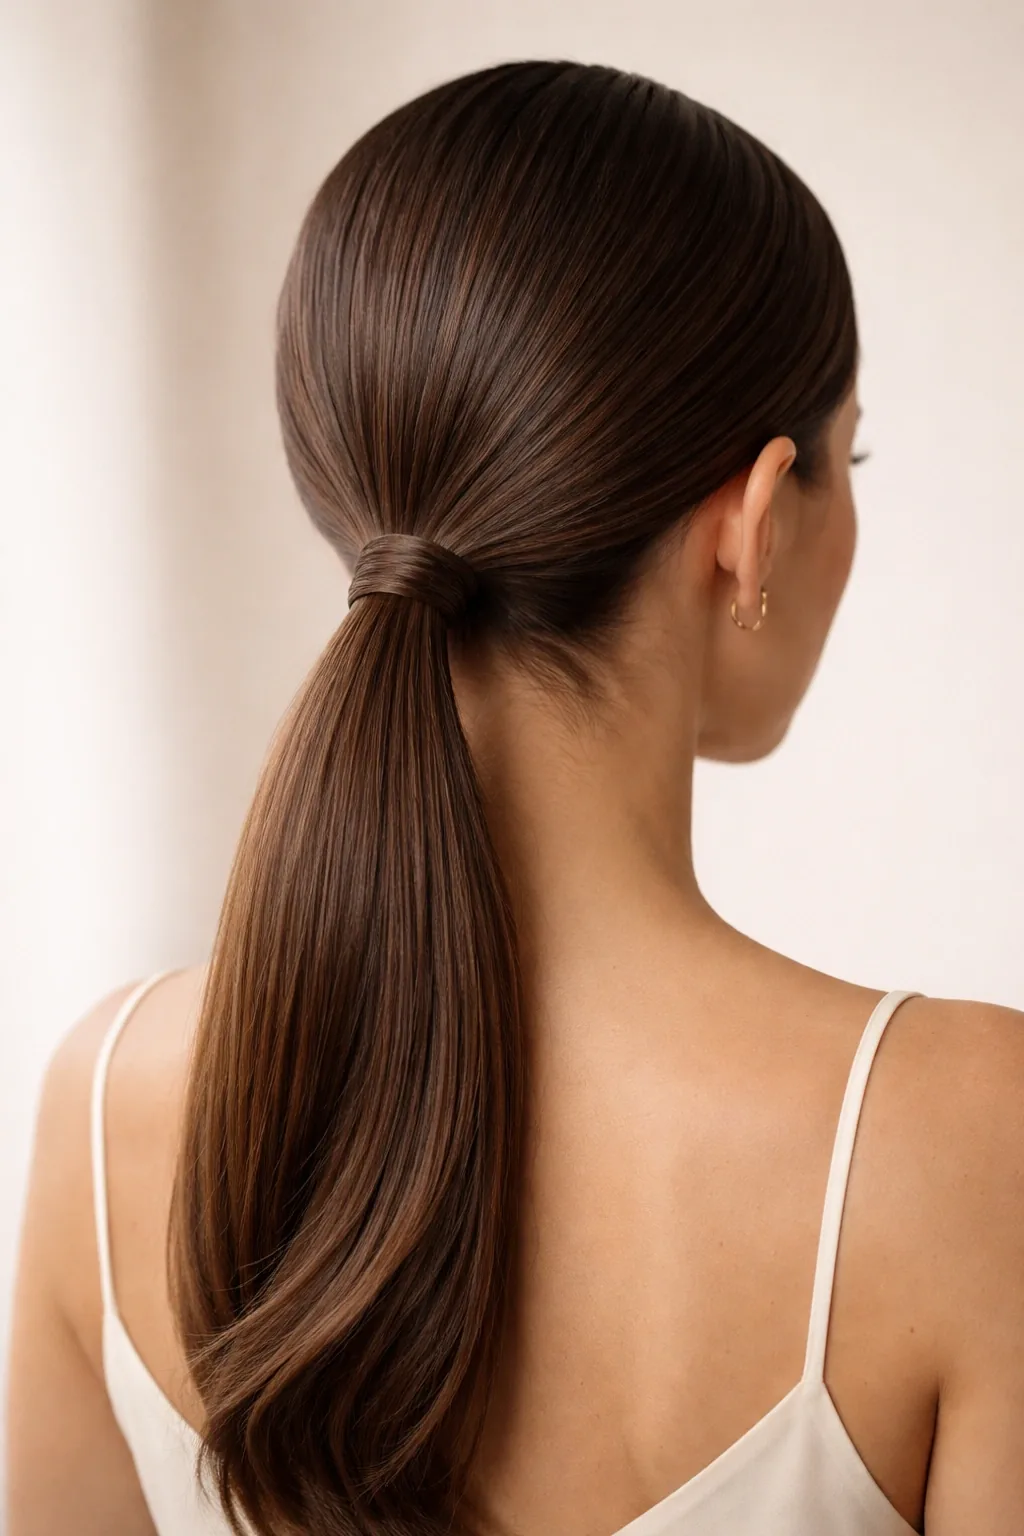
Take a thin section from underneath your ponytail, wrap it around the base to hide the elastic, and pin it underneath. That one move turns an ordinary ponytail into something that looks considered, and it costs nothing but thirty seconds and one pin.
Best for: workdays and any day you want a ponytail to look like a choice rather than a default. Pros: hides stretched or mismatched elastics entirely. Cons: on very fine hair the wrapped section may be too thin to cover the tie — use a small ribbon or scarf instead, which gives the same effect.
The Sleek Low Bun: Polished in Four Minutes
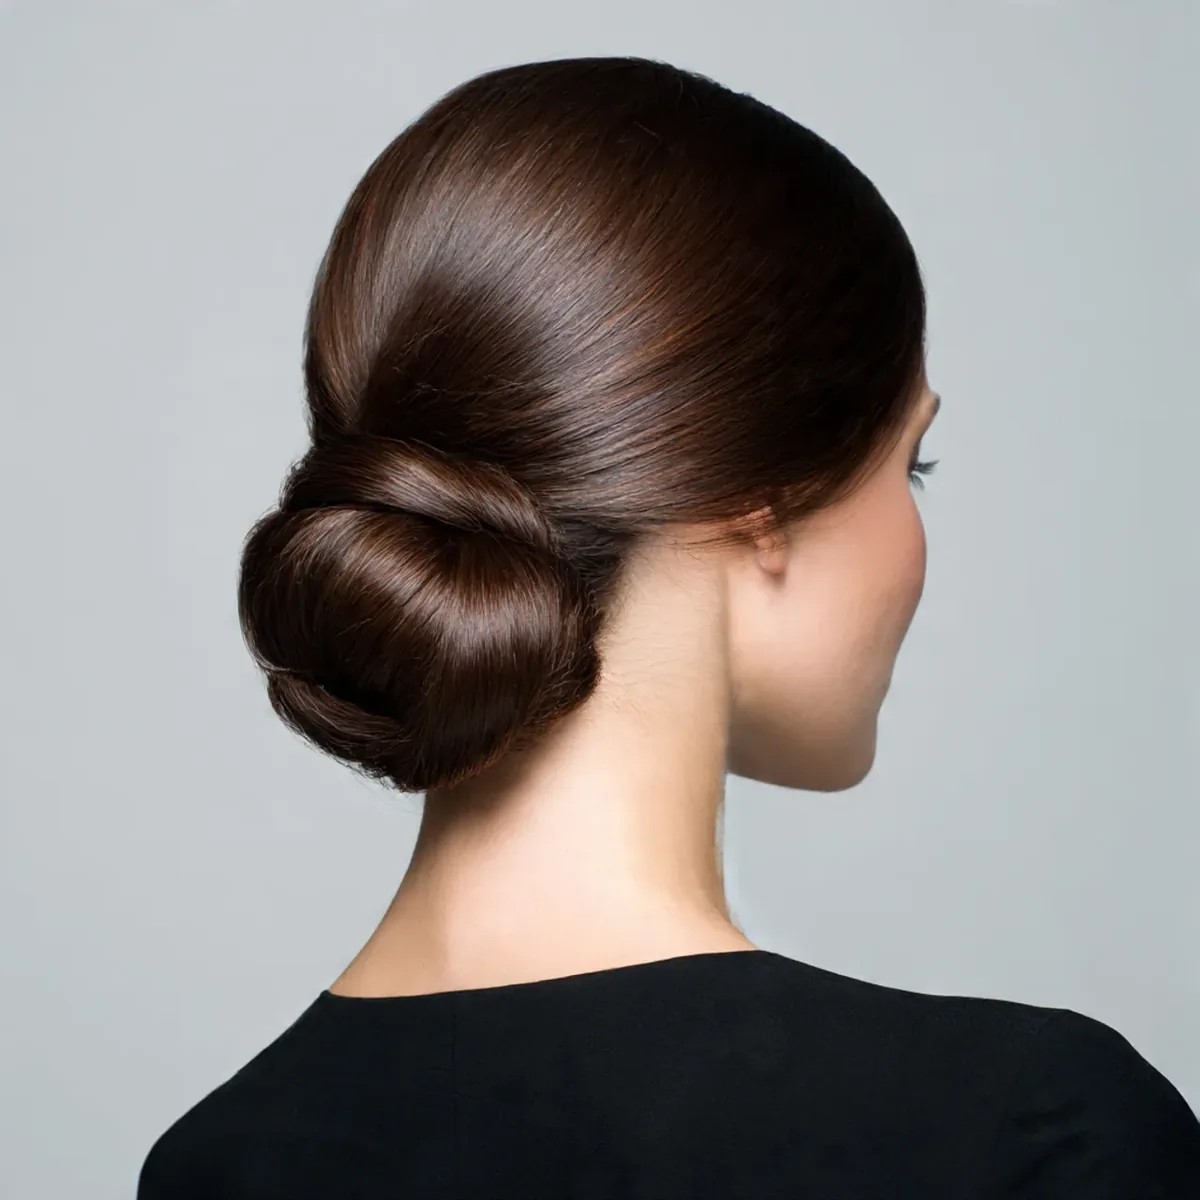
A sleek low bun brushes all the hair back smoothly and coils it at the nape, and it is the fastest polished style for long hair. Smooth the top with a brush and a little gel or cream, twist the ponytail, coil it flat, and pin it all the way around so no loop escapes.
Time and cost: four minutes, no products beyond a brush and pins. Who should avoid the scraped-back version: anyone with a very tight scalp or a hairline that aches under tension — the soft version, with the front left relaxed, gives the same polish with far less pull.
Overnight Braid Waves: Style While You Sleep
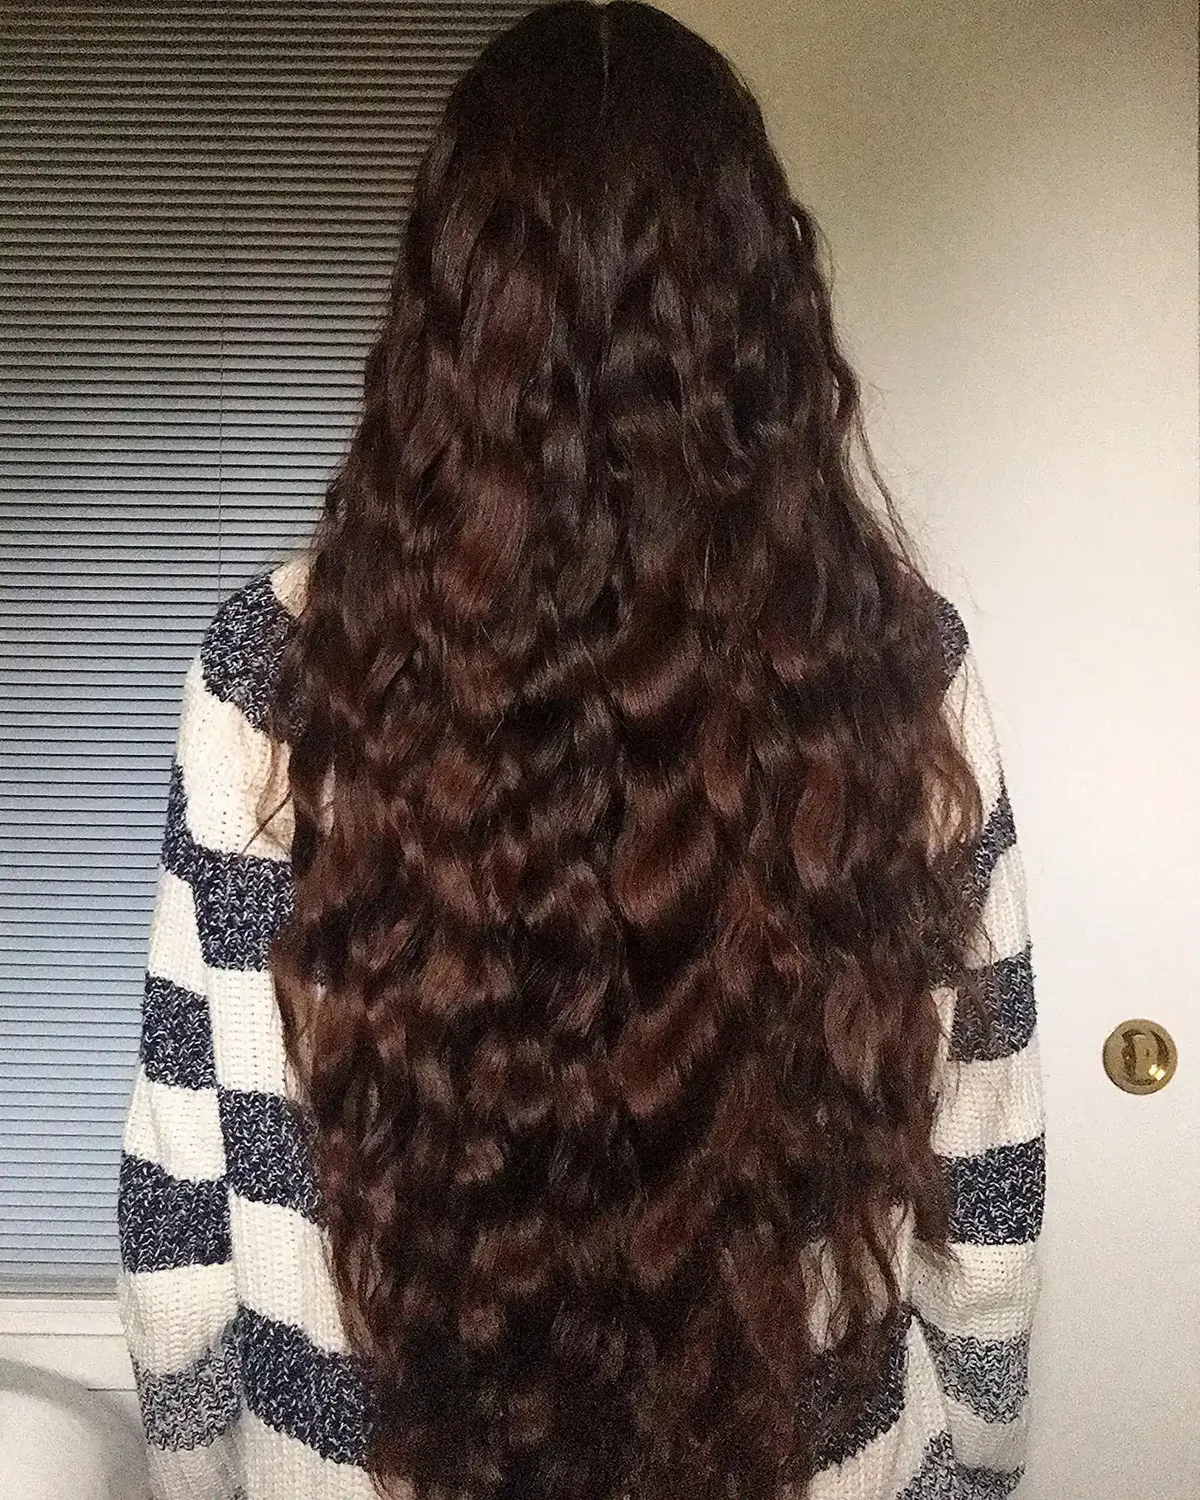
Braid damp hair loosely before bed — one loose braid for soft waves, two for more texture — and undo it in the morning for waves with no heat at all. The looser the braid, the softer the wave, so this is a style you control entirely by how tightly you plait.
Maintenance: a silk scrunchie at the end and a silk pillowcase, which stop the braid from frizzing overnight. Best for: anyone who wants a styled look with a zero-minute morning. Common mistake: braiding soaking-wet hair, which may still be damp at the roots by morning — braid it damp, not dripping.
Heatless Curls: The Long Hair Version That Actually Holds
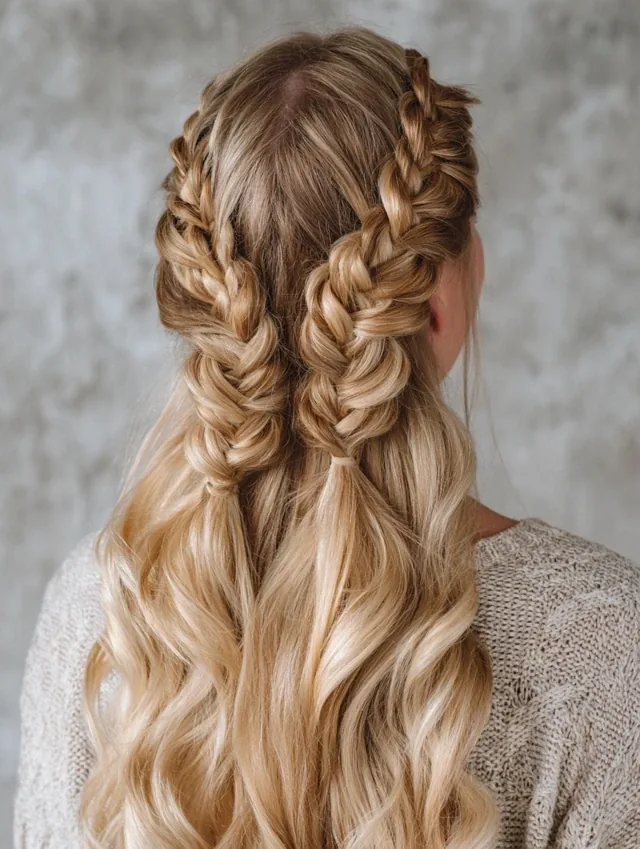
Heatless curls on long hair work best with a soft rod, a headband or a long sock: wrap damp sections around it, leave it for a few hours or overnight, and unwrap for curls with no heat damage at all. Long hair needs more wrapping time than short hair, so overnight is the realistic option, not an hour before leaving.
Pros: zero heat damage, and the curls last well because long hair holds a set once it is fully dry. Cons: sleeping in a rod takes a night to get used to. Quick verdict: worth it once a week if you love curls but want to cut your heat styling in half.
Air-Dried Natural Waves: Let Your Texture Do the Work
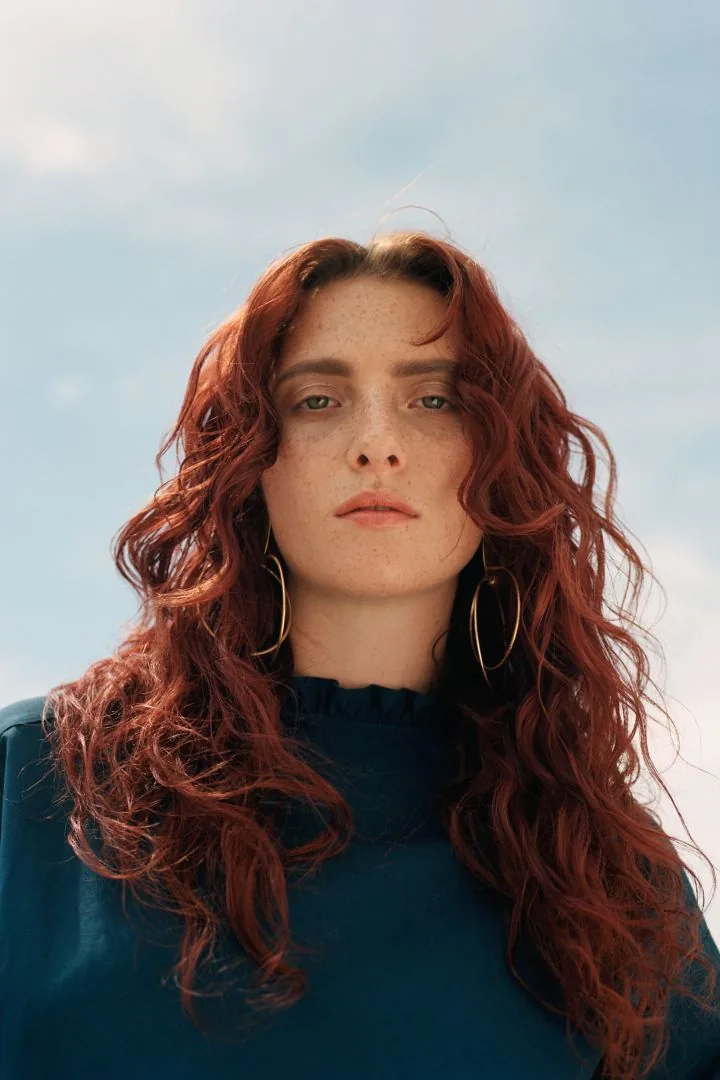
Air-dried waves mean washing, applying leave-in and a little curl cream to soaking-wet hair, scrunching, and then leaving it alone until it is dry. The hard part is genuinely the leaving-it-alone: touching drying waves breaks the pattern and invites frizz.
Best for: wavy and curly long hair, and for anyone cutting heat out of their routine. Time: five minutes of handling, then drying time you are not involved in. Who should skip it: very straight hair, which will simply dry straight — try overnight braid waves instead for the same low-effort idea.
Flipped Ends: The Small Detail That Makes Long Hair Look Styled
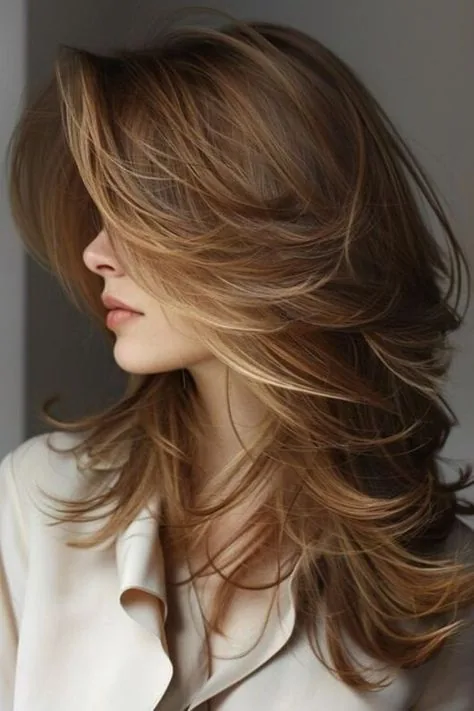
Flipped ends turn just the last few inches of long hair outward or under with a round brush or a straightener, and that small detail makes the whole length look freshly styled even when the rest of it is simply air-dried. Flip outward for a retro feel, under for a neater finish.
How to style it: work in large sections, flip only the ends, and do not overdo the product — a light spray is enough. Time: about five minutes on top of drying. Common mistake: flipping the whole length, which turns a detail into a full curl set and takes three times as long.
The Voluminous Blowout: Big Hair, Honest Expectations
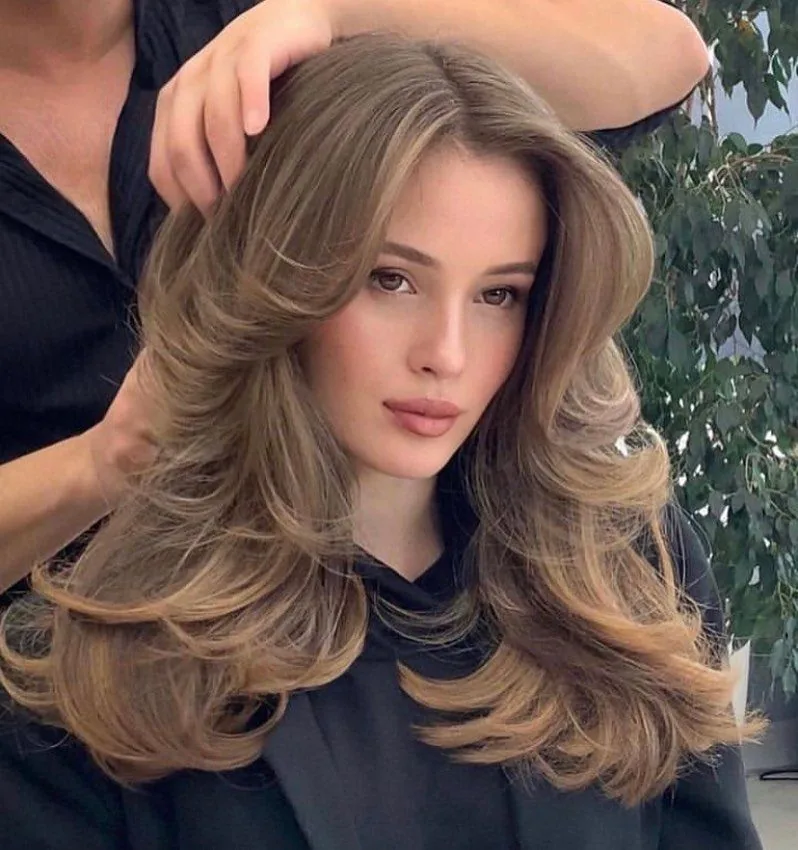
A voluminous blowout on long hair means blow-drying in sections with a large round brush, lifting at the roots and turning the ends under, then letting it cool before you touch it. It is the most time-consuming style in this guide, and it is worth being honest about that: expect thirty to forty minutes on long, thick hair.
Pros: unmatched volume and movement, and a style that lasts two days if you sleep carefully. Cons: the time, and humidity, which will soften it into waves by afternoon. Maintenance: a light flexible spray and a silk pillowcase overnight, and the second-day version is a perfectly good soft wave.
The Headband Style: A Bad Hair Day, Rescued in Seconds
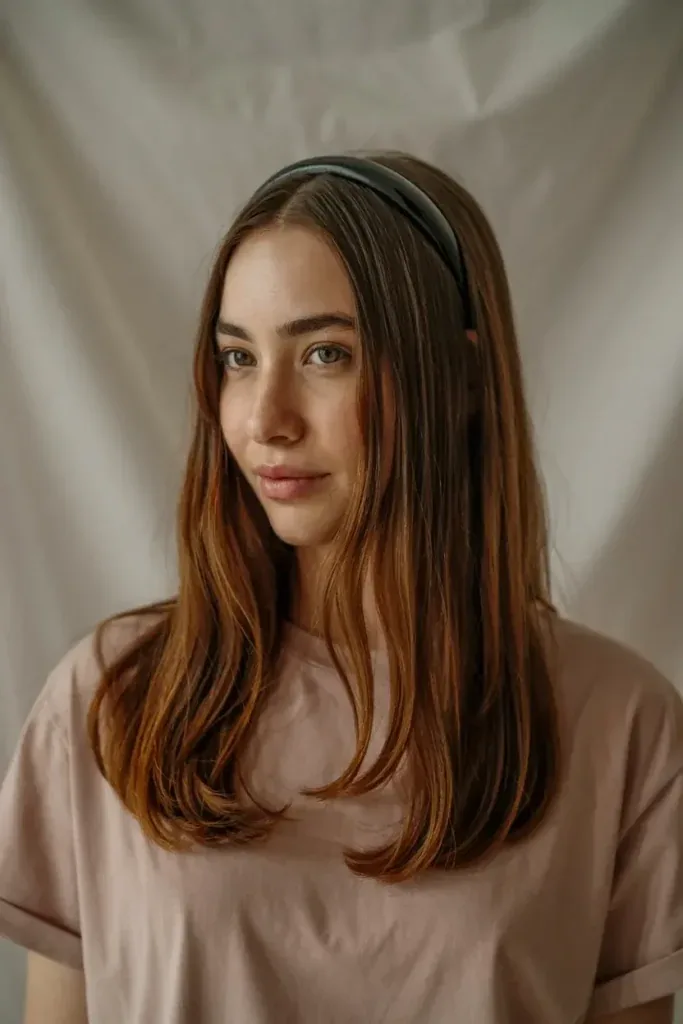
A soft fabric headband pushed back over loose long hair hides a frizzy hairline, keeps hair out of your eyes, and turns second-day hair into a deliberate look in seconds. It is the fastest rescue in this guide, and it works on every texture.
Best for: anyone whose hairline frizzes first, which is most people. Time: under a minute. Pros: no pins, no product, no skill. Cons: a tight headband can ache and leave a dent, so choose a soft, wide one and move it slightly during the day if you wear it for hours.
The Silk Scarf Ponytail: Colour and Grip in One Move
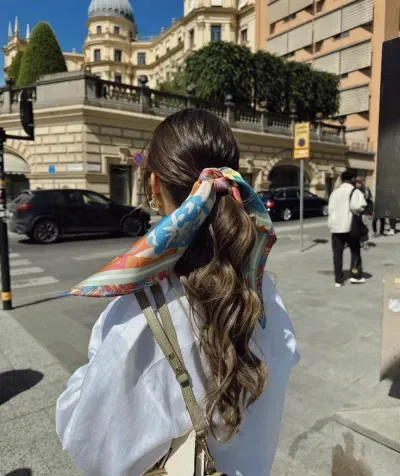
Tie a low or high ponytail, then wrap a silk scarf around its base and let the ends trail with the hair. The scarf adds colour, protects the tie, and stops flyaways from frizzing better than a bare elastic does, because silk creates less friction than cotton or elastic alone.
How to style it: fold the scarf into a band, wrap it twice around the base, and knot it underneath so the knot is hidden. Time: three minutes including the ponytail. Who should skip silk: anyone whose scarf slips constantly — a cotton bandana gives more grip, if less shine.
The Twisted Low Ponytail: The Last Style You Will Learn Today
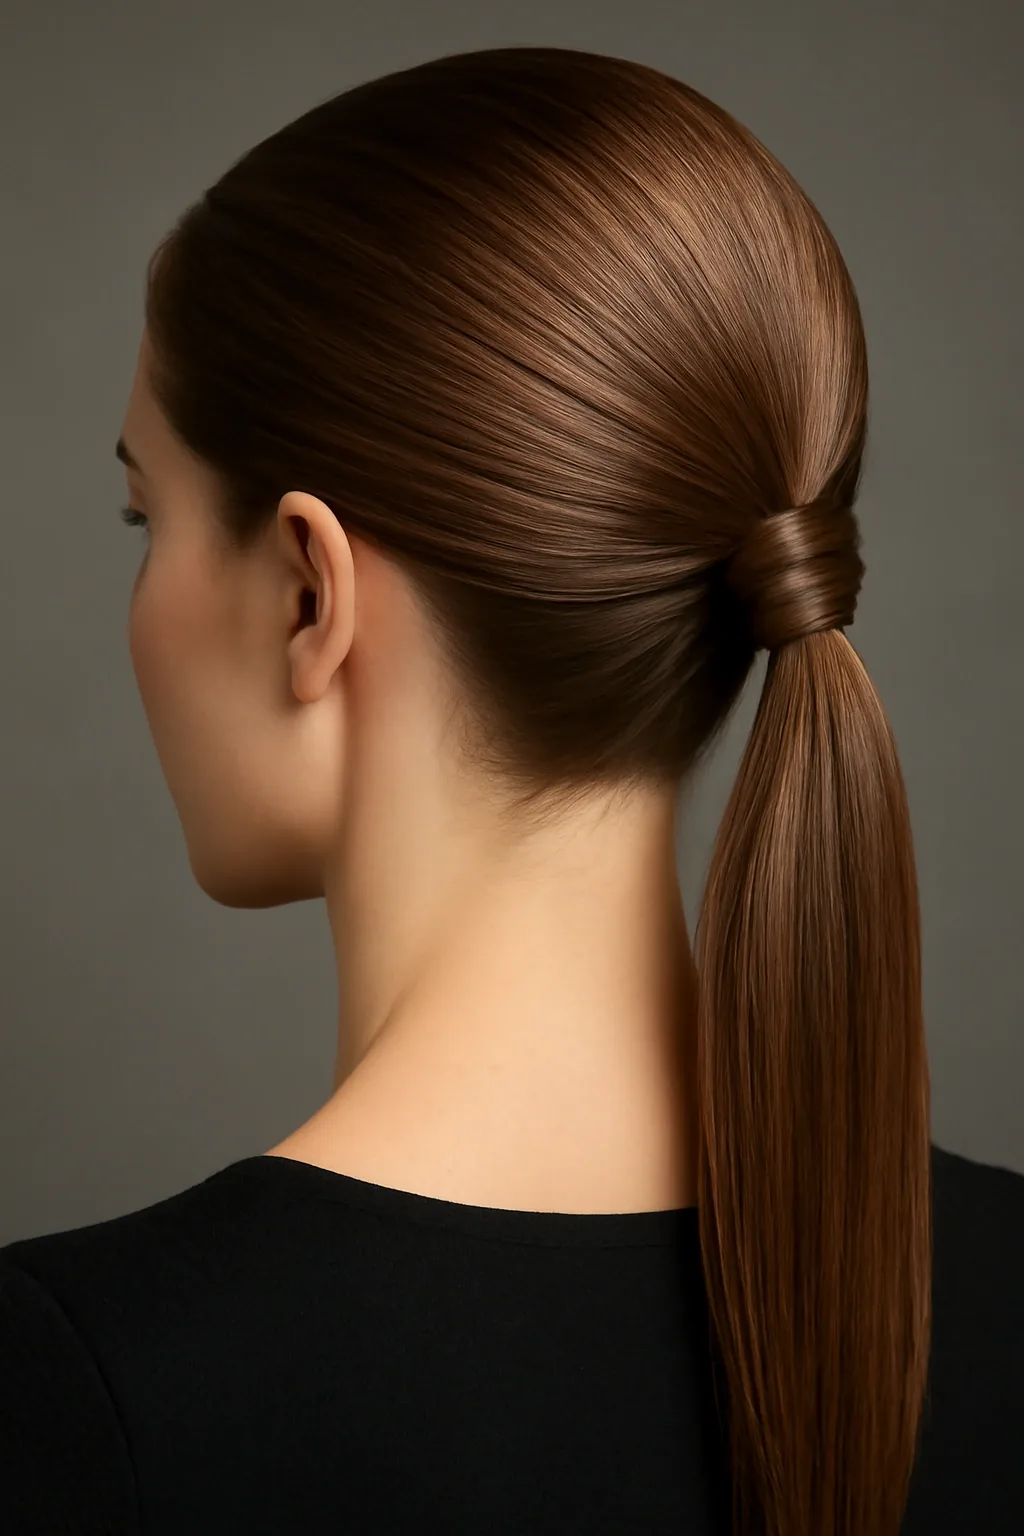
A twisted low ponytail twists two sections of hair back from the face, joins them at the nape, and ties them with the rest of the hair into a low ponytail. It looks like you did something clever, and all you did was twist twice and tie once.
Quick verdict: the best five-minute upgrade to a plain low ponytail, and a good final style to learn because it uses only skills from earlier in this guide — twisting, gathering, tying. Common mistake: twisting the sections in opposite directions so they unwind; twist both the same way, as with the half-up twist, and they will hold.
Second-Day and Third-Day Long Hair: The Rescue Plan
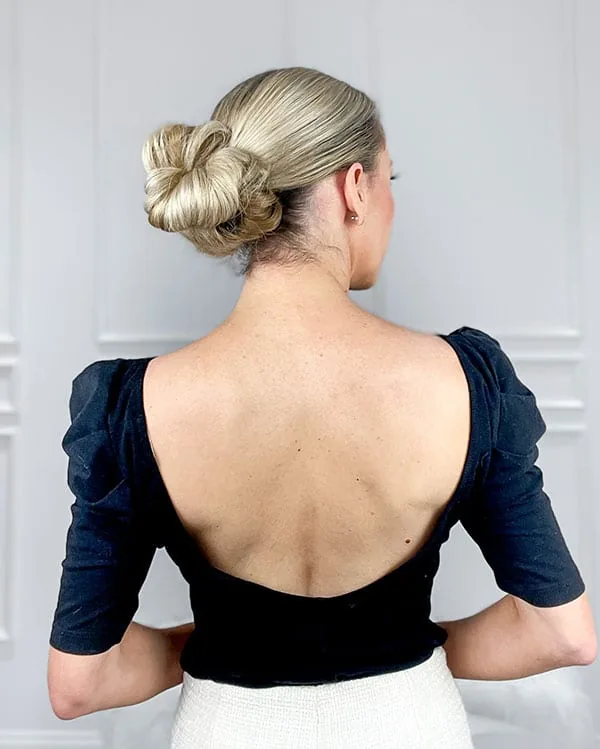
Second-day long hair is not dirty hair; it is hair with texture, grip and a head start. A little dry shampoo at the roots, a quick brush-through and a style that uses texture — a braid, a bun, a claw clip twist — will look better on day two than most freshly washed styles. The trick is to style the texture you have, not to fight it back into day-one smoothness.
By day three, lean fully into updos: a braided bun, a low chignon or double braids all hide oily roots and frizzy ends at once. A silk scarf or headband covers the hairline, and a low ponytail with a wrapped base looks deliberate rather than desperate. Wash when the scalp tells you to, not when a calendar does, and second-day styling stops feeling like a compromise.
Trims and Split Ends: How to Keep Length, Not Lose It
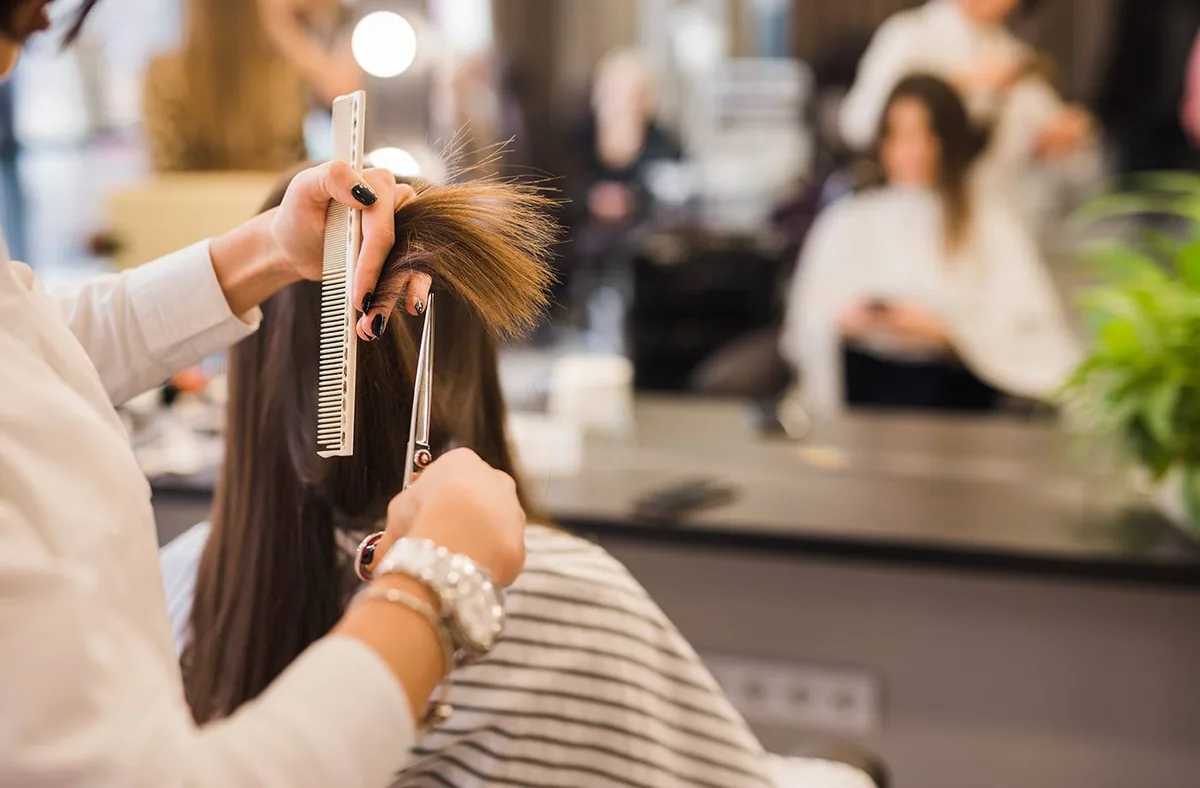
The paradox of growing long hair is that regular trims are what let you keep it. Split ends travel upward if left alone, so a small trim every eight to twelve weeks removes damage before it costs you inches. Ask for a dusting — a tiny amount off the very ends — if length is your priority, and show your stylist exactly how much you mean by pinching it between your fingers.
Between trims, protect the ends: sleep on a silk pillowcase or in a loose sleep braid, keep them out of tight elastics, and oil just the last few inches after washing. If splits appear between appointments, spot-trim individual split hairs rather than cutting the whole length, and check whether heat, rough brushing or tight styles are causing the damage in the first place.
Mistakes That Quietly Cost You Length
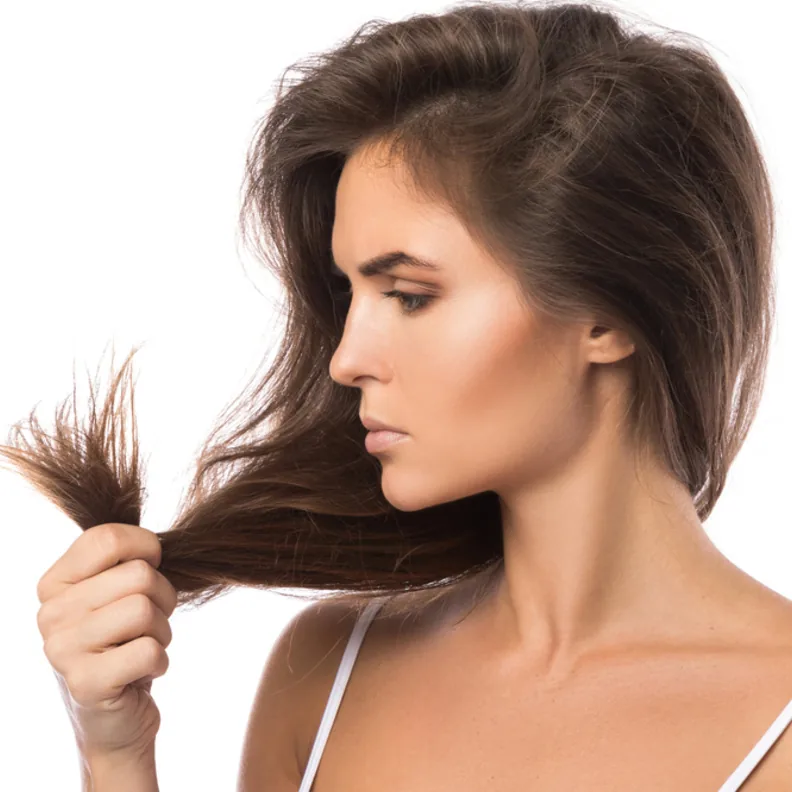
The most expensive long hair mistakes are quiet ones: tying wet hair tightly every day, brushing from the roots down through knots, sleeping with hair loose on rough cotton, and skipping trims until splits force a big cut. None of them feels dramatic on the day, but together they are why so much long hair never seems to get longer.
Fix the big three first and the rest follows. Detangle ends-first, keep wet styles firm but not strangled, and sleep in a loose braid or on silk. Add a heat protectant and a realistic trim schedule, and your length will start to accumulate instead of breaking off at the same rate it grows. Long hair rewards patience more than products.
What is the easiest everyday hairstyle for long hair?
A low ponytail, a messy bun or a half-up claw clip are the easiest everyday hairstyles for long hair, because each takes under five minutes, needs only a tie or a clip, and works on second-day hair. For a style that looks more polished with the same effort, try a wrapped-base ponytail or a twisted low ponytail.
How do I stop long hair tangling every day?
Detangle ends-first with a wide-tooth comb, braid hair loosely for sleep, and keep it contained in a braid or bun on windy days. Never brush dry, tangled hair from the roots down, and use a leave-in conditioner or detangling spray on the lengths after washing.
How often should I wash long hair?
Most long hair does well washed two or three times a week, with shampoo focused on the scalp and conditioner on the lengths. Very oily scalps may need more frequent washing, and very dry or curly hair may need less — let your scalp, not a fixed schedule, decide.
Does long hair need a trim if I am growing it out?
Yes. A small trim every eight to twelve weeks removes split ends before they travel up the hair and force a much bigger cut later. Ask for a dusting — just the very ends — if keeping length is your priority.
What is the best hairstyle for long hair on a busy morning?
A messy bun, a low ponytail or a half-up claw clip clip takes under five minutes and looks intentional on long hair. If you have five more minutes, a French braid or a twisted low ponytail will stay put all day without any restyling.
How can I get waves in long hair without heat?
Braid damp hair loosely before bed and undo it in the morning for soft waves, or wrap damp sections around a soft heatless-curl rod overnight. Braid damp, not soaking-wet, hair, and let it dry completely before undoing it, or the waves will fall out.
Why does my long hair go flat at the roots?
Weight pulls long hair flat, especially on fine hair. A deep side part, root-lifting layers, drying upside down for the first few minutes, and a little texture spray at the crown all help. Avoid heavy oils and creams near the roots, and keep them on the ends instead.
Is it bad to tie long hair up every day?
Tying it up is fine if you vary the position, use snag-free ties, and keep styles firm rather than painfully tight. Tying wet hair tightly in exactly the same spot every day causes breakage, so move the ponytail or bun by an inch and alternate with loose styles.
How do I make a ponytail stay up in long, heavy hair?
Use two ties crossed over each other, secure the ponytail in two places if needed, and start with slightly textured or second-day hair for grip. A wrapped base also helps, because the wrapped section anchors the tie and stops it sliding down under the weight.
What should I ask my stylist for if I want low-maintenance long hair?
Ask for long layers or a U-cut that removes bulk without losing length, face-framing layers if you want the front to look styled with no effort, and a trim schedule of every eight to twelve weeks. Tell your stylist how you actually style your hair day to day, so the cut matches your real routine, not an ideal one.
Conclusion
Long hair does not need a complicated routine — it needs a few styles you trust, a realistic washing and trim schedule, and the patience to detangle ends-first and sleep in a loose braid. Start with one loose style you love, one updo that stays put, and one braid you can do without a mirror, and you have covered almost every ordinary day this guide is about.
Pick three styles from this list, practise them on a weekend when there is no rush, and keep the tools for them in one place. Long hair rewards consistency far more than it rewards new products, and once the basics are easy, the length itself does most of the work — it is the style, the volume and the drama, all in one.