One Night, One Perfect Hairstyle: 36 Homecoming Looks, From Romantic Curls to Sleek Updos
Homecoming is one night, but the photos last for years — and the hairstyle you choose is what ties the whole look together. The dress gets all the attention in the shop, but it is the hair that decides whether the outfit reads romantic, polished, carefree or glamorous. A soft curl can make a simple dress feel like a fairytale, a sleek bun can make a sparkly gown look expensive, and a boho braid can turn a short dress into the most memorable look in the room. The trick is not picking the prettiest hairstyle in a vacuum. It is picking the one that suits your dress, your hair length, your face, and how much dancing you actually plan to do.
This guide brings together 36 homecoming hairstyles for women, grouped by vibe so you can shop by feeling: romantic looks for soft, dreamy dresses; sleek and polished styles for fitted gowns; boho and relaxed hair for anyone who wants to look beautiful without feeling overdone; vintage glamour for a night that deserves drama; and short-hair showstoppers that prove you do not need long hair to steal the room. Eight guides answer the questions every homecoming girl actually asks: how to match your hair to your dress, which styles survive a night of dancing, whether to do your own hair or book a stylist, and what to do the night before so nothing goes wrong on the day. Every style notes how long it takes, what you need, and what it pairs best with — so you can choose with confidence and still have time to enjoy the night.
Picking a Homecoming Hairstyle to Match Your Dress
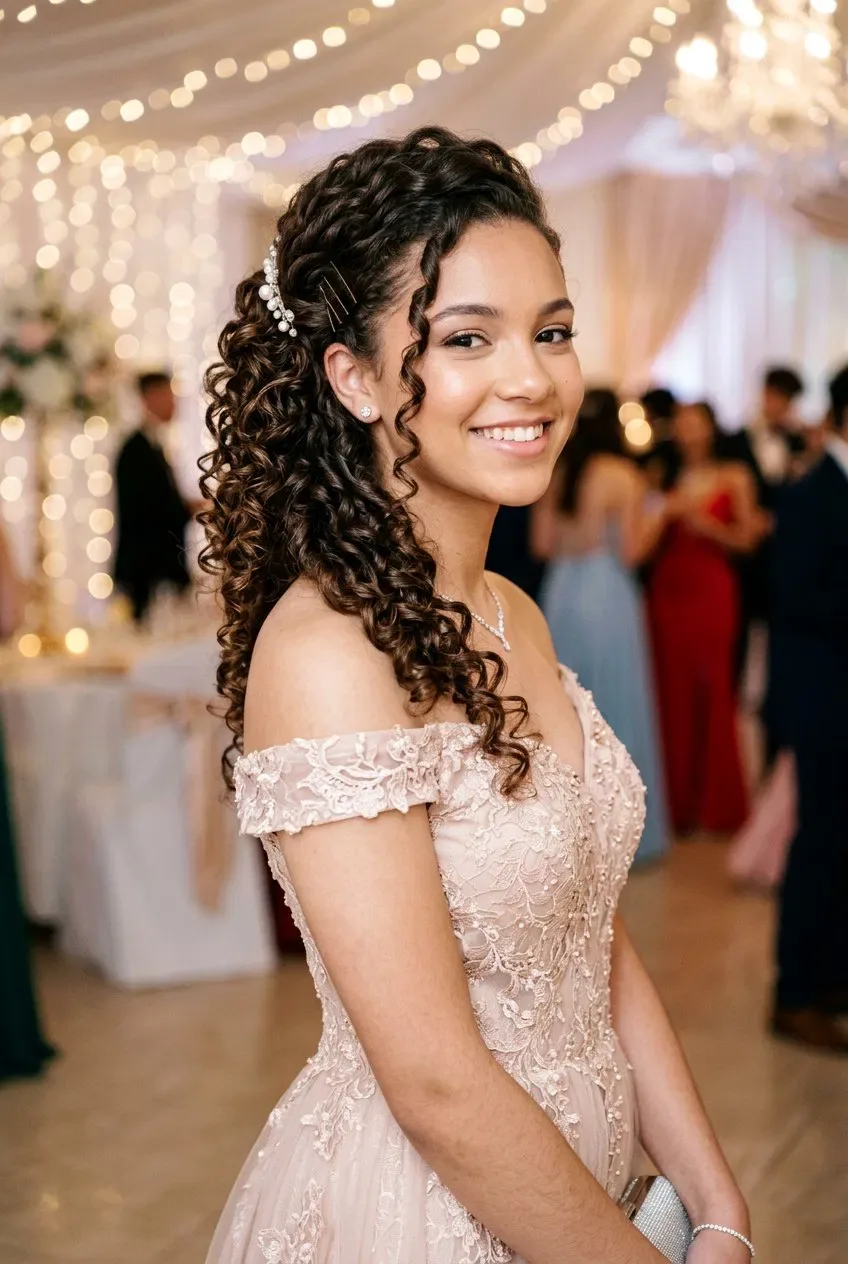
Start with the neckline, because it decides how much hair should be up and how much should be down. A strapless or off-the-shoulder dress shows off the shoulders and collarbones, so hair worn down in soft curls or a half-up style frames that open neckline beautifully, while a high bun or an updo can leave the shoulders looking bare and the whole outfit top-heavy in the wrong direction. A halter or high-neck dress, on the other hand, already has a lot happening around the neck, so an updo or a swept-back style keeps the lines clean and stops the hair competing with the neckline. A one-shoulder dress is the trickiest of all: keep the hair on the opposite side, or sweep it up entirely, so the bare shoulder stays the star.
Then think about the dress itself — its length, its sparkle, and its mood. A short, flirty dress pairs well with loose, playful hair: beachy waves, a bouncy half-up style, or a textured ponytail that moves when you do. A long, formal gown calls for something more finished: a low chignon, a polished updo, or old-Hollywood waves that match the drama of the fabric. If the dress is heavily beaded or sequinned, keep the hair simpler so the two do not fight; if the dress is plain, the hair can carry the glamour. And always try the hair with the actual dress on, not just in the mirror in a T-shirt — a style that looks perfect on its own can look completely different once the neckline, the straps and the skirt are in the picture.
Hairstyles That Survive Dancing All Night

The difference between a hairstyle that looks perfect in the bathroom mirror and one that still looks good at midnight is structure — and the secret is that the most dance-proof styles are the ones with the hair anchored in more than one place. A low bun or a braided updo survives because the weight of the hair is distributed and pinned at several points, while a single high ponytail held by one elastic will slide, sag and loosen the moment you start moving. Braids are your best friend on the dance floor: a French braid, a Dutch braid or a braided crown locks the hair in place section by section, so even if one piece loosens, the rest holds.
Prep matters as much as the style. Start with hair that is not freshly washed — day-old hair has more grip and holds pins and curls far better than slippery clean hair. Work a texturising spray or a little dry shampoo through the roots before you style, and set every section with a flexible-hold hairspray as you go, not just a blast at the end. Carry three things in your clutch: a handful of bobby pins that match your hair colour, a small elastic, and a travel-size hairspray. And do the jump test before you leave the house: jump up and down ten times in front of the mirror. If anything moves, pin it now — because it will move a lot more on the dance floor.
Doing Your Own Homecoming Hair vs Booking a Stylist
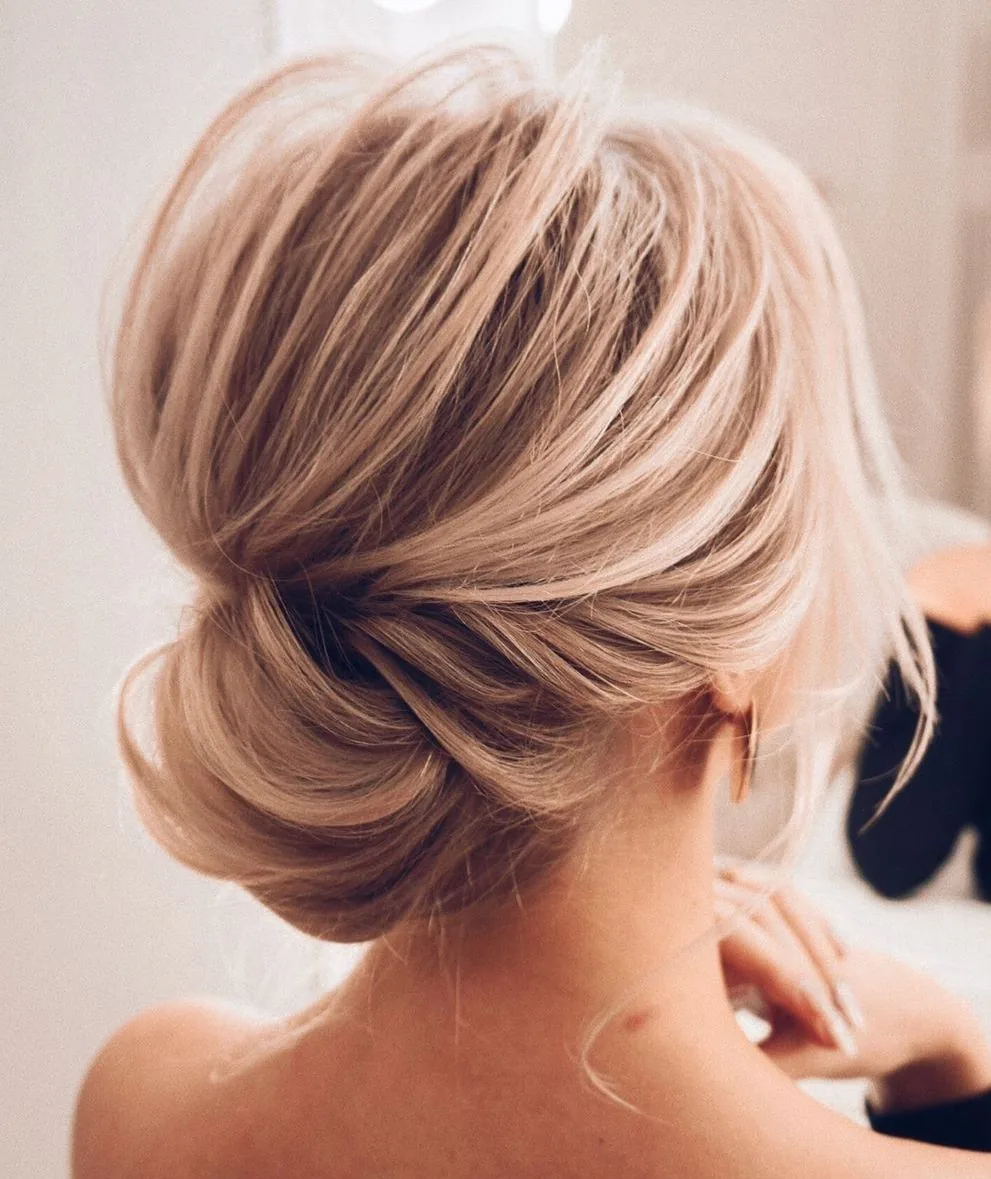
Doing your own homecoming hair has one big advantage: you control the timing, you know your hair, and you can practise as many times as you like without paying for each attempt. Simple styles are genuinely doable at home — soft curls, a half-up twist, a messy bun, a braided crown — especially if you have done them before and you have the right tools. The trade-off is time and stress: on the day itself you will be doing your makeup, getting dressed, and watching the clock, and a style that took forty relaxed minutes in practice can take twice as long when you are nervous and the curling iron is hot.
Booking a stylist makes sense when the style is complicated — a sculpted updo, a French twist, an intricate braid — or when your hair is very thick, very long, or very resistant to holding a curl. A stylist brings professional pins, products and a second pair of hands, and the result usually lasts longer. Book at least two weeks ahead, bring photos of the exact style from more than one angle, and bring a photo of your dress. Ask how long it will take, what it will cost including any trial, and whether they can work around your dress and makeup timing. If you do it yourself, do a full trial run at least a week before — hair, makeup and dress together — and time it. Whichever route you choose, the trial run is what turns a gamble into a plan.
Half-Up Styles That Photograph Well
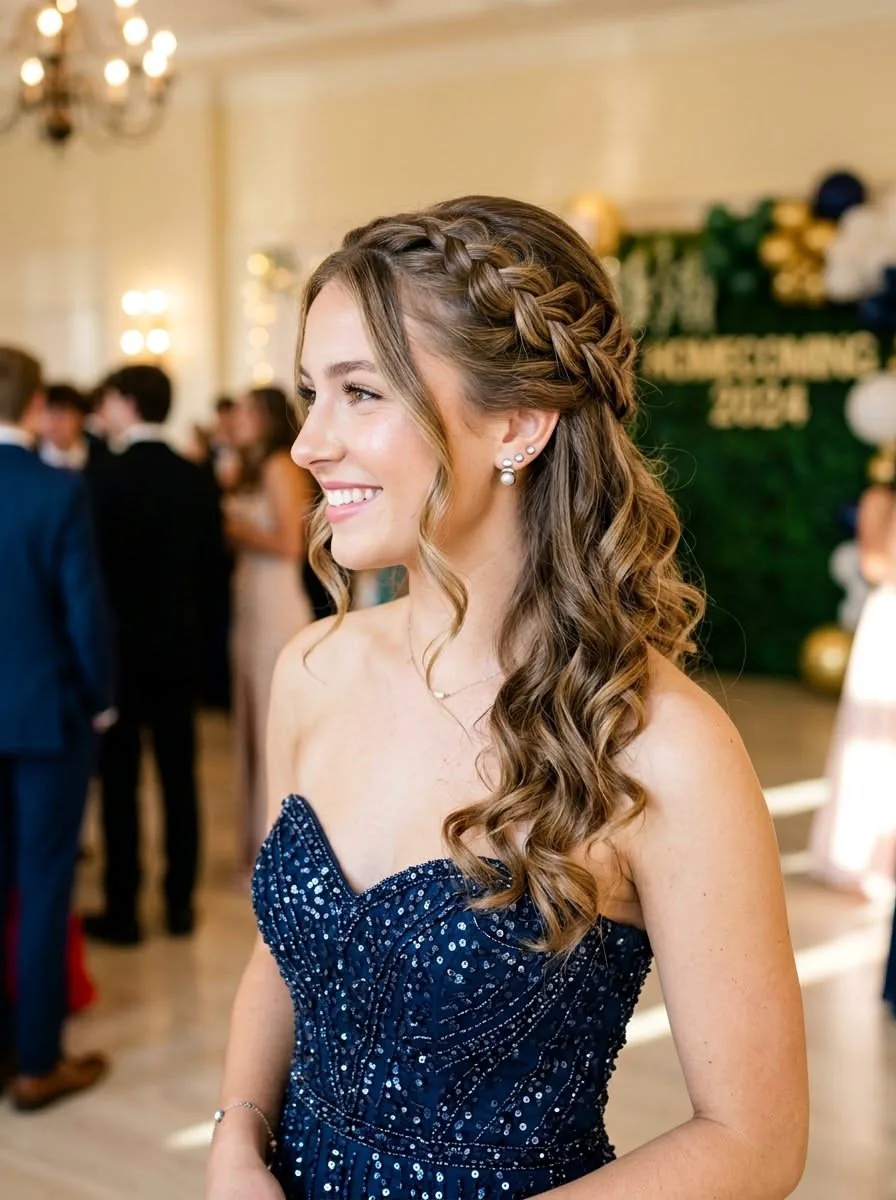
Half-up hairstyles are the most photographed styles at homecoming for a reason: they give you the best of both worlds in a photo. The hair pulled back from the face keeps your features visible — your eyes, your smile, your earrings — while the hair left down gives the photo movement, softness and length. A full updo can look severe in a flash photo, and hair worn completely down can hide the face and the dress neckline; half-up sits right in the middle, and it flatters almost every face shape. The key is volume at the crown: a little backcombing or a texturising spray at the roots stops the top from looking flat, which is the one thing that makes half-up styles look tired in pictures.
For the best photos, think about the back as well as the front, because homecoming photos are taken from every angle. A half-up twist, a braided half-up or a half-up with a pretty clip gives the back of the head something to look at, so the photos from behind are just as good as the ones from the front. Keep the loose lengths curled or waved rather than dead straight — curls catch the light and add dimension in a photo, while straight hair can look flat under a camera flash. And do a photo test during your trial run: take pictures in the same kind of light you will be in, with flash and without, and check the back view too. A style that looks perfect in the mirror can have a flat spot or a stray pin that only the camera sees.
Updos That Hold Without a Hundred Pins

A good updo should not feel like a helmet, and it should not need a hundred pins to stay put — the secret is building the style in layers, so each section supports the next, instead of piling all the hair into one knot and pinning it into submission. Start by securing the hair in sections: a low ponytail as the base, then twist or fold the sections around it, pinning each one as you go. When every section is anchored to the one beneath it, the whole structure holds with a handful of pins, because no single pin is carrying the weight of all your hair. The other secret is texture: work a texturising spray or a little dry shampoo through the hair first, because grip is what keeps pins in, and silky, freshly washed hair is the reason pins slide out.
Choose the right pins and use them properly, and you will need far fewer of them. Use bobby pins that match your hair colour, open them slightly, slide them in with the wavy side down, and push them against the scalp — a pin that is just sitting on the surface of the hair will fall out, but a pin that is woven through two sections of hair and pressed flat will hold all night. For a bun or a chignon, use a hair doughnut or a small braid as a foundation: the bun wraps around something solid instead of collapsing on itself. And finish with a flexible-hold spray rather than a rock-hard one, so the style can move a little without cracking. A comfortable updo is a lasting updo — if it hurts when you put it in, it will hurt more by midnight, and you will end up taking it down.
Homecoming Hair for Short Hair
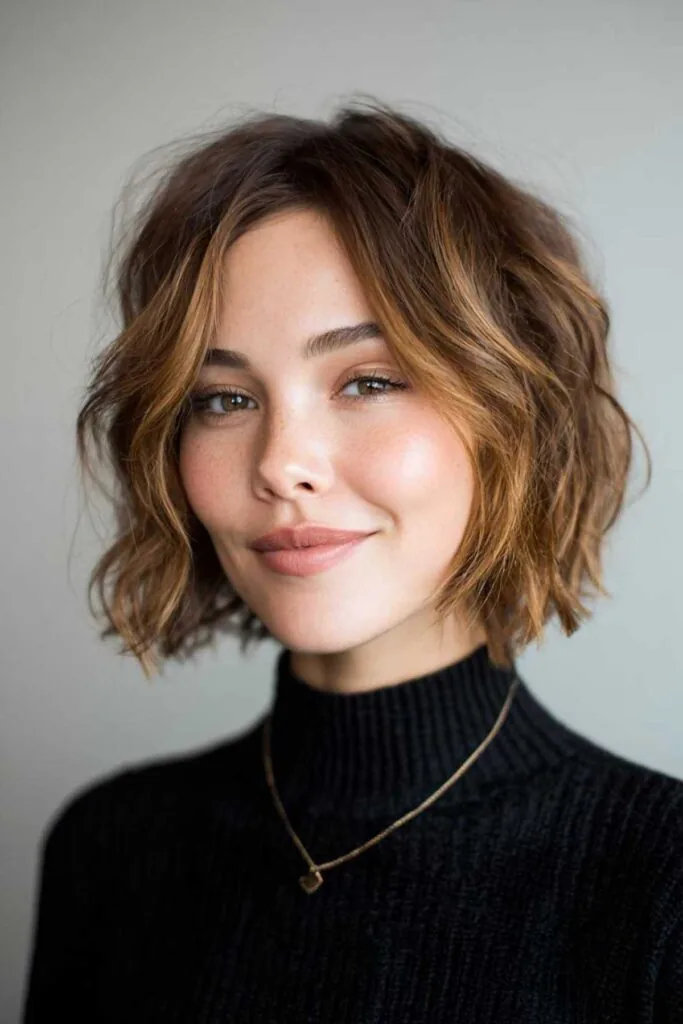
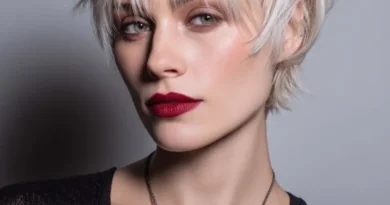
Short hair is not a limitation at homecoming — it is an advantage, because a short cut is already a statement, and it needs far less work to look finished than long hair does. A pixie, a bob or a lob photographs brilliantly, shows off earrings and necklines, and will not wilt or fall flat by the end of the night. The mistake is trying to force short hair into a long-hair style: a tiny, tight bun on a pixie looks like an afterthought, while a sleek, polished pixie with a sparkly clip looks deliberate and glamorous. Work with the cut you have, and add the occasion with accessories, texture and shine rather than with length you do not have.
For bobs and lobs, a deep side part, a smooth blow-dry, or soft waves with the ends flipped out can turn an everyday cut into a homecoming look in fifteen minutes. For pixies, texture is everything: a little pomade or texturising paste, pieces swept to one side, and a statement clip or a headband will do more than any amount of curling. And if you want the illusion of an updo, a faux bob — tucking and pinning the ends under — gives a bob the silhouette of a chignon without needing the length. The best short-hair homecoming looks are the ones that look intentional: clean lines, a little shine, and one beautiful accessory, rather than a style that is apologising for being short.
Accessories: Clips, Pins, Flowers and Sparkle
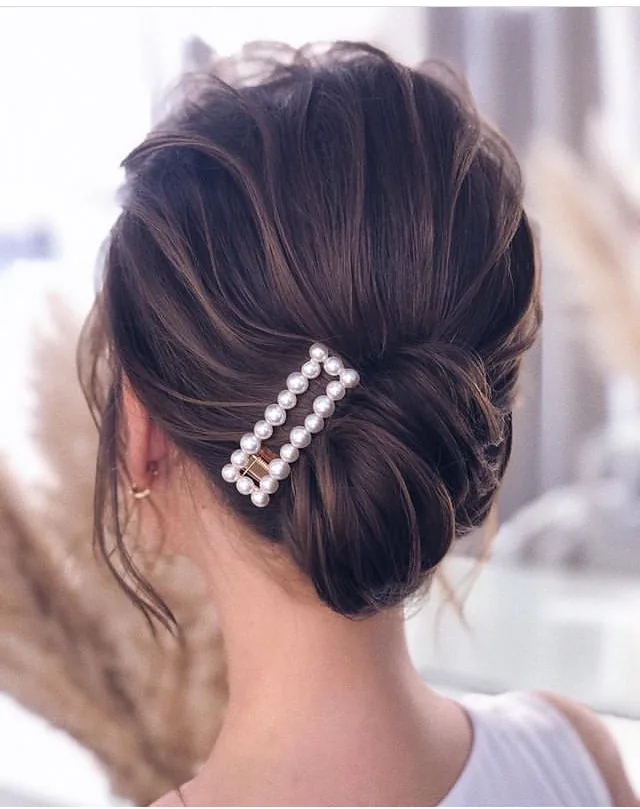
The right accessory can turn a simple hairstyle into a homecoming hairstyle, and it is the cheapest way to make your look feel special. Pearl pins are the classic choice: they suit romantic and vintage dresses, they catch the light in photos, and a cluster of three small pearl pins at the side of a half-up style looks expensive without trying too hard. Crystal and rhinestone clips suit sparkly dresses and sleek updos, because they echo the shine of the dress without competing with it. Fresh flowers — a single gardenia, a sprig of baby’s breath, a small rose — suit boho and garden-party dresses, but they wilt, so ask your florist for flowers that last and keep them in water until the last minute.
The rule with accessories is one statement, not five: a big crystal clip and a flower crown and a headband and pearl pins will fight each other, and the photos will look busy. Pick one hero piece that matches your dress — pearls for a classic dress, crystals for a sparkly one, flowers for a soft one — and let the hairstyle do the rest. Attach the accessory last, after the hairspray, so it sits on top of the finished style rather than getting buried in it, and secure it with a bobby pin as well as its own clip, because clips slip on smooth hair. And if your dress has a lot of sparkle, keep the accessory smaller; if the dress is plain, the accessory can be bigger. The accessory should finish the look, not compete with it.
Your Night-Before Homecoming Prep Timeline
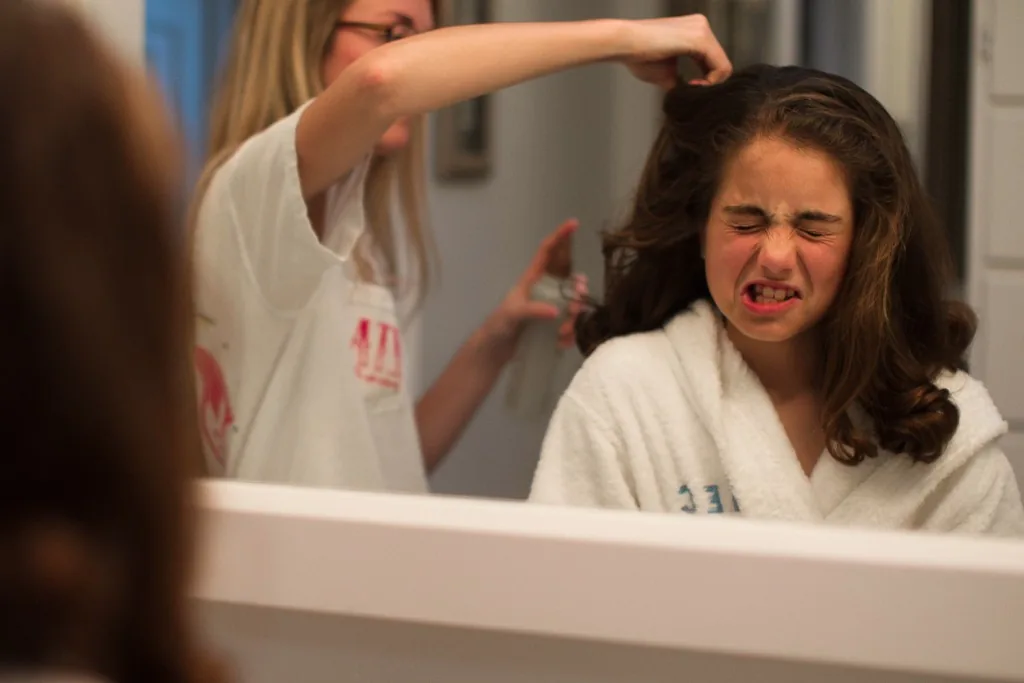
The night before homecoming is when the good hair happens — not on the day itself, when you are rushed and nervous. Wash your hair the night before, not the morning of, because day-old hair holds curls and pins far better than freshly washed hair, and a wash the night before gives you time to let it dry properly instead of blow-drying in a panic. Use a deep-conditioning mask, rinse with lukewarm water, and let the hair air-dry most of the way before you sleep. If you sleep with your hair in a loose, high bun or a loose braid, you will wake up with soft, natural texture that is the perfect starting point for curls or waves.
Lay everything out the night before, too: the dress on its hanger, the shoes, the jewellery, the clutch, and a small hair kit — bobby pins, an elastic, a travel hairspray, a comb, and the accessory you chose. Charge your phone, set two alarms, and decide the order of the day: hair first or makeup first is a personal choice, but hair first is usually better, because a curling iron near finished makeup is a recipe for smudging. Plan the timing backwards from when you need to leave, and add thirty minutes of buffer — something always takes longer than expected. And get a proper night’s sleep: tired hair is flat hair, and no amount of backcombing fixes a night of no sleep. The best homecoming hair starts the night before, with a calm plan and a good night’s rest.
1. Romantic Loose Curls
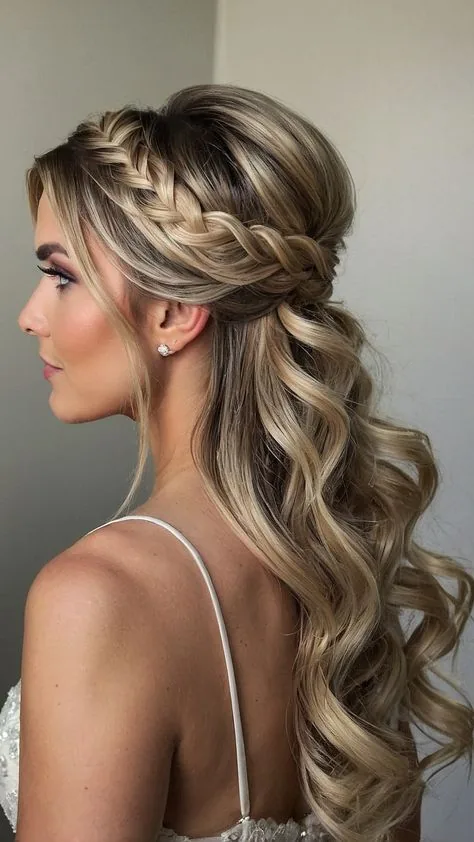
Romantic loose curls are the homecoming classic for a reason: soft, brushed-out waves that fall past the shoulders, catch the light with every turn, and make any dress look like it belongs in a fairytale. The curls are not tight ringlets — they are loose, touchable, and a little bit undone, which is exactly what makes them romantic rather than formal. This is the style to choose when your dress is soft and flowing, when you want to look beautiful without looking like you spent four hours in a chair, and when you want your hair to move when you dance. It suits almost every face shape and almost every hair length past the shoulders, which is why it is the most requested homecoming style year after year.
How long it takes: 30 to 40 minutes, including cooling time for the curls. What you need: a large-barrel curling iron, a heat protectant, a soft-bristle brush, and a flexible-hold hairspray. Best with: a flowing A-line or empire-waist dress, a sweetheart or off-the-shoulder neckline, and medium to long hair. Let each curl cool in your hand before you brush it out — that is what turns a tight curl into a soft, romantic wave that lasts all night.
2. Soft Half-Up Curls with a Twist
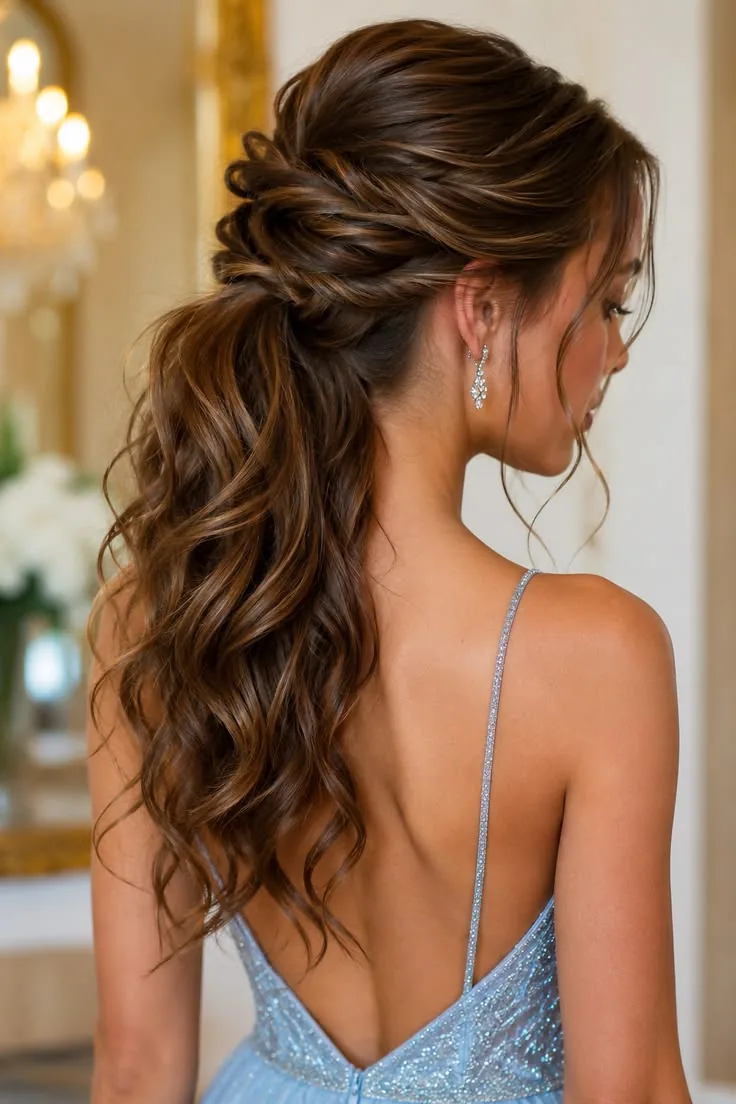
A soft half-up with a twist takes romantic curls and gives them a little structure: the top sections are twisted back from the face and pinned at the crown, while the rest falls in loose curls down the back. The twist is what makes it photograph so well — it keeps your face open for photos, shows off your earrings, and gives the back of the head a pretty detail that a plain down style does not have. It is also one of the most forgiving styles to do yourself, because the twist hides any unevenness in the curls and the pins disappear into the hair. This is the sweet spot between wearing your hair up and wearing it down, and it works with almost every dress on the rack.
How long it takes: 25 to 35 minutes. What you need: a curling iron, two or three bobby pins, a small clear elastic, and a light-hold hairspray. Best with: a strapless or sweetheart dress, a dress with a detailed bodice you want to show off, and medium to long hair. Twist the sections loosely rather than tightly — a soft twist looks romantic, a tight one looks severe, and the whole point of this style is that it looks effortless.
3. Low Romantic Chignon

A low romantic chignon is the updo for girls who want to look elegant without looking stiff: the hair is gathered low at the nape, twisted into a soft knot, and a few face-framing pieces are left loose to soften the front. Unlike a tight ballerina bun, a chignon is deliberately a little undone — the knot is loose, the texture is soft, and the overall effect is a girl who looks like she belongs at a ball, not a board meeting. It is also one of the most practical romantic styles, because the hair is completely off your neck, it will not fall in your face while you dance, and it shows off a high neckline or an open back beautifully.
How long it takes: 20 to 30 minutes. What you need: a hair tie, four to six bobby pins, a texturising spray, and a flexible-hold hairspray. Best with: a high-neck or open-back dress, a long formal gown, and medium to long hair. Pull the knot apart gently once it is pinned to make it look fuller and softer — a chignon that is too tight looks severe, and a little looseness is what makes it romantic.
4. Braided Crown with Soft Waves

A braided crown with soft waves is the most romantic hairstyle on this list, and the one that gets the most compliments in photos: two braids worked from each side of the head and pinned across the crown like a halo, with the rest of the hair falling in loose waves underneath. The braid puts the texture on display — every twist shows off the colour and the dimension of the hair — while the waves underneath keep the look soft and feminine rather than severe. It is a style that says garden party and fairytale at once, and it is surprisingly secure, because the braid anchors the hair in place section by section, so it survives dancing far better than loose curls alone.
How long it takes: 30 to 45 minutes. What you need: a curling iron, a texturising spray for grip, and six to eight bobby pins. Best with: a flowy or floral dress, a dress with a soft, romantic feel, and medium to long hair. Curl the hair before you braid — curls give the braid grip and fullness, and straight hair will slip out of a crown braid within the hour.
5. Waterfall Braid with Curls
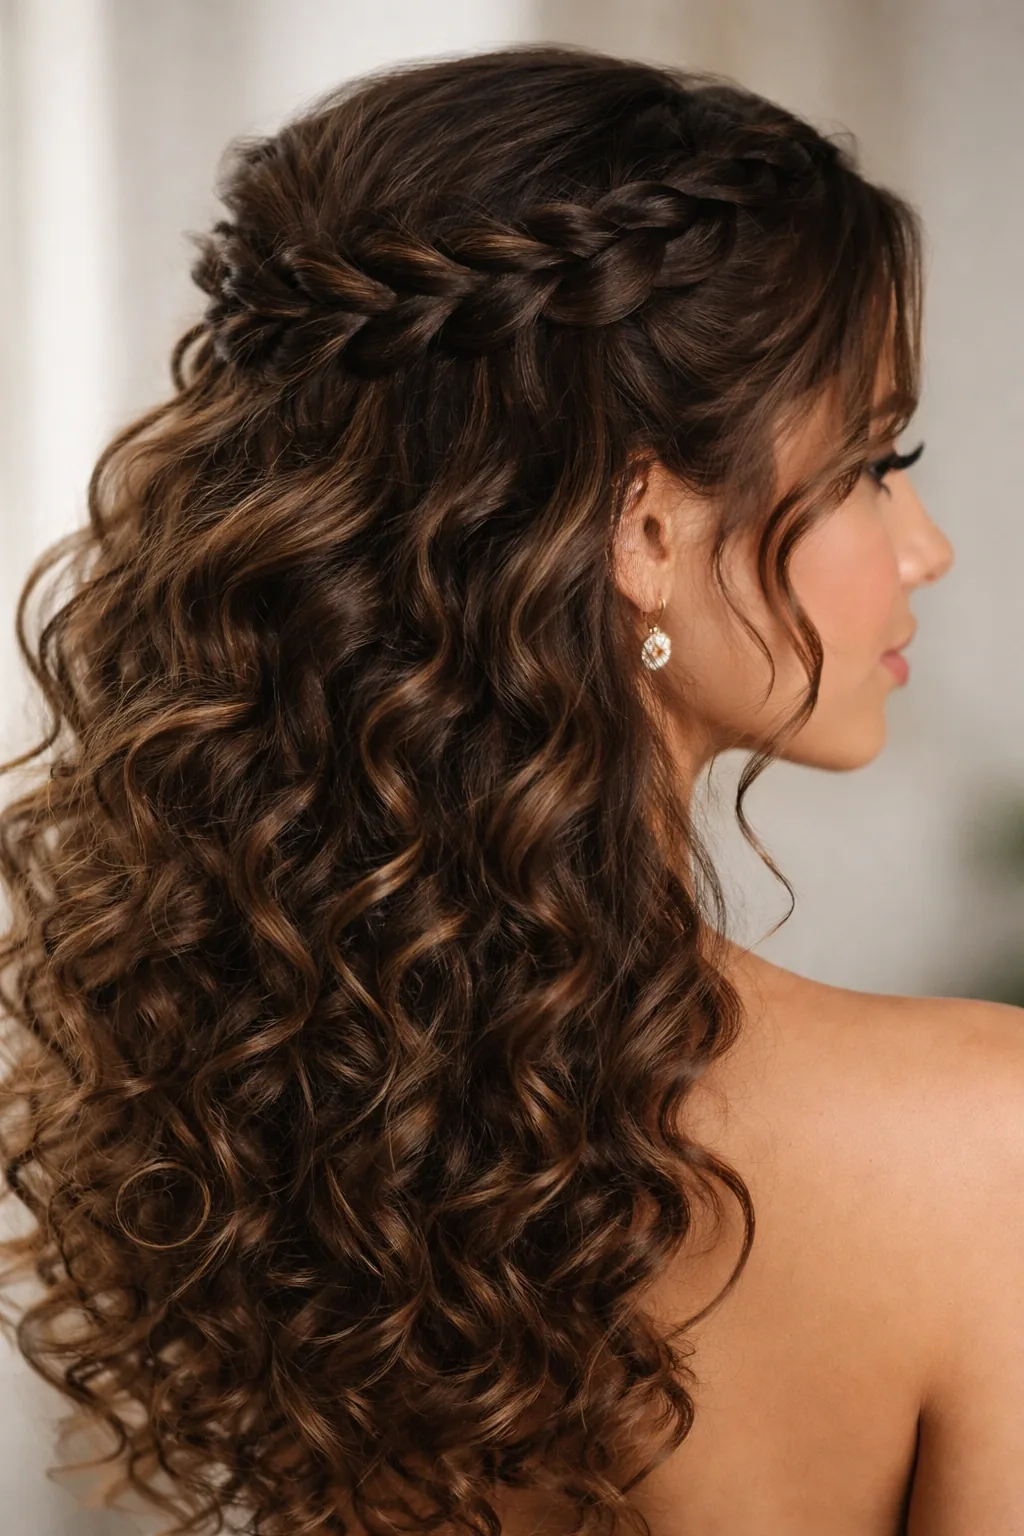
A waterfall braid is the prettiest trick in the homecoming book: a braid worked across the back of the head that lets strands of hair fall through it like water, so the braid looks like it is woven into the curls rather than sitting on top of them. The falling strands are the whole point — they create a cascading effect that is endlessly photogenic from the back, which is where half your homecoming photos are taken. It is a style that looks far more complicated than it is, and once you have practised it twice, it takes about ten minutes on top of your curls. Pair it with a dress that has an open or detailed back, and the braid becomes part of the outfit.
How long it takes: 15 minutes on top of curling time, so 40 minutes in total. What you need: a curling iron, two small clear elastics, and a few bobby pins. Best with: a backless or open-back dress, a dress with a plain back that needs a little interest, and long hair. Practise the waterfall braid on a friend first — the dropping motion feels strange the first time, but once your hands learn it, it becomes automatic.
6. Curly Romantic Updo with Tendrils
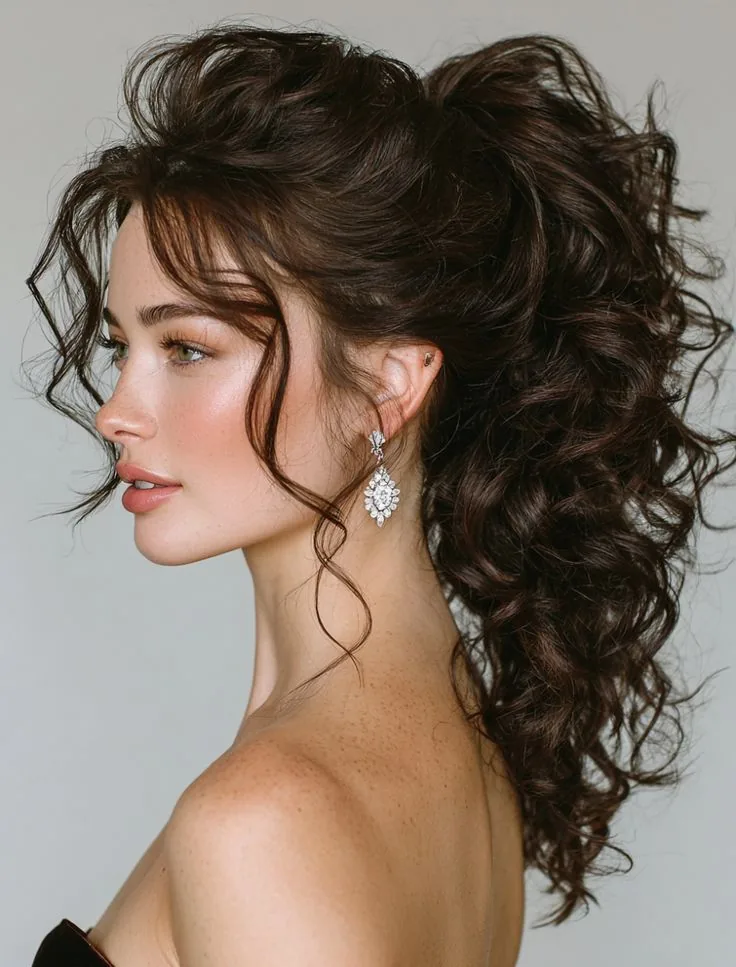
A curly romantic updo with tendrils is the style for girls whose hair is naturally curly, or who love the look of curls pinned up softly: the hair is gathered up loosely, the curls are allowed to fall where they want, and a few tendrils are pulled out around the face and at the nape to keep the whole thing soft. The tendrils are what make it romantic — without them, a curly updo can look severe, but with them, it looks like the hair just happened to fall that way. This is also one of the most forgiving updos, because curly hair has natural volume and texture, so you do not need to backcomb or add padding to make the shape look full.
How long it takes: 25 to 35 minutes. What you need: a curling iron or a diffuser, a handful of bobby pins, and a flexible-hold hairspray. Best with: a romantic or vintage-style dress, a dress with a soft neckline, and naturally curly or wavy hair. Leave the tendrils longer than you think — they will spring up as the night goes on, and a tendril that starts at the cheekbone will be at the temple by midnight.
7. Rose-Gold Waves
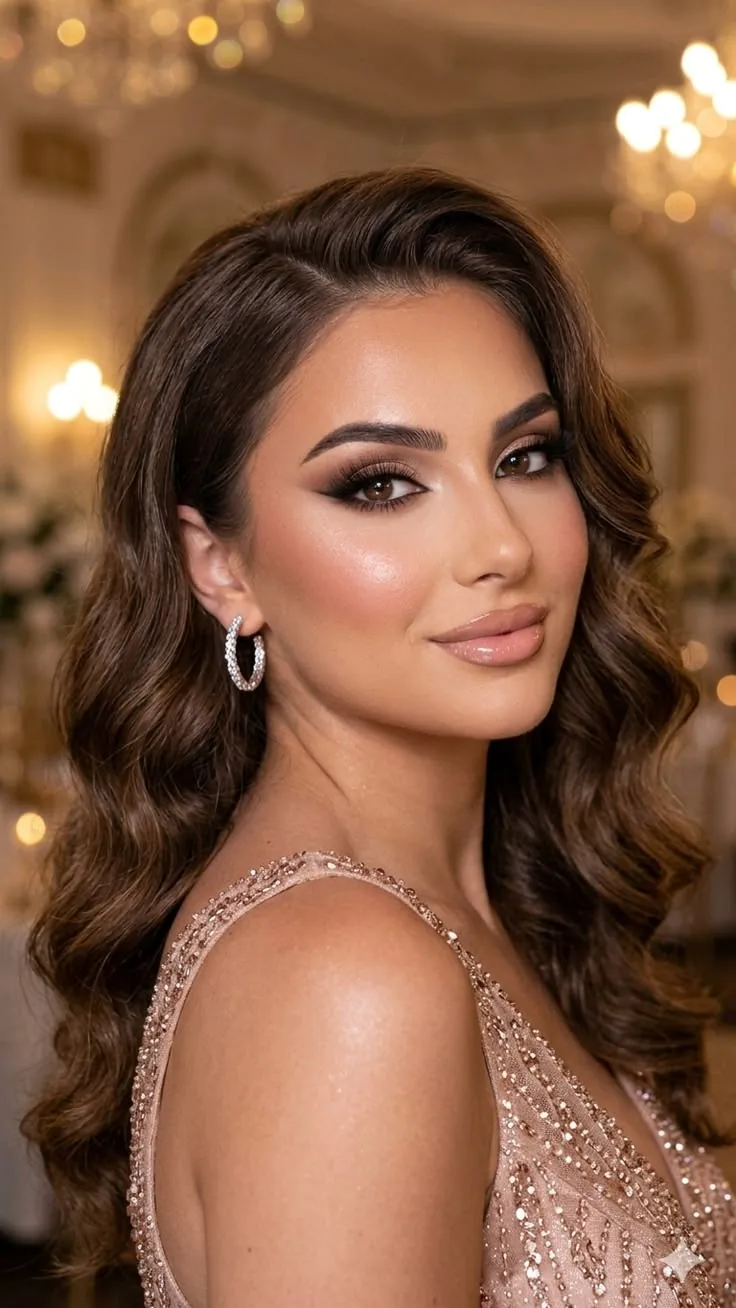
Rose-gold waves are a colour and a style in one: soft, loose waves in a warm, blush-toned blonde or brunette that catches the light like jewellery and makes the whole look glow. The rose-gold tone is what sets this style apart — it is warmer and more unusual than plain blonde or brown, it photographs beautifully under evening light, and it suits a surprising range of skin tones because the pink undertone adds warmth to the face. The waves themselves are simple — large, brushed-out curls with a soft, touchable finish — so the colour does the talking and the styling stays relaxed. If your dress is a soft blush, champagne or dusty pink, rose-gold waves will make the whole outfit look like it was planned together.
How long it takes: 30 to 40 minutes, plus colour time if you are toning. What you need: a large-barrel curling iron, a heat protectant, and a shine spray to make the tone glow. Best with: a blush, champagne or dusty-pink dress, a dress with warm undertones, and medium to long hair. Ask your colourist for a rose-gold gloss rather than a permanent colour — a gloss washes out in a few weeks, so you can try the tone for homecoming without committing to it for months.
8. Side-Swept Romantic Curls
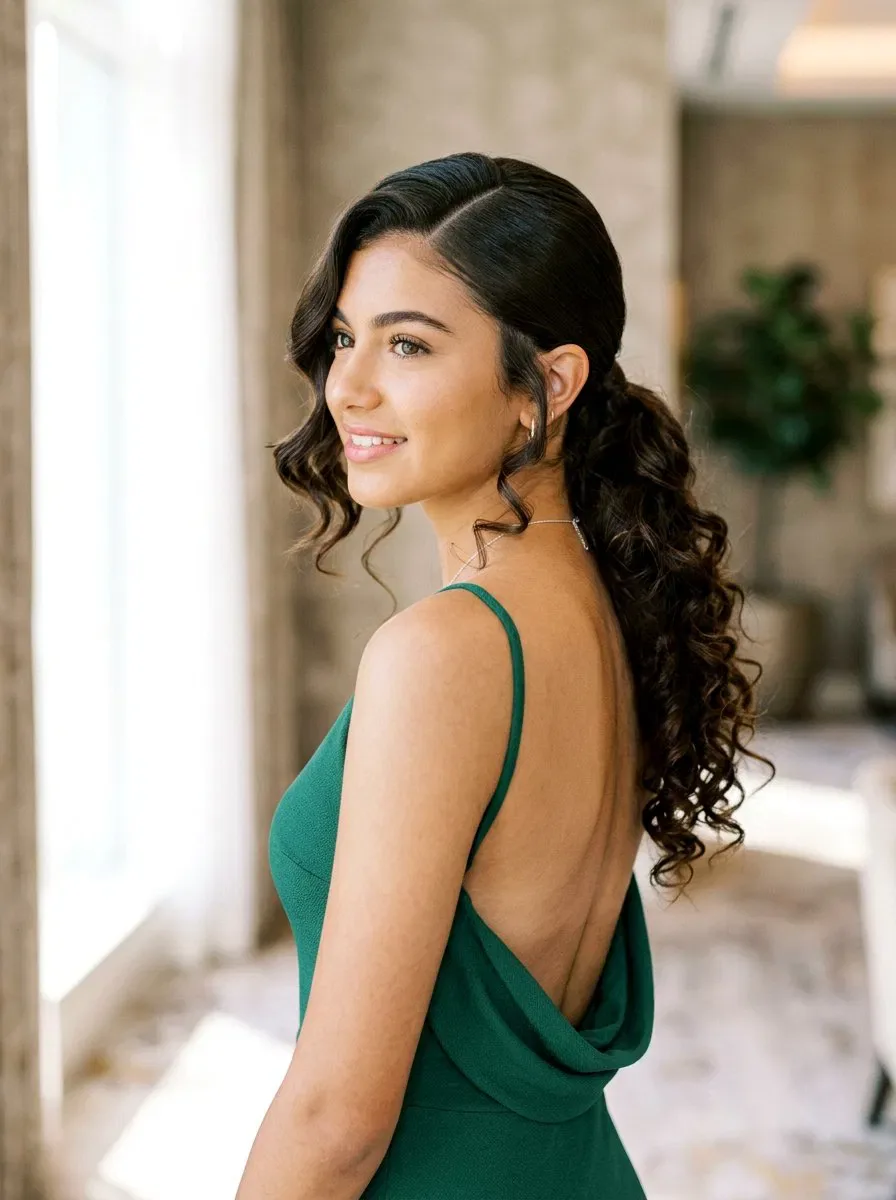
Side-swept romantic curls are the old-Hollywood answer to homecoming: all the hair swept over one shoulder in soft, glossy waves, leaving the other side of the neck and shoulder bare. The asymmetry is what makes it glamorous — it creates a long, elegant line from the crown to the shoulder, it shows off one earring and one side of the neckline, and it photographs beautifully from the front and from the side. It is also a practical choice for a one-shoulder dress, because the hair falls on the opposite side and never covers the bare shoulder. The curls should be soft and brushed out, not tight, so the whole sweep looks like it fell there naturally rather than being pinned into place.
How long it takes: 30 to 40 minutes. What you need: a large-barrel curling iron, a deep side part, a few bobby pins to anchor the sweep, and a shine spray. Best with: a one-shoulder dress, an asymmetrical neckline, and medium to long hair. Pin the sweep at the nape, not at the ear — a pin at the nape holds the weight of the hair without showing, while a pin at the ear will pull and show in photos.
9. Sleek Low Bun
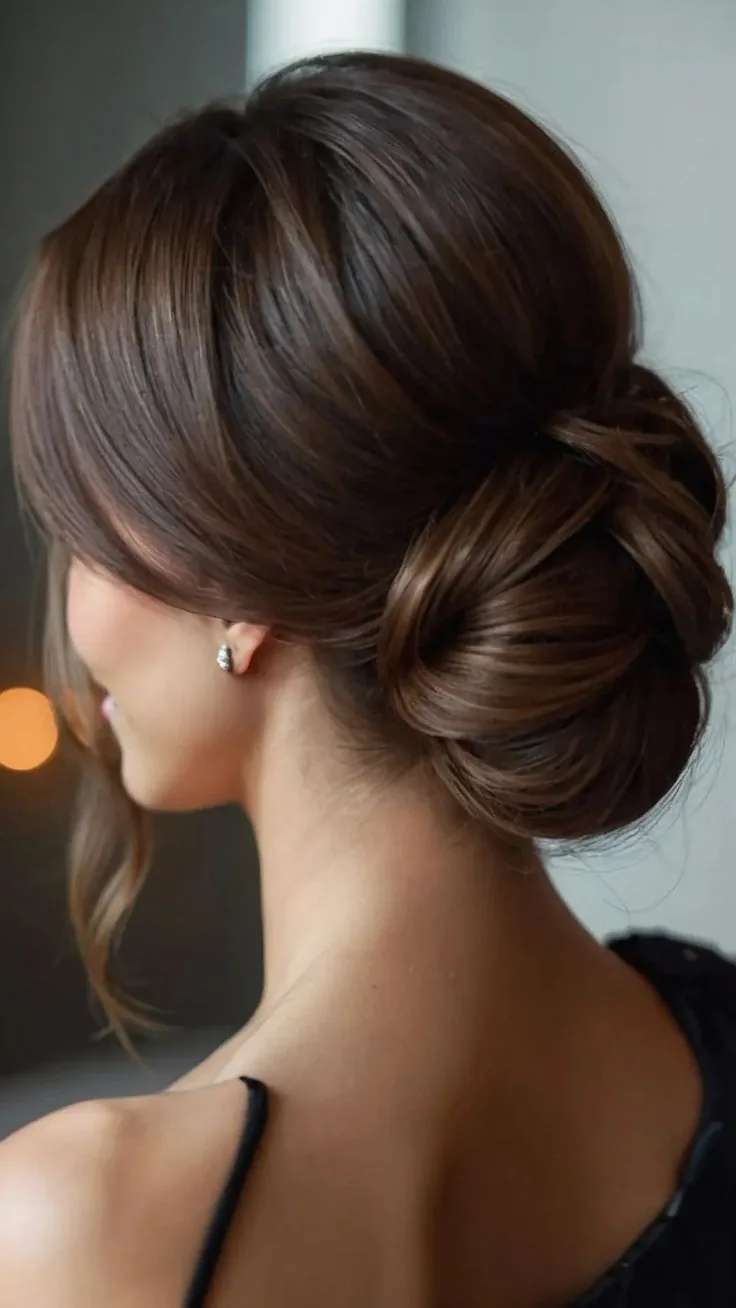
A sleek low bun is quiet luxury in hairstyle form: the hair smoothed back without a single flyaway, gathered low at the nape, and coiled into a clean, polished knot. There is nothing fussy about it, and that is exactly the point — the sleekness makes the dress, the jewellery and the makeup the stars, while the hair provides a calm, expensive frame. It is also one of the most reliable styles of the night: once it is pinned, it does not move, it does not frizz, and it looks exactly the same in the last photo as it did in the first. If your dress is sparkly, beaded or dramatic, a sleek low bun is the hairstyle that lets the dress do the talking.
How long it takes: 20 to 25 minutes. What you need: a smoothing pomade or gel, a fine-tooth comb, a hair tie, four to six bobby pins, and a strong-hold hairspray. Best with: a beaded or sequinned dress, a high-neck or halter neckline, and straight to wavy hair. Smooth the hair in sections with the pomade before you gather it — a bun that is smoothed as you go will be far sleeker than one that is gathered first and smoothed afterwards.
10. Slicked-Back High Ponytail
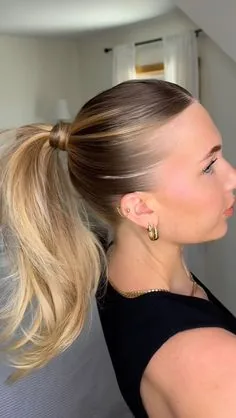
A slicked-back high ponytail is homecoming with energy: the hair pulled up high and tight, the ponytail falling in smooth, glossy lengths, and the whole look lifted, bright and confident. The slicked-back front is what makes it polished rather than casual — every strand is smoothed into place, so the style reads as deliberate and glamorous, not like a gym ponytail. It is also a brilliant choice for dancing, because the hair is completely off your face and neck, and a high ponytail that is properly secured will bounce without falling. Pair it with statement earrings and a dress with a clean neckline, and the whole look is sharp, modern and unforgettable.
How long it takes: 15 to 20 minutes. What you need: a smoothing gel or pomade, a boar-bristle brush, a strong elastic, and a shine spray. Best with: a fitted or bodycon dress, a dress with a clean, simple neckline, and long hair. Wrap a small section of hair around the elastic to hide it — that one detail is what turns a ponytail into a hairstyle, and it takes ten seconds.
11. Glossy Blowout with Volume
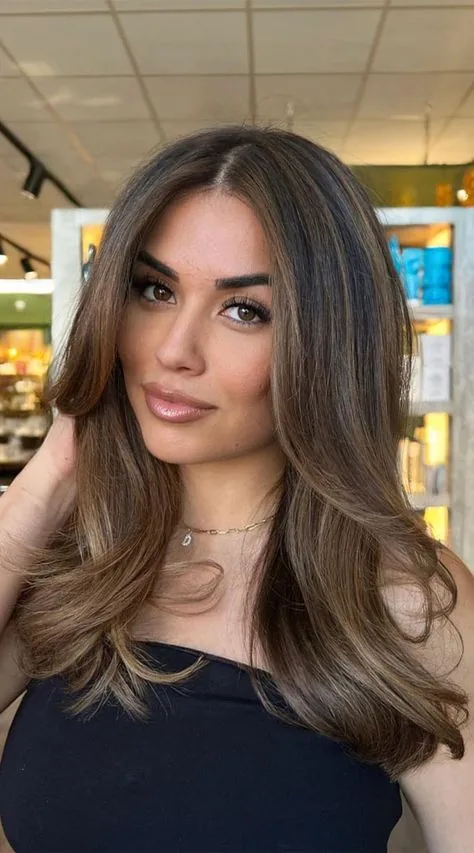
A glossy blowout with volume is the salon-fresh look that makes everyone ask where you got your hair done: big, bouncy, smooth hair with lift at the roots, curved ends, and a shine that catches the light from across the room. The volume is the key — it is what separates a blowout from hair that has just been dried straight — and it comes from blow-drying in sections with a round brush, rolling the roots up and the ends under. This is the style to choose when your dress is simple and you want the hair to carry the glamour, or when you have naturally thick hair that looks its best with a bit of bounce. It is also the most comfortable style on this list, because there is nothing pinned, pulled or tight.
How long it takes: 40 to 50 minutes. What you need: a round brush, a blow dryer with a nozzle, a volumising mousse, and a light-hold hairspray. Best with: a simple or plain dress that needs the hair to add glamour, a strapless dress, and medium to thick hair. Blow-dry the roots upwards, not downwards — lifting the hair at the root as you dry is what creates the volume, and drying flat will leave it limp no matter how much mousse you use.
12. Polished Low Chignon
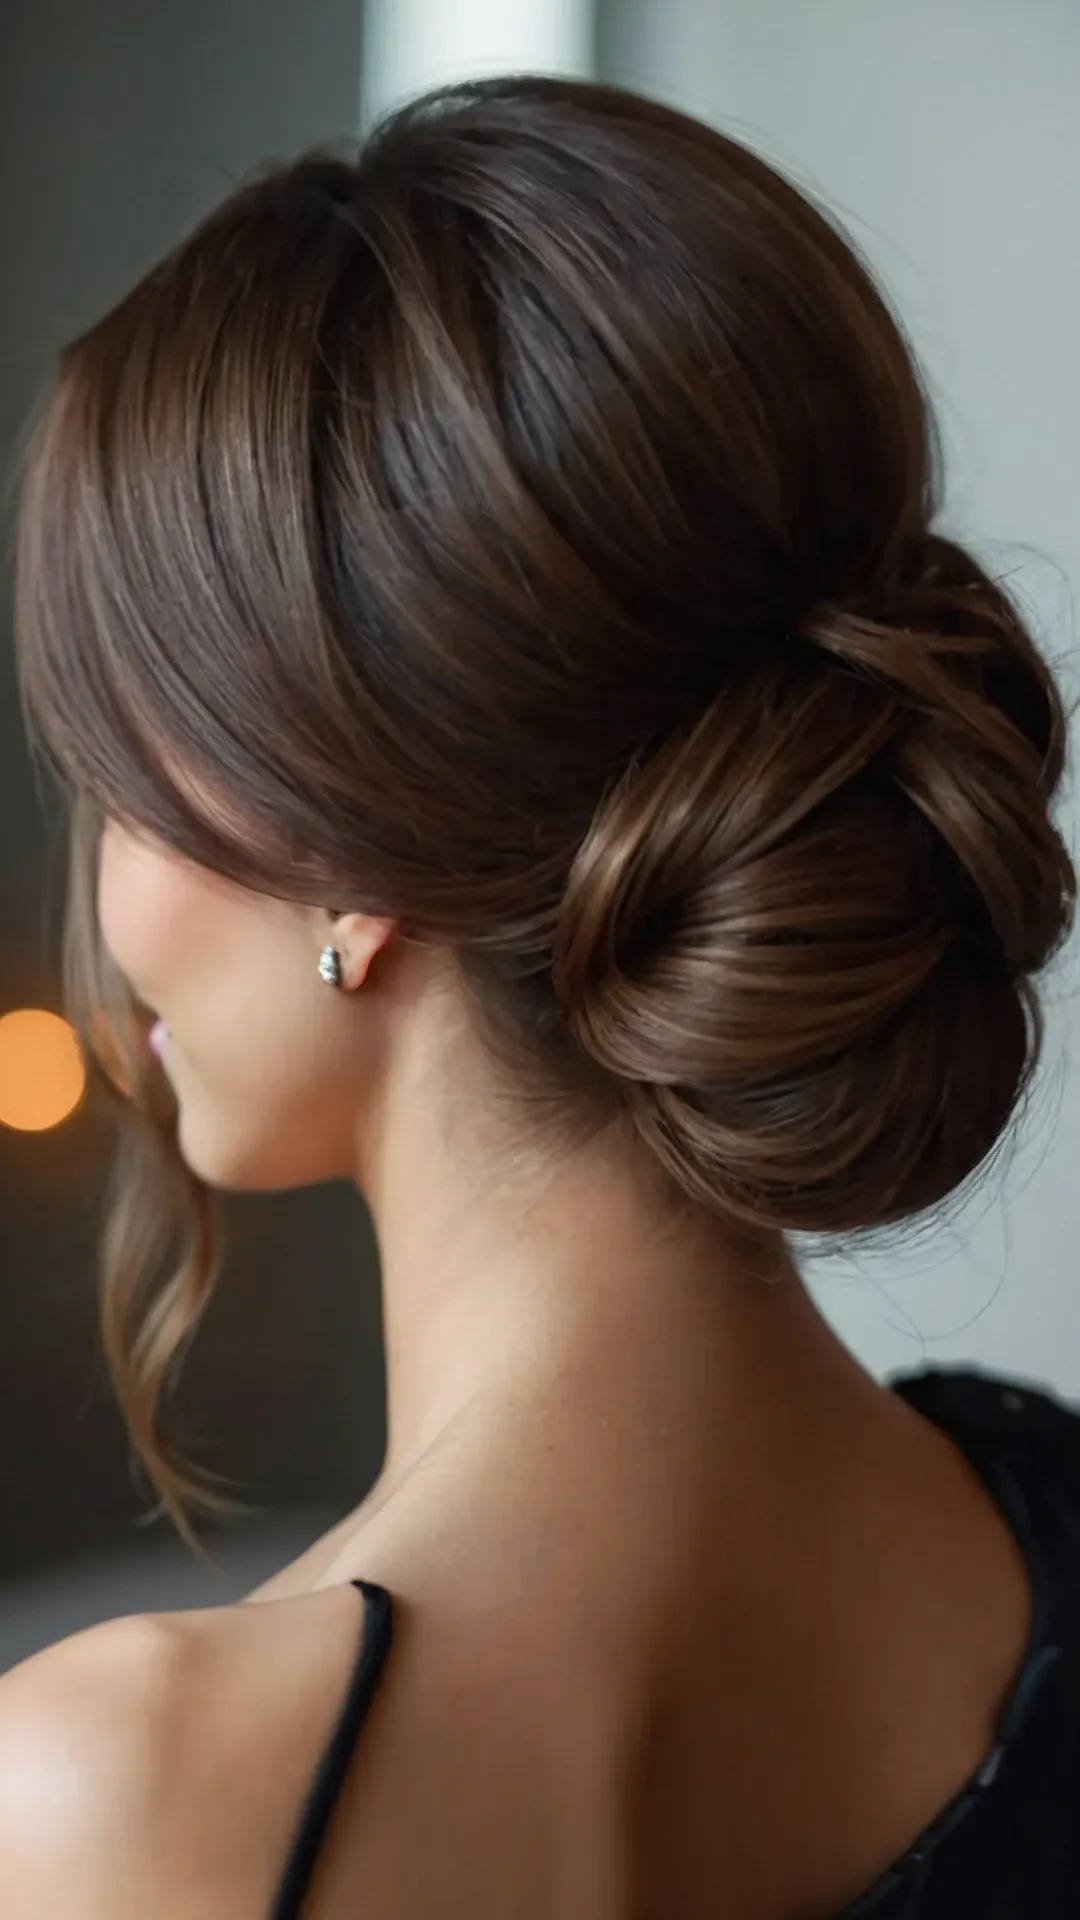
A polished low chignon is the formal updo for girls who want to look like they belong at a ball: the hair gathered low, twisted into a smooth, sculpted knot, and finished so cleanly that not a single strand is out of place. Unlike its romantic cousin, this chignon is all about control — the surface is smooth, the shape is symmetrical, and the whole thing reads as intentional and refined. It is the updo to choose for a long, formal gown, for a dress with a detailed back, or for any night where the dress code leans towards black-tie rather than party. And because the hair is anchored low and pinned in layers, it is one of the most secure updos on this list — it will still be perfect when the last song plays.
How long it takes: 25 to 35 minutes. What you need: a smoothing serum, a hair tie, six to eight bobby pins, and a strong-hold hairspray. Best with: a long formal gown, a dress with a detailed or open back, and medium to long hair. Build the chignon around a small hair doughnut for a perfectly round shape — it gives the knot a foundation to wrap around, so it holds its shape all night instead of flattening.
13. Sleek Side Part with Glossy Waves
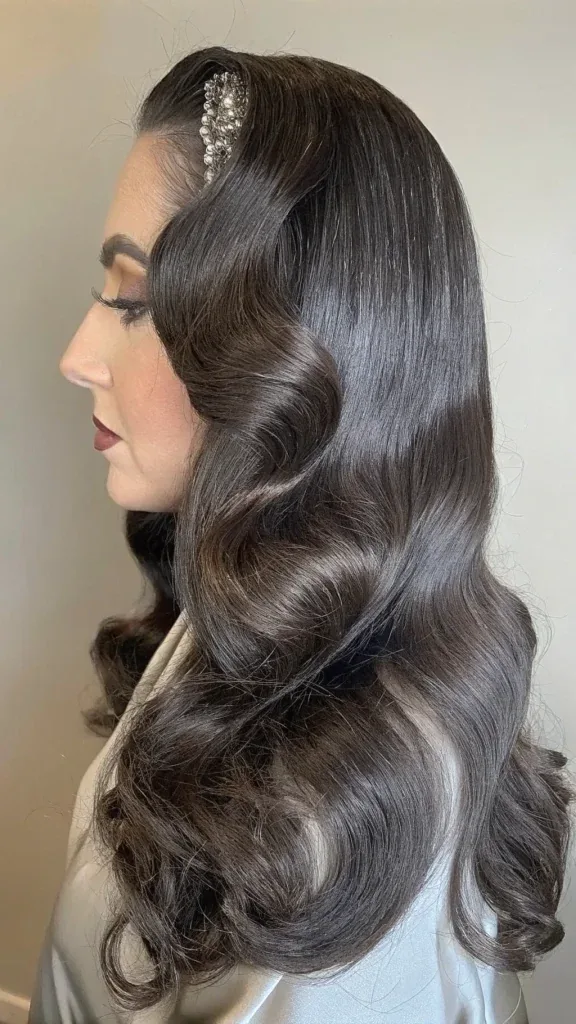
A sleek side part with glossy waves is the polished middle ground between wearing your hair down and putting it up: the hair is parted deeply on one side, the top is smoothed flat and glossy, and the lengths fall in soft, controlled waves. The deep part is what makes it look expensive — it creates a heavy, sweeping fall of hair on one side and a clean, sculpted line on the other, and the gloss makes the whole thing shine under evening light. This is the style for girls who love the idea of wearing their hair down but want it to look finished rather than casual, and it suits almost every dress, because the sleekness works with sparkle and the waves work with softness.
How long it takes: 30 to 35 minutes. What you need: a flat iron for the top section, a curling iron for the lengths, a shine serum, and a flexible-hold hairspray. Best with: a fitted gown, a dress with a deep neckline, and medium to long straight or wavy hair. Straighten the top six inches before you curl the lengths — a sleek top with wavy ends is the whole look, and curling all the way to the root will make it look like ordinary curls.
14. Smooth High Ponytail with Curls

A smooth high ponytail with curled ends is the playful side of polished: the top is sleek and smooth, the ponytail itself is full of bouncy curls, and the whole look is lifted, youthful and full of movement. The contrast is what makes it work — the smooth top keeps it looking finished, while the curled ends keep it from looking severe. It is also one of the best styles for dancing, because the ponytail moves with you and the curls bounce back into shape after every song. Choose this one when your dress is short and flirty, or when you want a style that looks as good from behind as it does from the front.
How long it takes: 20 to 30 minutes. What you need: a smoothing brush, a strong elastic, a curling iron for the ponytail, and a light-hold hairspray. Best with: a short, flirty dress, a dress with a fun, youthful feel, and long hair. Curl the ponytail after you have tied it up, not before — curling the gathered ponytail gives the curls a uniform bounce, and it is far quicker than curling all the hair first.
15. Glass Hair: Ultra-Straight and Shiny
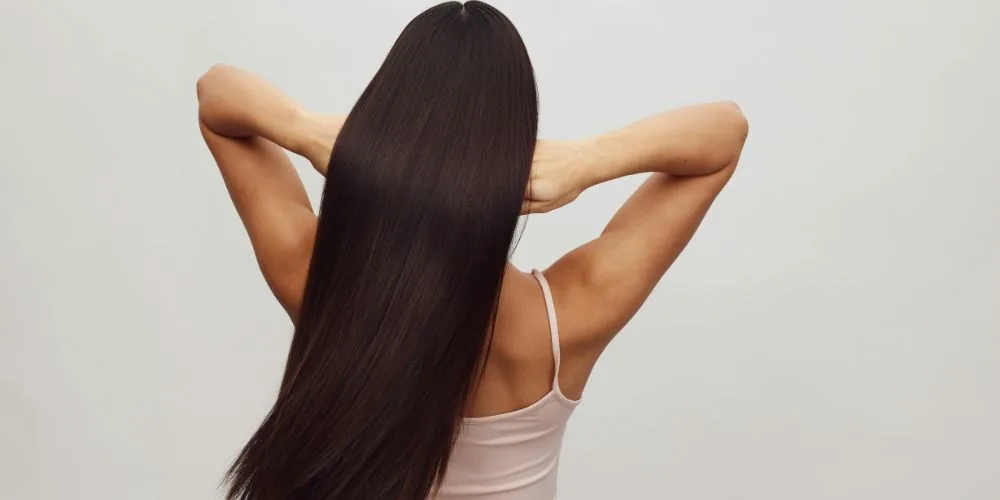
How long it takes: 25 to 35 minutes. What you need: a flat iron, a heat protectant, a shine serum, and a smoothing spray. Best with: a bold or colourful dress, a dress with statement details, and naturally straight hair. Use a shine serum on the lengths before you flat-iron, not after — the heat seals the serum in and creates the glassy finish, while serum applied afterwards just sits on the surface and looks greasy.
16. Boho Loose Waves
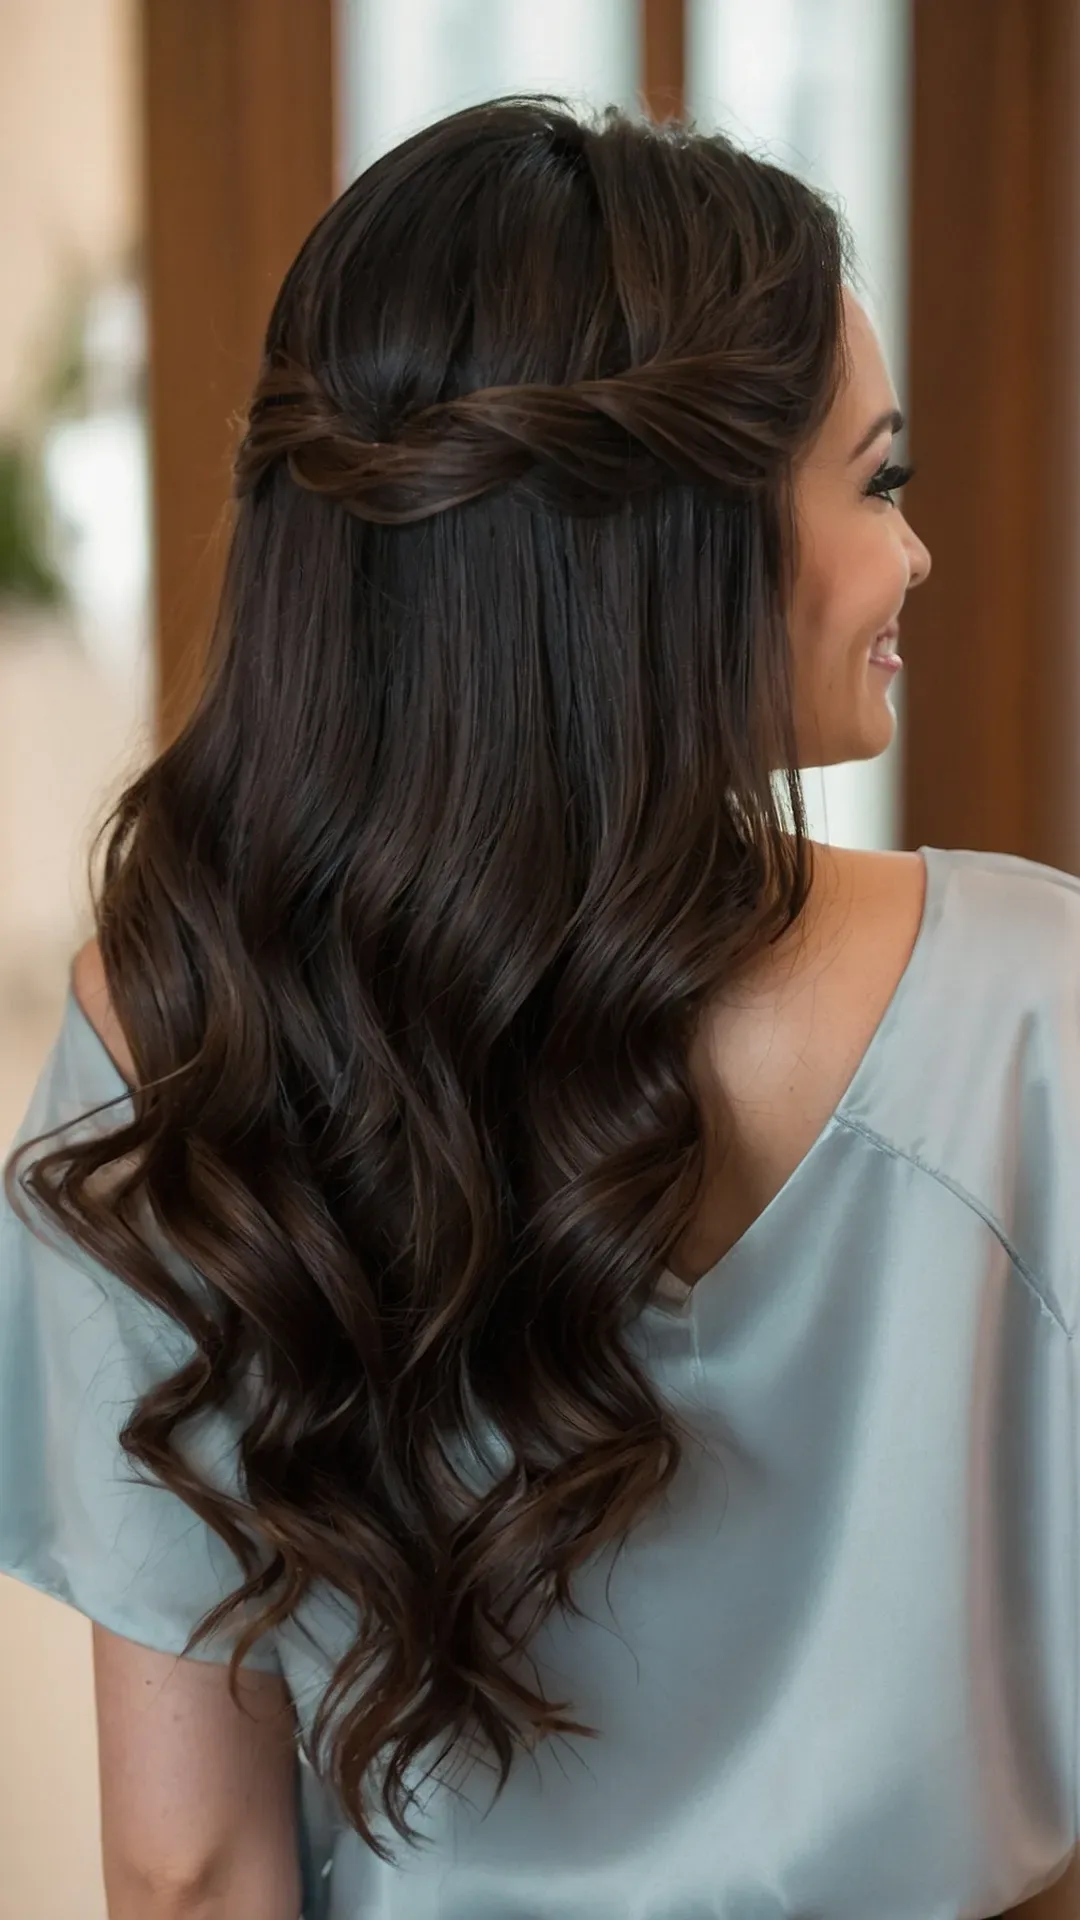
Boho loose waves are the homecoming style for girls who want to look beautiful without feeling overdone: soft, tousled waves with a natural, lived-in texture, a centre part, and no hard lines anywhere. The waves are deliberately imperfect — some pieces curl one way, some the other, and a few fall across the face — which is exactly what makes them look relaxed rather than styled. This is the style to choose when your dress is flowy, floral or a little bit whimsical, when you hate the feeling of hairspray and pins, and when you want to dance all night without worrying about whether your hair is still in place. It will not be perfect at midnight, but it will still look good, because boho waves are supposed to look a little undone.
How long it takes: 20 to 30 minutes. What you need: a curling wand, a sea-salt or texturising spray, and a light-hold spray. Best with: a flowy, floral or chiffon dress, a dress with a relaxed, whimsical feel, and medium to long hair. Leave the last inch of each section uncurled — straight ends are what make the waves look boho rather than formal, and curling all the way to the tip will turn them into ordinary curls.
17. Messy Bun with Face-Framing Pieces
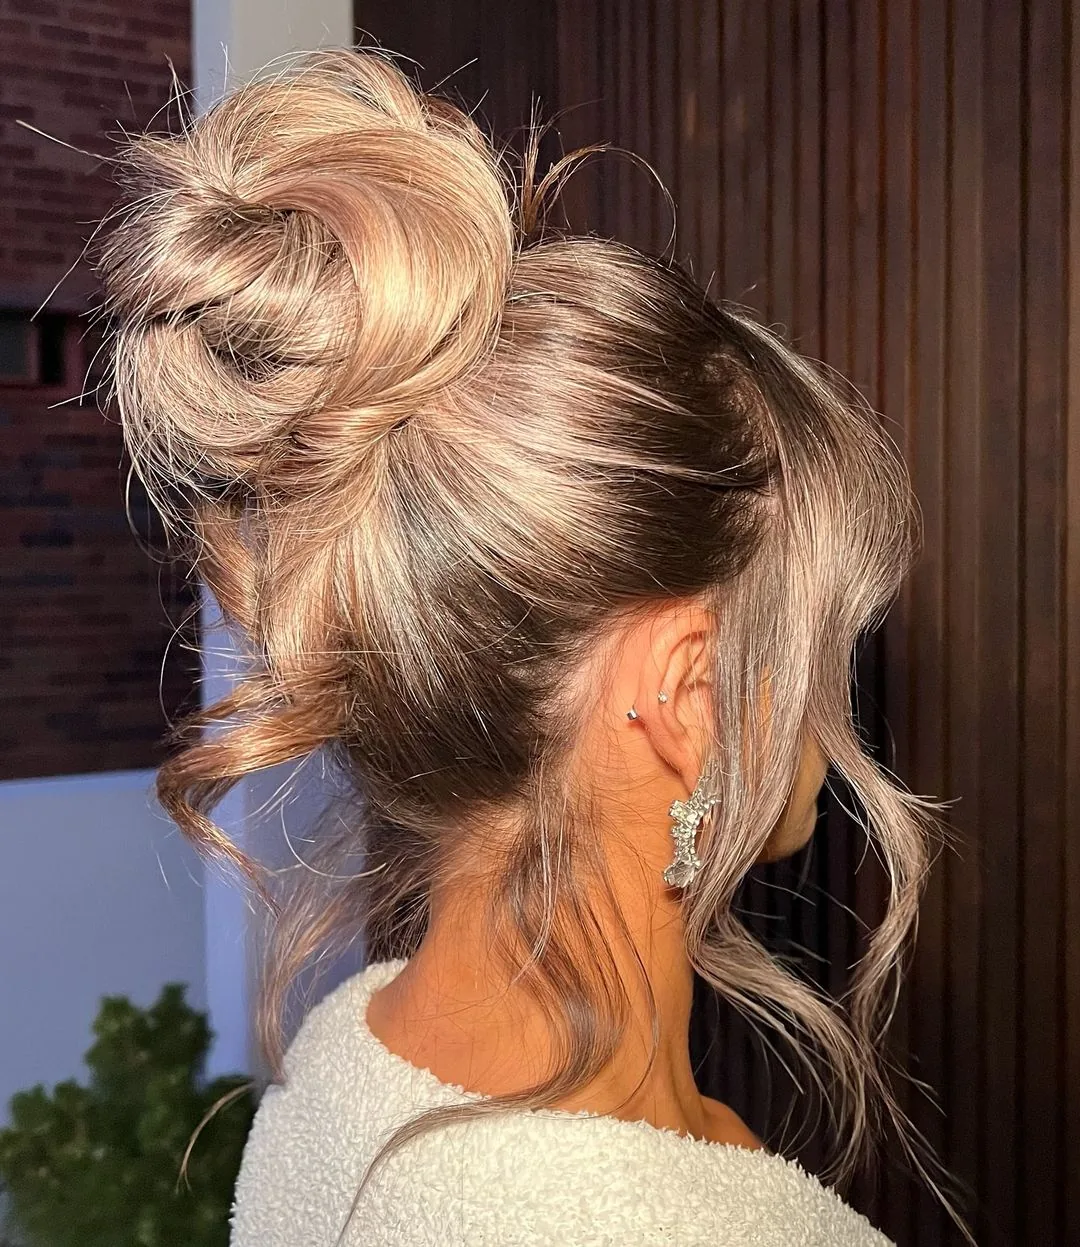
A messy bun with face-framing pieces is the easiest elegant style on this list, and the one that looks most like you did not try — even though you did. The bun itself is loose and textured, sitting high or low depending on your dress, and the face-framing pieces are pulled out around the forehead and cheeks to soften the whole look. The pieces are the secret: without them, a messy bun can look like a gym hairstyle, but with them, it looks romantic, intentional and photogenic. This is the style for girls who want their hair up and out of the way, who do not want to spend an hour on it, and who want to look relaxed rather than formal. It also survives dancing better than almost any down style, because the hair is already where it is going to end up.
How long it takes: 10 to 15 minutes. What you need: a hair tie, three or four bobby pins, a texturising spray, and a light-hold hairspray. Best with: a casual or short dress, a dress with a fun, relaxed feel, and medium to long hair. Pull the face-framing pieces out before you finish the bun, not after — pulling them out afterwards tugs the bun loose, while pulling them out first lets you shape them properly.
18. Fishtail Braid over One Shoulder
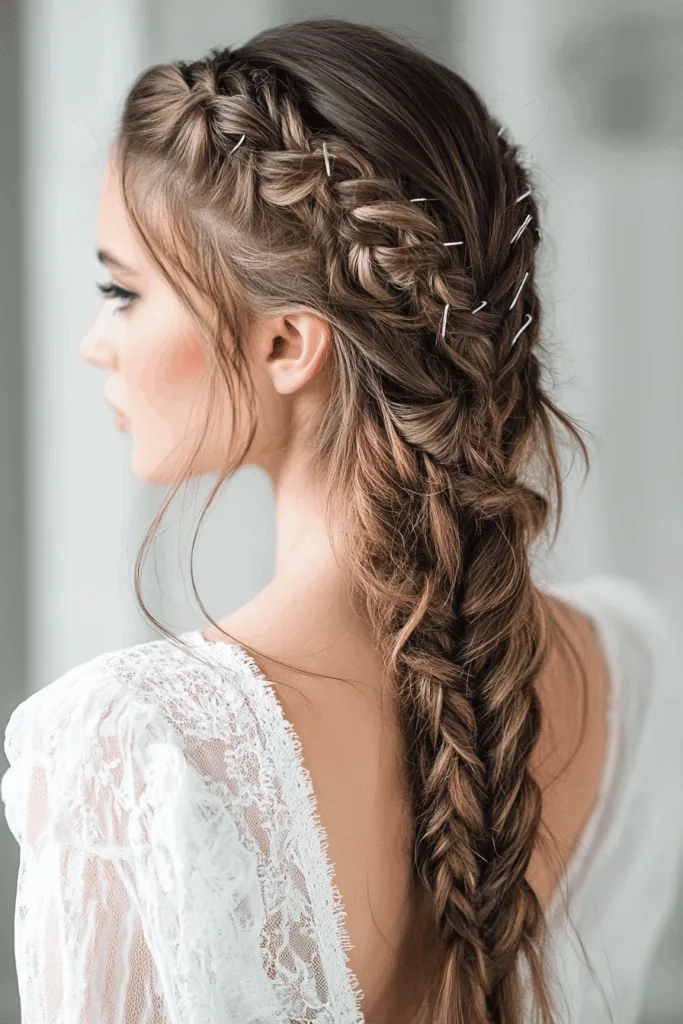
A fishtail braid worn over one shoulder is boho with a twist: the braid itself is intricate and detailed, woven from two sections instead of three, so it looks finer and more delicate than an ordinary braid, and wearing it over one shoulder shows it off from the front instead of hiding it down the back. The fishtail is the star of this style, so the rest of the hair stays simple — a soft side part, a little volume at the crown, and the braid falling over the shoulder in a long, textured rope. It is a style that looks far more complicated than it is, and it is one of the most secure braids you can wear, because the two-section weave locks the hair in place and barely loosens over hours of dancing.
How long it takes: 20 to 30 minutes. What you need: a texturising spray for grip, a small clear elastic, and a few bobby pins. Best with: a one-shoulder or strapless dress, a dress with a boho or festival feel, and long hair. Pull the braid apart gently once it is tied — pancaking the braid is what makes it look full and textured, and a tight, skinny fishtail looks thin and severe by comparison.
19. Textured Lob with Beachy Waves
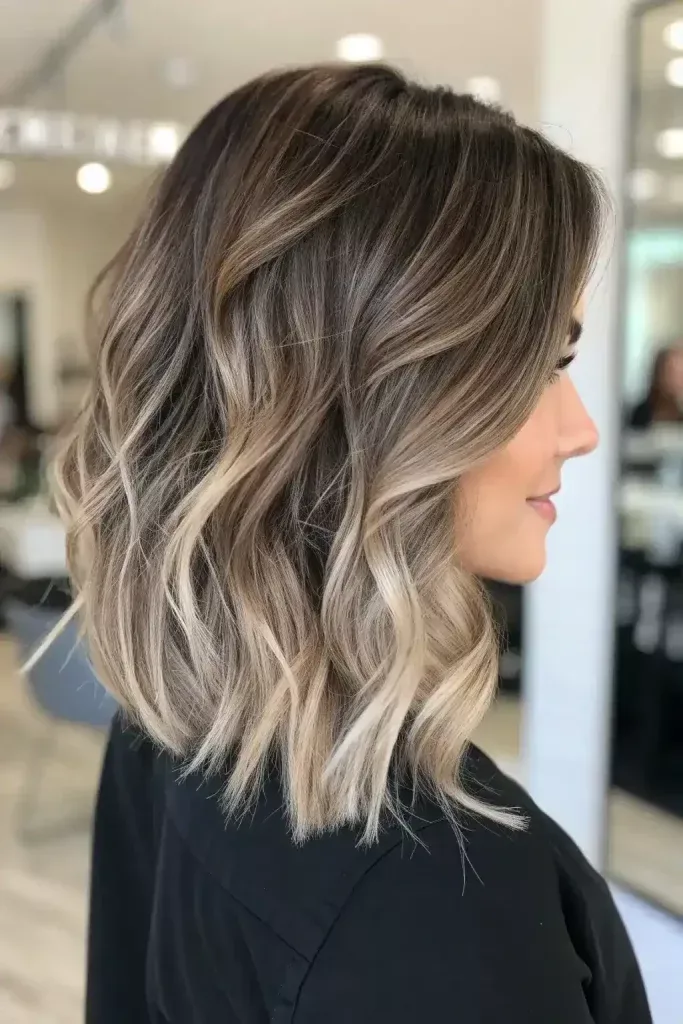
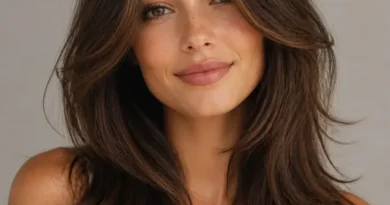
A textured lob with beachy waves is the short-hair girl’s boho answer: a shoulder-length cut with soft, choppy layers, worn in loose, undone waves that look like they happened at the beach rather than in a bathroom. The texture is built into the cut, so the waves need almost no effort — a little salt spray, a scrunch, and the lob does the rest. This is the style for girls who cut their hair short and never looked back, who want a homecoming look that feels like them rather than a costume, and who want to dance without a single pin in their hair. It is also one of the most flattering lengths there is: long enough to wave, short enough to stay bouncy all night.
How long it takes: 15 to 20 minutes. What you need: a curling wand or a flat iron for bends, a sea-salt spray, and a texturising spray. Best with: a short or midi dress, a dress with a relaxed, modern feel, and a lob or shoulder-length cut. Bend the hair with a flat iron rather than curling it — a bend creates a wave with straight ends, which is the beachy look, while a curl creates a ringlet, which is not.
20. Braided Half-Up with Loose Waves
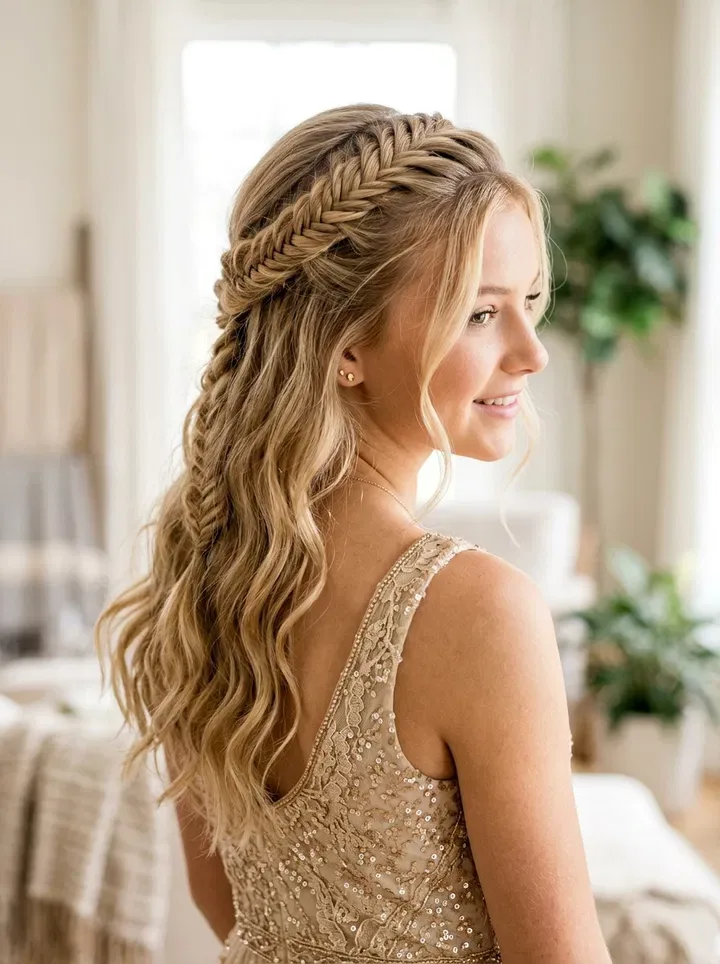
A braided half-up with loose waves combines the two most reliable homecoming ideas: the braid keeps the hair off your face and gives the style structure, while the loose waves underneath keep it soft and romantic. Two small braids from each side meet at the back of the head and are pinned together, and the rest of the hair falls in waves below them — so the style looks detailed from the back and effortless from the front. It is also one of the easiest styles to do on yourself, because the braids are small and forgiving, and any unevenness disappears into the waves. Choose this one when you want a style that looks like you put thought into it, but you do not want to spend an hour on it.
How long it takes: 25 to 30 minutes. What you need: a curling iron, two small clear elastics, and three or four bobby pins. Best with: a flowy or romantic dress, a dress with a soft neckline, and medium to long hair. Braid the sections loosely and pull them apart a little before you pin them — a soft, full braid looks boho and romantic, while a tight braid looks severe.
21. Flower Crown Boho Hair
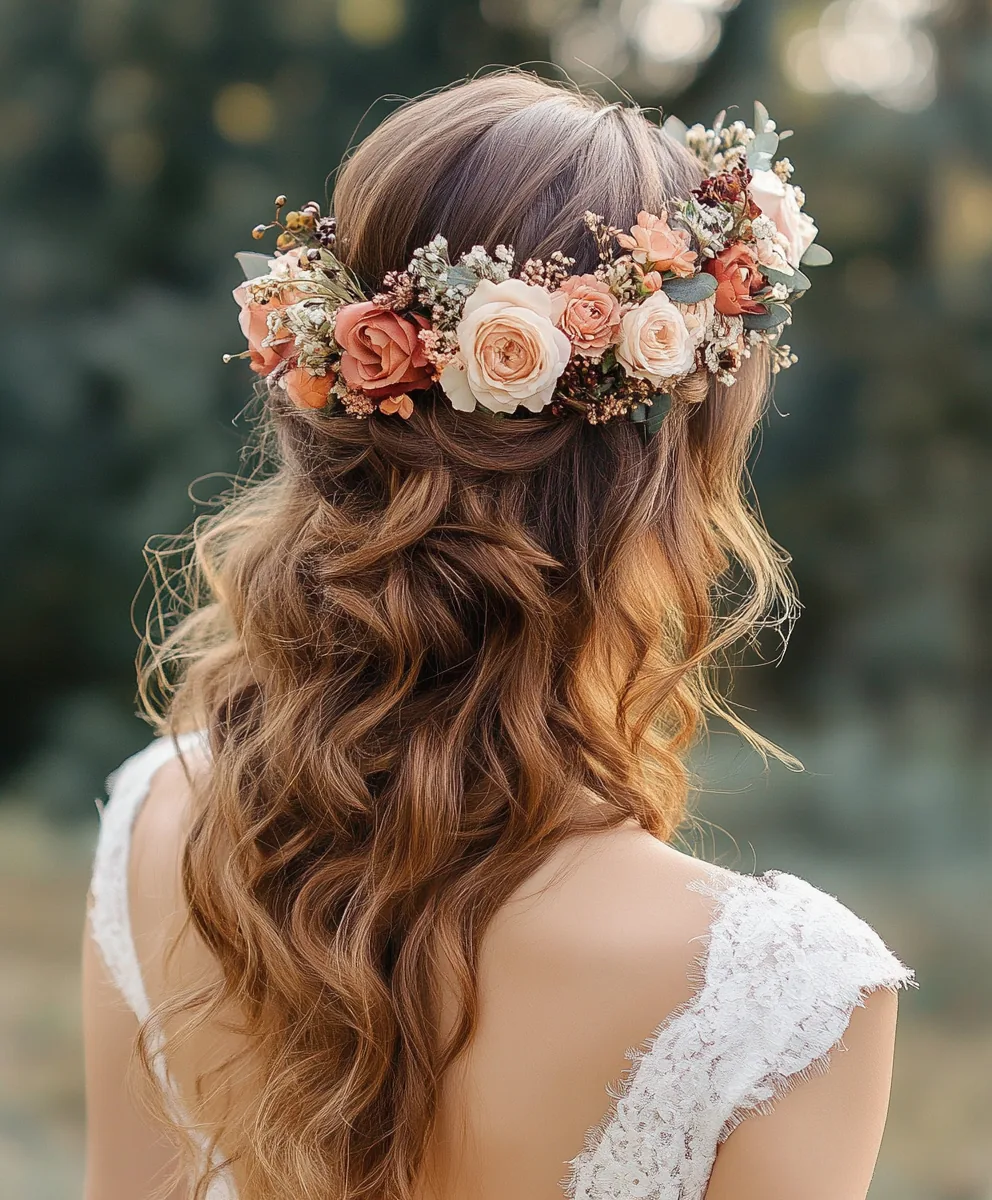
Flower crown boho hair is the most whimsical style on this list: loose, soft waves worn down, with a crown of small fresh or silk flowers sitting across the forehead or the crown of the head. The flowers are the whole look — they turn an ordinary wavy hairstyle into something that feels like a garden party, a festival, or a fairytale — and they photograph beautifully, because the colour of the flowers picks up the colour of the dress and the skin. The hair itself stays deliberately simple, so the crown is the star: soft waves, a centre part, and no pins or braids competing with the flowers. Use silk flowers if you want them to last all night, and fresh flowers if you want the scent and the softness — just keep fresh flowers in water until the last minute.
How long it takes: 20 minutes for the hair, plus fitting the crown. What you need: a curling wand, a texturising spray, and a flower crown that fits snugly. Best with: a floral or garden-party dress, a dress with a soft, whimsical feel, and medium to long hair. Pin the crown in place with two bobby pins hidden under the flowers — a crown that slides forward will spend the whole night in your eyes, and two hidden pins stop it moving entirely.
22. Relaxed Low Ponytail with a Ribbon
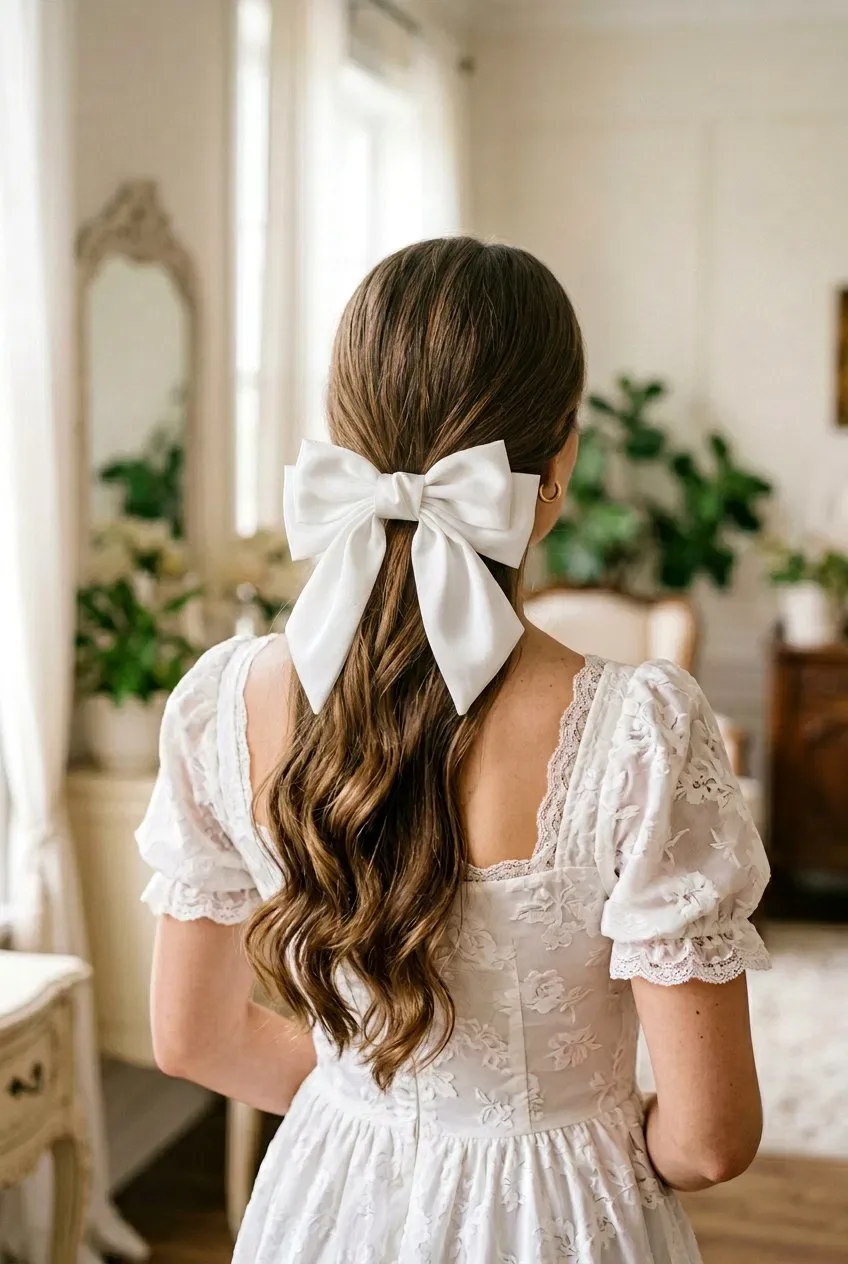
A relaxed low ponytail with a ribbon is the simplest style on this list, and one of the prettiest: the hair gathered loosely at the nape, a few pieces pulled out around the face, and a velvet or satin ribbon tied around the base in a bow that matches the dress. The ribbon is what turns a plain ponytail into a homecoming hairstyle — it adds colour, texture and a focal point, and it echoes the softness of the dress in a way a plain elastic never could. This is the style for girls who want to look polished without feeling overdone, who have fine hair that does not hold curls, or who simply love the idea of a bow. It is also the most comfortable style here: nothing is tight, nothing is pinned, and the hair moves naturally all night.
How long it takes: 10 minutes. What you need: a soft elastic, a velvet or satin ribbon in a colour that matches your dress, and a light-hold hairspray. Best with: a simple or classic dress, a dress in a colour you can match with a ribbon, and fine to medium hair. Tie the ribbon after the ponytail is secure, and wrap it around the elastic twice before you bow it — a ribbon tied once will slip, but a ribbon wrapped twice will stay put all night.
23. Old Hollywood Waves
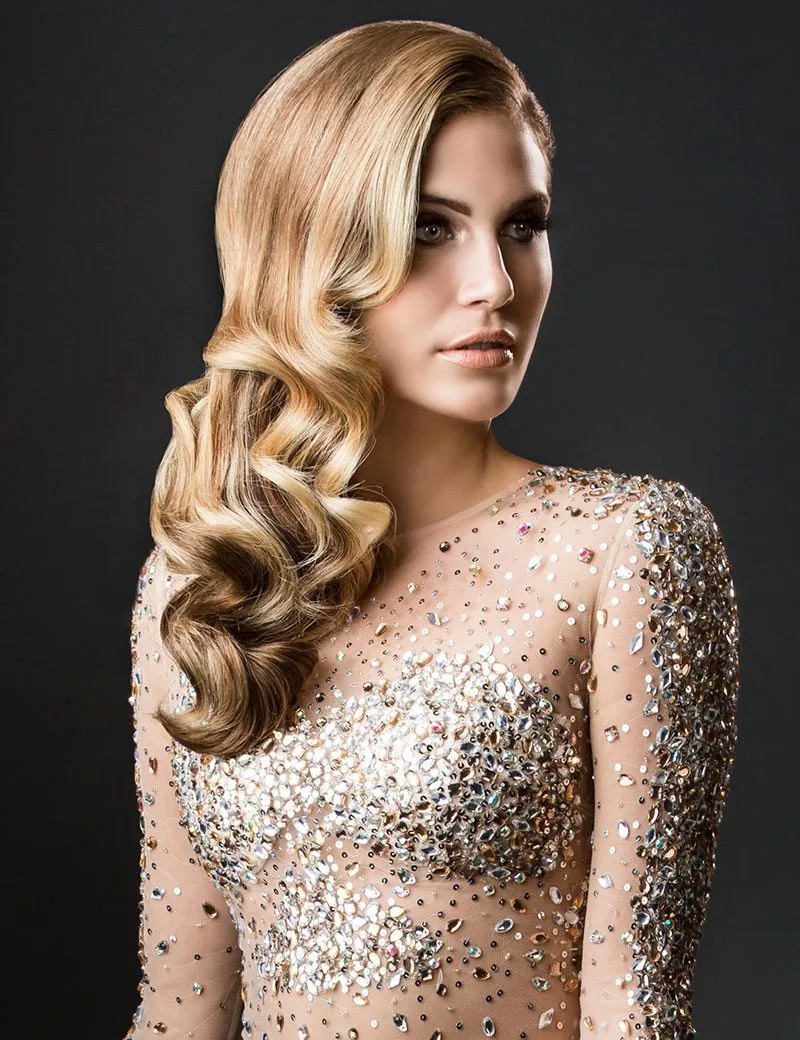
Old Hollywood waves are the most glamorous style on this list, and the one that makes the biggest entrance: deep, sculpted waves that fall in a single, glossy curtain over one shoulder, with a deep side part and a shine that looks like it belongs on a red carpet. The waves are not loose or tousled — they are set, brushed out, and shaped into a smooth, continuous S-curve that holds its shape all night. This is the style for a long, formal gown, for a night when the dress code leans towards drama, and for girls who want to look like a film star rather than a schoolgirl. It takes time and it takes patience, but the result is the most photographed hairstyle at any homecoming, because it looks extraordinary from every angle.
How long it takes: 45 to 60 minutes. What you need: a curling iron, setting clips, a soft-bristle brush, a shine spray, and a strong-hold hairspray. Best with: a long formal gown, a dress with a dramatic or vintage feel, and medium to long hair. Set the curls with clips while they cool — a wave that cools in a clip will hold its shape for hours, while a wave that is brushed out while still warm will fall flat within the hour.
24. Victory Rolls
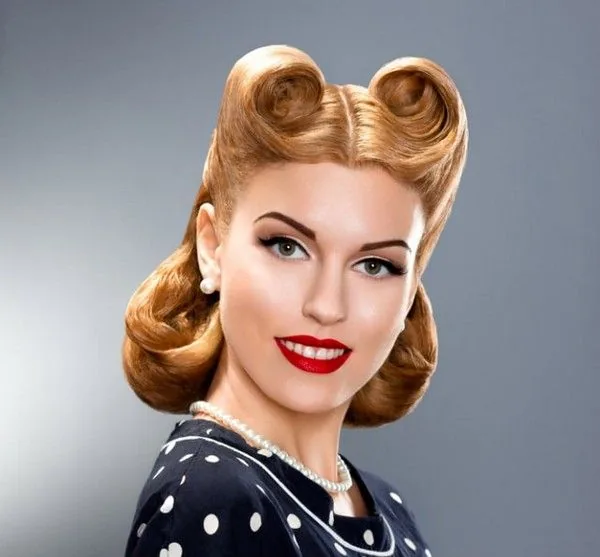
Victory rolls are the most daring vintage style on this list: two sculpted rolls of hair sitting high on the head, one on each side of a centre or side part, in the unmistakable silhouette of the 1940s. The rolls are the whole look — they are bold, architectural, and impossible to ignore — so the rest of the hair stays simple, usually worn down in soft curls or gathered into a low bun underneath. This is the style for girls who love vintage, who want a hairstyle that nobody else in the room will have, and who are not afraid of a little drama. It takes practice, but once you have rolled one, you have rolled them all, and the result is a hairstyle that looks like it stepped out of a different decade.
How long it takes: 40 to 50 minutes. What you need: a curling iron, a teasing comb, plenty of bobby pins, and a strong-hold hairspray. Best with: a vintage or retro-style dress, a dress with a 1940s feel, and medium to long hair. Backcomb the section before you roll it — the teasing gives the roll its structure and its height, and a roll made from smooth hair will collapse within the hour.
25. Classic French Twist
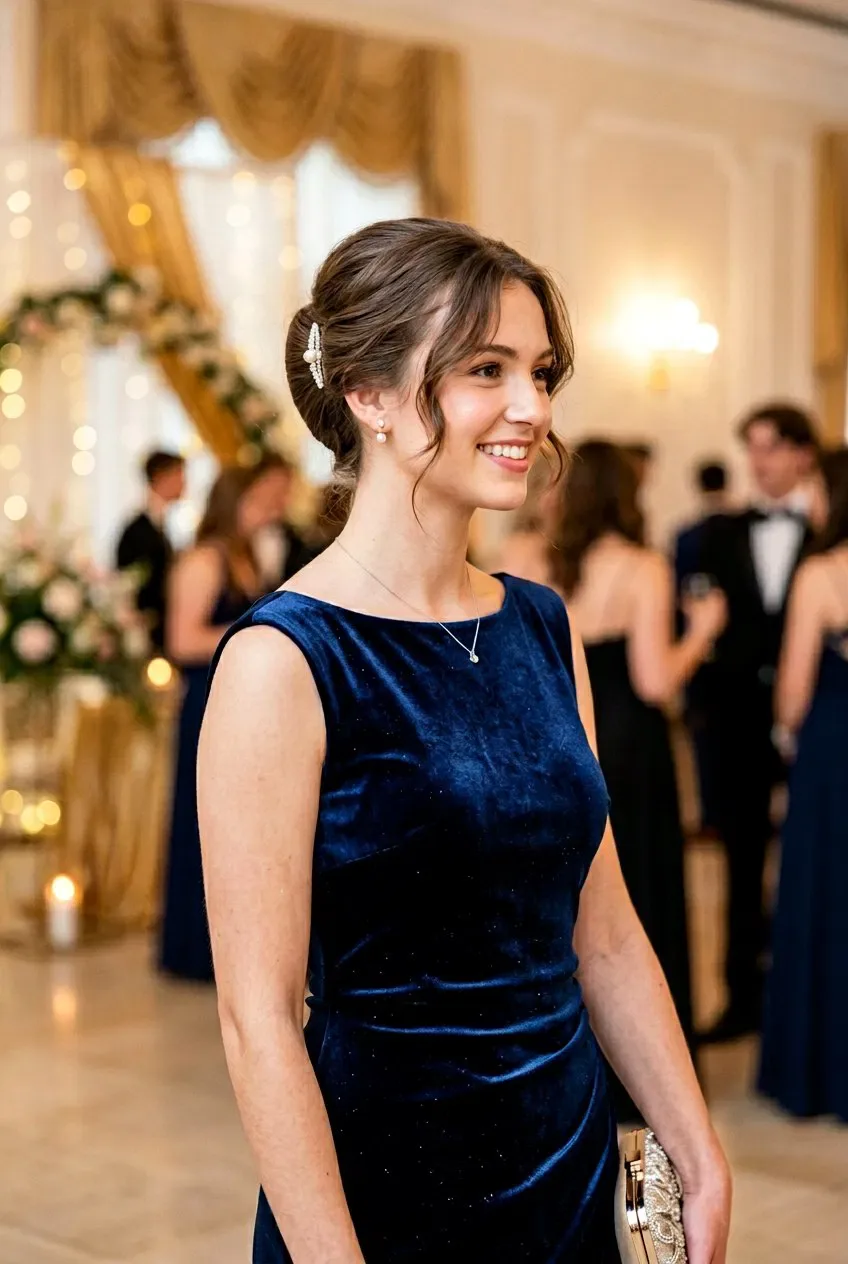
A classic French twist is the most elegant updo a girl can wear to homecoming, because it is all about control and sculpture: the hair is smoothed back, folded up the back of the head, and pinned into a sleek, vertical roll that looks like it was carved rather than styled. The twist shows off the neck and the shoulders, it pairs beautifully with a high neckline or an open back, and it has a timeless quality that no trend can touch — it looked right in the 1950s, and it looks right tonight. The secret to a good French twist is the smoothing: every strand must be brushed into place before the twist begins, because a single stray piece will show against the clean surface of the roll. It is a style that rewards patience, and it is worth every minute.
How long it takes: 30 to 40 minutes. What you need: a smoothing pomade, a fine-tooth comb, six to eight bobby pins, and a strong-hold hairspray. Best with: a long formal gown, a dress with a high neckline, and medium to long hair. Tuck the ends of the twist under as you roll it up — the tucked ends are what give the twist its clean, finished edge, and loose ends poking out of the top will ruin the silhouette.
26. Retro Pin Curls
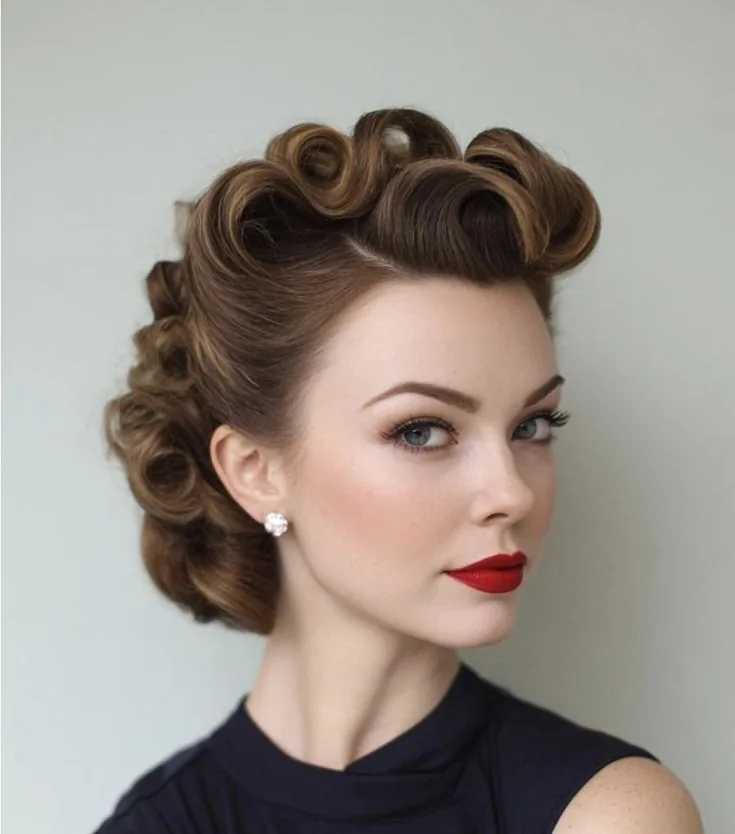
Retro pin curls are the vintage style for girls who love the look of the 1950s but want something softer than victory rolls: small, tight curls set with pins and then brushed out into soft, sculpted waves that frame the face and fall past the shoulders. The pin curls themselves are the technique — each section is curled, pinned flat against the head, and left to cool — and the brushing out is what turns them from ringlets into waves. The result is a hairstyle with incredible hold, because the curls are set into the hair rather than just curled on the surface, and it will survive a whole night of dancing without dropping. It is also the most flattering vintage style for round and heart-shaped faces, because the waves frame the face without hiding it.
How long it takes: 45 to 60 minutes including setting time. What you need: a small-barrel curling iron, plenty of setting pins, a soft-bristle brush, and a strong-hold hairspray. Best with: a vintage or retro dress, a dress with a 1950s silhouette, and medium to long hair. Let every pin curl cool completely before you brush it out — brushing a warm curl will straighten it, and a cool curl will hold its shape for hours.
27. Glamorous Beehive

A glamorous beehive is the tallest, boldest style on this list: the hair teased and piled high on top of the head into a smooth, sculpted dome, with the ends curled under or swept to one side. The height is the whole point — it lengthens the neck, it makes the face look slimmer, and it turns an ordinary dress into a statement, because a beehive is a hairstyle that demands attention. This is the style for girls who love drama, who are not afraid of backcombing, and who want a hairstyle that will be remembered long after the night is over. The trick is the teasing: the beehive is built on a foundation of backcombed hair, and the smooth outer layer is brushed over it to hide the work underneath.
How long it takes: 40 to 50 minutes. What you need: a teasing comb, a volumising powder, plenty of bobby pins, and a strong-hold hairspray. Best with: a dramatic or vintage dress, a dress with a bold silhouette, and medium to long hair. Tease in small sections, not big ones — small, tight teasing creates a firm foundation that holds its height, while big, loose teasing will collapse within the hour.
28. Vintage Side Sweep with Curls
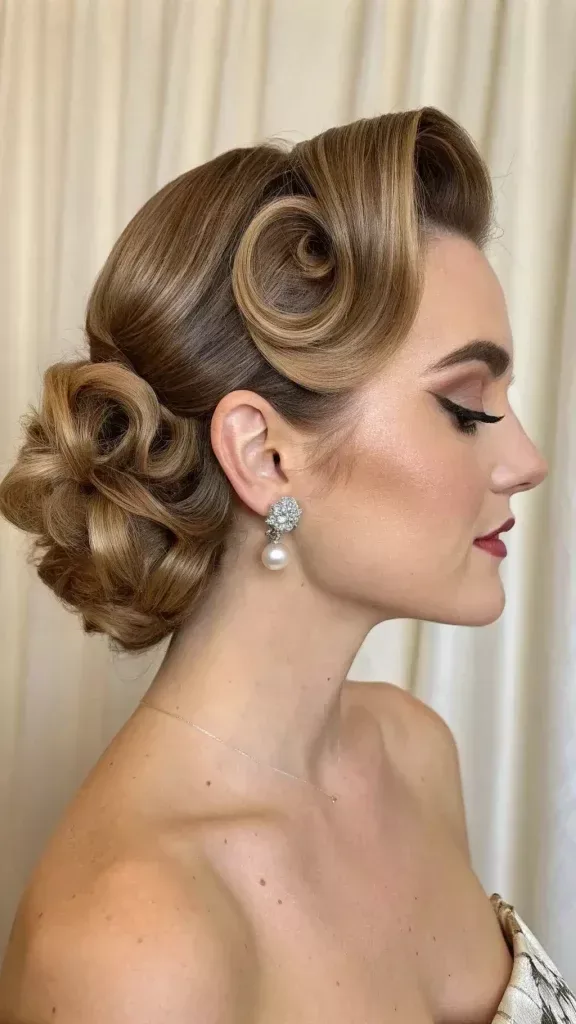
A vintage side sweep with curls is old-Hollywood glamour made wearable: the hair parted deeply, swept across the forehead in a heavy, glossy wave, and falling in soft, sculpted curls over one shoulder. The sweep is what makes it vintage — it is the same silhouette as the film stars of the 1940s, with the hair framing one side of the face and leaving the other side open — and the curls are what make it romantic rather than severe. This is the style for a dress with a dramatic neckline, for a night when you want to look like you stepped out of a different era, and for girls who love the idea of glamour but do not want the height and the drama of a beehive or victory rolls. It is also one of the most photogenic styles here, because the sweep creates a beautiful line in every photo.
How long it takes: 35 to 45 minutes. What you need: a large-barrel curling iron, a deep side part, setting clips, and a shine spray. Best with: a long gown, a dress with a dramatic neckline, and medium to long hair. Clip the sweep in place while it cools — a wave that cools under a clip will hold its curve all night, while one that is left to fall will straighten out by the first dance.
29. Pearl-Adorned Vintage Updo
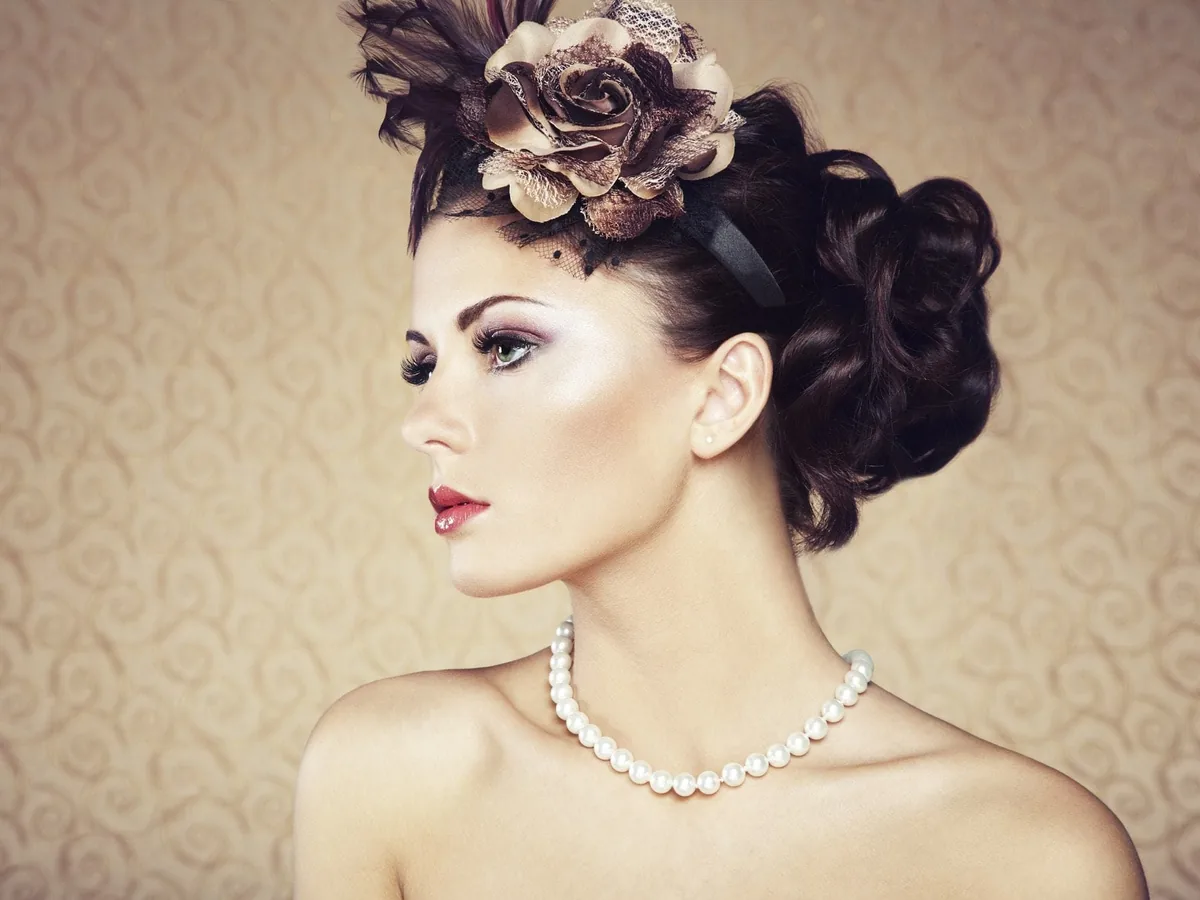
A pearl-adorned vintage updo takes a classic sculpted updo — a low chignon, a French twist, or a rolled bun — and finishes it with pearl pins scattered through the hair like jewellery. The pearls are what make it vintage: they echo the jewellery of the 1920s and 1950s, they catch the light in photos, and they turn a simple updo into something that looks like it belongs at a ball. The updo itself should be smooth and controlled, because the pearls need a clean surface to sit on — a messy bun will swallow them, but a sleek chignon will show them off. This is the style for a classic, elegant dress, for a girl who loves jewellery, and for anyone who wants a hairstyle that looks expensive without being complicated.
How long it takes: 30 to 40 minutes. What you need: a smoothing serum, six to eight bobby pins, a cluster of pearl pins, and a strong-hold hairspray. Best with: a classic or elegant dress, a dress with pearl or crystal details, and medium to long hair. Place the pearl pins after the hairspray, not before — pins placed before the spray will get coated and lose their shine, while pins placed last will sit on top of the finished style and catch the light.
30. Sparkly Pixie with a Crystal Clip
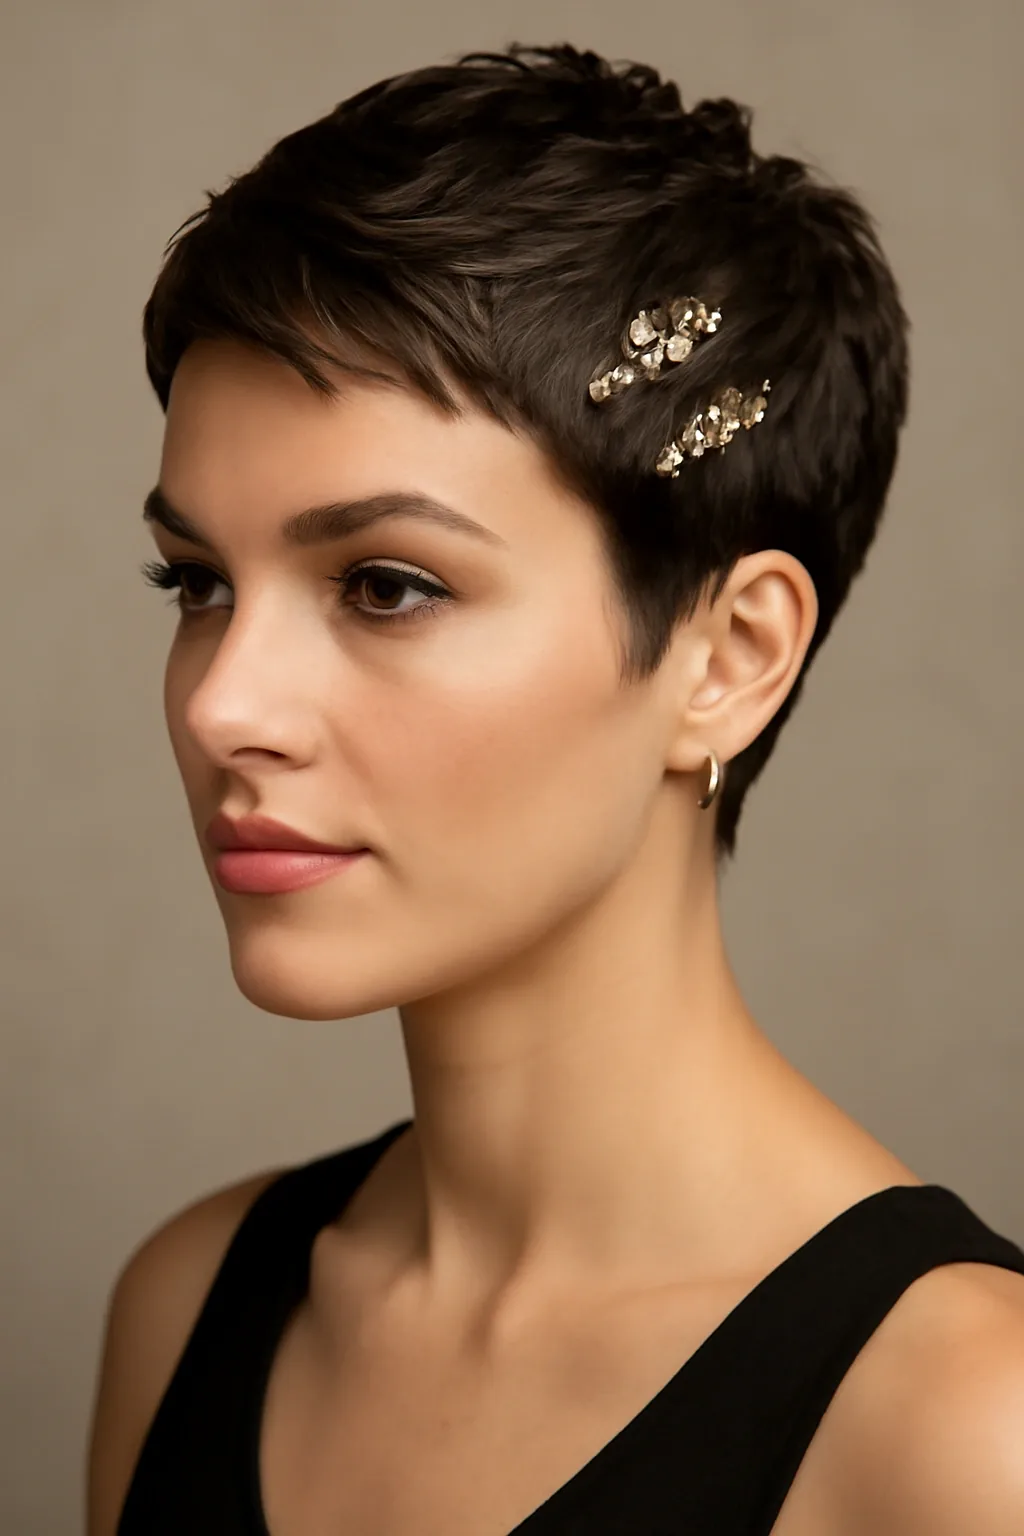
A sparkly pixie with a crystal clip is proof that short hair can outshine long hair at homecoming: the pixie itself is textured and piecey, swept to one side, and the crystal clip sits just above the ear like a piece of jewellery. The clip is the whole trick — it turns an everyday pixie into a homecoming pixie in ten seconds, it catches the light in every photo, and it shows off the earrings and the neckline at the same time. The pixie should be styled with a little texture and a little shine, so it looks deliberate rather than accidental, and the clip should be the only accessory — one statement piece is all a pixie needs. This is the style for girls who love their short hair, who want to dance without a single pin falling out, and who want a look that is entirely their own.
How long it takes: 10 to 15 minutes. What you need: a texturising paste, a little shine spray, and a crystal or rhinestone clip. Best with: a dress with a bold neckline, a dress with statement details, and a pixie cut. Apply the paste to damp hair and style with your fingers, not a brush — fingers create the piecey texture that makes a pixie look modern, while a brush will flatten it.
31. Textured Bob with Soft Waves
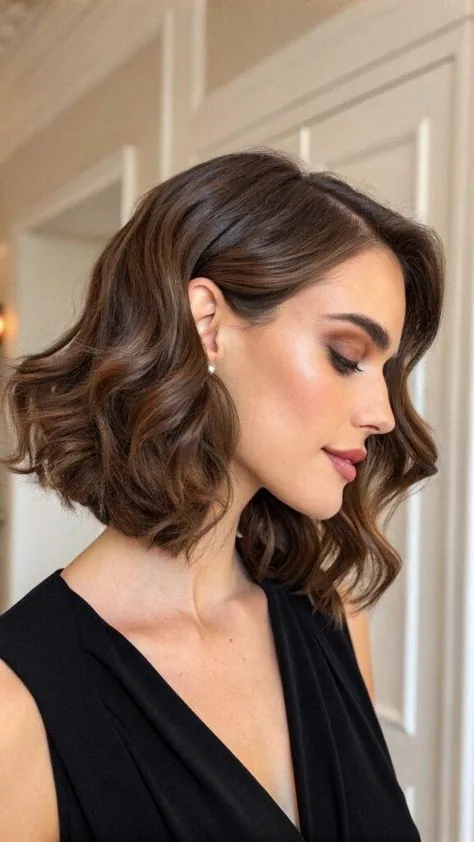
A textured bob with soft waves is the short-hair style that flatters almost everyone: a chin-length or jaw-length bob with soft, choppy layers, worn in loose, undone waves that give it movement and bounce. The texture is built into the cut, so the waves need almost no effort, and the length is the sweet spot — short enough to stay bouncy all night, long enough to tuck behind the ears or pin to one side. This is the style for girls who want a homecoming look that feels like them, who do not want to spend an hour on their hair, and who want a style that will still look good at midnight. It pairs beautifully with a dress that has a clean neckline, because the bob frames the face without hiding the dress.
How long it takes: 15 to 20 minutes. What you need: a curling wand or a flat iron for bends, a texturising spray, and a light-hold spray. Best with: a short or midi dress, a dress with a clean neckline, and a bob cut. Bend the ends outwards, not under — flipped-out ends are what give a textured bob its modern, playful edge, while ends bent under will look like a 1960s set.
32. Curly Bob with Volume
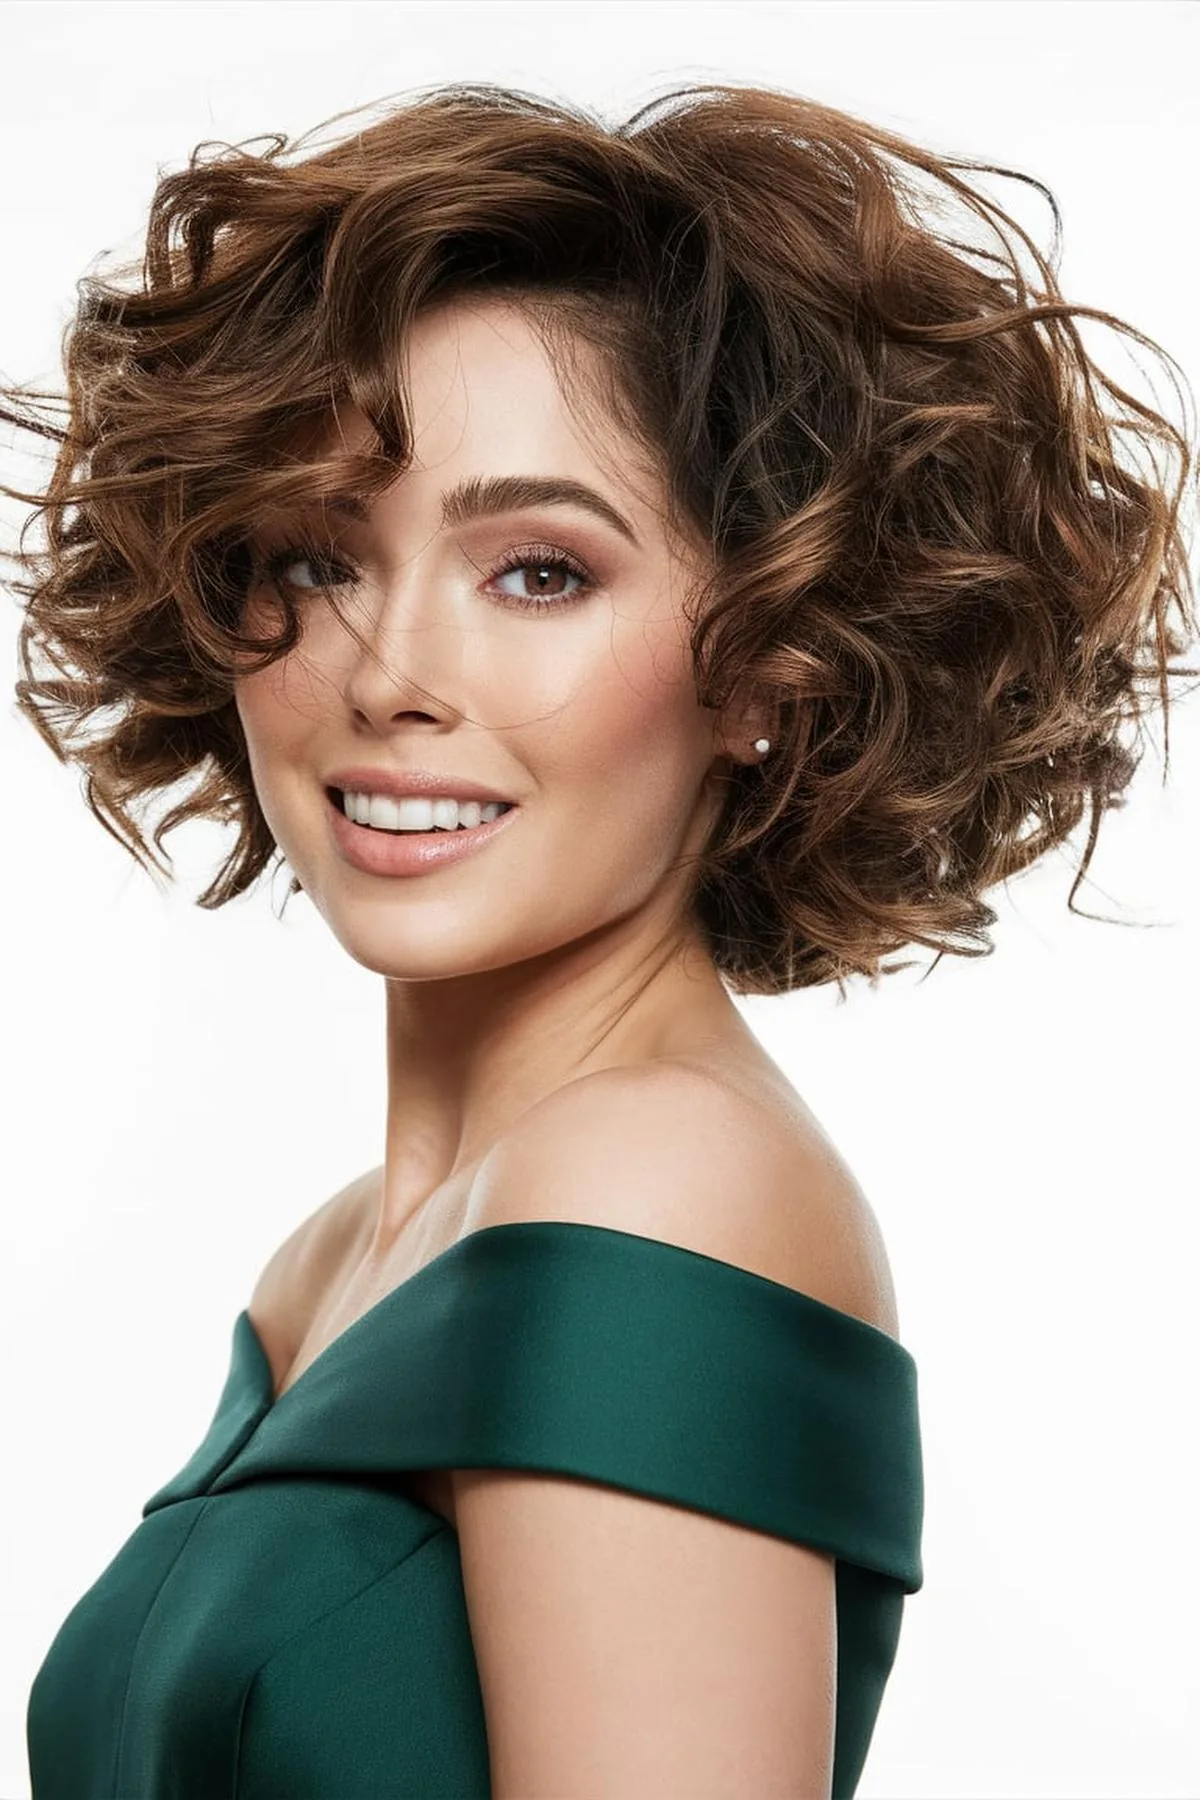
A curly bob with volume is the short-hair style for girls whose curls are the star: a chin-length bob cut to follow the curl pattern, worn with the curls defined, bouncy and full of life. The volume is the point — the curls are allowed to expand, to frame the face, and to move when you do, so the whole look is joyful and energetic rather than controlled. This is the style for girls with naturally curly hair who have spent years straightening it and are ready to let it be itself for one night. It needs almost no styling beyond curl cream and a diffuser, and it will not fall flat, because curls do not fall — they spring back. Pair it with a dress that has a simple neckline, and let the curls do the talking.
How long it takes: 20 to 25 minutes. What you need: a curl cream, a diffuser, and a light-hold spray. Best with: a simple or classic dress, a dress with a clean neckline, and naturally curly hair. Diffuse on a low heat with the head tilted to one side — the tilt creates volume at the roots, and high heat will frizz the curls before they have a chance to set.
33. Sleek Bob with a Deep Side Part

A sleek bob with a deep side part is the most polished short style on this list: the hair smoothed flat and glossy, parted deeply on one side, and falling in a clean, straight line to the jaw or the chin. The deep part is what makes it glamorous — it creates a heavy, sweeping fall of hair on one side and a clean, sculpted line on the other, and the sleekness makes the whole thing look expensive. This is the style for girls who love clean lines, who want a homecoming look that is modern rather than romantic, and who have naturally straight hair that does what it is told. It pairs beautifully with a bold dress or a statement earring, because the hair stays quiet and lets the outfit shine, and it will look exactly the same in the last photo as it did in the first.
How long it takes: 15 to 20 minutes. What you need: a flat iron, a heat protectant, a shine serum, and a smoothing spray. Best with: a bold or colourful dress, a dress with statement details, and naturally straight hair. Part the hair while it is damp, not dry — a part made on damp hair will stay in place all night, while a part made on dry hair will drift back to the centre within the hour.
34. Wavy Lob with a Sparkly Headband
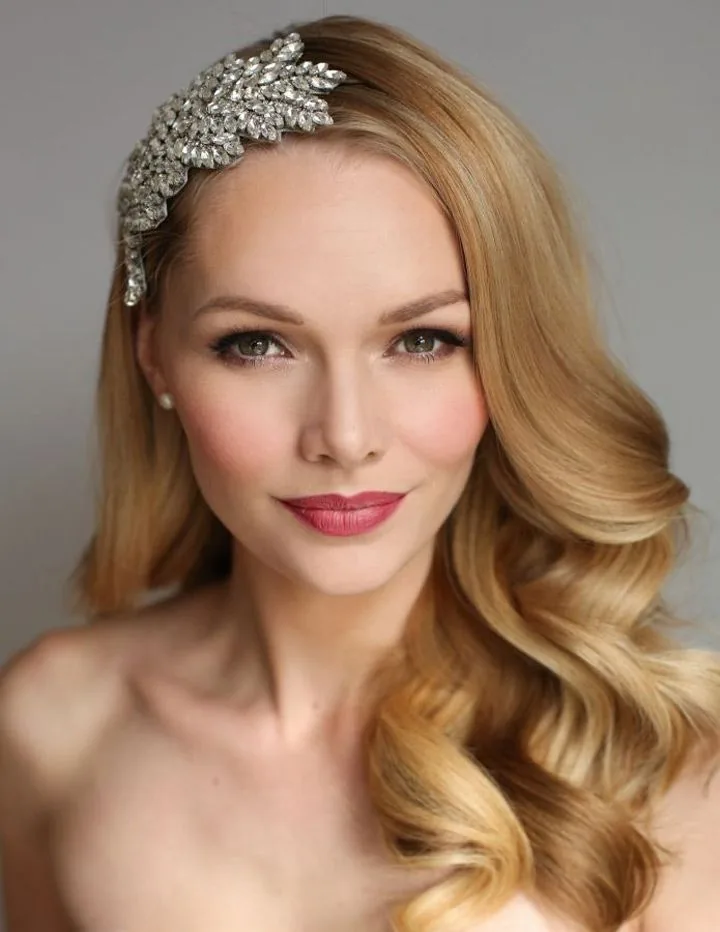
A wavy lob with a sparkly headband is the short-hair style that feels like a celebration: a shoulder-length lob worn in soft, loose waves, with a crystal or pearl headband sitting across the crown like a tiara. The headband is the trick — it turns an everyday lob into a homecoming lob in five seconds, it keeps the hair off the face while you dance, and it catches the light in every photo. The waves themselves stay soft and simple, so the headband is the star and the hair is the frame. This is the style for girls who love sparkle, who want a look that is easy and joyful, and who want a hairstyle that will still be in place when the last song plays. Choose a headband that matches the dress — crystals for a sparkly dress, pearls for a classic one — and let it do the work.
How long it takes: 20 minutes. What you need: a curling wand, a texturising spray, and a sparkly headband that fits snugly. Best with: a short or midi dress, a dress with a fun, celebratory feel, and a lob cut. Put the headband on last, after the hairspray — a headband placed before the spray will get coated and slip, while one placed last will sit on top of the finished style and stay put.
35. Short Updo with Twists
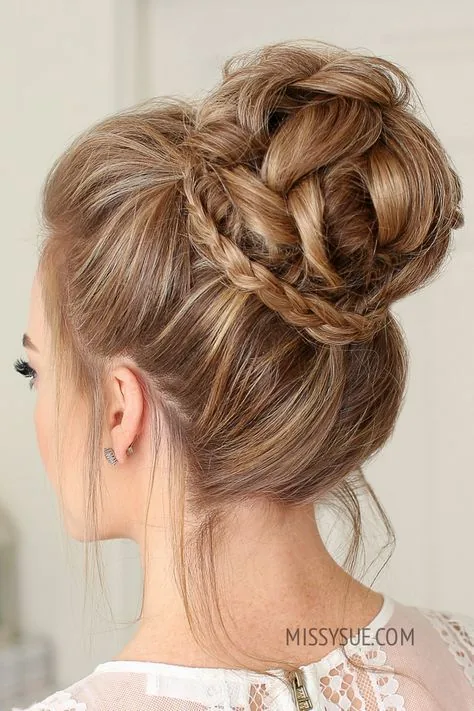
A short updo with twists is the answer for bob-length girls who want their hair up: the hair is divided into sections, each section is twisted back and pinned at the crown or the nape, and the twists build into a soft, textured updo that looks like it took far longer than it did. The twists are the secret — they create the illusion of an updo without needing the length for a bun, and they give the style a beautiful, detailed texture that photographs brilliantly from the back. A few pieces are left loose around the face to soften the front, and the whole thing is finished with a light spray. This is the style for girls with a bob or a lob who want the elegance of an updo without growing their hair out first.
How long it takes: 20 to 30 minutes. What you need: a texturising spray for grip, six to eight bobby pins, and a flexible-hold hairspray. Best with: a formal or elegant dress, a dress with a detailed neckline, and a bob or lob cut. Twist each section loosely and pin it before you move to the next one — building the updo section by section is what makes it hold, and trying to twist all the hair at once will leave it loose and lopsided.
36. Faux Bob: Tucked and Pinned Elegance
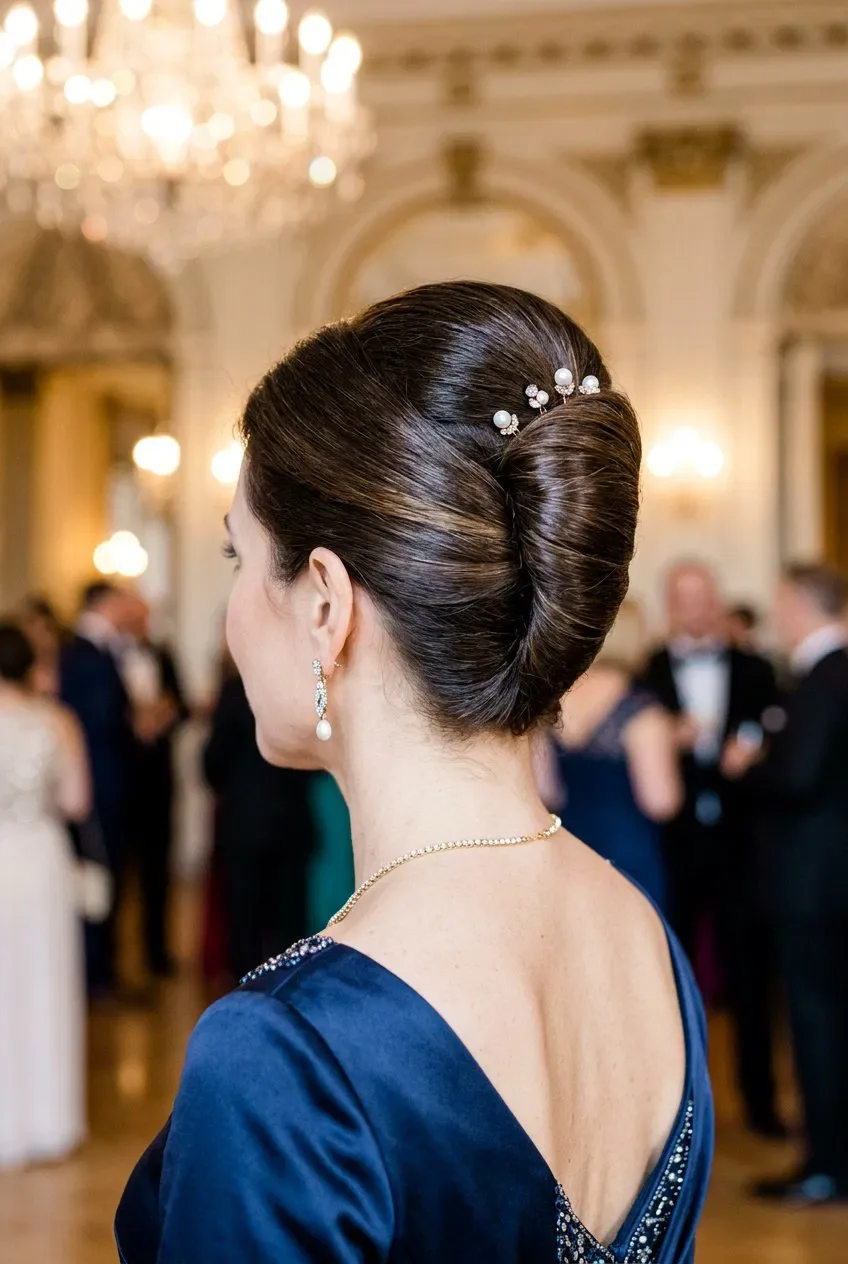
A faux bob is the cleverest trick in the short-hair book: long hair tucked and pinned under to create the silhouette of a bob, without cutting a single strand. The ends are rolled under and pinned at the nape, the hair is smoothed over the top, and the result is a chin-length bob that looks completely real — until you take the pins out at the end of the night and the length comes back. This is the style for girls with long hair who want to try short hair for one night, who love the look of a bob but are not ready to commit to the cut, and who want a hairstyle that will surprise everyone in the room. It is also one of the most flattering styles here, because the bob length frames the jawline and shows off the neckline beautifully.
How long it takes: 25 to 35 minutes. What you need: a curling iron for the ends, a texturising spray, plenty of bobby pins, and a strong-hold hairspray. Best with: a dress with a bold neckline, a dress with a vintage feel, and long hair. Curl the ends before you tuck them under — curled ends roll into a smooth, full bob, while straight ends will poke out and give the trick away.
What is the best hairstyle for homecoming?
The best hairstyle for homecoming is one that matches your dress, your hair length and how much you plan to dance. Romantic curls suit soft, flowing dresses; a sleek bun or chignon suits a sparkly or formal gown; a braided style or a low bun survives dancing best; and short hair looks wonderful with texture, a deep side part or a statement clip. Choose the style that feels like you, then do a trial run with the actual dress on.
How do I make my homecoming hairstyle last all night?
To make your homecoming hairstyle last all night, start with day-old hair rather than freshly washed hair, work a texturising spray or dry shampoo through the roots before styling, set each section with hairspray as you go, and choose a style with more than one anchor point — a braid, a low bun or a pinned-up style holds far better than a single ponytail. Carry bobby pins and a travel-size hairspray in your clutch, and do the jump test before you leave the house.
Should I wear my hair up or down for homecoming?
Wear your hair up if your dress has a high neckline, a detailed back, or a lot of sparkle, because an updo keeps the lines clean and shows off the dress. Wear it down if your dress is strapless or off-the-shoulder, because soft curls frame the open neckline beautifully. A half-up style is the safest middle ground: it keeps your face visible in photos, shows off your earrings, and still gives you the softness of wearing your hair down.
What hairstyle goes with a strapless homecoming dress?
A strapless homecoming dress goes best with hair worn down or half-up: romantic loose curls, soft half-up curls with a twist, or side-swept curls all frame the bare shoulders and neckline beautifully. A high bun can leave strapless shoulders looking bare, so if you want your hair up, choose a low chignon or a soft half-up style instead, and leave a few face-framing pieces loose to soften the look.
What hairstyle goes with a short homecoming dress?
A short homecoming dress goes best with a playful, youthful hairstyle: a bouncy high ponytail, beachy waves, a textured lob, or a curly bob. Short dresses have a fun, flirty energy, and the hair should match it — loose, moving and full of life rather than stiff and formal. A sparkly headband or a crystal clip adds a festive touch without any extra styling time.
Can I do my own homecoming hair?
Yes, you can do your own homecoming hair — soft curls, a half-up twist, a messy bun, a braided crown and a low ponytail are all genuinely doable at home, especially if you have practised them before. Book a stylist if the style is complicated, like a sculpted updo or a French twist, or if your hair is very thick, very long, or resistant to holding a curl. Whichever route you choose, do a full trial run at least a week before, with the dress on, and time it.
How far in advance should I book a hairstylist for homecoming?
Book a hairstylist for homecoming at least two weeks in advance, because the best stylists fill up quickly in homecoming season. Bring photos of the exact style from more than one angle and a photo of your dress, ask how long it will take and what it will cost including any trial, and book the trial for at least a week before the night so there is time to change the plan if the style does not work.
What should I do with my hair the night before homecoming?
The night before homecoming, wash your hair and use a deep-conditioning mask, then let it air-dry most of the way before bed — day-old hair holds curls and pins far better than freshly washed hair. Sleep with your hair in a loose, high bun or a loose braid for soft natural texture, and lay out everything you will need: bobby pins, an elastic, a travel hairspray, a comb and your accessory, plus the dress, shoes and jewellery. Plan your timing backwards from when you need to leave, and add thirty minutes of buffer.
What hair accessories are best for homecoming?
The best hair accessories for homecoming are pearl pins for a classic or romantic dress, crystal or rhinestone clips for a sparkly dress, and fresh or silk flowers for a soft, boho dress. Pick one statement piece rather than several — a big clip and a flower crown and a headband will fight each other in photos. Attach the accessory last, after the hairspray, and secure it with a hidden bobby pin as well as its own clip, because clips slip on smooth hair.
How do I keep my curls from falling flat at homecoming?
To keep your curls from falling flat at homecoming, start with day-old hair, use a heat protectant and a volumising mousse before curling, curl smaller sections than you think you need, and let every curl cool completely before you brush it out — a curl that cools in your hand or in a clip will hold for hours, while a curl brushed out while still warm will fall within the hour. Finish with a flexible-hold hairspray, and avoid touching your hair during the night, because the oils on your hands break curls down.
Conclusion
Homecoming is one night, but the hairstyle you choose is the thread that ties the whole look together — the dress, the shoes, the jewellery and the photos all hang off it. The best homecoming hairstyle is not the most complicated one, and it is not the one with the most pins. It is the one that matches your dress, suits your hair, survives the dance floor, and feels like you. Romantic curls, a sleek bun, a boho braid, a vintage wave or a sparkly pixie can all be the right answer, as long as the answer fits the girl wearing it.
Start with the dress, then choose the vibe, then do the trial run — hair, makeup and dress together, a week before, with photos from the front and the back. Pack the pins, the spray and the confidence, and then stop worrying about your hair and enjoy the night. The photos will last for years, and the best ones are always the ones where you are laughing, dancing, and not thinking about your hair at all — because it stayed exactly where you put it.