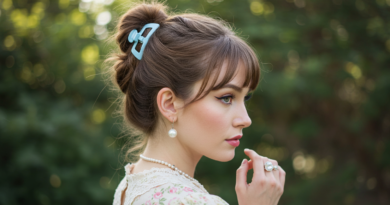
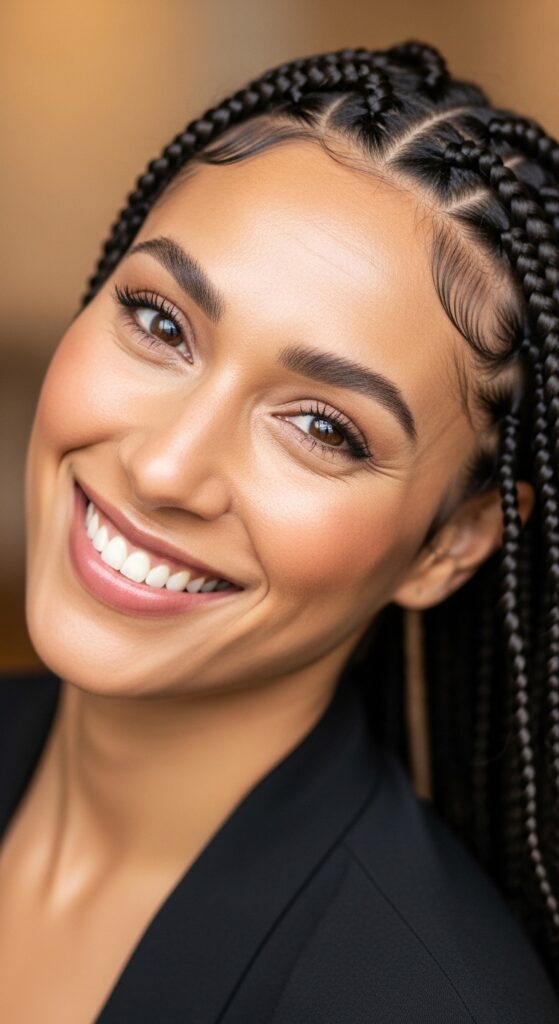
Knotless 21 Braid Perimeter Softening Edges for Feminine Touch
Okay, let’s be real. We’ve all been there. You get these gorgeous, intricate knotless braids installed, and then… the edges. They can feel a bit harsh, a little too perfect, and not quite “you.” If you’re looking for that final touch to make your protective style feel effortlessly feminine and soft, you’re in the right place.
Today, we’re diving deep into the art of softening your perimeter. This isn’t about a complicated technique; it’s about a simple mindset shift. It’s that “I woke up like this” vibe, but for your braids.
Think of it as the hairstyle equivalent of quiet luxury—understated, intentional, and deeply personal. Whether your vibe is romantic goth or classic old money hair, softening your edges is the secret sauce. Let’s get into how to do it, step by simple step.
Why Soften Your Braid Edges?
It’s all about balance. Knotless braids are structured and beautiful, but adding a soft perimeter creates a beautiful contrast. It frames your face, adds a touch of romance, and makes the style look like it grew from your own head.
This little detail bridges the gap between a protective style and your personal aura. It’s that feminine touch that pulls everything together. In a world of bold 2026 hairstyles, sometimes the most powerful statement is softness.
Gather Your Edge Control Toolkit
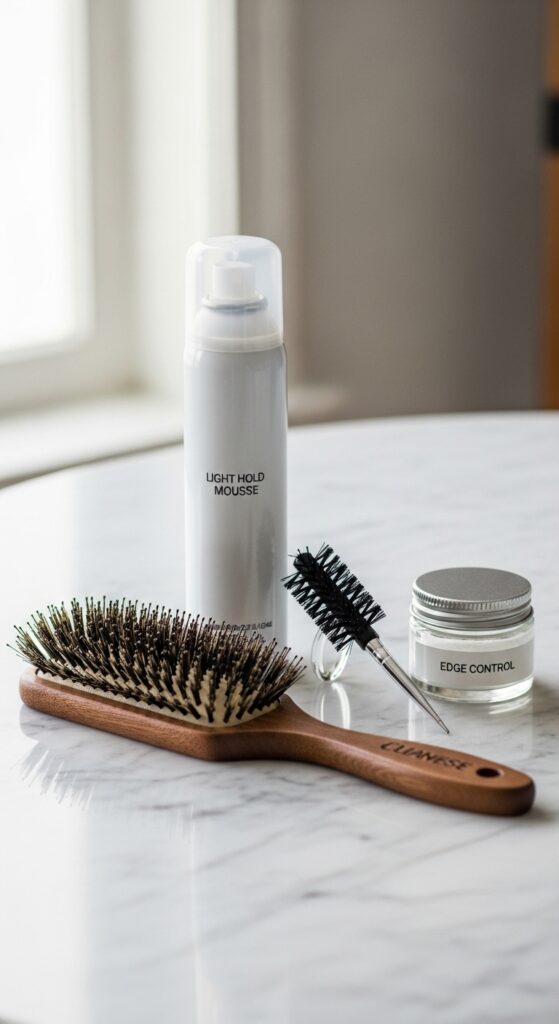
You don’t need much! The right tools make all the difference. Here’s my go-to kit for perfect, soft edges every time.
- A fine-tooth edge brush or a soft baby brush.
- A strong-hold edge control gel for the base.
- A light, non-flaky mousse for the final layer.
- A boar bristle brush for blending.
- A satin scarf for setting.
Start with a Clean, Moisturized Base
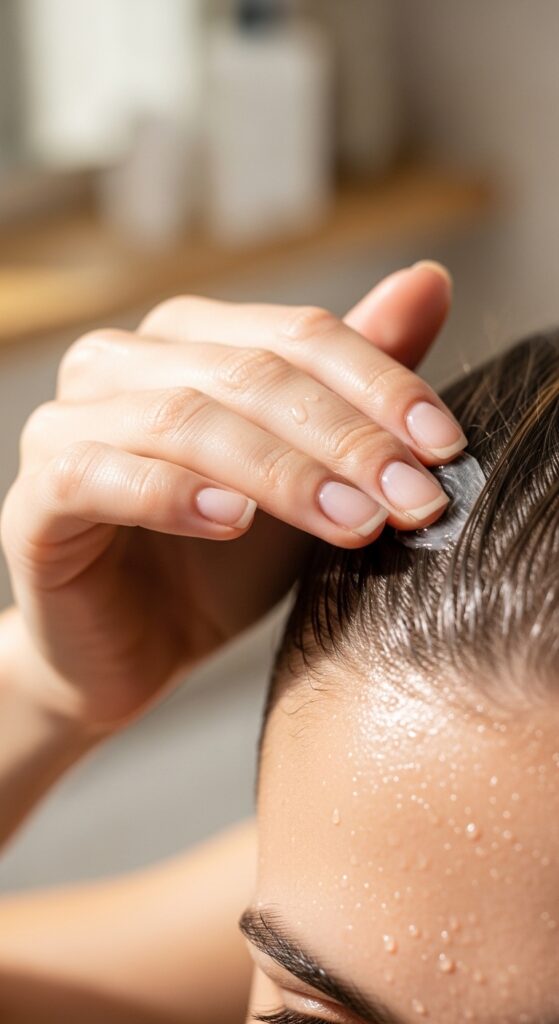
Never apply product to dry or dirty edges. Start by cleansing your perimeter with a gentle wipe or micellar water. Then, apply a tiny bit of your favorite leave-in conditioner or edge moisturizer.
This hydrates the hair and prevents the gel from just sitting on top and flaking. Think of it like prepping your canvas before you paint. Healthy hair lays better and looks shinier.
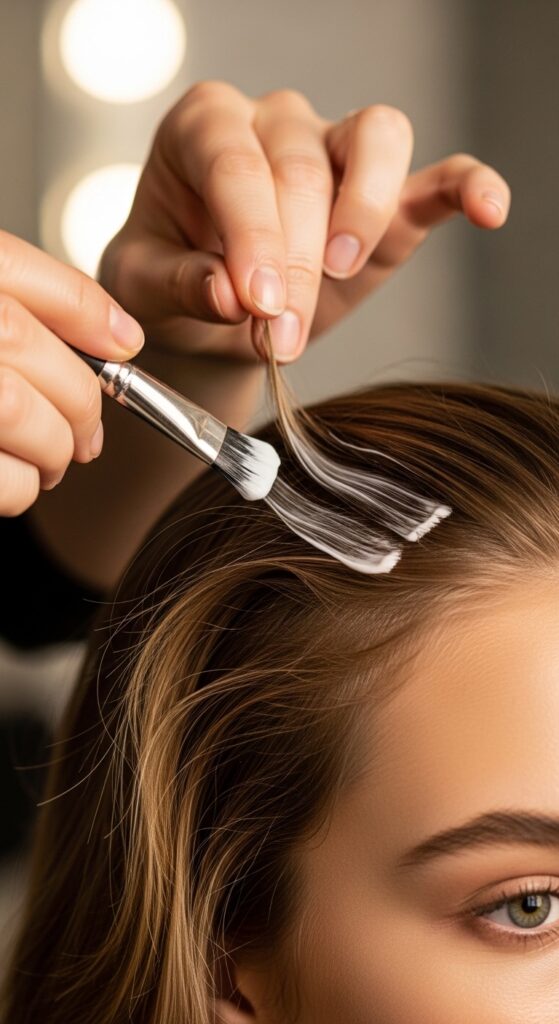
The “Less is More” Gel Application
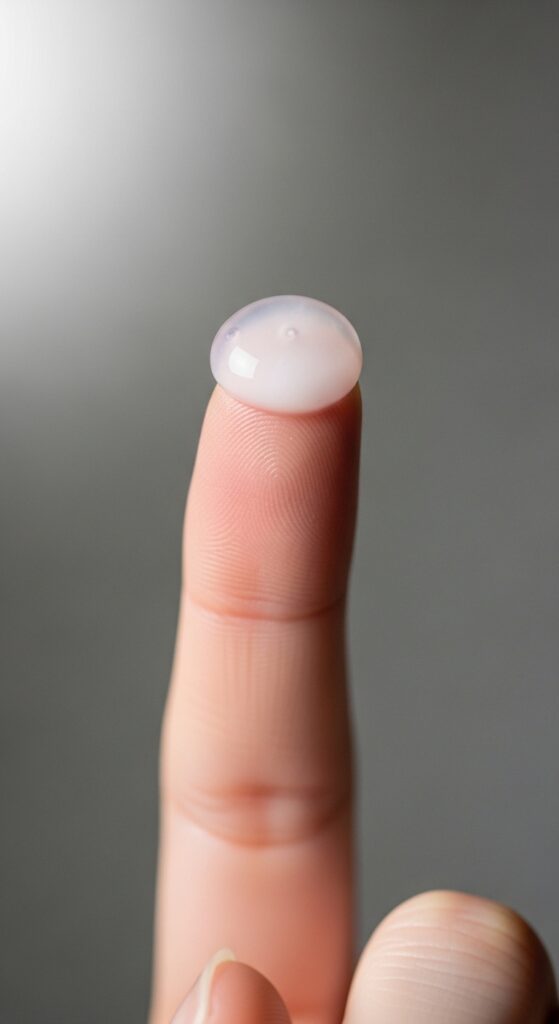
This is the biggest mistake I see! You only need a pea-sized amount of gel for both sides. Seriously. Too much product leads to crunchiness and flakes, which is the opposite of soft.
Warm the gel between your fingers before applying. Gently smooth it along your hairline, focusing on the areas where you want your baby hairs to lay. We’re aiming for hold, not a helmet.
Brush with Direction, Not Force
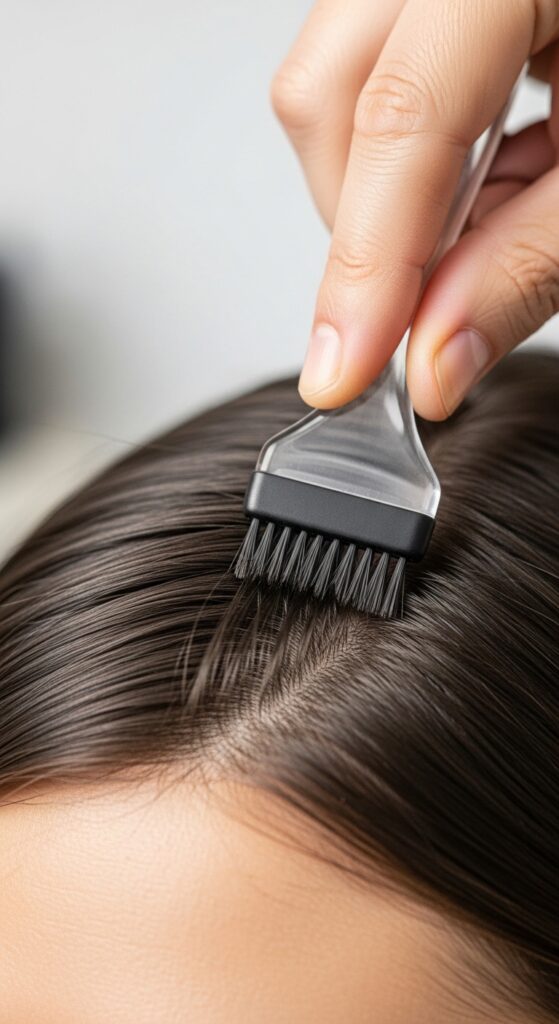
Don’t just brush hair straight down. Use directional brushing to create soft shapes. For a feminine look, brush your edges into gentle “C” shapes or swoops at the temples.
Use light pressure. You’re guiding the hair, not forcing it. If a section isn’t laying, apply a *tiny* bit more gel with the brush, but always go back to using less next time.
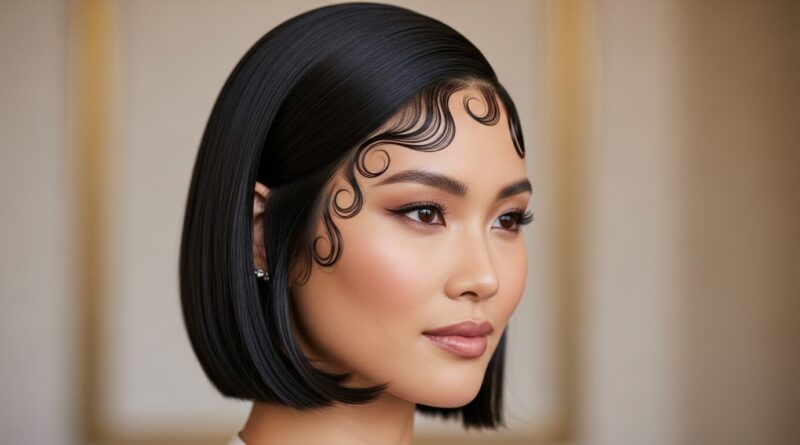
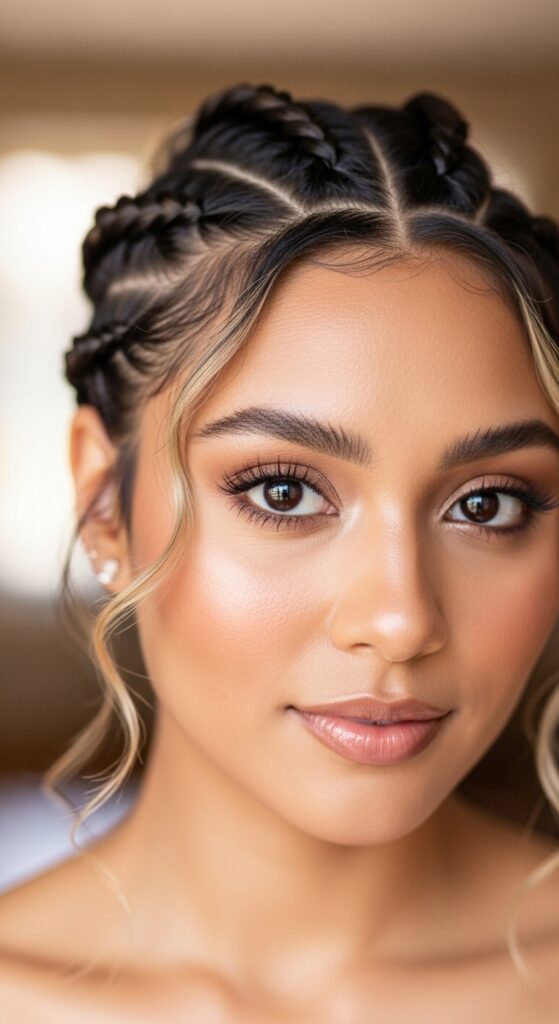
Create Soft Baby Hair Patterns
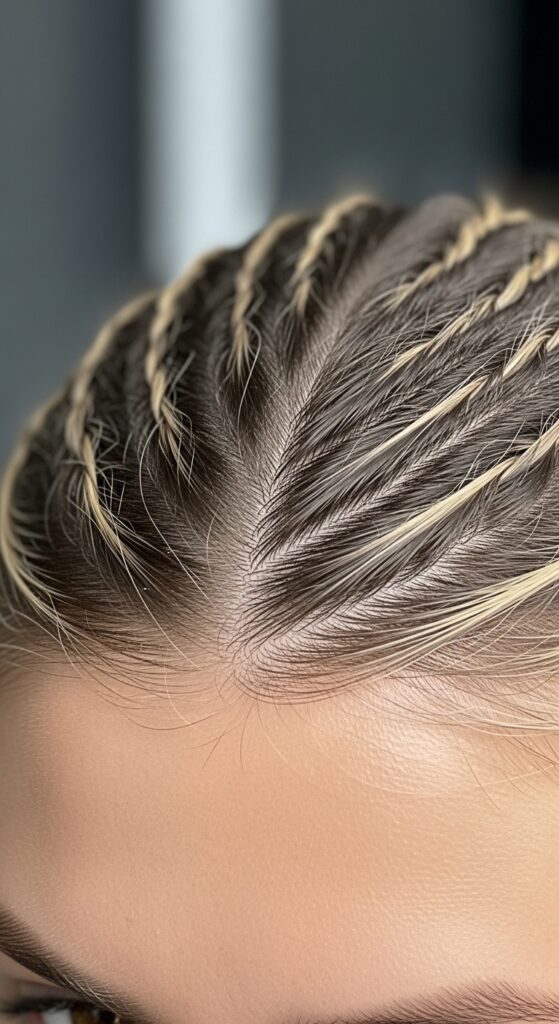
Forget super-tight, intricate swirls. The goal is softness. Think wispy tendrils and loose curves. Use the tip of your edge brush to pull out a few tiny hairs from the braid itself to blend.
Patterns to try include simple swoops, broken heart shapes at the center, or just gently brushed-down wisps. This works with any vibe, from glitchy glam hair to a classic look.
The Magic of the Boar Bristle Blend
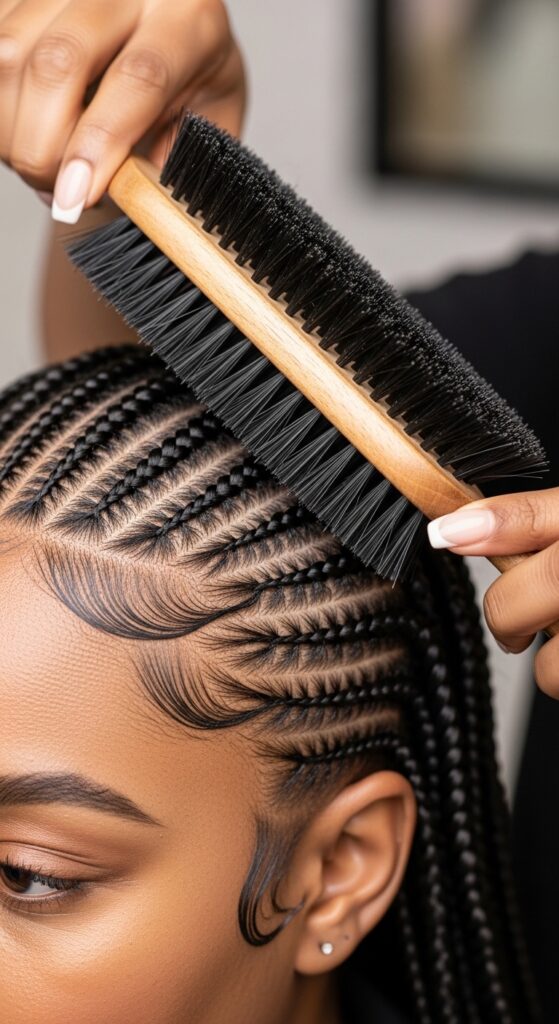
After you’ve laid your edges with the edge brush, take a clean, soft boar bristle brush. Lightly go over the area where your baby hairs meet the braids.
This crucial step blends the line, removing any harsh gel lines and creating a seamless, natural transition. It’s the secret to making it look like your hair, not a separate style.
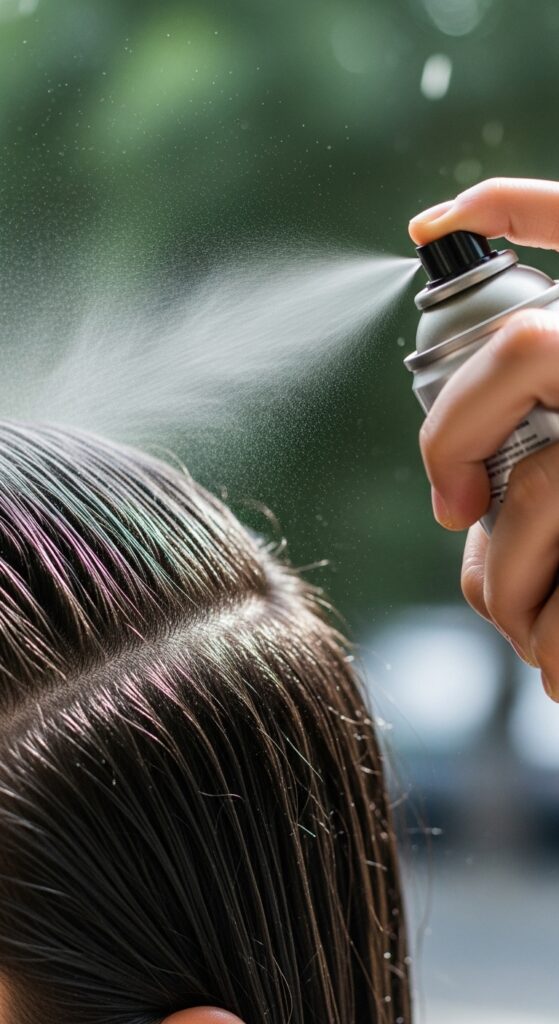
Set with a Light Mousse for Hold
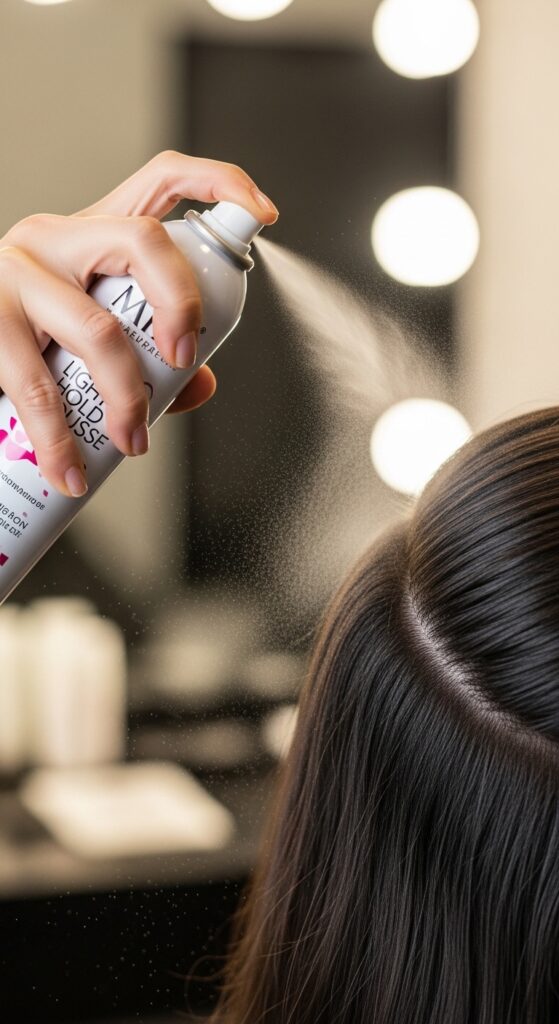
To lock in the softness without crunch, I swear by a light holding mousse. Spray a small cloud of mousse into your palm, rub your hands together, and gently pat and smooth it over your laid edges.
This gives a flexible, lasting hold that won’t flake or get hard. It keeps those wispy bits in place all day while letting them move naturally.
The Satin Scarf Press is Key
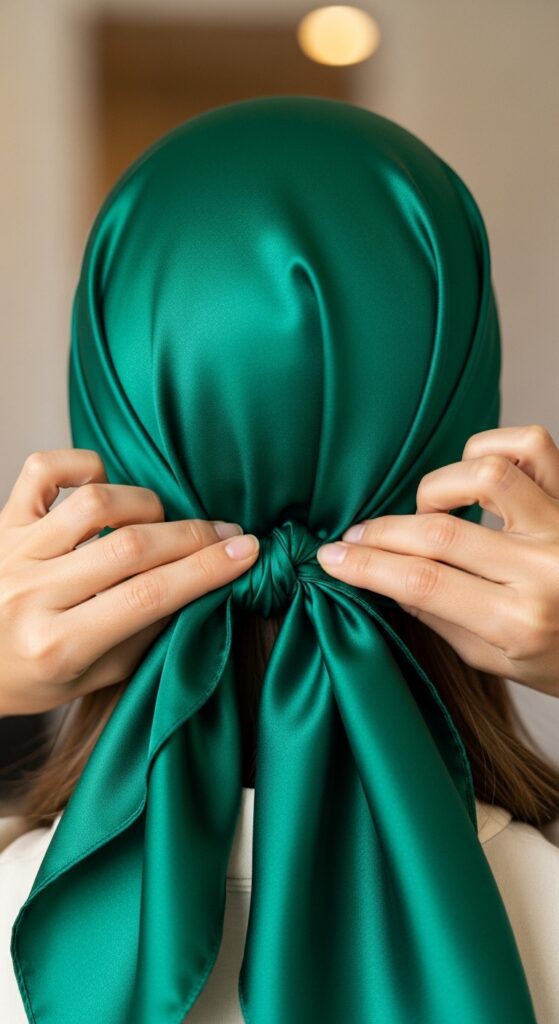
Don’t skip this! Once your edges are styled, immediately tie them down with a satin scarf. The scarf should lay flat over your hairline. Leave it on for at least 15-20 minutes while you finish getting ready.
The gentle pressure sets the style, and the satin prevents frizz. This is what gives you that sleek, polished finish that lasts from morning to night.
Avoid These Common Mistakes
Let’s quickly go over what to avoid so your efforts pay off. First, using too much gel. It always leads to flakes. Second, brushing with too much force, which can cause breakage.
Also, avoid overly complicated designs. Simplicity is elegance. And never sleep without a satin bonnet or pillowcase—it protects your hard work!
Day 2 Refresh: No Redo Needed

Your edges don’t need a full redo every day. For a quick refresh, lightly mist your perimeter with a mix of water and a drop of conditioner.
Then, use your boar bristle brush to gently re-smooth the hairs. You can pat on a minuscule bit more mousse if needed. This takes two minutes and keeps your style looking fresh all week.
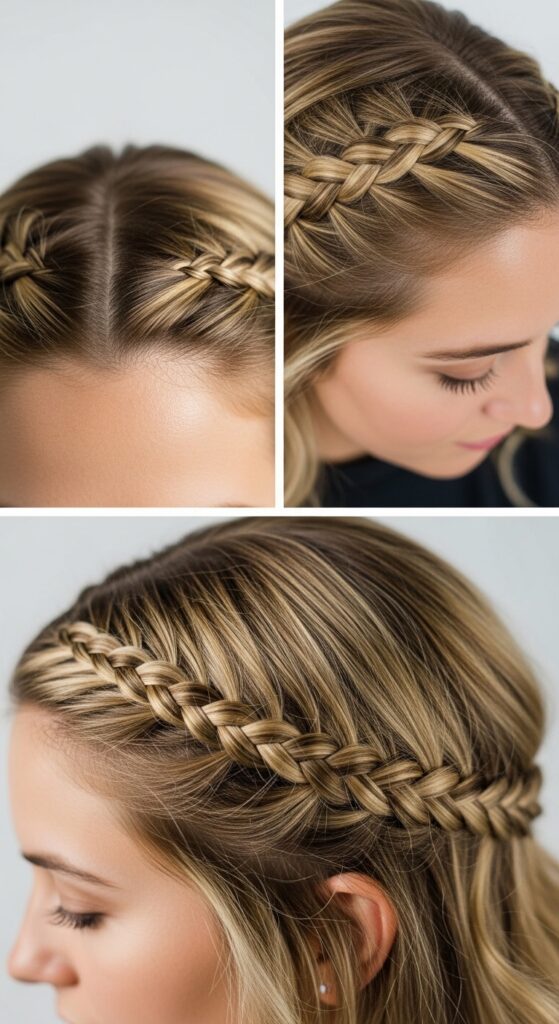
Pair with Romantic Accessories
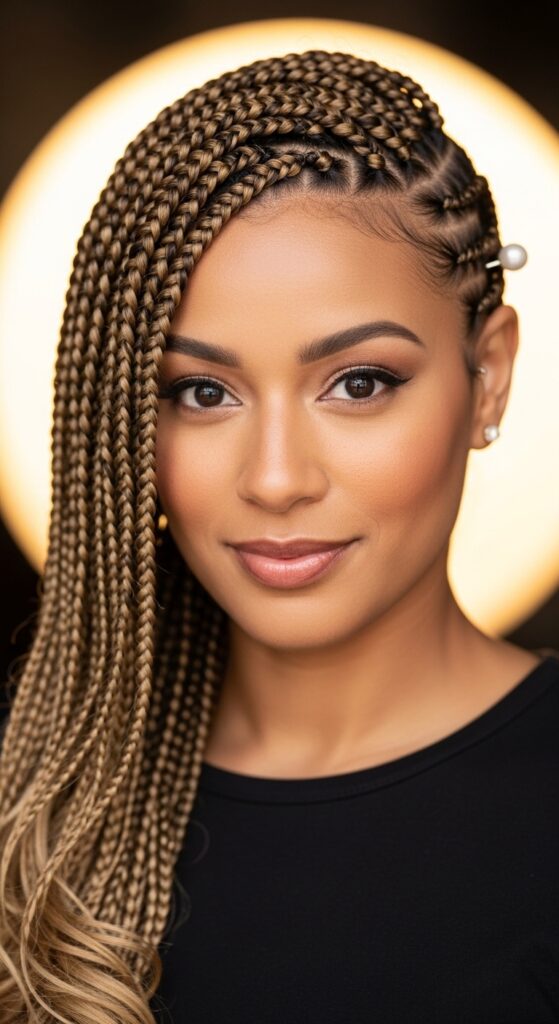
Softened edges pair beautifully with delicate accessories. Think small gold or pearl clips, thin silk scarves woven into the first braid, or even just dainty hoop earrings.
This enhances that feminine, intentional feel. It’s a trick seen in old money hair aesthetics—understated details that speak volumes.
From Bold to Soft: Adapting Your Vibe
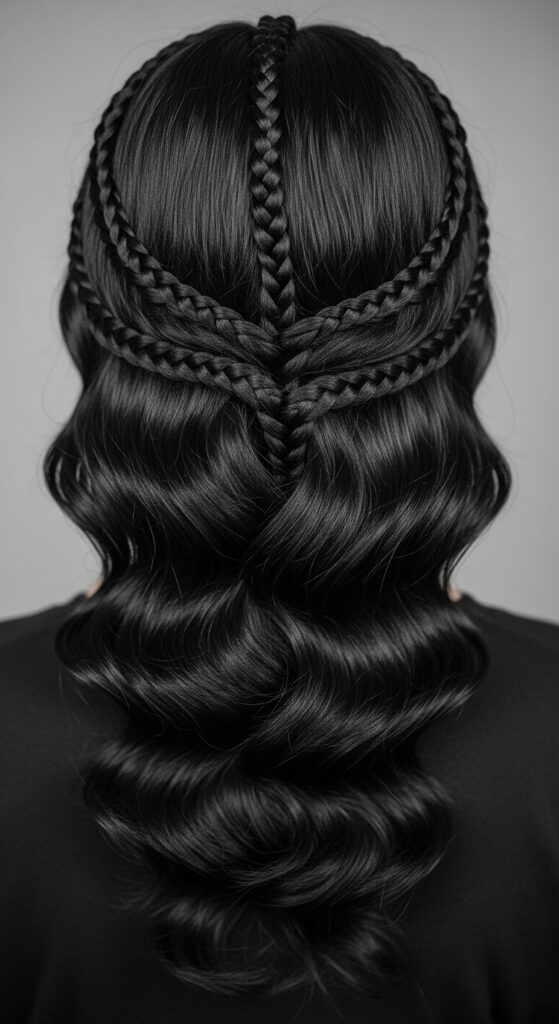
This technique adapts to any aesthetic. For a romantic goth hairstyles vibe, keep the edges dark and brushed into deep, romantic swoops. For a glitchy glam hair look, you might make the wisps a bit more piece-y and textured.
Even with a sharp asymmetrical lob or a bold vampire haircut, soft edges can add an unexpected, beautiful contrast. It’s all about personalization.
Protecting Your Natural Hairline
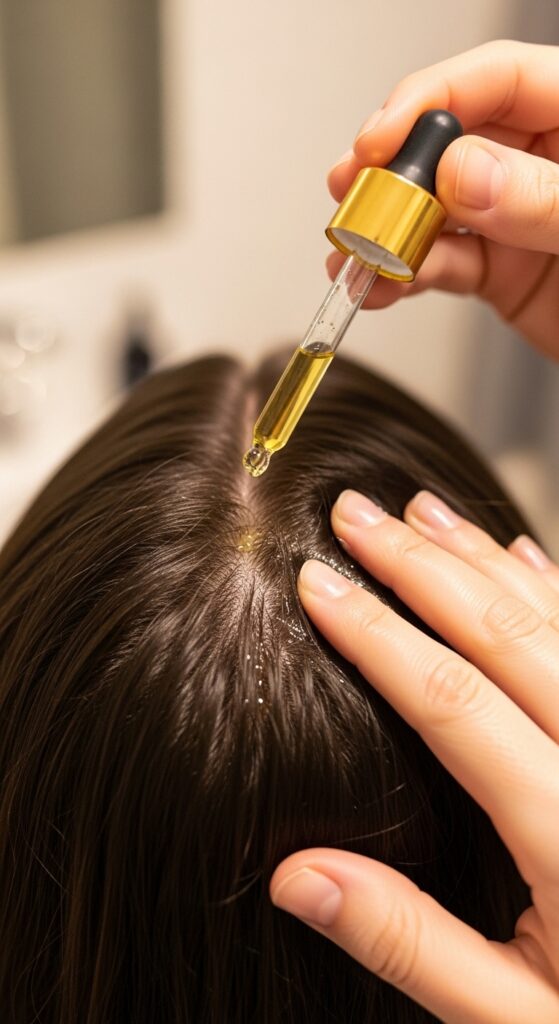
While styling, always prioritize the health of your edges. Take breaks from tight styling. At night, massage a nourishing oil like jojoba or castor oil into your hairline to stimulate blood flow and strengthen the follicles.
Listen to your hair. If it feels sore or you see thinning, give it a rest. Healthy hair is the foundation of any great style.
Inspiration Beyond Braids
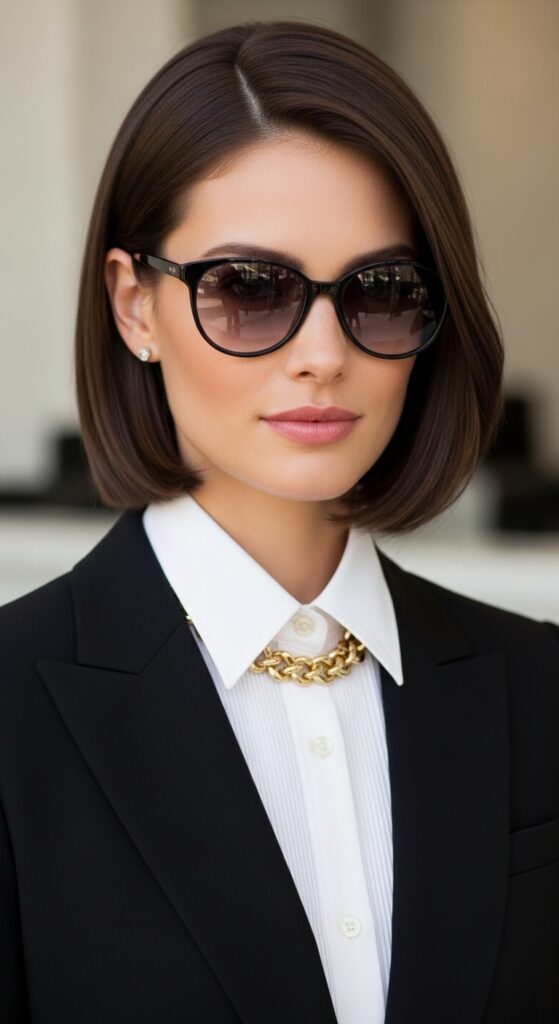
This softening principle isn’t just for braids! Apply it to sleek buns, ponytails, or even a quiet luxury bob. The goal is the same: to avoid a harsh, “too perfect” line and invite a little softness around the face.
It works with straight hair, curly hair, and everything in between. It’s a universal rule for a more feminine, lived-in finish.
When to Skip the Gel Entirely
On low-key days, or if your hair naturally lays well, you might skip gel altogether. Try using just a tiny bit of a lightweight curl cream or even a serum.
Brush your edges into place and secure with the satin scarf. This gives the most natural, no-product look possible—perfect for that “I truly woke up like this” illusion.
Matching Your Makeup Vibe
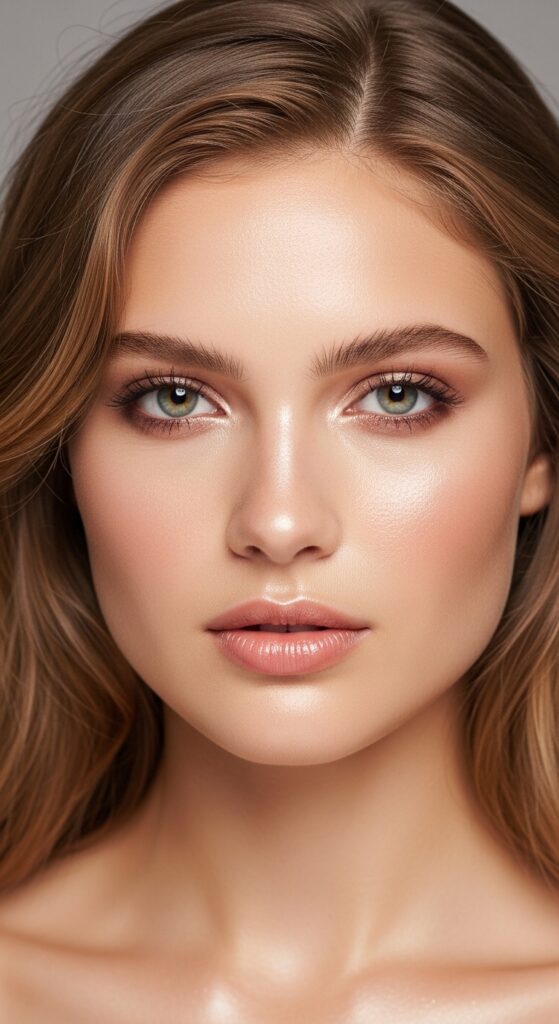
Your soft edges will shine brightest with complementary makeup. Go for dewy, glowing skin and soft, blended makeup. Think cream blushes, glossy lips, and fluffy brows.
A sharp, dramatic wing can look amazing too, creating a cool contrast. But overall, a soft glam look harmonizes perfectly with the soft hair vibe.
Seasonal Adjustments for Your Edges
Humidity and cold weather require small tweaks. In summer, use an anti-humidity gel or a stronger setting spray. In dry winter months, focus more on moisturizing before styling to prevent static and dryness.
Your products can rotate with the seasons, just like your skincare. Pay attention to what your hair needs.
Connecting to Bigger Hair Trends
This trend connects to bigger ideas in hair. The hime cut focuses on strong, blunt lines softened by face-framing pieces. The asymmetrical lob plays with balance and soft ends.
Even the vampire haircut uses shags and texture to soften its impact. It’s all about intentional imperfection, which is a huge theme for 2026 hairstyles.
Your Confidence is the Final Touch
At the end of the day, the most important element is your confidence. Walking out the door knowing your hair looks and feels like “you” is the ultimate accessory.
Style your edges, then forget about them. Don’t fuss in the mirror. Trust the process, own the softness, and let that inner confidence shine through. That’s the real feminine touch.
My Favorite Products Right Now
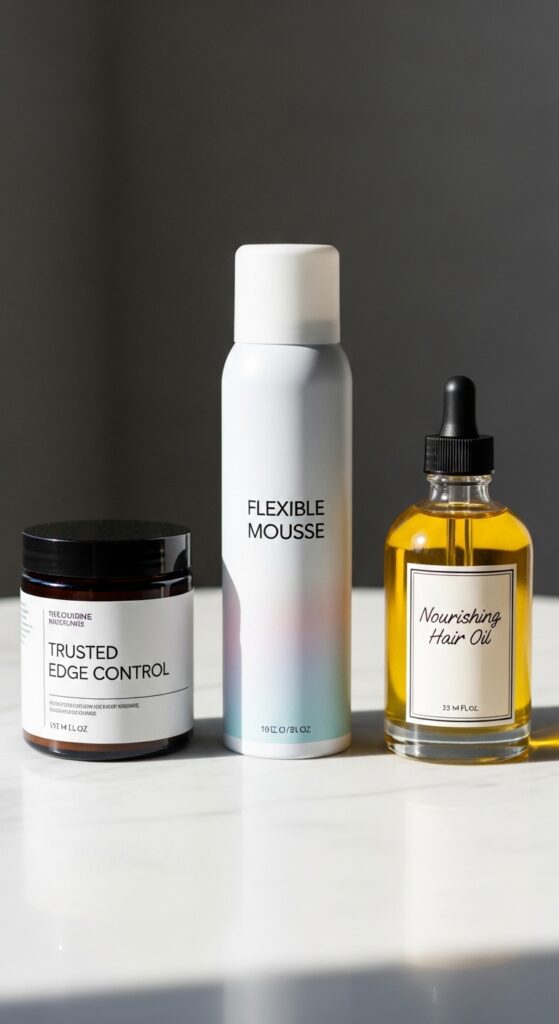
I get asked all the time what I actually use. Here are my current can’t-live-withouts. First, the Mielle Organics Edge Gel for a strong but non-flaky hold.
Second, the Design Essentials Honey & Curl Mousse for that flexible finish. And finally, pure jojoba oil for nightly scalp massages. These are my holy grails for healthy, soft edges.
Your Turn to Try It
The best way to learn is to practice. Set aside some time before your next shower to play. Try different brushes, different amounts of product, and different patterns.
See what feels easiest and looks most natural on *your* hairline. There’s no single right way, only your way. Master the basics, then make it your own.
And just like that, you’ve got the complete guide to transforming your knotless braids with that perfect, soft perimeter. It’s one of those small changes that makes a huge difference in how your style feels—to you and to the world.
Remember, great style is in the details. It’s the soft edges on braids, the effortless drape of a quiet luxury bob, the personal twist you add to any trend. It’s what makes your look uniquely yours.
I’d love to hear how it goes for you! Did you try a swoop or a wispy tendril? What’s your go-to edge product? Spill all your tips in the comments below.
Save this post to Pinterest to keep these steps handy for your next braid appointment!