Master 21 Waterfall Cascade Variations Flowing Endlessly Romantic
Okay, let’s be real. We’ve all seen that classic waterfall braid and thought, “It’s gorgeous, but is that it?” I used to think the same thing. It felt like a one-trick pony for proms and weddings.
But girl, was I wrong. This style is having a major moment, and it’s evolved into so much more. It’s the secret weapon for that effortlessly romantic, “I just woke up like this” vibe we all crave.
I got obsessed and dove deep, playing with textures, placements, and vibes. The result? A full playbook of 21 stunning takes. From soft ‘old money hair’ elegance to edgy ‘romantic goth’ twists, there’s a cascade for every mood.
Best part? They look complex but are seriously simple to master. Let’s break them down, one beautiful variation at a time.
1. The Classic Soft Waterfall
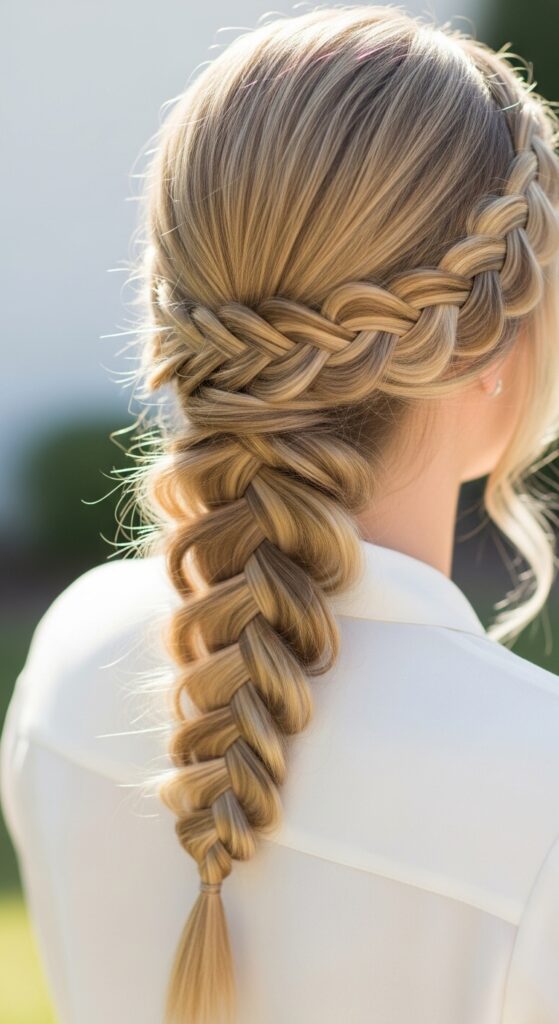
This is your perfect starting point. It’s the foundational technique all the other looks build on. Master this, and the whole world of cascades opens up.
The goal is soft, flowing, and perfectly imperfect. Don’t pull the strands too tight. You want those pieces to drape gently like, well, a waterfall.
- Start with a deep side part for instant drama.
- Take a section at the front and begin a simple three-strand braid.
- As you braid, drop the bottom strand and pick up a new section of hair from the top to replace it. Let the dropped strand fall free.
- Continue this “drop and replace” pattern along your hairline to your ear, then secure.
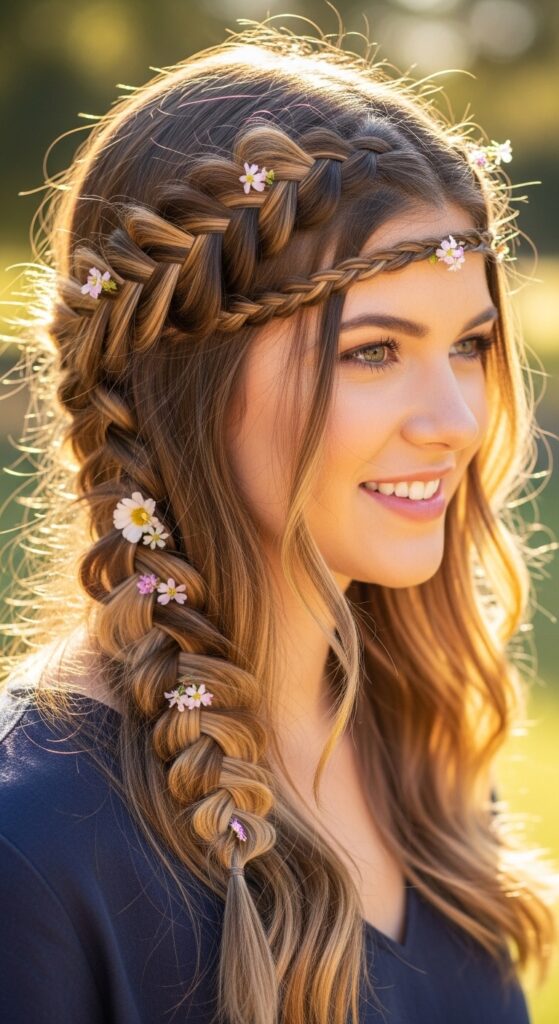
2. The Boho Textured Cascade
This is my go-to for summer festivals or a casual weekend. It’s all about embracing texture and a carefree feel. Perfection is not the goal here.
Start with day-old hair or add a texturizing spray. The messier, the better. Pull gently on the braided sections after you finish to pancake them and create a fuller, softer look.
3. The Crown Waterfall Braid
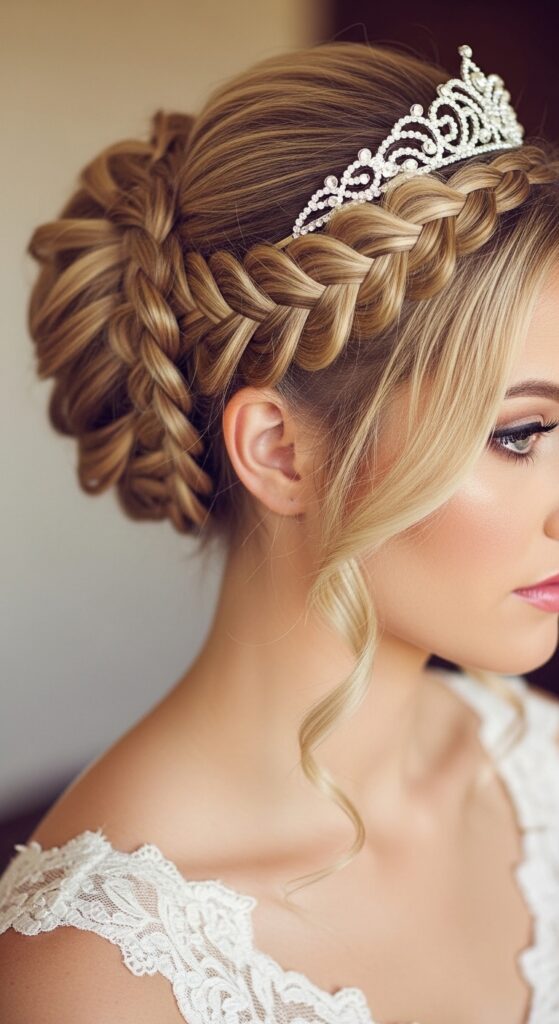
Instant princess vibes, but make it practical. This style keeps hair out of your face beautifully while looking incredibly elegant. It’s a red-carpet favorite for a reason.
Begin at one temple and braid the waterfall pattern along your hairline, over the crown, to the other side. You can stop there or continue into a loose ponytail or bun.
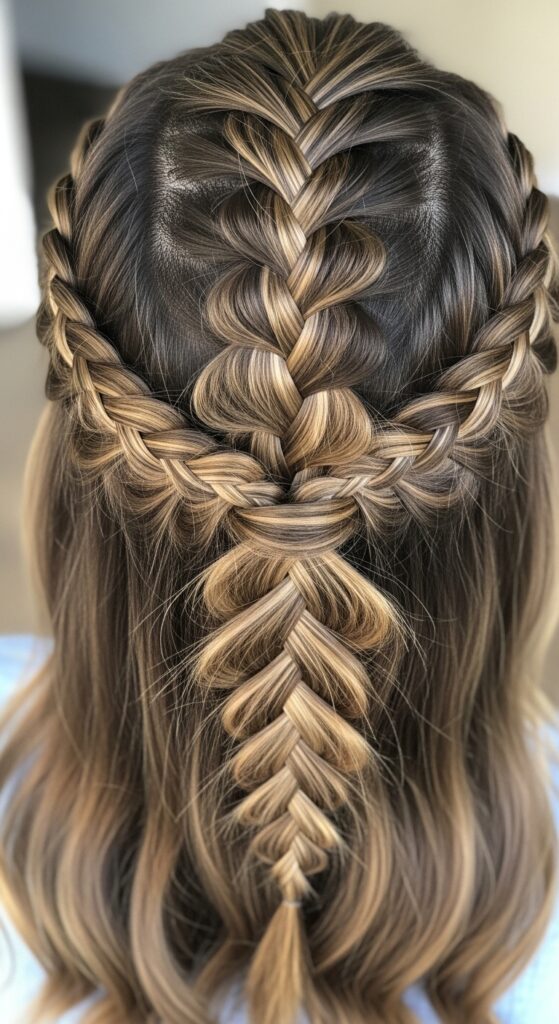
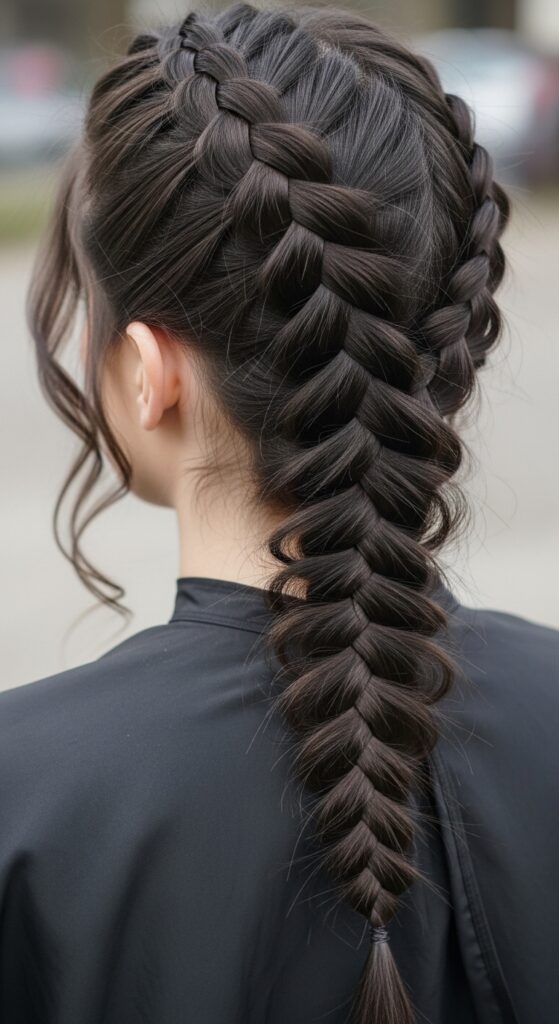
4. The Double Waterfall Braid
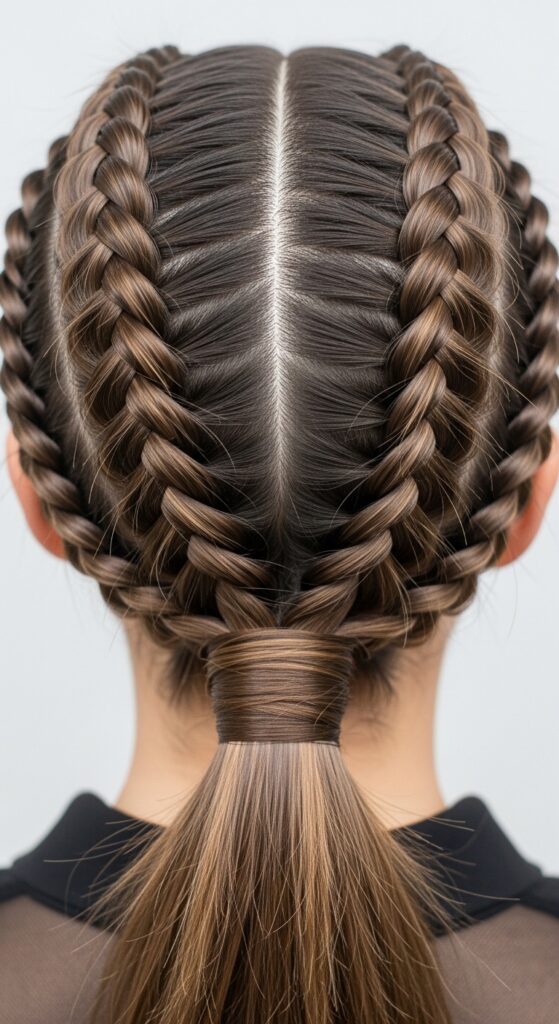
Double the braids, double the impact. This looks incredibly intricate but is just the classic technique done twice. It frames the face beautifully and feels very fresh for 2026 hairstyles.
Create a deep center part. Do one waterfall braid on each side, mirroring each other. Secure them together at the back for a stunning, symmetrical look.
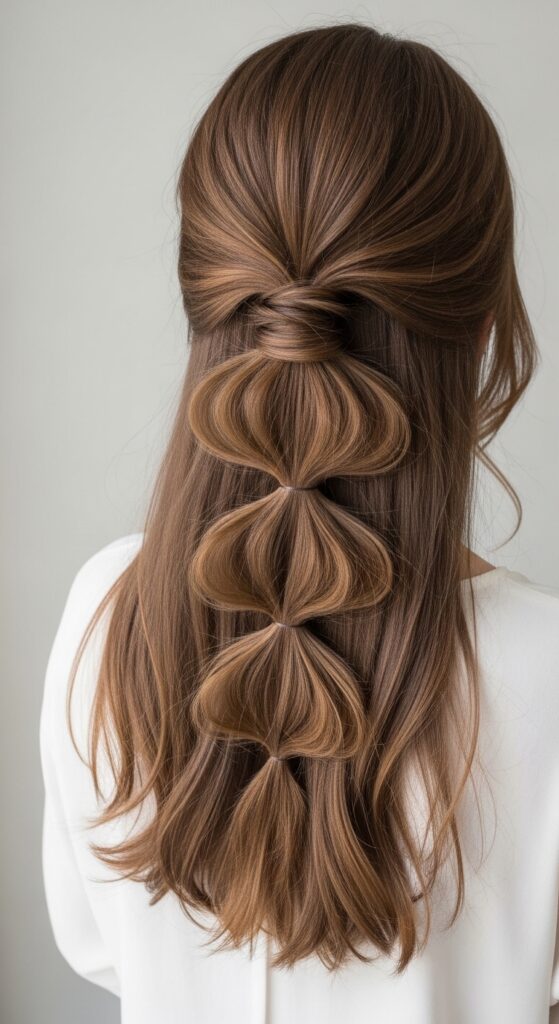
5. The Waterfall Ponytail
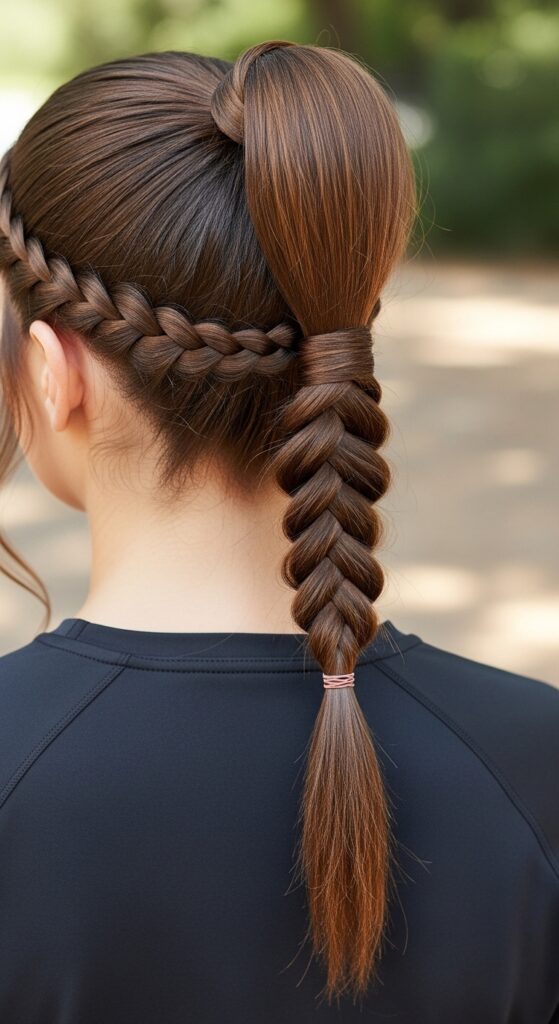
Elevate your basic ponytail in two minutes flat. This adds a special detail that turns a gym look into a brunch look. It’s practical, pretty, and holds like a dream.
Create a short waterfall braid along your hairline, from one side to the other. Then, gather all your hair, including the ends of the braid, into a high or mid-height ponytail.
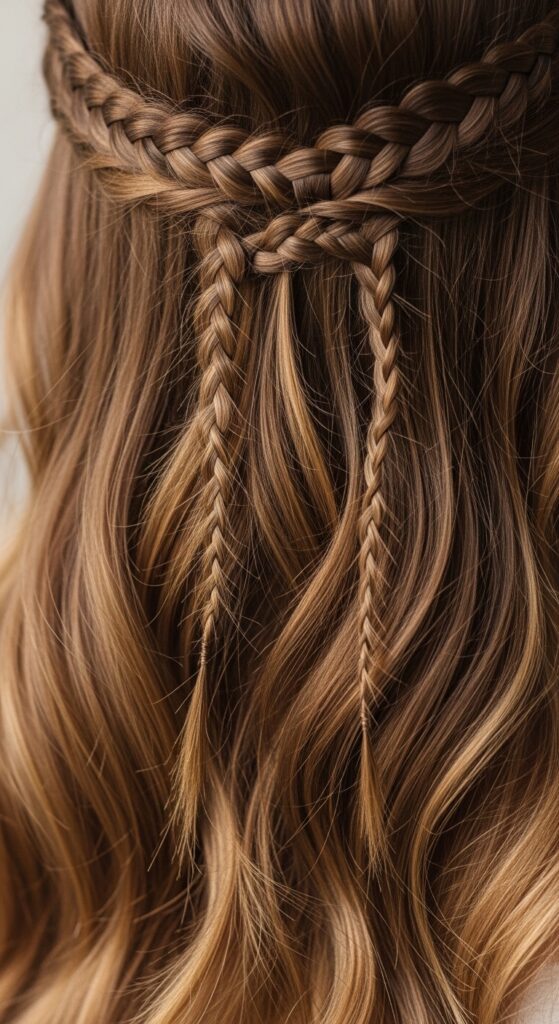
6. The Half-Up Waterfall Crown
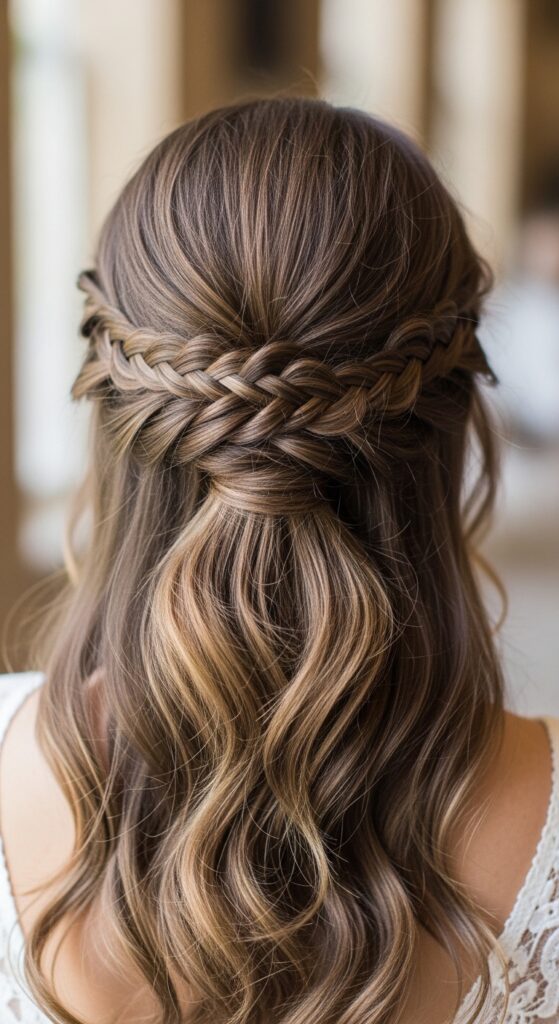
This is the ultimate “I tried, but not too hard” style. It gives you the polish of an updo with the romance of leaving your hair down. Perfect for date night.
Braid a crown waterfall (like variation #3). Instead of letting the ends hang, tuck and pin them under the braid at the back of your head for a seamless finish.
7. The Fishtail Waterfall Hybrid
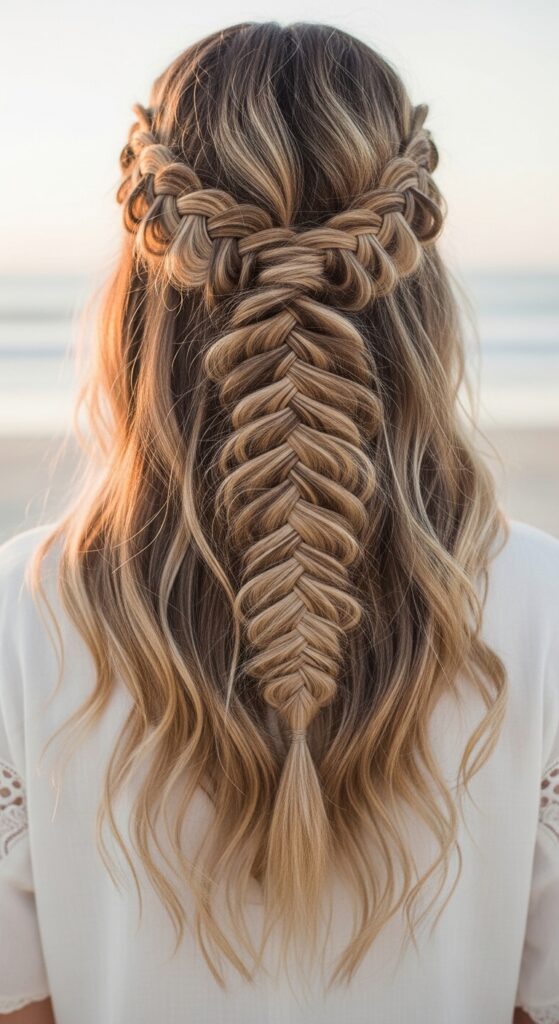
If you’re ready to level up your braiding game, this hybrid is it. The fishtail technique makes the cascading effect even more delicate and detailed. It’s stunning on textured hair.
Use the same drop-and-replace pattern, but with a fishtail braid method. Take small pieces from the outer edges of each section to cross over. It takes practice but is worth it.
8. The “Old Money Hair” Waterfall
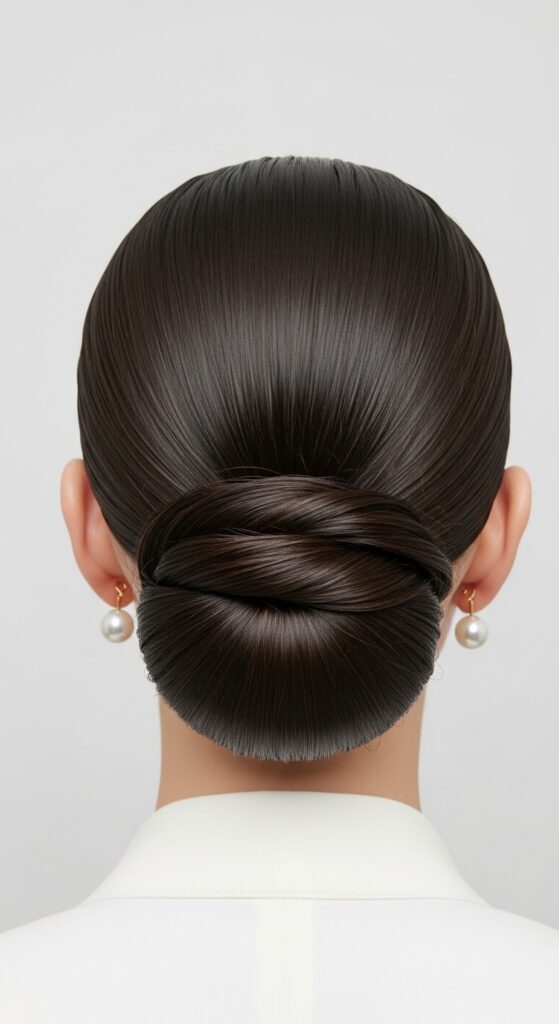
Think quiet luxury bob energy, but in braid form. This is sleek, polished, and whisper-quiet in its elegance. The key is zero flyaways and a seamless blend.
Use a strong-hold gel or pomade on a toothbrush to slick down baby hairs. Keep the braid very neat and tight, and integrate it into a low, flawless chignon.
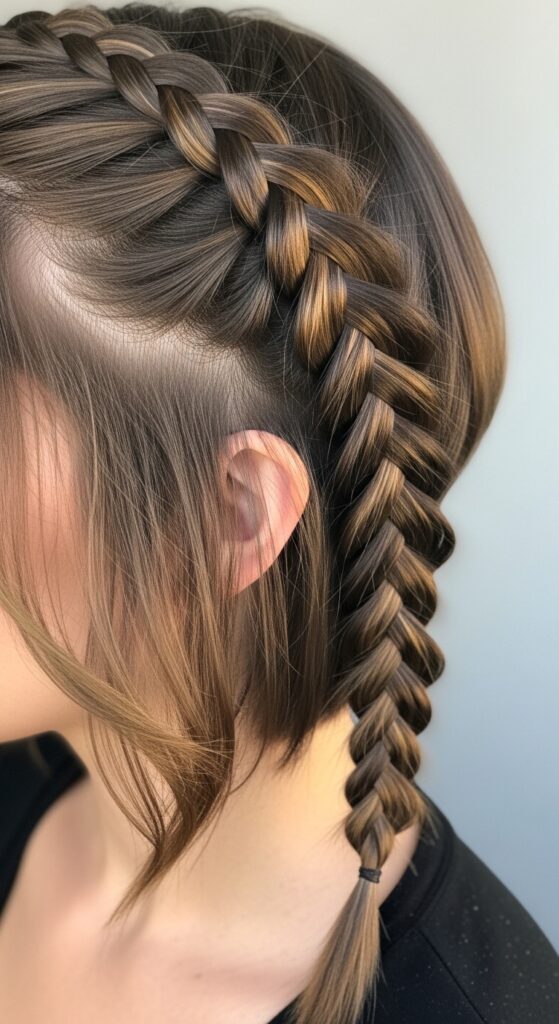
9. The Romantic Goth Cascade
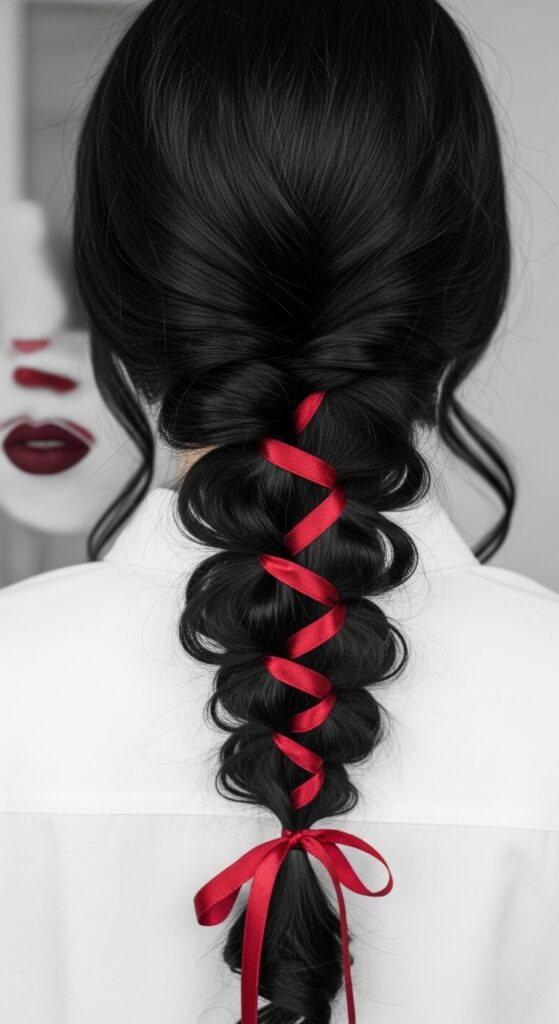
This is for my dark romantic souls. It takes the softness of the cascade and adds an edge. It’s perfect for the vampire haircut aesthetic—beautiful but with a bite.
Incorporate a satin ribbon into your braid as the third strand. Or, braid normally and pull at the sections afterward for a deliberately disheveled, dramatic look.
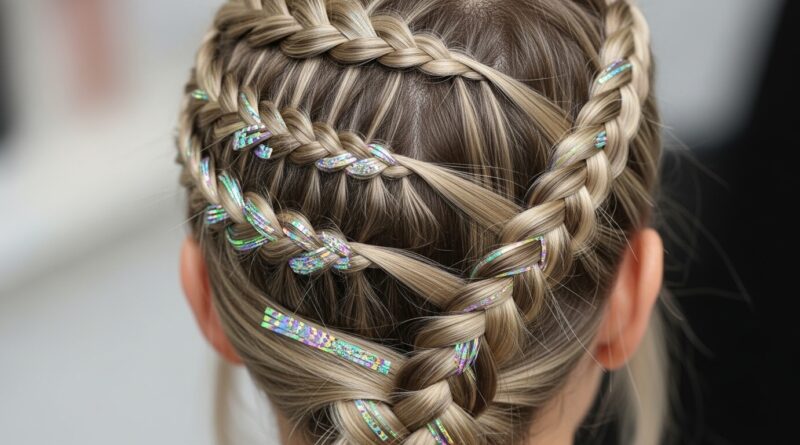
10. The Glitchy Glam Waterfall
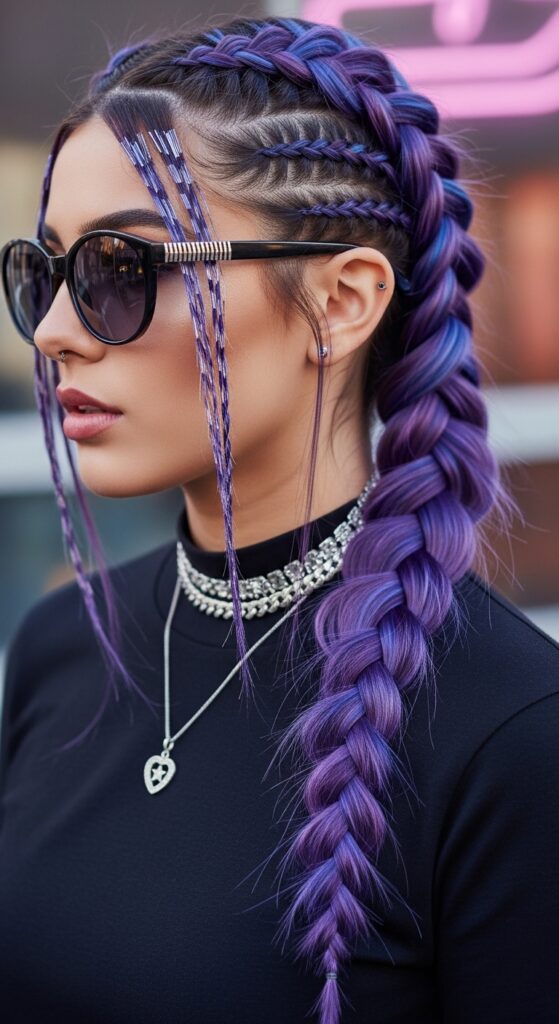
Glitchy glam hair is all about intentional imperfection and mixed textures. This variation plays with that perfectly. It’s cool, editorial, and surprisingly easy.
As you braid, intentionally leave out a few strategic face-framing pieces. Afterward, curl those pieces in a different direction or add a different texture, like crimping.
11. The Asymmetrical Lob Companion
If you have an asymmetrical lob, this style is your best friend. It accentuates the dramatic cut without hiding it. It adds detail to the longer side beautifully.
Braid the waterfall only on the side with more hair. Let it cascade over your shoulder to really show off the gorgeous line of your cut. Keep the other side sleek and simple.
12. The Hime Cut Accent Braid
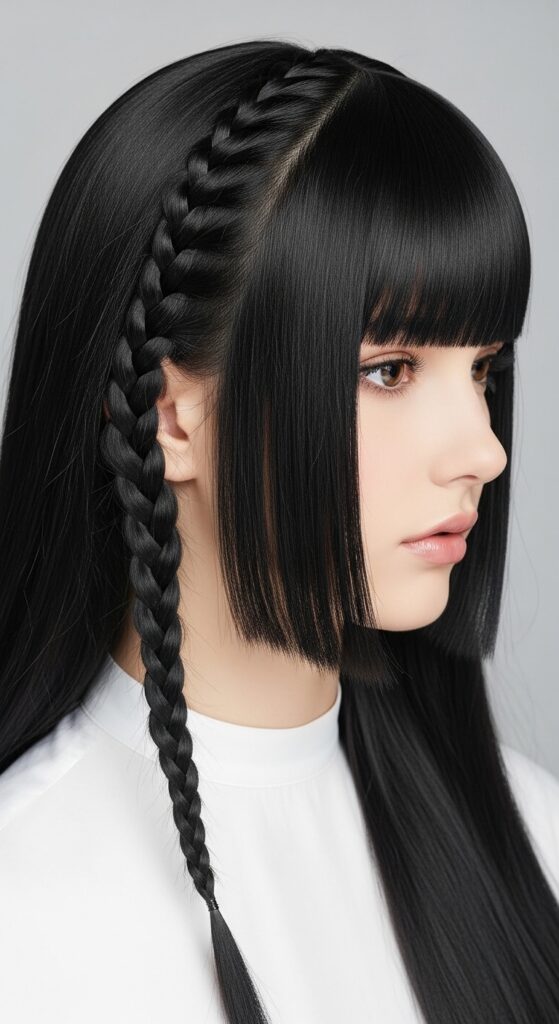
The hime cut is bold and graphic on its own. Adding a tiny, delicate waterfall braid softens the look just enough. It’s a beautiful contrast of strong and soft.
Create a very thin, precise waterfall braid just along the front of your hime section. Keep it small and neat to complement, not compete with, the striking haircut.
13. The Waterfall Bun Wrap
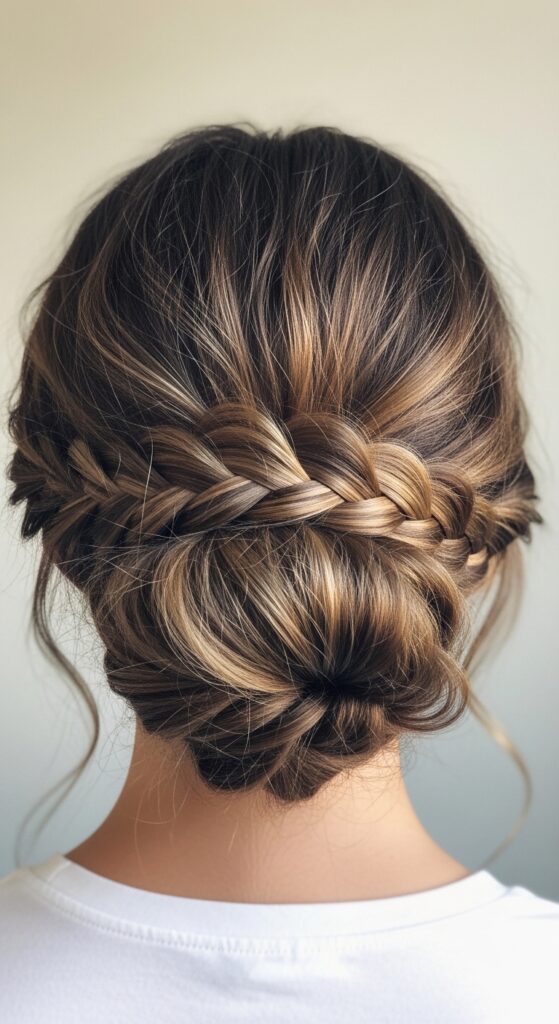
This is a genius way to create an updo that looks professionally done. The braid acts as both decoration and a functional tie. It’s elegant and secure.
Do a waterfall braid along your hairline. Gather all hair into a low bun. Use the remaining tail of the braid to wrap around the bun’s base and pin it underneath.
14. The Pull-Through Waterfall
This method creates a wider, lacier braid that feels incredibly romantic and light. It’s less structured than the classic version and perfect for fine hair.
Instead of a three-strand braid, create a pull-through braid: pick up new hair only on the top side, pulling the bottom section through. Continue the drop-and-replace pattern.
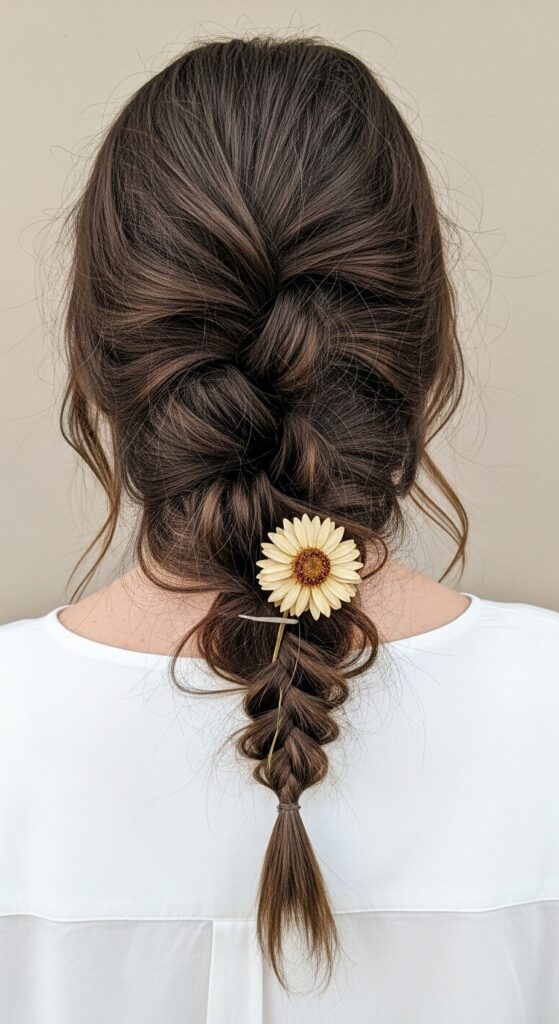
15. The Waterfall with Twists
If braiding feels tricky, try this twist version. It gives a similar cascading effect but is even simpler to execute. It feels very minimalist and modern.
Take two sections. Twist them together once, drop the bottom section, pick up a new top section, and continue. Secure with a clear elastic when you’re done.
16. The Side-Swept Voluminous Cascade

Big hair? This is your moment. This variation celebrates volume. Tease the hair at your crown slightly before braiding to give the cascade major lift and drama.
Do a larger, chunkier waterfall braid on one side only. After securing, gently pull at the braided sections to integrate them with your voluminous hair for a cohesive look.
17. The Waterfall Headband
This is such a fun, playful take. It literally creates a braided headband out of your own hair. It’s perfect for hot days when you want your hair completely off your face.
Start the braid just behind your ear. Curve it up and across your hairline, following the path a headband would take. It’s a stunning way to show off your features.
18. The Mini Waterfall Accents
Sometimes less is more. A few tiny, scattered waterfall accents add magic to loose waves or curls. It’s subtle, fairy-core, and absolutely charming.
Create 2-3 mini waterfall braids in random spots where you’d normally tuck hair behind your ear. Keep them small and let them disappear into your curls.
19. The Dutch (Inside-Out) Waterfall
The Dutch technique, where you braid under instead of over, makes the braid stand out from your head. This adds amazing dimension and makes the cascade really pop.
Do the exact same drop-and-replace pattern, but braid each section under the middle strand instead of over. It creates a beautiful, raised effect.
20. The Waterfall into Loose Waves
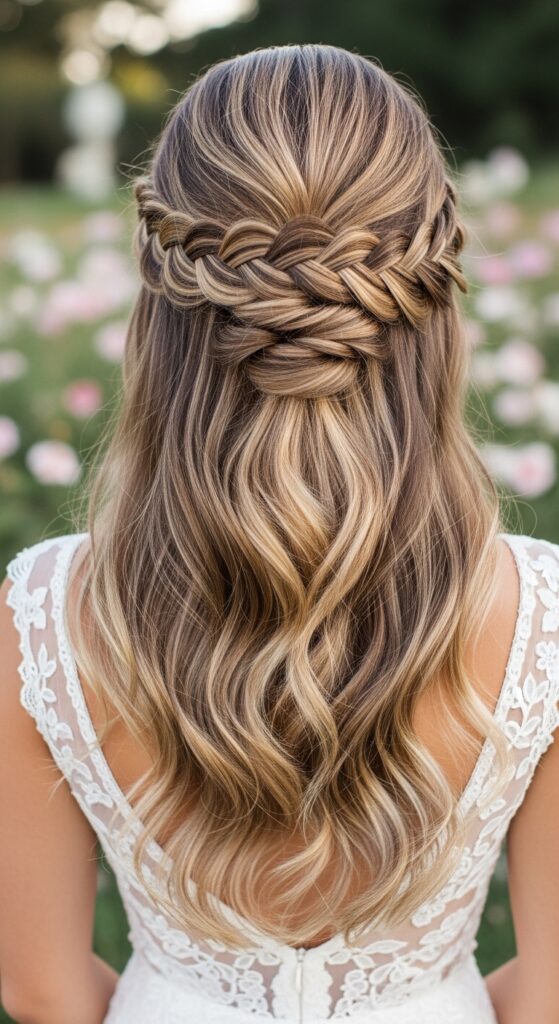
The ultimate wedding or formal event style. It has that perfect balance of intricate detail and soft, flowing romance. It photographs like an absolute dream.
Create your waterfall braid. Curl the rest of your hair with a large-barrel iron. Gently brush out the curls into soft waves, making sure the braid blends seamlessly into them.
21. The Deconstructed Waterfall
This is the most modern, editorial take. It’s not about seeing the perfect braid; it’s about seeing its beautiful ghost. It’s artful, cool, and perfect for a fashion-forward look.
Braid a classic waterfall neatly. Then, using your fingers, gently but thoroughly pull apart every section until the braid is almost gone, leaving just a textured path.
See? I told you the waterfall braid was so much more than a single look. It’s a whole language of romance you can now speak fluently. Whether you’re feeling elegant, edgy, or effortlessly cool, there’s a cascade waiting for you.
The best way to get good is just to play. Start with the classic, then mix in textures, try a different placement, or add a ribbon. Your perfect, personalized variation is in there. Remember, the goal is soft, flowing, and feeling amazing.
Did you find your favorite? I’d love to know which one you’re trying first! Tag me in your pics. And if you want to keep this guide handy for your next hair inspiration session…
Save this post to Pinterest! Just hover over any image to pin it. What’s the first variation you’re going to try? Tell me in the comments below!