The Pixie Cut for Women, Explained: Lengths, Textures and Styling for Every Hair Type
A pixie cut is not one haircut. It is a family of short cuts, from a close crop to a longer, piecey top that can be swept, spiked, curled or smoothed. That range is exactly why the pixie works for so many women — and why two people can ask for a pixie and leave with very different results.
The trick is to be specific before the scissors come out. Decide how short the back and sides should be, how much length you want on top, whether you want a fringe, and how much styling time you honestly have each morning. This guide explains those choices first, then shows 41 pixie styles to help you point, describe and decide.
Use the photos as a starting point, not a promise. Your hair texture, growth pattern and face shape will change how the same cut sits on you, so take your favourite two or three styles to your stylist and talk through what to keep and what to adapt.
Is a Pixie Right for You? Start with Honesty, Not Hype
A pixie suits you if you like your face, neck and ears on show, and if you enjoy a cut that looks intentional rather than accidental. It can be wonderfully freeing: less drying time, less weight, and a shape that holds its style all day.
It is less ideal if you hate frequent trims, rely on tying your hair back, or are going through a phase where you want to hide behind your hair. A pixie needs a trim every four to six weeks to keep its shape, and it cannot be scraped into a ponytail on a bad hair day.
Ask yourself one practical question: would you still like this cut on a rushed Tuesday morning? If the answer is yes, a pixie is a strong choice. If not, a longer pixie or a bixie gives you the same spirit with more fallback options.
Pixie Lengths Decoded: From Cropped to Long
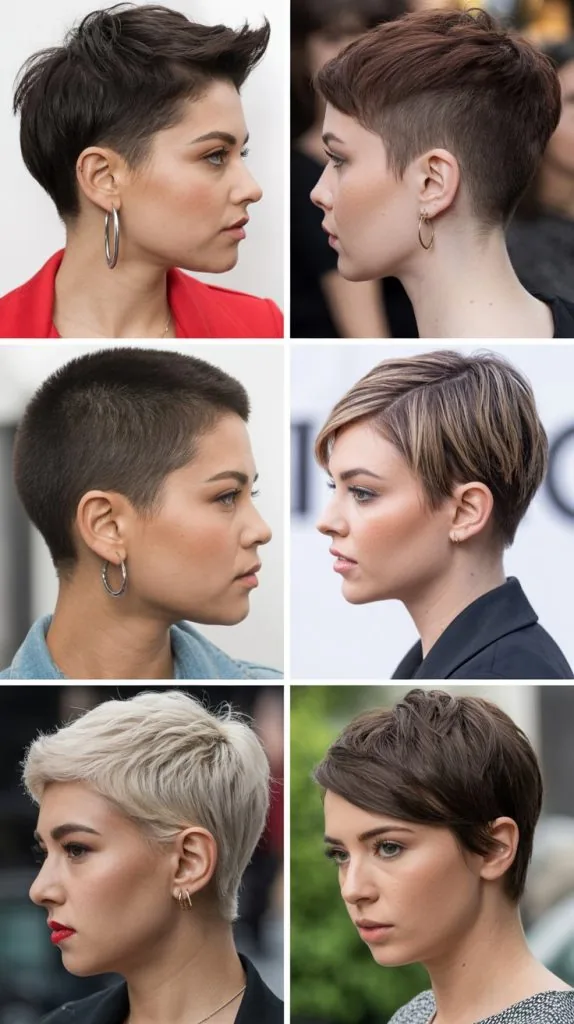
Cropped pixies sit very close to the head, with short sides and a short top. They show the head shape clearly and need the least styling, but they also leave the least room to hide a cowlick or an uneven growth pattern.
Classic pixies keep a little more length on top — enough to finger-style, sweep or add texture. Long pixies, sometimes called grown-out pixies, keep the top long enough to tuck, part deeply or add soft waves, while the back stays neat.
When you describe length, use fingers and landmarks, not just words like short. Say how long the top should be when pulled forward, whether the sides should be tapered or undercut, and whether the nape should be soft or sharp.
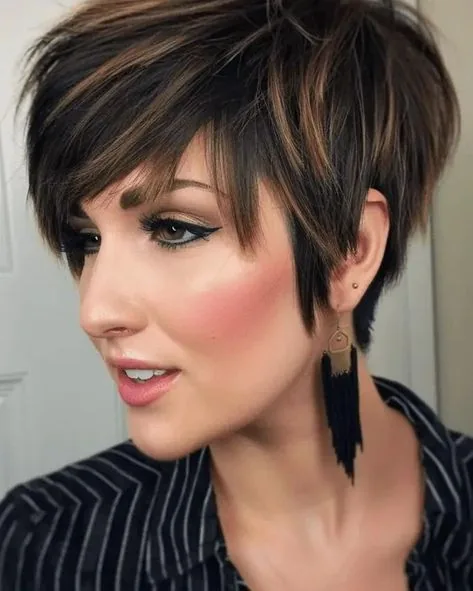
Pixie by Face Shape: Balance, Not Rules
Face-shape advice works best as balance, not as a ban. Round faces often suit height on top and a longer, sweeping fringe, which lengthens the look. Oval faces can carry most pixies, so texture and fringe choice matter more than length.
Square faces tend to suit softness around the jaw — wispy ends, a side sweep or feathered layers — rather than a blunt, boxy edge. Heart faces often suit volume at the sides or a fringe that softens a wider forehead and balances a narrower chin.
The real test is proportion in the mirror, not a diagram. A good stylist will check the cut from the front, side and back, and adjust the fringe and side length so the shape flatters your features, not just your face-shape label.
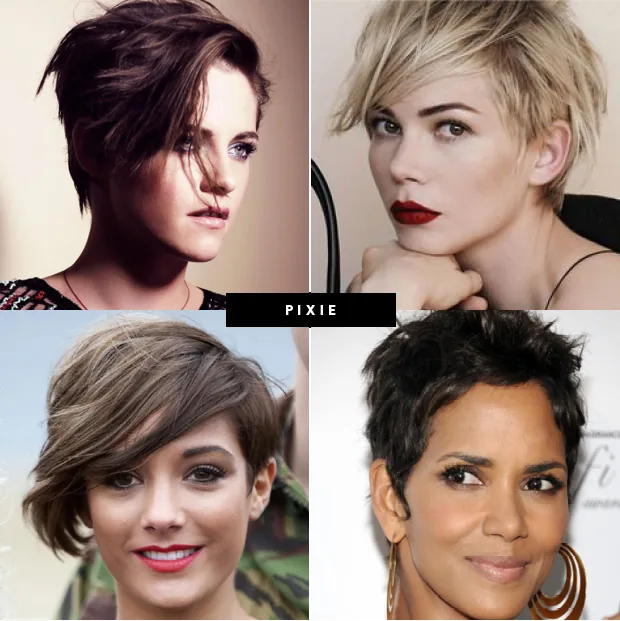
Pixie by Hair Texture: Work With What You Have
Fine hair loves texture and layering: choppy ends, a little root lift and a light paste can make a pixie look much fuller than it is. Avoid heavy oils and flat, one-length tops, which can make fine hair look thinner.
Thick hair needs weight removed, not just length cut off. Internal layers, thinning where it counts and a tapered nape stop a thick pixie from puffing out into a helmet shape. Ask for movement, not bulk.
Curly and wavy pixies are about shape, not straightening. Cut curls dry or in their natural pattern where possible, leave enough length for the curl to spring, and use curl cream rather than fighting the texture flat every morning.
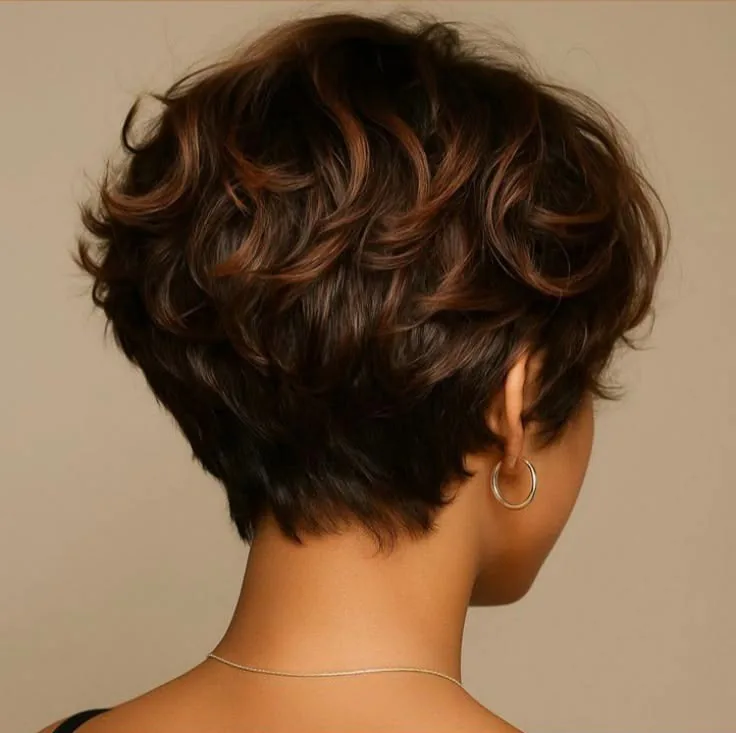
The Grow-Out Plan: How to Grow a Pixie Without the Awkward Stage
Growing out a pixie is a series of small, planned cuts, not a single wait. First, let the top grow while the nape and sides are kept tidy. Then reshape the sides into a bob-like outline, and finally even out the length into a bixie or bob.
Book a trim every six to eight weeks during grow-out, even if it feels counterintuitive. Those appointments remove split ends, reshape the mullet-like back section, and keep the cut looking deliberate at every stage.
Accessories help more than products at this stage. Headbands, clips, scarves and a good texturising spray can carry you through uneven weeks, and a fringe trim between full cuts keeps the front looking fresh.
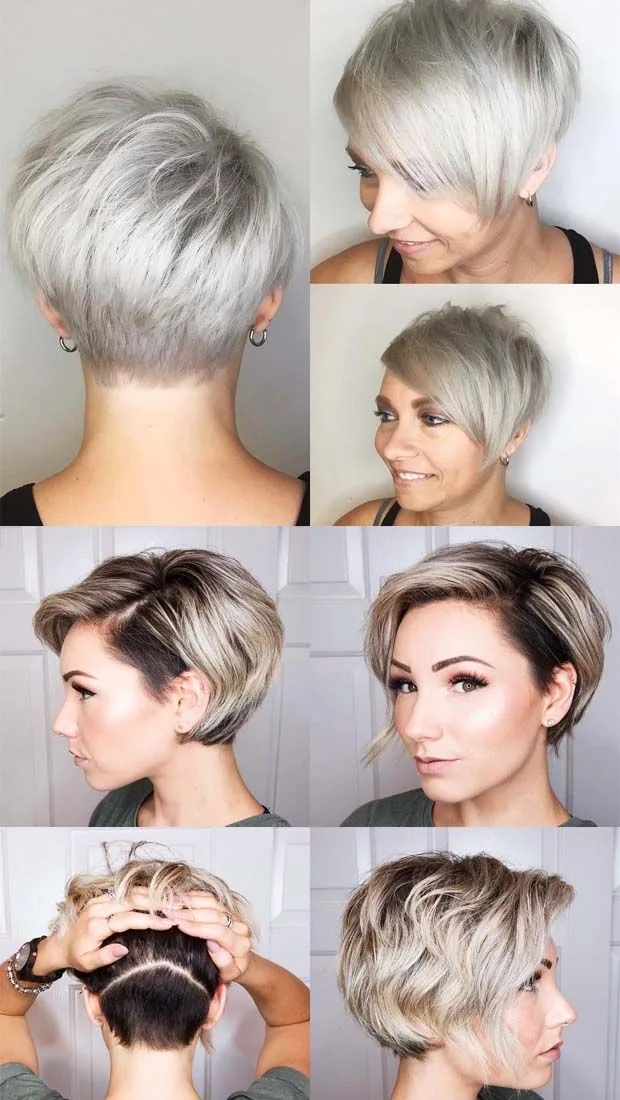
Pixie Colour and Contrast: Small Changes, Big Impact
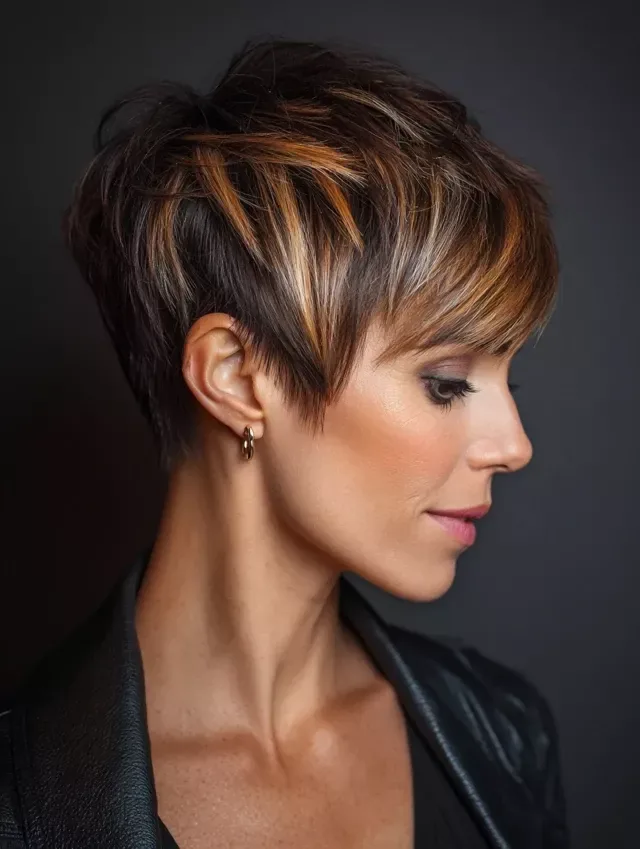
Short hair shows colour more clearly than long hair, so even a small change reads loudly. Face-framing highlights, a brighter top over darker sides, or a glossy dark shade can completely change a pixie without changing the cut.
If you want low maintenance, stay close to your natural shade and add soft dimension rather than a full bleach. Platinum, vivid colour and high-contrast roots look striking on a pixie, but they need regular toning and root upkeep.
Bring a colour reference as well as a cut reference. Tell your colourist how often you are willing to return for upkeep, and whether you want the colour to grow out softly or stay sharp and graphic.
The 10-Minute Pixie Routine: Wash, Shape, Go
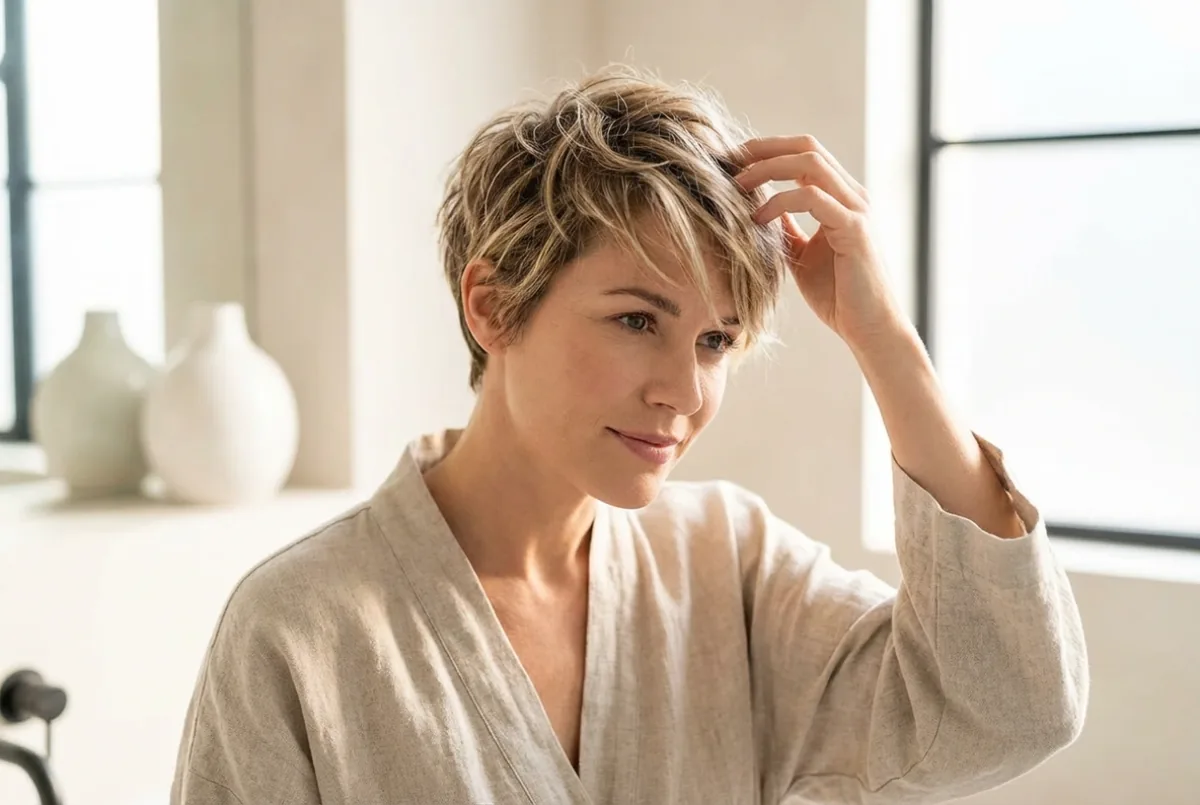
A pixie routine should be short enough to do half-asleep. Wash or dampen the hair, work a pea-sized amount of product through from roots to ends, and shape with your fingers or a small brush while blow-drying on low heat.
For texture, scrunch or twist small sections and let them air-dry for a few minutes. For sleek styles, use a flat brush and a smoothing cream, then finish with a light hold spray. For volume, lift the roots with your fingers and dry upward, not flat.
Keep just three products: one for hold or texture, one for shine or smoothing, and one finishing spray or wax. Too many products weigh a pixie down and make it look greasy by midday, especially on fine hair.
The Salon Consultation for a First Pixie: What to Say
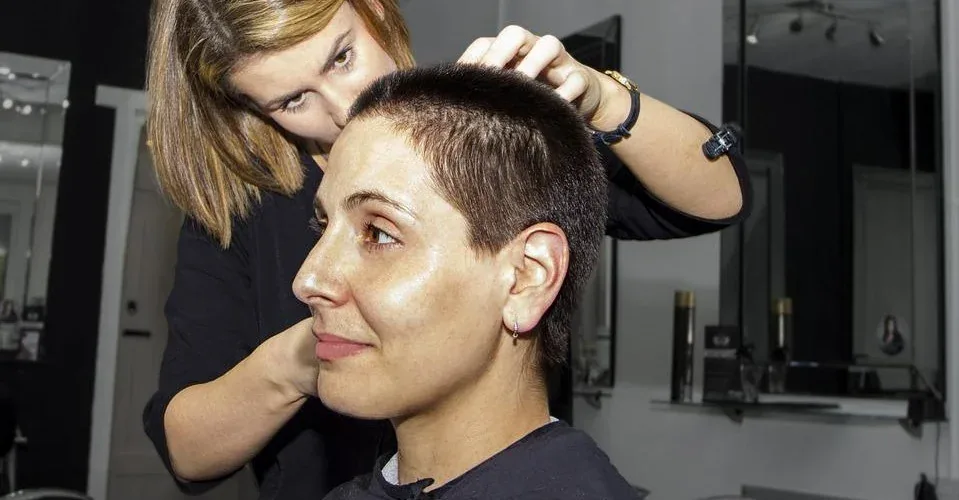
A good first-pixie consultation takes longer than the cut itself. Show two or three photos you like and one you do not, explain your morning routine honestly, and say what you are not willing to lose — for example, length at the front or coverage over your ears.
Ask your stylist to explain the maintenance: how often to trim, what products to use, and how the cut will look as it grows. Ask them to show you the styling steps before you leave, so you are not guessing at home the next morning.
If you are nervous, start longer. A long pixie can be shortened at the next visit, but a crop that is too short cannot be undone. A staged first cut is not indecision — it is smart planning.
1. Classic Short Pixie
Quick verdict: The timeless, neat pixie: short sides, a slightly longer top, and a clean outline that always looks polished.
Common mistake: Cutting the top too short as well as the sides, which removes all styling options.
How to style it:
- Towel-dry, add a little styling cream, smooth the top forward or to one side, and finish with light hold spray.
- Shape the cut with your fingers while it is still slightly damp, not when it is fully dry.
- Finish with a light hold spray or a tiny amount of wax, and check the back in a second mirror.

2. Textured Pixie
Quick verdict: The everyday favourite: choppy layers and piecey ends that look effortless and add instant movement.
Common mistake: Using heavy wax all over, which clumps texture into greasy strands instead of separated pieces.
How to style it:
- Work a small amount of texturising paste through damp hair, pinch and twist the ends, and let it air-dry or diffuse briefly.
- Shape the cut with your fingers while it is still slightly damp, not when it is fully dry.
- Finish with a light hold spray or a tiny amount of wax, and check the back in a second mirror.
3. Pixie with Long Top
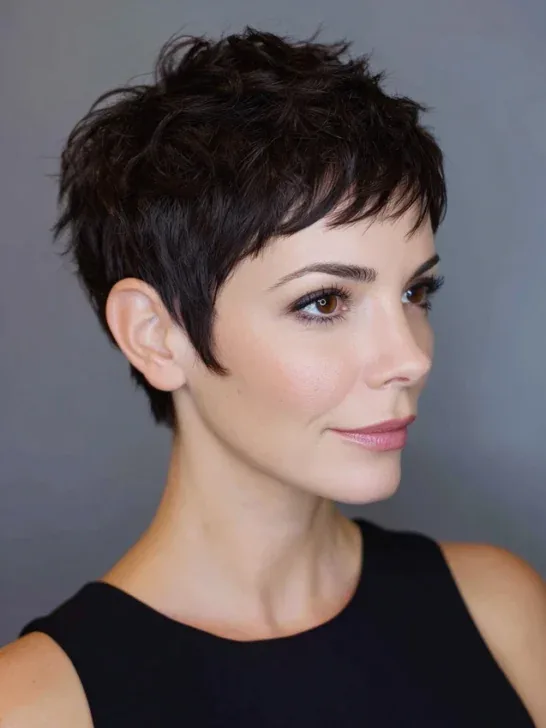
Quick verdict: Short at the back and sides with real length on top — the most versatile pixie for styling changes.
Common mistake: Letting the top grow so long that the back looks disconnected and heavy.
How to style it:
- Blow-dry the top forward with a small round brush, sweep it to one side, and set the shape with a flexible spray.
- Shape the cut with your fingers while it is still slightly damp, not when it is fully dry.
- Finish with a light hold spray or a tiny amount of wax, and check the back in a second mirror.
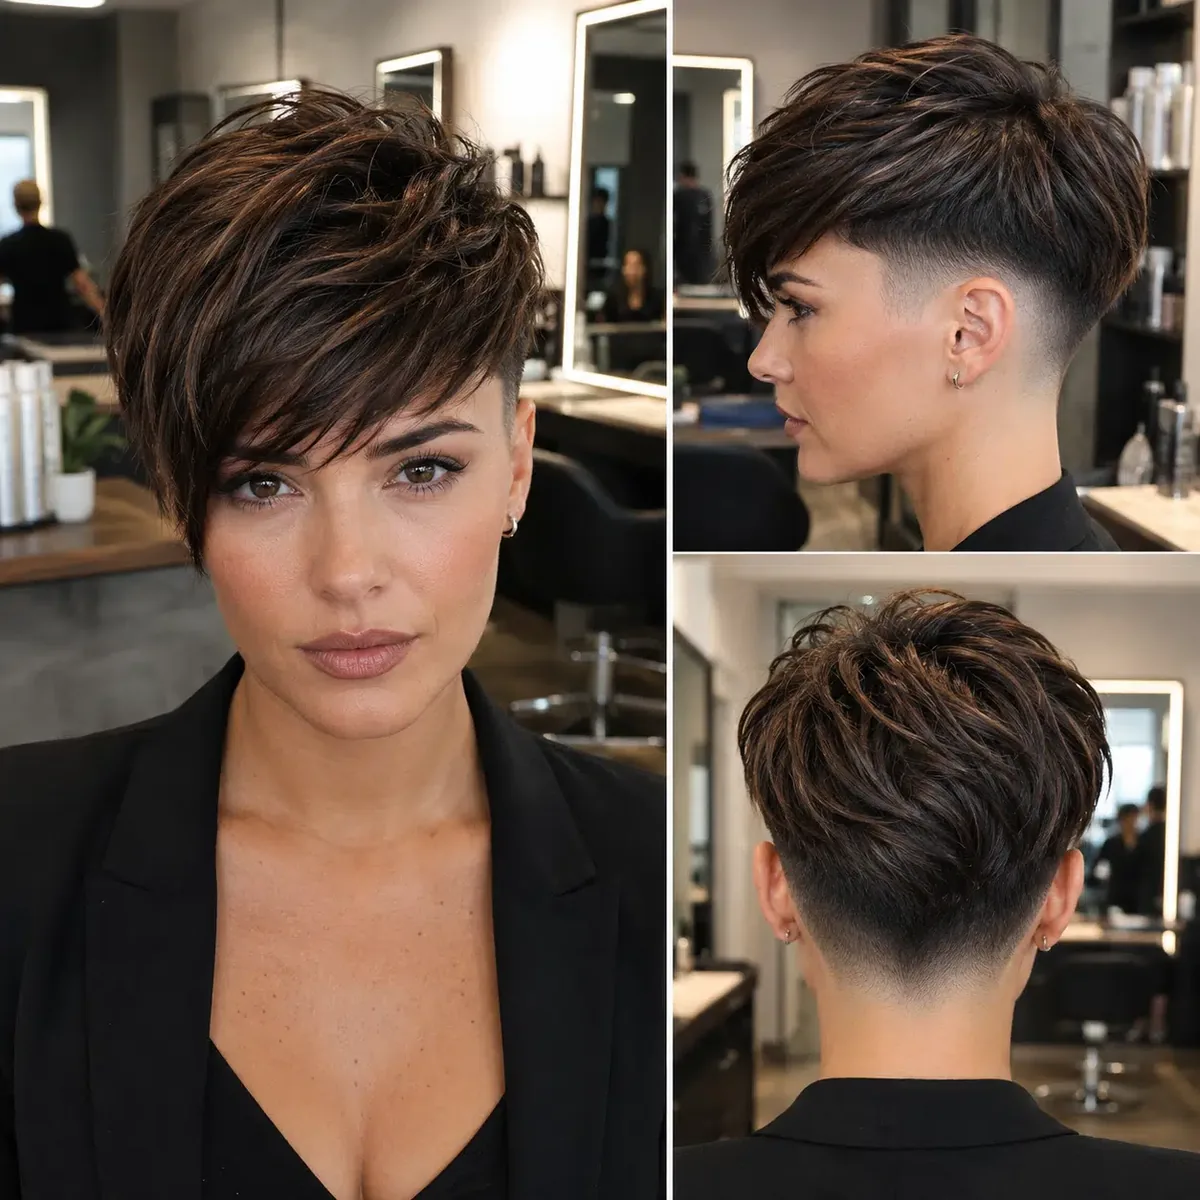
4. Side-Swept Pixie
Quick verdict: A soft, face-framing pixie with the fringe swept across the forehead. Flattering, feminine and easy to wear.
Common mistake: Cutting the fringe too short to sweep, so it sticks up instead of lying across.
How to style it:
- Part on your natural side, blow-dry the fringe across with a flat brush, and tuck one side neatly behind the ear.
- Shape the cut with your fingers while it is still slightly damp, not when it is fully dry.
- Finish with a light hold spray or a tiny amount of wax, and check the back in a second mirror.
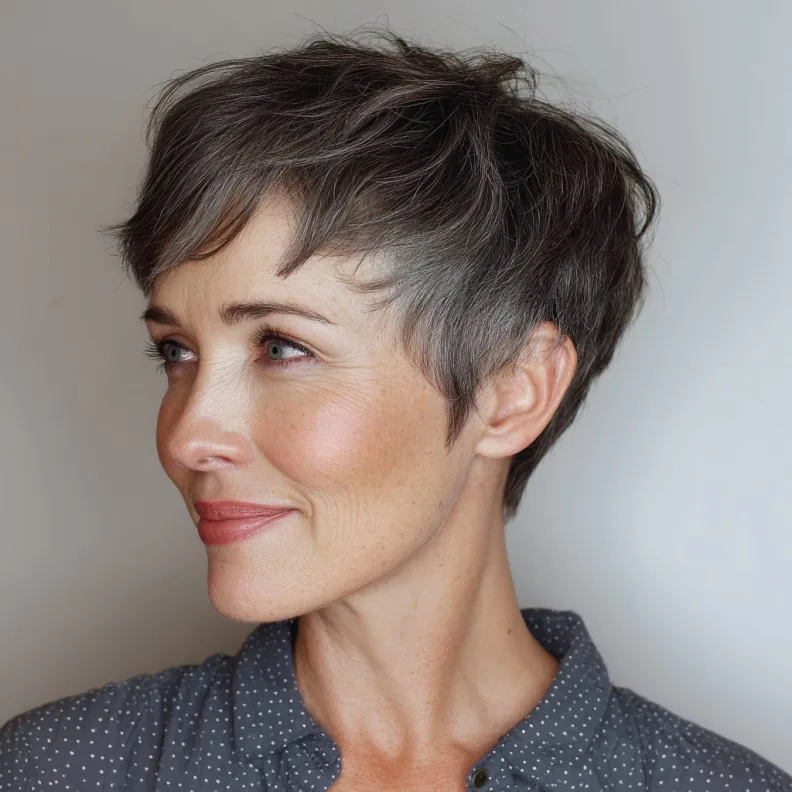
5. Pixie with Undercut
Quick verdict: A bold contrast: a closely cut or shaved section under longer hair on top. Edgy, cool and surprisingly wearable.
Common mistake: Shaving the undercut too high, which makes grow-out obvious and limits styling.
How to style it:
- Style the top forward or swept to show or hide the undercut, and keep the shaved section trimmed every two to three weeks.
- Shape the cut with your fingers while it is still slightly damp, not when it is fully dry.
- Finish with a light hold spray or a tiny amount of wax, and check the back in a second mirror.
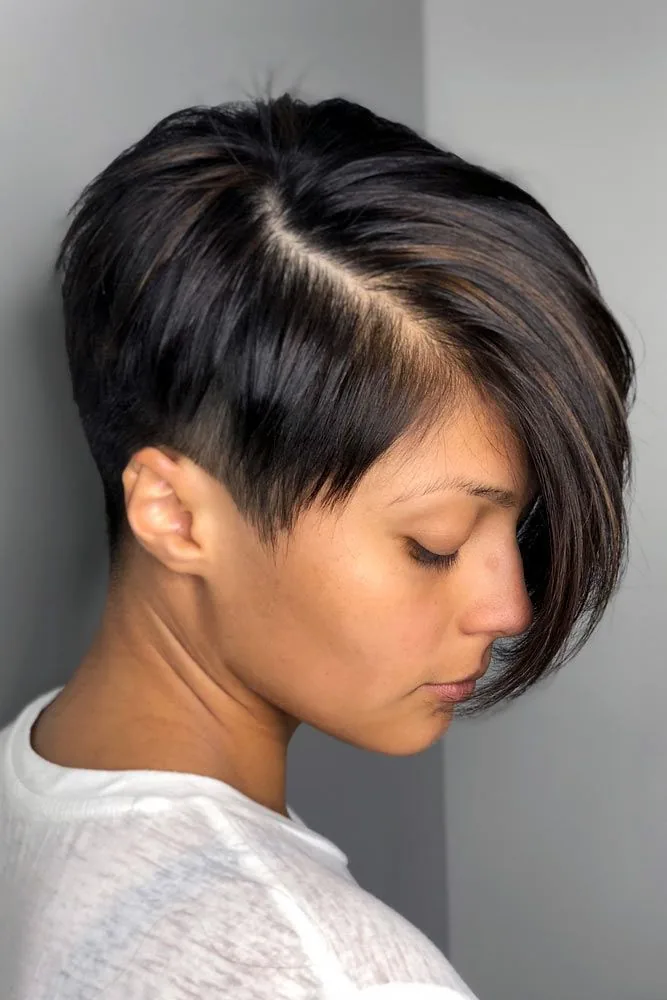
6. Asymmetrical Pixie
Quick verdict: One side longer than the other for a modern, fashion-forward shape that draws the eye across the face.
Common mistake: Making the asymmetry so extreme that only one styling direction works.
How to style it:
- Blow-dry in the direction of the longer side, smooth the shorter side close, and finish with shine spray for a sharp line.
- Shape the cut with your fingers while it is still slightly damp, not when it is fully dry.
- Finish with a light hold spray or a tiny amount of wax, and check the back in a second mirror.
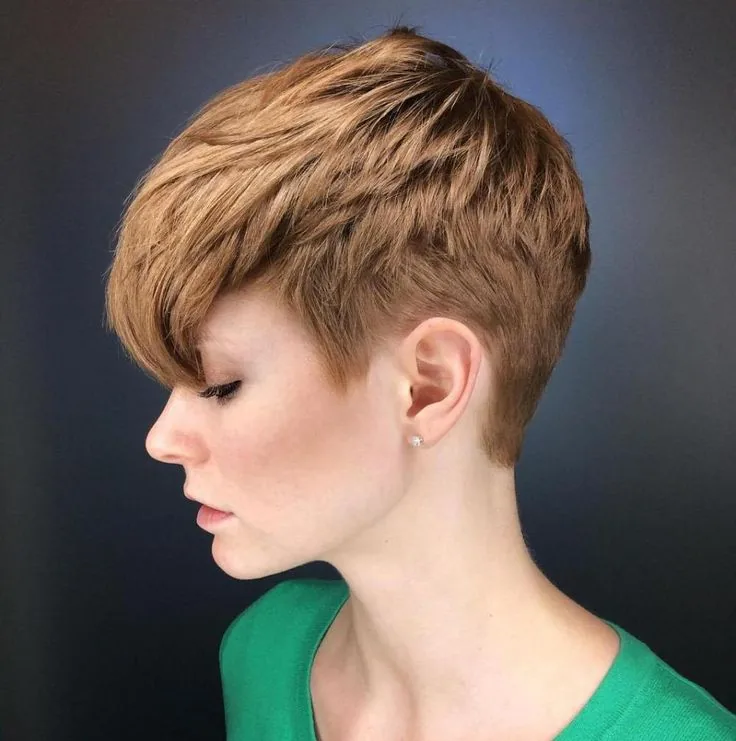
7. Pixie with Bangs
Quick verdict: A pixie paired with a real fringe — blunt, wispy or side-swept — for a youthful, finished look.
Common mistake: Choosing a fringe that fights your forehead shape or cowlick instead of working with it.
How to style it:
- Dry the fringe first, before the rest of the hair, using a small brush and low heat, then shape the top around it.
- Shape the cut with your fingers while it is still slightly damp, not when it is fully dry.
- Finish with a light hold spray or a tiny amount of wax, and check the back in a second mirror.
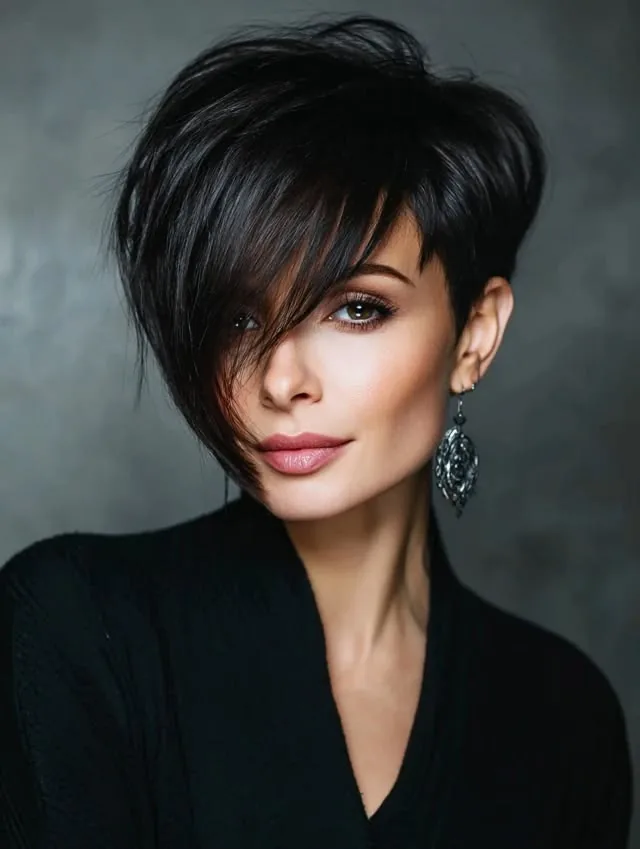
8. Wispy Pixie
Quick verdict: Soft, feather-light ends and a gentle fringe. The gentlest pixie, ideal if a sharp crop feels too severe.
Common mistake: Over-thinning wispy ends until the cut looks straggly rather than soft.
How to style it:
- Use a light cream, not wax, finger-comb the ends outward, and avoid heavy backcombing that breaks the softness.
- Shape the cut with your fingers while it is still slightly damp, not when it is fully dry.
- Finish with a light hold spray or a tiny amount of wax, and check the back in a second mirror.
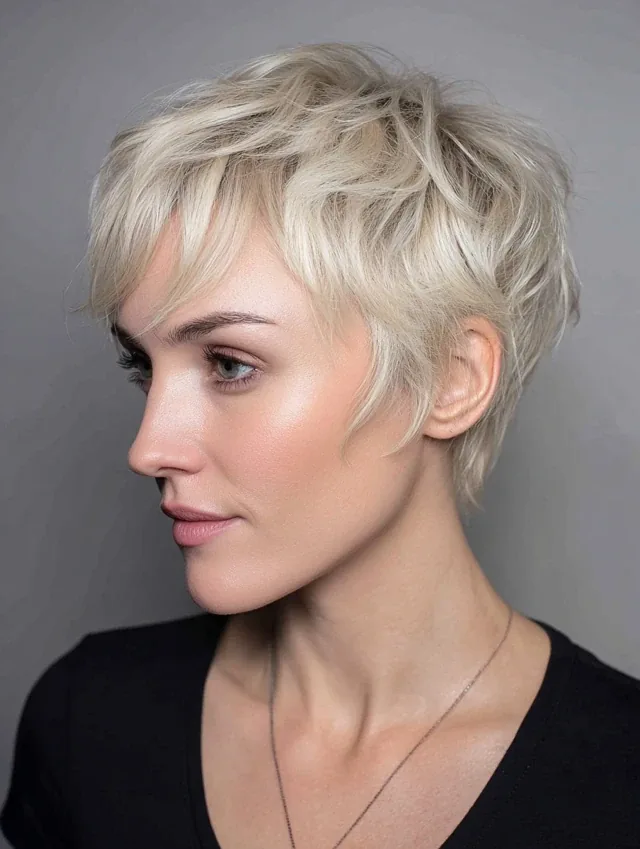
9. Curly Pixie
Quick verdict: A pixie shaped around natural curls, with volume, spring and a beautiful rounded silhouette.
Common mistake: Cutting curls wet and straight, then being surprised when they spring up much shorter dry.
How to style it:
- Apply curl cream to soaking-wet hair, scrunch gently, diffuse on low heat or air-dry, and do not brush curls dry.
- Shape the cut with your fingers while it is still slightly damp, not when it is fully dry.
- Finish with a light hold spray or a tiny amount of wax, and check the back in a second mirror.
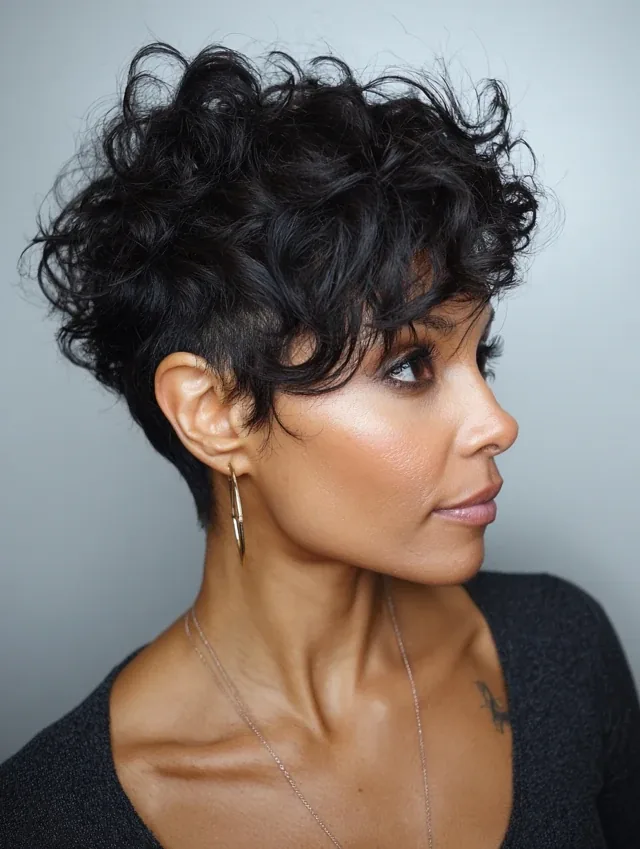
10. Wavy Pixie
Quick verdict: Natural wave gives this pixie built-in texture and movement, with very little daily effort.
Common mistake: Brushing waves out dry, which turns soft wave into frizz.
How to style it:
- Scrunch a little sea-salt spray or mousse through damp hair, twist a few sections, and let it dry naturally.
- Shape the cut with your fingers while it is still slightly damp, not when it is fully dry.
- Finish with a light hold spray or a tiny amount of wax, and check the back in a second mirror.
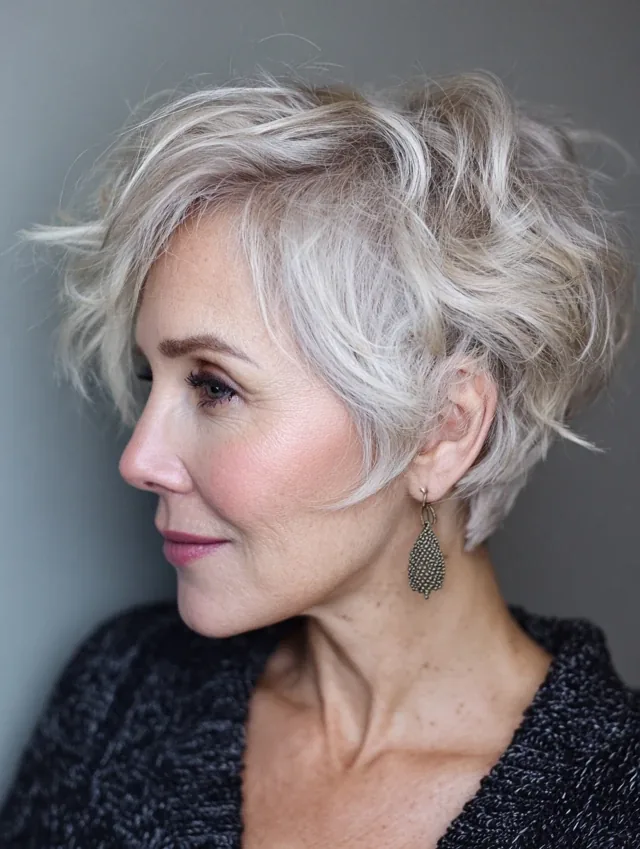
11. Pixie for Fine Hair
Quick verdict: Layers, texture and root lift make fine hair look thicker and fuller in pixie form.
Common mistake: Leaving fine hair one-length and flat, which shows the scalp and looks thinner.
How to style it:
- Blow-dry roots upward with a small brush, use a volumising mousse sparingly, and finish with dry texture spray.
- Shape the cut with your fingers while it is still slightly damp, not when it is fully dry.
- Finish with a light hold spray or a tiny amount of wax, and check the back in a second mirror.
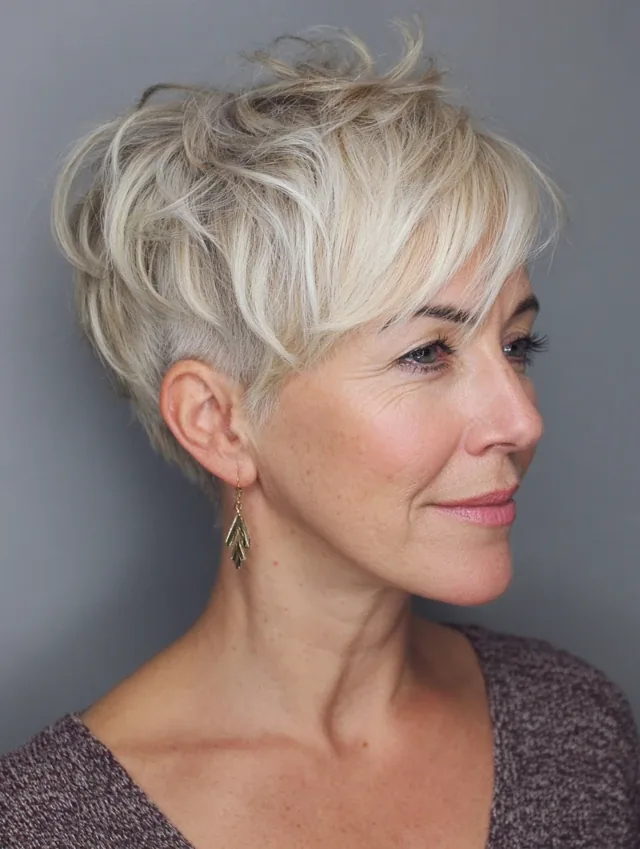
12. Pixie for Thick Hair
Quick verdict: Internal layers and a tapered nape remove bulk while keeping the shape full and healthy.
Common mistake: Cutting thick hair blunt all over, which creates a heavy, helmet-like shape.
How to style it:
- Ask for thinning or internal layers at the cut, use a smoothing cream on damp hair, and blow-dry sections smoothly.
- Shape the cut with your fingers while it is still slightly damp, not when it is fully dry.
- Finish with a light hold spray or a tiny amount of wax, and check the back in a second mirror.
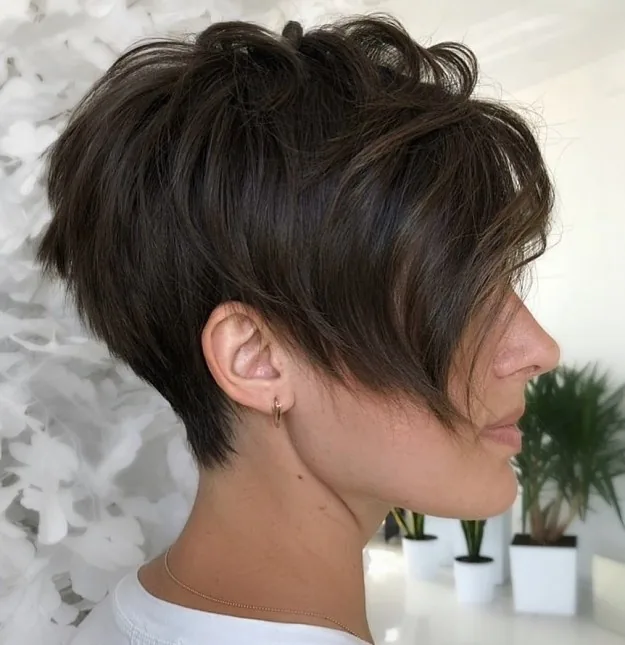
13. Pixie for Straight Hair
Quick verdict: Sleek, sharp and graphic: straight hair shows a pixie’s lines beautifully.
Common mistake: Skipping texture, so a straight pixie falls flat and looks severe rather than sleek.
How to style it:
- Add a little texturising spray at the roots, smooth the top with a flat brush, and use a pea-sized amount of shine serum.
- Shape the cut with your fingers while it is still slightly damp, not when it is fully dry.
- Finish with a light hold spray or a tiny amount of wax, and check the back in a second mirror.
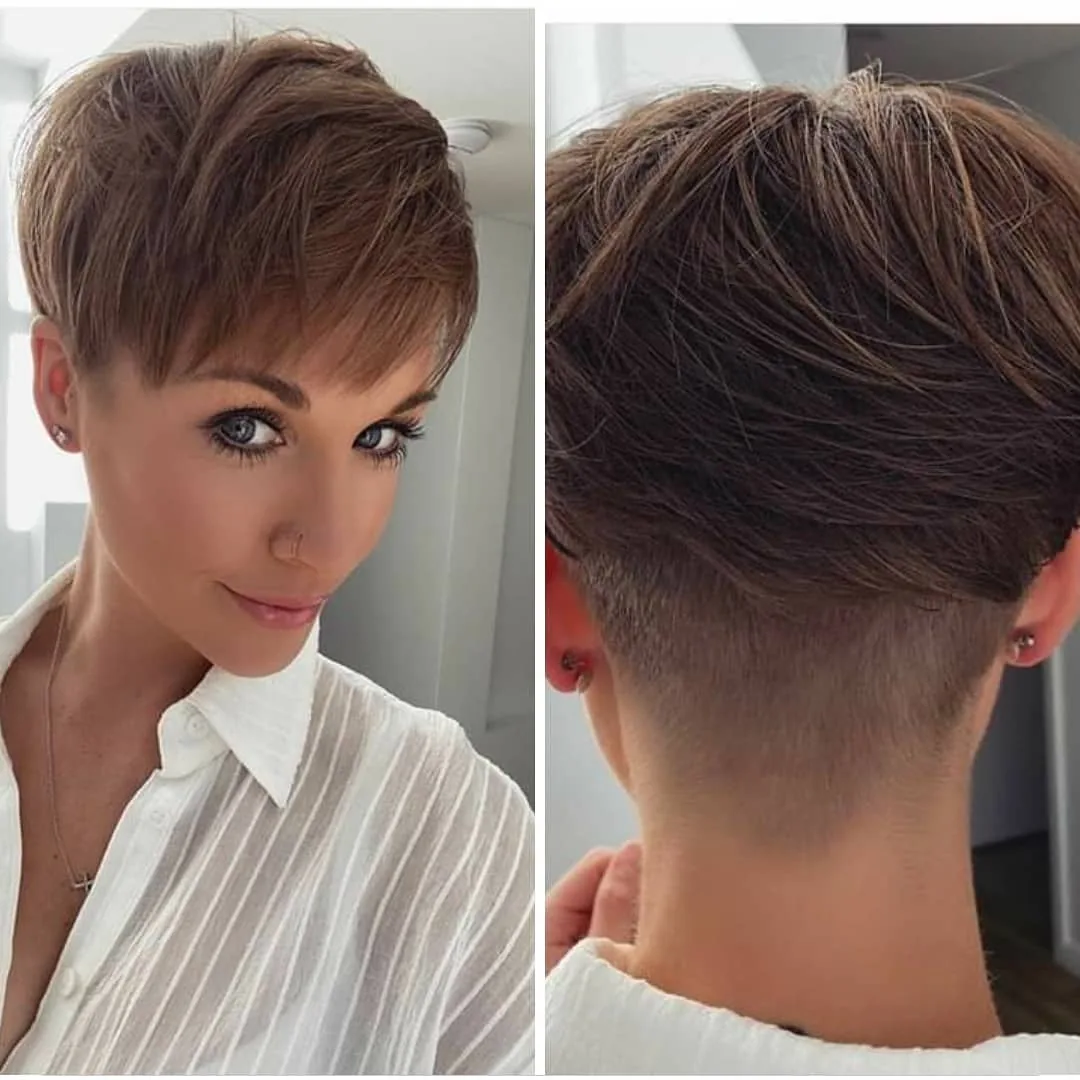
14. Pixie Bob (Bixie)
Quick verdict: The halfway house: pixie lightness at the back, bob length around the face. Ideal for a first short cut.
Common mistake: Calling every short bob a bixie — the back should still feel like a pixie, not a full bob.
How to style it:
- Tuck the front behind the ears for a pixie feel, or wear it forward for a bob feel, and keep the nape tapered.
- Shape the cut with your fingers while it is still slightly damp, not when it is fully dry.
- Finish with a light hold spray or a tiny amount of wax, and check the back in a second mirror.
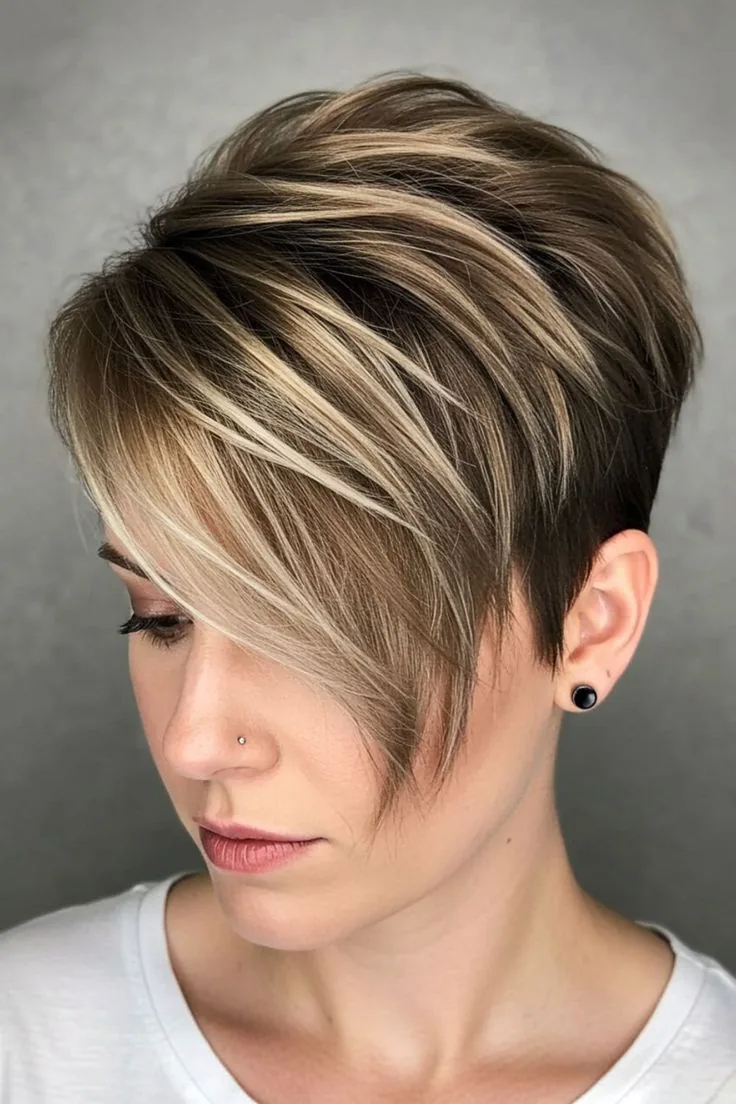
15. Shaggy Pixie
Quick verdict: Choppy, lived-in layers with a rock-and-roll edge. Great for wavy and thick hair.
Common mistake: Cutting shaggy layers too short on top, which removes the messy, grown-in look.
How to style it:
- Scrunch with texture spray, tousle with your fingers, and resist over-brushing — mess is the point here.
- Shape the cut with your fingers while it is still slightly damp, not when it is fully dry.
- Finish with a light hold spray or a tiny amount of wax, and check the back in a second mirror.
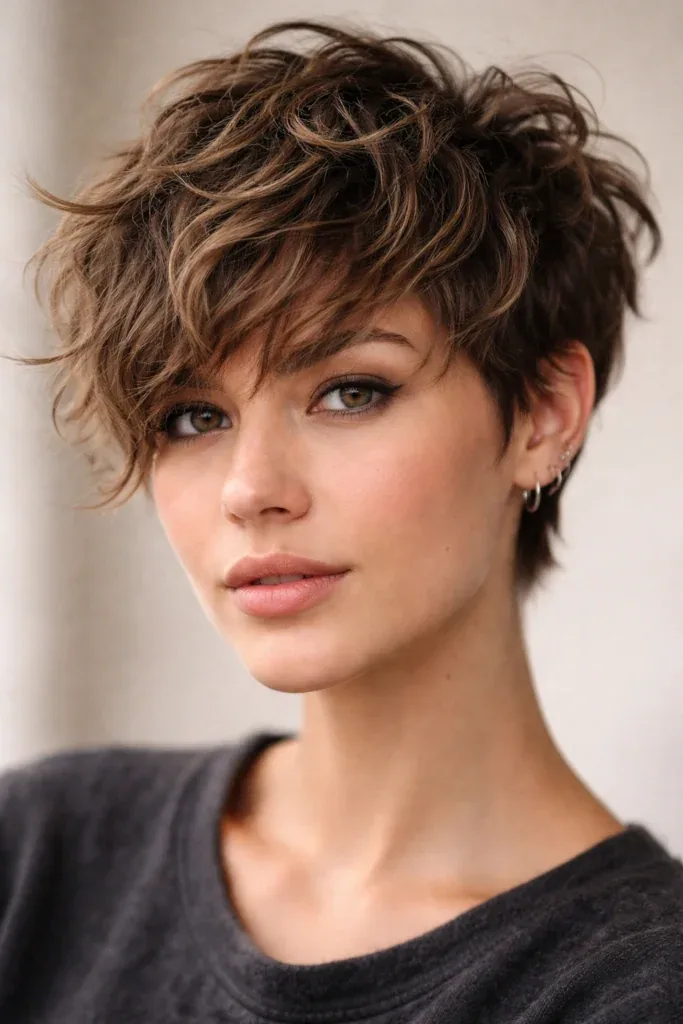
16. Pixie with Curtain Fringe
Quick verdict: A centre-parted fringe that opens like curtains, softening the forehead and framing the eyes.
Common mistake: Cutting curtain pieces too short, so they cannot part and fall to each side.
How to style it:
- Part in the centre, blow-dry each side outward with a round brush, and let the pieces fall naturally around the face.
- Shape the cut with your fingers while it is still slightly damp, not when it is fully dry.
- Finish with a light hold spray or a tiny amount of wax, and check the back in a second mirror.
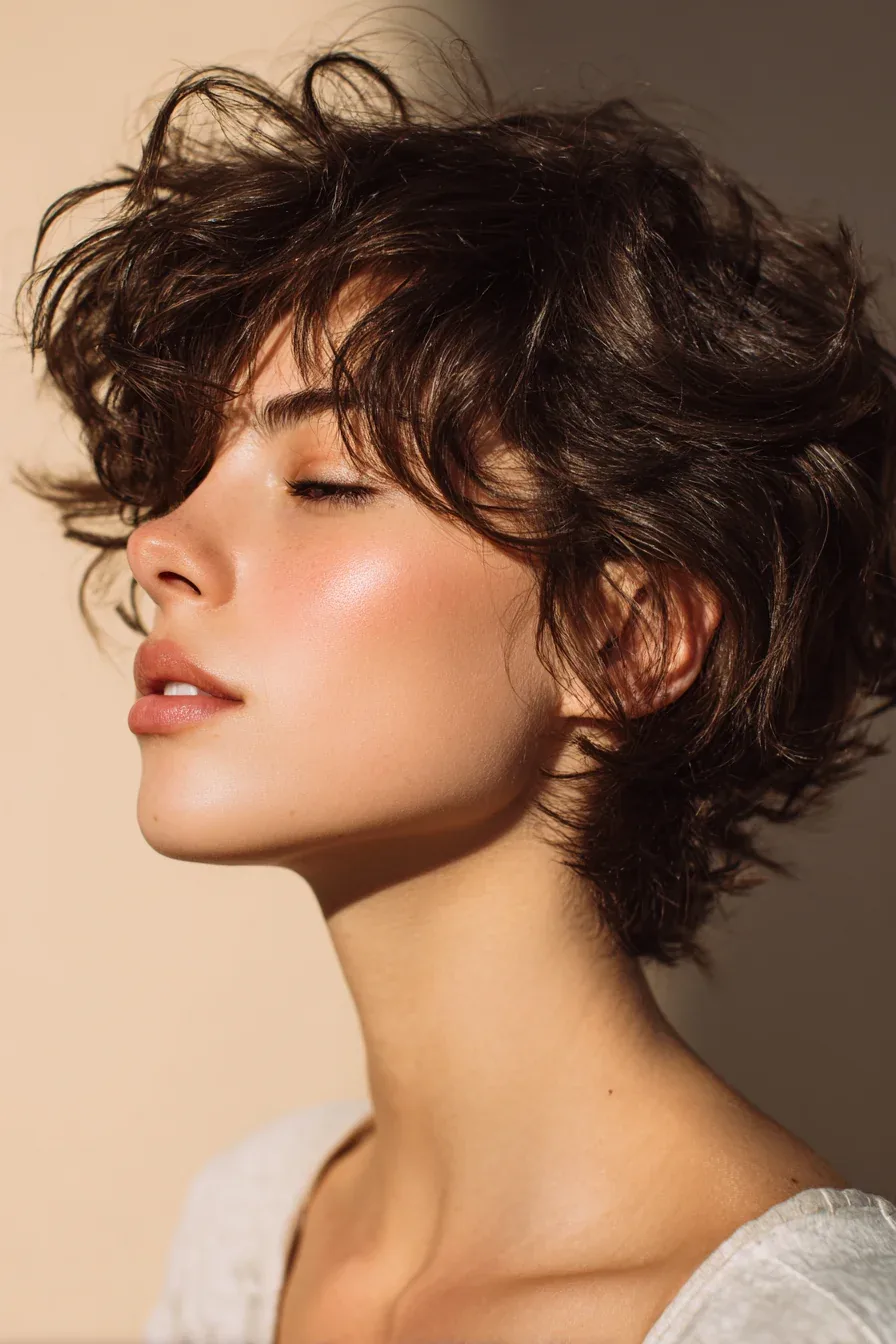
17. Tapered Pixie
Quick verdict: Neatly graduated sides and nape that taper close to the head, with length kept on top. Clean and professional.
Common mistake: Tapering too aggressively, which can look like an undercut when you wanted a soft taper.
How to style it:
- Smooth the sides down with a little pomade, style the top as usual, and book regular nape trims to keep the taper crisp.
- Shape the cut with your fingers while it is still slightly damp, not when it is fully dry.
- Finish with a light hold spray or a tiny amount of wax, and check the back in a second mirror.
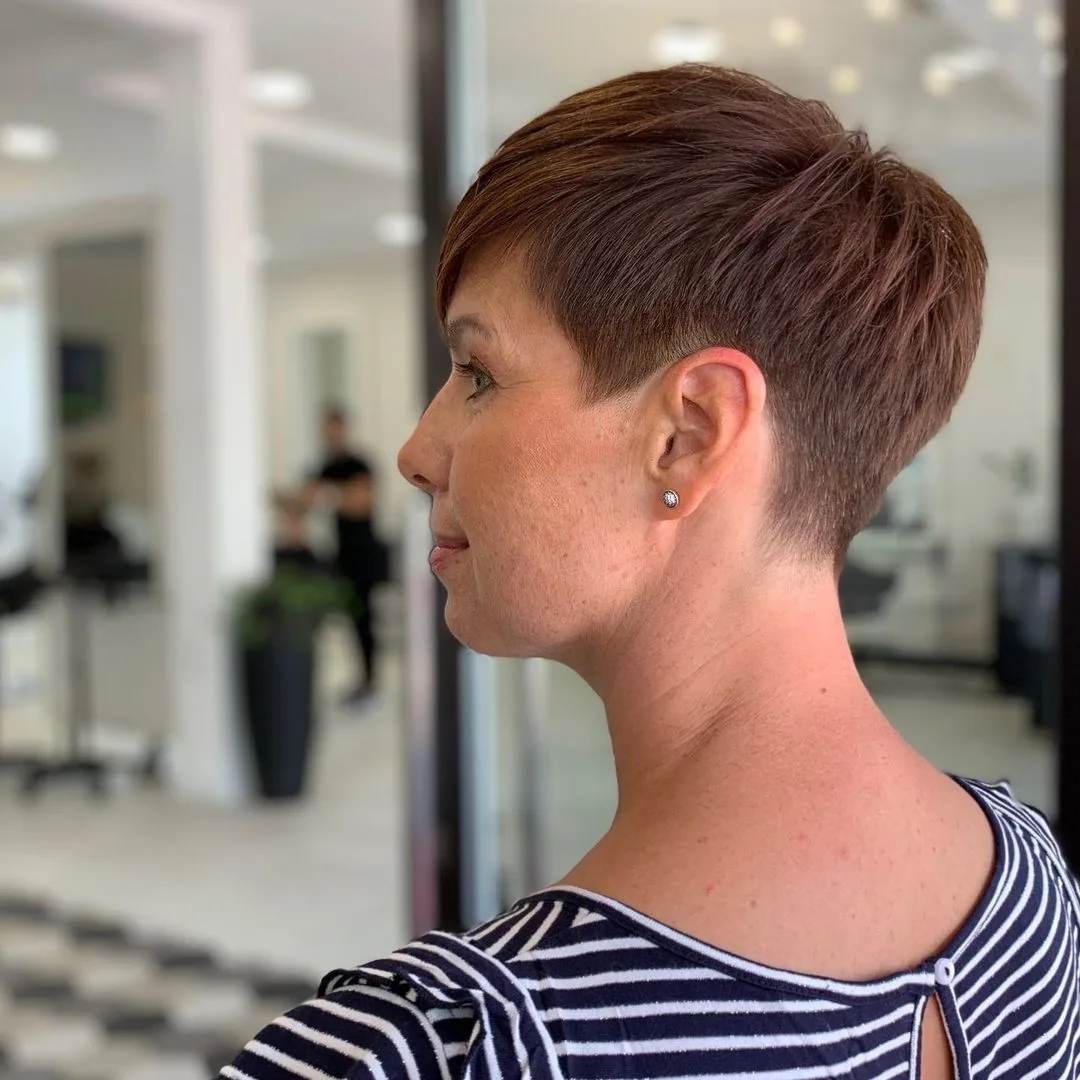
18. Spiky Pixie
Quick verdict: Short, piecey spikes on top for a playful, confident look that needs almost no length.
Common mistake: Using too much strong gel, which makes spikes stiff and crunchy instead of soft and piecey.
How to style it:
- Warm a small amount of wax between your palms, pinch small sections upward, and leave the sides smooth for contrast.
- Shape the cut with your fingers while it is still slightly damp, not when it is fully dry.
- Finish with a light hold spray or a tiny amount of wax, and check the back in a second mirror.
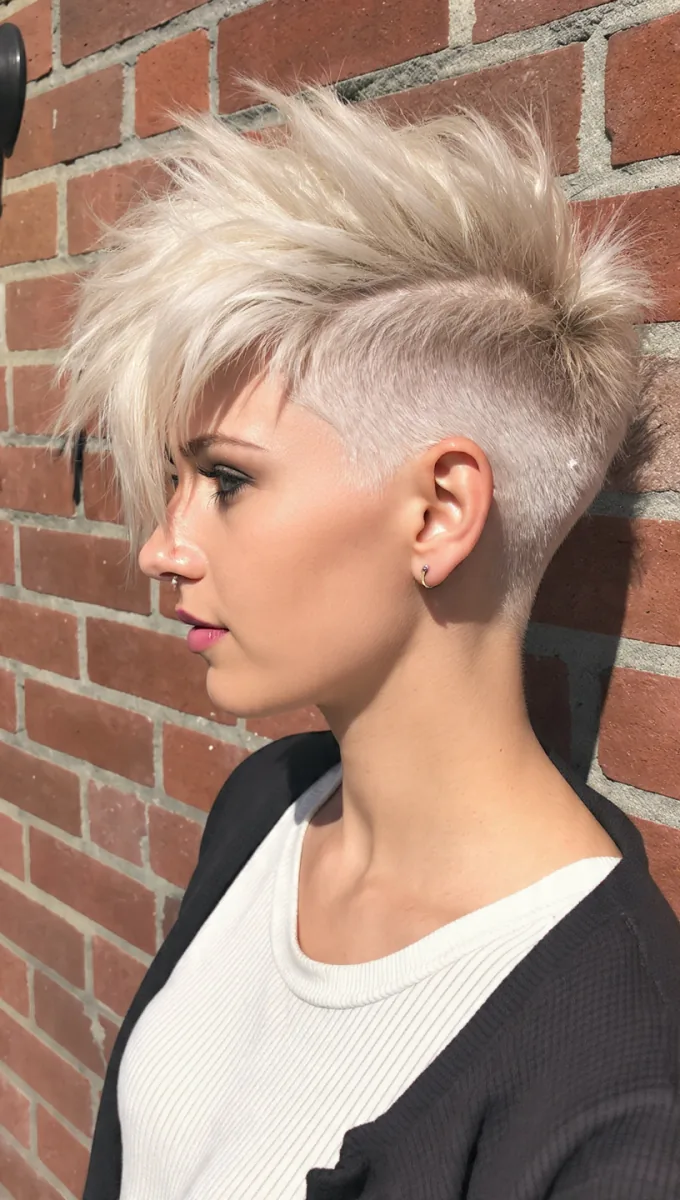
19. Soft Feminine Pixie
Quick verdict: Rounded shape, soft ends and a gentle fringe — a pixie that feels romantic rather than edgy.
Common mistake: Adding harsh, blunt edges that fight the soft shape you asked for.
How to style it:
- Blow-dry with a round brush for a rounded silhouette, use a light smoothing cream, and keep the fringe soft and side-swept.
- Shape the cut with your fingers while it is still slightly damp, not when it is fully dry.
- Finish with a light hold spray or a tiny amount of wax, and check the back in a second mirror.
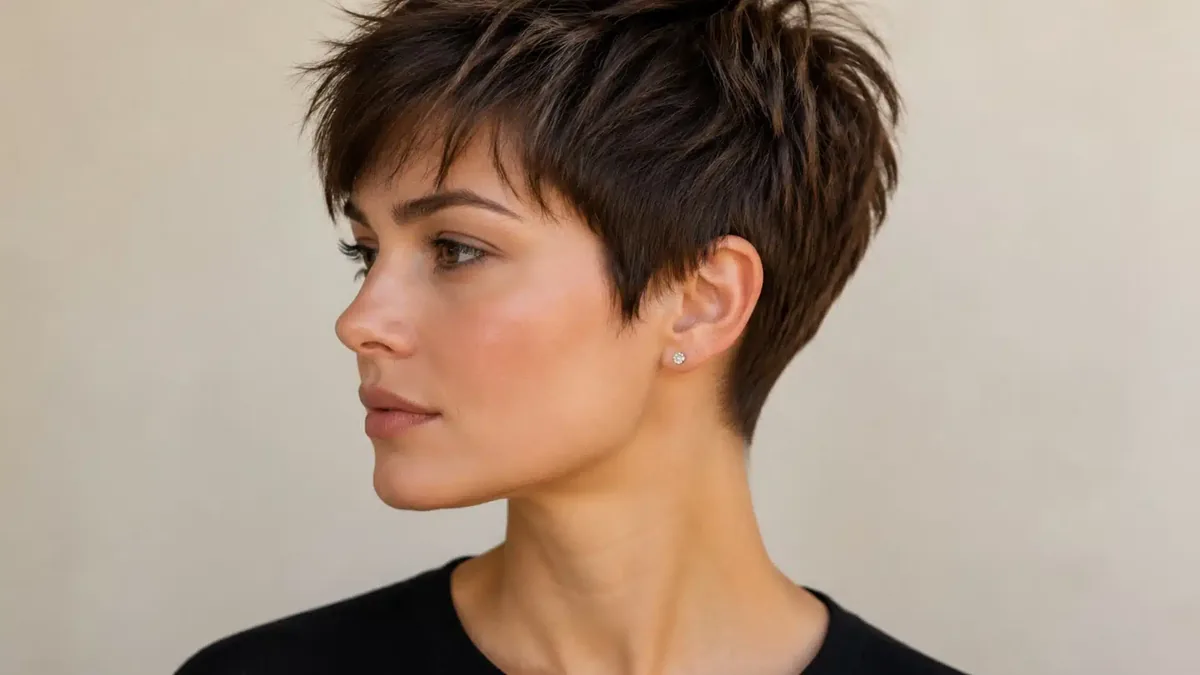
20. Edgy Pixie
Quick verdict: Sharp lines, bold texture or an undercut detail. A statement cut for women who like to stand out.
Common mistake: Going edgy in every direction at once — undercut, asymmetry and vivid colour can compete rather than complement.
How to style it:
- Pick one edgy element as the focus, keep the rest of the cut clean, and style with a strong-hold, matte product.
- Shape the cut with your fingers while it is still slightly damp, not when it is fully dry.
- Finish with a light hold spray or a tiny amount of wax, and check the back in a second mirror.
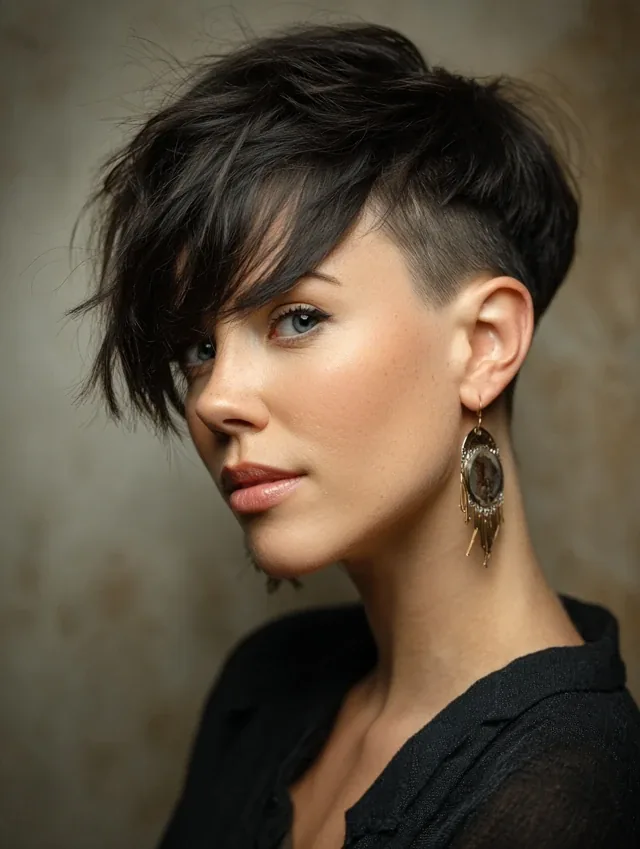
21. Pixie for Round Faces
Quick verdict: Height on top and a longer sweeping fringe lengthen a round face beautifully.
Common mistake: Adding width at the cheeks with a round, full shape that mirrors the face shape.
How to style it:
- Lift the crown while drying, sweep the fringe diagonally across the forehead, and keep the sides close and neat.
- Shape the cut with your fingers while it is still slightly damp, not when it is fully dry.
- Finish with a light hold spray or a tiny amount of wax, and check the back in a second mirror.
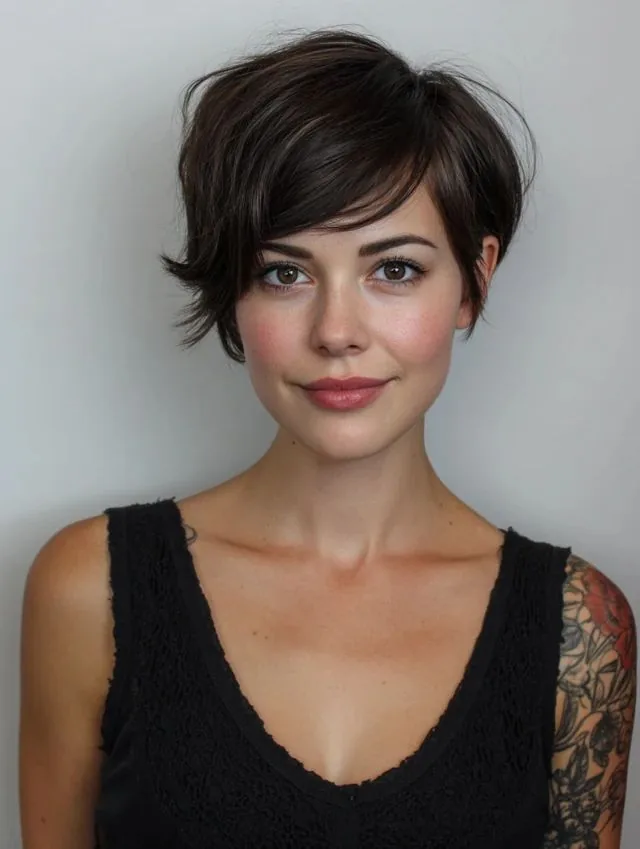
22. Pixie for Oval Faces
Quick verdict: Oval faces can wear almost any pixie, so choose by texture and personality, not by restriction.
Common mistake: Hiding an oval face behind a heavy fringe when a lighter, more open pixie would flatter it more.
How to style it:
- Try a textured or side-swept top, keep the fringe light, and experiment — this face shape forgives most pixie choices.
- Shape the cut with your fingers while it is still slightly damp, not when it is fully dry.
- Finish with a light hold spray or a tiny amount of wax, and check the back in a second mirror.
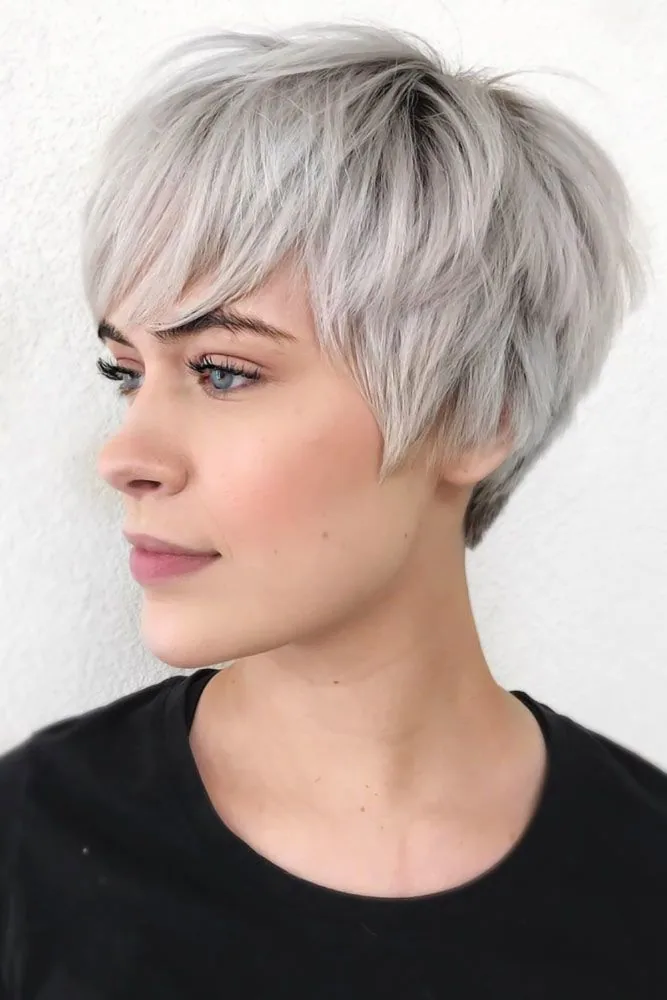
23. Pixie for Square Faces
Quick verdict: Soft, wispy ends and a side sweep soften a strong jawline without hiding it.
Common mistake: A blunt, boxy pixie that echoes the jawline and makes the whole shape look harder.
How to style it:
- Use feathered layers around the face, sweep the fringe to one side, and avoid a hard, straight line at the jaw.
- Shape the cut with your fingers while it is still slightly damp, not when it is fully dry.
- Finish with a light hold spray or a tiny amount of wax, and check the back in a second mirror.
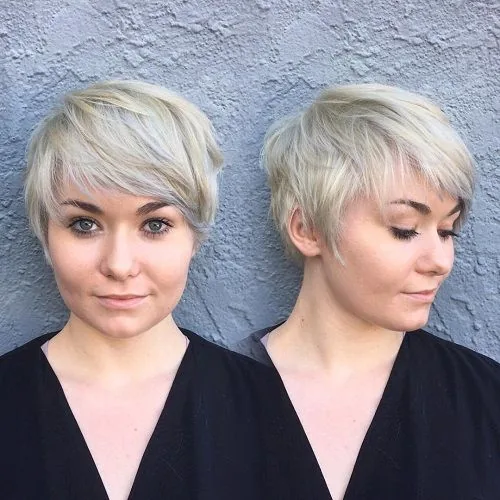
24. Pixie for Heart Faces
Quick verdict: Volume at the sides or a soft fringe balances a wider forehead and narrower chin.
Common mistake: Keeping all volume on top only, which can exaggerate the forehead-to-chin difference.
How to style it:
- Add soft fullness around the cheeks and jaw, keep the fringe wispy, and avoid a very high, flat crown.
- Shape the cut with your fingers while it is still slightly damp, not when it is fully dry.
- Finish with a light hold spray or a tiny amount of wax, and check the back in a second mirror.
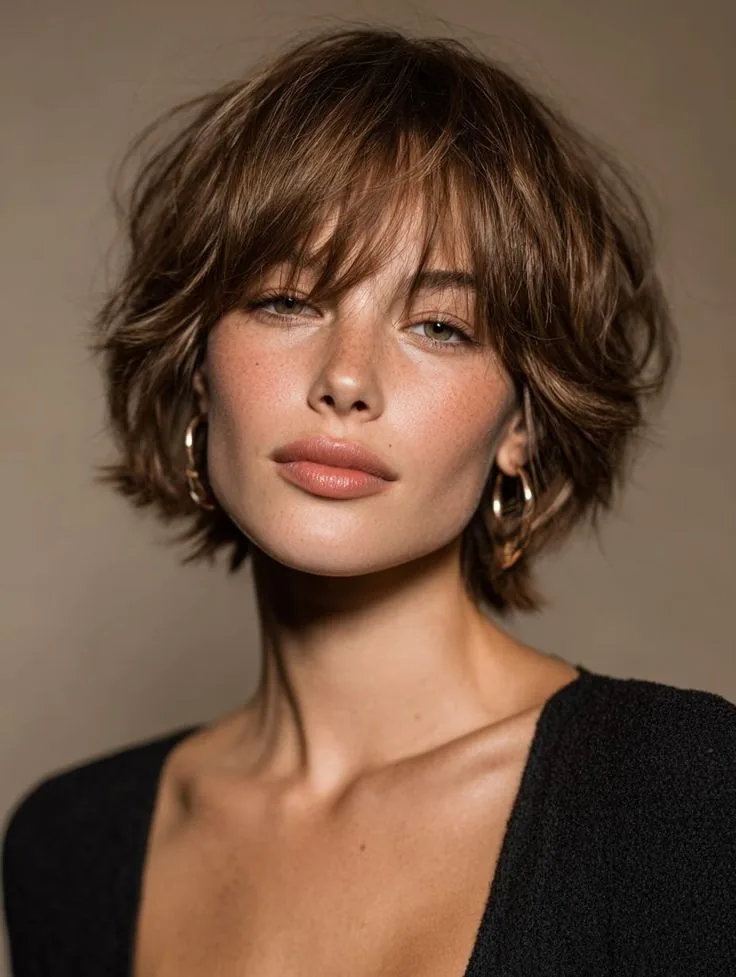
25. Pixie for Women Over 50
Quick verdict: A modern, lift-giving cut that frames the face, shows off cheekbones and takes years off styling time.
Common mistake: Choosing a dated, overly set pixie that looks stiff instead of fresh and current.
How to style it:
- Use a light volumising product, keep the top textured rather than lacquered, and trim regularly to keep the shape youthful.
- Shape the cut with your fingers while it is still slightly damp, not when it is fully dry.
- Finish with a light hold spray or a tiny amount of wax, and check the back in a second mirror.
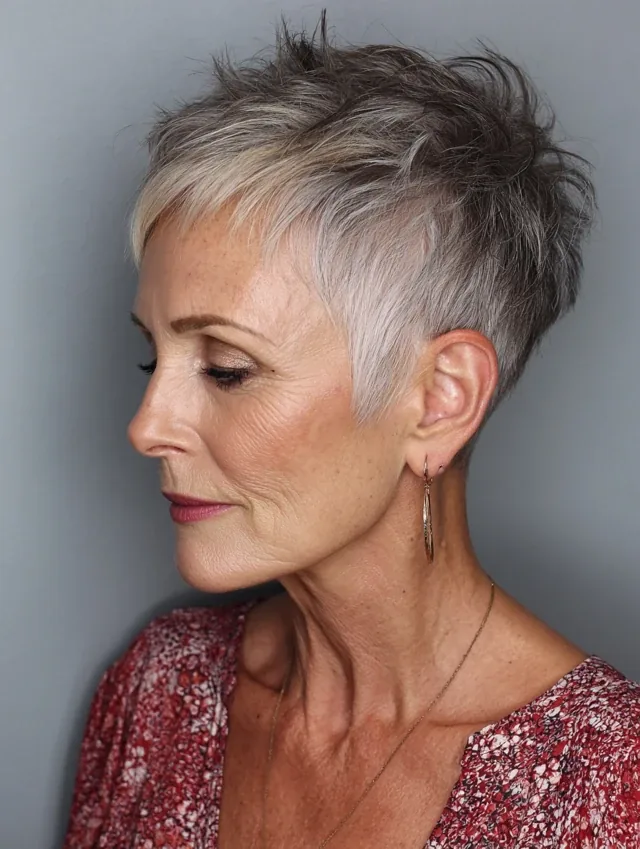
26. Pixie for Women Over 60
Quick verdict: Soft, easy and elegant: a pixie that works with natural texture and grey or silver tones.
Common mistake: Cutting too short all over without softness, which can feel harsh rather than flattering.
How to style it:
- Keep a soft fringe, use a silver-enhancing shampoo if grey, and style with a light cream for gentle movement.
- Shape the cut with your fingers while it is still slightly damp, not when it is fully dry.
- Finish with a light hold spray or a tiny amount of wax, and check the back in a second mirror.
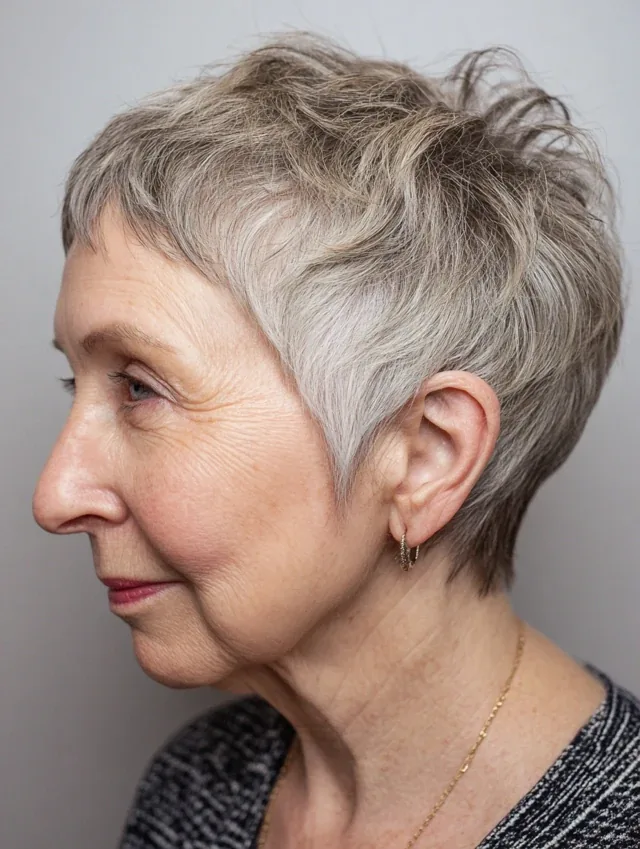
27. Pixie with Highlights
Quick verdict: Highlights add dimension and make pixie layers pop, even on a short cut.
Common mistake: Highlighting every layer heavily, which can look stripey on short hair.
How to style it:
- Ask for fine, blended highlights or a balayage effect, and use a colour-safe shampoo to keep them bright.
- Shape the cut with your fingers while it is still slightly damp, not when it is fully dry.
- Finish with a light hold spray or a tiny amount of wax, and check the back in a second mirror.
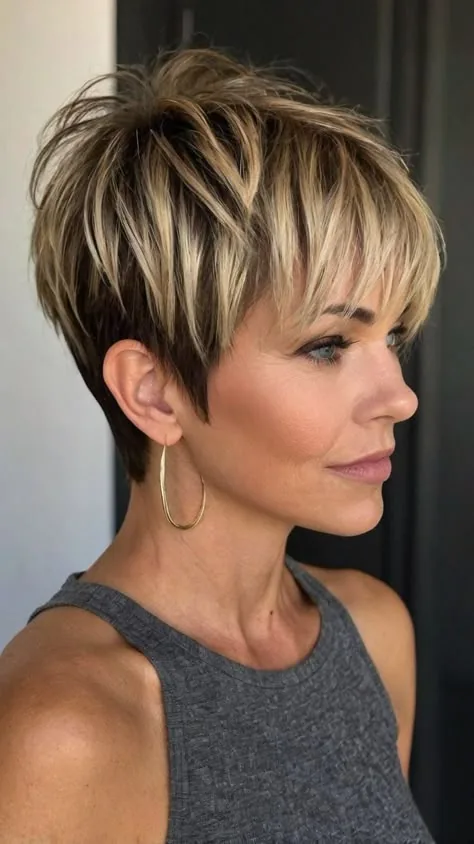
28. Platinum Pixie
Quick verdict: Bright, icy blonde on a pixie is striking, modern and surprisingly low-effort to style.
Common mistake: Bleaching without a toning and care plan, which leads to brassiness and breakage.
How to style it:
- Use purple shampoo once a week, deep-condition regularly, and book toning appointments between colour visits.
- Shape the cut with your fingers while it is still slightly damp, not when it is fully dry.
- Finish with a light hold spray or a tiny amount of wax, and check the back in a second mirror.
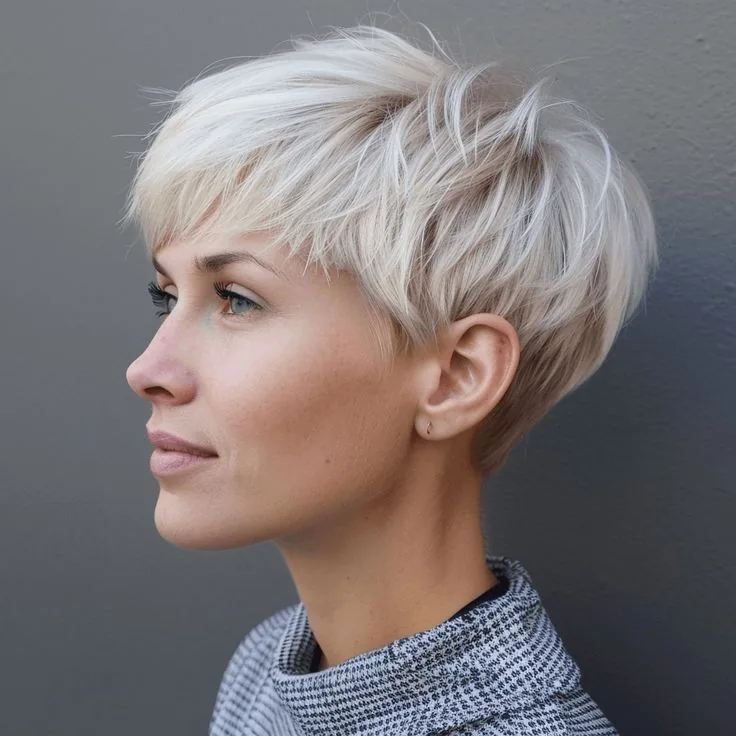
29. Dark Pixie with Gloss
Quick verdict: Deep, glossy dark hair makes a pixie look rich, healthy and expensive.
Common mistake: Letting dark colour go dull and flat, which shows every split end on short hair.
How to style it:
- Use a gloss treatment every few weeks, add shine serum sparingly, and keep ends trimmed for a healthy edge.
- Shape the cut with your fingers while it is still slightly damp, not when it is fully dry.
- Finish with a light hold spray or a tiny amount of wax, and check the back in a second mirror.
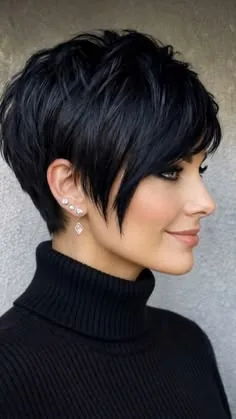
30. Pixie with a Deep Side Part
Quick verdict: A dramatic deep part adds volume, glamour and a vintage feel to any pixie.
Common mistake: Parting so deep that the hair constantly falls into the eyes.
How to style it:
- Find your deep part while hair is damp, blow-dry the roots in that direction, and pin the shorter side neatly if needed.
- Shape the cut with your fingers while it is still slightly damp, not when it is fully dry.
- Finish with a light hold spray or a tiny amount of wax, and check the back in a second mirror.
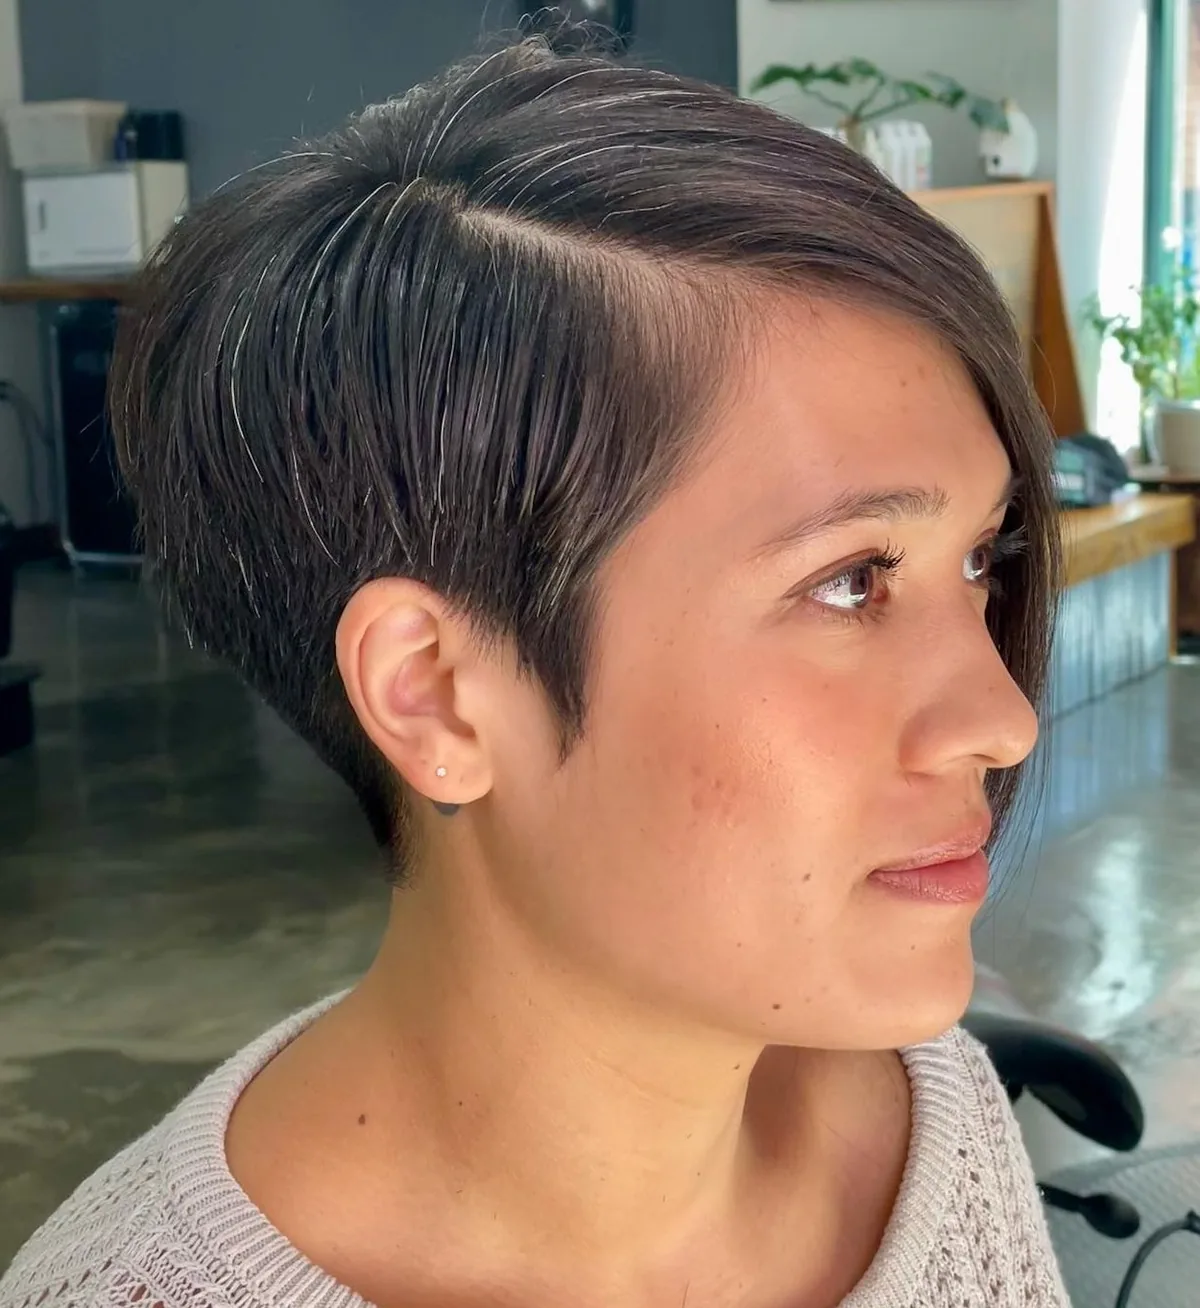
31. Tousled Pixie
Quick verdict: Bedhead, but on purpose: soft tousle, piecey texture and a relaxed finish.
Common mistake: Over-styling a tousled pixie until it looks neat — that defeats the whole look.
How to style it:
- Scrunch with texture spray, shake the roots with your fingers, and stop styling before it looks finished.
- Shape the cut with your fingers while it is still slightly damp, not when it is fully dry.
- Finish with a light hold spray or a tiny amount of wax, and check the back in a second mirror.
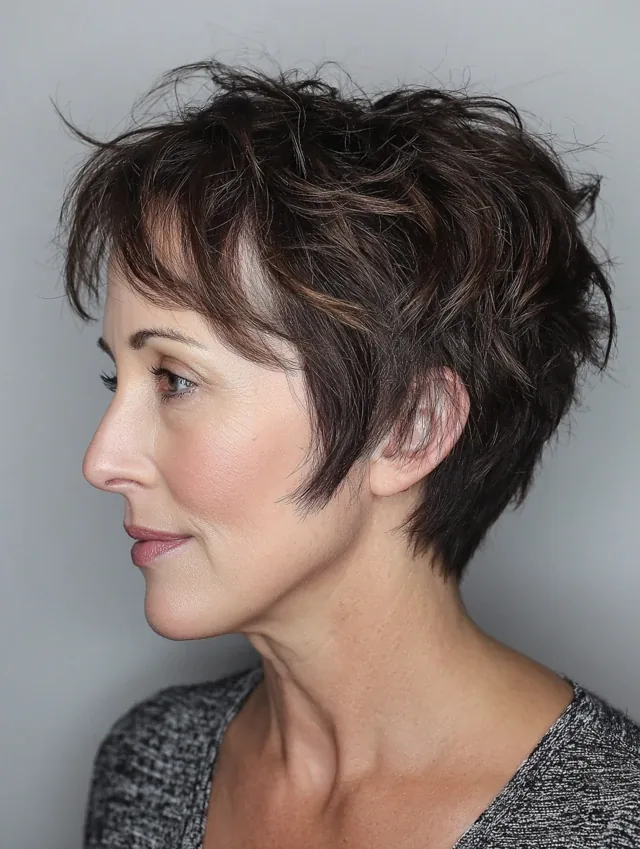
32. Sleek Pixie
Quick verdict: Smooth, polished and chic: a sleek pixie is the short-cut equivalent of a great blazer.
Common mistake: Using too much oil, which turns sleek into greasy within hours.
How to style it:
- Blow-dry smooth with a flat brush, use a small amount of smoothing cream, and finish with a light shine spray.
- Shape the cut with your fingers while it is still slightly damp, not when it is fully dry.
- Finish with a light hold spray or a tiny amount of wax, and check the back in a second mirror.
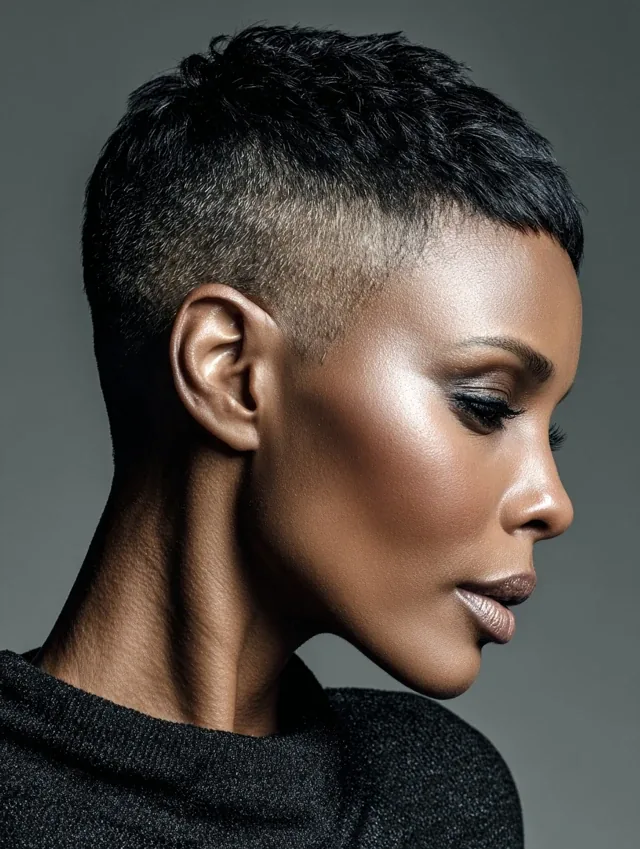
33. Pixie with Volume on Top
Quick verdict: Lift and height at the crown lengthen the face and give a pixie real presence.
Common mistake: Backcombing aggressively every day, which damages short hair quickly.
How to style it:
- Blow-dry the crown upward, use root-lift spray at the roots only, and set with a flexible hold spray.
- Shape the cut with your fingers while it is still slightly damp, not when it is fully dry.
- Finish with a light hold spray or a tiny amount of wax, and check the back in a second mirror.
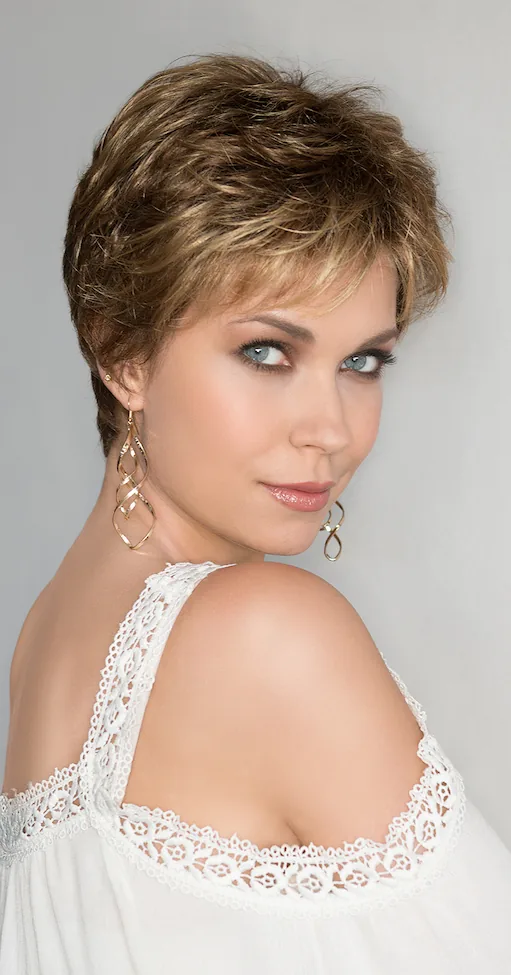
34. Low-Maintenance Pixie
Quick verdict: The wash-and-go champion: a cut that falls into shape with minimal product and no heat styling.
Common mistake: Choosing a low-maintenance cut that does not suit your natural texture, so it still needs daily fixing.
How to style it:
- Wash, add a little leave-in or cream, finger-style, and go — but book trims on time, because shape is everything here.
- Shape the cut with your fingers while it is still slightly damp, not when it is fully dry.
- Finish with a light hold spray or a tiny amount of wax, and check the back in a second mirror.
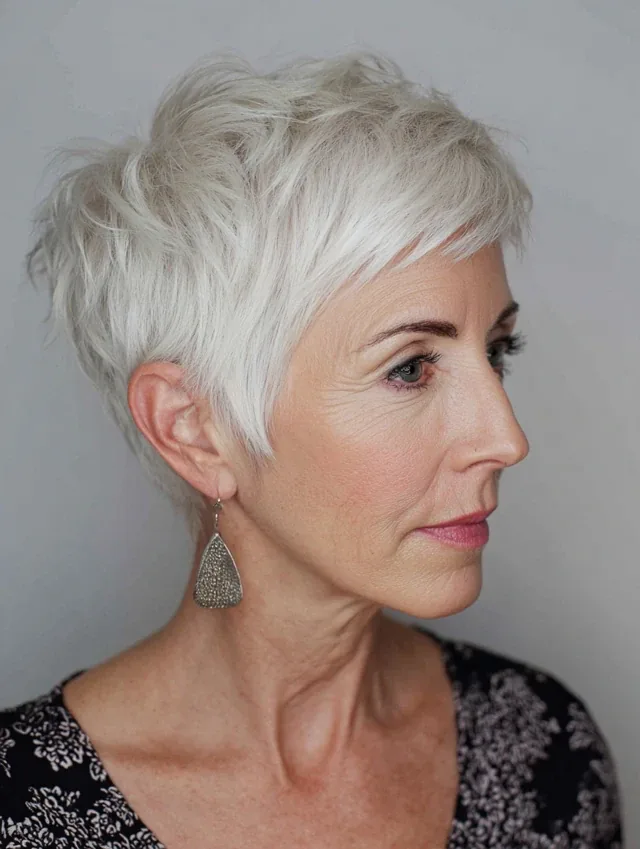
35. Pixie for a Job Interview Look
Quick verdict: Neat, polished and confident: a pixie that says professional without saying boring.
Common mistake: Trying a brand-new, dramatic pixie the day before an interview.
How to style it:
- Style sleek or softly textured, keep the fringe out of your eyes, and finish with a light hold so the shape lasts all day.
- Shape the cut with your fingers while it is still slightly damp, not when it is fully dry.
- Finish with a light hold spray or a tiny amount of wax, and check the back in a second mirror.

36. Occasion Pixie with Texture
Quick verdict: Textured, piecey and party-ready: add shine, definition and a little drama for evenings out.
Common mistake: Overloading occasion hair with product, which makes it look wet rather than glamorous.
How to style it:
- Define pieces with a little wax, add a touch of shine spray, and consider a sparkly clip or headband for instant occasion polish.
- Shape the cut with your fingers while it is still slightly damp, not when it is fully dry.
- Finish with a light hold spray or a tiny amount of wax, and check the back in a second mirror.
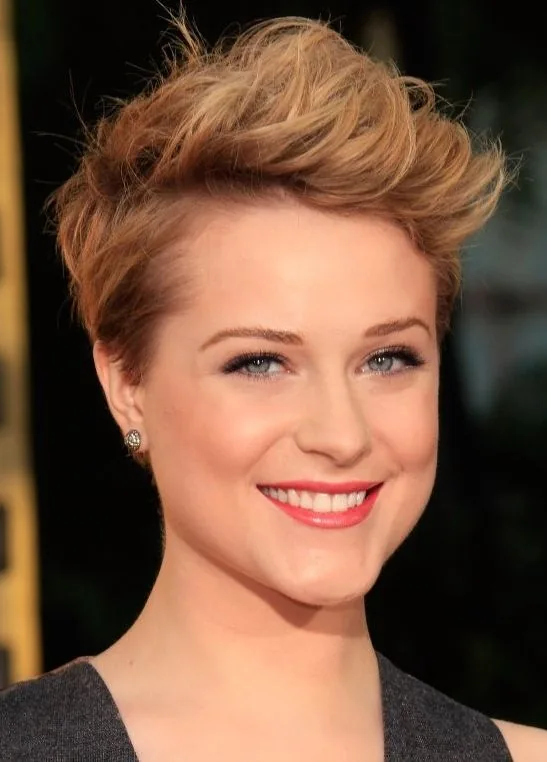
37. Pixie Grow-Out Stage Cut
Quick verdict: A shaped cut designed for the in-between stage: tidy at the back, longer on top, heading toward a bixie.
Common mistake: Letting the back grow unchecked, which creates the classic grow-out mullet shape.
How to style it:
- Trim the nape regularly, let the top and sides catch up, and use texture spray to blend uneven lengths.
- Shape the cut with your fingers while it is still slightly damp, not when it is fully dry.
- Finish with a light hold spray or a tiny amount of wax, and check the back in a second mirror.
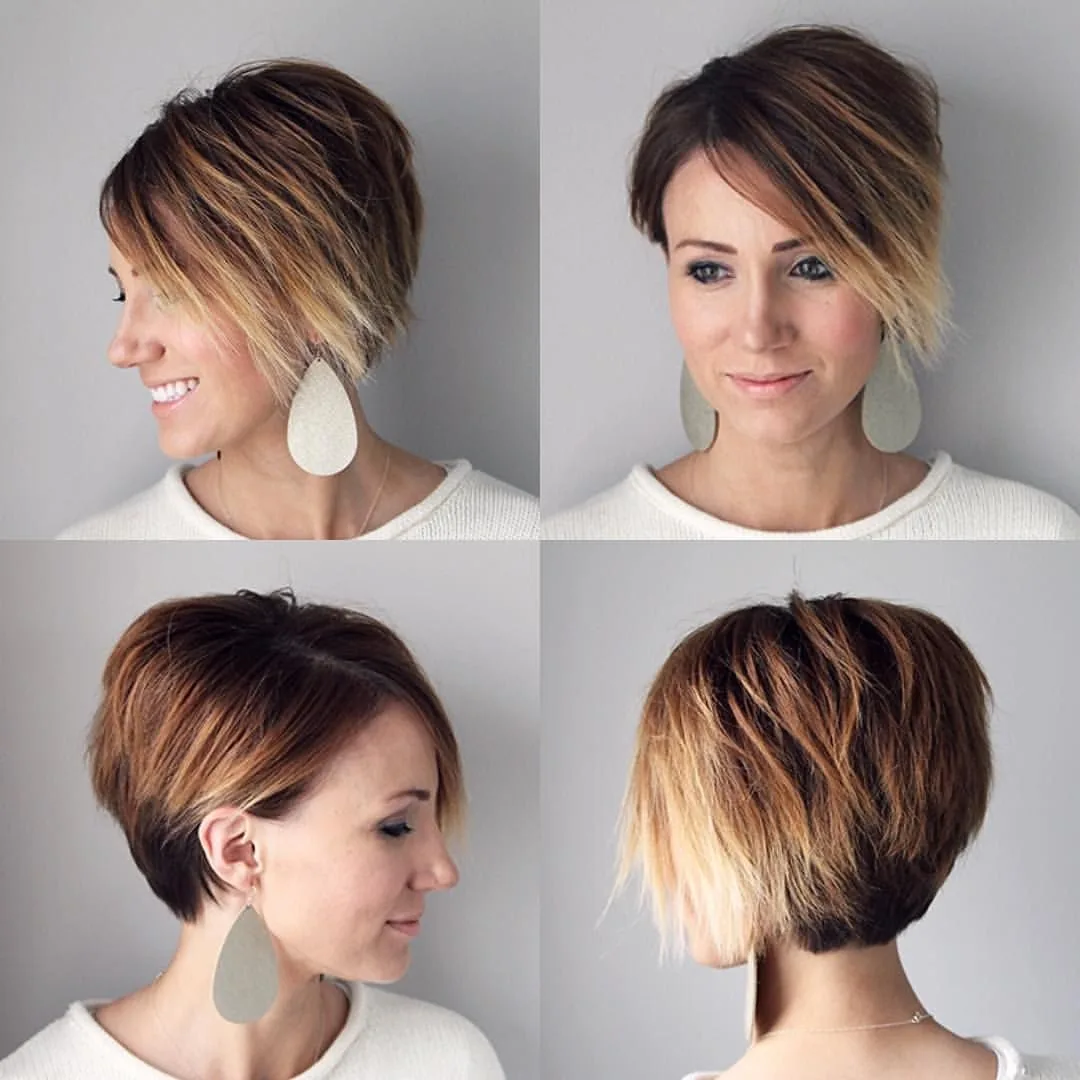
38. Pixie with Feathered Layers
Quick verdict: Light, airy layers that feather outward for soft movement and a classic, feminine finish.
Common mistake: Cutting feathered layers too thin, so the pixie loses its shape and looks wispy all over.
How to style it:
- Blow-dry layers outward with a small round brush, use a light cream, and keep the overall outline rounded.
- Shape the cut with your fingers while it is still slightly damp, not when it is fully dry.
- Finish with a light hold spray or a tiny amount of wax, and check the back in a second mirror.
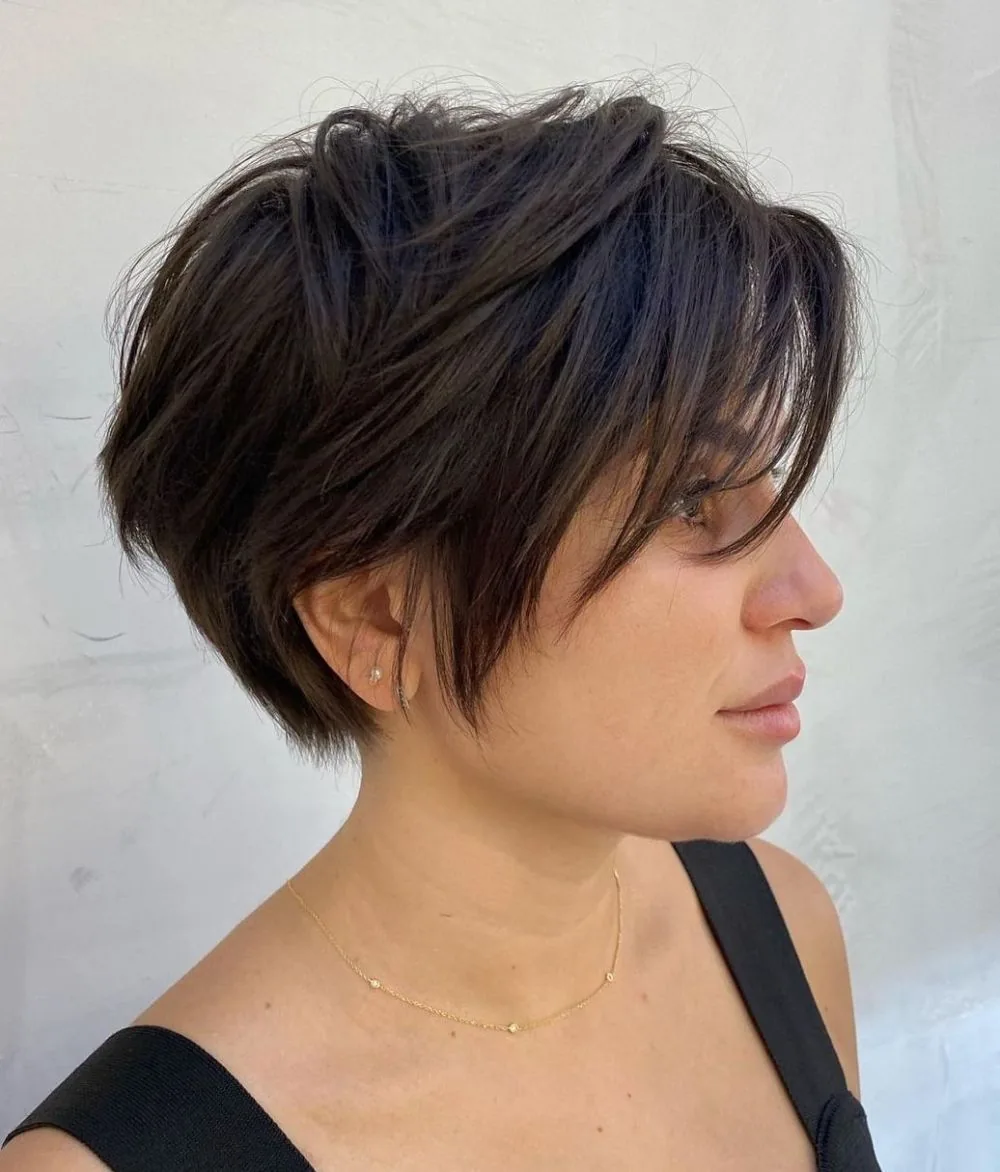
39. Pixie with a Fringe Sweep
Quick verdict: A long fringe swept across the forehead, softening the pixie and giving instant styling versatility.
Common mistake: Cutting the sweeping fringe too blunt, so it cannot move or sweep naturally.
How to style it:
- Blow-dry the fringe across the forehead in one smooth direction, and use a light wax on the ends for definition.
- Shape the cut with your fingers while it is still slightly damp, not when it is fully dry.
- Finish with a light hold spray or a tiny amount of wax, and check the back in a second mirror.
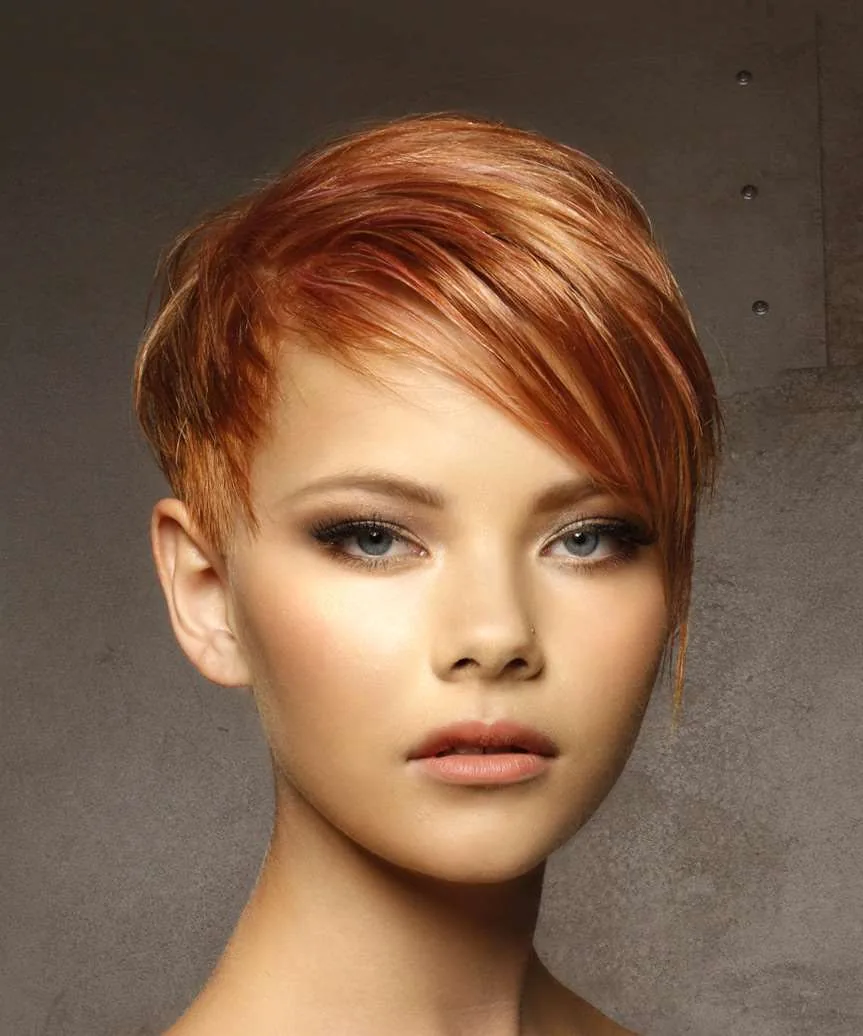
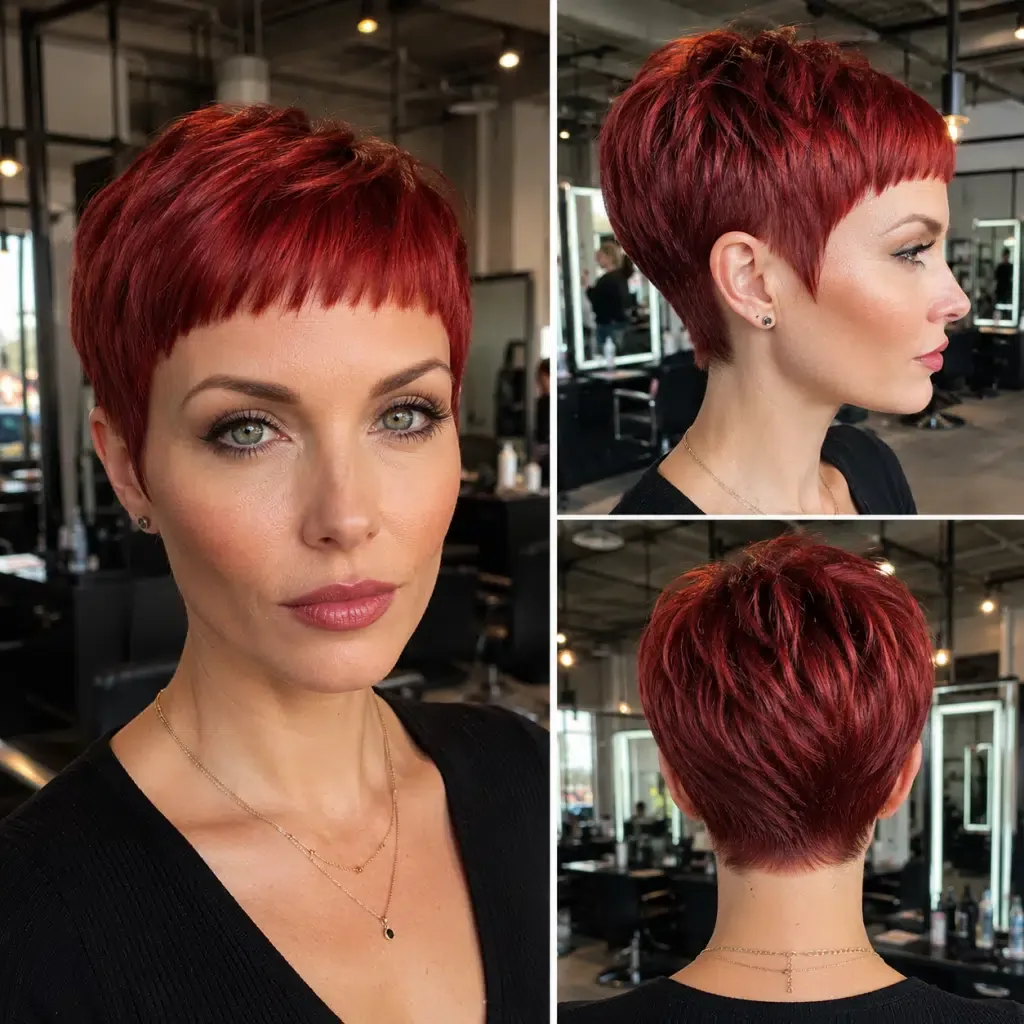
40. Bold Colour Pixie
Quick verdict: Vivid colour — red, copper, pink, blue or violet — looks incredible on short hair, where every shade shows.
Common mistake: Choosing a vivid shade without checking upkeep, fading and workplace rules first.
How to style it:
- Use colour-safe shampoo, wash in cooler water, and top up with a colour-depositing conditioner between salon visits.
- Shape the cut with your fingers while it is still slightly damp, not when it is fully dry.
- Finish with a light hold spray or a tiny amount of wax, and check the back in a second mirror.
41. Everyday Wash-and-Go Pixie
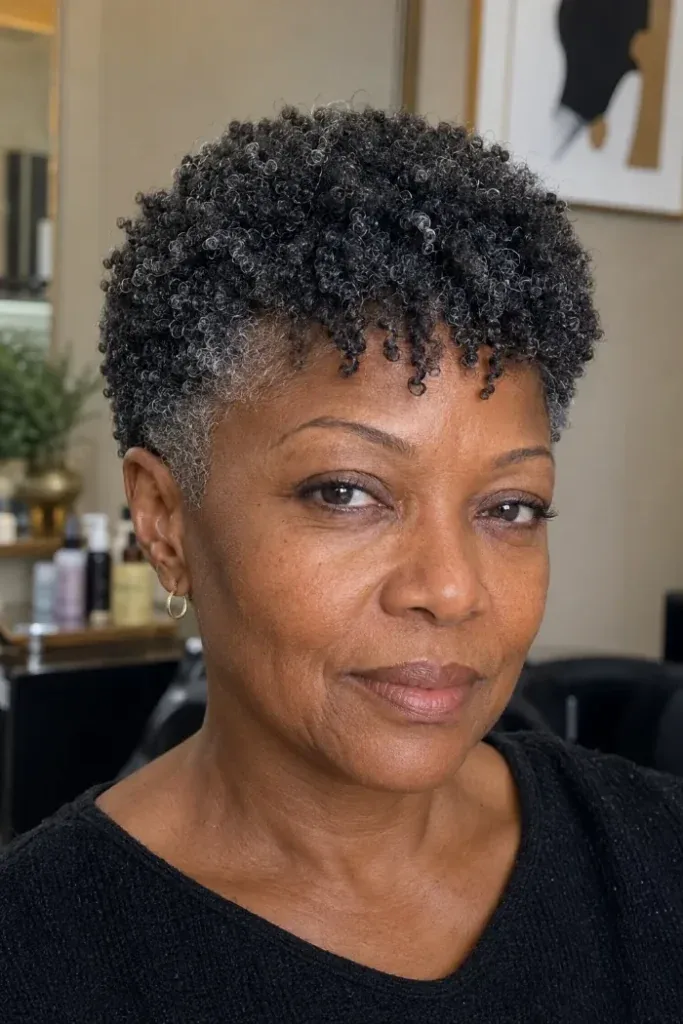
Quick verdict: The simplest pixie of all: wash, scrunch or smooth, and walk out the door in under five minutes.
Common mistake: Picking a wash-and-go cut that needs heat styling to look right — that is not wash-and-go.
How to style it:
- Wash, apply a pea-sized amount of cream or mousse, shape with your fingers, and let it air-dry while you get dressed.
- Shape the cut with your fingers while it is still slightly damp, not when it is fully dry.
- Finish with a light hold spray or a tiny amount of wax, and check the back in a second mirror.
Frequently Asked Questions About Pixie Cuts for Women
How do I know if a pixie cut will suit me?
A pixie usually suits you if you like your face and neck on show and you are happy with trims every four to six weeks. Start with a longer pixie or bixie if you are unsure, and ask your stylist to check the shape from all angles before cutting shorter.
How often does a pixie cut need trimming?
Most pixies need a trim every four to six weeks to keep their shape. The nape and sides grow out fastest and lose their neat outline first, so even a quick tidy-up between full cuts helps.
Is a pixie cut high maintenance?
A pixie is low maintenance in daily styling but higher maintenance in salon visits. Daily styling often takes five to ten minutes, while trims are more frequent than for long hair.
Can I get a pixie cut with curly hair?
Yes. A curly pixie can look fantastic, but it should be cut with your natural curl pattern in mind, ideally dry or in its natural state, with enough length left for curls to spring up.
Will a pixie cut make my face look rounder?
Not necessarily. Height on top, a sweeping fringe and close sides can lengthen a round face, while a very round, full pixie can add width. Tell your stylist you want lengthening, not widening.
How long does it take to grow out a pixie cut?
Growing a pixie to a bob usually takes six to twelve months, depending on your starting length and growth rate. Regular shaping trims during that time keep it looking intentional at every stage.
Can older women wear a pixie cut?
Absolutely. Pixies are popular over 50 and over 60 because they add lift, frame the face and reduce styling time. Softer layers and a gentle fringe tend to flatter more than a very severe crop.
What products do I need for a pixie cut?
Three products cover most pixies: a styling cream or paste for texture, a smoothing or shine product, and a light finishing spray. Fine hair needs lighter formulas; thick or curly hair needs more moisture.
Can I style a pixie cut for a formal occasion?
Yes. Sleek it smooth with shine spray, add defined texture with wax, or use a decorative clip or headband. A deep side part instantly makes a pixie feel more formal.
Should I cut my own pixie at home?
A first pixie is best left to a stylist, because the back, taper and fringe are hard to judge on yourself. Home trims between salon visits are fine for tidying the nape, but not for reshaping the cut.
Conclusion
The best pixie cut for women is not the trendiest one in this list — it is the one that fits your hair texture, your face, your lifestyle and your willingness to trim it regularly. Start with the guides, shortlist two or three styles that feel like you, and take them to your stylist for an honest conversation.
Whether you choose a classic short pixie, a textured crop, a curly pixie or a long-topped version, the same rule applies: be specific about length, fringe and upkeep, and start a little longer if you are nervous. A great pixie should make your mornings easier and your face the focus — and with the right cut, it will.