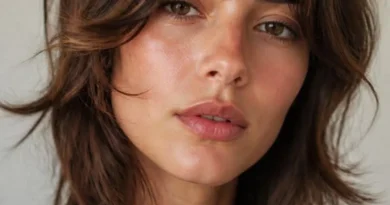
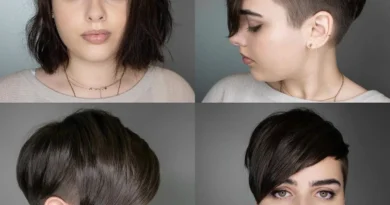
Let Your Waves Do the Talking: Beautiful Hairstyles for Wavy Hair at Every Length
Wavy hair lives in the best middle ground: it has natural movement that straight hair has to be styled into, and softness that tighter curls sometimes have to fight for. Yet so much wavy-hair advice still starts with straightening it away, as if the wave were a problem to fix. This guide does the opposite. It starts with your wave pattern and builds the cut around it.
Here you will find 44 hairstyles for wavy hair, for 2A, 2B and 2C waves and for short, medium and long lengths. Some are cuts, some are quick everyday styles, and some are occasion updos — but all of them work with the wave, not against it. You will also find eight practical guides on wave types, cuts, drying, frizz, colour and the mistakes that flatten waves, so you can keep the style looking good long after you leave the salon.
Know Your Wave Type: 2A, 2B and 2C
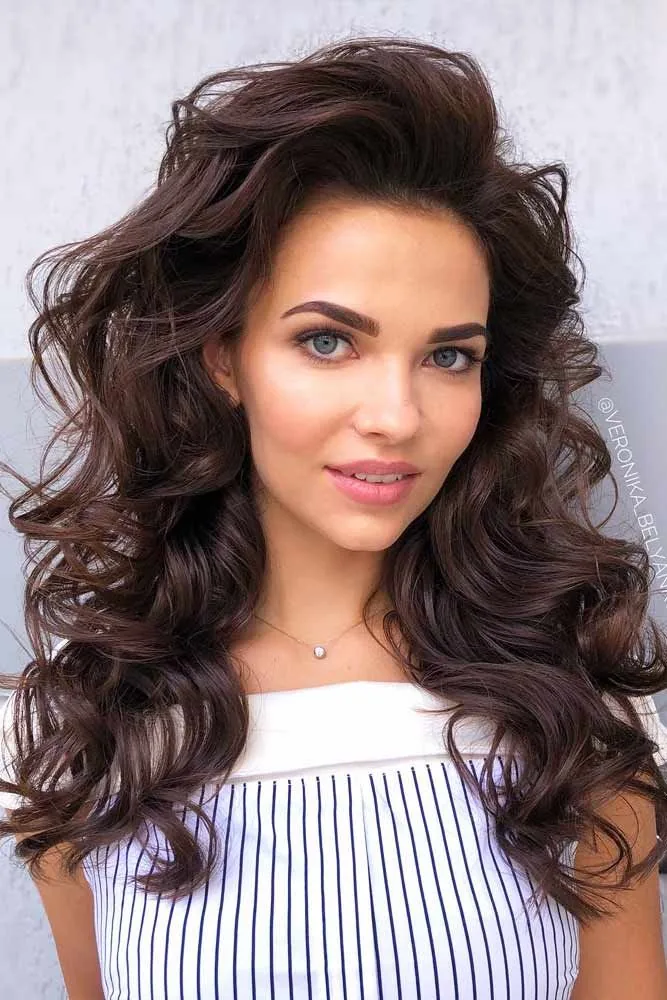
Wavy hair is usually grouped as type 2. Type 2A is a loose, gentle S-shape that is easy to brush out and can fall flat at the roots. Type 2B has a more defined S-wave from mid-length down, with a little frizz at the crown. Type 2C has strong, well-defined waves that border on curls, with more volume and more frizz.
Most people have more than one type on one head — straighter at the nape, wavier at the crown, for example. That is normal. Use your dominant pattern to choose a cut, and let your stylist see your hair air-dried, so they cut the wave they can actually see rather than the wave they imagine.
Cuts That Enhance Waves: Layers, Shag and Long Layers
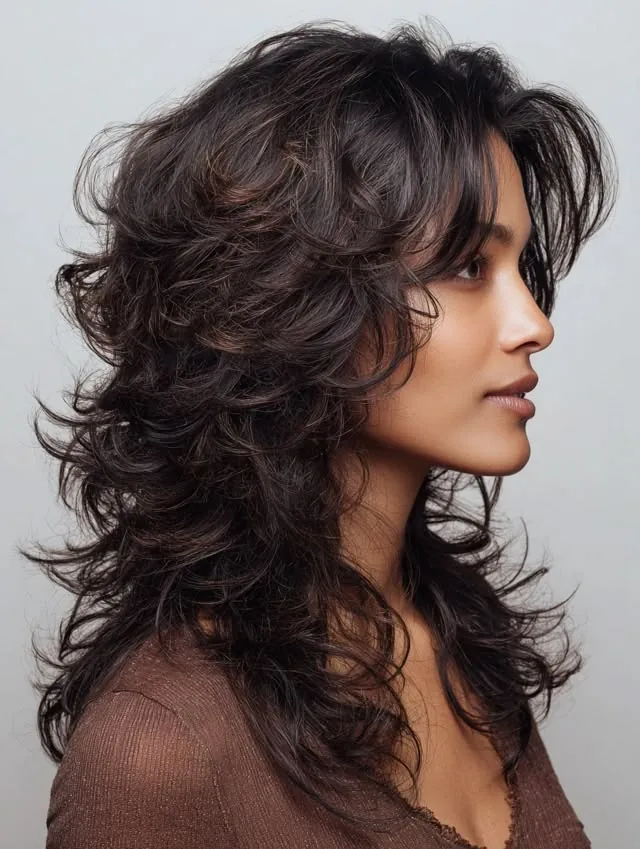
Layers are what turn wavy hair from a heavy triangle into a shape with movement. Long layers keep length while letting waves spring up, a shag adds choppy texture through the crown and ends, and short layers at the face frame the eyes. The right amount depends on your wave strength: looser 2A waves often need fewer, longer layers, while 2C waves can carry more layering without losing length.
Ask for layers cut into dry or part-dried wavy hair when possible, because wet waves stretch longer than they will dry. A cut that looks perfect wet can spring up several centimetres once dry, so a dry cut — or at least a dry check at the end — avoids surprises.
Drying and Scrunching for Definition
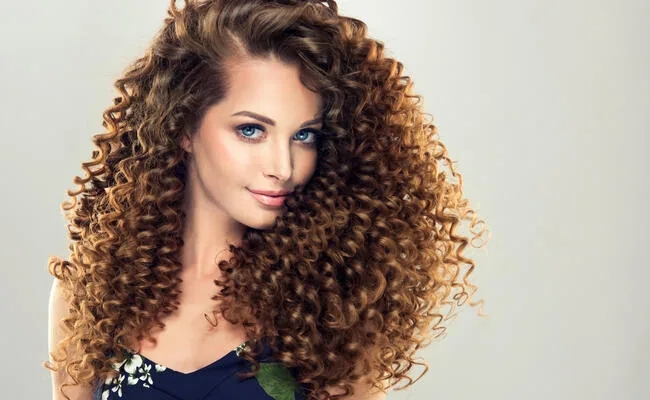
The simplest way to define waves is to scrunch them while damp. Apply a light mousse or curl cream to soaking-wet hair, scrunch upwards in sections, and then either air-dry or diffuse on low heat without touching the hair until it is fully dry. Touching wet waves breaks the pattern and invites frizz.
If you blow-dry, use a diffuser and keep the heat low. A regular nozzle blows waves straight, while a diffuser supports them as they dry. Once dry, scrunch out any crunch from styling products with a drop of oil on your hands — that step turns stiff waves soft without losing definition.
Taming Frizz Without Losing Waves
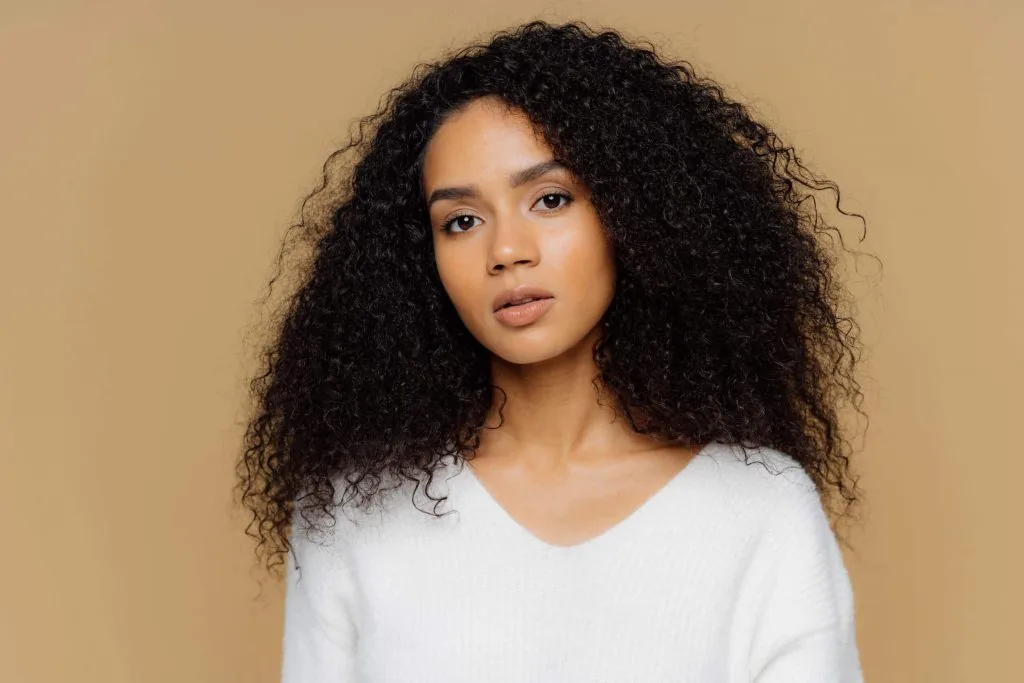
Frizz in wavy hair is usually dryness or friction, not a flaw in the wave itself. A moisturising conditioner, a leave-in on the ends, and drying with a cotton T-shirt or microfibre towel instead of a rough towel all help. Sleep on a silk or satin pillowcase, or in a loose pineapple or braid, to keep waves intact overnight.
Avoid brushing dry wavy hair, which turns waves into fluff. Detangle when wet with conditioner in, using a wide-tooth comb or your fingers. A little frizz at the crown is normal for 2B and 2C hair — smoothing serum on the surface, rather than heavy oil through the lengths, keeps the wave while calming the halo.
1. Long Layered Waves
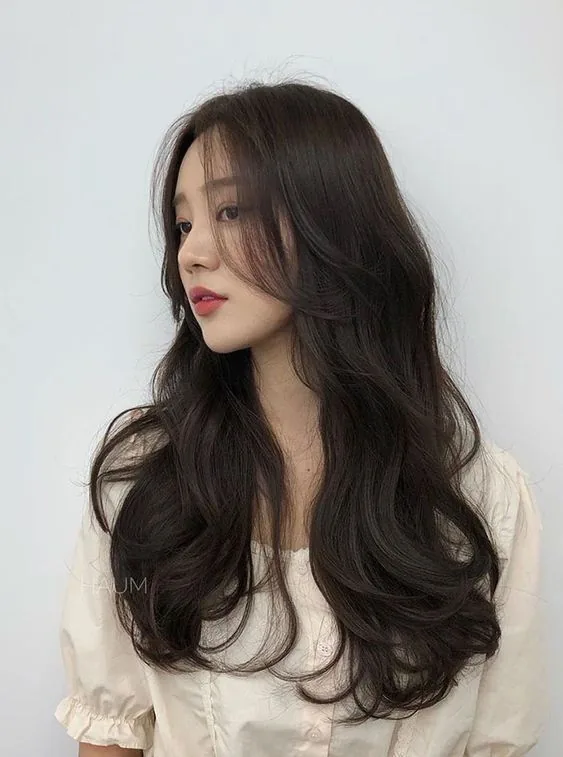
Long layers are the classic wavy cut for a reason: they let the wave move without losing length, and they stop long hair from hanging heavy and straight at the top.
Best for: 2A to 2C waves that want length with movement. Long layers suit almost every face shape.
How to style: Scrunch curl cream into damp hair, diffuse or air-dry, and scrunch out the crunch once fully dry.
What to ask: Long layers starting at the cheekbone or chin, with soft, blended ends — not short, choppy layers.
2. Shoulder-Length Natural Waves
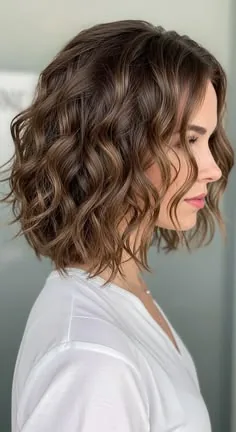
Shoulder-length waves are the low-effort sweet spot: quick to wash and dry, easy to tie back, and long enough for the wave to show properly.
Pros and cons: Pros: fast drying, versatile, flattering on most faces. Cons: it can flip out at the shoulders if the ends are cut too blunt — ask for textured ends.
Quick verdict: If you only pick one wavy length, pick this one. It is the easiest to live with day to day.
3. The Wavy Lob
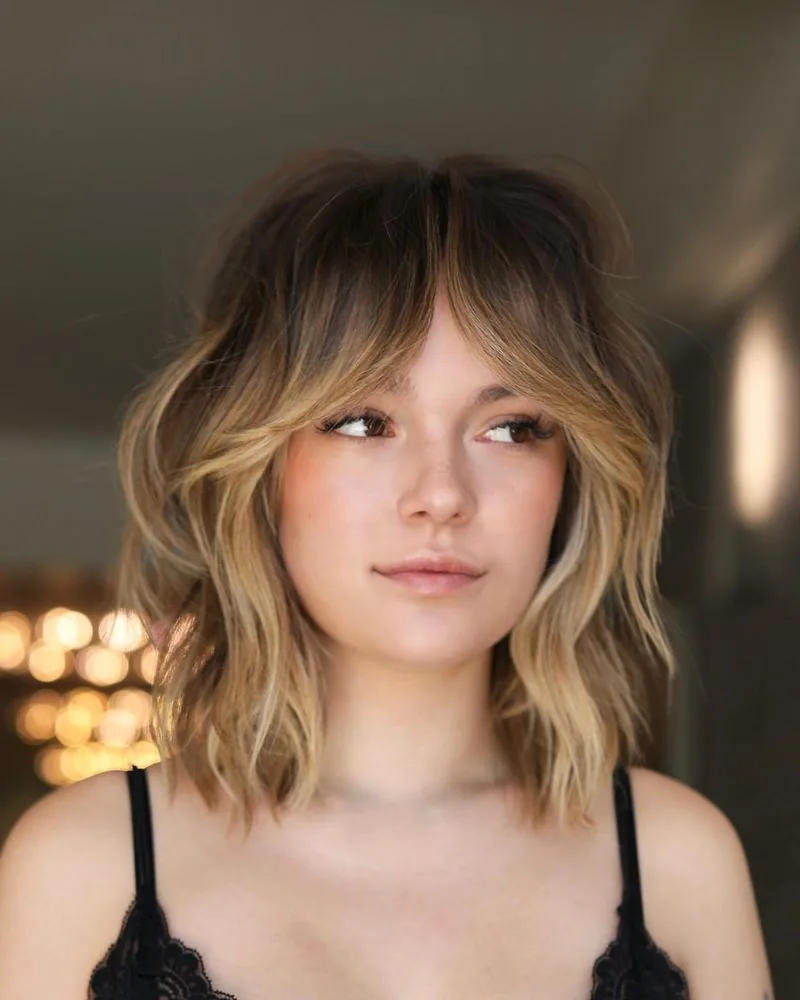
A lob — a long bob — gives wavy hair structure without sacrificing the ability to tie it up. The length sits around the collarbone, where waves fall beautifully.
Best for: 2B and 2C waves, and anyone growing out a bob. It also suits finer wavy hair that needs a little shape.
Common mistake: Cutting it exactly at chin length, where waves can spring up and widen. A lob should sit clearly below the jaw.
4. The Wavy Bob
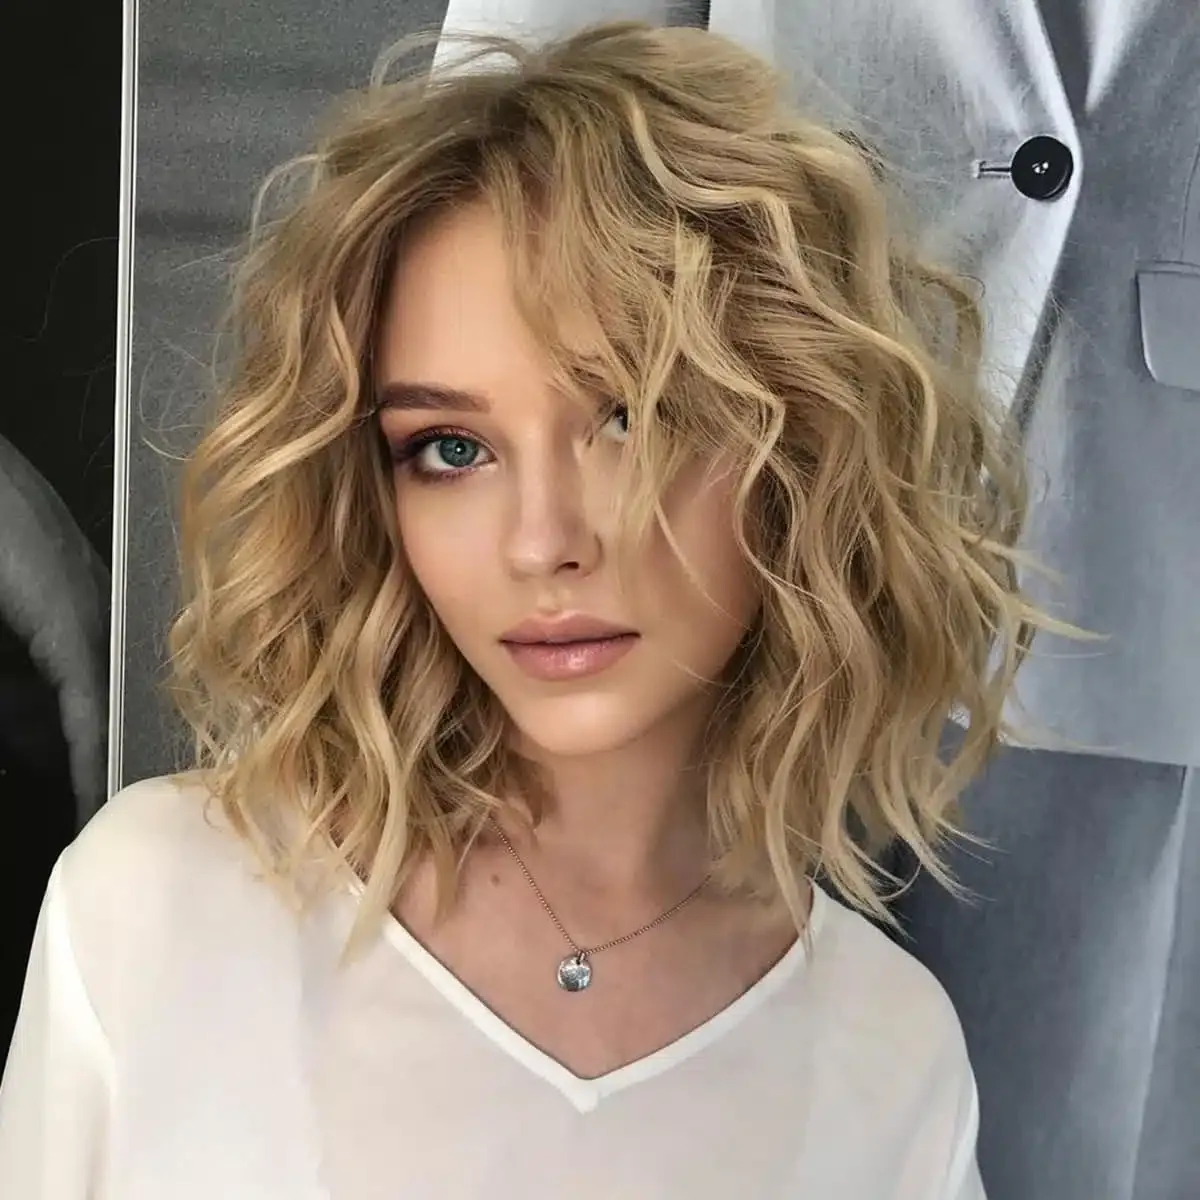
A wavy bob is playful, chic and full of texture. With soft ends it never looks severe, and the wave does most of the styling for you.
How to style: Scrunch mousse into damp hair and diffuse, or air-dry for a softer finish. A little texture spray adds separation.
Maintenance: Trims every 6 to 8 weeks keep the shape from growing into a triangle. Bang trims are not needed unless you add a fringe.
5. Shaggy Wavy Cut
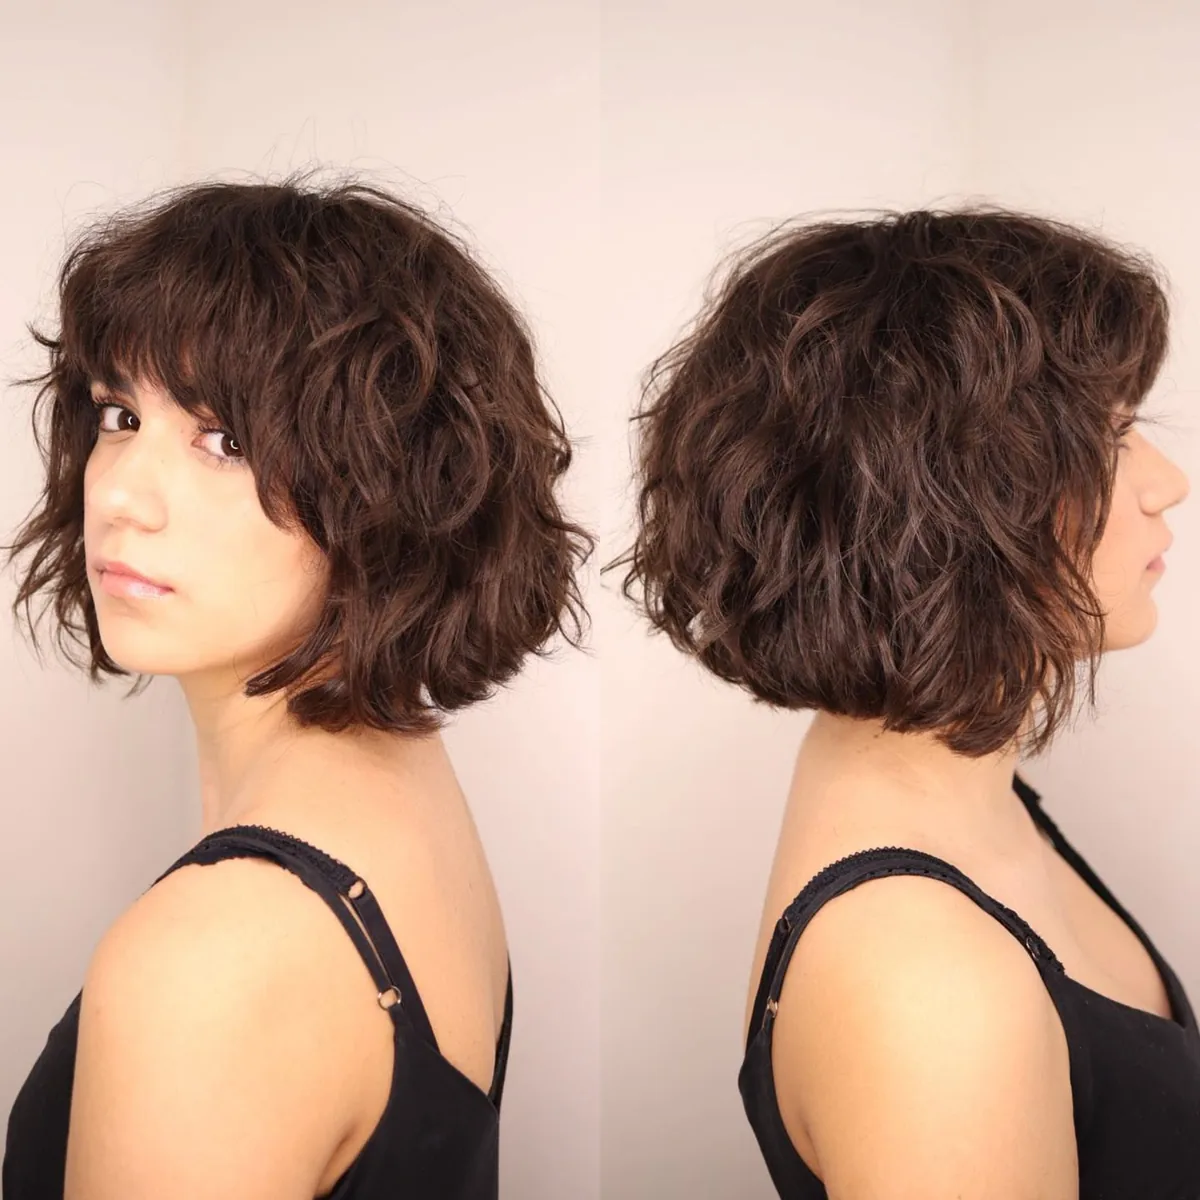
A shag layers texture through the crown and ends, giving wavy hair that effortless, lived-in look. It is the cut for people who hate neat, polished hair.
Pros and cons: Pros: huge texture, low styling effort, great for 2B and 2C. Cons: it can look messy if the layers are cut too short on top — keep the crown layers moderate.
What to ask: A soft shag with face-framing layers, not a sharp 1970s shag with very short crown layers.
6. Long Waves With Face-Framing Layers
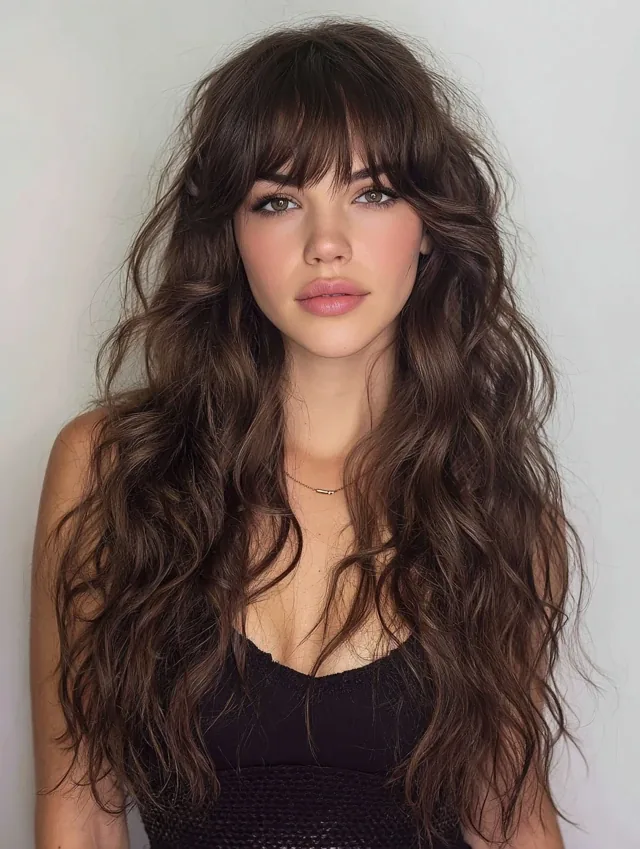
Face-framing layers are the gentlest way to shape long wavy hair. They open up the face, add movement at the front, and leave the back long and full.
Best for: Long 2A and 2B hair that feels heavy or shapeless. The framing pieces make the whole cut look intentional.
Quick verdict: A small change with a big payoff — ideal if you love your length and only want a refresh.
7. Wavy Curtain Bangs
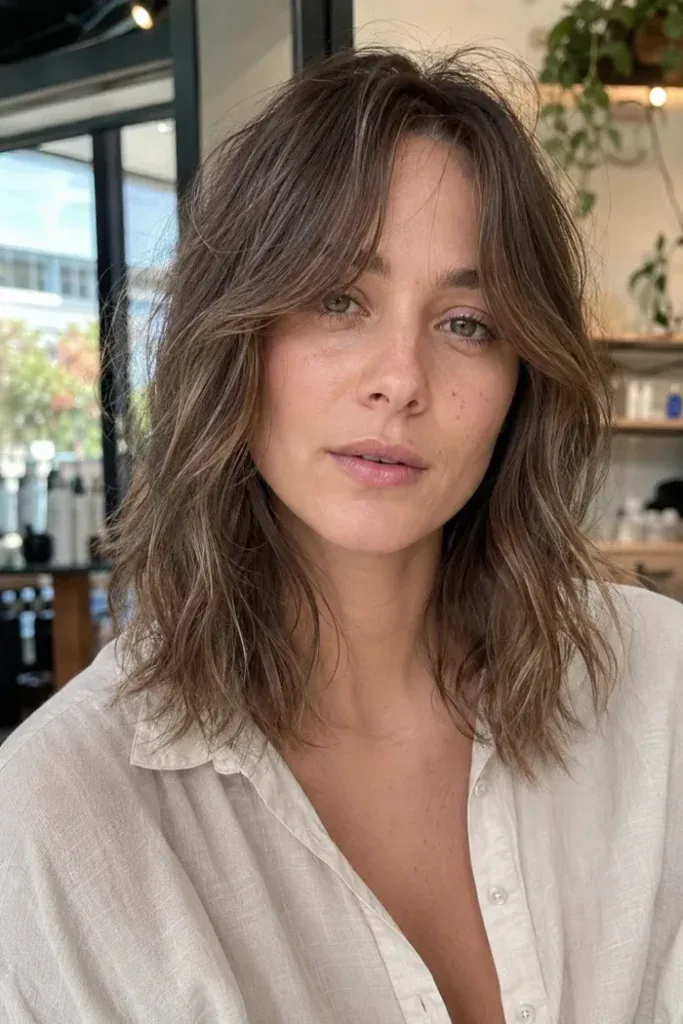
Curtain bangs part in the middle and sweep to each side, framing the eyes and cheekbones. On wavy hair they blend in naturally, without the harsh line a blunt fringe can give.
How to style: Blow-dry the bangs forward with a round brush, then sweep each side out. Let the natural wave do the rest.
Common mistake: Cutting curtain bangs too short when wet. Wavy bangs spring up as they dry, so cut them longer than you think.
8. Side-Swept Wavy Fringe
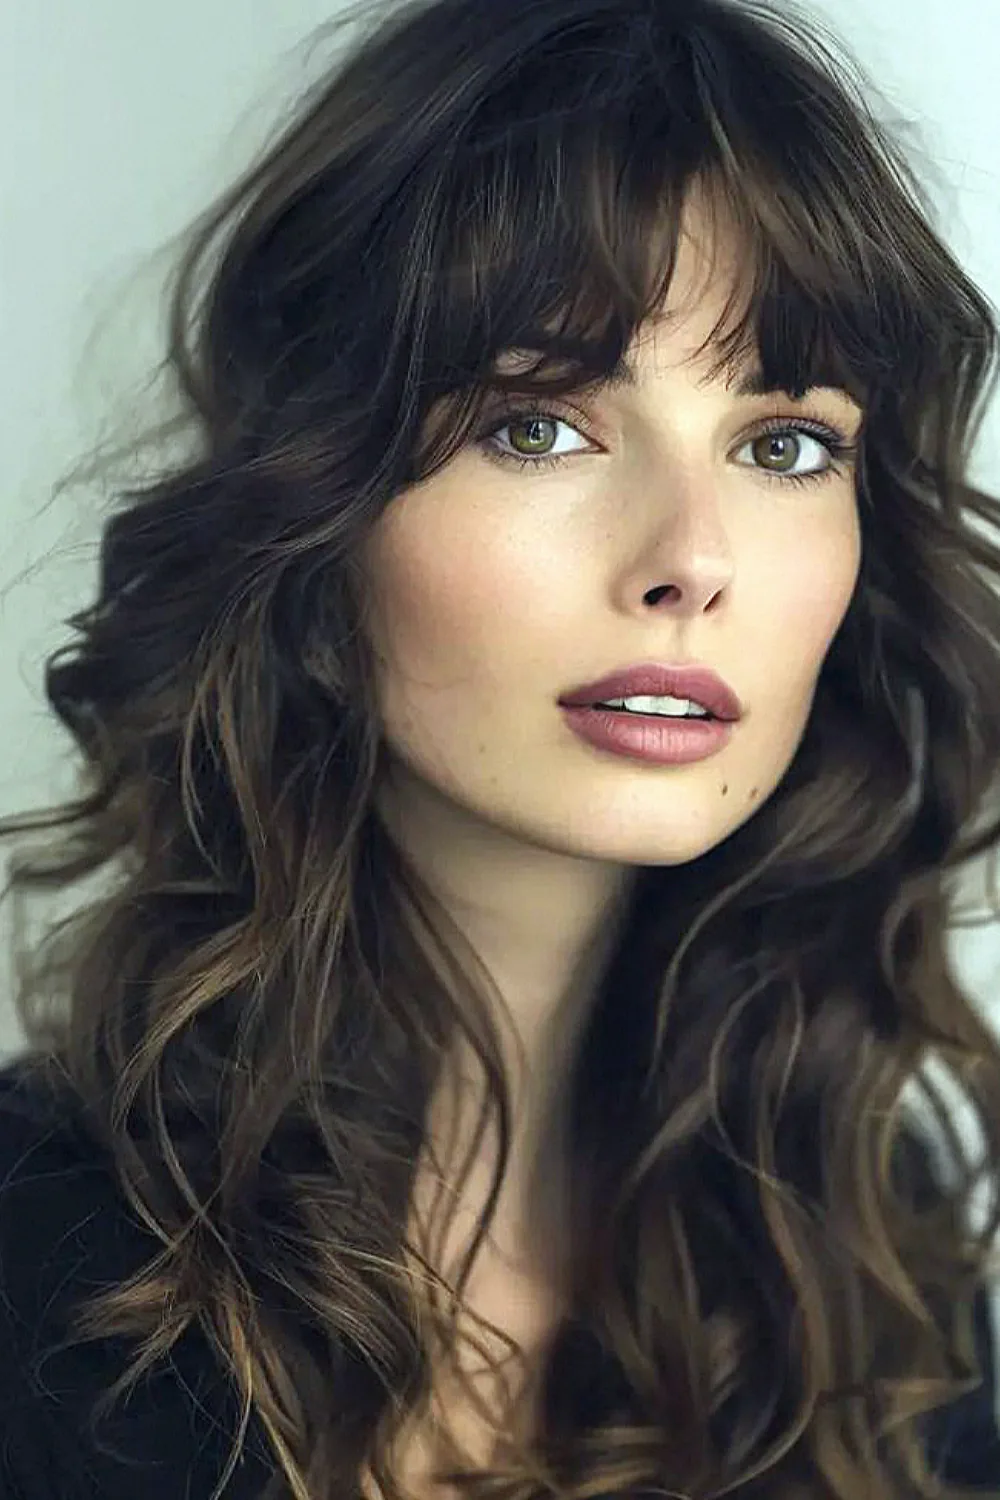
A side-swept fringe adds a soft diagonal across the forehead and pairs beautifully with waves, because the sweep follows the wave’s own direction.
Best for: Anyone who wants a fringe without the commitment of a full, straight-across bang.
Maintenance: Trim every 3 to 4 weeks, or let it grow into longer face-framing layers between cuts.
9. Everyday Beach Waves
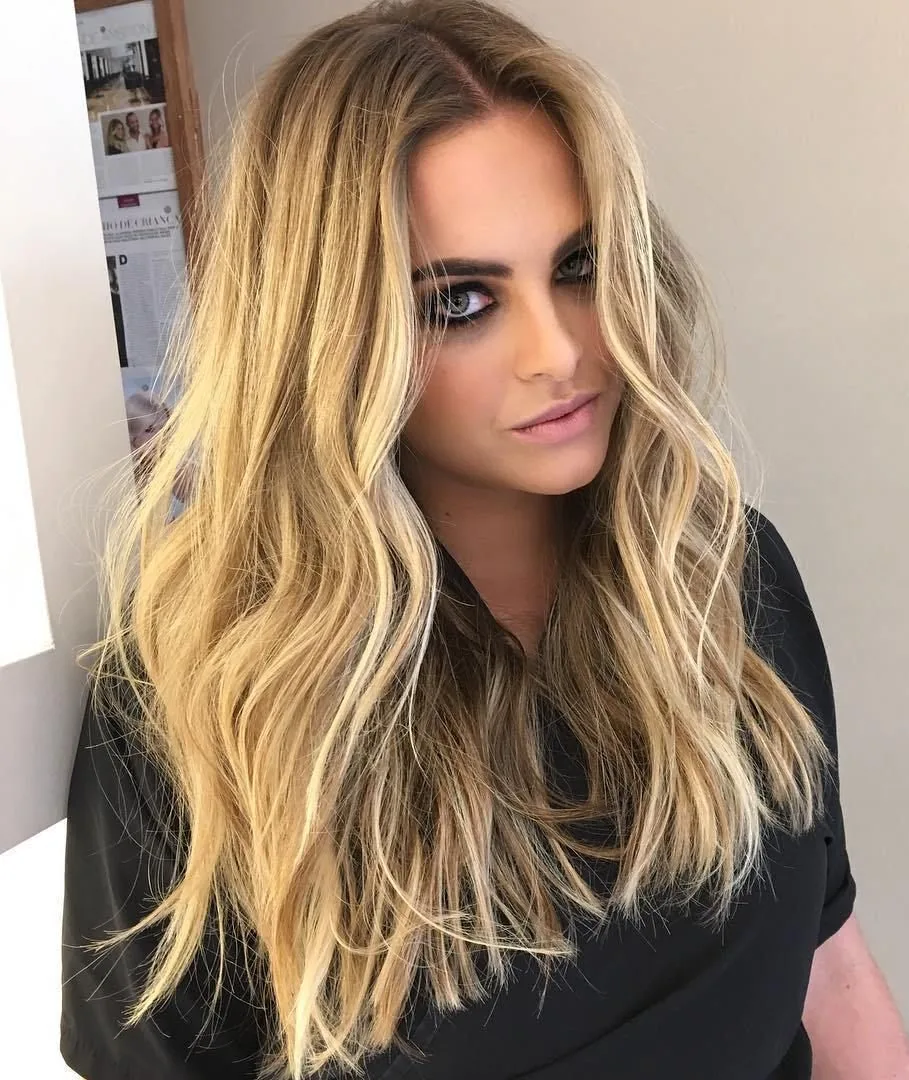
Beach waves are the relaxed, undone version of wavy hair — not too defined, not too straight, just sun-dried and soft. On naturally wavy hair, they are almost no work at all.
How to style: Scrunch sea-salt spray or light mousse into damp hair, braid loosely for an hour or air-dry, then shake out.
Quick verdict: The five-minute wavy style. If your waves already exist, you barely need to style them at all.
10. Soft 2A Waves, Defined
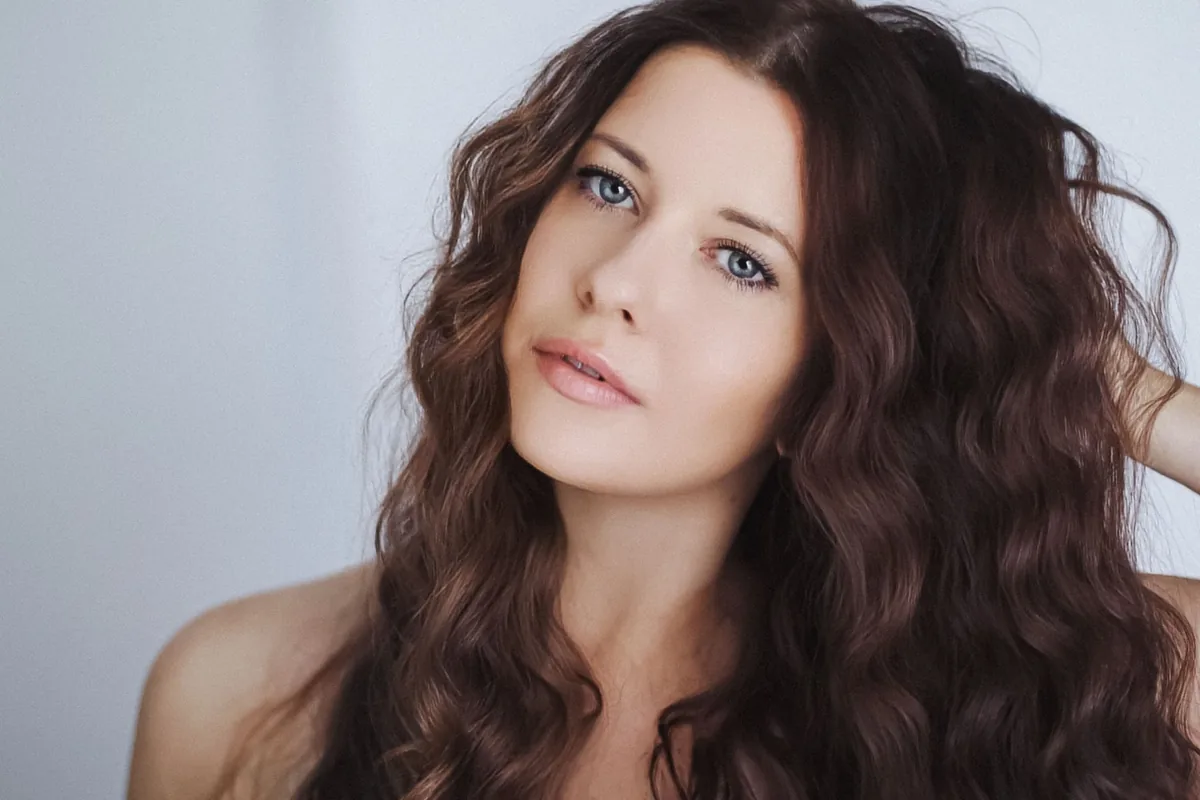
2A waves are loose and gentle, and they can disappear if you brush them out or weigh them down. Light products and scrunching bring out the S-shape without stiffness.
Pros and cons: Pros: easy to style, dries quickly, looks polished with little effort. Cons: definition fades by day two without a refresh spray.
What to ask: Long, light layers only — heavy layering can make 2A hair look thin at the ends.
11. Defined 2B S-Waves
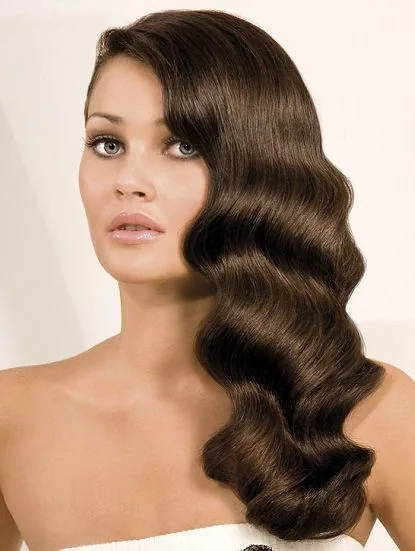
2B hair has a clear S-wave from mid-length down. With the right cut and a little scrunching, those S-shapes become the star of the style rather than something to smooth away.
Best for: Medium to long hair where the S-wave has room to form. Shorter cuts can work too, if the layers are kept long.
How to style: Apply curl cream to soaking-wet hair, scrunch in sections, diffuse on low, and do not touch until dry.
12. Bouncy 2C Waves
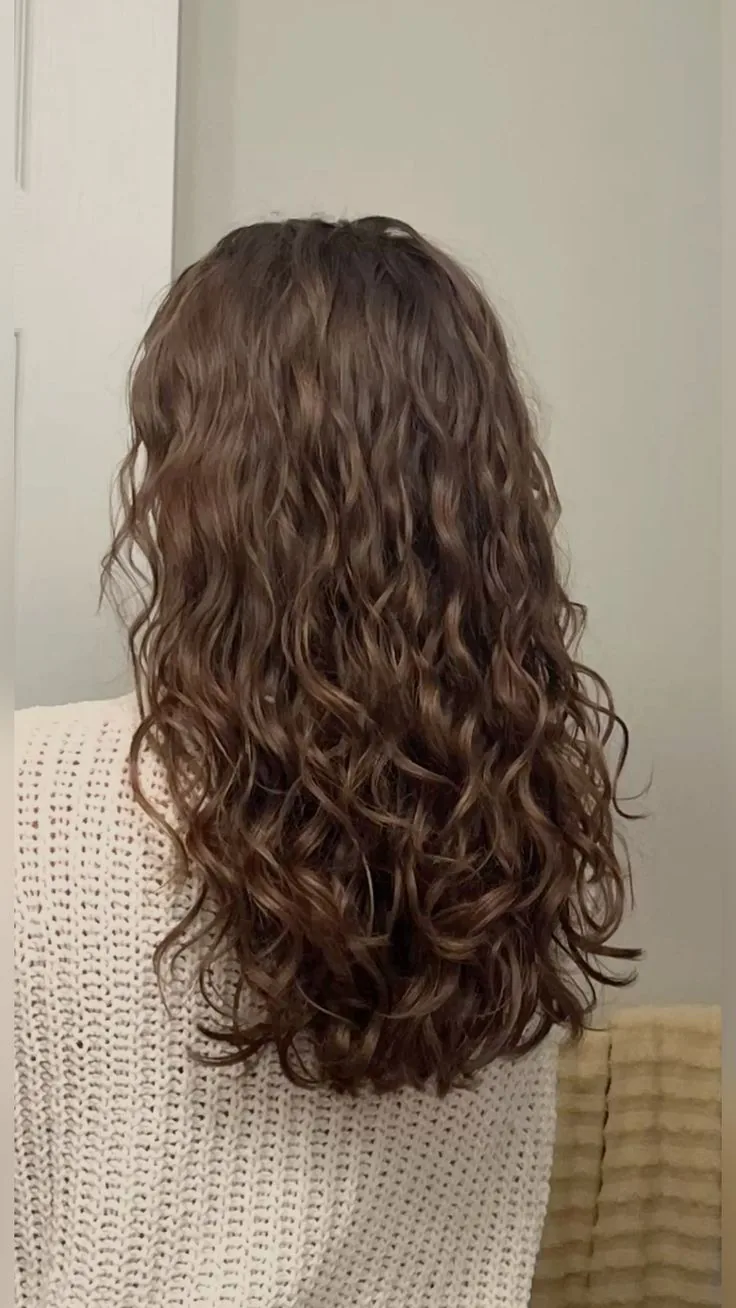
2C waves are strong, voluminous and close to curls. They need moisture and a cut that lets them spring up without turning into a wide triangle.
Common mistake: Cutting 2C hair in a blunt, one-length shape, which creates width at the bottom. Layers through the mid-lengths solve it.
Maintenance: Deep condition weekly, detangle only when wet, and refresh with water and a little cream between washes.
13. Wavy Pixie Cut
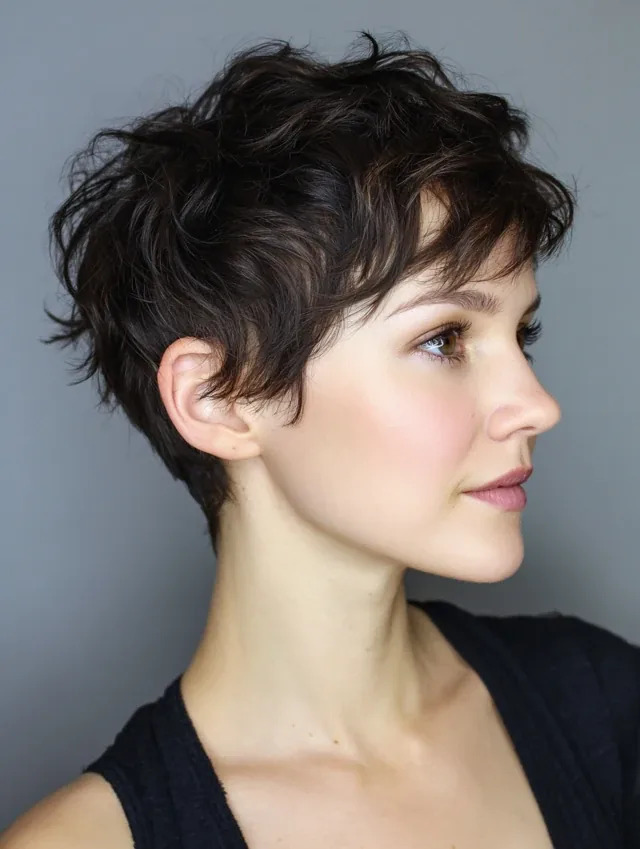
A wavy pixie is full of character: the wave gives texture on top, the short sides keep it neat, and the whole cut looks styled even when it is not.
Pros and cons: Pros: very low wash-and-dry time, huge personality. Cons: frequent trims every 4 to 5 weeks, and the top needs a little product to define the wave.
Quick verdict: Bold, beautiful and surprisingly easy — if you are ready for short hair, waves make a pixie better, not harder.
14. Wavy Midi With a Centre Part
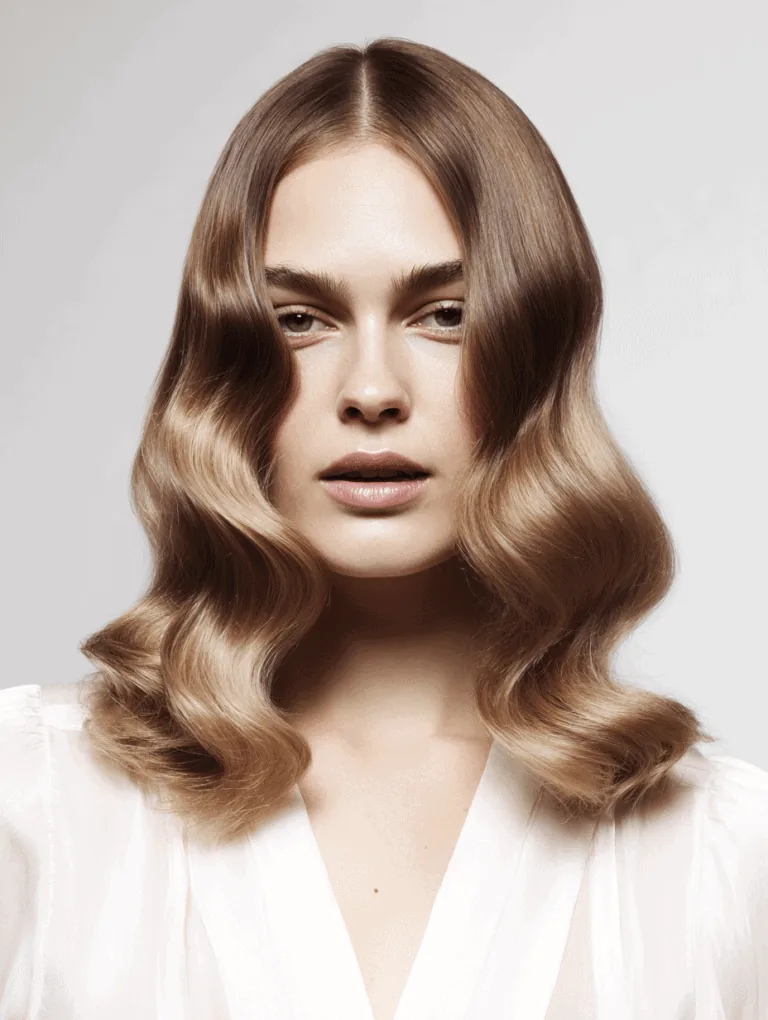
A midi cut — between chin and shoulder — with a centre part is clean, symmetrical and modern on wavy hair. The waves stop it looking severe.
Best for: 2A and 2B waves that want a tidy everyday cut with a little edge.
How to style: Part in the centre while wet, scrunch lightly, and let the waves fall evenly on both sides.
15. Deep Side Part Glam Waves
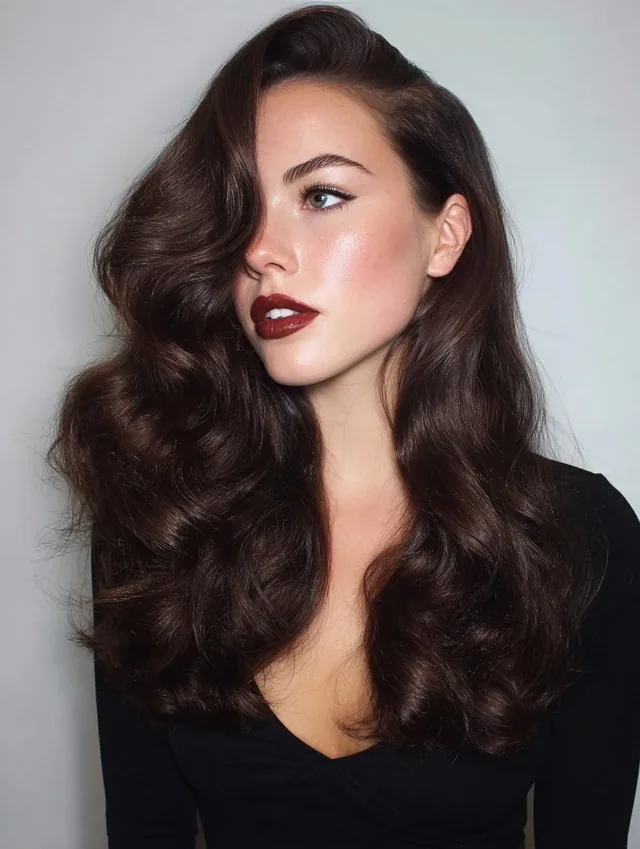
A deep side part turns everyday waves into an occasion style. The sweep across the forehead adds drama, and the waves add glamour without needing a curling iron.
How to style: Part deeply to one side, scrunch and diffuse, then smooth the top with a little serum and set the sweep with a pin if needed.
What to ask: Long layers, so the heavy side has enough weight to sweep smoothly rather than puffing up.
16. Tousled Wavy Bob
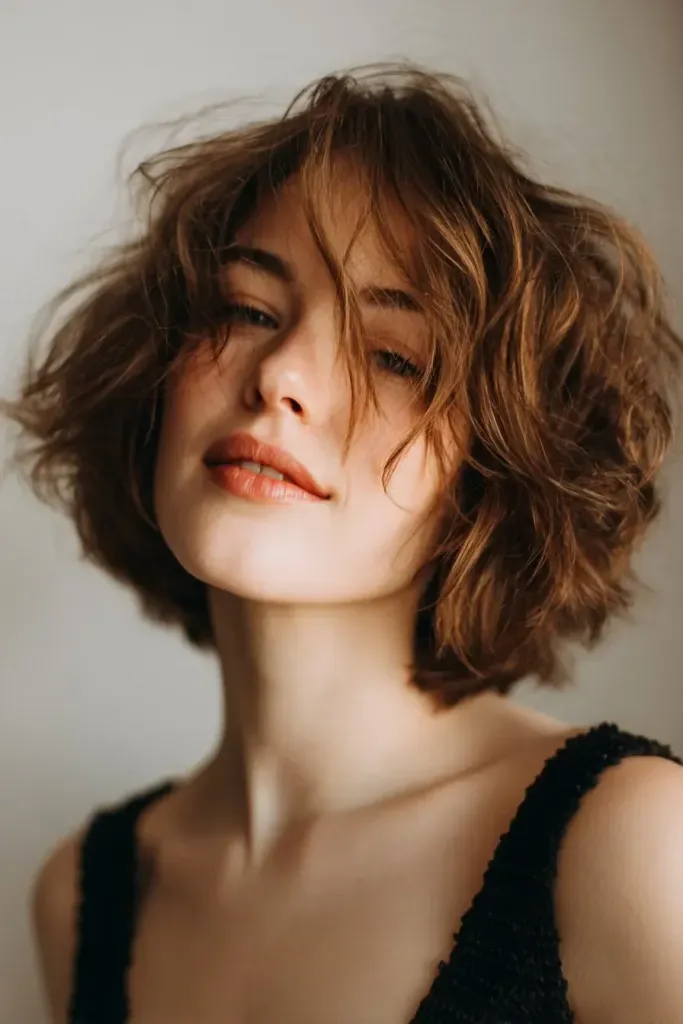
A tousled bob is a wavy bob with attitude: textured ends, a little mess, and no attempt at perfection. It is the bob for people who do not want to look too done.
Pros and cons: Pros: fast to style, forgiving on second-day hair. Cons: it needs textured ends — a blunt bob will not tousle well.
Common mistake: Over-styling it. The tousle comes from scrunching and leaving it alone, not from hours with a wand.
17. Butterfly Wavy Layers
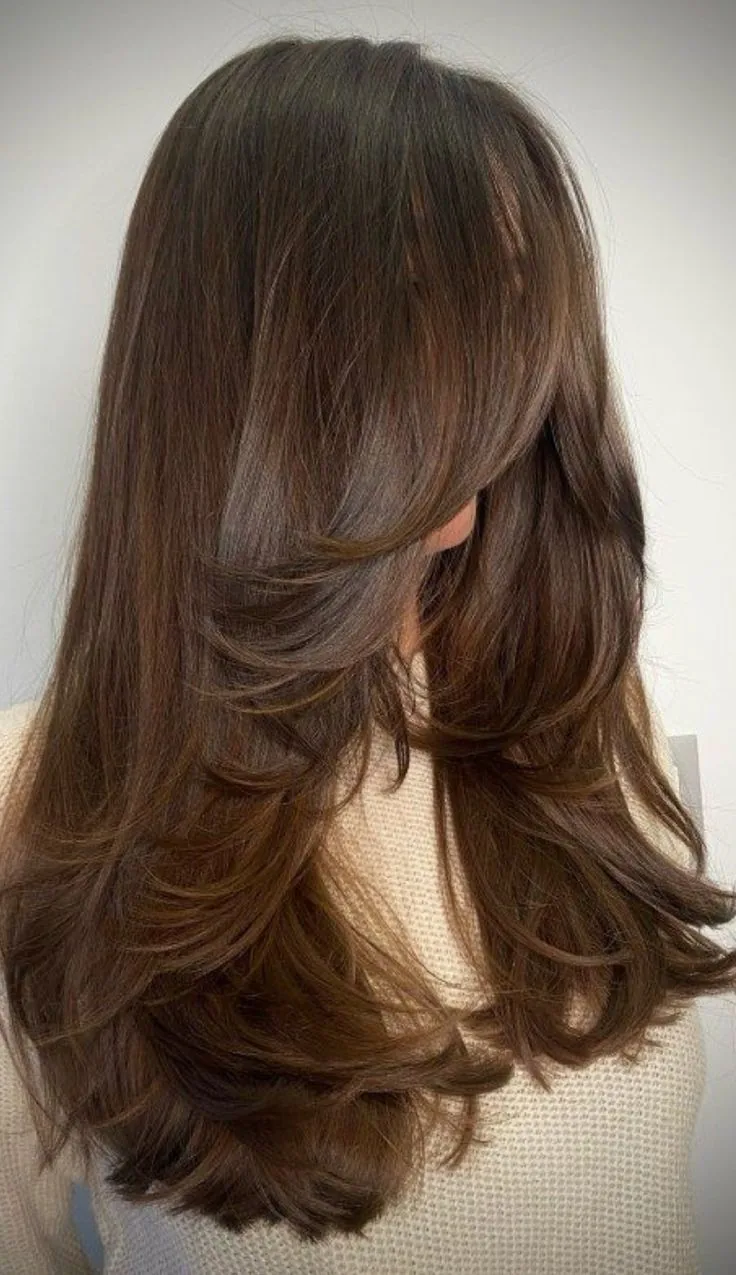
Butterfly layers combine short face-framing layers with long lengths behind, so wavy hair looks short and bouncy at the front and long at the back. It is a clever trick for volume.
Best for: Long wavy hair that feels flat on top. The short front layers create lift and movement around the face.
Quick verdict: All the bounce of a short cut, with the length you love kept at the back.
18. Wolf Cut Waves
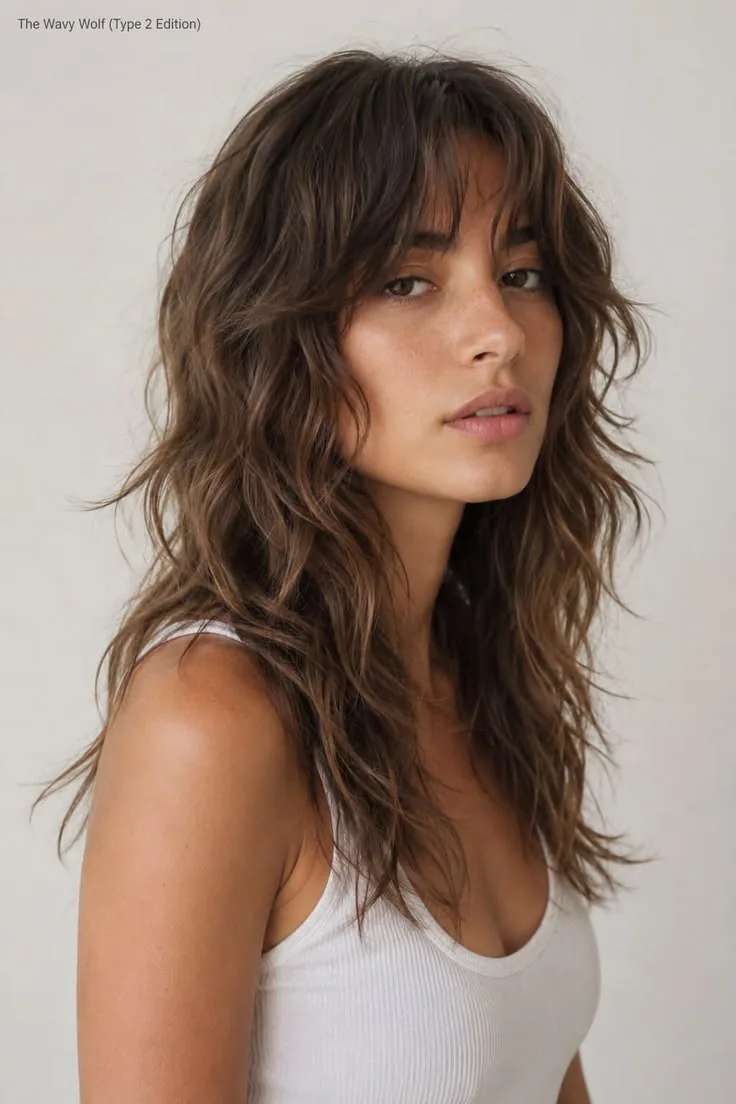
A wolf cut mixes shaggy layers on top with long lengths below, and wavy hair is its natural home. The texture does the work, and the cut looks intentionally undone.
How to style: Diffuse with mousse, scrunch the lengths, and keep the top piecey with a little texture cream.
Maintenance: Trims every 8 weeks to keep the shape from growing out unevenly.
19. Wavy Bob With Wispy Bangs
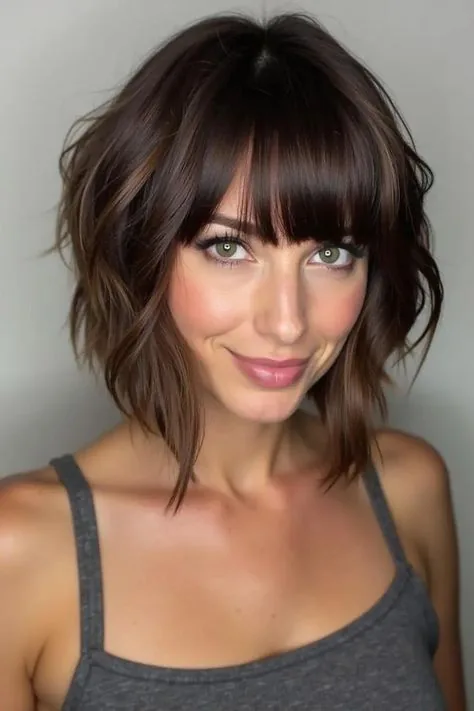
Wispy bangs soften a wavy bob and draw attention to the eyes, without the weight of a full fringe. On wavy hair they blend in softly.
Best for: Short to medium wavy hair, especially if you want a fringe but worry about a heavy, straight-across look.
Common mistake: Cutting wispy bangs too thick. They should be light enough to see through slightly.
20. Long Wavy Layers With Curtain Bangs
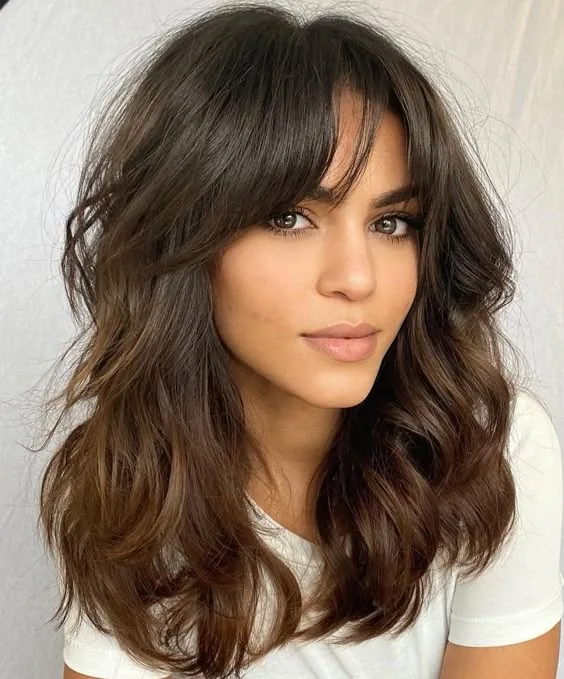
Long layers plus curtain bangs is the ultimate wavy combination: length at the back, framing at the front, and waves everywhere in between.
Pros and cons: Pros: flattering on almost everyone, easy to grow out. Cons: curtain bangs need a quick blow-dry most mornings to sit right.
How to style: Dry the bangs first with a round brush, then scrunch the lengths and diffuse.
21. Wavy High Ponytail
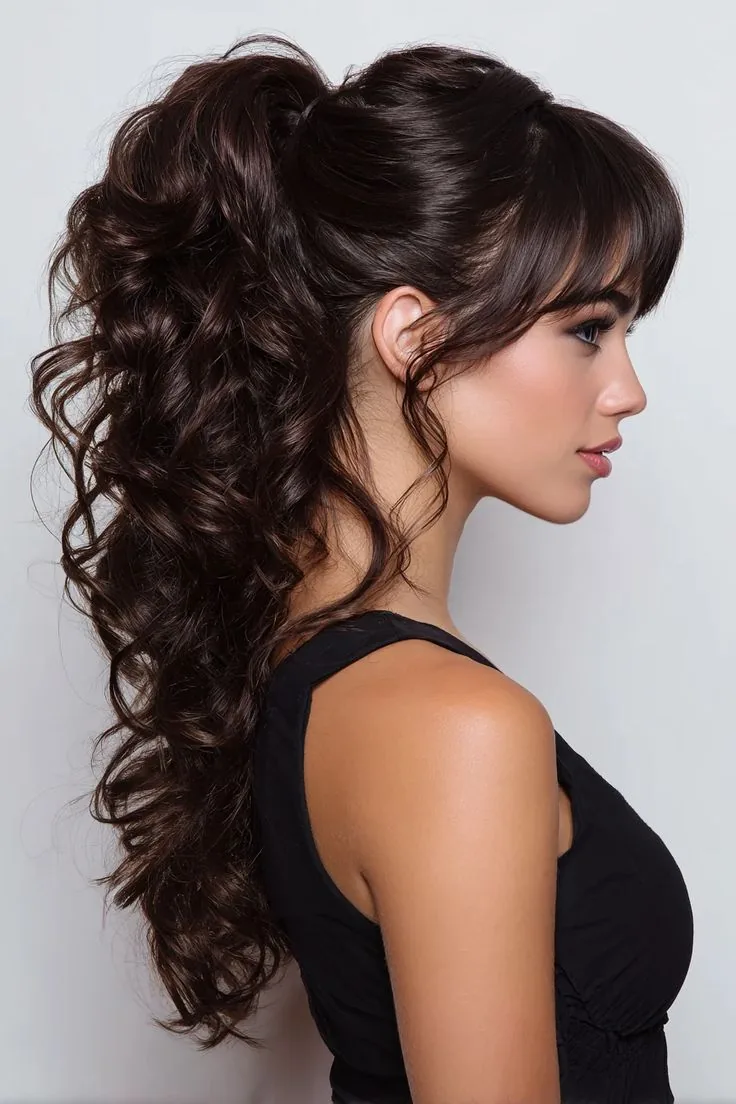
A high ponytail on wavy hair has instant volume and texture that straight hair has to fake. The waves give the tail body, and a few loose pieces soften the hairline.
How to style: Gather loosely at the crown, secure with a snag-free band, pull out two soft face pieces, and wrap a strand around the band.
Quick verdict: Five minutes, maximum impact — especially good for second-day waves.
22. Wavy Low Bun
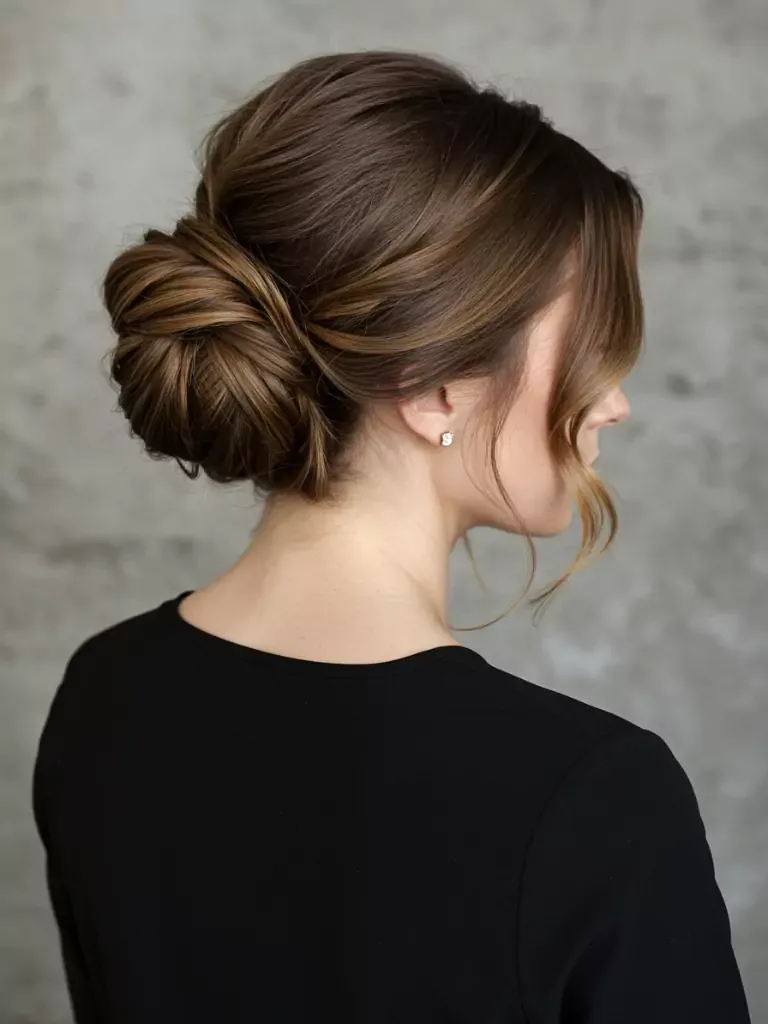
A low bun on wavy hair looks soft and romantic without trying, because the wave already gives it texture. It is a perfect work or wedding-guest style.
Best for: Medium to long waves, and anyone who wants an elegant style that does not need heat.
How to style: Gather loosely at the nape, twist and pin, pull out soft pieces, and finish with flexible spray.
23. Half-Up Claw Clip Waves
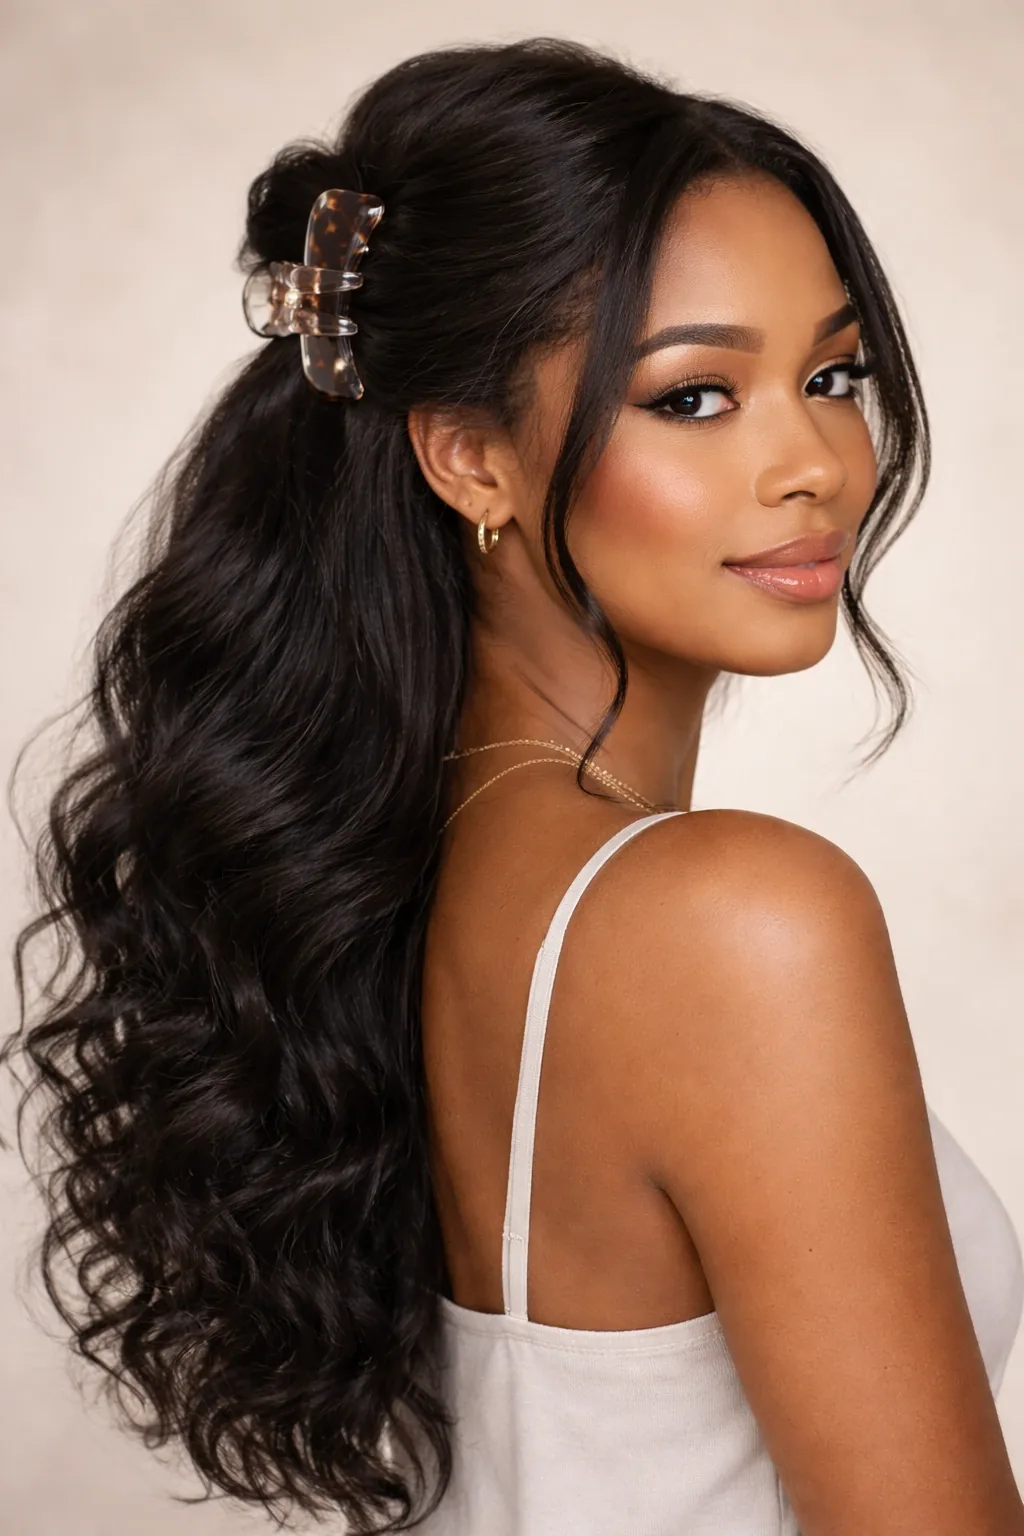
A half-up claw clip is the easiest wavy updo there is: pull the top section back, clip it, and let the waves fall. It takes under a minute and looks deliberately relaxed.
Pros and cons: Pros: fastest updo, no pins needed, works on second-day hair. Cons: very fine waves may slip — use a smaller clip or a little texture spray for grip.
Quick verdict: The wavy hair owner’s best friend. Keep a claw clip in your bag.
24. Loose Side Braid Waves
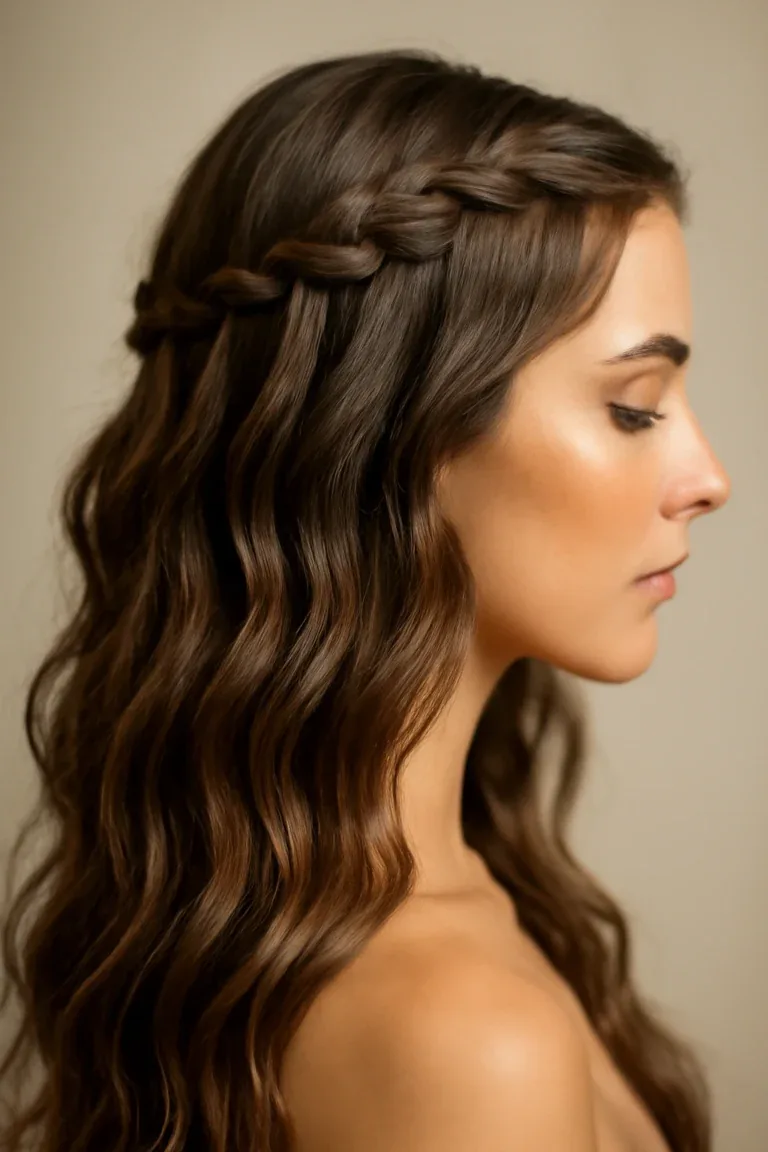
A loose side braid sweeps wavy hair over one shoulder and shows off the wave in the braid itself. Pulling a few pieces loose makes it look soft, not school-like.
How to style: Braid loosely over one shoulder, pull the braid gently wider, pull out face pieces, and secure with a soft band.
Common mistake: Braiding too tightly, which hides the wave. Loose is the whole point here.
25. Wavy Crown Braid
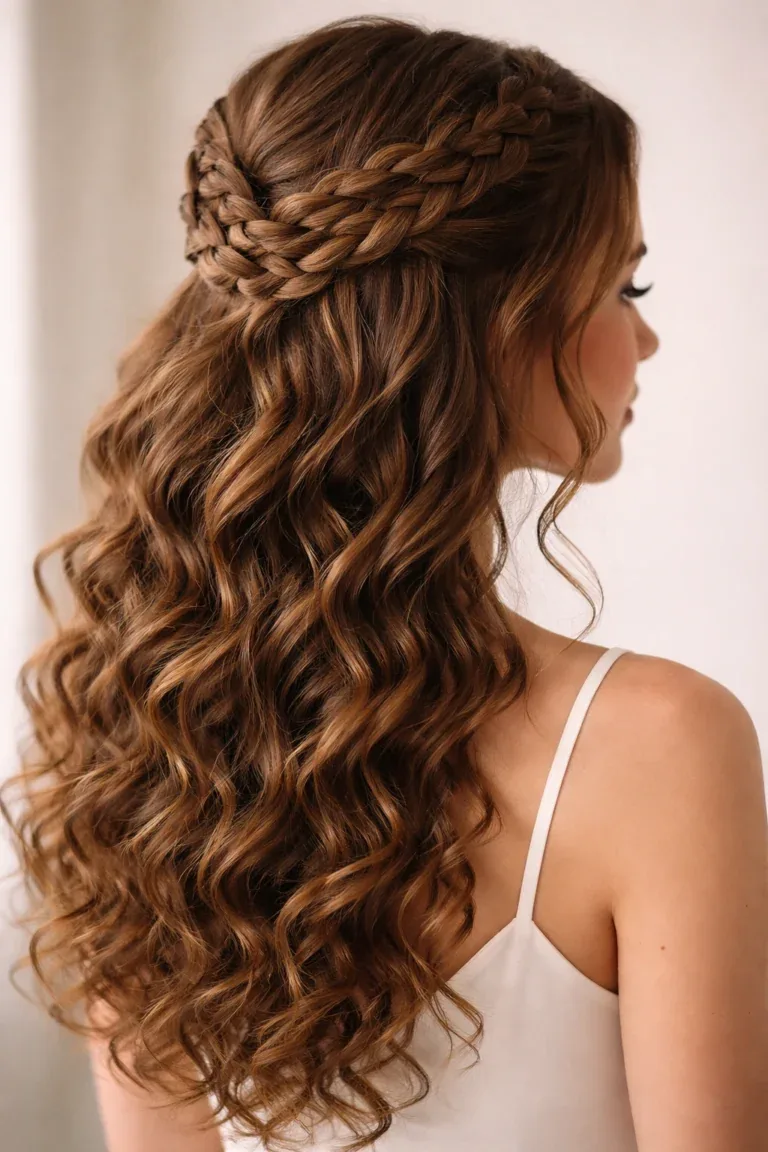
A crown braid — braided across the top of the head — looks intricate on wavy hair but is easier than it looks, because the wave hides any unevenness.
Best for: Occasions, festivals and hot days when you want hair off your face but still want texture showing.
Maintenance: No special maintenance; it works best on day-two waves with a little texture spray.
26. Soft Wavy Top Knot
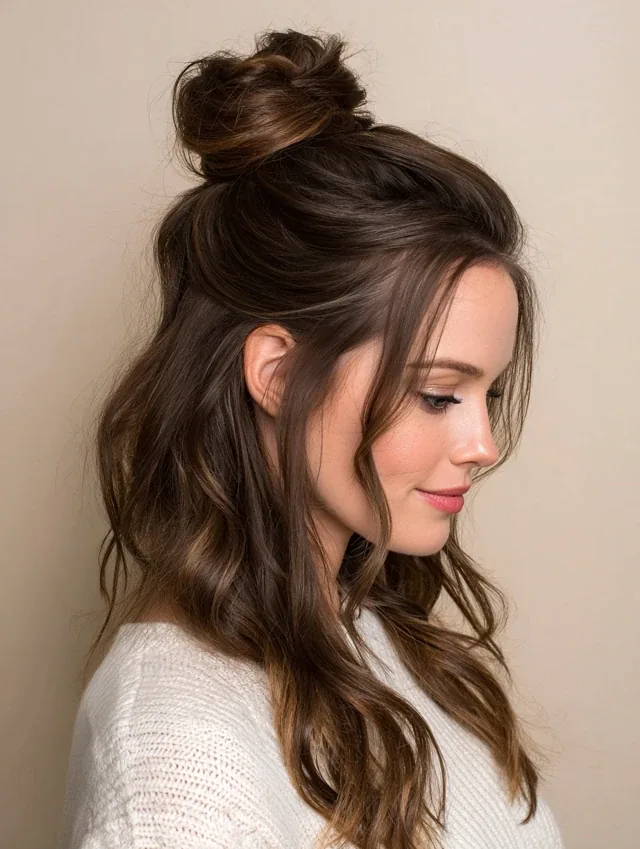
A top knot on wavy hair should be soft, not scraped back. Leave the texture in, pull out pieces, and the knot looks relaxed rather than severe.
How to style: Gather loosely on top, twist into a knot, pin softly, and pull out waves around the face and nape.
Quick verdict: Perfect for hot weather and busy days — and it looks better a little undone.
27. Wavy Bubble Ponytail
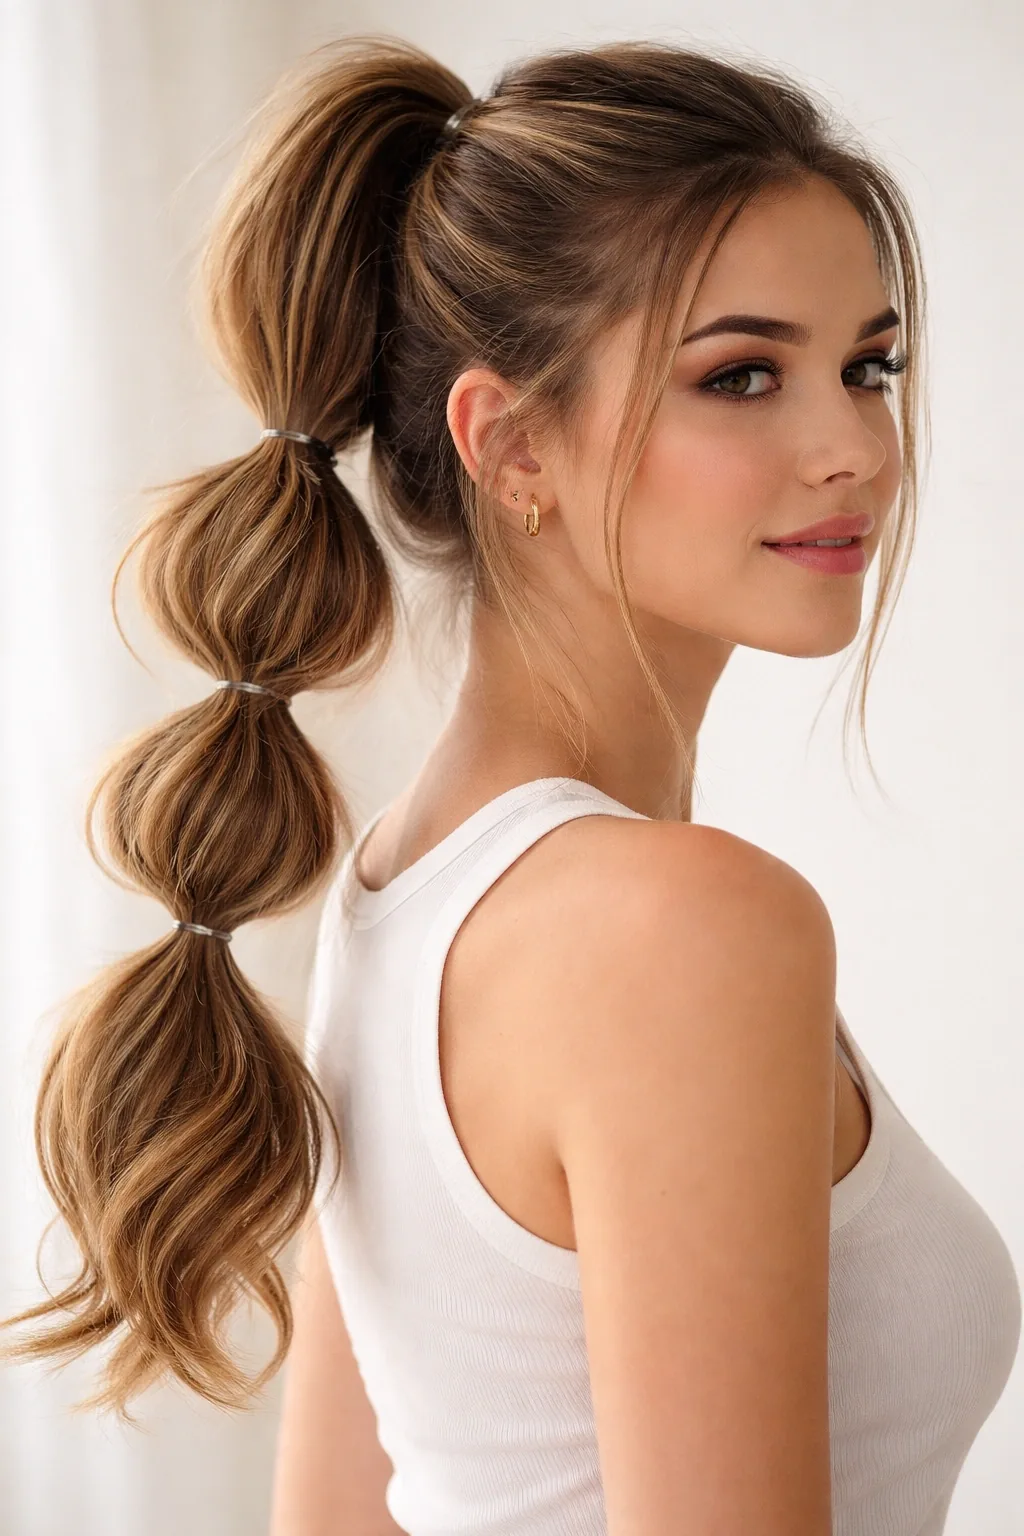
A bubble ponytail — bands spaced down a ponytail, with each section pulled out — looks playful and full on wavy hair, because the waves fill each bubble.
Pros and cons: Pros: fun, youthful, needs no heat. Cons: it suits medium to long hair best; short waves will not have enough length for many bubbles.
How to style: Secure a ponytail, add bands every few centimetres, and gently pull each section out to form bubbles.
28. Wavy Hair With a Headband
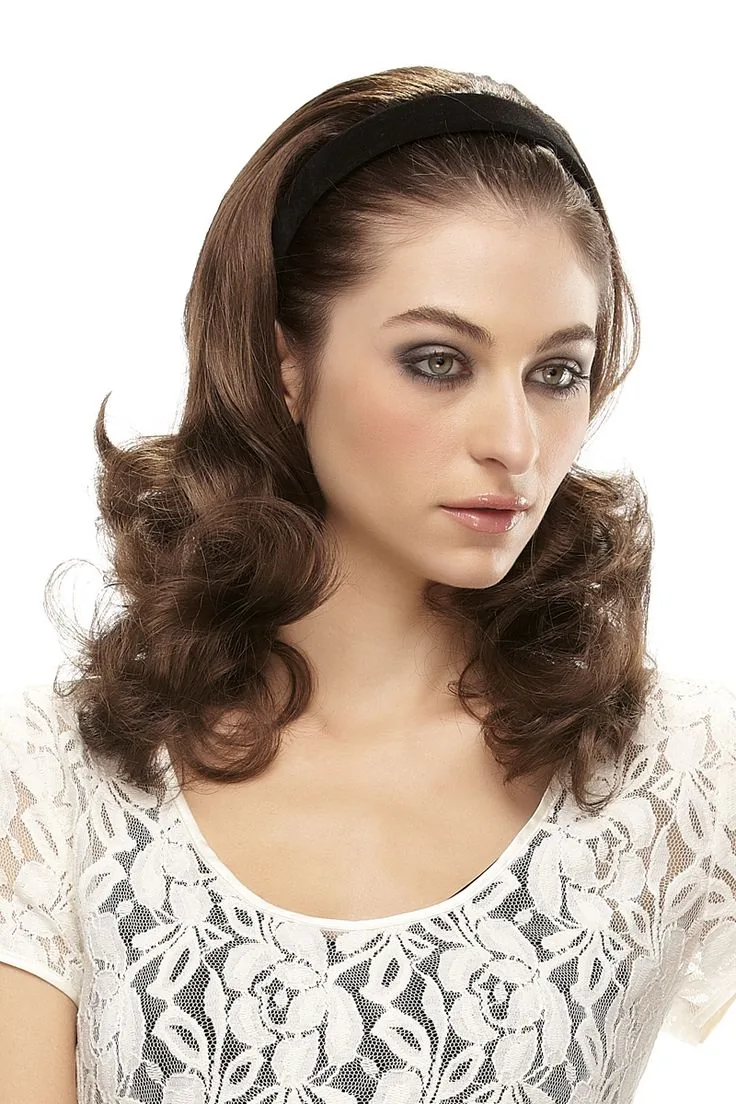
A headband is the simplest wavy accessory: it keeps hair off the face, shows off the wave behind it, and turns bedhead into a style in seconds.
Best for: Growing-out bangs, second-day waves, and days when you do not want to style at all.
How to style: Place the band a few centimetres back from the hairline, pull out a few face pieces, and scrunch the lengths.
29. Vintage Hollywood Waves, Wavy Version
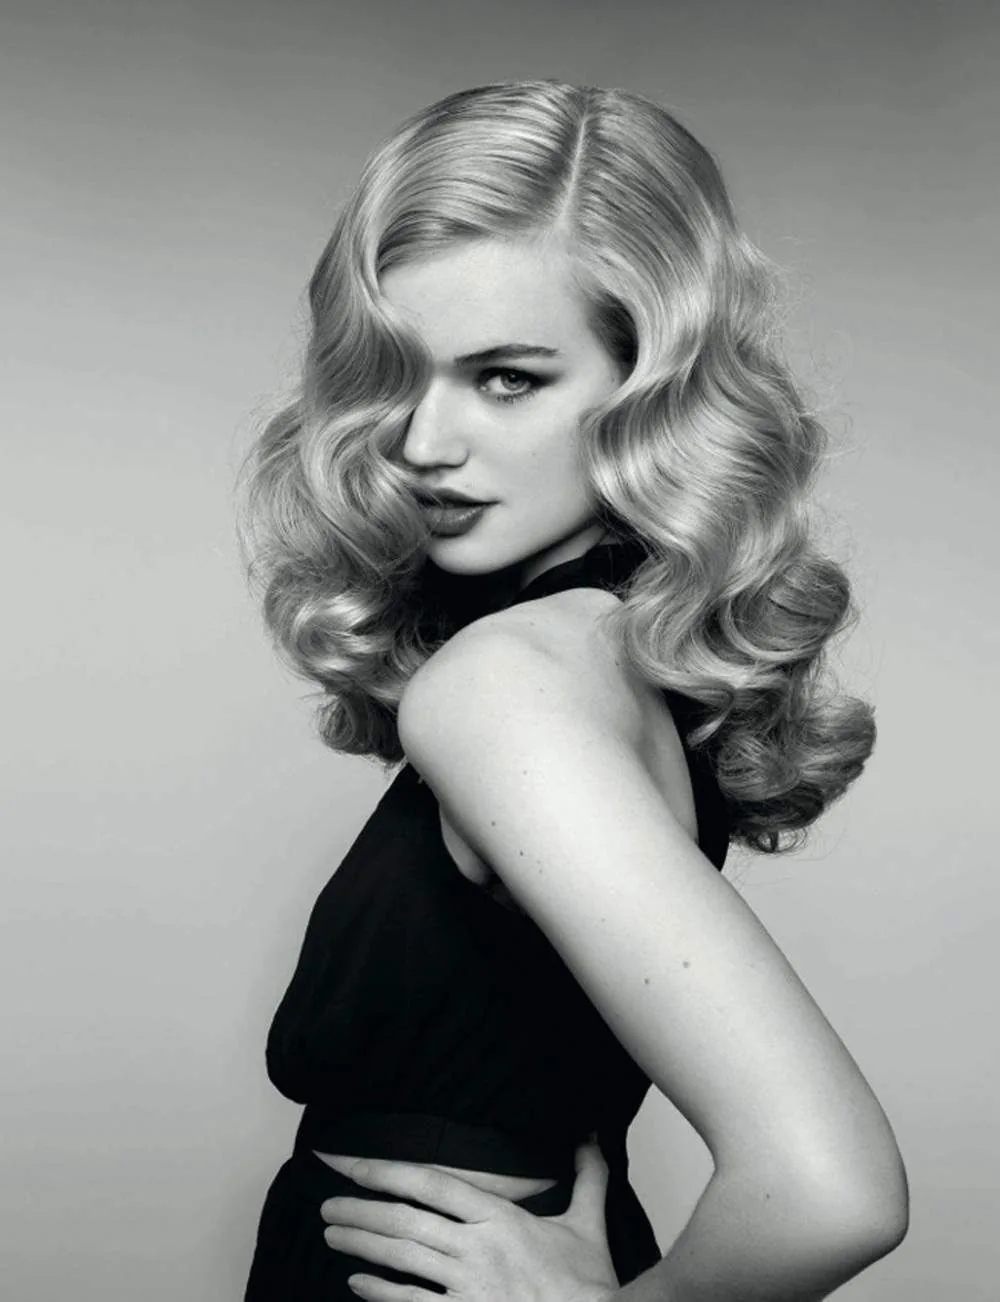
Hollywood waves are usually created with irons, but wavy hair can get close naturally: a deep side part, defined S-waves and a smooth, glossy finish.
How to style: Part deeply, define waves with cream and a diffuser, brush out very gently once dry, and finish with shine spray.
Common mistake: Brushing too much, which turns waves into frizz. One gentle brush-through is enough.
30. Mermaid Long Wavy Hair
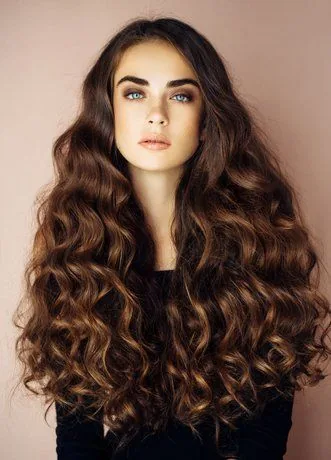
Mermaid hair is very long, very wavy and very free — the look wavy hair was made for. Long layers and good conditioning are all it needs.
Pros and cons: Pros: stunning, low daily styling. Cons: long drying time, and the ends need regular trims to stay healthy.
What to ask: Long layers only, with no thinning at the ends — mermaid hair needs full, healthy ends.
31. Wavy Shag Bob
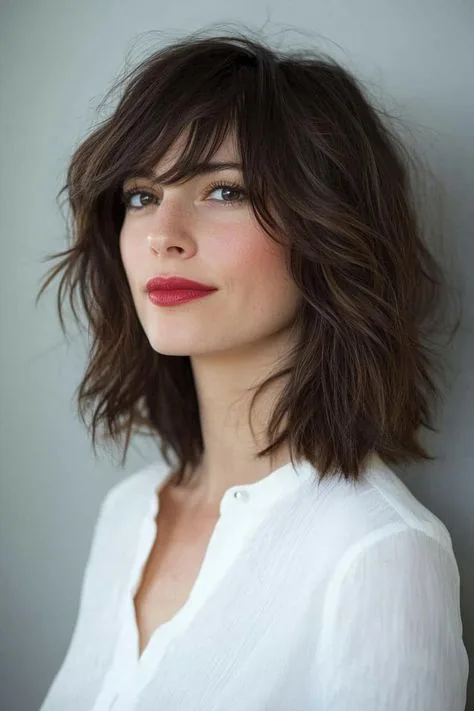
A shag bob combines the short length of a bob with the texture of a shag. On wavy hair it is bouncy, piecey and full of movement.
Best for: 2B and 2C waves that want a short cut with lots of texture and no blunt line.
Quick verdict: Short, textured and full of personality — the bob for people who hate neat bobs.
32. Asymmetrical Wavy Lob
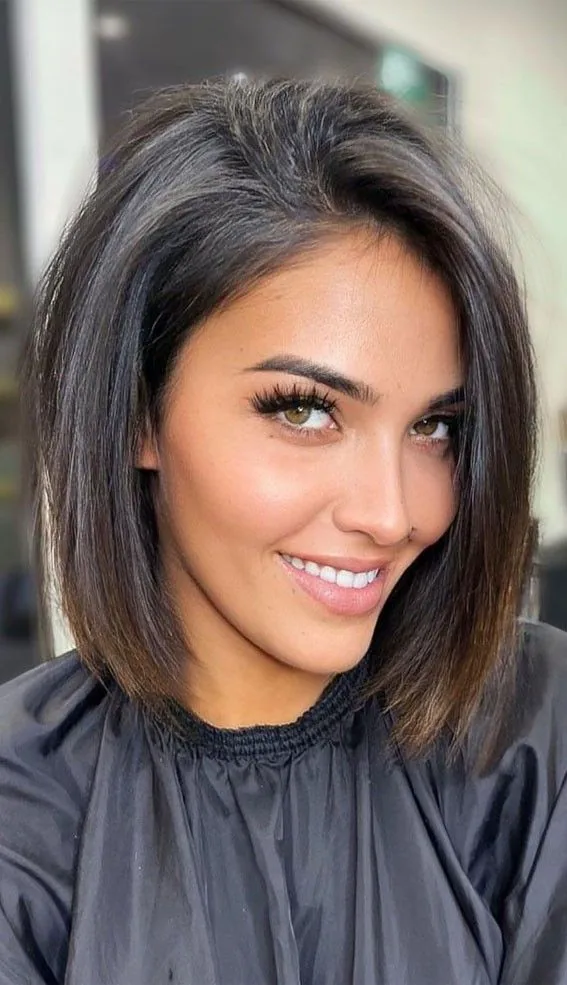
An asymmetrical lob — longer on one side — adds a modern edge to wavy hair. The waves soften the asymmetry so it looks stylish, not stark.
How to style: Scrunch and diffuse, then smooth the longer side forward so the asymmetry is visible.
Maintenance: Trims every 6 to 8 weeks to keep the uneven lengths intentional rather than grown-out.
33. Wavy Curtain Layers, Medium Length
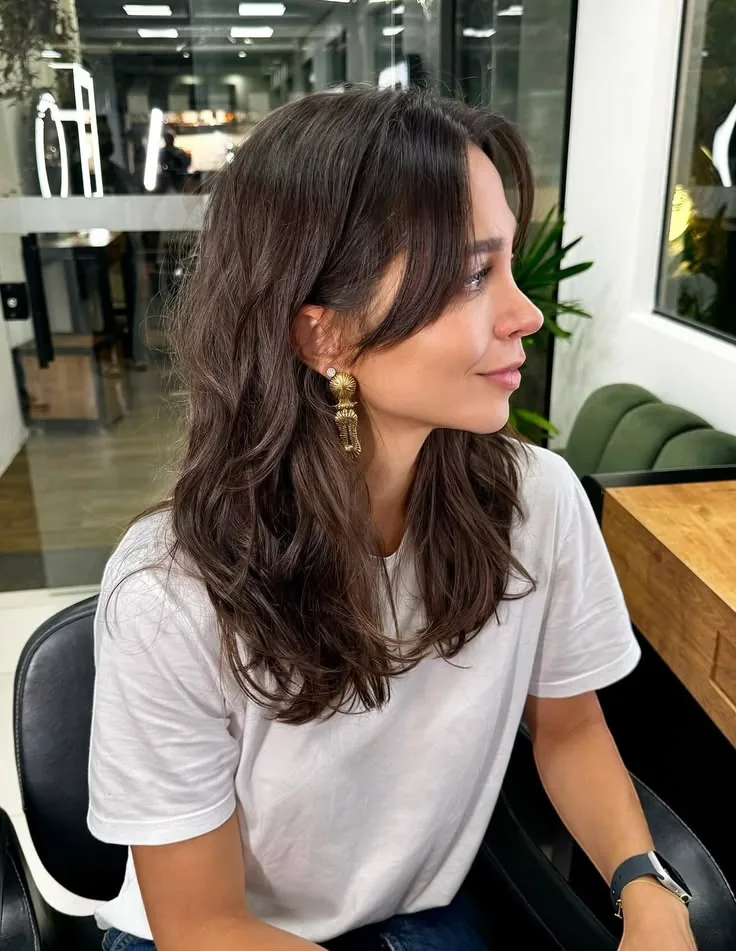
Medium-length curtain layers frame the face in soft, sweeping pieces while the rest of the hair falls to the shoulders. It is a gentle, face-opening cut.
Pros and cons: Pros: flattering, easy to style, grows out well. Cons: the front layers need a quick dry most mornings.
Best for: Anyone who wants face-framing without committing to bangs.
34. Sun-Kissed Wavy Layers
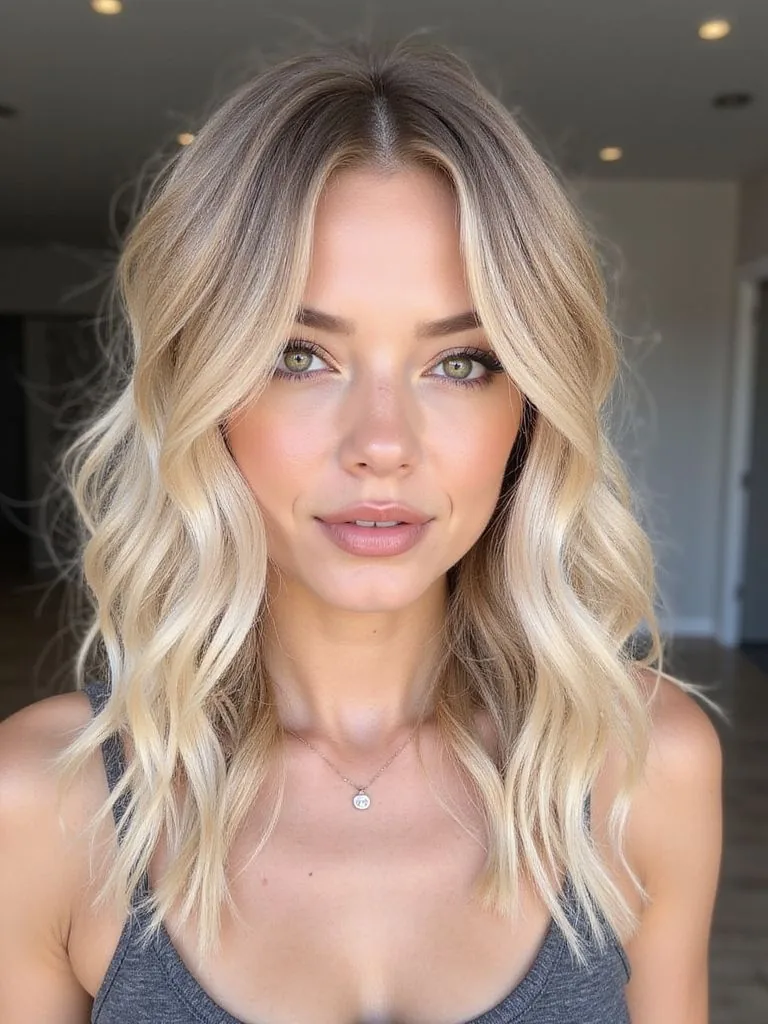
Sun-kissed colour — soft balayage or highlights that look like summer light — makes wavy layers pop, because each wave catches the light differently.
How to style: Style as usual; the colour does the work. Use colour-safe shampoo to keep the lightness fresh.
Common mistake: Going too blonde too fast, which dries waves out. Build lightness gradually with balayage.
35. Wet-Look Wavy Waves
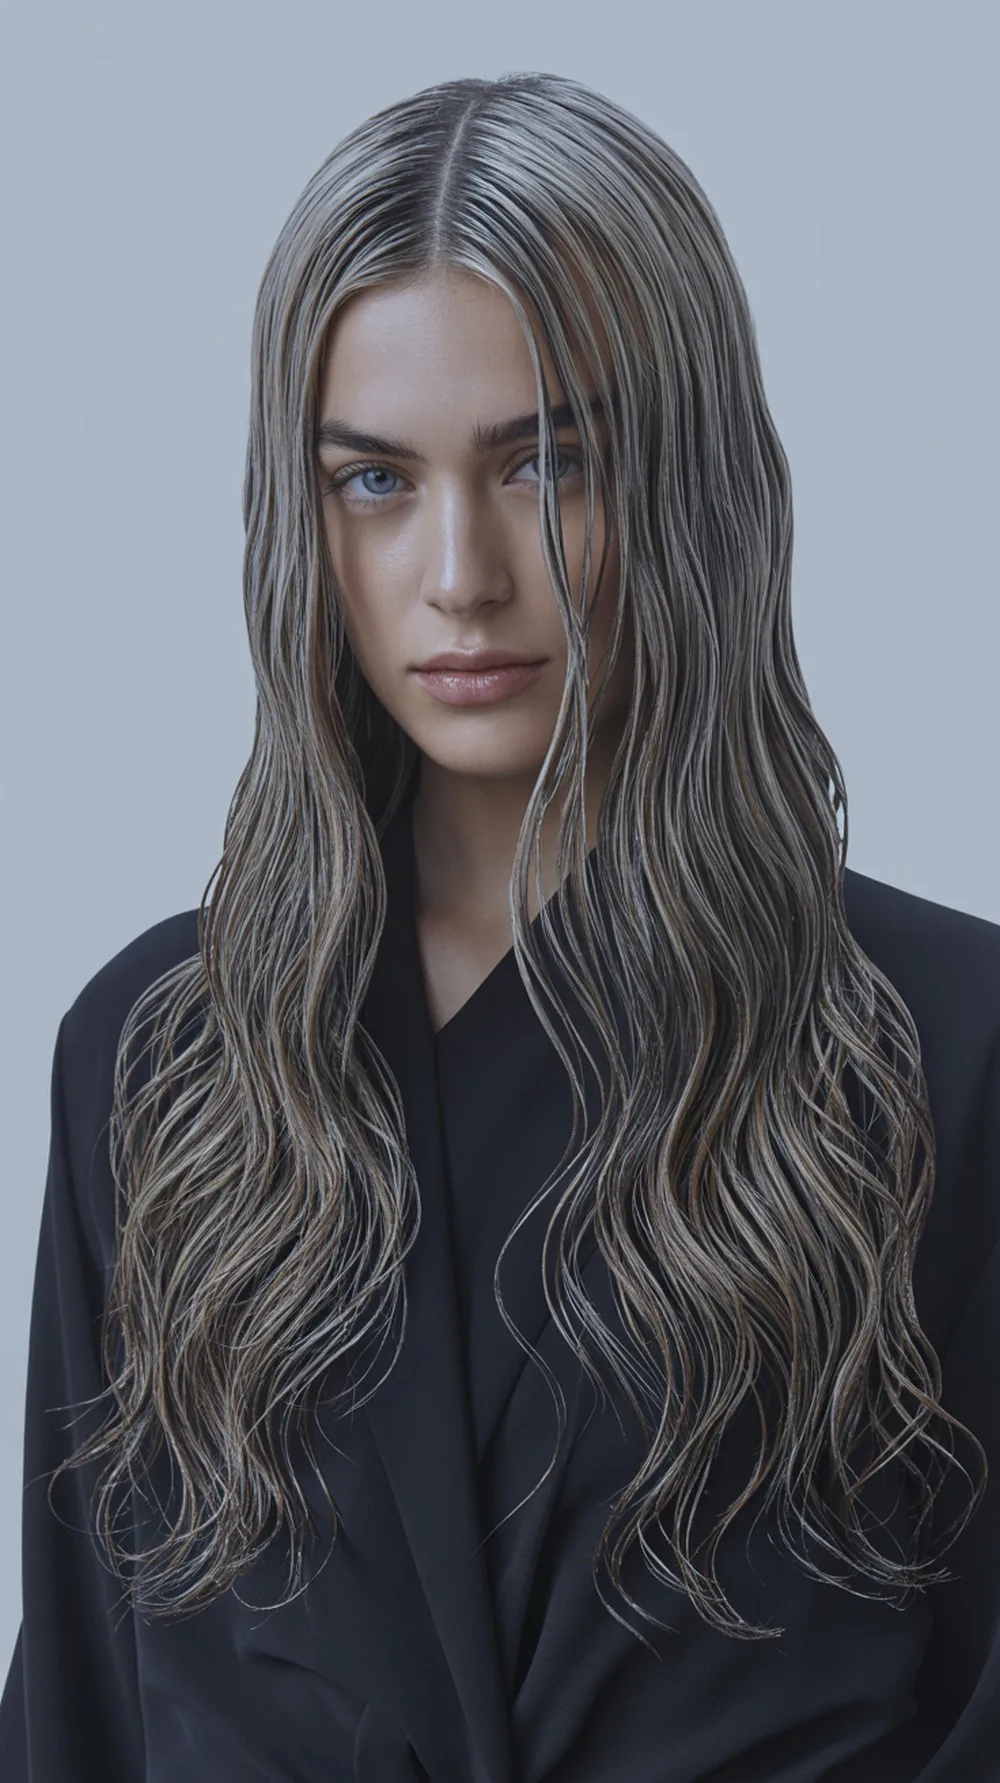
Wet-look waves use gel or cream to define the wave into glossy, sculpted S-shapes. It is a striking evening or editorial look that works beautifully on natural waves.
How to style: Apply gel to soaking-wet hair, scrunch and define waves with your fingers, and let it dry without touching.
Quick verdict: Bold and glossy — save it for evenings, when the shine really shows.
36. Air-Dried Natural Waves
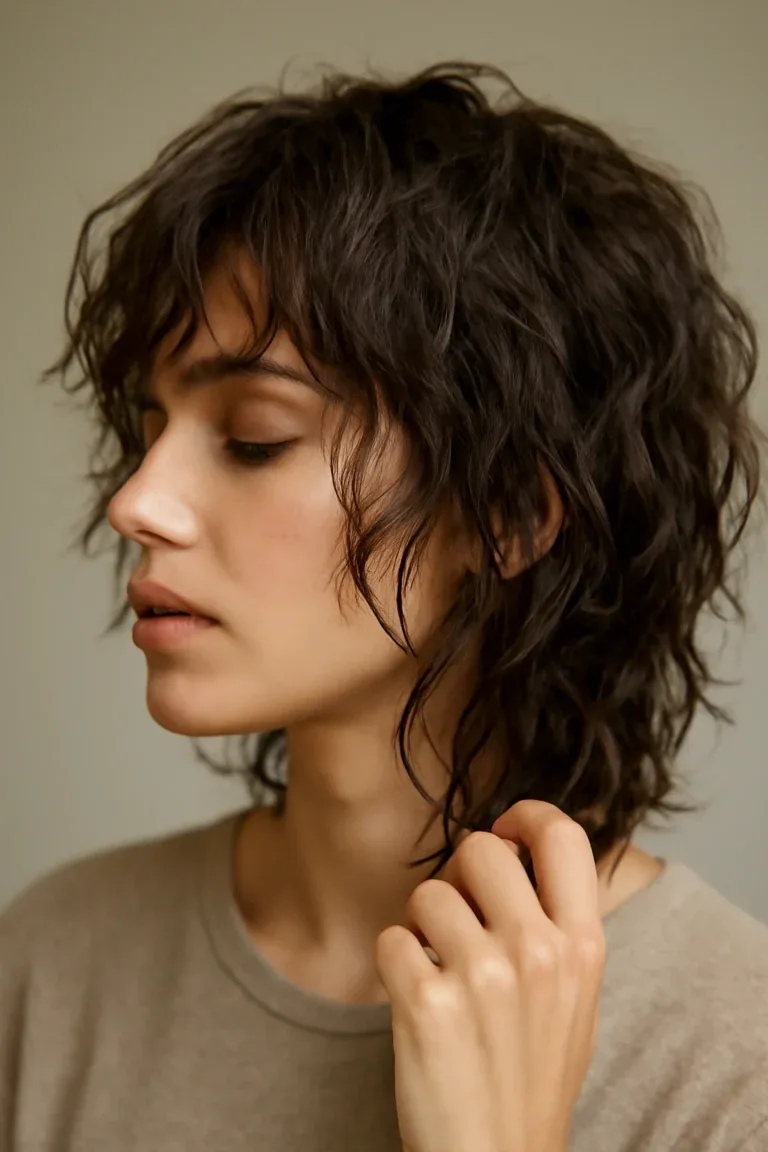
Air-drying is the purest wavy style: wash, scrunch, and leave it alone. No heat, no tools, just your natural pattern.
Best for: Hair health, busy mornings, and anyone trying to cut down on heat styling.
How to style: Apply light cream to wet hair, scrunch, micro-plop with a T-shirt for a few minutes, then do not touch until dry.
37. Half-Up Slicked-Back Waves
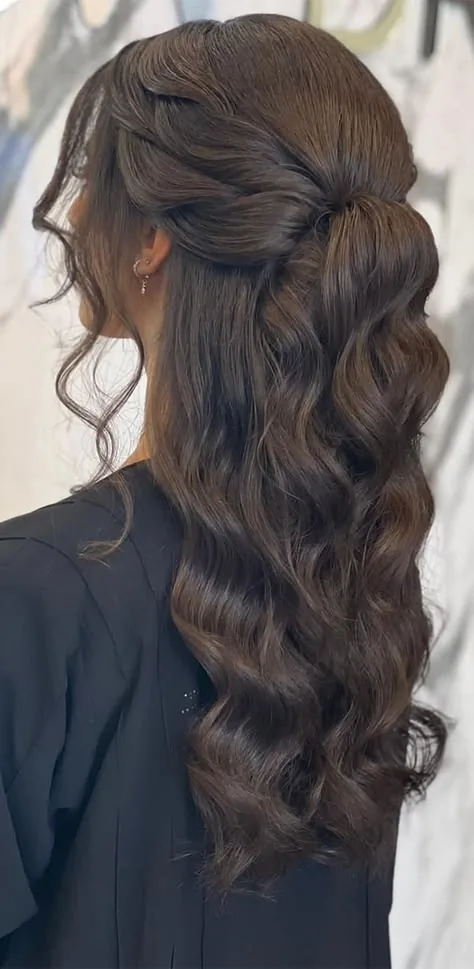
A half-up style with a smooth, slicked-back top and wavy lengths below gives the best of both worlds: polished at the front, textured at the back.
Pros and cons: Pros: elegant, keeps hair off the face, shows off waves. Cons: it needs a little gel or cream at the top to stay smooth.
How to style: Smooth the top section back with cream, secure with pins or a clip, and leave the lengths wavy.
38. Wavy Ponytail With a Scrunchie
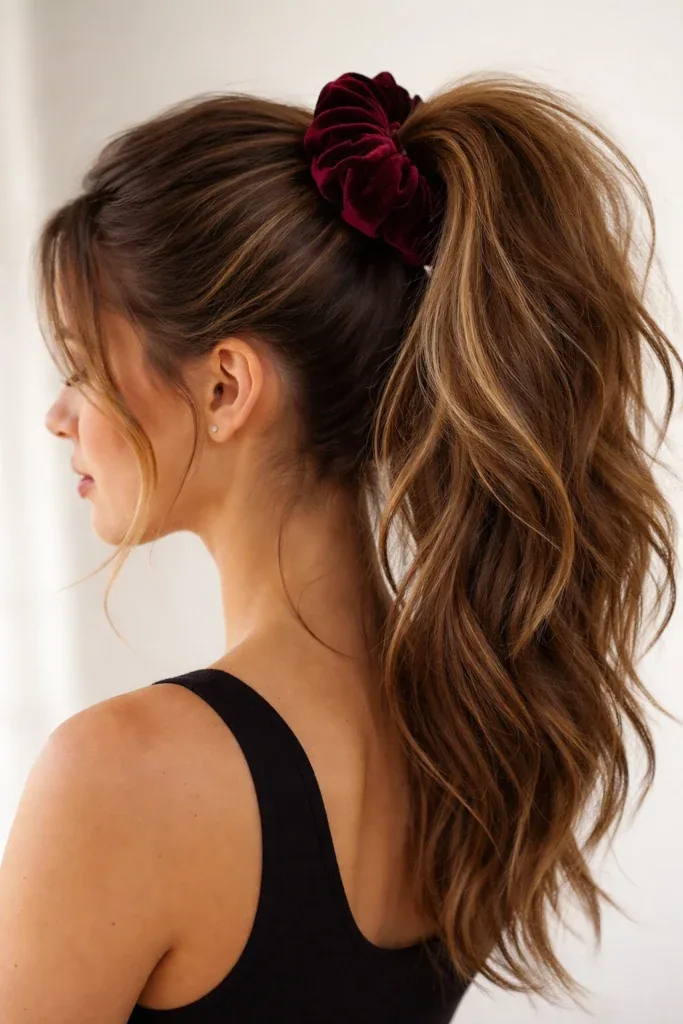
A scrunchie ponytail is gentle on wavy hair, does not dent the wave, and adds a soft, retro touch. It is the kindest way to tie waves up.
How to style: Gather loosely, secure with a silk or velvet scrunchie, pull out face pieces, and scrunch the tail.
Quick verdict: Kind to hair, easy to wear, and it never leaves a kink — a wavy essential.
39. Soft Wavy Wedding Updo
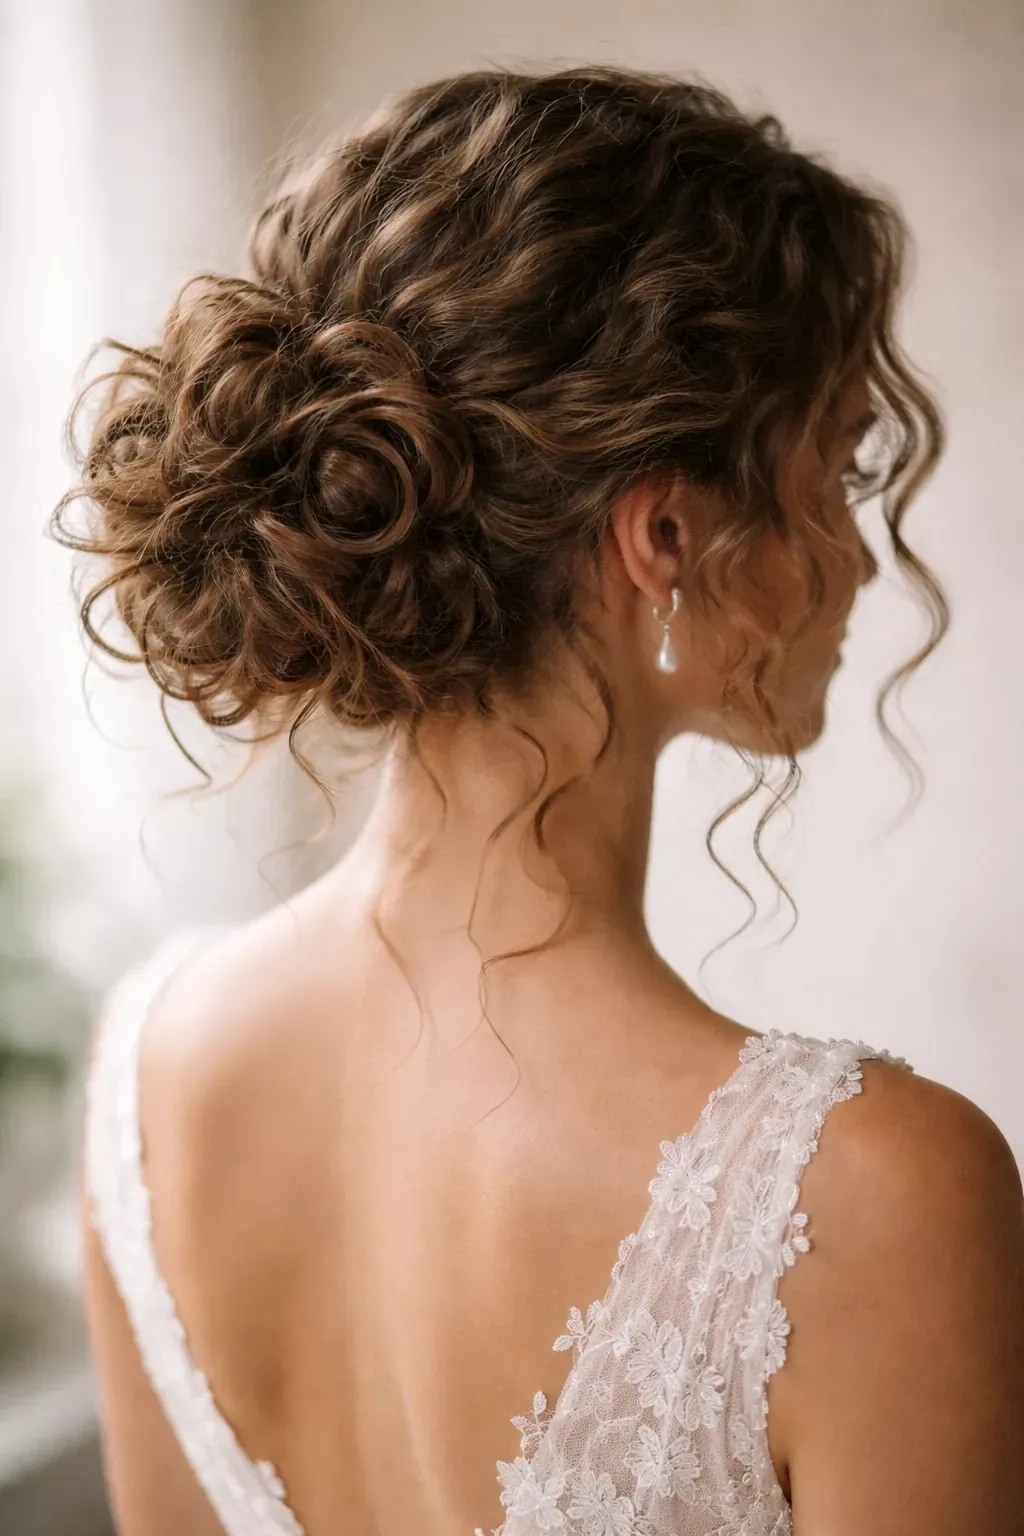
For weddings and special occasions, a soft wavy updo — loose bun or twist with waves left out around the face — looks romantic and photographs beautifully.
Best for: Brides, bridesmaids and wedding guests with medium to long wavy hair.
How to style: Curl or define waves first, gather loosely, pin softly, and leave plenty of soft pieces out — tightness is the enemy here.
40. Short Wavy Layers With Bangs
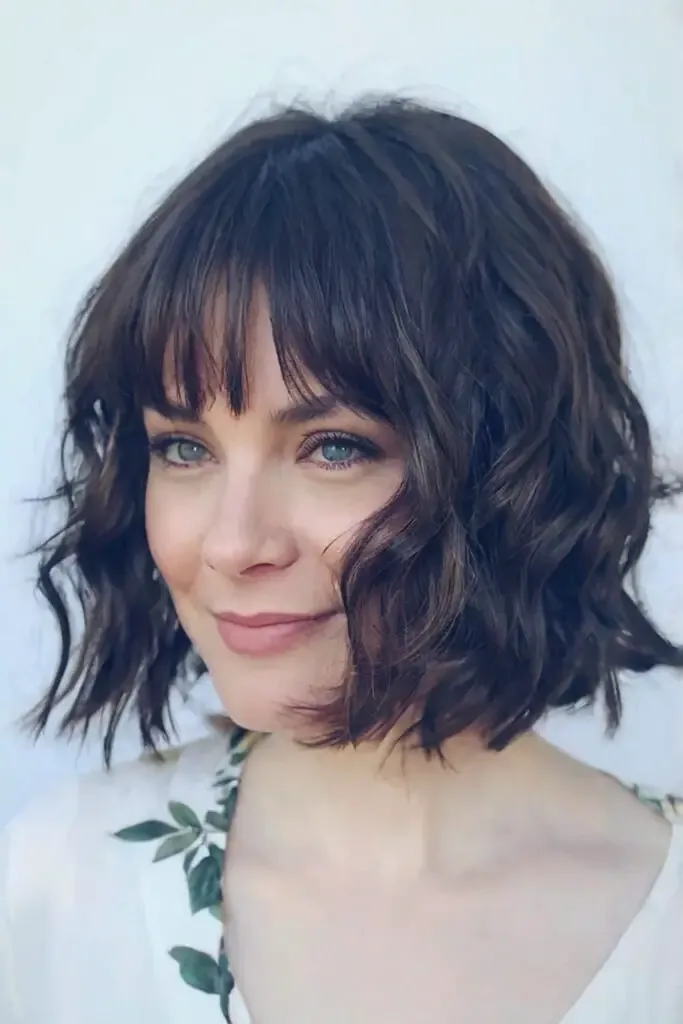
Short layers with a soft fringe give short wavy hair shape and personality. The layers create bounce, and the fringe frames the eyes.
Common mistake: Cutting short layers too short on top, which can make waves stick out. Keep the top layers long enough to fall, not stand up.
Maintenance: Trims every 6 weeks, and a little texture cream on the top layers most mornings.
41. Long Wavy Hair With a Side Part
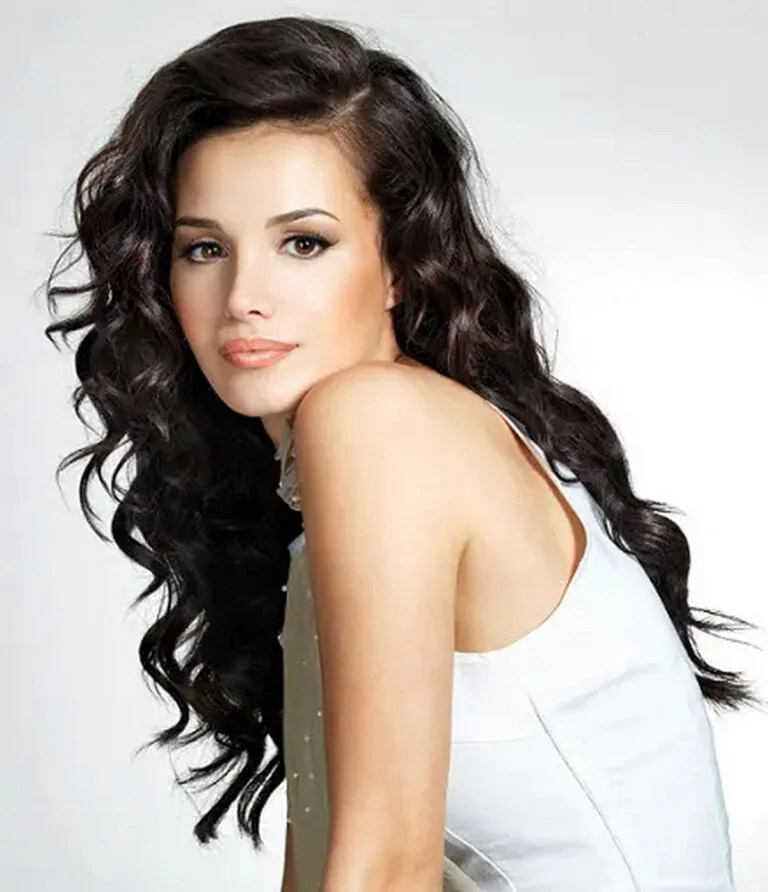
A side part on long wavy hair adds instant volume at the roots and a sweeping shape that a centre part cannot give. It is a one-second change with a big effect.
Pros and cons: Pros: instant root lift, flattering asymmetry. Cons: the part may need training if you always wore a centre part — flip it while wet for a few washes.
How to style: Part to one side while wet, scrunch, and let the heavy side fall in waves.
42. Textured Wavy Midi
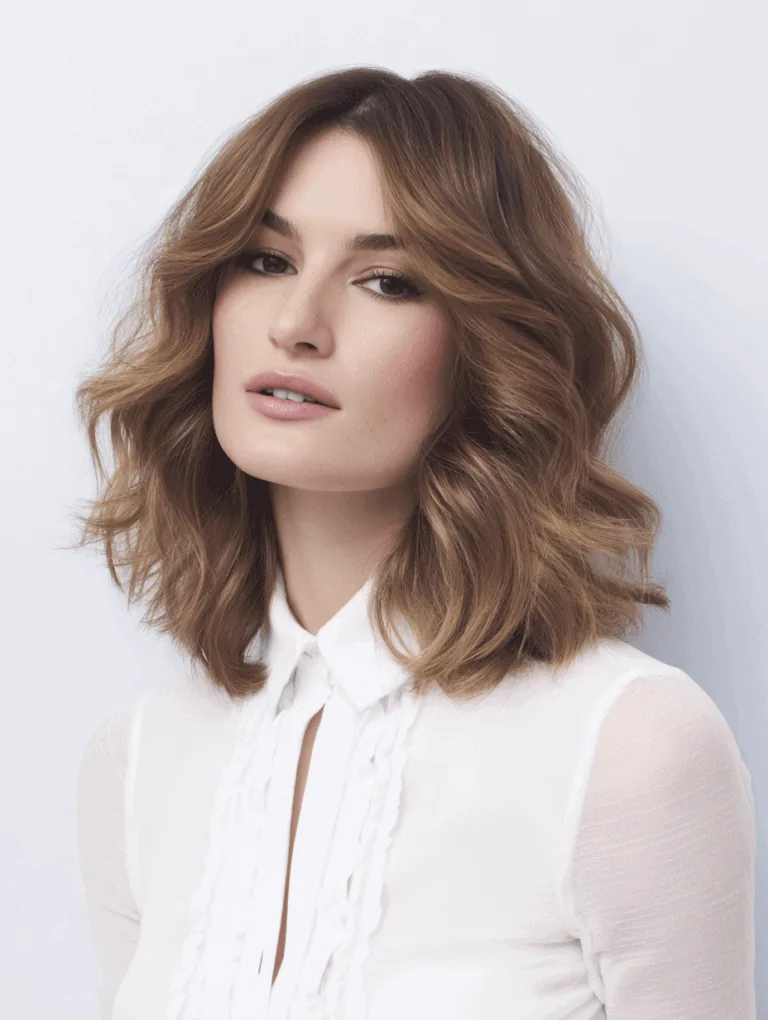
A textured midi — shoulder to collarbone with choppy, piecey ends — is the wavy cut for people who want movement everywhere, not just at the front.
Best for: 2B and 2C waves, and anyone whose blunt midi felt heavy or shapeless.
What to ask: Textured, point-cut ends and light layers through the mid-lengths, not a blunt finish.
43. Wavy Flipped Ends
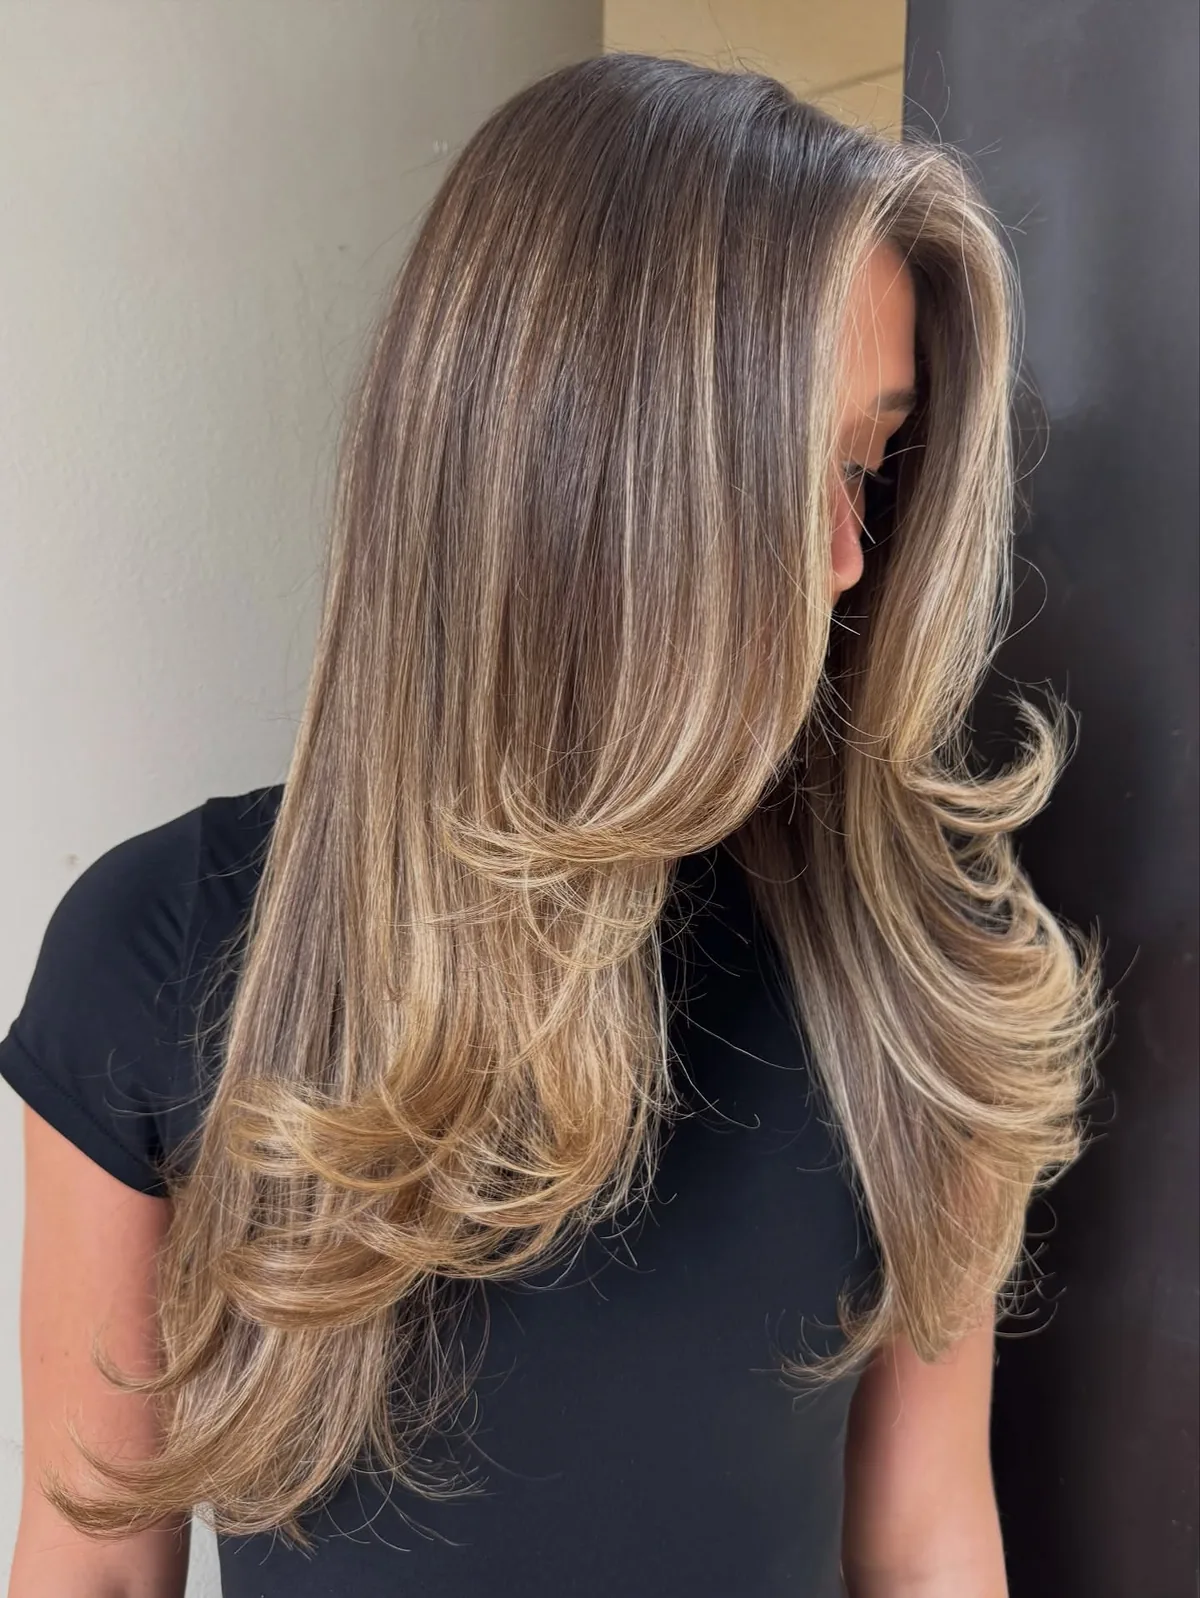
Flipped ends — where the ends of wavy hair flick outward — give a playful, retro finish to medium and long waves. It is a small detail that changes the whole silhouette.
How to style: Blow-dry the ends outward with a round brush, or twist small sections outward while air-drying, then set lightly.
Quick verdict: A fun, low-commitment twist on everyday waves — try it before you book a cut.
44. Soft Layers With Root Volume
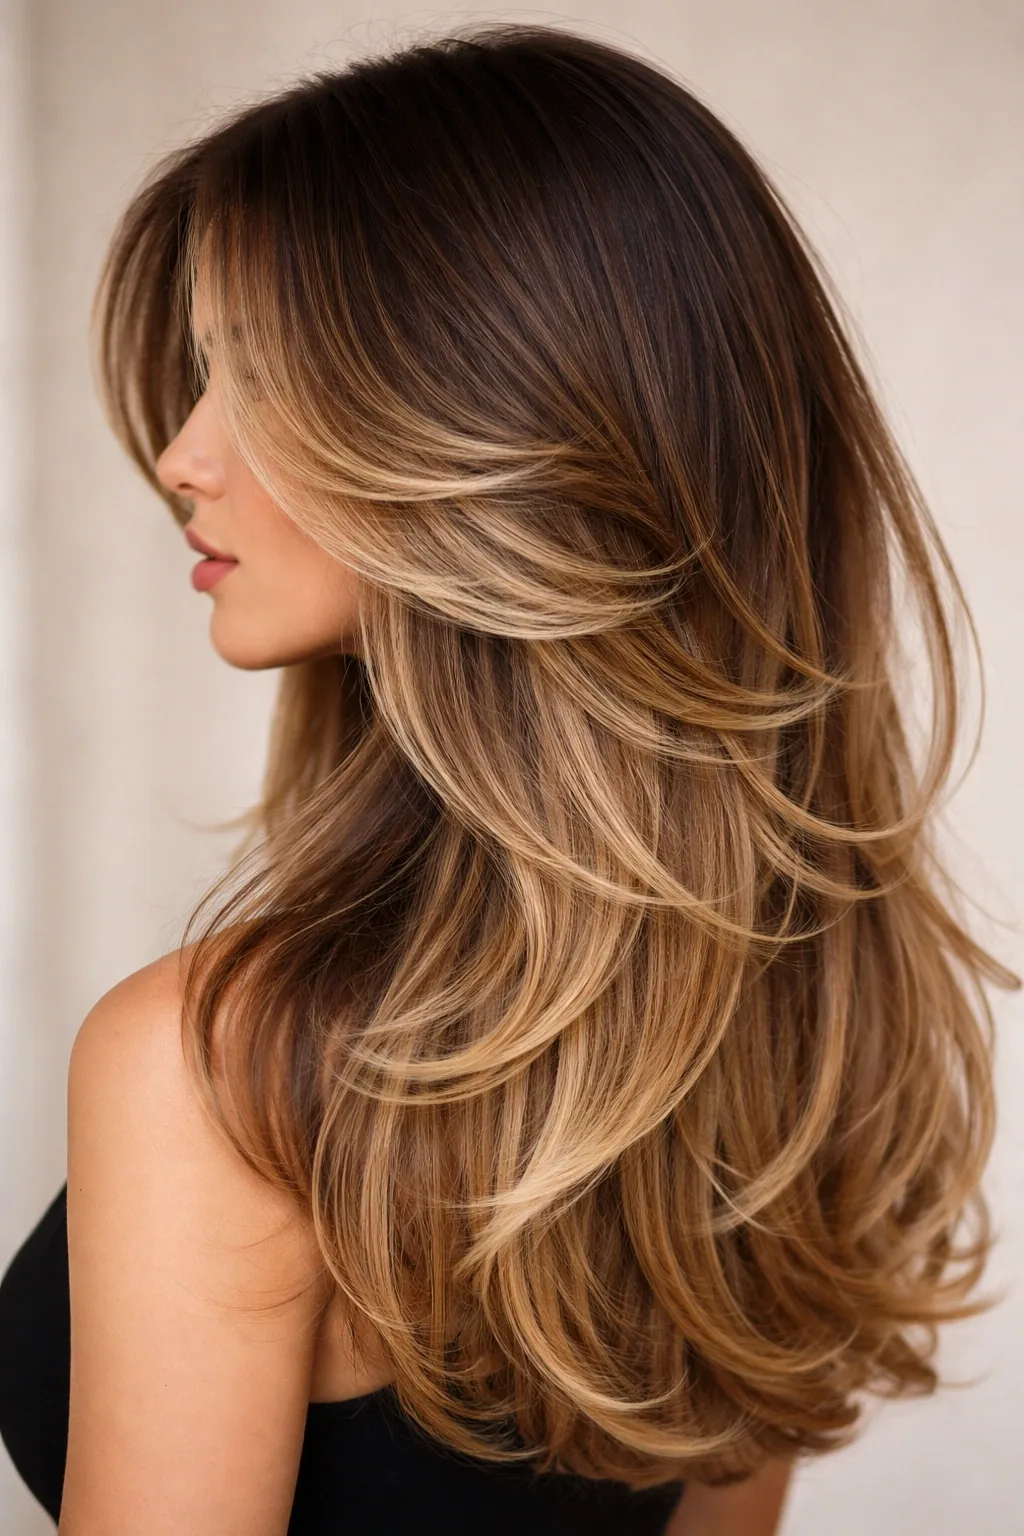
Soft layers with a little root volume give wavy hair lift at the top and movement through the lengths, without the choppiness of a shag. It is polished wavy hair, not messy wavy hair.
How to style: Apply mousse at the roots, blow-dry with lift or diffuse upside down briefly, then scrunch the lengths.
Maintenance: Trims every 8 to 10 weeks, and a volumising mousse is the only product you really need.
Wavy Bobs, Lobs and Long Hair
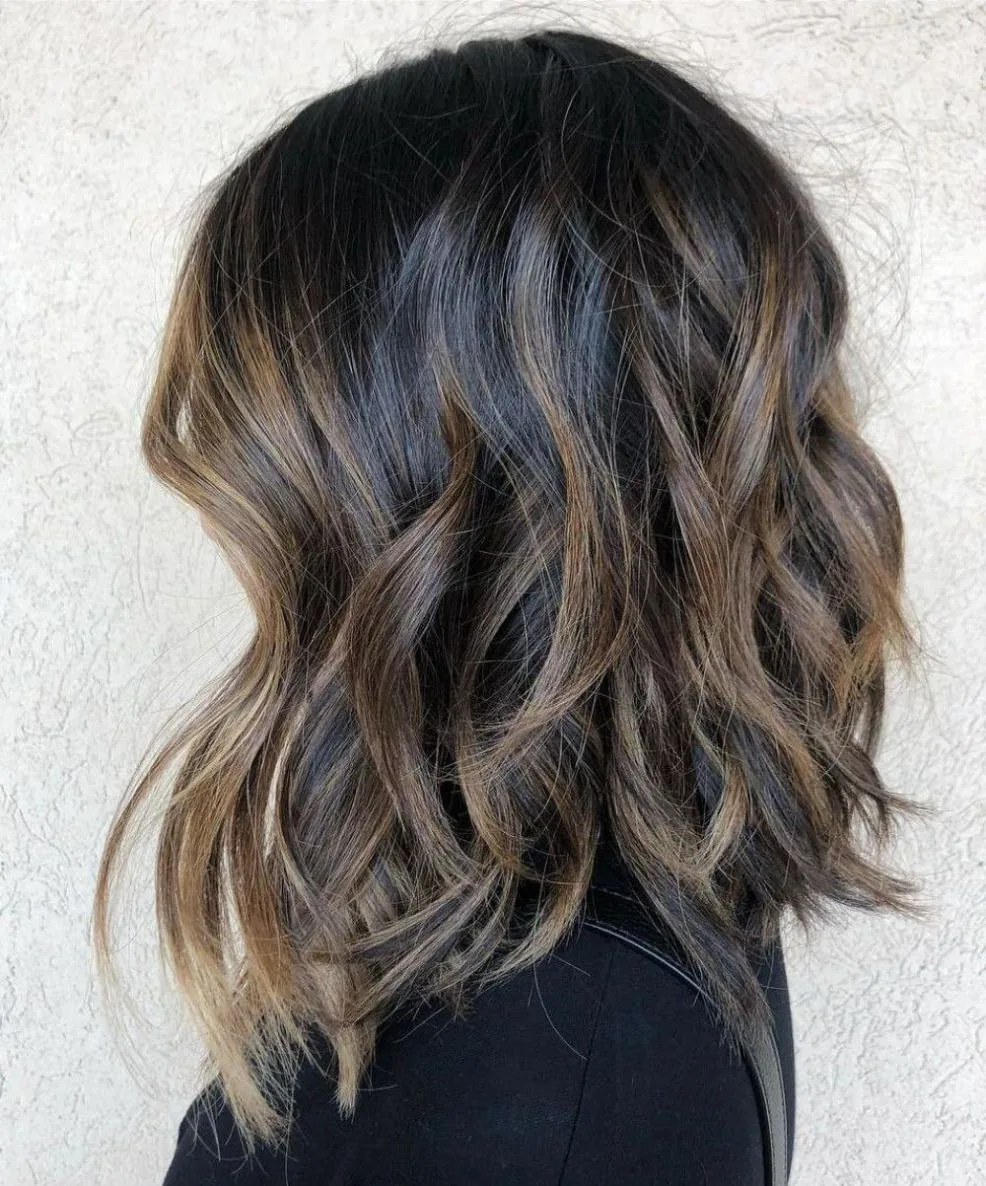
Short, medium and long wavy hair each have a different sweet spot. A wavy bob works best with soft, textured ends and a little length at the front so it does not spring up too short. A lob is the easiest wavy length of all — long enough to pull back, short enough to dry quickly. Long wavy hair needs long layers to stop the weight pulling the wave out at the top.
When choosing length, think about drying time and how much styling you will really do. The best length is the one you will wear wavy most days, not the one that only looks good after an hour of styling.
Updos and Half-Up Styles for Waves
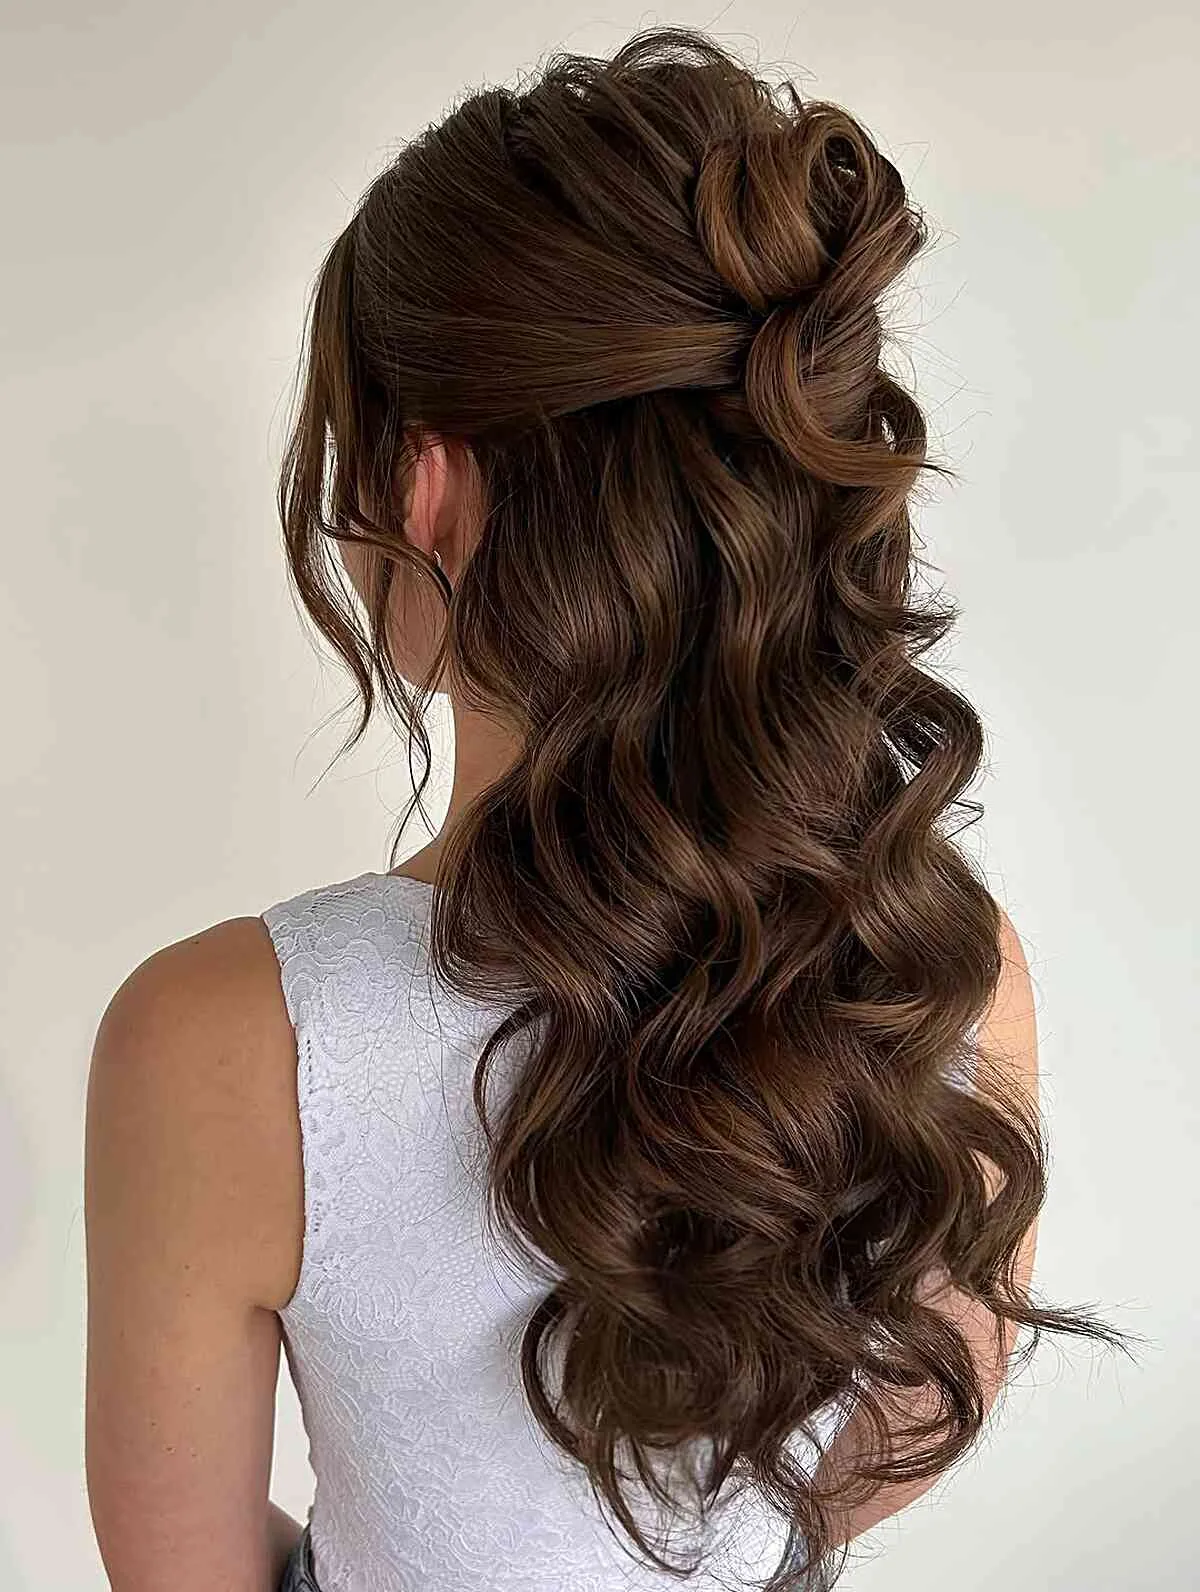
Waves make updos easier, because the texture already gives grip and softness. A loose bun, a half-up claw clip or a soft braid all look fuller and more relaxed on wavy hair than on sleek hair, and they need fewer pins. Pull out a few face-framing pieces and the style instantly looks intentional rather than messy.
The trick is to work with the wave you woke up with, not to restyle it first. Second-day waves often hold an updo better than freshly washed hair, and a little texture spray gives grip without stiffness.
Colour That Shows Off Waves
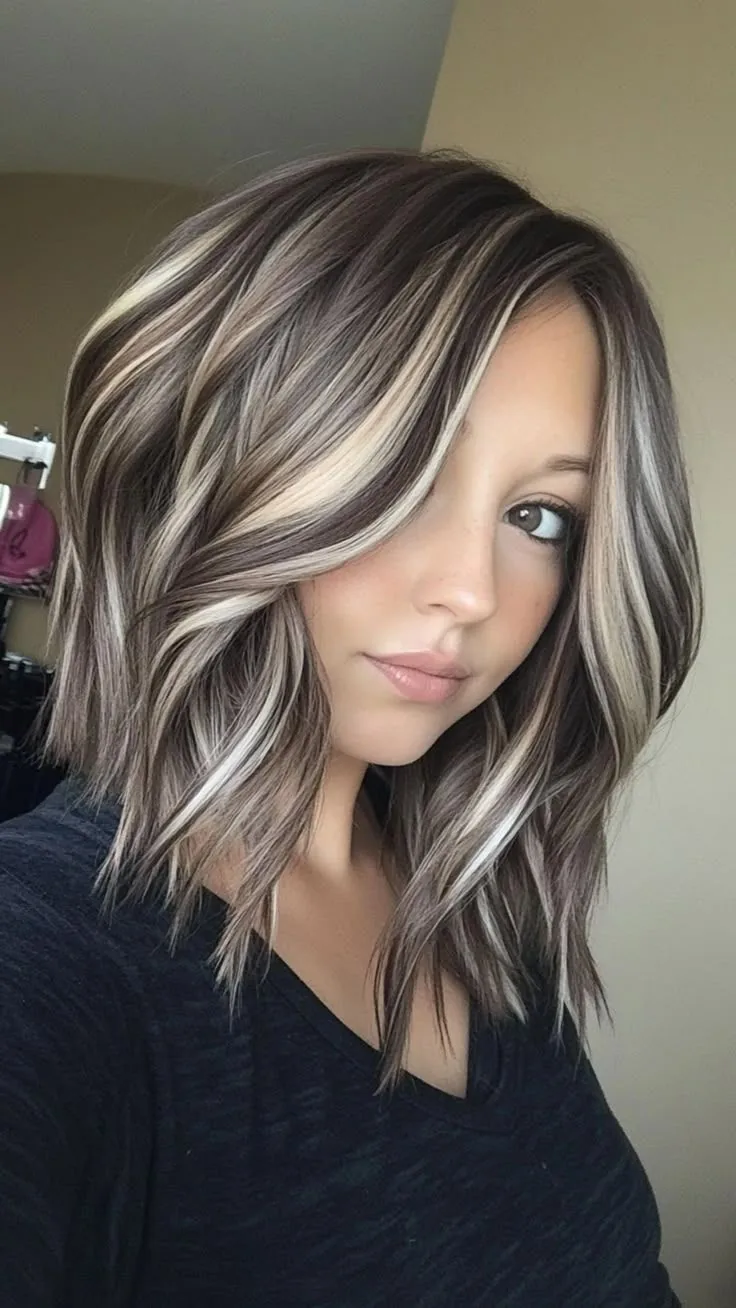
Colour and waves are a perfect match, because waves catch light differently at every bend. Balayage, face-framing highlights and soft dimension all make the wave pattern more visible, as lighter pieces sit on top of the curves and darker pieces sit in the shadows between them.
Keep colour soft and blended for the most natural effect, and protect waves after colouring with a moisturising mask once a week. Over-processed, dry waves lose definition, so colour that keeps hair healthy will always show the wave better than colour that damages it.
Mistakes That Flatten Waves
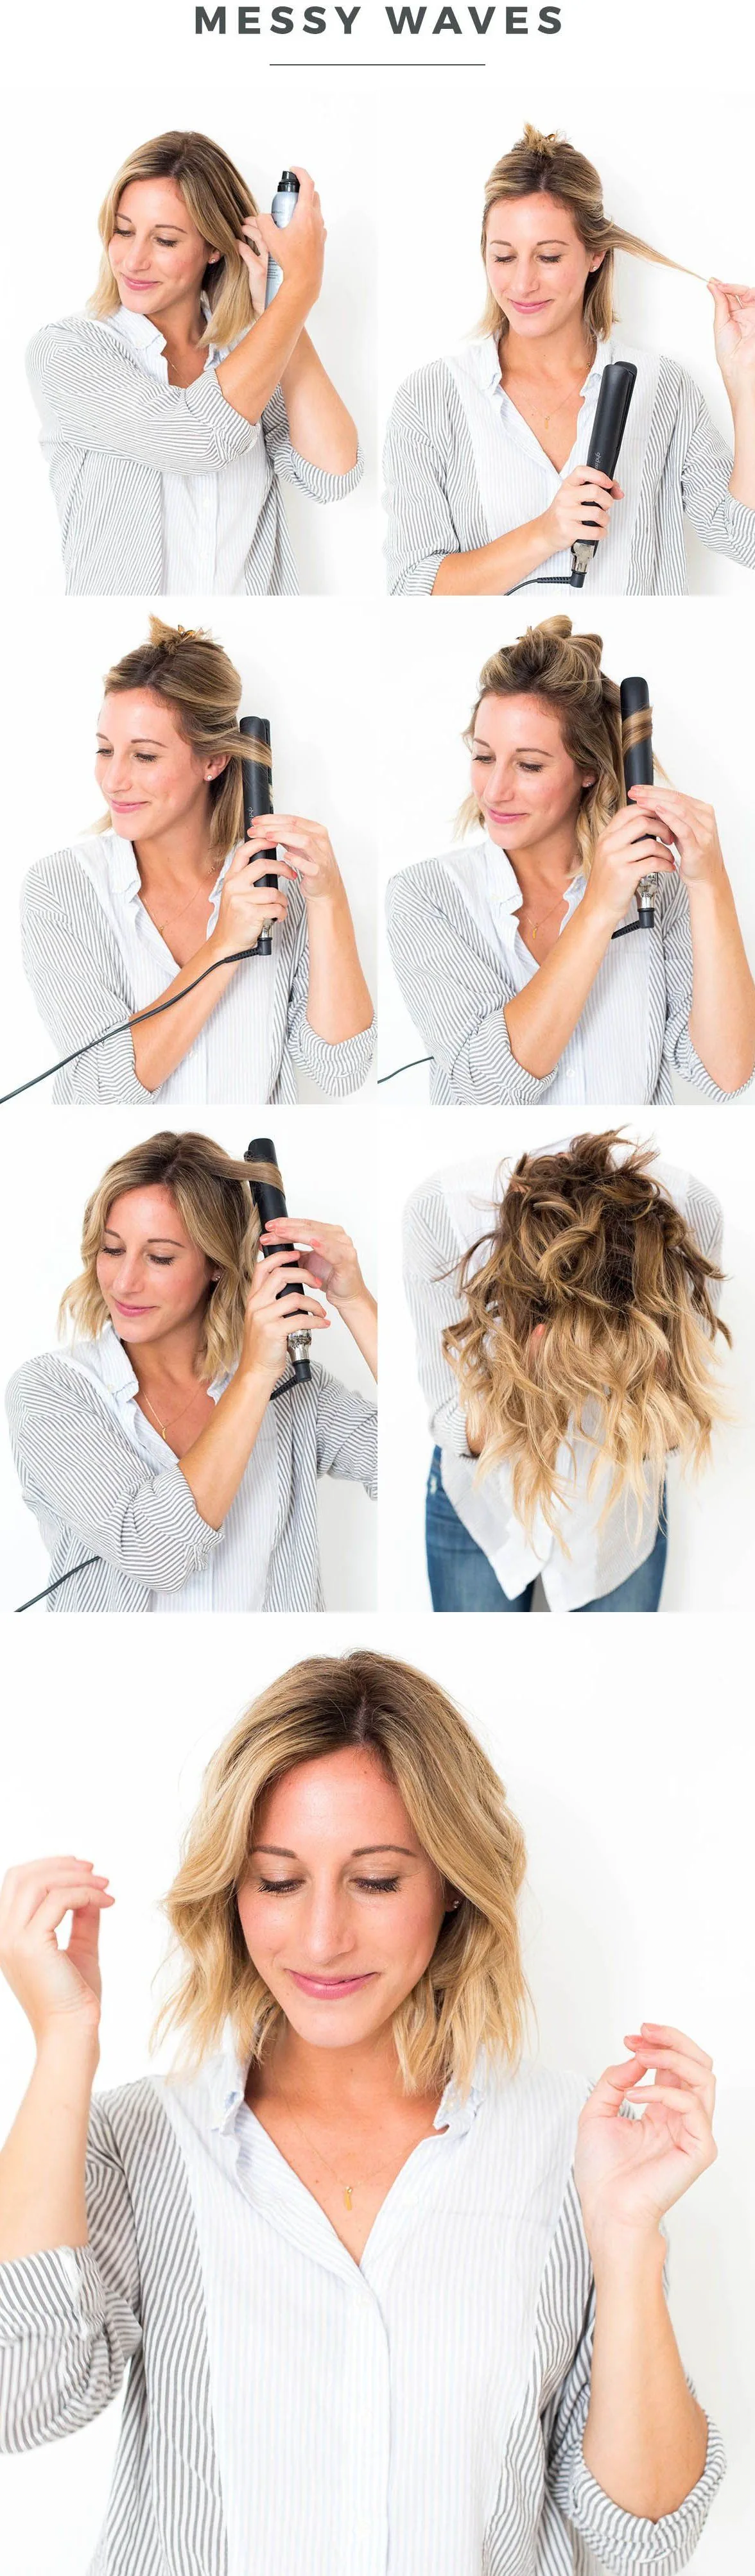
The most common wave-flattening mistakes are easy to fix: brushing dry hair, using heavy oils and butters that weigh waves down, straightening every day, and cutting blunt, one-length hair with no layers. Heavy products are the sneakiest culprit — a little goes a long way on wavy hair.
Other flatteners include towel-drying roughly, tying wet hair up tightly, and skipping conditioner. Swap those habits for scrunching, light products, a microfibre towel and a loose dry, and most waves will show up stronger within a couple of washes.
What is the best haircut for wavy hair?
The best haircut for wavy hair is usually one with layers — long layers for long hair, a textured lob for medium hair, or a shag for maximum texture. Layers let waves move and spring up instead of hanging heavy, and they stop the cut from turning into a triangle shape.
How do I style wavy hair without heat?
Apply a light mousse or curl cream to soaking-wet hair, scrunch upwards in sections, and air-dry without touching it until it is fully dry. A cotton T-shirt or microfibre towel for plopping, instead of a rough towel, also helps waves form cleanly.
Should I brush wavy hair?
Do not brush wavy hair when it is dry, because that turns waves into frizz and fluff. Detangle only when wet, with conditioner in, using a wide-tooth comb or your fingers, and then scrunch to reform the wave pattern.
What is the difference between 2A, 2B and 2C wavy hair?
2A waves are loose and gentle and can fall flat, 2B waves have a defined S-shape from mid-length down with some frizz, and 2C waves are strong and voluminous, bordering on curls. Most people have a mix of types on one head.
How do I reduce frizz in wavy hair?
Use moisturising conditioner and a leave-in on the ends, dry with a microfibre towel or T-shirt, sleep on silk or satin, and avoid brushing dry hair. A little smoothing serum on the surface of dry hair calms the crown without weighing waves down.
Can wavy hair be cut short?
Yes, wavy hair can be cut short very successfully. A wavy pixie, a tousled bob or a shag bob all use the wave for texture, so short wavy hair often looks more styled than short straight hair with no effort at all.
How often should wavy hair be trimmed?
Trim bobs and short wavy cuts every 6 to 8 weeks, lobs and medium cuts every 8 weeks, and long layered waves every 8 to 10 weeks. Regular trims keep the ends healthy, which is what keeps waves defined rather than straggly.
What products are best for wavy hair?
Light products work best: a mousse or curl cream for definition, a leave-in conditioner for moisture, and a light oil or serum to scrunch out crunch once dry. Heavy butters and oils tend to weigh waves down and flatten them.
Can I straighten wavy hair sometimes?
Yes, you can straighten wavy hair occasionally, but use heat protectant and do not straighten every day, because repeated heat damages the wave pattern over time. On straightened days, the wave will usually return after the next wash if the hair is healthy.
How do I refresh wavy hair on day two?
Spray lightly with water, scrunch a small amount of curl cream or refresh spray through the lengths, and let it air-dry. A loose braid overnight also refreshes waves, and a half-up clip or scrunchie ponytail hides any flat sections.
Conclusion
Wavy hair does not need to be fixed, straightened or fought into submission. It needs a cut that lets it move, light products that let it define itself, and a drying routine that leaves it alone long enough to form its natural pattern. That is really all there is to it.
Start with your wave type, pick a length you will actually wear wavy most days, and add one detail you love — curtain bangs, a shaggy texture, a lob, or a soft updo. Then let your waves do what they already know how to do. They have been doing it all along.