Everyone in Focus: 36 Hairstyles for a Family Photoshoot That Look Timeless in Every Frame
There is one photograph in almost every home that never comes down from the wall. It is the family portrait — the one taken on an ordinary afternoon that somehow becomes the picture everyone points to for years. Choosing hairstyles for a family photoshoot is really about that picture: styles that flatter every face in the frame, from toddlers to grandparents, and still look like you when you look back in ten years.
The secret is not matching hair, it is matching polish. A family looks wonderful in photographs when every person looks like the best version of themselves — neat where it matters, relaxed where it counts, and comfortable enough to laugh properly. Over-styled hair looks stiff on camera, and under-styled hair disappears into the background. The sweet spot sits in between, and it is different for every age in the family.
This guide starts with the planning — how to coordinate looks without making everyone identical, what photographs well, how hair and outfits work together, and what to tell your photographer — and then walks through 36 hairstyles for a family photoshoot, one for every member of the family. Pick the styles that suit each person, try them once before the day, and let the camera do the rest.
Coordinating Looks Across the Whole Family
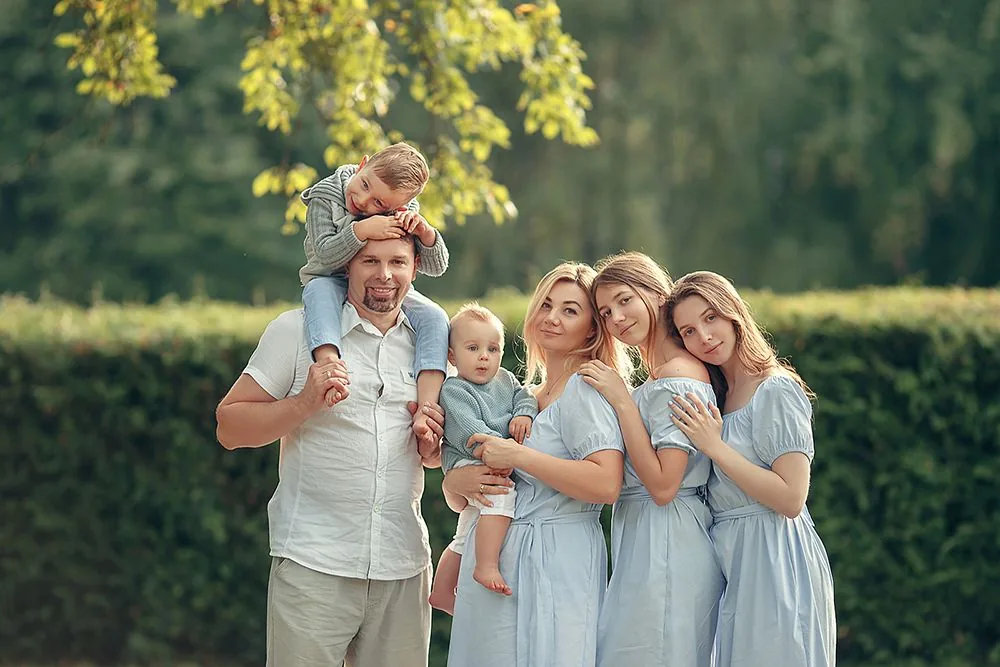
A family photograph works when everyone looks like they belong in the same picture, not when everyone looks the same. The aim is a shared level of polish: if Mum has a smooth blowout and Dad has a neat side part, the children should look tidy too, even if their styles are completely different. One person in a formal updo next to someone with wet, just-washed hair will always look accidental.
Pick one word for the whole family and let every hairstyle answer it. Relaxed means soft waves, loose buns and natural texture. Polished means smooth blowouts, neat parts and pinned-up styles. Classic means side parts, chignons and gentle curls. Once the word is chosen, each person gets the version that suits their age and hair, and the photograph holds together without anyone looking like a copy of anyone else.
Quick verdict: agree on the mood first, then choose individual styles. A shared feeling across different hairstyles photographs far better than identical hair on six different people.
What Photographs Well — and What Disappears on Camera
Cameras flatten hair. Fine detail that looks lovely in a mirror — a delicate twist, a tiny braid, a subtle layer — can vanish completely in a photograph, especially in a group shot where each face is small. The styles that photograph best have clear shape: a visible parting, a defined wave, a smooth silhouette, or a bun with a clean outline. If you can recognise the style from across the room, the camera will catch it too.
Shine matters more than complexity. Healthy, glossy hair catches the light and gives a photograph life, while dry, dull hair absorbs it. A light serum on the surface, a good blow-dry the day before, and a little shine spray on the morning will do more for your pictures than an elaborate style ever could. Avoid heavy hairspray crust and stiff, helmet-like finishes — they reflect flash harshly and look frozen.
Common mistake: choosing a style that only works from one angle. In a family shoot the camera moves, children turn, and grandparents look over their shoulders. Pick styles that look good from the front, the side and the back, because the photographer will use all three.
Hair and Outfits: Making Them Work Together
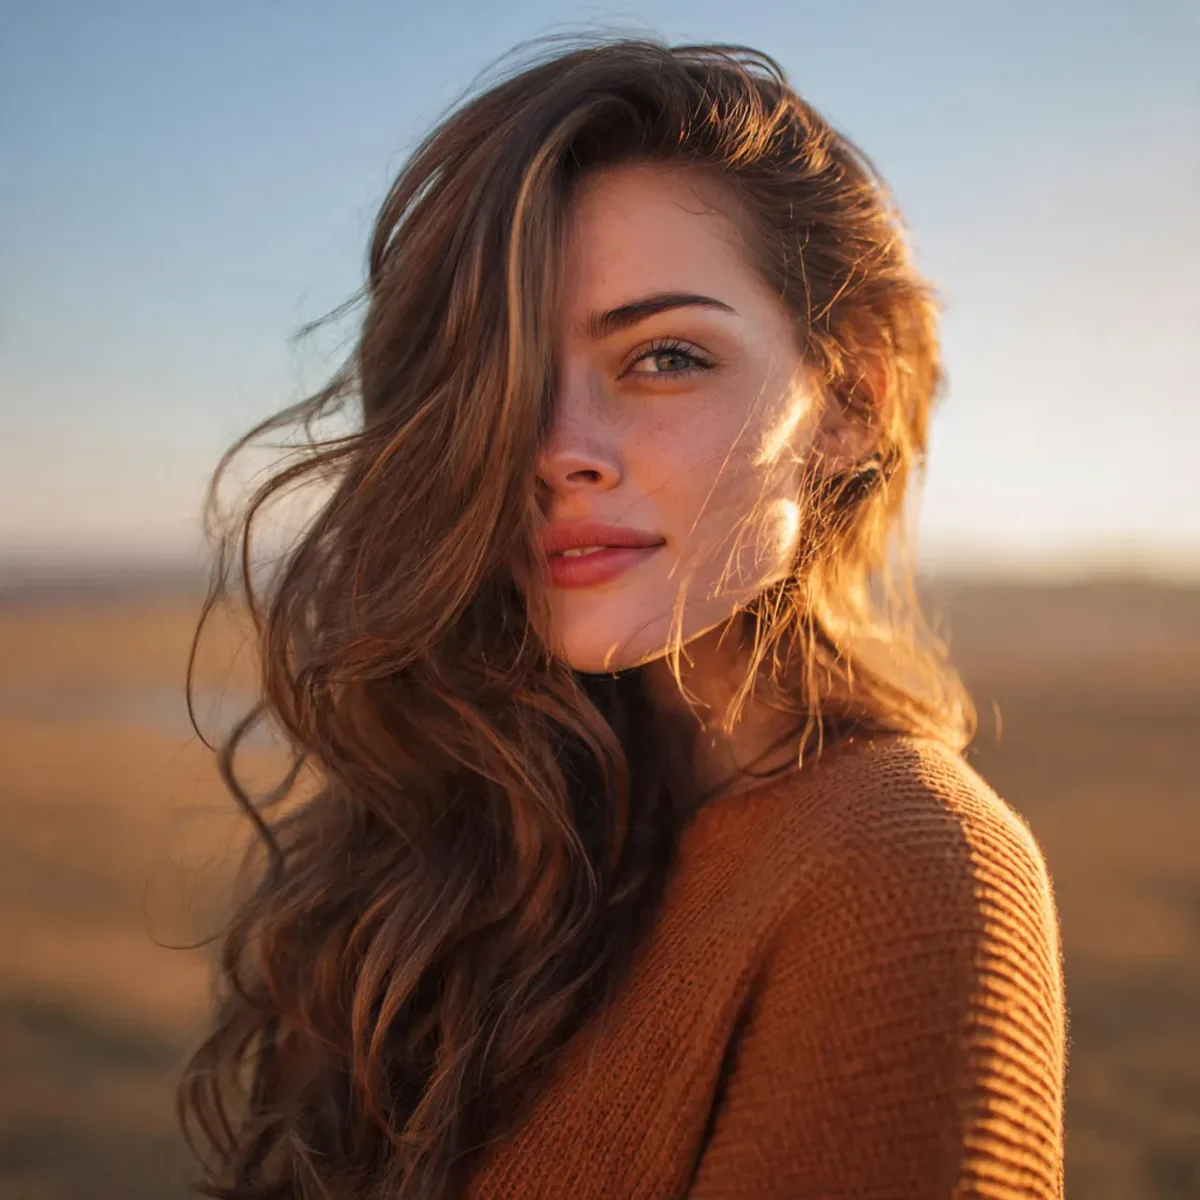
Hair and clothes share the frame, so they should agree with each other. A soft, romantic dress pairs beautifully with loose waves or a low, soft updo, while a smart, structured outfit calls for something sleeker — a smooth blowout, a neat ponytail, a polished chignon. When the outfit is busy — a bold print, a wide collar, a statement necklace — keep the hair simple so the two are not competing.
Necklines decide a surprising amount. A high neckline or a scarf looks best with hair up or swept to one side, so the collar is not hidden. An off-the-shoulder or open neckline leaves room for hair down. For children, keep hair away from printed slogans and busy patterns on their clothes, or the photograph becomes a tangle of detail with no clear focal point.
Best for: families who have already chosen outfits. Lay the clothes out together, look at the necklines and colours, and then choose the hair — it is far easier to match hair to clothes than clothes to hair.
Timing and Light: When to Book the Shoot
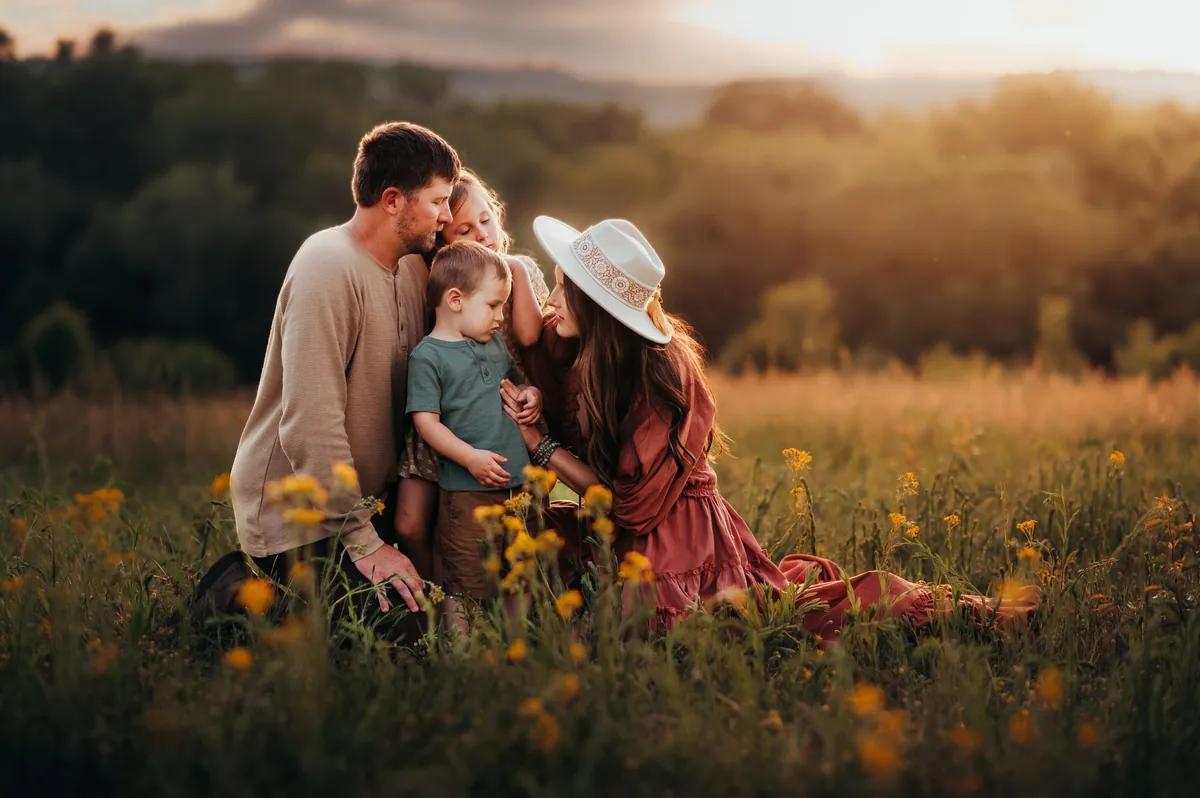
The best family photographs are usually taken in the hour before sunset, when the light is warm, low and kind to every face. Harsh midday sun creates shadows under chins and makes everyone squint, and it also makes flyaways and frizz far more visible. If you can choose, book the golden hour — your hair will look glossier and your skin will look warmer without any extra effort.
Plan hair around the clock, not just the camera. Style the youngest children last, because their hair is the first to be undone by running, wind and curious hands. Book hair appointments for the morning of the shoot rather than the day before, so styles are fresh, and leave at least an hour between the last hair appointment and the first photograph — rushing makes everyone tense, and tension shows in faces before it shows in hair.
What to ask a stylist: how the style will hold in outdoor light and wind, and whether it needs a touch-up after an hour. A style built for a studio is not the same as one built for a breezy park at sunset.
Kids’ Hair for a Photoshoot: Comfort Comes First
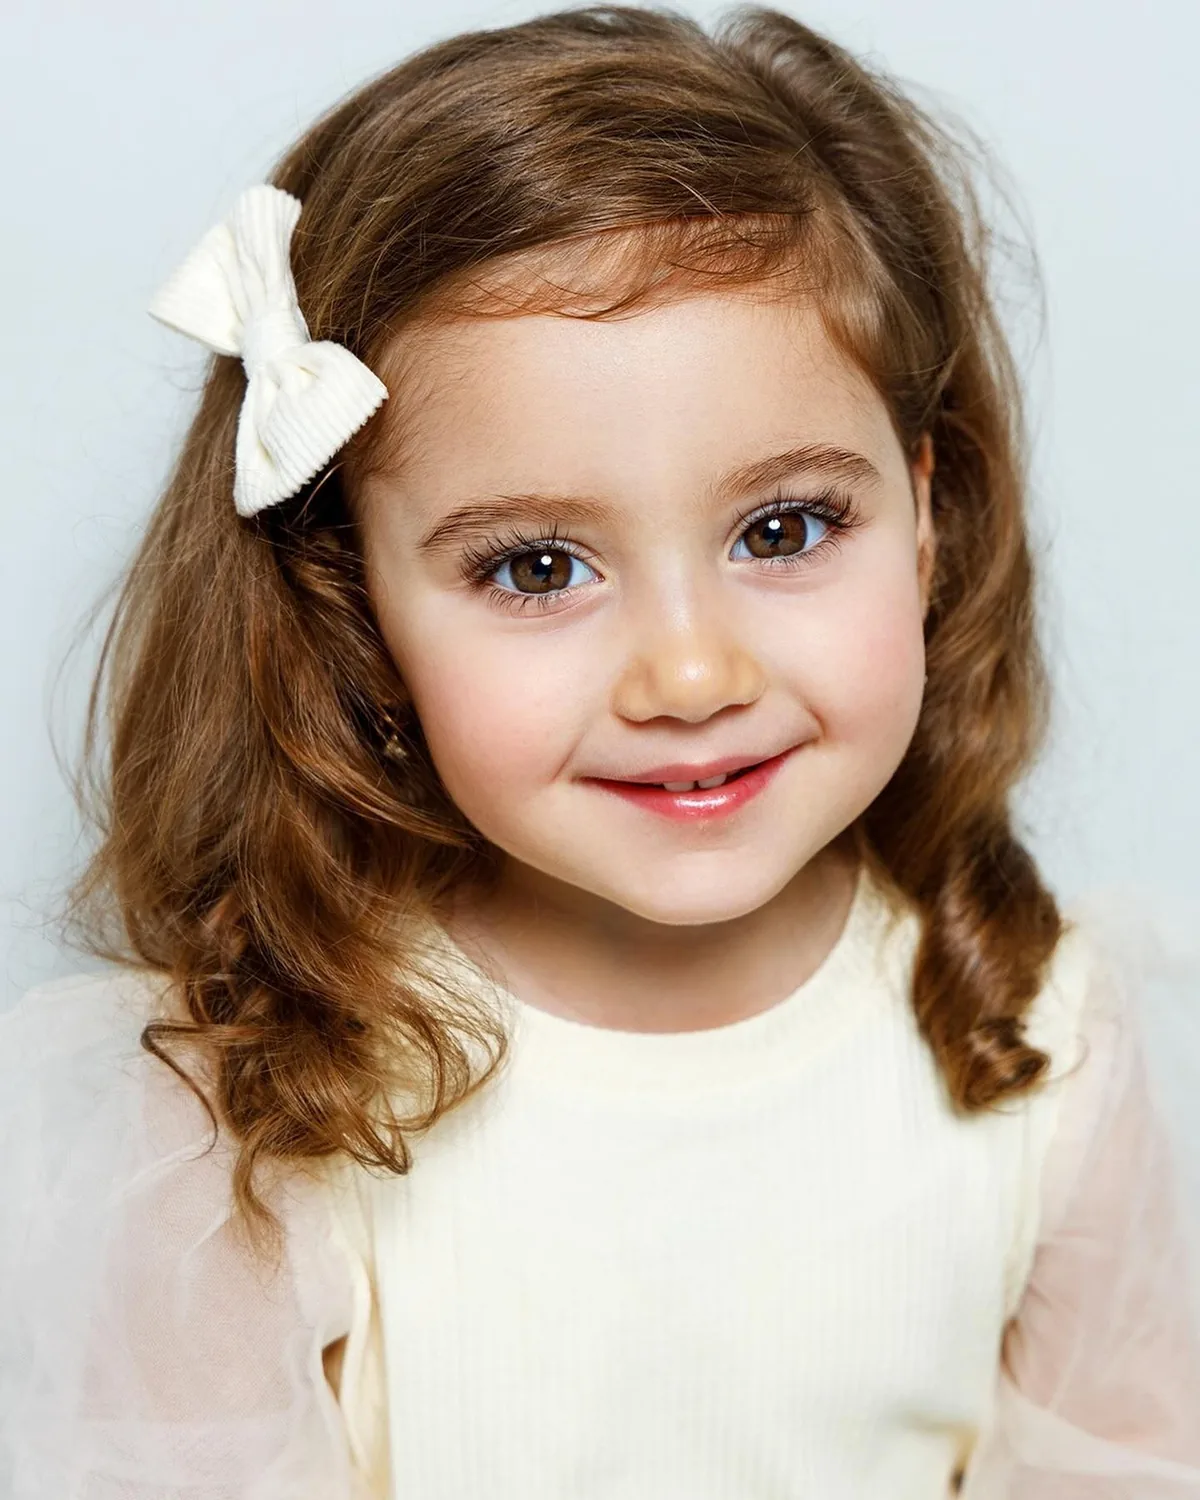
Children photograph best when they forget about their hair entirely. The moment a child is aware of a tight braid, a scratchy clip or a heavy bow, their smile changes — and no hairstyle is worth that. Choose styles that stay put without pulling: soft braids, loose curls, a half-up twist with a comfortable clip, or a simple neat crop for boys. If it hurts, it will show.
Practise the style at home at least once, on an ordinary day, not the morning of the shoot. A child who has worn a style before will sit still for it; a child meeting it for the first time will pull at it within minutes. Keep the accessories light — one bow, one clip, one ribbon — and carry spares, because the first one will end up on the grass.
Quick verdict: comfort beats perfection for every child under ten. A relaxed child with slightly messy hair always photographs better than a miserable child with perfect hair.
Grandparents’ Hair: Classic, Comfortable and Camera-Ready
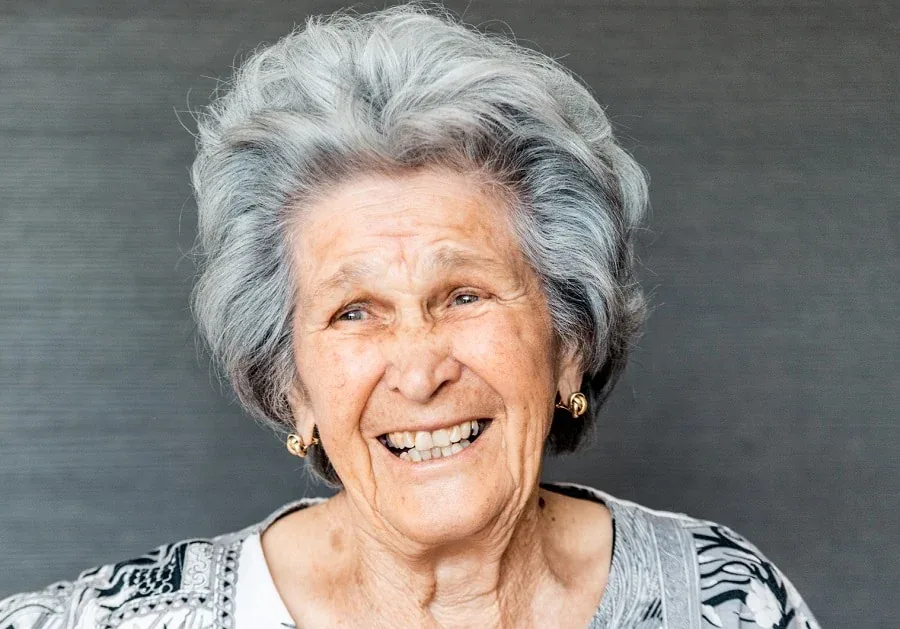
Grandparents anchor a family photograph, and their hair should look like them on their best day — not like a younger person’s style borrowed for the occasion. Classic shapes suit the camera beautifully: a neat short bob, soft silver curls, a tidy side sweep, or a gentle comb-over. Silver and white hair photographs wonderfully in soft light, with a natural glow that younger hair cannot imitate.
Comfort matters just as much as style. Avoid anything that needs constant holding, pinning or checking, and avoid brand-new cuts or colours on the week of the shoot — a familiar style, freshly tidied, always looks better than an experiment. A light purple shampoo in the week before will keep silver hair bright rather than yellow, and a little shine serum will stop it looking dry on camera.
Best for: anyone who wants grandparents to look dignified and relaxed. Ask them what they like, keep it familiar, and let their own style lead — the camera loves confidence.
Touch-Ups on the Day: The Little Kit That Saves the Shoot
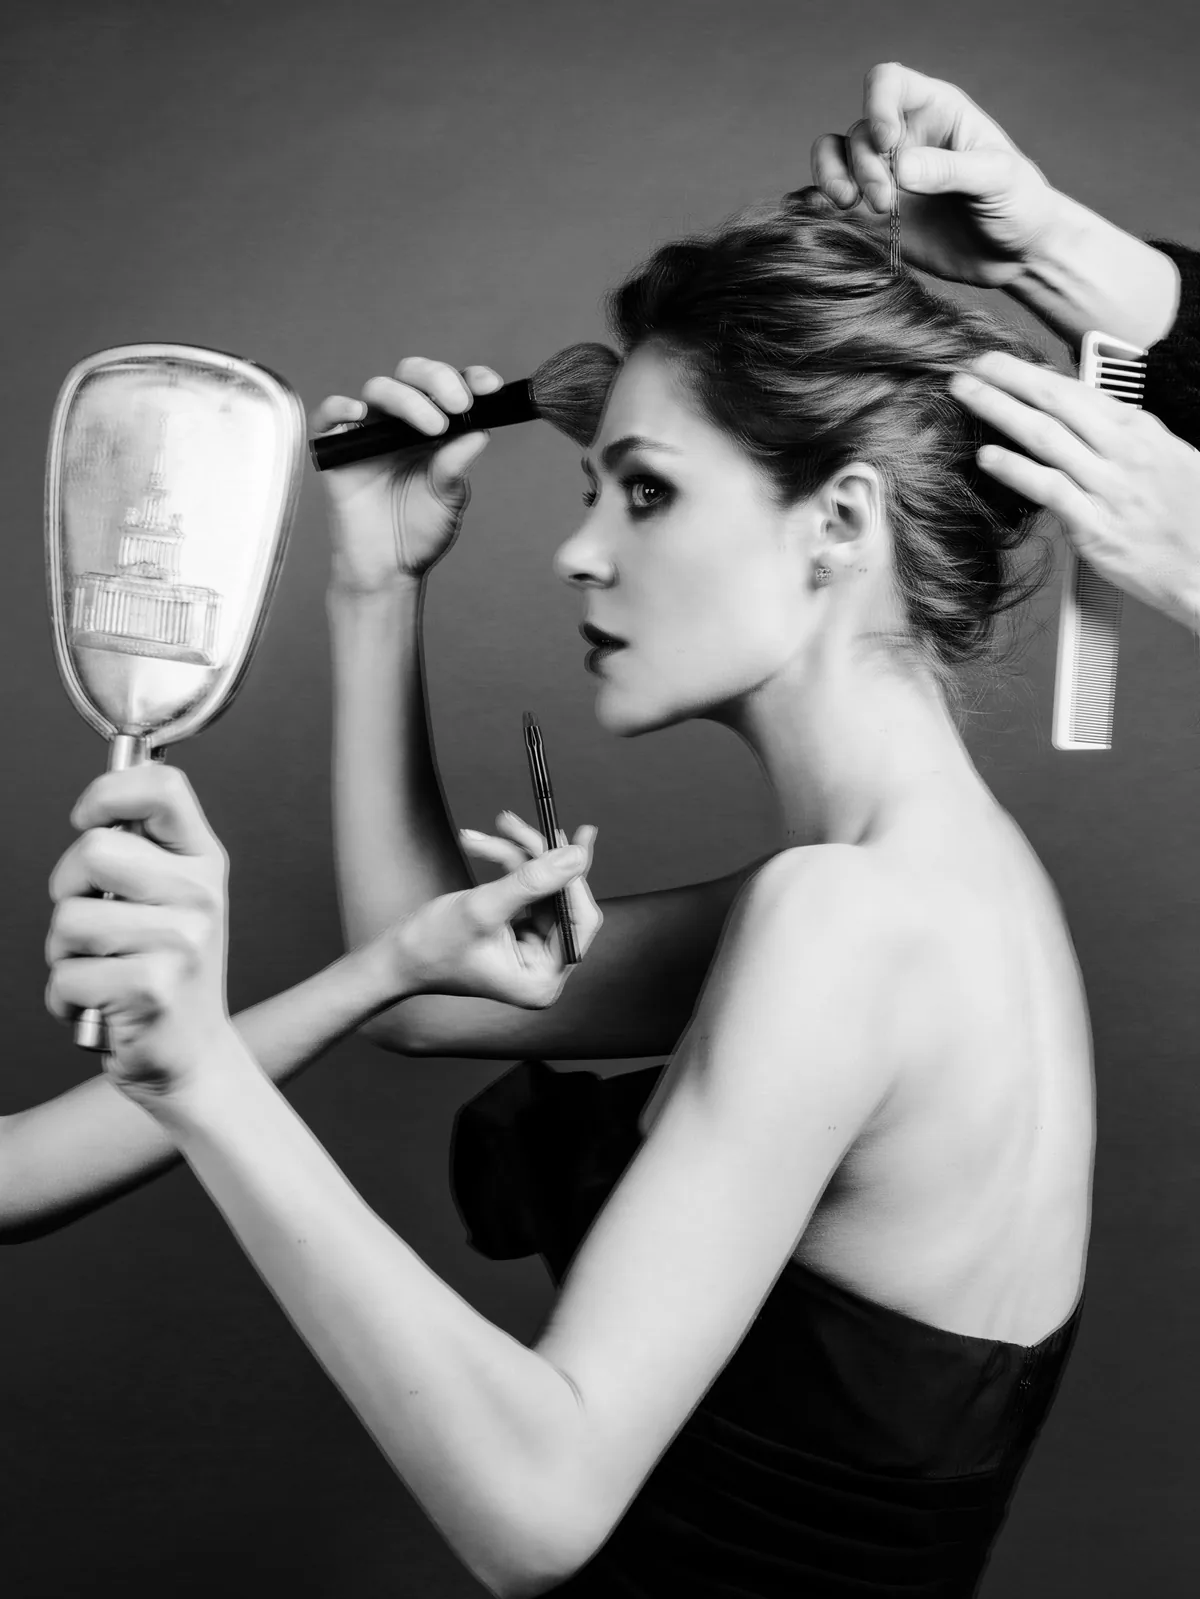
Every family shoot needs a small hair kit, and it fits in one bag. Pack a soft brush, a few bobby pins in each hair colour in the family, two clear elastics, a small bottle of shine serum, a travel-size flexible hairspray, a pack of tissues for shiny foreheads, and a couple of clips for children. That is all — a full salon in a tote bag, and it will be used within ten minutes of arriving.
Assign one adult to hair duty, ideally someone who is not being photographed in every frame. Their job is a quick check before each new set-up: smooth the flyaways, straighten a parting, re-pin a bun, and wipe a smudge of lipstick from a collar. Five seconds of checking between shots saves hours of wishing later, and it keeps the photographer shooting instead of waiting.
Common mistake: over-spraying between shots. A light mist holds a style; a heavy coat makes hair look stiff and shiny in flash. Touch, smooth, pin — spray only once, lightly, at the start.
What to Tell Your Photographer About Hair
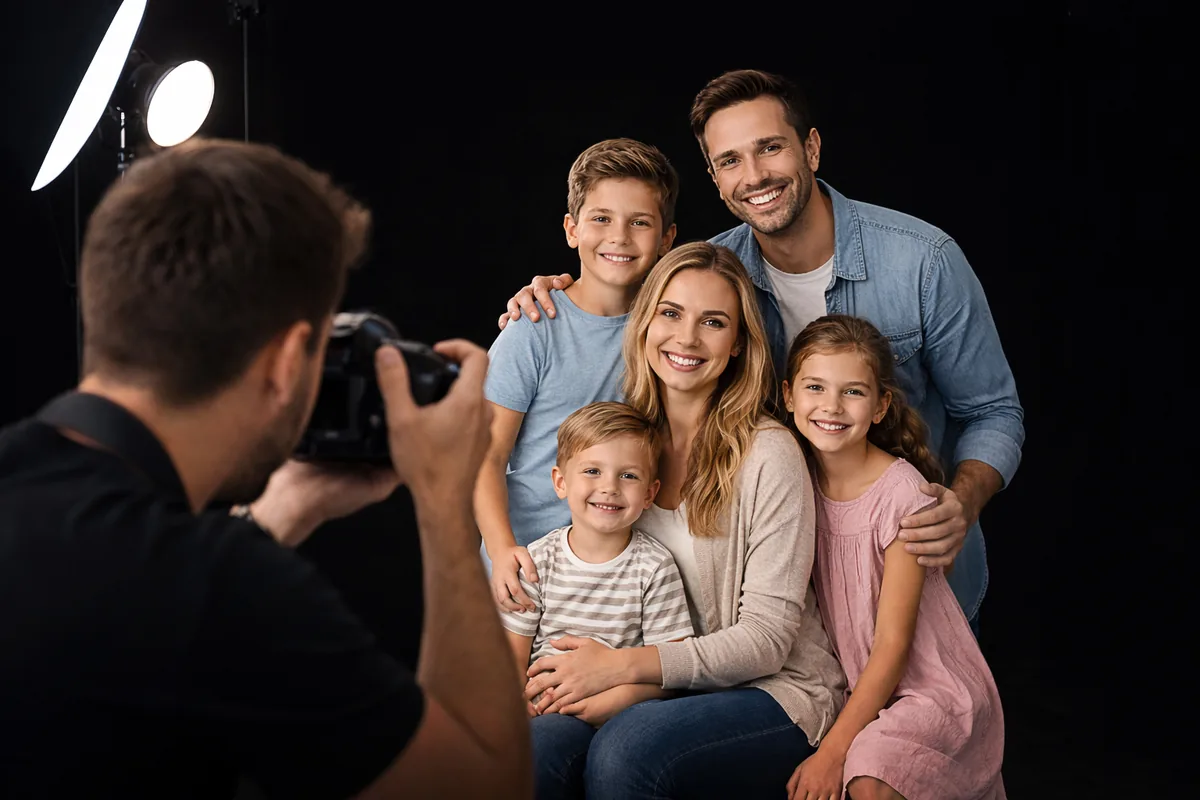
Tell your photographer about hair before the shoot, not during it. Mention who has very fine hair that falls flat, who has curls that grow in humidity, which child hates having their hair touched, and whether anyone is trying a new style for the first time. A photographer who knows will choose angles, light and poses that flatter the hair instead of fighting it.
Ask how they handle wind and movement. A good photographer will shoot a mix of still, posed frames and moving, laughing ones, so a little wind-blown hair looks joyful rather than messy. Agree on a signal for a hair check between set-ups, and ask for a quick look at the back of the camera after the first few frames — if a style is not working from a certain angle, it is far better to know in minute five than in the final gallery.
Quick verdict: hair is part of the brief, not an afterthought. Five minutes of conversation beforehand gives you a gallery where every hairstyle looks intentional.
Mum’s Soft Blowout
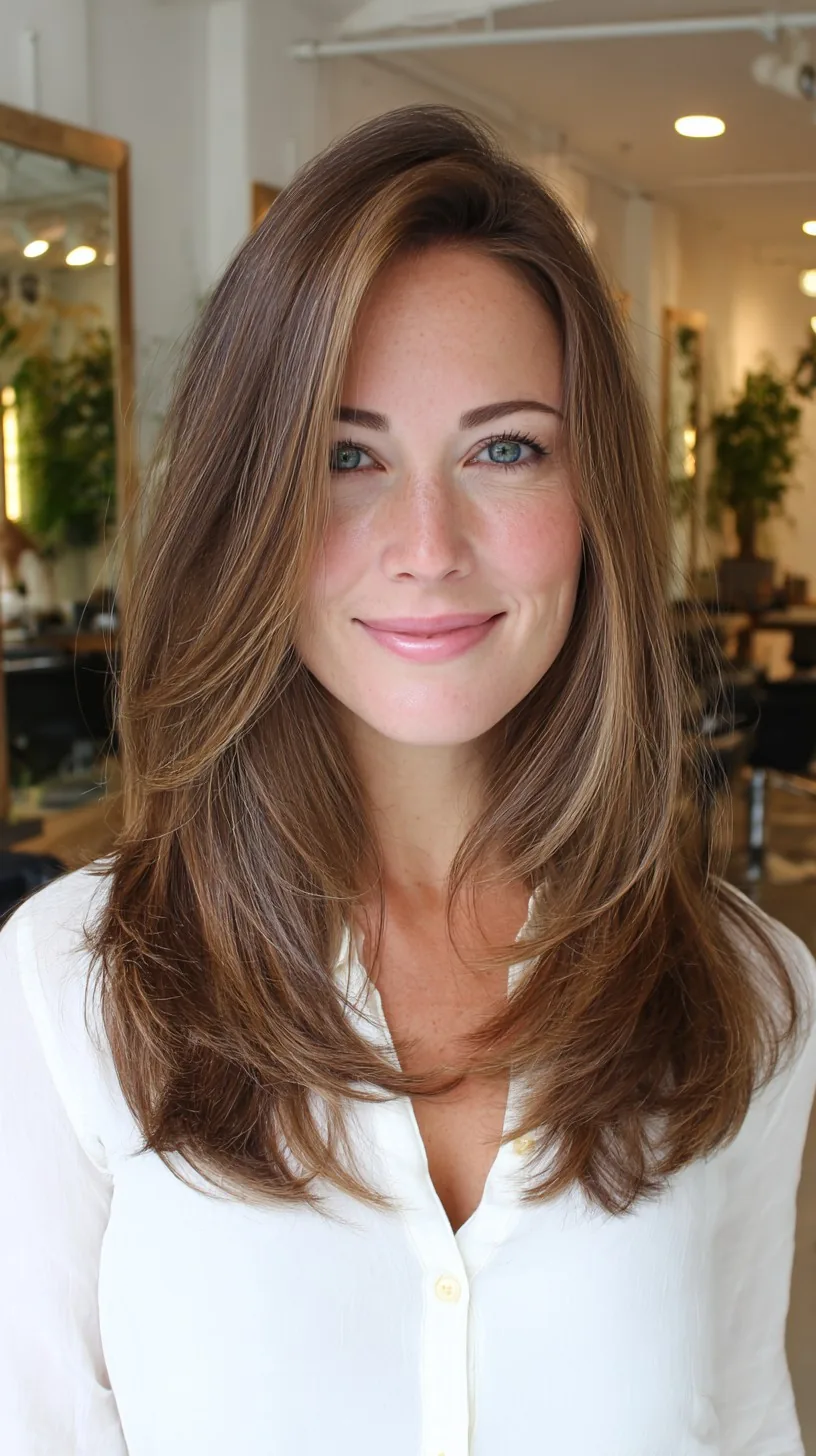
A soft blowout is the safest choice a mum can make for a family photoshoot, and often the best. The hair has volume at the roots, gentle movement through the lengths, and a smooth, glossy finish that catches the light in every frame. It suits almost every face shape, works with dresses and smart outfits alike, and looks just as good in a close-up as it does in the full group shot.
Best for: mums with medium to long hair who want a polished but relaxed look that lasts from the first frame to the last, without needing constant attention.
How to style: blow-dry with a large round brush, lifting at the roots and curling the ends under, then let the hair cool completely before brushing through with your fingers. A light-hold spray and a drop of serum on the ends will keep the shine without stiffness.
What to ask your stylist: for long layers through the front, so the blowout frames your face instead of hiding it, and whether your hair will hold volume outdoors or needs a little extra root lift.
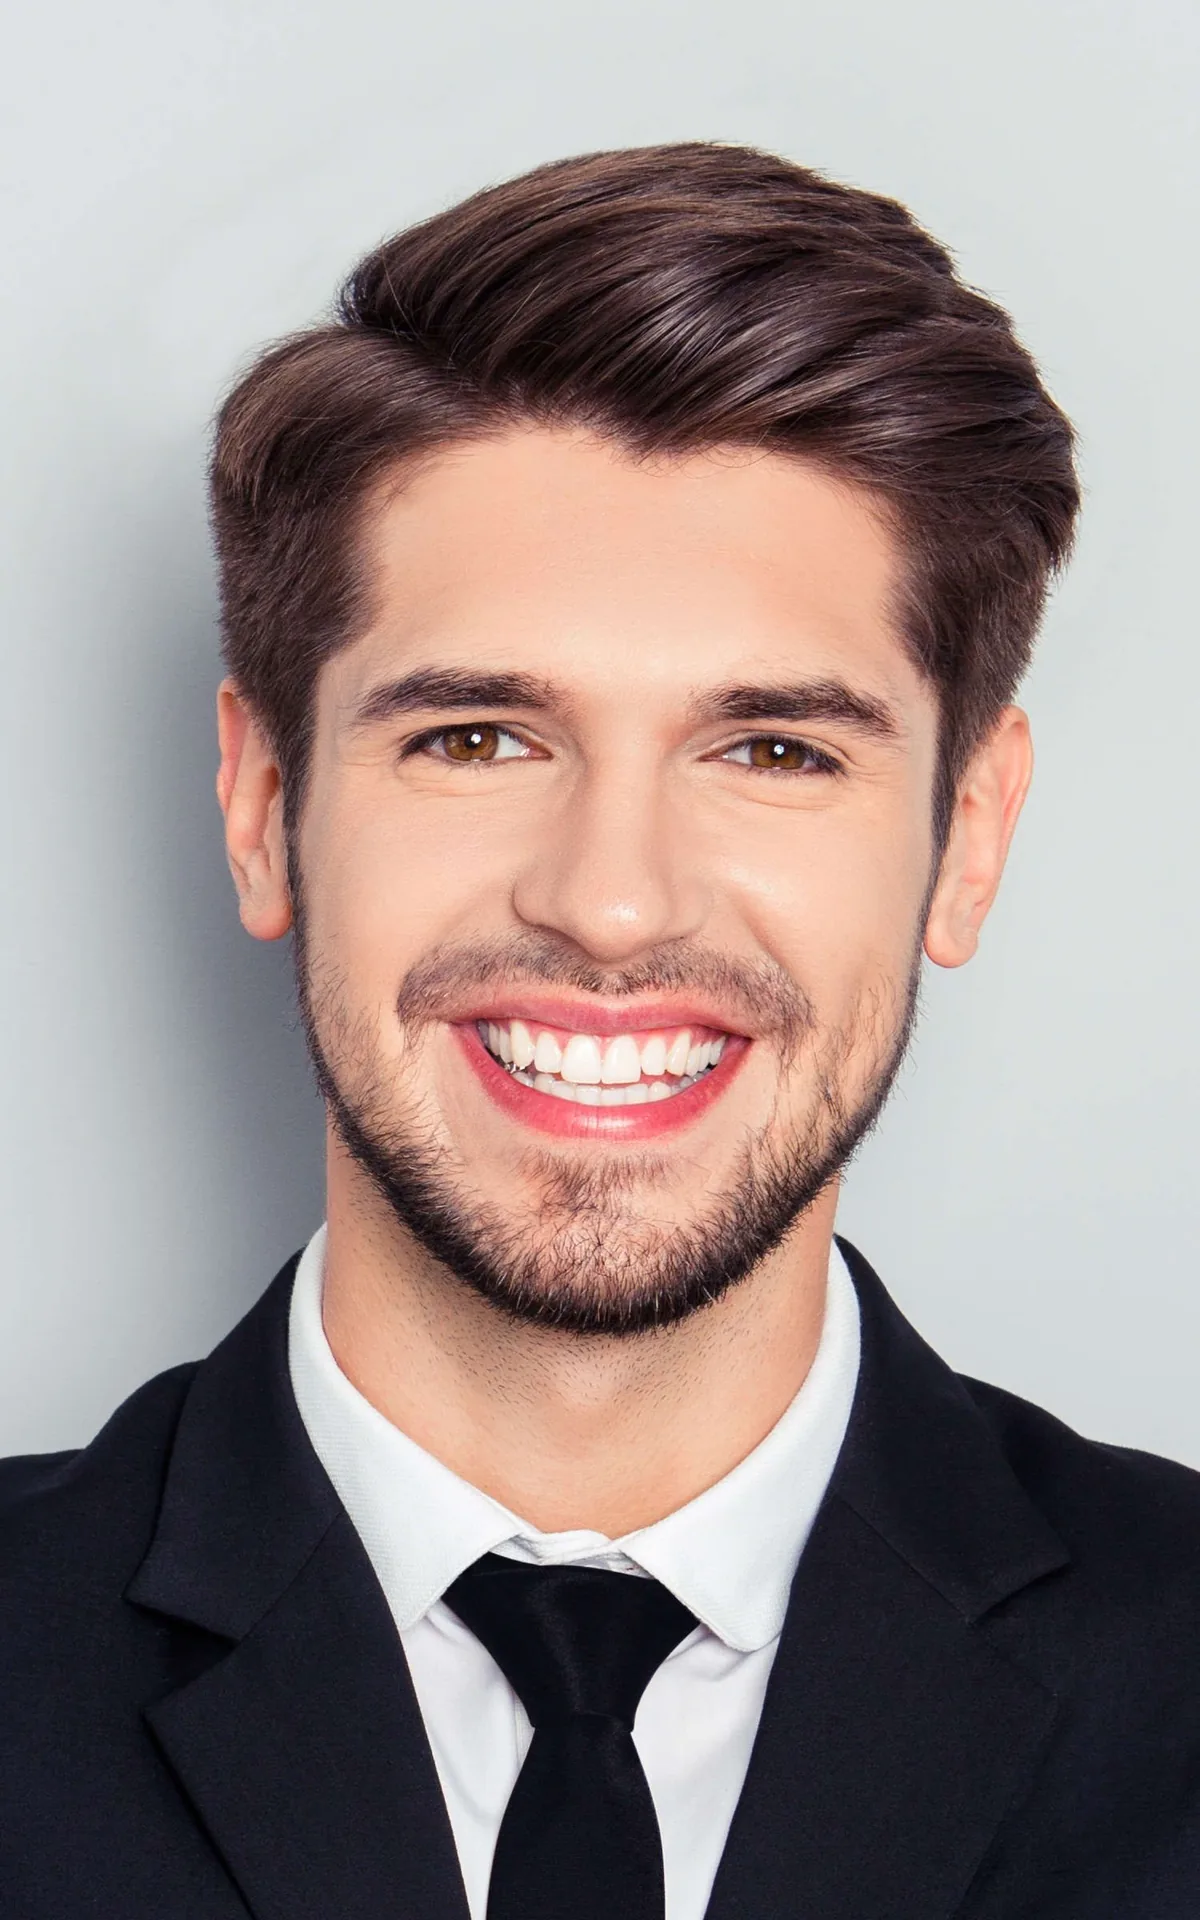
Dad’s Classic Side Part
The classic side part has photographed well for a hundred years, and it still does. It is neat without looking stiff, smart without looking overdone, and it flatters almost every man in a family portrait. The clean line of the part gives the face structure on camera, and the swept top adds height that balances the frame beautifully.
Best for: dads who want to look smart with almost no effort, and for men with straight or slightly wavy hair that falls naturally to one side.
How to style: ask your barber for a clean side part with a short, tapered back and sides, then style with a little matte pomade, combing the top over to your natural parting. Keep the finish soft — a wet, shiny look reflects camera flash.
What to ask your stylist: where your natural parting sits, because forcing hair against its growth makes it fall apart within an hour. A good barber will find it in seconds.
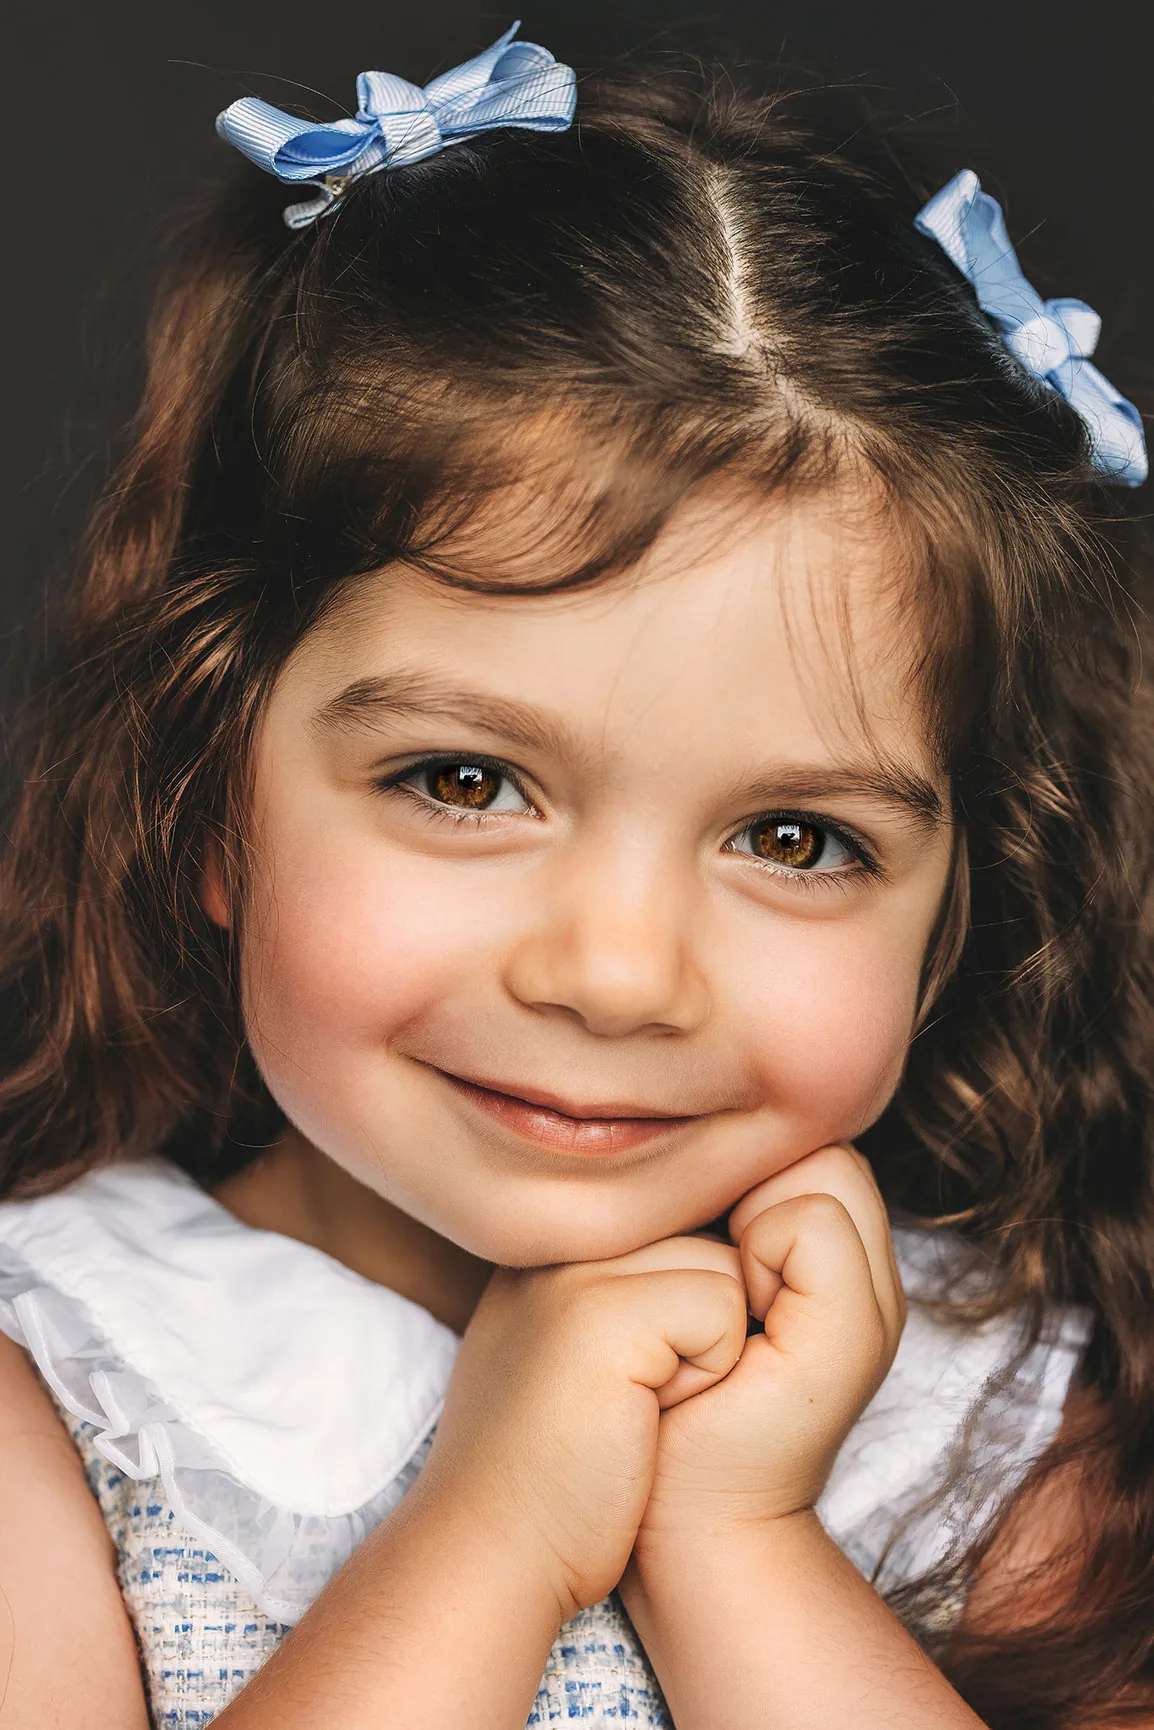
Little Girl’s Loose Curls with a Bow
Loose curls with a single bow are the kind of childhood photograph that grandparents frame twice. The curls give the hair shape and bounce on camera, while the bow adds one clear, sweet detail without overwhelming a small face. It works on natural curls and on hair curled gently with a wide iron, and it survives hugs, spins and sitting on the grass far better than a complicated updo.
Best for: little girls aged three to eight with medium or long hair, especially for outdoor shoots where the curls can move a little in the breeze.
How to style: curl in large sections with a wide-barrel iron on a low heat, or braid damp hair the night before and undo it in the morning for heat-free curls. Pin one bow at the side, not the top, so it shows in profile as well as face-on.
What to ask your stylist: whether a heat-free overnight curl will hold in your daughter’s hair, and what clip will grip fine hair without slipping or pulling.
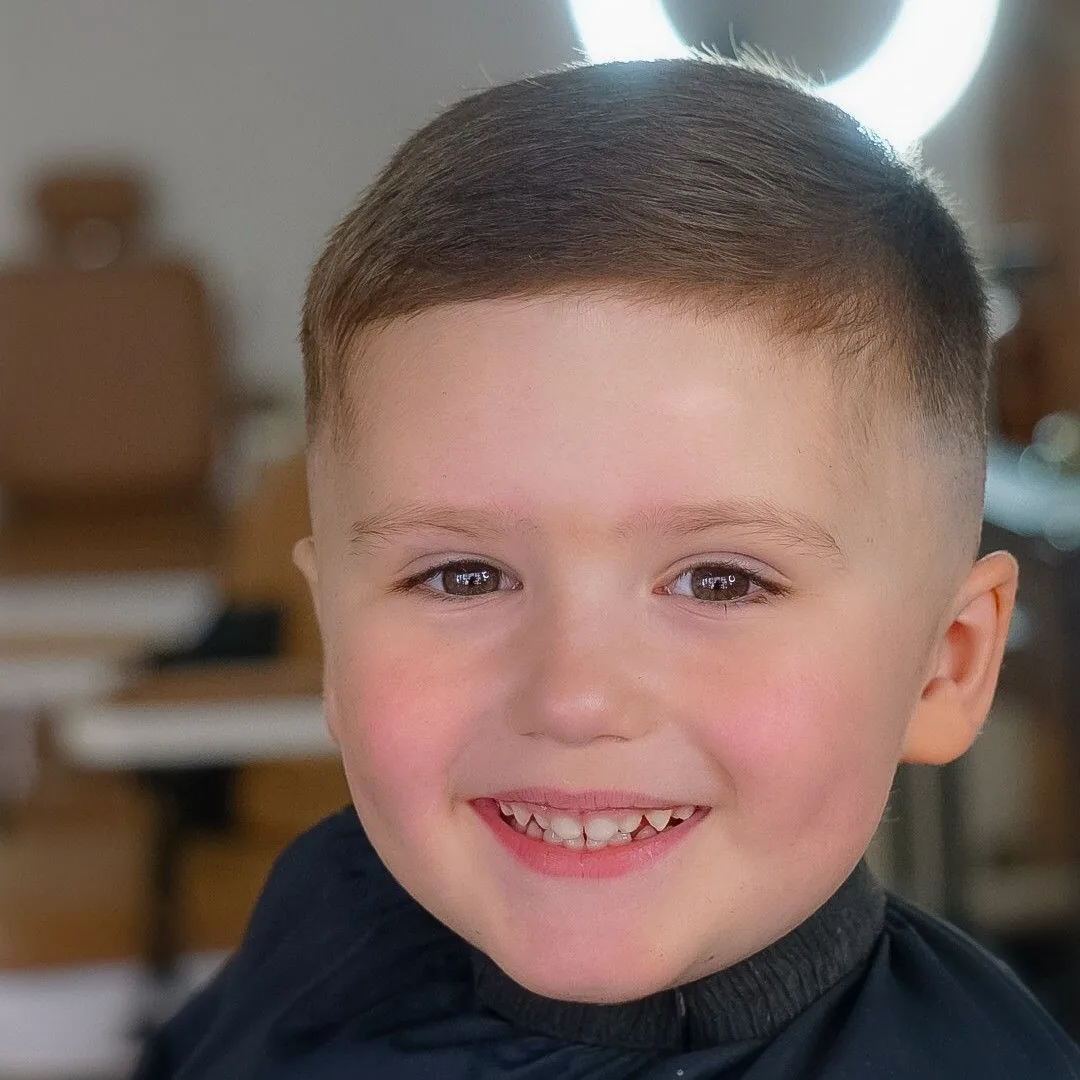
Little Boy’s Neat Textured Crop
A neat textured crop is the easiest win in a family photoshoot: it looks tidy in every single frame, it needs no maintenance between shots, and it lets a little boy be a little boy — running, climbing and laughing — without anyone worrying about his hair. The texture on top stops it looking flat or severe, and the short sides keep the shape clean on camera.
Best for: little boys of any age, especially active ones, and for families shooting outdoors where longer hair would blow into eyes within minutes.
How to style: ask the barber for short back and sides with a little length left on top, then rub a pea-sized amount of light styling cream through the top and push it forward or to one side. No gel, no stiffness — it should look like hair, not a helmet.
What to ask your stylist: for a cut that will still look neat two weeks after the shoot, so the photograph is not the only time it looks good.
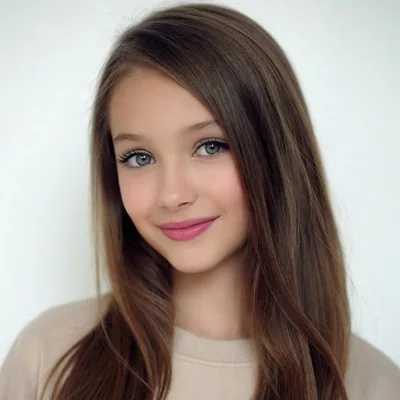
Teen Girl’s Long Layers
Long layers are a teenage girl’s best friend on camera. They give long hair movement and shape instead of letting it hang in one heavy sheet, and they catch the light in a way that makes the whole photograph feel brighter. Layers also frame the face gently, which matters in a group shot where a teenager can otherwise disappear behind her own hair.
Best for: teenage girls with long hair who want to look grown-up without looking over-styled, and for girls who usually wear their hair down and want to keep it that way.
How to style: ask for long, face-framing layers rather than short ones, then add loose waves with a wide iron, curling away from the face. Brush through with your fingers so the waves fall into one soft shape.
What to ask your stylist: how the layers will grow out over the next few months, and whether a little face-framing colour would lift the style on camera without looking obvious.
Teen Boy’s Modern Quiff
A modern quiff gives a teenage boy height, shape and a little bit of attitude — exactly what makes him look confident rather than posed in a family photograph. The volume on top lengthens the face on camera, the short sides keep the silhouette tidy, and the style reads clearly even in a wide group shot where smaller details disappear.
Best for: teenage boys with straight or wavy hair who like a bit of style, and for boys who are old enough to sit still for a blow-dry but young enough to want their hair to look cool.
How to style: blow-dry the front upwards and back with a round brush, then work a small amount of matte clay through the top and push it into place with your fingers. Finish with a light mist of flexible spray.
What to ask your stylist: for a quiff length that suits his hair thickness — too long and it collapses, too short and it will not stand up. Bring a photo of the exact height he likes.
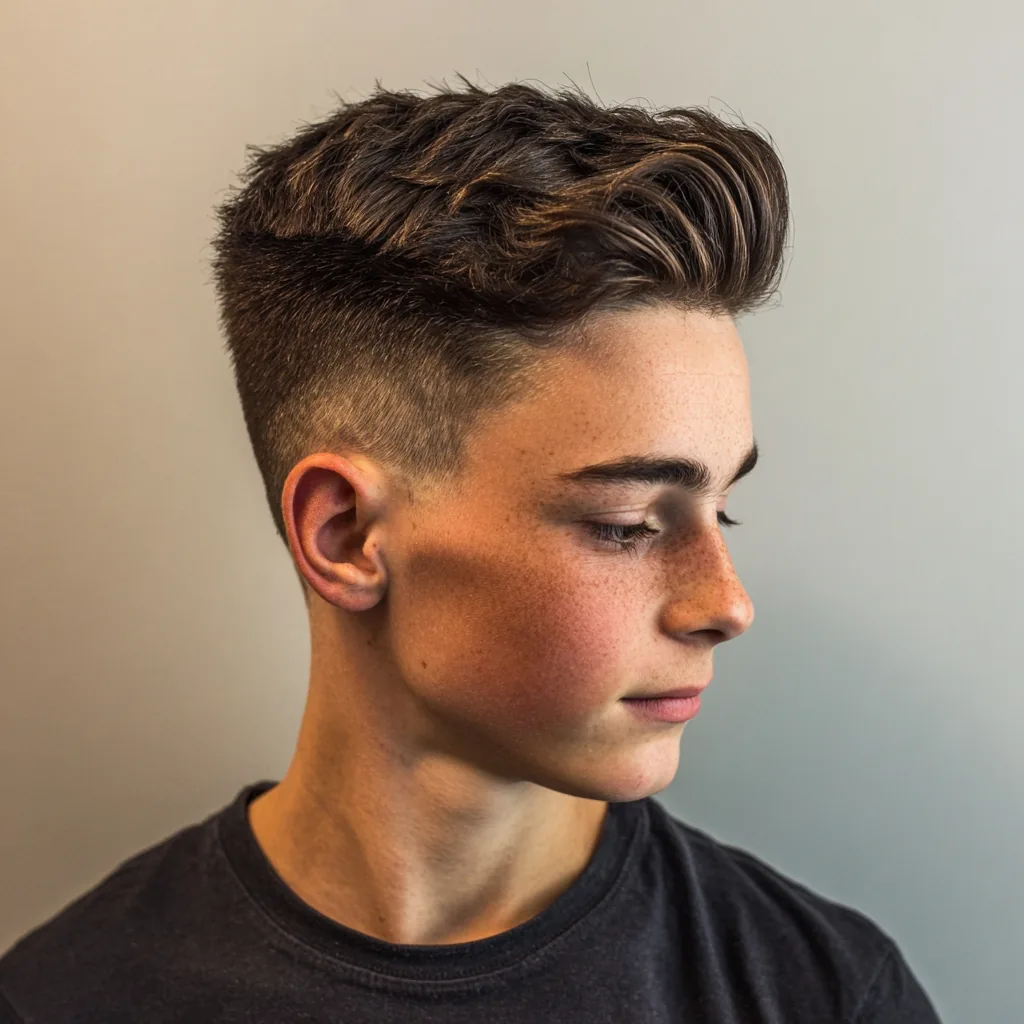
Grandma’s Elegant Short Bob
An elegant short bob is one of the most photogenic styles a grandmother can wear. It frames the face cleanly, shows off a smile and a pair of earrings, and holds its shape beautifully from the first photograph to the last. The clean line of the bob also photographs with a lovely sharpness that softer, longer styles sometimes lose in a group frame.
Best for: grandmothers with straight or slightly wavy hair who like a classic, tidy style, and for anyone whose longer hair has started to look thin on camera.
How to style: ask for a bob that sits at the jaw or just below, with a soft undercut at the nape to keep it light. Blow-dry smooth with a round brush, tuck one side behind the ear, and finish with a shine serum on the ends.
What to ask your stylist: whether a slightly graduated shape would suit her face better than a blunt one, and how often the bob needs a trim to keep its line.
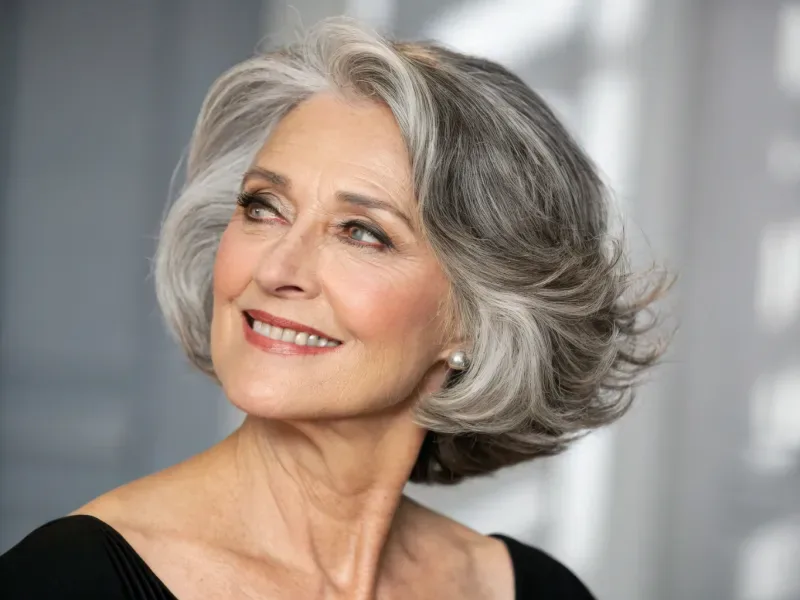
Grandpa’s Silver Side Sweep
Silver hair is a gift in a photograph — it catches the light, adds contrast against darker hair in the family, and gives a portrait a sense of history. A neat side sweep keeps that silver looking intentional and tidy, with enough length on top to show the colour and short enough sides to hold a clean shape.
Best for: grandfathers with grey or silver hair who want a classic, dignified look, and for men whose hair is thinning and needs a style that adds coverage rather than exposing it.
How to style: keep a little length on top and sweep it to the side with a soft cream, not a stiff gel. A light purple shampoo in the week before the shoot will keep the silver bright instead of yellow.
What to ask your stylist: whether a softer, textured finish would suit his hair better than a slick one, and how to style it at home without a barber’s help.
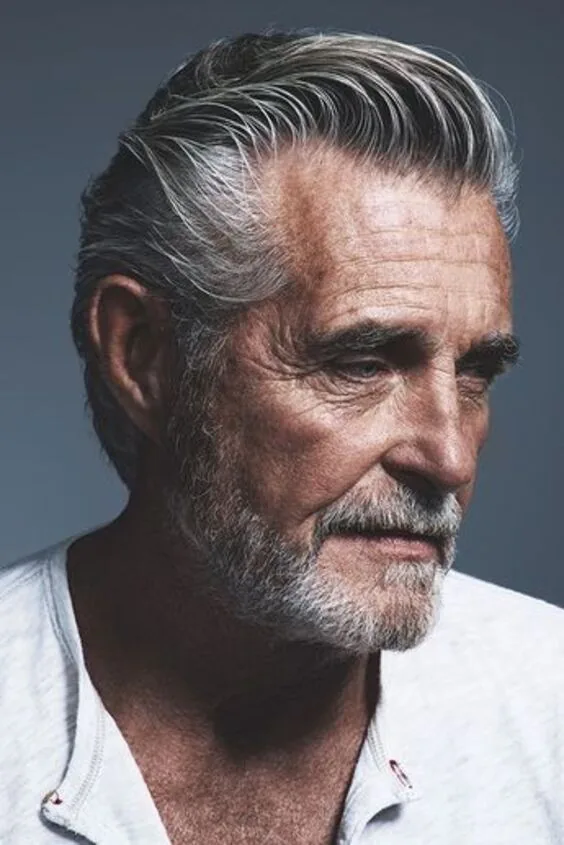
Matching Sister Braids
Matching sister braids are the photograph every parent hopes for: two girls, the same neat braids, standing side by side and looking like a team. Braids hold beautifully on camera — their shape is clear, they do not move in the wind, and they survive an entire afternoon of playing between shots. They also photograph wonderfully from the back, which is where some of the sweetest family pictures happen.
Best for: sisters aged four to twelve with medium or long hair, and for outdoor shoots where loose hair would tangle within minutes.
How to style: part the hair cleanly down the middle, braid each side in a classic three-strand or Dutch braid, and secure with clear elastics. Add a small ribbon at each end in the family’s colour palette for a coordinated finish.
What to ask your stylist: how to make the braids comfortable enough to wear for hours, and whether a looser, softer braid would suit fine hair better than a tight one.
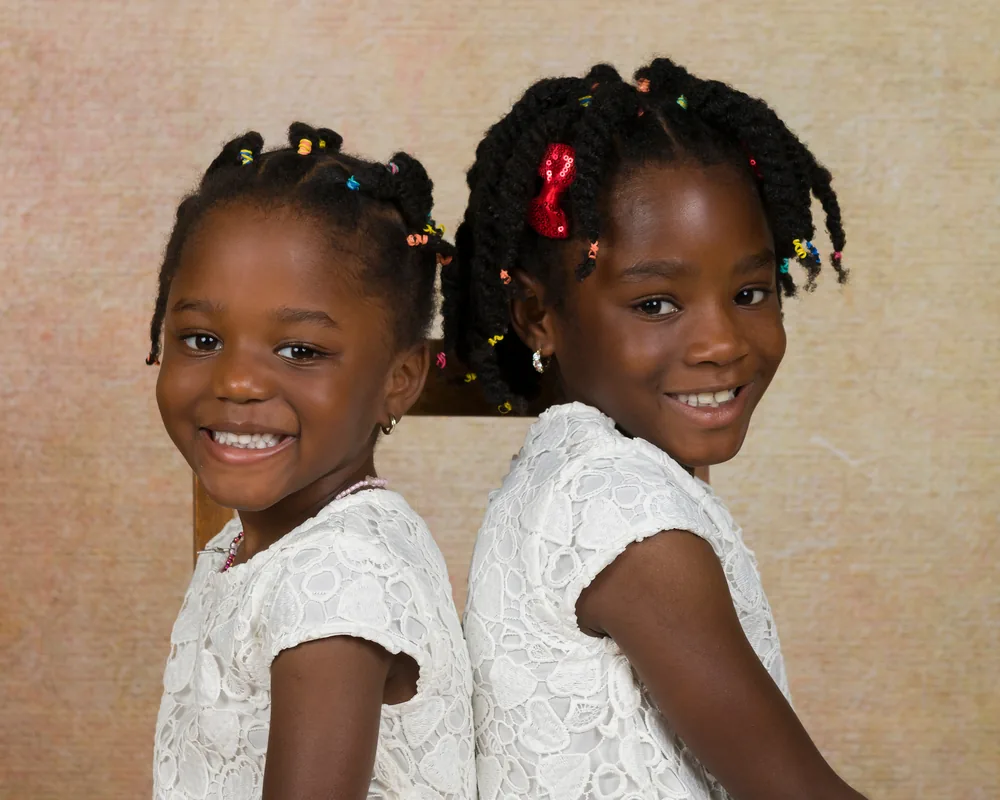
Brother-and-Sister Coordinated Cuts
Coordinating siblings is not about identical hair — it is about the same level of neatness. A brother with a tidy crop and a sister with a neat half-up style look like they belong in the same photograph, even though their hair is completely different. The shared thread is polish: both tidy, both comfortable, both themselves.
Best for: families with young children of different ages, where one child needs a simple style and the other wants something a little more special.
How to style: choose both styles the day before and try them together at home. Check they look balanced side by side — if one child looks far more dressed-up than the other, simplify the fancier style until they match in feeling.
What to ask your stylist: for styles that will both last a full afternoon, and for a cut for your son that matches the neatness of his sister’s style.
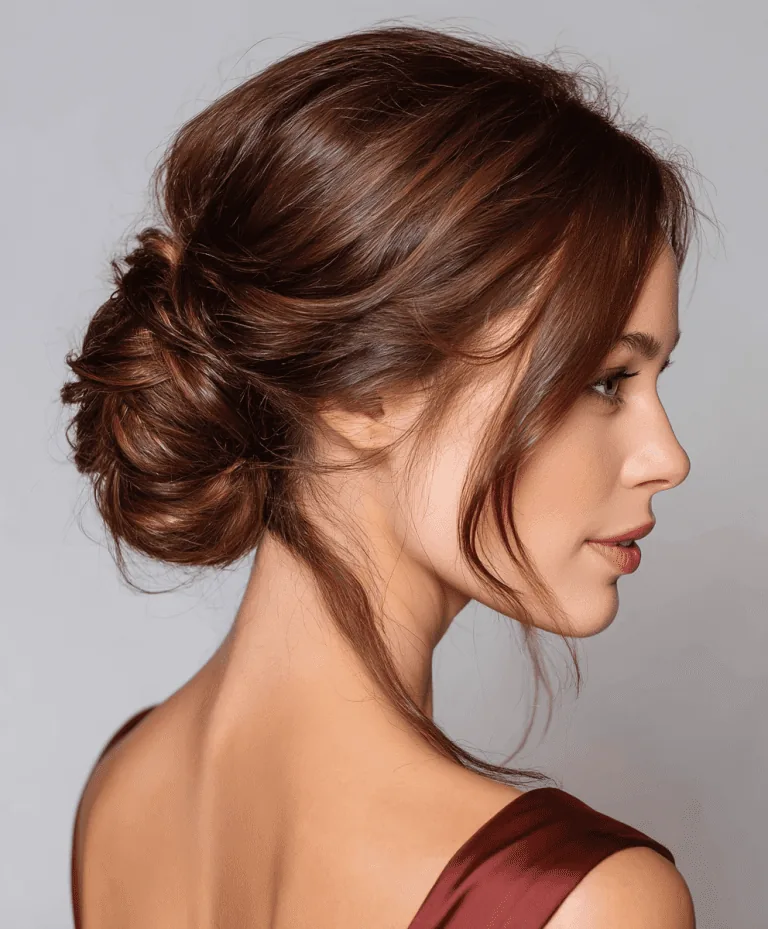
Mum’s Low Chignon
A low chignon is the quiet classic of family photography: elegant, timeless and almost impossible to get wrong. Sitting at the nape, it keeps the neck and shoulders clear, shows off earrings and a neckline, and gives the whole photograph a calm, composed feeling. It also photographs beautifully from behind, which matters when the photographer captures candid moments between poses.
Best for: mums with medium or long hair who want an updo that feels grown-up without feeling formal, and for shoots in warm weather where hair down would stick to skin.
How to style: gather the hair low at the nape, twist it loosely into a soft roll and pin it firmly, leaving a few soft pieces at the front. A middle or side part both work — choose the one you wear every day.
What to ask your stylist: how to anchor the chignon so it survives an hour outdoors, and whether a few face-framing pieces would soften the style for your face shape.
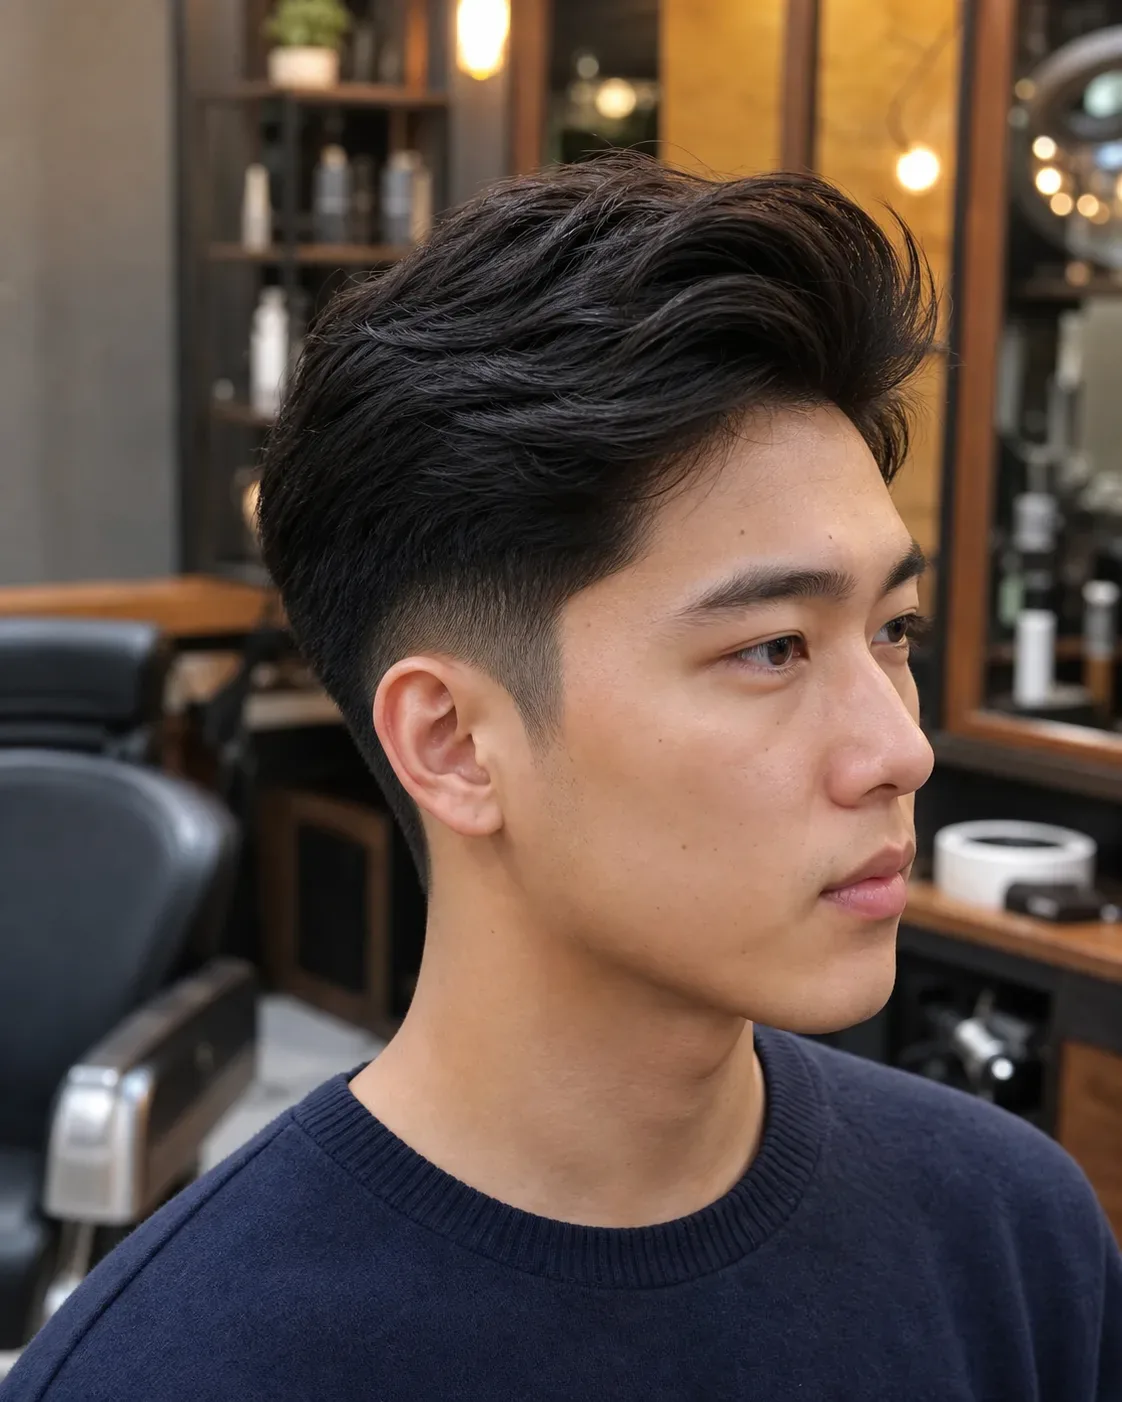
Dad’s Taper Fade
A taper fade is the modern dad’s answer to the family portrait: sharp at the sides, clean around the ears, and full of shape on top. The fade gives the haircut a crisp outline that the camera loves, while the longer top leaves room for texture, a side sweep or a little volume. It looks smart in a suit and just as good in a casual shirt.
Best for: dads who like a sharp, modern cut and do not mind a barber visit every few weeks to keep the fade fresh.
How to style: ask for a mid taper fade with texture on top, then style with a small amount of matte paste, pushing the top forward or to the side. Keep the finish natural — a fade already has enough definition.
What to ask your stylist: how high the fade should go for his head shape, and how the top should be cut so it styles itself on busy mornings.
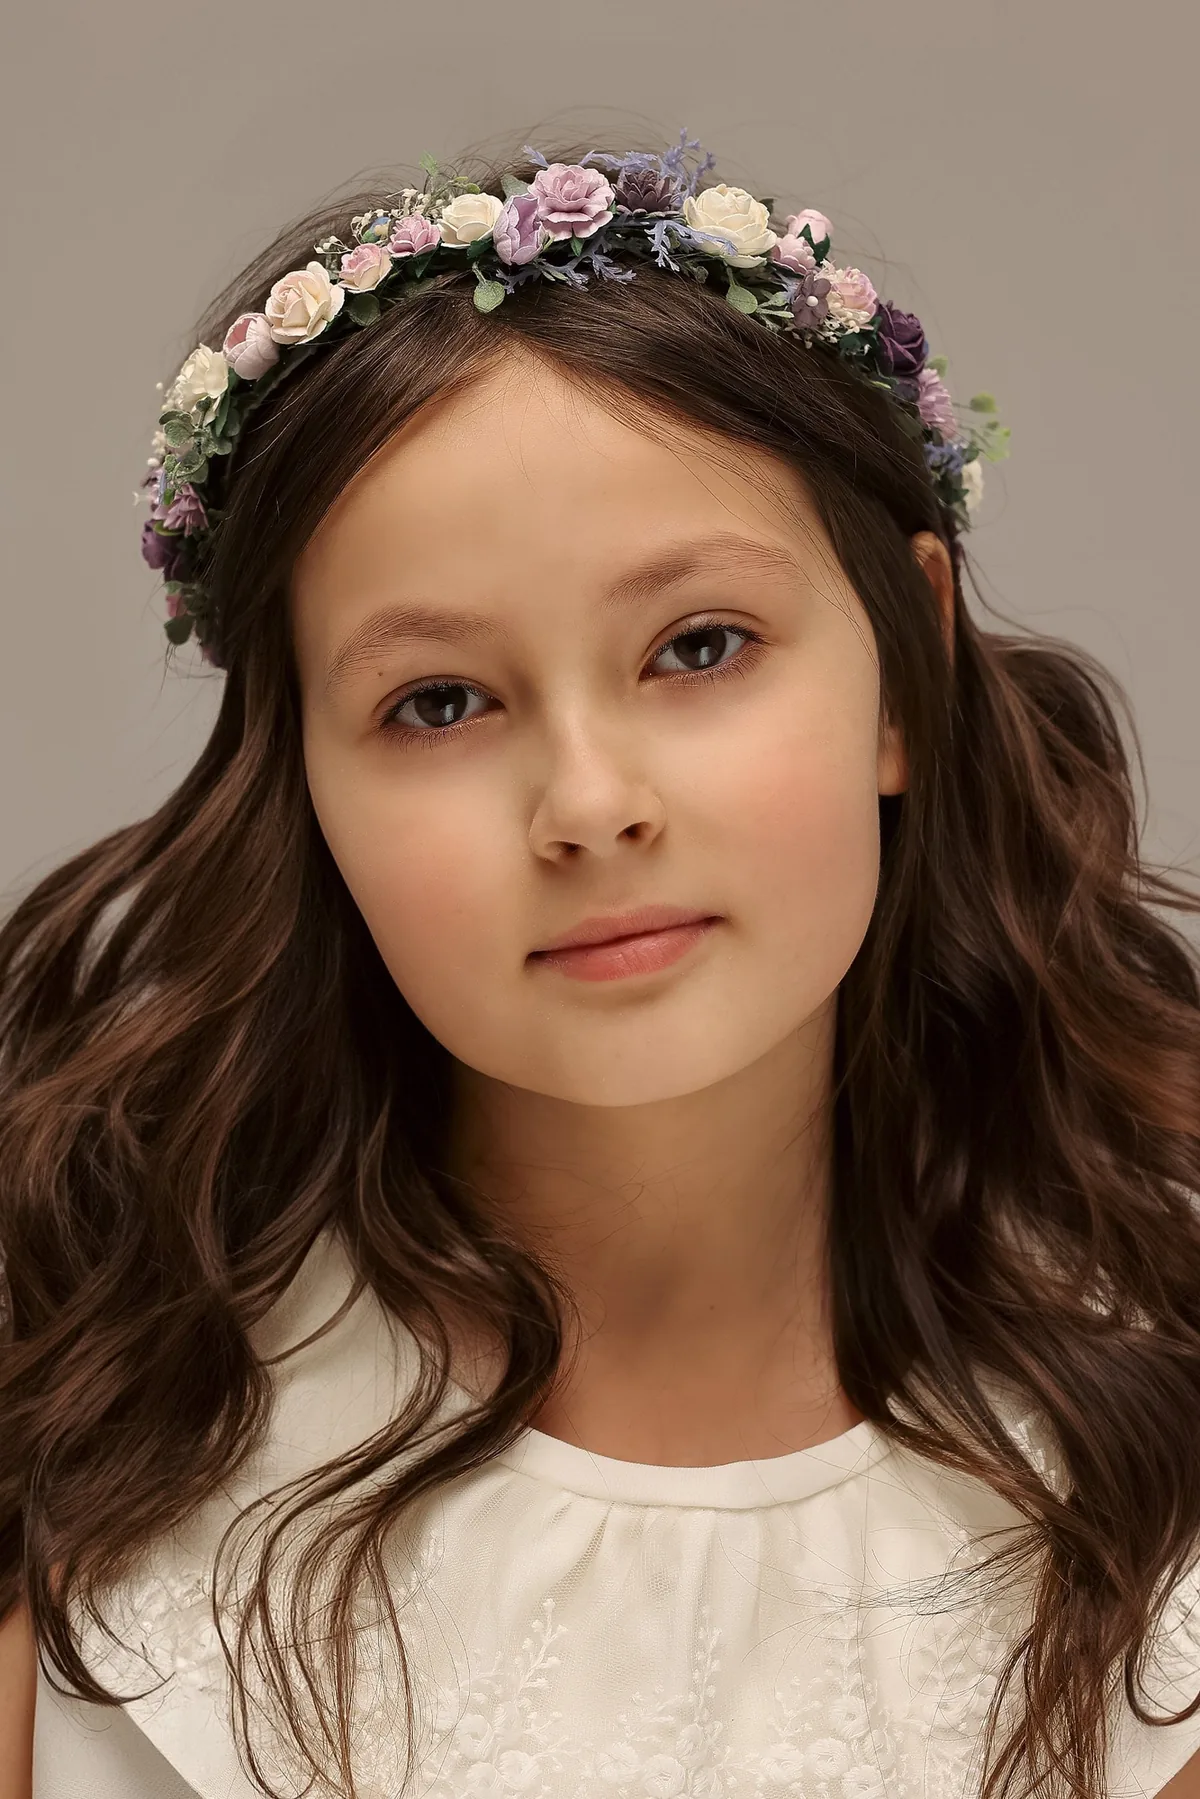
Flower-Girl Half-Up for Little Girls
A half-up style with a small flower is the prettiest compromise for a little girl: the top is neat and out of her eyes, the bottom is free to curl and move, and the flower gives the camera one lovely detail to catch. It suits garden shoots, spring portraits and any family photograph where a touch of softness is welcome.
Best for: little girls aged three to nine with medium or long hair, especially for spring and summer shoots outdoors.
How to style: take two small sections from the temples, twist or braid them back, and secure them at the crown with a small clip. Leave the rest of the hair in soft natural curls, and tuck one small flower or floral clip beside the join.
What to ask your stylist: whether a twist or a small braid will hold better in her hair type, and which clip will stay put without pulling.
A Toddler’s Soft Curls
A toddler’s soft curls need almost no styling at all — and that is exactly why they photograph so beautifully. Natural curls give a small face a halo of shape and movement, and the camera loves the way light catches each curl. The job is not to create curls but to protect them: a little leave-in conditioner, a gentle finger-comb, and nothing else.
Best for: toddlers with naturally curly or wavy hair, and for parents who want the photograph to look like their child, not like a styling session.
How to style: wash the hair the night before, apply a small amount of leave-in conditioner, and let the curls dry naturally. On the morning, refresh with a light mist of water and scrunch gently — never brush dry curls, or they turn to frizz.
What to ask your stylist: whether her curl pattern needs a curl cream or just a leave-in, and how to trim the curls so they keep their shape without losing length.
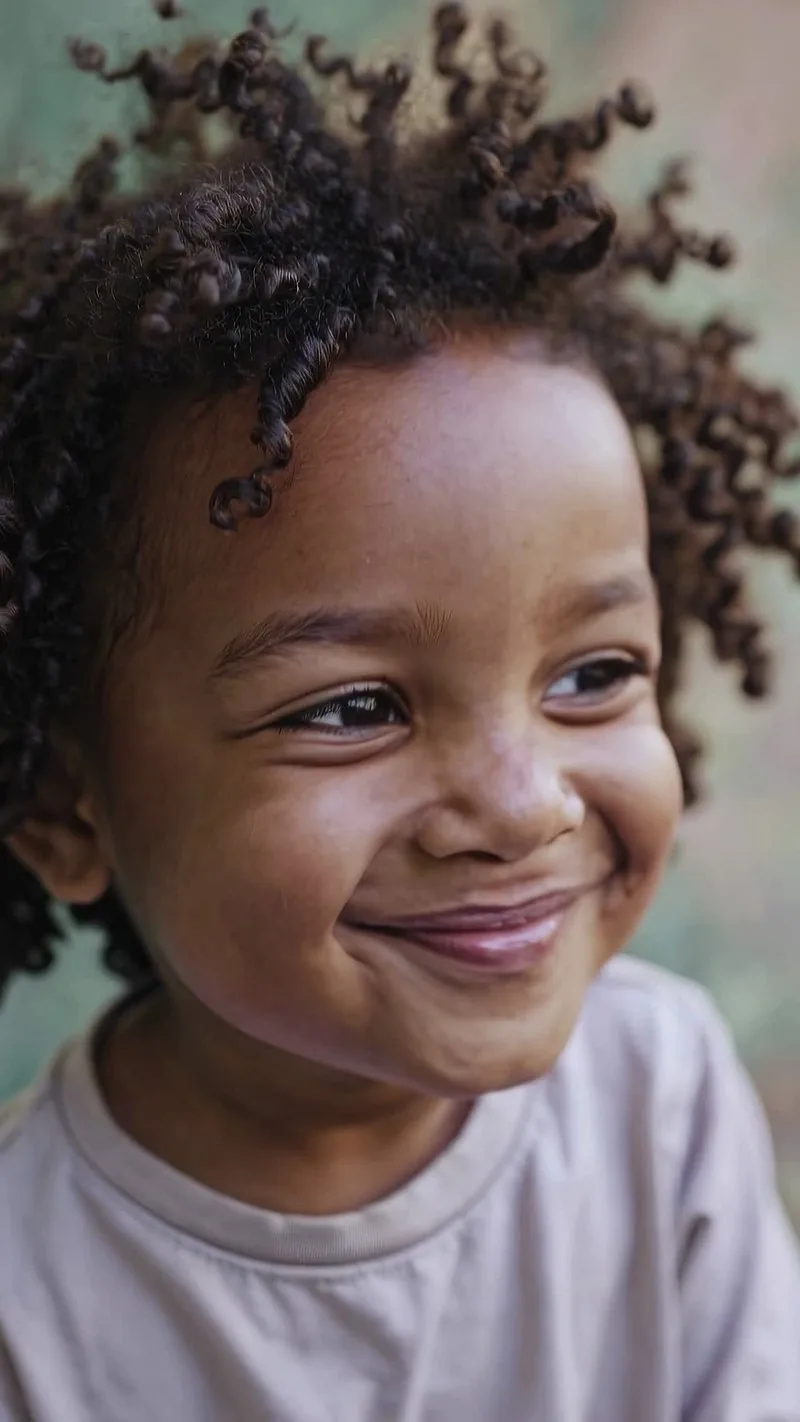
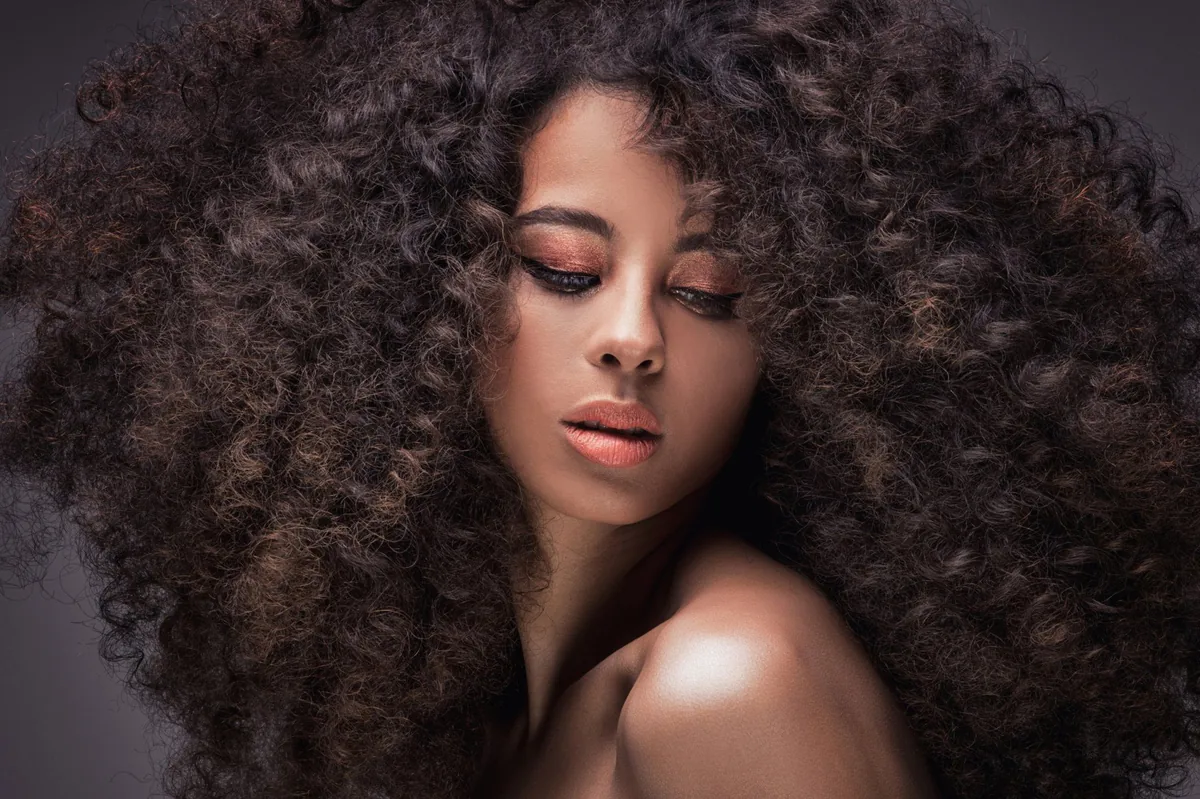
Defined Curls, Camera-Ready
Defined curls are made for the camera. Each curl catches the light separately, giving the photograph texture and depth that straight hair cannot match, and a head of well-defined curls frames the face like a portrait in itself. The key is definition without crunch: soft, separated curls that move, not a stiff, sprayed shape.
Best for: anyone in the family with naturally curly hair — mums, teens and children alike — who wants their curls to look intentional rather than accidental.
How to style: apply curl cream to soaking wet hair, scrunch upwards, and let the curls dry naturally or with a diffuser on a low heat. Once fully dry, break the cast gently with a drop of oil on your palms.
What to ask your stylist: which curl cream suits your curl pattern, and whether a few layers would help the curls sit better around your face on camera.
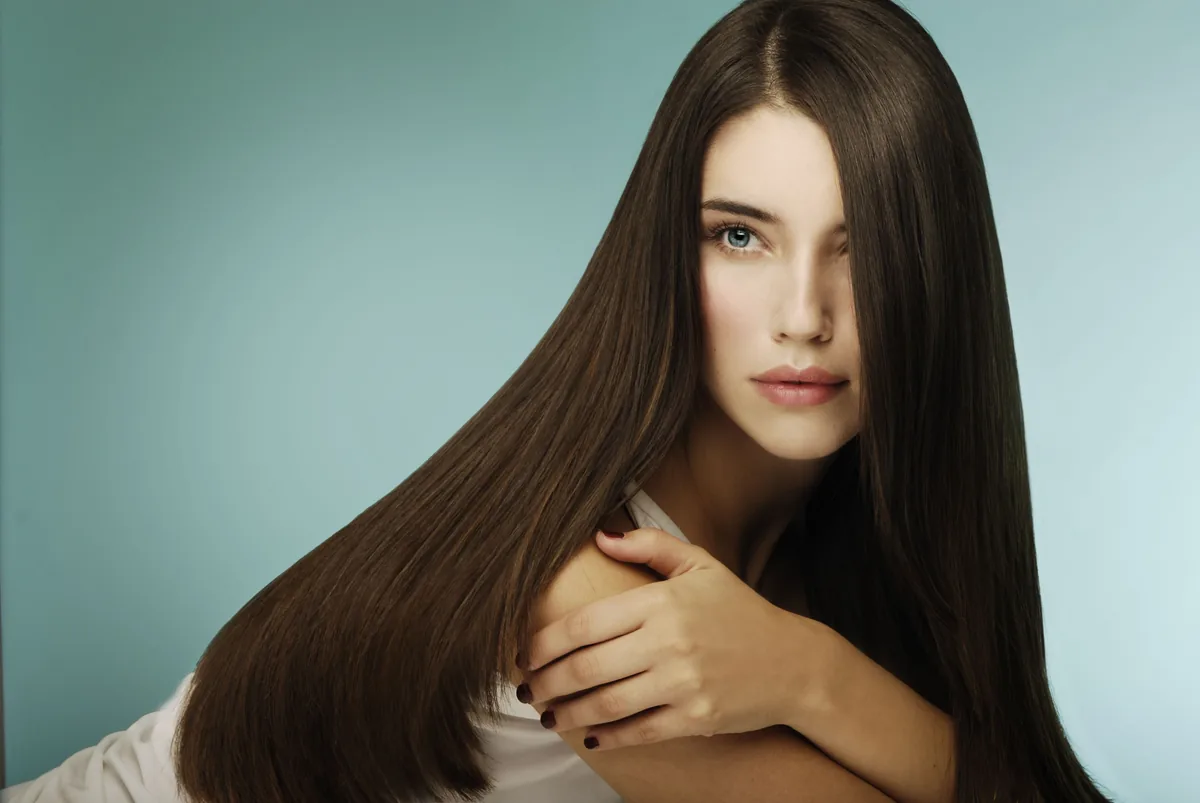
Straight Hair with a Glass Shine
Sleek, straight hair with a glass shine is one of the most striking looks in a family photograph, because it creates a clean, dark frame around the face that makes eyes and smiles stand out. The shine is the whole point: light bounces off smooth hair and gives the portrait a polished, almost editorial quality.
Best for: anyone with naturally straight hair, or hair that straightens well, who wants a clean, modern look that reads clearly even in a wide group shot.
How to style: blow-dry smooth with a paddle brush, then pass a flat iron through in slow sections, always with heat protectant. Finish with a tiny amount of shine serum smoothed over the surface with your palms.
What to ask your stylist: for a cut with a blunt, clean edge, which makes straight hair look thicker and glossier on camera than feathered ends do.
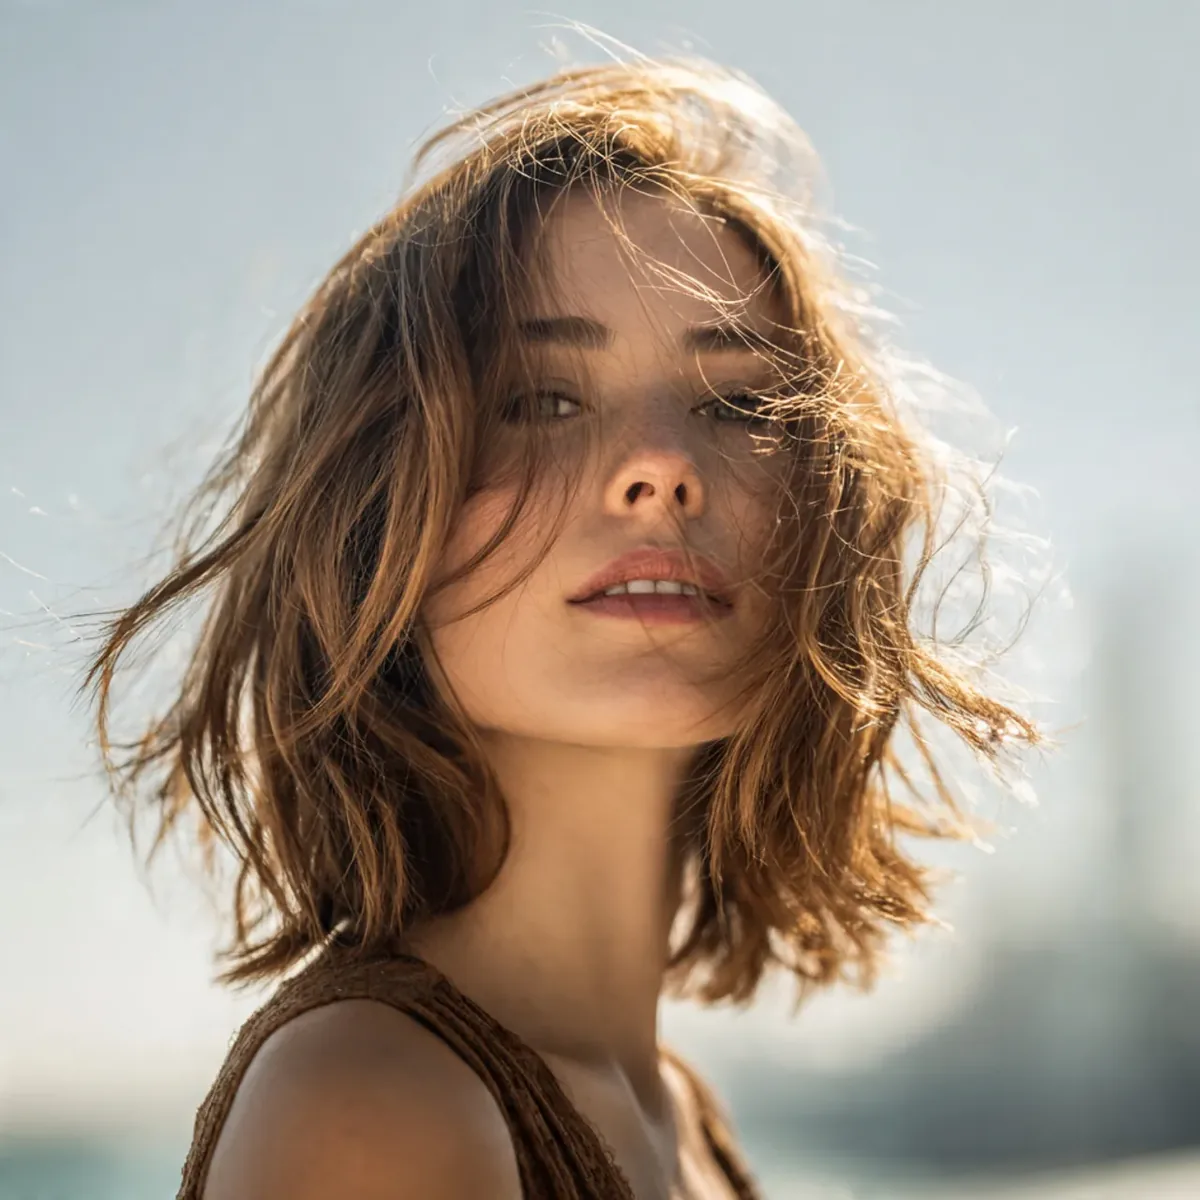
Effortless Wavy Hair
Effortless waves are the style that looks like you did nothing at all — which is precisely why they photograph so well. The waves have movement, texture and a relaxed feeling that makes a family portrait look like a happy afternoon rather than a formal occasion. They suit almost everyone, and they forgive wind, humidity and a long afternoon far better than a sleek blowout.
Best for: mums and teen girls with medium or long hair who want a relaxed, natural look, and for beach, garden or park shoots where a polished style would feel out of place.
How to style: curl in alternating directions with a wide iron, leaving the ends straight, then shake the waves out with your fingers and add a little texturising spray. The messier the finish, the more natural it looks.
What to ask your stylist: for long layers that help the waves form naturally, so the style works even on days when you do not have time to curl it.
The Classic French Twist
The French twist is the most elegant updo in this whole guide, and one of the most photogenic. Its smooth, vertical roll gives the head a long, graceful line on camera, it keeps every strand in place for hours, and it looks wonderful from the back — which is where many of the best candid family photographs are taken.
Best for: mums and grandmothers with medium or long hair who want a formal, timeless updo, and for anyone whose hair is too fine to hold a loose bun.
How to style: gather the hair to one side, twist it upwards and tuck the ends in, pinning firmly along the fold. Smooth the surface with a brush and a light mist of spray, and leave one soft tendril at the front if you like.
What to ask your stylist: for a twist that suits your hair thickness — fine hair needs a little backcombing at the roots, thick hair needs strong pins and a slightly looser roll.
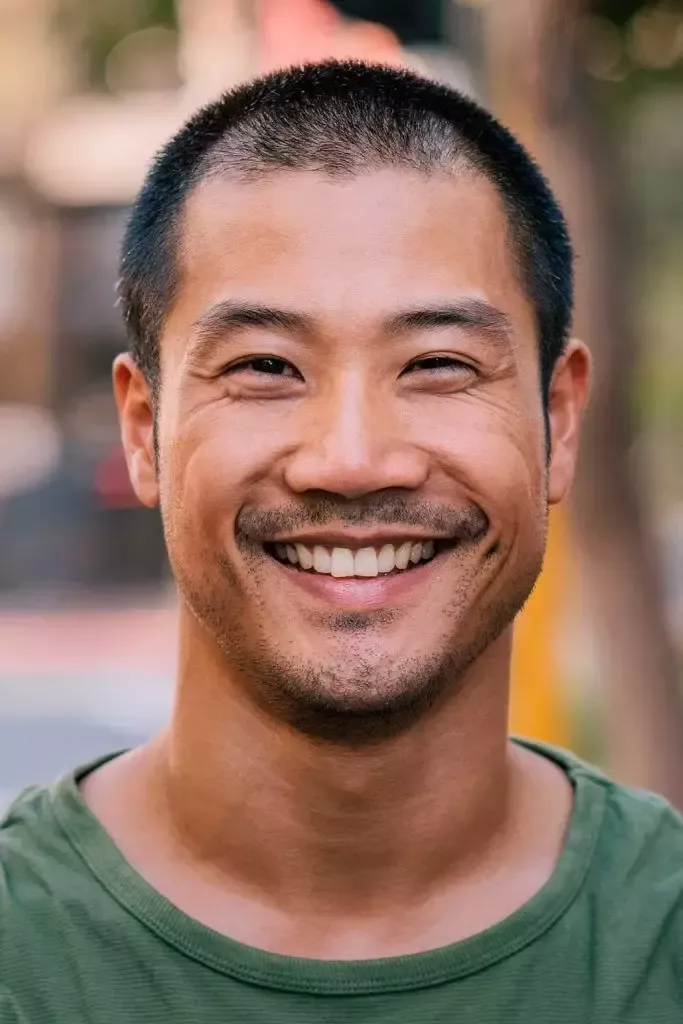
Dad’s Clean Buzz Cut
A clean buzz cut is the lowest-maintenance style in this guide and one of the most honest on camera. It shows the shape of the head and the warmth of the face with nothing in the way, and it looks the same in the first frame as it does in the last — no wind, no humidity and no toddler pulling at it will change it. In a family portrait, that reliability is worth a lot.
Best for: dads who like a sharp, no-fuss look, and for men with thick hair or a strong jawline that a buzz cut shows off beautifully.
How to style: ask your barber for a uniform short length, usually a number two or three guard, with the edges cleaned up around the ears and neckline. At home, a little moisturiser on the scalp keeps it looking healthy rather than dry.
What to ask your stylist: which guard length suits his head shape best, and whether a slight fade at the sides would add a little extra polish for the photographs.
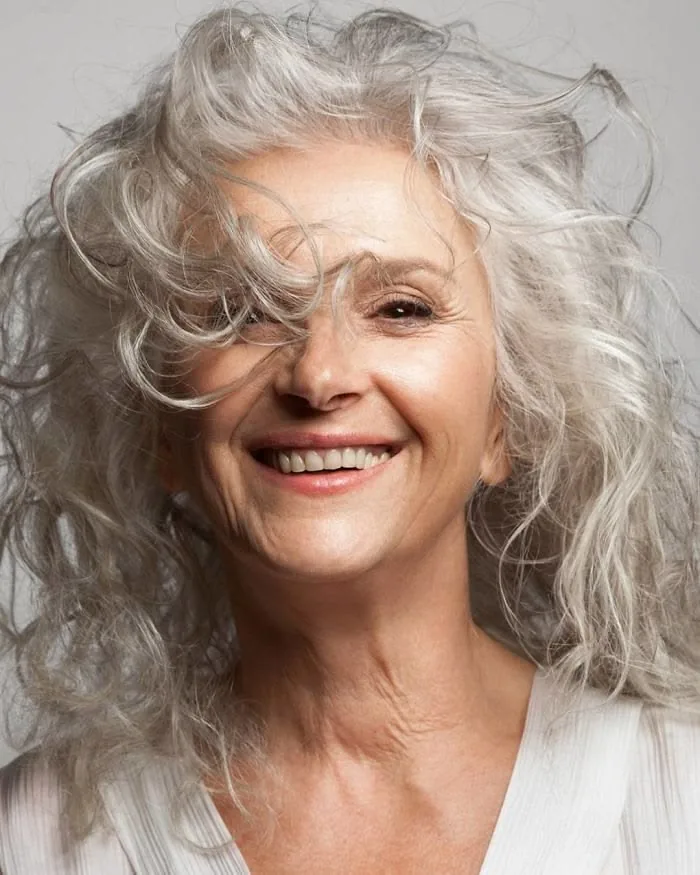
Grandma’s Soft Silver Curls
Soft silver curls are pure warmth on camera. The curls give silver hair volume and movement, the silver itself glows in soft light, and the combination makes a grandmother look joyful rather than formal in a family portrait. It is a style with personality — gentle, lively and full of life.
Best for: grandmothers with naturally curly or wavy hair, and for anyone whose silver hair has gone a little flat and needs lift around the face.
How to style: set the hair in large rollers or curl with a wide iron, then brush through very gently so the curls soften into waves. A light-hold spray will keep the shape without making the silver look stiff or dull.
What to ask your stylist: for a cut that lets the curls fall naturally around the face, and whether a weekly purple shampoo would keep the silver bright for the shoot.
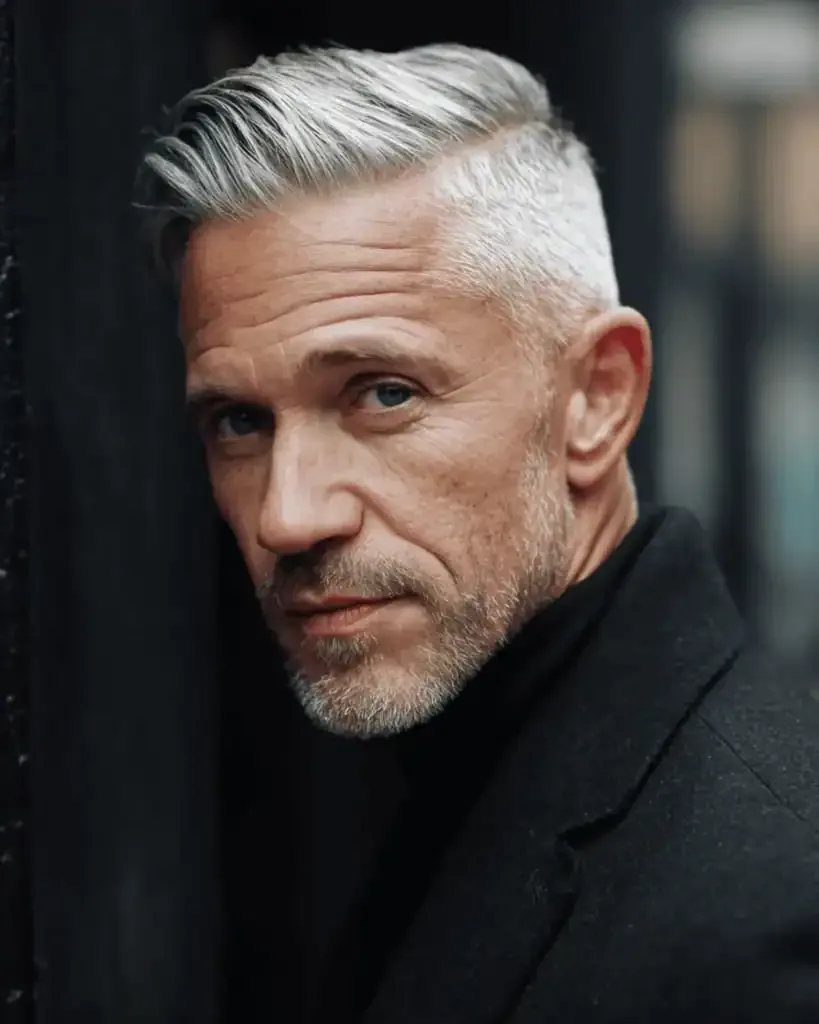
Grandpa’s Neat Comb-Over
A neat comb-over is a dignified, classic choice that suits grandfathers beautifully in a family portrait. It gives thinning hair coverage and direction, it frames the face with a clean line, and it looks like the man himself — familiar, comfortable and smart. The camera rewards that kind of quiet confidence.
Best for: grandfathers with thinning or fine hair who want coverage without fuss, and for men who have worn a side part for years and want to keep it.
How to style: keep the top long enough to sweep across, use a light cream rather than a heavy gel, and comb it into place while the hair is slightly damp. A clean neckline and tidy sideburns finish the look.
What to ask your stylist: how much length to keep on top for the best coverage, and whether a softer, textured finish would look more natural than a slick one.
Mum’s Half-Up Twist
A half-up twist is the perfect middle ground for mums: the top is neat, lifted and out of the face, while the rest of the hair falls free in soft waves. On camera it gives you the best of both worlds — the polish of an updo and the softness of hair down — and it holds up far better than hair worn completely loose.
Best for: mums with medium or long hair who want to look polished without committing to a full updo, and for windy outdoor shoots where loose hair would blow everywhere.
How to style: take two sections from the temples, twist each one back and cross them at the crown, securing with pins that match your hair colour. Curl the lengths loosely and leave a few soft pieces around the face.
What to ask your stylist: whether a twist or a small braid will hold longer in your hair, and how to hide the pins so the style looks seamless from every angle.
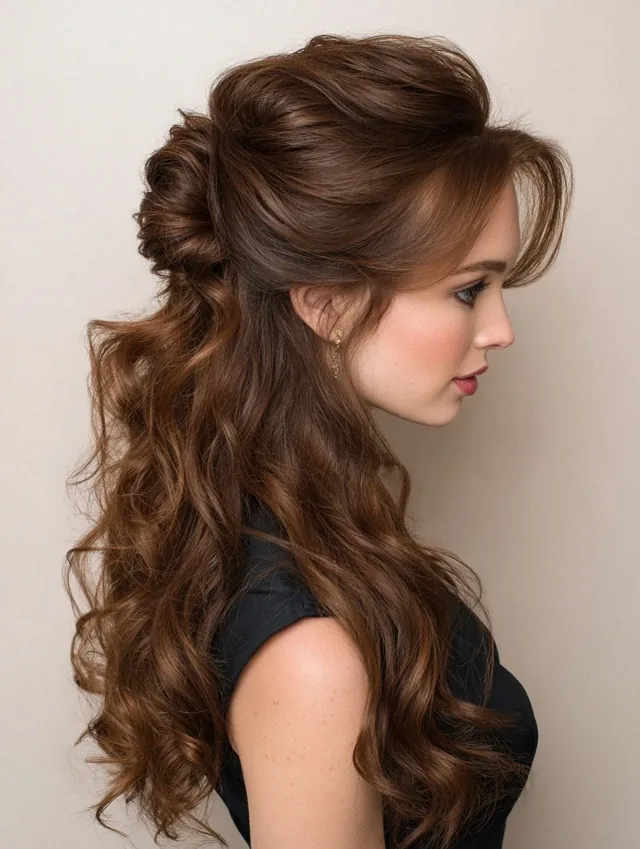
A Braided Crown for Teen Girls
A braided crown turns a teenage girl into the picture everyone remembers. The braid circles the head like a halo, giving the photograph a clear, beautiful shape from every angle — front, side and back — and it keeps every strand in place for hours. It feels special without feeling grown-up, which is exactly right for a teenager in a family portrait.
Best for: teenage girls with medium or long hair who want a standout style, and for garden or outdoor shoots where a crown braid looks wonderfully at home.
How to style: braid two Dutch braids from behind each ear, cross them over the top of the head and pin them in place, tucking the ends underneath. Pull a few strands loose at the front for softness.
What to ask your stylist: how to make the crown sit flat and secure for hours, and whether a looser, pulled-apart braid would suit her face better than a tight one.
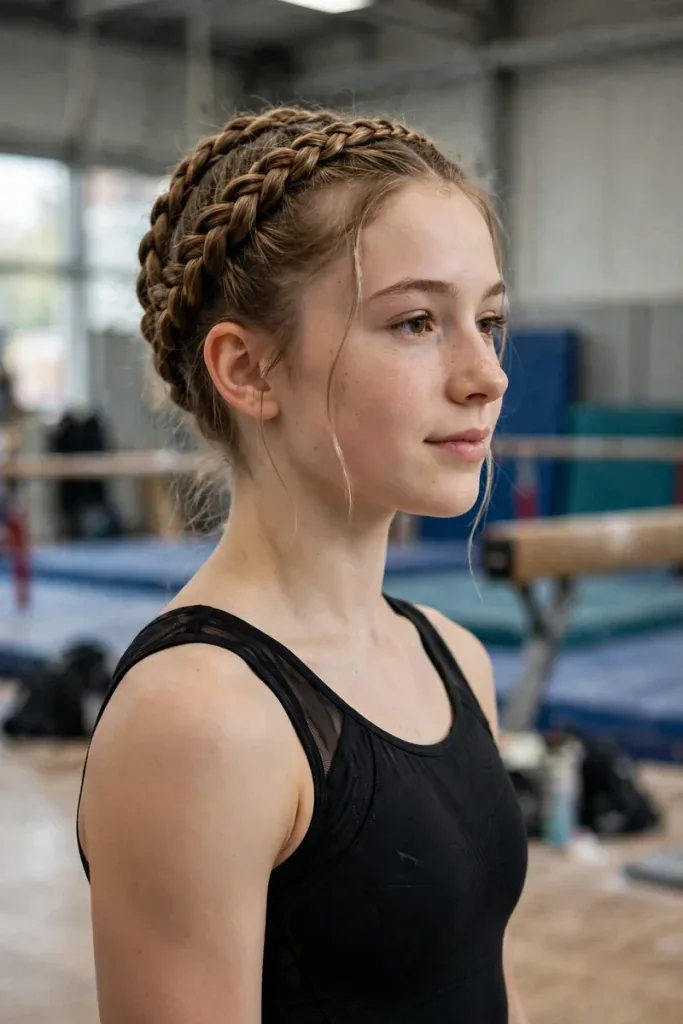
The Sleek Low Ponytail
A sleek low ponytail is quiet, confident and endlessly photogenic. It pulls the face into clean focus, shows off cheekbones and earrings, and gives the photograph a modern, polished feeling without any fuss. Because the hair is secured, it also survives wind, children and a long afternoon without a single touch-up.
Best for: mums and teen girls with straight or slightly wavy hair who want a clean, modern look, and for anyone whose hair is long enough to ponytail but too fine to hold a big blowout.
How to style: brush the hair back smoothly with a little smoothing cream, secure it low at the nape with a snag-free elastic, and wrap a small strand of hair around the base to hide the elastic. Finish with a shine spray.
What to ask your stylist: for a centre or side part that suits your face shape, and whether a little volume at the crown would stop the style looking too flat on camera.
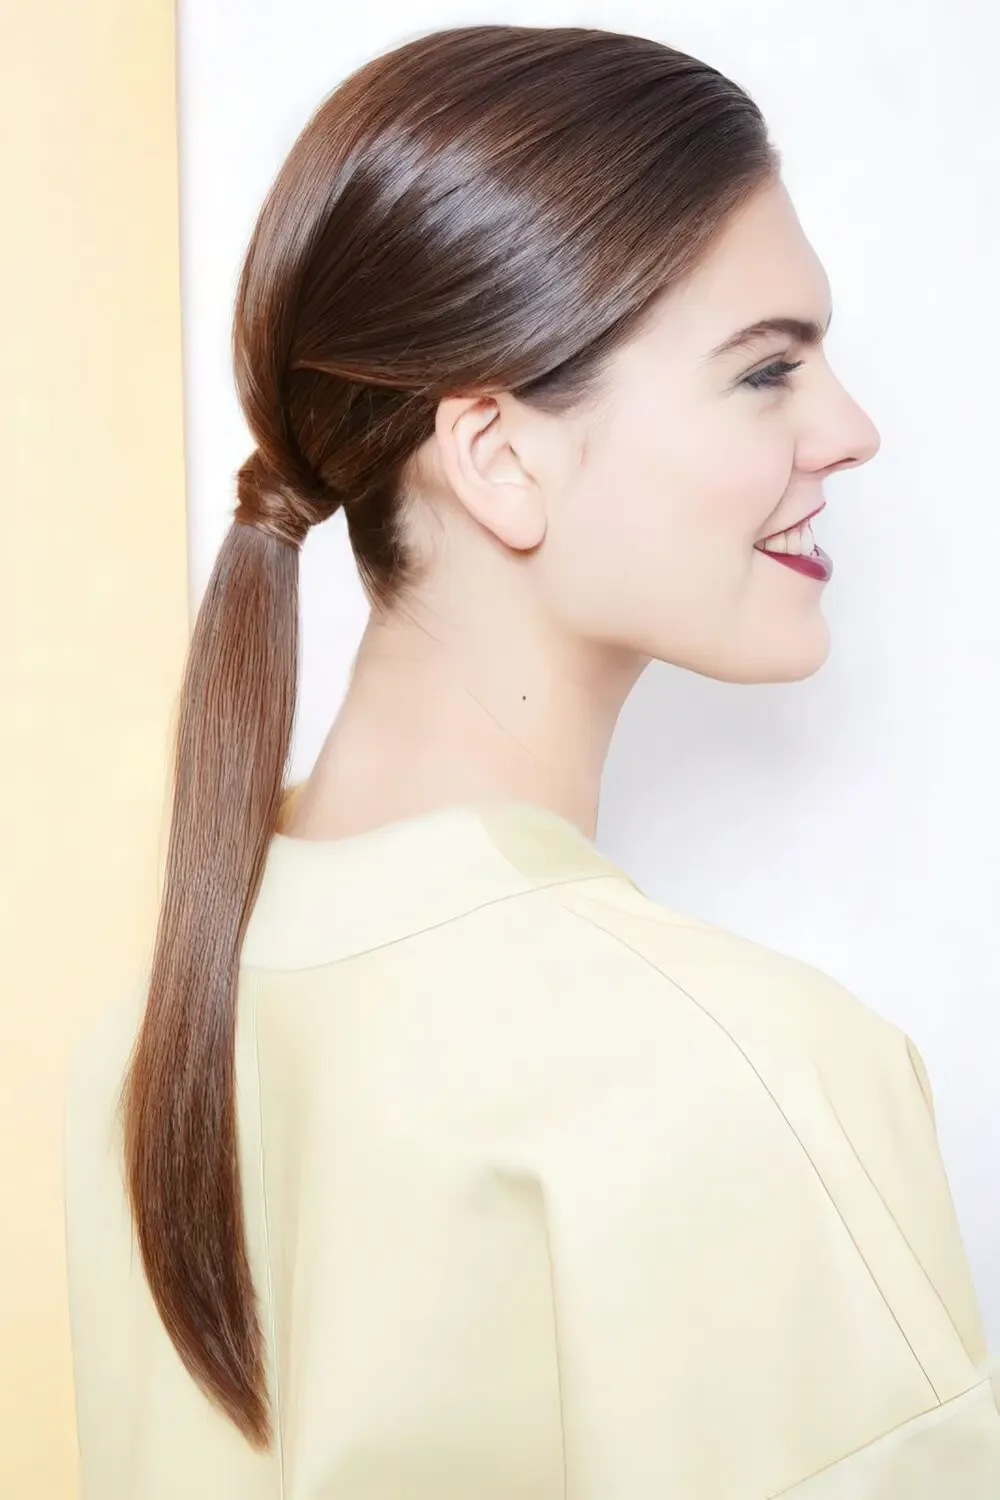
Mum’s Textured Lob
A textured lob — a long bob with soft, piece-y layers — is one of the most flattering cuts a mum can wear for a family photoshoot. It sits between chin and collarbone, frames the face, moves when she laughs, and dries in minutes. On camera it has a lovely, modern shape that never looks dated, which is exactly what you want in a photograph that will hang on a wall for years.
Best for: mums with fine or medium hair who want volume and movement without long hair to manage, and for anyone growing out a shorter cut.
How to style: ask for soft internal layers and a slightly longer front, then style with a little texturising spray scrunched through damp hair. A few loose waves with a flat iron add polish, but the lob looks lovely air-dried too.
What to ask your stylist: how the lob will grow out over the next two months, and whether a slightly longer front would flatter her jawline on camera.
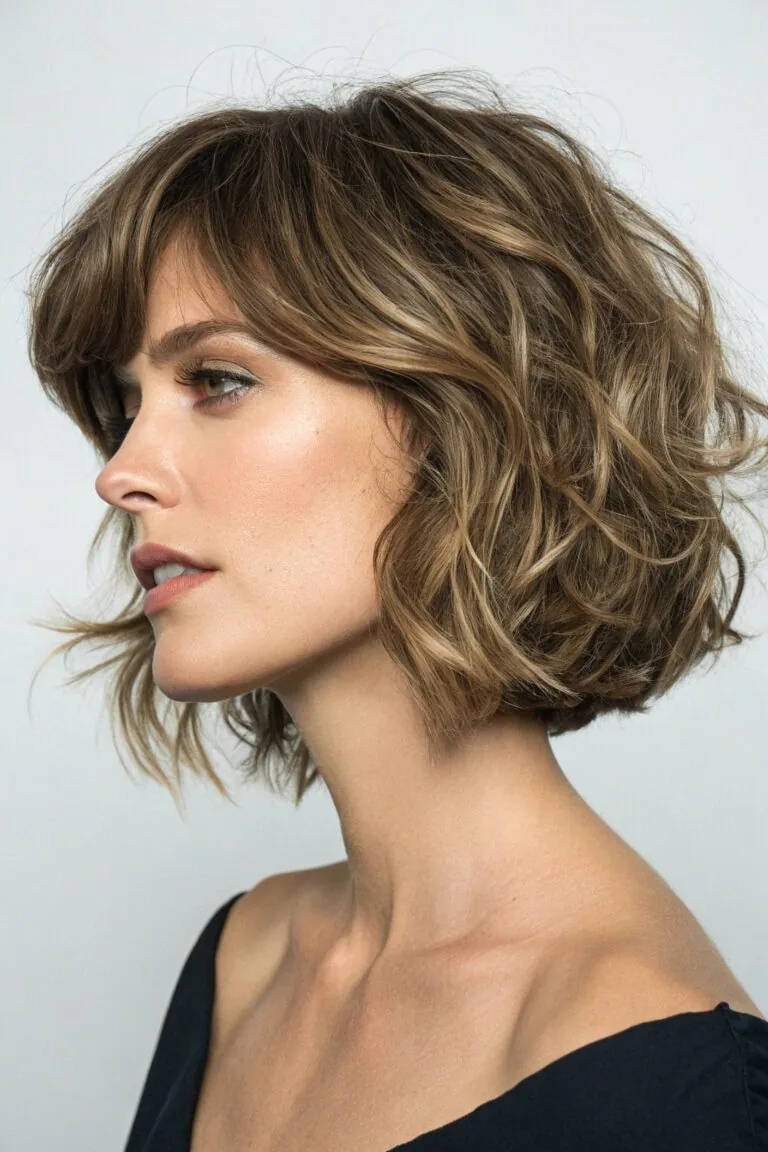
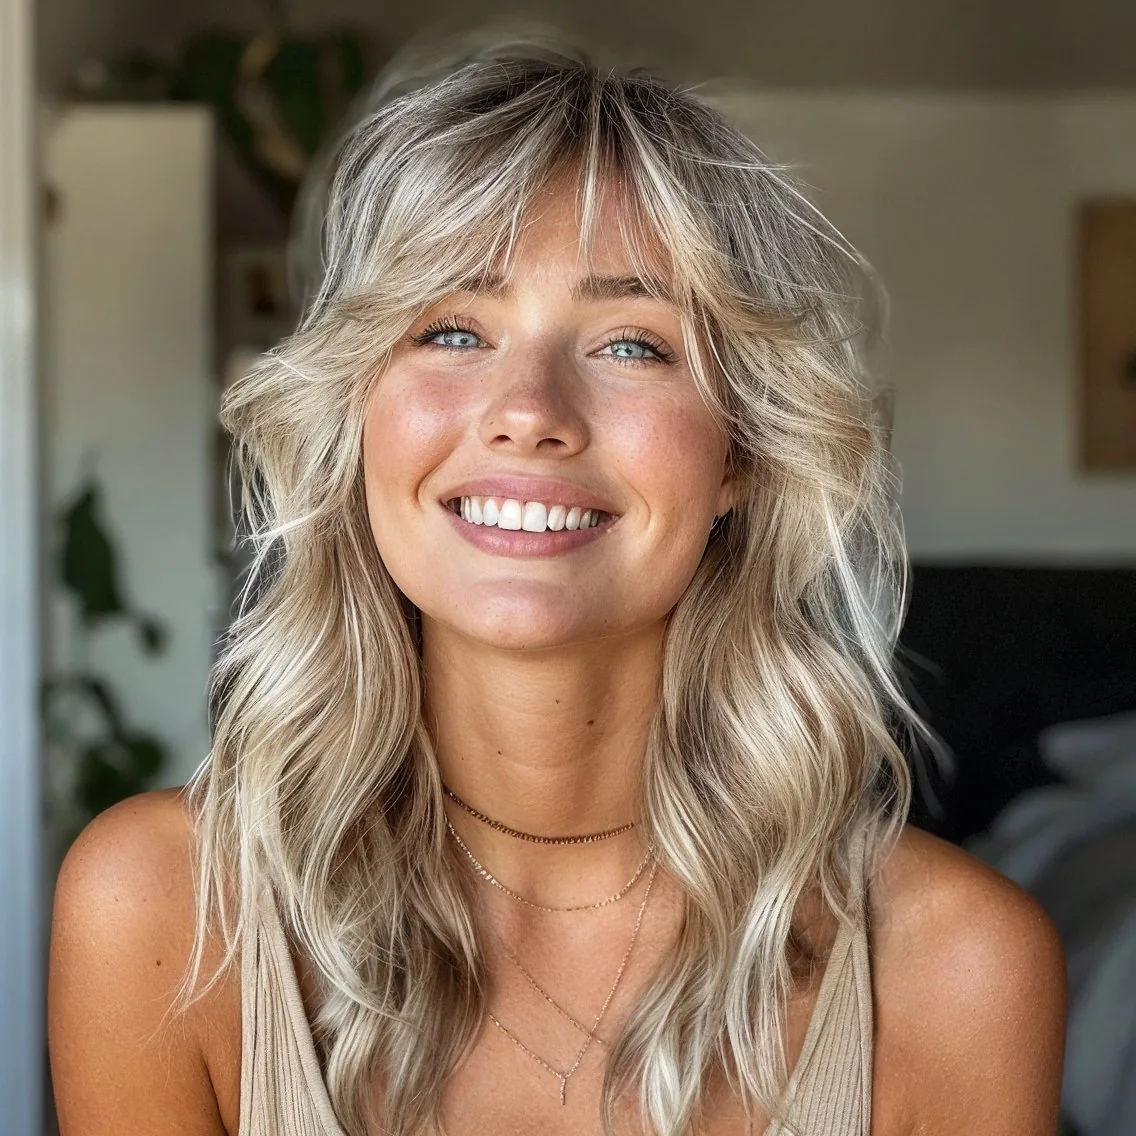
Curtain Bangs for Mum
Curtain bangs open up the face like nothing else. Parted in the middle and sweeping to each side, they soften the forehead, frame the eyes and add instant shape to any length of hair. In a family photograph they do something subtle and wonderful: they make Mum look relaxed and approachable, even in the most formal posed frame.
Best for: mums with medium or long hair who want a fresh change without losing length, and for anyone whose forehead photographs larger than they would like.
How to style: blow-dry the bangs with a round brush, sweeping each side away from the face, and let them fall naturally. Keep the rest of the hair in soft waves so the bangs blend in rather than sitting apart.
What to ask your stylist: how long the bangs should be for your face shape, and how often they will need a trim to keep their sweep.
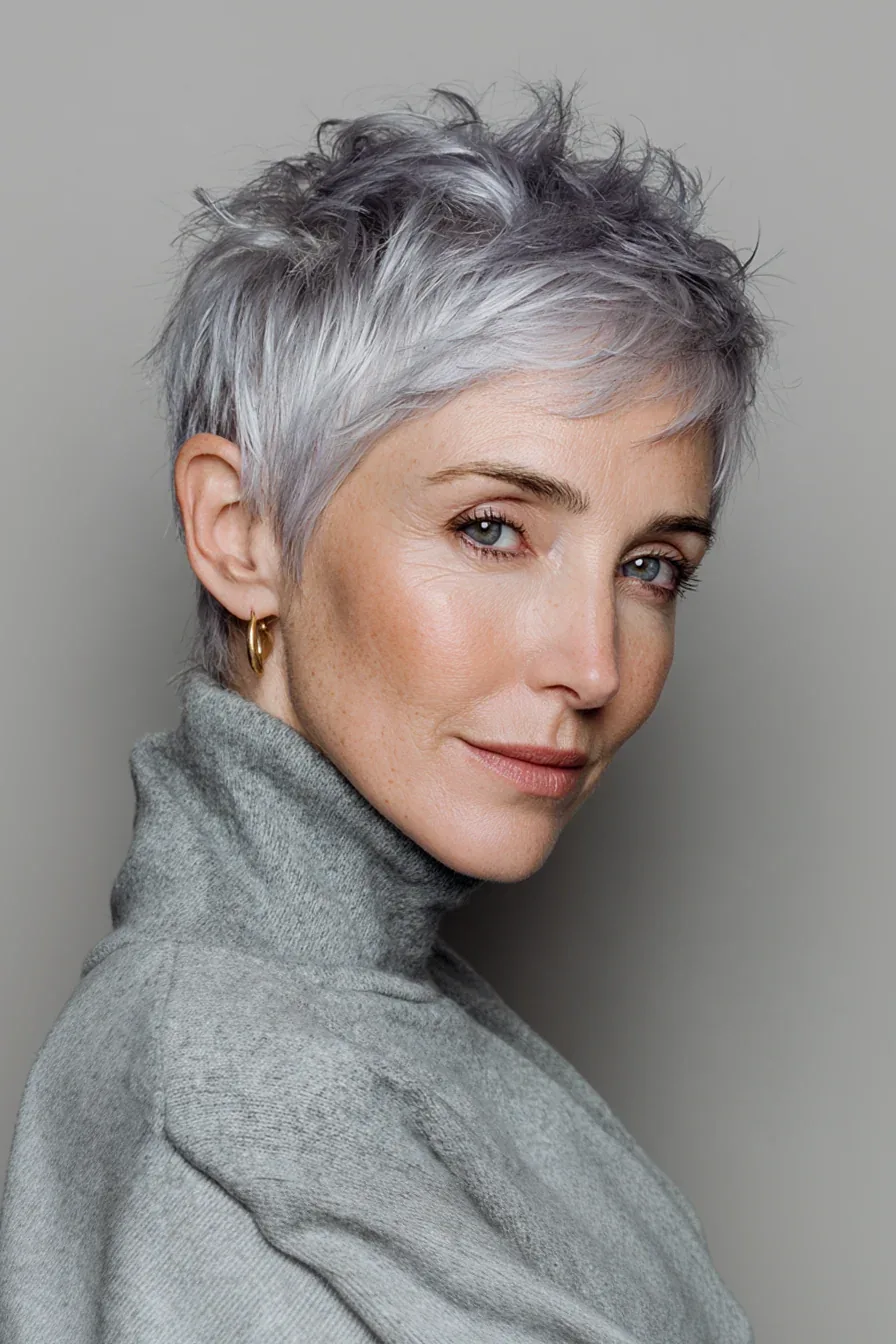
The Polished Pixie
A polished pixie is bold, bright and beautiful on camera. With the face completely open, the photograph captures every expression — and in a family portrait, expressions are everything. The pixie also has a clean, graphic shape that stands out in a group shot, so the person wearing it never disappears into the background.
Best for: mums and grandmothers with fine hair or strong features who love a short, confident style, and for anyone who wants a look that will still feel modern in ten years.
How to style: ask for a pixie with soft texture on top and a clean, tapered nape, then style with a tiny amount of texturising paste, pushing the top forward or to the side. A little shine serum keeps it looking healthy rather than dry.
What to ask your stylist: whether a longer top would suit her face better than a short one, and how to keep the pixie tidy between salon visits.
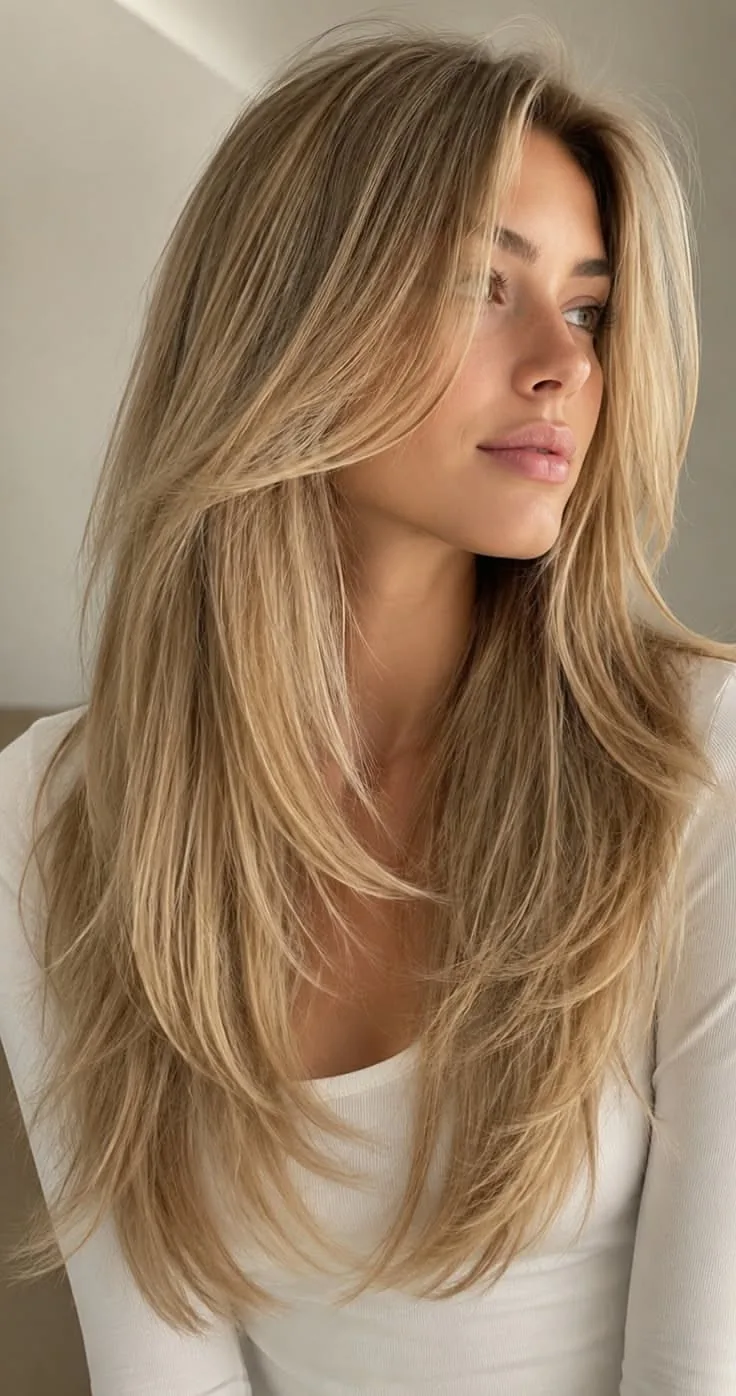
Long Hair with Face-Framing Layers
Face-framing layers are the quiet heroes of family photography. They soften the line where hair meets face, draw attention to the eyes and the smile, and stop long hair from becoming a flat curtain in a group photograph. The effect is subtle in the mirror and obvious in the picture — which is exactly the kind of detail that makes a portrait feel special.
Best for: anyone with long hair who wants shape without losing length, and for mums and teens whose long hair tends to hide their face in photographs.
How to style: ask for layers that start at the cheekbones and get gradually longer, then blow-dry them curving gently towards the face. A wide iron can add a soft bend to the front pieces for extra definition.
What to ask your stylist: how short the shortest layer should be for your face shape, and whether the layers will work with your natural wave or need a little styling each time.
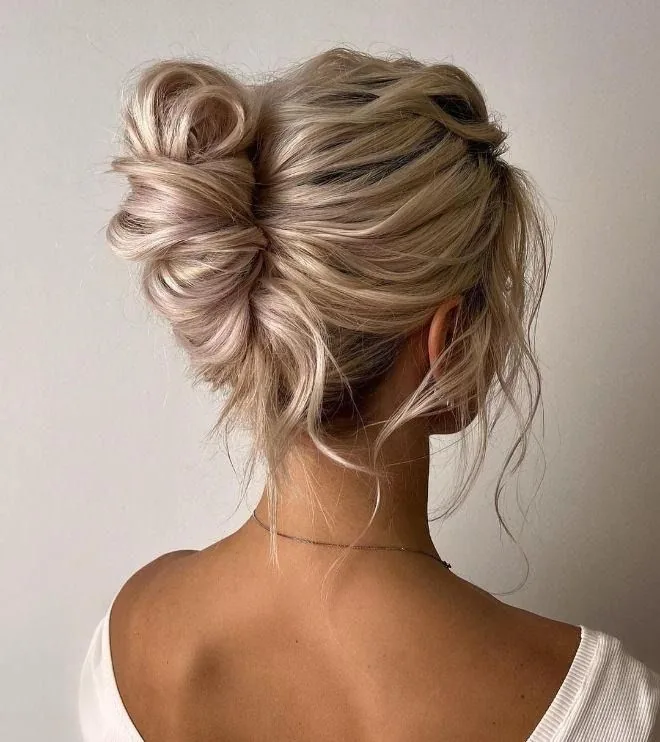
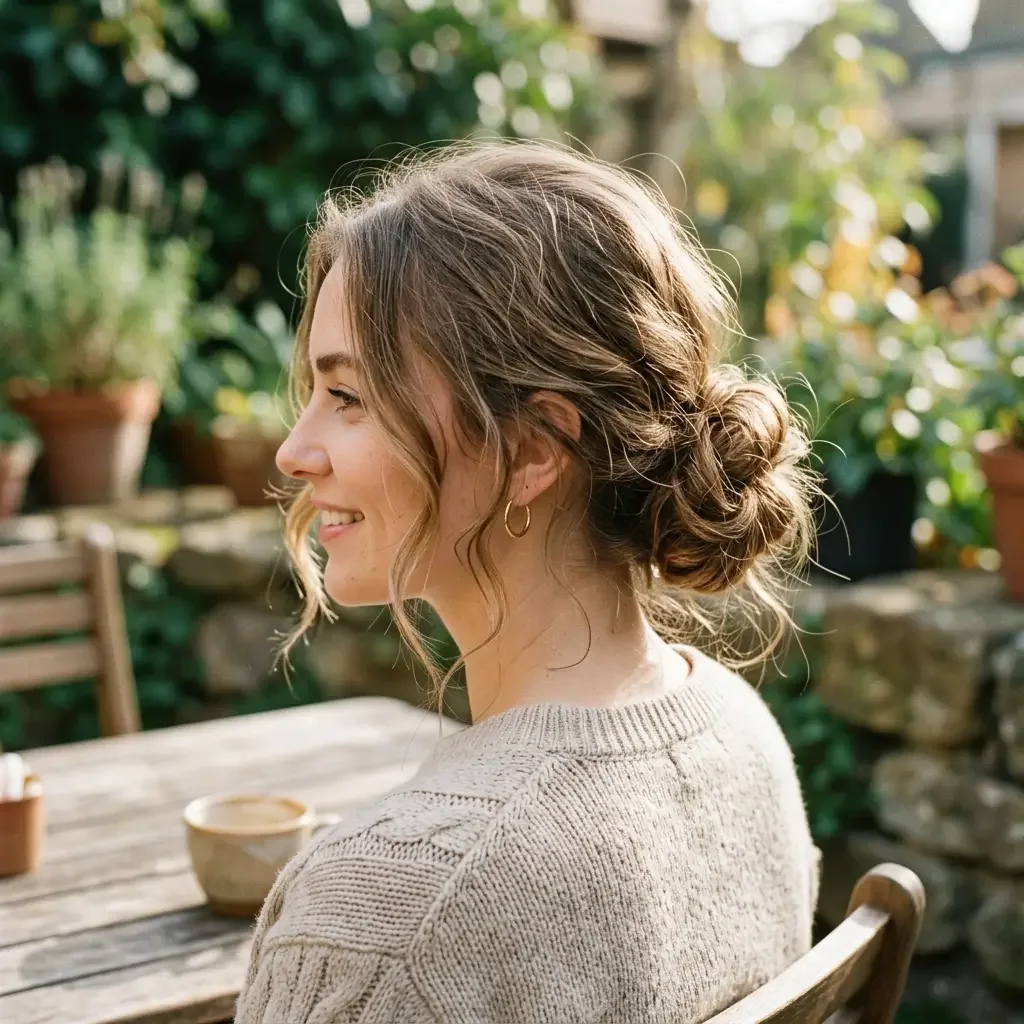
The Messy Bun, Made Photo-Ready
A messy bun is every busy mum’s everyday style — and with a little intention, it becomes a genuinely lovely photoshoot style too. The trick is controlled messiness: a soft, low bun with a few deliberate loose pieces, a smooth crown and a clean parting. It looks relaxed and real, which is exactly the feeling a family photograph should have.
Best for: mums who live in a bun and want the photograph to look like them, and for warm-weather shoots where an updo is simply more comfortable.
How to style: gather the hair low, twist it loosely and pin it, then pull a few strands free around the face and smooth the crown with a brush. A light mist of flexible spray will hold it without stiffness.
What to ask your stylist: how to anchor the bun so it lasts an afternoon, and whether a slightly higher placement would suit her face better than a low one.
Dad’s Textured Crop with a Beard Blend
Hair and beard are one picture in a family photograph, so they should be shaped together. A textured crop with a beard blended neatly into the hairline gives Dad a complete, intentional look — tidy on top, tidy underneath, with no harsh line where one ends and the other begins. The camera picks up that kind of grooming instantly.
Best for: dads with beards who want a coordinated, polished look, and for men whose beard and hair have been styled separately until now.
How to style: ask the barber to blend the beard into the sideburns and shape the neckline, then style the crop with a small amount of matte clay. Keep the beard conditioned and combed so it photographs soft rather than wiry.
What to ask your stylist: for a beard shape that suits his face, and how often the blend needs tidying to stay sharp between barber visits.
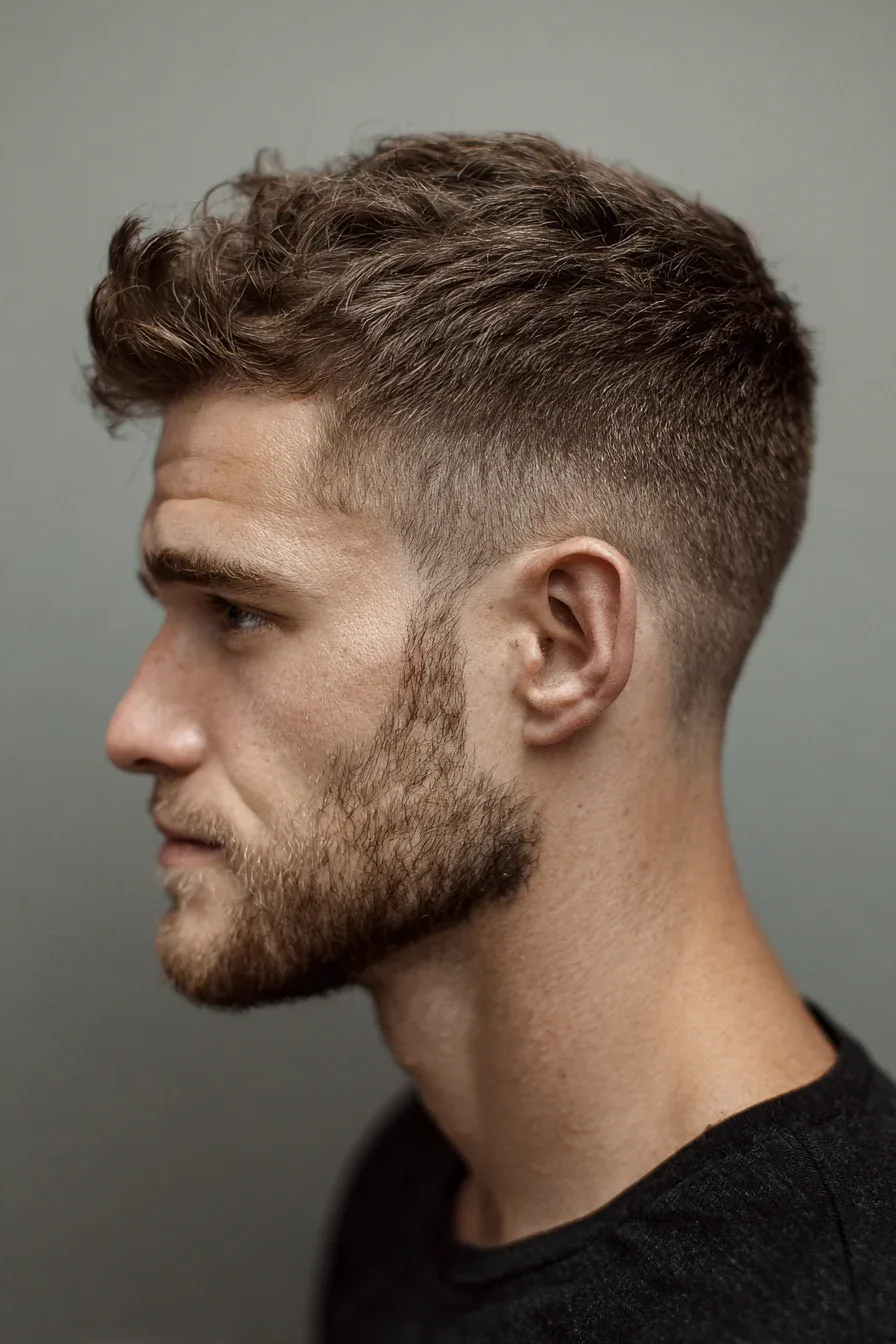
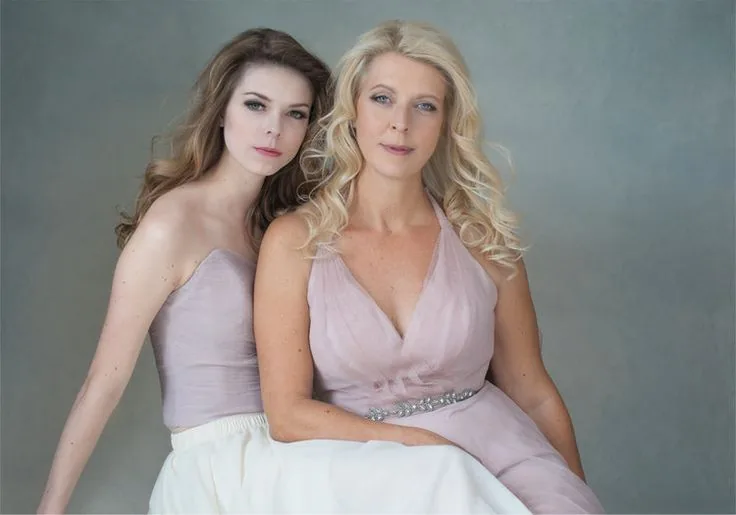
Matching Mother-Daughter Waves
Matching mother-daughter waves are the photograph that makes everyone smile. The shared wave pattern ties the two together in the frame without matching outfits or identical cuts — Mum’s waves are a little more polished, her daughter’s a little more carefree, and together they look like family in the truest sense.
Best for: mothers and daughters with medium or long hair who want a sweet, coordinated look, especially for milestone portraits and holiday shoots.
How to style: curl both heads of hair in large sections with the same wide iron, brushing through with fingers for the same soft finish. Keep Mum’s waves slightly smoother and her daughter’s slightly looser so each suits her age.
What to ask your stylist: whether the same wave size will work on both hair types, and how to keep a young girl’s waves from falling flat before the shoot ends.
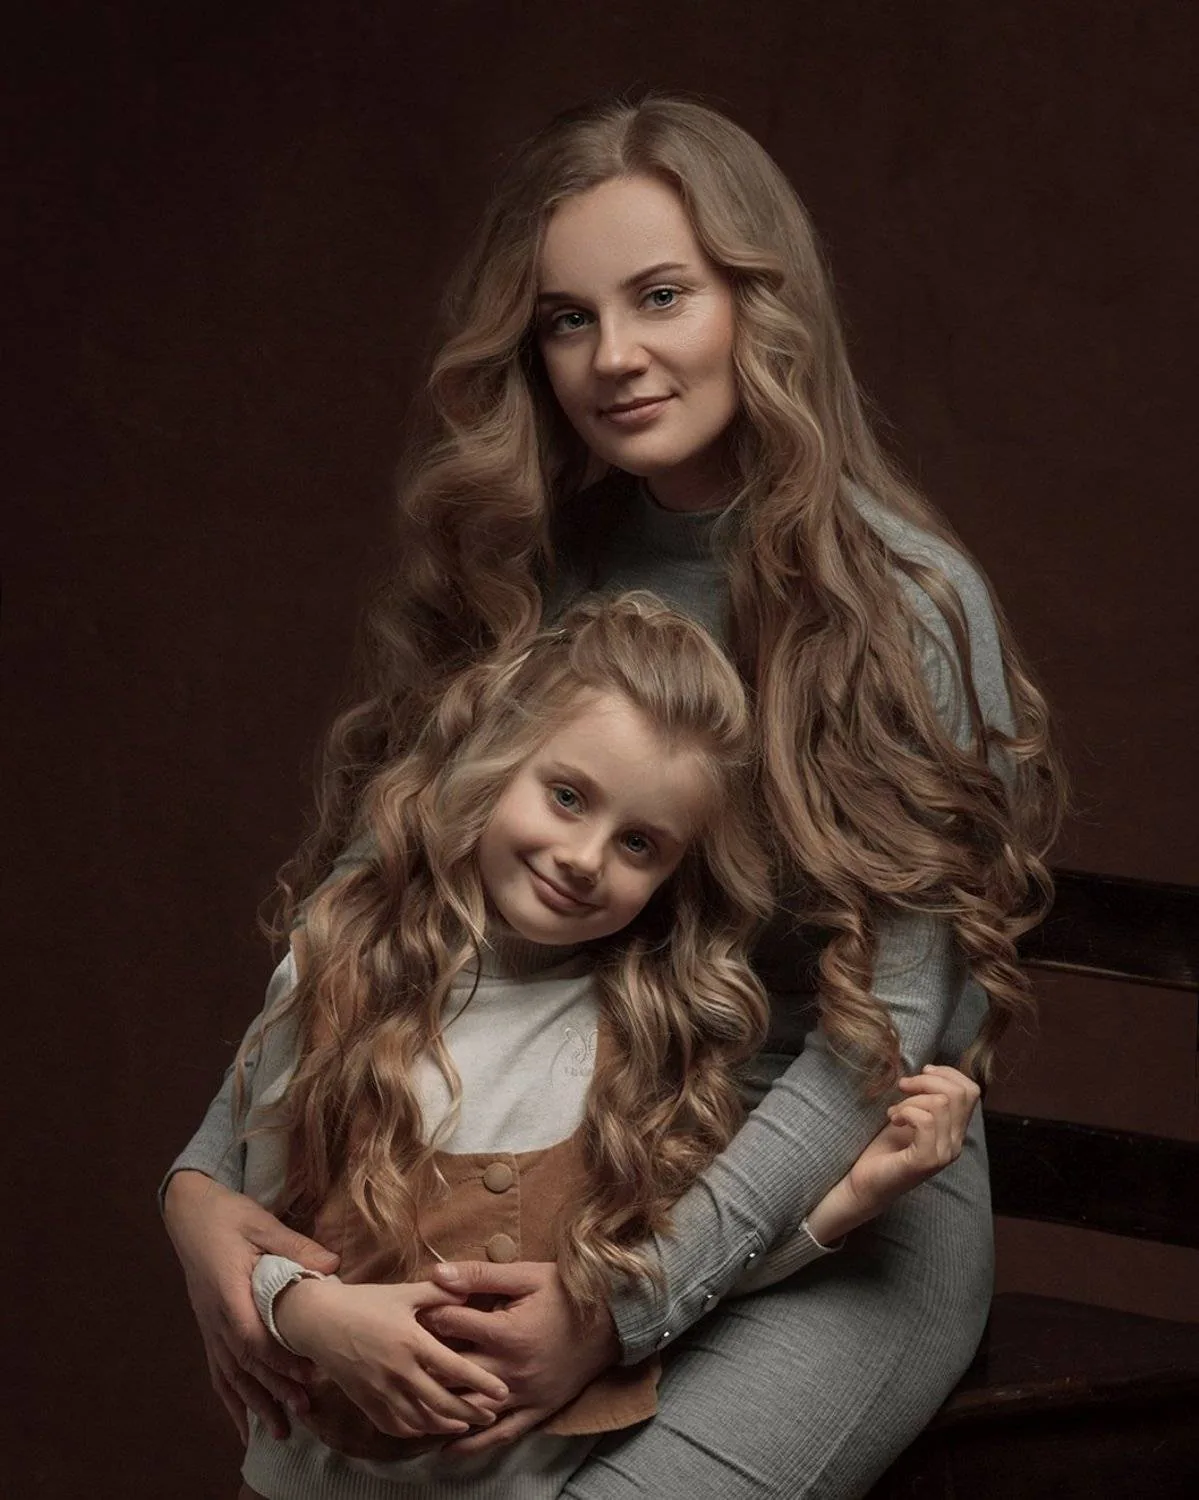
Father-and-Son Matching Side Parts
A father and son with matching side parts is one of the most charming images in family photography. It is a small, visible thread between generations — the same neat part, the same smart finish, one big and one small — and it makes the whole portrait feel connected. It also happens to be one of the easiest matching looks to achieve, because a side part suits almost every age.
Best for: fathers and sons of any age, especially for milestone portraits, first-day-of-school photographs and holiday family shoots.
How to style: book both haircuts together and ask the barber for the same parting and the same tidy finish, scaled down for the smaller head. Style both with the same light cream so the shine matches.
What to ask your stylist: for a side part that suits his son’s hair growth pattern, so the style holds without fighting the way the hair naturally falls.
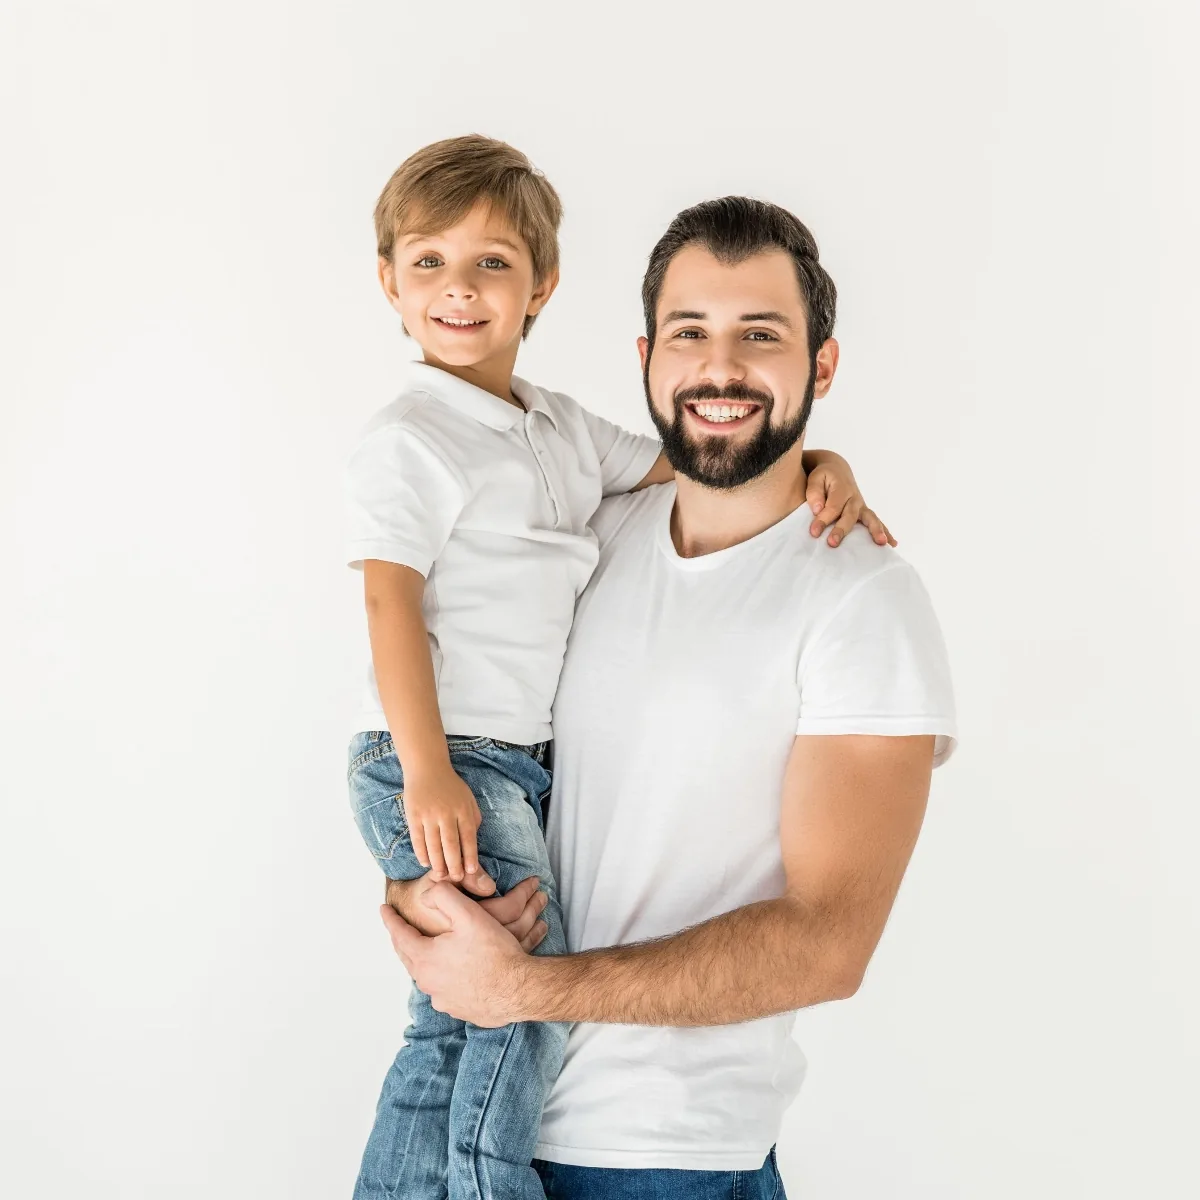
The Romantic Loose Updo
A romantic loose updo is softness itself: hair gathered up with curls escaping, tendrils at the temples, and nothing pulled too tight. It photographs like a painting — gentle, warm and a little bit dreamy — and it suits garden shoots, golden-hour light and any family portrait where Mum wants to feel beautiful rather than formal.
Best for: mums with medium or long hair who want an updo that feels soft and romantic, and for outdoor shoots where a stiff, polished updo would look out of place.
How to style: curl the hair first, then gather it loosely at the back and pin it in soft sections, leaving tendrils free around the face. Pull a few pieces loose at the crown for volume, and finish with a flexible spray.
What to ask your stylist: how to build the updo so it holds for hours without feeling tight, and whether a few pinned curls at the nape would add shape from behind.
Braided Pigtails for Little Girls
Braided pigtails are childhood in a hairstyle: cheerful, practical and completely adorable on camera. The two braids frame a small face symmetrically, they stay put through running and spinning, and they photograph beautifully from the front and the back. Add a small ribbon at each end and the picture is finished.
Best for: little girls aged three to eight with medium or long hair, especially for playful outdoor shoots where the photograph should feel joyful.
How to style: part the hair cleanly down the middle, braid each side in a simple three-strand braid and secure with a small elastic. Tie a ribbon at each end, and keep the braids a little loose so they are comfortable all afternoon.
What to ask your stylist: whether a Dutch braid would show up better on camera than a classic braid for her hair colour, and how to keep the parting straight while she wriggles.
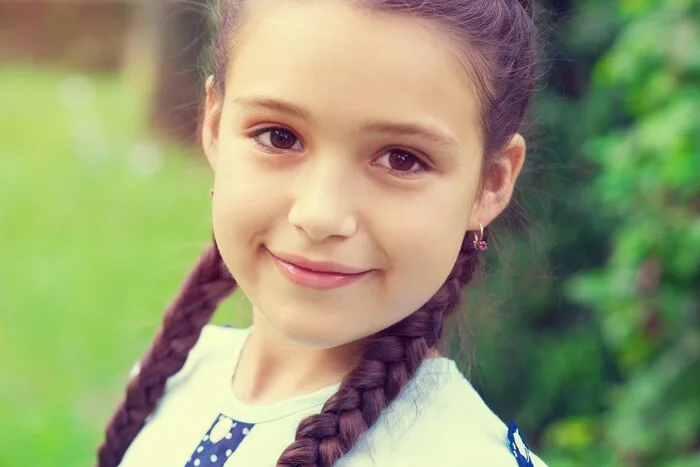
Side-Swept Waves for Mum
Side-swept waves bring a touch of old Hollywood glamour to a family portrait without ever looking overdone. Sweeping the hair to one side opens up the face, shows off the neck and shoulders, and creates a beautiful diagonal line across the frame that the camera loves. It is elegant, flattering and surprisingly easy to wear.
Best for: mums with medium or long hair who want a glamorous but wearable look, and for anyone whose face photographs best from a slight angle.
How to style: create a deep side part, curl the hair in large sections away from the face, then sweep it all to one side and pin it discreetly behind the opposite ear. Finish with a shine spray for a glossy, red-carpet feel.
What to ask your stylist: which side suits your face better, and whether a few hidden pins will keep the sweep in place through an hour of photographs.
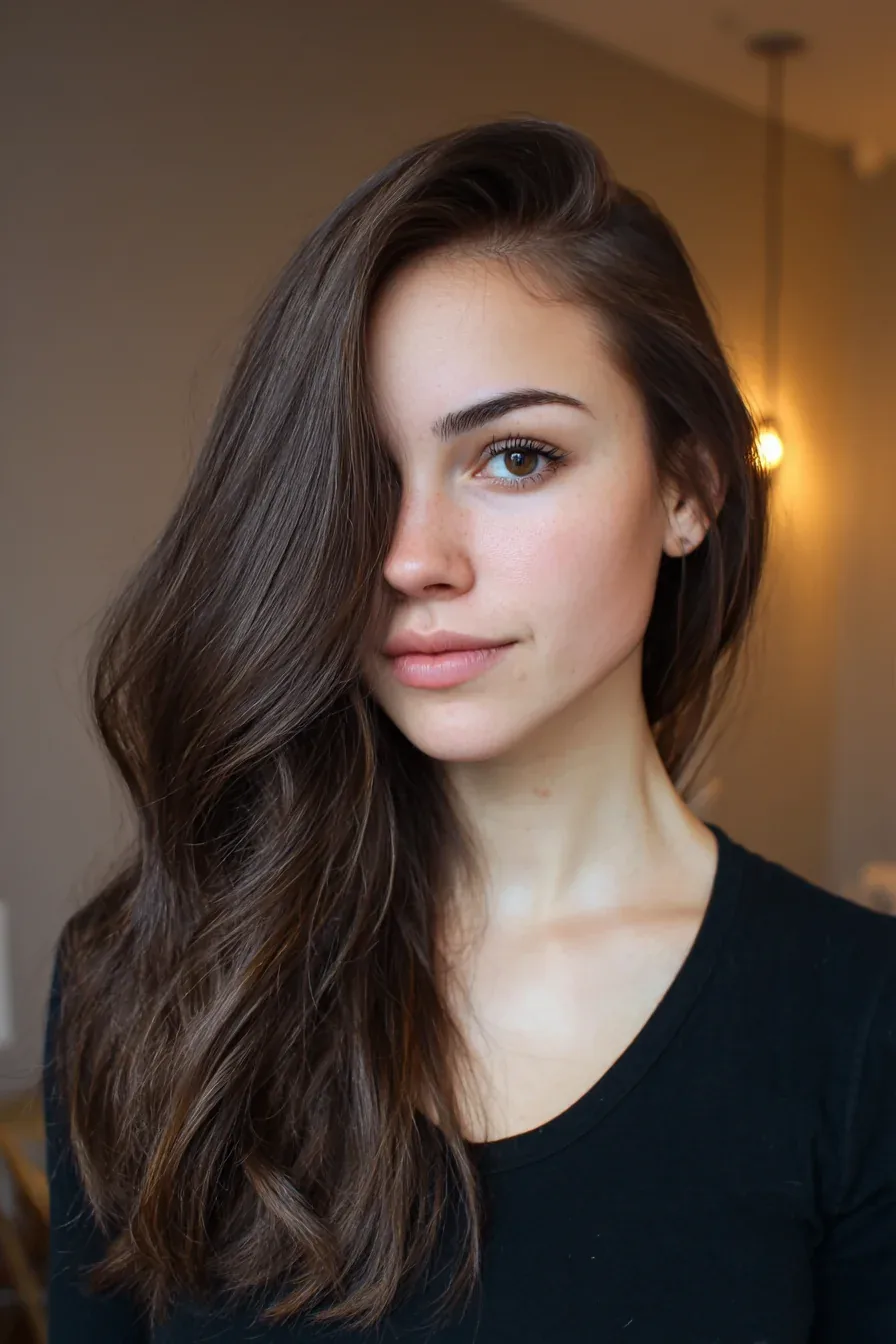
The Timeless Centre-Part Blowout
A centre-part blowout is the last style on this list and the most timeless: symmetrical, glossy and calm, with hair falling evenly on both sides of the face. It is the style that will look just as good in ten years as it does today, because it does not follow a trend — it follows the face. For the photograph that hangs on the wall for years, that is the whole point.
Best for: mums with straight or slightly wavy hair who want a classic, balanced look, and for anyone who wants the family portrait to feel elegant rather than fashionable.
How to style: blow-dry with a round brush, parting the hair precisely down the centre, and curl the ends under for a smooth, finished shape. A shine serum on the lengths will give the hair its signature gloss.
What to ask your stylist: for a centre part that suits your face shape — it flatters oval and heart-shaped faces most — and whether long layers would add movement without breaking the symmetry.
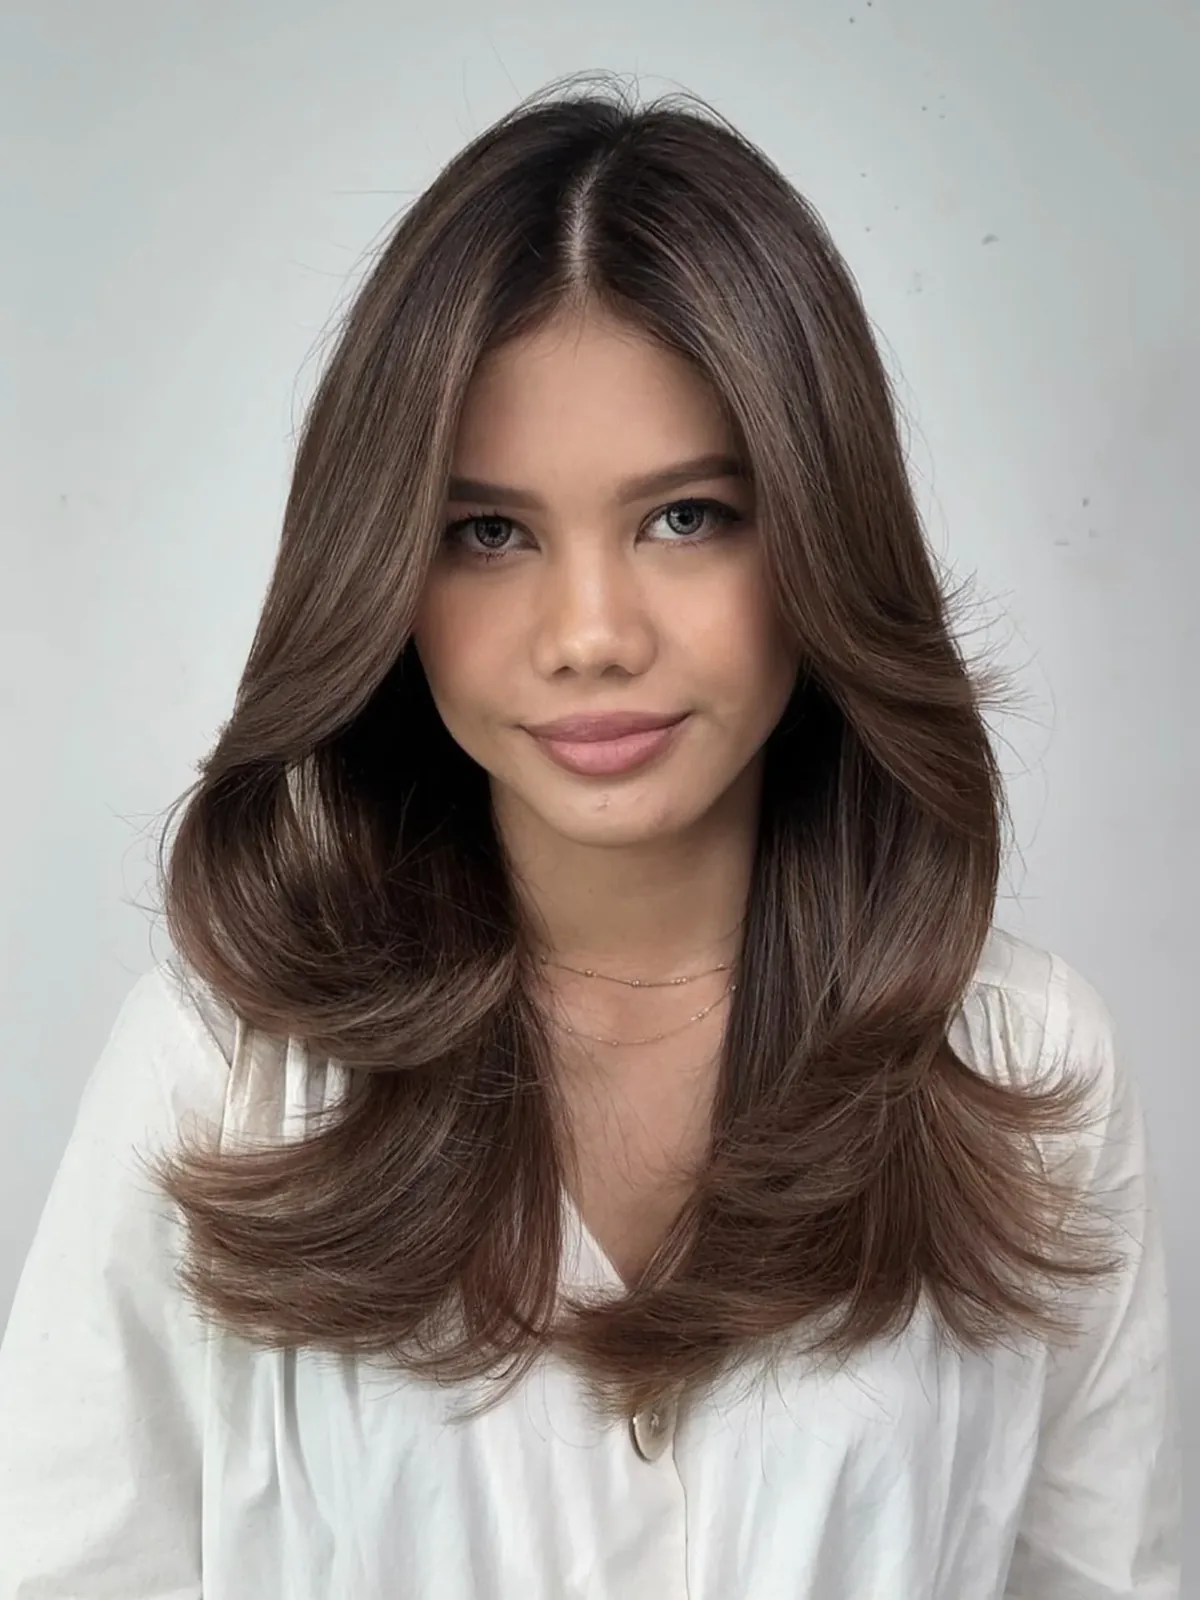
What are the best hairstyles for a family photoshoot?
The best hairstyles for a family photoshoot are the ones that flatter each person and hold up for an hour outdoors: a soft blowout or low chignon for Mum, a neat side part or taper fade for Dad, loose curls or braids for children, and a classic bob or soft silver curls for grandparents. Choose a shared level of polish rather than matching styles, and try every style once before the day.
Should everyone in the family match their hairstyles?
No, everyone should not match their hairstyles. A family photograph looks best when each person wears the style that suits their age, face and hair, at the same level of polish. Agree on one mood word — relaxed, polished or classic — and let every hairstyle answer it. Matching polish photographs far better than identical hair.
How should I style my hair for a family photoshoot?
Style your hair for a family photoshoot with a clear shape the camera can read: a smooth blowout, defined waves, a neat updo or a sleek ponytail. Add shine with a serum, keep flyaways smooth, and avoid styles that only look good from one angle. Book the appointment for the morning of the shoot so the style is fresh.
What hairstyles photograph best in family portraits?
The hairstyles that photograph best have clear shape and healthy shine: blowouts, defined curls, neat side parts, low chignons and braided crowns. Avoid very fine detail that disappears on camera, heavy hairspray that reflects flash, and styles that fall apart in wind. If you can recognise the style from across the room, the camera will catch it too.
How do I keep my child’s hair neat during a photoshoot?
Keep your child’s hair neat by choosing a comfortable style that stays put without pulling — soft braids, a half-up twist, a neat crop for boys — and practising it at home first. Pack spare clips, a soft brush and a little serum for touch-ups, and style the youngest children last so their hair is fresh when the camera starts.
Should I get my hair cut before a family photoshoot?
Yes, get your hair cut one to two weeks before a family photoshoot, not the day before. A fresh cut needs a few days to settle into its natural shape, and a brand-new style can look stiff on camera. Book the cut early, then have a lighter tidy-up or styling appointment on the morning of the shoot.
What hairstyle suits grandparents in family photos?
Classic, familiar styles suit grandparents best in family photos: an elegant short bob or soft silver curls for grandmothers, and a neat side sweep or comb-over for grandfathers. Keep the style they already love, freshly tidied, rather than trying something new. Silver hair photographs beautifully in soft, golden light.
Can I wear my hair down for a family photoshoot?
Yes, you can wear your hair down for a family photoshoot, and many mums do. Choose a style with shape — a blowout, loose waves or face-framing layers — rather than hair that hangs flat, and keep it off your face with a side part or a half-up twist if the shoot is outdoors. Carry a clip in case the wind picks up.
How do I stop flyaways ruining family photos?
Stop flyaways by smoothing a drop of serum or a little hairspray on a clean toothbrush over the surface of the hair, and by choosing a style with an anchor — a braid, a bun or pins — on windy days. A quick check between set-ups, and a light mist of flexible spray at the start, will keep flyaways under control without making hair look stiff.
When should I book a hair appointment before a photoshoot?
Book a haircut one to two weeks before the photoshoot and a styling appointment for the morning of the shoot. This gives a new cut time to settle while keeping the style fresh on the day. Leave at least an hour between the last appointment and the first photograph so nobody arrives rushed or tense.
Conclusion
The best hairstyles for a family photoshoot are not the most complicated ones — they are the ones that let every person in the frame look like themselves on their very best day. A soft blowout for Mum, a neat side part for Dad, braids for the girls, a tidy crop for the boys, and a classic, comfortable style for grandparents: together, they make a photograph that feels like family, not like a styling session.
Start with the planning, choose one style per person from this guide, and try each one once before the day. Pack the little touch-up kit, tell your photographer about the hair, and then forget about it completely — the camera will take care of the rest, and the picture on the wall will take care of the years.