Small Ceremony, Big Style: 32 Courthouse Wedding Hairstyles for Women That Feel Special Without the Fuss
A courthouse wedding is small on purpose. There is no aisle that goes on forever, no three hundred guests watching you walk in, no ballroom to fill — just the two of you, a handful of the people who matter most, a registrar, and a few minutes that turn out to be the most important minutes of your life. And because the ceremony is small, everything in it shows. Your dress shows, your bouquet shows, and your hair shows in every single photograph — the one outside the courthouse steps, the one your best friend takes on her phone, the one that ends up framed on your wall for the next fifty years. Courthouse hair deserves real thought, but not the kind of fuss that belongs to a ballroom wedding.
This guide gathers 32 courthouse wedding hairstyles for women, chosen for exactly that balance: special enough for a wedding day, simple enough for a registry office, and practical enough to survive a morning ceremony, photographs on the steps, and lunch with your favourite people afterwards. Eight guides first walk you through what actually matters: daytime hair that photographs well in natural light, no-veil options that still feel bridal, small-party photo tips, the practical side of a registry office, pairing your hair with your bouquet, minimal accessories, balancing your hair with a simple dress, and quick touch-ups between the ceremony and lunch. Whether your hair is long, short, curly, or straight, there is a style here that feels like you — on your best day, without the fuss.
Daytime Ceremony Hair That Photographs Beautifully
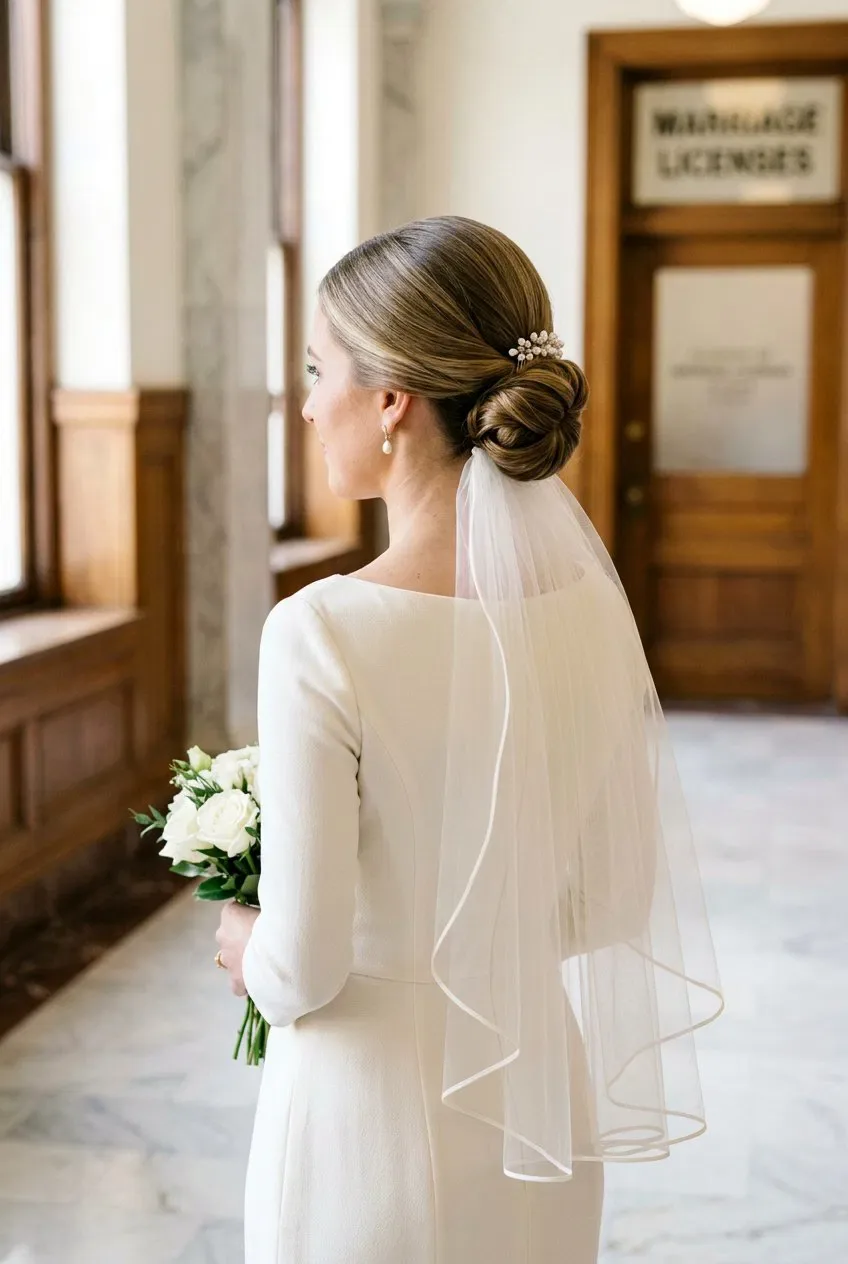
Most courthouse weddings happen in the daytime, and daytime light is both the kindest and the most honest light there is. There is no warm ballroom glow to soften things, no candles, no dimmed chandeliers — just clear daylight, which shows shine, shape, and every flyaway. That is actually good news. The styles that look best in daylight are the ones with clean shapes and healthy shine: a sleek low chignon, glossy waves, a polished low ponytail, a smooth blowout. They read beautifully on camera because the light does the work for them, catching the shine on the surface and the shape of the style from every angle.
The trick is to build for the light you will actually be in. If your ceremony is in the morning, your hair needs to hold from about ten o’clock through lunch, which is a short day — so a style that is pinned rather than sprayed into place will survive it. Pros: daylight flatters healthy hair and makes simple styles look expensive. Cons: frizz and flyaways show up in daylight, so a smoothing serum on the surface is worth its weight in gold. Common mistake: overloading on hairspray, which looks stiff and dull in bright light. Keep it simple — a shine serum, a few well-placed pins, and hair that can move.
No-Veil Options That Still Feel Bridal
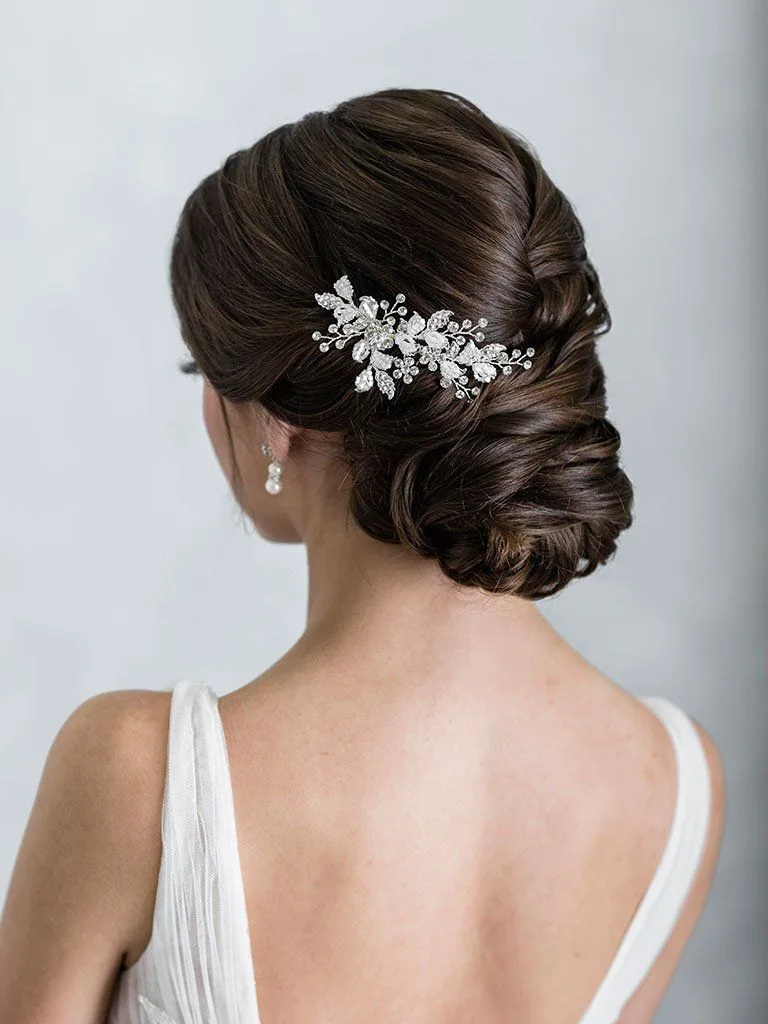
Most courthouse brides skip the veil, and that is a choice worth celebrating rather than apologising for. A veil belongs to a long aisle and a big church; a courthouse ceremony belongs to the woman herself, and her hair is the statement. The secret to feeling bridal without a veil is one beautiful detail: a pearl pin, a slim gold comb, a silk ribbon, a small fresh flower, or a delicate headband. One detail, placed with intention, does the same work a veil does — it says “bride” — without hiding your hair or getting in the way of the registrar’s pen.
Why it works: without a veil, the shape of the hairstyle itself becomes the star, and a low bun or soft waves with one pretty accessory photographs better than a veil ever would in a small room. How to style it: choose the accessory after you choose the style, not before, so the two work together — a pearl pin suits a sleek chignon, a gold comb suits soft waves, a ribbon suits a low ponytail. Who should avoid it: nobody, but if you do wear a statement earring, skip the statement hairpiece — one statement at a time. Quick verdict: one beautiful detail beats a veil at a courthouse wedding, every time.
Small-Party Photo Tips: Hair That Works on the Steps
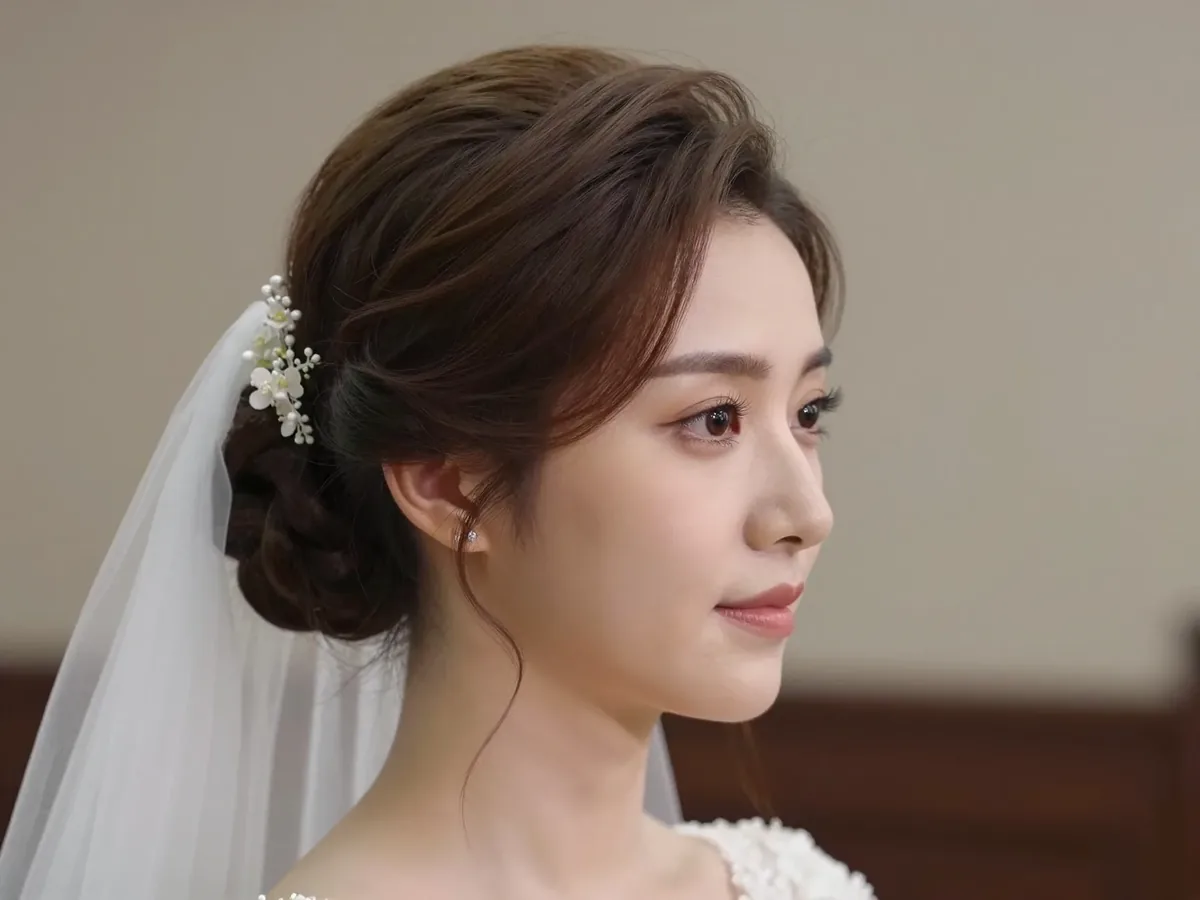
At a courthouse wedding, the photographs are not taken by a professional with a flash and a reflector — they are taken by your sister on her phone, your best friend on the steps, your new spouse’s cousin who has a good camera and too much enthusiasm. The photographs are candid, close, and taken from every angle, including the side and the back, because nobody is standing in a line. That means your hair needs to look good from the side as well as the front, and from the back as well as the side. A low bun with a soft sweep, waves that fall evenly, a braid that shows from behind — these are the styles that survive the courthouse steps.
Pros: candid photographs flatter relaxed, natural hair far more than stiff, sprayed hair. Cons: a style that only looks good from the front will disappoint you in the side shots, so check the mirror from three angles before you leave. Maintenance: ask your witness to carry two bobby pins in her pocket — one pin, thirty seconds, and any piece that slipped during the ceremony is back in place before the group photo. Cost and time: nothing extra. A quick check in the courthouse bathroom mirror between the ceremony and the photographs is the only touch-up you need, and it costs nothing at all.
Registry-Office Practicalities: Hair That Behaves in a Small Room
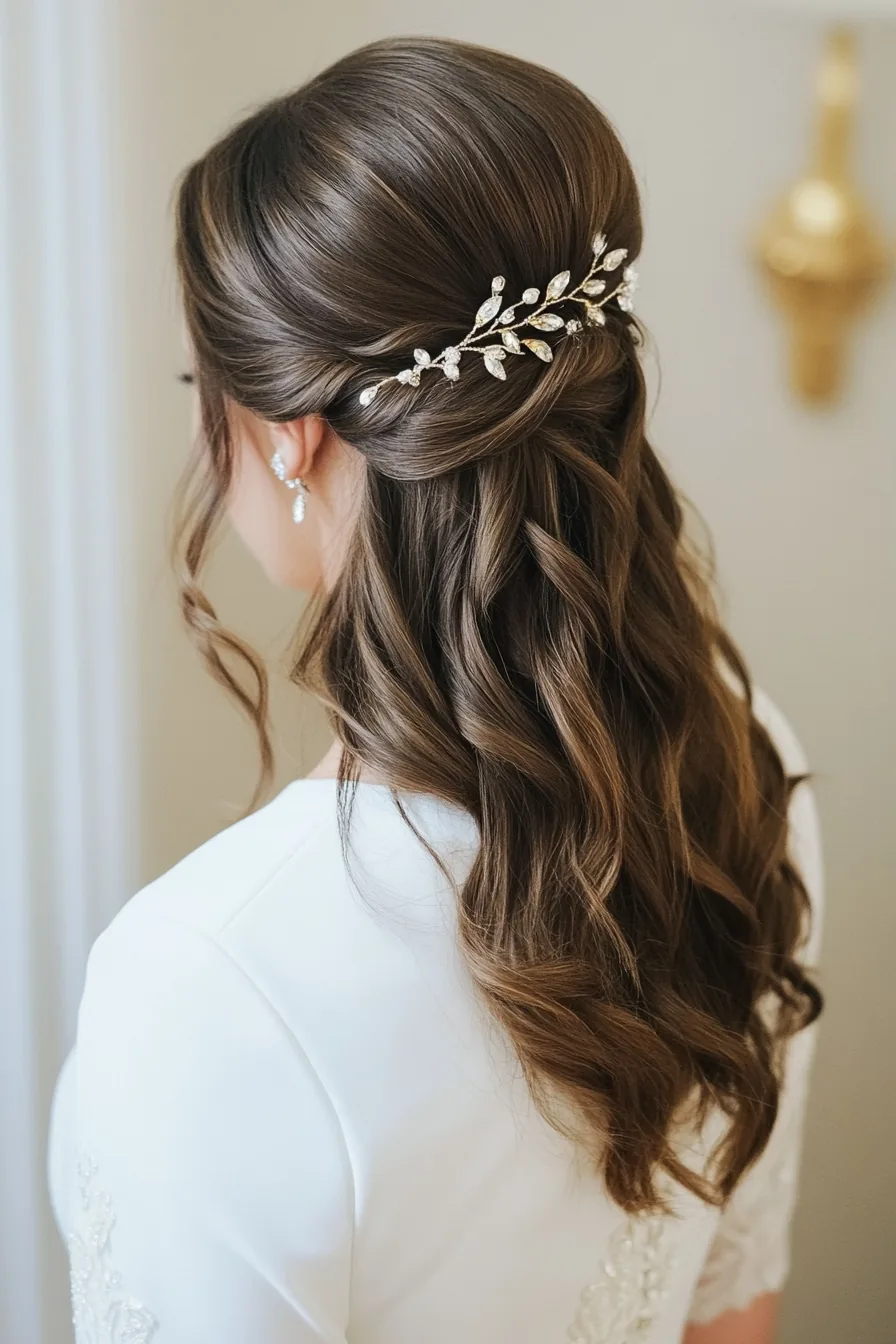
A registry office is a small room with a desk, a registrar, and not much space to move. You will be standing close to your partner, close to the registrar, and close to your witnesses — there is no long walk, no grand entrance, and no moment when you are far enough away for anyone to admire your hair from a distance. Everything is close up, which changes what works. Big, wide styles can feel overwhelming in a small room; a huge crown of curls or a high, wide updo can look like too much hair for the space. The styles that work best here are the ones with a neat, contained shape: a low chignon, a sleek bun, a low ponytail, a smooth blowout.
Another practical point: you will be signing a register, which means leaning forward over a desk. Hair that falls forward will fall onto the paper, into your face, and into the photographs of the signing — the photographs you will show everyone. Pros: a pinned-up style keeps your hair completely out of the way while you sign, and it looks neat in the close-up photographs. Cons: a style that is too tight will hurt by lunchtime, so build it soft and pinned, not pulled. Maintenance: pin it at three points and carry two spare pins. The whole ceremony takes twenty minutes, and your hair should be the last thing on your mind during it.
Pairing Your Hair with Your Bouquet
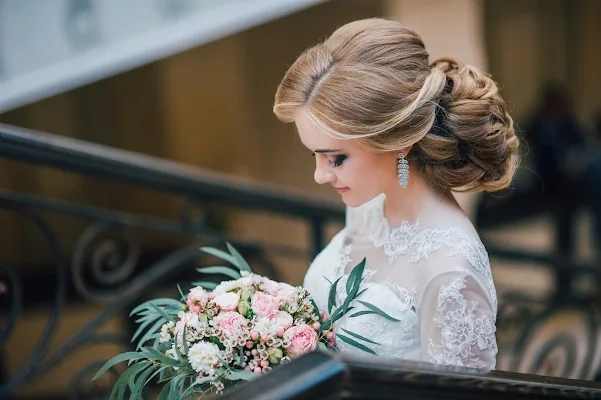
At a courthouse wedding the bouquet is usually small — a handful of stems, a simple posy, sometimes a single flower — and that is exactly right, because a small bouquet and a simple hairstyle belong together. The rule is balance: a big, dramatic bouquet needs simple hair, and a big, dramatic hairstyle needs a small bouquet. Since courthouse bouquets are almost always small and simple, your hair can afford one beautiful detail — a flower tucked into a low bun, a pearl pin in soft waves, a ribbon on a ponytail — without the whole look tipping into too much. The bouquet and the hair should echo each other, not compete.
Why it works: a flower in the hair that matches the bouquet ties the whole look together in the photographs, and it costs almost nothing — ask your florist for one spare stem. How to style it: tuck the flower in last, after the style is pinned, and pin it through the stem so it cannot slip. Pros: the matching flower is the cheapest bridal detail there is, and it photographs beautifully. Cons: fresh flowers wilt, so add them just before the ceremony, not an hour before. Who should avoid it: if your bouquet is already large or very colourful, skip the flower in the hair — one floral statement is enough, and two will fight each other in the photographs.
Minimal Accessories That Elevate the Look
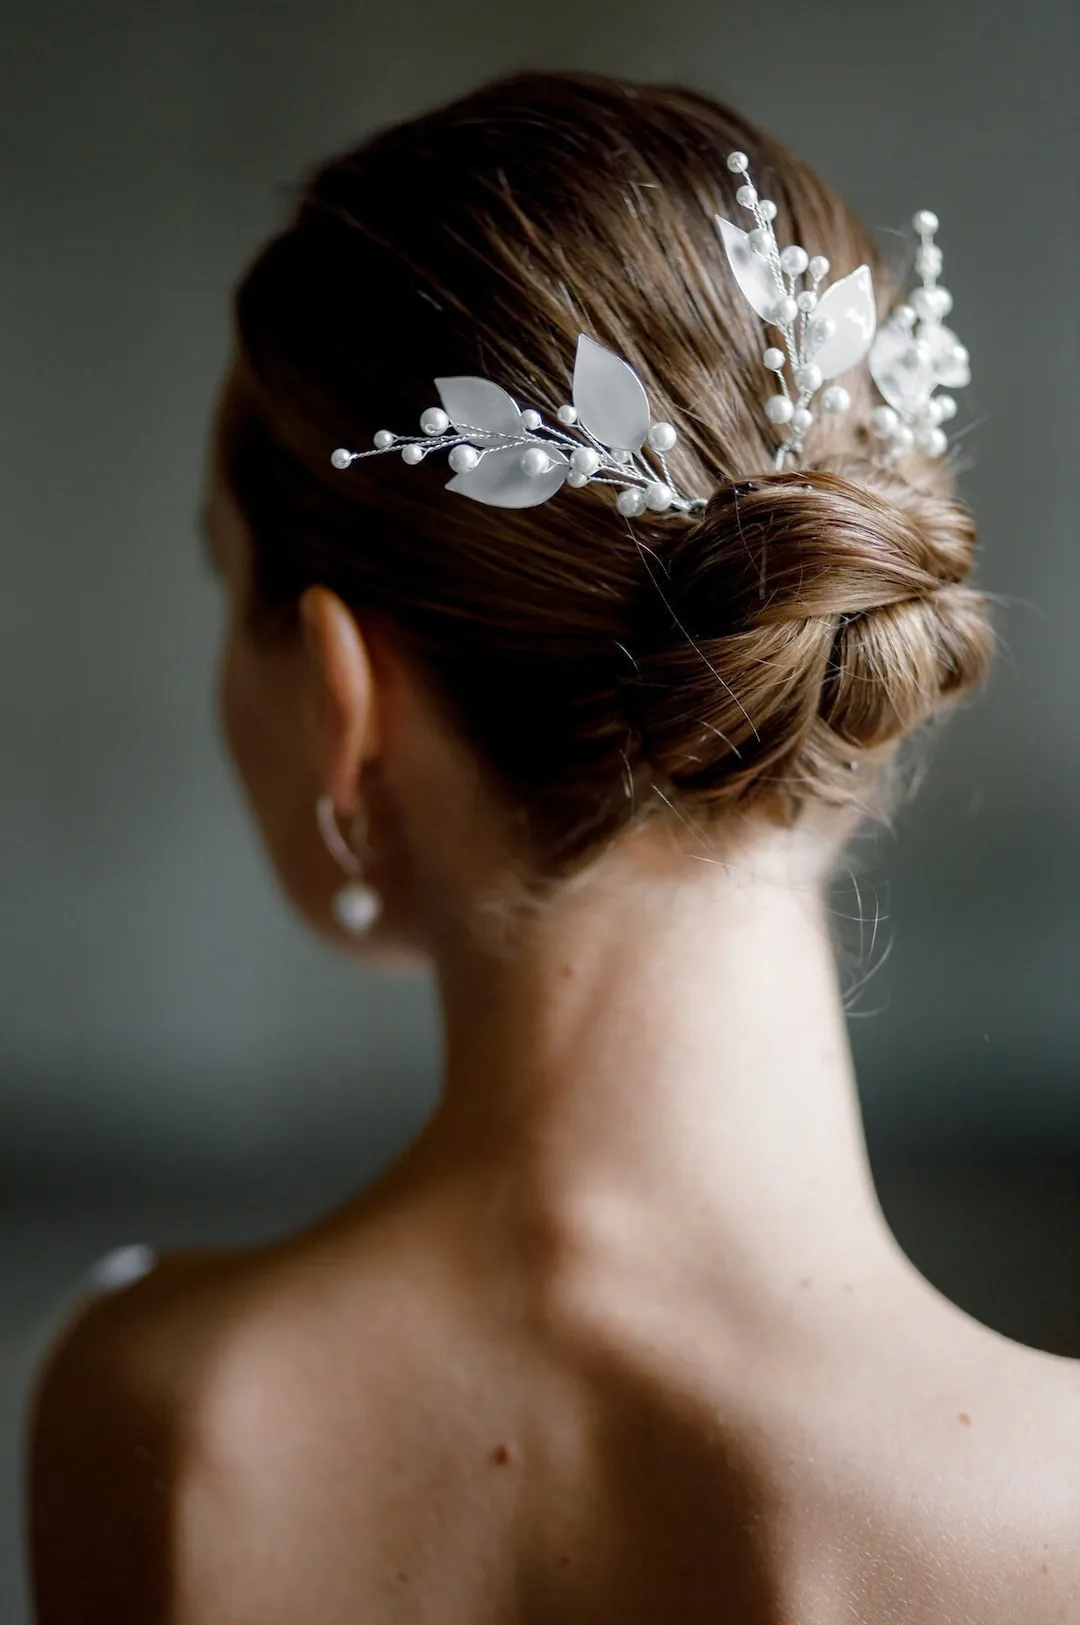
The best courthouse wedding accessories are the ones you barely notice — until you see the photographs, and then you notice them everywhere. A single pearl pin catching the light, a slim gold comb at the side of a low bun, a silk ribbon tied around a ponytail, a delicate headband that keeps the front pieces in place: these are small things, but they are the difference between “nice hair” and “bridal hair”. The rule is one accessory, worn with intention, and everything else simple. Two accessories will argue with each other; one accessory will shine.
Pros and cons: a pearl pin is the safest choice — it suits every style, every dress, and every hair colour, and it costs very little. A gold comb is the warmest choice, beautiful on dark hair and in daylight. A ribbon is the most romantic choice, but it needs to be tied neatly or it will look like an afterthought. Common mistake: buying the accessory before choosing the hairstyle, then forcing a style to fit it. Choose the style first, then the accessory that flatters it. Maintenance: none — a pin or a comb stays put all day, and a ribbon needs one check before the photographs. Cost: most of these cost less than lunch, which is the whole point of a courthouse wedding.
Balancing Your Hair with a Simple Dress
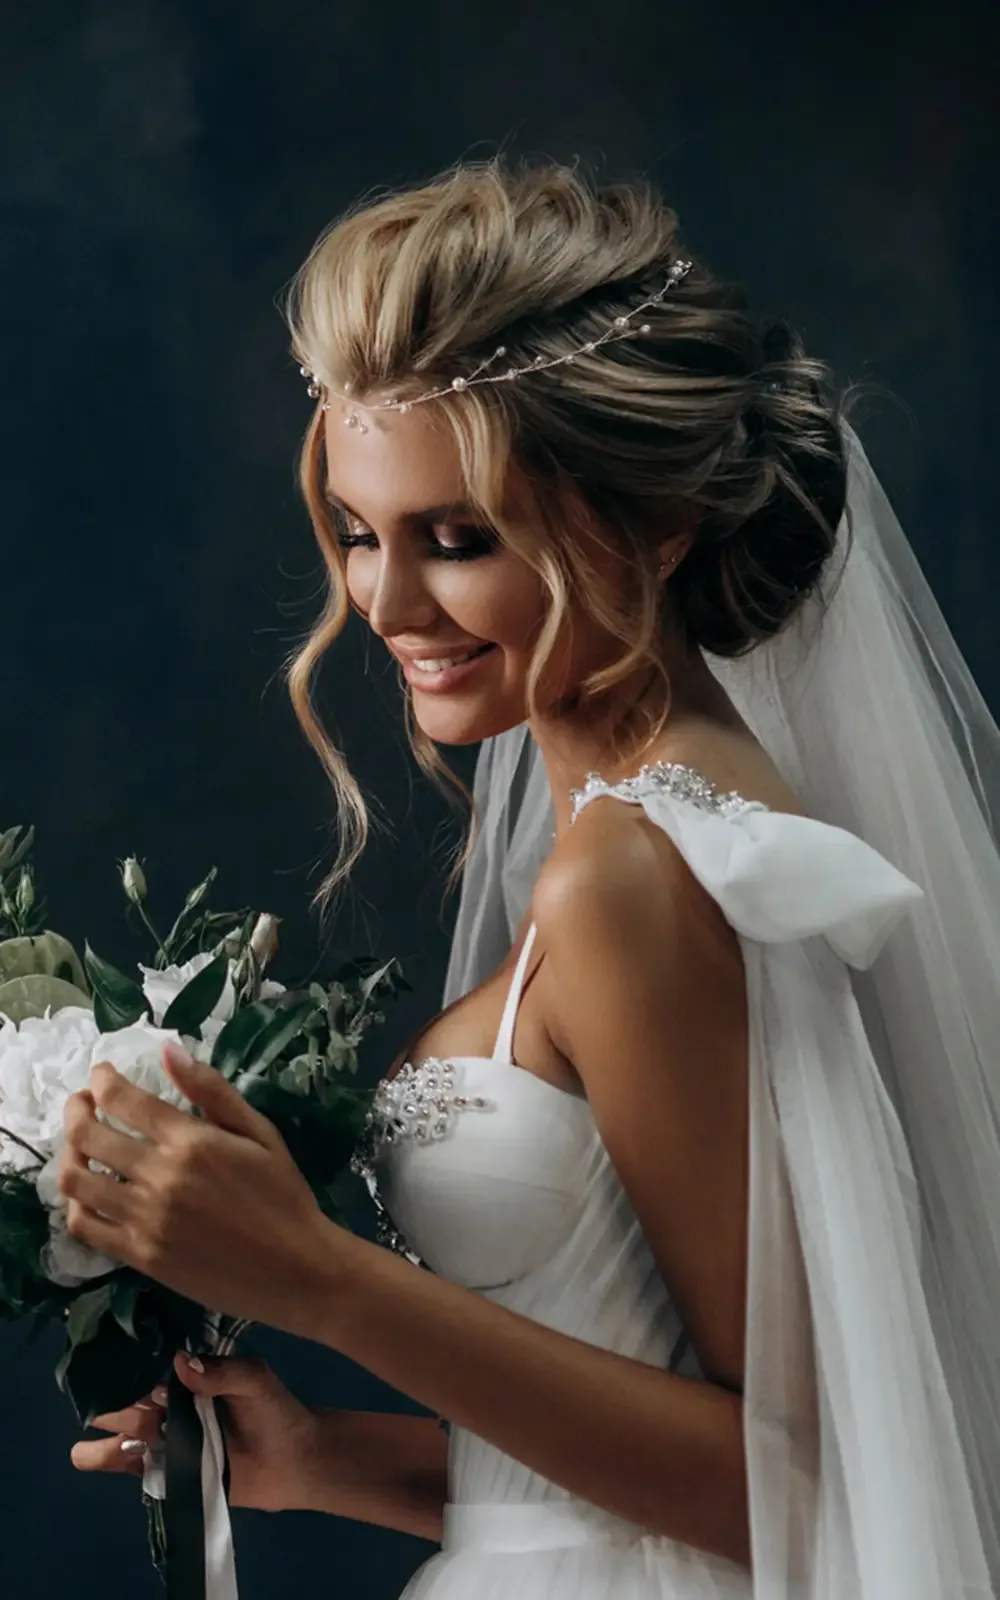
Most courthouse wedding dresses are simple — a white midi dress, a tailored jumpsuit, a simple slip dress, a tea-length dress with a clean line. A simple dress is a gift to your hair, because it leaves room for the hair to be the beautiful part. The balance works like this: a simple dress with simple hair can look plain in photographs, while a simple dress with one beautiful hair detail looks complete. The detail can be the style itself — a polished chignon, glossy waves, a romantic updo — or it can be the accessory. What it cannot be is nothing at all, because then the photographs will show a lovely dress and hair that looks like an ordinary Tuesday.
How to style it: look at your dress’s neckline first. A high neckline pairs beautifully with hair worn up, because it shows the line of the dress and the length of the neck. A strapless or sweetheart neckline pairs beautifully with hair worn down or half-up, because the softness of the hair balances the bare shoulders. Pros: a simple dress means your hair gets the attention it deserves, and you never have to worry about the two fighting each other. Cons: a very plain dress with very plain hair can underwhelm in photographs, so add one detail — a pin, a flower, a soft wave at the front. Quick verdict: let the dress be simple and let the hair be the star.
Quick Touch-Ups Between Ceremony and Lunch
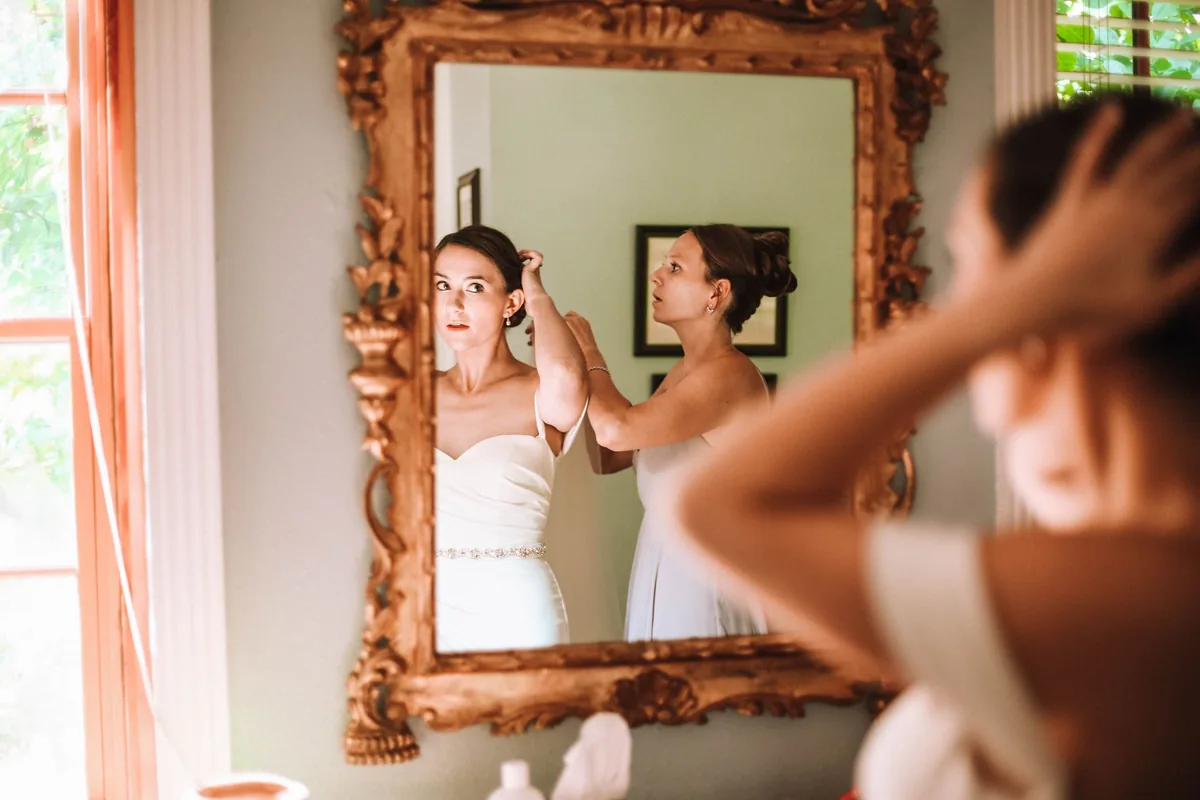
Between the ceremony and lunch there is a gap — twenty minutes on the courthouse steps, photographs with your witnesses, a walk to the restaurant — and that gap is your touch-up window. You will not have a dressing room or a mirror with good light, so the touch-up has to be one you can do by feel, in a courthouse bathroom, with what is in your bag. The three fixes are the same ones every bride needs: the re-pin, the re-tie, and the refresh. The re-pin: slide a bobby pin into the section you can feel falling, flat against the head. The re-tie: take a ponytail or bun down and put it back up using the same parting your fingers already know. The refresh: flip your head forward, shake the roots with your fingers, and add a spritz of dry shampoo.
Pack the kit the night before: four bobby pins, one spare elastic, a travel hairspray, and a small comb in your bag — or better, in your witness’s bag, so you are not carrying it yourself. Pros: each fix takes under a minute, and you can do all three in a bathroom without a mirror. Cons: none, except that you need the kit ready before the morning, because you will not have time to buy one. Maintenance: do it once, after the photographs on the steps, and then forget about your hair for the rest of the day. Your hair should be the least of your worries at lunch — you have just got married, and that is worth celebrating properly.
1. The Sleek Low Chignon
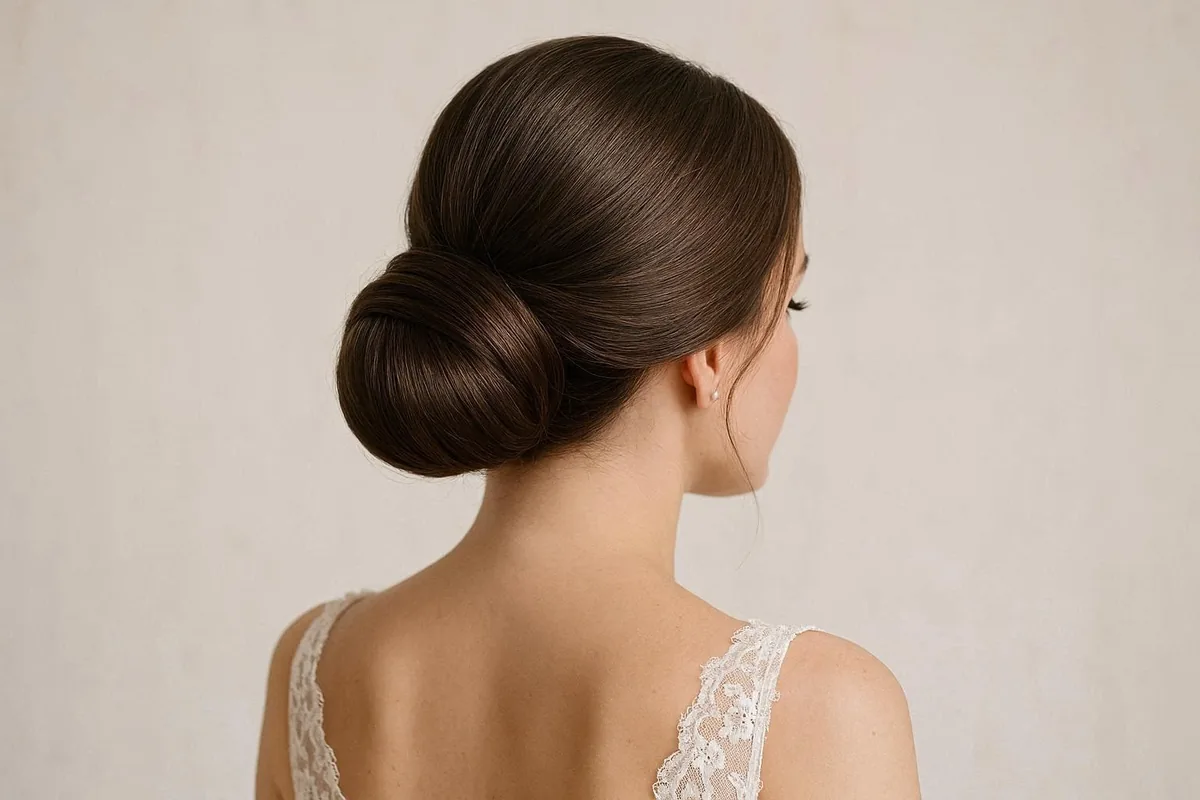
The sleek low chignon is the courthouse wedding classic, and it has earned that place for a reason. The hair is smoothed back, gathered low at the nape, and coiled into a neat, polished knot — no height, no drama, no fuss, just a clean shape that looks expensive in daylight and photographs beautifully from every angle. It is the style for the bride who wants to look like the most polished version of herself, not like a different person, and it suits every dress, every bouquet, and every face shape. A chignon is also the most practical bridal style there is: it stays put while you sign the register, it never falls into your face, and it looks just as good at lunch as it did at the ceremony.
Best for: brides with medium to long hair who want a timeless, elegant look. How to style it: smooth the hair back with a shine serum, gather it low at the nape, twist it into a coil, and pin it flat with crossed bobby pins — not one pin, but three, at the base and both sides. What to ask your stylist for: a low, centred chignon with a clean centre or side part and no height at the crown. Pros: it photographs beautifully, it holds all day, and it suits a veil or a headband equally well. Cons: very fine hair may need a little padding or texture spray to give the knot shape. Maintenance: one re-pin after the photographs, and a shine serum on the surface before lunch.
2. A Soft Low Bun with Tendrils
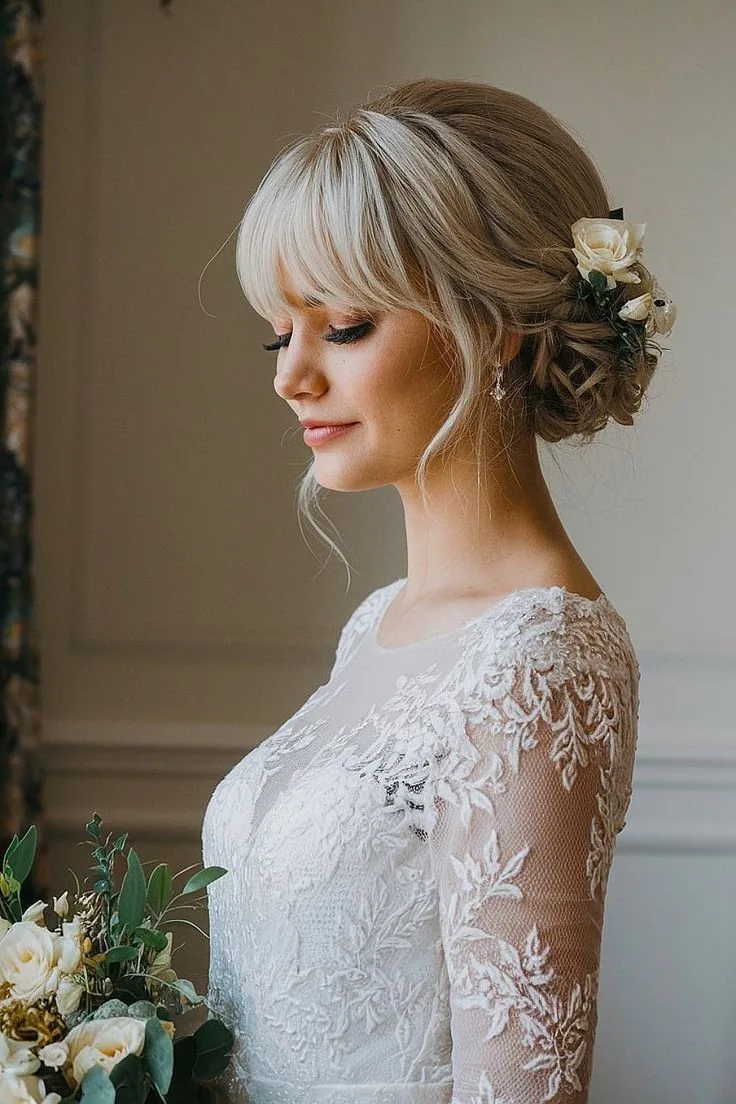
If the sleek chignon is the polished choice, the soft low bun with tendrils is the romantic one. The bun sits low at the nape, just like a chignon, but it is built loosely — a little texture, a little softness — and two fine tendrils are left loose at the front to frame the face. Those tendrils are the whole point: they soften the look, they move when you move, and they make the style feel romantic rather than severe in the close-up photographs of a small ceremony. It is the style for the bride who loves an updo but does not want to look like she is going to a board meeting.
Why it works: the softness at the front flatters every face shape, and the loose bun photographs beautifully from the side, which is where most courthouse photographs are taken. How to style it: curl the hair loosely first, gather it low without brushing it smooth, pin it softly, and pull out two fine tendrils at the front — then curl those tendrils lightly so they hold their shape. Common mistake: pulling out too many tendrils, which turns a soft bun into a messy one. Two tendrils, no more. Pros: romantic, flattering, and forgiving — if a piece slips, it looks intentional. Cons: the tendrils can fall flat in humidity, so a light hairspray on them is worth it. Quick verdict: the most romantic updo in this guide, and the easiest to wear.
3. The Classic French Twist
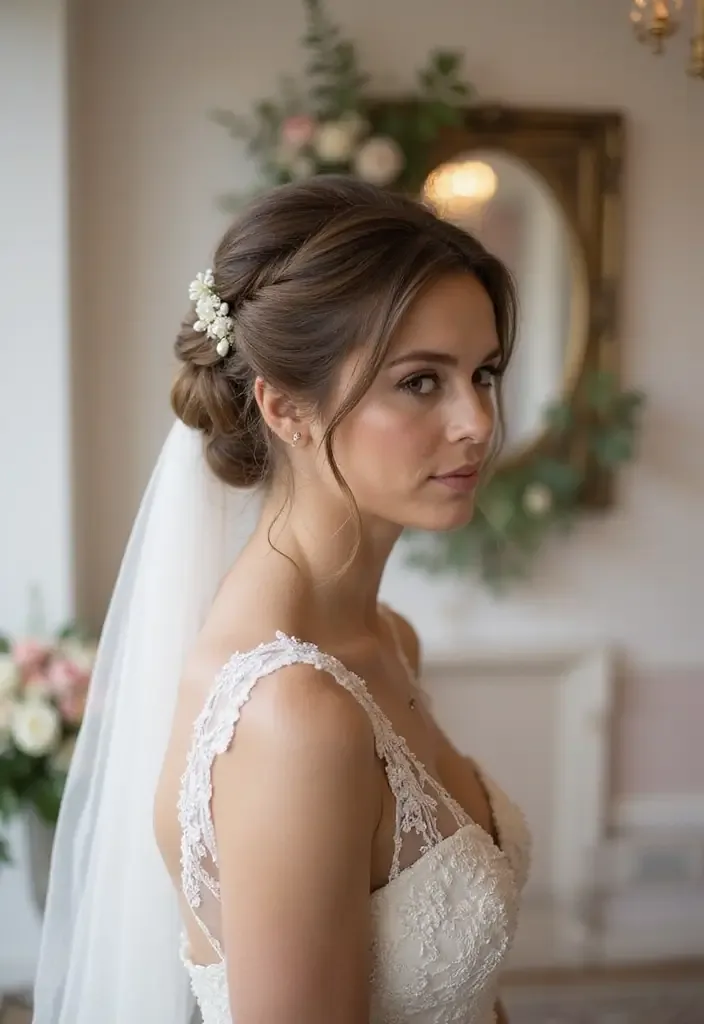
The French twist is the most elegant hairstyle ever invented, and it was made for a courthouse wedding. The hair is swept up the back of the head and twisted into a vertical roll, pinned neatly along the spine of the twist, and the result is a long, clean line that lengthens the neck and looks extraordinary in photographs. It is formal enough for a wedding and simple enough for a registry office, which is a rare combination — most formal styles are too much for a courthouse, and most simple styles are not quite special enough. The French twist is exactly right.
Best for: brides with medium to long hair who love classic, timeless elegance. How to style it: gather the hair low, twist it upwards along the back of the head, tuck the ends in, and pin the twist at three points — the top, the middle, and the base. A few pins are not enough; this style needs a proper pin job. What to ask your stylist for: a soft French twist, not a severe one, with a little softness at the front. Pros: it lengthens the neck, it photographs beautifully from the side, and it holds all day without a single touch-up. Cons: it takes a stylist to do well — this is not a do-it-yourself style for most brides. Maintenance: none. Once it is pinned, it stays.
4. A Polished Low Ponytail
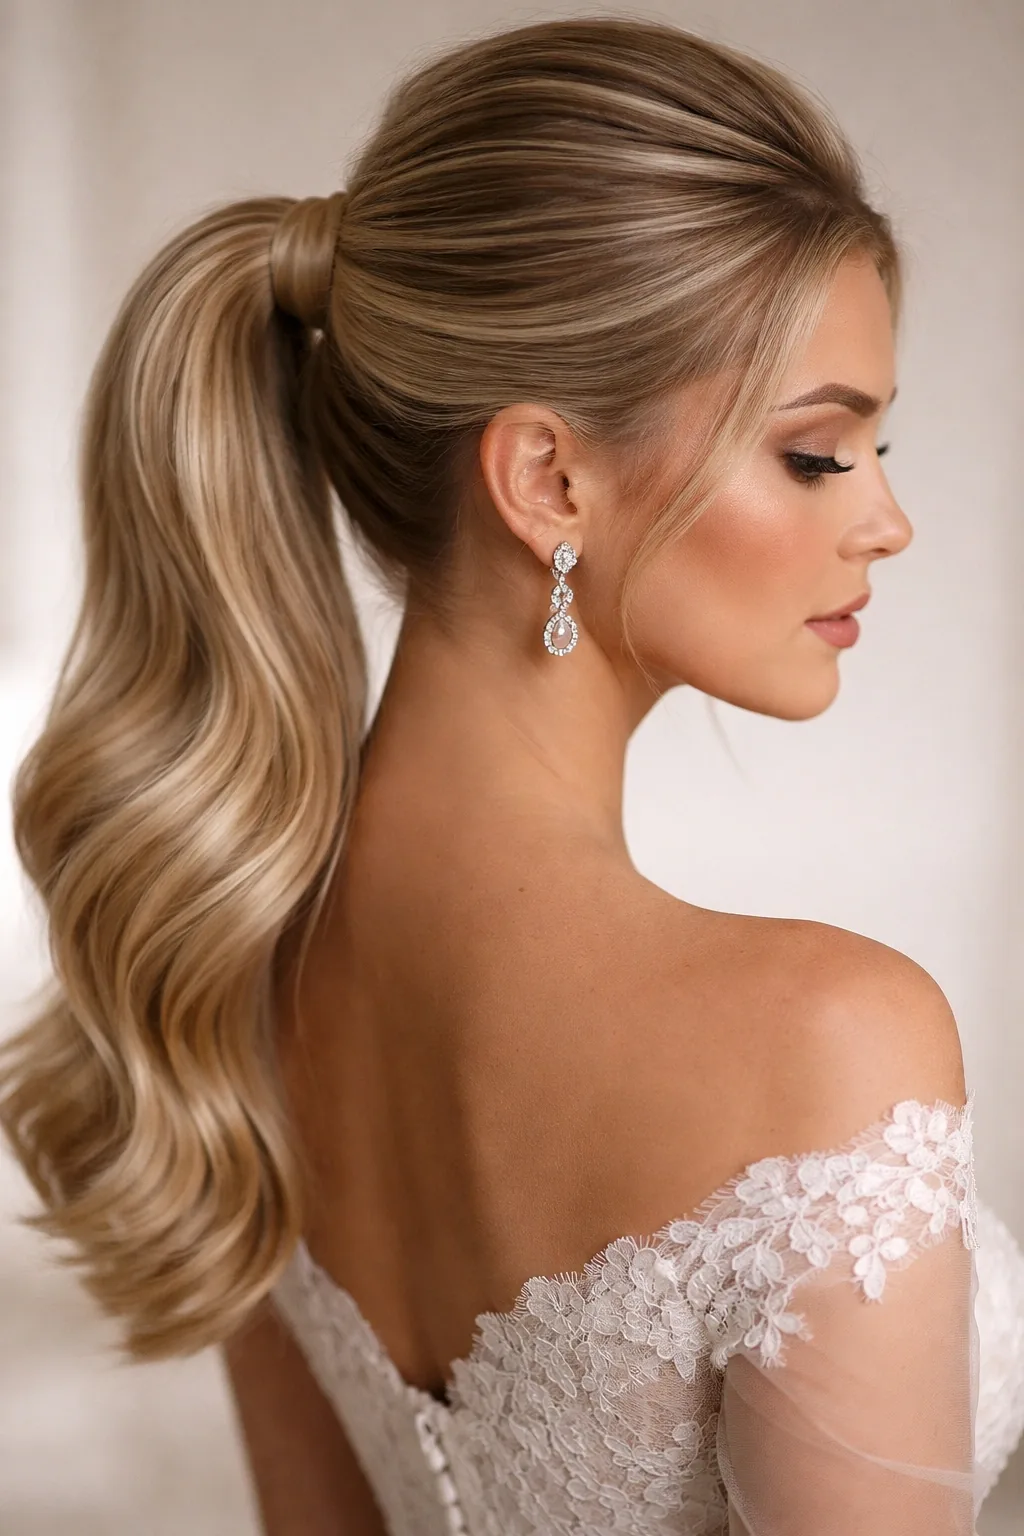
A low ponytail sounds too simple for a wedding, and that is exactly why it works at a courthouse. The polished low ponytail is not the ponytail you wear to the gym — it is smoothed to a shine, gathered low at the nape, wrapped with a strand of your own hair to hide the elastic, and finished with a ribbon or a pearl pin. It is modern, confident, and completely unfussy, and it photographs beautifully because the clean line of the ponytail draws the eye to your face. It is the style for the bride who wants to look like herself, only more polished — the bride who would never wear a tiara and knows it.
Why it works: a low ponytail keeps your hair completely out of the way while you sign the register, and it survives the whole day without a single touch-up. How to style it: smooth the hair with a serum, gather it low, secure it, then wrap a strand around the elastic and pin it underneath. Add a ribbon for romance or a pearl pin for polish. Pros: the quickest bridal style in this guide, and the most comfortable — nothing pulls, nothing hurts. Cons: a ponytail shows the condition of your hair, so it needs to be healthy and shiny. Who should avoid it: brides with very short hair, who cannot gather enough length. Quick verdict: simple, modern, and surprisingly bridal.
5. Romantic Loose Waves
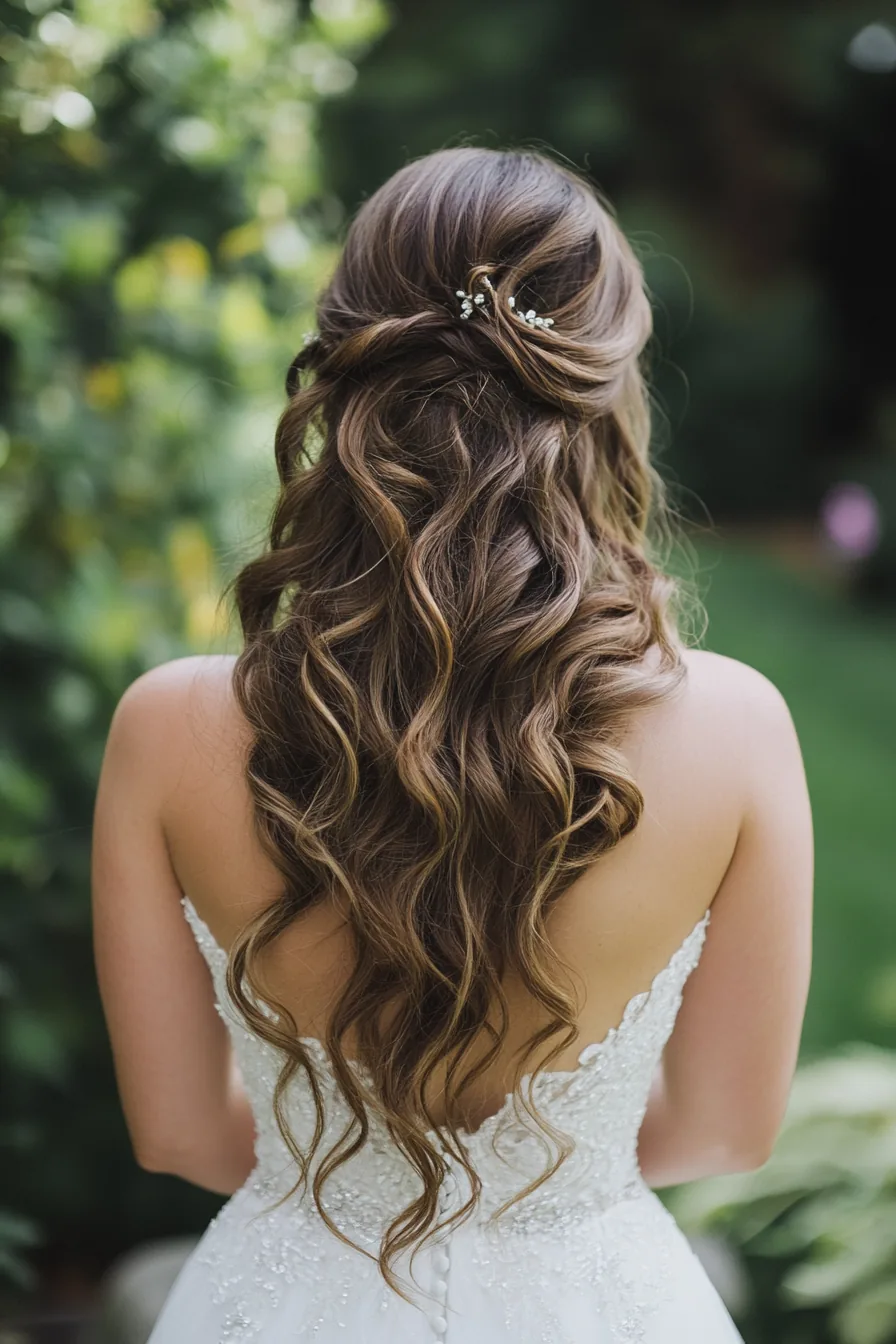
Romantic loose waves are the most popular bridal hairstyle in the world, and at a courthouse wedding they are at their best. The waves are large, soft, and brushed out — not tight curls, but movement — and the hair falls over the shoulders in a way that looks effortless and photographs beautifully in daylight. It is the style for the bride who wants to wear her hair down, who loves the feeling of her hair loose, and who wants the photographs to show her hair as it really is, only better. In a small ceremony, loose waves feel intimate and personal in a way an updo never can.
Best for: brides with medium to long hair who want a soft, romantic look. How to style it: curl the hair in large sections with a wide-barrel iron, brush the curls out gently so they become waves, and finish with a shine serum — not hairspray, which will stiffen the waves. Pros: soft, romantic, and completely natural-looking, and it suits every dress. Cons: waves can fall flat in humidity or in a warm room, so a texture spray at the roots helps them hold. Maintenance: a quick finger-comb through the ends before the photographs, and a spritz of dry shampoo at the roots if the volume drops. Cost and time: a salon blowout and wave takes about an hour, or you can do it at home in thirty minutes.
6. A Half-Up Twist
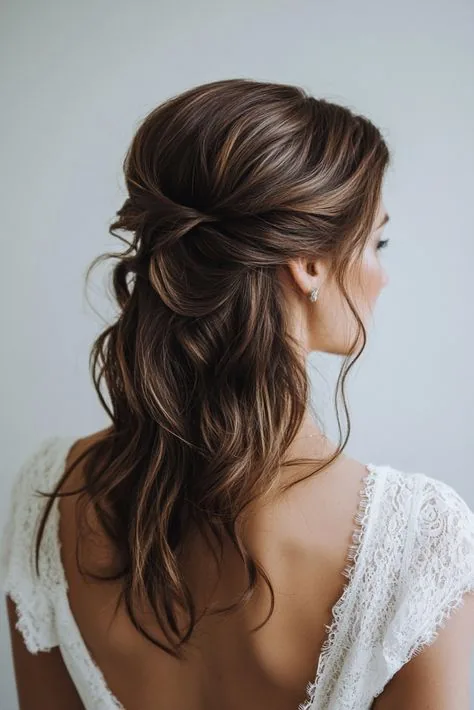
A half-up twist is the compromise that pleases everyone: the top half of the hair is twisted back and pinned, the rest falls loose, and the result is a style that is both up and down, both polished and relaxed. It is the style for the bride who cannot decide between an updo and wearing her hair down — and at a courthouse wedding, where the ceremony is short and the photographs are close, it is often the perfect answer. The twist at the back gives the style its bridal shape, the loose lengths give it its romance, and the whole look takes ten minutes to build.
Why it works: the half-up keeps the front pieces out of your face while you sign the register, and the loose lengths frame your face beautifully in the photographs. How to style it: take the top sections from each side, twist them towards the back, cross them over, and pin them at the crown — then curl the loose lengths softly. Pros: quick, pretty, and it suits almost every hair length from shoulder-length up. Cons: the twist can loosen over a few hours, so pin it twice and use a light hairspray. Common mistake: twisting too tightly, which pulls the front pieces back and makes the style look severe. Keep the twist soft, and let a few fine pieces fall at the front. Quick verdict: the best of both worlds, and the easiest half-up in this guide.
7. An Elegant Braided Crown
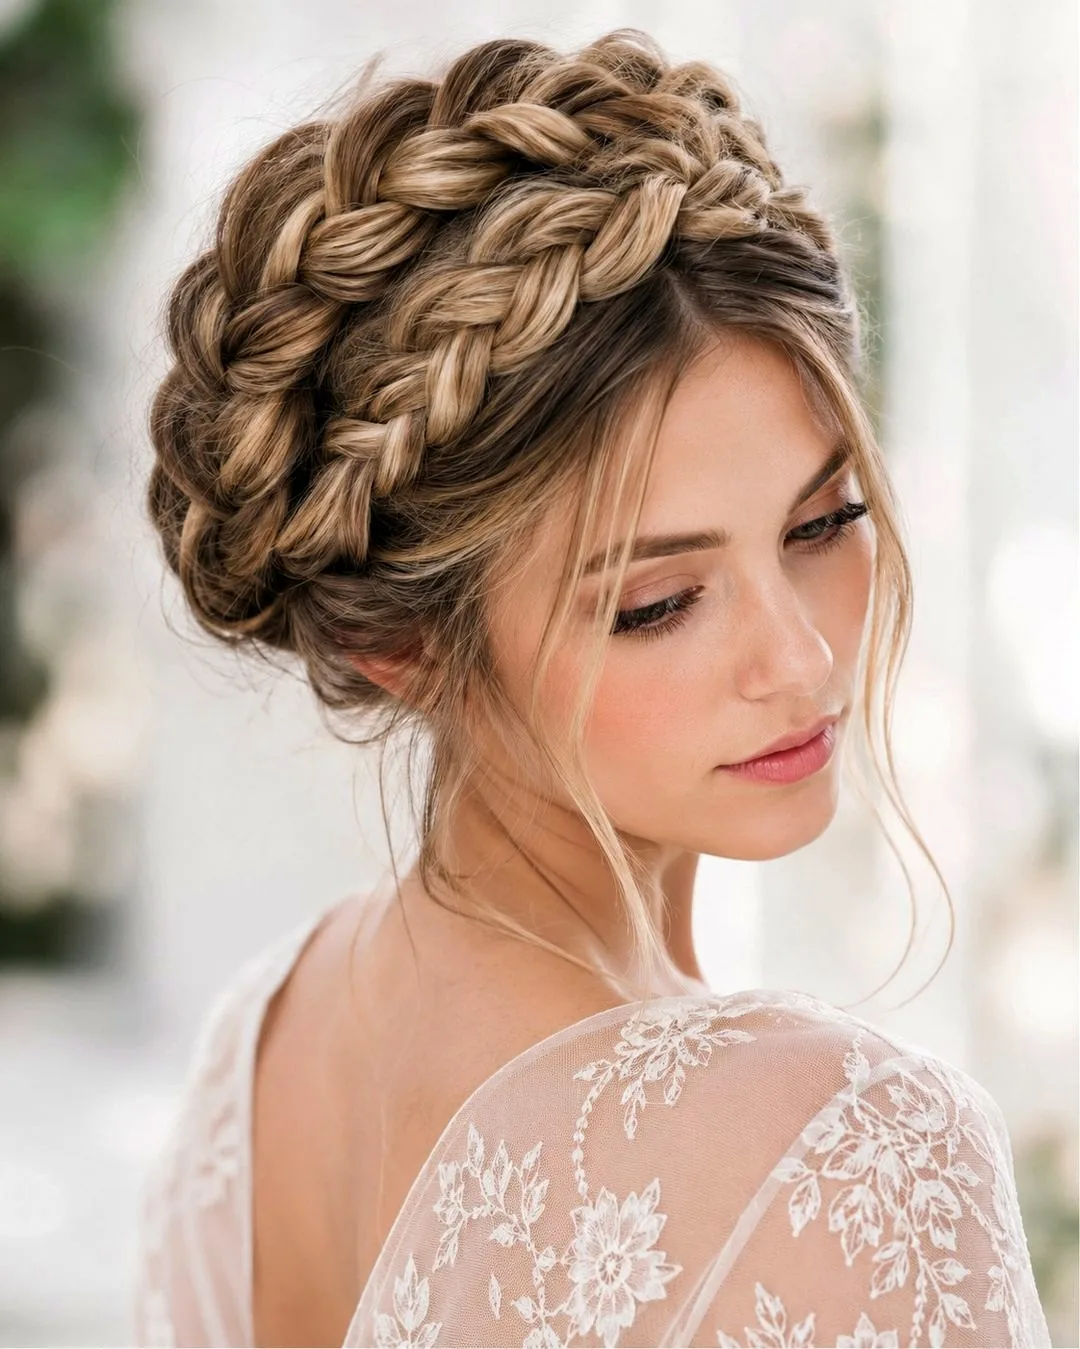
A braided crown is the most romantic updo in this guide, and the one that looks most like a fairy tale — which is a lovely thing to wear to a courthouse. The braid wraps around the head like a crown, the rest of the hair is pinned up softly underneath it, and the whole style has a soft, old-fashioned romance that photographs beautifully in daylight. It is the style for the bride who loves braids, who wants something special but not formal, and who wants her hair to be the prettiest thing in the room — which, at a courthouse wedding, it will be.
Best for: brides with medium to long hair who want a romantic, storybook look. How to style it: braid the hair from one side, wrap the braid around the head, and pin it in place — then pin the remaining hair up softly underneath, so the crown is the star. What to ask your stylist for: a soft, slightly loose crown braid, not a tight one, with a little texture at the front. Pros: romantic, unique, and it holds all day — a braid is the most secure style there is. Cons: it takes time and a skilled hand, so this is a salon style for most brides. Maintenance: none. A braid does not move, does not fall, and does not need a touch-up. Quick verdict: the most romantic style here, and the most secure.
8. A Side-Swept Chignon
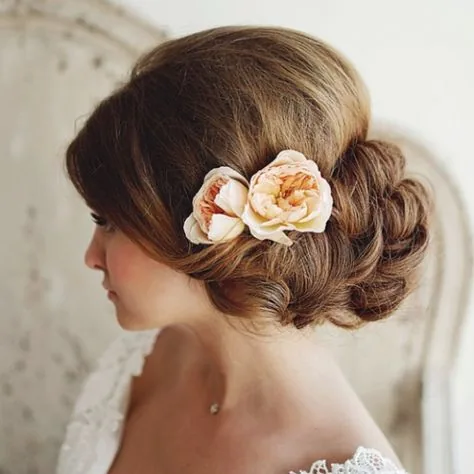
A side-swept chignon is the chignon with a little more romance: the bun sits to one side at the nape, the hair sweeps across the front, and the whole style has a soft, asymmetric shape that photographs beautifully from every angle. It is the style for the bride who loves an updo but wants something a little less formal than a centred chignon — a little more movement, a little more charm — for the photographs on the courthouse steps, when the cameras come out and the whole party is watching. The asymmetry is what makes it special: it looks like a choice, not a default.
Pros: romantic, flattering, and it looks beautiful from the side as well as the front, which matters when most of your photographs are taken at an angle. Cons: it needs a good pin job to stay put, because an asymmetric bun has a habit of drifting towards the centre. How to style it: sweep the hair to one side, gather it low at the nape on that side, coil it into a bun, and pin it at three points — the base, the side, and the top of the sweep. Maintenance: pin it firmly and carry one spare pin for the afternoon. Who should avoid it: brides who will be dancing a lot at lunch — a centred bun is more secure for a long celebration. Quick verdict: the most charming chignon in this guide.
9. A Chic Low Knot
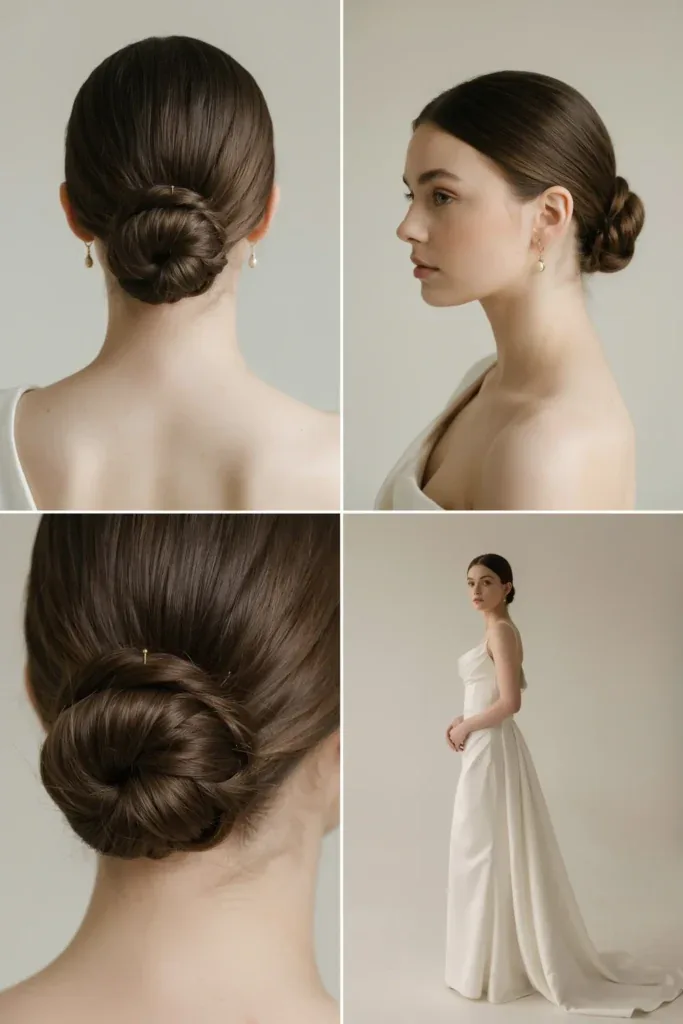
A chic low knot is the minimalist’s bridal style: the hair is gathered low at the nape and coiled into a small, neat knot — smaller than a chignon, simpler than an updo, and completely modern. It is the style for the bride in a simple dress with a simple bouquet who wants her hair to match: clean, confident, and completely without fuss. It photographs beautifully because there is nothing to distract from your face, and it is the most comfortable bridal style there is — nothing pulls, nothing hurts, and nothing needs fixing.
Best for: brides with fine to medium hair who love minimal, modern style. How to style it: smooth the hair back, gather it low, twist it once, coil it into a small knot, and pin it flat. The knot should be small — the size of a plum, not an orange. Pros: quick, comfortable, and it suits a simple dress perfectly. Cons: a very small knot can look plain in photographs if the hair is very fine, so a pearl pin or a gold comb at the side is worth adding. Maintenance: one re-pin after the photographs. Cost and time: ten minutes at home, or a quick salon visit — this is the cheapest bridal style in the guide.
10. A Textured Bob with a Side Part
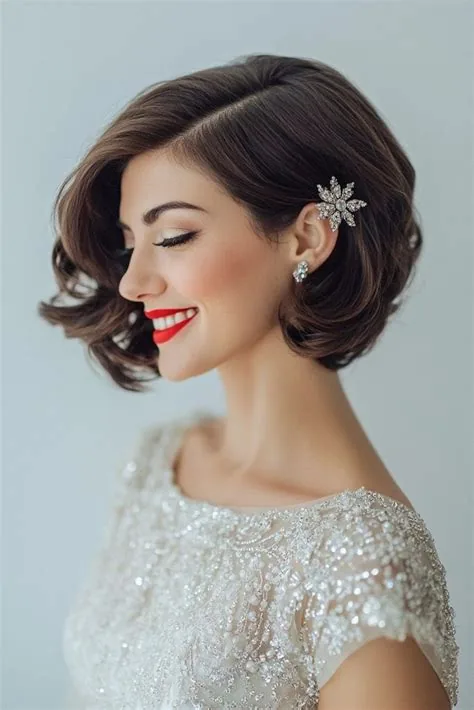
A textured bob with a side part is the short-hair bride’s secret weapon. The bob sits at the jaw, the deep side part adds shape and drama, and a little texture through the lengths keeps it from looking flat or severe. It is chic, modern, and completely unbothered by a small ceremony — it does not need pins, it does not need a touch-up, and it photographs beautifully because the shape is so clean. It is the style for the bride who already has a bob and loves it, and who knows that the best wedding hair is the hair she already loves, only a little more polished.
Why it works: a bob frames the face beautifully in close-up photographs, and the side part adds instant shape. How to style it: add texture with a texturising spray, blow-dry with a round brush for volume at the roots, and finish with a shine serum on the ends. A single pearl pin or a small gold clip at the side is all the accessory you need. Pros: short, sharp, and unforgettable, and it never needs fixing during the day. Cons: a bob that is too blunt at the ends can look heavy, so ask for soft, tapered ends. Maintenance: a trim a week before the wedding keeps the line sharp. Who should avoid it: nobody — but if your bob is growing out, pin the front pieces back rather than fighting them.
11. Soft Curls with Pearl Pins
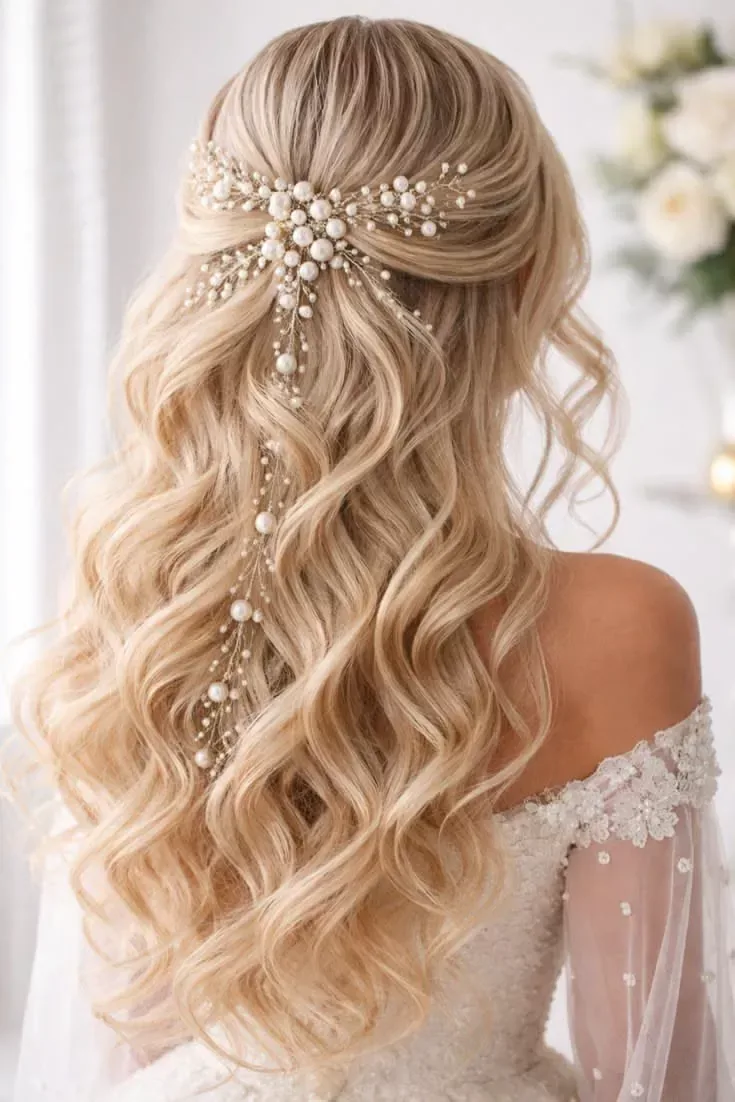
Soft curls with pearl pins are the most classic bridal look in this guide, and the one that says “bride” the fastest. The curls are soft and brushed out, the hair falls over the shoulders, and two or three small pearl pins are placed at the side — one above the ear, one at the temple — catching the light in every photograph. It is the style for the bride who wants her hair down, who loves curls, and who wants one beautiful detail that makes the whole look feel bridal without a veil. The pearls do the work of a tiara, quietly and elegantly.
Best for: brides with medium to long hair who want a soft, classic bridal look. How to style it: curl the hair in large sections, brush the curls out gently, and place the pearl pins on one side — two or three, no more, clustered close together so they read as one detail. Pros: soft, romantic, and the pearls photograph beautifully in daylight. Cons: curls can drop in humidity, so a light hairspray and a texture spray at the roots help them hold. Common mistake: scattering the pins all over the hair, which looks messy. Cluster them on one side, and let the rest of the hair be simple. Maintenance: a quick finger-comb through the curls before the photographs.
12. A Low Bun with a Headband
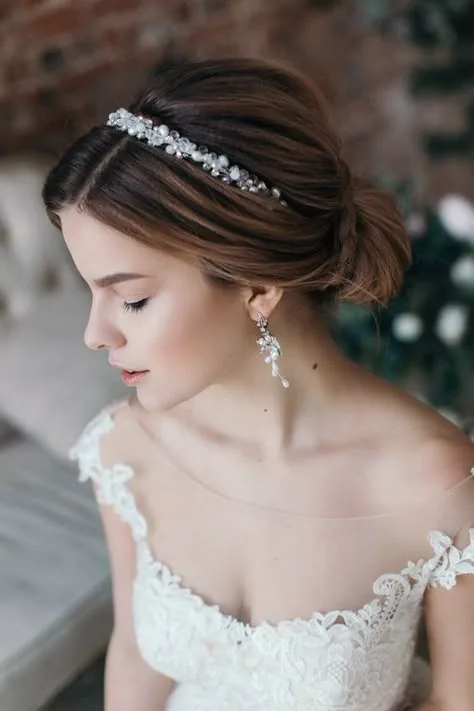
A low bun with a headband is the no-veil bride’s best friend. The bun is low and neat at the nape, the headband sits across the crown — a slim gold band, a pearl headband, a delicate beaded band — and the combination does exactly what a veil does: it frames the face, it says “bride”, and it gives the photographs a focal point. It is the style for the bride who wants the structure of a veil without wearing one, and for the bride whose hair is fine or slippery and needs something to hold the front pieces in place.
Why it works: the headband holds the front pieces back while you sign the register, and the low bun keeps the rest of the hair completely out of the way. How to style it: build the bun first, then place the headband — not the other way round — so the band sits exactly where it flatters your face. Pros: a headband suits every face shape, and it is the easiest accessory to wear all day. Cons: a headband that is too tight will hurt by lunch, so try it on for an hour before the wedding. Who should avoid it: brides wearing statement earrings — a headband and statement earrings compete, so choose one. Quick verdict: the simplest way to feel bridal without a veil.
13. Sleek Straight Hair with a Centre Part
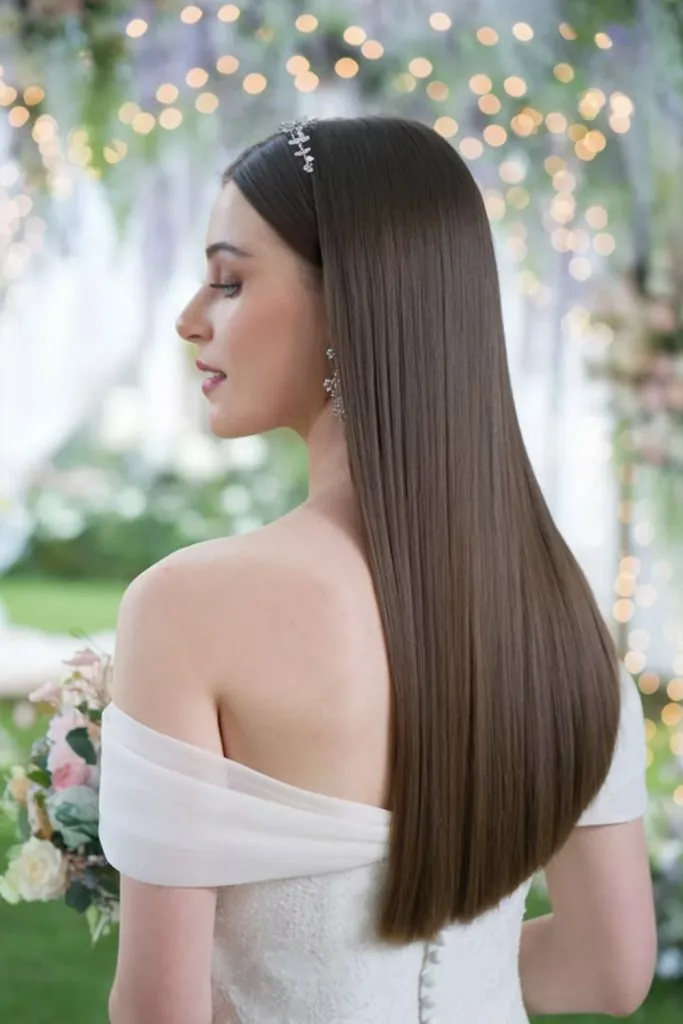
Sleek straight hair with a centre part is the most modern bridal look in this guide — simple, confident, and completely about shine and health. The hair is straightened smooth, parted cleanly in the centre, and left to fall evenly on both sides, and the whole style is about the condition of the hair itself. It is the style for the bride whose hair is in beautiful condition and wants to show it off, and for the bride who would never wear curls and knows it. In daylight, sleek straight hair looks extraordinary — the shine catches the light in every photograph.
Best for: brides with naturally straight or straightened hair who love minimal, modern style. How to style it: straighten in small sections with a flat iron, smooth a shine serum over the surface, and keep the centre part clean and straight. Pros: simple, sleek, and all about shine, and it takes very little time. Cons: a centre part on hair that is flat at the roots can look severe, so add a little volume at the crown with a round brush. Maintenance: a shine serum on the ends before the photographs, and a quick lift at the crown with your fingers if the roots flatten. Who should avoid it: brides with very curly hair who would need a lot of heat to straighten it — the humidity will undo it by lunch.
14. Vintage Finger Waves
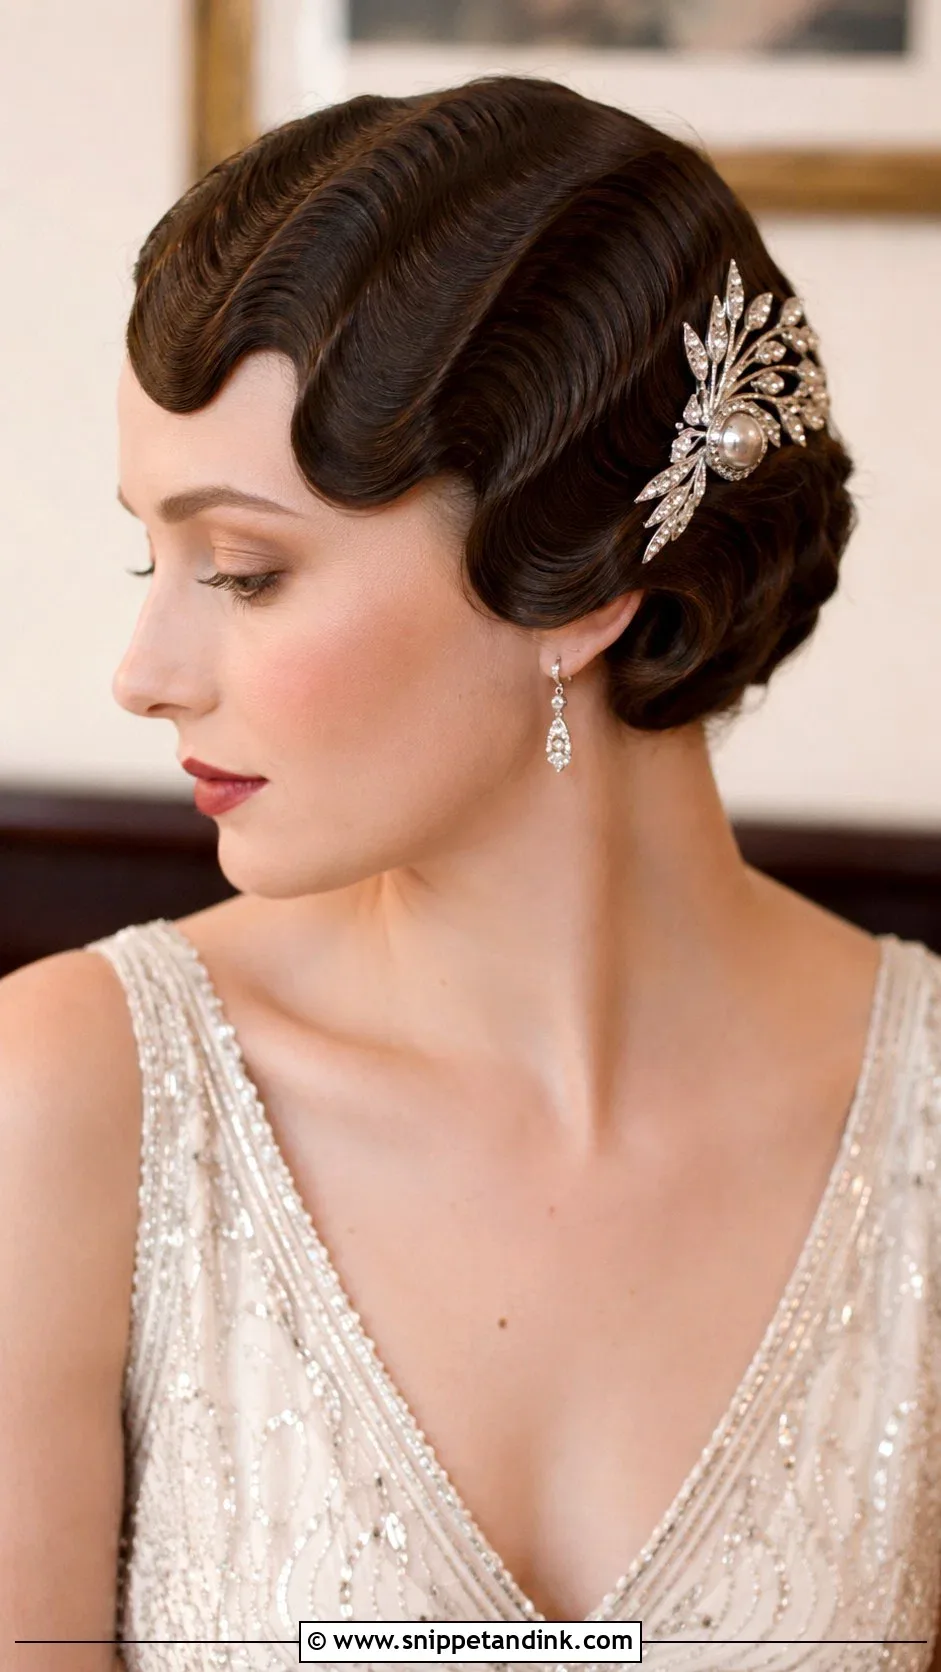
Vintage finger waves are the most glamorous style in this guide, and the one that turns a courthouse wedding into a film still. The waves are sculpted close to the head in smooth, S-shaped curves — the style of the 1920s and 1930s — and the result is pure old-Hollywood glamour in a small room. It is the style for the bride who loves vintage, who is wearing a simple dress and wants her hair to be the drama, and who wants the photographs to look like they belong in a different era. Finger waves are a statement, and at a courthouse wedding, a statement is exactly what you want.
Why it works: finger waves photograph beautifully from every angle, because the sculpted shape reads clearly even in a candid phone photograph. How to style it: this is a salon style — the waves are sculpted with gel and a comb, set, and brushed out softly. Do not try it at home the morning of your wedding. Pros: glamorous, unique, and unforgettable — nobody else at the courthouse will have this hair. Cons: it takes a skilled stylist and at least an hour, and it is not a style you can fix yourself if it slips. Maintenance: none, once it is set — finger waves do not move. Cost and time: a salon appointment and a little patience, but the photographs are worth it.
15. A Messy-Chic Low Bun
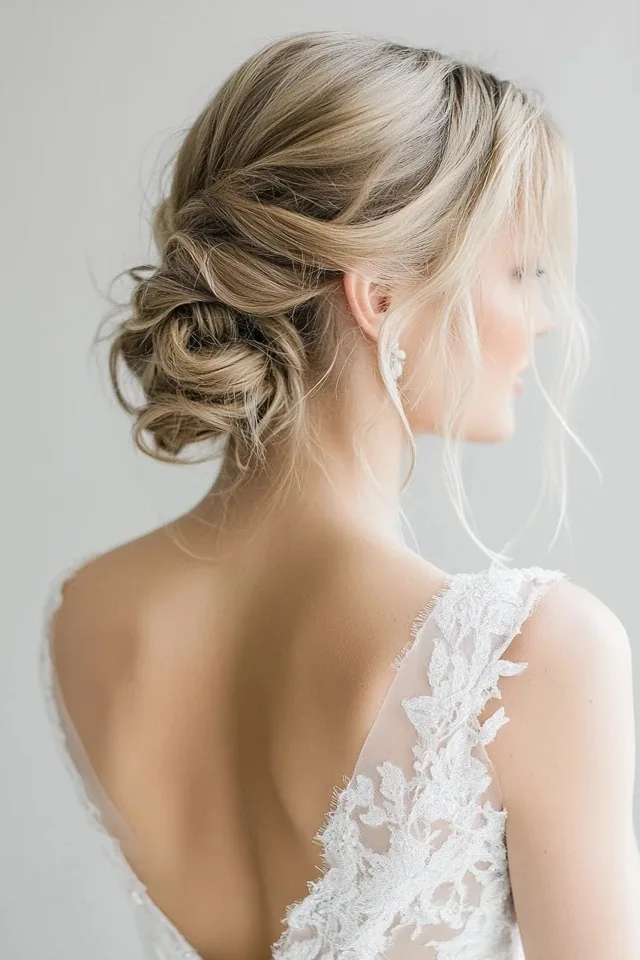
A messy-chic low bun is the relaxed bride’s updo: the bun sits low at the nape, but it is built loosely — a little texture, a few soft pieces falling at the front, nothing pulled tight — so it looks effortless and romantic rather than severe. It is the style for the bride who wants an updo but does not want to look like she tried too hard, and for the bride whose wedding is small and intimate and whose hair should feel the same way. The beauty of a messy bun is that it gets better as the day goes on: the looseness that comes with a few hours makes it softer, not messier.
Pros: quick, forgiving, and the most relaxed updo in this guide — if a piece slips, it looks intentional. Cons: a messy bun can tip into actually messy if you pull out too many pieces, so keep it to two or three soft pieces at the front. How to style it: curl the hair loosely first, gather it low without brushing it smooth, pin it softly, and pull out two fine pieces at the front. Maintenance: a single re-pin halfway through the day is all it needs. Who should avoid it: brides who want a very polished, formal look — this is the relaxed choice, not the formal one. Quick verdict: effortless, romantic, and the easiest updo to wear all day.
16. A Braided Low Ponytail
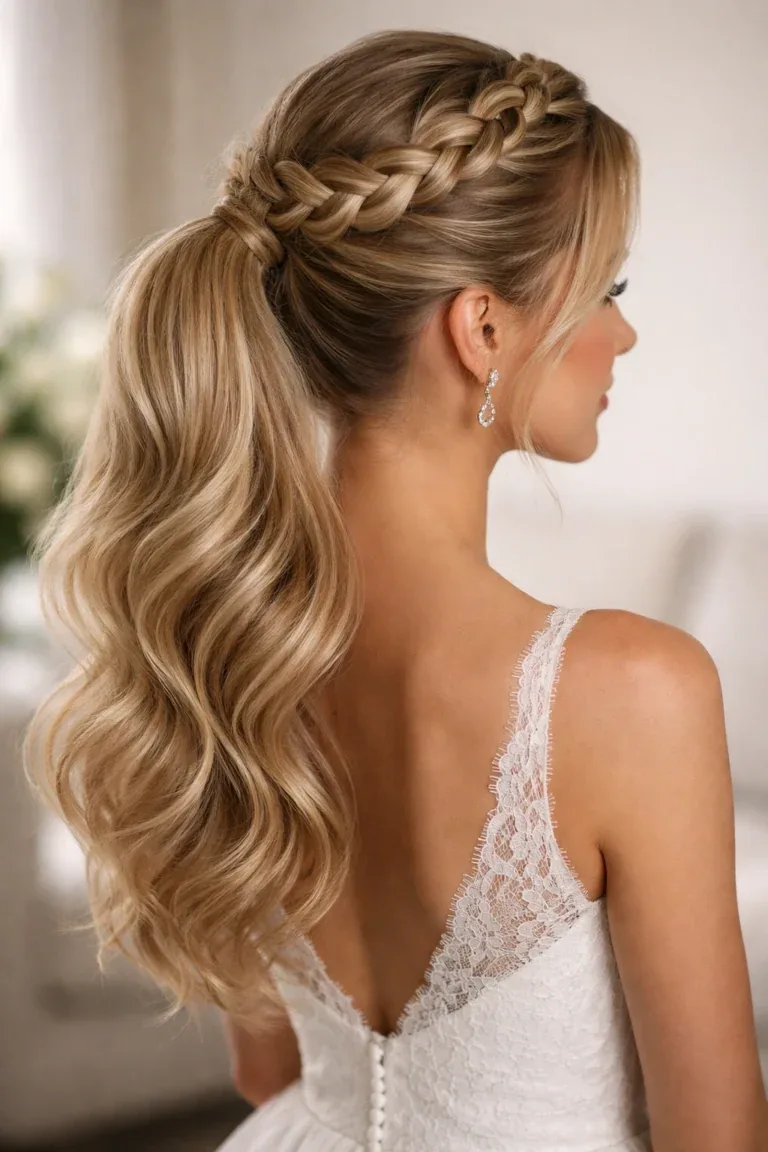
A braided low ponytail is the style for the bride who loves braids and wants them in her wedding photographs. The hair is gathered low at the nape, braided loosely down the back, and finished with a ribbon or a small gold cuff at the end — and the result is romantic, practical, and completely secure. It is the style for a courthouse wedding in summer, when the weather is warm and the photographs are outside, because a braid does not move, does not frizz, and does not need a touch-up. It is also the style for the bride who wants her hair to look beautiful from behind, which is where the braid is.
Why it works: a braid is the most secure hairstyle there is — it will not fall, it will not loosen, and it will look the same at lunch as it did at the ceremony. How to style it: gather the hair low, braid it loosely, and pull the braid apart gently to make it look fuller — then tie it with a ribbon that matches your bouquet. Pros: secure, romantic, and it photographs beautifully from the back. Cons: a braid needs length, so this is not the style for short hair. Common mistake: braiding too tightly, which pulls the front pieces back and makes the style look severe. Keep the braid loose, and let a few soft pieces fall at the front. Maintenance: none at all.
17. An Elegant Updo with Volume
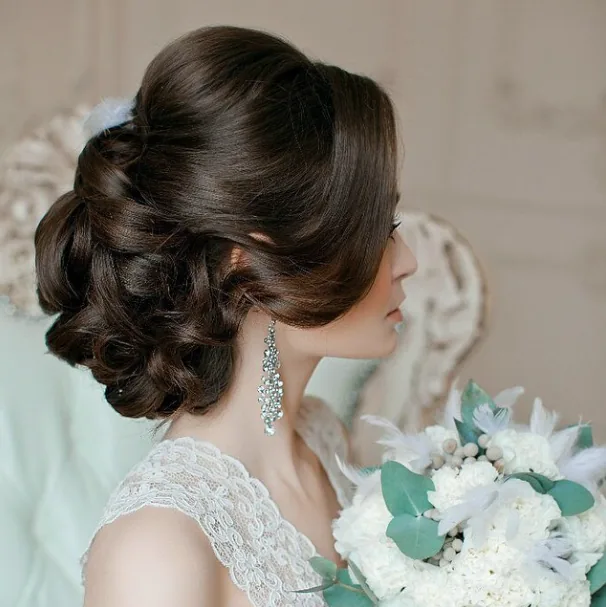
An elegant updo with volume is the style for the bride who wants height and drama without formality. The hair is pinned up with volume at the crown — not a beehive, not a tower, just a soft lift that lengthens the face and adds presence in photographs — and the rest is pinned softly at the back. It is the style for the bride who is petite and wants a little height, or for the bride whose dress is simple and wants her hair to add the drama. In a small room, a little volume goes a long way: it makes you look taller, it makes the photographs look grander, and it never looks like too much.
Best for: brides with medium to long hair who want a little height and presence. How to style it: backcomb the crown gently for volume, smooth the surface over it, and pin the rest of the hair up softly at the back — the volume should be soft, not stiff. Pros: it lengthens the face, it adds presence in photographs, and it holds all day. Cons: too much volume can look dated, so keep the lift soft and the rest of the style simple. What to ask your stylist for: a soft, modern updo with volume at the crown and softness at the front. Maintenance: a light hairspray at the crown, and one re-pin after the photographs. Cost and time: a salon updo takes about an hour, and it is worth every minute.
18. A Side Braid Over the Shoulder
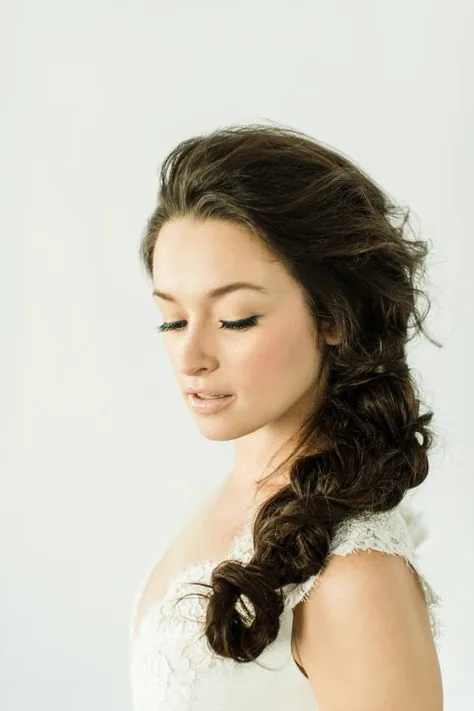
A side braid over the shoulder is the most romantic braid in this guide, and the one that photographs best in a courthouse. The braid falls over one shoulder, the hair sweeps across the front, and the whole style has a soft, asymmetric shape that looks beautiful from the front and from the side. It is the style for the bride who loves braids, who wants her hair down but not loose, and who wants the photographs to show her hair as a beautiful detail rather than a background. A side braid is also wonderfully practical: it keeps your hair out of the way while you sign the register, and it never falls into your face.
Why it works: the braid over the shoulder frames your face and your bouquet in the same photograph, which is a lovely composition. How to style it: sweep the hair to one side, braid it loosely, and pull the braid apart gently to make it fuller — then tie it with a ribbon or a small flower. Pros: romantic, practical, and it holds all day without a touch-up. Cons: a side braid needs length, and it can look thin on very fine hair — a little texture spray before braiding helps it look fuller. Common mistake: braiding too tightly, which makes the braid look thin and severe. Keep it loose, and let a few soft pieces fall at the front. Quick verdict: the prettiest braid for a small ceremony.
19. The Classic Blowout
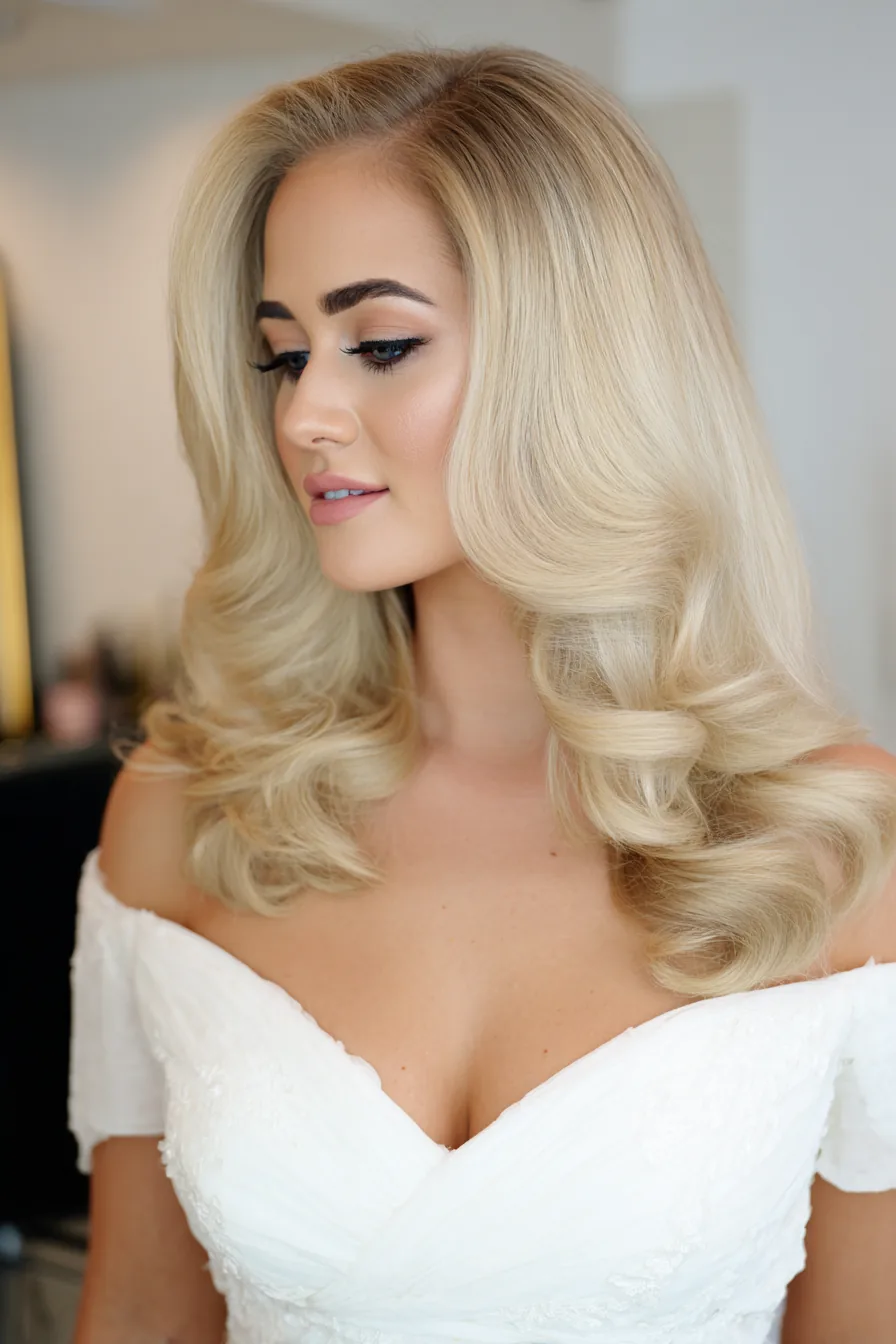
A classic blowout is the style for the bride who wants her hair to look full, healthy, and alive. The roots have lift, the lengths are smooth and shining, and the ends turn under softly, so the whole style has movement and shine in every photograph. It is the style for the bride who loves her hair down, who wants it to look like the best version of itself, and who trusts a good blowout more than any updo. In daylight, a blowout looks extraordinary — the volume at the crown lifts the face, and the shine in the lengths catches the light.
Best for: brides with medium to long hair who want a full, healthy look. How to style it: blow-dry with a round brush, lifting at the roots for volume, and finish with a shine serum on the lengths — not on the roots, which will flatten them. Pros: full, healthy, and full of life, and it suits every dress. Cons: a warm room can flatten the roots, so this style needs a little backup. Maintenance: a spritz of dry shampoo at the roots halfway through the day brings the volume back, and a quick lift with your fingers at the crown is all the fixing it needs. Cost and time: a salon blowout takes about forty-five minutes, and it is the most reliable bridal style there is.
20. A Pinned-Back Half-Up
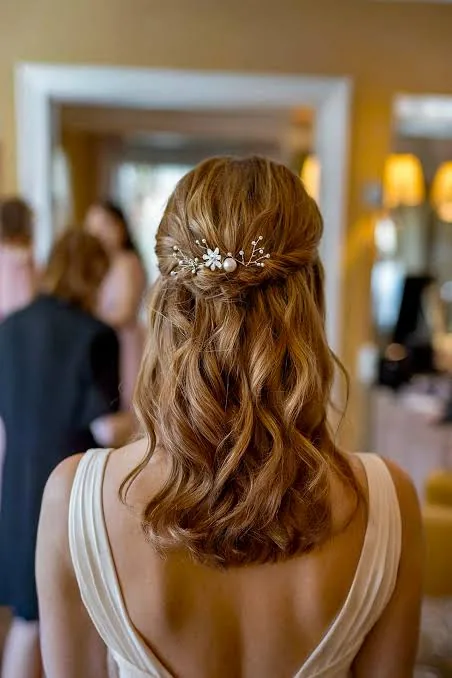
A pinned-back half-up is the simplest half-up there is: the front sections are pinned back at the crown, the rest falls loose, and the whole style takes five minutes. It is the style for the bride who wants her hair down but does not want it in her face while she signs the register, and for the bride who wants the photographs to show her face clearly. The pins are the detail — a pearl pin on each side, or a small gold comb at the back — and they are all the accessory you need. It is the most effortless style in this guide, and sometimes effortless is exactly right.
Why it works: the pinned-back front keeps your hair out of your face and out of the photographs of the signing, while the loose lengths keep the look soft and romantic. How to style it: take the front sections from each side, cross them at the back of the crown, and pin them with two pearl pins — then curl the loose lengths softly. Pros: quick, pretty, and it suits almost every hair length. Cons: the pins can slip if they are not crossed properly, so pin them in an X shape. Maintenance: one check before the photographs, and a spare pin in your bag. Who should avoid it: nobody — but if your hair is very short, pin the front pieces back with a single clip instead. Quick verdict: five minutes, two pins, and you are a bride.
21. A Romantic Updo with Loose Curls
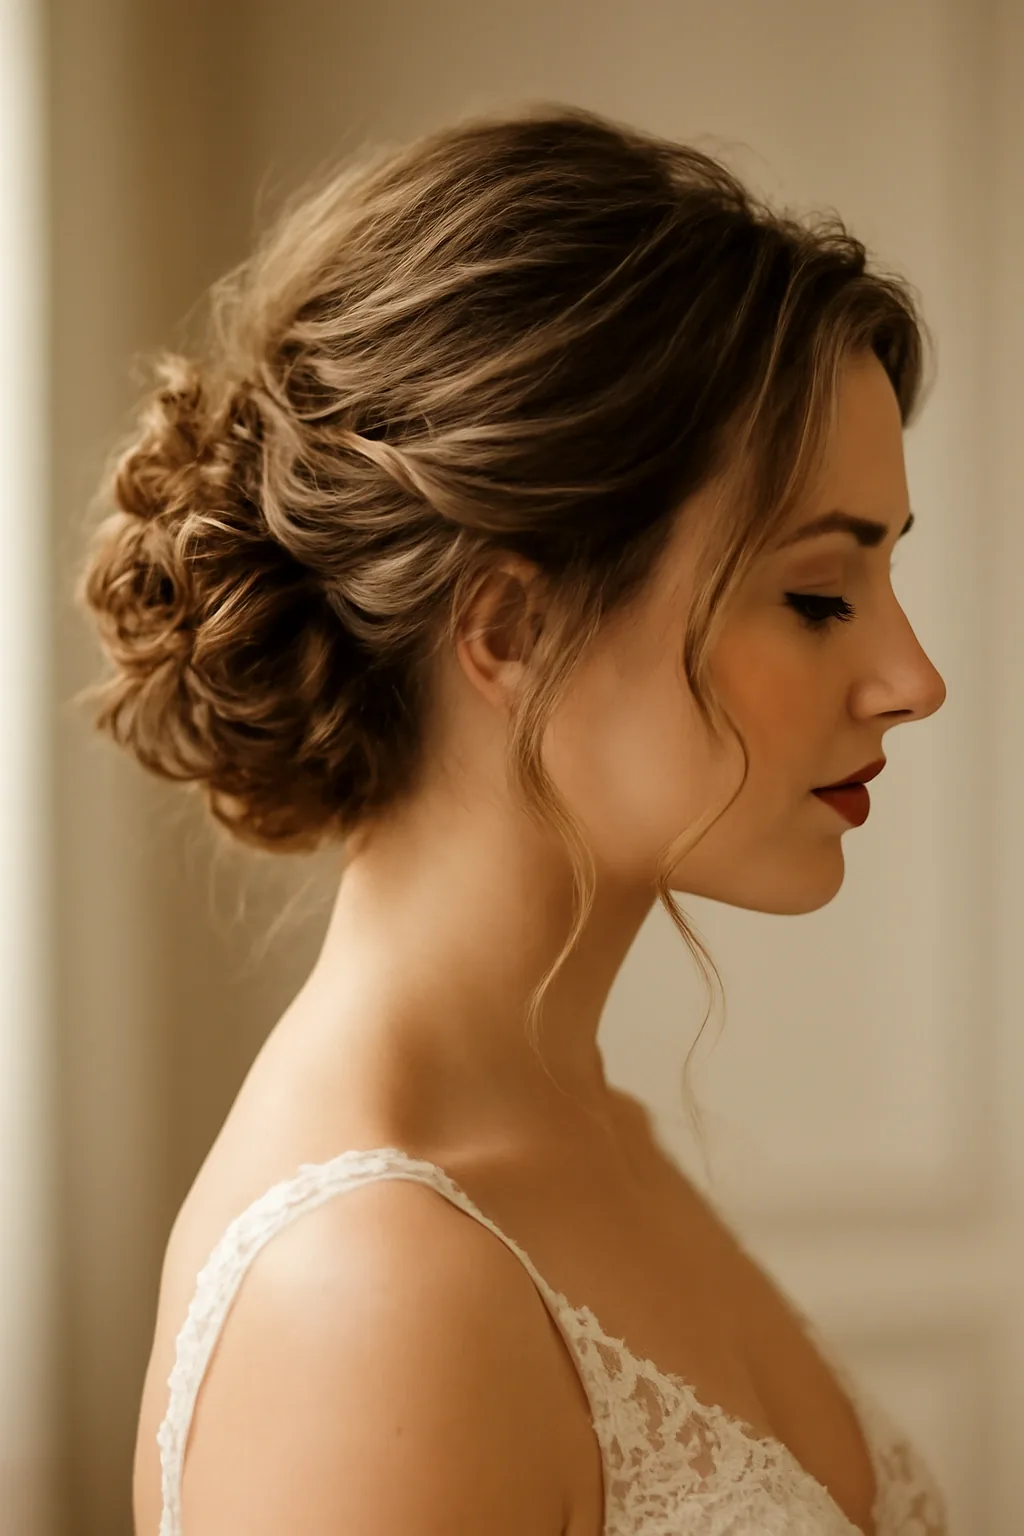
A romantic updo with loose curls is the style for the bride who wants an updo that feels like a dream. The hair is curled loosely first, then pinned up softly — not pulled tight, not smoothed flat, but gathered into a soft, textured shape with curls falling gently at the front and at the nape. It is the most romantic updo in this guide, and the one that looks most like a wedding — soft, pretty, and completely unforced. It is the style for the bride who loves curls, who loves romance, and who wants the photographs to show her hair as something beautiful rather than something controlled.
Best for: brides with medium to long hair who want a soft, romantic updo. How to style it: curl the hair loosely first, then pin it up softly, leaving a few curls loose at the front and at the nape — the curls are the style, so do not brush them out. Pros: romantic, soft, and forgiving — if a curl slips, it looks intentional. Cons: curls can drop in humidity, so a light hairspray on the pinned curls helps them hold. What to ask your stylist for: a soft, textured updo with loose curls, not a tight, polished one. Maintenance: one re-pin after the photographs, and a light hairspray before lunch. Cost and time: a salon updo takes about an hour, and the result is worth it.
22. A Sleek Bob with a Hair Clip
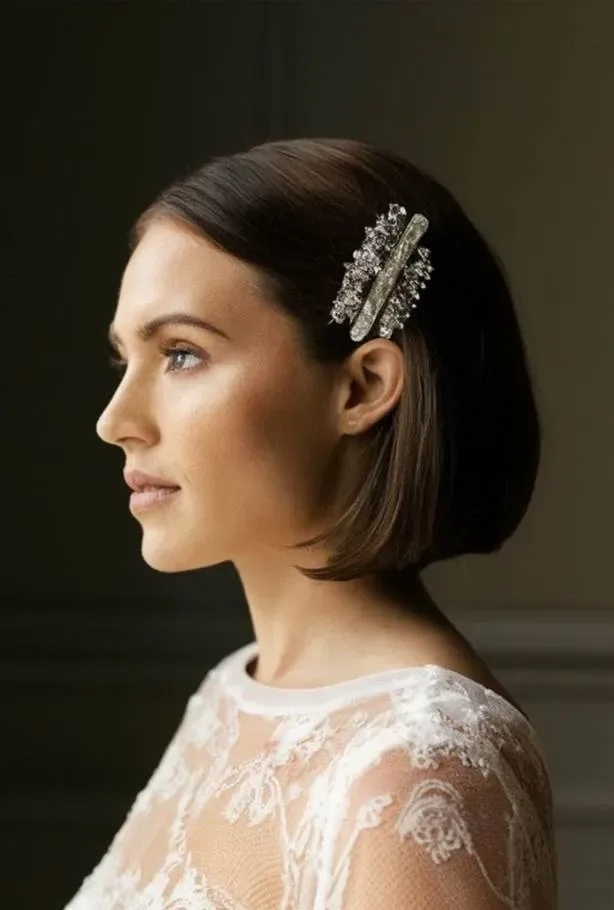
A sleek bob with a hair clip is the short-hair bride’s most elegant option. The bob is smoothed to a shine, parted cleanly, and finished with one beautiful clip — a pearl barrette, a gold clip, a crystal pin — placed at the side above the ear. The clip is the whole bridal detail: it catches the light, it says “bride”, and it takes two seconds to put in. It is the style for the bride who has a bob and loves it, who wants her wedding hair to be simple and chic, and who knows that one beautiful detail is worth more than an hour of styling.
Why it works: a sleek bob frames the face beautifully in close-up photographs, and the clip adds the bridal detail without any fuss. How to style it: smooth the bob with a flat iron, add a shine serum, and place the clip on one side — above the ear, where it catches the light in photographs. Pros: quick, chic, and it never needs fixing during the day. Cons: a bob that is too blunt at the ends can look heavy, so ask for soft, tapered ends. Maintenance: a trim a week before the wedding, and a shine serum on the day. Who should avoid it: nobody — but if your bob is very short, choose a small clip rather than a large barrette. Quick verdict: the chicest short-hair style in this guide.
23. A Low Chignon with Fresh Flowers
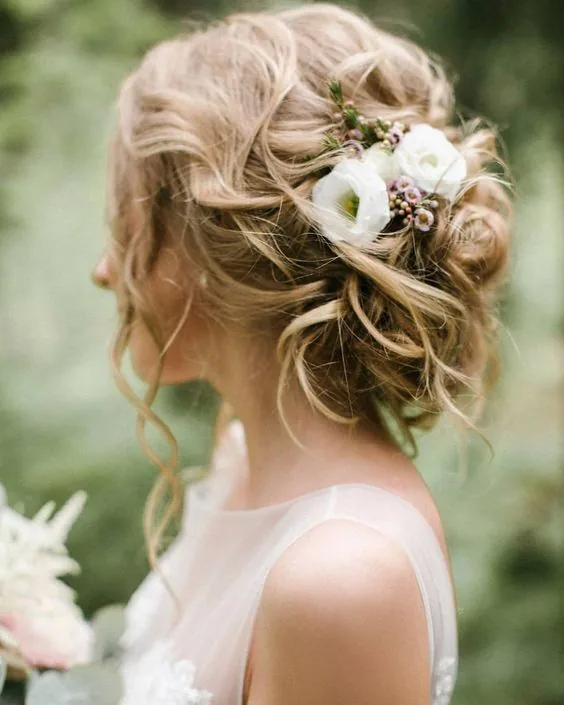
A low chignon with fresh flowers is the dreamiest style in this guide, and the one that ends the updo section the way a wedding should end — with something pretty and a little bit magical. The chignon is low and neat at the nape, and small fresh flowers — a few tiny blooms from your own bouquet, or a sprig of greenery — are tucked into it, so the hair looks like a garden and the photographs look like a dream. It is the style for the bride who loves flowers, who wants her hair to feel like a celebration, and who wants the photographs to be the prettiest ones in the album.
Pros: the prettiest style in this guide, and the flowers are free — they come from your bouquet. Cons: the flowers wilt in a warm room, so tuck them in just before the ceremony, not an hour before. How to style it: build the chignon first, then tuck the flowers in last, pinning them through the stems so they cannot slip. Ask your florist for two or three spare stems the morning of the wedding. Maintenance: keep the flowers in water until the last moment, and carry one spare flower in case one wilts. Who should avoid it: brides with hay fever, or brides whose ceremony is outdoors in strong sun — the flowers will wilt before the photographs. Quick verdict: the most romantic finish to any chignon.
24. A Wavy Lob
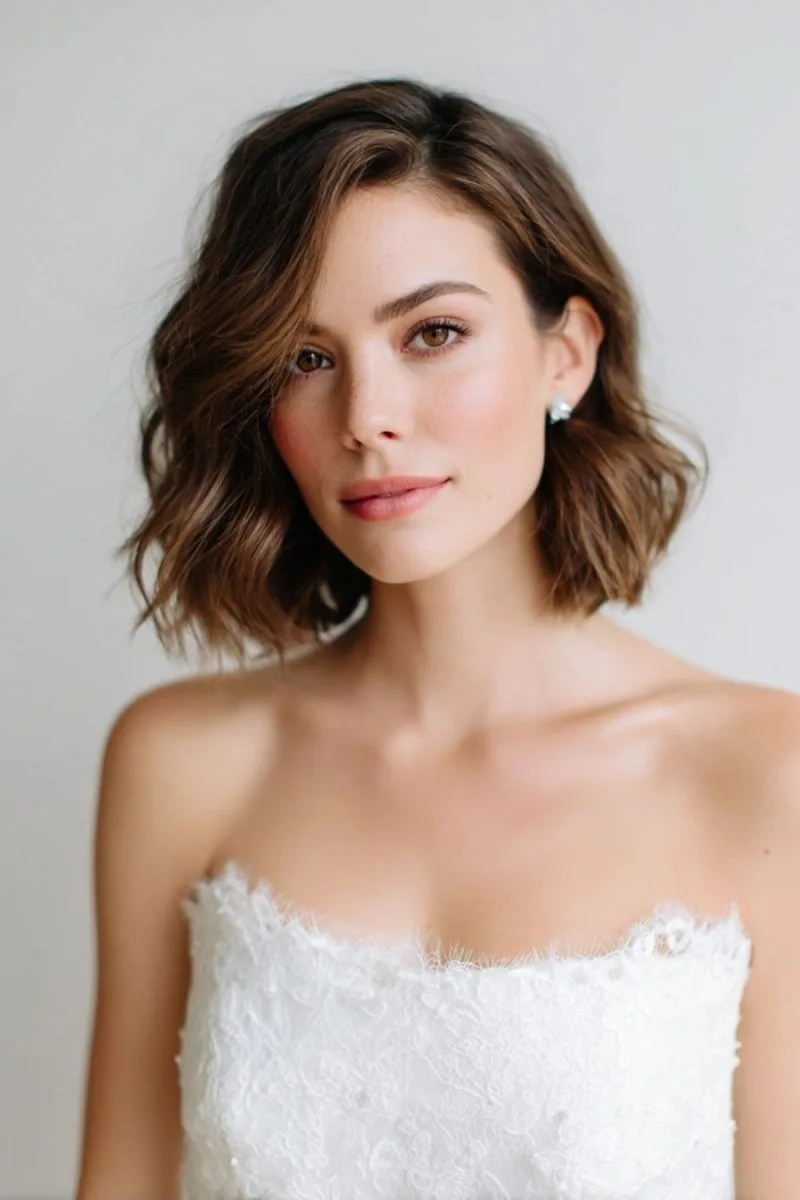
A wavy lob is the medium-length bride’s best friend. The lob — a long bob that sits at the collarbone — is cut with soft layers, waved loosely, and left to fall naturally, and the result is a style that is modern, relaxed, and completely flattering. It is the style for the bride who has medium-length hair and does not want to grow it out for the wedding, who loves waves, and who wants her hair to look effortless in the photographs. A wavy lob is also wonderfully practical: it does not need pins, it does not need a touch-up, and it looks just as good at lunch as it did at the ceremony.
Best for: brides with shoulder-length hair who want a modern, relaxed look. How to style it: curl the hair in large sections with a wide-barrel iron, brush the curls out gently so they become waves, and finish with a texture spray at the roots for volume. Pros: modern, flattering, and it never needs fixing. Cons: waves can fall flat in humidity, so a texture spray is worth carrying in your bag. Maintenance: a quick finger-comb through the waves before the photographs. Who should avoid it: nobody — but if your lob is growing out and the ends are uneven, a trim a week before the wedding will make all the difference. Quick verdict: the easiest medium-length style in this guide.
25. A Twisted Low Updo
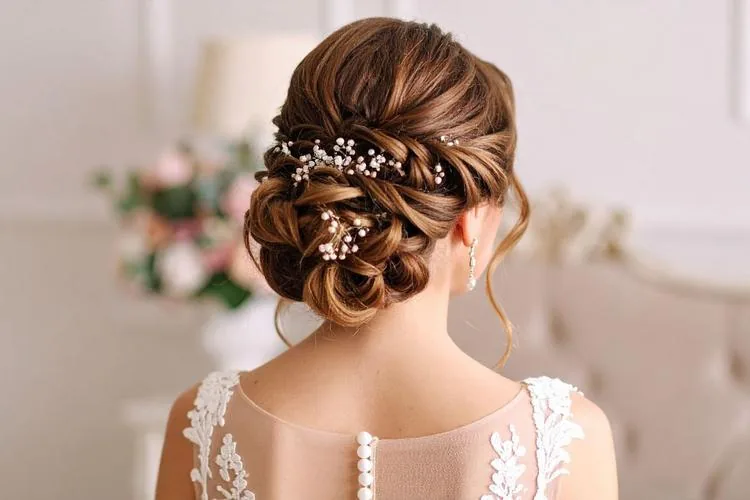
A twisted low updo is the style for the bride who loves texture. The hair is divided into sections, each section is twisted, and the twists are pinned together low at the nape into a soft, sculptural shape — no braid, no bun, just twists, which catch the light beautifully in daylight and give the style a handmade, artisanal feel. It is the style for the bride who wants something different from a chignon but just as elegant, and for the bride who loves the look of a style that was built by hand rather than by a machine. In photographs, the twists read as texture and movement, which is exactly what a small ceremony needs.
Why it works: twists are more secure than a bun and softer than a braid, so the style holds all day and looks soft in every photograph. How to style it: twist each section away from the face, pin the twists together at the nape, and tuck the ends in — then pull a few soft pieces loose at the front. Pros: unique, textured, and very secure. Cons: it takes a little longer to build than a simple bun, so allow forty-five minutes. Common mistake: twisting too tightly, which makes the style look stiff. Keep the twists soft, and let the texture do the work. Maintenance: one re-pin after the photographs. Quick verdict: the most artisanal updo in this guide.
26. A Soft Updo with Face-Framing Layers
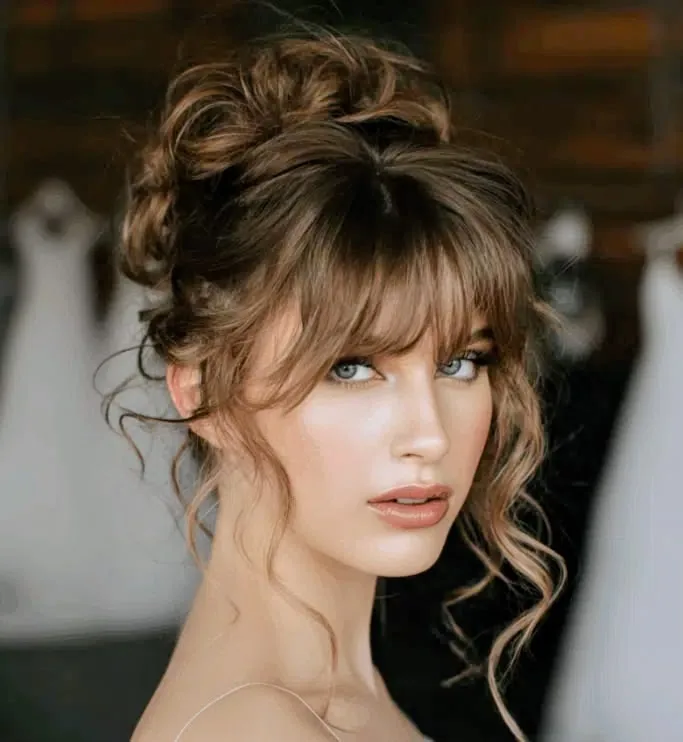
A soft updo with face-framing layers is the most flattering updo in this guide, and the one that suits the most faces. The hair is pinned up softly at the back, and the front layers — the pieces that frame the face — are left loose and curled gently, so the face is framed softly in every photograph. It is the style for the bride who has layers and wants to show them off, who wants an updo but does not want to look severe, and who wants the photographs to show her face as clearly as possible. The layers are the whole point: they soften the updo, they move when you move, and they make the style feel romantic rather than formal.
Best for: brides with layered hair who want a soft, flattering updo. How to style it: curl the front layers first, pin the rest of the hair up softly, and leave the layers loose — then curl them lightly so they hold their shape. Pros: flattering, romantic, and it suits every face shape. Cons: the layers can fall flat in humidity, so a light hairspray on them is worth it. What to ask your stylist for: a soft updo with the face-framing layers left out and curled, not pinned back. Maintenance: a quick curl of the front layers before the photographs, if you have a curling iron at the venue. Who should avoid it: brides with very short layers that will not stay curled — pin them back instead. Quick verdict: the most flattering updo here.
27. An Elegant Ponytail with a Wrap
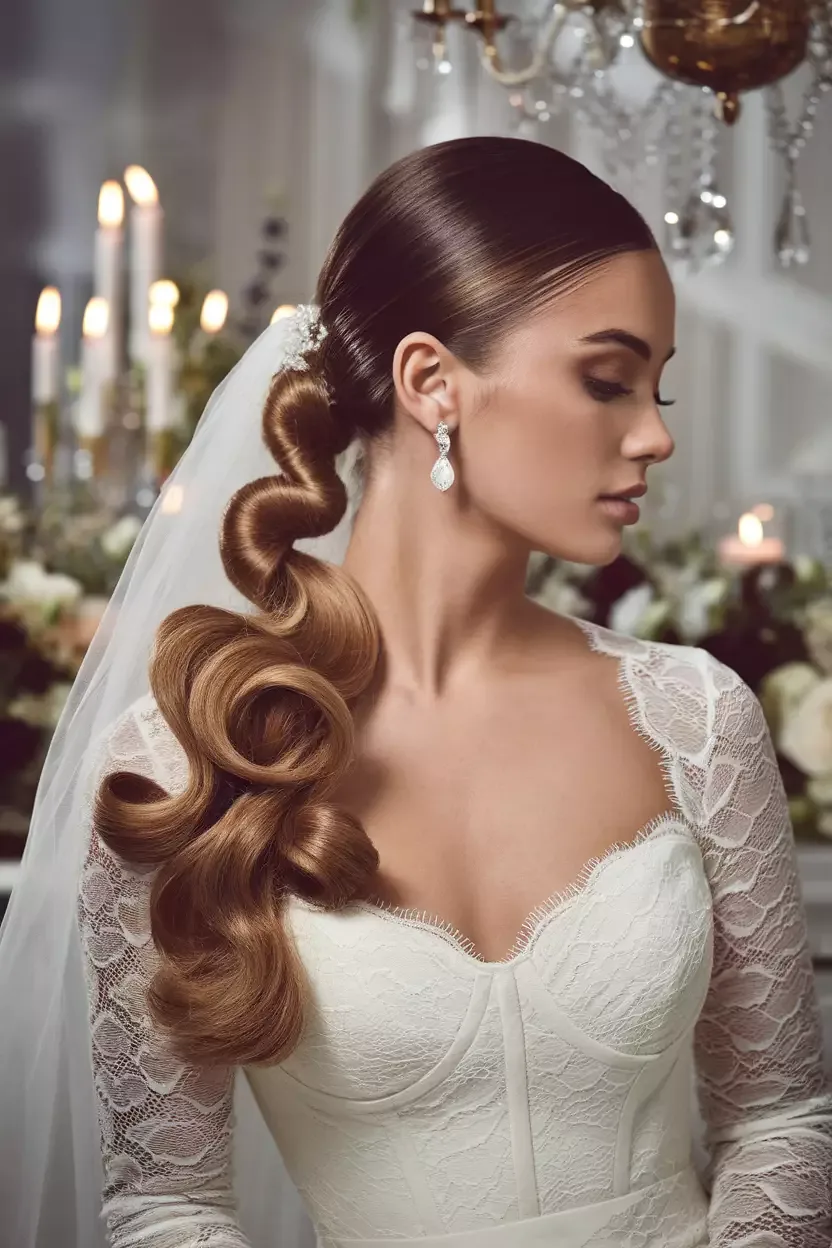
An elegant ponytail with a wrap is the low ponytail’s more polished sister. The hair is gathered low, smoothed to a shine, and the elastic is wrapped with a strand of your own hair — or with a silk ribbon, or a slim gold cuff — so there is no visible elastic anywhere. It is the detail that makes a ponytail look bridal: the wrap hides the mechanics and leaves only the clean, polished shape. It is the style for the bride who wants a ponytail but wants it to look finished, and for the bride whose dress is simple and whose hair should be the polished part.
Why it works: the wrap is a tiny detail that makes a huge difference in photographs, where a bare elastic would show. How to style it: smooth the hair with a serum, gather it low, secure it, then wrap a strand around the elastic and pin it underneath — or wrap a silk ribbon around it and tie a small bow. Pros: quick, comfortable, and the wrap makes it look expensive. Cons: the wrap can slip if it is not pinned properly, so pin it underneath, not on top. Maintenance: one check before the photographs. Cost and time: ten minutes at home, or a quick salon visit — and a ribbon costs almost nothing. Quick verdict: the most polished ponytail in this guide.
28. A Braided Half-Up Crown
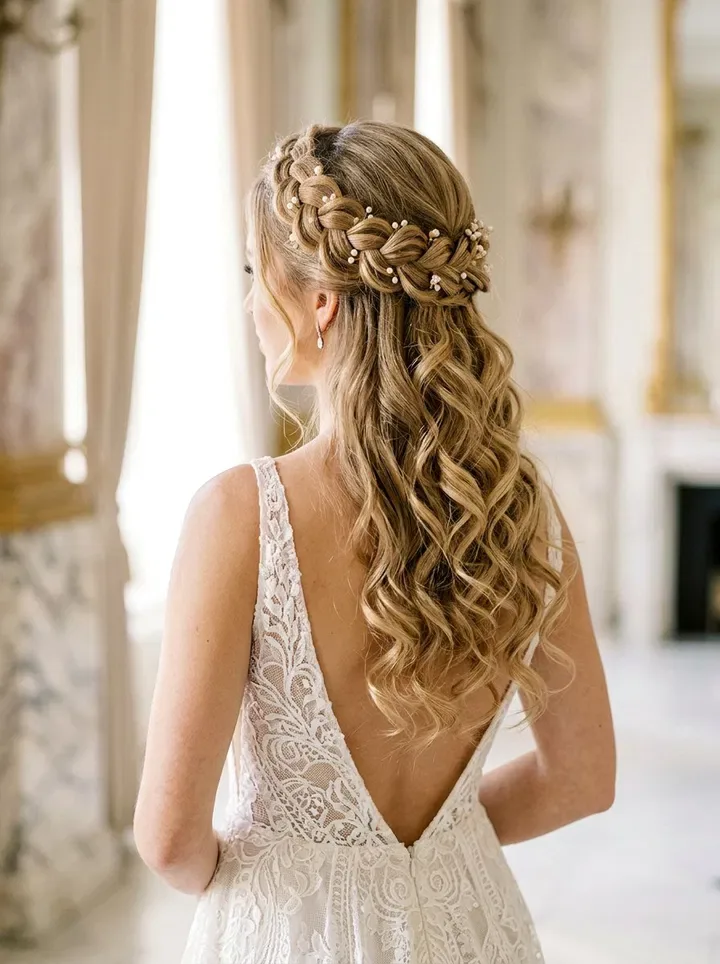
A braided half-up crown is the style for the bride who wants a braid and wants her hair down. The top sections are braided from each side and joined at the back of the crown, like a crown made of braids, and the rest of the hair falls loose — curled softly, or left in natural waves. It is romantic, it is pretty, and it is the style for the bride who loves braids but does not want a full updo. In photographs, the braided crown frames the face beautifully and gives the style its bridal shape, while the loose lengths keep it soft and relaxed.
Best for: brides with medium to long hair who want a romantic half-up. How to style it: braid the top sections from each side, cross them at the back of the crown, and pin them — then curl the loose lengths softly. Pros: romantic, flattering, and the braid holds the front pieces out of your face. Cons: the braid can loosen over a few hours, so pin it twice and use a light hairspray. Common mistake: braiding too tightly, which pulls the front pieces back and makes the style look severe. Keep the braids soft, and let a few fine pieces fall at the front. Maintenance: a single re-pin after the photographs. Quick verdict: the prettiest half-up braid in this guide.
29. A Chic Pixie with an Accessory
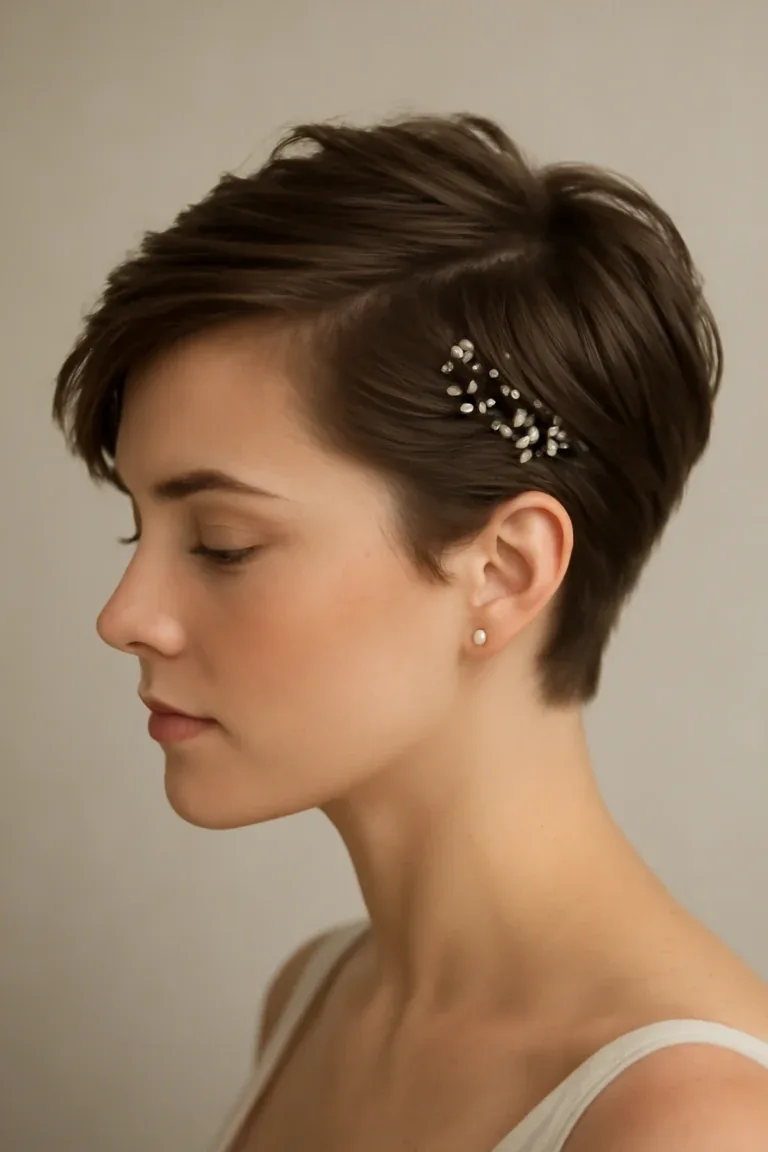
A chic pixie with an accessory is the shortest-hair bride’s most elegant option, and it is a wonderful one. The pixie is textured and polished, and one beautiful accessory — a pearl pin, a slim gold comb, a delicate headband — is placed at the side, where it catches the light and says “bride” in the photographs. It is the style for the bride who has a pixie and loves it, who would never grow her hair out for a wedding, and who knows that the best wedding hair is the hair she already loves, only a little more special. A pixie is also the most practical bridal style there is: it does not move, it does not fall, and it does not need a touch-up.
Why it works: a pixie frames the face beautifully in close-up photographs, and the accessory adds the bridal detail without any fuss. How to style it: add texture with a texturising paste, sweep the front pieces to one side, and place the accessory above the ear. Pros: quick, chic, and it never needs fixing during the day. Cons: a pixie shows the shape of the cut, so a trim a week before the wedding is essential. Maintenance: none at all. Who should avoid it: nobody — but if your pixie is growing out, pin the front pieces back with a small clip rather than fighting them. Quick verdict: the boldest, chicest style in this guide.
30. A Classic Bun with a Middle Part
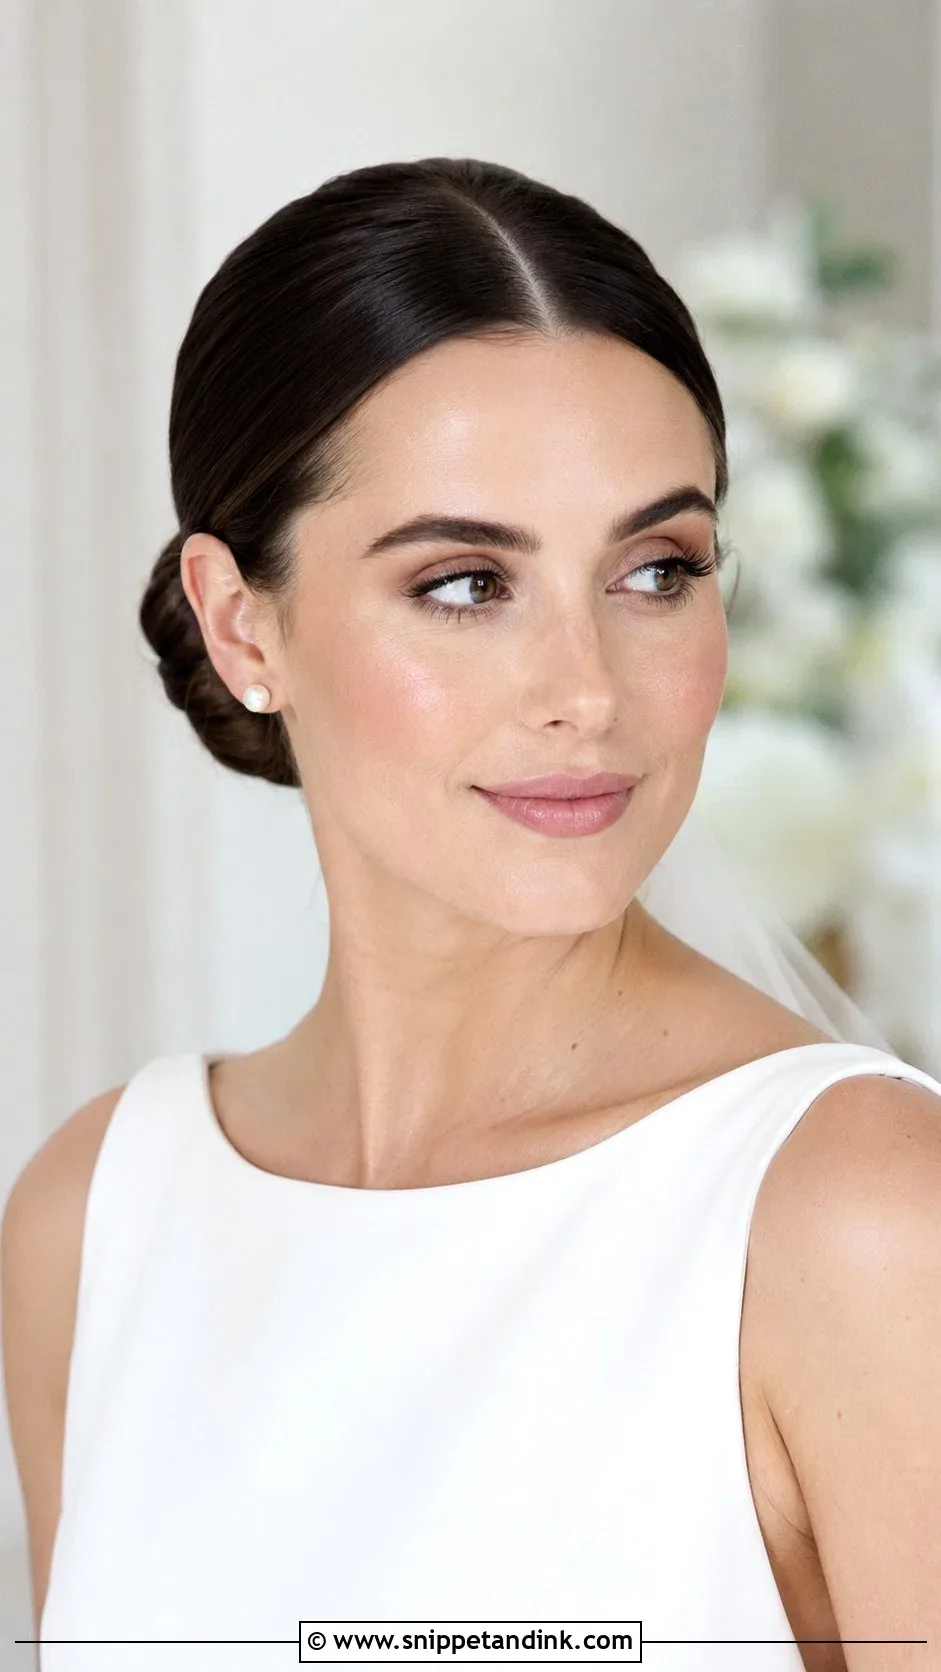
A classic bun with a middle part is the most timeless style in this guide — the one that will look just as beautiful in fifty years as it does today. The hair is parted cleanly in the centre, smoothed back, and gathered into a neat bun at the nape or at the crown, and the result is a clean, symmetrical shape that looks extraordinary in photographs. It is the style for the bride who loves classics, who wants her wedding photographs to be timeless, and who trusts simplicity more than any trend. A middle part is also wonderfully flattering in a small ceremony, where the photographs are close and the symmetry of the style frames the face beautifully.
Best for: brides with medium to long hair who want a timeless, classic look. How to style it: part the hair cleanly in the centre, smooth it back with a shine serum, gather it into a bun, and pin it flat. The part should be straight — use the end of a comb to draw it. Pros: timeless, elegant, and it holds all day without a touch-up. Cons: a centre part can look severe on some faces, so soften it with a little volume at the crown. Maintenance: one re-pin after the photographs. What to ask your stylist for: a classic bun with a clean middle part and a soft, not stiff, finish. Quick verdict: the most timeless style here, and the safest choice.
31. Loose Curls with a Side Part
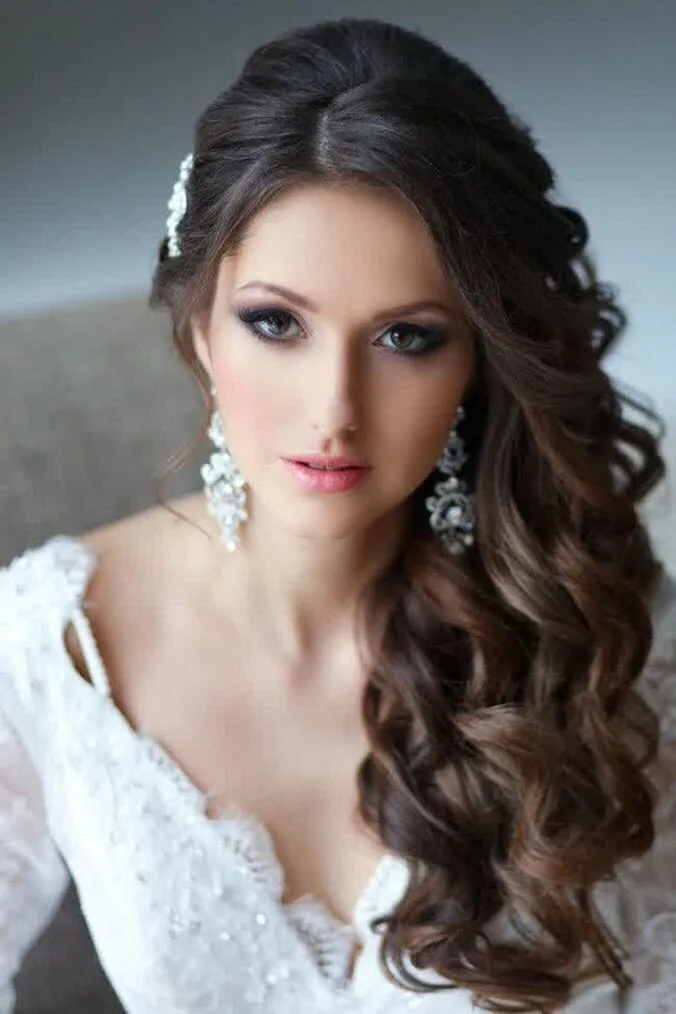
Loose curls with a side part are the style for the bride who wants volume, movement, and a little drama. The hair is curled loosely, parted deeply to one side, and left to fall over one shoulder — and the deep side part gives the style its shape, its volume, and its glamour. It is the style for the bride who loves curls, who wants her hair to be the star of the photographs, and who wants the courthouse steps to feel like a red carpet for exactly one minute. A deep side part is also wonderfully flattering: it adds volume at the crown, it frames the face asymmetrically, and it photographs beautifully from the side.
Why it works: the deep side part adds instant volume and shape, and the loose curls move beautifully in photographs. How to style it: curl the hair in large sections, part it deeply to one side, and sweep the curls over one shoulder — then finish with a shine serum, not hairspray, which will stiffen the curls. Pros: glamorous, flattering, and full of movement. Cons: curls can drop in humidity, so a texture spray at the roots helps them hold. Maintenance: a quick finger-comb through the curls before the photographs, and a spritz of dry shampoo at the roots if the volume drops. Who should avoid it: brides with very fine hair that will not hold a curl — a soft wave will suit them better. Quick verdict: the most glamorous down style in this guide.
32. A Minimal Sleek Updo
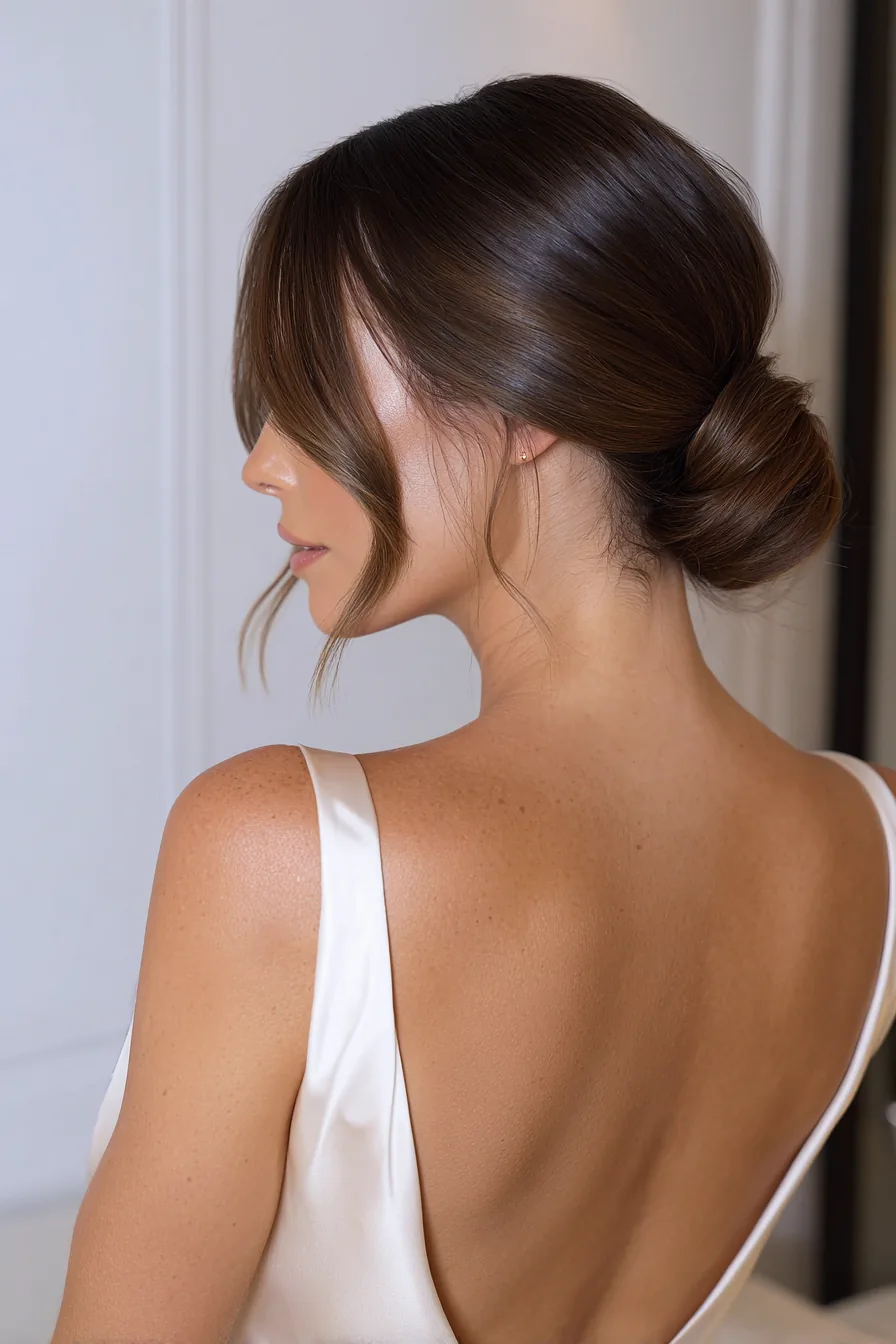
A minimal sleek updo is the style that ends this guide the way a courthouse wedding should end — with something simple, polished, and completely confident. The hair is smoothed back, gathered up, and pinned into a clean, sleek shape — no curls, no tendrils, no flowers, no fuss — just a beautiful, modern silhouette that looks extraordinary in daylight and photographs beautifully from every angle. It is the style for the bride who loves minimalism, who is wearing a simple dress, and who wants her hair to be the quiet, confident part of the look. It is also the most practical style in this guide: it stays put, it never falls into your face, and it needs nothing at all after the ceremony.
Pros: simple, sleek, and completely modern, and it holds all day without a single touch-up. Cons: a very sleek style shows the condition of the hair, so it needs to be healthy and shiny — a shine serum is essential. How to style it: smooth the hair with a serum, gather it up, pin it into a clean shape, and finish with a light hairspray on the surface. Maintenance: none. Once it is pinned, it stays. Who should avoid it: brides who want softness and romance — this is the minimal choice, not the romantic one. Quick verdict: the perfect ending to a courthouse wedding — simple, polished, and completely yours.
What is the best hairstyle for a courthouse wedding?
The best hairstyle for a courthouse wedding is one that is elegant, simple, and practical for a small daytime ceremony — a sleek low chignon, a soft low bun, romantic loose waves, or a polished low ponytail. These styles look special enough for a wedding, hold their shape through the ceremony and the photographs on the steps, and do not need a touch-up before lunch. A sleek low chignon is the safest choice, soft waves are the most romantic choice, and a low ponytail is the most modern choice.
Do I need a veil for a courthouse wedding?
No, you do not need a veil for a courthouse wedding — most courthouse brides skip the veil entirely. A veil belongs to a long aisle and a big church, while a courthouse ceremony is small and personal. Instead, wear one beautiful detail that says “bride”: a pearl pin, a slim gold comb, a silk ribbon, a small fresh flower, or a delicate headband. One detail, placed with intention, does the same work a veil does without hiding your hair.
Should I wear my hair up or down for a courthouse wedding?
You can wear your hair up or down for a courthouse wedding — both work beautifully, and the right choice depends on your dress and your comfort. Hair worn up, like a low chignon or a soft bun, keeps your hair out of the way while you sign the register and looks neat in close-up photographs. Hair worn down, like loose waves or soft curls, feels romantic and personal in a small ceremony. A half-up style is the best compromise, with the top pinned back and the rest loose.
What hairstyle photographs best at a courthouse wedding?
The hairstyles that photograph best at a courthouse wedding have a clean shape, healthy shine, and softness at the front — a sleek low chignon, glossy waves, a polished low ponytail, or a soft low bun with tendrils. Daylight flatters healthy hair and makes simple styles look expensive, so a shine serum on the surface is worth its weight in gold. Avoid styles that only look good from the front, because courthouse photographs are taken from every angle, including the side and the back.
What is a good courthouse wedding hairstyle for short hair?
Good courthouse wedding hairstyles for short hair include a textured bob with a side part, a sleek bob with a hair clip, a wavy lob, and a chic pixie with an accessory. These styles are chic, comfortable, and completely unbothered by a small ceremony, and they photograph beautifully because their shapes are so clean. A shine serum and a single beautiful accessory — a pearl pin, a gold clip, or a slim headband — are all you need to make a short style feel bridal.
How do I keep my hair looking good between the ceremony and lunch?
Keep your hair looking good between the ceremony and lunch by packing a small touch-up kit the night before: four bobby pins, one spare elastic, a travel hairspray, and a small comb in your bag or your witness’s bag. Use the three quick fixes — the re-pin, the re-tie, and the refresh with dry shampoo — in a courthouse bathroom after the photographs on the steps. Each fix takes under a minute, and one touch-up is all you need for the rest of the day.
Can I do my own hair for a courthouse wedding?
Yes, you can do your own hair for a courthouse wedding — most courthouse styles are simple enough to do at home in fifteen to thirty minutes with a few pins. A low bun, a polished ponytail, loose waves, and a half-up twist are all easy do-it-yourself styles. A French twist, finger waves, and a braided crown are harder and better left to a stylist. If you do your own hair, practise the style once the week before the wedding, so the morning itself is calm.
What hair accessories work for a courthouse wedding?
The best hair accessories for a courthouse wedding are one beautiful detail, not three — a pearl hairpin, a slim gold comb, a silk ribbon, a delicate headband, or a few fresh flowers from your bouquet tucked into a low bun. Choose one accessory that matches your dress and your hairstyle, and let it be the star. Avoid wearing a statement hair accessory with statement earrings, which can compete with each other — one statement at a time.
Should I get my hair done professionally for a courthouse wedding?
Getting your hair done professionally for a courthouse wedding is a lovely treat, but it is not necessary — most courthouse styles can be done at home in thirty minutes with a few pins. If you want one less thing to think about on the morning, a professional blowout or a low updo is worth it, and you will not have to worry about your hair for the rest of the day. If you do it yourself, practise once beforehand, and choose a style you already know how to build.
How far in advance should I plan my courthouse wedding hairstyle?
Plan your courthouse wedding hairstyle at least a week in advance, and practise it once before the day. Get a trim a week before the wedding so the ends are neat, buy your accessory after you choose the style so the two work together, and pack your touch-up kit the night before. On the morning itself, build the style calmly — a courthouse ceremony is short, and your hair should be the last thing on your mind when you say your vows.
Conclusion
A courthouse wedding is small on purpose — just the two of you, a handful of the people who matter most, a registrar, and a few minutes that turn out to be the most important minutes of your life. The 32 hairstyles in this guide are all chosen with that in mind: special enough for a wedding day, simple enough for a registry office, and practical enough to survive a morning ceremony, photographs on the steps, and lunch with your favourite people afterwards. The right courthouse wedding hairstyle does not demand your attention all day — it lets you forget about your hair and enjoy the people who came to celebrate with you.
Start with the guides, not the gallery. Think about what your ceremony actually holds — a morning or an afternoon, a veil or no veil, a simple dress or a bouquet that deserves a matching flower — and pick the style family that fits it. Pin it, don’t pull it; pack the small touch-up kit in your bag the night before; and choose the version that feels like you on your best day. Your hair should be the least of your worries on your wedding day. Now it can be.