Fishtail Braid Hairstyles for Women: 36 Ways to Wear the Weave, From Sleek to Boho
The fishtail braid has a reputation it does not deserve: people look at its fine, herringbone weave and assume it must be difficult, fiddly, or reserved for stylists with nimble fingers. The truth is the opposite. A fishtail uses only two strands of hair, not three, and the whole technique is a single repeating move — take a small piece from the outside of one strand and cross it to the inside of the other, then do the same on the other side. That is all there is to it. Once your hands learn the rhythm, the braid practically weaves itself, and the result looks far more intricate than the effort it took. It is the braid that makes beginners look like experts.
This guide gathers 36 fishtail braid hairstyles for women, from the sleek classic to the messy boho braid, the wedding fishtail to the gym fishtail, with the technique front and centre in every style. Eight guides cover what a fishtail actually is, the basic weave step by step, how it behaves on short and long hair, on thick, fine, curly and straight hair, how to make it last all day, how to wear it to a wedding, which accessories earn their place, and how to rescue one that goes lopsided. Each style tells you how to do that version, how hard it is, who it suits best, and what to ask a stylist — so whether you have five minutes or an hour, there is a fishtail here with your name on it.
What a Fishtail Braid Is — and How It Differs from a Three-Strand Braid
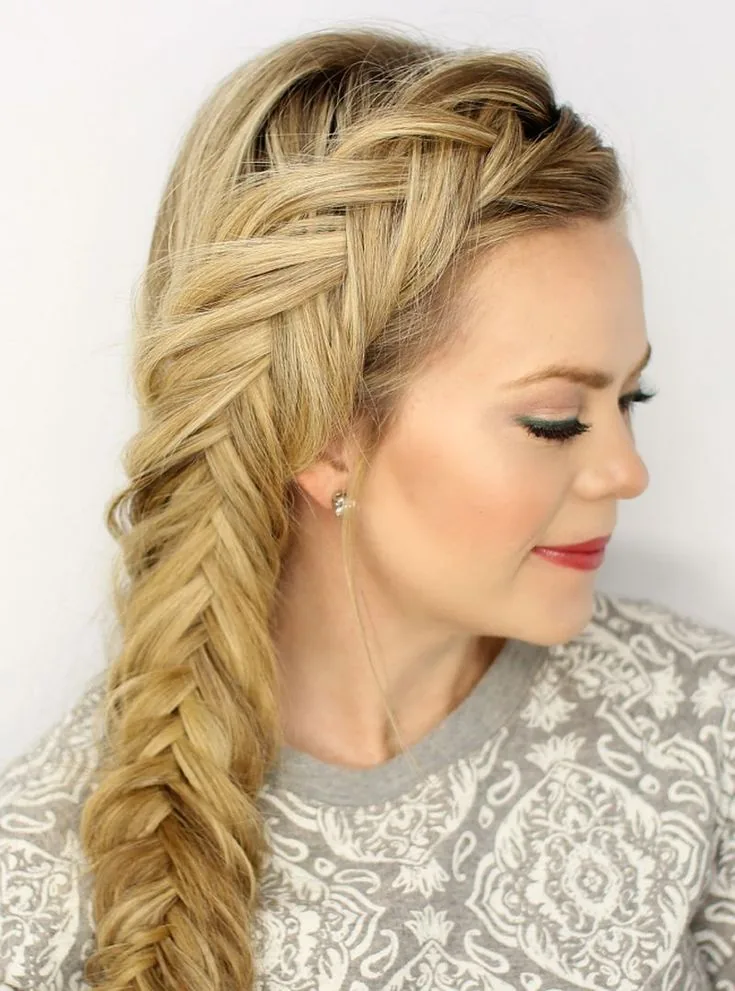
A fishtail braid is a plait made from just two sections of hair. You split the hair in half, then take a thin piece from the outer edge of the right section and cross it over to join the left section, then take a thin piece from the outer edge of the left section and cross it to the right. Repeat, and a fine, V-shaped herringbone pattern appears — the weave that gives the fishtail its name, because the finished braid looks like the skeleton of a fish tail. The thinner the pieces you cross over, the finer and more detailed the braid looks; thicker pieces give a chunkier, more casual fishtail.
A three-strand braid, by contrast, works with left, middle and right sections, crossing the outer strands over the middle one. It is wider, rounder and quicker to do, and it is the braid most of us learned first. The fishtail takes a little longer because it uses many small movements instead of a few big ones, but it is not harder — it is just slower, and more forgiving, because a mistake in one small crossing disappears into the pattern. If you can do a basic plait, you can do a fishtail; the only new skill is patience with small pieces. Start with a side fishtail, where you can see what your hands are doing, and the rhythm clicks within a few minutes.
The Basic Fishtail, Step by Step
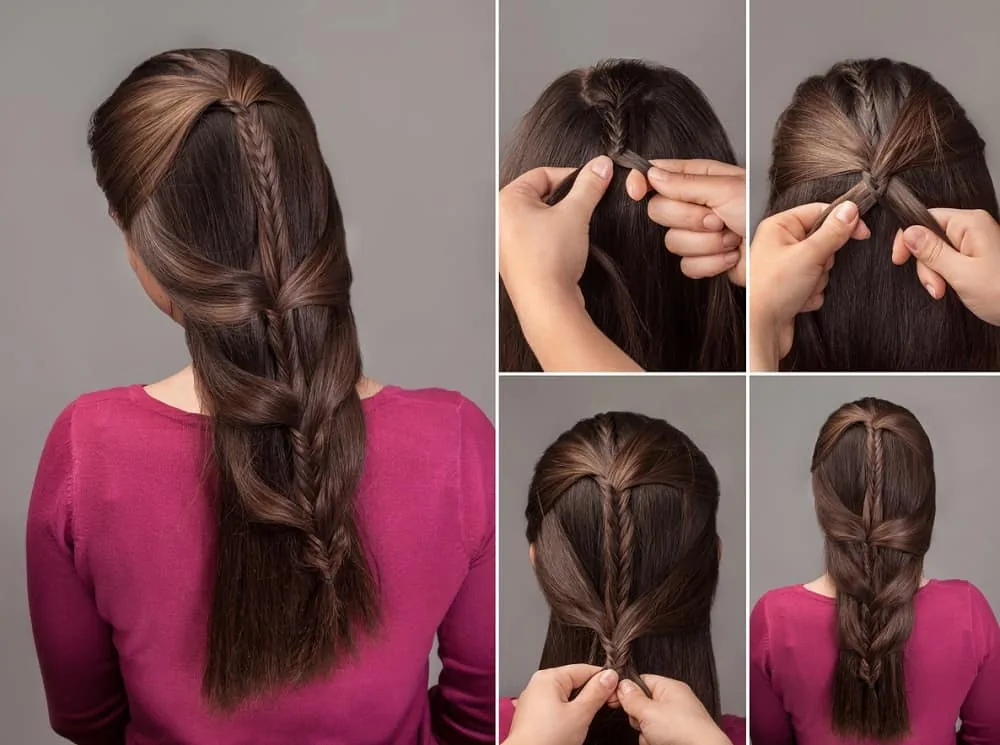
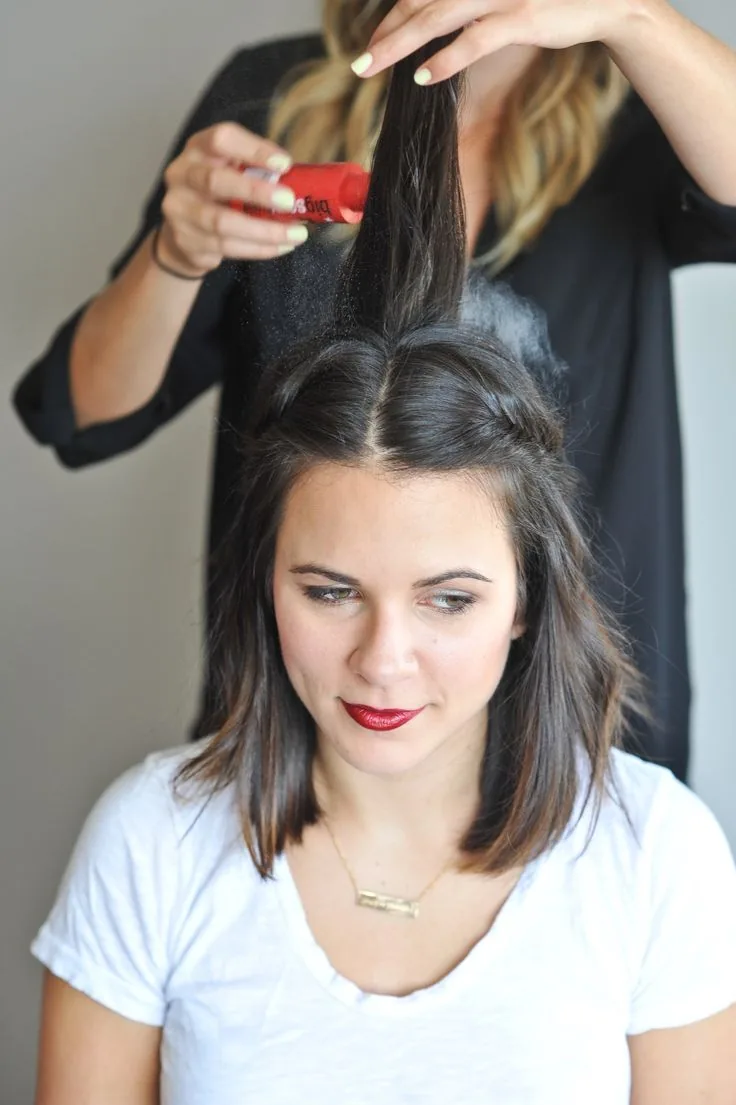
Start with brushed, tangle-free hair — day-old hair is best, because clean hair is slippery, and a little dry shampoo or texturising spray at the roots gives the weave grip. Gather the hair where you want the braid to sit: low at the nape for a classic fishtail, over one shoulder for a side fishtail, or high for a ponytail fishtail. Split the hair into two equal sections, one in each hand, and hold them firmly. Take a thin piece — about the width of a pencil — from the outside edge of the right section, cross it over the right section, and tuck it into the left section. Then take a thin piece from the outside edge of the left section and cross it to the right. That is the whole move, repeated until you run out of hair.
Keep the pieces even and the tension steady, and the braid will look neat; let the pieces vary slightly and it will look relaxed, which is also lovely. The most common beginner mistake is taking pieces that are too thick — the braid then looks like an ordinary plait with a zigzag, not a fishtail. If that happens, start over with thinner pieces; you will feel the difference within ten crossings. When you reach the ends, secure with a small clear elastic, then gently pull the edges of the braid apart — pancaking — if you want it fuller. Finish with a light mist of hairspray, and pull out a soft strand or two at the face if you like. The first fishtail takes fifteen minutes; the fifth takes five.
Fishtail Braids on Short Hair vs Long Hair
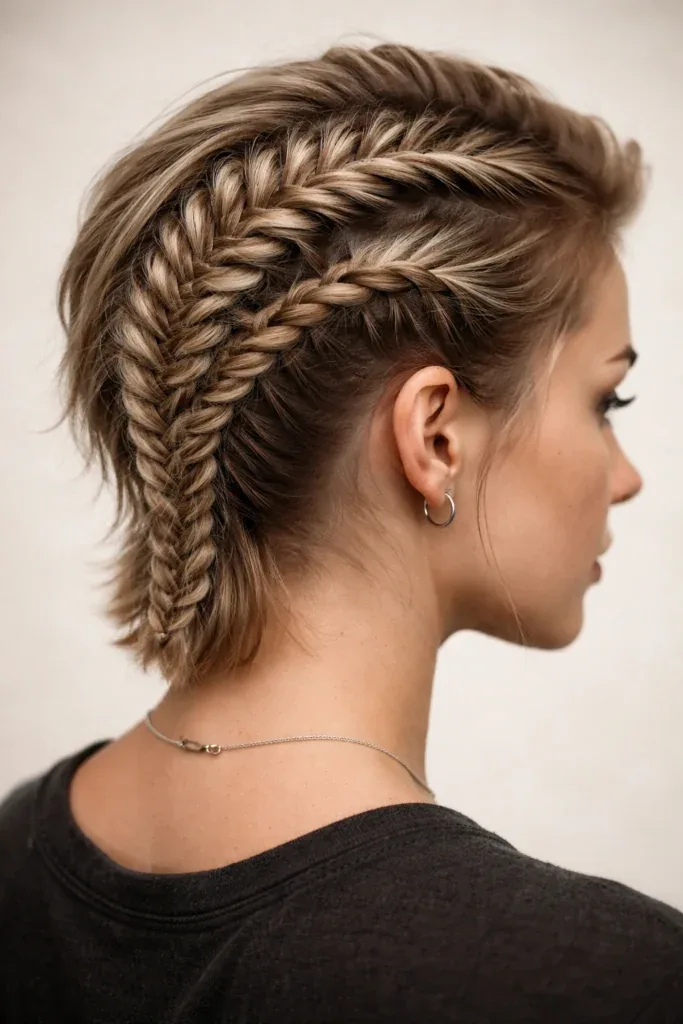
Short hair can wear a fishtail, but the technique changes. With a bob or a lob, the braid has less length to work with, so the herringbone pattern shows best in a side fishtail — gathered over one shoulder, where the weave is visible from the front — or as a small fishtail accent, braided into a half-up section while the rest of the hair falls loose. The pieces you cross over need to be very thin, or the braid will run out of hair in a few crossings. Braid firmly near the scalp for grip, use small clear elastics, and pin the ends well, because short layers love to escape. A little texturising spray before you start is almost essential on short hair.
Long hair is where the fishtail truly shines: the longer the hair, the more crossings the braid gets, and the finer and more impressive the herringbone looks. A long fishtail down the back is the style’s showpiece, and long hair also opens up the double fishtail, the fishtail crown and the fishtail bun. The challenge with long hair is arm fatigue — fishtailing takes longer than a three-strand braid, and your arms will ache the first few times, so rest them on a chair back or braid over one shoulder where you can see. Medium hair, shoulder length and beyond, is the sweet spot: long enough for a full fishtail, light enough to wear all day without the braid pulling.
Fishtail Braids on Thick, Fine, Curly and Straight Hair
Thick hair makes a generous fishtail: the braid is full, the herringbone is bold, and the style has real presence. The trade-off is weight — a thick fishtail is heavy, so braid firmly, use a strong elastic, and pin the braid at intervals if you wear it up. Fine hair is the fishtail’s hardest customer, because the weave needs grip and fine hair is slippery, but the fishtail is actually kinder to fine hair than a three-strand braid: the many small crossings hold each other in place, so a fine fishtail loosens less than a fine plait. Prep is everything — day-old hair, texturising spray, a light backcomb at the crown, and no smoothing serum before you braid.
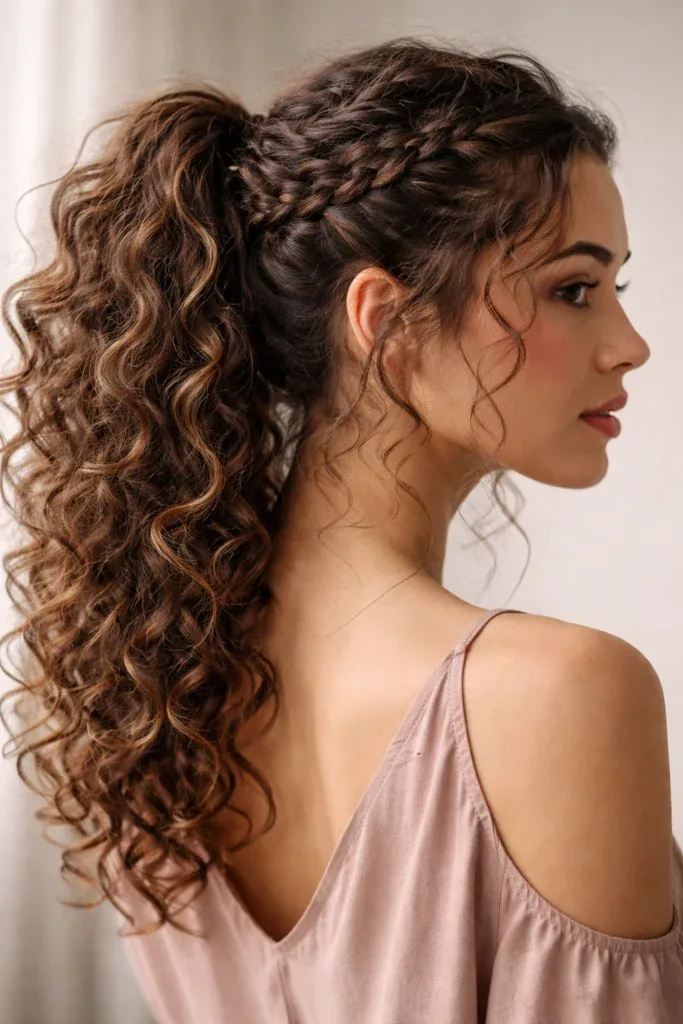
Curly hair gives a fishtail a beautiful, textured surface, and the curls hide any uneven crossings completely, which makes it the most forgiving hair type for a beginner. Braid on stretched or lightly blown-out hair for a neat, defined fishtail, or on natural curls for a soft, boho one — either way, use a leave-in conditioner first so the strands do not snag. Straight hair shows the herringbone pattern most clearly of all, which is why the sleek fishtail looks so striking on it, but straight hair also shows every uneven crossing, so take your time and keep the pieces even. Whatever your hair type, the fishtail adapts: change the piece size, the tension and the finish, and the same braid becomes a different style.
How to Make a Fishtail Braid Last All Day
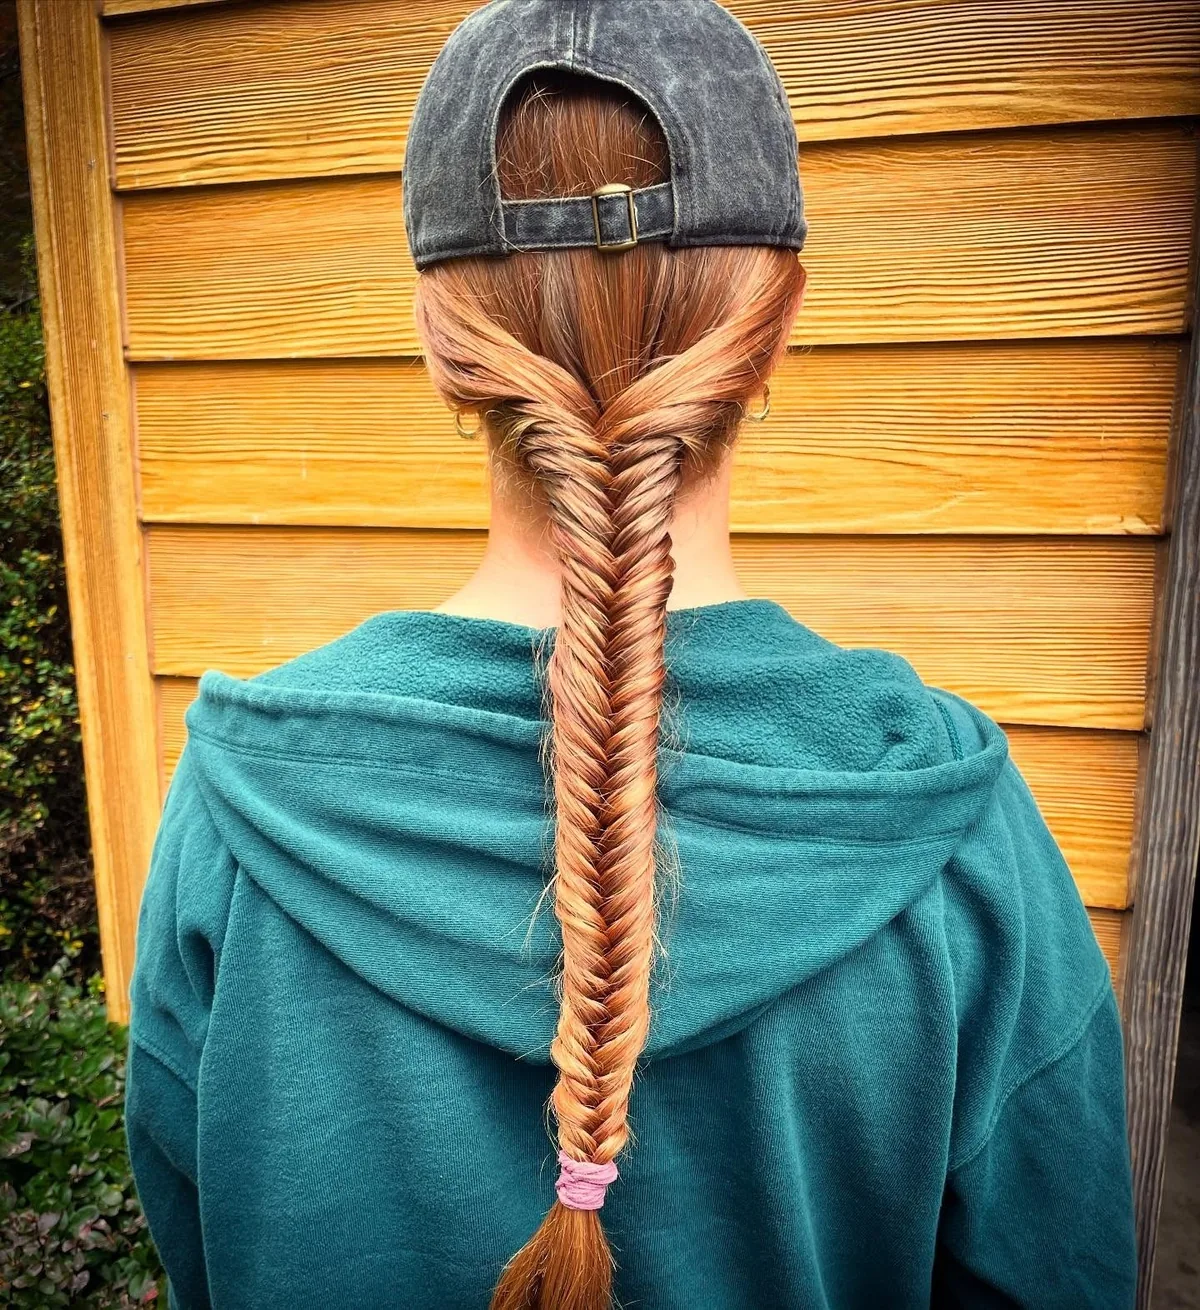
A fishtail that lasts all day is built on prep, not on hairspray alone. Start with day-old hair if you can, and work texturising spray or dry shampoo through the roots and lengths before you braid. The fishtail’s many small crossings give it a natural advantage — the weave locks against itself — but the braid still needs even tension: a section that is tight in one place and loose in another will loosen in the loose spot first. Braid firmly and keep the pieces small, because small crossings grip better than big ones. Secure the ends with a small elastic, then wrap a thin strand of hair around the elastic and pin it underneath for a polished finish that also stops the elastic sliding.
Finish with hairspray in light layers rather than one heavy blast, and if the day is long or the weather is humid, carry a few spare pins and a travel-size spray. A fishtail loosens most often at the top, where the braid meets the scalp, so pin the top of the braid to the head with two crossed bobby pins if you are wearing it up. If a piece escapes during the day, do not take the braid down — tuck it back in with a pin and mist with spray. And if the whole braid starts to sag, the quickest rescue is to pancake it: gently pull the edges apart and the braid looks fuller and more intentional, hiding the looseness completely.
Fishtail Braids for Weddings and Formal Events
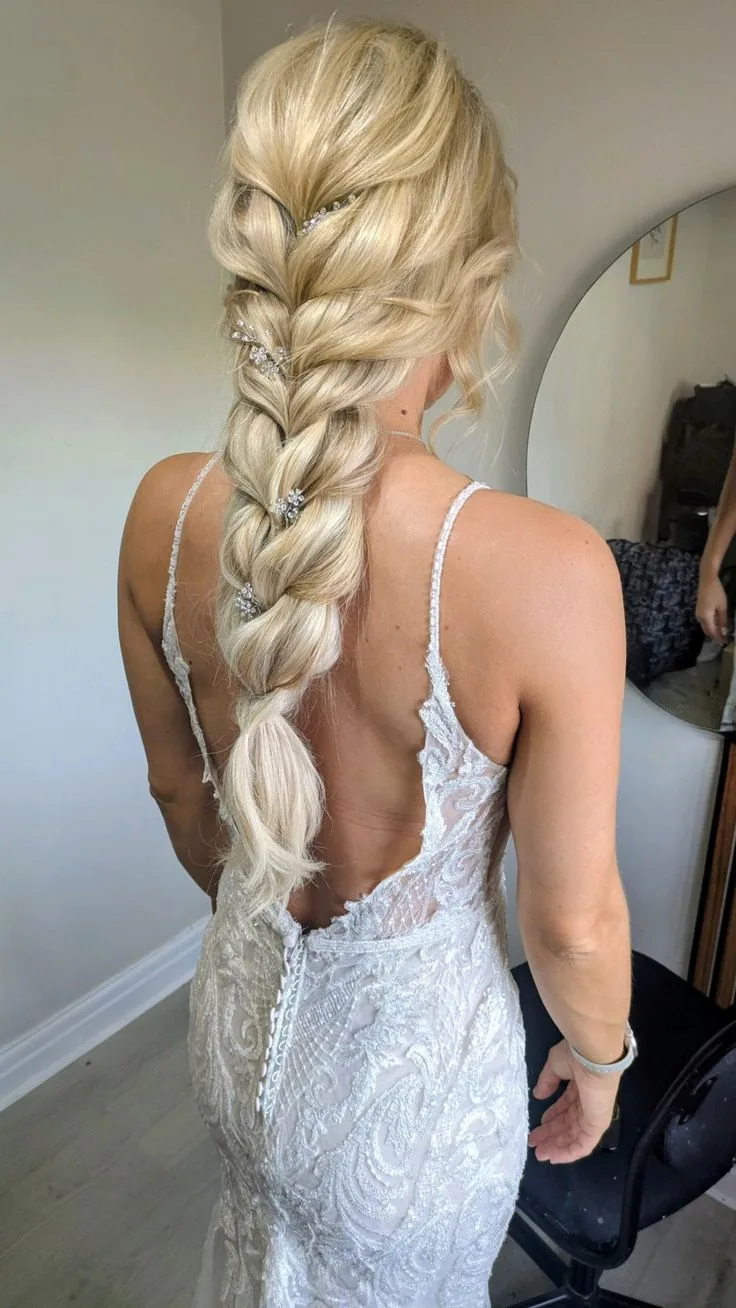
The fishtail is one of the most requested wedding braids, and for good reason: the fine herringbone looks like lace in photographs, it holds through a ceremony, a dinner and a dance floor, and it flatters almost every dress, from a boho gown to a ballgown. For the bride, the fishtail is usually the fullest version — a long, pancaked fishtail down the back, or a fishtail crown, finished with fresh flowers or pearl pins tucked into the weave. For bridesmaids, a side fishtail is the classic choice: soft, romantic, coordinated across the group, and easy to match to any hair length. For guests, a relaxed fishtail with a few loose pieces is elegant without upstaging the bride.
If you are the bride, book a trial at least a month before the wedding and bring your veil and accessories, because a fishtail takes longer to braid than a three-strand plait and the timing matters on the day. Ask your stylist how the veil will be attached — a veil comb slides neatly behind a fishtail crown, and a side fishtail leaves the back free for a veil — and decide whether you want face-framing pieces, because they will frame your face in every photograph. For a formal evening that is not a wedding, the sleek fishtail is the safest choice: glossy, neat, and unmistakably dressed up. Whatever the occasion, braid on day-old hair with texture spray, and give the braid a full day’s wear in the trial so you know exactly how it holds.
Accessories That Suit a Fishtail Braid
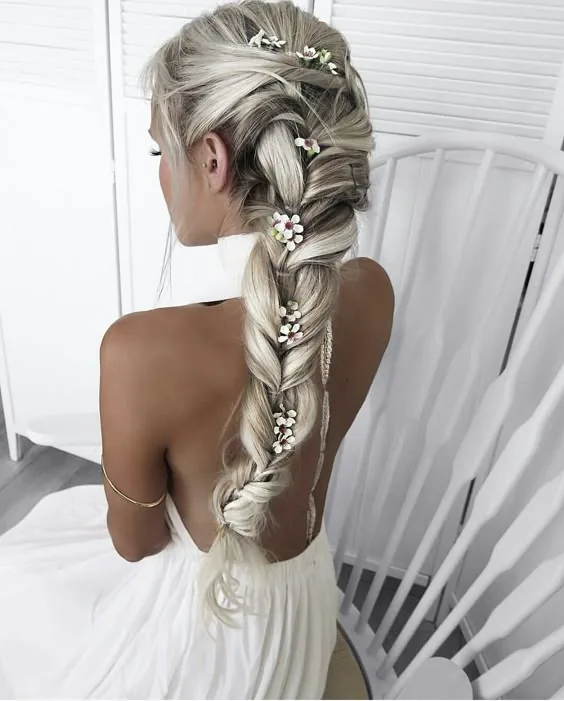
A fishtail braid is already detailed, so accessories should finish it, not fight it. Small, light pieces work best: pearl pins scattered along the weave catch the light and give the braid a bridal feel; a thin velvet ribbon woven through the fishtail adds colour and softness; fresh flowers — baby’s breath, spray roses, lavender — tucked into the braid at intervals suit weddings and garden parties. A single decorative pin at the top of the braid, or a small cuff where the braid meets the elastic, is enough for everyday wear. The fishtail’s fine weave holds small pins beautifully, because there are so many crossings for a pin to grip.
What to avoid: anything heavy or bulky. A big flower comb or a heavy clip will drag a fishtail down and distort the weave, and a chunky accessory fights the braid’s delicate texture. Choose accessories that are light and small, and always do a trial with the accessory in — a pin that looked perfect in the box can sit awkwardly once the braid is in. For a wedding, build up slowly: flowers first, then pearls, then stop. For everyday, one detail is plenty. The braid is the statement; the accessories are the punctuation. One or two marks of punctuation are all a good sentence needs.
Fixing a Fishtail That Goes Lopsided or Loose
A fishtail goes lopsided for one of three reasons: the two starting sections were not equal, the pieces crossed over were bigger on one side than the other, or the tension was firmer on one side. The fix is easiest at the start — if the braid starts drifting after a few crossings, undo it and begin again with two truly equal sections, and count the thickness of your pieces until your hands learn the size. If the braid is already half done and drifting, you can rescue it by taking slightly thicker pieces from the fuller side for a few crossings, which pulls the braid back toward the centre. It is not perfect, but it works, and pancaking the finished braid hides a multitude of sins.
If the fishtail goes loose, the problem is usually piece size or prep: pieces that are too thick make a loose, gappy braid, and clean, slippery hair makes the crossings slide. The fix is thinner pieces, more texture spray, and firmer tension — and if the braid is already done, do not undo it. Instead, pancake it gently: pull the edges of the braid apart, a little at a time, and the braid looks fuller and more intentional, which disguises the looseness completely. A quick mist of hairspray and a pin at the top of the braid, pushed against the scalp, will hold it for the rest of the day. A lopsided fishtail is almost always a piece-size problem, not a talent problem — and piece size is a skill you learn in one practice run.
1. The Classic Fishtail Braid
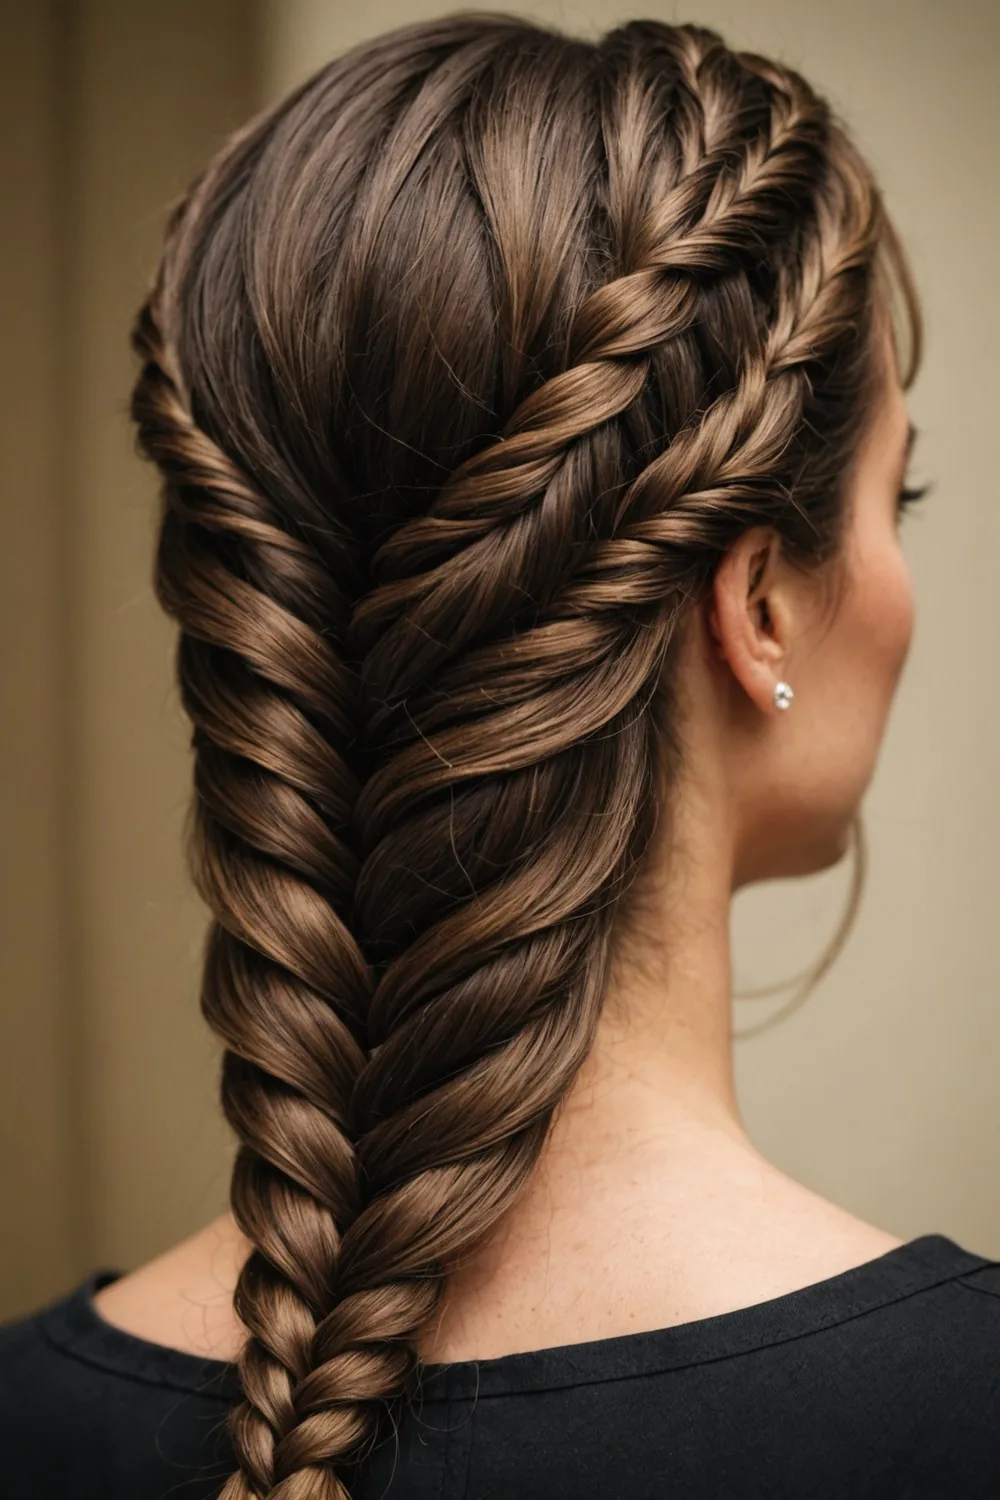
The classic fishtail braid is the original: a single fishtail down the back, starting at the nape, woven with small, even pieces, and finished with a small elastic — nothing more, nothing added. The herringbone pattern is the whole decoration, and on long hair it runs the full length of the braid like a fine, woven cord. It shows off the neck and shoulders, pairs beautifully with an open back or a simple neckline, and has a timeless quality that no trend can touch. This is the fishtail to learn first, because every other version in this guide is a variation on this one braid.
Difficulty: easy once the rhythm clicks — the braiding itself is simple, but it takes a few practice runs before your hands stop fumbling the small pieces. Who it suits best: anyone with shoulder-length hair or longer, and especially women with straight or wavy hair, where the herringbone shows most clearly. How to do this version: gather the hair low at the nape, split into two equal sections, and cross thin pieces from the outside of each section to the inside of the other, keeping the pieces as even as you can. What to ask a stylist: for a neat, even fishtail with small crossings and a polished finish. Quick verdict: the fishtail in its purest form — learn it, and the other 35 styles in this guide become variations.
2. The Messy Fishtail Braid
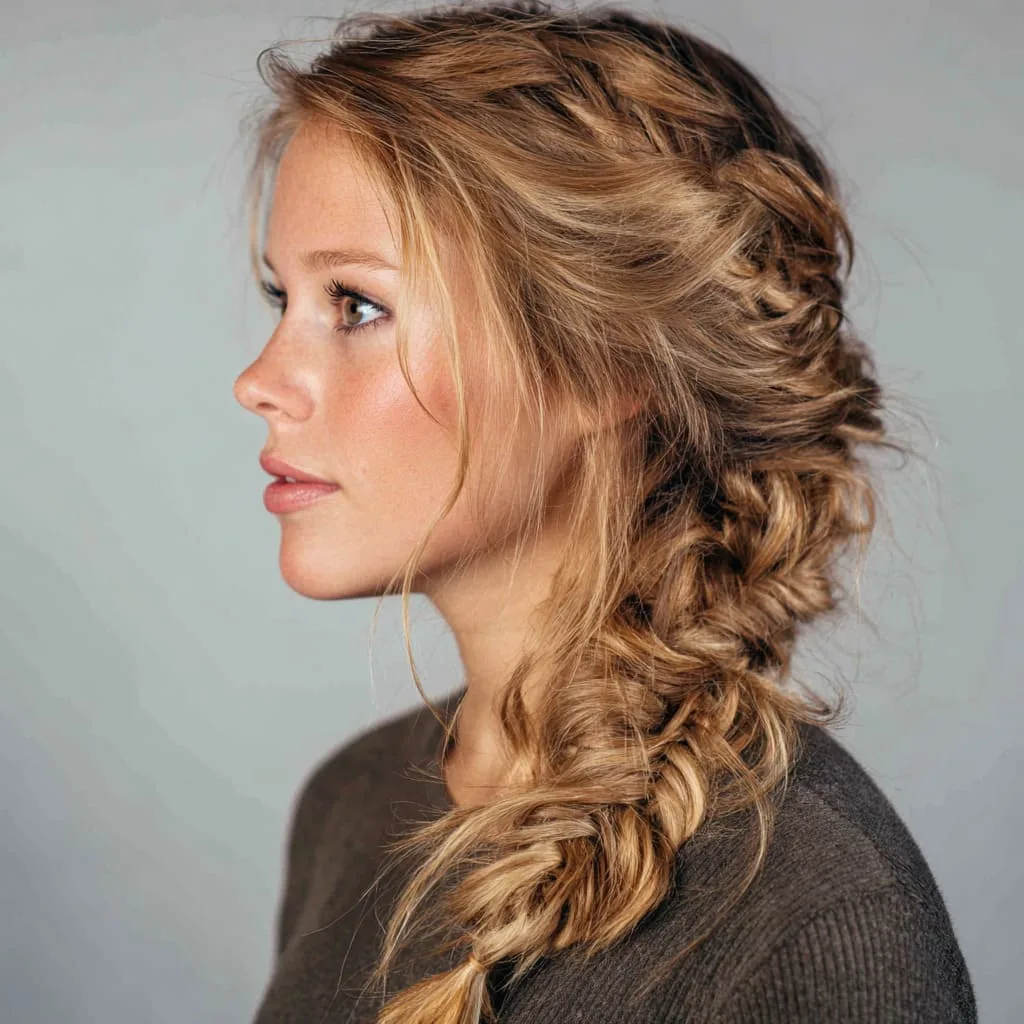
The messy fishtail braid is the classic with the tension turned down: the braid is woven loosely, pulled apart gently once it is secured — pancaking — so it looks full, soft and a little bit undone, and a few pieces are left out around the face to soften the whole look. The result is a fishtail that feels like it belongs at a festival, a beach day or a lazy Sunday, not a state occasion. It is the fishtail for women who love the herringbone but find the classic version too neat, too severe, or too much like a school photograph — and it is the most forgiving fishtail of all, because uneven crossings disappear into the looseness.
Occasion: the everyday fishtail — weekends, casual weddings, holidays, and any day when you want to look put-together without looking polished. Difficulty: easy — this is the best fishtail to learn first, because the looseness hides every mistake. Who it suits best: wavy and textured hair, where the messiness looks intentional, and anyone in a hurry. How to do this version: braid a classic fishtail, secure it, then pull the edges apart a little at a time, starting at the bottom and working up, and tug a few face-framing pieces loose. What to ask a stylist: for a loose fishtail with texture, pancaked for fullness, not a tight one. Quick verdict: the fishtail you will actually wear every week — relaxed, romantic, and kind to beginners.
3. The Sleek Polished Fishtail Braid
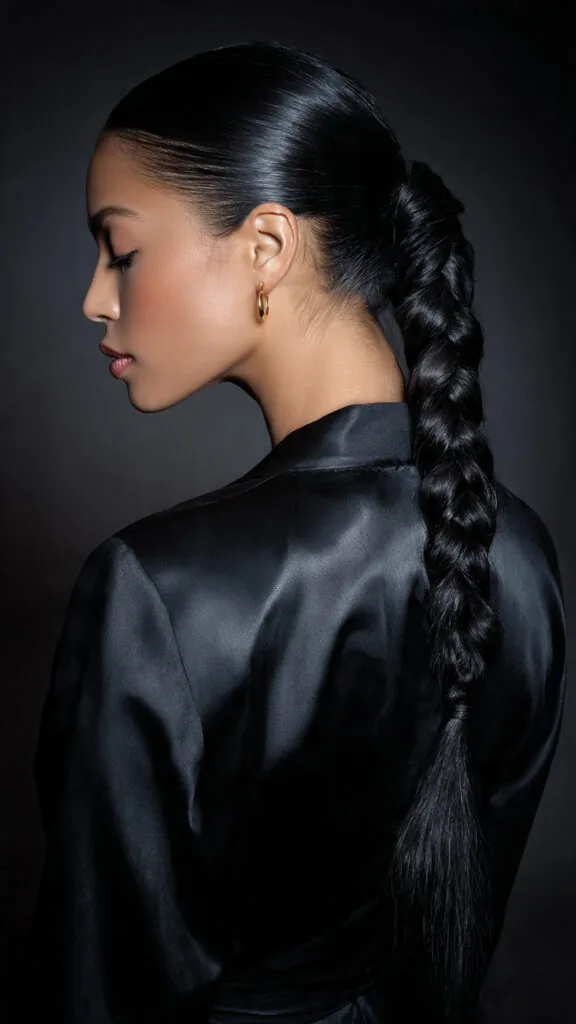
The sleek polished fishtail braid is the classic turned up a notch: every strand smoothed into place, the weave tight and even, the surface glossy, and not a single flyaway allowed. The hair is blow-dried smooth first, a smoothing serum is worked through the lengths, and the fishtail is woven with small, even pieces and steady tension all the way down, so the herringbone looks carved rather than styled. This is the fishtail for a black-tie evening, a formal wedding, or any occasion when the photographs matter as much as the day itself — because a sleek fishtail reads beautifully on camera, and the clean silhouette makes any outfit look more expensive.
Difficulty: medium — the braiding is the same as the classic, but the polish demands patience: every piece must be even, every strand smoothed, and the tension constant. Who it suits best: straight hair, where the herringbone shows most clearly, and medium to long lengths. How to do this version: blow-dry straight, apply serum, braid tightly and evenly, smooth the surface with a fine-tooth comb, and set with a strong-hold spray. What to ask a stylist: for a tight, even fishtail with a glossy finish and the elastic wrapped in a strand of hair. Quick verdict: maximum polish, maximum presence — the fishtail at its most glamorous, and worth every minute of prep.
4. The Side Fishtail Braid

The side fishtail braid is the fishtail most women learn first, and for good reason: gathered over one shoulder, you can see what your hands are doing, your arms do not ache, and the herringbone is visible from the front — which is where compliments come from. It is also the most flattering fishtail for most faces, because the braid falling over one shoulder softens the jawline and draws the eye diagonally, and it pairs beautifully with an off-shoulder top, a one-shoulder dress, or a simple T-shirt. A side fishtail is the fishtail you wear when you want the braid to be seen, not just felt.
Difficulty: easy — if you only learn one fishtail, learn this one, because everything about it is kinder: the angle, the visibility, the arm position. Who it suits best: everyone, but especially women with shorter hair, where a side fishtail shows the weave better than a back braid ever could. How to do this version: sweep all the hair over one shoulder, split into two sections, and fishtail downward, keeping the pieces small and even. What to ask a stylist: for the braid to sit forward on the shoulder, with a few loose pieces at the face. Quick verdict: the beginner’s fishtail and the most-worn fishtail — visible, flattering, and the easiest way to show off the weave.
5. The Fishtail Braid Ponytail
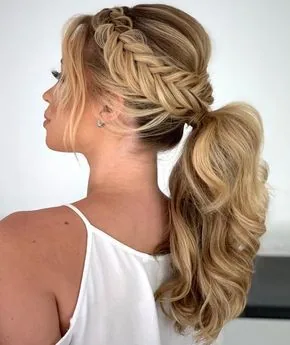
The fishtail braid ponytail is two styles in one: a high ponytail for lift and energy, with the ponytail itself fishtailed from the elastic down, so the tail has the fine herringbone texture instead of a plain plait. It is sporty and polished at the same time — the height of the ponytail gives the face a lift, the fishtail gives the tail detail, and the whole style stays completely out of your way. It works for the gym, for work, for a night out, and for any day when you want your hair up but a plain ponytail feels too plain. It is also one of the easiest fishtails to do on yourself, because once the ponytail is secured, the fishtailing happens in front of you.
Difficulty: easy — the ponytail does the hard work of gathering the hair, and the fishtail is just the tail. Who it suits best: medium to long hair, and anyone who lives in a ponytail but wants it to look deliberate. How to do this version: gather the hair into a high ponytail and secure it firmly, then split the tail in two and fishtail to the ends, finishing with a small elastic and a wrapped strand to hide it. What to ask a stylist: for a high, secure ponytail with the fishtail woven tightly so it does not loosen. Quick verdict: the ponytail, upgraded — five extra minutes, and a plain ponytail becomes a hairstyle.
6. The Double Fishtail Braids
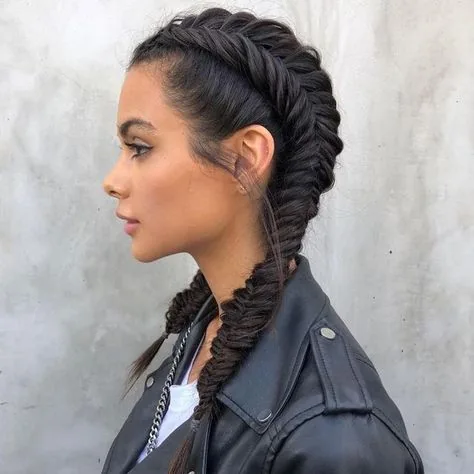
Double fishtail braids are exactly what they sound like: two fishtails, one on each side of the head, parted down the middle, each woven from the crown to the ends. The result is twice as interesting as a single fishtail — two fine herringbone cords, a clean centre part, and a symmetry that photographs beautifully from behind. It is the fishtail for a festival, a holiday, a workout, or a day when you want your hair completely contained and still looking like a style. It is also the most practical fishtail for very long or very thick hair, because two thinner braids are easier to manage than one enormous one.
Difficulty: medium — each fishtail is easy, but making the two sides match takes care: equal sections, equal piece sizes, and braids that start at the same height. Who it suits best: long or thick hair, and anyone who wants a playful, youthful fishtail. How to do this version: part the hair down the middle, clip one side away, and fishtail the other side from behind the ear to the ends, then repeat — and check in the mirror that both braids start at the same height. What to ask a stylist: for two fishtails of equal size, with the part clean and the ends even. Quick verdict: the playful fishtail — symmetrical, practical, and twice the herringbone.
7. The Dutch Fishtail Braid
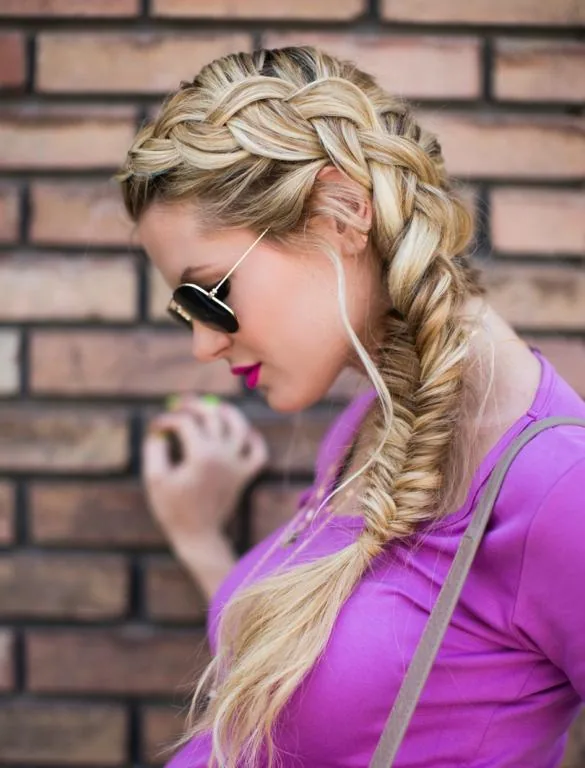
The Dutch fishtail braid combines two techniques: the fishtail’s two-strand weave, worked as a Dutch braid — adding hair as you go, with the strands crossed under — so the finished braid sits on top of the hair like a raised, three-dimensional cord. It is the most sculpted fishtail in this guide, and the one that photographs best, because the raised herringbone catches the light in a way a flat braid never does. It is the fishtail for a bride who wants her braid to have a talking point, or for anyone who loves braids and wants the most detailed version of the style. It takes longer than a regular fishtail, and it takes a steady hand, but the effect is worth it.
Difficulty: advanced — a Dutch fishtail asks your hands to do two things at once, adding hair and crossing small pieces, and most women will want a stylist or a patient friend for the first few attempts. Who it suits best: medium to thick hair, where the raised braid has enough volume to really show. How to do this version: start at the crown with two small sections, add hair to each section as you cross thin pieces under, and keep the tension even as you travel down. What to ask a stylist: for a Dutch fishtail, pancaked gently for fullness, with the ends tucked at the nape or left loose. Quick verdict: the most intricate fishtail — a braid that looks like jewellery, and a style nobody else in the room will have.
8. The French Fishtail Braid
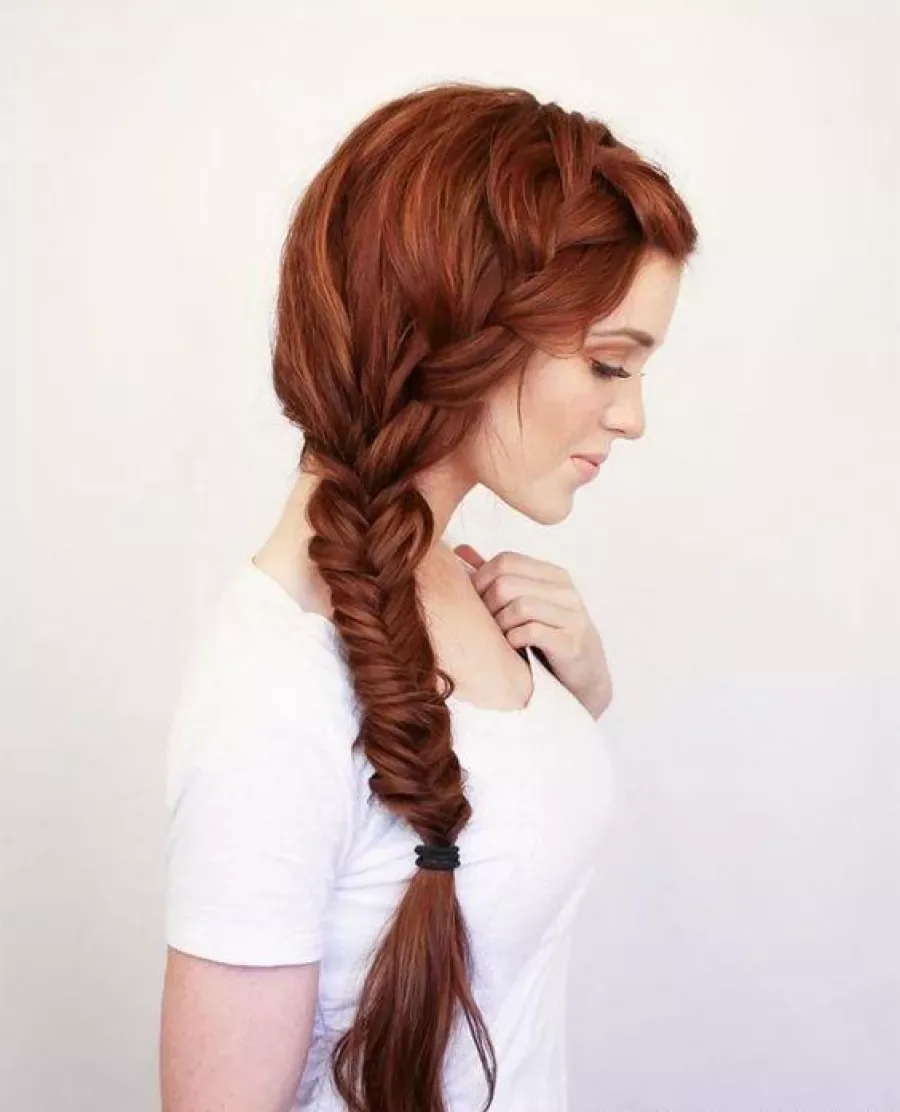
The French fishtail braid uses the classic French technique — adding hair as you go, with the pieces crossed over — so the braid lies flatter against the head and looks smoother and more understated than the Dutch version. It is the quieter fishtail: less sculpted, more woven-in, and lovely for women who want the herringbone effect without the drama of a raised braid. It also suits finer hair beautifully, because the flat braid does not demand the volume that a Dutch fishtail does, and it sits closer to the scalp, which makes it feel more secure on hair that slips.
Difficulty: medium — the French fishtail is the natural next step after the basic fishtail, because it adds one new skill, picking up hair as you go, to a weave you already know. Who it suits best: fine hair, and women who want a fishtail they can wear to work without it looking like a statement. How to do this version: start at the crown, add a small section of hair to each side before you cross its piece over, and keep the additions even so the braid stays straight. What to ask a stylist: for a French fishtail that lies flat and neat, with the braid running straight down the centre. Quick verdict: the understated fishtail — quiet, elegant, and the easiest fishtail to wear every day.
9. The Fishtail Braid with Loose Waves
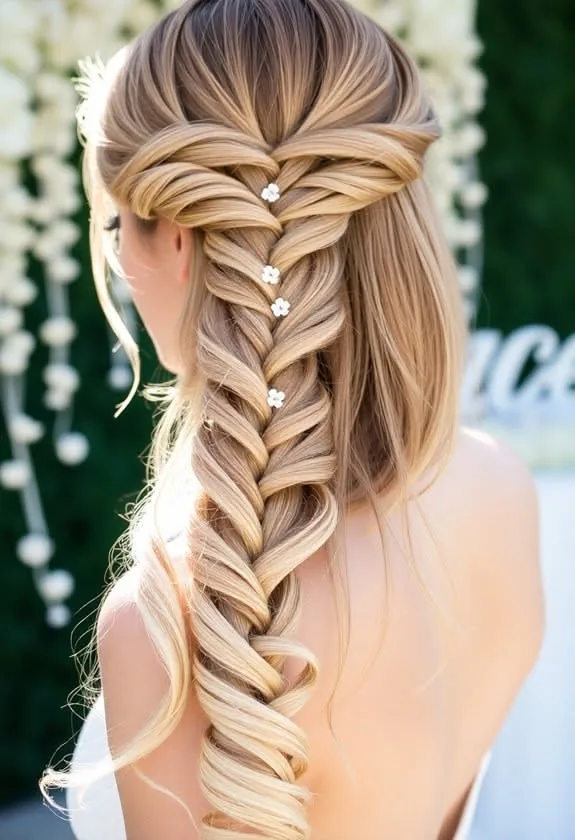
A fishtail braid with loose waves is the romantic version of the style: the hair is waved first, then gathered into a loose fishtail, so the braid itself has a soft, tousled surface and the pieces left out at the face fall in waves instead of lying flat. The waves are the whole point — they are loose, touchable, and a little bit undone, which keeps the fishtail from looking formal and makes the whole style feel like a summer evening. This is the fishtail for a beach wedding, a garden party, or a date night, and it is one of the easiest fishtails to do yourself, because the loose waves hide any unevenness in the braid.
Hair type: wavy and naturally textured hair will get here fastest, but straight hair can be waved first with a large-barrel iron. Difficulty: easy to medium — the fishtail is the same as the classic, and the waves do the forgiving. How to do this version: curl the hair in large sections first, let the curls cool completely, then gather the hair loosely and fishtail it, leaving two soft pieces out at the face. What to ask a stylist: for a soft fishtail over pre-waved hair, with the braid pancaked gently and the waves left loose. Quick verdict: the romantic fishtail — soft on top, softer underneath, and lovely from every angle.
10. The Fishtail Braid with Curls
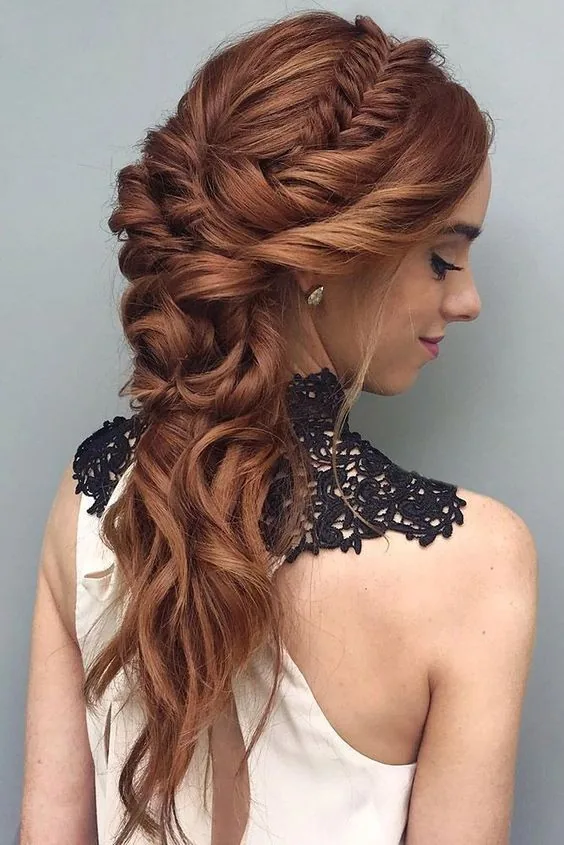
A fishtail braid with curls takes the fine herringbone and gives it a romantic, textured finish: the hair is curled before it is braided, so the braid itself has a soft, bouncy surface and the pieces left out at the face curl gently instead of lying flat. A few curls escape at the nape and the temples, and the whole style has a softness that a sleek fishtail never has. This is the fishtail for a romantic wedding, a Valentine’s dinner, or any evening when the dress is soft and flowing and the hair should match. It is also a wonderful fishtail for naturally curly hair, because the curls are already there — the braid just organises them into a herringbone.
Hair type: naturally curly or wavy hair is ideal, and straight hair can be curled first. Difficulty: easy — the curls hide uneven crossings, so this is a kind fishtail for a beginner. Who it suits best: romantic occasions, and medium to long lengths where the curls have room to show. How to do this version: curl in large sections, let them cool, then braid loosely — do not brush the curls out, or you will lose the texture that makes this fishtail special. What to ask a stylist: for a soft, textured fishtail with curled ends showing, and a few loose curls at the face. Quick verdict: the romantic fishtail — structured enough to last, soft enough to feel like you.
11. The Bridal Fishtail Braid
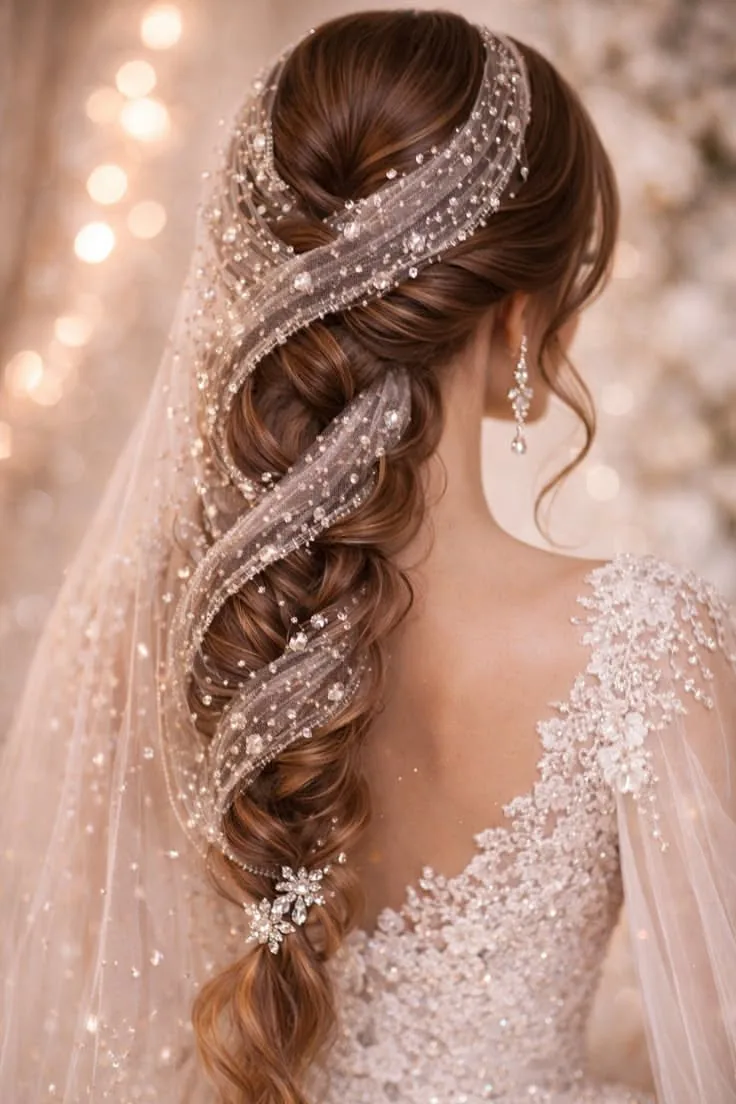
The bridal fishtail braid is the fullest, most polished fishtail in this guide, built to survive a whole wedding day and to look perfect in every photograph. The braid is usually long and pancaked just enough for fullness, the herringbone is neat and even, and it is finished with a veil attached behind the braid and pearl pins or fresh flowers tucked into the weave. It shows off the neckline and the back of the dress, it keeps the hair completely out of the way through the ceremony, the dinner and the dancing, and the fine weave looks like lace in photographs — which, on a wedding day, feels exactly right.
Occasion: the wedding day itself, and the most formal version of the fishtail. Difficulty: advanced — book a stylist, and book a trial at least a month before the wedding, with your veil and accessories, and wear the braid for a full day to test how it holds. Who it suits best: brides with medium to long hair who want a braid that reads as bridal, not everyday. How to do this version: this is a stylist job — a long, even fishtail, pancaked for fullness, with the veil comb slid in behind the braid. What to ask a stylist: for a fishtail that holds all day, with the veil attached at the back of the braid, not the top. Quick verdict: the crown for the biggest day — book the trial, trust the stylist, and wear it with confidence.
12. The Fishtail Braid for a Wedding Guest
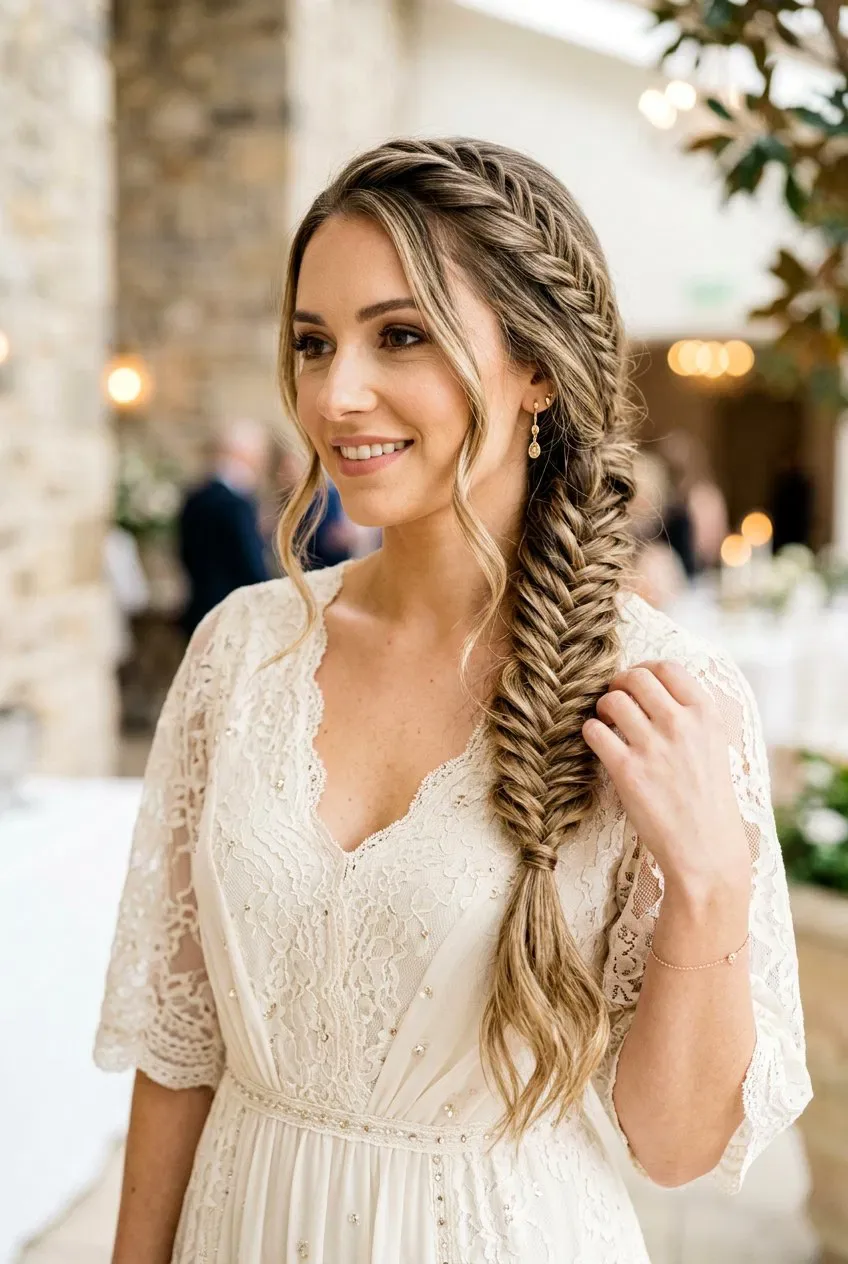
The wedding guest fishtail braid is the art of looking elegant without upstaging anyone: a relaxed fishtail, worn over one shoulder, with a few soft pieces at the face and a single pretty pin — nothing bridal, nothing dramatic, just polished and romantic. It is the perfect guest style because it is formal enough for a wedding, comfortable enough for a long day, and interesting enough to feel special without demanding attention. It also photographs beautifully, which matters when you will be in the background of a hundred wedding photographs, and it keeps the hair off your face through the ceremony, the meal, and the dancing.
Occasion: weddings as a guest, and any formal daytime event. Difficulty: easy to medium — a side fishtail is the easiest version to do yourself, and this one only adds a little softening. Who it suits best: wedding guests, and anyone attending a formal event who wants to look polished without looking bridal. How to do this version: sweep the hair over one shoulder, braid a loose fishtail, pull it apart gently for fullness, leave two soft pieces at the face, and finish with one simple pin — no veil, no flowers, no pearls. What to ask a stylist: for a relaxed side fishtail that looks effortless, not sculpted. Quick verdict: the polite fishtail — elegant, relaxed, and exactly right for a guest.
13. The Boho Fishtail Braid
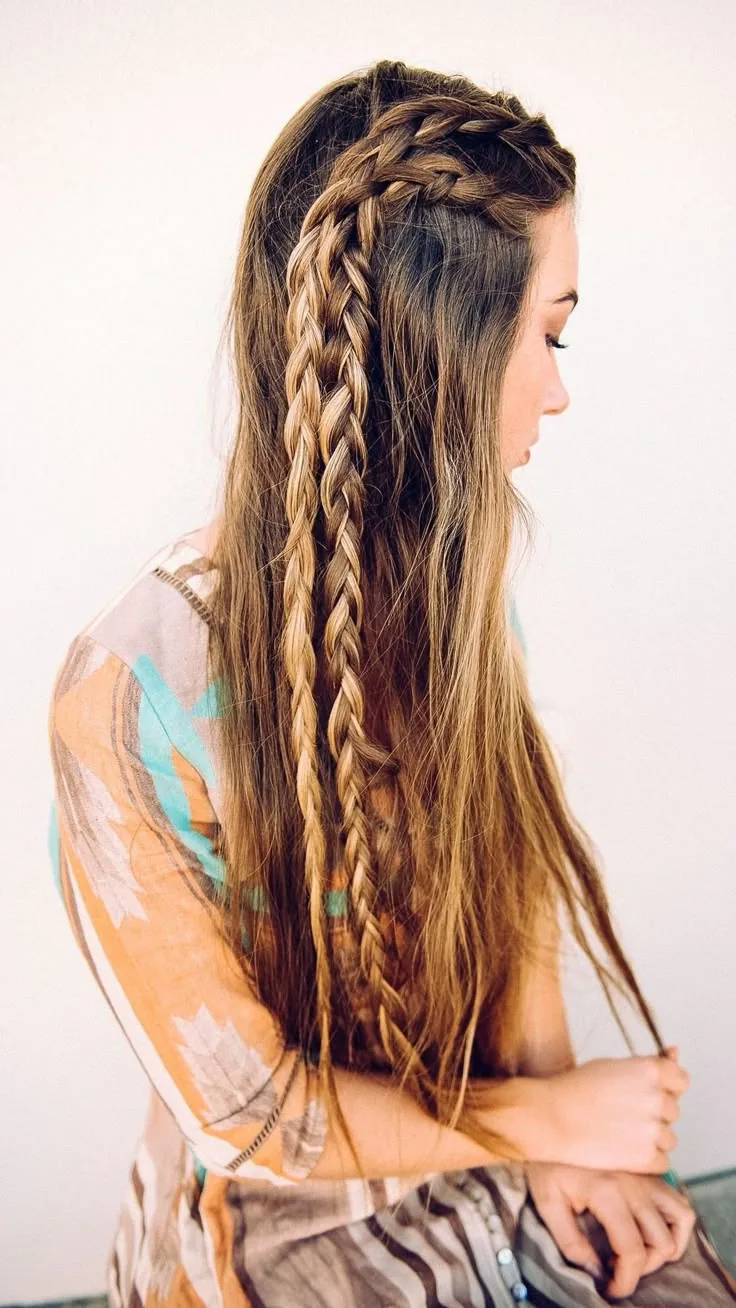
The boho fishtail braid is the relaxed, free-spirited cousin of the classic: a loose fishtail with soft, wavy texture, a few pieces falling free around the face, and often a small flower or two woven into the weave. The hair is not blow-dried smooth — it is left with its natural wave, or given a few loose bends with a curling wand — and the fishtail is woven loosely down the back or over one shoulder so the braid has a soft, organic shape. This is the fishtail for a festival, a beach wedding, a garden party, or any occasion where the dress is flowy and the mood is relaxed. Boho hair is supposed to look a little undone, and a piece that falls out just adds to the charm.
Occasion: festivals, outdoor weddings, holidays, and any day the outfit is flowy. Difficulty: easy — the looseness forgives everything, and the waves hide uneven crossings. Who it suits best: naturally wavy or curly hair, and anyone who wants romance without formality. How to do this version: add loose waves first, fishtail loosely, pull the braid apart gently for fullness, and leave two or three pieces out around the face. What to ask a stylist: for a soft, loose fishtail with natural texture, and for any flowers to be secured with a hidden pin. Quick verdict: the fishtail for women who want romance without the formality — loose, lovely, and a little bit wild.
14. The Fishtail Braid with Flowers
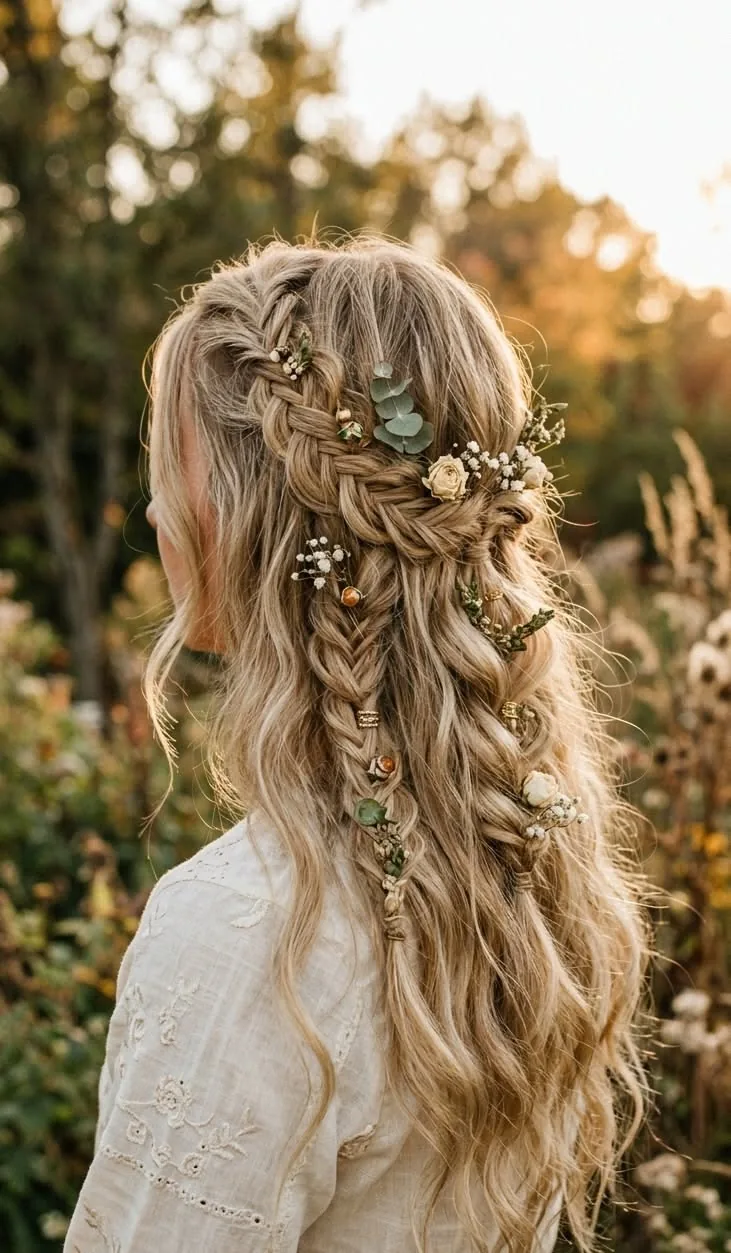
A fishtail braid with flowers is the most romantic version of the style, and the one most brides ask for first: small, fresh blooms tucked into the weave at intervals, so the braid looks like it grew there. Baby’s breath is the classic choice — light, delicate, and easy to pin — but spray roses, lavender, chamomile and small wildflowers all work beautifully, and the best choice is usually whatever is in season and matches the bouquet. The flowers should be small and spaced out along the braid, not clustered in one place, so the herringbone looks balanced from every angle. The fine weave of a fishtail holds small stems better than a three-strand braid, because there are so many crossings for a stem to sit in.
Occasion: weddings, garden parties, spring festivals, and photo shoots. Difficulty: easy to medium — the fishtail is the same as the classic; the flowers are the new skill, and they are added last. Who it suits best: brides, bridesmaids, and anyone at a garden wedding. How to do this version: braid first, then tuck the flowers in one by one, securing each stem with a small bobby pin hidden inside the weave — do not try to braid the flowers in, or they will be crushed. What to ask a stylist: for hardy, small blooms, and for the flowers to be added last, just before you leave. Quick verdict: the most photographed fishtail in this guide — a braid of herringbone and flowers, and pure romance.
15. The Fishtail Braid with a Ribbon
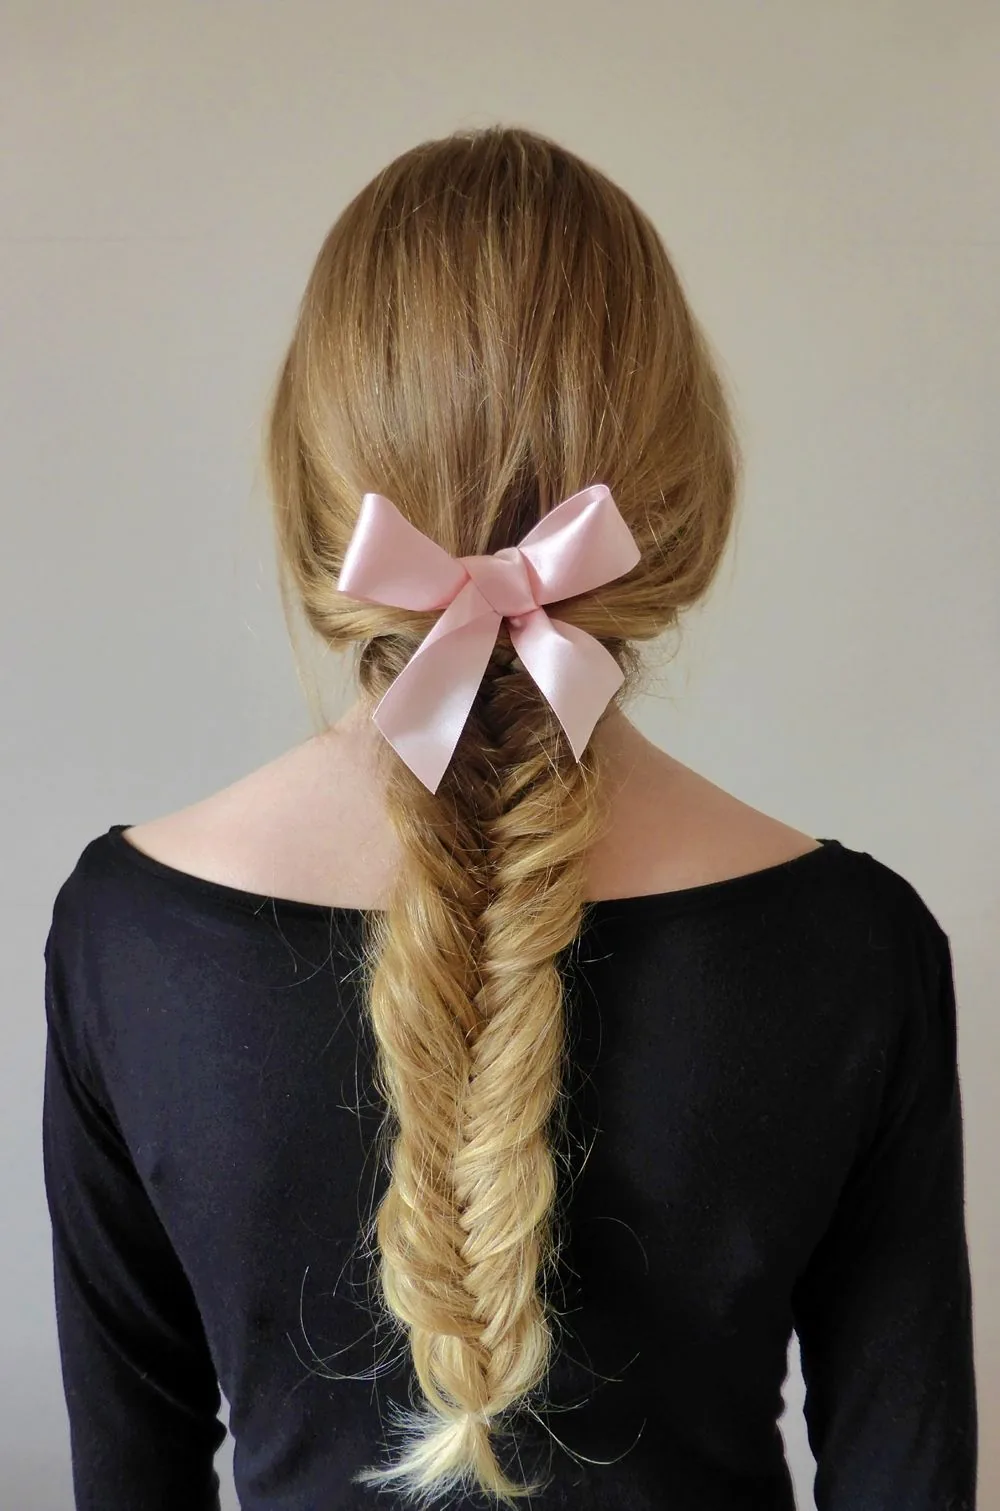
A fishtail braid with a ribbon is the sweetest version of the style: a velvet or satin ribbon woven through the braid as you go, or tied in a small bow at the end once the fishtail is finished. The ribbon softens the whole look, adds a touch of colour, and gives the braid a romantic, almost vintage feel — perfect for a garden wedding, a spring party, or a little girl’s flower-girl moment, though it suits grown women just as well. A thin ribbon in a soft colour — blush, sage, cream, dusty blue — works best, because it reads as an accent, not a costume. A wide ribbon in a bright colour can overwhelm the delicate weave, so keep it delicate.
Difficulty: easy — the ribbon is woven in as you braid, and it actually makes the fishtail easier to follow, because the ribbon shows you where the crossings are. Who it suits best: garden weddings, spring parties, and anyone who loves a romantic detail. How to do this version: tie the ribbon to one section before you start, and let it travel with that section as you cross pieces over, keeping it loose so it shows between the strands; or braid first and thread the ribbon through afterwards with a blunt needle. What to ask a stylist: for the ribbon to be woven in, not just tied on, so it stays put all day. Quick verdict: the prettiest fishtail — one ribbon, woven through a herringbone, and a style that feels like a storybook.
16. The Fishtail Braid with Pearls
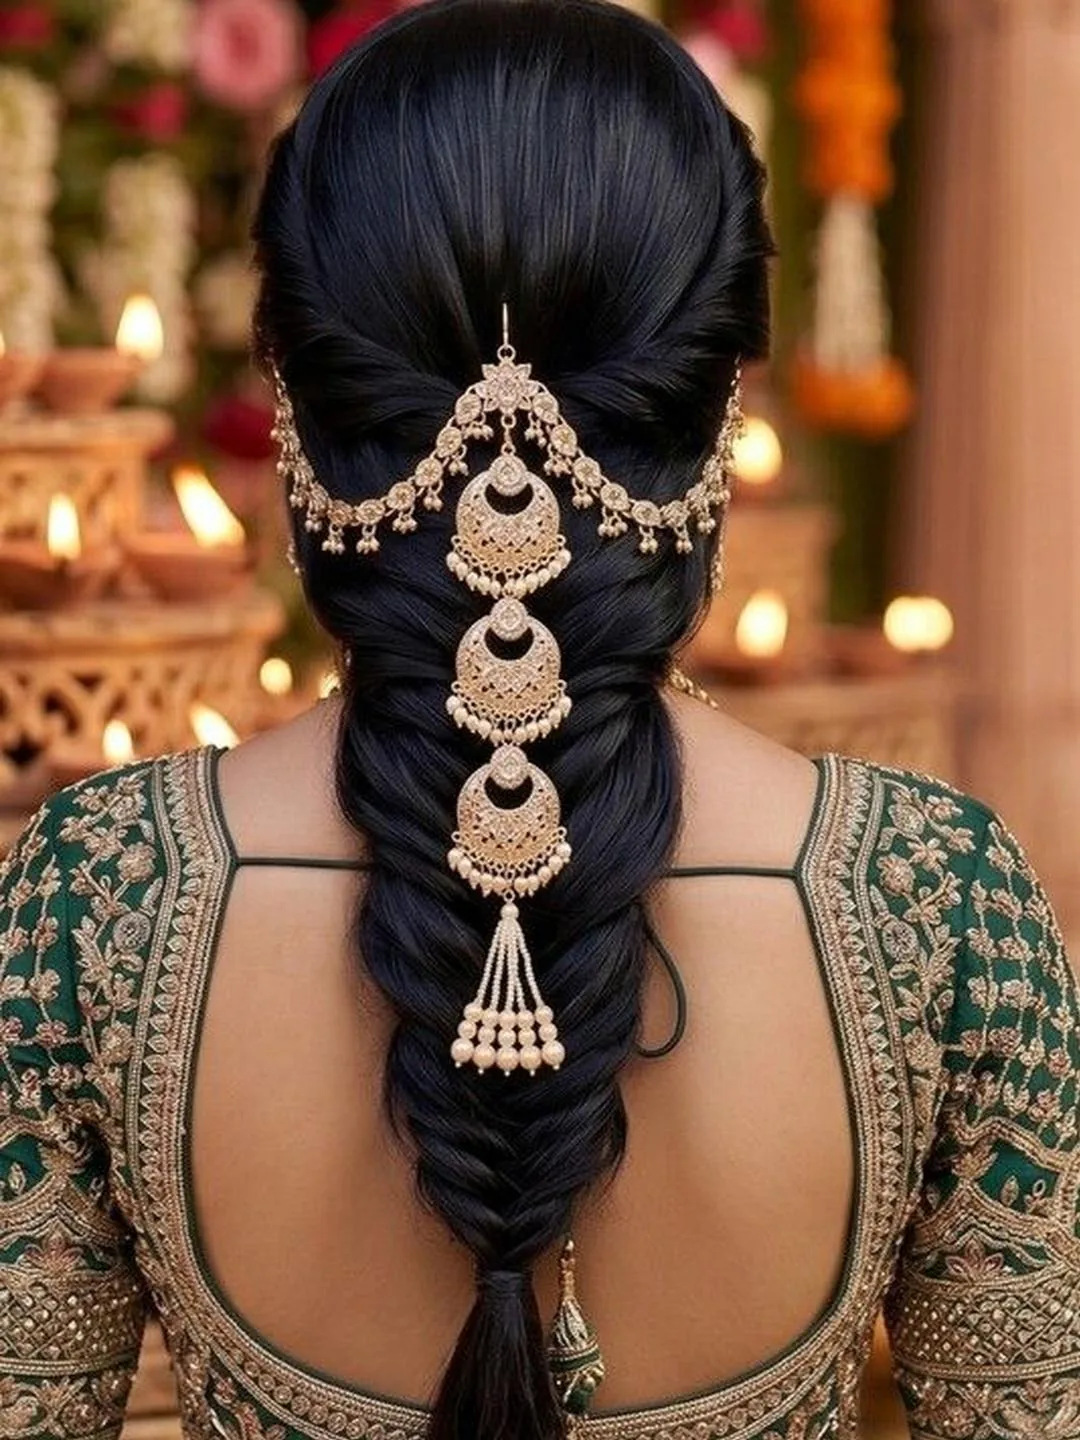
A fishtail braid with pearls is the most elegant version of the style after the bridal fishtail: small pearl pins scattered along the braid, catching the light as you move, and giving the herringbone a regal, almost royal feel. Pearls work on every hair colour — they glow against dark hair, they shimmer against blonde, and they look exquisite against red — and they suit every occasion from a wedding to a black-tie evening. The trick is restraint: a few pearls, spaced out along the braid, look expensive; a whole string of them looks like a costume. Five or six pins, placed where the braid catches the light, are plenty.
Occasion: weddings, black-tie evenings, and formal dinners. Difficulty: easy — the pearls are placed after the braid is done, and the fishtail’s fine weave gives each pin something to grip. Who it suits best: everyone — pearls suit every fishtail, and every woman. How to do this version: braid a neat fishtail, secure it, then push small pearl pins through the braid at intervals, weaving them through the crossings rather than sitting them on top. What to ask a stylist: for a few small pearl pins, spaced evenly, and for the braid to be neat enough that the pearls read as jewellery, not clutter. Quick verdict: the jewelled fishtail — a few pearls, a herringbone braid, and instant elegance.
17. The Half-Up Fishtail Braid
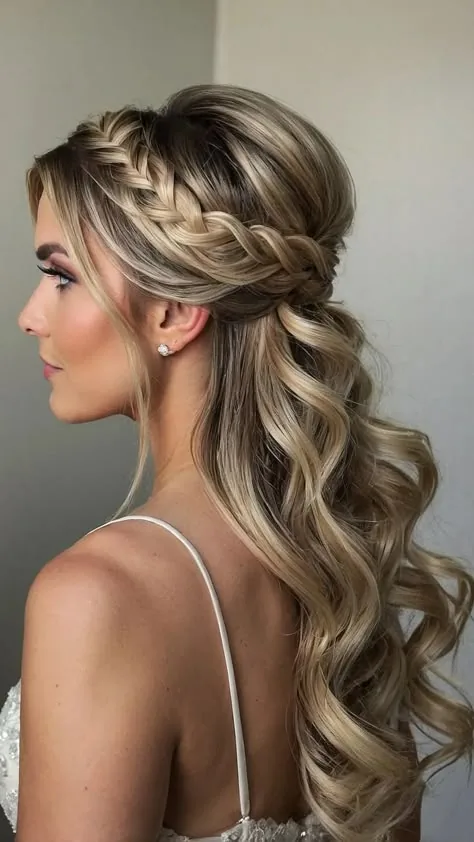
The half-up fishtail braid is the best of both worlds: the top section of the hair is gathered and fishtailed, while the rest falls loose in waves or curls down the back. It gives you the detail of a fishtail and the softness of wearing your hair down, and it is the fishtail for women who love the herringbone but are not ready to put all their hair up. The braided section keeps the hair off your face, shows off your earrings, and gives the back of the head a pretty detail — while the loose lengths keep the look romantic and relaxed. It also photographs beautifully, because the fishtail gives the back view something to look at.
Difficulty: easy — this is one of the kindest fishtails to learn, because the section is small and you can see what you are doing. Who it suits best: women with medium to long hair, and anyone who wants a fishtail without a full updo. How to do this version: section off the top half of the hair, fishtail that section only, secure it with a small elastic, then curl the loose lengths in large, soft waves. What to ask a stylist: for the fishtail to sit at the crown, not the nape, and for the loose hair to be curled, not straight, so the two halves feel connected. Quick verdict: the fishtail for women who cannot decide between up and down — you do not have to choose.
18. The Fishtail Braid Crown
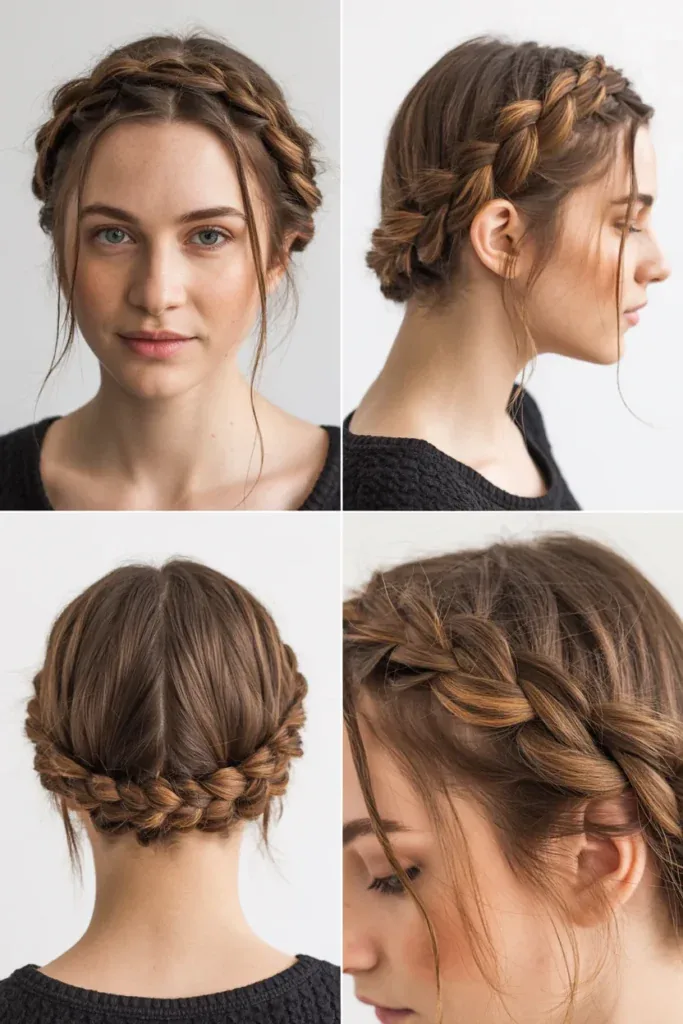
The fishtail braid crown takes the fine herringbone and wraps it all the way around the head, like a halo, so the braid becomes a crown. The result is the most delicate crown in this guide: the fine, lace-like texture catches the light in a way a regular braid does not, and in photographs it looks almost like jewellery. It is the fishtail for a bride who wants her crown to have a talking point, or for anyone who loves braids and wants the most detailed version of the crown. It takes longer than a regular fishtail, and it takes a steady hand, but the effect is worth it.
Difficulty: advanced — fishtailing around your own head is the most fiddly version here, and most women will want a stylist or a patient friend. Who it suits best: medium to long hair, and formal occasions where the crown will be photographed from every angle. How to do this version: start at one temple and fishtail around the head, adding hair as you go, until the braid meets where it began, then tuck the ends under the start of the braid and pin them in place. What to ask a stylist: for a fishtail crown, pancaked gently for fullness, with the ends tucked at the nape. Quick verdict: the most intricate crown — a fishtail that circles the head, and a braid nobody else in the room will have.
19. The Fishtail Braid for Short Hair
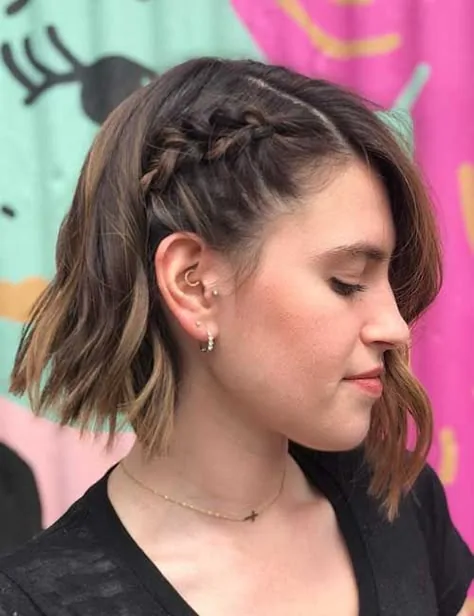
A fishtail braid on short hair is a small, delicate plait — and it is entirely possible, as long as your hair reaches at least chin length. The braid sits over one shoulder, a little thinner than the classic fishtail, and it looks more like a braided accent than a full plait, which is actually its charm: delicate, pretty, and surprisingly striking. The trick is to braid with very thin pieces, so the herringbone has enough crossings to show, and to use small, clear elastics and plenty of bobby pins at the ends, because short layers love to escape. A little texturising spray before you start gives short hair the grip it needs, and the result is a style that makes a bob look completely different.
Hair type: bobs and lobs, chin length and beyond. Difficulty: medium — short hair gives you less to hold on to, so take small sections and braid firmly, and expect your first attempt to be looser than you want. Who it suits best: women with a bob or a lob who want a braid without the length. How to do this version: sweep the hair over one shoulder, split into two sections, and fishtail with very thin pieces, keeping the braid close to the shoulder so it shows. What to ask a stylist: for a side fishtail with thin crossings, with the ends pinned and hidden. Quick verdict: the small fishtail — proof that you do not need long hair to wear a herringbone.
20. The Fishtail Braid for Medium Hair
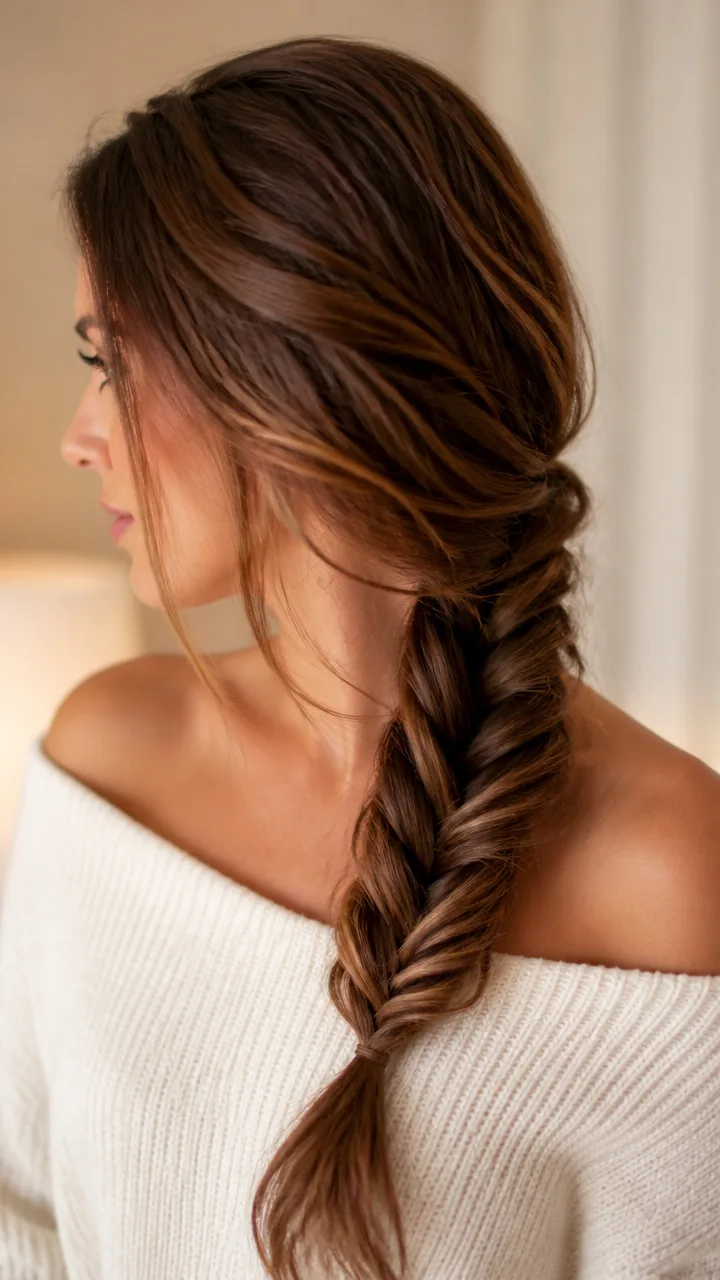
Medium hair is the sweet spot for a fishtail braid: long enough for a full, satisfying plait, light enough to stay put without a fight, and versatile enough for every version in this guide. A shoulder-length fishtail has real presence — the braid is long enough for the herringbone to show properly — but it does not have the weight that pulls a long-hair fishtail down over the course of the day. It is also the easiest length to fishtail on yourself, because you can reach all the way down the braid without your arms aching, and the ends finish neatly at the shoulder. If you are growing your hair out and wondering when you can start wearing a fishtail, shoulder length is the answer.
Hair type: shoulder-length hair, straight, wavy or curly. Difficulty: easy — the easiest length to braid, and the most comfortable to wear all day. Who it suits best: almost everyone, and especially beginners learning the fishtail for the first time. How to do this version: gather the hair low at the nape or over one shoulder, split into two equal sections, and fishtail with small, even pieces to the ends. What to ask a stylist: for a fishtail that shows the herringbone clearly, pancaked gently for fullness if the hair is fine. Quick verdict: the Goldilocks fishtail — not too short, not too heavy, and just right for almost everyone.
21. The Fishtail Braid for Long Hair
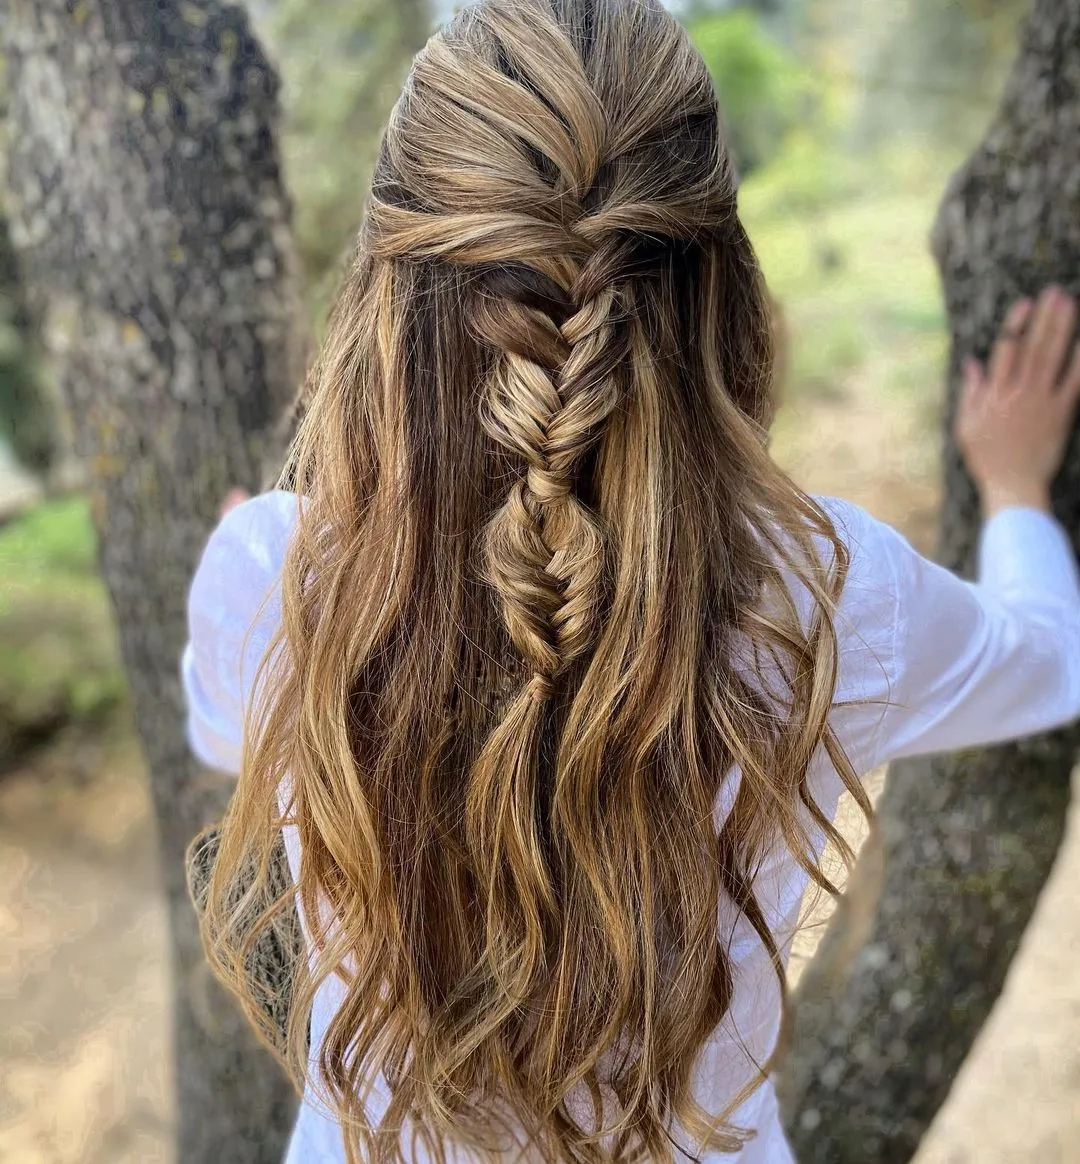
Long hair makes the most dramatic fishtail braid: a long, fine herringbone with real presence, enough length for dozens of crossings, and ends that finish well below the shoulders. A long fishtail is the style people picture when they hear the name — fine, detailed, and unmistakably a fishtail. It is also the version with the most options: a double fishtail, a fishtail crown, a fishtail bun, or a fishtail woven with ribbon or flowers. Long hair gives you the most braid to work with, and the most room to be creative with it.
Hair type: long and very long hair, any texture. Difficulty: easy to medium — the braiding is the same as the classic, but a long fishtail takes longer, and your arms will ache the first few times, so braid over one shoulder where you can see. Who it suits best: women with long hair who want the fullest herringbone. How to do this version: gather the hair low or over one shoulder, split into two sections, and fishtail with small, even pieces, keeping the tension steady all the way down. What to ask a stylist: for a long fishtail with the braid pancaked for fullness, and for the ends to be finished with a wrapped strand. Quick verdict: the full fishtail — long hair was made for this weave, and it shows.
22. The Fishtail Braid for Thick Hair
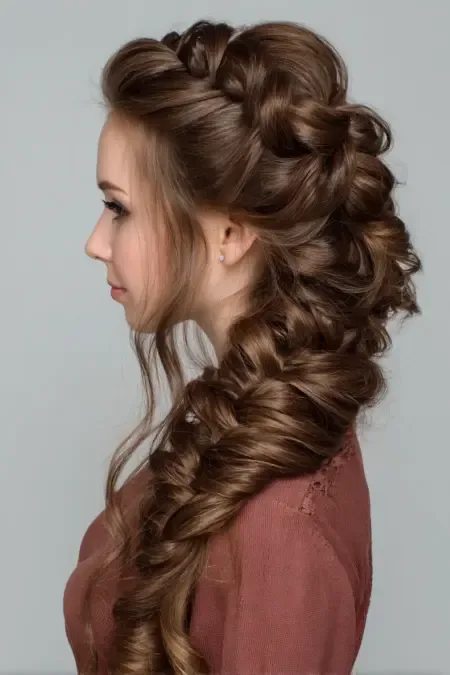
Thick hair makes a magnificent fishtail braid — full, bold, and sculpted — but it also fights back, because the weight of the hair pulls the braid downward all day. The fix is to braid firmly and evenly, keeping the pieces small so the weave grips, and to use a strong elastic at the ends rather than a small clear one. A strong-hold spray, applied section by section as you braid, is far more effective than one heavy coat at the end. And if your hair is very long as well as thick, consider a double fishtail: two thinner braids are easier to manage than one enormous one.
Hair type: thick and very thick hair. Difficulty: medium — the braiding is the same, but the weight means you need firmer tension and a stronger finish. Who it suits best: women with thick hair who want a braid with real presence. How to do this version: gather the hair, split into two sections, and fishtail firmly with small pieces, securing the ends with a strong elastic and wrapping a strand around it. What to ask a stylist: for a fishtail braided firmly all the way down, with a strong elastic and a wrapped finish. Quick verdict: the grand fishtail — big, bold, and worth every crossing.
23. The Fishtail Braid for Fine Hair
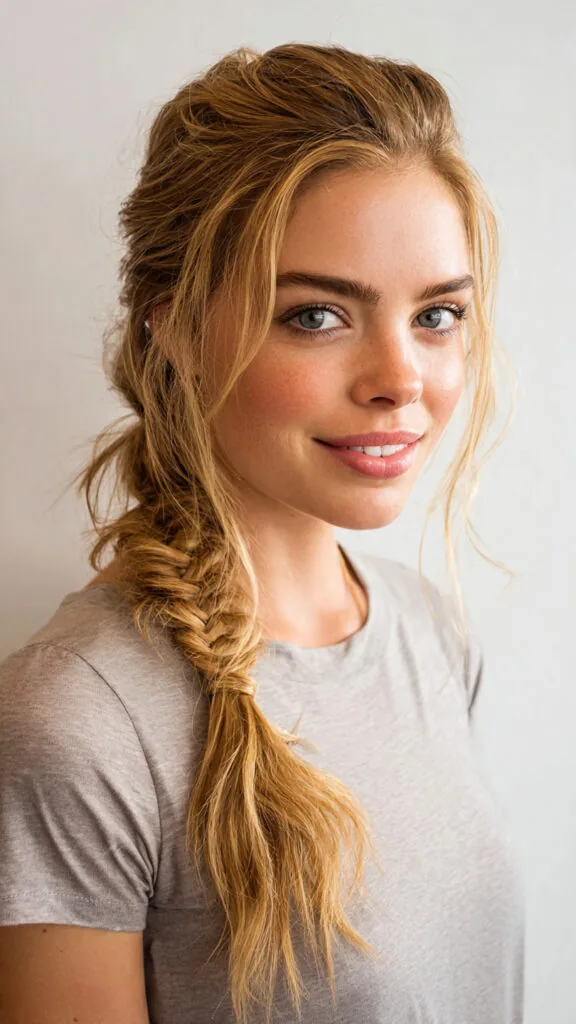
Fine hair is the fishtail braid’s hardest customer, because the weave needs grip and fine hair is naturally slippery — but with the right prep, fine hair can hold a fishtail beautifully. The secret is texture before structure: wash your hair the day before, not the morning of, and work a volumising mousse or a texturising spray through the roots and lengths while the hair is still damp. Dry shampoo at the roots adds even more grip, and a light backcomb at the crown gives the braid something to bite into. Skip the smoothing serum, which makes fine hair even silkier and harder to braid, and use a flexible-hold spray as you build the plait.
Hair type: fine or thin hair. Difficulty: medium — the braiding is the same, but the prep takes longer, and the braid needs more attention to hold. Who it suits best: women with fine hair who want a braid that stays put — and the fishtail is a good choice, because its many small crossings hold each other in place. How to do this version: add texture first, braid firmly with small pieces, pancake the braid gently for fullness, and pin the top of the braid to the head with two crossed pins. What to ask a stylist: for a fishtail with texture, pancaked for fullness, and for a small padding insert at the crown if the braid looks flat. Quick verdict: the delicate fishtail — it takes a little more prep, but fine hair wears a fishtail beautifully once it has grip.
24. The Fishtail Braid for Curly Hair
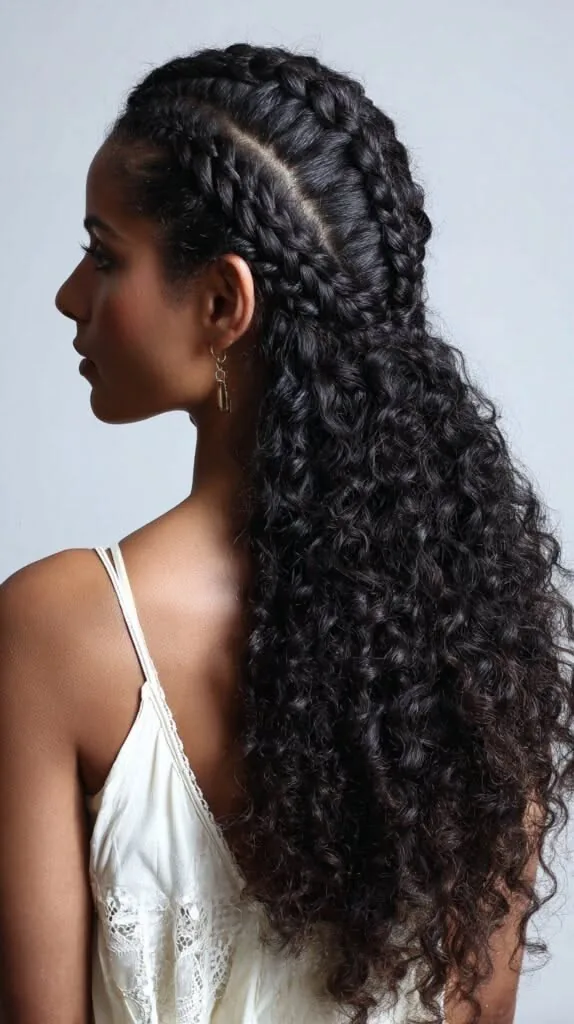
Curly hair makes a wonderful fishtail braid, because the natural volume and texture give the plait a fullness that straight hair has to fake with backcombing. The braid sits on top of the curls like a sculpted cord, the texture hides any unevenness in the braiding, and the finished style has a softness and a presence that is hard to match. The key is to work with the curls, not against them: braid on stretched or lightly blown-out hair if you want a neat, defined fishtail, or braid on natural curls for a softer, more bohemian braid. Either way, use a little leave-in conditioner or a curl cream first, so the hair is smooth enough to braid without snagging.
Hair type: curly, coily or wavy hair. Difficulty: easy — the curls hide uneven crossings, so this is the most forgiving fishtail for a beginner. Who it suits best: women with curly hair who want a braid with real character. How to do this version: section carefully before you start, keep the sections even, and braid with a little less tension than you would on straight hair — tight braiding on curly hair can pull and cause breakage. What to ask a stylist: for a fishtail braided on stretched hair if you want definition, or on natural curls if you want softness. Quick verdict: the most characterful fishtail — full, textured, and unmistakably yours.
25. The Fishtail Braid for Straight Hair
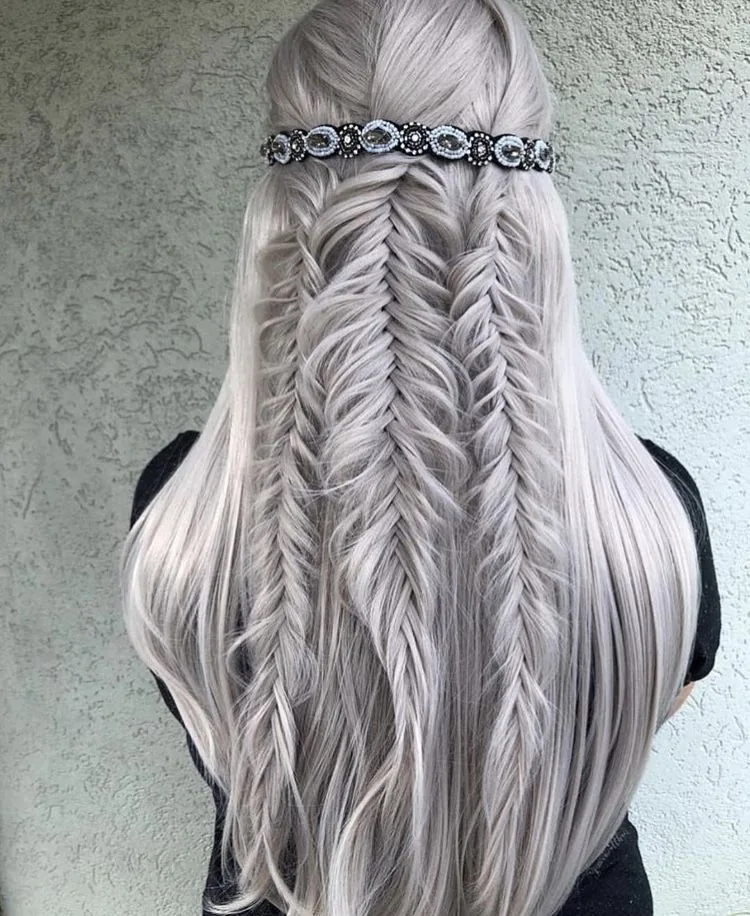
Straight hair shows the fishtail’s herringbone pattern most clearly of all, which is why the sleek fishtail looks so striking on it: every crossing is visible, the V-shape is crisp, and the braid looks like a woven cord. The trade-off is that straight hair also shows every uneven crossing, so a fishtail on straight hair rewards patience — take your time, keep the pieces even, and keep the tension steady. A little texturising spray before you start gives straight hair the grip it needs, and a light mist of hairspray at the end keeps the flyaways down without making the braid crunchy.
Hair type: straight and very straight hair. Difficulty: easy to medium — the braiding is the same, but straight hair demands even pieces, because nothing hides a mistake. Who it suits best: women with straight hair who want the herringbone to show at its best, and anyone who loves a neat, polished braid. How to do this version: brush the hair smooth, add a little texture spray, gather the hair low or over one shoulder, and fishtail with small, even pieces. What to ask a stylist: for a neat, even fishtail with the herringbone crisp and the finish glossy. Quick verdict: the crispest fishtail — straight hair was made to show off this weave.
26. The Fishtail Braid with Face-Framing Pieces
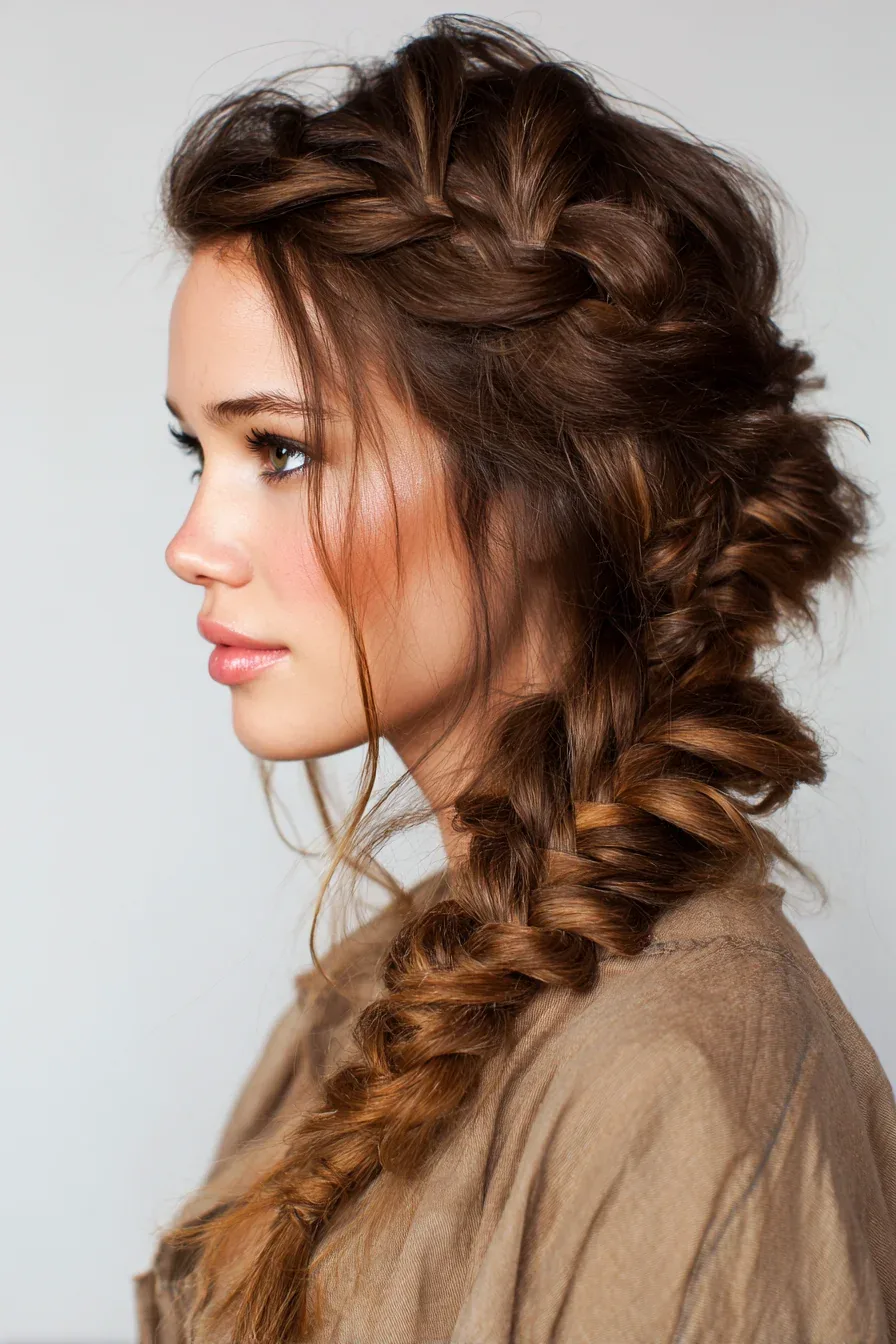
A fishtail braid with face-framing pieces is the most flattering fishtail for most faces, because the pieces do the softening that a tight braid cannot. Two soft strands are left out at the front before the braid is woven — one on each side, or a longer sweep on one side — and they are curled lightly so they fall along the cheekbones and jawline. The braid itself sits low and a little loose, and the overall effect is romantic rather than severe: the plait is there, but the face is framed, not exposed. This is the fishtail for women who have always thought a braid makes them look harsh, because the face-framing pieces change the whole feeling of the style.
Difficulty: easy — the pieces are left out before you braid, and curled afterwards, which is the only extra step. Who it suits best: round, square and heart-shaped faces, weddings, and photographs. How to do this version: leave the front pieces out before you braid, weave the fishtail loosely, then curl the loose pieces with a large-barrel iron and set them with a light spray. What to ask a stylist: for the pieces to start at the temple and fall to the cheekbone, not shorter. Quick verdict: if you only learn one fishtail, make it this one — the face-framing pieces make it wearable for everyone.
27. The Fishtail Braid with a Deep Side Part
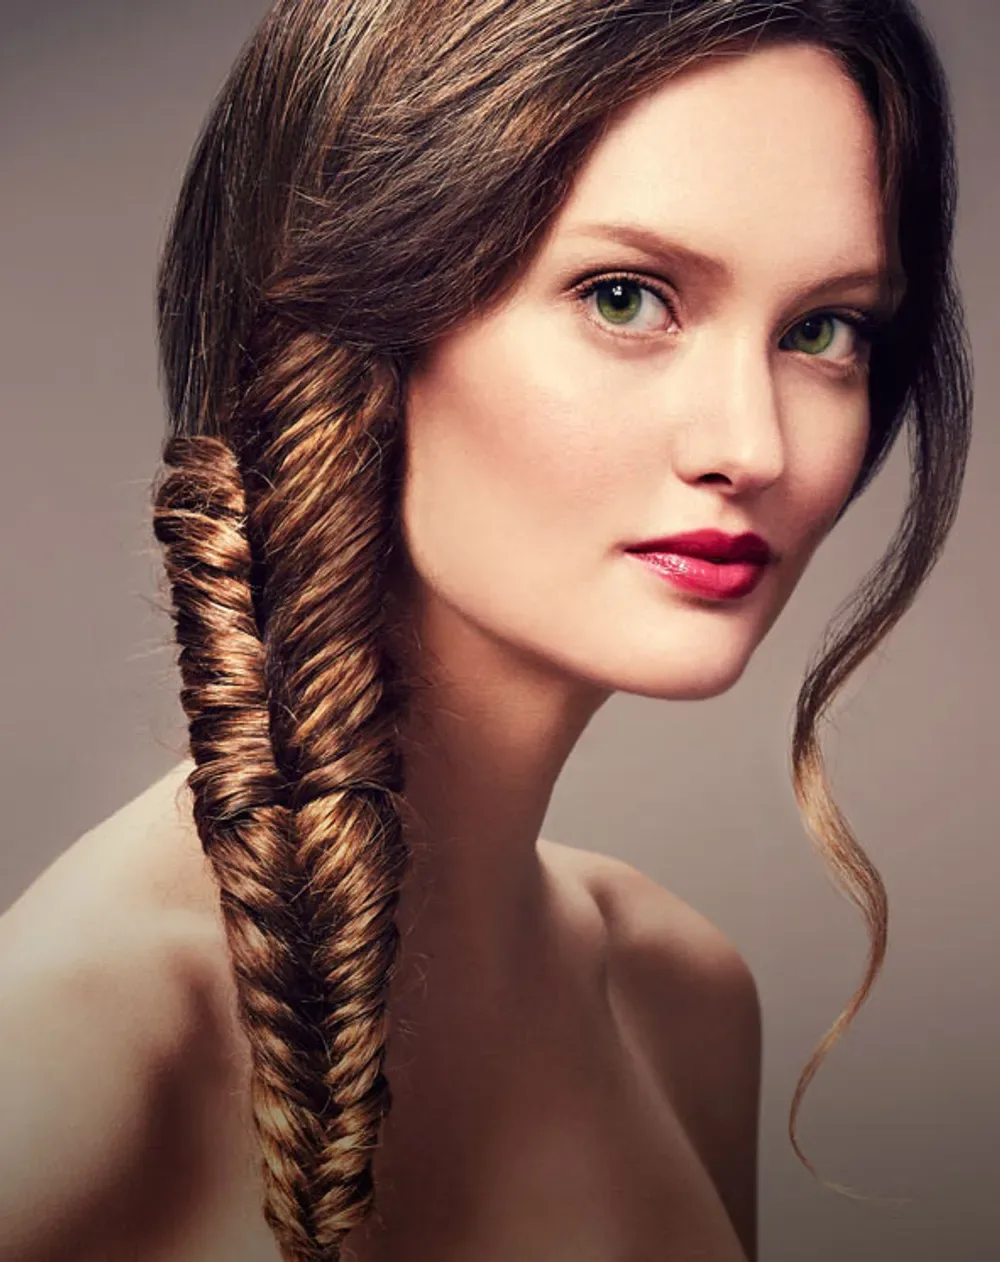
A fishtail braid with a deep side part is the classic braid with a dash of old-Hollywood drama: the hair is parted deeply on one side, swept across the forehead in a heavy, glossy wave, and then gathered into a fishtail over the opposite shoulder. The deep part changes everything — it creates a sweeping line across the face, it adds volume on one side, and it gives the braid a glamorous, film-star quality that a centre part never quite achieves. This is the fishtail for a long gown, a dramatic neckline, or any evening when you want to look like you stepped out of a different era. It also flatters round and square faces beautifully, because the diagonal sweep breaks up the symmetry of the face.
Difficulty: medium — the fishtail is the same, but the swept section needs to be set with a clip while it cools or it will fall flat. Who it suits best: formal evenings, and women with round or square faces. How to do this version: part the hair deeply on one side while it is damp, sweep the front section across, gather the hair over the opposite shoulder, and fishtail downward, keeping the braid forward so it shows. What to ask a stylist: for a deep side part swept into a side fishtail, with the sweep set so it holds all evening. Quick verdict: the most glamorous fishtail in this guide — a deep part, a sweeping fringe, and a braid that turns heads.
28. The Fishtail Braid Bun
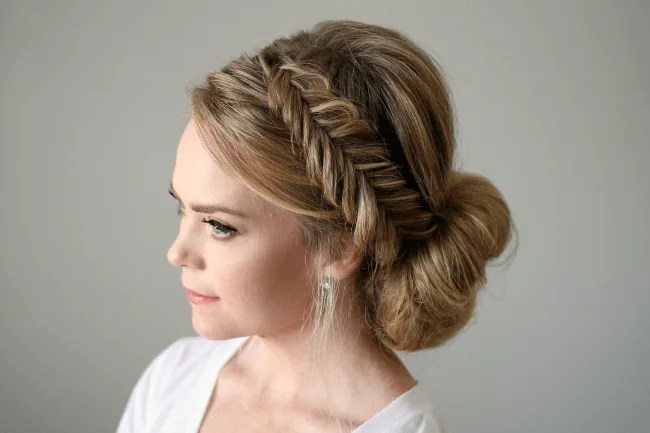
The fishtail braid bun is the fishtail turned into an updo: the hair is fishtailed first, then the braid is coiled into a bun at the nape or the crown, so the bun itself has the fine herringbone texture instead of a smooth surface. It is the most elegant fishtail in this guide after the bridal braid, and it is the one to choose when you want your hair completely up but a plain bun feels too plain. The fishtail bun shows off the neck and shoulders, pairs beautifully with an open back or a high neckline, and holds through a long evening without a single strand escaping — because the braid locks the hair in place before the bun is even formed.
Difficulty: medium — the fishtail is the same as the classic, and the coiling is simple, but the bun needs enough pins to hold the braid’s weight. Who it suits best: medium to long hair, and formal occasions, weddings, and work. How to do this version: fishtail the hair low at the nape, secure the ends, then coil the braid into a bun and pin it in place with U-shaped pins, tucking the ends underneath. What to ask a stylist: for a fishtail bun pinned securely at the nape, with the herringbone showing on the outside of the bun. Quick verdict: the updo fishtail — a braid and a bun in one style, and the most polished way to wear a fishtail up.
29. The Fishtail Braid for Work
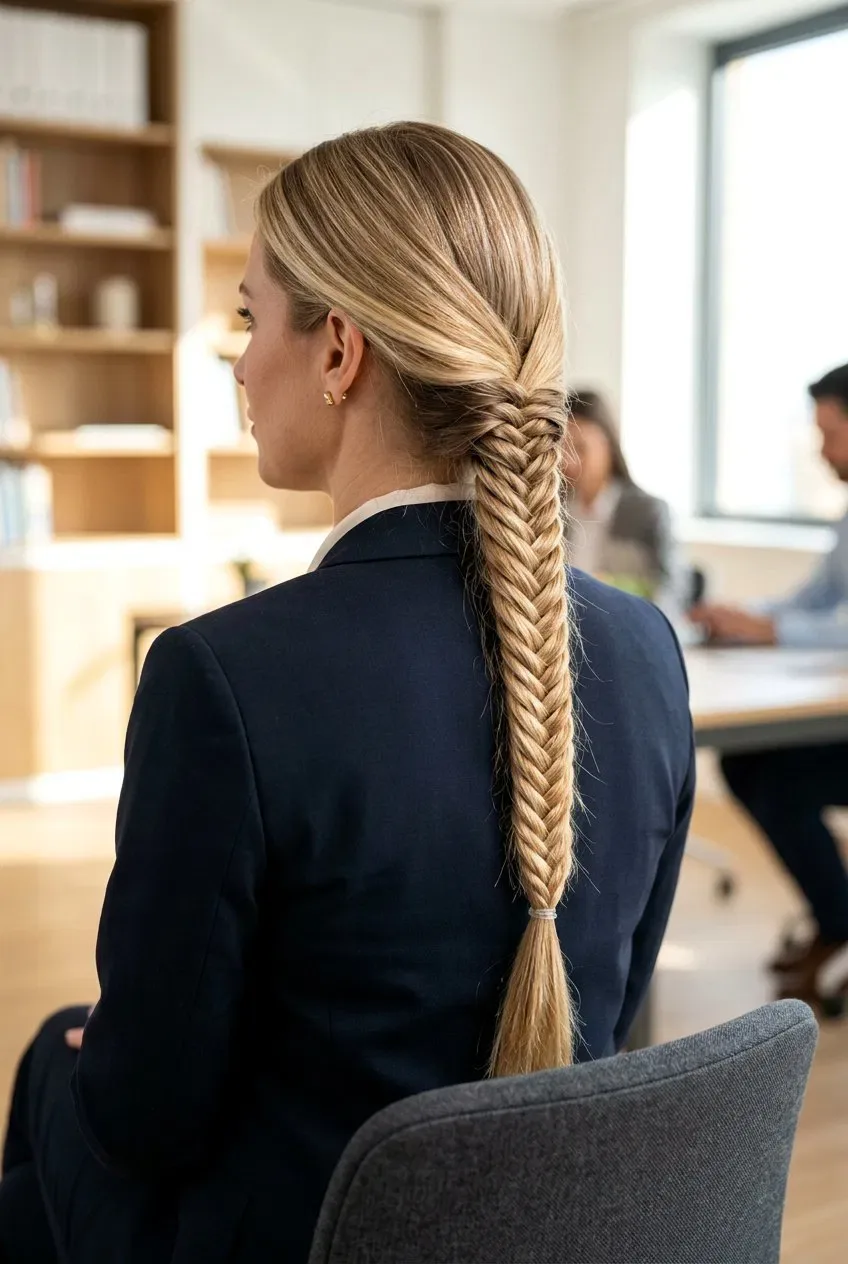
The fishtail braid is the ultimate work hairstyle, because it is the only braid that is simultaneously polished, fast, comfortable and completely out of your way. A low, neat fishtail takes ten minutes once you know the weave, it keeps the hair off your collar and out of your face through a long day of meetings, and it reads as deliberate and professional in a way a ponytail never quite does. For a normal office day, a soft, low fishtail with a few loose pieces is perfect; for a presentation, a job interview or a client dinner, a sleeker, tighter fishtail with a smooth finish adds authority. The same braid that gets you through a Tuesday can be dressed up for a Friday evening with a single pearl pin.
Occasion: work, interviews, and any day you need a polished braid that lasts. Difficulty: easy — a low fishtail is one of the simplest versions to do yourself. Who it suits best: anyone who works long days and wants a braid that holds. How to do this version: braid a neat, low fishtail, keep the finish smooth rather than messy, and keep the accessories minimal — one plain pin, not a flower crown. What to ask a stylist: for a low, secure fishtail that sits comfortably for eight hours. Quick verdict: the professional fishtail — polished, practical, and quietly impressive, from the first meeting to the last.
30. The Fishtail Braid for a Date Night
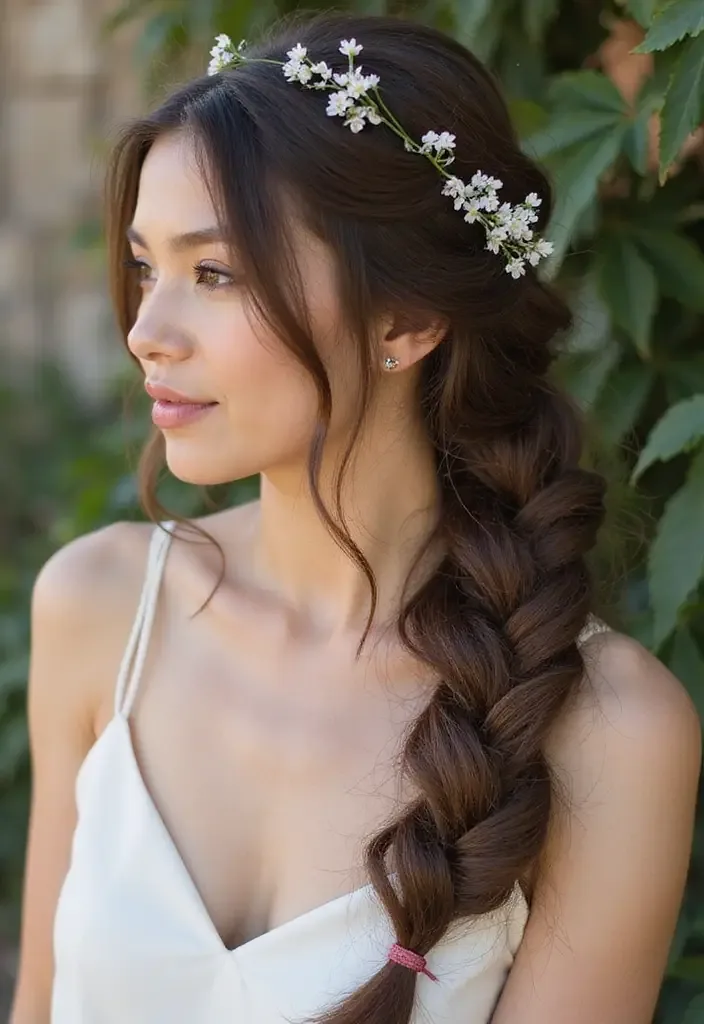
The fishtail braid for a date night is the romantic fishtail at its best: a loose side fishtail, worn over one shoulder, with soft waves, a few pieces left out at the face, and the braid pancaked gently so it looks full and touchable. It is the fishtail that says you made an effort without looking like you spent an hour on it — and that is exactly the point. The side position means the braid is visible across the table, the loose pieces soften the face, and the whole style moves when you do. It pairs beautifully with a simple dress and a little jewellery, and it is the fishtail most likely to earn a compliment before the starters arrive.
Occasion: date nights, anniversaries, and romantic evenings. Difficulty: easy — a loose side fishtail is the kindest version to do yourself. Who it suits best: anyone who wants to look romantic without looking formal. How to do this version: add loose waves first, sweep the hair over one shoulder, braid a loose fishtail, pull it apart gently for fullness, and leave two soft pieces out at the face. What to ask a stylist: for a soft, loose side fishtail with waves, and for the braid to sit forward on the shoulder. Quick verdict: the romantic fishtail — soft, flattering, and the easiest way to look like you tried.
31. The Fishtail Braid for a Festival
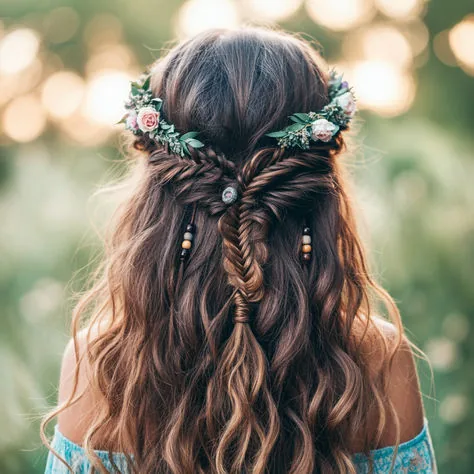
The festival fishtail braid is the fishtail at its most fun: a loose, textured braid, often a double fishtail, with a little glitter, a few small braids woven in, or a flower crown sitting on top of it. The hair is given texture first — salt spray, a little backcombing, or natural second-day texture — and the fishtail is woven loosely, pulled apart for fullness, and finished with whatever the day calls for: tiny flowers, metallic pins, or a ribbon in a bright colour. It is the fishtail for a music festival, a summer party, or a day when the outfit is bold and the hair should keep up. It is also the most forgiving fishtail of all, because festival hair is supposed to look a little wild.
Occasion: music festivals, summer parties, and holidays. Difficulty: easy — the looseness forgives everything, and the texture hides uneven crossings. Who it suits best: anyone who wants a fishtail that survives a long day in the sun. How to do this version: add texture first, braid a loose fishtail or a double fishtail, pancake it for fullness, and add one festival detail — flowers or glitter or ribbon, not all three. What to ask a stylist: for a loose, textured fishtail that will hold through a long day outdoors. Quick verdict: the party fishtail — loose, joyful, and made for long days in the sun.
32. The Fishtail Braid for the Gym
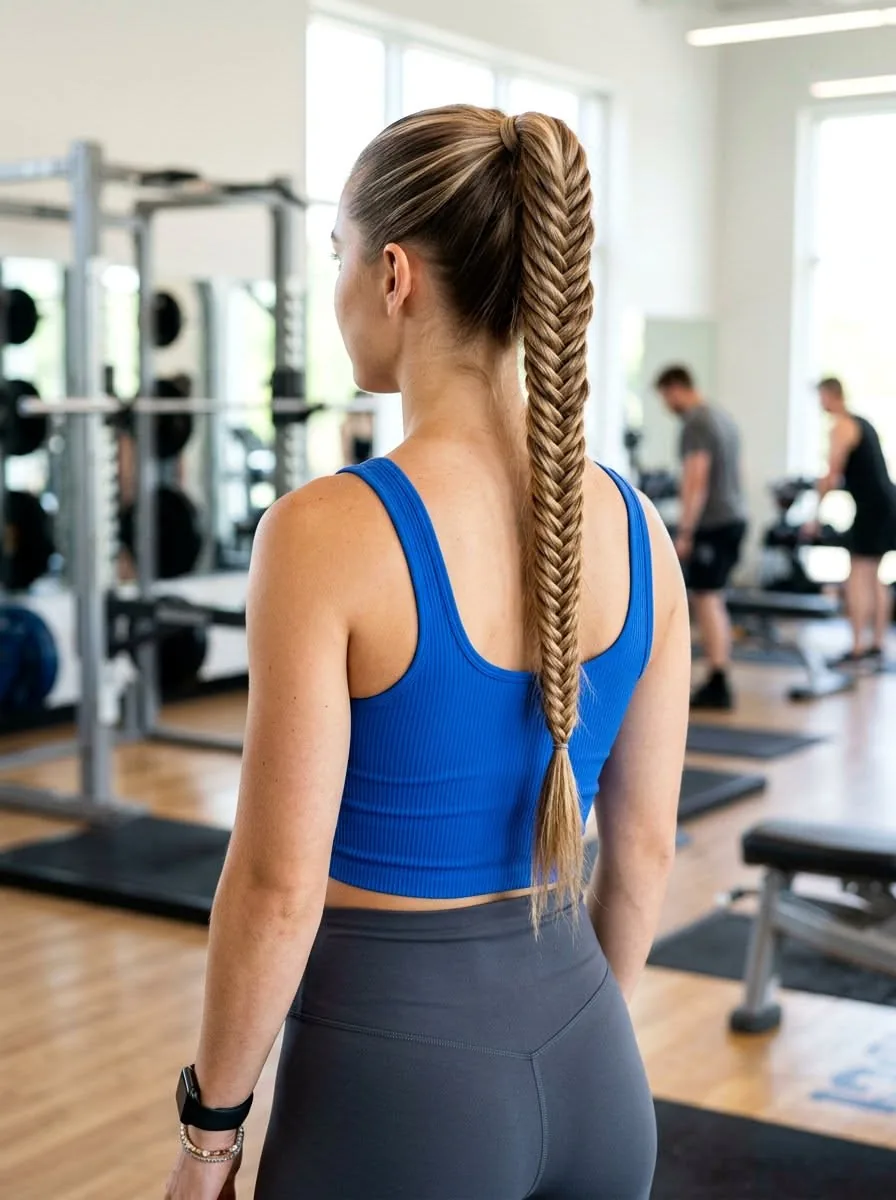
The fishtail braid for the gym is the fishtail at its most practical: a tight, secure braid that keeps every strand out of your face, survives a workout, and still looks like a hairstyle when you leave. The fishtail is actually better than a three-strand braid for the gym, because its many small crossings grip each other and loosen less with movement — a tight fishtail stays put through a run, a class, or a weights session in a way a loose plait never does. Braid it tightly, secure it with a strong elastic, and pin the top of the braid to the head if you are wearing it up. The result is a braid that works as hard as you do.
Occasion: the gym, running, yoga, and any workout. Difficulty: easy — a tight fishtail is the same braid as the classic, just firmer. Who it suits best: anyone who exercises with long hair and is tired of braids falling apart mid-workout. How to do this version: gather the hair high or low, braid tightly with small pieces, secure with a strong elastic, and finish with a light mist of hairspray. What to ask a stylist: nothing — this is the do-it-yourself fishtail, and it is supposed to be practical, not pretty. Quick verdict: the hardworking fishtail — tight, secure, and the braid that survives the workout.
33. The Fishtail Braid for a Beach Day
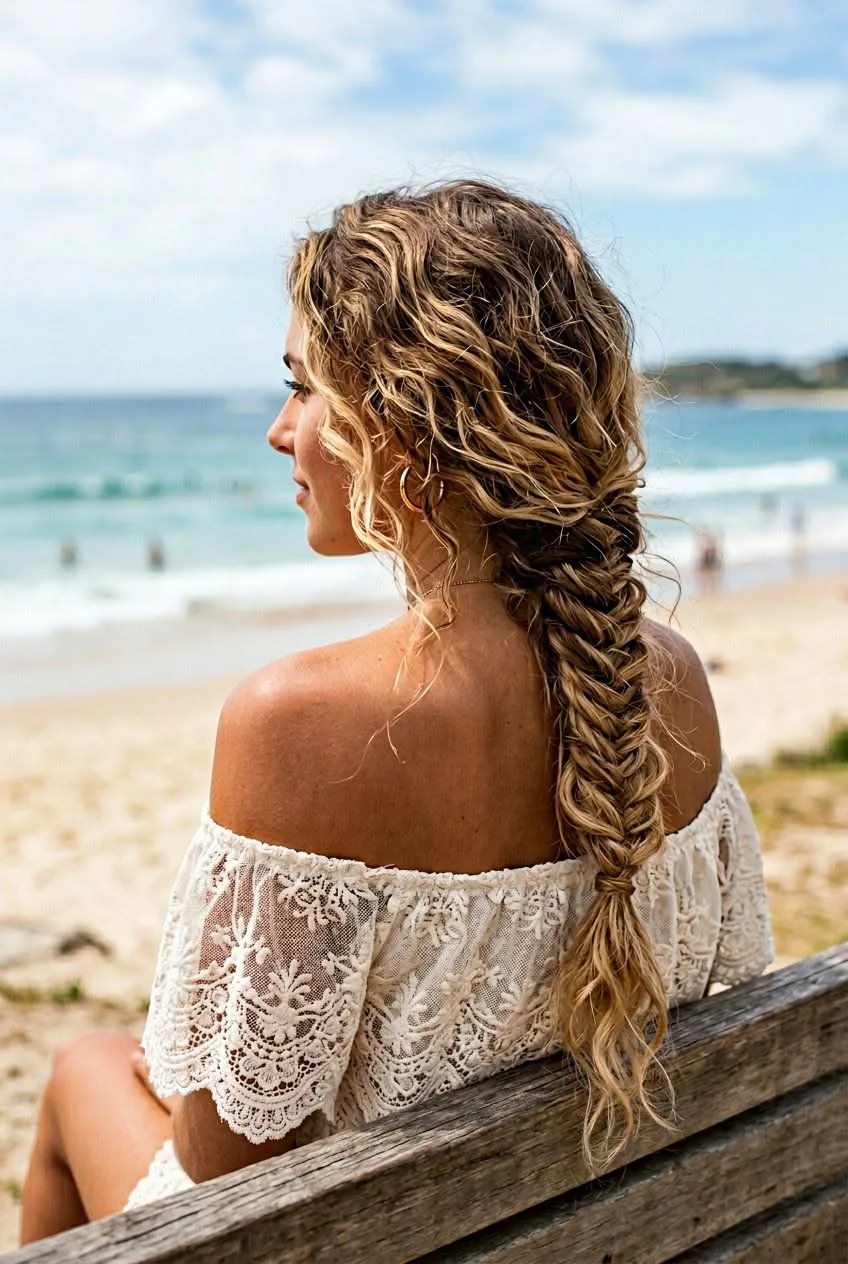
The fishtail braid for a beach day is the fishtail at its most relaxed: a loose side fishtail, woven over one shoulder, with salt-spray texture, a few pieces escaping in the sea breeze, and no attempt at polish at all. It is the fishtail for a day when the hair will get wet, sandy and windswept, and the braid is there to keep it out of your face, not to impress anyone. The salt and the sun actually help — beach texture gives the braid grip, and a fishtail that loosens a little in the sea air just looks more bohemian. It is the braid you wear to the beach, and the braid you are still wearing, a little messier, at dinner afterwards.
Occasion: beach days, holidays, and summer weekends. Difficulty: easy — the loosest, most forgiving fishtail in this guide. Who it suits best: anyone on holiday, and wavy or textured hair, where the beach texture does half the work. How to do this version: work salt spray through the hair, sweep it over one shoulder, and braid a loose fishtail with slightly thicker pieces, leaving a few strands out at the face. What to ask a stylist: nothing — this is the holiday fishtail, and it is supposed to look a little undone. Quick verdict: the holiday fishtail — loose, salty, and the braid that gets better as the day goes on.
34. The Fishtail Braid for a Lazy Sunday
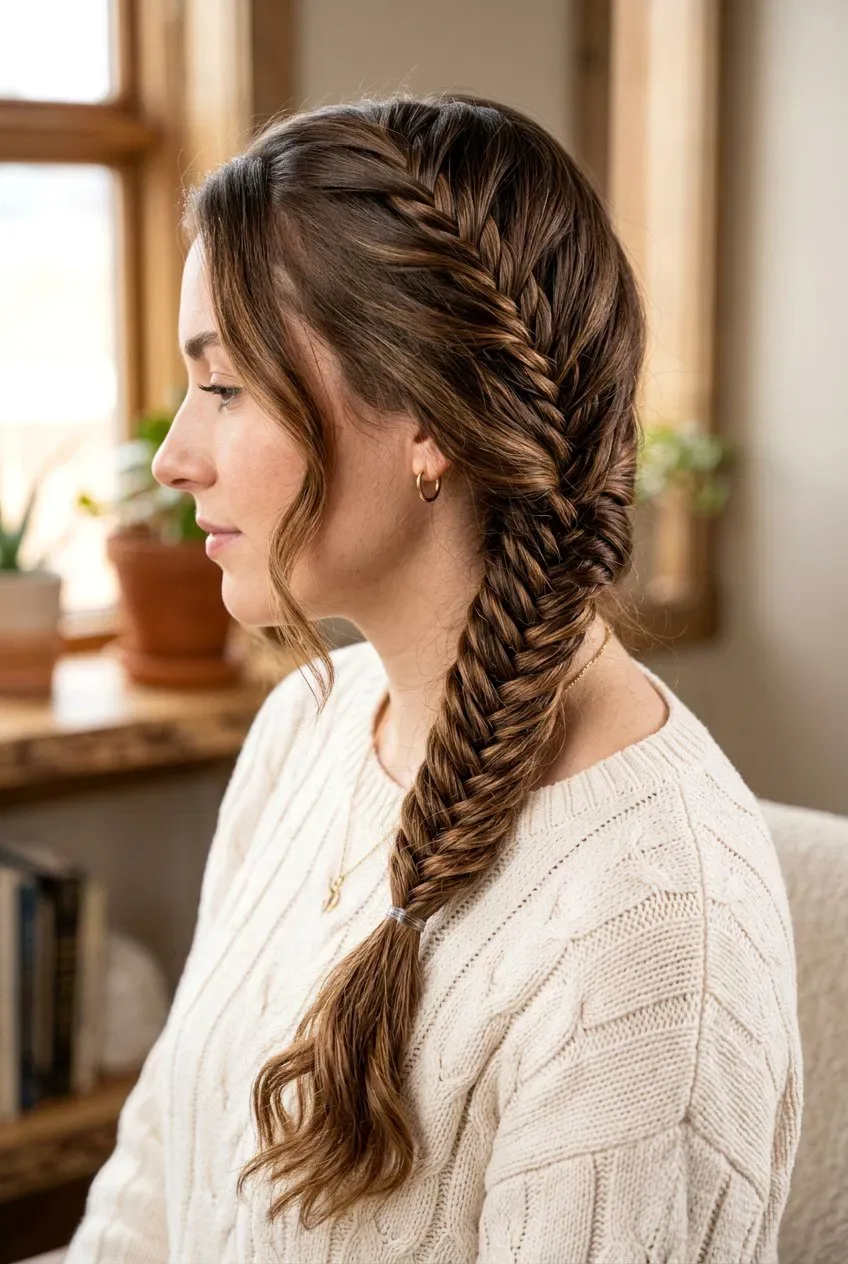
The fishtail braid for a lazy Sunday is the five-minute version of the style, and it is the one that proves a fishtail is not a special-occasion braid at all — it is an everyday one, once you know the weave. The hair is not washed, not blow-dried, not curled: it is day-old hair with a little dry shampoo, fishtailed loosely over one shoulder, secured where it needs securing, and left a little messy on purpose. It keeps the hair out of your face while you cook, read, walk the dog, or do absolutely nothing, and it looks lovely doing it. It is the fishtail for a day with no plans, and it is the version you will wear most of all.
Occasion: lazy Sundays, and any day when effort is in short supply. Difficulty: easy — the easiest fishtail in this guide, and the best one to practise on. Who it suits best: everyone, on a day when effort is in short supply. How to do this version: braid loosely over one shoulder, secure it, pull out a piece or two, and go — no tools beyond an elastic and a mirror. What to ask a stylist: nothing — this is the do-it-yourself fishtail, and it is supposed to look a little imperfect. Quick verdict: the everyday fishtail — five minutes, no tools beyond an elastic, and a style that works with whatever your hair is doing that day.
35. The Fishtail Braid with a Scarf
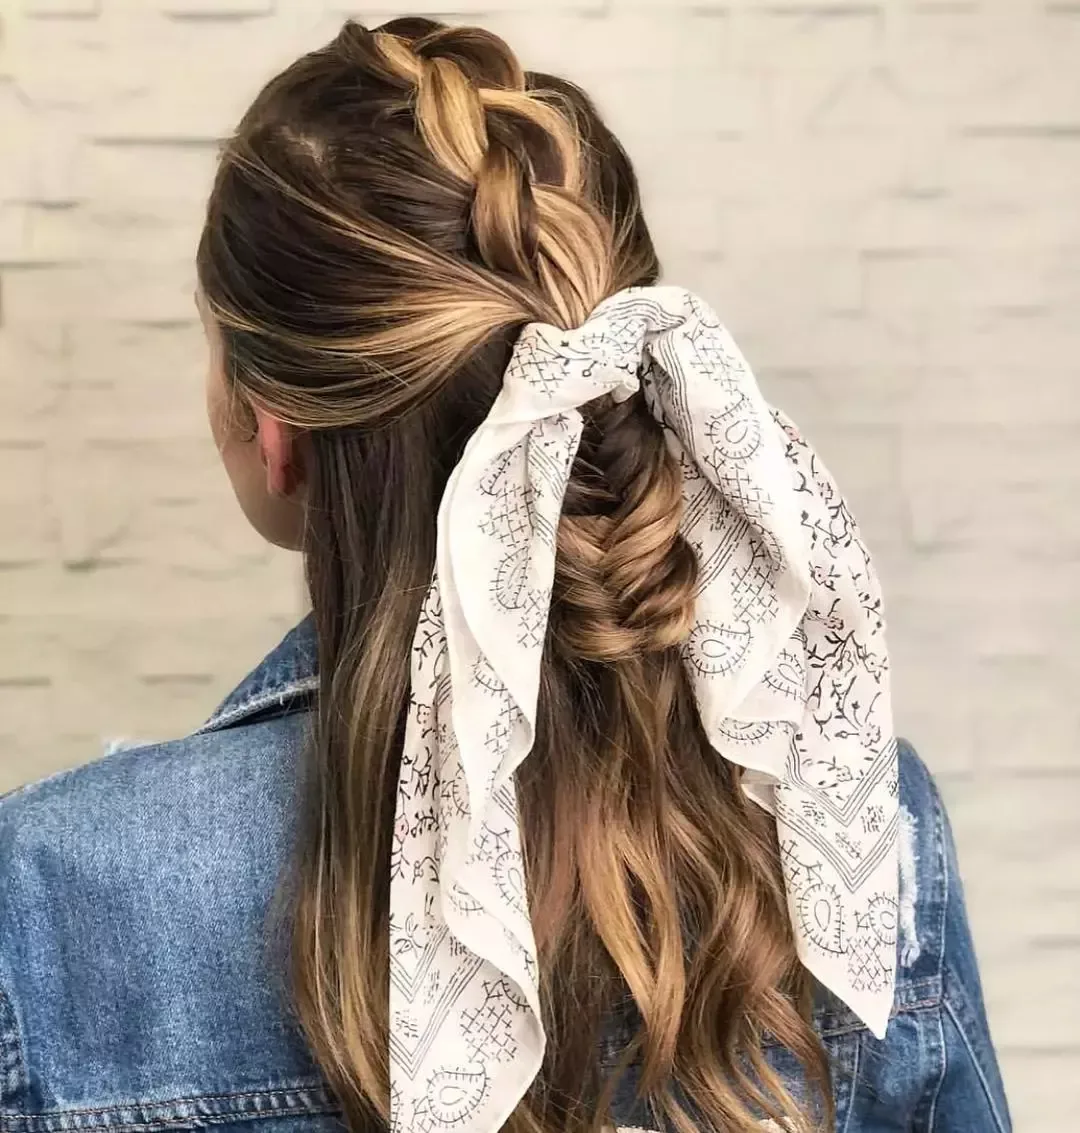
A fishtail braid with a scarf is the most stylish version of the style: a silk scarf woven through the braid as you go, or tied in a small knot at the end, so the fishtail has a ribbon of colour running through the herringbone. The scarf softens the whole look, adds a touch of colour, and gives the braid a chic, almost Parisian feel — perfect for a holiday, a city break, or any day when the outfit is simple and the hair should do the talking. A thin silk scarf in a soft print works best, because it reads as an accent, not a costume, and a lightweight scarf will not drag the braid down the way a heavy one would.
Difficulty: easy to medium — the scarf is woven in as you braid, and it actually makes the fishtail easier to follow, because the scarf shows you where the crossings are. Who it suits best: holidays, city breaks, and anyone who loves a chic detail. How to do this version: tie the scarf to one section before you start, and let it travel with that section as you cross pieces over, keeping it loose so it shows between the strands; or braid first and thread the scarf through afterwards. What to ask a stylist: for the scarf to be woven in, not just tied on, so it stays put all day. Quick verdict: the chicest fishtail — one scarf, woven through a herringbone, and a style that feels like a holiday.
36. The Fishtail Braid for a Formal Evening
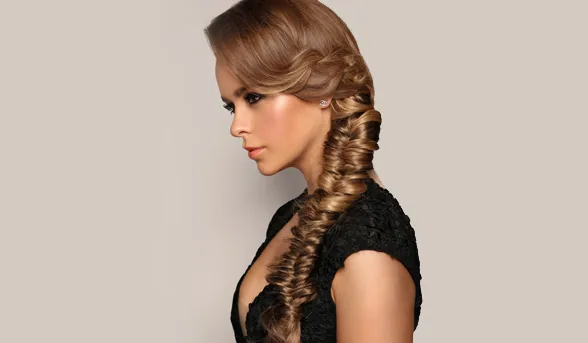
The fishtail braid for a formal evening is the final fishtail in this guide, and the most glamorous: a sleek, polished fishtail, worn low and neat, with a glossy finish, the elastic wrapped in a strand of hair, and a single pearl pin or a slim metallic cuff where the braid begins. The herringbone is neat and even, the surface is smooth, and the silhouette is clean — the fishtail at its most dressed-up, and the one to choose when the dress is long, the neckline is dramatic, and the photographs will be kept. It is the fishtail for a gala, a black-tie dinner, or any evening when the hair should be as considered as the outfit.
Occasion: galas, black-tie dinners, and formal evenings. Difficulty: medium — the braiding is the same as the classic, but the polish demands patience: every piece even, every strand smooth, and the tension constant. Who it suits best: medium to long hair, and anyone who wants a braid that reads as formal. How to do this version: blow-dry smooth, apply serum, braid tightly and evenly, smooth the surface with a fine-tooth comb, set with a strong-hold spray, and finish with one elegant pin. What to ask a stylist: for a sleek, even fishtail with a glossy finish, the elastic hidden, and one statement pin. Quick verdict: the fishtail that ends the guide — sleek, glamorous, and the braid that proves a fishtail belongs at a gala.
What is a fishtail braid?
A fishtail braid is a plait made from just two sections of hair. You split the hair in half, then take a thin piece from the outside of one section and cross it to the inside of the other, repeating on both sides. The result is a fine, V-shaped herringbone pattern that looks like the skeleton of a fish tail. It looks intricate, but it is only one repeating move.
How do you do a fishtail braid step by step?
To do a fishtail braid, start with brushed, day-old hair and a little texturising spray, gather the hair where you want the braid to sit, and split it into two equal sections. Take a thin piece from the outside of the right section and cross it to the left, then take a thin piece from the outside of the left section and cross it to the right. Repeat until you run out of hair, secure with a small clear elastic, and gently pull the edges apart if you want the braid fuller.
How long does a fishtail braid take?
A fishtail braid takes 5 to 10 minutes once you know the technique, 15 minutes if you are still learning, and 40 to 60 minutes with a stylist for a bridal or Dutch fishtail with accessories. A loose, messy fishtail is the fastest version, while a Dutch fishtail or a fishtail crown takes the longest.
Can you do a fishtail braid with short hair?
Yes, you can do a fishtail braid with short hair, as long as it reaches at least chin length — a bob or a lob works well. Braid with very thin pieces so the herringbone has enough crossings to show, sweep the hair over one shoulder for a side fishtail, and use texturising spray and small clear elastics for grip. A half-up fishtail, braiding only the top section, is an even easier option for short hair.
Is a fishtail braid hard to do?
No, a fishtail braid is not hard — it only looks hard. It uses one repeating move with two strands of hair, and most women get the rhythm within a few minutes of practice. Start with a side fishtail, where you can see your hands, use thin pieces, and keep the tension even. The messy fishtail is the most forgiving version to learn first.
How do I keep my fishtail braid from falling out?
To keep a fishtail braid from falling out, start with day-old hair, add texture with dry shampoo or texturising spray, braid firmly with small pieces, and secure the ends with a small elastic. Pin the top of the braid to the head with two crossed bobby pins if you are wearing it up, and finish with hairspray in light layers. Small crossings grip better than big ones, so thinner pieces hold longer.
Is a fishtail braid good for a wedding?
Yes, a fishtail braid is one of the best wedding hairstyles, because the fine herringbone looks like lace in photographs, it holds through a ceremony, a dinner and a dance floor, and it flatters almost every dress. Brides usually wear a long, full fishtail or a fishtail crown with a veil, bridesmaids wear a softer side fishtail, and guests wear a relaxed fishtail with a single pretty pin.
What is the difference between a fishtail braid and a French braid?
A French braid is a three-strand braid woven close to the scalp, adding hair as you go, while a fishtail braid is a two-strand braid with a fine herringbone pattern. A French fishtail combines the two: it is a fishtail weave worked with the French technique, adding hair as you go, so the braid lies flat against the head. The fishtail looks finer and more detailed; the French braid looks wider and rounder.
Can I do a fishtail braid on myself?
Yes, you can do a fishtail braid on yourself, and it is one of the easiest braids to learn alone — start with a side fishtail, where you can see your hands, and use day-old hair with texturising spray for grip. Most women get it on the third or fourth try. A Dutch fishtail or a fishtail crown is harder to do on yourself, and those are the versions to book a stylist for.
How do you take a fishtail braid down?
To take a fishtail braid down, remove the elastic and gently pull the braid apart from the bottom up, working the crossings loose with your fingers rather than pulling the hair apart. The hair will have soft, natural waves from being braided — run your fingers through it gently, add a little dry shampoo at the roots if needed, and wear the waves down or gather them into a loose braid again.
Conclusion
The fishtail braid is not the hardest braid — it is the most rewarding one. Behind the fine herringbone is a single repeating move, two strands of hair, and a handful of small crossings, and everything else in this guide is a variation on that move: sleek or messy, side or crown, bridal or everyday, for short hair or long, for curls or fine hair, for a wedding or a lazy Sunday. The fishtail that suits you is the one that fits your hair, your day, and the way you want to feel — and the only way to find it is to braid the weave, wear it for a day, and see how it holds.
Start with the side fishtail, on day-old hair, with texture spray and a small elastic. Wear it to work, to a wedding, or nowhere at all — and when you take it down at the end of the day, enjoy the second gift the braid gives you: soft, natural waves, ready for tomorrow. The fishtail braid has survived every trend for a reason. It is intricate, it is practical, and once your hands learn the rhythm, it is yours.