Mat to Mirror: 36 Pilates Class Hairstyles That Hold Through Every Stretch and Flow
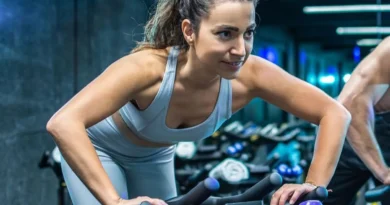
Pilates asks a lot of your hair. You roll up and down, lie flat on your back, flip onto your stomach, hook your feet into straps and slide along a reformer — and your hairstyle has to survive all of it without pulling, slipping or digging into the back of your head. That is why hairstyles for a pilates class deserve more thought than a quick ponytail thrown up in the car park. The right style stays comfortable through fifty minutes of movement and still looks good when you walk out of the studio.
Think about what actually happens on the mat. A high bun presses into your skull every time you lie down for a roll-up. A loose ponytail swings across your face during a teaser. A metal clip digs in during a chest lift. A style that looks perfect standing in front of the mirror can become a distraction within the first ten minutes of class — and once you are thinking about your hair, you are not thinking about your breath, your alignment or your core.
This guide starts with eight short guides on the practical side: grip that survives the reformer, sweat-proofing, the difference between mat hair and reformer hair, low buns versus ponytails, and how to look after short and long hair in regular classes. Then come 36 hairstyles for a pilates class — low buns, braids, claw-clip twists, headbands and sweat-proof updos — each with how long it takes, what it costs, how to keep it in place and who should skip it.
Pick one or two styles that suit your hair length and your class type, practise them once at home, and keep a small kit in your gym bag. Your hair should be the last thing on your mind in class — and the first compliment you get afterwards.
Grip and Hold That Survives the Reformer
The reformer is where most hairstyles fail. You slide, you roll, you change direction, and every movement tugs at the base of your style. The secret is not more hairspray — it is anchoring in layers. Start with a snag-free elastic at the base, add two bobby pins crossed in an X at the anchor point, and finish with a second elastic or a small claw clip as a backup. If one layer loosens, the others hold.
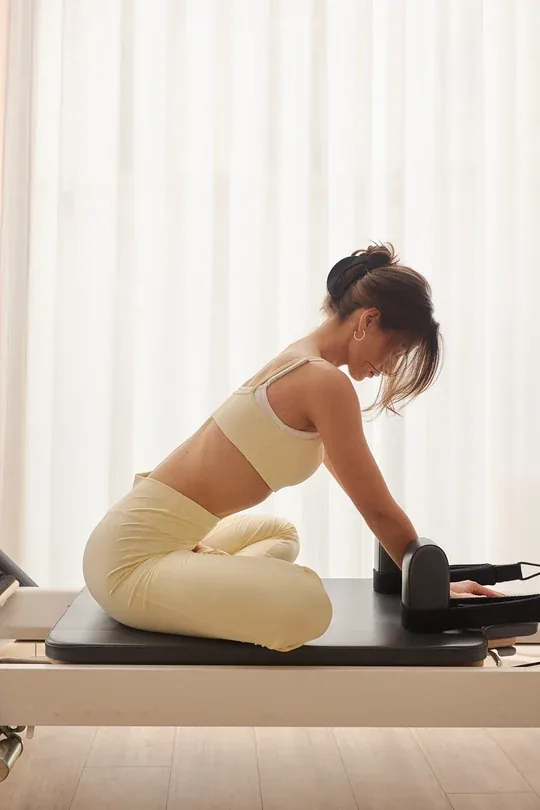
Choose your tools carefully. Fabric-covered elastics grip without snapping hair, and spiral telephone-cord ties hold thick hair without leaving a dent. Avoid metal clips and heavy accessories on the back of your head — they press into the mat and into your skull during supine work, and they can scratch a reformer carriage. Test your style by lying down and rolling your head side to side before you leave home; if it hurts on your bedroom floor, it will hurt in class.
Quick verdict: a style anchored in three places — elastic, pins, and a backup — survives a full reformer session. A style held by one elastic alone rarely makes it past the warm-up.
Sweat-Proofing Your Hair Before Class
Pilates is gentler than a spin class, but you will still sweat — especially in a heated studio or a fast-paced reformer session. Sweat-proofing starts before you tie your hair up, not after. A light dusting of dry shampoo at the roots before class absorbs moisture as it appears, and it gives fine hair extra grip so elastics and pins hold better through the whole session.
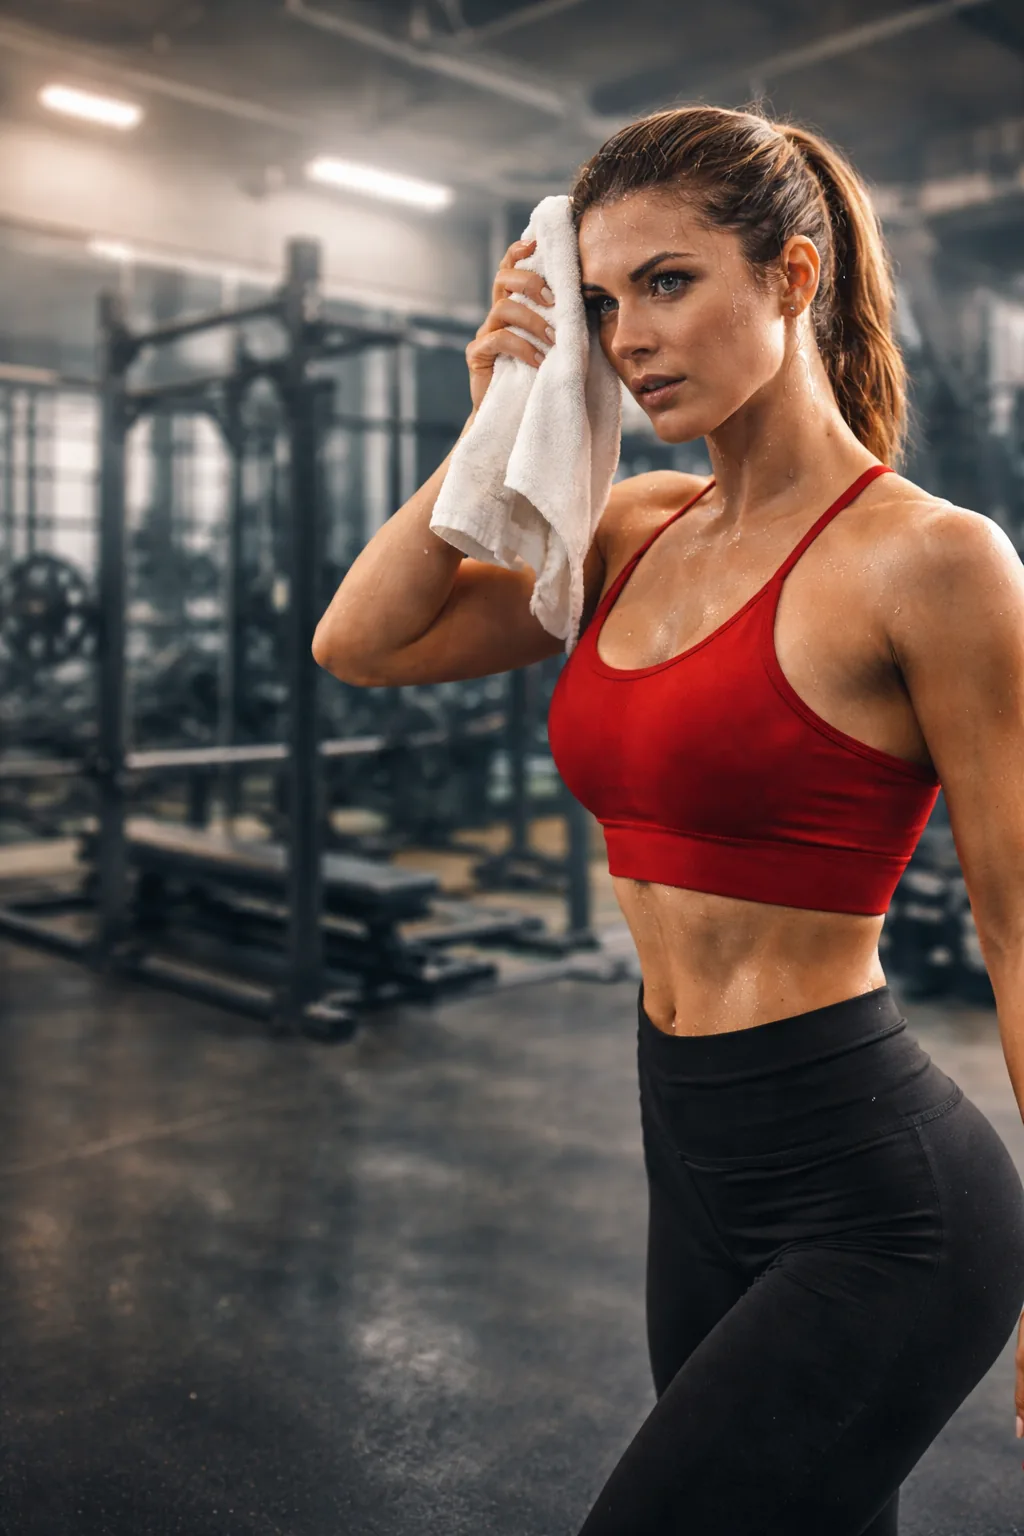
Keep products light. Heavy oils and thick creams make hair slippery, so styles slide out, and they mix with sweat to leave roots looking greasy. A pea-sized amount of smoothing cream on the lengths only, a little dry shampoo at the crown, and a flexible-hold spray on flyaways is enough. If your scalp sweats a lot, a thin sweatband or a headband under your style keeps moisture off your hairline without flattening your hair.
Best for: anyone in heated or high-energy classes, and anyone with fine hair that slips out of elastics. Do the dry shampoo before you style, not after — it works as a primer, not a rescue.
Mat Hair vs Reformer Hair: What Actually Changes
Mat and reformer classes look similar from the outside, but they ask different things of your hair. On the mat you spend most of the time lying down, rolling and bridging, so anything on the back of your head matters most — a flat, low style is comfortable, and a high or bulky one is not. On the reformer you move more, change position faster and use straps and springs, so grip and hold matter more than flatness.
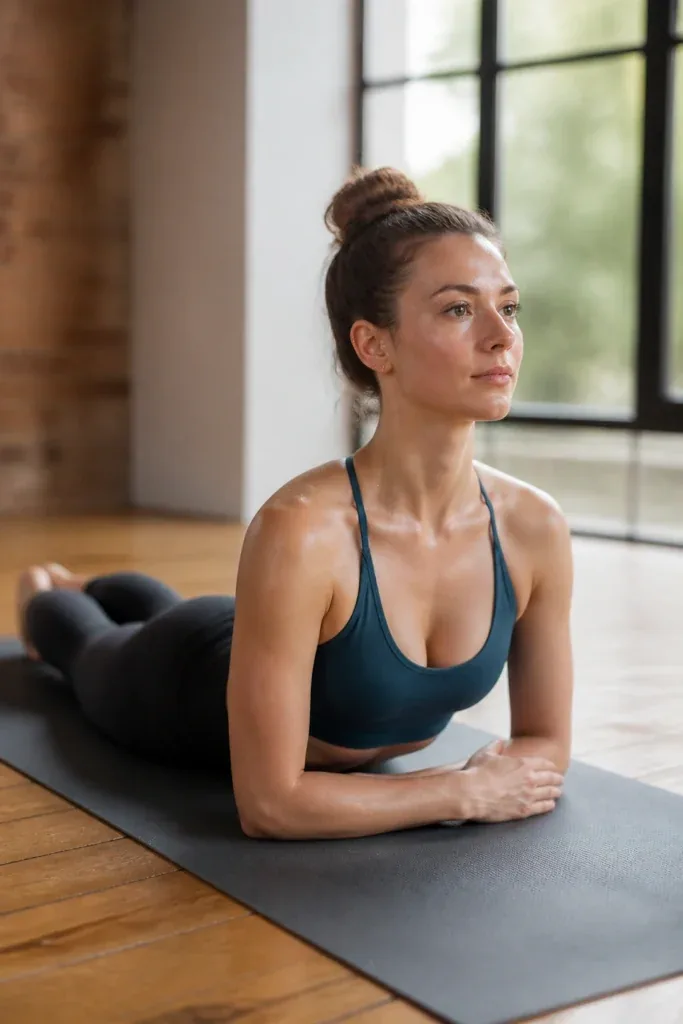
The practical answer is to choose one low, flat style for mat classes and one firmly anchored style for reformer classes, and to learn both. A low bun or a flat braid is perfect for the mat because it disappears under your head. The same braid, finished with extra pins and a second elastic, becomes a reformer style. The style does not need to change completely — it just needs one extra anchor for the moving carriage.
Quick verdict: if a style is comfortable lying flat on the floor, it is a mat style. If it also survives a fast change of direction on the reformer, it is a reformer style too. Test both positions before class.
Low Buns vs Ponytails: Which Holds Better?
Low buns and ponytails are the two workhorses of pilates hair, and each wins in a different situation. A low bun wins on the mat: it is flat, it does not swing, it does not catch under your shoulders, and it keeps every strand off your neck. A ponytail wins for standing work and for very long hair, because it is faster to do and easier to redo between exercises if it loosens.
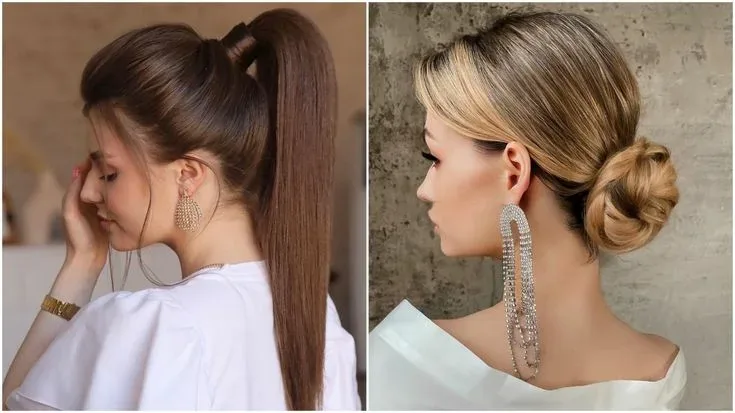
The deciding factor is usually your hair length and your class. Shoulder-length hair often sits better in a bun, because a short ponytail flicks into your face during roll-ups. Long, heavy hair often sits better in a low ponytail, because a big bun pulls at the nape and gives you a headache by the end of class. If you are torn, try the hybrid: a low ponytail braided or twisted into a bun, which gives you the flatness of a bun with the lighter pull of a ponytail.
Quick verdict: choose a bun for mat classes and a ponytail for standing-heavy or reformer classes. If you only want to learn one style, learn the low braided ponytail — it does both jobs.
Short Hair in Class: Less Hair, Same Rules
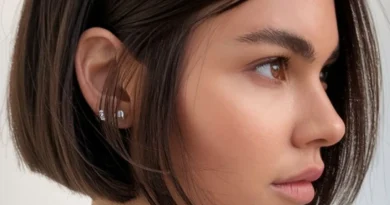
Short hair has a real advantage in pilates: there is less of it to manage, nothing heavy pulls at your neck, and a bob or pixie dries in minutes after class. But short hair has its own problems. Layers fall forward into your face during roll-downs, a fringe sticks to a sweaty forehead, and a bob can flip up oddly when you lie on your back.
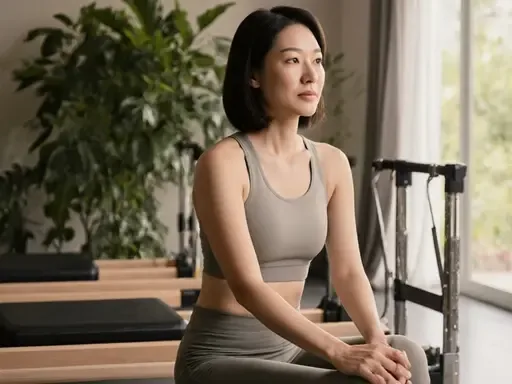
The fix is small and simple. Pin the front sections back with two flat clips that sit flush against your head, or wear a thin, grippy headband that keeps the hairline clear without a headache. A little texture spray or a dab of styling cream gives short hair enough grip to stay where you put it. Avoid heavy gel, which makes short hair look wet and stiff after a sweaty class.
Best for: bobs, lobs and pixies in any class type. Keep two flat clips in your gym bag at all times — they weigh nothing, they cost almost nothing, and they rescue a fringe in ten seconds.
Long Hair in Class: Taming Length Without a Headache
Long hair is beautiful in pilates and a nuisance in equal measure. It catches under your shoulders during a bridge, it swings across your face during a teaser, it gets trapped in reformer springs, and a heavy bun can leave you with a headache before the cool-down. The answer is to distribute the weight instead of piling it all in one place.
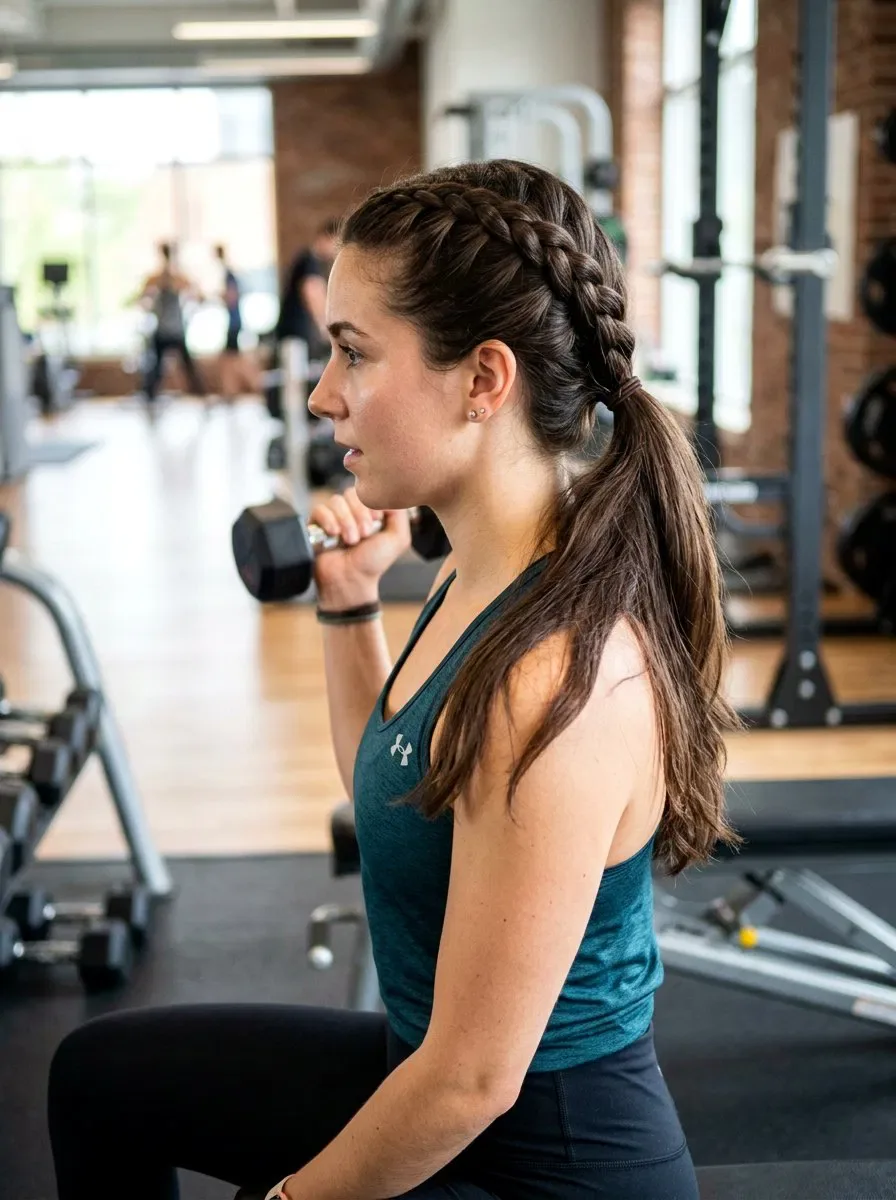
Braids are the long-hair hero in pilates because they spread the weight along the whole length instead of hanging it from one anchor point. A French braid, a low braided ponytail or two braids down the back all keep long hair contained without the pulling of a tight bun. If you prefer a bun, make it low and loose rather than high and tight, and anchor it with a scrunchie rather than a thin elastic, which concentrates all the pressure in one thin line.
Quick verdict: braid long hair for class, bun it for the coffee afterwards. Your neck will notice the difference by the end of the first week.
The Five-Minute Post-Class Refresh
The best pilates hairstyles do double duty: they hold through class and they look good enough afterwards that you do not need to start over. A five-minute refresh is all it takes if the style comes down gracefully. Take the style out, shake your hair out at the roots, spray a little dry shampoo through the crown, and brush through gently — most low buns and braids leave behind a soft wave that looks deliberate rather than messy.
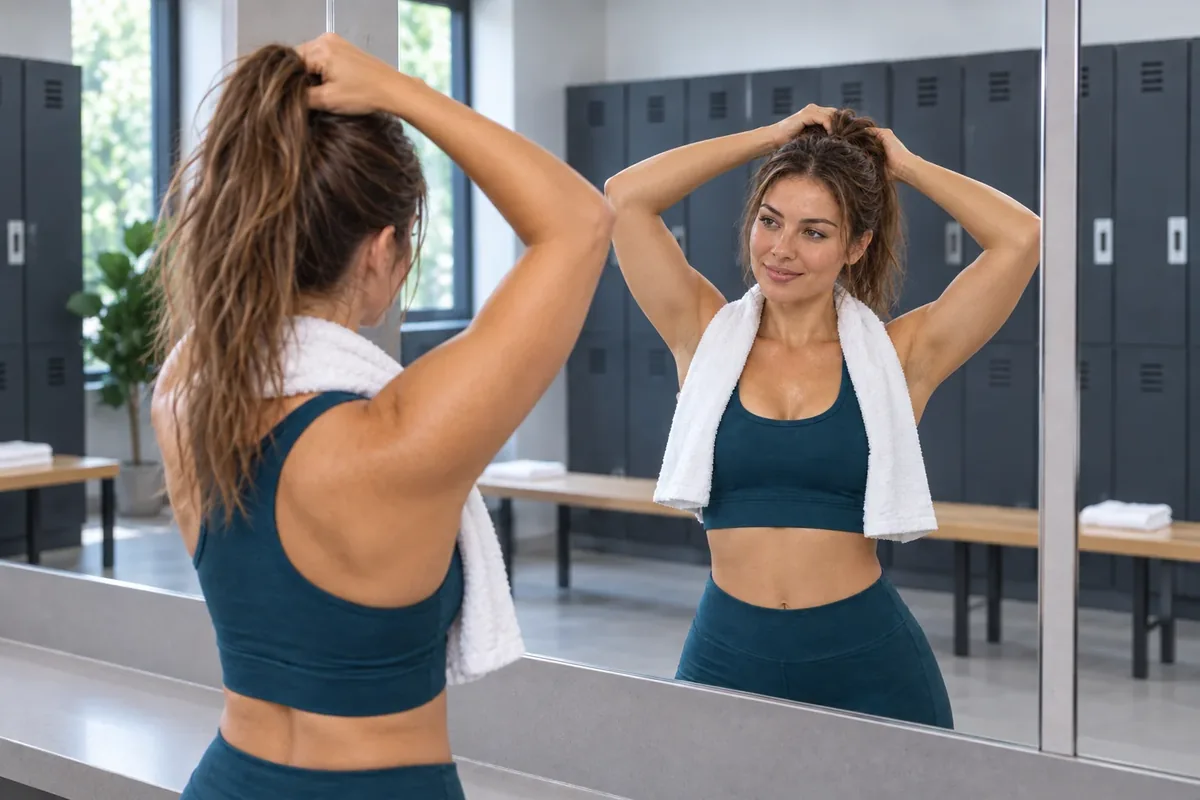
Keep a tiny refresh kit in your gym bag: a travel brush, a mini dry shampoo, two bobby pins and a silk scrunchie. If your hair is damp with sweat, tip your head upside down and blast the roots with a hand dryer for thirty seconds, or just let the air do the work while you change. Re-style into a loose low bun or a soft ponytail, add a clip or a scarf, and you are ready for brunch, errands or the school run.
Best for: anyone who goes straight from class to the rest of their day. The refresh works best on styles that were not pulled too tight — a gentle style comes down into a wave, while a scraped-back style comes down into a dent.
Keeping Your Hair Healthy With Regular Classes
Pilates three or four times a week is wonderful for your body, and it can be hard on your hair if you are not careful. The same elastic in the same spot every day breaks hair in the same place. Daily washing strips natural oils, and daily heat styling to fix post-class hair adds damage on top. A little planning protects your hair without adding time to your routine.
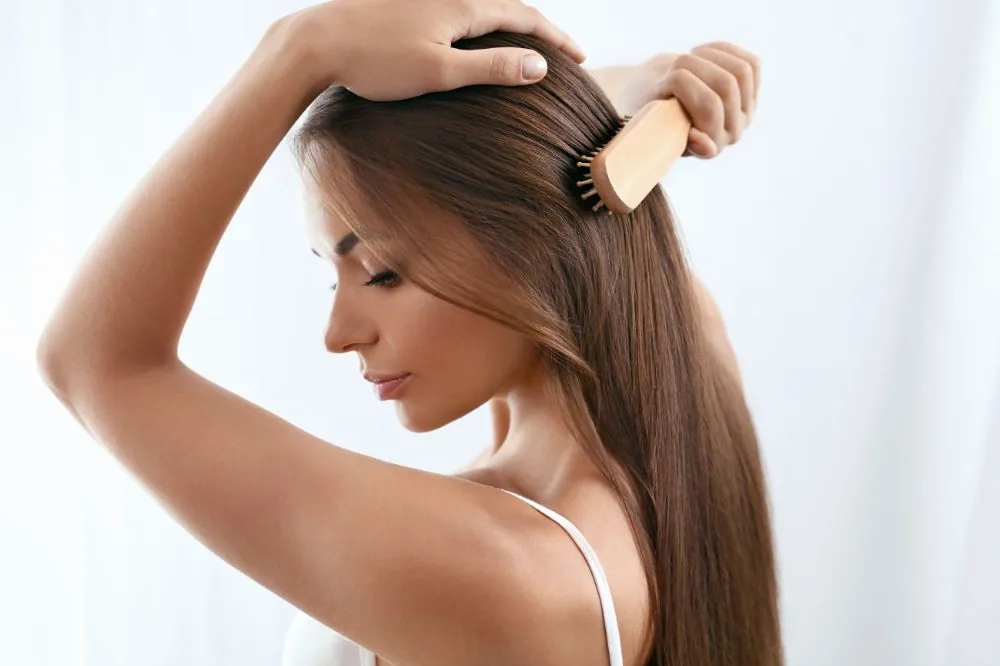
Vary your part and your anchor point: a low bun on Monday, a braid on Wednesday, a ponytail on Friday. Use silk or fabric scrunchies instead of thin rubber elastics, and never rip a tie out of sweaty hair — slide it out gently or cut it if it is truly stuck. Wash with a gentle shampoo, condition the lengths every time, and give your hair one heat-free day a week. A weekly hair mask takes five minutes and makes a visible difference within a month.
Quick verdict: healthy pilates hair is about variety and gentleness, not expensive products. Change the style, loosen the tie, and let your hair rest — it will thank you.
The Classic Low Bun
The classic low bun is the pilates hairstyle everything else is measured against. It sits flat at the nape of your neck, so it disappears when you lie on your back, it never swings into your face, and it keeps every strand off your neck through a whole class. It is simple, neat and completely reliable — the style instructors themselves wear most often.
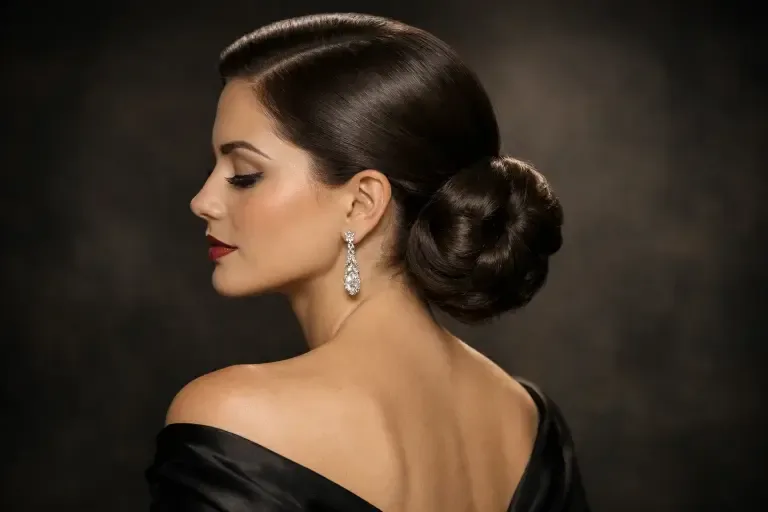
Gather your hair low, twist it gently and coil it into a small bun, then pin it in place with two or three bobby pins. A fabric scrunchie or a snag-free elastic holds it without denting your hair, and a light mist of flexible-hold spray tames flyaways. It takes about three minutes once you have done it a few times, and it works on almost any hair length past the shoulders.
Cost and time: free, about 3 minutes, with elastics and pins you already own. Maintenance: re-pin once midway through a long class if needed. Who should skip it: anyone with very short hair that will not reach a bun — try the headband ponytail instead.
The Sleek Low Ponytail
A sleek low ponytail is the fastest reliable pilates style there is. It keeps your hair contained in one smooth line, it lies flat enough for mat work, and it is easy to redo in ten seconds between exercises if it loosens. For reformer classes it is ideal, because there is nothing bulky to catch on straps or springs.
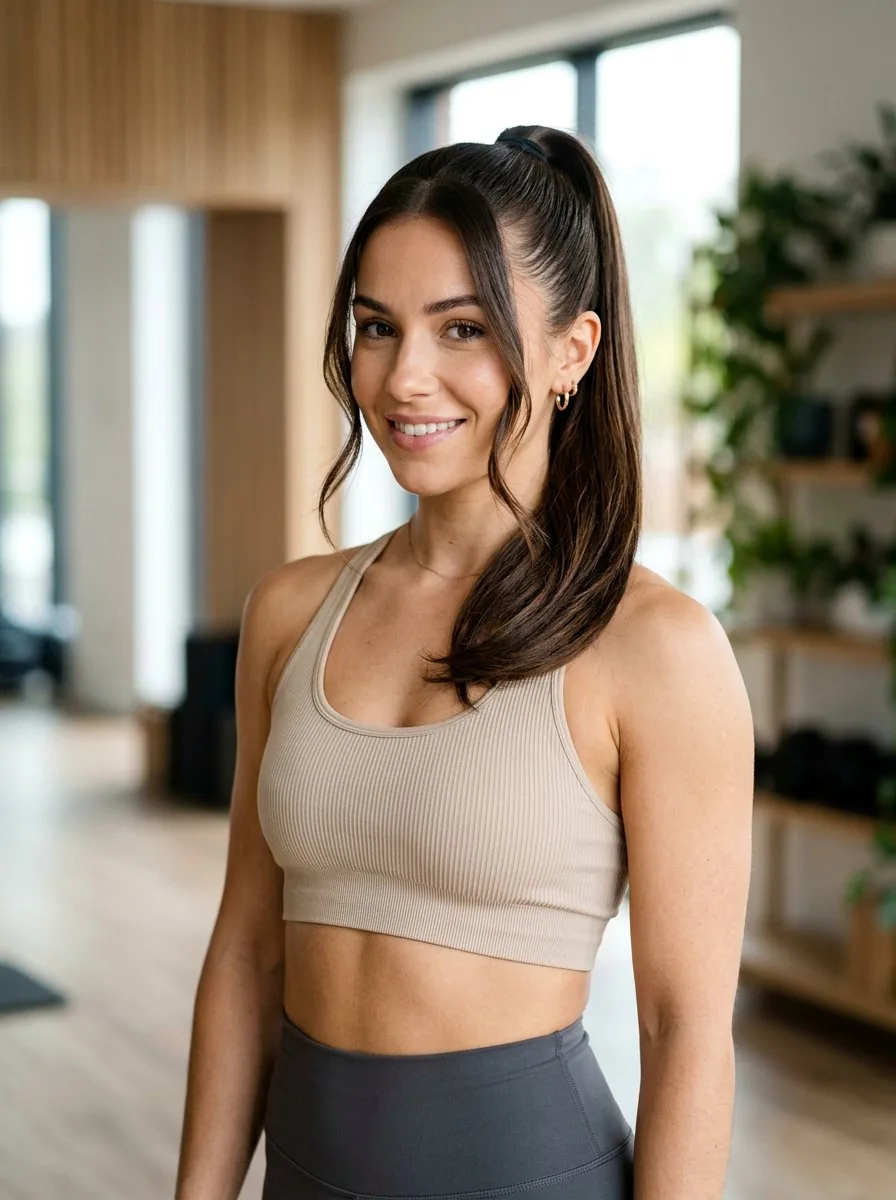
Brush your hair back smoothly, secure it low at the nape with a strong elastic, and smooth the crown with a little serum on your palms. If your hair is fine or slippery, add dry shampoo at the roots first for grip. A wrapped strand around the elastic makes it look polished enough for after class too.
Cost and time: free, about 2 minutes. Maintenance: almost none — tighten the elastic once if it slips. Quick verdict: the best all-round pilates ponytail, and the one to learn first if you are new to class.
The Braided Low Ponytail
A braided low ponytail is the low ponytail with extra insurance. The braid locks the length down so it cannot swing, tangle or catch, while the low position keeps it comfortable on the mat. It is one of the best styles for long hair in pilates, because the braid carries the weight instead of hanging it all from one elastic.
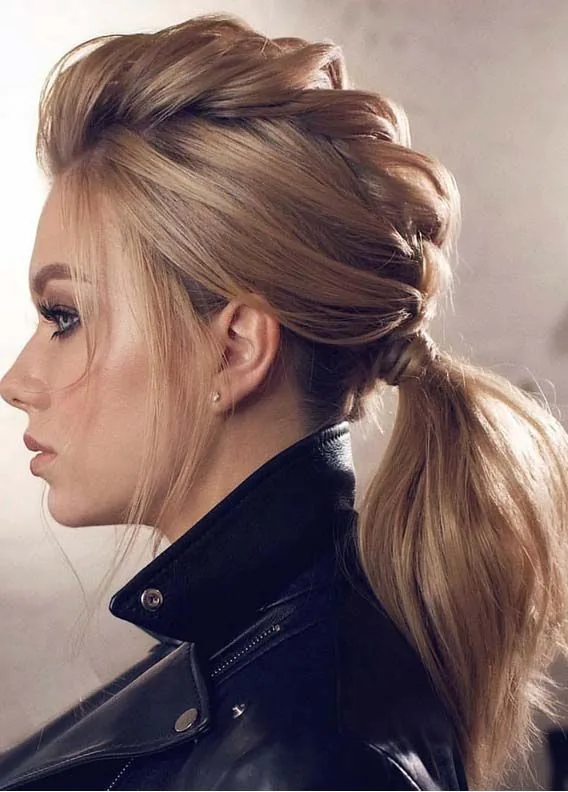
Start with a low ponytail, braid the length loosely to the ends, and secure it with a small elastic. Pull the braid gently at the edges to make it look fuller, or leave it neat for a sportier finish. It takes a little longer than a plain ponytail, but it holds far better through a fast reformer flow.
Cost and time: free, about 4 minutes. Maintenance: none during class — the braid is its own anchor. Who should skip it: very short hair, which will not braid; try a low twisted ponytail instead.
The French Braid
The French braid is the gold standard for long hair in pilates. It gathers hair from the crown downwards, so the whole style is anchored along the head rather than at one point, and it stays put through rolls, twists and inversions without a single pin. It also comes down into a beautiful soft wave after class.
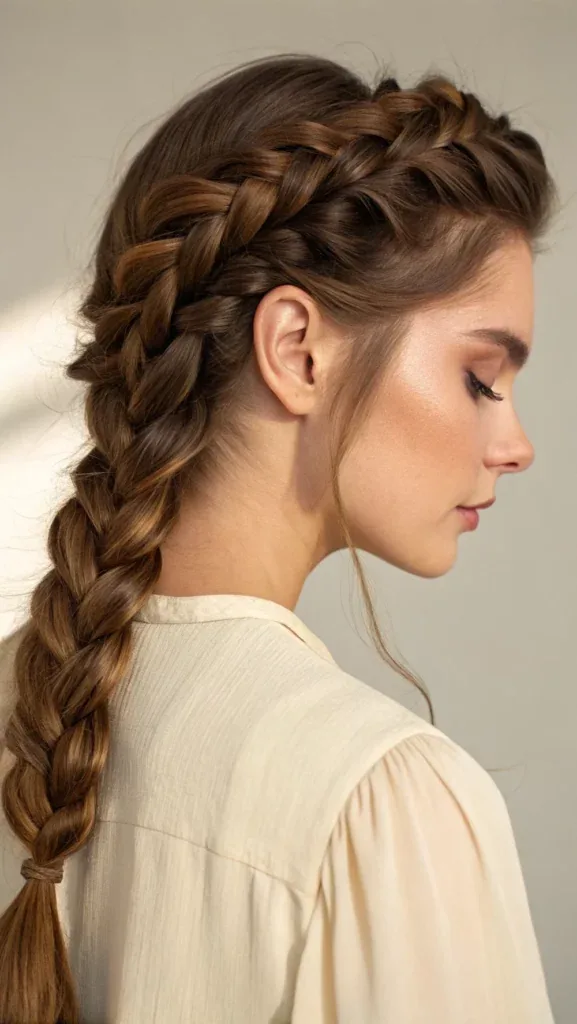
Braid from the crown, adding small sections as you go, and keep the tension even so it does not pull at your hairline. Finish low at the nape or continue to the ends, depending on your length. If your arms get tired, practise on dry hair at home first — the muscle memory comes quickly.
Cost and time: free, about 5 minutes once practised. Maintenance: none — check the ends once after floor work. Quick verdict: the most secure pilates braid, and the best choice for long, heavy hair.
The Dutch Braid
A Dutch braid is a French braid turned inside out, so the braid sits on top of the hair instead of tucked inside it. That raised shape grips even better than a French braid, which makes it a brilliant choice for thick or slippery hair that slides out of other styles. It looks sporty and neat, and it holds through the hardest reformer sessions.
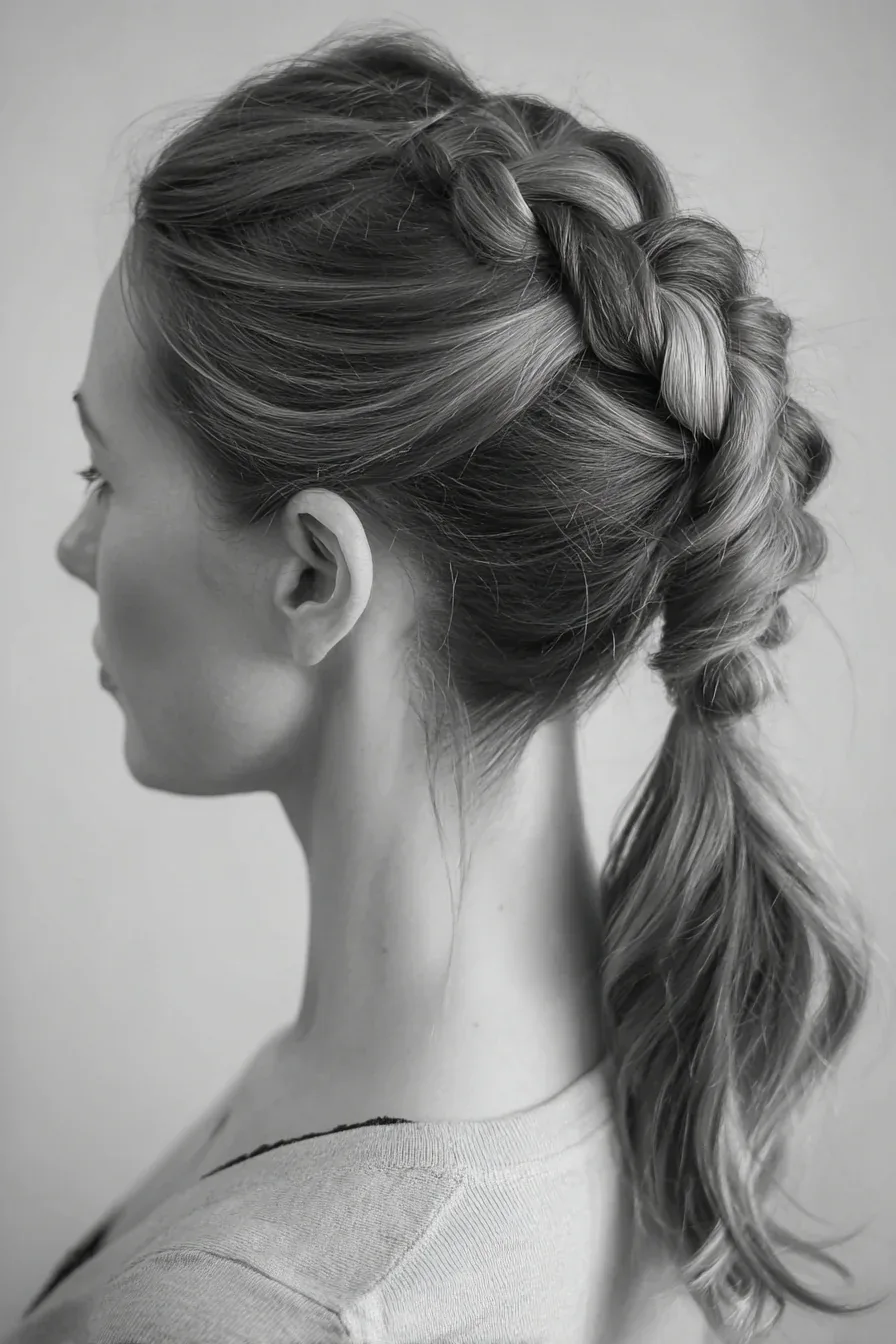
Braid under rather than over, crossing each section beneath the middle strand as you add hair from the sides. Keep it snug at the crown and looser towards the ends so it does not pull. A Dutch braid also works beautifully as a double style, with one braid on each side for extra hold.
Cost and time: free, about 5 minutes. Maintenance: none during class. Who should skip it: anyone with very fine hair that shows the scalp easily — a French braid sits flatter and hides the part better.
Double French Braids
Double French braids are the most secure hairstyle in this whole guide. Two braids mean the weight of your hair is split in half, nothing swings, nothing pulls, and the style survives any class — mat, reformer, heated or fast. They are the style to choose when you know the class will be hard and you do not want to think about your hair at all.
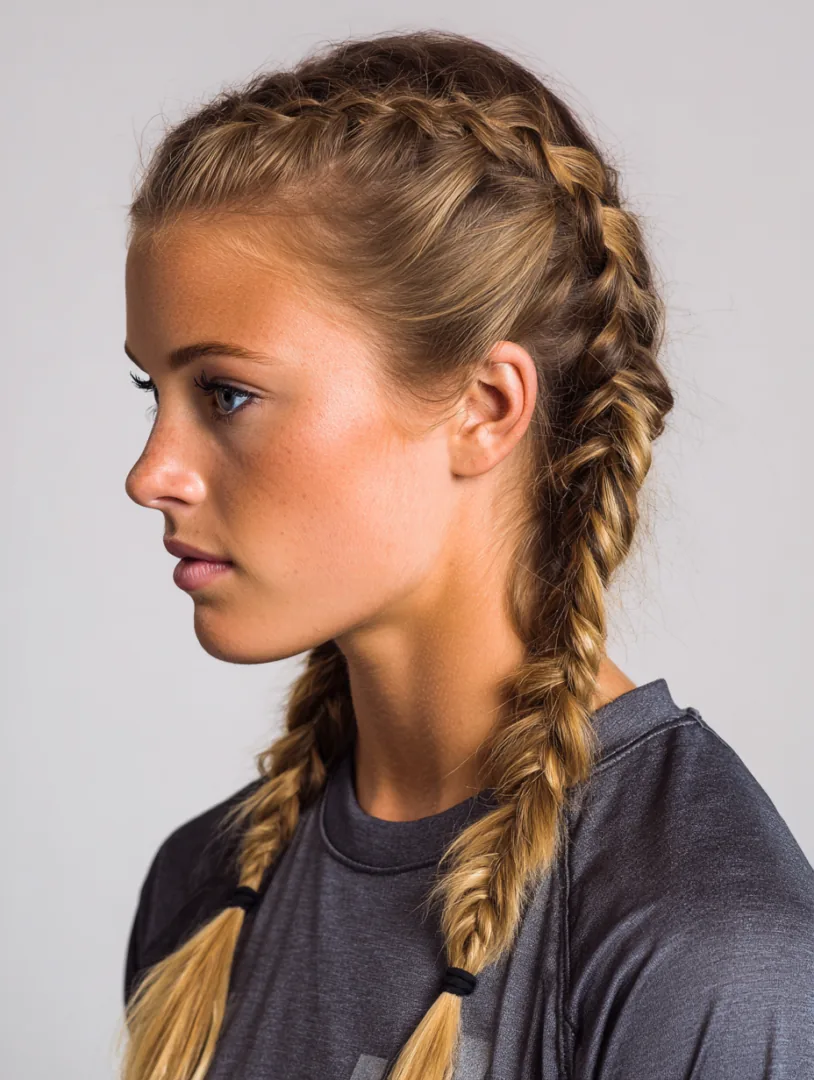
Part your hair down the middle, braid each side from the crown to the nape, and secure both ends. Keep the parts neat for a polished look, or let them be slightly messy for a relaxed one. The braids sit flat against your head, so they are completely comfortable when you lie down.
Cost and time: free, about 7 minutes. Maintenance: none — this is the lowest-maintenance style here. Quick verdict: if you only trust one style for a tough class, trust this one.
The Bubble Ponytail
A bubble ponytail brings a little fun to pilates without giving up hold. Small elastics spaced down the ponytail divide it into soft bubbles, which stops the length from swinging as one heavy piece and keeps it neatly contained. It looks playful and modern, and it photographs well if your studio has a social corner.
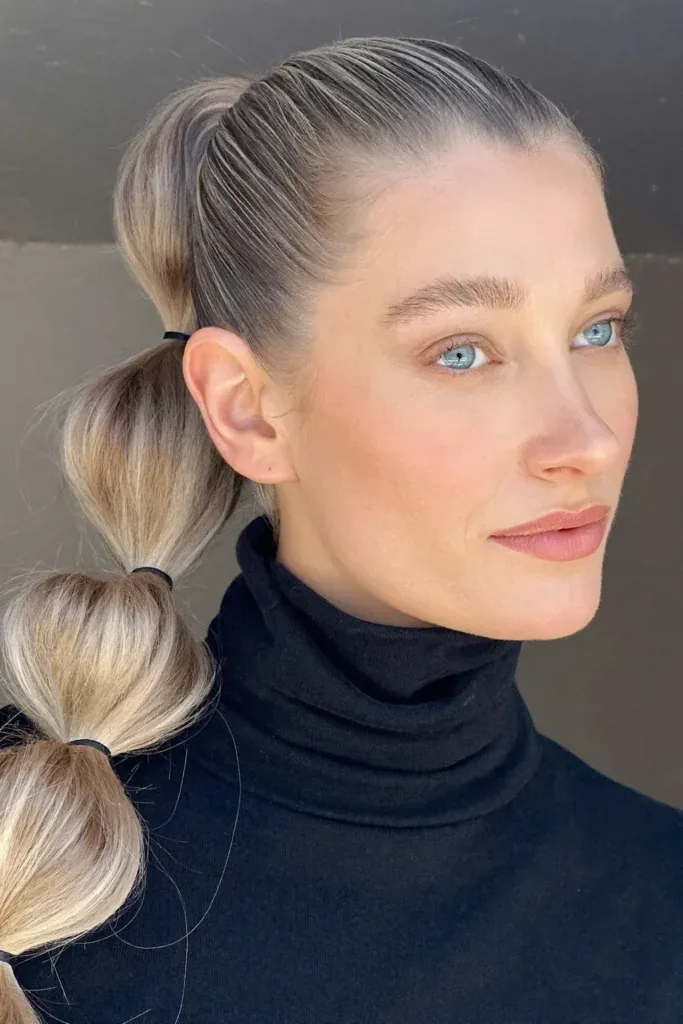
Make a low ponytail, then add elastics every few inches and gently pull each section apart to form the bubbles. Use fabric elastics so they do not snag, and keep the bubbles small — large ones bounce too much during jumping or standing work. It works best on medium to long hair with a little thickness.
Cost and time: free, about 5 minutes, plus a few extra elastics. Maintenance: check the bubbles once after floor work. Who should skip it: fine, thin hair, which can look sparse in bubbles — a braided ponytail holds better for you.
The High Top Knot (for Standing Flows Only)
A high top knot is the one style in this guide with a warning attached: it is wonderful for standing and seated work, and terrible for lying down. If your class is mostly standing, barre-style or chair pilates, a top knot keeps every strand up and away and looks effortlessly polished. Just know its limits before you choose it.
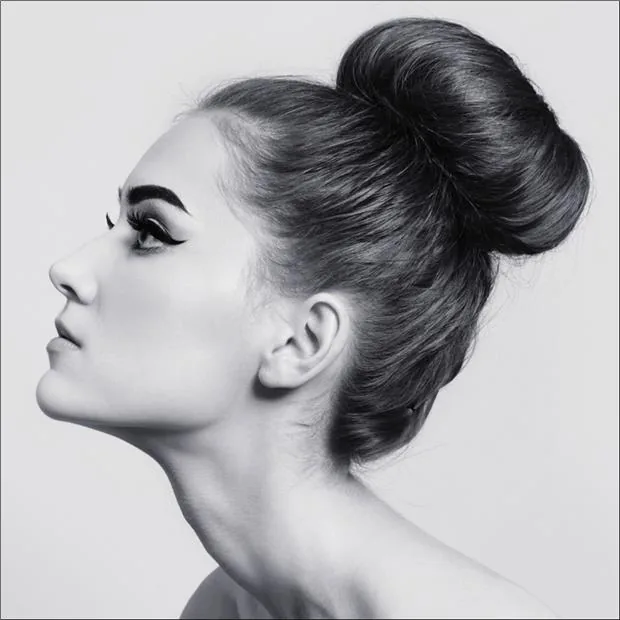
Gather your hair high at the crown, twist it into a knot and pin it securely, smoothing flyaways with a little cream. Keep the knot small and tight so it does not wobble when you move. If the class switches to mat work, take it down and re-do it as a low bun in under a minute.
Cost and time: free, about 3 minutes. Maintenance: re-do as a low bun before floor work. Who should skip it: anyone in a mat-heavy class — the knot will dig into your head on every roll-up.
The Low Messy Bun
A low messy bun is the relaxed version of the classic low bun, and it is perfect for a casual mat class or a gentle morning session. It is soft, a little undone and very comfortable, because it is not pulled tight — and that looseness is also its charm after class, when it looks like an intentional, lived-in style.
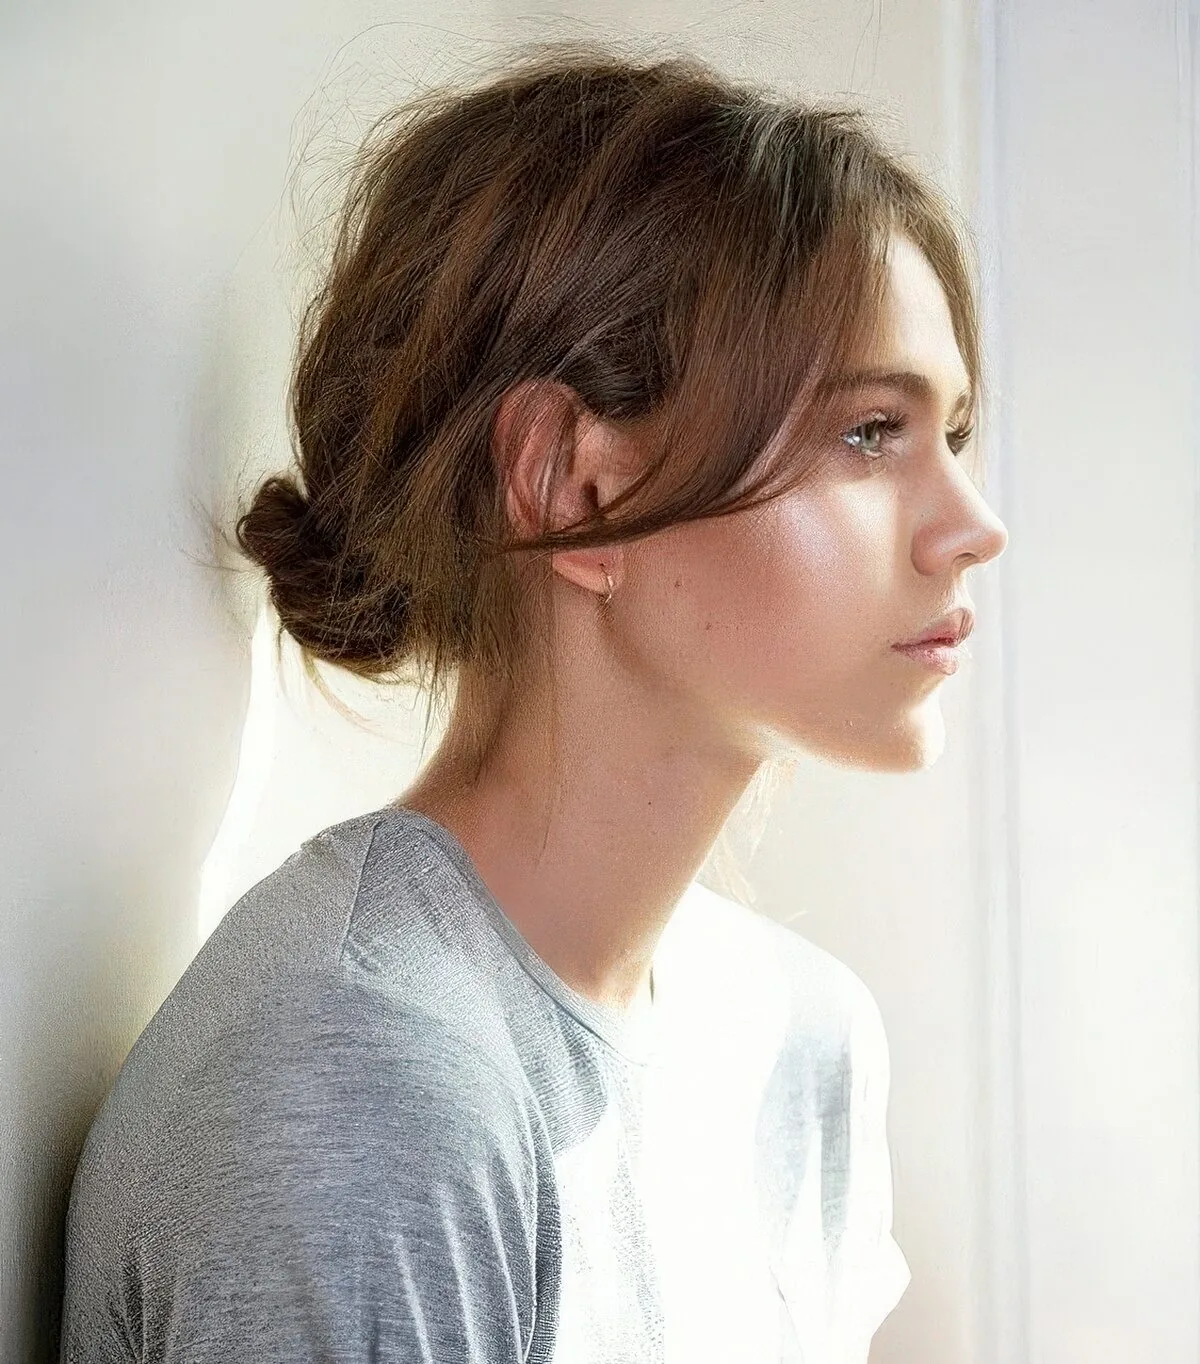
Gather your hair low and loosely, twist it without pulling it smooth, and pin it with two or three pins, leaving a few soft pieces free around your face. A silk scrunchie holds it gently and comes out without a dent. It takes about two minutes, which makes it ideal when you are running late.
Cost and time: free, about 2 minutes. Maintenance: re-pin once if it loosens during fast work. Quick verdict: best for gentle and beginner classes; choose a tighter bun for a fast reformer session.
The Half-Up Claw Clip Twist
A half-up claw clip twist is the quickest genuinely secure style for medium-length hair. The top half of your hair is twisted up and clipped, while the rest falls loose — but because the loose hair sits below your shoulders, it stays out of the way during most mat work. It is the style for days when a full updo feels like too much effort.
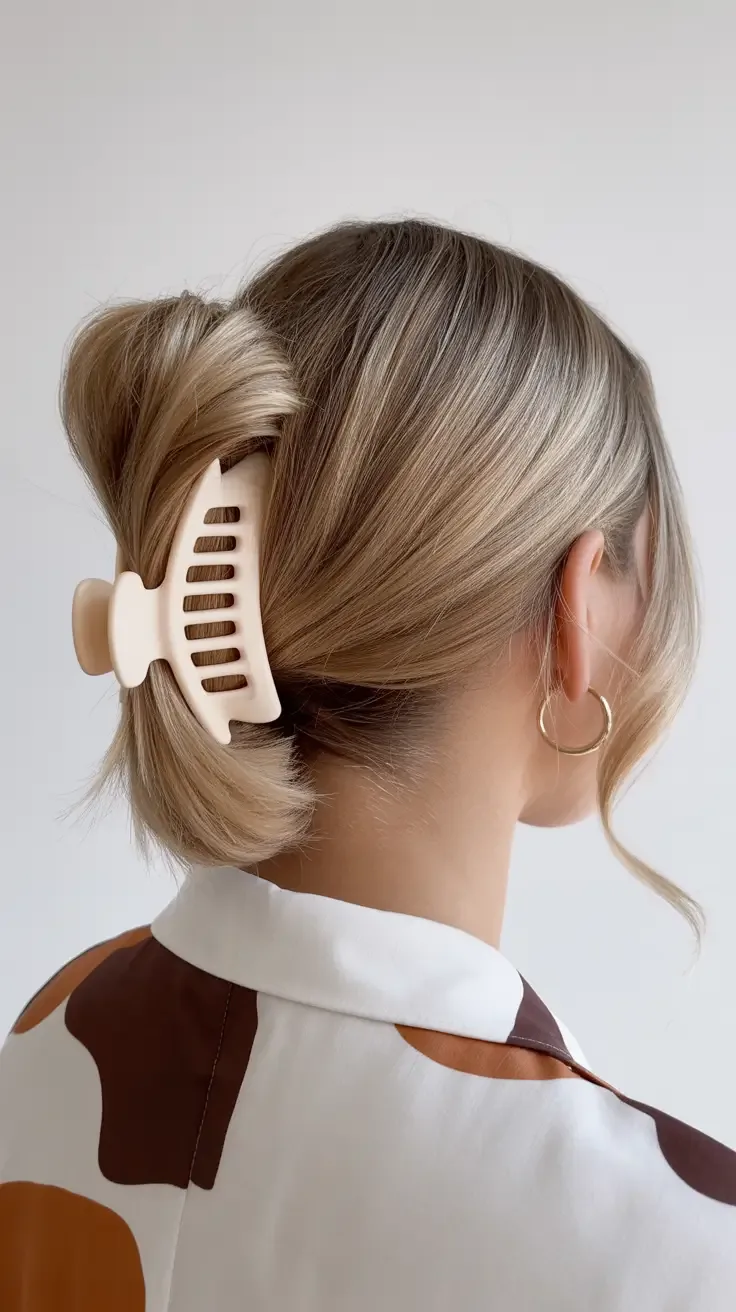
Take the top section of your hair, twist it upwards and clip it with a small, flat claw clip at the crown. Keep the clip low and flat so it does not press into your head when you lie down. The twist holds the front back, which is the part that usually falls into your face.
Cost and time: one small claw clip, about 2 minutes. Maintenance: re-clip once if it slips. Who should skip it: anyone with very long, heavy hair — the clip will not hold the weight through a full class.
The Claw Clip Bun
A claw clip bun is the low bun for people who hate elastics. You twist all your hair up, fold it into a bun shape and clip it in place — no pulling, no dent, no headache, and it comes out in two seconds after class with a soft wave left behind. It is also the kindest style for hair that breaks easily.
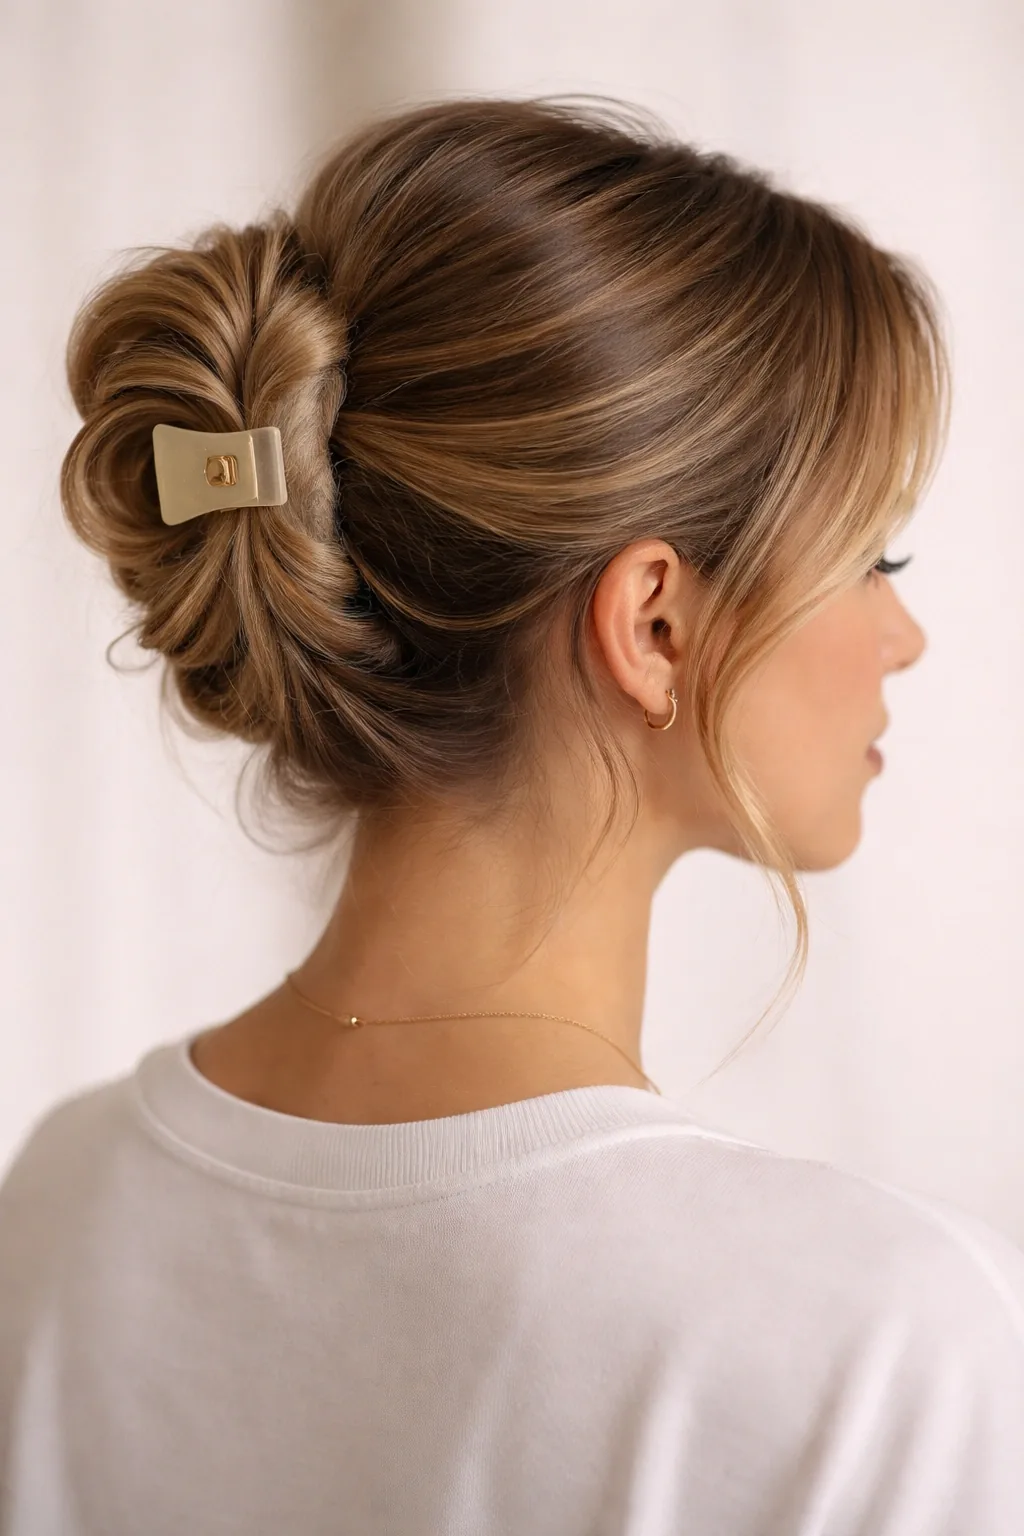
Twist your hair up from the nape, fold the ends in, and secure the whole shape with a medium flat claw clip. Choose a clip with a flat back so it sits comfortably against the mat, and test it lying down before class. A metal-free plastic clip is lighter and more comfortable than a heavy metal one.
Cost and time: one claw clip, about 2 minutes. Maintenance: tighten the clip once midway. Quick verdict: the most comfortable bun in this guide, and the kindest to fragile hair.
The Headband Low Ponytail
A headband low ponytail solves the two problems that ruin most pilates styles: flyaways at the hairline and a fringe that falls forward. The headband keeps the front clear, the low ponytail keeps the back contained, and together they survive sweat, rolls and reformer work without a single pin.
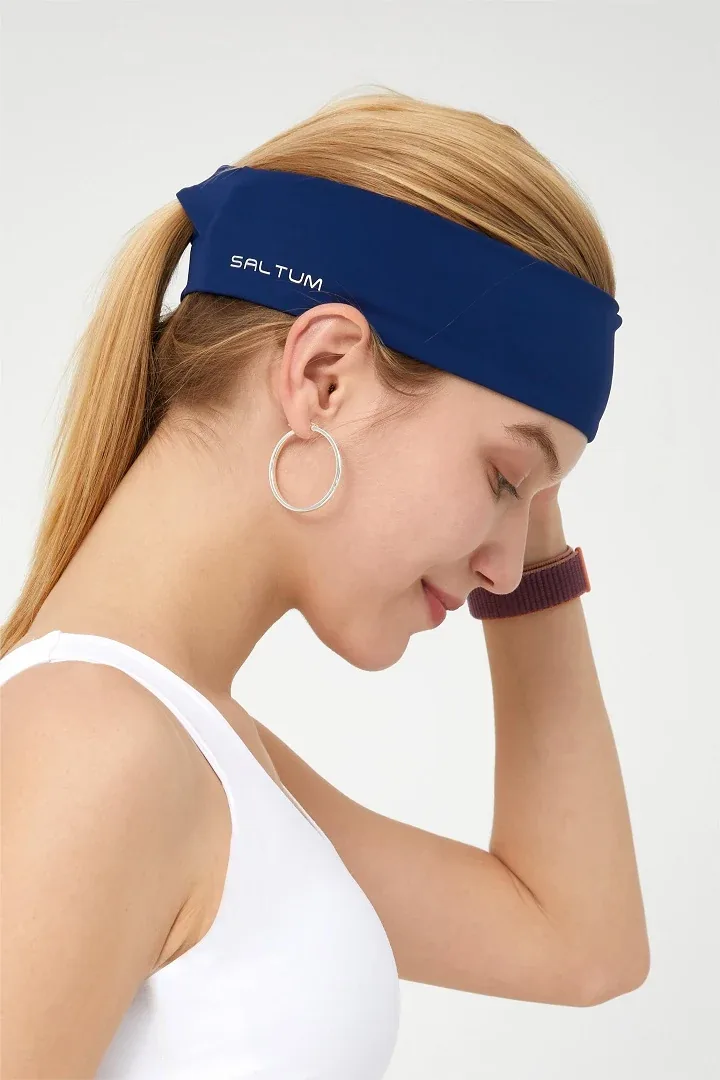
Slide a thin, grippy fabric headband into place, then gather your hair into a low ponytail. Choose a headband that grips without squeezing — a wide one can give you a headache, and a silky one will slide off once you sweat. Keep a spare in your bag, because headbands are the easiest thing to forget.
Cost and time: one fabric headband, about 2 minutes. Maintenance: push the headband back into place once if it rides up. Who should skip it: anyone who finds headbands uncomfortable — try flat clips for the front instead.
The Silk Scarf Low Bun
A silk scarf low bun is the classic low bun dressed up for after class. The scarf wraps around the base of the bun, adds colour and polish, and — usefully — it also helps the bun hold, because the fabric grips the hair. It is the style to choose when you are going from the studio straight to lunch.
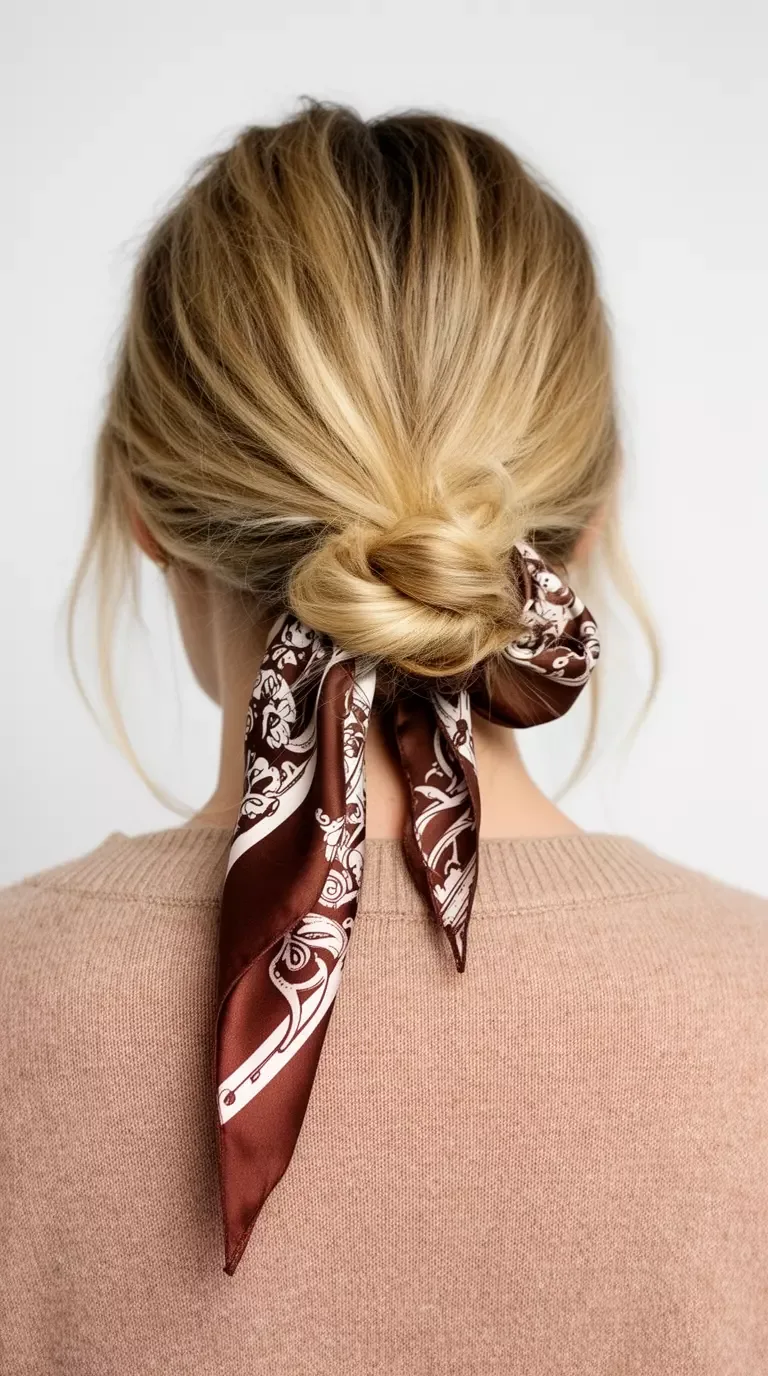
Make a low bun as usual, then wrap a small silk scarf around its base and tie it in a small knot or bow. Keep the scarf ends short so they do not flap during exercise, and tuck them in if your class is fast. A lightweight scarf is best; a heavy one pulls the bun down.
Cost and time: one small silk scarf, about 4 minutes. Maintenance: tuck the scarf ends in once if they loosen. Who should skip it: anyone in a heated class — the extra layer traps heat at the nape.
Low Pigtail Braids
Low pigtail braids are double braids worn low and relaxed, and they are wonderfully practical in pilates. The weight is split evenly, the braids lie flat on the mat, and nothing swings or pulls. They look youthful and sporty, and they are one of the best styles for very thick hair that is too heavy for a single bun.
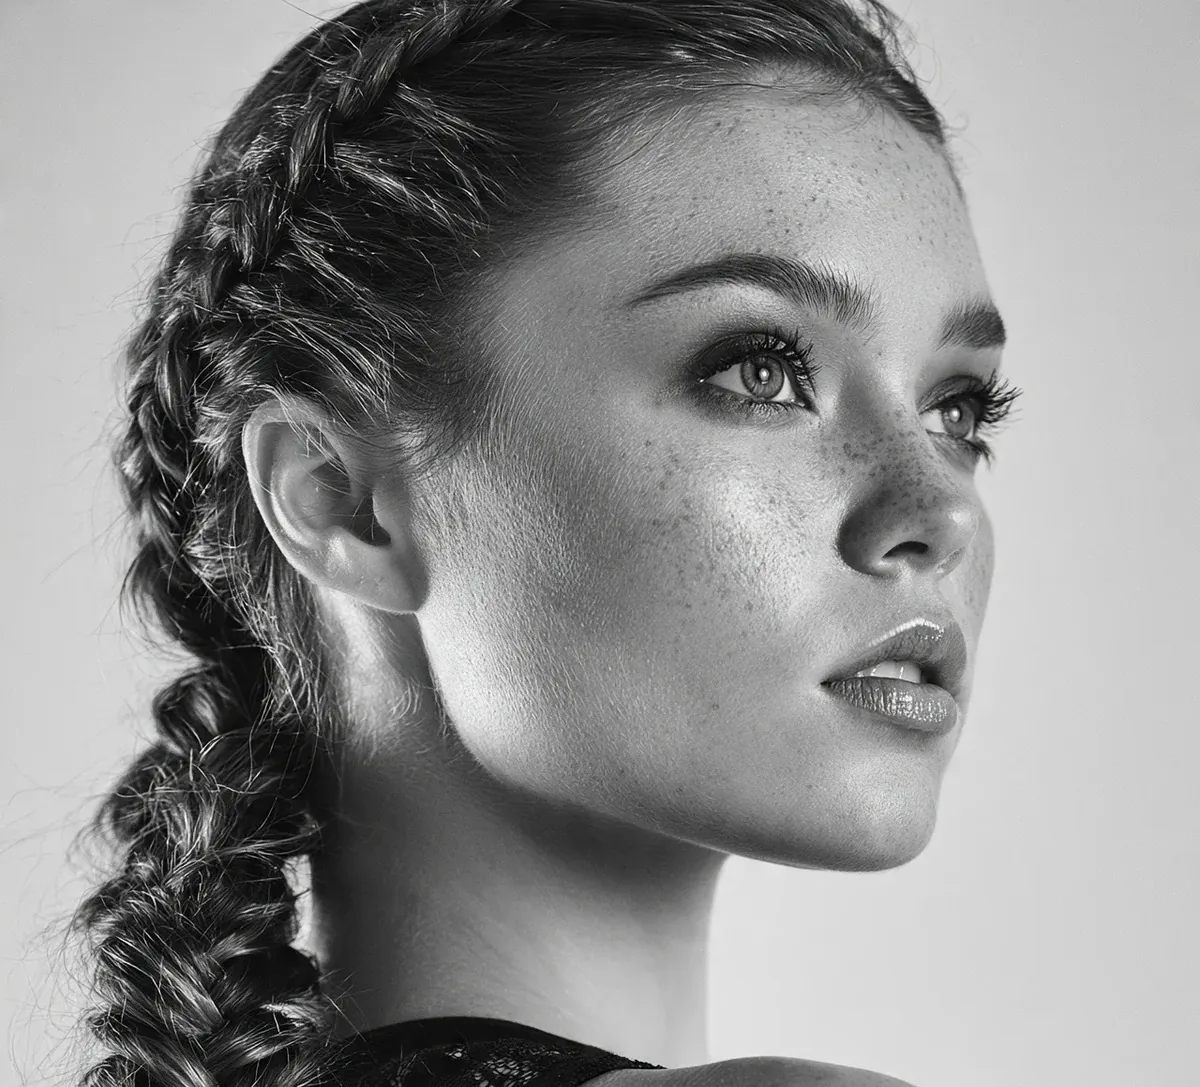
Part your hair down the middle and braid each side loosely from behind the ear to the ends. Keep the braids low rather than high so they rest on the mat instead of pressing into your head. A little texture spray before braiding helps the style grip and stops layers from poking out.
Cost and time: free, about 6 minutes. Maintenance: none during class. Quick verdict: the best style for very thick hair in a mat class, and a fun change from a single braid.
The Fishtail Braid
A fishtail braid looks intricate and holds like a workhorse. The fine, woven pattern grips the hair along its whole length, so it rarely loosens, and it lies flat and comfortable on the mat. It is a beautiful choice for long hair, and it comes down after class into a soft, crimped wave that looks deliberate.
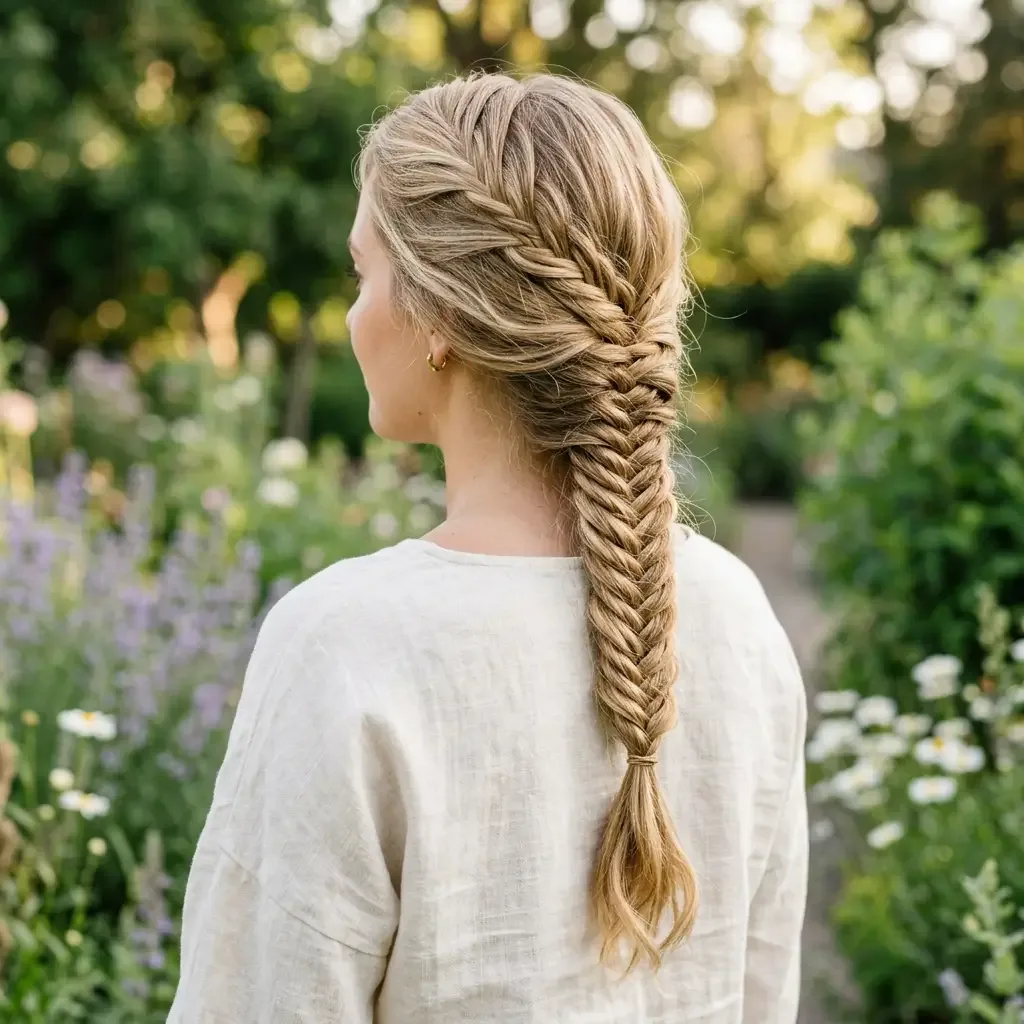
Divide the ponytail into two sections and cross small pieces from each side to the other, working down to the ends. It takes a little longer than a regular braid, so learn it at home first. Pull the braid gently at the edges for a fuller, softer look, or keep it neat for a sleeker finish.
Cost and time: free, about 7 minutes once practised. Maintenance: none — the weave is its own anchor. Who should skip it: anyone short on time before class; a French braid is faster and nearly as secure.
The Rope Braid Ponytail
A rope braid ponytail is the fastest braid in this guide — just two strands twisted together — and it holds surprisingly well. The twist locks the hair into a neat rope that does not swing like a loose ponytail and does not tangle during floor work. It is ideal for mornings when you have three minutes and a reformer class to get to.
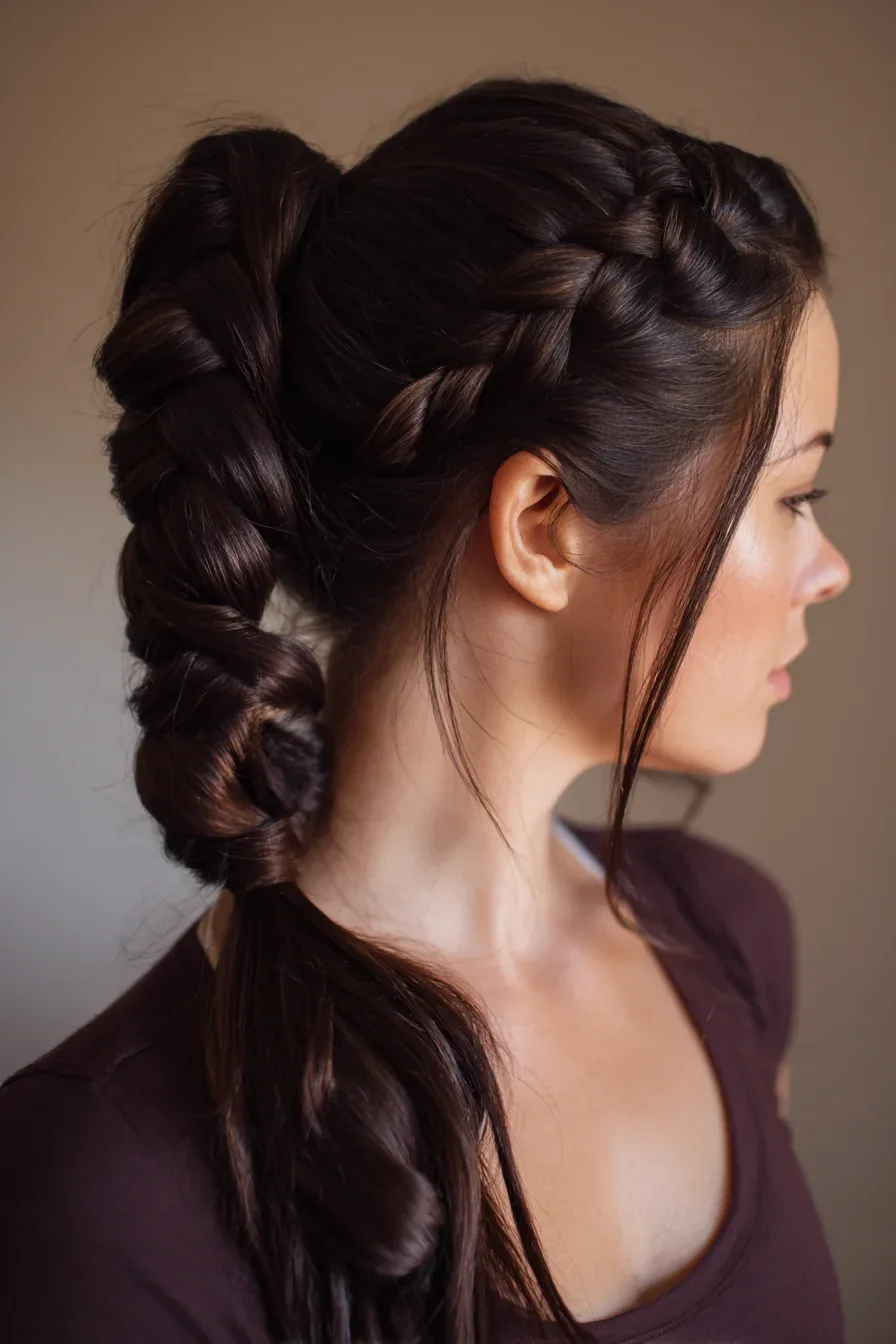
Make a low ponytail, split it into two sections, twist each section in the same direction, then twist the two together in the opposite direction and secure the ends. The opposing twists are what lock it in place. Keep it low so it lies flat on the mat.
Cost and time: free, about 3 minutes. Maintenance: re-twist the ends once if they loosen. Quick verdict: the best braid for beginners — two strands, three minutes, and it actually holds.
The Twisted Low Chignon
A twisted low chignon is the elegant cousin of the low bun. The hair is twisted rather than coiled, which gives it a softer, more textured shape, and it sits low and flat at the nape — perfect for mat work. It looks polished enough for a studio that doubles as a social space, and it takes only a minute longer than a plain bun.
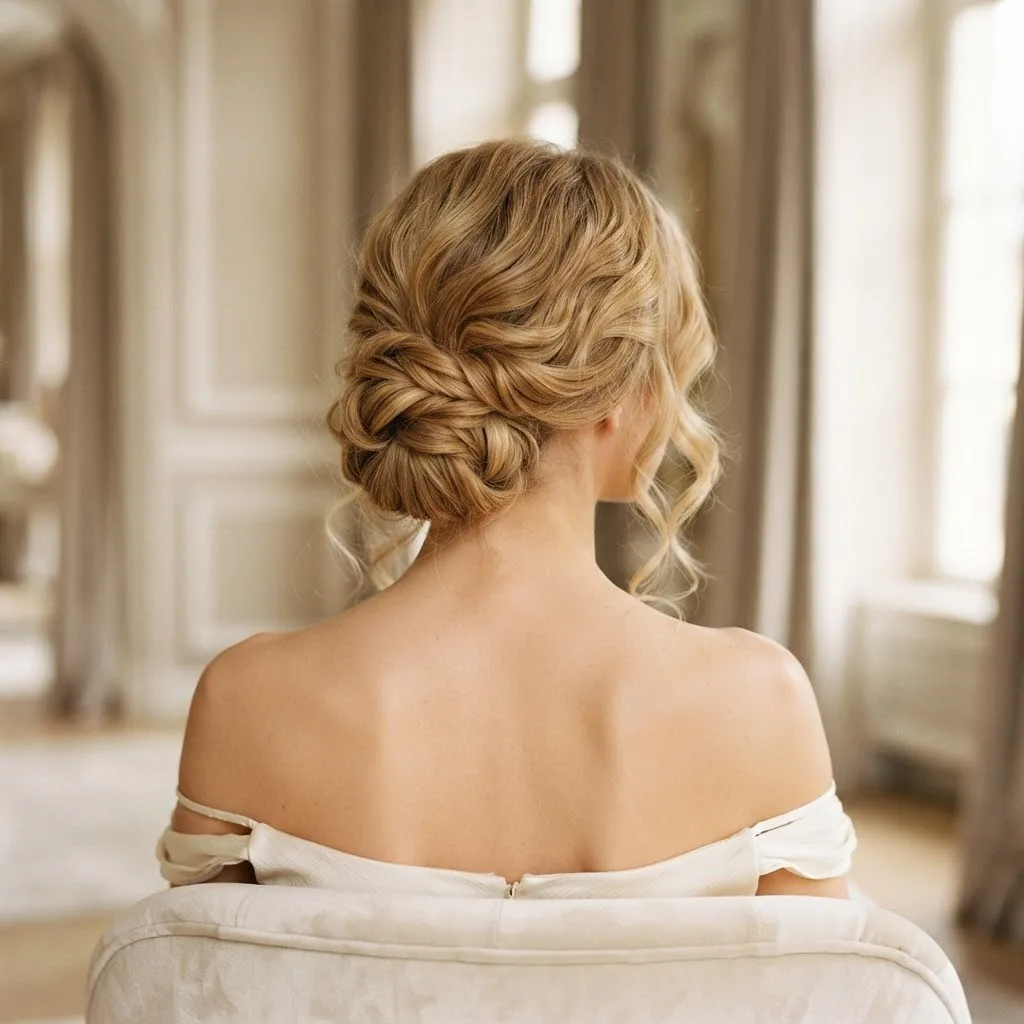
Gather your hair low, twist it into a rope, then coil the rope into a flat chignon and pin it in place. Leave a few soft pieces free around your face for a romantic finish, or smooth everything back for a sleeker look. A silk scrunchie at the base adds grip without a dent.
Cost and time: free, about 4 minutes. Maintenance: re-pin once during a long class. Who should skip it: very short hair that will not twist and coil — try the claw clip bun instead.
The Side Braid
A side braid is the most comfortable braid for mat work, because all the hair sits over one shoulder instead of under your head. Nothing presses into the mat, nothing catches under your shoulders, and you can check the braid with a glance. It is relaxed, pretty and very forgiving for beginners.
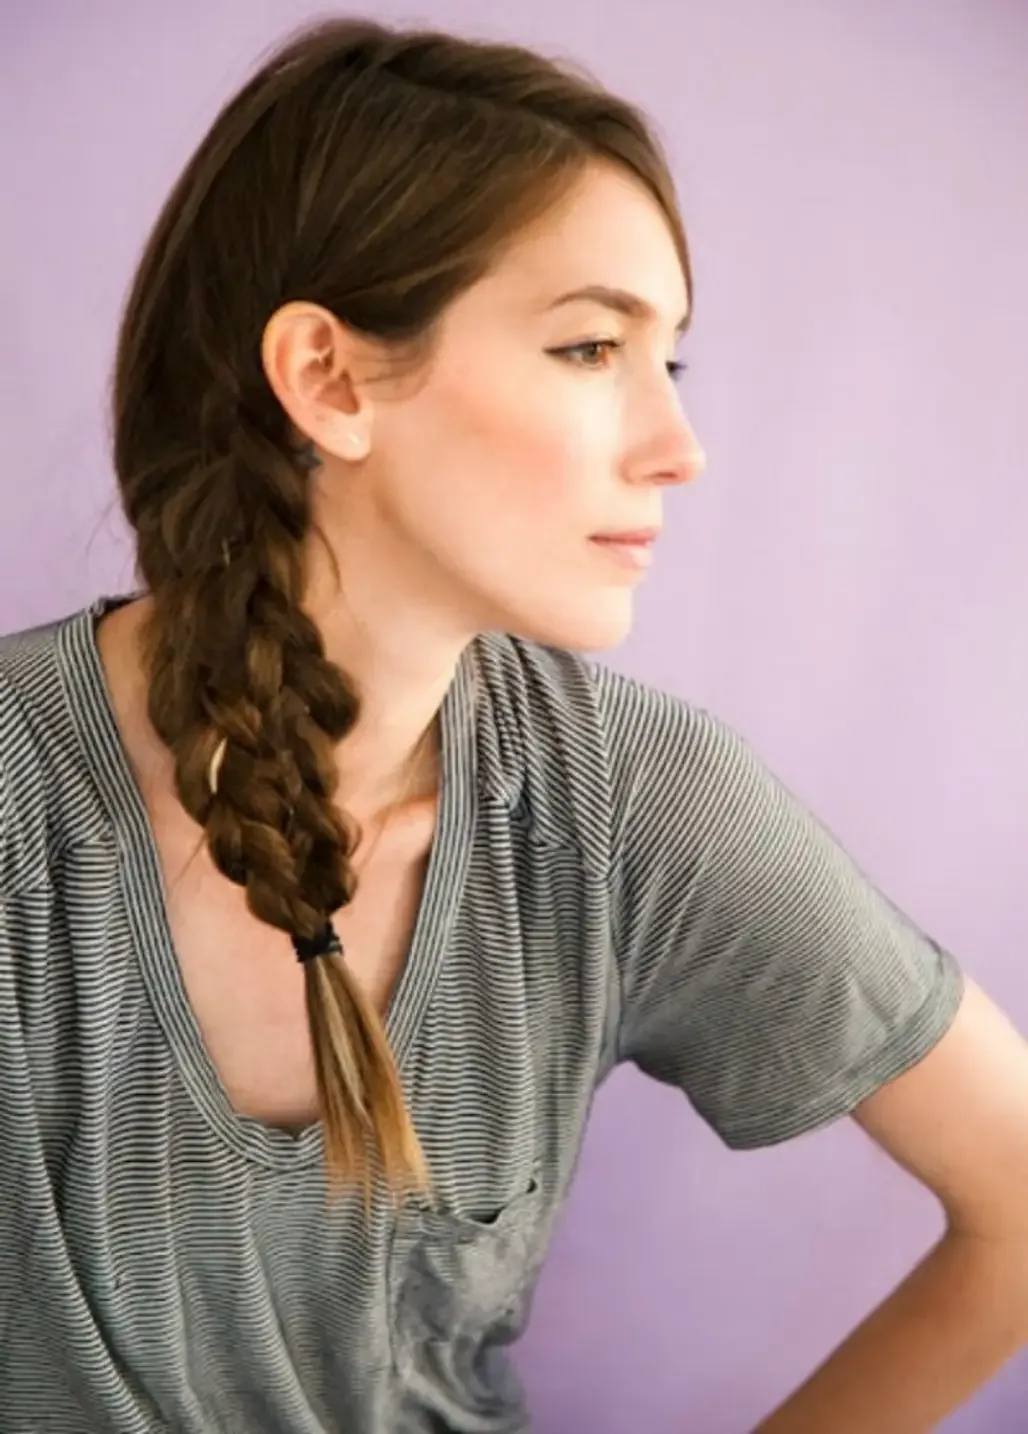
Sweep all your hair to one side, braid it loosely from behind the ear, and secure the ends. Pull the braid gently at the edges to make it look fuller, and leave a few pieces free at the front. It works on medium to long hair, and it is especially good for a gentle or prenatal pilates class.
Cost and time: free, about 4 minutes. Maintenance: pull it back over your shoulder once if it slips behind you. Quick verdict: the most comfortable braid on the mat — nothing under your head at all.
The Braided Crown
A braided crown wraps a braid around your head like a halo, keeping every strand off your face and neck. It is one of the most secure styles in this guide, because the braid is anchored all the way around, and it looks beautiful — romantic, neat and a little bit special, which makes it a favourite for weekend classes.
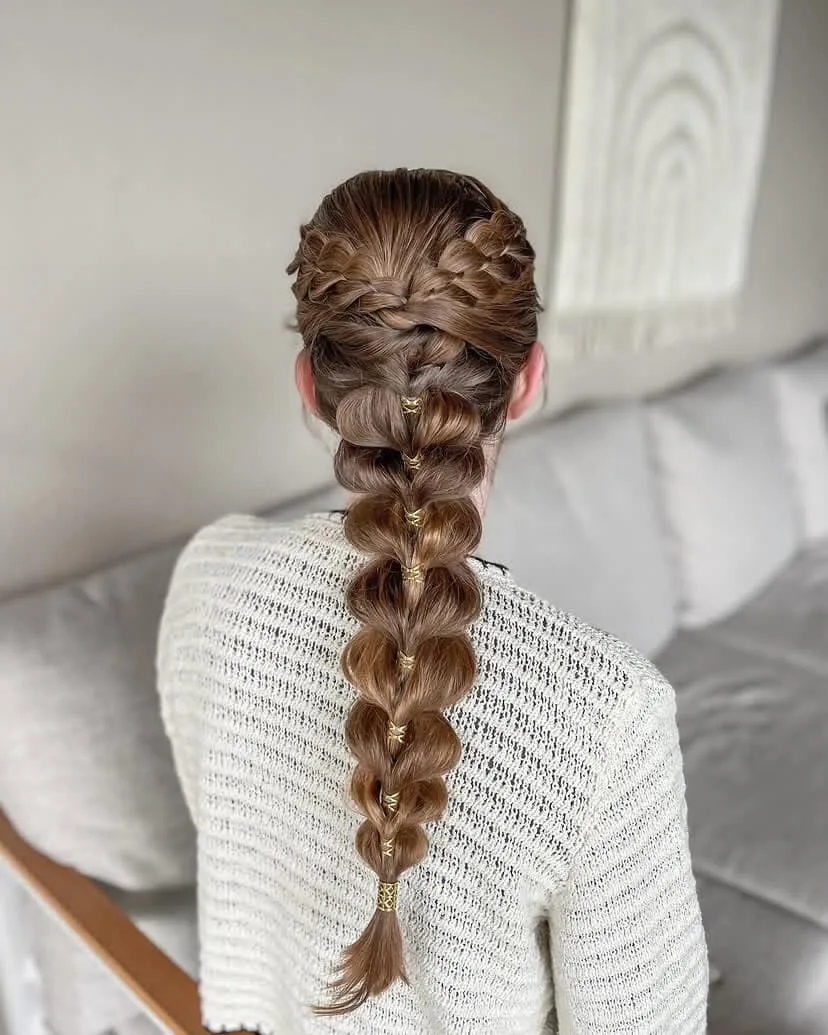
Braid two sections from either side of your head, bring them across the crown and pin them in place, tucking the ends underneath. Loosen the braid gently for softness, and add two crossed pins at each side for extra hold. It takes practice, so try it at home first.
Cost and time: free, about 8 minutes once practised. Maintenance: none during class. Who should skip it: anyone in a rush — this is a weekend style, not a before-work style.
The Slicked-Back Low Bun
A slicked-back low bun is the sharpest, most sweat-proof style in this guide. Every strand is smoothed back with a little gel or cream, so there are no flyaways to fall into your face, no frizz from sweat, and nothing to re-pin. It looks sleek in the studio and polished afterwards, and it holds through the sweatiest heated class.
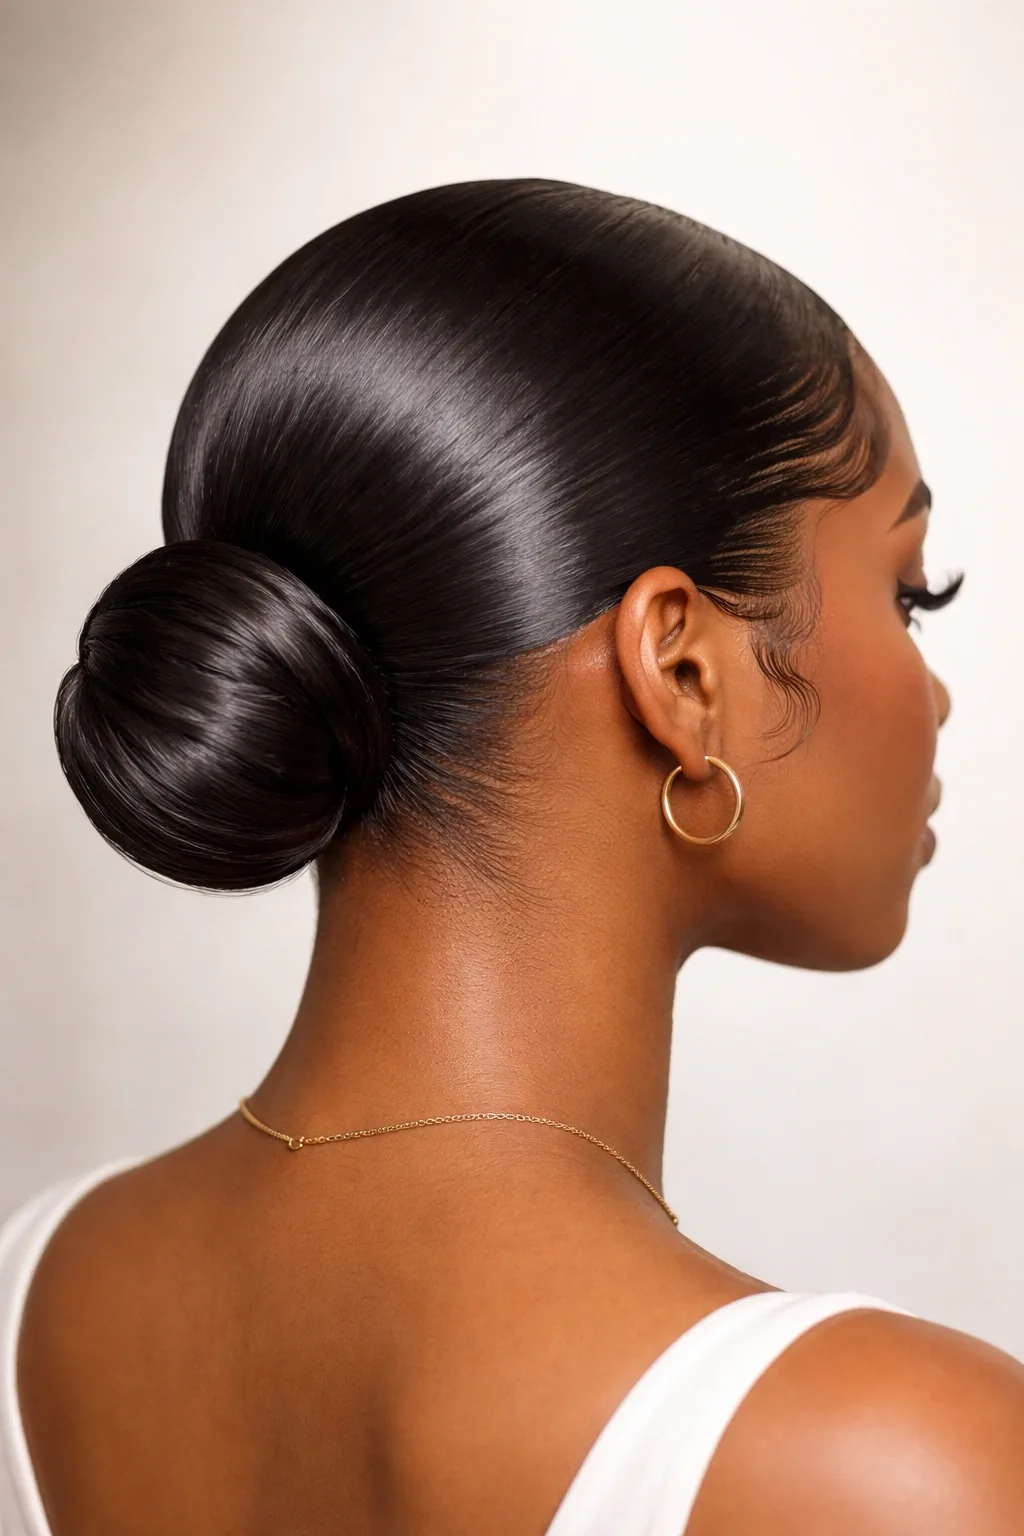
Apply a small amount of styling gel or cream through damp hair, brush it smoothly back, and secure it into a low bun. Use a fine-tooth comb for the front and a little extra product at the hairline. Keep the gel light — too much leaves hair crunchy and stiff once it dries.
Cost and time: a small amount of gel or cream, about 4 minutes. Maintenance: none — this is the lowest-maintenance sleek style here. Who should skip it: anyone with very dry hair, which can look straw-like under gel — use a cream instead.
The Low Curly Puff
A low curly puff is the best pilates style for natural curls. The curls are gathered low at the nape into a soft, rounded puff that lies flat on the mat, keeps the curl pattern intact, and does not pull the hair straight or flatten it. It celebrates the curls instead of fighting them.
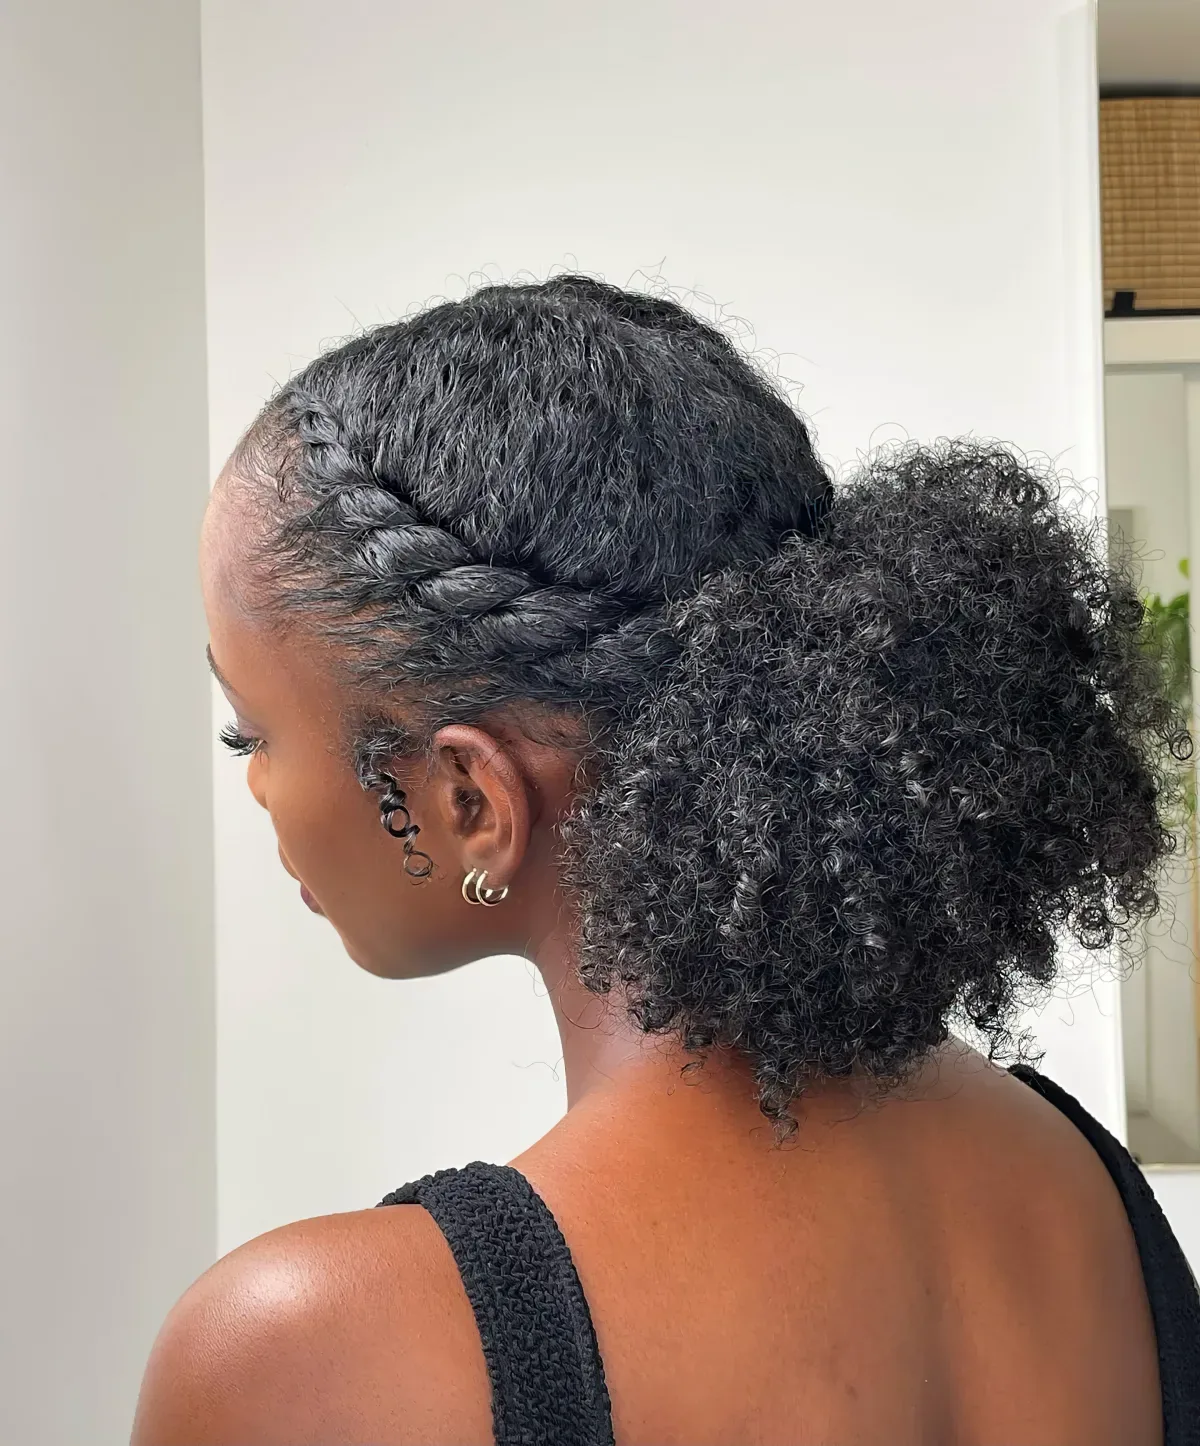
Gather your curls gently with a wide-tooth comb or your fingers, and secure them low with a fabric scrunchie or a satin-covered band — never a thin rubber elastic, which snags curls. Leave the front soft, and use a little curl cream on the edges to keep them smooth. Do not brush the puff out, or it will frizz.
Cost and time: one fabric scrunchie, about 3 minutes. Maintenance: smooth the edges once with a little cream. Quick verdict: the kindest, most comfortable style for curly hair in class.
The Tucked Bob With a Headband
A tucked bob with a headband is the short-hair style that actually stays put. The bob is tucked behind the ears, the headband keeps the front and the fringe clear, and the whole look is neat, sporty and completely mat-friendly — nothing hangs down, nothing falls forward, and nothing needs re-pinning.
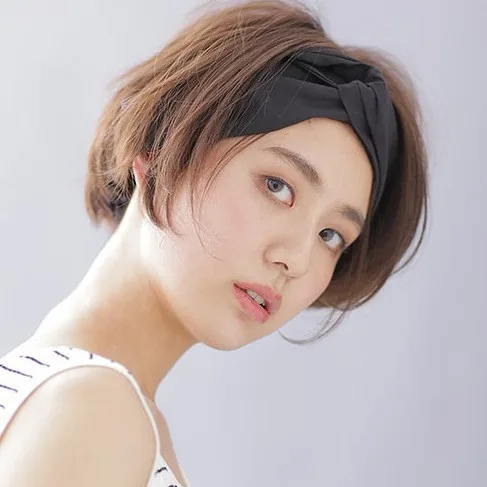
Tuck both sides of your bob behind your ears, slide a thin grippy headband into place, and add two flat clips at the sides if your layers are prone to escaping. A little texture spray gives the bob grip so it does not slide forward during roll-downs. It takes about two minutes and dries in minutes after class.
Cost and time: one headband, about 2 minutes. Maintenance: re-tuck once after floor work. Who should skip it: anyone with hair too short to tuck — a pixie with a sweatband suits you better.
The Pixie With a Sweatband
A pixie with a sweatband is the ultimate low-effort pilates style. The cut is already short, so there is nothing to tie up — the sweatband simply keeps sweat off your forehead and stops the front from sticking to your skin. It is light, cool and completely comfortable on the mat.
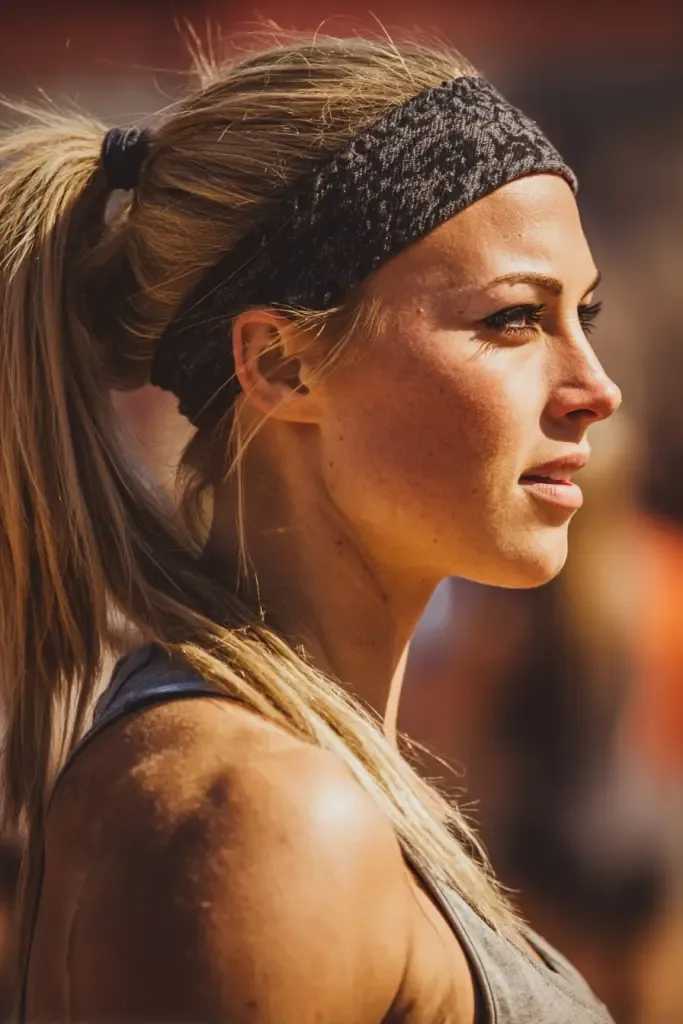
Choose a thin, absorbent sweatband in a fabric that grips without squeezing, and wear it just behind the hairline. A little texture paste through the top gives the pixie shape and stops it from going flat under the band. After class, take the band off, shake the pixie out, and you are done.
Cost and time: one sweatband, about 1 minute. Maintenance: none. Quick verdict: the fastest style in this guide — if you have a pixie, this is your pilates hairstyle.
Pinned-Back Curtain Bangs and Low Ponytail
Curtain bangs are lovely out of class and a nuisance in it — they fall forward during every roll-down and stick to a sweaty forehead. Pinning them back and pairing them with a low ponytail solves the problem completely, and it looks polished rather than improvised, because the pinned bangs read as a deliberate sweep.
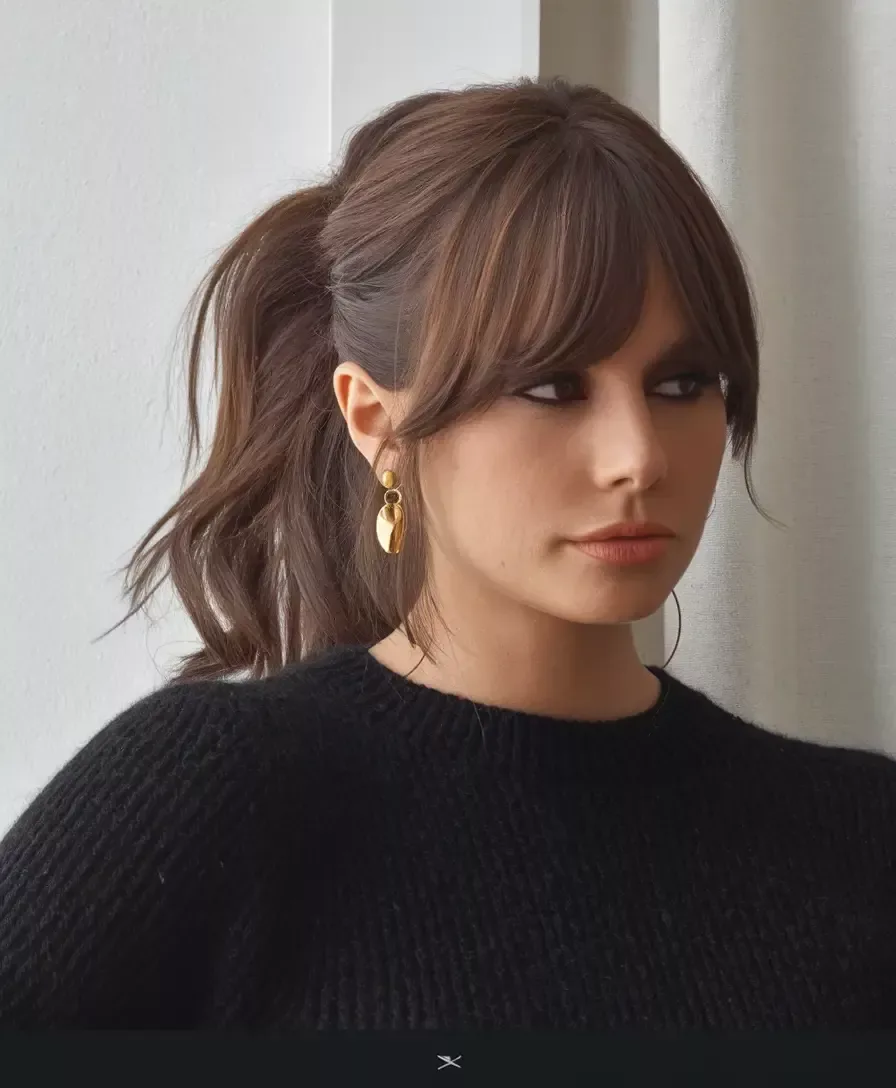
Sweep each side of the fringe back and pin it flat with a bobby pin that matches your hair colour, then gather the rest into a low ponytail. Cross two pins in an X on each side for extra hold. A little dry shampoo at the roots stops the bangs from going limp with sweat.
Cost and time: free, about 3 minutes. Maintenance: re-pin once if a bang escapes. Who should skip it: anyone without bangs — the plain low ponytail does the same job for you.
Box Braids in a Low Bun
Box braids in a low bun are the protective style that works hardest in pilates. The braids are already secure, so gathering them low simply contains them — nothing unravels, nothing frizzes, and the low position lies flat on the mat. It is comfortable, long-lasting and completely sweat-friendly.
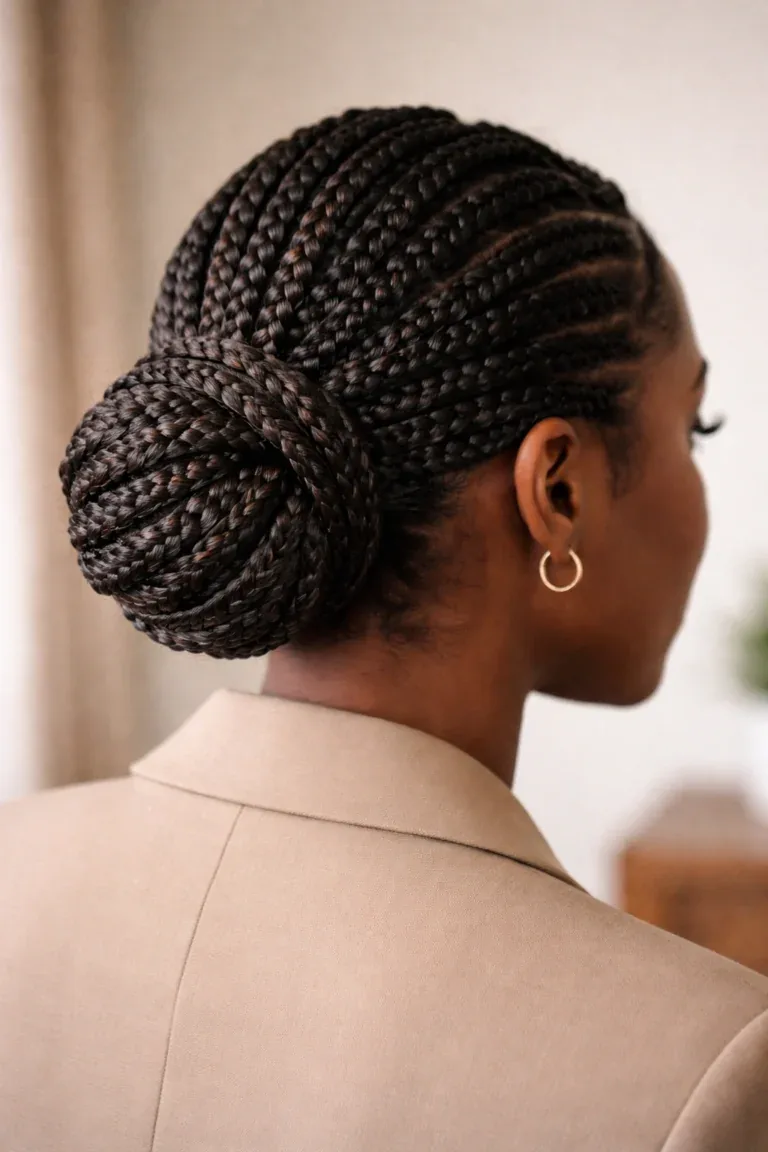
Gather your braids low at the nape and coil them gently into a bun, securing with a large fabric scrunchie or a satin band. Keep the bun loose rather than tight so it does not pull at your edges, and smooth the hairline with a little edge control. The style lasts for days, so you can wear it to every class in the week.
Cost and time: one large scrunchie, about 3 minutes to gather. Maintenance: re-tie the scrunchie once if it loosens. Who should skip it: anyone with fresh, tight braids that are still tender — wait until the tension settles before pulling them into a bun.
Cornrows Into a Low Bun
Cornrows into a low bun are the neatest, most secure style for textured hair in pilates. The cornrows lie flat against the scalp, so there is nothing to catch or shift, and gathering the ends into a low bun keeps everything contained and comfortable on the mat. It is a style that lasts all week with almost no daily effort.
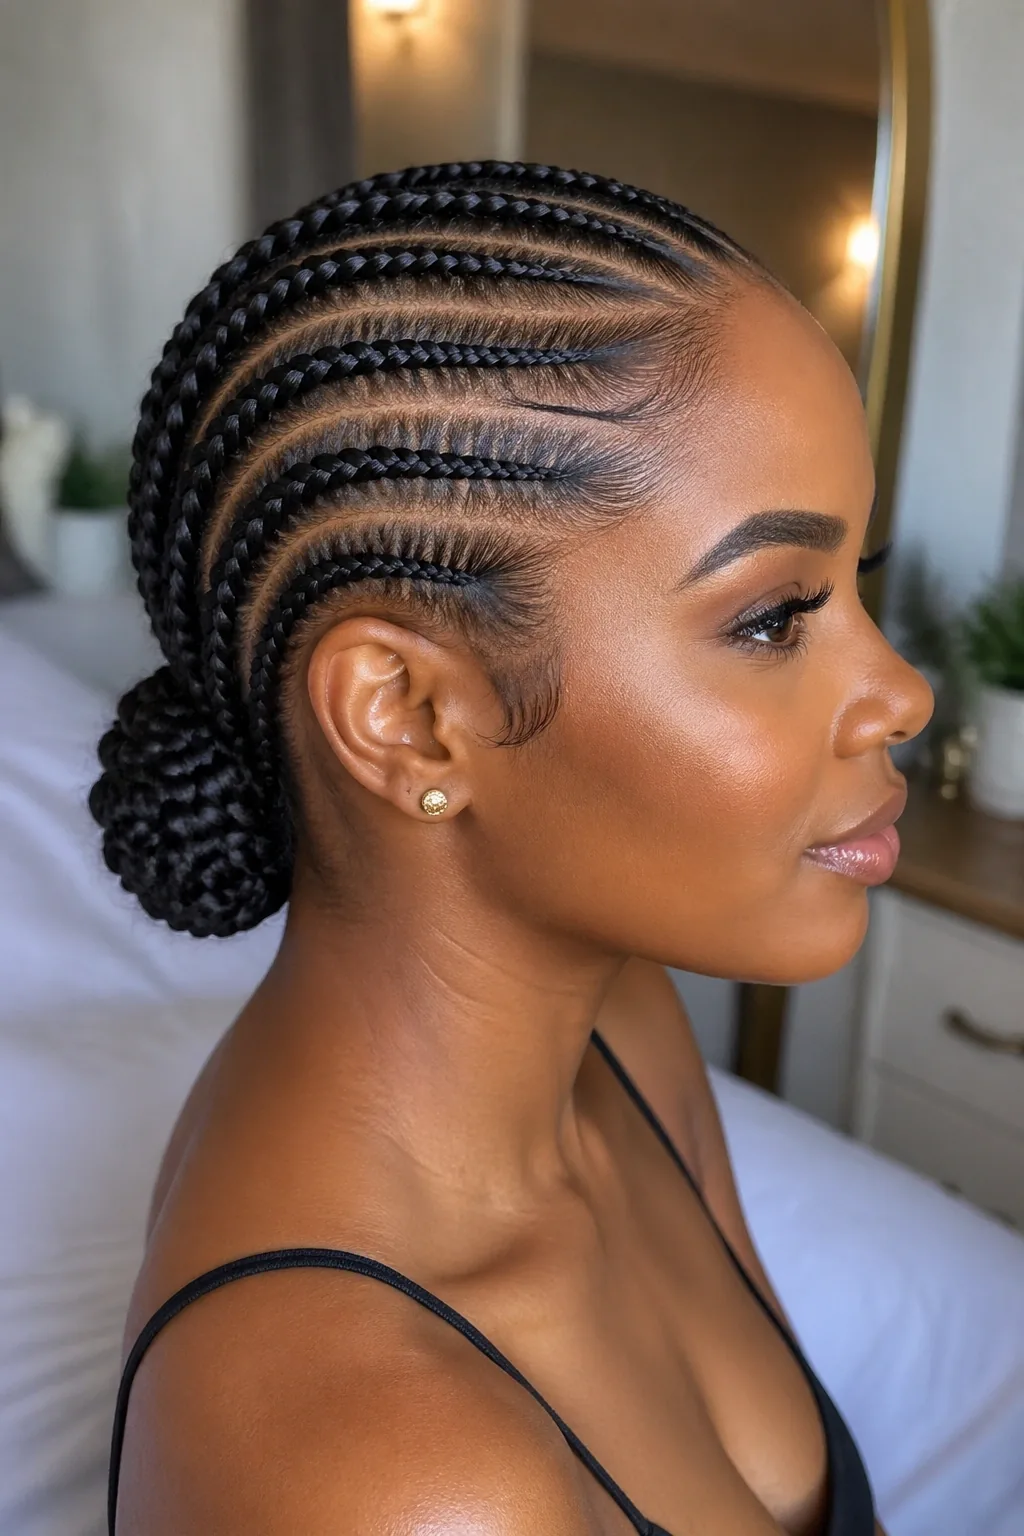
Braid or have your cornrows braided back from the hairline, then gather the loose ends low and coil them into a small bun. A satin scrunchie protects the ends, and a silk scarf at night keeps the style fresh between classes. Keep the bun small and low so it does not press into your head.
Cost and time: cornrows from a braider, about 3 minutes daily to gather. Maintenance: smooth the edges with a little gel before class. Quick verdict: the lowest-effort pilates style for textured hair — braid once, wear it all week.
The Wrapped-Base Low Ponytail
A wrapped-base low ponytail is the plain low ponytail made polished. A strand of your own hair wraps around the elastic and hides it completely, so the style looks finished and intentional — good enough for the studio, the office and dinner afterwards, with no extra accessories needed.
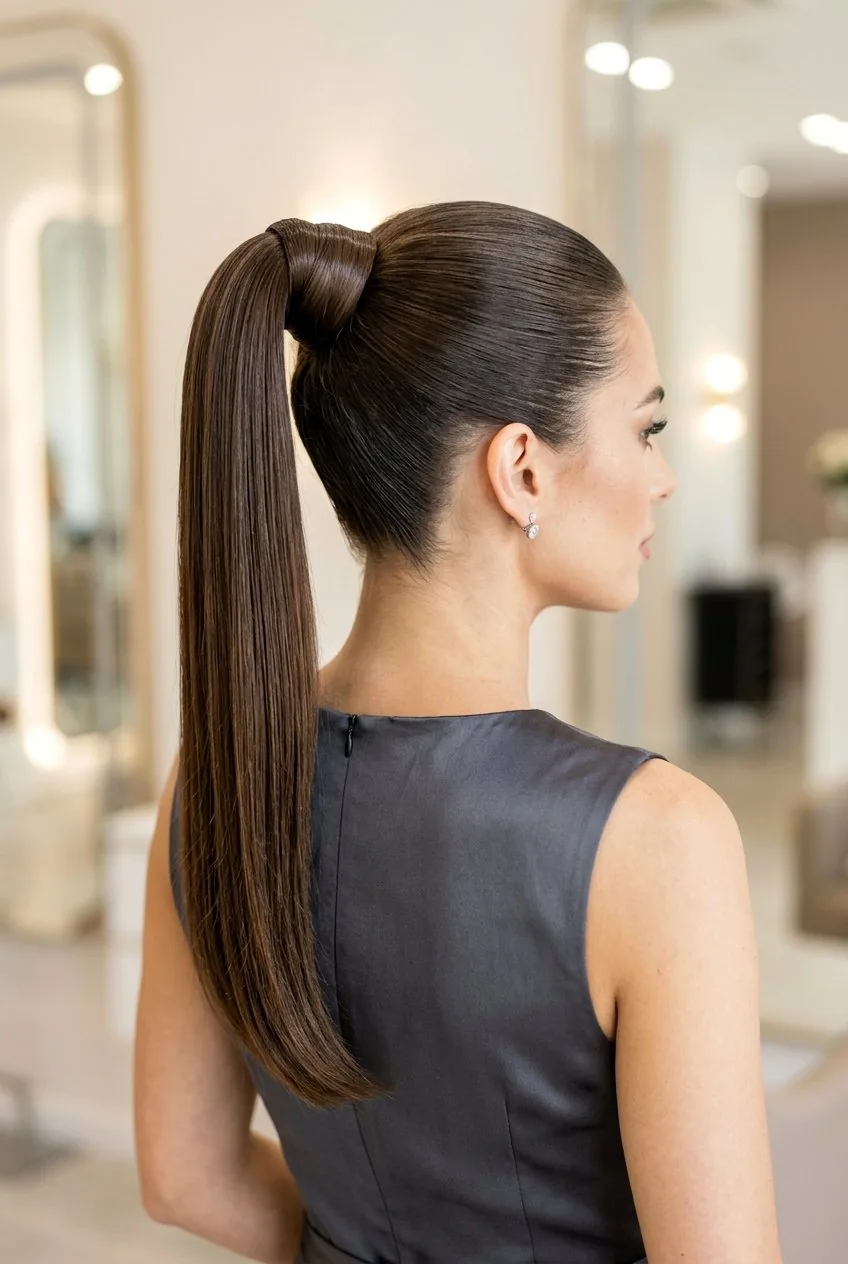
Make a low ponytail, take a thin strand from underneath, wrap it around the elastic two or three times, and pin the end underneath with a bobby pin. Keep the wrap snug so it does not unravel during floor work. It takes one extra minute over a plain ponytail, and it transforms how the style looks.
Cost and time: free, about 3 minutes. Maintenance: check the wrap once after lying down. Who should skip it: very short hair, which will not have a strand long enough to wrap — use a fabric-covered elastic instead.
The Twisted Ponytail
A twisted ponytail adds a soft rope detail to a plain ponytail, and that twist is what keeps it from swinging and tangling. It looks more finished than a basic ponytail, it holds better through a reformer flow, and it takes only a minute longer to do — a good trade for a style you will wear all day.
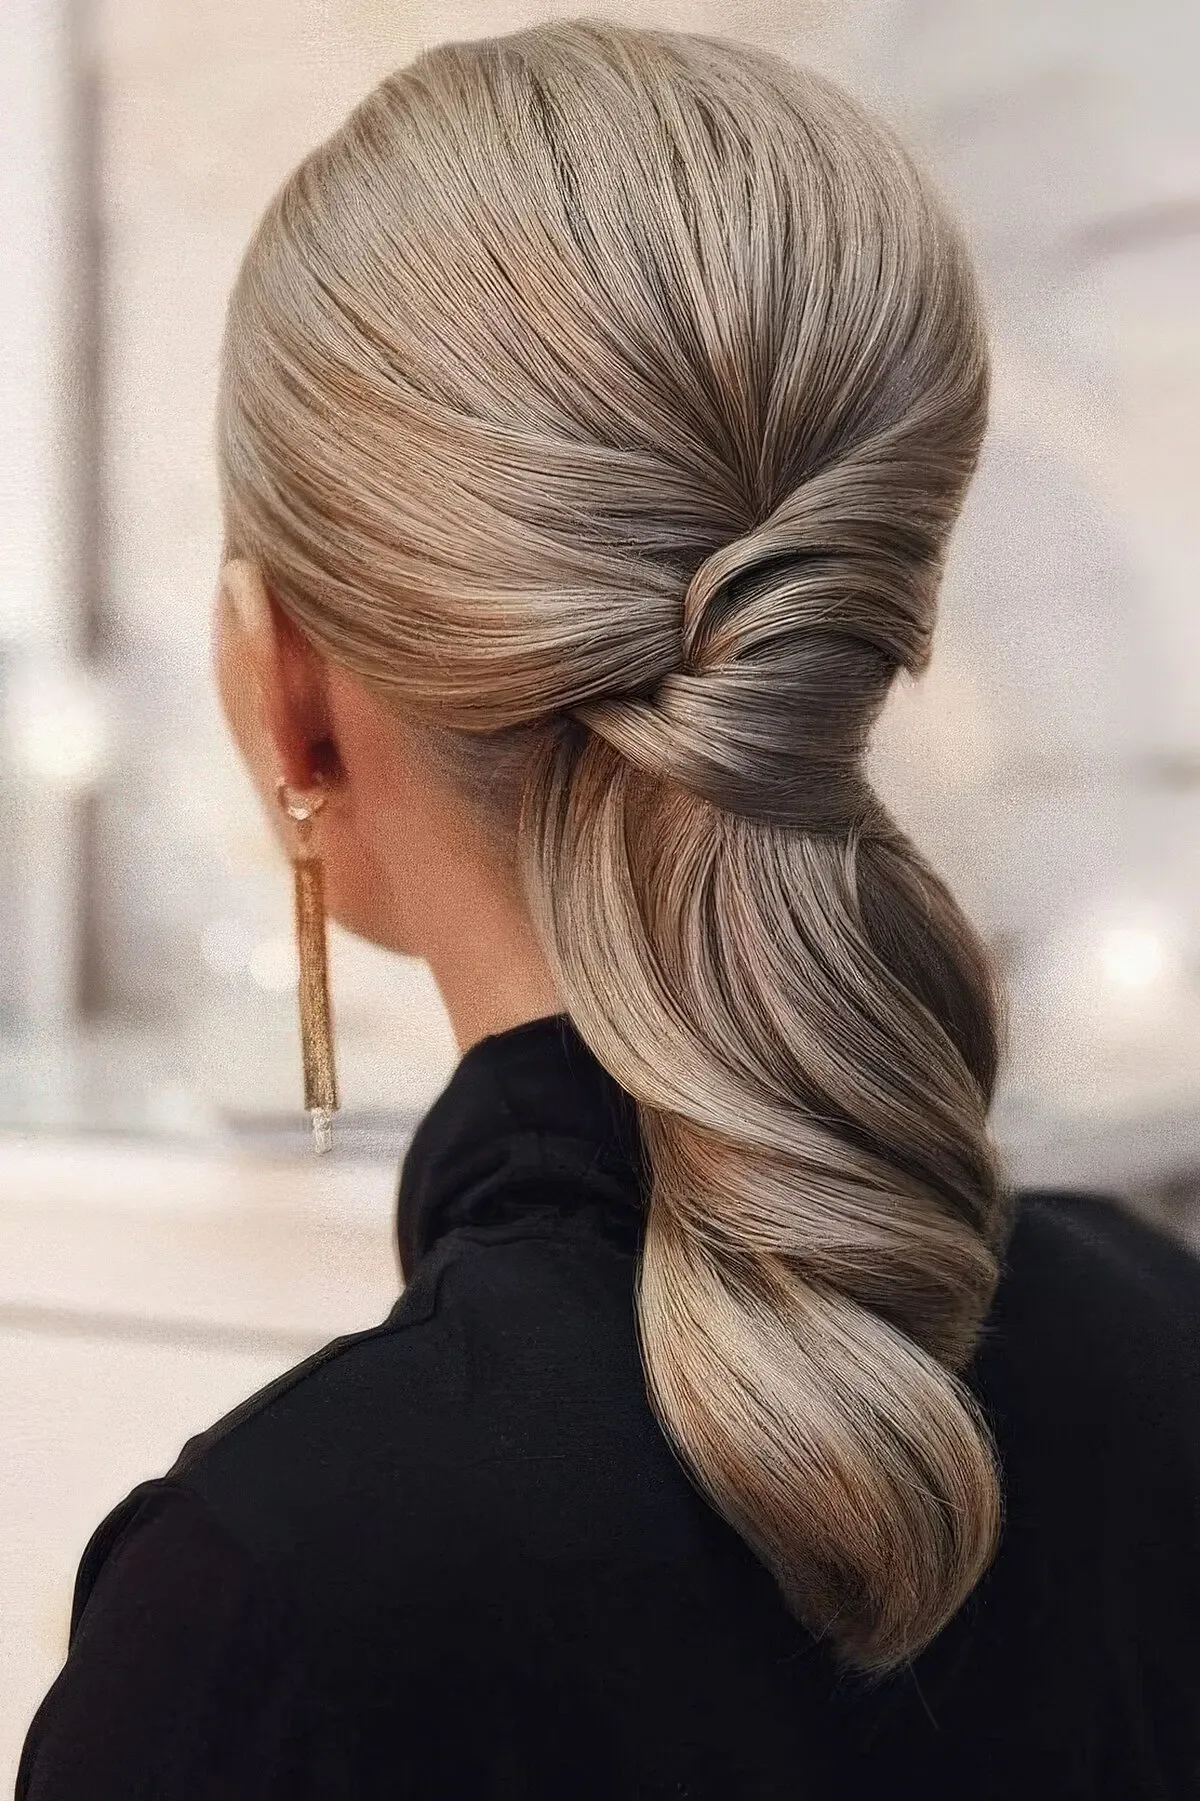
Make a low ponytail, split it into two sections and twist them around each other to the ends, then secure with a small elastic. Or twist the ponytail through a small gap above the elastic for a topsy-tail effect. Keep the twist loose and soft for a relaxed look, or tight for a sleeker one.
Cost and time: free, about 3 minutes. Maintenance: re-twist the ends once if they loosen. Quick verdict: a plain ponytail with one extra minute of effort — and it shows.
The Braided Bun
A braided bun is two secure styles in one: a braid for grip and a bun for flatness. The braid stops the bun from unravelling, and the bun keeps the braid from swinging, so the combination holds through any class — including the fast, heated ones where other buns come undone.
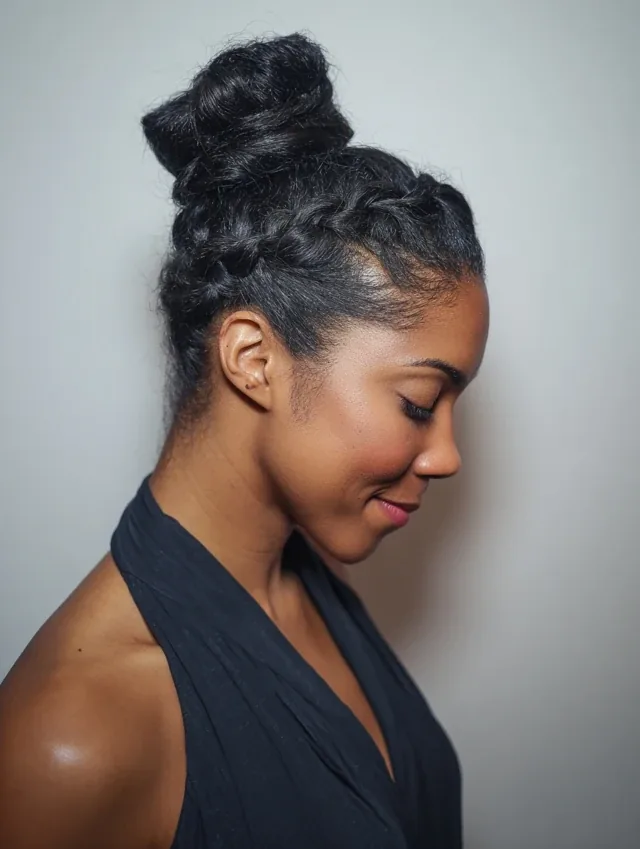
Braid your hair first, then coil the braid into a low bun and pin it in place. A French braid into a bun is the most secure version, while a simple three-strand braid into a bun is the fastest. Keep the bun low and small so it lies flat on the mat.
Cost and time: free, about 6 minutes. Maintenance: none during class — the braid locks the bun. Who should skip it: anyone short on time; a plain low bun is faster and nearly as good for a gentle class.
The Low Side Bun
A low side bun is the classic low bun moved to one side, and that small change makes it more comfortable on the mat. The bun sits beside your neck instead of under your head, so nothing presses into the mat when you lie down, and it looks soft and romantic from the front — a lovely choice for a weekend class.
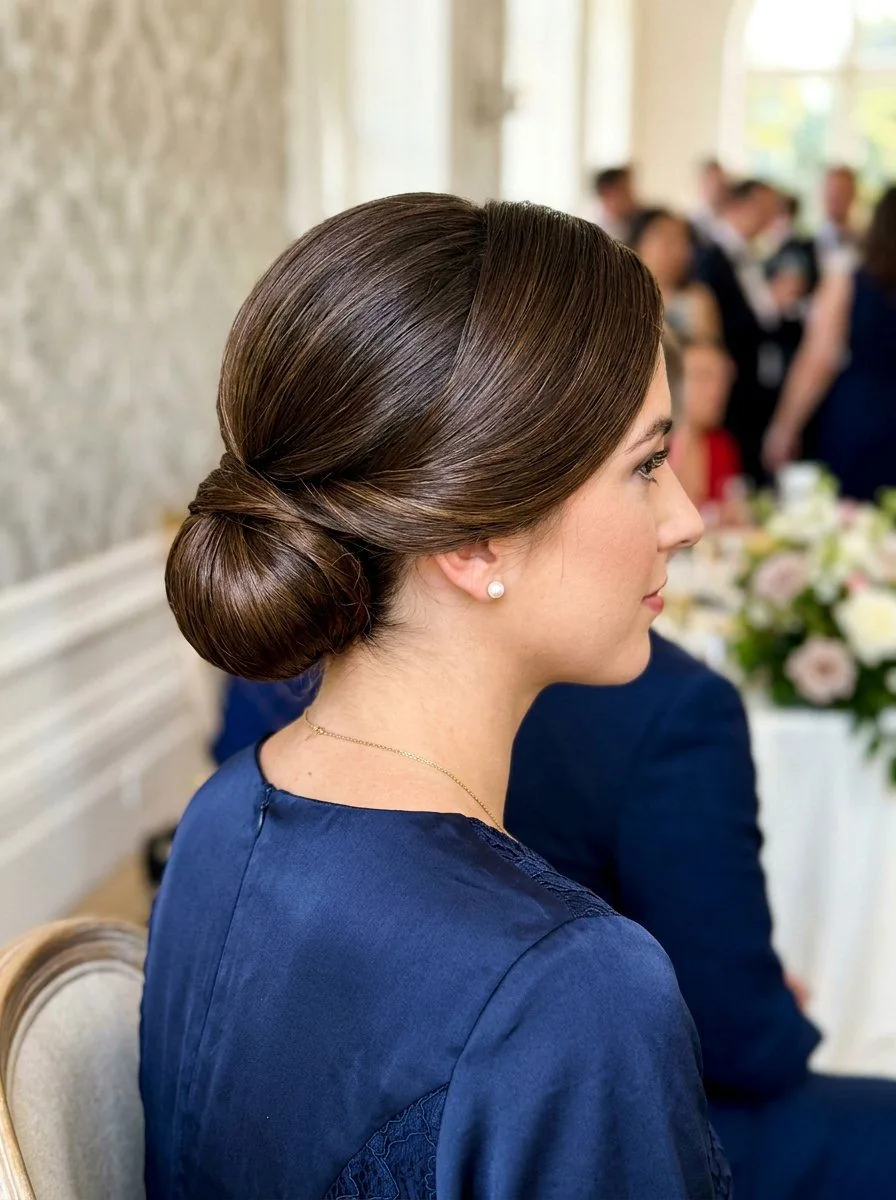
Gather your hair low and to one side, twist it loosely and pin it into a soft bun just behind your ear. Leave a few pieces free around your face for softness. Check that the bun sits clear of the mat by lying down and turning your head before class.
Cost and time: free, about 3 minutes. Maintenance: re-pin once if it shifts during floor work. Quick verdict: the most comfortable bun on the mat — nothing under your head at all.
The Half-Up Mini Bun
A half-up mini bun is the smallest updo that still works in pilates. The top half of your hair is gathered into a tiny bun at the crown, the rest falls loose behind your shoulders, and the front stays clear of your face. It is quick, cute and surprisingly secure for a gentle or beginner class.
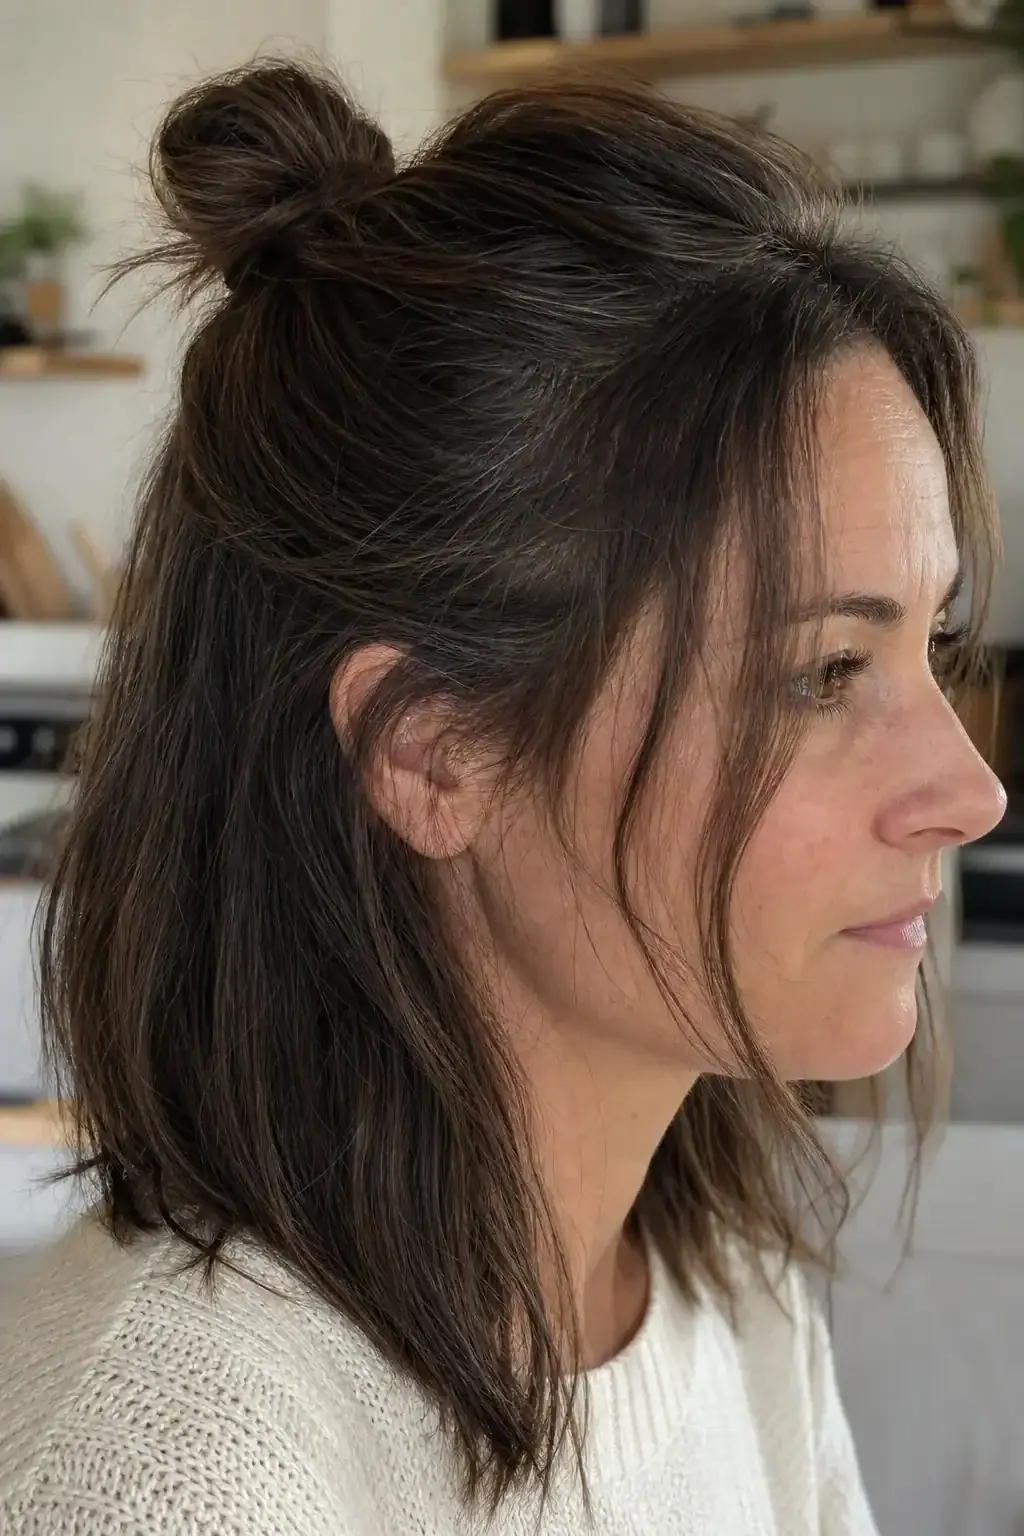
Gather the top section of your hair, twist it into a small bun and secure it with a mini elastic or two pins. Keep the bun small and tight so it does not wobble, and leave the loose hair smooth and tangle-free. It works best on medium-length hair.
Cost and time: free, about 2 minutes. Maintenance: re-pin once if it loosens. Who should skip it: anyone in a fast reformer class — the loose hair will swing; choose a full bun or braid instead.
Milkmaid Braids
Milkmaid braids wrap two braids across the top of your head like a crown, keeping every strand up, off your neck and out of your face. They are one of the most secure styles in this guide — anchored all the way around — and they look charming and a little bit special, which makes them a favourite for a Saturday morning class.
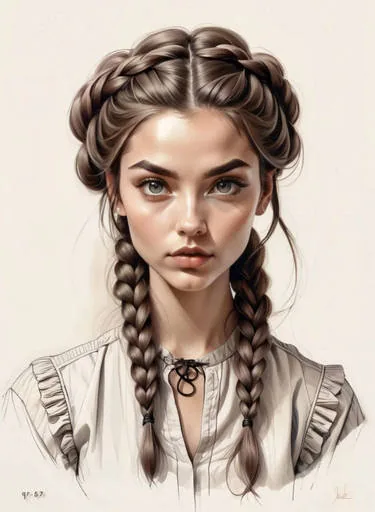
Braid two low pigtails, bring each one up and across the top of your head, and pin them in place, tucking the ends underneath. Cross two pins at each side for hold. It takes practice and a few extra minutes, so save it for a day when you are not in a rush.
Cost and time: free, about 8 minutes once practised. Maintenance: none during class. Who should skip it: anyone short on time, or with very short hair that will not reach across the crown.
The Silk Scrunchie Low Bun
A silk scrunchie low bun is the classic low bun made kinder to your hair. The silk slides instead of gripping and snagging, so it does not break hair or leave a dent, and it holds a bun securely without needing to be pulled tight. It is the style to choose if your hair is fine, fragile or colour-treated.
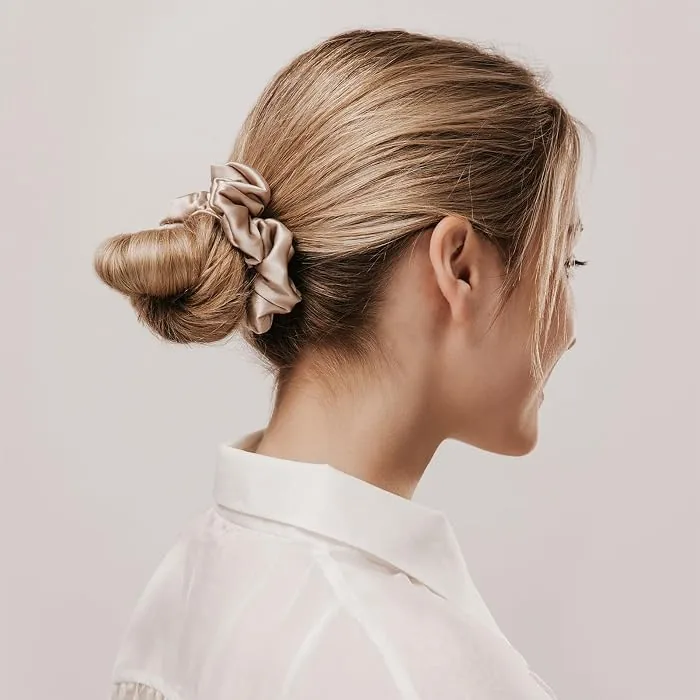
Gather your hair low and secure it with a silk scrunchie, then twist and coil it into a bun and pin it lightly. Use a scrunchie in a colour that matches your hair so it disappears, or a bright one as an accessory. The bun should feel loose and comfortable, never tight.
Cost and time: one silk scrunchie, about 3 minutes. Maintenance: almost none. Quick verdict: the kindest bun in this guide — your hair will notice the difference within a week.
The Crown-Braid Ponytail
A crown-braid ponytail combines the security of a braid at the front with the simplicity of a ponytail at the back. The braid keeps the hairline neat and the front out of your face, while the ponytail keeps the length contained. It is a polished, sporty style that holds through a hard reformer session.
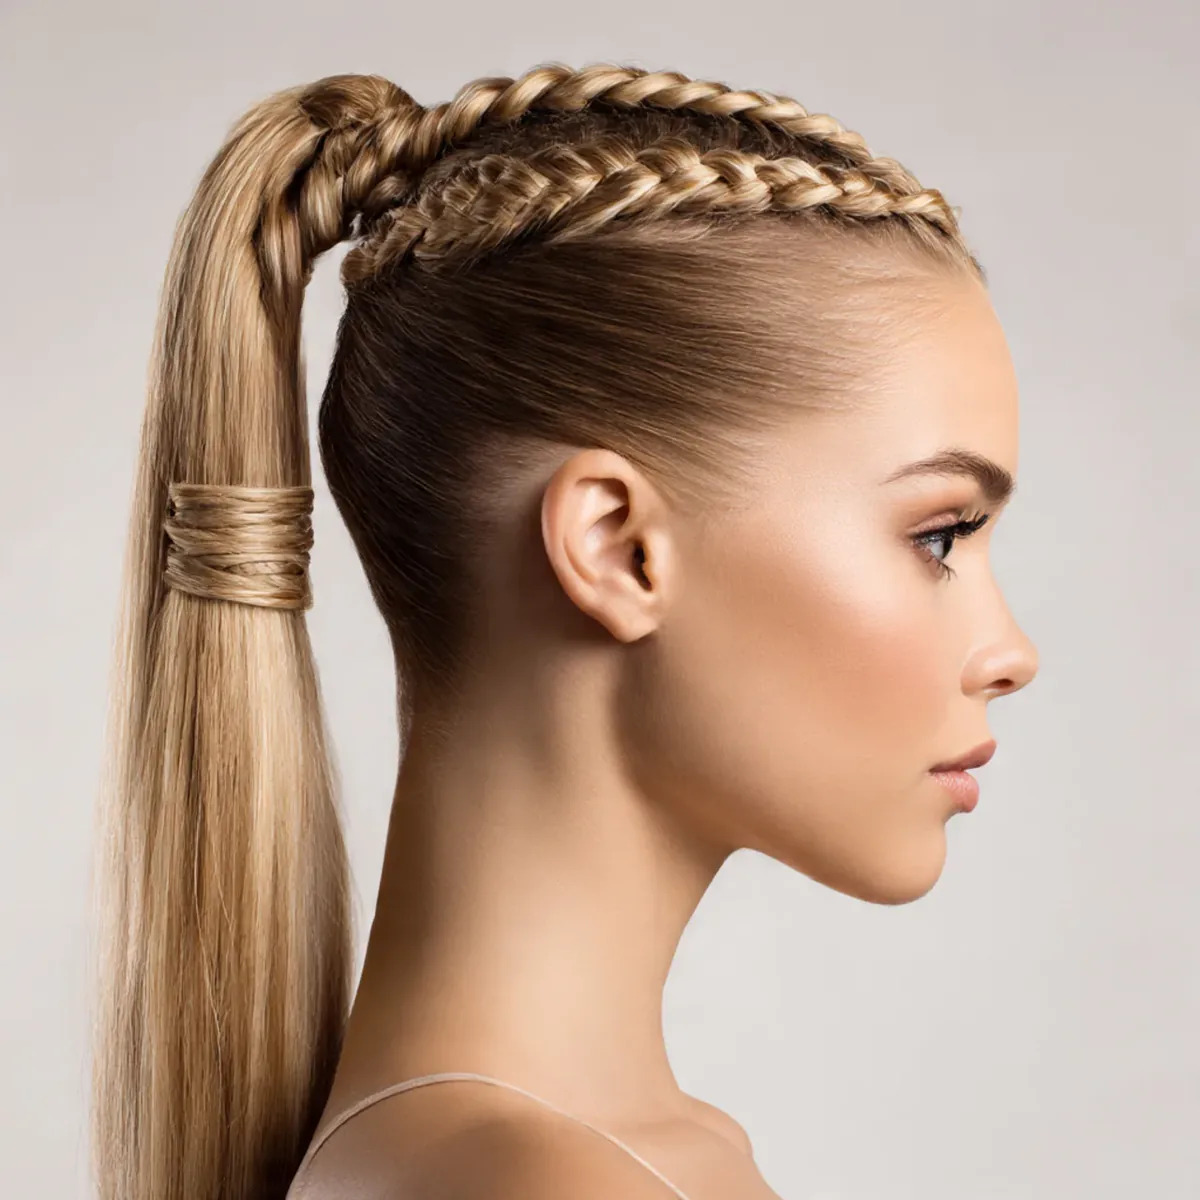
Braid a small section along one side of your hairline, bring it back and join it into a low ponytail with the rest of your hair. Secure the ponytail firmly and pin the braid end underneath. It takes a little practice, but it is worth learning — it is one of the most reliable styles here.
Cost and time: free, about 6 minutes once practised. Maintenance: none during class. Who should skip it: anyone who cannot braid yet — practise the French braid first, then add the crown detail.
The Low Bun With a Braided Wrap
A low bun with a braided wrap is the classic low bun with a beautiful detail: a thin braid wrapped around its base. The braid hides the elastic, adds texture and interest, and helps the bun hold — because the braid itself acts as an extra anchor. It looks far more complicated than it is.
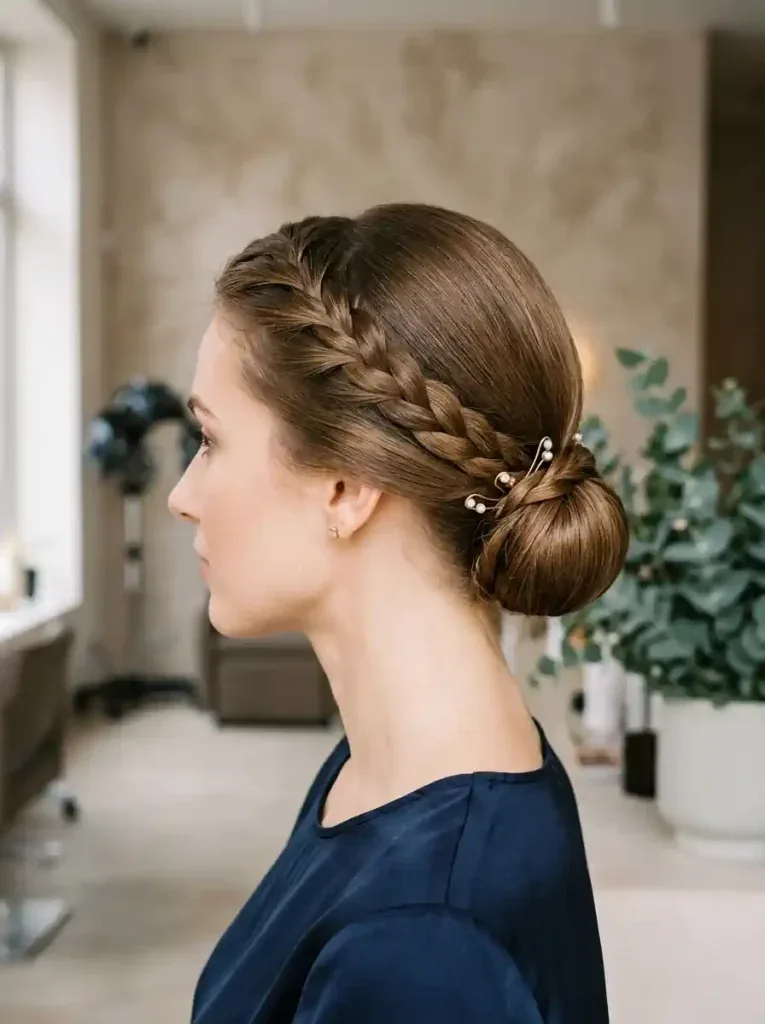
Make a low bun, then take a small section of hair from underneath, braid it thinly, and wrap it around the base of the bun, pinning the end underneath. Keep the wrap snug so it does not slip during floor work. The whole style takes about five minutes once you know the steps.
Cost and time: free, about 5 minutes. Maintenance: check the wrap once after lying down. Quick verdict: the prettiest low bun in this guide, and still completely mat-friendly.
The Two-Strand Twist Bun
A two-strand twist bun is the simplest twisted updo in this guide, and one of the most comfortable. Two strands twisted together coil naturally into a soft, flat bun that lies beautifully on the mat, holds without tight pulling, and comes down into a lovely wave after class. It is especially kind to textured and curly hair.
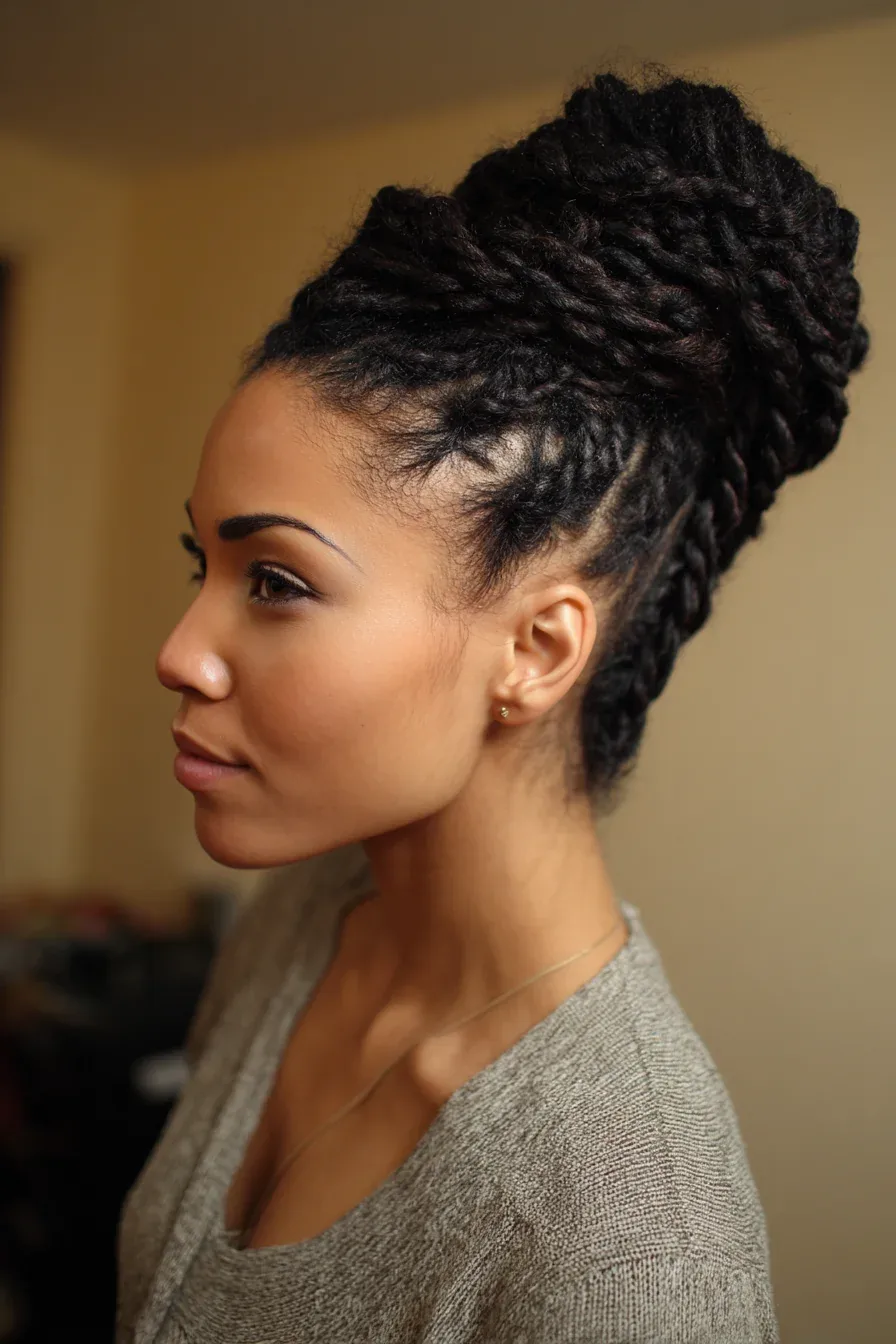
Split your hair into two sections, twist each one in the same direction, then twist the two together and coil them into a low bun, pinning it in place. Use a little styling cream on the twists for definition and hold. Keep the bun low and loose so it does not pull at your hairline.
Cost and time: free, about 5 minutes. Maintenance: re-pin once during a long class. Who should skip it: very fine, straight hair, which can unravel from a twist — a braided bun holds better for you.
What is the best hairstyle for a pilates class?
A low bun or a low braid is the best hairstyle for a pilates class, because it lies flat when you are on your back, does not swing into your face, and stays put through rolls and reformer work. A low ponytail is the best faster alternative, especially for long hair.
Should I wear my hair up or down for pilates?
Wear your hair up for pilates. Hair worn down falls across your face during roll-ups, catches under your shoulders during bridges, and gets in the way of straps on the reformer. A low updo keeps your hair safe and lets you focus on the exercises.
Is a high bun bad for pilates?
Yes, a high bun is usually a bad choice for pilates, because it presses into the back of your head every time you lie down on the mat. It can cause discomfort and headaches during supine exercises. Choose a low bun at the nape instead.
How do I stop my hair falling out during pilates?
Anchor your style in layers: a snag-free elastic at the base, two bobby pins crossed in an X at the anchor, and a second elastic or clip as a backup. Dry shampoo at the roots before styling also gives fine hair extra grip so pins hold better.
Can I wear a claw clip to pilates?
Yes, you can wear a claw clip to pilates if it sits low and flat against your head. A small, flat claw clip holding a low twist or bun is comfortable on the mat. Avoid large, bulky clips on the back of your head, which dig in when you lie down.
What hairstyle is best for short hair in pilates?
A headband with the front pinned back is the best hairstyle for short hair in pilates. Two flat clips keep a fringe and layers out of your face, and a thin grippy headband keeps the hairline clear without pressing on your head during floor work.
How do I keep my hair from getting sweaty in pilates?
Apply dry shampoo to your roots before class to absorb sweat as it appears, and wear a thin sweatband or headband to keep moisture off your hairline. Keep products light, since heavy oils make hair slippery and mix with sweat to look greasy.
Is a braid good for pilates?
Yes, a braid is one of the best choices for pilates. It spreads the weight of long hair along its whole length, so it does not pull at your neck, and it stays secure through rolls, twists and reformer work. A French, Dutch or fishtail braid all work well.
What should I do with my hair after pilates?
Take the style down, shake out the roots, and spray a little dry shampoo through the crown, then brush through gently. Most low buns and braids leave a soft wave behind, so you can re-style into a loose bun or ponytail in about five minutes.
Can I wear my hair in a ponytail on the reformer?
Yes, a low ponytail works well on the reformer as long as it is anchored firmly with a strong elastic and two pins at the base. Keep it low rather than high, so it does not catch in the springs or swing across your face when the carriage moves.
Conclusion
The best hairstyles for a pilates class are not the prettiest ones in the mirror — they are the ones you forget about for fifty minutes. A low bun that lies flat on the mat, a braid that spreads the weight of long hair, a claw-clip twist that takes thirty seconds and holds all class: these are the styles that let you breathe, move and focus on the work instead of on your hair.
Try two or three styles from this guide, practise them at home until they take under five minutes, and keep a small kit of elastics, pins and dry shampoo in your gym bag. Then forget about your hair completely and enjoy the class. It will still be there, still in place, when you roll up your mat.