One Band, Endless Looks: Hairstyles With a Headband for Every Length, Texture and Occasion
A headband is the hardest-working accessory in your drawer, and it is the only one that can do the job of a whole styling routine in about ten seconds. It hides a bad hair day, rescues bangs that are growing out, keeps hair off your face at the gym, and turns a plain ponytail into something that looks deliberate — all without heat, without product, and without a mirror full of tools. That is the whole appeal of hairstyles with a headband: the band does the styling, and your hair just has to show up.
It is also the most forgiving accessory you can own. A headband flatters every hair length, from a pixie to waist-length waves, and it works on every texture — straight, wavy, curly, thick, fine, and everything in between. The trick is not owning one headband, it is owning the right ones: a thin band for polish, a wide padded band for drama, a stretchy fabric band for workouts, and a knotted band for the days you want the accessory to be the outfit. This guide gives you 36 hairstyles with a headband across every length and occasion, plus eight short guides on the questions women actually ask — which width suits your face, how to stop a band from slipping, how to style around bangs, and which material to choose for which day.
Each style comes with honest notes on styling time, who it suits best, and what to watch out for, so you can pick the one that fits your morning rather than fighting it. Keep one band in your bag, one on your dressing table, and one in your gym kit, and you will never have a hair emergency again.
Choosing the Right Headband Width for Your Face Shape
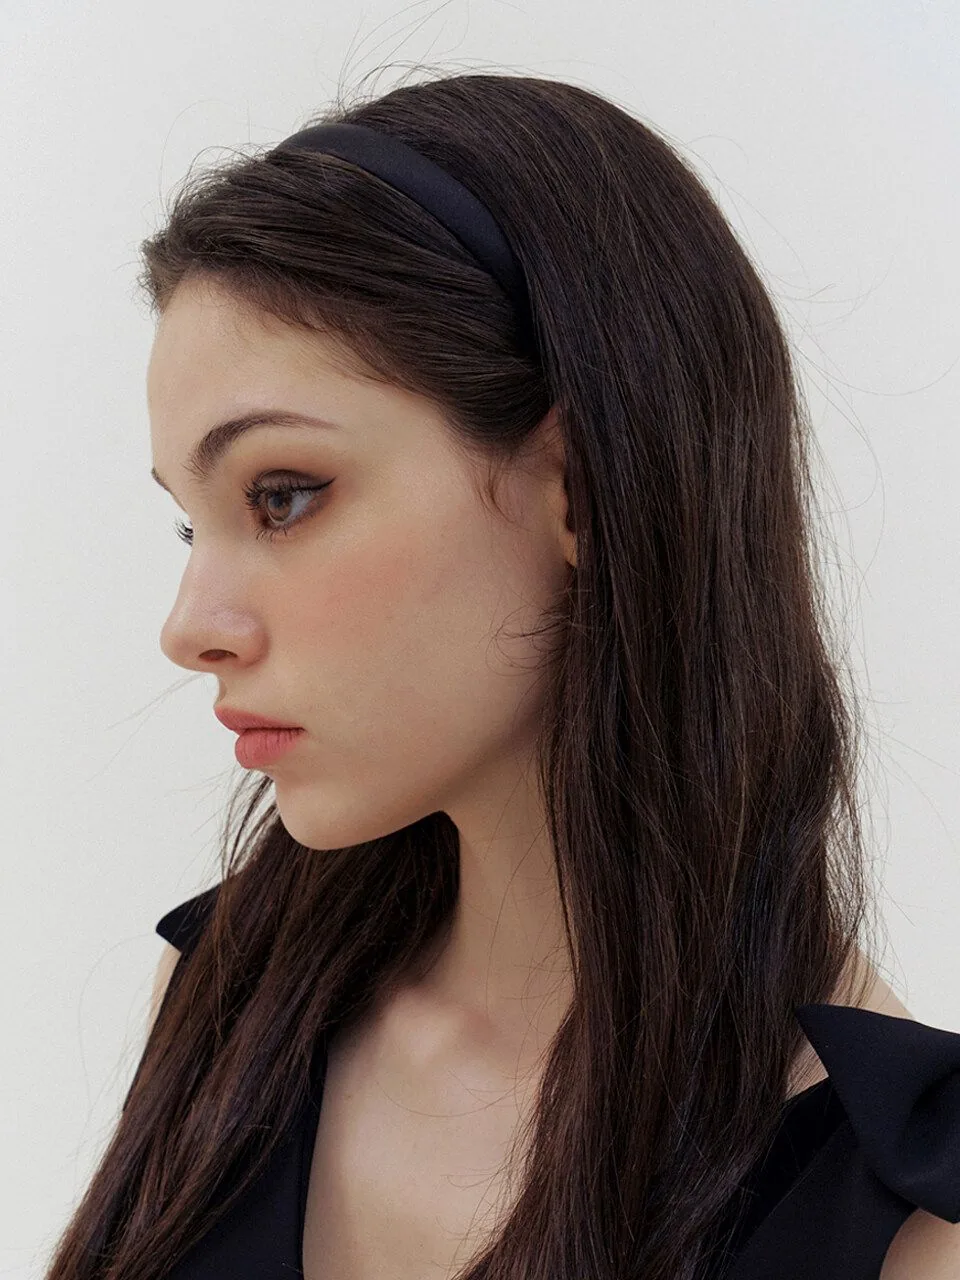
Width is the first decision, and it matters more than colour. A thin band, about half a centimetre wide, reads as jewellery — subtle, polished, and the right choice when your hair is the star. A medium band of one to two centimetres is the everyday workhorse: visible enough to make a statement, slim enough to wear with almost anything. A wide or padded band, three centimetres and up, becomes the outfit — it frames the face, adds height, and turns even a plain ponytail into a look.
Match the width to your face shape and your hair volume. A wide band suits a long or oval face because it breaks up the length and adds width at the crown. A thin or medium band suits a round face, where a very wide band can make the face look shorter. Fine hair can carry any width, but a heavy padded band may slide on it, so look for one with a grippy lining. Thick hair can hold a wide band easily, and the extra width actually helps keep the bulk in place. Quick verdict: when in doubt, start medium — it suits almost everyone, and you can size up or down from there.
How to Keep a Headband From Slipping All Day
A slipping headband is the most common complaint about the style, and it is almost always a fit problem, not a hair problem. The band should sit behind your ears and rest against the curve of your skull, not perch on top of your head like a crown. Push it back about two centimetres from your hairline, then let a few face-framing pieces fall in front of it — the hair in front anchors the band, and the band holds the hair behind it.
Texture is your other ally. A band grips far better on hair with a little texture than on freshly washed, silky hair, so a spritz of dry shampoo or texture spray at the roots before you put the band on works wonders. Look for bands with a velvet or silicone grip on the underside, or with small silicone teeth along the inner edge — they are invisible once the band is on, and they make the difference between a band that lasts all day and one you are pushing back every ten minutes. Common mistake: wearing the band too far forward, where the slope of the forehead pushes it off. Slide it back, add texture, and it will stay put.
Headbands for Short Hair vs Long Hair
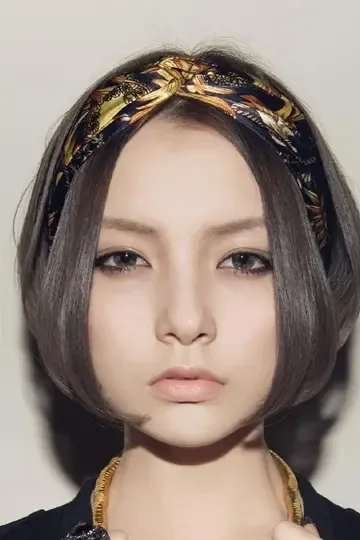
Short hair and headbands are a natural match, because the band adds the interest that a short cut sometimes lacks. On a pixie or a bob, a thin or medium band sits neatly against the cut, shows off the shape of the style, and keeps the front pieces out of your eyes without hiding the haircut itself. A wide padded band on short hair can overwhelm the cut, so save the drama for a special occasion and let the medium band do the everyday work.
Long hair has the opposite problem: there is so much of it that a band can disappear. On long hair, a medium or wide band works best, because it is visible against the volume, and it has a real job to do — keeping the front sections back while the lengths fall loose. Long hair also lets you play with placement: wear the band at the hairline for a retro look, or push it further back for a boho feel, with face-framing layers falling in front. Pros of short hair with a band: the look takes seconds and the band never gets lost. Pros of long hair with a band: the band can anchor braids, buns and ponytails that would otherwise need a dozen pins.
Styling a Headband Around Bangs and Layers
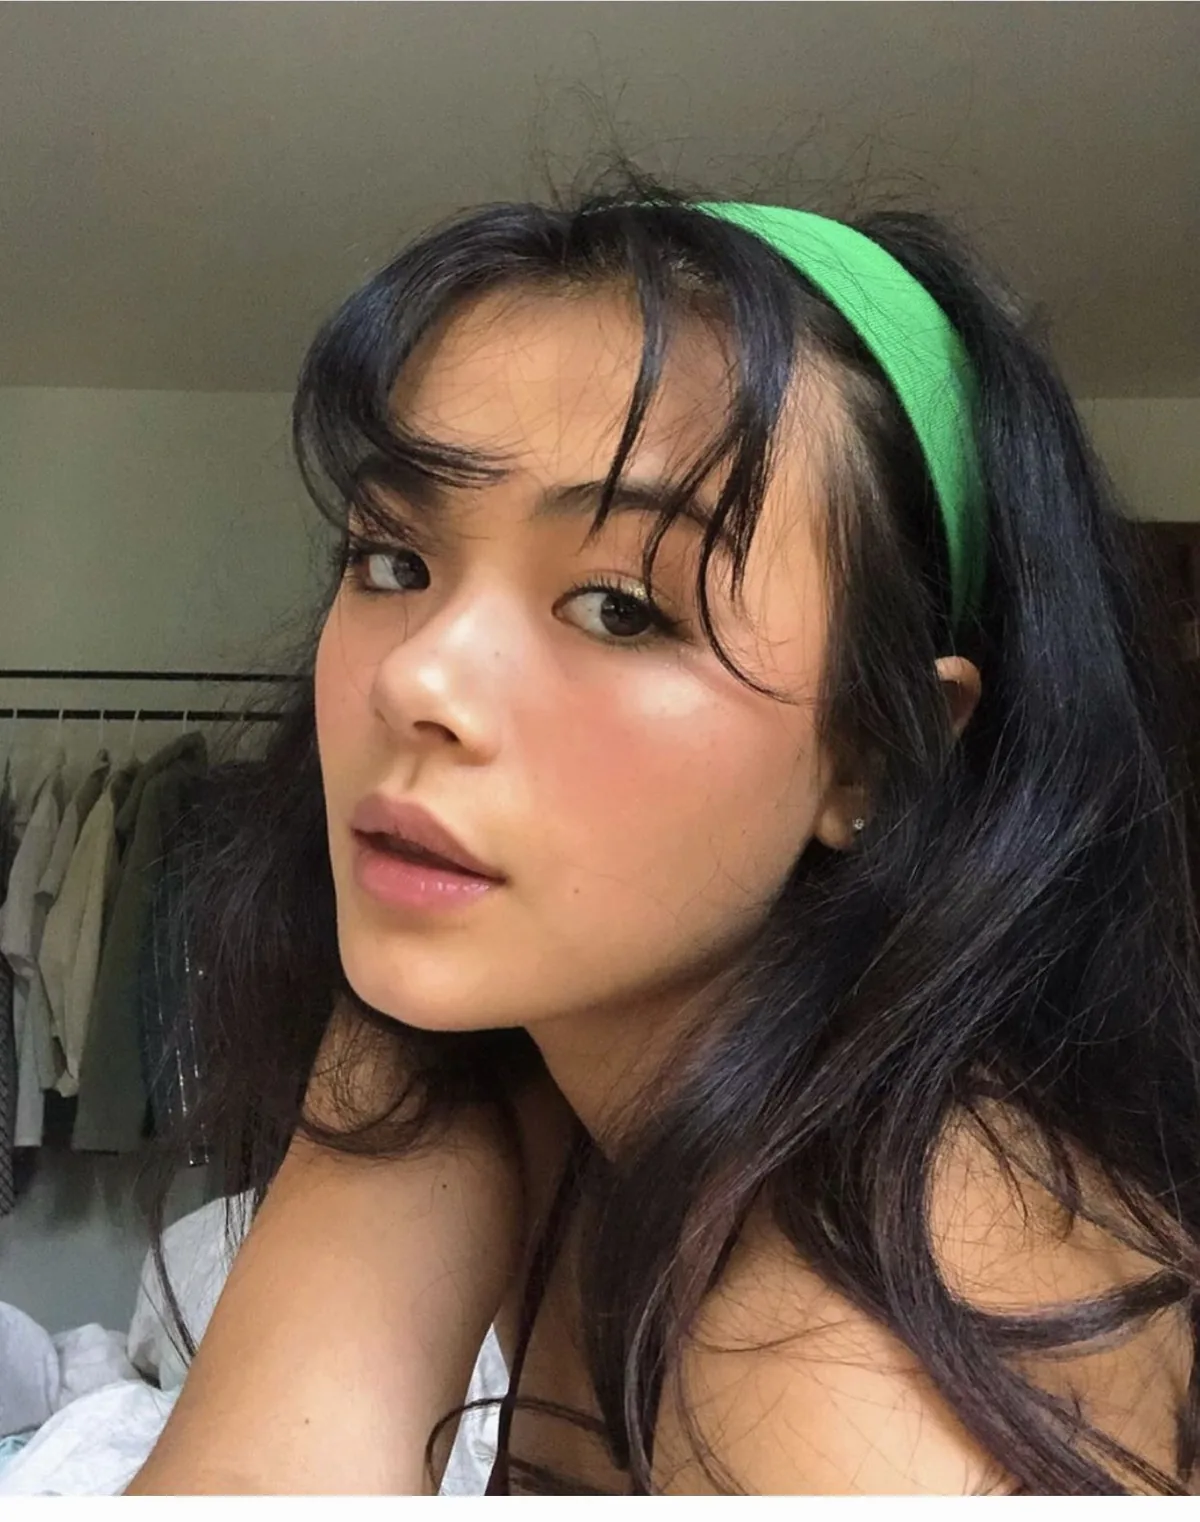
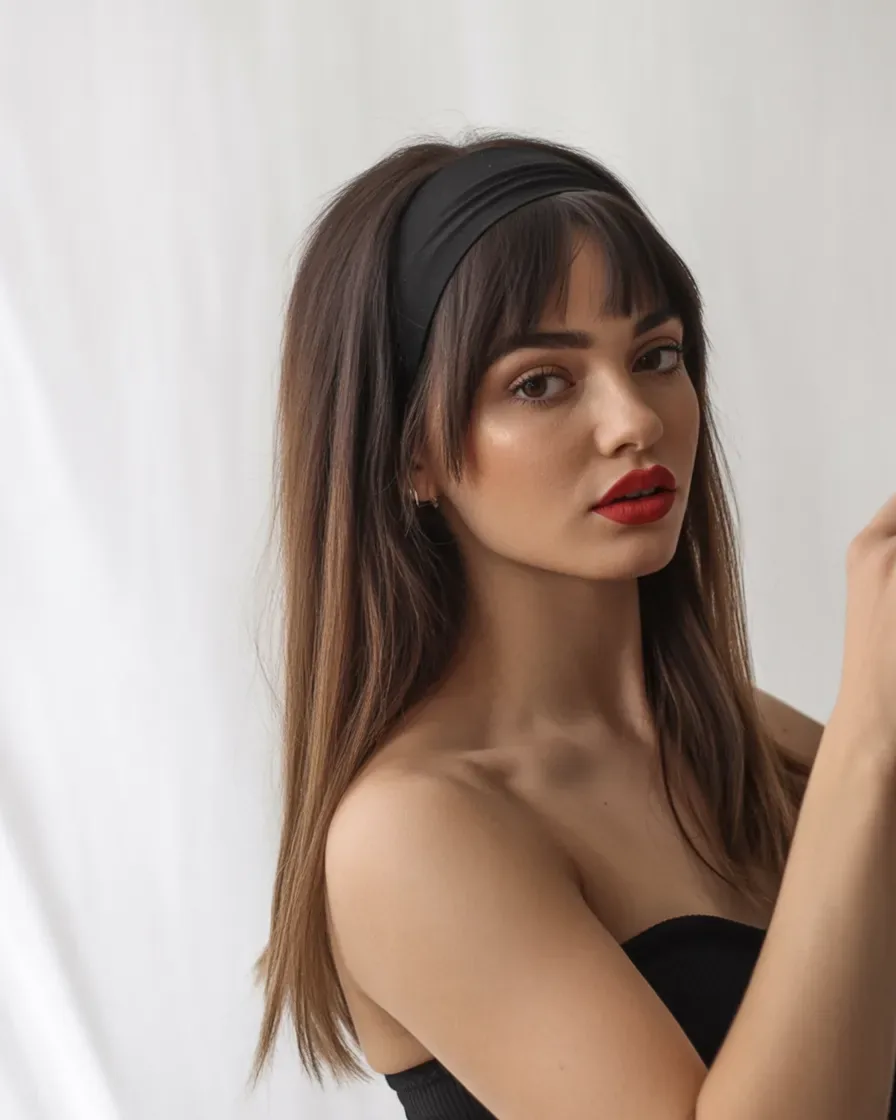
Bangs and headbands are made for each other, as long as you decide which one is in charge. The simplest rule is this: either the bangs sit in front of the band, or the band sits in front of the bangs — never both fighting for the same spot. For curtain bangs, let the bangs fall in front of the band and part in the middle, so the band frames them like a picture frame. For blunt bangs, push the band behind the fringe so the straight line of the bangs stays clean and the band peeks out above it.
Layers work the same way. Face-framing layers should come forward, in front of the band, to soften the look; the band then holds the bulk of the hair back while the layers do the flattering. If your layers are short and keep slipping out from under the band, that is not a failure — it is the style. Let them fall, and the look goes from strict to effortless. What to ask your stylist: layers that start at the cheekbone, so they fall naturally in front of a band without needing to be pinned. Styling time: two minutes, because the band is doing the work the layers used to do.
Fabric vs Metal vs Padded Headbands: Which One Suits You?
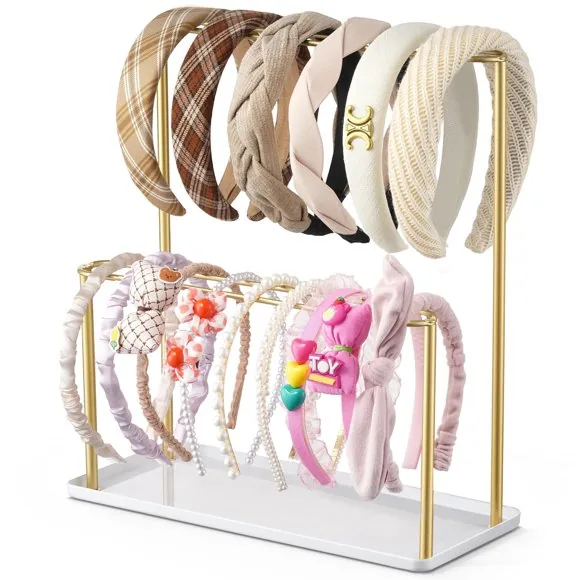
Fabric bands are the comfortable ones. A stretchy jersey or cotton band moulds to your head, stays put without pinching, and is the best choice for long wear, for workouts, and for anyone who has ever taken a headband off at noon with a headache. They come in every colour and pattern, so they are also the easiest way to match a band to an outfit. Their one weakness is polish — a fabric band reads casual, so it is not the first choice for a black-tie evening.
Metal bands are the polished ones. A thin metal band, plain or twisted, reads as jewellery and adds a finished edge to a simple style — a low bun, a sleek blowout, a plain ponytail. They grip well on most hair but can slide on very smooth hair, and they can pinch behind the ears if the fit is wrong, so try before you buy. Padded bands are the statement ones: they add height, drama and a deliberately retro feel, and they are the band to reach for when the band itself is the look. Cost and time: fabric bands are the cheapest and the most forgiving, metal bands last for years, and a good padded band is worth the small splurge because it changes a whole outfit.
Headbands for Workouts and Sweaty Days
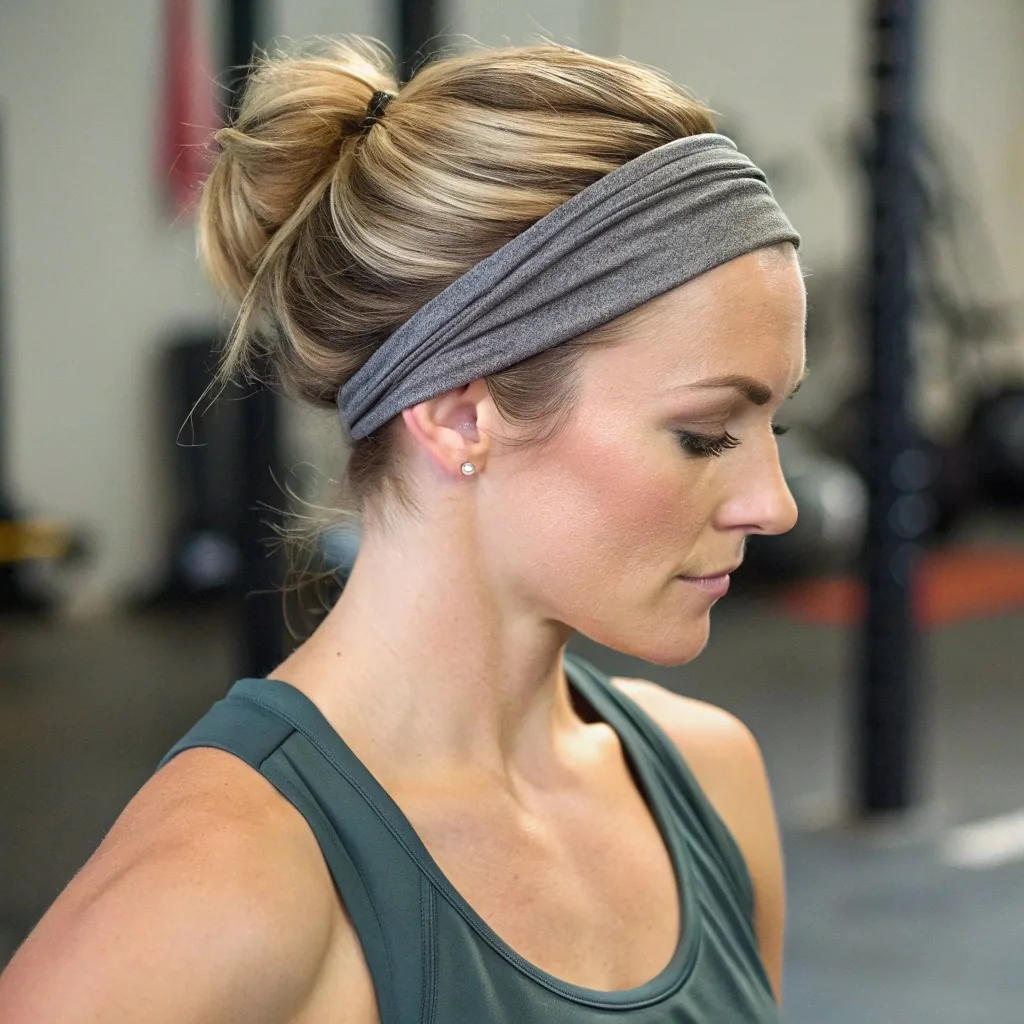
A workout headband has one job above all others: stay put and keep sweat out of your eyes. That means stretchy fabric, a wide enough band to catch sweat, and a grip that survives movement. Look for moisture-wicking material and a silicone grip strip on the inside — cheap fabric bands slide the moment you start sweating, while a proper sports band stays where you put it through a run, a class, or a full match.
Styling matters as much as the band. Put the band on over a low ponytail or a braid, not over loose hair, so the hair has somewhere to go and the band is not fighting the weight of it. Push the band back from the hairline by a couple of centimetres, then tuck the front pieces under it — they will stay out of your face, and the band will not slide forward when you bend over. Who should avoid a tight sports band: anyone who gets tension headaches, because a band that is too tight will make a workout miserable. Pick a band you can wear for an hour without noticing it, and wash it after every session — a sweaty band is a breakout waiting to happen.
Dressing a Headband Up or Down
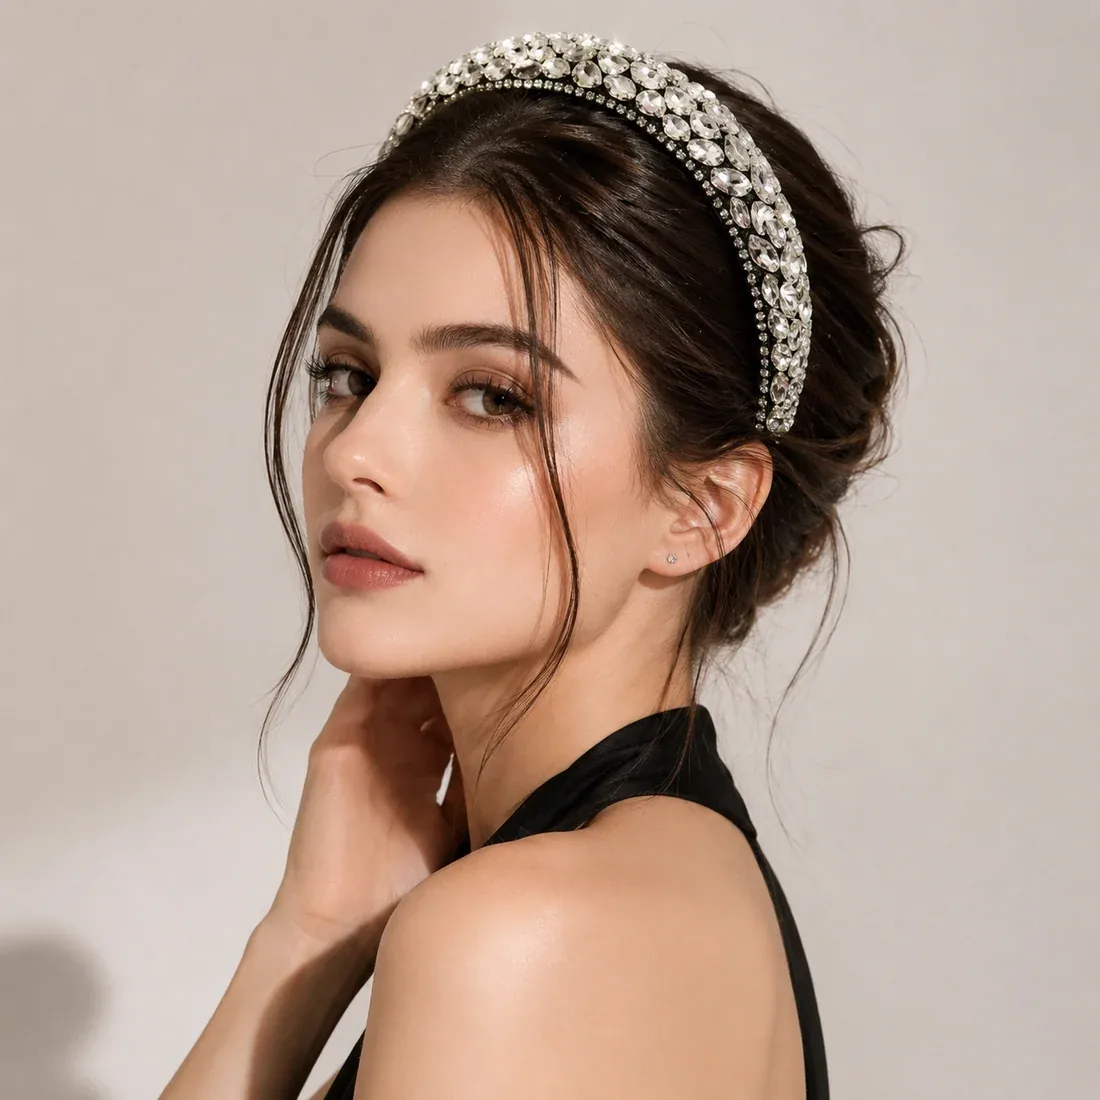
The same headband can go to the gym and to a wedding — the difference is what you pair it with. To dress a band down, choose fabric or a simple knotted band, wear it with loose waves or a messy bun, and let a few pieces fall free. The look is effortless, a little undone, and it works for school runs, coffee dates and ordinary days when you still want to look like you tried.
To dress it up, switch the material and tighten the style. A metal band, a pearl band, or a velvet padded band with a sleek low bun or a polished chignon reads instantly formal. Add a little shine spray, tuck every stray hair away, and the band becomes jewellery. Best for: anyone who wants one accessory to cover a whole week — buy one good metal band and one good padded band, and you have a dressed-up and a dressed-down option for every outfit you own. Maintenance is easy: wipe a metal band clean, hand-wash a fabric band, and keep a padded band out of the rain.
Common Headband Mistakes — and How to Fix Them
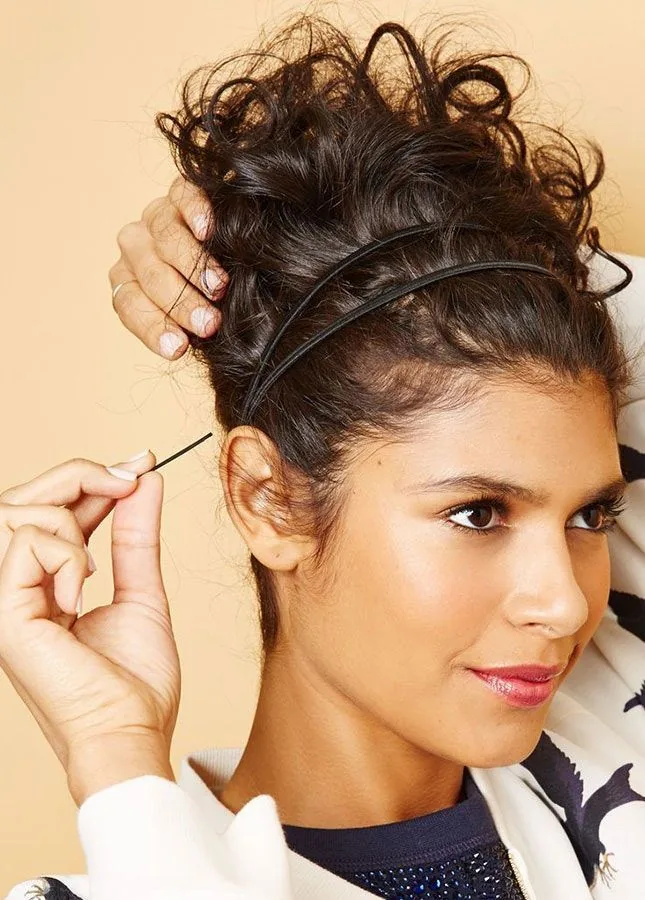
The first mistake is wearing the band too far forward, where it slides off within an hour. Slide it back two centimetres from the hairline and it will sit in the curve of your skull, where it belongs. The second is choosing the wrong size: a band that is too tight gives you a headache and a dent in your hair, while a band that is too loose slides everywhere. A band should feel snug but not tight, and if it leaves a mark after an hour, it is too small.
The third mistake is putting a band on freshly washed, slippery hair and expecting it to grip. Add texture first — dry shampoo at the roots, or a little texture spray — and the band will hold. The fourth is hiding the band under too much hair, so it disappears and does the work of nothing. Let the band show: pull a few face-framing pieces in front of it, but leave the band visible across the crown. And the last mistake is wearing the same band every day without washing it. Fabric bands collect oil and product, so wash them regularly, and wipe metal bands clean. Fix these five things, and a headband becomes the easiest style in your routine instead of the most frustrating one.
1. The Headband With Loose Waves
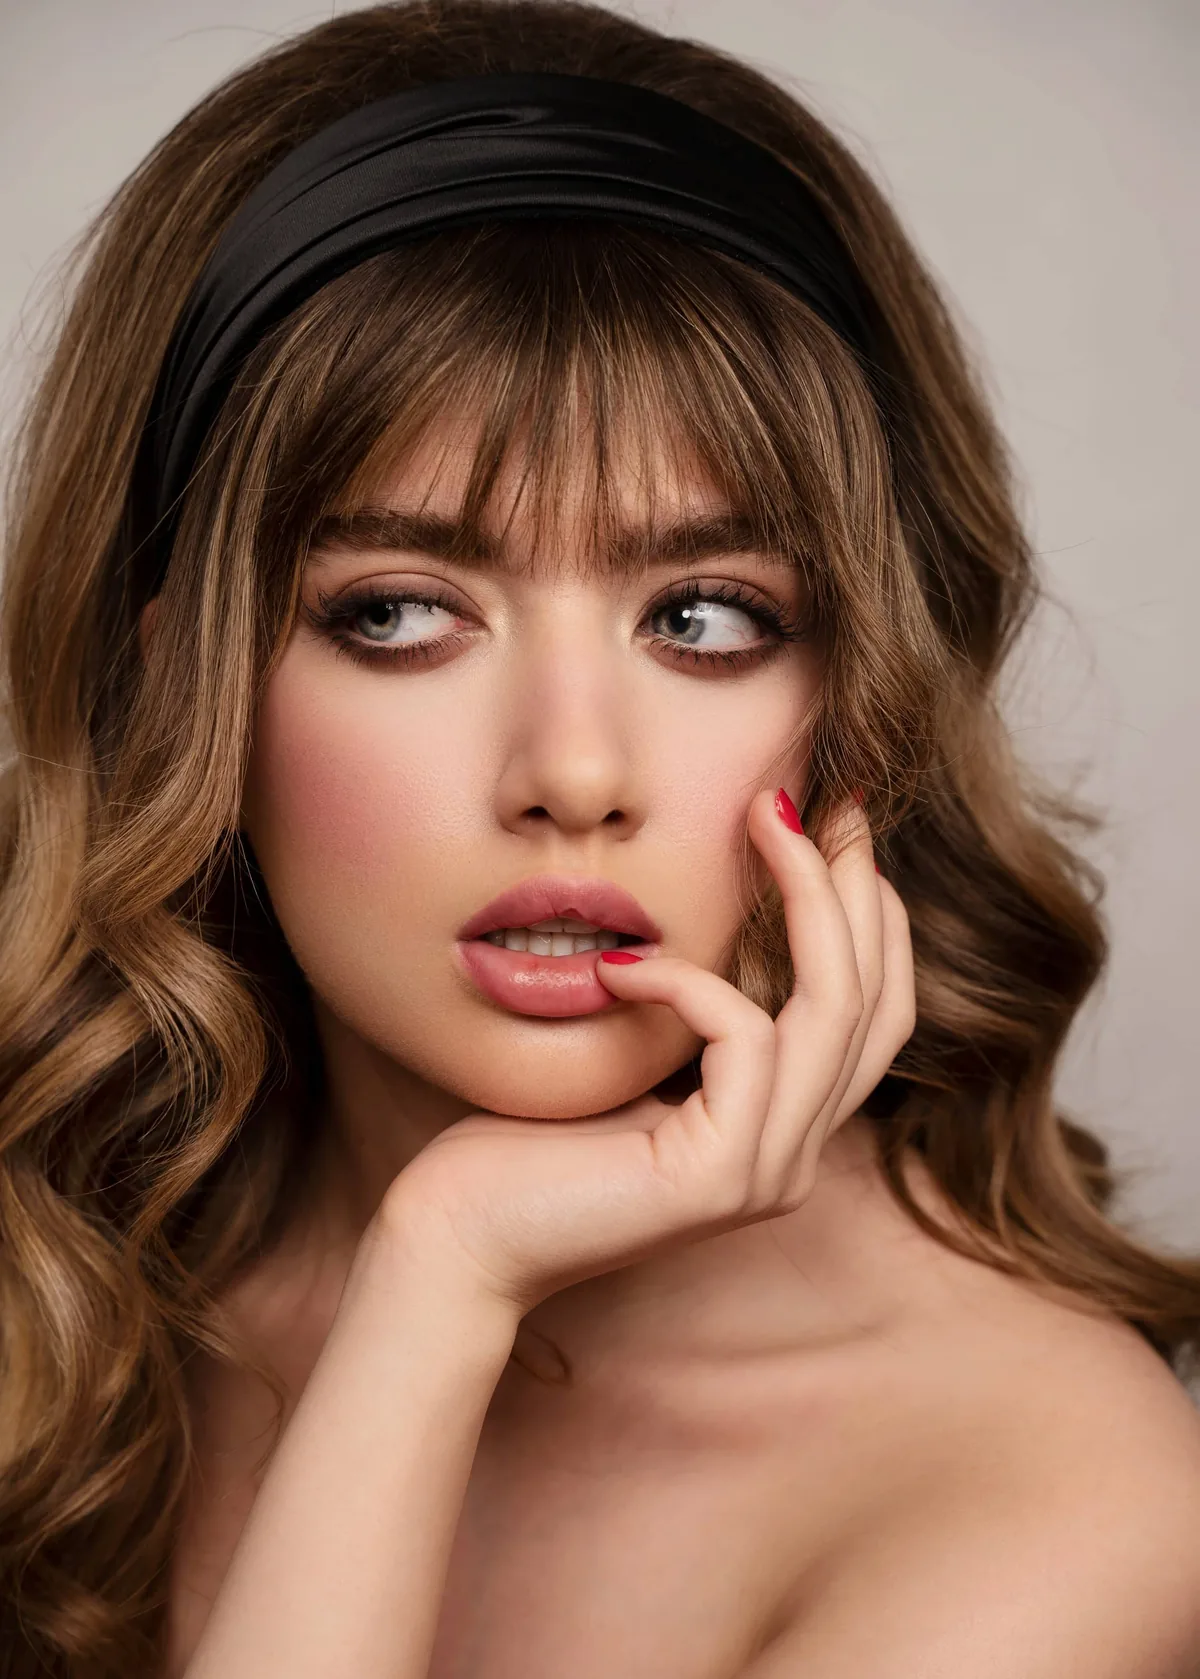
Loose waves and a headband are the most effortless combination on this list, because the waves do the softening and the band does the polishing. Curl the hair in large sections, brush the curls out into soft waves, and then slide a medium band back from the hairline, letting a few face-framing pieces fall in front of it. The result looks like you spent an hour on your hair, when the band did most of the work in ten seconds.
Best for: medium to long hair, and anyone who wants a finished look without a formal style. How to style: curl with a large barrel, brush out for softness, and add a little texture spray before the band goes on. What to ask your stylist: long layers that start at the cheekbone, so the waves fall in front of the band naturally. Styling time: fifteen to twenty minutes. Tools needed: a large curling iron, a brush, and a medium fabric or metal band.
2. The Headband With a Low Bun
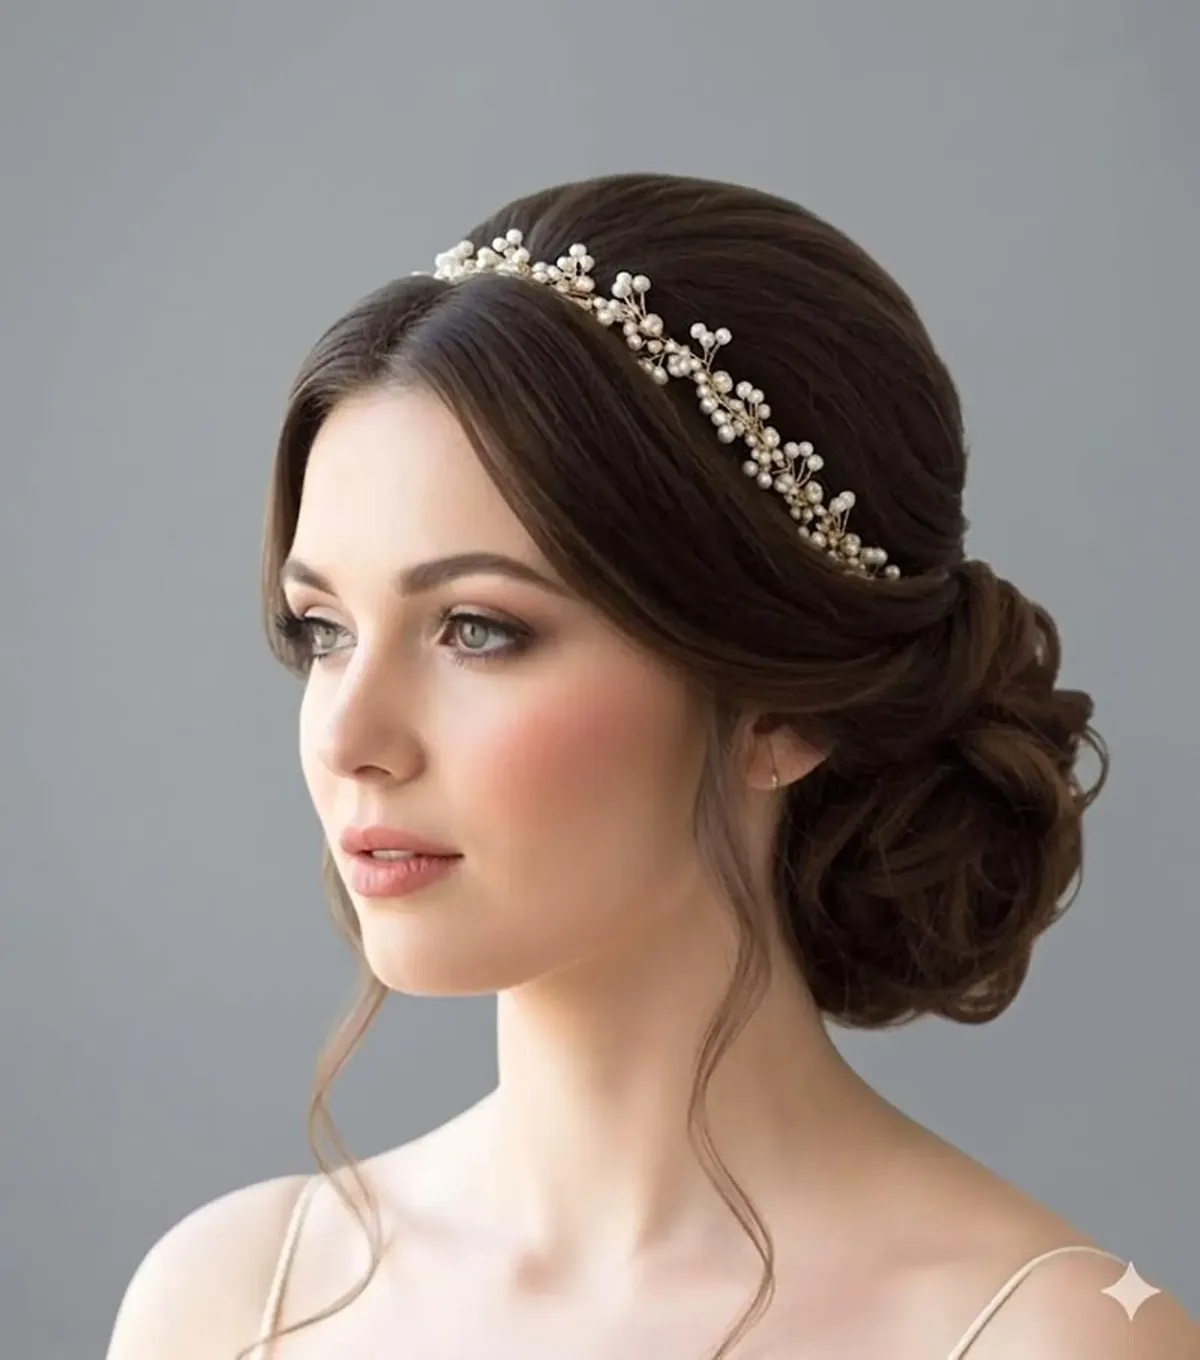
A low bun with a headband is the polished, grown-up version of the style — the kind of look that works for a wedding guest, a work presentation, or a dinner where you want to look put-together without looking overdone. Gather the hair into a low bun at the nape, leave two soft pieces at the front, and slide a thin or medium band back from the hairline. The band adds the finishing line the bun needs, and the soft front pieces keep it from looking severe.
Pros: it takes five minutes, it stays neat for hours, and it suits almost every face shape. Cons: a very tight bun can pull at the hairline, so keep it soft and loose. Common mistake: putting the band on before the bun, which traps hair in the wrong place. Do the bun first, then the band, then pull the front pieces out. Quick verdict: the fastest way to make a low bun look intentional — and the one to reach for when you have five minutes and a formal evening.
3. The Headband With a High Ponytail
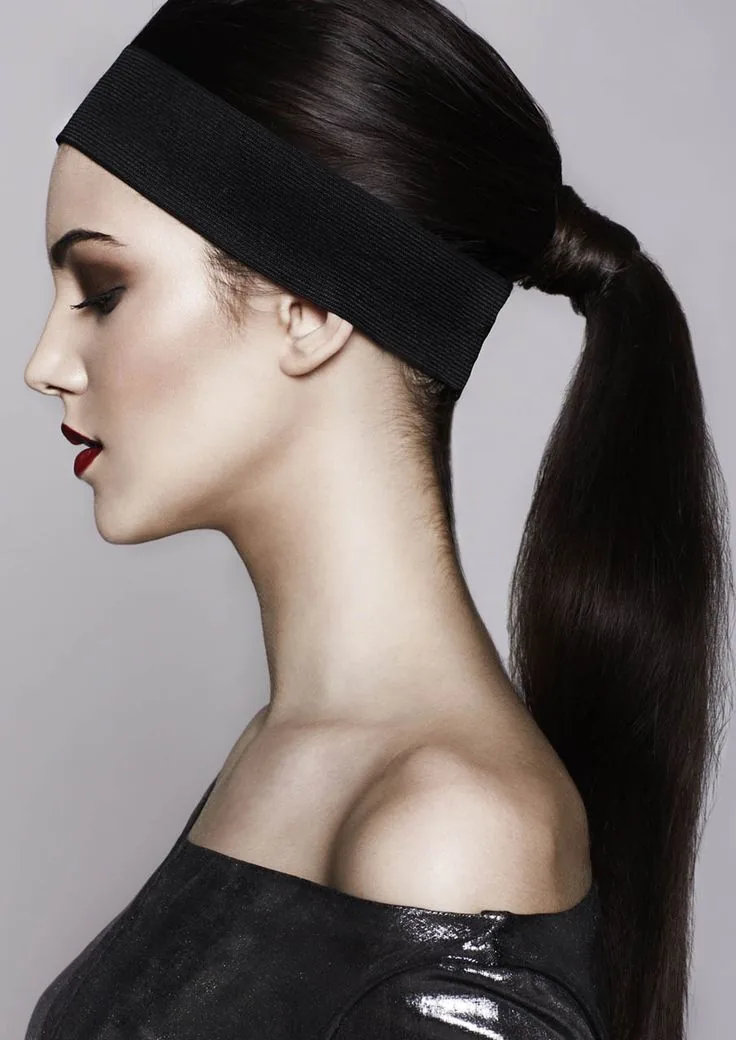
A high ponytail with a headband has a youthful, energetic feel, and it is the style to choose when you want your hair up and out of the way without looking like you are heading to the gym. Pull the hair into a high ponytail, wrap a small section around the elastic to hide it, and slide a band — thin, knotted or padded — back from the hairline. The band lifts the whole look, adds a line of colour or shine, and keeps the front pieces from falling into your face.
Styling time: five minutes. How to style: brush the hair up smoothly, secure it high on the crown, and place the band two centimetres back from the hairline. What to ask your stylist: layers that frame the face, so a few pieces can fall in front of the band. Tools needed: a brush, an elastic, and the band of your choice. Who should avoid it: anyone with a very heavy ponytail, because the weight can drag the band forward — in that case, use a band with a silicone grip or choose a lower ponytail instead.
4. The Headband With Soft Curls
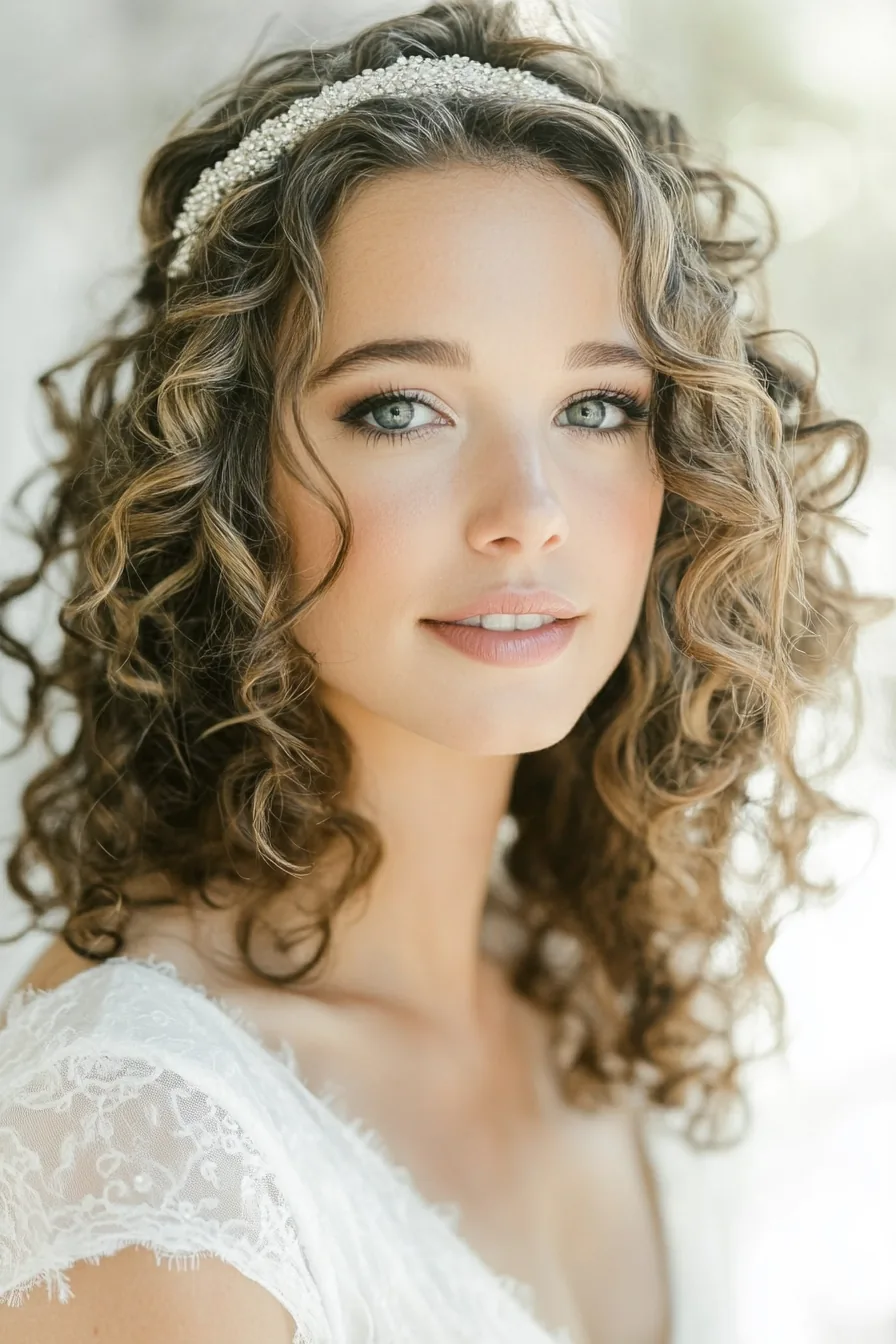
Soft curls and a headband belong together because the curls give the band something to sit against — volume, movement, and a shape that holds the band in place. Curl the hair in medium sections, let the curls cool, then brush them out gently so they fall into soft, touchable waves. Slide a padded or fabric band back from the hairline and let the curls fall in front of it and around it. The band frames the curls, and the curls soften the band.
Best for: medium to long hair, and anyone with natural curls or waves. How to style: use a medium barrel, curl away from the face, and finish with a light hold spray. Maintenance: the curls last a day, and the band keeps the second-day curls looking deliberate rather than slept-on. Cost and time: fifteen to twenty-five minutes at home, or a salon blow-dry if you want the curls to last through an event. Who should avoid a heavy padded band here: very fine hair, where the band can flatten the curls at the crown — a thin band holds the same look without the weight.
5. The Headband With Sleek Straight Hair
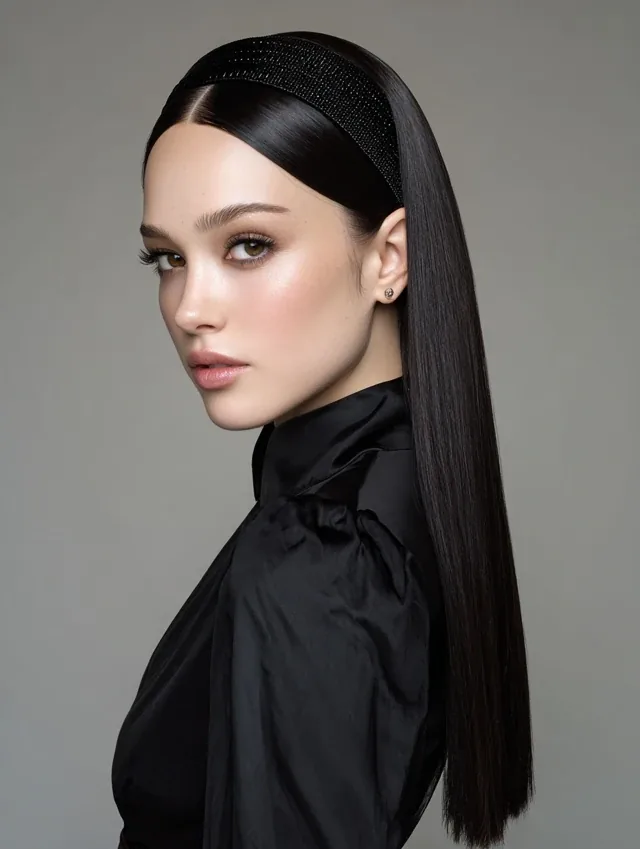
Sleek straight hair with a headband is the minimalist look of the list: one smooth sheet of hair, one clean line across the crown, and nothing else competing for attention. The band is the whole accessory, so it has to be a good one — a thin metal band, a velvet band, or a simple black band that reads as deliberate rather than accidental. Straighten the hair smooth, add a little shine serum to the ends, and slide the band back from the hairline.
Pros: it takes ten minutes, it looks expensive, and it works for work, for evenings, and for photographs. Cons: straight hair is slippery, so a band without grip will slide — use a band with a velvet lining or a little texture spray at the roots. Common mistake: wearing the band too far forward, where it pushes the sleek hair into a bump. Slide it back, smooth the crown, and let the band sit in the curve of the skull. Quick verdict: the simplest style on this list, and the one that most rewards a beautiful band.
6. The Headband With a Pixie Cut
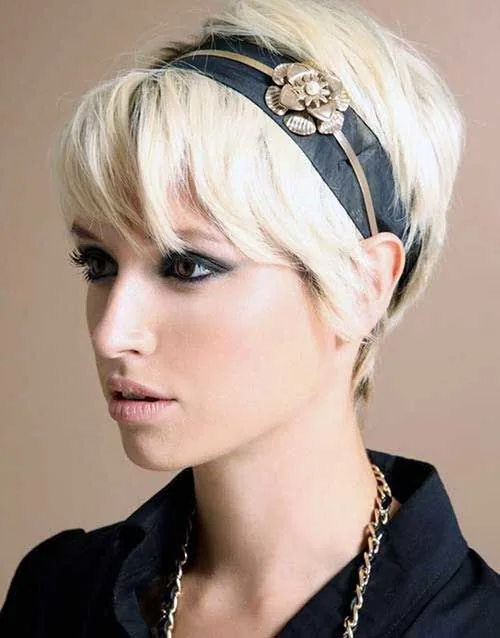
A pixie cut with a headband is proof that short hair can wear an accessory just as well as long hair — better, in some ways, because the band shows off the shape of the cut instead of hiding it. On a pixie, a thin or medium band sits neatly against the short layers, keeps the front pieces out of your eyes, and adds a line of colour or shine that a short cut sometimes lacks. It takes five seconds and changes the whole look.
Best for: pixies, short bobs, and anyone growing out a short cut. How to style: add a little texture paste to the top, then slide the band back from the hairline. What to ask your stylist: a pixie with enough length at the front to tuck behind the band. Styling time: under five minutes. Tools needed: texture paste and a thin or medium band. Who should avoid a very wide padded band here: most pixies, because the band can swallow the cut — save the wide band for longer hair and let the thin band do the work.
7. The Headband With a Classic Bob
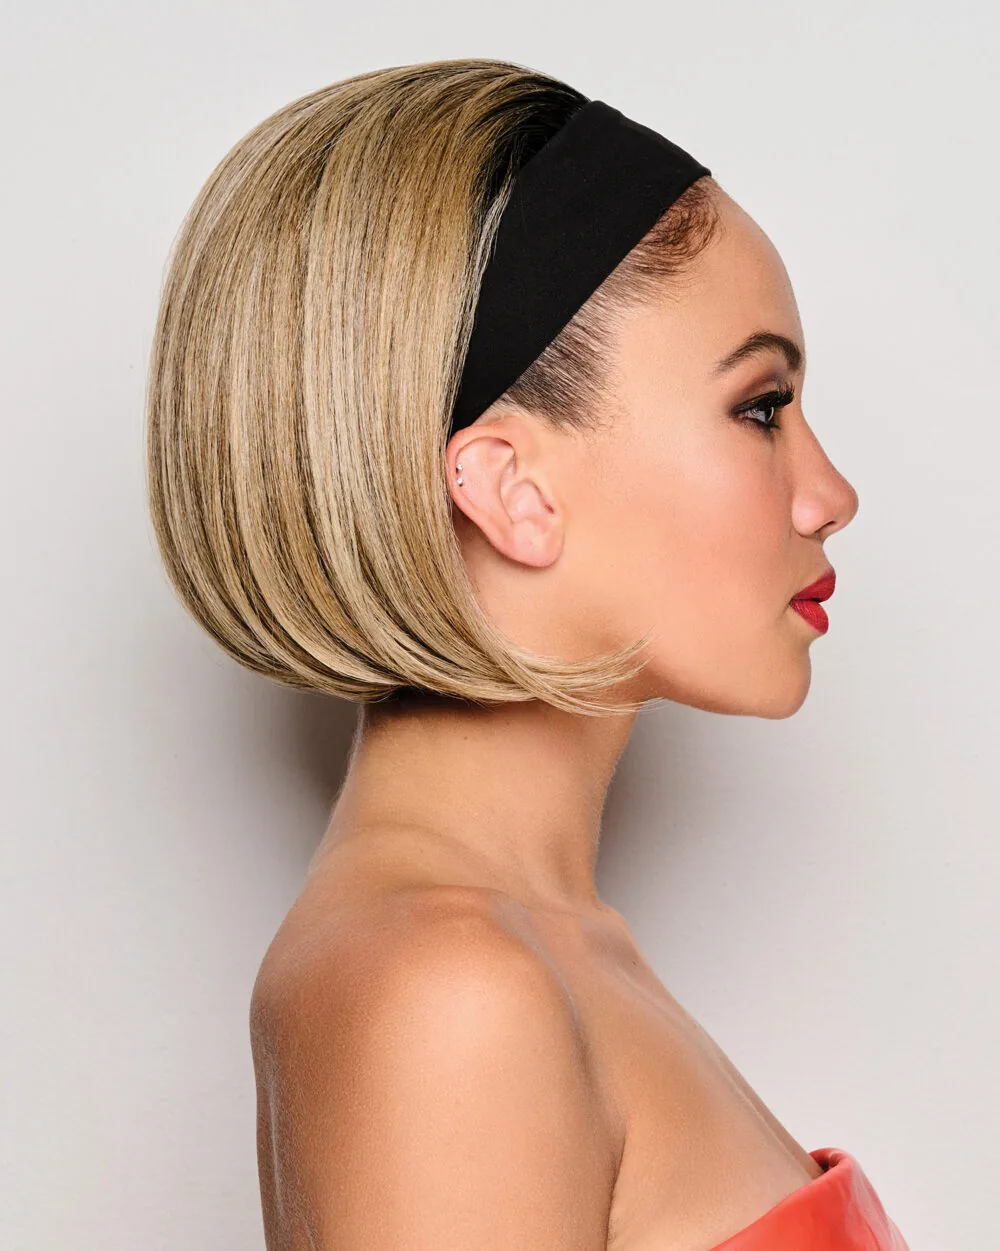
A classic bob with a headband is a timeless combination, and it is the one that most often gets photographed — because the clean line of the bob and the clean line of the band frame the face in exactly the same way. Blow-dry the bob smooth with a round brush, curve the ends under, and slide a medium band back from the hairline. The band lifts the look from a plain bob to a styled bob, and it keeps the front pieces neatly out of the way.
Pros: the bob dries fast, the band adds polish in seconds, and the whole look works for work, for weddings, and for everyday. Cons: a bob that is too short at the back can push the band forward — if that happens, use a band with a grip lining. Maintenance: trims every five to six weeks keep the bob’s line sharp, and the band hides the growing-out stage between appointments. Styling time: ten to fifteen minutes. What to ask your stylist: a bob that ends at the jaw or the chin, with soft layers at the front that can fall in front of the band.
8. The Headband With a Messy Bun
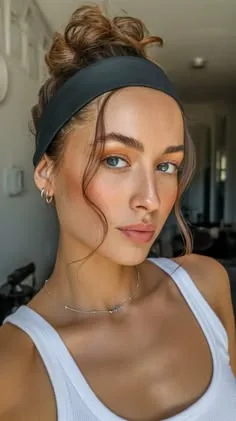
A messy bun with a headband is the off-duty version of the style — the one you wear on a Saturday, on a flight, or on a day when your hair needs to be up but you still want to look like you thought about it. Gather the hair into a loose, high bun, let pieces fall out around the face, and slide a fabric or knotted band back from the hairline. The band holds the loose pieces back, and the messiness of the bun keeps the look relaxed instead of strict.
Best for: second-day hair, thick hair, and anyone who hates a neat bun. How to style: gather the hair loosely, twist it up, pin it, and pull a few pieces free at the front. Styling time: three minutes. Tools needed: an elastic, a few pins, and a fabric band. Common mistake: making the bun too tight, which turns a messy bun into a neat bun with a band — the looseness is the point. Quick verdict: the easiest style on this list, and the one that most rewards a fabric band, because fabric suits the casual mood.
9. The Headband With a French Braid
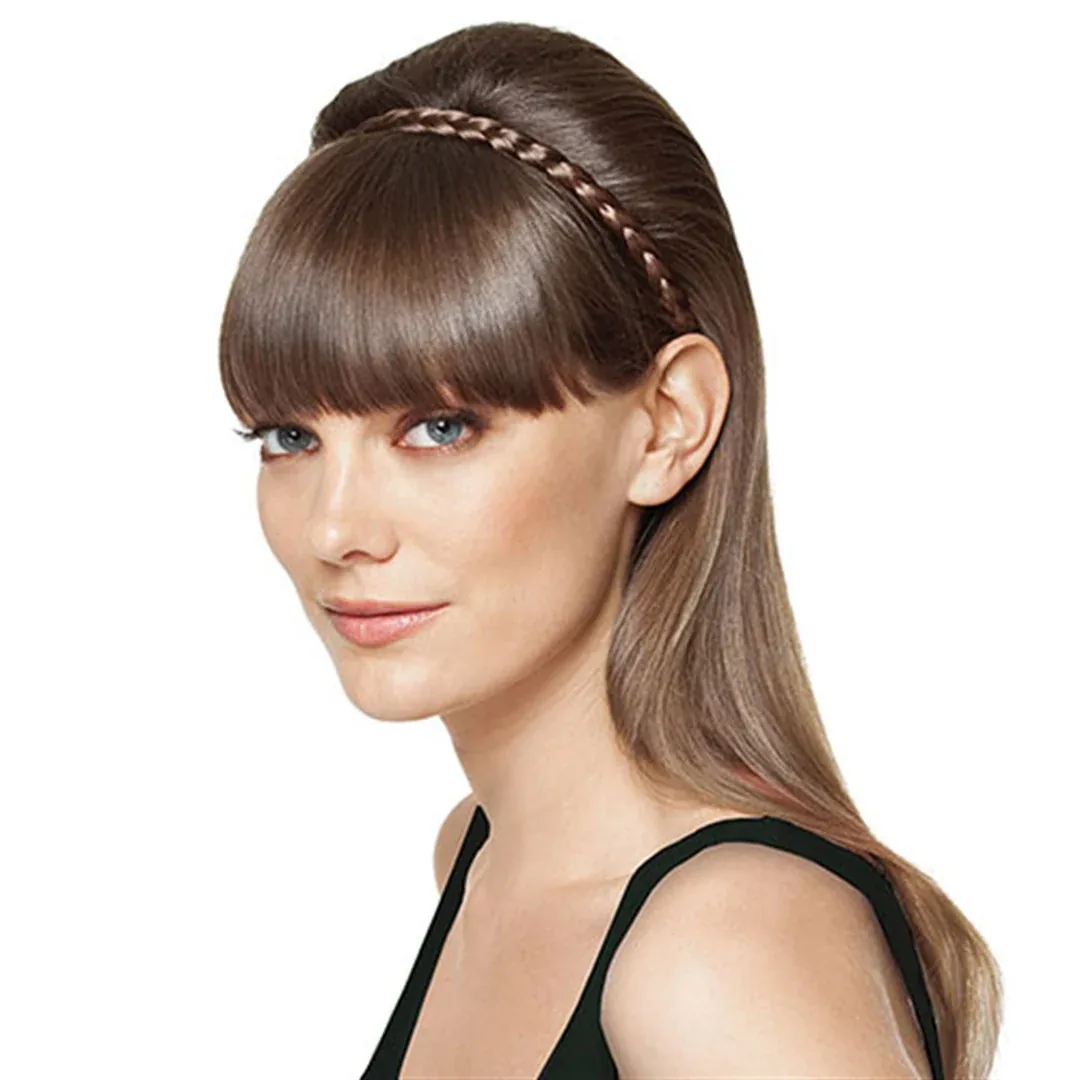
A French braid with a headband is a double layer of structure: the braid holds the hair, and the band frames it. Braid the hair from the crown down, keeping the braid neat and close to the head, and then slide a thin band back from the hairline so it sits just behind the start of the braid. The band catches any short pieces the braid missed, and the two lines — the braid and the band — run in parallel, which looks deliberate and polished.
Styling time: ten to fifteen minutes. How to style: braid from the front hairline back, secure the end, and place the band behind the braid’s start. What to ask your stylist: layers that are long enough to braid, because short layers slip out of a French braid. Tools needed: an elastic and a thin band. Who should avoid it: anyone with very short layers at the front, because they will escape the braid and the band will not hold them — in that case, wear the band in front of the braid instead.
10. The Headband With a Fishtail Braid
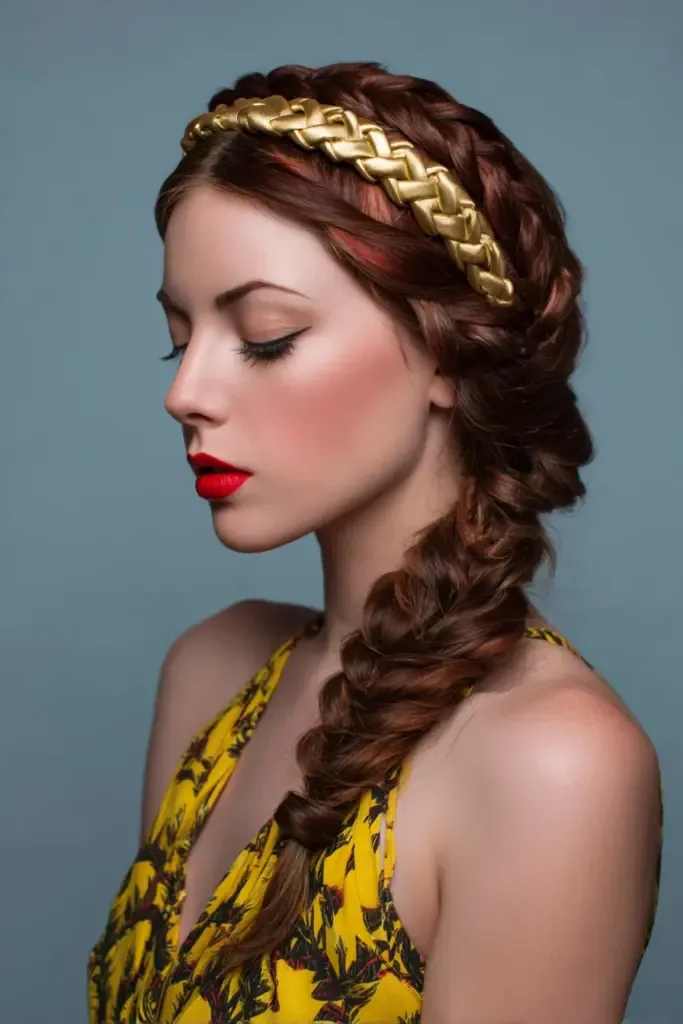
A fishtail braid with a headband has a soft, boho feel that a plain fishtail never quite manages on its own. The braid is the texture, the band is the frame, and together they look like a festival style that took an hour — when it took fifteen minutes. Braid the hair loosely to one side, pull the braid apart gently for fullness, and slide a fabric or knotted band back from the hairline, letting a few pieces fall in front of it.
Pros: the loose braid hides the band’s edge, so the band looks like part of the style rather than an add-on. Cons: a fishtail takes practice, and a tight band can flatten the braid at the crown. Common mistake: braiding too tightly, which makes the whole look severe. Keep the braid loose, keep the band relaxed, and let the style breathe. Maintenance: the braid holds all day, and the band keeps the front pieces out of your face. Styling time: ten to twenty minutes, depending on how practised you are.
11. The Headband With a Half-Up Twist
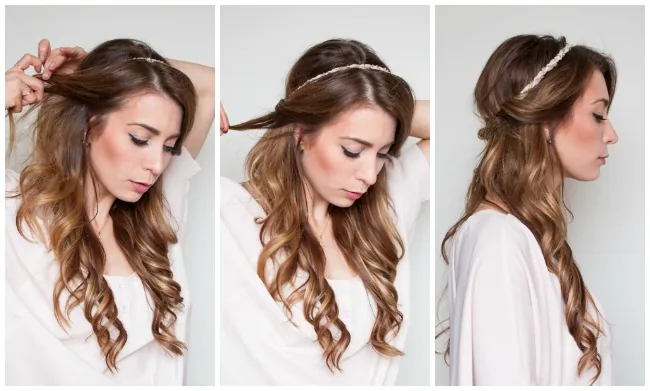
A half-up twist with a headband is one of the prettiest styles on this list, because it shows off the length of the hair while keeping the front out of the way. Twist two front sections back, pin them at the crown, and let the rest of the hair fall loose. Then slide a thin or medium band back from the hairline, just in front of the twist. The band and the twist work together — the twist holds the hair, the band frames it — and the result looks far more complicated than it is.
Best for: medium to long hair, and anyone who wants their hair down but out of their face. How to style: twist the front sections, pin them, and place the band behind the hairline. Styling time: ten minutes. Tools needed: two pins, an elastic, and a thin band. What to ask your stylist: face-framing layers, so the twist has something to catch. Quick verdict: the style to choose when you want to look like you spent an hour, but you have ten minutes.
12. The Headband With Curtain Bangs
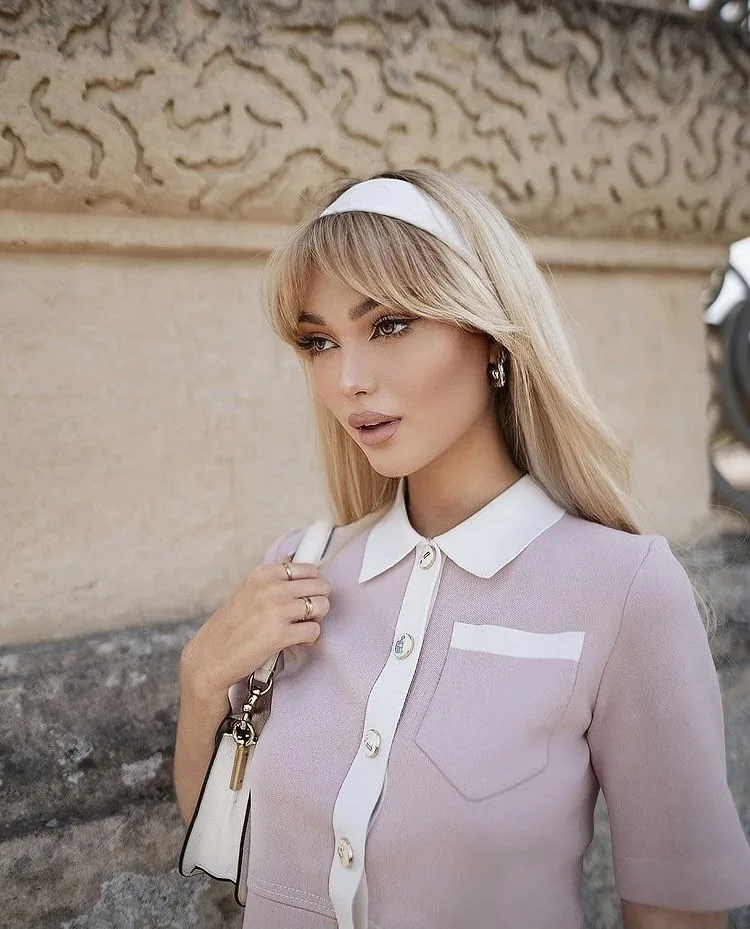
Curtain bangs and a headband were made for each other, because the bangs part in the middle and sweep to either side, and the band sits right where they part — framing them like a picture frame. Blow-dry the bangs forward and to the sides with a round brush, let them fall in front of the band, and slide a medium band back from the hairline. The band holds the rest of the hair back, the bangs soften the face, and nothing fights for the same spot.
Pros: the most flattering band style for almost every face shape. Cons: curtain bangs need a quick blow-dry each morning, or they fall flat. Common mistake: putting the band over the bangs, which flattens them and hides the part. The bangs go in front, the band goes behind them. Maintenance: trims every four to six weeks keep the bangs at cheekbone length, where they blend into the layers. Styling time: ten to fifteen minutes. Tools needed: a medium round brush and a medium band.
13. The Headband With a Low Ponytail
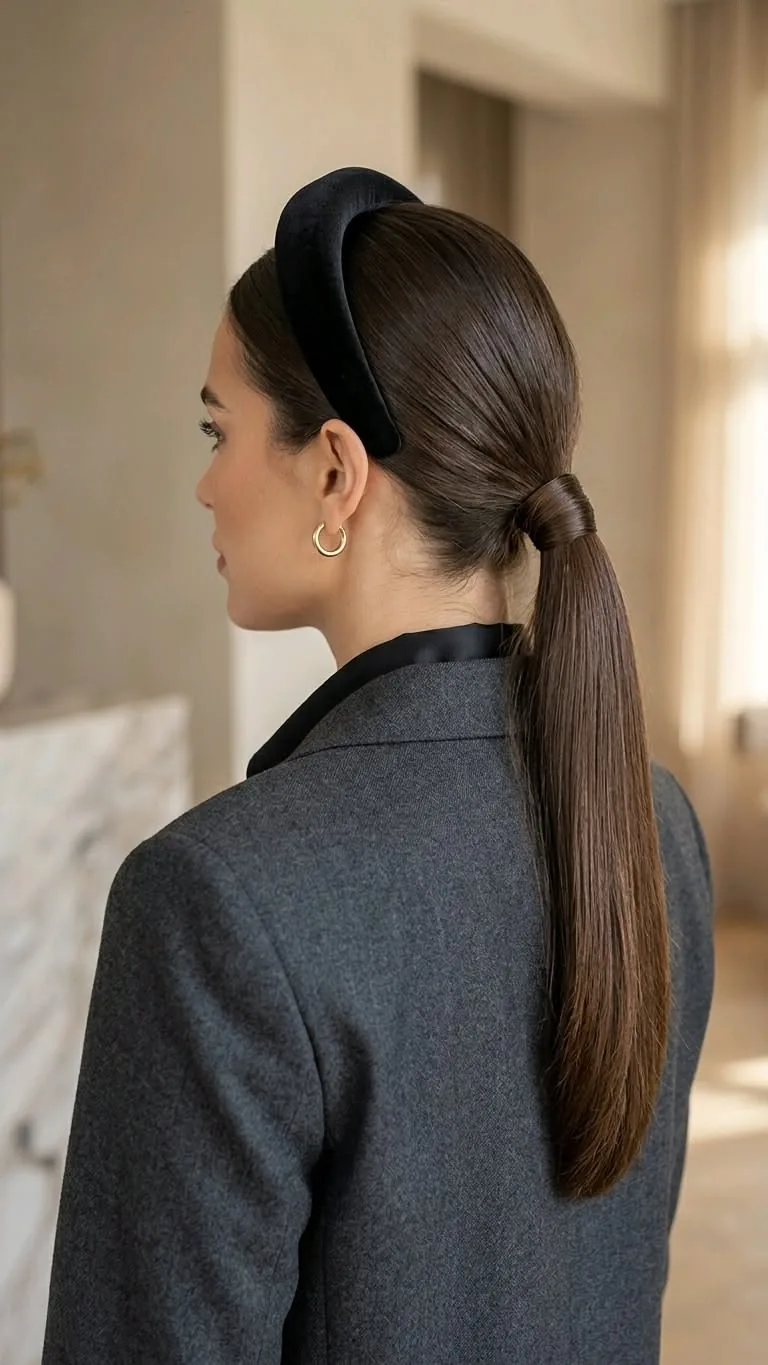
A low ponytail with a headband is the quiet, elegant version of the ponytail — the one that works for the office, for a wedding guest, and for any day when a high ponytail would feel too young. Gather the hair at the nape, secure it loosely, and wrap a small section around the elastic. Slide a thin metal or velvet band back from the hairline, and let two soft pieces fall in front of it. The band adds the one line of polish that turns a plain low ponytail into a finished style.
Styling time: five minutes. How to style: brush the hair back smoothly, secure it low, and place the band two centimetres back from the hairline. What to ask your stylist: layers that frame the face, so a few pieces can fall free. Tools needed: a brush, an elastic, and a thin band. Who should avoid a heavy padded band here: anyone whose ponytail is already heavy, because the weight can drag the band forward. A thin band does the same job with none of the drag.
14. The Headband With a Top Knot
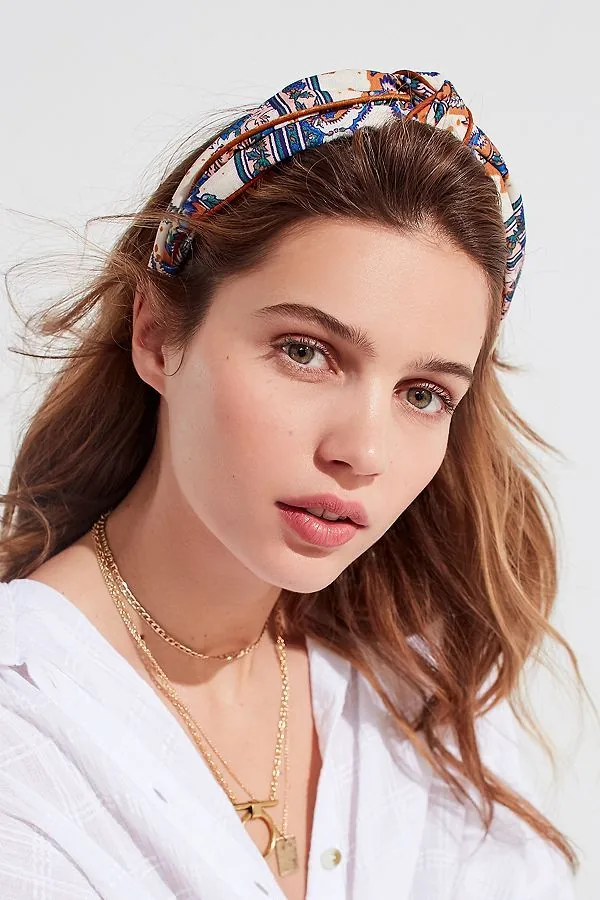
A top knot with a headband is the bold, graphic version of the style — the hair pulled high and tight, the band sitting just behind the hairline, and the whole silhouette clean and sculptural. It is the look for a night out, a fashion event, or any day when you want your hair to make a statement. Pull the hair into a high knot, smooth the sides with a brush, and slide a medium or padded band back from the hairline.
Pros: it lengthens the face, it keeps hair completely out of the way, and it photographs beautifully. Cons: a tight top knot can pull at the hairline, so keep it snug rather than severe. Common mistake: placing the band too close to the knot, which makes the two compete. Leave a gap of hair between the band and the knot, and each one gets its own space. Maintenance: the style holds all day with a few pins and a little hairspray. Styling time: ten minutes.
15. The Headband With a Side Braid
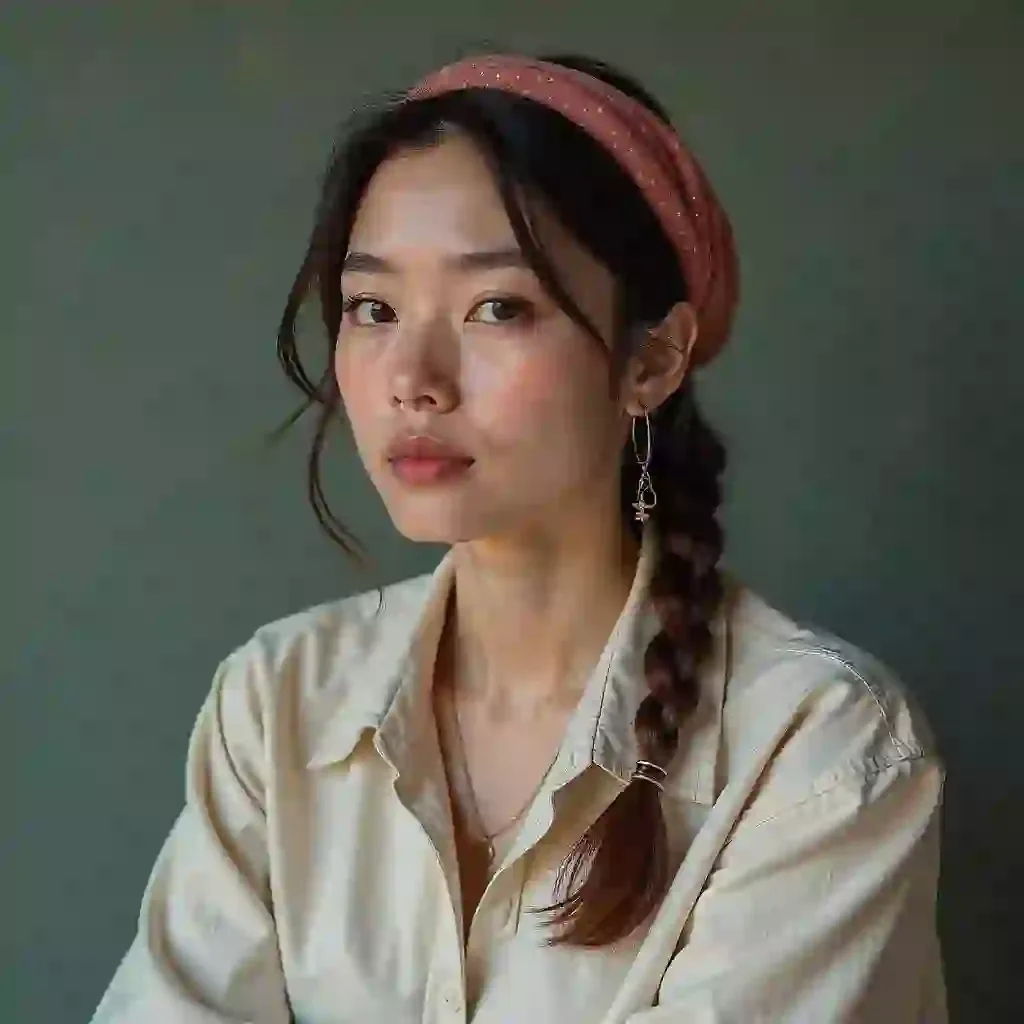
A side braid with a headband is the relaxed, romantic version of a braided style — the braid falls over one shoulder, the band keeps the front pieces back, and the whole look feels soft and easy. Braid the hair loosely to one side, pull the braid apart for fullness, and slide a fabric or knotted band back from the hairline. The band catches the short pieces at the front, and the braid does the rest of the work.
Best for: medium to long hair, and anyone who wants a braid without the formality of a French braid. How to style: sweep the hair to one side, braid loosely, and place the band behind the hairline. Styling time: five to ten minutes. Tools needed: an elastic and a fabric band. What to ask your stylist: layers that are long enough to braid without slipping out. Quick verdict: the braid to choose when you want the boho feel without the effort of a crown braid.
16. The Headband With Beach Waves
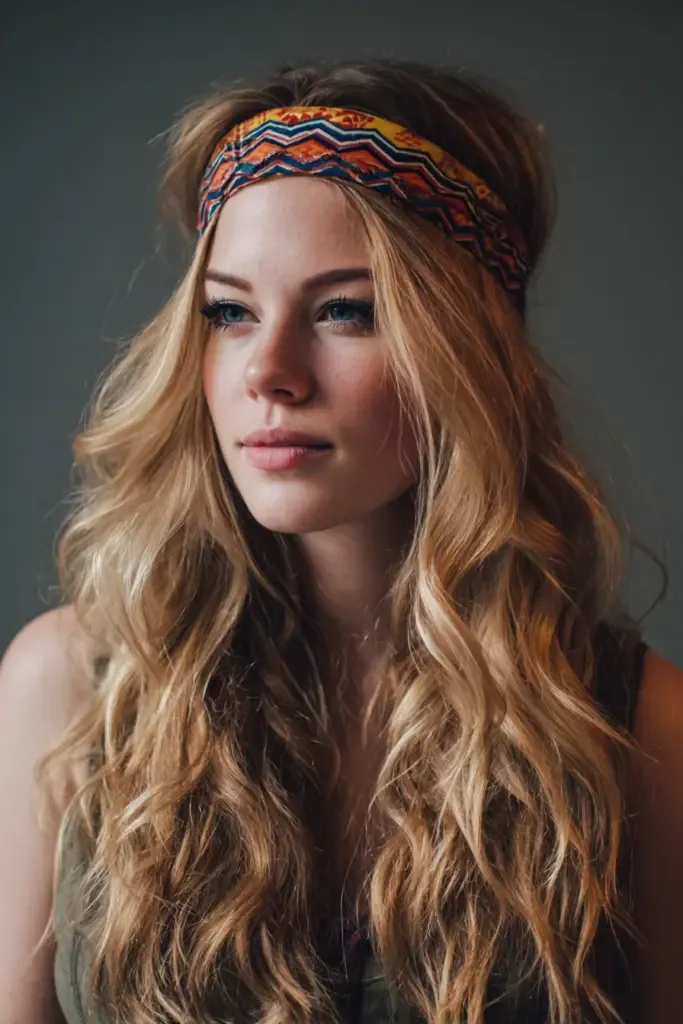
Beach waves with a headband are the holiday version of the style — tousled, sun-kissed, and deliberately undone. The waves give the hair texture, the band gives it a line, and together they look like a day at the beach, even if you are nowhere near one. Spray the hair with salt spray, scrunch it dry, and slide a fabric band back from the hairline, letting pieces fall in front of it and around it.
Pros: it takes five minutes, it works on second-day hair, and it hides the growing-out stage of bangs beautifully. Cons: salt spray can dry the hair out, so use it sparingly and follow with a little oil on the ends. Common mistake: using a metal band with beach waves, which can look too formal against the casual texture. A fabric or knotted band matches the mood. Maintenance: wash the band after a beach day, because salt and sand collect in the fabric. Styling time: five minutes.
17. The Headband With a Textured Lob
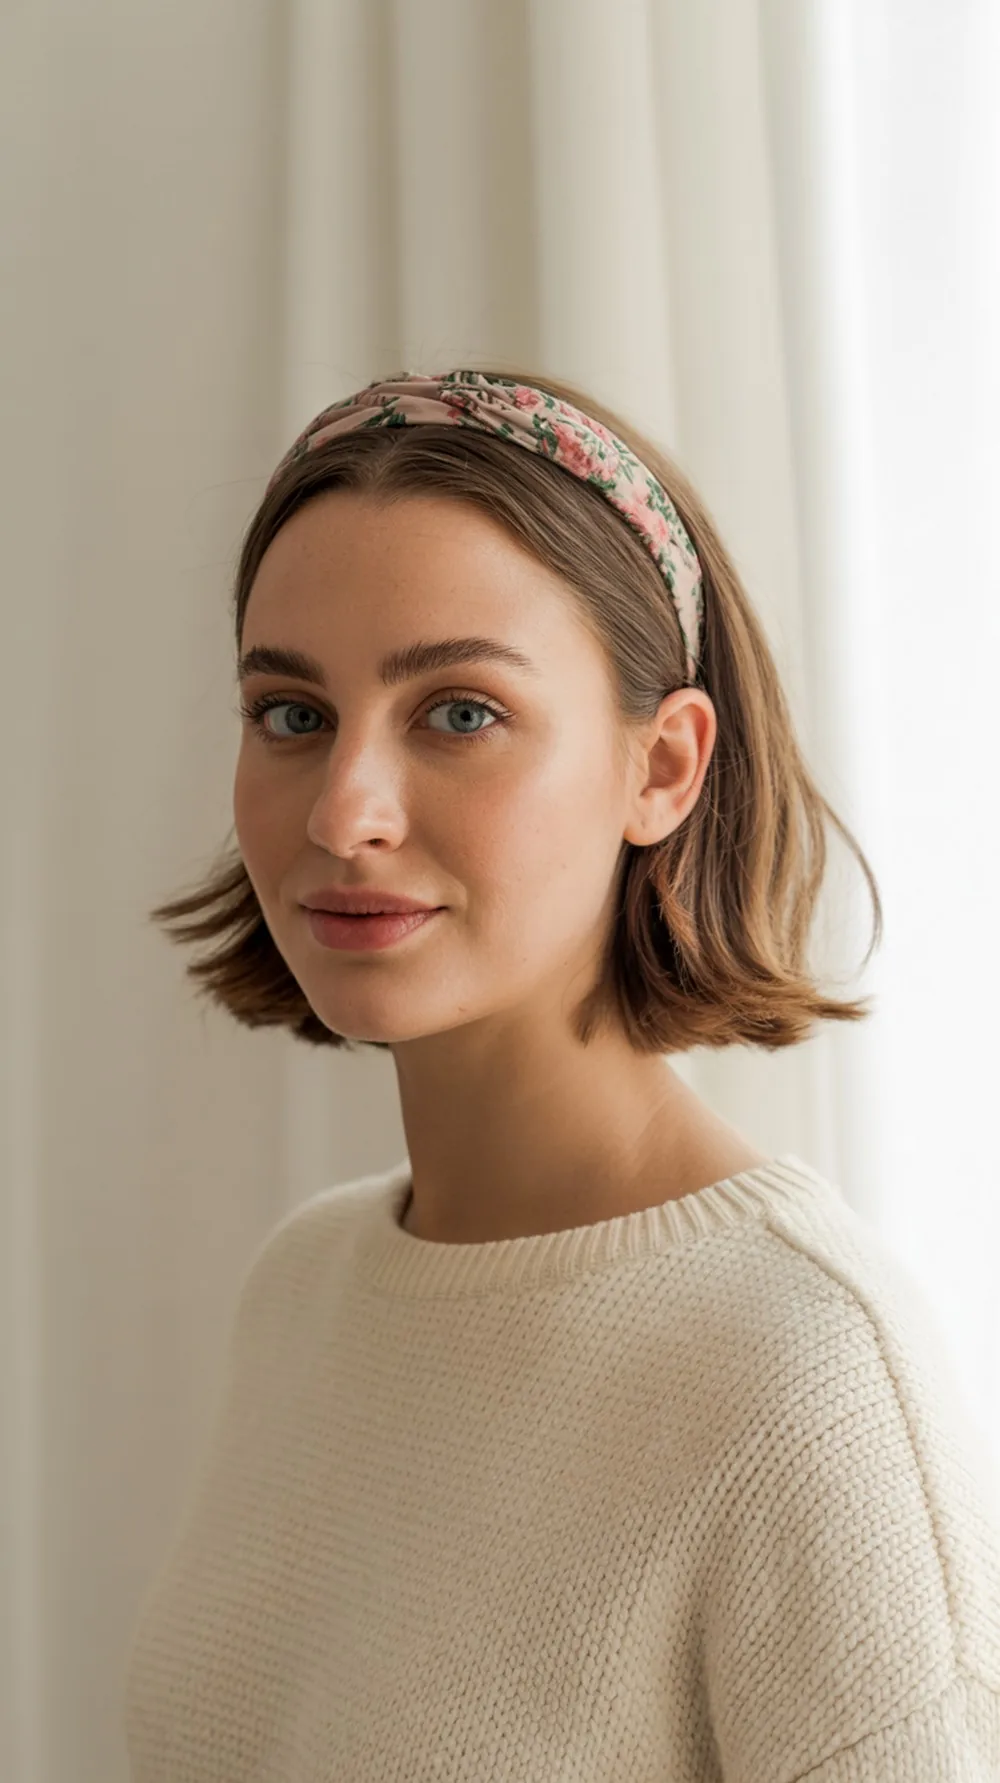
A textured lob with a headband is the modern, lived-in version of the style — the lob gives the hair its shape, the texture gives it movement, and the band gives it a finish. Blow-dry the lob with a little texture spray, tousle it with your fingers, and slide a medium band back from the hairline. The band sits neatly against the shoulder-length cut, shows off the texture, and keeps the front pieces out of your eyes without hiding the haircut.
Best for: shoulder-length hair, and anyone who wants a style that looks good with almost no effort. How to style: blow-dry with texture spray, tousle, and place the band two centimetres back from the hairline. Styling time: ten minutes. Tools needed: texture spray and a medium band. What to ask your stylist: a lob with textured ends, so the cut has movement on its own. Who should avoid a very wide band here: anyone with a fine lob, where the band can flatten the texture at the crown — a medium band holds the same look.
18. The Headband With a Braided Crown
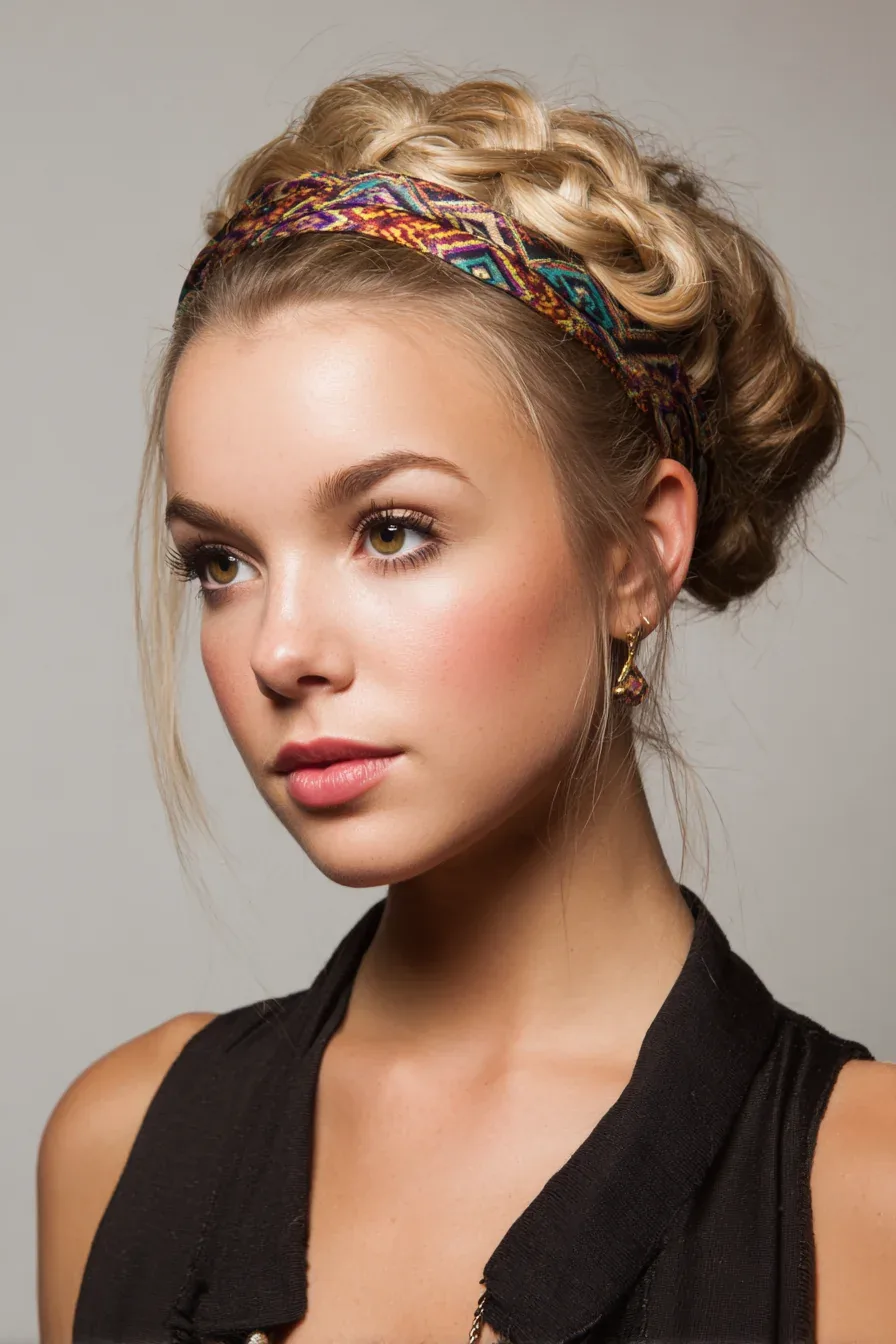
A braided crown with a headband is the most romantic style on this list, and it is the one that most often gets saved for weddings and festivals. Braid two sections from either side of the head, pin them across the crown like a headband made of hair, and then slide a thin band back from the hairline, just behind the braided crown. The band holds the short pieces, the braids do the decorating, and the two lines run together like a double crown.
Styling time: fifteen to twenty minutes. How to style: braid two side sections, cross them over the crown, pin them, and place a thin band behind them. What to ask your stylist: layers long enough to braid across the crown. Tools needed: pins, elastics, and a thin band. Common mistake: making the braids too tight, which pulls the whole style flat. Keep the braids loose, pull them apart for fullness, and let the band sit gently behind them.
19. The Headband With a Voluminous Blowout
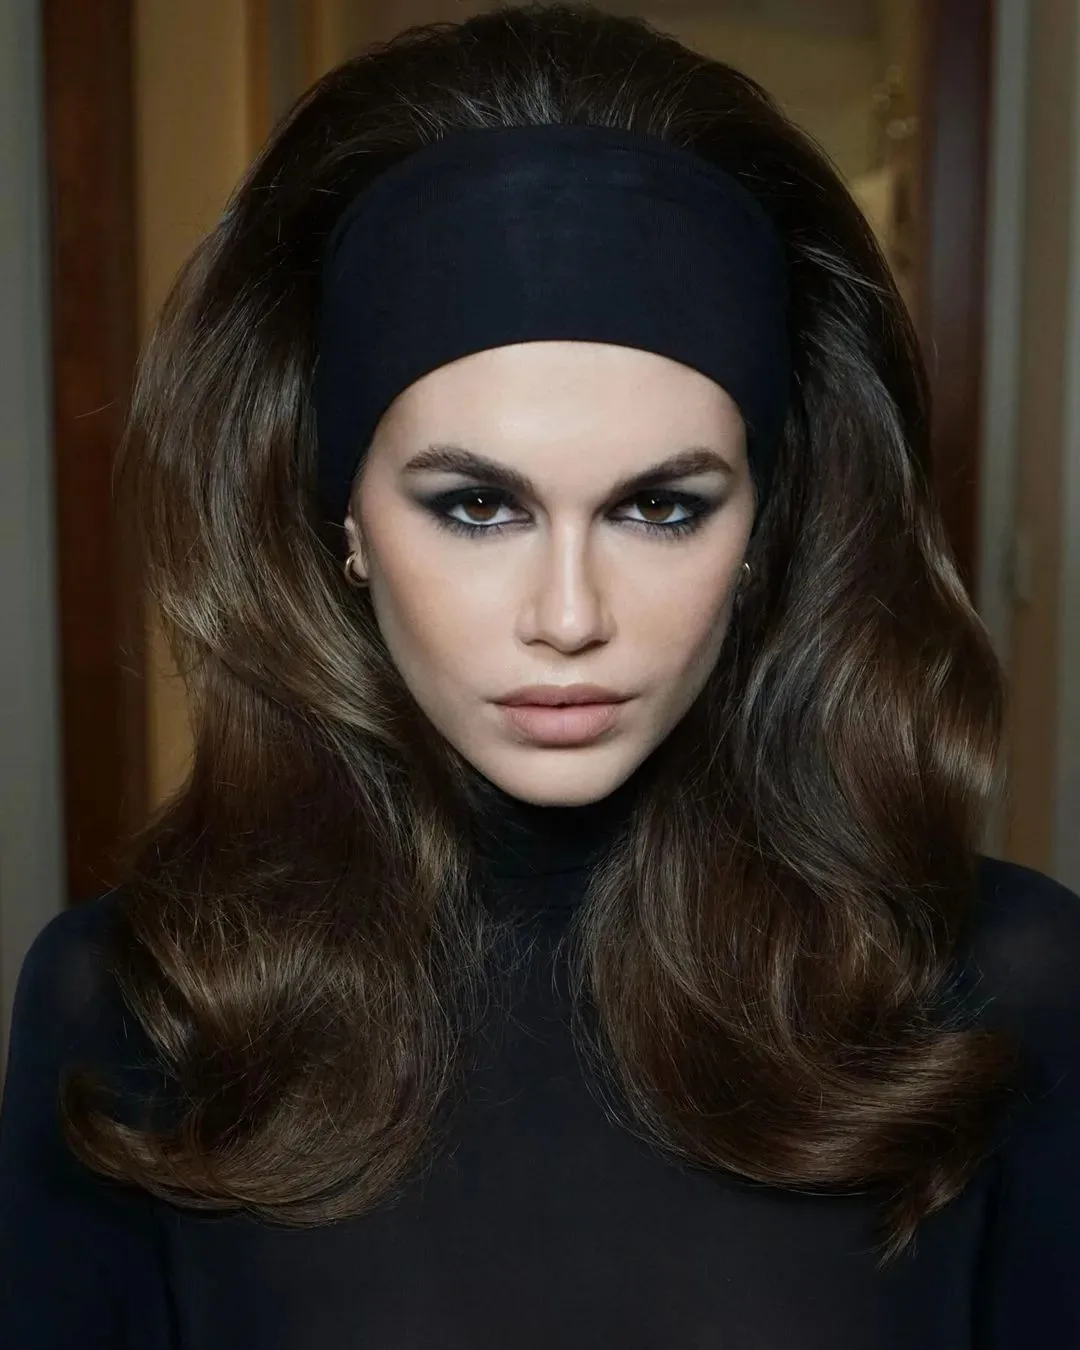
A voluminous blowout with a headband is the glamorous version of the style — big, bouncy hair with a clean line across the crown. Blow-dry the hair in large sections with a round brush, rolling each section away from the face and letting it cool before brushing out. Then slide a medium or padded band back from the hairline, letting the volume sit in front of and behind it. The band frames the volume, and the volume makes the band look like it belongs.
Pros: maximum impact, and a style that lasts two to three days. Cons: it takes thirty to forty minutes, and it needs heat, so a heat protectant is essential. Common mistake: putting the band on before the blowout has cooled, which flattens the volume at the crown. Let the hair cool first, then the band, then a light spray. Maintenance: dry shampoo at the roots on day two keeps the volume going. Styling time: thirty to forty minutes. Tools needed: a large round brush, a blow-dryer, mousse, and a medium or padded band.
20. The Headband With a Chignon
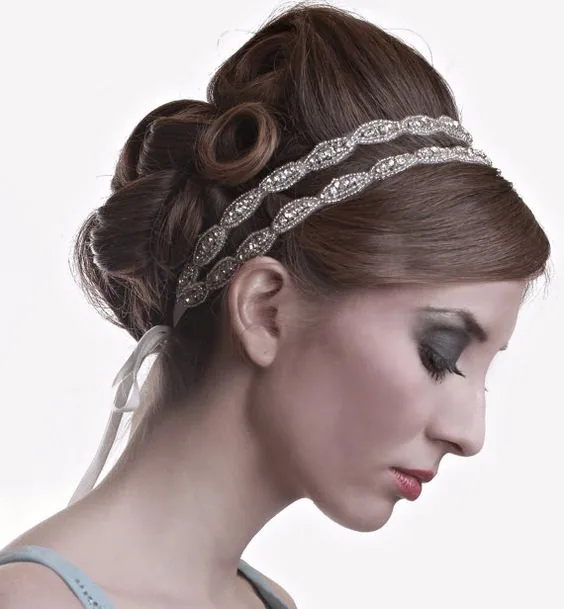
A chignon with a headband is the most formal style on this list — the kind of look that belongs at a black-tie event, a wedding, or a gala. Roll the hair into a low, neat chignon at the nape, smooth the sides, and slide a thin metal or pearl band back from the hairline. The band adds the one line of shine the chignon needs, and the chignon gives the band a formal home.
Best for: weddings, galas, and any evening when the hair needs to hold for hours. How to style: gather the hair low, twist it into a chignon, pin it, and place the band behind the hairline. Styling time: fifteen to twenty minutes. Tools needed: pins, a brush, hairspray, and a thin metal or pearl band. What to ask your stylist: a chignon that sits low and soft, not high and tight, so the band has room to breathe. Cost and time: a salon chignon takes about thirty minutes, and it is worth paying for when the evening matters.
21. The Headband With a Dutch Braid
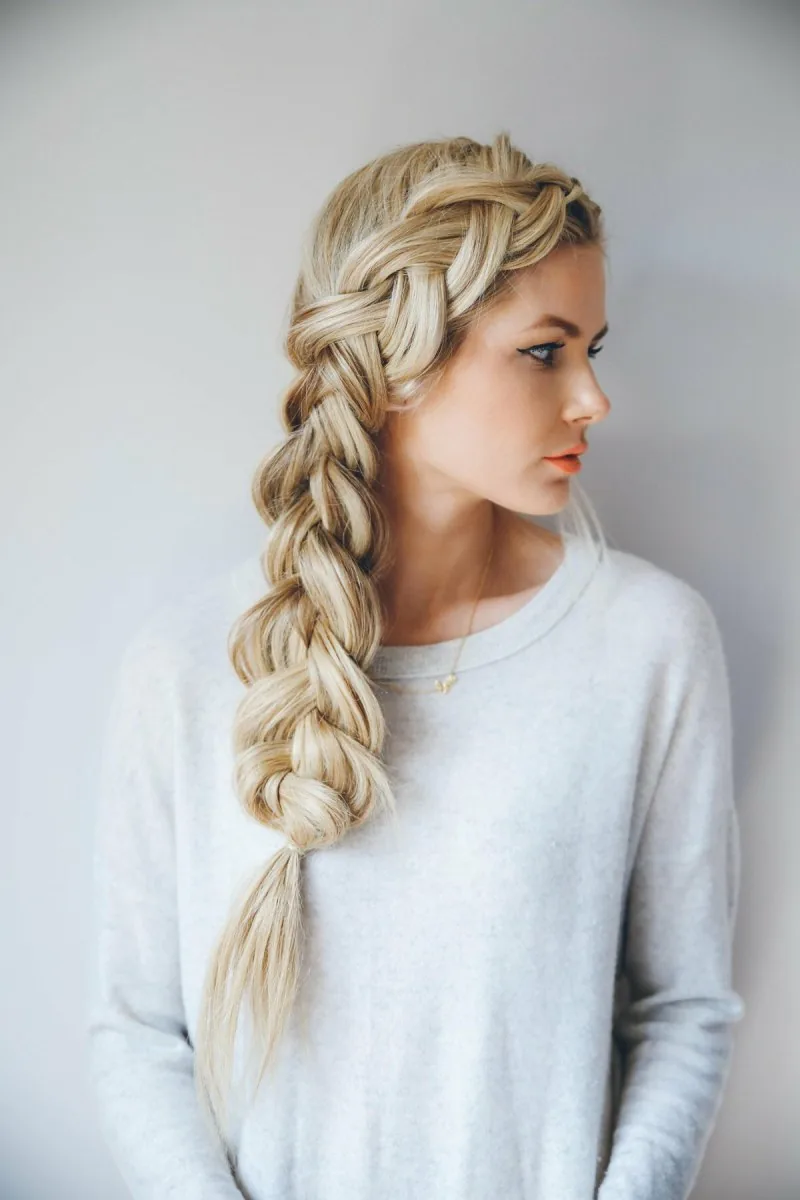
A Dutch braid with a headband is a bold, structured style, because the braid sits on top of the hair instead of inside it — a raised line that runs from the hairline back, with the band sitting just behind it. Braid the hair in a Dutch braid from the front, keeping the braid close and neat, and slide a thin band back from the hairline behind the braid’s start. The band catches the short pieces, and the braid does the talking.
Styling time: ten to fifteen minutes. How to style: Dutch braid from the front hairline, secure the end, and place the band behind the braid. What to ask your stylist: layers long enough to braid without slipping. Tools needed: an elastic and a thin band. Who should avoid it: anyone with very short layers at the front, because they will escape the braid — in that case, wear the band in front of the braid to hold them. Quick verdict: the braid to choose when you want structure and polish in one style.
22. The Headband With a Bubble Ponytail
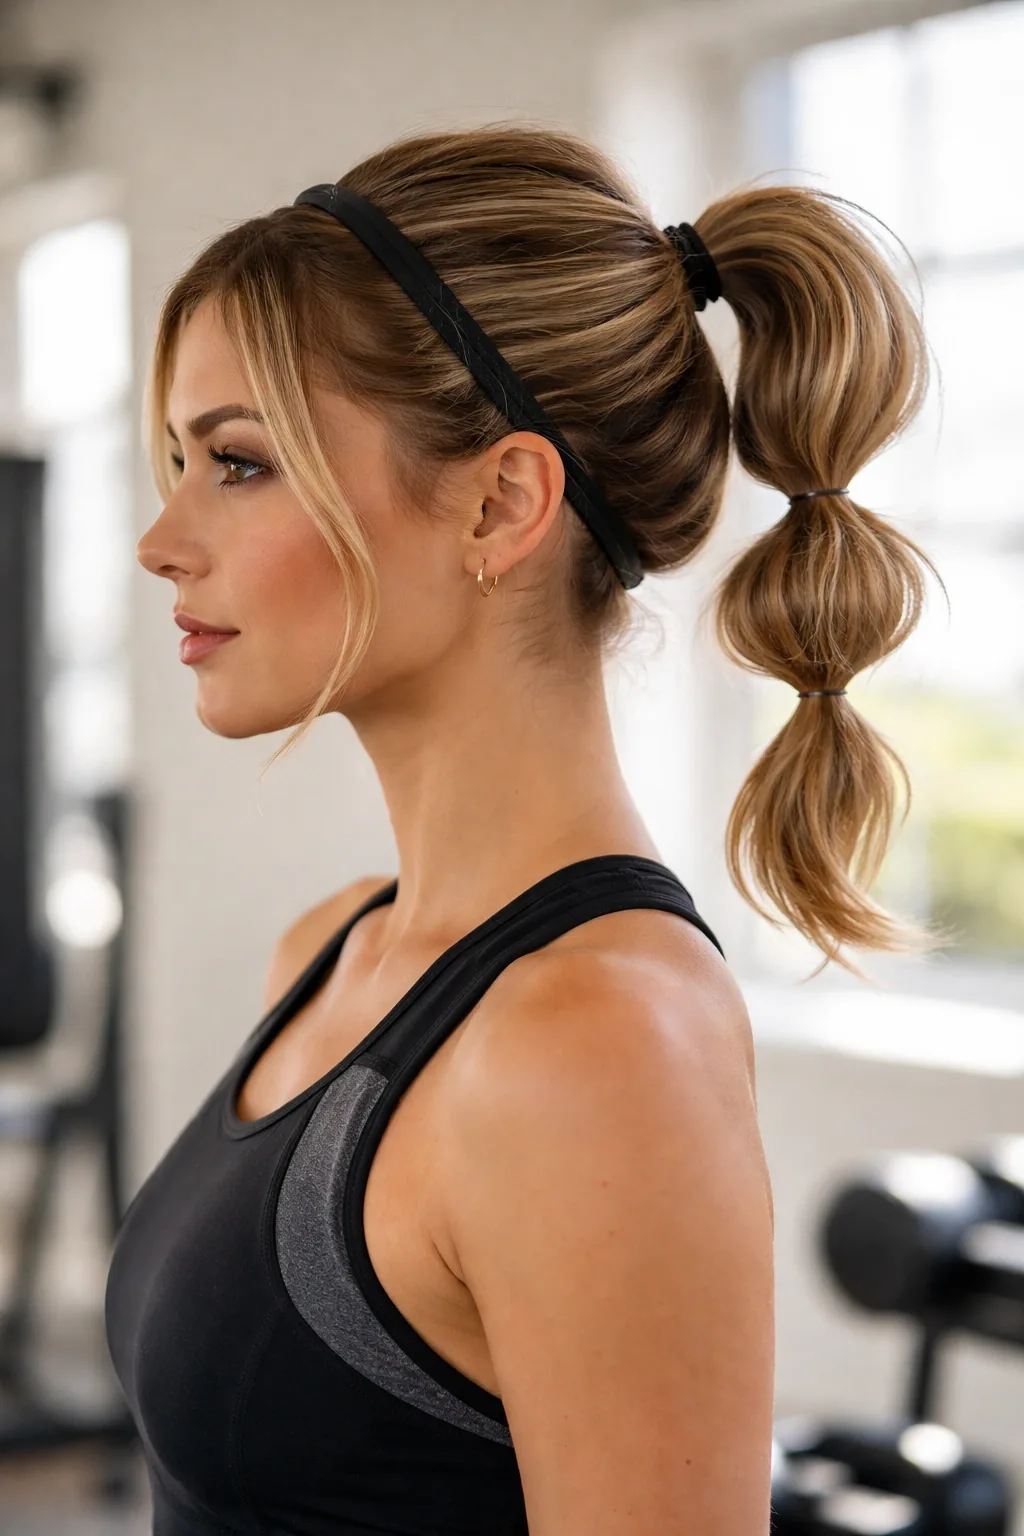
A bubble ponytail with a headband is the playful one — a high ponytail divided into puffs with elastics, with a band adding the finishing line at the front. It is the style for a party, a festival, or a day when you want your hair to be fun. Pull the hair into a high ponytail, add elastics every few centimetres down the length, and pull each section out gently to make the bubbles. Slide a knotted or fabric band back from the hairline, and the look is complete.
Pros: it takes five minutes, it works on long hair of any texture, and it looks far more complicated than it is. Cons: the bubbles can fall flat in fine hair, so add a little texture spray first. Common mistake: spacing the elastics too far apart, which makes the bubbles look uneven. Keep them even, pull each bubble out the same amount, and the ponytail looks deliberate. Styling time: five to ten minutes. Tools needed: several small elastics and a knotted or fabric band.
23. The Headband With a Deep Side Part
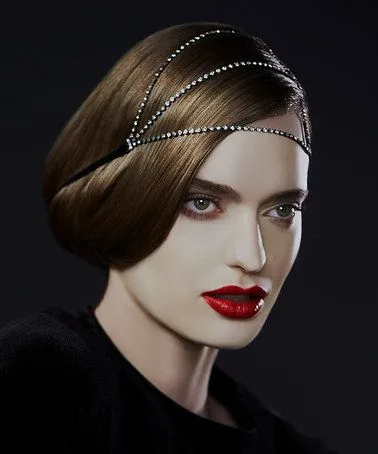
A deep side part with a headband has a dramatic, old-Hollywood feel, because the part changes where all the volume goes. Instead of falling evenly, the hair sweeps across the forehead in one big, glossy wave, and the band sits just behind the sweep, holding it in place. Part the hair deeply to one side while it is still wet, blow-dry the heavy side first, and slide a medium band back from the hairline.
Best for: almost every face shape, and anyone who wants a glamorous look without an updo. How to style: part deeply while wet, blow-dry the heavy side with a round brush, and place the band behind the sweep. Styling time: fifteen to twenty minutes. Tools needed: a tail comb, a round brush, and a medium band. Common mistake: parting the hair after it is dry — a deep side part has to be set while the hair is wet, or it will fight you all day. Quick verdict: the most glamorous band style that still leaves the hair down.
24. The Headband With a Shag Cut
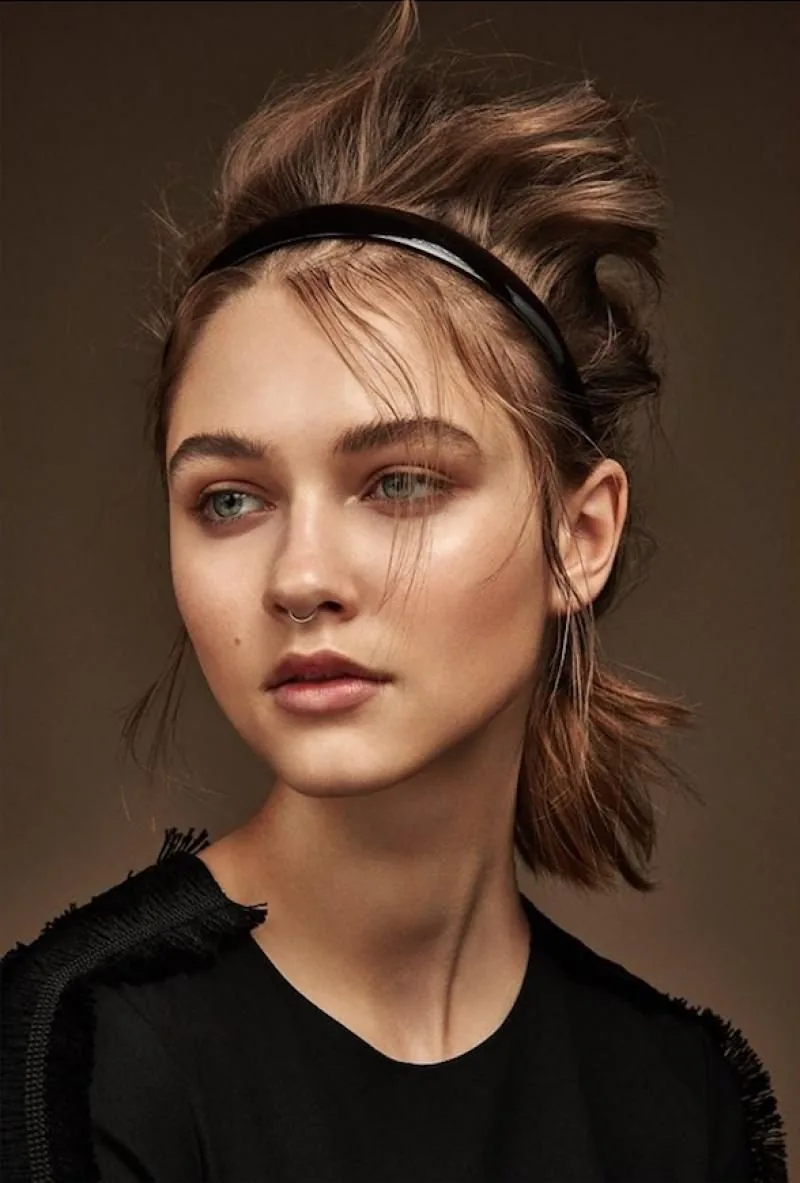
A shag cut with a headband is the edgy, lived-in version of the style — choppy layers, lots of movement, and a band that adds a line of order to the chaos. The shag already has texture and volume, so the band does not need to do much: a thin or medium band, slid back from the hairline, keeps the front layers out of the eyes and lets the shag’s shape show. It is the band style for women who like their hair to look a little undone.
Pros: the shag holds its shape with almost no styling, and the band adds polish in seconds. Cons: the layers can escape the band, so let them — the falling pieces are part of the look. Maintenance: trims every six to eight weeks keep the layers sharp. Styling time: five to ten minutes. Tools needed: texture spray and a thin or medium band. What to ask your stylist: a shag with layers that start at the cheekbone, so they fall naturally in front of the band. Who should avoid a wide padded band here: most shags, because the band can hide the layers that make the cut.
25. The Headband With a Romantic Updo
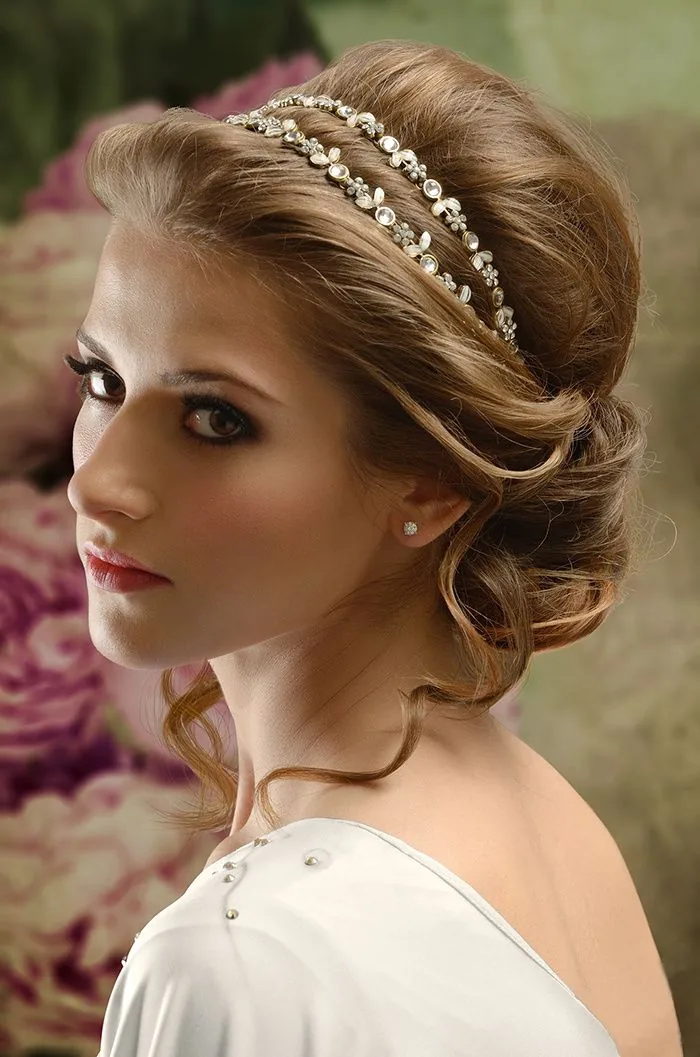
A romantic updo with a headband is the soft, dreamy version of an updo — the hair gathered loosely at the back, curls falling around the face, and a thin band sitting behind the hairline like a finishing touch. Curl the hair first, gather it loosely, pin it up, and let pieces fall free. Slide a thin metal or pearl band back from the hairline, and the updo goes from pretty to romantic in one move.
Best for: weddings, date nights, and any evening when you want softness rather than structure. How to style: curl, gather loosely, pin, and place the band behind the hairline. Styling time: twenty to thirty minutes. Tools needed: a curling iron, pins, and a thin metal or pearl band. Cost and time: a salon version takes about forty-five minutes, and it is the updo most worth paying for, because the looseness has to look deliberate rather than accidental. Maintenance: a few pins and a light spray keep it going all evening.
26. The Headband With a Boho Braid
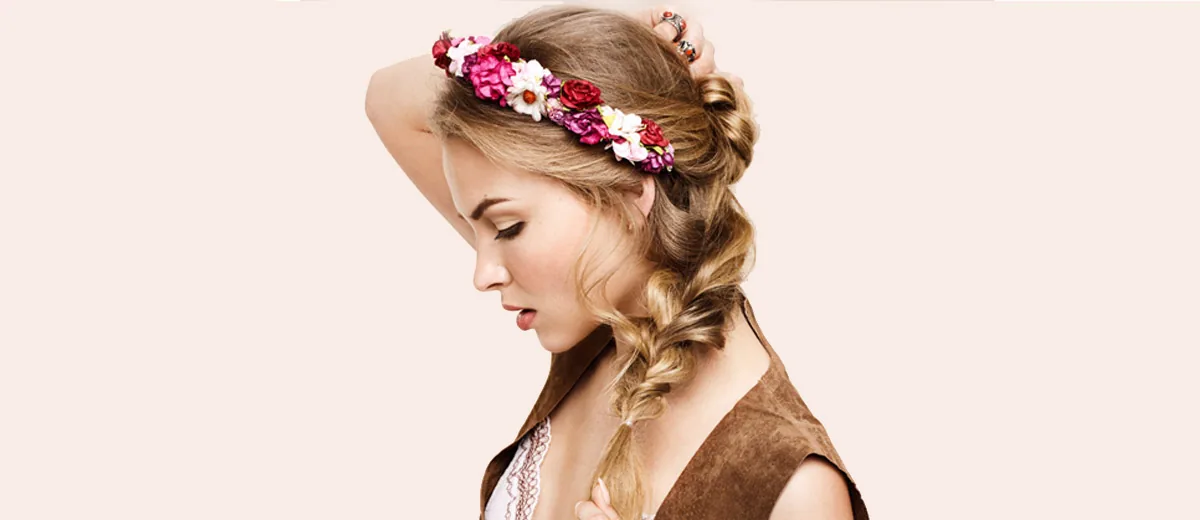
A boho braid with a headband is the festival style of the list — loose, textured, and deliberately imperfect. Braid a few small sections through the hair, leave the rest loose and wavy, and slide a fabric or knotted band back from the hairline. The braids add texture, the band adds a line, and the loose waves keep the whole thing soft. It is the style that looks best a little messy, so do not try to make it neat.
Pros: it works on second-day hair, it hides frizz, and it takes ten minutes. Cons: a boho braid can look unfinished if the band is too formal — keep the band fabric or knotted, never metal. Common mistake: braiding too neatly, which kills the boho feel. Keep the braids loose, pull them apart, and let pieces fall. Styling time: ten minutes. Tools needed: a few small elastics and a fabric band. Who should avoid it: anyone who needs a formal look — this one is strictly casual, and that is its charm.
27. The Headband With a Short Curly Cut
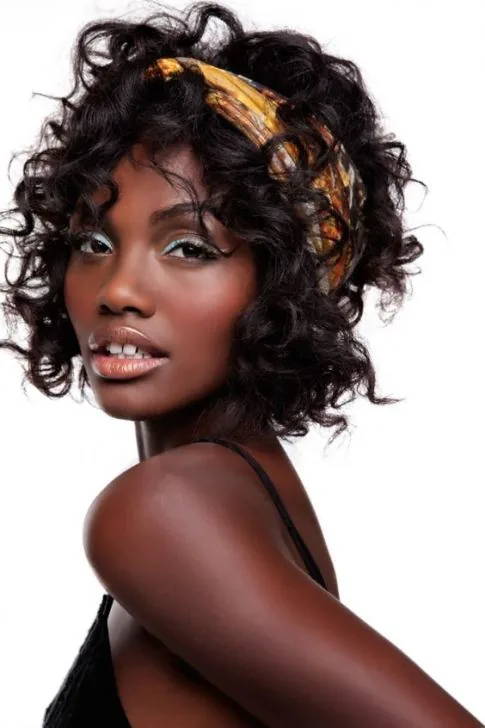
A short curly cut with a headband is a joyful combination, because the curls give the band volume to sit against and the band gives the curls a shape. On short curly hair, a thin or medium band sits neatly behind the hairline, keeps the front curls out of the eyes, and lets the curls at the crown do the talking. It is the easiest way to style short curls on a busy morning, and it works on every curl pattern.
Best for: short curly hair, and anyone who wants their curls controlled without being flattened. How to style: define the curls with a little cream, let them dry, and slide the band back from the hairline. Styling time: five minutes once the curls are dry. Tools needed: curl cream and a thin or medium band. What to ask your stylist: a cut that keeps the curls full at the crown, so the band has something to frame. Common mistake: using a tight band, which flattens the curls — choose a band that sits gently, and let the curls keep their volume.
28. The Headband With a Long Layered Cut
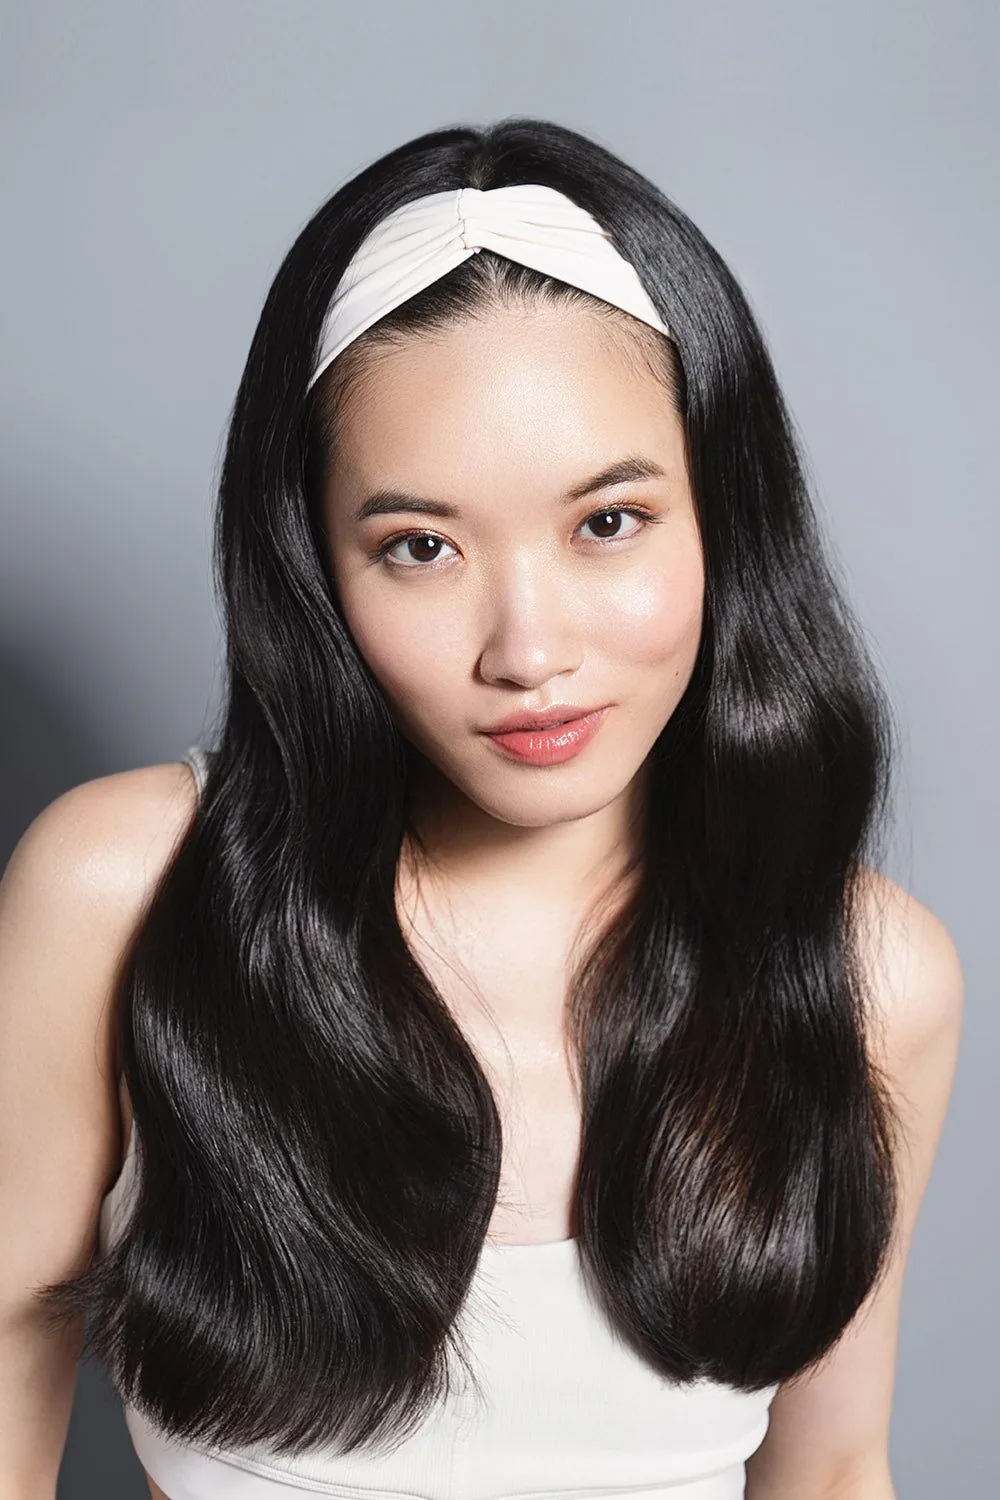
A long layered cut with a headband is the most versatile combination on this list, because the layers give the hair movement and the band gives it a finish. Blow-dry the layers smooth, or let them fall in natural waves, and slide a medium band back from the hairline, letting the face-framing layers fall in front of it. The band holds the hair back, the layers soften the face, and the length stays the star of the show.
Pros: the layers make the hair look full, the band makes it look styled, and the whole look takes ten minutes. Cons: very long hair can drag a band forward, so use a band with a grip lining. Maintenance: trims every eight to ten weeks keep the layers from splitting. Styling time: ten to fifteen minutes. Tools needed: a brush, a little serum, and a medium band. What to ask your stylist: long layers that start at the cheekbone and the longest layer no shorter than the chest, so the length stays.
29. The Headband With Old Hollywood Waves
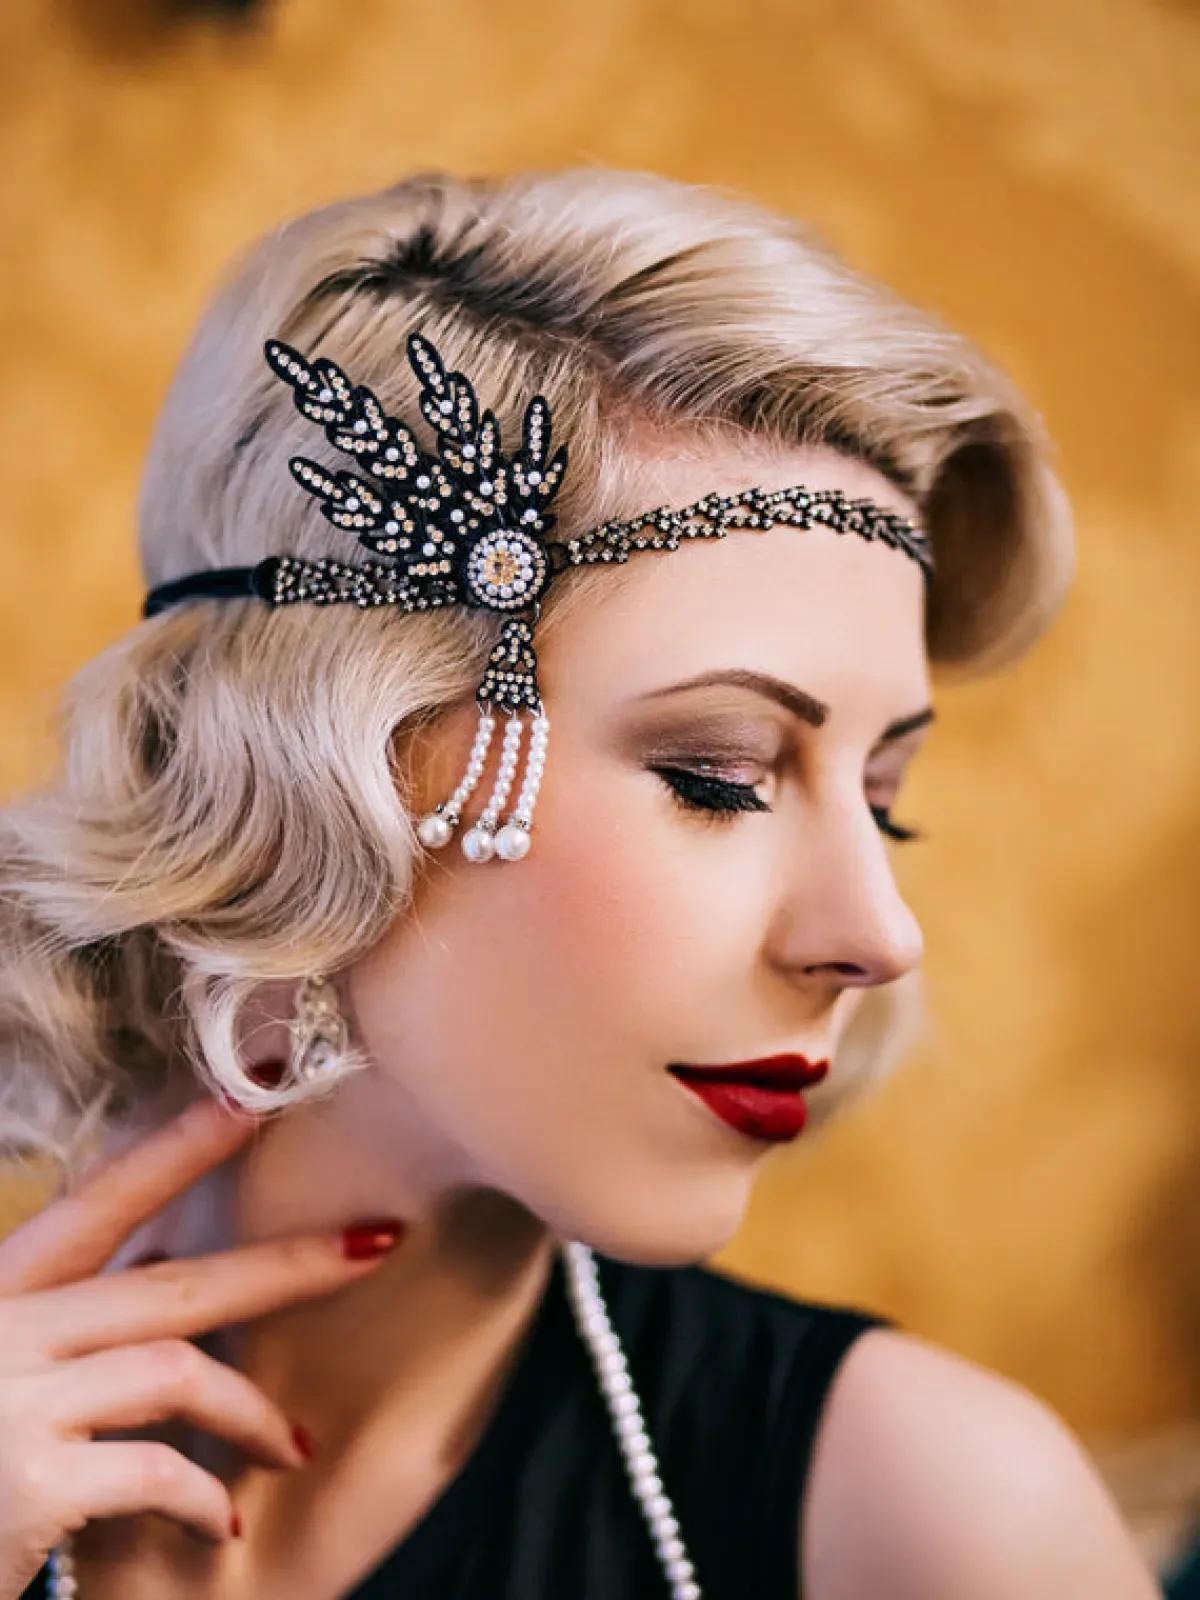
Old Hollywood waves with a headband are the most glamorous style on this list — deep, sculpted waves, a deep side part, and a thin band sitting behind the hairline like a piece of jewellery. The waves are the star: uniform, glossy, and brushed into a single smooth shape. Curl the hair in large sections, let the curls cool, and brush them out into one continuous wave. Then slide a thin metal or pearl band back from the hairline, and the look is complete.
Best for: formal evenings, weddings, and photographs. How to style: curl with a large barrel, cool, brush out, and set with a light spray. Styling time: thirty to forty minutes. Tools needed: a large curling iron, a brush, setting clips, and a thin metal or pearl band. Cost and time: a salon version takes about an hour, and it is worth it for the occasions that matter. Common mistake: using a wide band here, which competes with the waves — a thin band lets the waves do the talking.
30. The Headband With a Sleek Centre Part
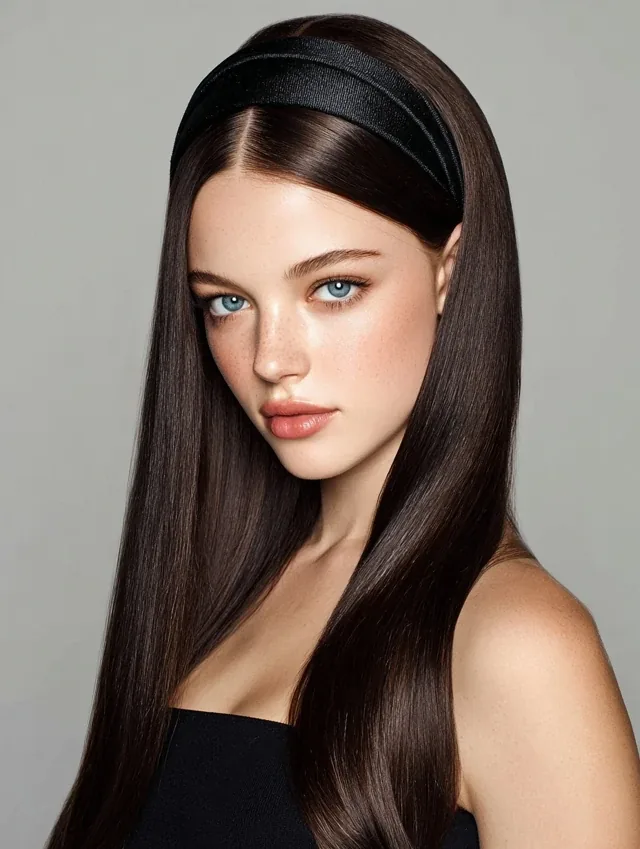
A sleek centre part with a headband is the minimalist, modern version of the style — hair parted cleanly down the middle, blown out smooth, and a thin band sitting behind the hairline like a frame. The symmetry is the point: the part divides the hair evenly, the band follows the same line, and the whole look reads as calm, deliberate, and polished. It is the style for a workday, a gallery opening, or any day when you want to look quietly put-together.
Pros: it takes ten minutes, it suits almost every face shape, and it photographs beautifully. Cons: a centre part shows every unevenness, so the part has to be straight — use a tail comb. Common mistake: wearing the band too far forward, which breaks the symmetry. Slide it back, smooth the crown, and let the part and the band run parallel. Styling time: ten minutes. Tools needed: a tail comb, a straightener, and a thin band. Quick verdict: the calmest style on this list, and the one that most rewards a precise part.
31. The Headband With a Half-Up Ponytail
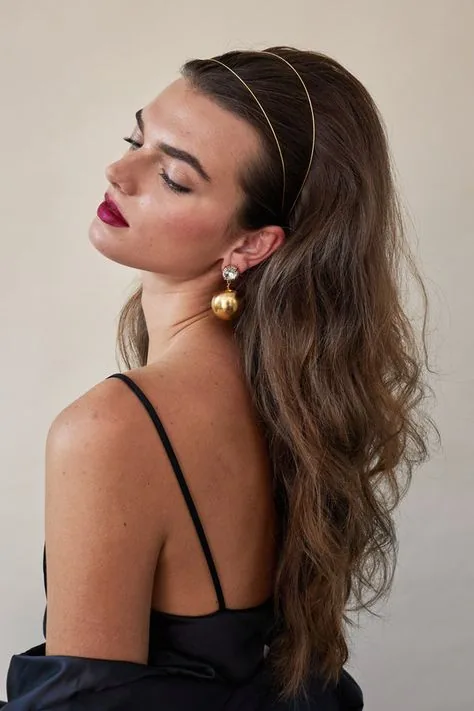
A half-up ponytail with a headband is the best of both worlds: the top half is up and out of the way, the bottom half falls loose, and the band adds the finishing line. Gather the top section into a ponytail at the crown, let the rest fall, and slide a medium band back from the hairline, just in front of the ponytail. The band frames the face, the ponytail lifts the crown, and the loose hair keeps the look soft.
Best for: medium to long hair, and anyone who wants their hair up without a full updo. How to style: gather the top half, secure it, and place the band behind the hairline. Styling time: five to ten minutes. Tools needed: an elastic and a medium band. What to ask your stylist: layers that frame the face, so a few pieces can fall in front of the band. Quick verdict: the style to choose when you cannot decide between up and down — it is both, and it works.
32. The Knotted Headband With Loose Hair
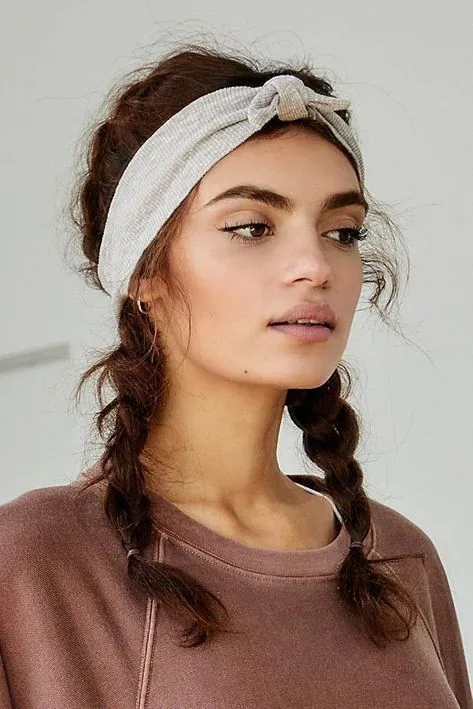
A knotted headband with loose hair is the statement version of the style — the knot sits at the top of the head like a bow, the band frames the face, and the loose hair falls around it. The knot is the whole point, so let it show: wear the hair down, straight or wavy, and slide the knotted band back from the hairline so the knot sits at the crown. The look is playful, a little retro, and it turns a plain hair day into an outfit.
Pros: the knot adds height and interest, and the style takes ten seconds. Cons: a knotted band can feel bulky, so it is not the best choice for a long day. Common mistake: wearing the knot too far forward, where it looks like a headband that slipped. Push it back to the crown, and the knot becomes a feature. Styling time: under five minutes. Tools needed: just the band — the hair does the rest. Who should avoid it: anyone who dislikes attention on the top of the head, because the knot is the first thing people see.
33. The Headband With a Tucked French Twist
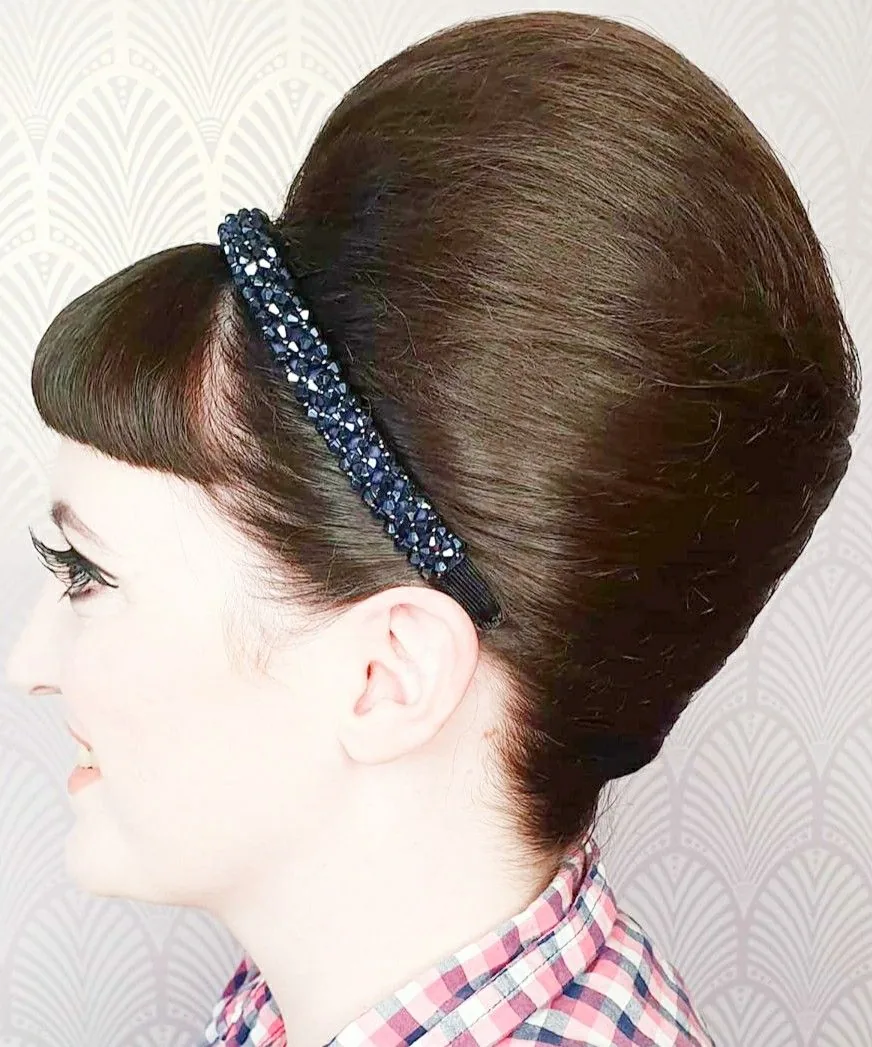
A tucked French twist with a headband is the most elegant style on this list — the hair swept up and tucked into a smooth twist at the back, with a thin band sitting behind the hairline. It is the look for a wedding, a gala, or any evening when the hair needs to be completely up and completely polished. Twist the hair up, tuck the ends in, pin it securely, and slide a thin metal band back from the hairline.
Best for: formal evenings and anyone with medium to long hair. How to style: gather the hair low, twist it up, tuck and pin, and place the band behind the hairline. Styling time: fifteen to twenty minutes. Tools needed: pins, a brush, hairspray, and a thin metal band. Cost and time: a salon French twist takes about thirty minutes, and it is worth paying for when the evening matters. Maintenance: a few pins and a light spray keep it going all night. Common mistake: making the twist too tight, which pulls the face — keep it soft, and let the band do the framing.
34. The Headband With a Silk Scarf Wrap
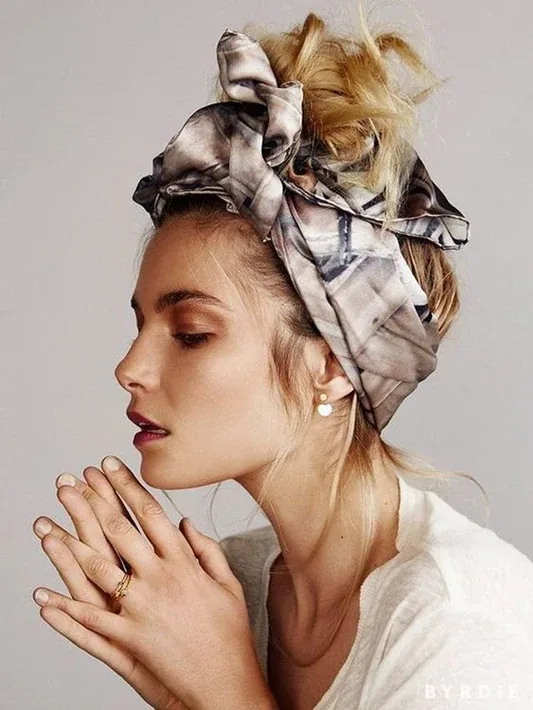
A silk scarf worn as a headband is the most versatile version of the style, because the scarf is both the band and the accessory — a splash of colour, a pattern, a little luxury, all in one. Fold a silk scarf into a band, tie it at the nape or on top, and let the ends fall with the hair or tuck them away. Wear the hair loose and wavy, or in a low ponytail, and let the scarf do the decorating. It is the style for a holiday, a brunch, or a day when a plain band feels too plain.
Pros: a scarf costs little, comes in endless patterns, and doubles as a hair tie. Cons: silk can slip on smooth hair, so add texture first or tie the scarf snugly. Common mistake: tying the scarf too loosely, so it slides off within an hour. Tie it firmly, tuck the ends, and it will stay. Styling time: five minutes. Tools needed: a silk scarf and a little texture spray. Quick verdict: the cheapest way to make a headband look expensive — and the one to pack for a holiday.
35. The Headband With Sporty Braids
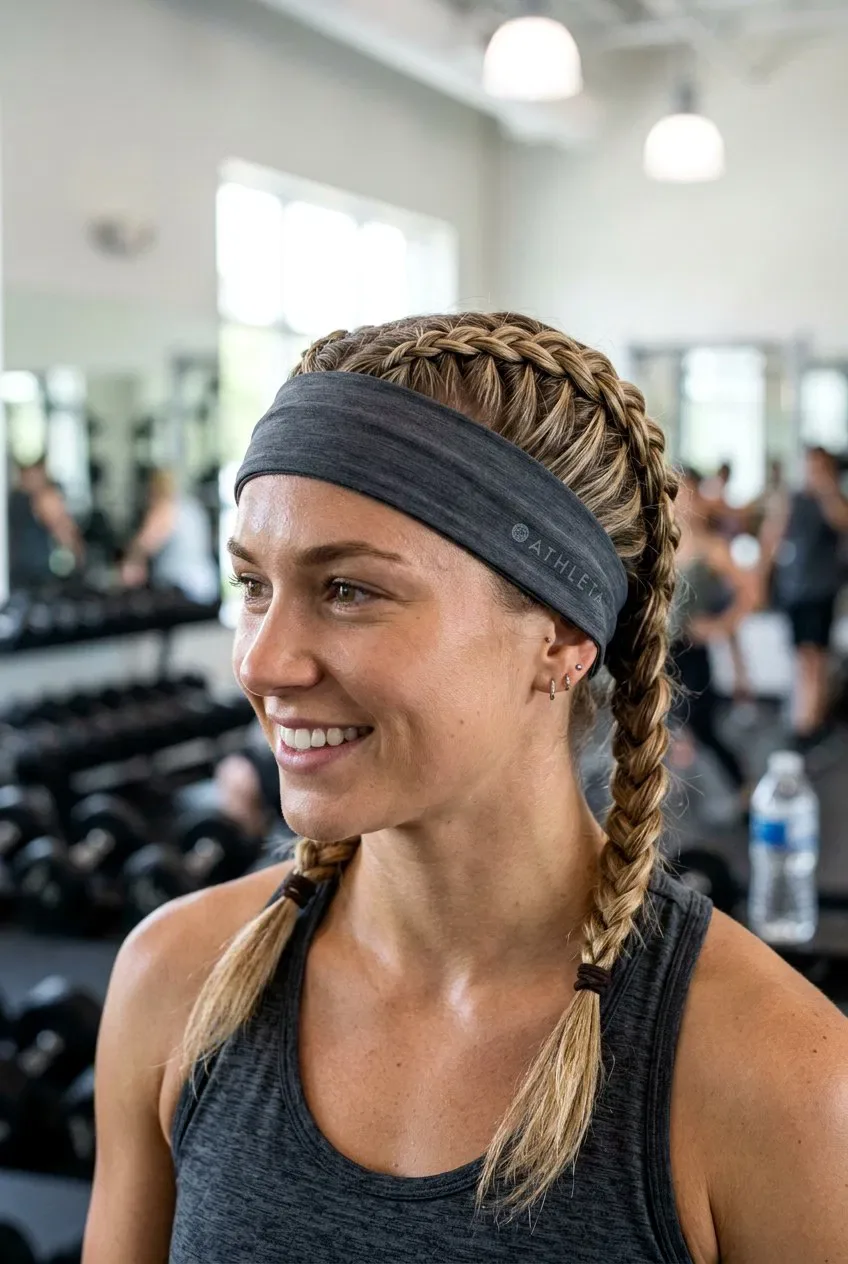
Sporty braids with a headband are the practical version of the style — the hair braided back so it stays out of the way, and a stretchy fabric band keeping the front pieces and the sweat in check. Braid two Dutch braids from the front, or a single French braid down the back, and slide a wide fabric band back from the hairline. The braids hold the hair, the band holds the front, and nothing moves, however hard you work out.
Best for: the gym, running, and any sport where the hair has to stay put. How to style: braid the hair back, secure it, and place a wide fabric band behind the hairline. Styling time: ten minutes. Tools needed: elastics and a wide fabric sports band. What to ask your stylist: layers long enough to braid, because short layers escape a braid and a band will not hold them. Who should avoid a tight sports band: anyone who gets tension headaches — pick a band you can wear for an hour without noticing it.
36. The Headband With a Glam Evening Updo
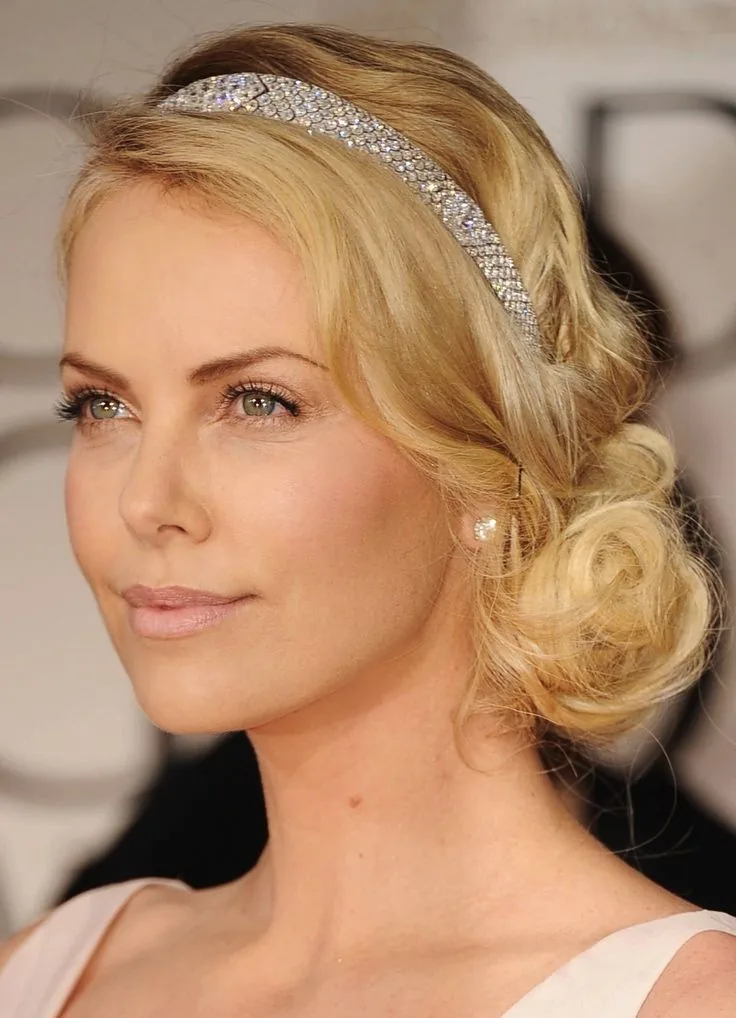
A glam evening updo with a headband is the finale of this list — the hair swept up, pinned, and polished, with a band adding the one line of sparkle that turns an updo into an evening look. Curl the hair first, gather it into a soft updo, pin it loosely, and slide a jewelled or pearl band back from the hairline. The updo gives the height, the band gives the shine, and the two together look like a red-carpet style.
Best for: weddings, galas, and any evening when the hair is part of the outfit. How to style: curl, gather, pin loosely, and place a jewelled or pearl band behind the hairline. Styling time: thirty to forty minutes. Tools needed: a curling iron, pins, hairspray, and a jewelled or pearl band. Cost and time: a salon updo takes about an hour, and it is worth it for the evenings that matter. Maintenance: a few pins and a light spray keep it going all night. Quick verdict: the most glamorous band style on this list — save it for the nights that deserve it.
Do headbands work on all hair types?
Yes. Headbands work on straight, wavy, curly and coily hair, and on fine, thick, short and long hair. The trick is choosing the right band: a thin or medium band with a grip lining for fine or slippery hair, a wide or padded band for thick hair, and a stretchy fabric band for curly hair, so the band holds without flattening the curls.
How do I stop my headband from slipping?
Slide the band back about two centimetres from your hairline so it sits in the curve of your skull, add texture to the roots first with dry shampoo or texture spray, and choose a band with a velvet or silicone grip on the underside. A band grips far better on hair with a little texture than on freshly washed, silky hair.
Can I wear a headband with short hair?
Yes. A headband suits a pixie, a bob and a lob just as well as long hair. On short hair, a thin or medium band works best, because it shows off the shape of the cut instead of hiding it. A very wide padded band can overwhelm a short cut, so save it for longer hair or a special occasion.
Are headbands bad for your hair?
No, as long as the band fits and you do not wear the same tight band in the same spot every day. A band that is too tight can cause breakage and headaches, and a metal band with rough edges can snag. Choose a smooth band that feels snug but not tight, vary where you place it, and take it off at night.
Which headband width suits a round face?
A thin or medium band usually suits a round face best, because a very wide band can make the face look shorter. A thin band adds a vertical line that lengthens the face, and wearing the band a little further back, with face-framing pieces in front of it, adds length too. A wide band can still work — just push it further back and keep the front pieces loose.
Can I wear a headband to the gym?
Yes, and it is one of the best uses for one. Choose a wide, stretchy fabric band with a silicone grip, wear it over a ponytail or braids rather than loose hair, and wash the band after every session. A sweaty band left unwashed can cause breakouts along the hairline.
How do I wear a headband with bangs?
Let the bangs fall in front of the band and part in the middle, so the band frames them — or push the band behind a blunt fringe so the straight line of the bangs stays clean. The rule is simple: either the bangs sit in front of the band, or the band sits in front of the bangs, never both fighting for the same spot.
Are padded headbands still in style?
Yes. Padded headbands are still in style, and they are the band to reach for when the band itself is the look. They add height and drama, they frame the face, and they turn a plain ponytail or loose waves into a deliberate style. Choose a velvet or satin padded band in a neutral colour for the most versatile version.
How do I wear a headband without it giving me a headache?
Choose a band that feels snug but not tight, and avoid wearing a tight band in the same spot all day. Fabric bands are usually the most comfortable, because they mould to your head. If a band leaves a mark after an hour, it is too small — size up, or switch to a stretchy fabric band.
What is the best headband for thick hair?
A wide or padded band is usually the best choice for thick hair, because it has enough grip to hold the volume and it is visible against the bulk. Look for a band with a velvet or silicone lining so it stays put, and avoid thin metal bands, which can slide on thick hair and disappear into the volume.
Conclusion
A headband is the smallest change you can make to your hair, and one of the biggest. It rescues growing-out bangs, hides a bad hair day, keeps hair out of your face at the gym, and turns a plain ponytail into a finished look — all in about ten seconds, with no heat and no product. The 36 hairstyles with a headband in this guide cover every length, every texture and every occasion, from a messy bun on a Saturday to a glam evening updo, and the eight guides cover the questions that actually come up: which width suits your face, how to stop slipping, which material to choose, and how to wear a band with bangs.
Start with three bands: a thin metal one for polish, a medium fabric one for everyday, and a padded one for drama. Wear them with loose waves, with a low bun, with braids, with a pixie — and let the band do the work. The best headband is the one you reach for without thinking, and once you have it, you will wonder how you ever styled your hair without one.