Just the Two of Us: 34 Hairstyles for an Elopement That Photograph Beautifully Anywhere
An elopement strips a wedding down to what matters most: two people, a place they love, and a promise. There is no audience to impress and no ballroom to fill, which makes the hair wonderfully freeing — and, in its own way, a little harder to choose. The best hairstyles for an elopement are the ones that survive wind, hiking and hours outdoors, that photograph beautifully from behind as well as from the front, and that still look like you at sunset.
This guide gathers 34 hairstyles for an elopement, from classic low chignons and braided crowns to loose beach waves, short bobs and windproof braided buns, plus eight practical guides on weather, photography, DIY planning and last-minute fixes. Every style includes honest notes on who it suits, how to build it and what to ask a stylist, so you can choose with confidence — whether you have a stylist beside you or just a mirror, a handful of pins and a beautiful view.
Wind and Weather: Styles That Hold Up Outside
An elopement rarely happens in a climate-controlled ballroom. Wind on a clifftop, humidity by the sea and thin mountain air all pull at a hairstyle in different ways, so the first decision is not which style looks prettiest in a mirror — it is which one still looks like itself after an hour outdoors. Anchored styles, braids and low buns cope far better than loose volume that depends on hairspray alone.
Before the day, test your chosen style in weather as close as possible to the real thing. A windy afternoon walk, a damp morning or a hot, still day will each reveal a different weakness, and it is much better to find it a week early than on a mountainside. Take a photo from the side and the back, because that is what your photographer will see most.
Best for: couples eloping on a beach, a clifftop, a mountain or anywhere the forecast is a suggestion rather than a promise. If your location is indoors, you can relax this rule — but a style that survives wind will also survive a long, happy day.
Remote and Outdoor Locations: Plan for No Mirror and No Plug
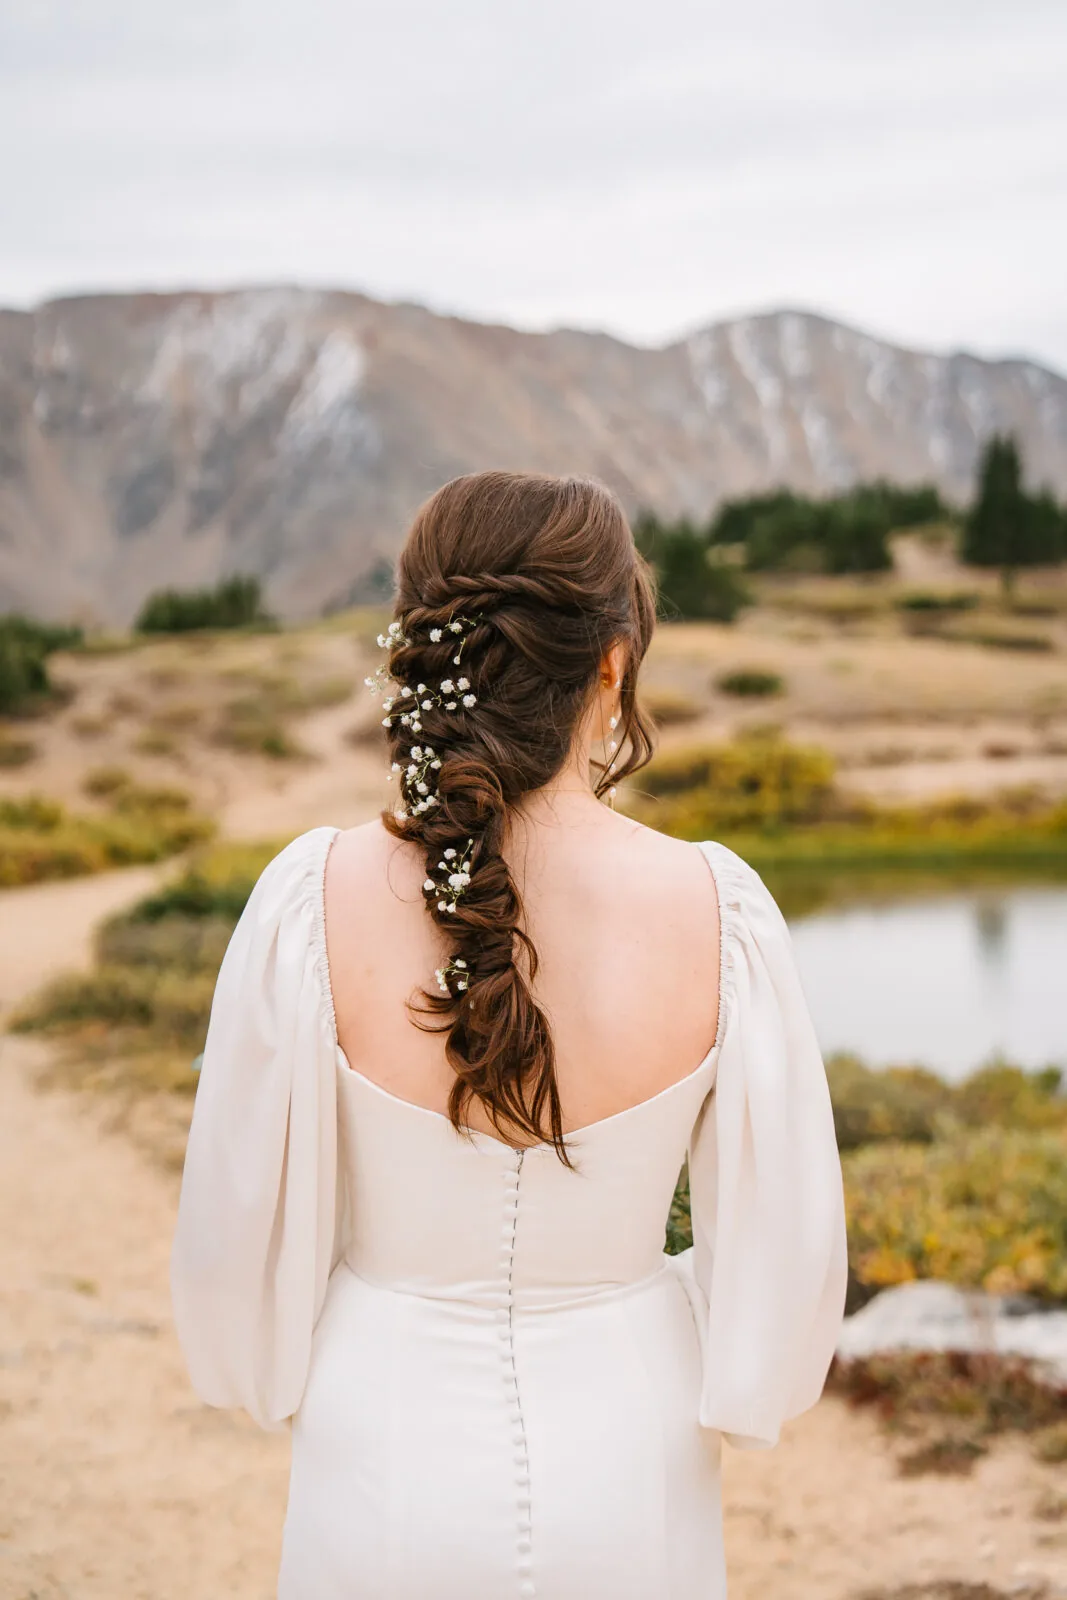
Many elopement spots are a hike from the nearest road, let alone the nearest salon chair. If you are getting ready in a cabin, a car or a clearing, your style needs to be doable with a small kit: a brush, pins, elastics, a travel mirror and a little product. Anything that needs a curling iron, a diffuser and three hands is a risk you do not need.
Choose a style you — or your partner, or a friend — can actually build in that setting, and practise it there if you can. Pack extra pins and elastics in a pocket, not just in a bag left at the trailhead. A style that looks slightly simpler but stays put will always beat an elaborate one that unravels halfway to the viewpoint.
What to ask a stylist: can this be done with no heat tools, and can you teach me the last two steps? A good stylist will simplify the structure without losing the look, and will show you exactly where the anchor pins go.
Photography: Hair That Reads Beautifully on Camera
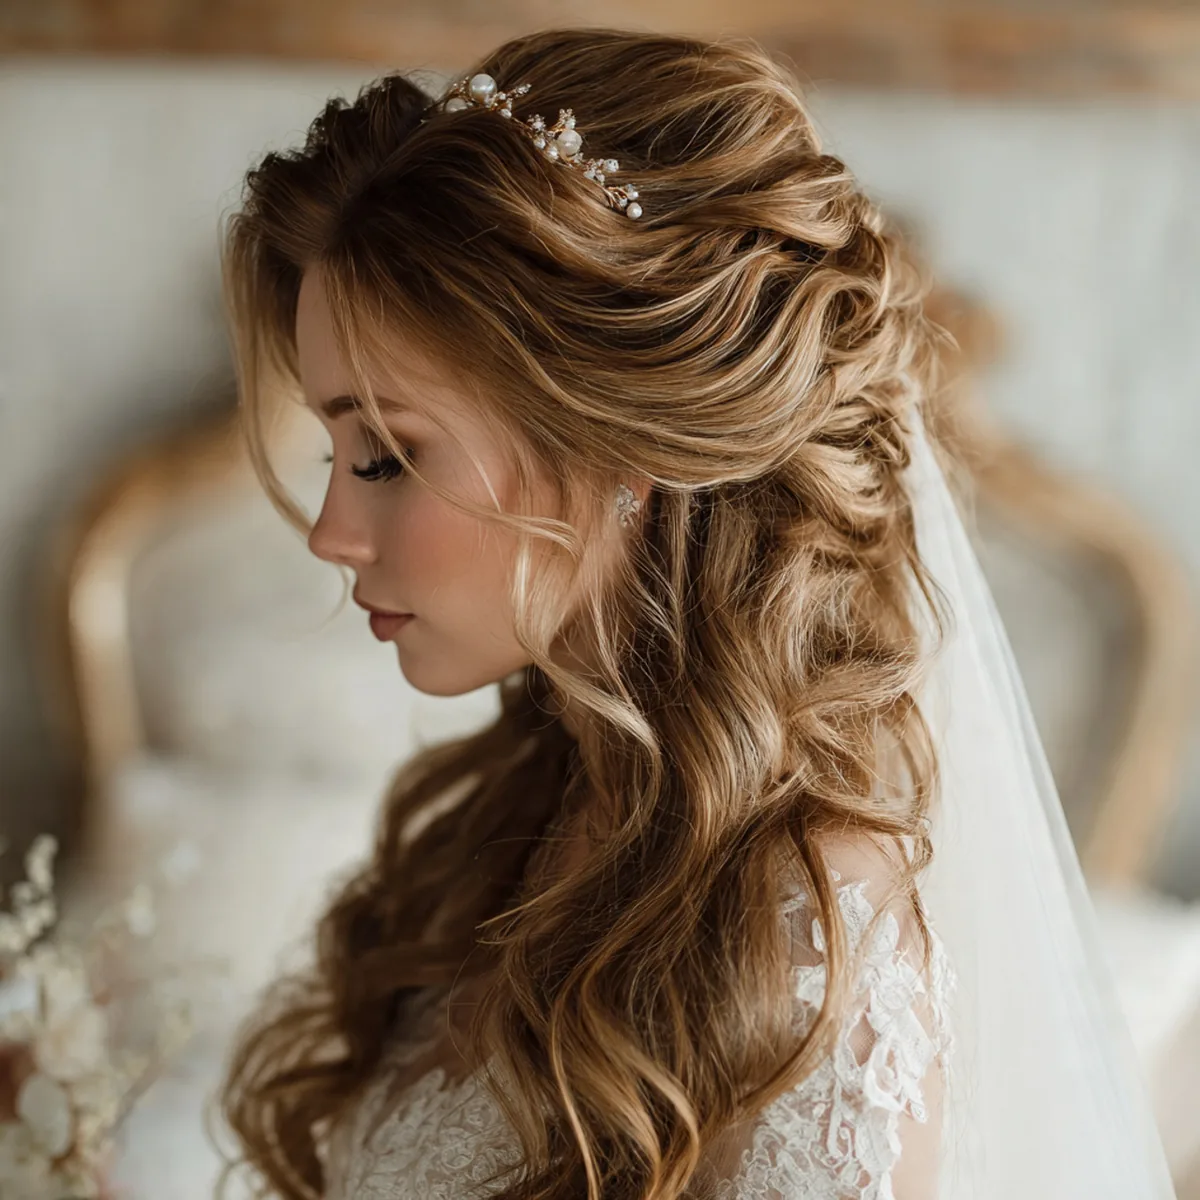
Elopement photos are often the only record of the day, and hair behaves differently on camera than in a mirror. Very dark, very flat hair can disappear against a dark forest background, while pale, flyaway hair can glow in backlight. A little texture, a soft edge or a visible braid line gives the camera something to hold on to.
Think about movement as well as stillness. A low ponytail that swings, a braid that catches the light and loose tendrils that move in the breeze all add life to a photo. Ask your photographer which side the light will come from at your ceremony time, and make sure the most detailed part of your style faces it.
Common mistake: choosing a style only from the front. Your elopement album will be full of back views — walking away down a trail, standing at an overlook, embracing — so the back of the style matters at least as much as the front.
No-Salon and DIY Planning: Doing It Yourself, Beautifully
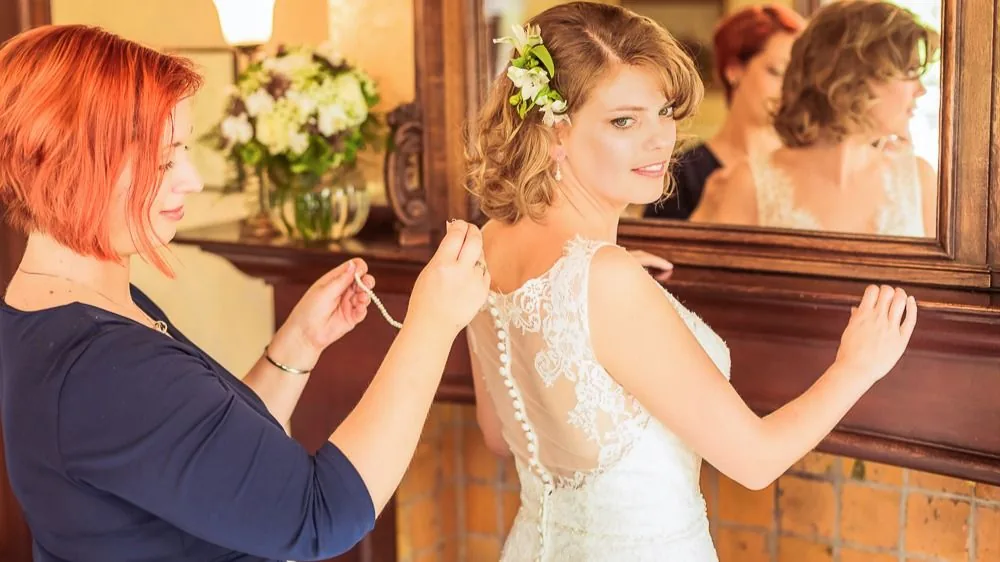
Not every elopement has a stylist on hand, and that is part of the charm. A DIY elopement hairstyle should be one you have made at least three times before the day, twice without looking at a tutorial. If you still need the video on the third try, pick something simpler.
Break the style into steps and time yourself. Most brides are surprised how long a relaxed-looking braid actually takes when nerves are involved, so add fifteen minutes to your practice time and then add it again. Lay out every tool in the order you will use it, and do a full trial run in the outfit you will wear, veil and accessories included.
Quick verdict: if you can build it calmly in under twenty minutes, it is a safe DIY choice. If it needs a second pair of hands, recruit that person now and practise together — do not discover on the day that your partner cannot braid.
Hair That Lasts All Day: From First Look to Last Light
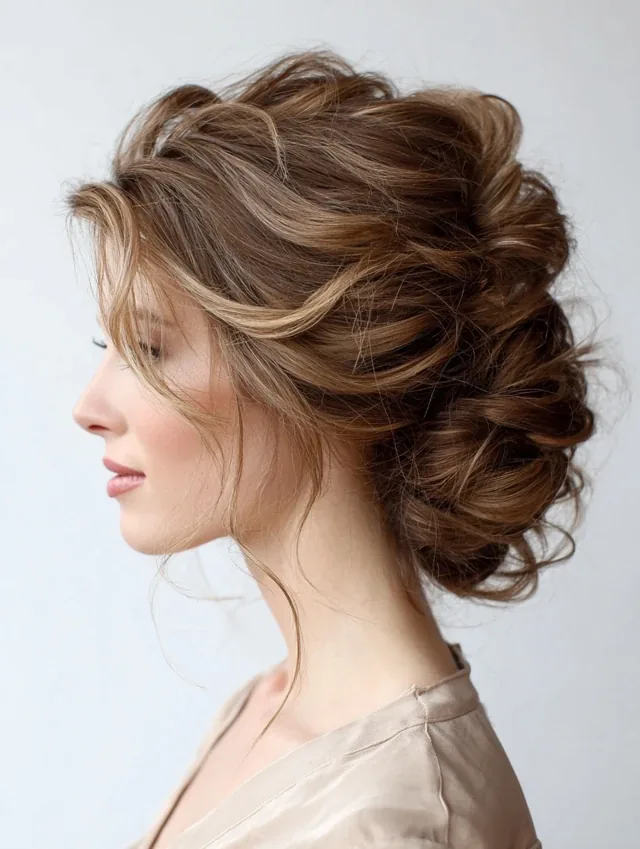
An elopement day is long. There is the getting ready, the hike or drive, the ceremony, portraits in several spots, dinner and probably a sunset session. Your hair needs to last through all of it without a touch-up station, so build in structure that survives: a braid base, a bun anchored at two points, or a ponytail with a hidden second elastic.
Products matter more than effort here. A light mousse on damp hair gives grip before styling, a texturising spray adds hold without stiffness, and a flexible-hold hairspray finishes without a helmet effect. Avoid heavy oils on the day — they loosen pins and weigh down curls as the hours pass.
Maintenance: carry four bobby pins, two elastics and a travel-size hairspray in a small pouch. That is the whole kit. A two-minute check after the ceremony — tuck the tendrils, tighten one pin, smooth the part — is usually all a well-built style needs.
Accessories: The Small Details That Make It Feel Like a Wedding
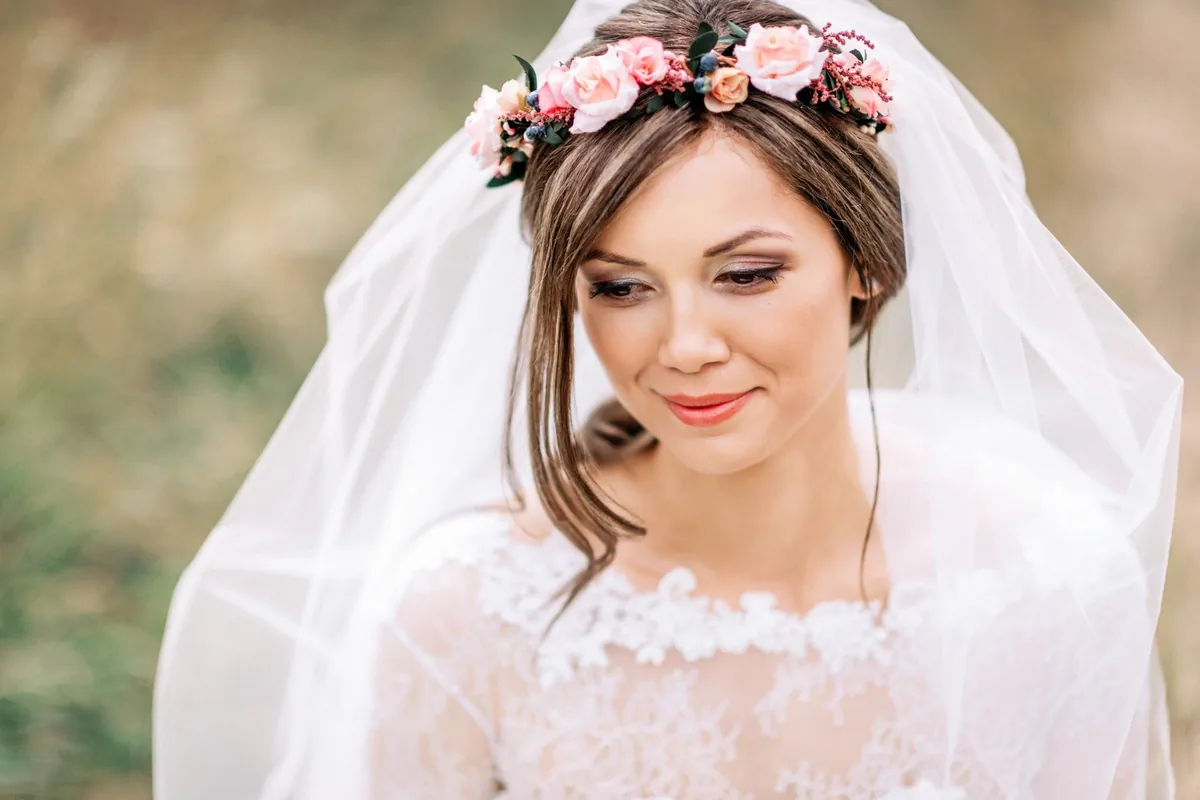
With just two people present, accessories do a lot of the work of saying “this is a wedding.” A delicate hair vine, a few pearl pins, a small flower crown or a short veil can turn an everyday bun into a bridal style without adding weight or fuss. The trick is choosing one statement piece and letting the rest of the hair stay calm.
Match the accessory to the setting, not just to the dress. Fresh flowers suit a garden or meadow; pearls and gold suit a historic building or a city hall; a simple vine suits a mountain or desert. Whatever you choose, pin it in during your trial run and wear it for an hour — some combs slide, some vines catch on veils, and it is better to learn that at home.
Who should avoid it: anyone whose style already has a lot of detail. A heavily braided crown plus a flower crown plus a veil is three ideas competing for attention. Pick the accessory or the braid, and let the other one rest.
Matching the Setting: Let the Place Shape the Style
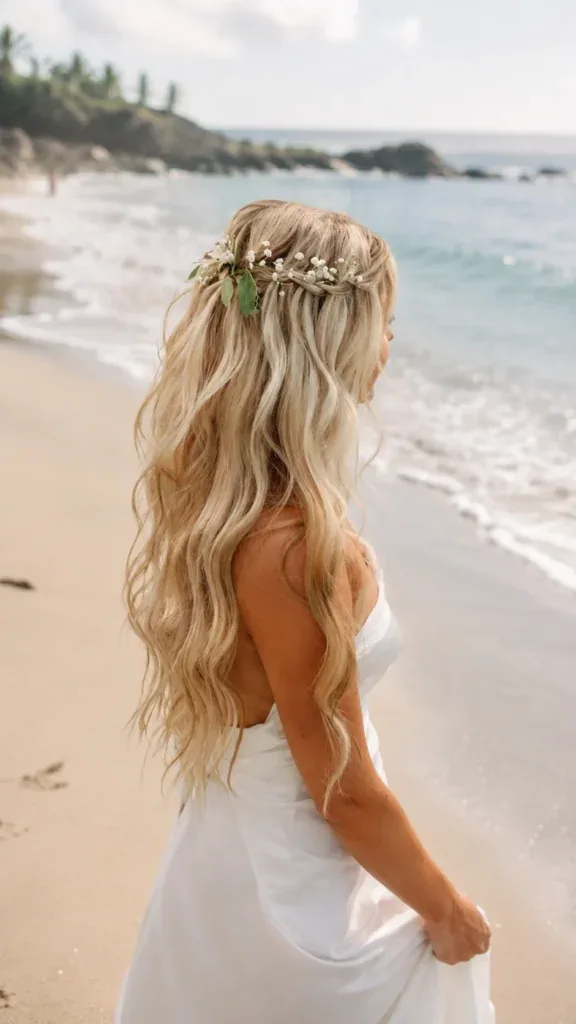
The best hairstyles for an elopement feel like they belong where they happen. A windswept beach asks for something loose and a little undone; a formal garden asks for something polished; a mountain asks for something secure. When the hair matches the place, the photos look effortless instead of staged.
Use the setting as a guide, not a rule. A sleek chignon can look stunning against a wild coastline precisely because of the contrast — but only if it is pinned to survive the wind. The question to ask is not “does this suit a beach?” but “will this still look like this after an hour in this place?”
Best for: couples who chose their location first and their dress second. If the place is dramatic, keep the hair a touch simpler and let the landscape do the talking; if the place is simple, the hair can carry more of the romance.
Last-Minute Fixes: What to Do When Something Goes Wrong
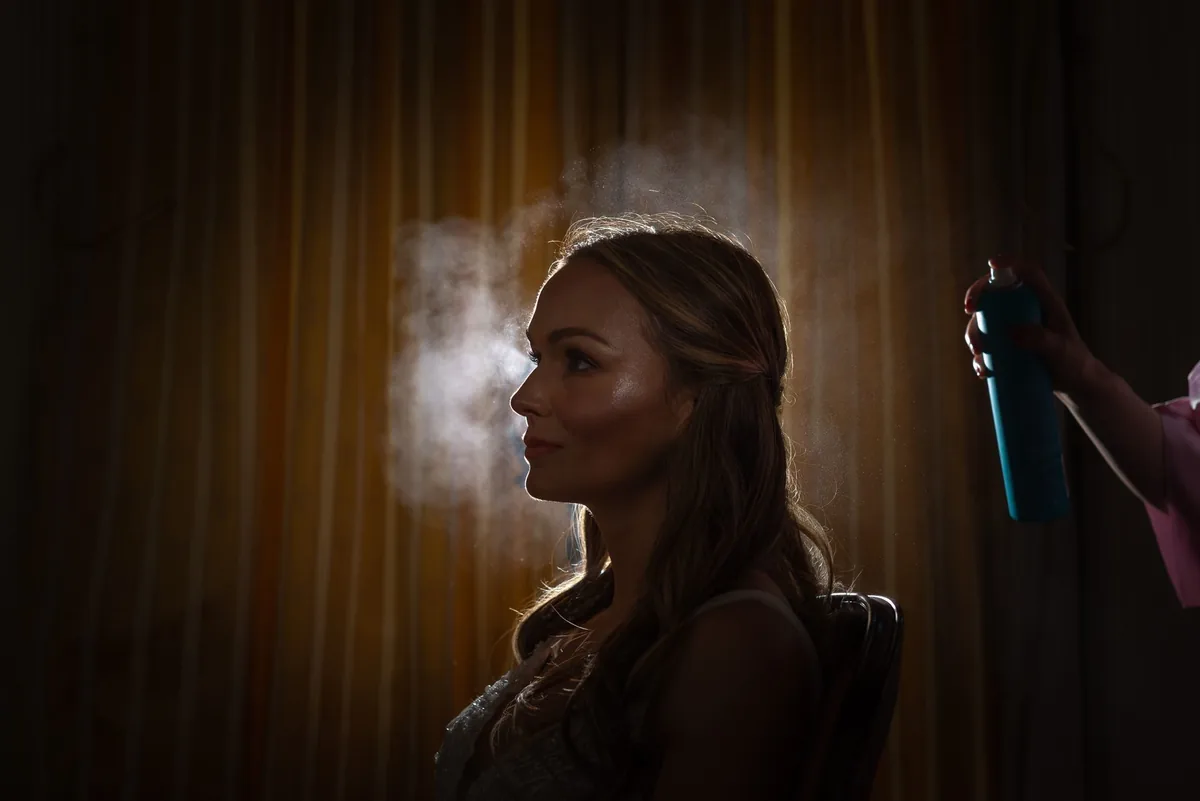
Something small will go wrong — a pin slips, a curl drops, the wind wins one round. That is normal, and a calm fix beats a perfect plan. Learn three quick rescues before the day: how to re-pin a bun in thirty seconds, how to turn a fallen curl into a face-framing tendril, and how to smooth flyaways with a dab of hand cream.
Keep your expectations kind. Elopement hair is not meant to look like a studio shoot at 6 p.m.; it is meant to look like you, happy, in a beautiful place. A slightly loosened braid after a hike is not a failure — in photos it often reads as romance.
Cost and time: the fix kit costs almost nothing and takes five minutes to pack. The real investment is the trial run. Do one full rehearsal, photograph it, and walk around in it for an hour. Whatever loosens in that hour is what you need to pin differently on the day.
1. The Classic Low Chignon
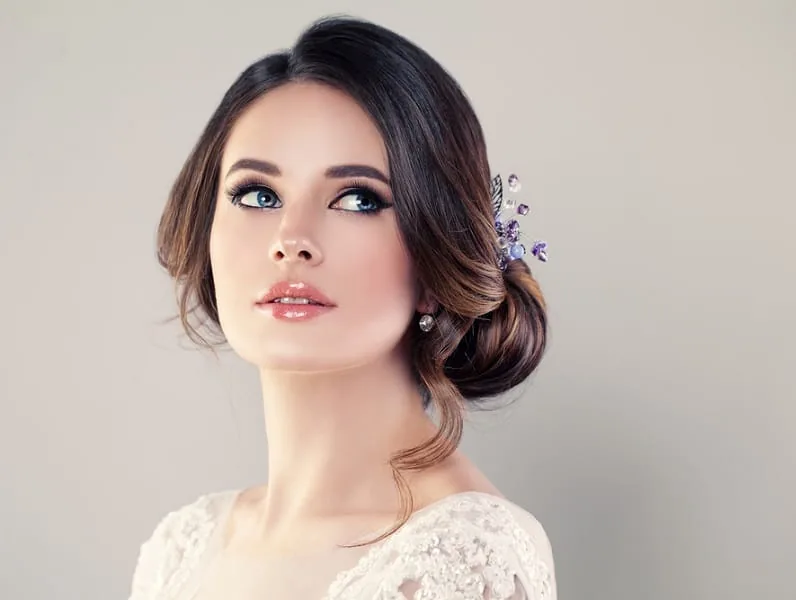
The low chignon is the elopement workhorse: elegant, secure and photogenic from every angle, with the hair gathered low at the nape so it never fights a veil, a collar or a mountain breeze.
Best for: brides who want timeless over trendy, and anyone wearing a veil, a high neckline or a dress with a detailed back.
How to style: smooth the hair back with a light mousse, gather it low, twist it into a soft roll and pin it in a flat, wide shape rather than a tight ball — the width is what makes it look modern.
What to ask a stylist: ask for a chignon anchored with pins at two levels, not just at the centre, so it cannot rotate as the day goes on.
2. Loose Romantic Waves
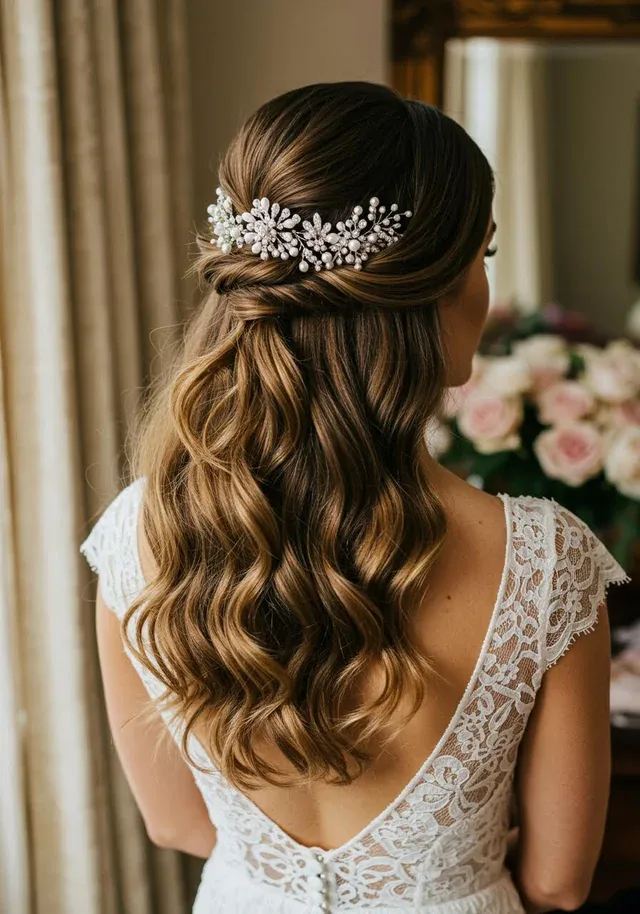
Best for: medium to long hair with natural texture, and brides who want to look like themselves, only a little more romantic.
Soft, loose waves are the closest thing to doing nothing and looking wonderful — they suit a garden, a beach or a forest clearing, and they move beautifully in photos.
What to ask a stylist: ask for waves that are set to drop slightly over the first hour, so the style you photograph at noon is the one you planned, not a tighter version.
How to style: curl large sections away from the face, let them cool completely, then brush through with your fingers and a little texturising spray for a soft, lived-in finish.
3. Half-Up, Half-Down
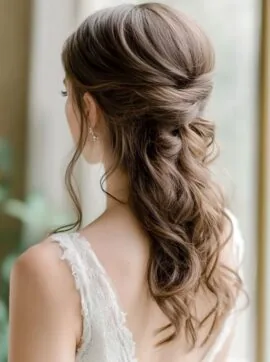
Half-up, half-down gives you the best of both worlds: the face is open, the hair is controlled, and the length still shows in photos from behind.
How to style: take the top section from above the ears, twist or braid it lightly, and secure it at the crown with pins hidden under a small accessory.
Best for: brides with long hair who love it down but do not want it in their face during the vows.
Common mistake: taking too much hair up, which leaves the down section thin. Keep the top section narrow and let the rest fall full.
4. The Braided Crown
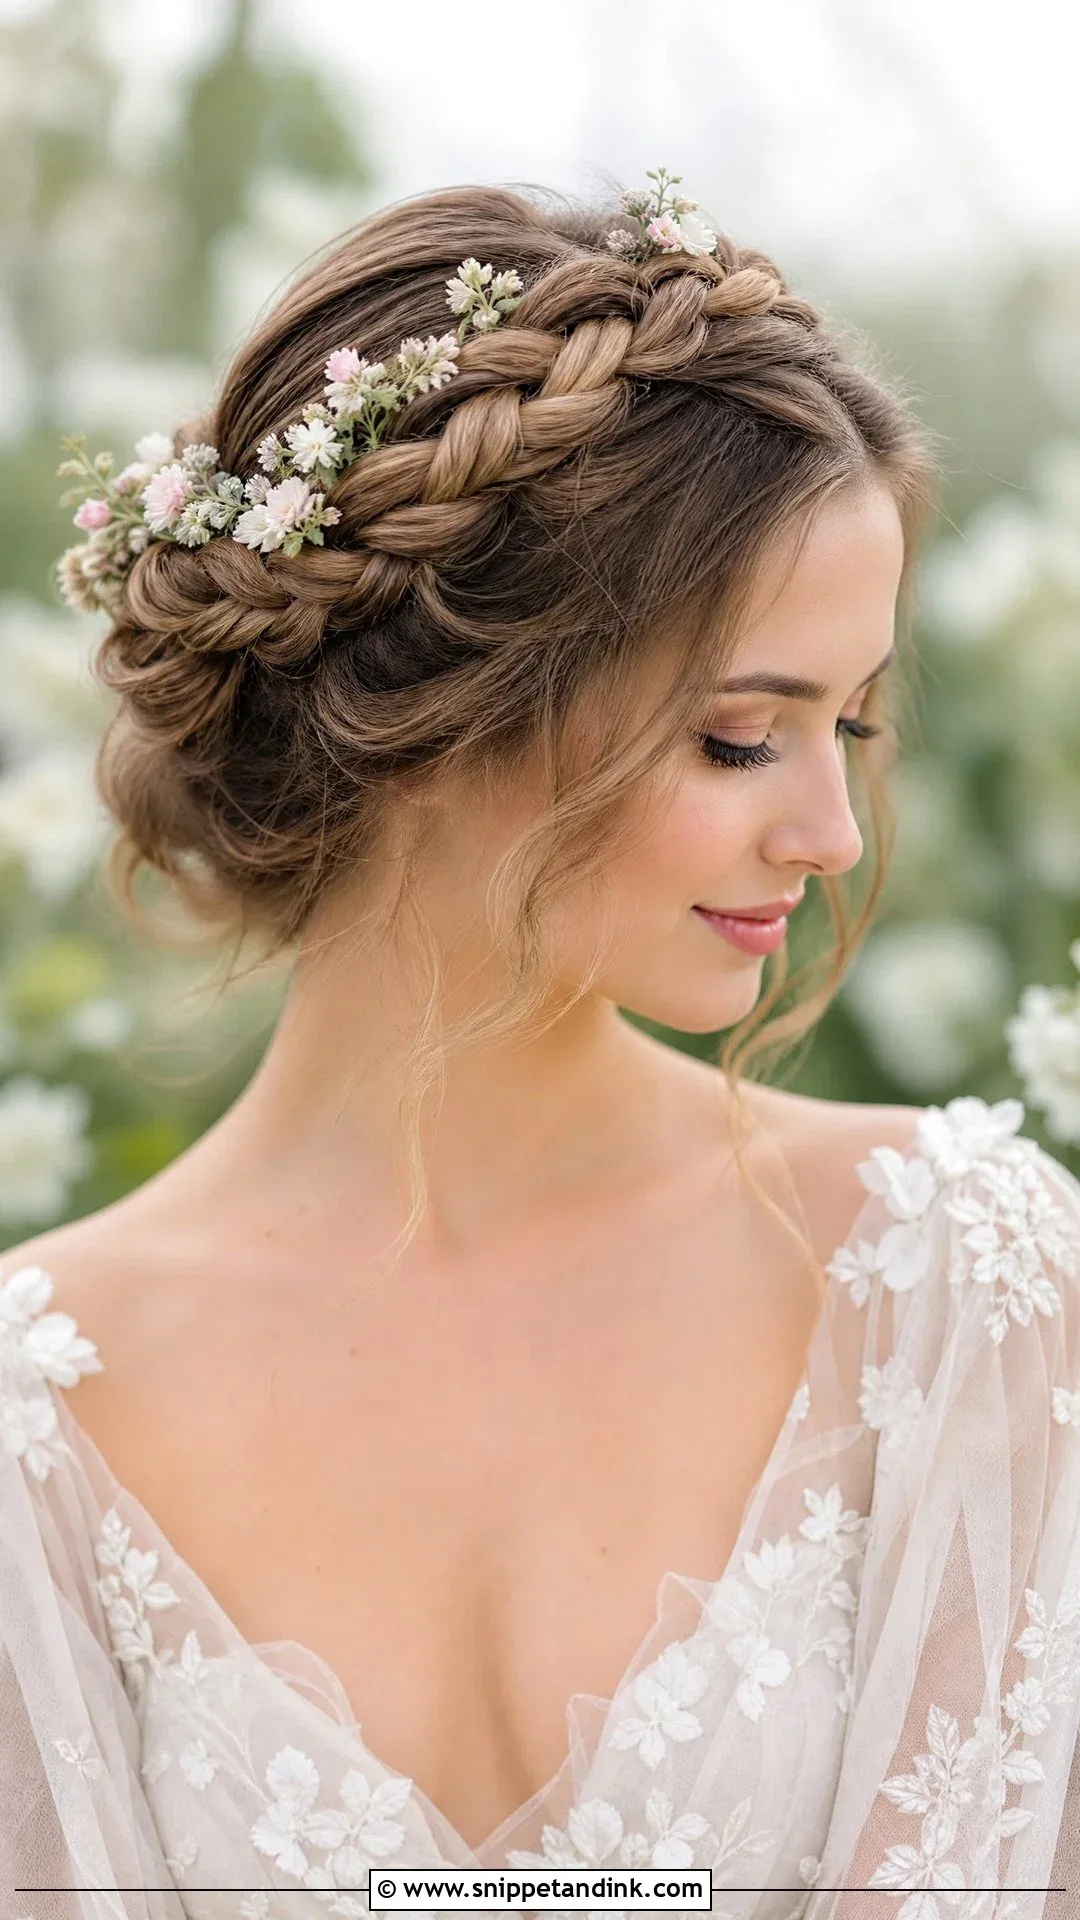
How to style: Dutch-braid two sections from behind each ear, cross them over the crown and pin the ends underneath, then gently pull the braid edges out for softness.
A braided crown wraps around the head like a halo, keeps every strand off the face, and photographs as a beautiful frame from the front and a detailed braid from the back.
What to ask a stylist: ask how the crown will be anchored at the back — a hidden elastic plus pins stops it sliding forward during a hike.
Best for: outdoor ceremonies, warm weather and brides who want a romantic, almost storybook feel without a veil.
5. The Sleek Low Bun
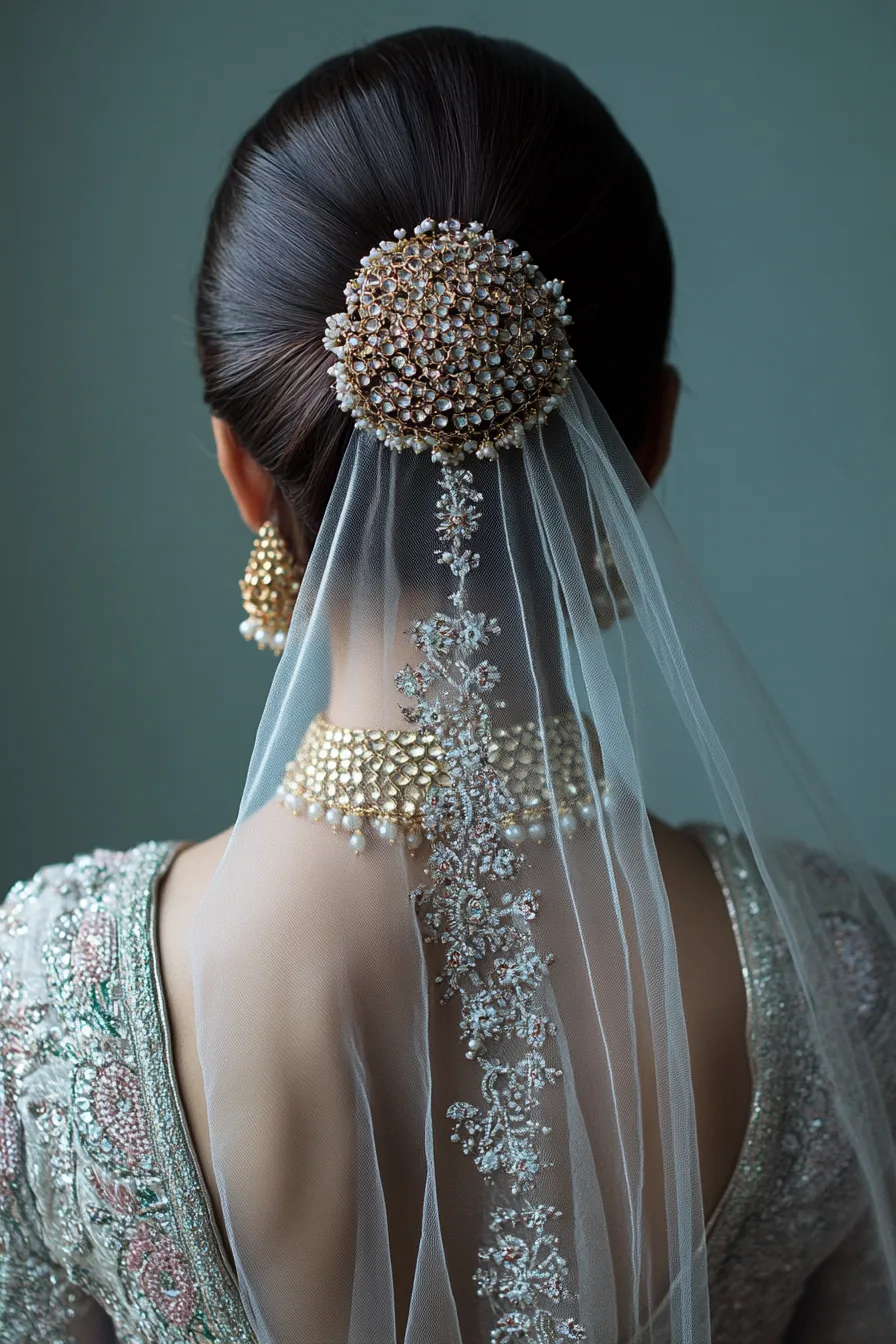
A sleek low bun is quiet luxury: smooth, polished and completely unfussy, with a centre or side part and a bun that sits neatly at the nape.
Best for: city hall elopements, formal dresses and brides who love a clean, editorial look.
How to style: blow-dry smooth with a light serum, part the hair precisely, gather it low and wrap it into a compact bun, smoothing flyaways with a toothbrush and hairspray.
Who should avoid it: anyone who dislikes a tight feeling — this style needs to be smooth, so it is not the most forgiving choice if you want to loosen up later.
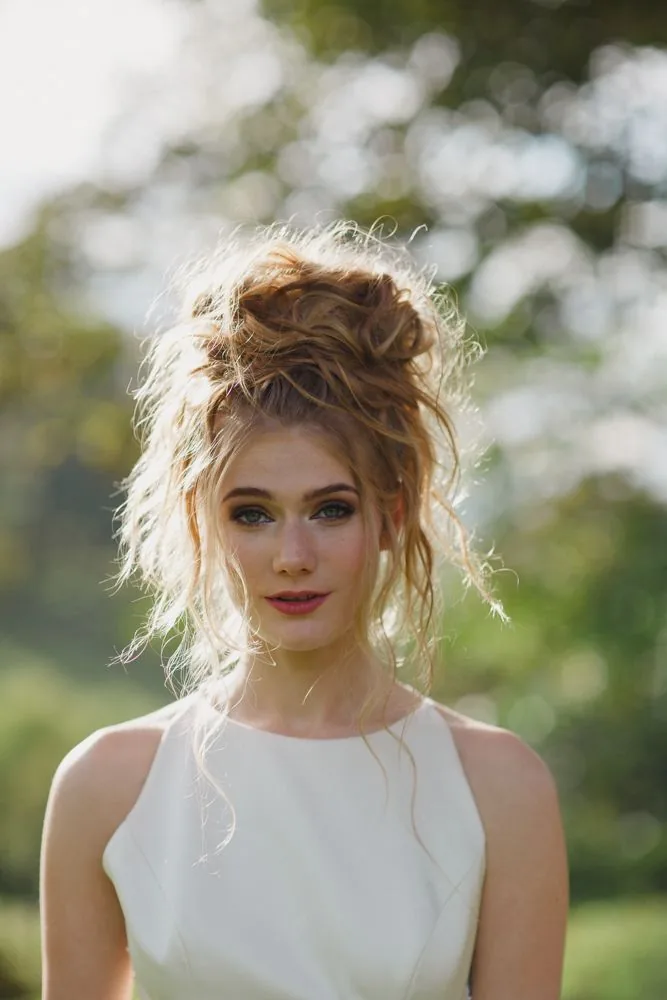
6. The Messy Textured Bun
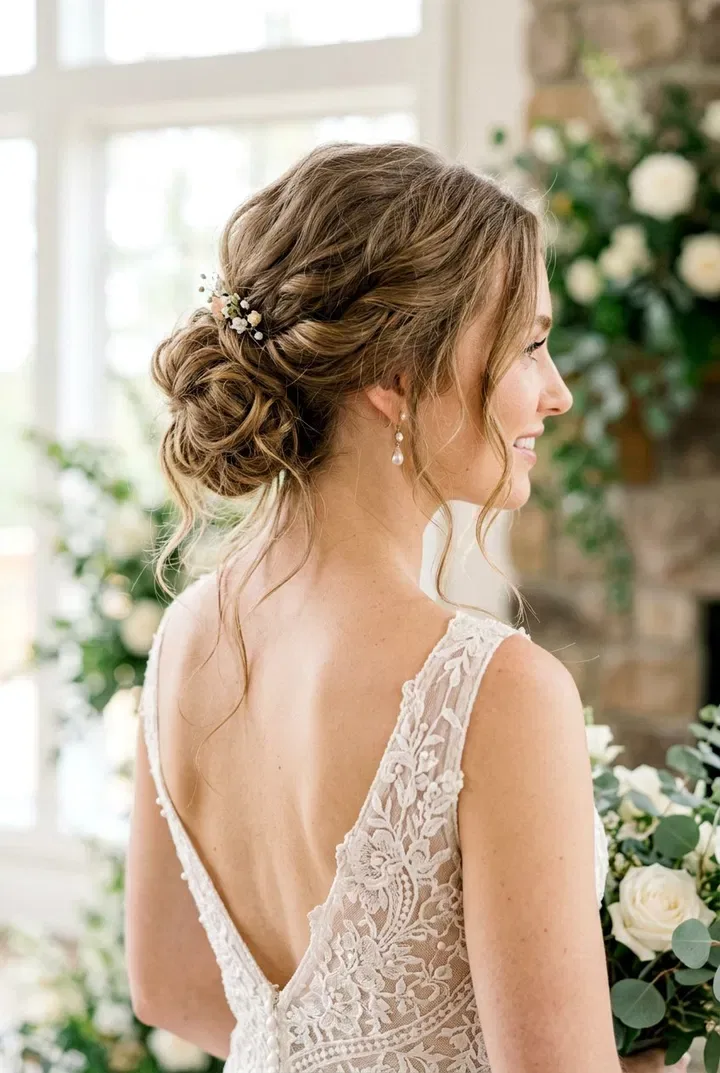
Best for: boho and outdoor elopements, and brides who want an updo that still feels relaxed.
A messy textured bun looks effortless because it is built on texture: a little backcombing, a few pulled-out pieces and a bun that is deliberately imperfect.
Maintenance: this style actually improves as it loosens, so do not panic if a piece escapes — tuck it back loosely or let it stay as a tendril.
How to style: add texturising spray to dry hair, gather it loosely at the nape or crown, twist it into a bun and pull out face-framing pieces before pinning.
7. The Fishtail Braid
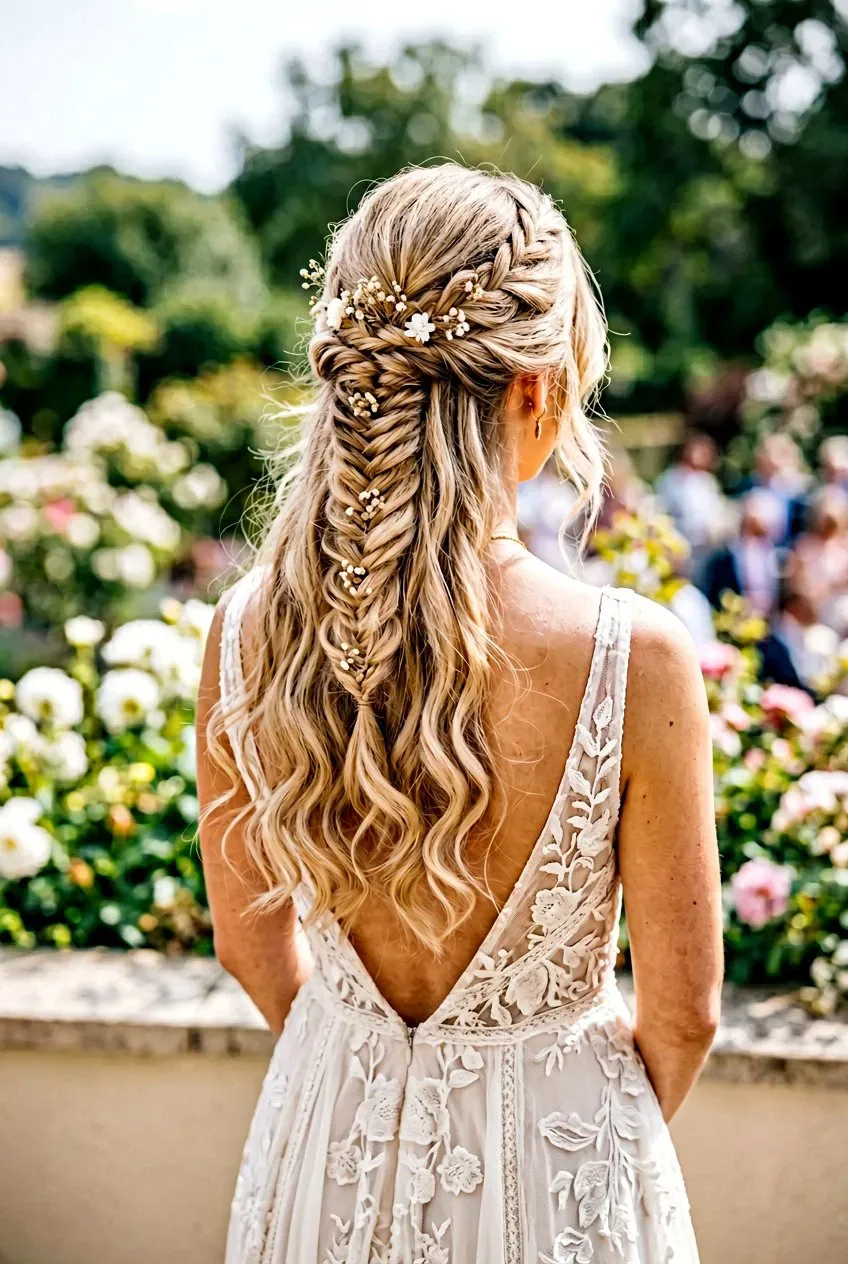
A fishtail braid looks intricate but is simply two sections woven in small pieces, and its fine, detailed texture photographs beautifully, especially from behind.
How to style: sweep the hair to one side, split it in two, and cross small outer pieces from each side to the other, keeping the tension even as you go down.
Best for: long hair, beach and garden settings, and brides who want a braid with more detail than a classic three-strand.
What to ask a stylist: ask for the braid to be pancaked — gently pulled wider — at the end, which makes it look fuller and more romantic in photos.
8. The French Twist
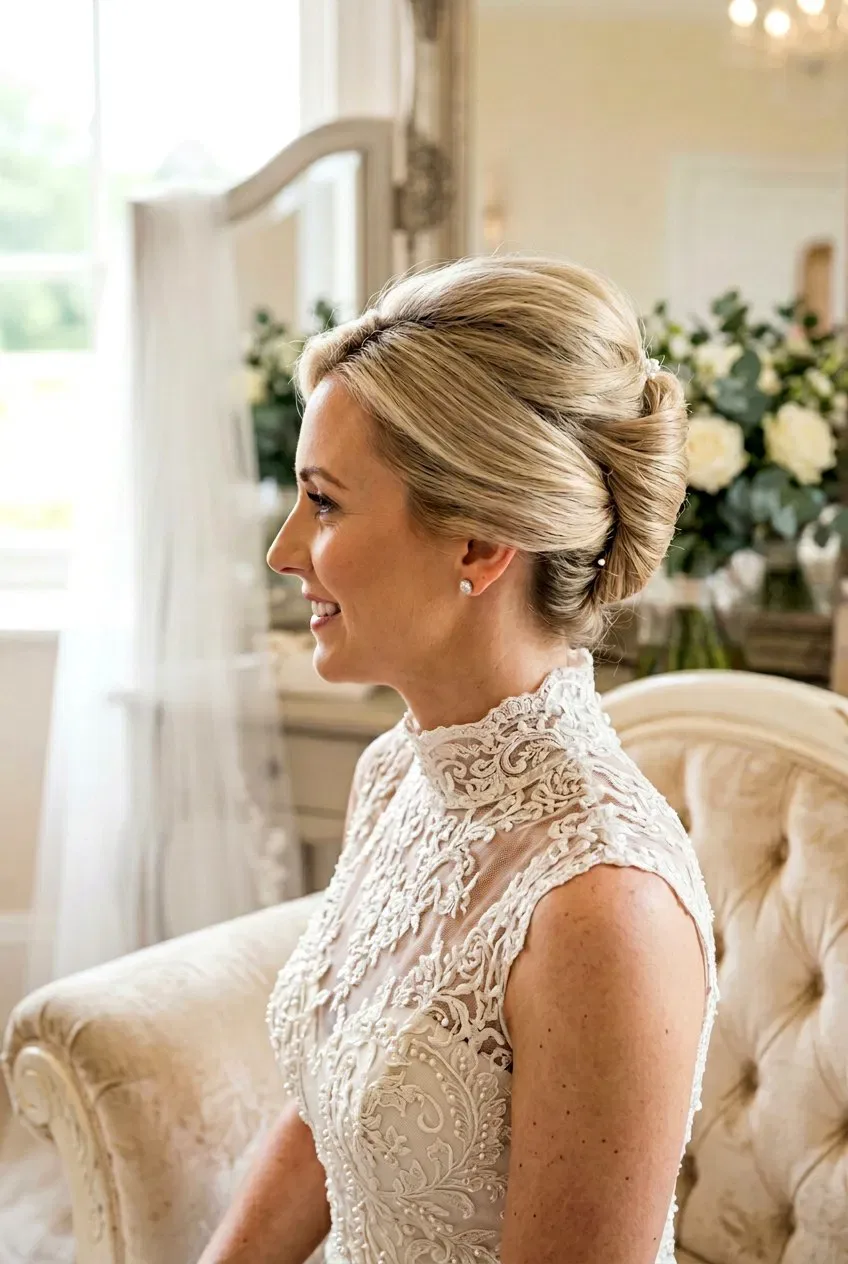
How to style: gather the hair to one side, twist it upward against the head and pin along the fold, leaving the top smooth and the ends tucked neatly inside.
The French twist is a classic for a reason: it lifts the hair up and away, shows off the neck and shoulders, and looks formal without needing a single curl.
Common mistake: pinning only at the top and bottom. Pin along the whole fold so the twist cannot open in the middle during the day.
Best for: shorter to medium hair, elegant dresses and brides who want a vintage, polished feel.
9. Side-Swept Curls
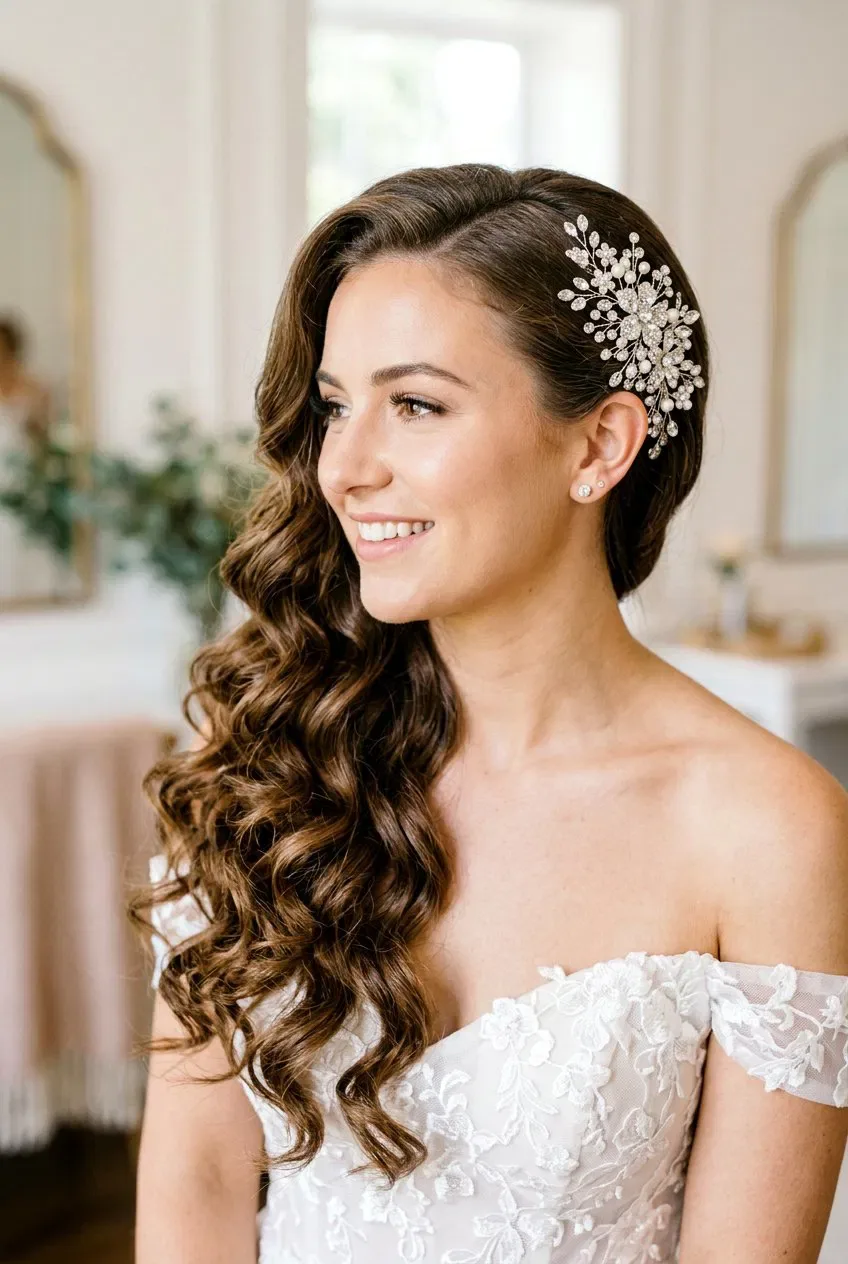
Side-swept curls drape all the hair over one shoulder, which is flattering in portraits, keeps the back of the dress visible, and gives the hair a glamorous, old-Hollywood feel.
Best for: one-shoulder or strapless dresses, and brides who want drama without an updo.
How to style: curl the hair in large sections, sweep it all to one side, pin it discreetly at the nape on the opposite side, and let the curls fall over the chosen shoulder.
Quick verdict: gorgeous in photos and comfortable to wear, but bring extra pins — gravity and wind both pull at a side-swept style.
10. Boho Beach Waves
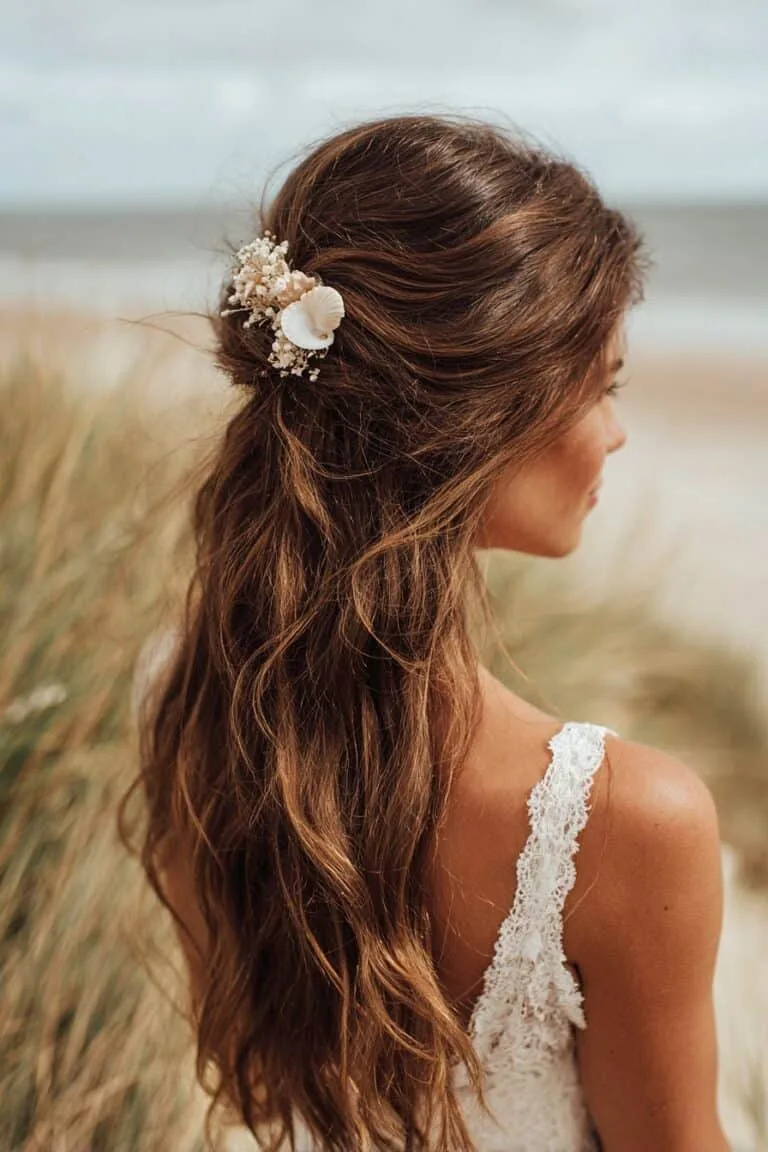
Best for: beach and desert elopements, relaxed dresses and brides with natural wave or curl.
Boho beach waves are soft, slightly undone waves with a centre part and a natural texture that looks right at home on sand, grass or a cliff path.
What to ask a stylist: ask for waves that start below the cheekbone, so the style keeps its shape instead of frizzing at the roots in humidity.
How to style: use a large-barrel iron or braids left overnight, then separate the waves with your fingers and finish with sea-salt spray for texture.
11. The Waterfall Braid
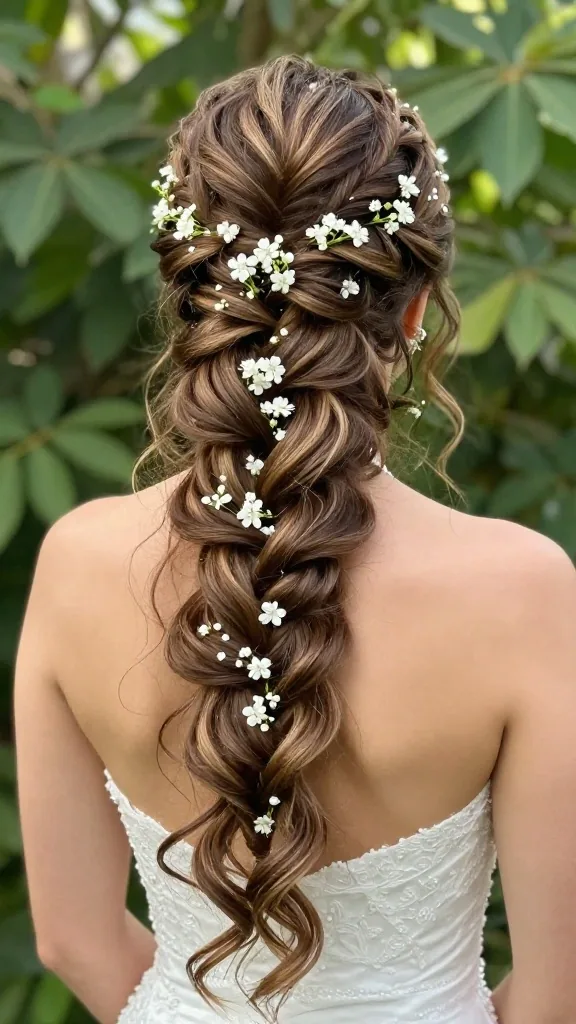
A waterfall braid lets strands fall through the braid like water, creating a delicate, lacy effect that is perfect for half-up styles and romantic settings.
How to style: begin a French braid at one temple, dropping the bottom strand each time and picking up a new one, and continue across the back of the head.
Best for: long hair and garden or woodland elopements where a soft, feminine detail matters.
Maintenance: this braid loosens more easily than a standard one, so have it pinned at both ends and check it after the ceremony.
12. The Twisted Low Ponytail
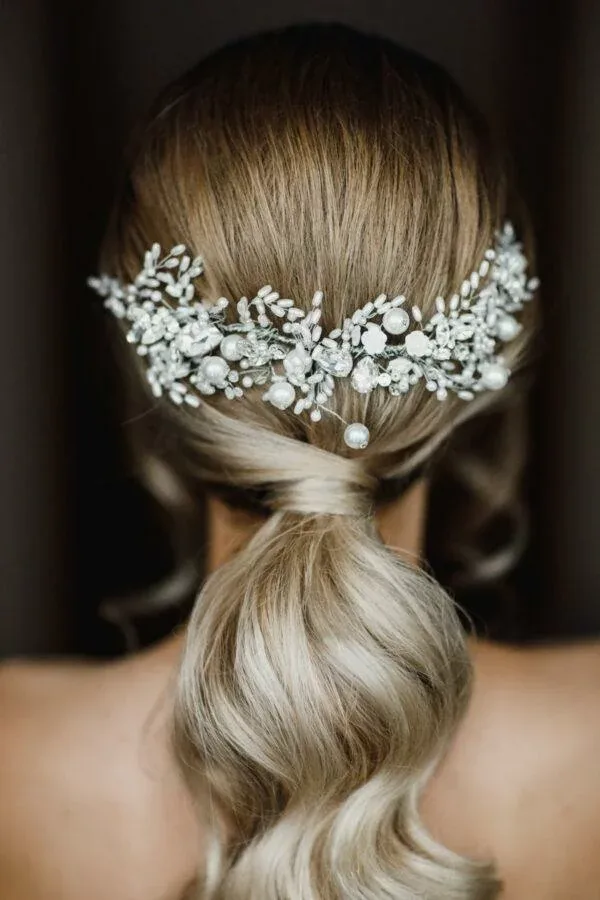
How to style: twist two front sections back, join them into a low ponytail, then wrap a thin strand around the elastic and pin it underneath.
A twisted low ponytail takes the simplest style and makes it bridal: the hair is twisted at the sides, gathered low and wrapped with a strand of its own hair for a polished finish.
Cost and time: one of the quickest styles on this list — about ten minutes — which makes it ideal for a DIY elopement morning.
Best for: brides who love ponytails but want something more special than their everyday version.
13. The Romantic Updo With Tendrils
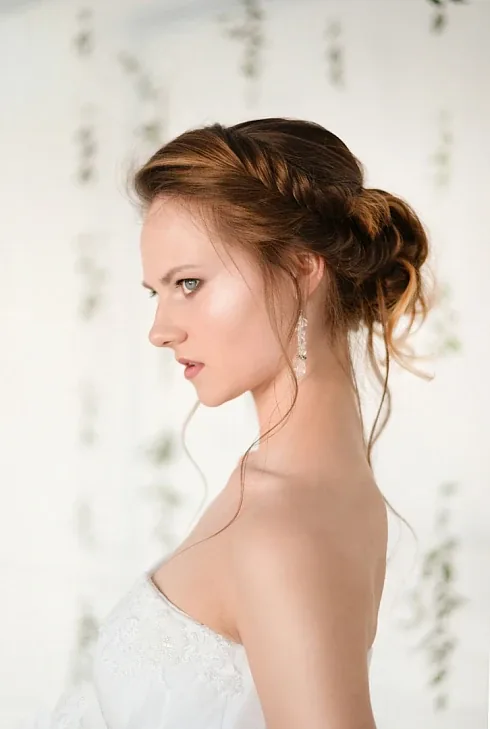
Soft tendrils around the face turn a structured updo into something romantic: the hair is secure at the back while the front stays gentle and flattering.
Best for: brides who love updos but worry they look severe, and anyone with a strong jawline or high cheekbones that soft pieces flatter.
How to style: build a low bun or twist first, then pull out two thin pieces at the temples and one at the nape, curling them lightly so they frame the face.
What to ask a stylist: ask for the tendrils to be cut slightly shorter than the rest, so they curl naturally instead of hanging straight.
14. The Dutch Braid Updo
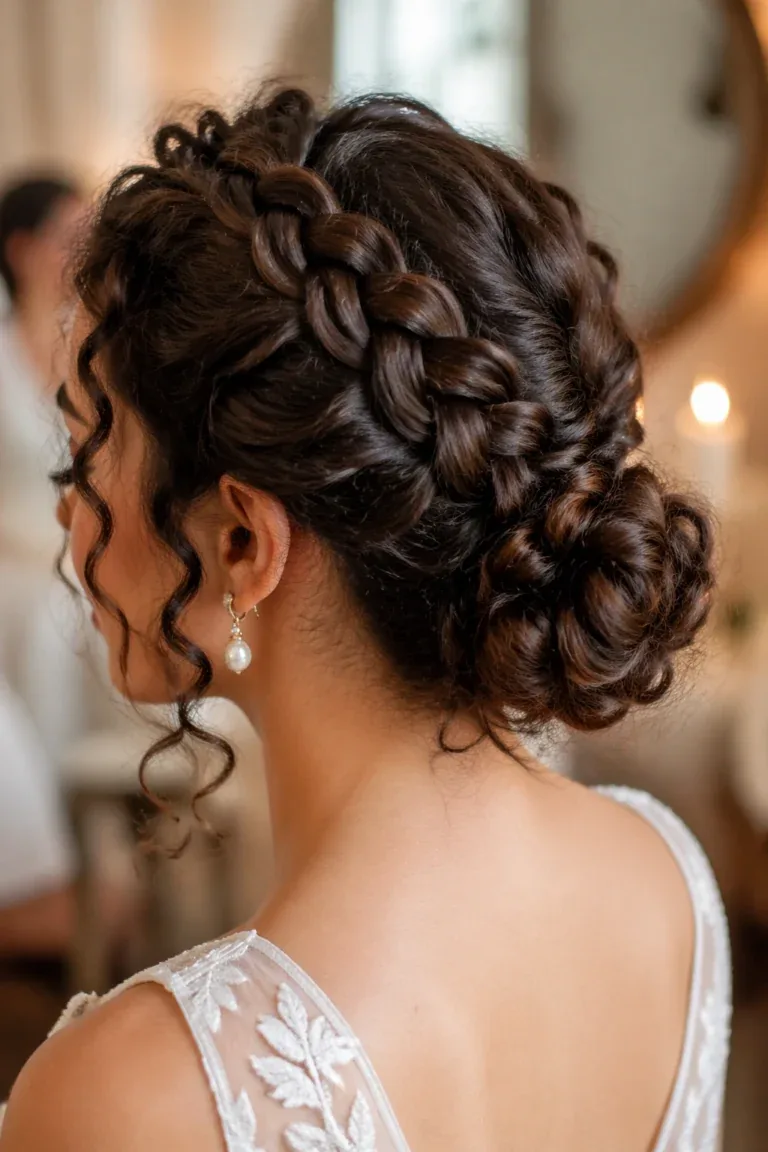
Best for: thick hair, windy locations and brides who want a braid that is the feature, not just a detail.
A Dutch braid — braided under rather than over — stands proud of the head, so it reads clearly in photos and holds its shape for hours.
Common mistake: braiding too tightly at the hairline, which causes a headache by midday. Keep the first few crosses soft and tighten only at the back.
How to style: Dutch-braid from the front hairline back on each side, join the braids into a low bun, and pull the braid edges out gently for fullness.
15. The Curly Updo for Natural Curls
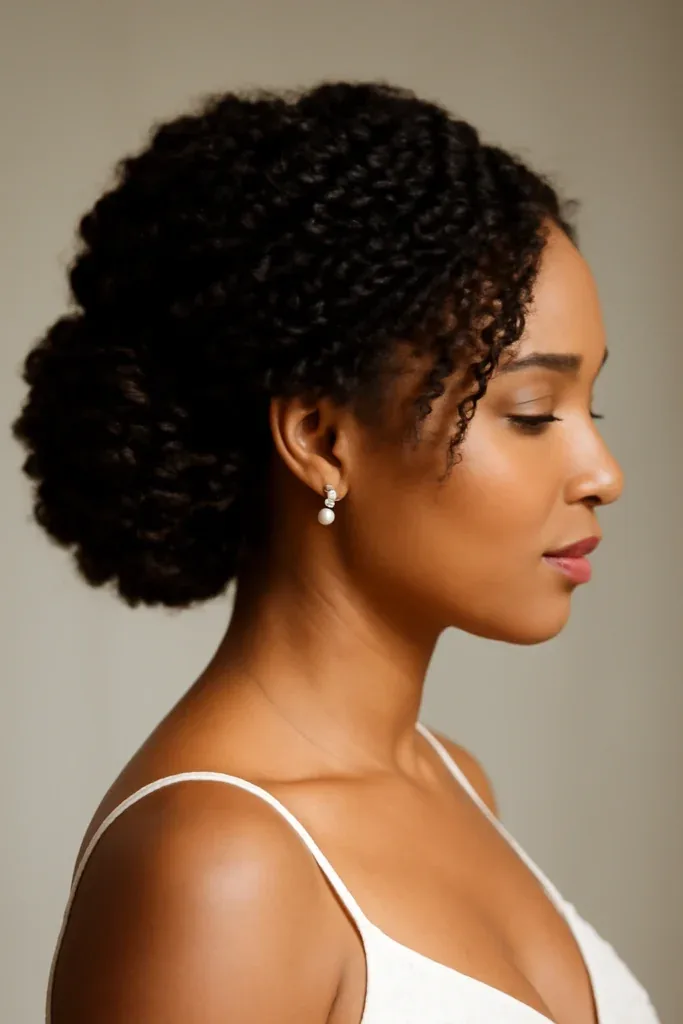
Natural curls need no straightening to look bridal — a curly updo gathers them into a soft, voluminous shape that celebrates the texture instead of fighting it.
How to style: define the curls with a light cream, gather them loosely at the crown or nape, and pin in sections so the curl pattern stays visible.
Best for: brides with natural curls or coils who want an updo that works with their hair, not against it.
What to ask a stylist: ask for a stylist experienced with curly hair, and for pins rather than tight elastics, which can dent and break the curl pattern.
16. The Short Bob, Elopement-Ready
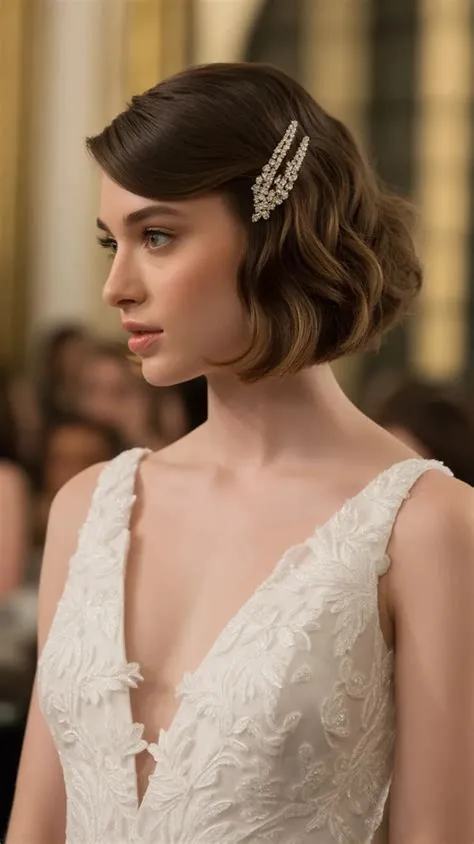
How to style: blow-dry with a round brush for bend at the ends, add a deep side part, tuck one side behind the ear and finish with a pearl pin or small clip.
A short bob can be beautifully bridal with the right finish: a smooth blow-dry, a soft wave or a deep side part, plus one elegant accessory.
Quick verdict: low effort, high polish — and it will not unravel, because there is nothing to unravel.
Best for: brides with short hair who do not want extensions, and city or garden elopements where a polished short style shines.
17. The Pixie, Dressed Up
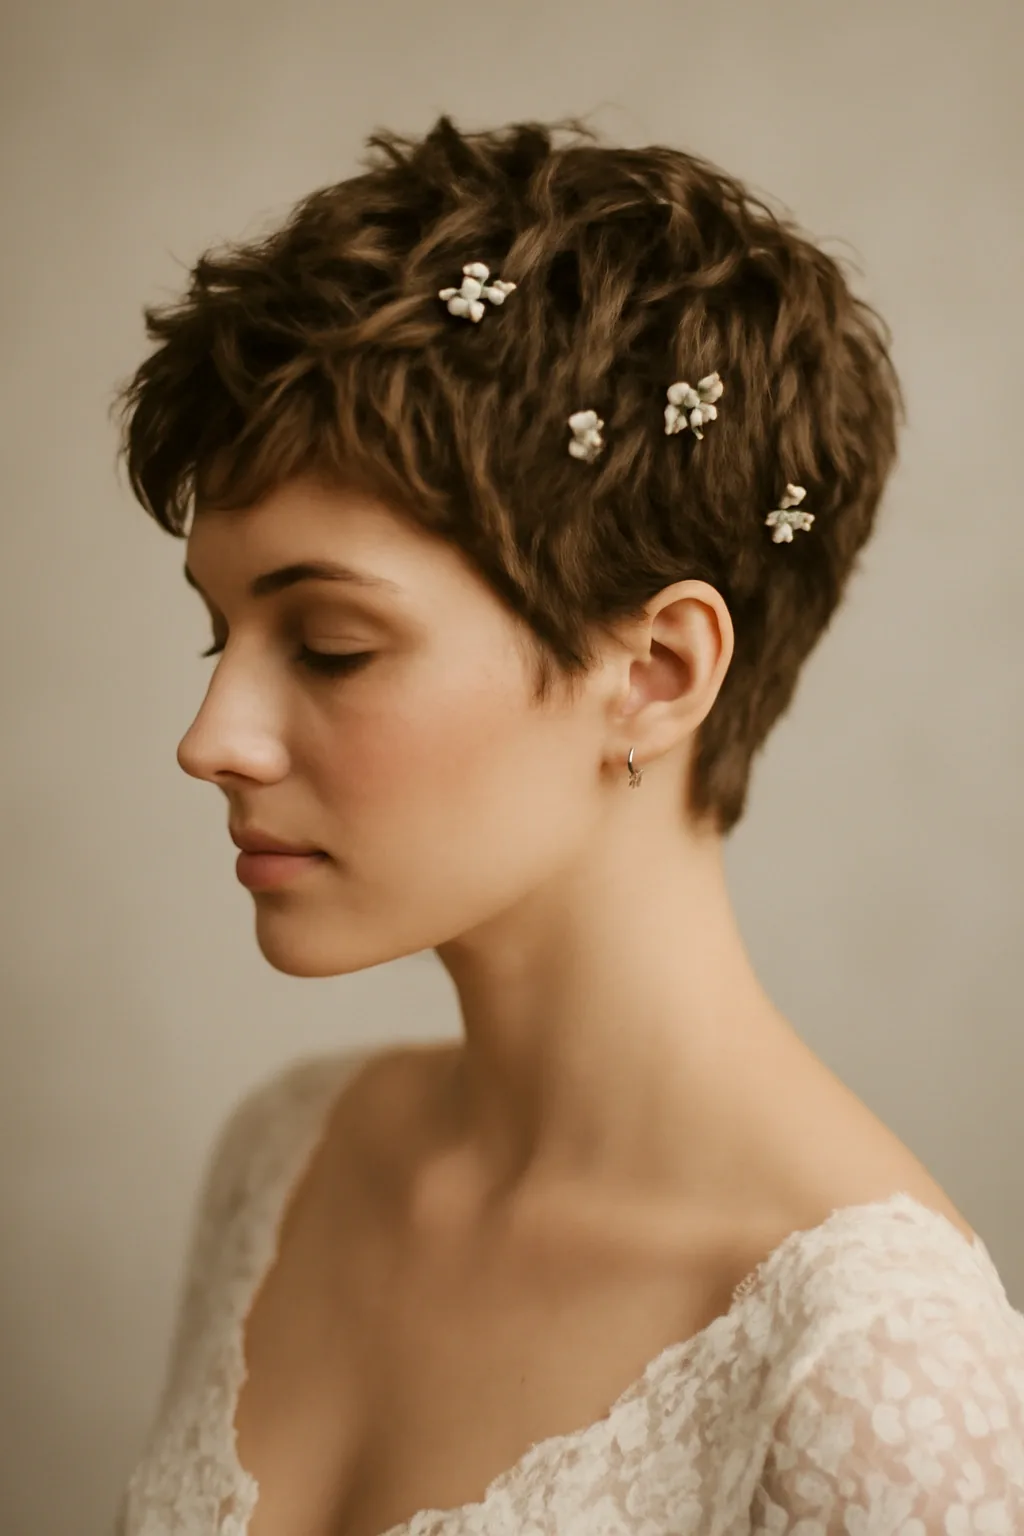
A pixie cut is already a statement, and for an elopement it needs only texture and one beautiful detail — a hair vine, a small flower or a delicate clip.
Best for: confident brides who love their short cut and want the dress and the setting to carry the romance.
How to style: add texture with a matte paste, piece out the fringe, and place the accessory just above one ear so it shows in profile photos.
Who should avoid it: anyone hoping to hide behind their hair — a pixie puts your face front and centre, which is exactly its charm.
18. Long, Straight and Sleek
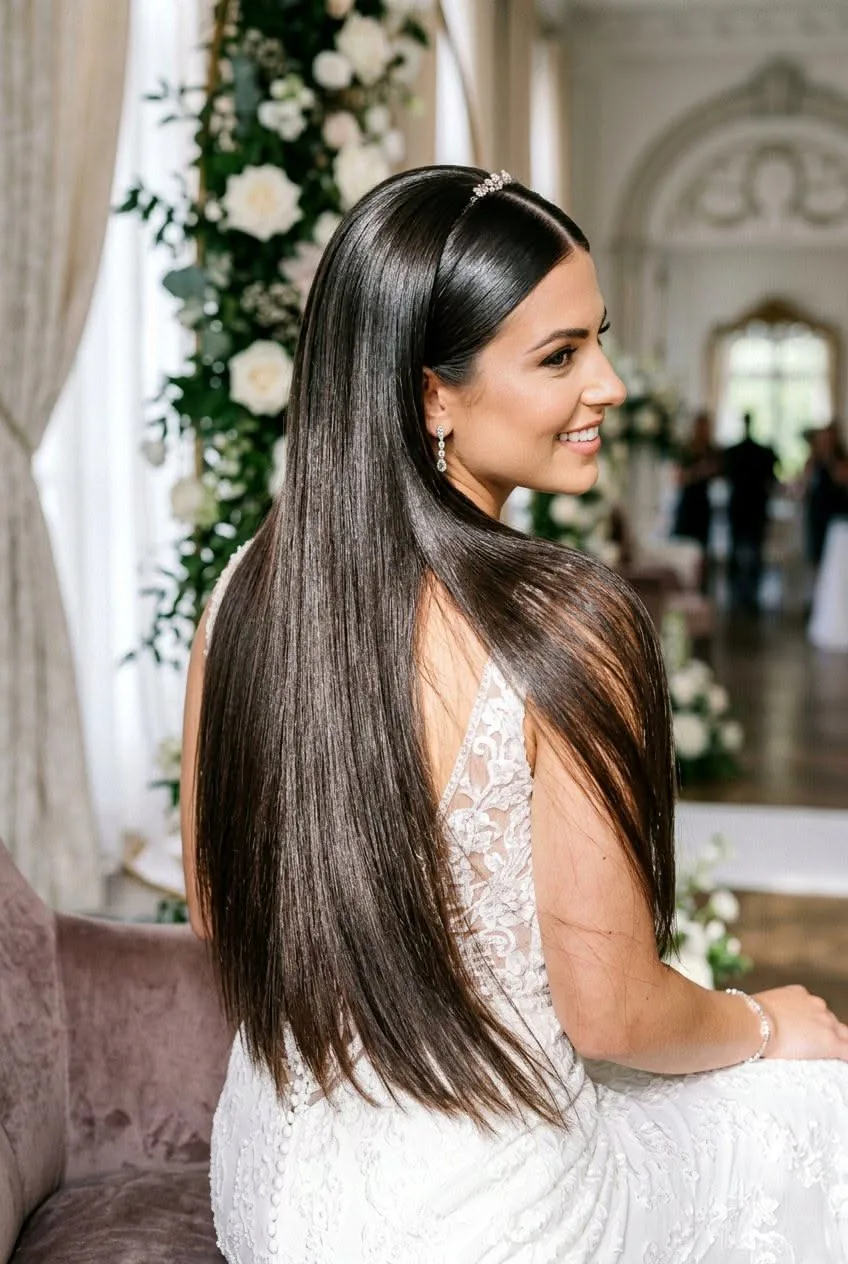
Best for: brides with healthy long hair, minimalist dresses and mountain or desert backdrops where clean lines stand out.
Long, straight, glossy hair is a look in itself: simple, modern and striking against a dramatic landscape, with a centre part and a mirror shine.
Maintenance: pack a small brush. Straight hair shows wind and tangles more than curls do, so a quick brush before portraits makes a real difference.
How to style: blow-dry straight with a paddle brush, flat-iron in small sections, and finish with a light shine serum — not oil, which can look greasy on camera.
19. The Windproof Braided Bun
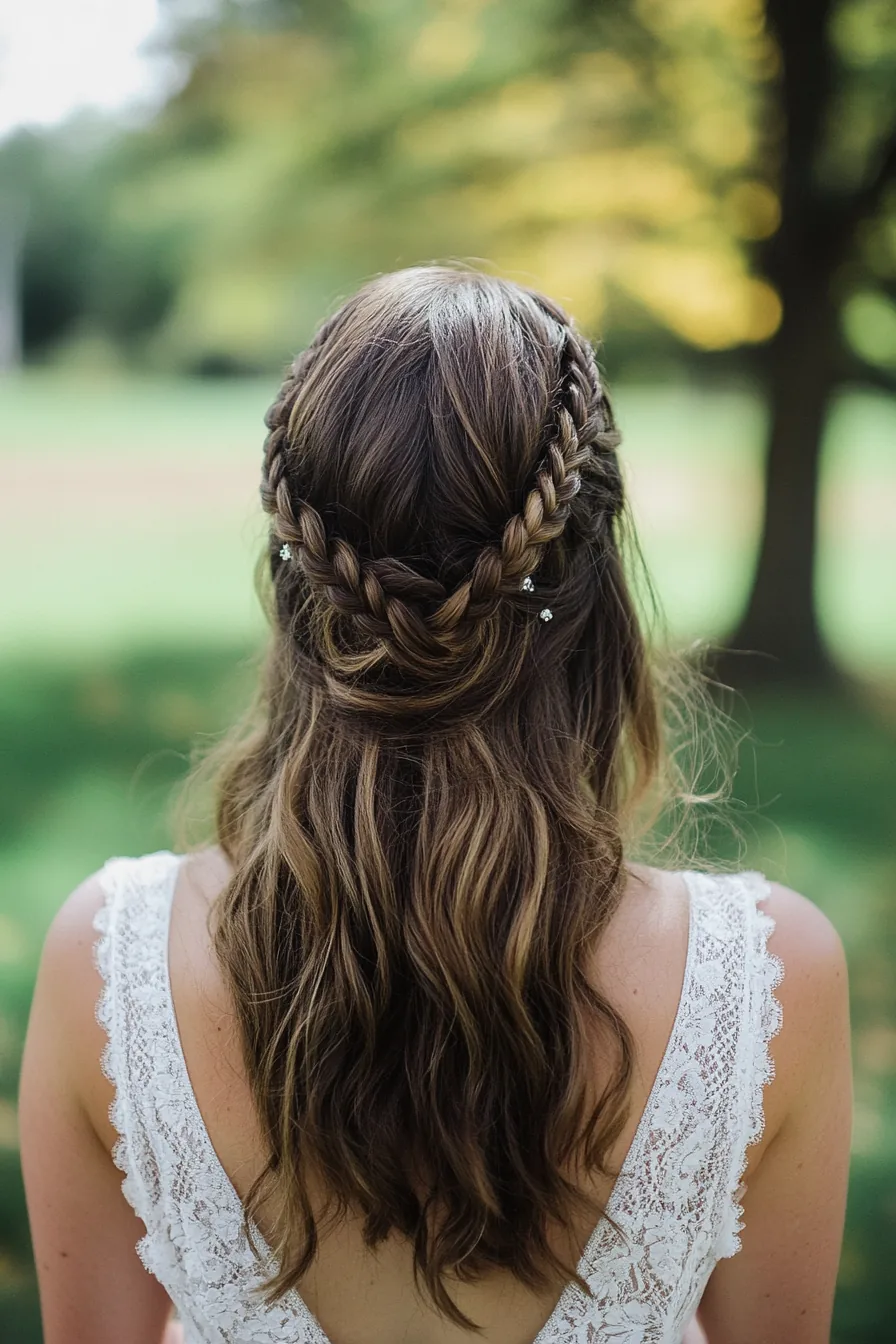
This is the style for the wildest locations: the hair is braided first, then coiled into a bun, so even a clifftop gust cannot pull it apart.
How to style: braid the hair into one or two braids, coil each braid into a bun at the nape, pin at several points and finish with a strong-hold spray.
Best for: mountain, coastal and desert elopements where wind is guaranteed, not just possible.
What to ask a stylist: ask for the braid to be the anchor — if the braid holds, the bun holds, and a braid is far harder for wind to undo than a twist.
20. The Garden Half-Up With Flowers
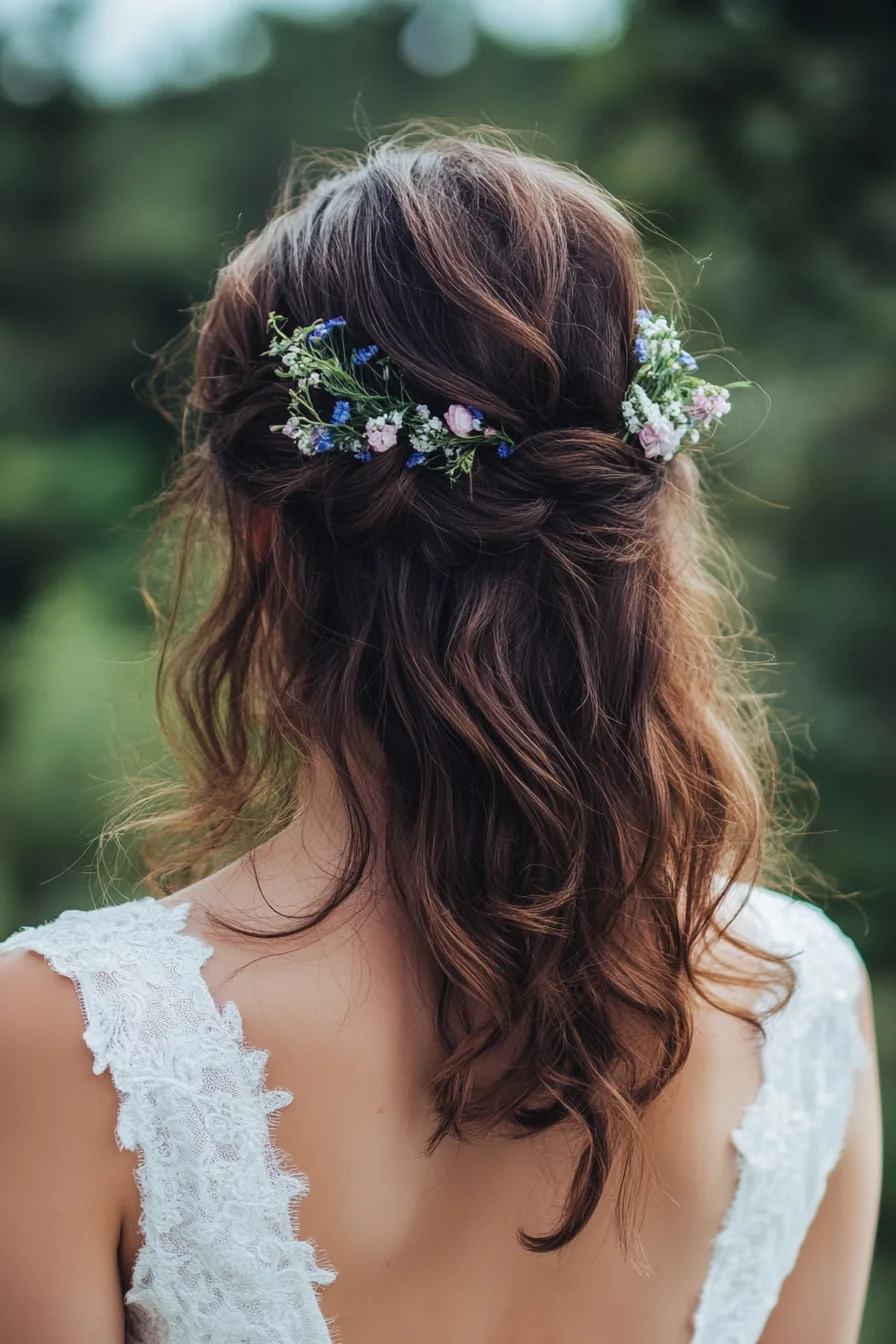
How to style: build a loose half-up twist or braid, then tuck small fresh flowers — or realistic silk ones — along the twist, pinning each stem flat.
Fresh flowers woven into a half-up style are the definition of a garden elopement: soft, romantic and completely in tune with the setting.
Common mistake: using large, heavy blooms that pull the style down. Small flowers, wired or pinned close to the head, last far longer.
Best for: garden, meadow and woodland elopements in spring and summer.
21. Vintage Hollywood Waves
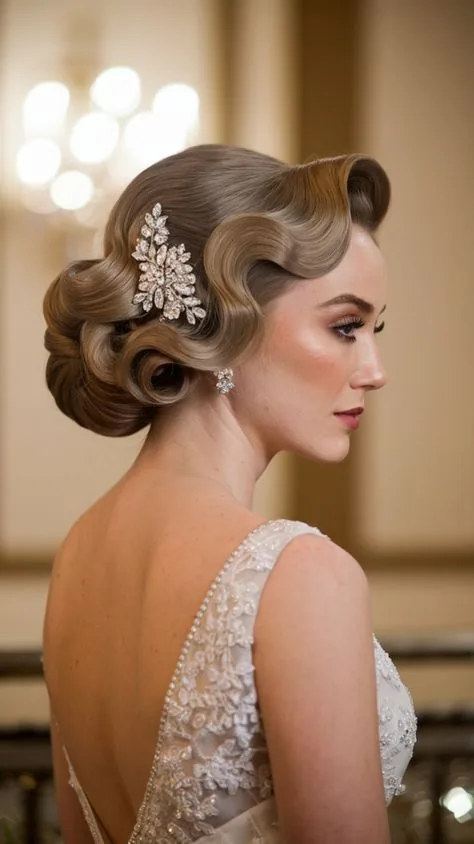
Deep, glossy Hollywood waves bring old-school glamour to a two-person wedding: structured, shiny and unforgettable in black-and-white photos.
Best for: formal elopements, vintage-inspired dresses and brides who love a dramatic, polished look.
How to style: set the hair in large pin curls or with a large iron, brush them into one smooth wave pattern, and pin the wave at the cheekbone on one side.
Cost and time: allow at least forty-five minutes and a stylist if you can — this is one of the hardest styles to do well on yourself.
22. The Textured Low Ponytail
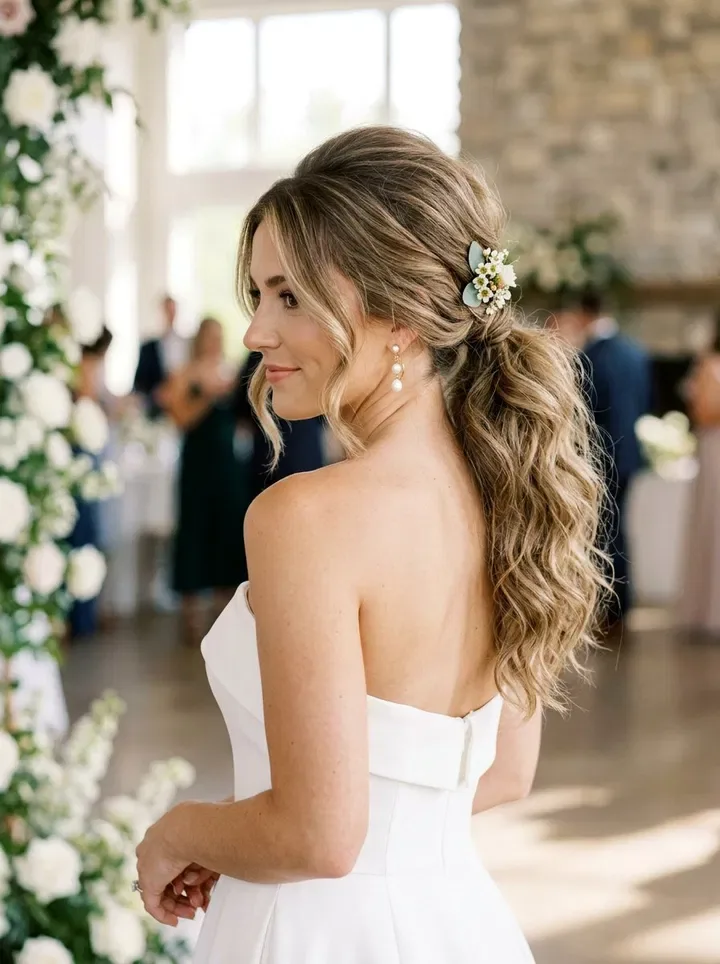
Best for: brides who want to feel like themselves, and anyone eloping somewhere warm where an updo would feel too formal.
A textured low ponytail is relaxed and modern: soft volume at the crown, a little texture through the length, and a wrapped elastic that makes it look finished.
Maintenance: this style is easy to refresh — just re-wrap the elastic strand and smooth the crown with your hands.
How to style: add texturising spray, backcomb the crown lightly, gather the hair low and wrap a strand around the elastic.
23. The Milkmaid Braid
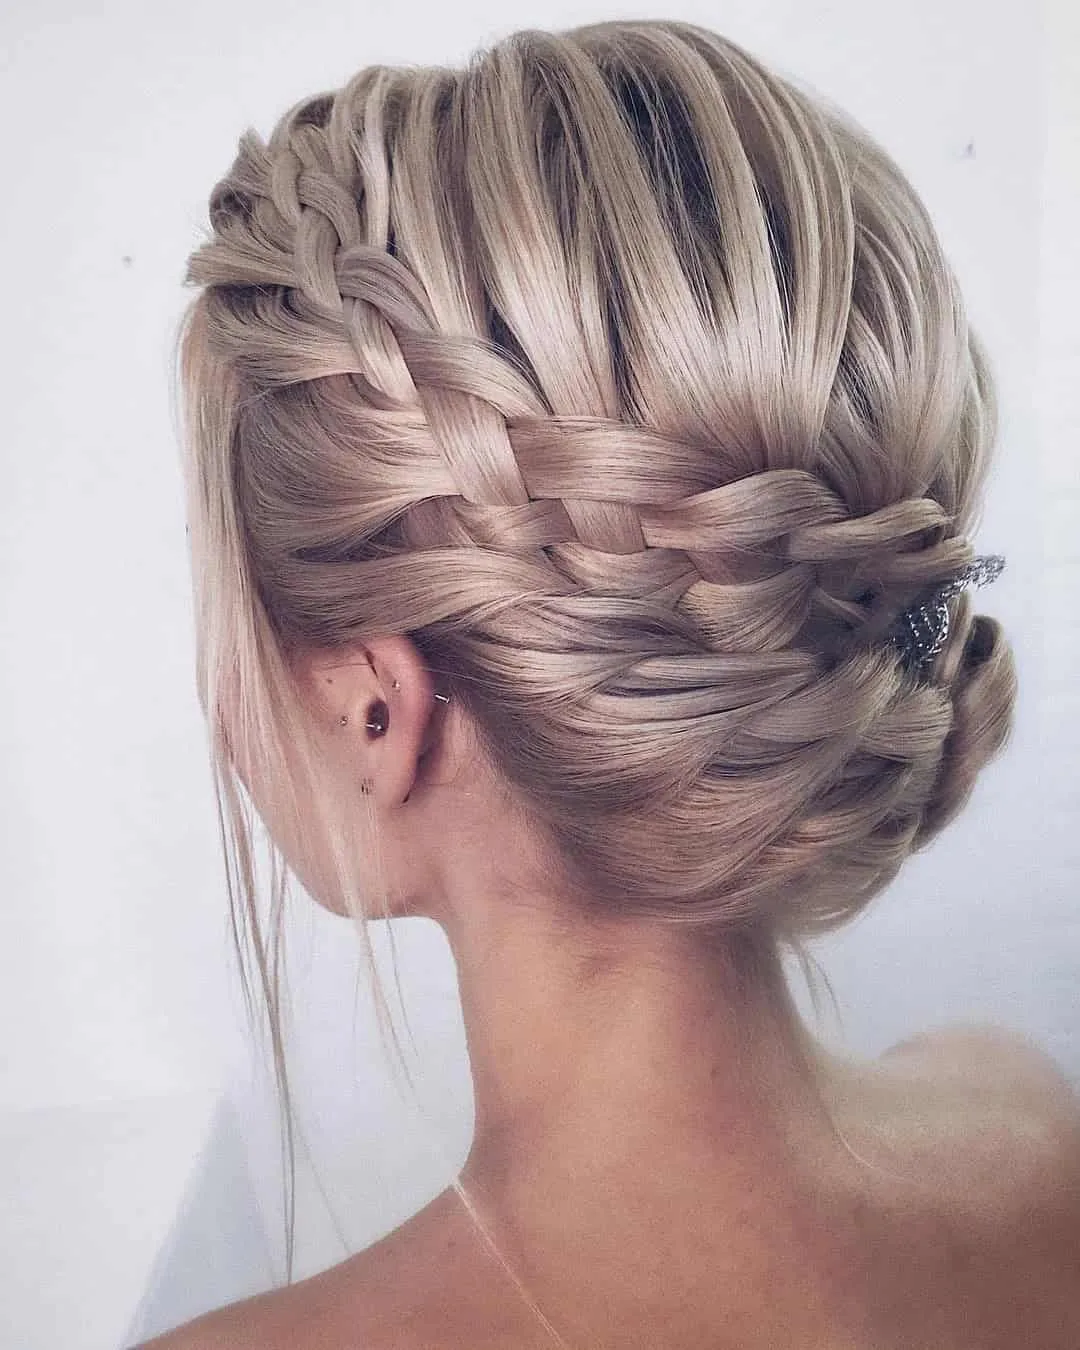
Two braids crossed over the top of the head make a milkmaid braid: romantic, secure and wonderfully photogenic, with a folk-tale feel that suits meadows and forests.
How to style: braid two low pigtail braids, cross them over the crown in opposite directions and pin the ends underneath each other.
Best for: long hair, outdoor ceremonies and brides who want a braid that is also an updo.
What to ask a stylist: ask for the braids to be pancaked before pinning, so the crown looks full rather than thin and tight.
24. The Messy Side Braid
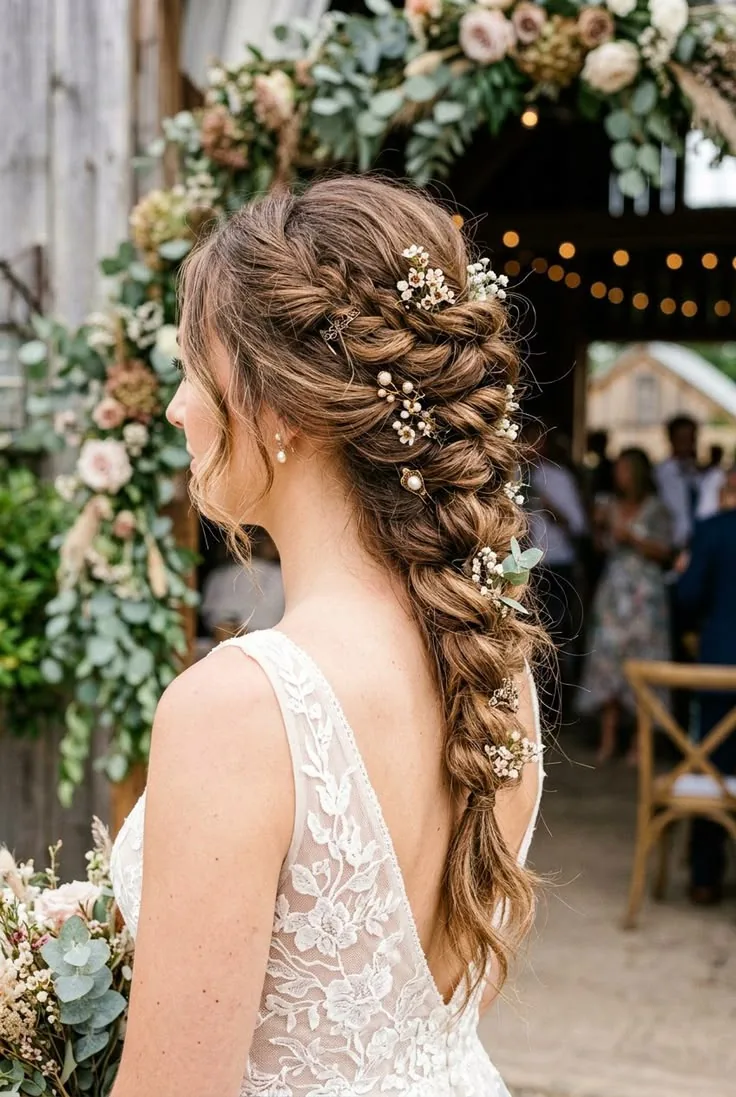
How to style: sweep the hair to one side, braid loosely, tie it off, then pull out a few pieces around the face and along the braid for softness.
A messy side braid draped over one shoulder is relaxed, romantic and easy to wear — and it looks better as it loosens, which is a gift on a long day.
Quick verdict: one of the most forgiving styles here — if a piece escapes, it just looks more romantic.
Best for: beach and boho elopements, and brides who want a braid without the formality of an updo.
25. The Elegant Top Knot
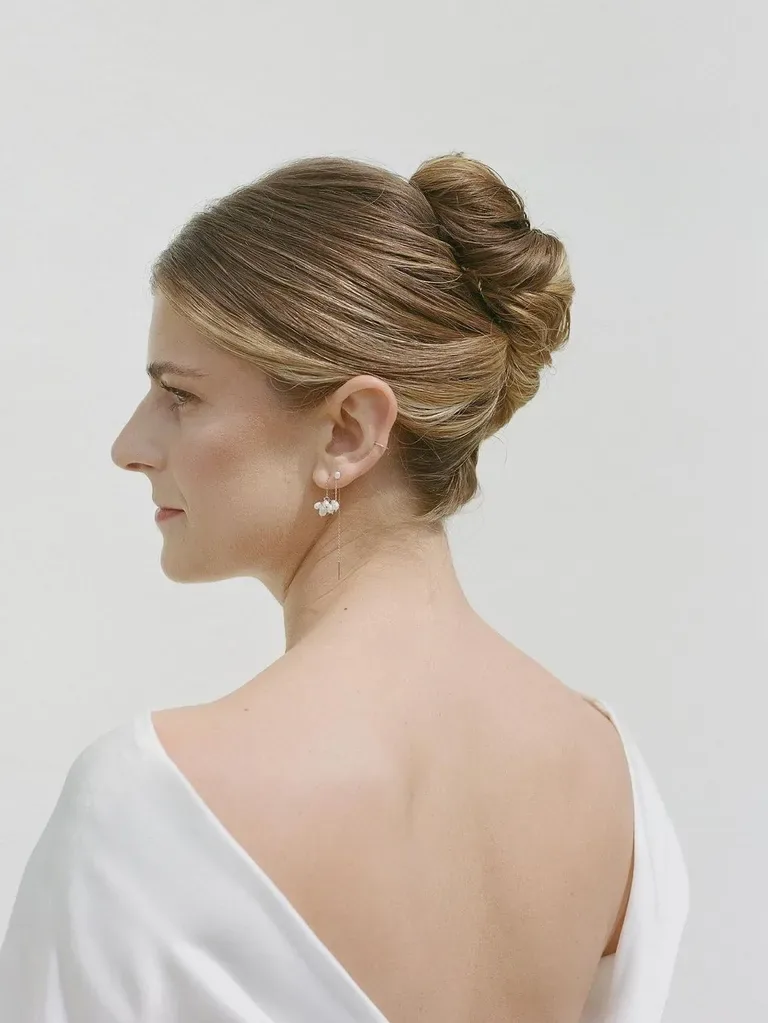
A top knot lifts everything up and away, shows off the shoulders and neckline, and stays completely out of the way during a hike or a dance.
Best for: warm weather, high necklines and brides who want a clean, modern silhouette.
How to style: gather the hair high, twist it into a knot, pin it securely and smooth the hairline — or leave a soft tendril or two for romance.
Who should avoid it: anyone with very fine hair, unless a hair donut is used — a top knot needs enough volume to look intentional.
26. The Wavy Lob
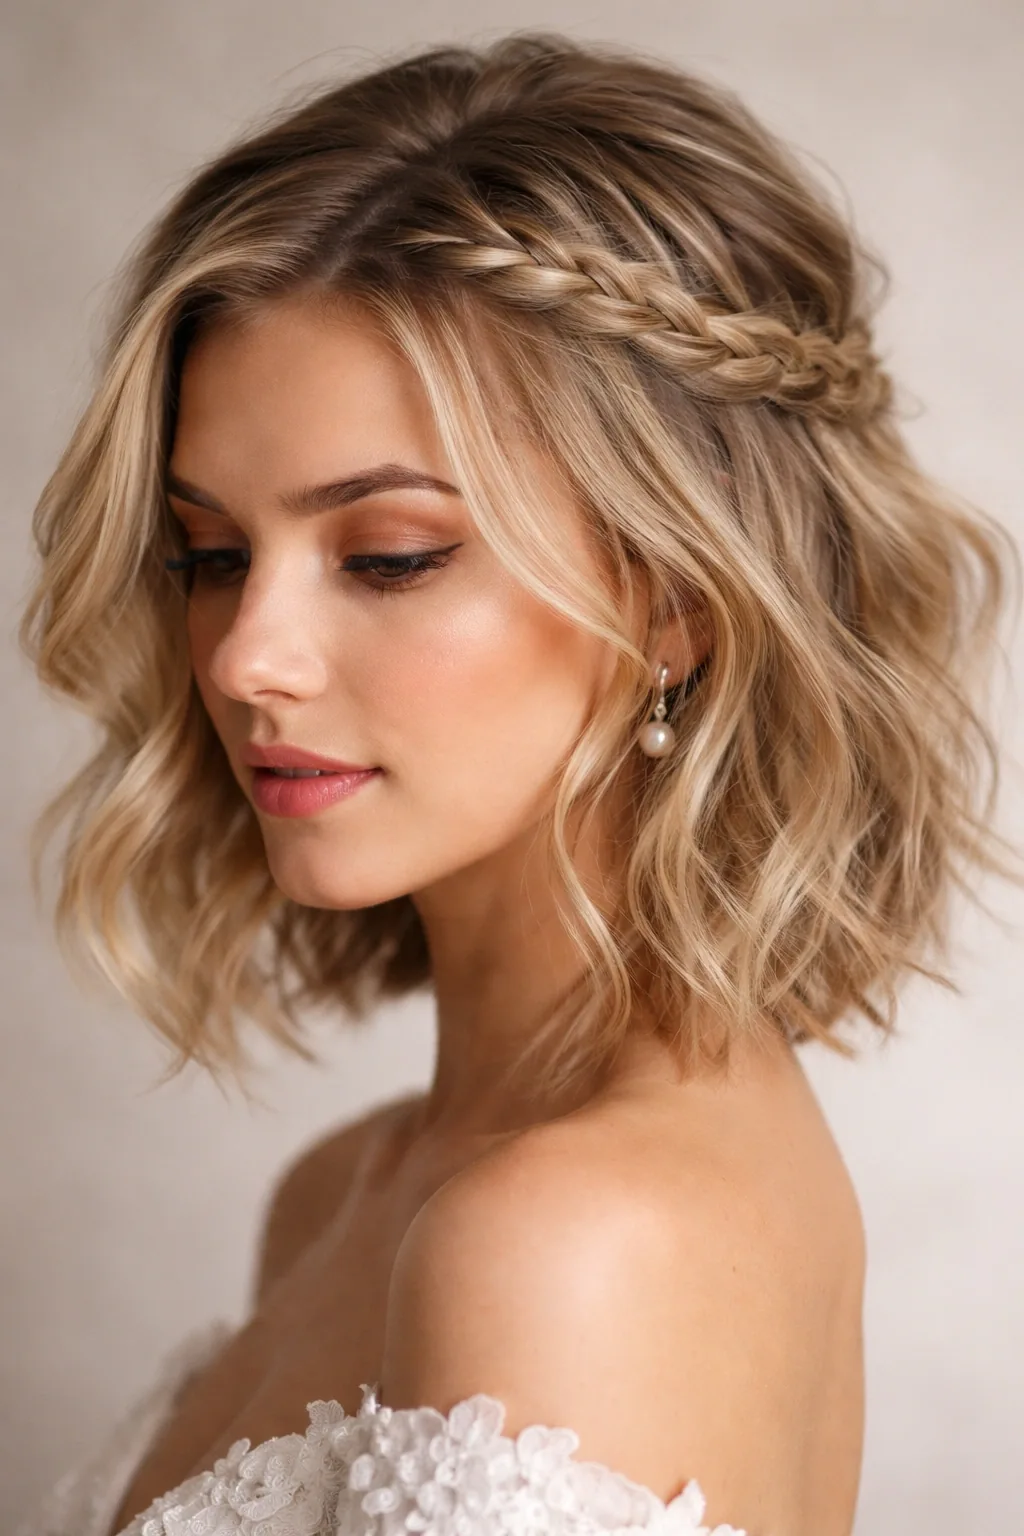
Best for: shoulder-length hair, and brides who want a fresh, contemporary look rather than a traditional updo.
A wavy lob — a long bob with soft waves — is the modern elopement sweet spot: short enough to be practical, long enough to feel bridal.
What to ask a stylist: ask for the waves to be cut in layers first — a lob without layers can look heavy and triangular when waved.
How to style: curl the hair in alternating directions with a medium iron, brush through for soft waves and finish with a light texturising spray.
27. The Braided Low Bun
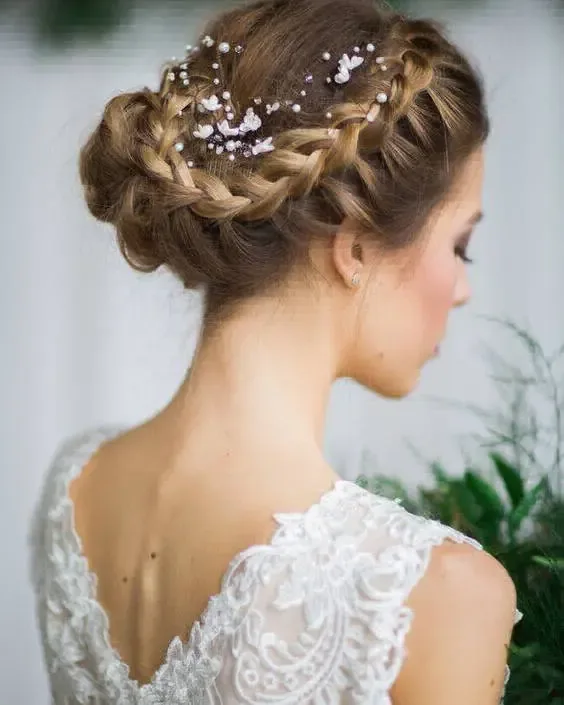
A braided low bun combines two secure ideas: the braid locks the hair down and the bun gathers it neatly, so the result is both detailed and dependable.
How to style: braid the hair from the crown down, coil the braid into a low bun and pin it, leaving the braid texture visible on top of the bun.
Best for: windy locations, long ceremonies and brides who want an updo with visible detail from behind.
Common mistake: braiding all the way to the very ends before coiling, which makes a stiff bun. Stop the braid a few inches early and let the ends tuck in softly.
28. The Half-Up Twisted Crown
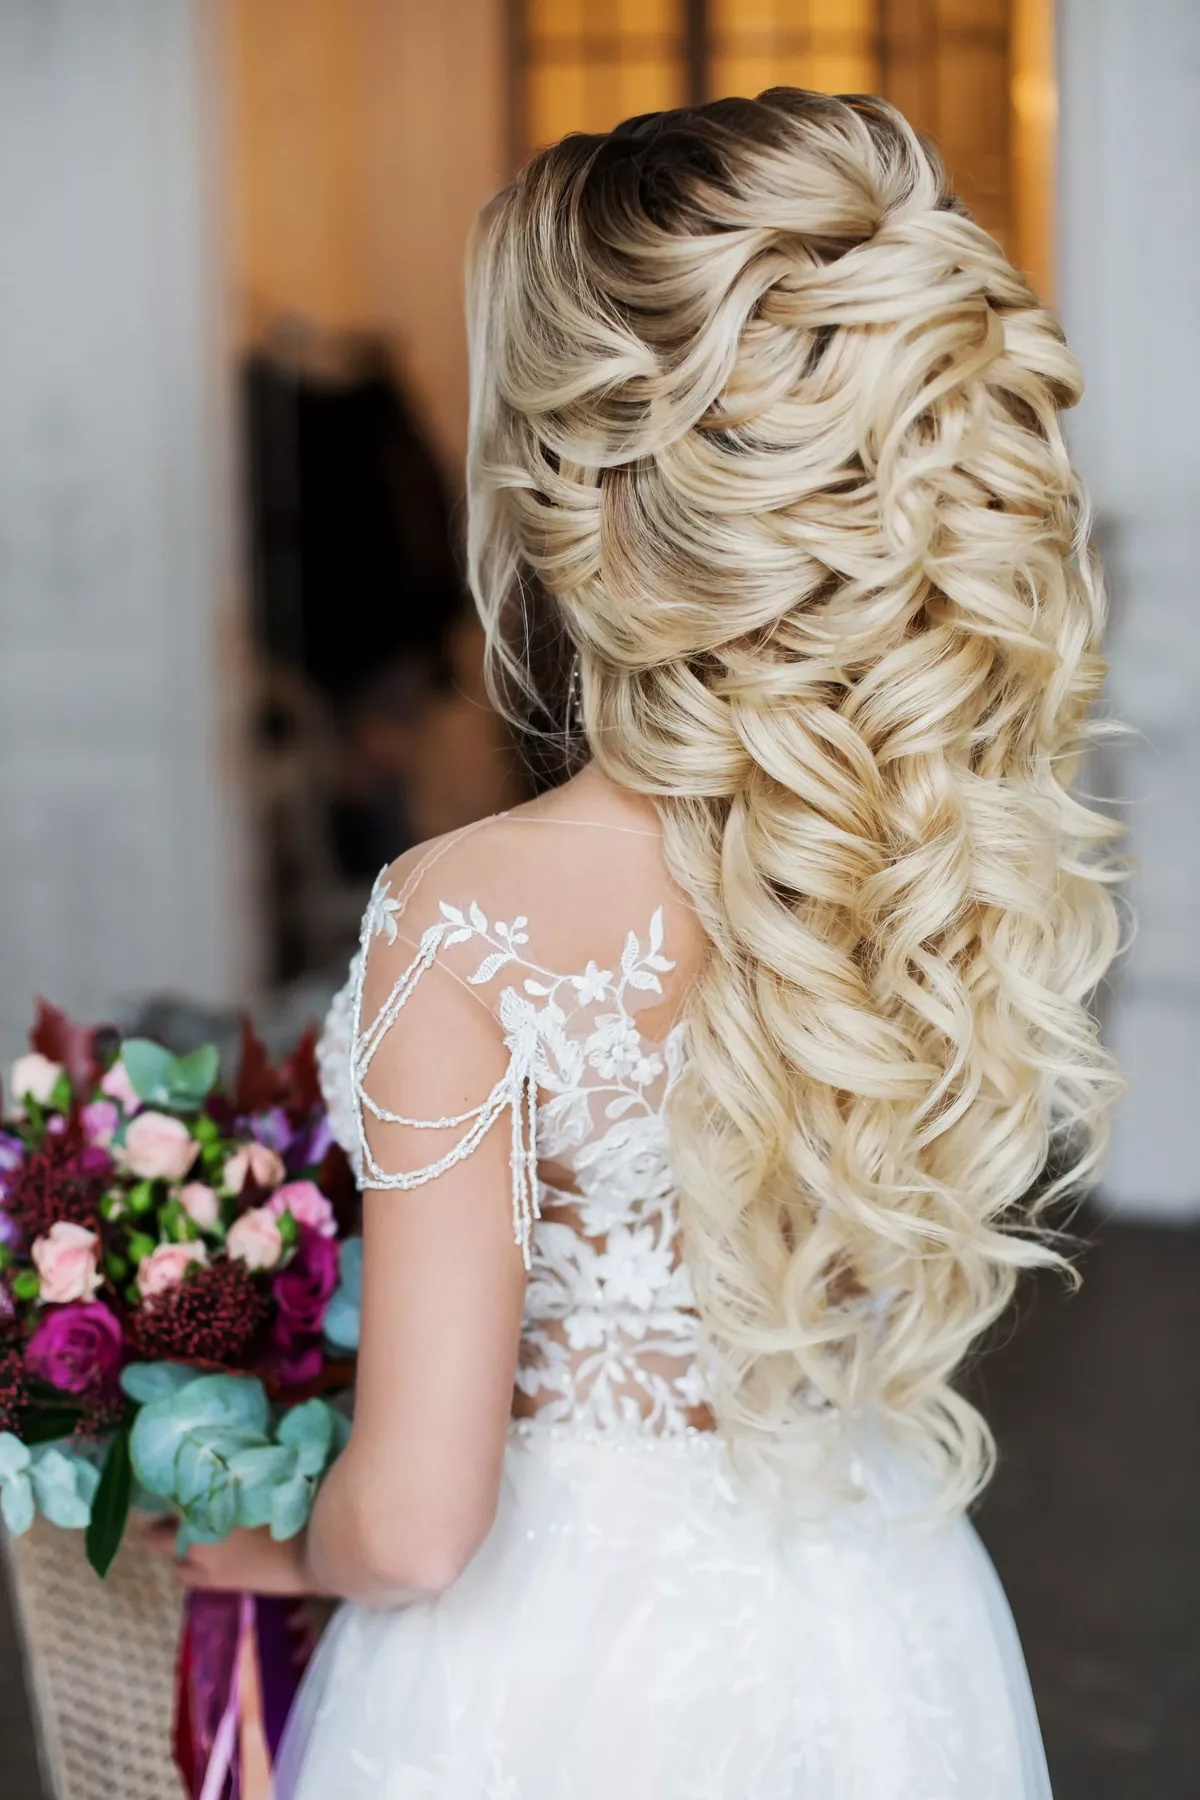
How to style: twist a section from each temple back to the crown, cross them over each other, pin them in place and let the remaining hair fall naturally.
A half-up twisted crown twists two front sections back and joins them at the crown, leaving the rest of the hair down — simple, secure and very pretty.
Cost and time: about ten minutes, with no heat tools needed — an ideal DIY choice for a remote elopement.
Best for: brides who want their hair down but need it off their face, and anyone doing their own hair.
29. Soft Curls With a Veil
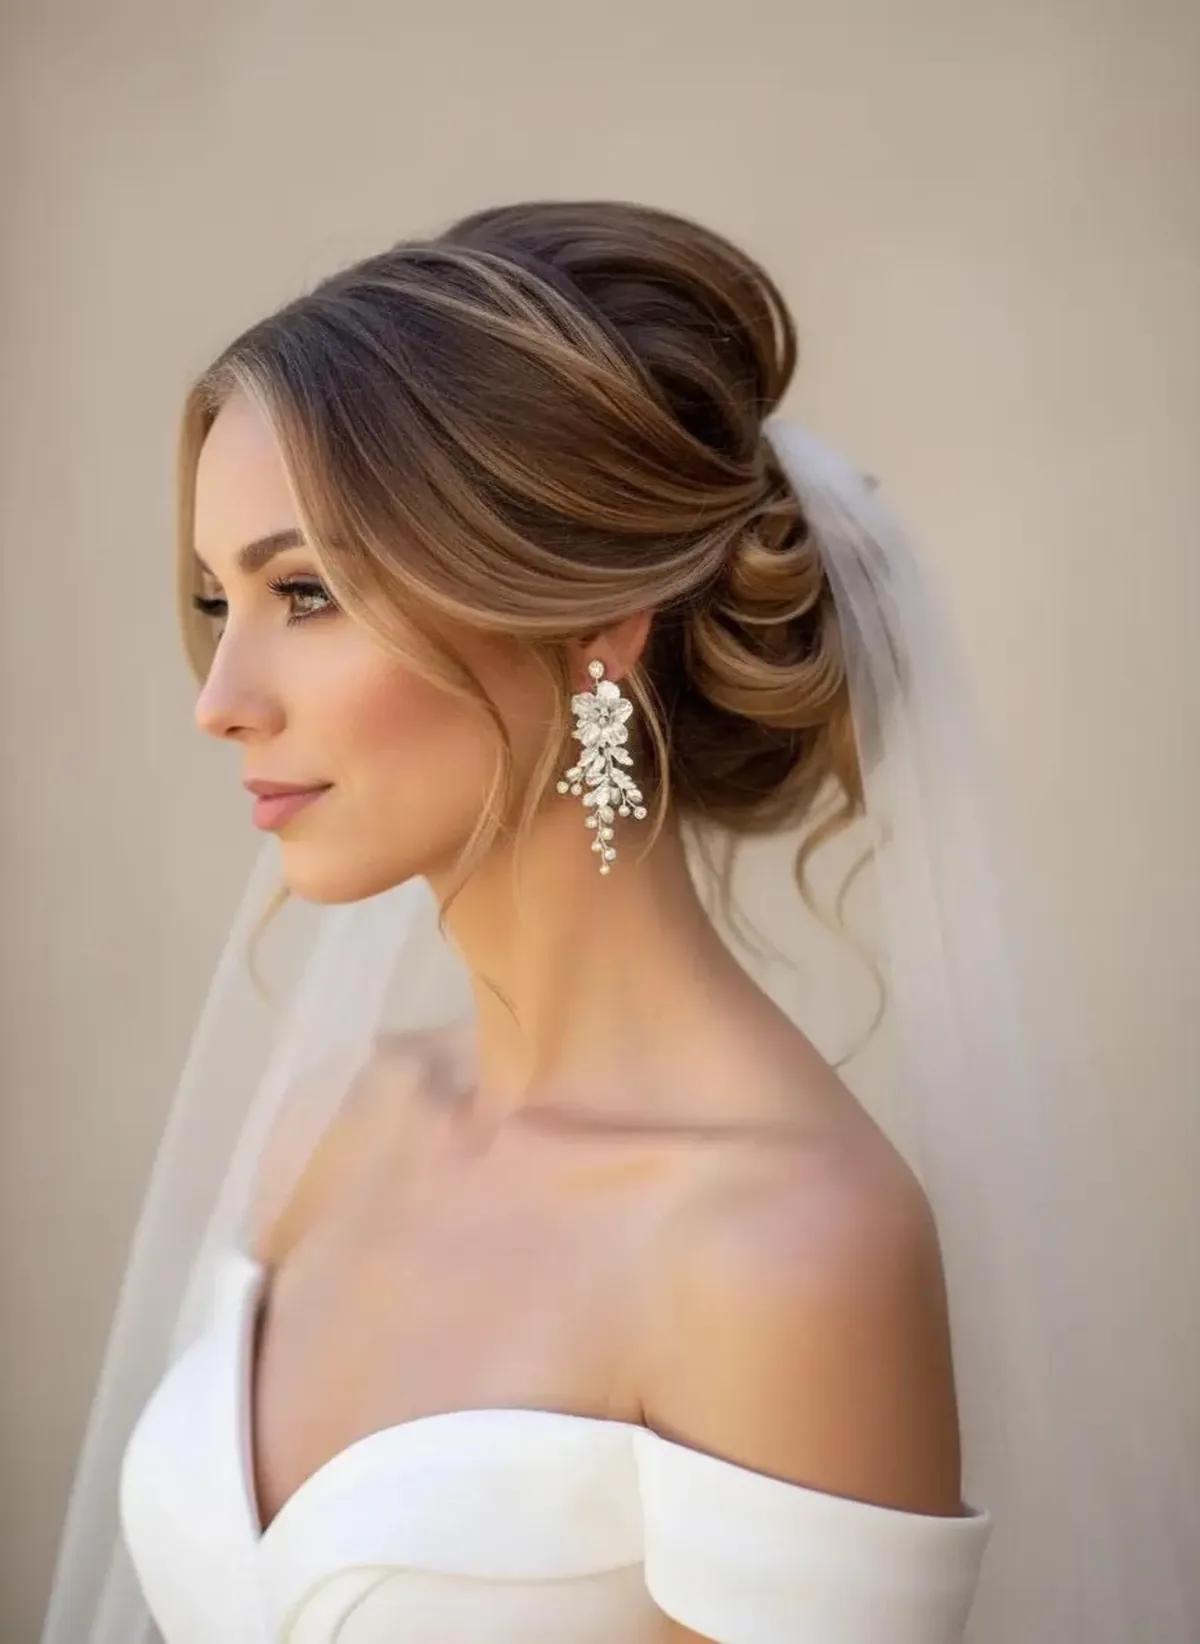
Soft curls and a veil are a classic pairing: the curls give the veil something to sit on, and the veil gives the curls a bridal frame.
Best for: brides who have always dreamed of a veil, even at a two-person ceremony.
How to style: curl the hair softly, place the veil comb at the crown — not at the very back — and secure it with two crossed pins so it cannot slide.
What to ask a stylist: ask where the veil will sit before the curls are set, because curls under a veil comb behave differently from curls left free.
30. The Low Bun With Pearl Pins
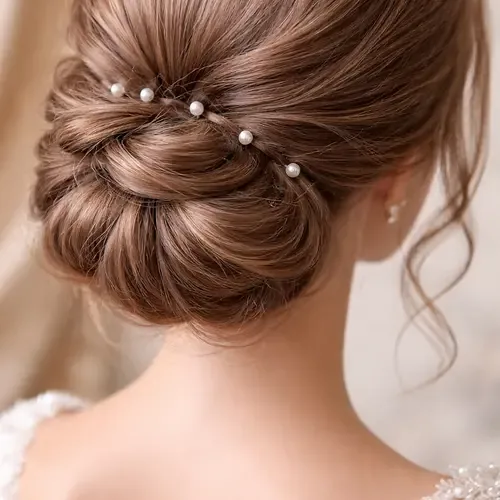
Best for: minimalist dresses, and brides who want one elegant detail rather than a complicated style.
Pearl pins turn a simple low bun into a bridal style in seconds: a few pins scattered through the bun catch the light and read beautifully in photos.
Maintenance: check the pins after the ceremony — pearl pins can work loose, so carry two spares in your pocket.
How to style: build a smooth or slightly textured low bun, then place five to seven pearl pins at different angles, stepping back to check the balance.
31. The Bohemian Loose Braid
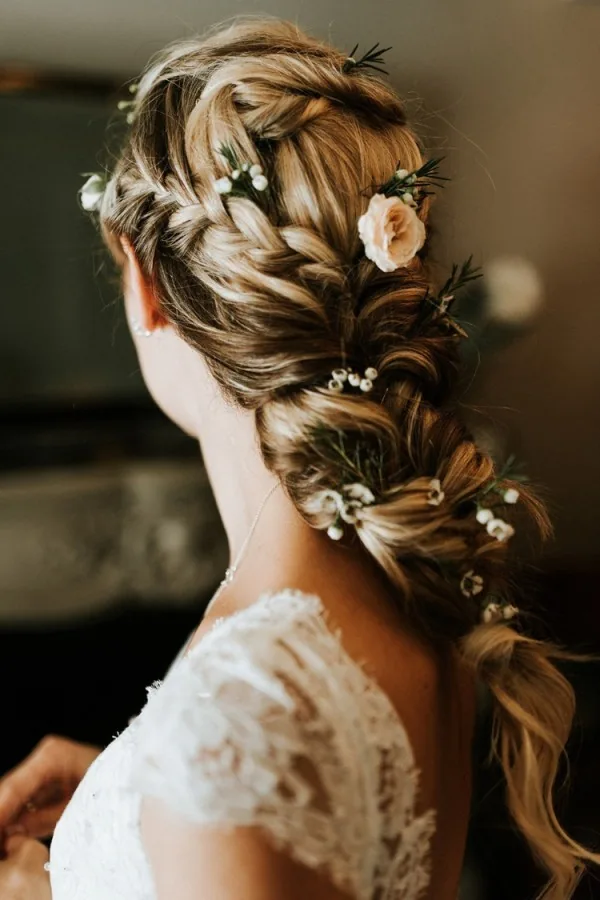
A bohemian loose braid is soft, wide and a little undone, often with small flowers or a ribbon woven through — the free-spirited cousin of the classic braid.
How to style: braid loosely from the nape, pull the edges out wide, weave in a ribbon or a few tiny dried flowers, and leave the ends wispy.
Best for: boho, festival-style and desert elopements, and brides with long, thick hair.
Who should avoid it: anyone with very fine hair — a loose braid needs volume to look intentional rather than thin.
32. The Sleek Chignon With a Centre Part
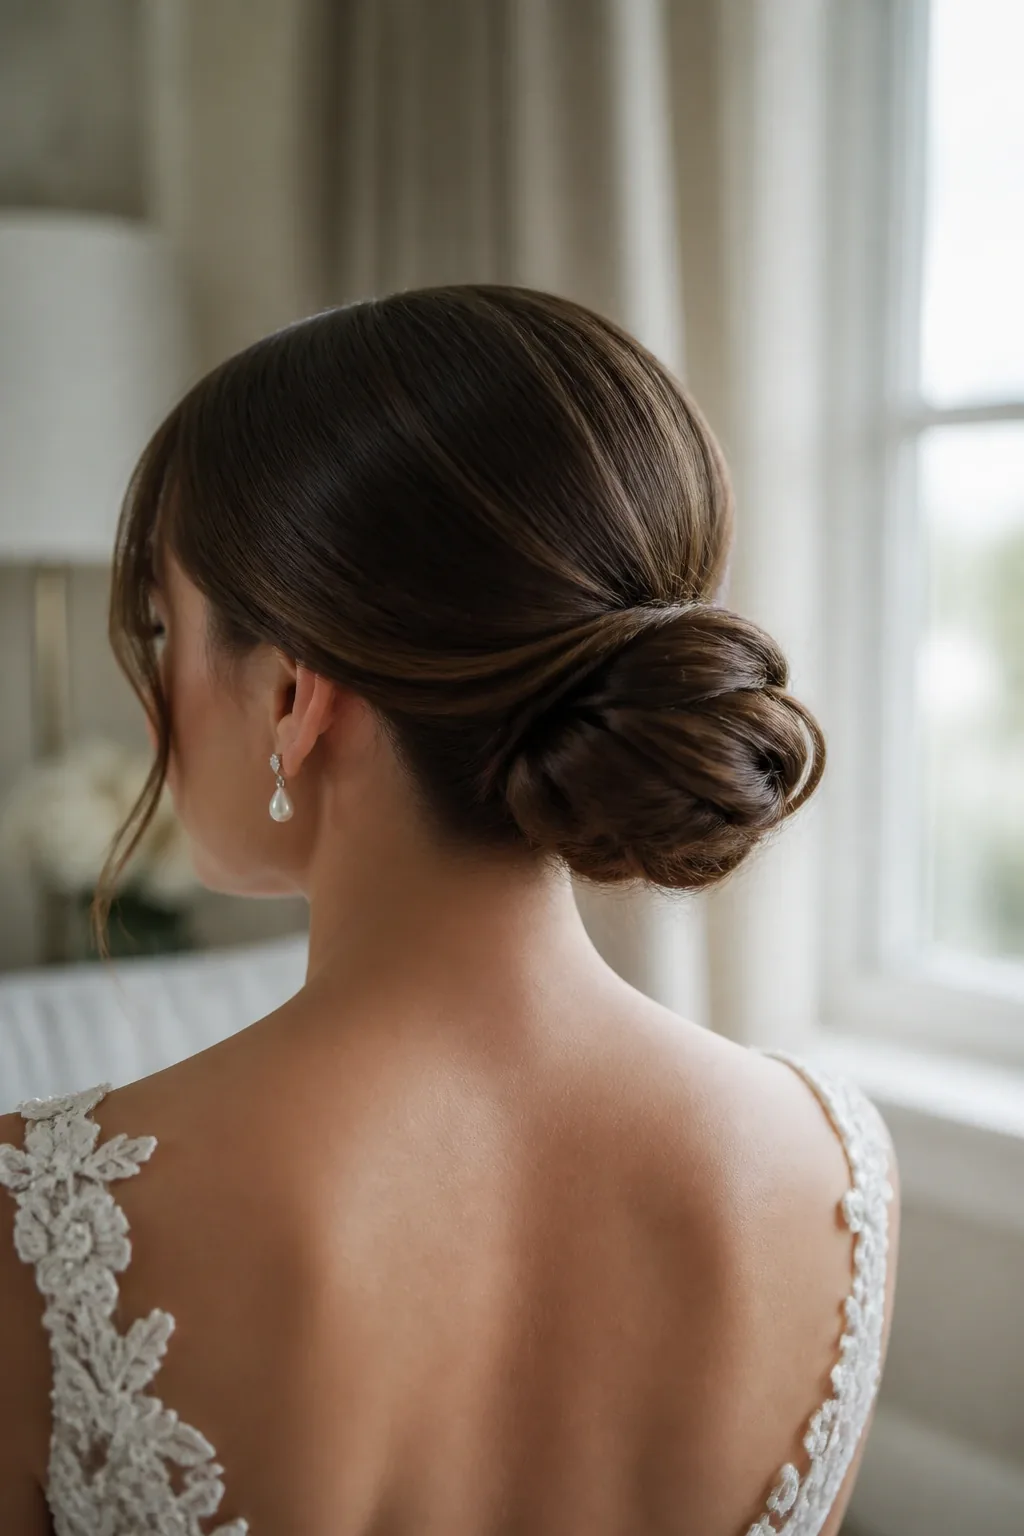
How to style: part the hair exactly in the centre, smooth it back with a serum, and form a flat, wide chignon at the nape, pinning it low and neat.
A centre part and a sleek chignon is the most editorial style on this list: symmetrical, polished and striking, especially with a clean-lined dress.
Quick verdict: beautiful, but unforgiving — every bump shows, so take your time smoothing and check the back in a mirror before you leave.
Best for: modern, minimalist elopements and brides who love a sharp, confident look.
33. Voluminous Curls
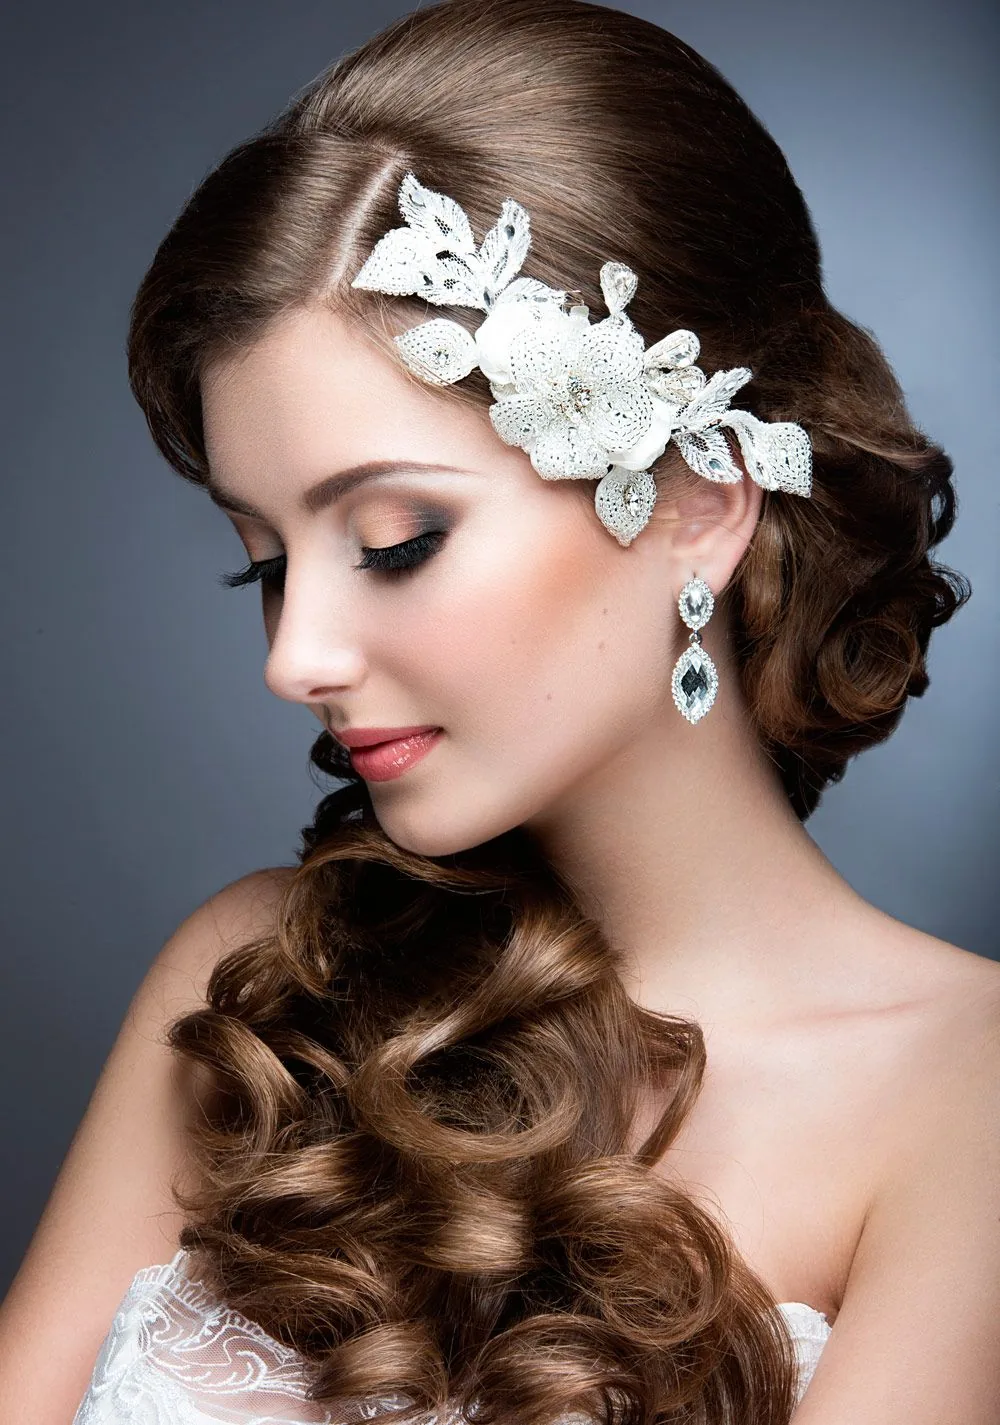
Big, voluminous curls are pure celebration: full, bouncy and full of movement, they fill a photo with life and suit a joyful, uninhibited elopement.
Best for: brides with thick hair or a good set of hot rollers, and anyone whose dress is simple enough to let the hair be the drama.
How to style: set the hair in large rollers or with a large iron, let the curls cool, then brush out gently and backcomb at the roots for volume.
Common mistake: using too much product, which weighs the curls down. A light mousse before styling and a flexible spray after is enough.
34. Straight Hair With a Hair Vine
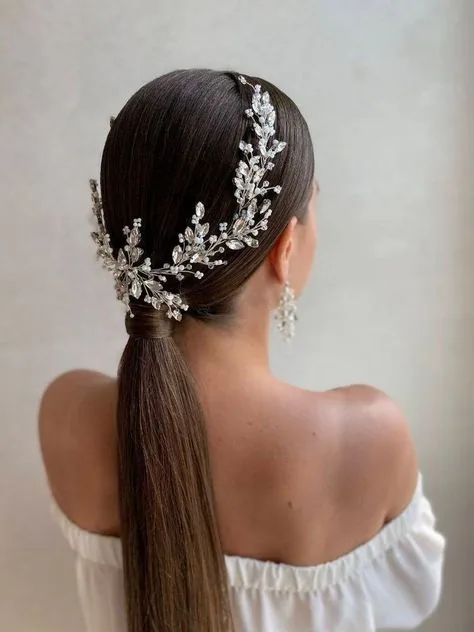
Best for: brides with straight hair who want a bridal detail without curls, braids or an updo.
If your hair is naturally straight, a delicate hair vine is all you need: it adds sparkle and bridal feeling without fighting your hair’s nature.
What to ask a stylist: ask for the vine to be pinned through the hair, not just laid on top — a vine that is only resting will slide within an hour.
How to style: smooth the hair, add a centre or side part, and place the vine across the crown or along a side part, pinning it at both ends.
What is the best hairstyle for an elopement?
A style that stays put outdoors and photographs well from behind — usually a low bun, a braided updo or a half-up style. Choose one you have tested in similar weather, rather than the prettiest option in a mirror.
Should I wear my hair up or down for an elopement?
Up is safer outdoors, because wind and hiking pull at loose hair, but down can work beautifully in a calm, sheltered spot. Half-up styles are the best compromise: the face stays open and the length still shows.
How do I keep my elopement hairstyle from falling apart in wind?
Build it on a braid or a bun anchored at two points, use mousse for grip before styling, and finish with a flexible-hold spray. Test it on a windy day first, and carry spare pins in a pocket.
Can I do my own hair for an elopement?
Yes, if you choose a style you can build calmly in under twenty minutes and have practised it at least three times. Simple braids, low buns, twisted crowns and textured ponytails are the safest DIY choices.
Do I need a veil for an elopement?
No — a veil is optional, even at a wedding for two. If you love the idea, choose a short or fingertip veil and pin it at the crown so it cannot slide. A hair vine, flower crown or pearl pins can give the same bridal feeling with less fuss.
What hairstyle photographs best for an elopement?
Styles with visible texture and detail from the back — braids, twists and low buns — photograph best, because so many elopement photos are taken from behind. A little movement, like loose tendrils or a swinging ponytail, also adds life to pictures.
How far in advance should I trial my elopement hairstyle?
Do a full trial at least two weeks before the day, wearing your dress and accessories and walking around in the style for an hour. That gives you time to change the plan if something loosens or feels uncomfortable.
What should I pack in an elopement hair kit?
Four bobby pins, two elastics, a travel-size hairspray, a small brush or comb and any spare accessory pins. That small pouch fits in a pocket and fixes almost every problem you are likely to meet.
Are braids good for elopement hairstyles?
Yes — braids are one of the best elopement choices. They lock the hair down, survive wind and hiking, and look detailed and romantic in photos. Fishtail, Dutch, waterfall and braided buns all work well.
What hairstyle works for short hair at an elopement?
A polished bob with a deep side part, a textured pixie with one elegant accessory, or soft waves on a lob all work beautifully. Short hair is practical outdoors, and one beautiful pin or vine is enough to make it feel bridal.
Conclusion
An elopement is a wedding with nothing to hide behind — and that is exactly what makes it beautiful. The right hairstyle does not need to be the most elaborate one, or the one in the most-liked photo you have saved. It needs to hold through wind and walking, to photograph well from every angle, and to let you forget about it completely while you say your vows.
Start with the place, then choose the style that belongs there. Test it in real weather, practise it until it feels easy, and pack the small kit that fixes the small things. However you wear it — braided, loose, pinned up or flowing free — the best hairstyles for an elopement are the ones that leave you free to be fully present, just the two of you, in a moment that is entirely yours.