Your 20s, Your Hair Rules: 38 Hairstyles for Women in Their 20s That Actually Fit Real Life
Your 20s are the decade when your hair finally belongs to you. For the first time, nobody is booking your haircut for you, and nobody is telling you what is appropriate — which is exactly why it can feel harder, not easier. One week you want the sleek bob your new boss has, the next you want copper balayage for a festival, and the week after that you are growing out a pixie you cut on impulse at 2 a.m. That is not indecision. That is your 20s doing exactly what they are supposed to do: letting you try things on, keep what works, and grow out what does not.
This guide brings together 38 hairstyles for women in their 20s that actually fit real life — the first job and the night out after it, the wedding you are attending as a guest, the festival weekend, the tiny bathroom mirror in a shared flat, and the budget that is somewhere between student and salary. The styles are grouped by vibe so you can shop by mood: effortless everyday hair, polished work-ready looks, night-out glamour, experimental colour and cuts, short hair, long hair, curly and textured hair, and protective, low-maintenance styles for the weeks when life is too busy for a 45-minute routine. Eight guides answer the questions every 20-something actually asks: how to find a cut that works for the office and the dance floor, how to grow out a pixie without the awkward stage, how to look expensive on an entry-level budget, and how to build a five-minute morning routine that still looks like you tried. Every style notes what it costs in time and money, who it suits, and what can go wrong — so you can experiment without the regret.
Finding a Cut That Fits a First Job AND a Night Out

The first-job haircut is a balancing act: it has to look polished at 9 a.m. in a meeting and still look like you at 9 p.m. on a Friday. The safest bet is a cut with a clean shape and a little movement — a long bob, soft layers, or a shoulder-length cut with face-framing pieces — because those styles read as professional when they are smooth and blow-dried, and completely different when they are tousled, waved, or pulled into a messy bun. The trick is versatility built into the cut itself, not into a mountain of styling products. If a style only looks good one way, it will betray you the moment you try to change it up after work.
Before you book the cut, think about the two versions of your day. Can this style be pulled back neatly for a presentation? Can it be let down and waved for dinner? A blunt bob can do both if it has soft ends; a pixie can do both with a change of product; long layers can do both with a different part. Show your stylist two photos — one work version, one night-out version — and ask whether one cut can genuinely do both. If the answer is no, ask what would need to change. And remember that your first job does not need the most conservative haircut in the building. It needs a cut that looks intentional, is easy to keep tidy, and still feels like you when the workday ends.
Growing Out a Pixie or Bob Without the Awkward Stage
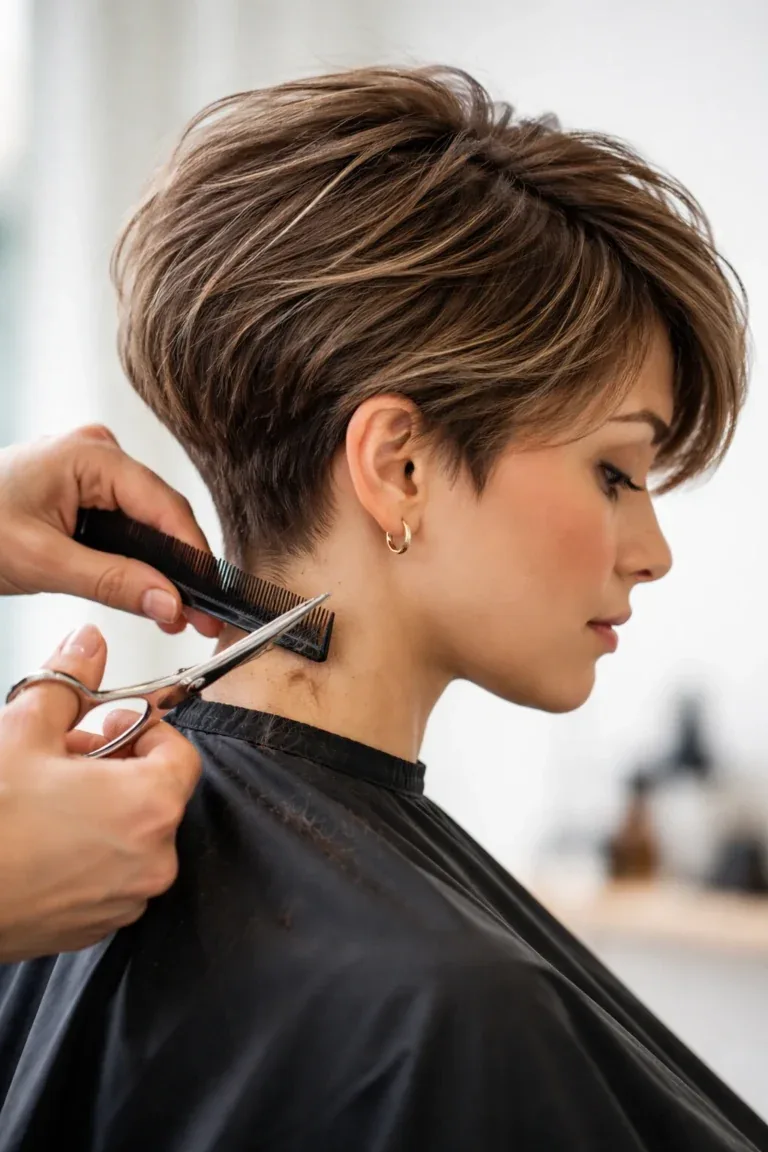
Growing out a pixie or a bob is a test of patience, because there is a stretch — usually around month three to five — when the hair is too long to be a pixie and too short to be a bob, and it seems to stick out in every direction at once. The awkward stage is real, but it is also manageable, and the secret is regular trims rather than no trims at all. A trim every six to eight weeks does not slow the grow-out down; it shapes the back and the sides so the growing hair has a deliberate silhouette instead of a mushroom one. Think of it as steering, not cutting: you are keeping the shape while the length catches up.
The other trick is styling through the transition instead of fighting it. Headbands, clips, and a good texturising product turn an in-between length into a look on purpose: slick the sides back with a little pomade, pin one side behind the ear, or add a deep side part and let the longer top fall across the forehead. Accessories are your best friend in this phase, and so is a stylist who understands grow-outs — tell them the goal length up front and ask them to trim only what keeps the shape. Most grow-outs take eight to twelve months to reach a bob, and the women who make it through are the ones who planned the awkward months instead of being surprised by them.
Budget Hair: Looking Expensive on a Student or Entry-Level Budget
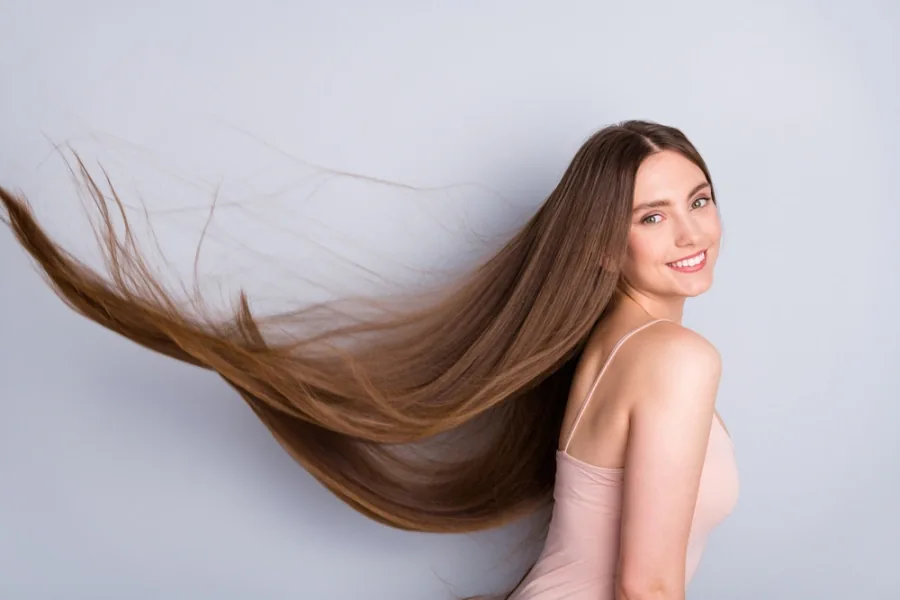
Expensive-looking hair is rarely about an expensive haircut. It is about condition, shine, and a shape that looks deliberate — and all three are cheaper than most people think. The single best investment on a tight budget is a good trim every eight weeks, because split ends make even a great cut look cheap, while healthy ends make even a simple cut look salon-fresh. After that, a bottle of decent leave-in conditioner and a heat protectant will do more for your hair than any luxury shampoo. Drugstore products have closed the gap with salon brands in the last few years, and the difference between a five-dollar and a fifty-dollar conditioner is usually the packaging, not the result.
Where you spend matters more than how much you spend. Save money on the cut by going to a reputable salon’s junior stylist or a training academy, where the same cut costs half the price and is checked by a senior stylist. Spend money on the things that are hard to fix at home — a colour correction, a first balayage, or a treatment for damaged hair — and do the easy things yourself: root touch-ups with a tinted dry shampoo, a gloss treatment at home, or a trim of the very ends between appointments. And skip the products your hair does not need: most 20-something hair needs three things — a shampoo that suits your scalp, a conditioner, and one styling product — and everything else is marketing. Looking expensive is a routine, not a receipt.
Heat Damage and How 20-Something Hair Recovers
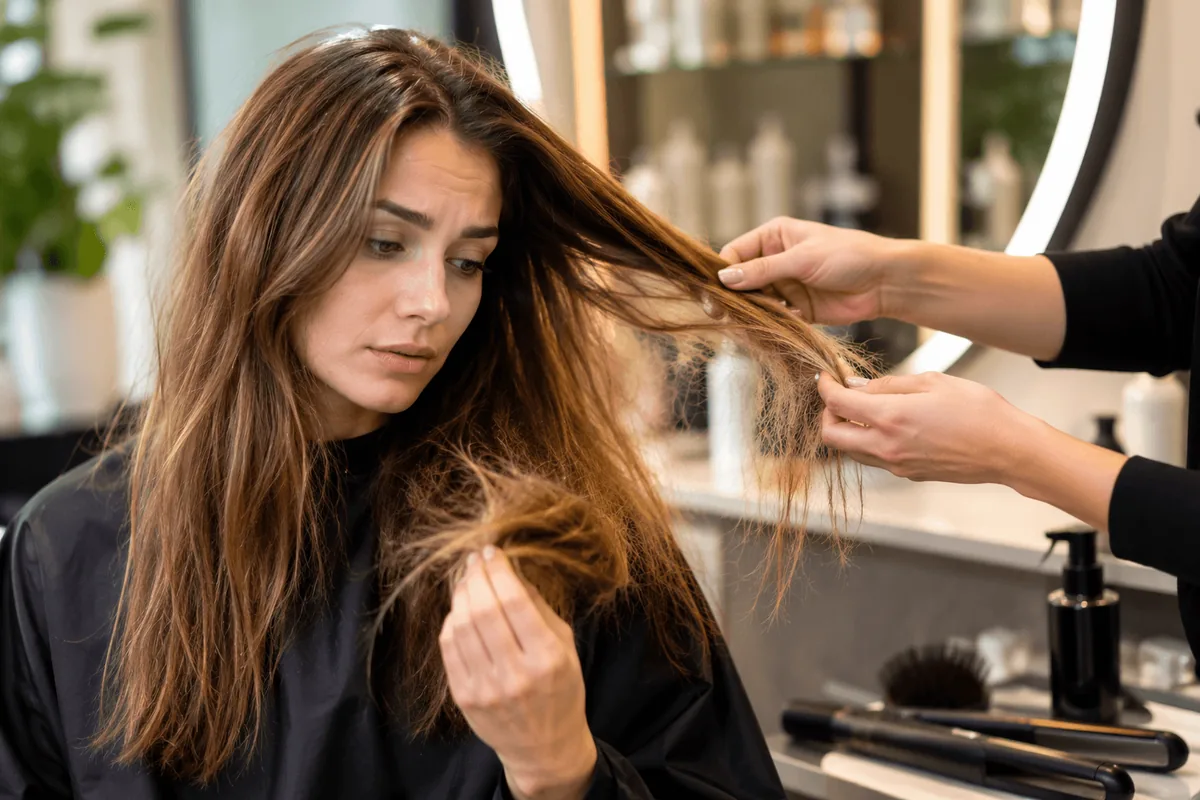
Your 20s are when heat damage usually starts to show. The straighteners at 230 degrees every morning, the curling wand before every night out, the blow-dry on the hottest setting because you are late — it all adds up, and the signs are unmistakable: ends that feel like straw, hair that will not hold a curl anymore, breakage at the crown, and a dullness that no shine spray can fix. The good news is that 20-something hair recovers faster than hair at any other age, because the scalp is healthy and the growth rate is at its peak. The bad news is that damaged hair cannot be repaired — it can only be managed while new, healthy hair grows in.
Recovery starts with a heat holiday: two to four weeks with no straightener, no curling iron, and no high-heat blow-drying, while you lean on heatless styles like braids, buns, and air-dried waves. In the meantime, a weekly deep-conditioning mask and a protein treatment every two weeks will make the damaged lengths feel smoother and stronger, even though they cannot undo the damage itself. The real fix is a trim — cutting off the worst of the split ends — and then protecting the new growth with a heat protectant every single time you use heat, and keeping the iron at 180 degrees or below. Fine hair should stay under 170. The quick verdict: your hair will forgive you, but only if you stop the damage first and then protect what grows back.
Colour in Your 20s: First Balayage, Vivid Colour, and Going Back

Your 20s are the best decade to play with colour, because your hair is strong enough to handle it and your life is flexible enough to enjoy it. A first balayage is the classic entry point: hand-painted highlights that grow out softly, with no harsh root line and no six-week touch-up panic, which makes it the most forgiving colour for a first-timer and the easiest to maintain on a budget. Vivid colour — cherry, copper, pastel pink — is the other direction: it makes a statement, it photographs beautifully, and it fades, which is both its charm and its cost, because keeping it bright means cold-water washes and regular top-ups.
Before you commit, know the way back. Balayage can be toned down or grown out with almost no drama, but a full vivid colour or a bleach-out needs a colourist to bring it back to natural, and that correction costs more than the original colour did. The common mistakes are easy to avoid: bleaching at home without a strand test, choosing a shade that fights your skin tone instead of flattering it, and forgetting that coloured hair needs different care — sulphate-free shampoo, cooler water, and a colour-protecting mask. Ask your colourist three things: how will this grow out, what will the upkeep cost every two months, and how do I get back to my natural colour if I change my mind. If they cannot answer all three, find a colourist who can.
Hairstyles That Survive Festivals and All-Nighters

Festival hair has one job: still look good at 2 a.m. after ten hours of sun, dust, dancing, and a tent that is either too hot or too cold. The styles that survive are the ones with structure — braids, buns, and space buns — because they lock the hair in place section by section, while loose curls and sleek straight styles give up within the first hour. Braids are the festival classic for a reason: a Dutch braid, a fishtail, or two French braids will hold through a full day, keep the hair off a sweaty neck, and look better slightly messy than they did when they were perfect. Add a little hair glitter, a few coloured clips, or a bandana, and the style goes from practical to festival-ready.
Prep is half the battle. Start with hair that is not freshly washed — day-old hair has grip, and it holds braids far better than slippery clean hair. Work dry shampoo through the roots before you braid, and pack a festival kit: a few elastics, bobby pins, a small dry shampoo, and a scarf or bandana for the second day, when the braids come out and the waves underneath become the style. The mistake most people make is choosing a style that needs a mirror and a socket: at a festival you have neither, so pick a style you can redo by feel in a tent. The quick verdict: braids on day one, waves from the braids on day two, and a scarf on day three — three days, one wash, zero panic.
Your First Salon Visit vs DIY: What to Ask

Your first proper salon visit can feel intimidating, especially if you have only ever had your hair cut at home or by a family friend. The truth is that a good salon expects first-timers, and the consultation is the most important part of the appointment — it is where you and the stylist agree on what is actually going to happen. Bring photos, but bring the right kind: two or three photos of the same style from different angles, on hair that is roughly your texture and length, not a single filtered photo of a celebrity with different hair. Tell the stylist what you do not like about your current hair, how much time you spend styling it each morning, and what your budget is for upkeep — those three answers tell them more than any photo can.
Ask the questions that protect you: how long will this take, what will it cost in total including any toner or treatment, how will it grow out, and what do I need to do at home to keep it looking like this. If the stylist suggests something very different from what you asked for, ask why — sometimes they are right, because they can see your hair texture and face shape in a way a photo cannot, and sometimes they are pushing a trend that does not suit you. DIY has its place: trims of the very ends, a gloss, or a root touch-up are all doable at home, but a first balayage, a big chop, or a colour correction belongs in a salon. The rule is simple: if getting it wrong would take months to fix, pay a professional.
A 5-Minute Morning Routine for Busy 20-Something Life
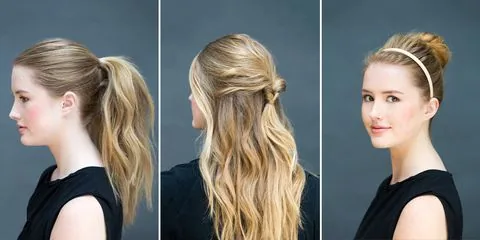
A five-minute morning routine is not about doing less — it is about doing the right things in the right order. The night before is where the routine really starts: sleep with your hair in a loose braid or a high, loose bun, and you will wake up with soft waves instead of flat, slept-on hair. In the morning, the first minute is a refresh, not a wash: a spritz of water or a little dry shampoo at the roots, worked through with your fingers, brings yesterday’s style back to life. The second minute is the shape: a quick brush-through, a part where you want it, and a decision — down, half-up, or up — made in seconds, not after ten minutes of staring in the mirror.
Minutes three to five are the finish. If it is going down, a few bends with a flat iron on the front sections only will frame your face and make the whole style look intentional. If it is going up, a claw clip or a low ponytail with a wrapped elastic takes thirty seconds and looks polished. A drop of hair oil on the ends adds shine, and a single accessory — a clip, a headband, a scarf — is the difference between hair that looks rushed and hair that looks styled. The common mistake is trying to redo the whole style every morning: a good five-minute routine is a refresh of what you already have, not a rebuild. Keep a small kit by the mirror — dry shampoo, one clip, one elastic, hair oil — and the routine becomes automatic within a week.
1. The Effortless Everyday Blowout
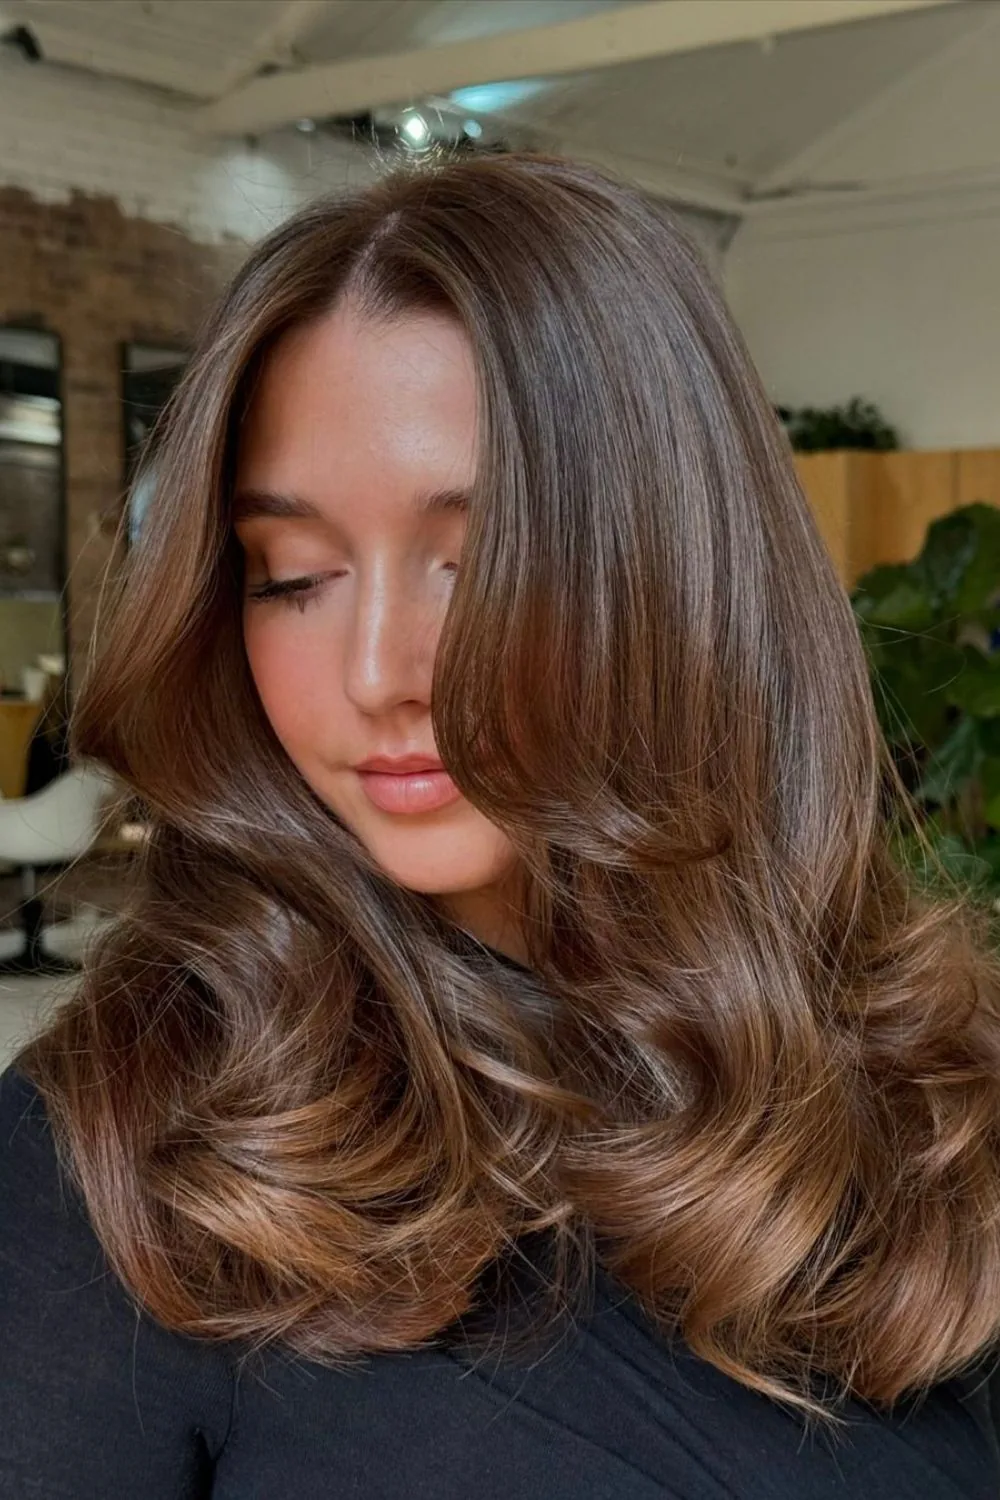
The effortless everyday blowout is the style that makes people ask what you did differently, when the answer is almost nothing. It is not a salon blowout with forty minutes and a round brush — it is hair dried with a little lift at the roots, the ends curved under or flicked out, and a shine that comes from healthy hair rather than a shelf of products. The whole point is that it looks like your hair, only better: bouncy, soft, and full of movement, without a single pin or a stiff curl in sight. It works on almost every length from a bob to long layers, and it is the style that flatters a face without hiding it.
Best for: every day — work, lectures, errands, and the coffee run that turns into a lunch date. How to style: blow-dry with a round brush in sections, lifting the roots up as you go, and finish with a cool shot from the dryer to set the shape. What to ask a stylist: for long layers that give the blowout its bounce, and a cut that dries well without a brush, so the style survives the days you skip the round brush entirely. Time: 15 to 20 minutes. Cost: free once you own a dryer and a round brush. The quick verdict: if you only learn one styling skill in your 20s, make it this one — it upgrades every outfit you own.
2. Messy Bun, But Make It Intentional
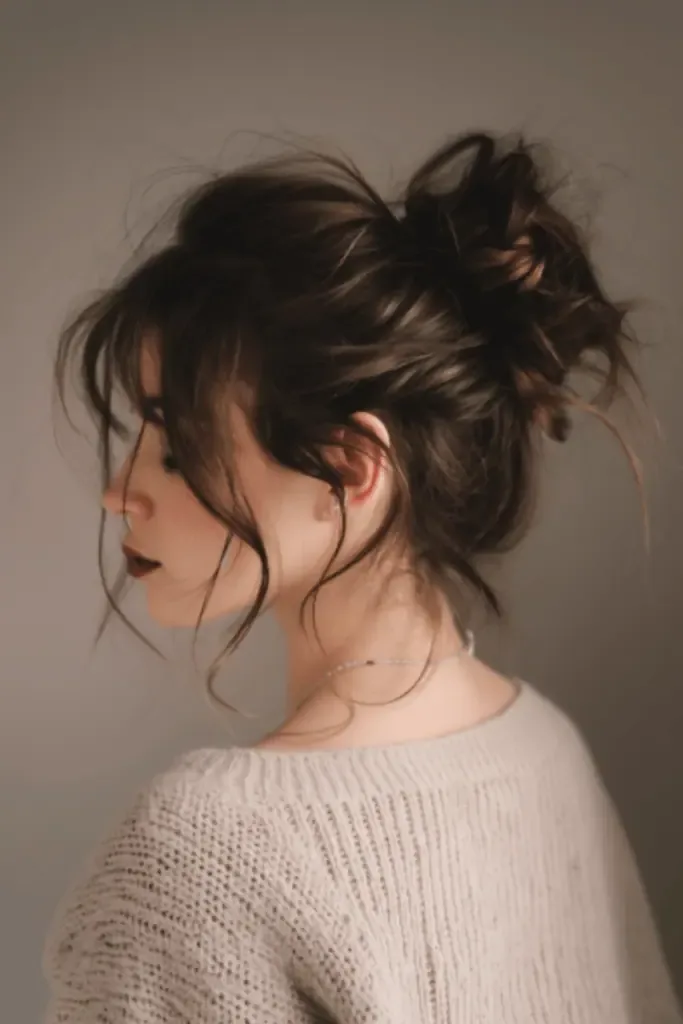
The messy bun has a reputation problem: done badly, it looks like you gave up, and done well, it looks like the most confident style in the room. The difference is in the details. An intentional messy bun sits high or low on purpose, has a little volume at the crown, and leaves two face-framing pieces out at the front — the pieces are what turn a gym bun into a hairstyle, because they soften the face and make the whole thing look styled rather than accidental. The bun itself should be loose and textured, not tight and scraped back, and a few pins will hold it without making it look stiff.
Pros: it takes five minutes, it works on second- or third-day hair, and it keeps the hair off your neck on a hot day. Cons: it can look sloppy if the pieces are too long or the bun is too low and loose, and it will not survive a windy day without pins. Common mistake: pulling the bun too tight, which kills the texture and gives you a headache by lunchtime. Maintenance: almost none — a texturising spray before you twist it up is all it needs. The quick verdict: the messy bun is a skill, not a surrender, and once you learn the intentional version, you will wear it three times a week.
3. Beachy Waves That Take Ten Minutes
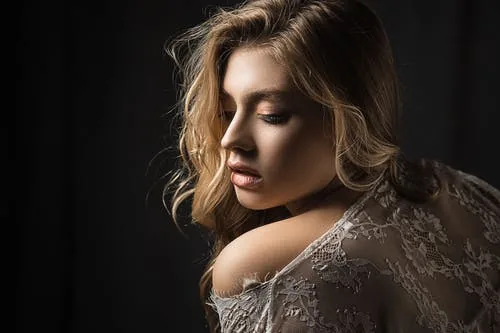
Beachy waves are the unofficial hairstyle of your 20s, and the ten-minute version is the one you will actually wear. The trick is not to curl every section — it is to bend the hair with a flat iron or a large curling wand, leaving the last inch of each section straight, which is what makes the waves look beachy instead of formal. Work in big sections, alternate the direction of each bend, and then shake the hair out with your fingers and a spritz of sea-salt spray. The result is soft, undone, and a little bit wild, which is exactly the point: beachy waves are supposed to look like they happened at the coast, not in a bathroom.
Best for: weekends, holidays, festivals, and any day when you want to look like you tried without actually trying. How to style: a flat iron is faster than a curling wand for this one, because a bend takes five seconds and a curl takes thirty. What to ask a stylist: for long layers with soft ends, because blunt ends will not bend properly and the waves will look stiff. Time: 10 minutes once you have practised it twice. Cost: a bottle of sea-salt spray. Common mistake: curling all the way to the ends, which turns beachy waves into ordinary curls and doubles the styling time for a worse result.
4. The Low Ponytail You Can Wear Anywhere
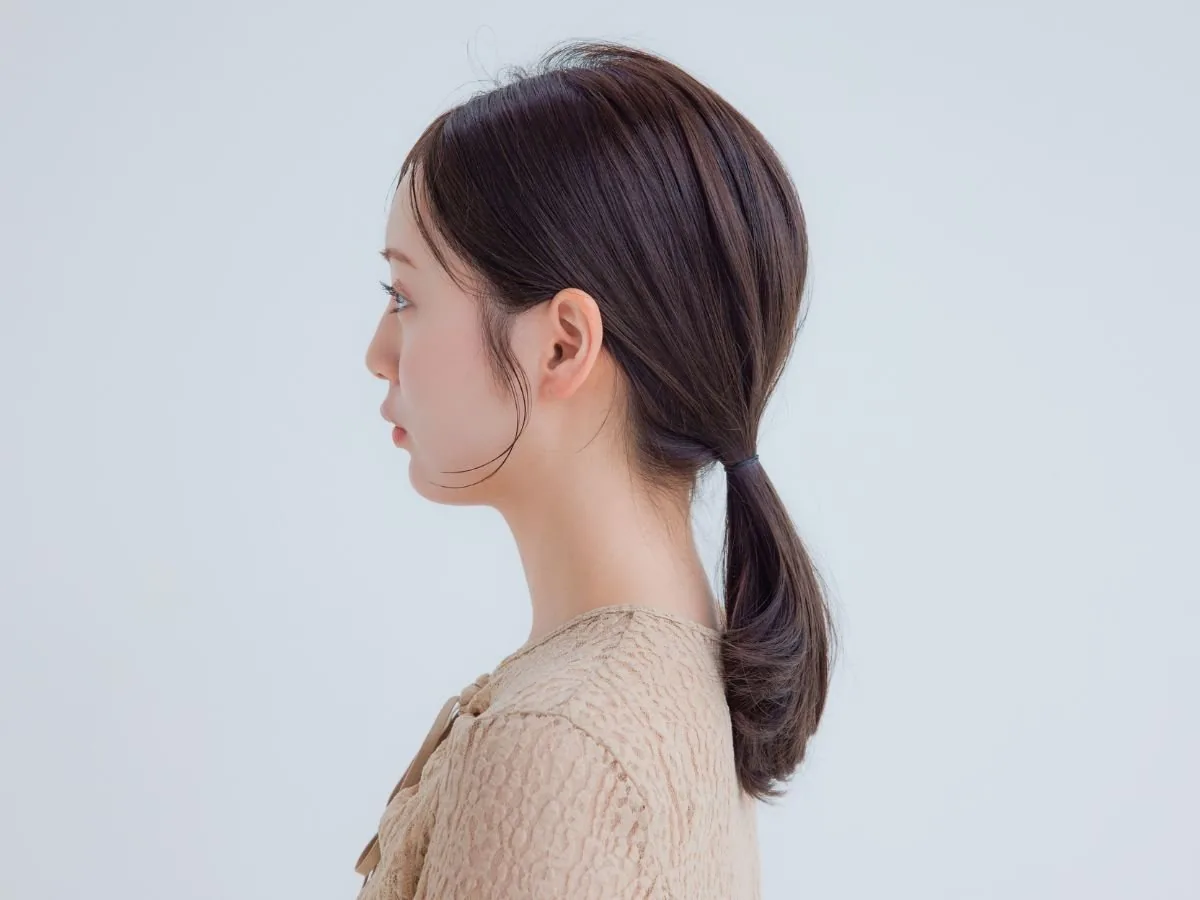
The low ponytail is the most underrated style of your 20s, because it does something almost no other style does: it works everywhere. Pulled back smooth with a wrapped elastic, it is polished enough for a job interview. Worn loose with face-framing pieces, it is relaxed enough for a Sunday. Add a velvet ribbon or a gold cuff, and it is dressed up enough for a dinner. The secret is the position — at the nape, not halfway up the head — and the finish: smooth at the top, soft at the ends, and never scraped so tight that it pulls at your forehead.
Pros: it takes two minutes, it suits every face shape, and it keeps the hair out of your way without a single pin. Cons: on very fine hair it can look flat, and on very thick hair it can feel heavy by the end of the day. How to style: smooth the top with a boar-bristle brush, secure with a strong elastic, and wrap a small section of hair around the base to hide the elastic — that one detail is what turns a ponytail into a hairstyle. Maintenance: none, though a little dry shampoo at the roots keeps it looking fresh on day two. The quick verdict: every 20-something needs a low ponytail she trusts, because it is the style that saves every bad hair day.
5. Curtain Bangs for a Fresh Start
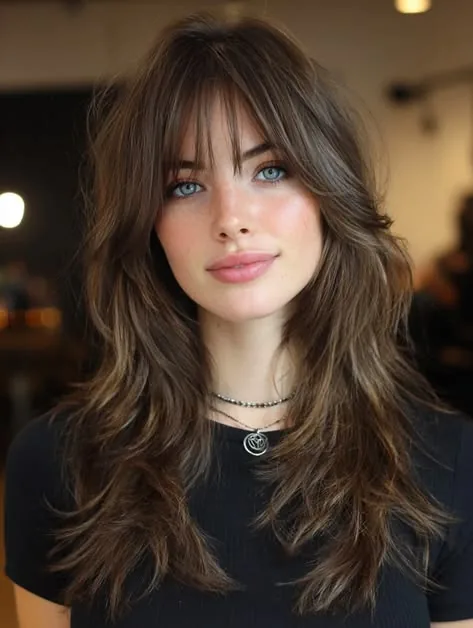
Curtain bangs are the commitment-phobe’s fringe: long, face-framing pieces that part in the middle and sweep to either side like curtains, softening the face without the maintenance of a full blunt fringe. They are the perfect first fringe for your 20s, because they grow out gracefully — there is no awkward in-between stage, because the bangs simply become layers — and they suit almost every face shape, from round to long, because the parting can be adjusted to flatter your features. They also make every other style look better: a ponytail with curtain bangs looks intentional, a bun with curtain bangs looks romantic, and loose hair with curtain bangs looks finished.
Best for: anyone who wants a change without a big chop, and anyone growing out a fringe who needs a stylish middle step. How to style: blow-dry the bangs forward with a round brush, then sweep them to the sides with your fingers — the whole thing takes ninety seconds. What to ask a stylist: for the bangs to start at the cheekbone, not the forehead, so they frame the face instead of covering it, and to cut them dry so the length is accurate. Common mistake: cutting them too short, which turns soft curtain bangs into a blunt fringe that needs daily styling. Cost: usually free as part of a haircut, or a small fee on its own. The quick verdict: the lowest-risk hair change you can make, and the one most women wish they had tried sooner.
6. The Half-Up Claw Clip
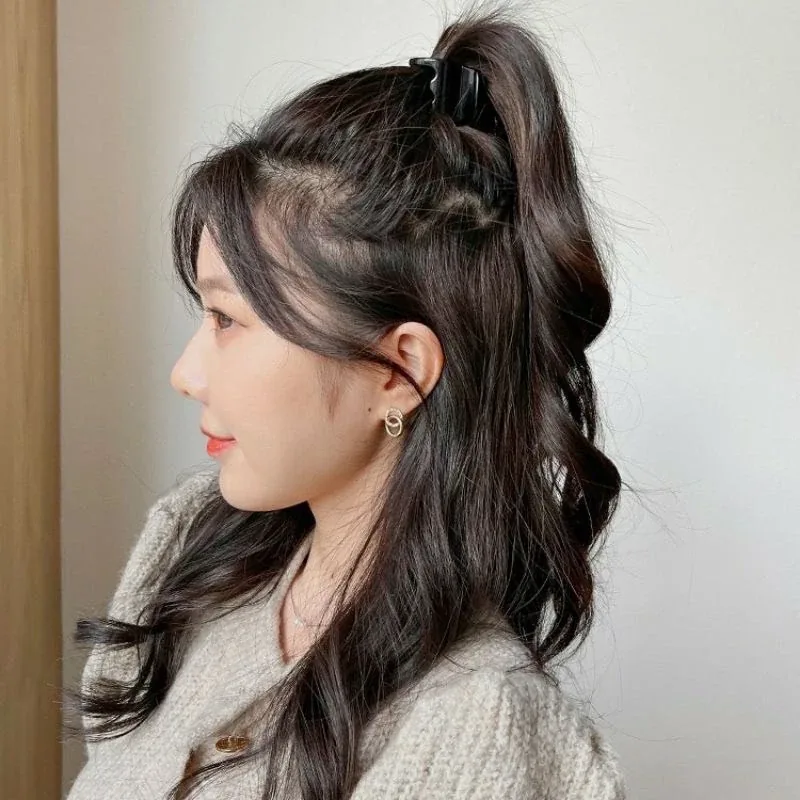
The half-up claw clip is the style that defined 20-something hair in the last few years, and it earned its place: it takes ten seconds, it looks like you thought about it, and it works on almost every length from a bob to long hair. The top half of the hair is twisted up and clipped at the crown, the bottom half falls loose, and the clip itself — tortoiseshell, matte black, or a soft pastel — is part of the look. It keeps the hair off your face without the formality of a full updo, and it is the rare style that looks as good at a lecture as it does at brunch.
Pros: ten seconds, no heat, no pins, and it works on second-day hair. Cons: it can slide on very fine or silky hair, and a cheap clip will snap under thick hair, so buy one that matches your hair’s weight. How to style: twist the top section loosely, clip it at the crown, and pull out a few pieces around the face. What to ask a stylist: for layers around the crown, because layers give the clipped section its volume and stop it from looking flat. Maintenance: zero. The quick verdict: keep a claw clip in your bag at all times — it is the fastest good hair day you will ever have.
7. The Polished Low Bun for the Office

The polished low bun is the workhorse of the professional world, and it is the style that quietly signals you have your life together. The hair is smoothed back without a flyaway, gathered low at the nape, and coiled into a clean, tidy knot that stays exactly where you put it from the first meeting to the last email. It is not a boring style — it is a deliberate one — and it does something no loose style can do: it puts the focus on your face, your earrings, and what you are saying, instead of on your hair. That is why it is the first style most women learn when they start their first serious job.
Best for: interviews, presentations, client meetings, and any day when you need to look unshakeable. How to style: smooth the hair with a little pomade, gather it at the nape, twist it into a knot, and pin it with four to six bobby pins. What to ask a stylist: for a cut with clean ends, because split ends are the first thing a sleek bun reveals. Time: 10 minutes once you have practised it. Cost: a smoothing product and a pack of pins. Common mistake: making the bun too high, which turns a polished office style into a ballerina look that feels out of place at work.
8. Sleek Straight Hair with a Centre Part
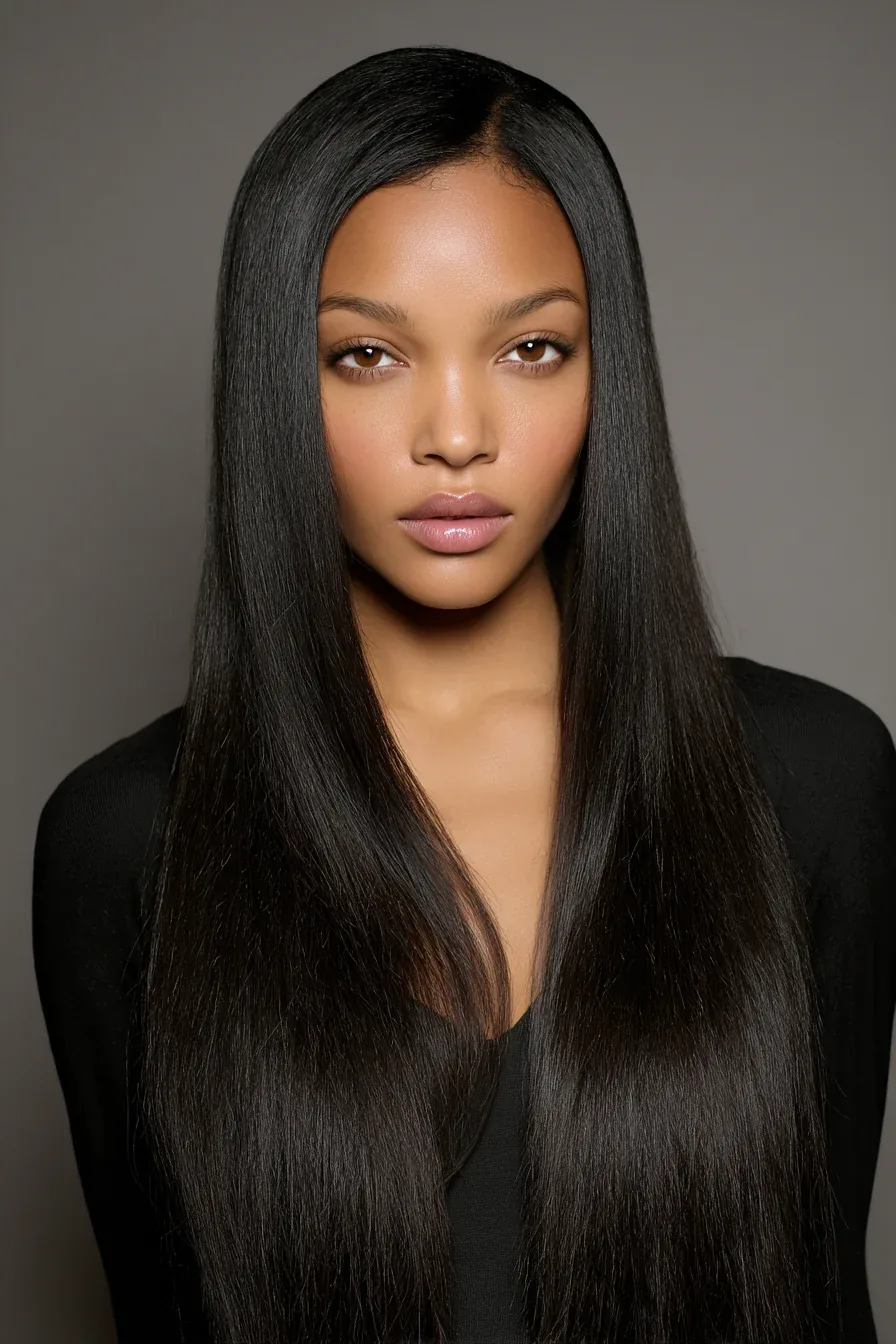
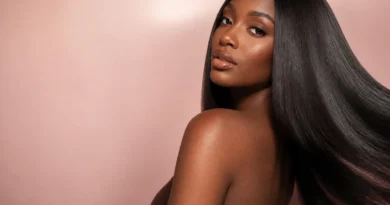
Sleek straight hair with a centre part is the quiet luxury of 20-something hair: dead straight, perfectly smooth, and so glossy it reflects the light, with a centre part that frames the face symmetrically. It is the style that makes a simple outfit look expensive, because the hair itself becomes the statement — clean, controlled, and deliberate. It works best on naturally straight or slightly wavy hair, and it suits the office, a dinner, or a date, because it never tries too hard and never looks out of place. The catch is condition: straight hair shows every split end, every dull patch, and every flyaway, so the hair has to be healthy and well-trimmed for the style to work.
Pros: it looks polished with almost no effort once the hair is straightened, and it photographs beautifully. Cons: it falls flat in humidity, it shows damage honestly, and it needs a flat iron to look its best. How to style: a heat protectant first, then a flat iron in small sections, then a drop of shine serum on the ends only. What to ask a stylist: for a trim every eight weeks, because the ends are the whole look. Maintenance: a silk pillowcase helps, because it stops the hair from frizzing overnight. The quick verdict: the simplest style on this list, and the one that most depends on healthy hair rather than styling skill.
9. The Interview-Ready Blowout
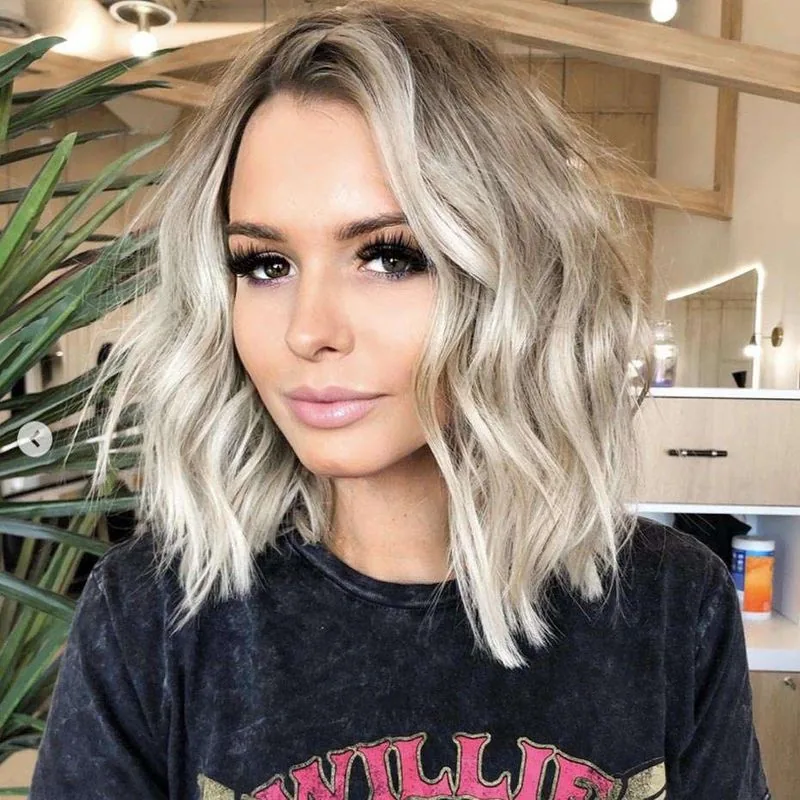
The interview-ready blowout is a specific thing: not the bounciest blowout you can manage, and not the most dramatic, but the one that looks calm, confident, and completely under control. The volume is at the roots, not at the ends; the ends are smooth and curved under, not flicked out; and the whole style sits neatly on the shoulders without a strand out of place. It is the hairstyle equivalent of a good handshake — it does not draw attention to itself, but it makes everything else about you look more credible. Recruiters notice hair more than anyone admits, and a neat blowout says you took the morning seriously.
Best for: job interviews, first days at a new job, and any meeting where you want to be taken seriously. How to style: blow-dry in sections with a round brush, rolling the roots up and the ends under, and finish with a light-hold spray — never a stiff one, because a helmet of hairspray looks nervous, not polished. What to ask a stylist: for a blowout lesson during your next cut, because most salons will show you the technique for free if you ask. Time: 20 to 25 minutes. Cost: a round brush and a dryer you already own. Common mistake: over-volumising the ends, which turns a professional blowout into a party blowout.
10. Soft Waves That Mean Business
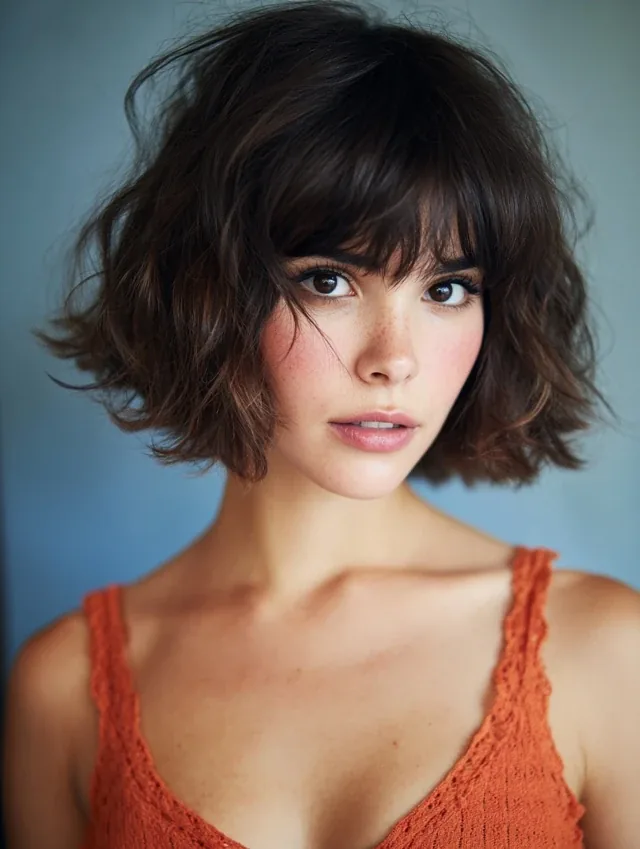
Soft waves that mean business are the middle ground every working 20-something needs: looser than curls, more polished than beachy waves, and finished enough for the office without feeling stiff. The waves are large, brushed out, and soft at the ends, so the hair moves when you do but never looks messy. They are the style for the woman who finds straight hair a little boring and curls a little much, and who wants her hair to look like she put thought into it without spending forty minutes on it. They also have a practical advantage: soft waves hold their shape all day, while tighter curls drop by lunchtime and straight hair goes flat by mid-afternoon.
How to style: a large-barrel curling iron, big sections, and a brush-through once the curls have cooled — the cooling is what turns curls into waves. What to ask a stylist: for long layers, because layers are what give soft waves their movement and stop them from looking like a single heavy curtain. Time: 20 minutes. Cost: a curling iron and a heat protectant. Pros: it lasts all day, it suits every face shape, and it works on hair from shoulder-length to long. Cons: it needs heat, so it is not a daily style unless you protect the hair properly. The quick verdict: the most versatile work hairstyle on this list.
11. The Tidy French Braid for Workdays

The tidy French braid is the workday style for women who want their hair completely out of the way without looking like they are heading to the gym. A single French braid down the back, or two smaller braids pinned up, keeps every strand in place from the morning commute to the evening, and it does it with a neatness that reads as professional rather than sporty. The key word is tidy: the braid is smooth, the part is clean, and there are no loose pieces falling out by 11 a.m. It is the style for long days, busy days, and days when you will not have a mirror for eight hours.
Best for: long shifts, lab days, teaching days, and any workday when you cannot think about your hair. How to style: start with a little texturising spray for grip, braid from the crown to the nape, and secure with a small elastic wrapped in hair. What to ask a stylist: for layers that are long enough to stay in a braid, because short layers will poke out within an hour. Pros: zero maintenance during the day, and the braid waves you get when you take it out are a free second style. Cons: it takes practice to braid your own hair neatly, and a lumpy braid looks worse than no braid at all. The quick verdict: learn this one braid and your busiest workdays get dramatically easier.
12. Big Voluminous Curls for a Night Out
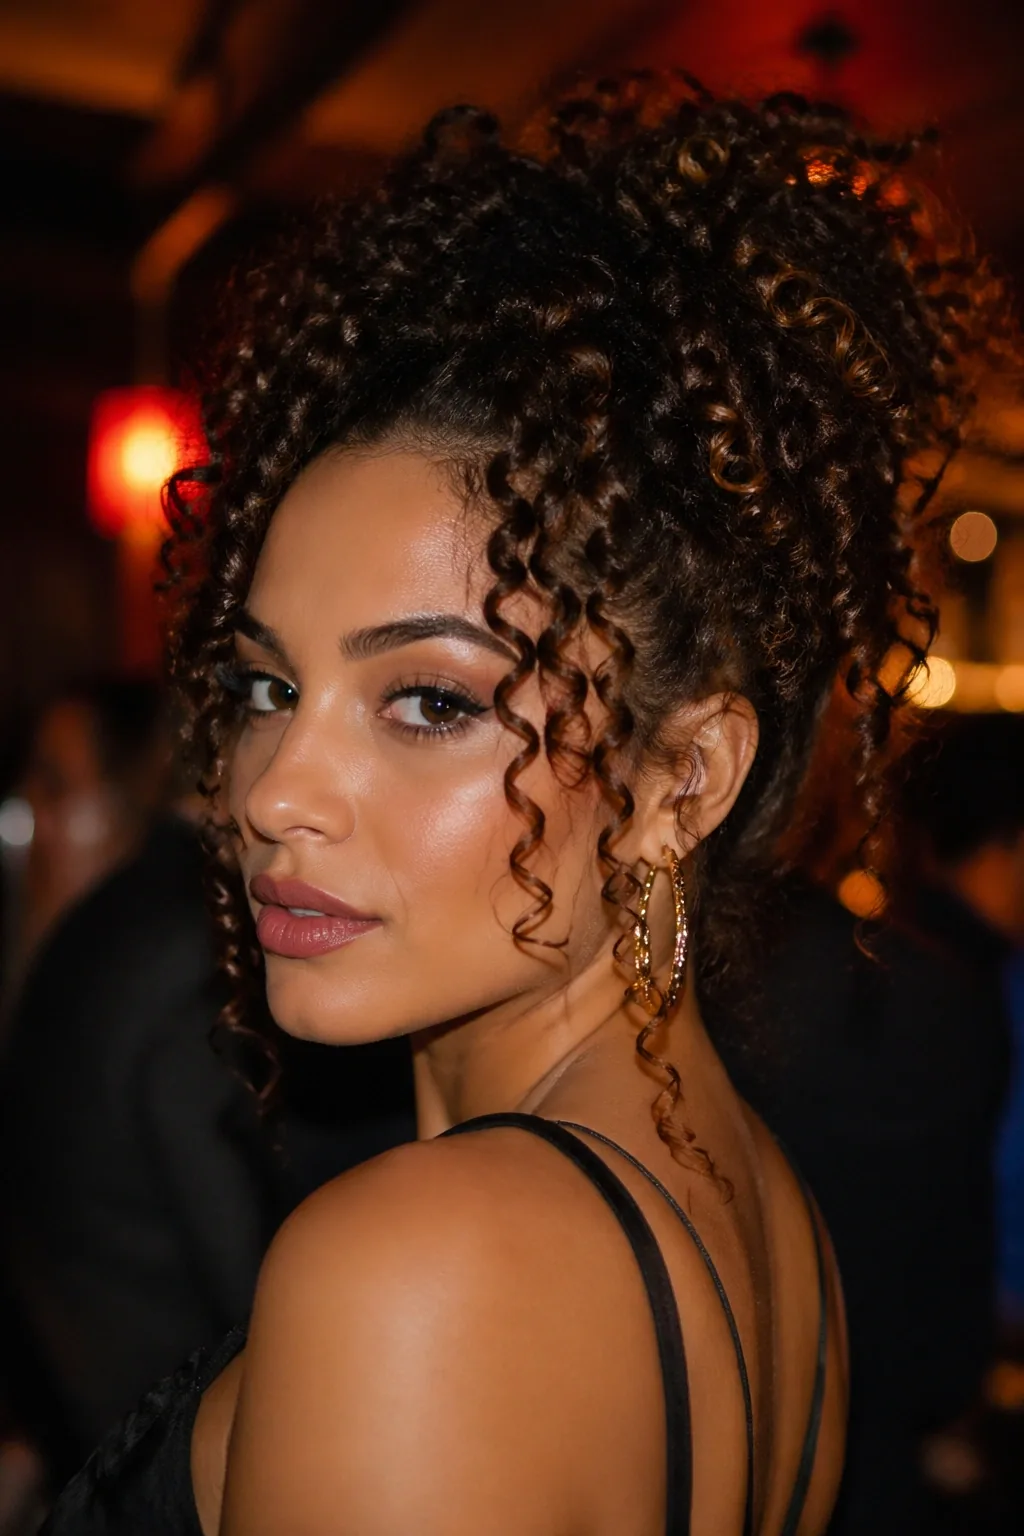
Big voluminous curls are the night-out classic, and they work because they do what no other style does: they make an entrance. The curls are large, bouncy, and full of body, with lift at the roots and movement at the ends, so the hair looks alive in a way that straight hair never can. It is the style for birthdays, nights out, and the evenings when you want to feel like the best version of yourself — and it photographs beautifully, because the curls catch the light from every angle. The secret is volume at the roots, not just curl at the ends: without root lift, big curls fall flat within the hour.
Best for: nights out, parties, dates, and any evening when you want drama. How to style: hot rollers or a large-barrel curling iron, curling away from the face, and a volumising mousse at the roots before you start. What to ask a stylist: for long layers, because layers are what let the curls stack and bounce instead of hanging in one heavy sheet. Time: 30 to 40 minutes. Cost: a curling iron and a good mousse. Common mistake: brushing the curls out while they are still warm, which kills the volume — let every curl cool completely before you touch it.
13. The Slicked-Back Wet Look

The slicked-back wet look is the boldest night-out style on this list, and the one that gets the most compliments: the hair combed back from the face, smooth and glossy, with a shine that looks like you just stepped out of the sea. It is glamorous, modern, and a little bit daring, because it puts your whole face on display — there is nothing to hide behind, which is exactly why it feels so confident. It works best on medium to long hair, and it suits a night out, a party, or a date where you want to look like you know exactly what you are doing.
Pros: it takes ten minutes, it needs no heat, and it stays in place all night. Cons: it shows every imperfection in the hairline, and it can look greasy rather than glossy if you use too much product. How to style: a strong-hold gel or pomade worked through damp hair, combed straight back, and a shine spray to finish. What to ask a stylist: for a cut with a clean hairline, because the wet look exposes it completely. Maintenance: wash it out the same night, because the product will not survive a pillow. The quick verdict: the highest-impact style for the least effort — if you have the confidence to wear it, it will reward you.
14. High Ponytail with a Party Bounce
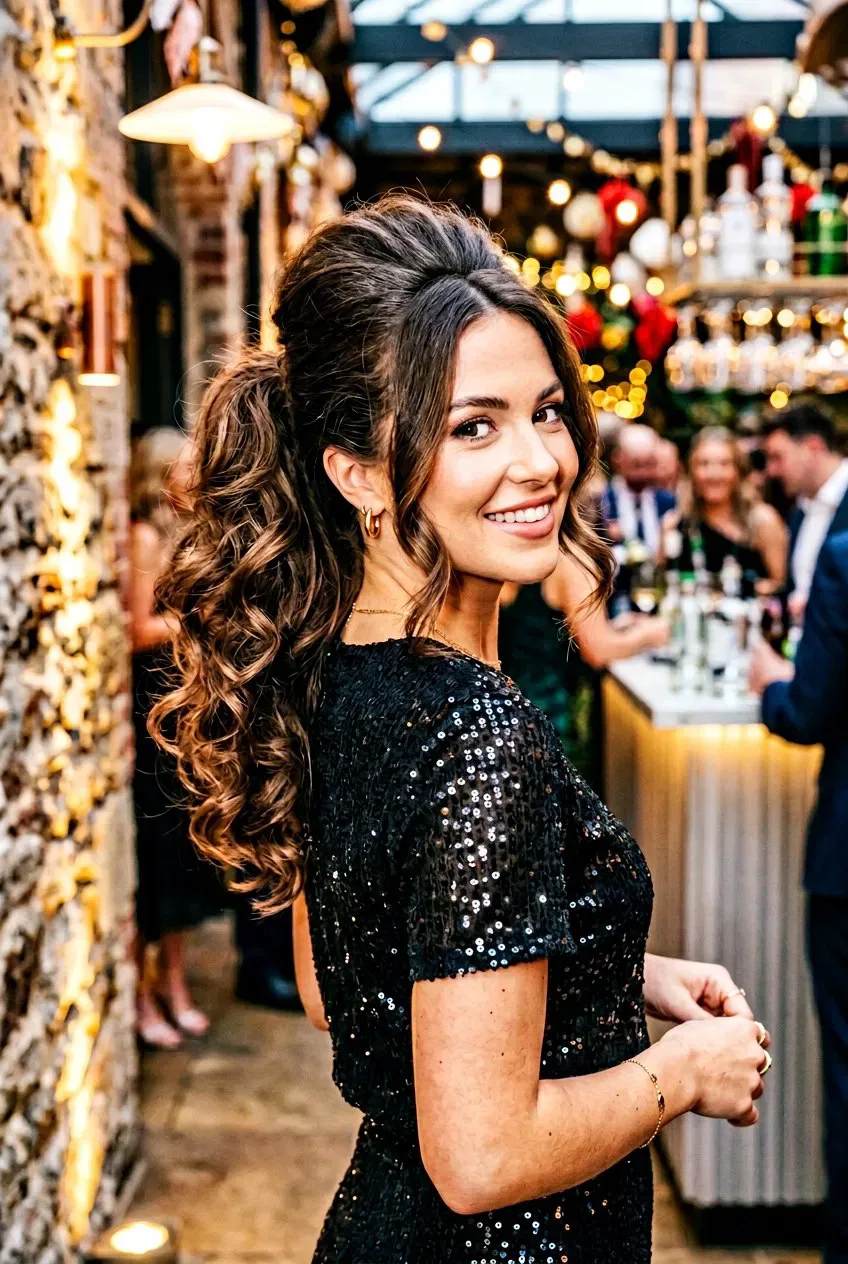
A high ponytail with a party bounce is energy in hairstyle form: the hair pulled up high and tight, the ponytail falling in bouncy curls, and the whole look lifted, bright, and full of movement. It is the style for dancing, because the ponytail moves with you and the curls bounce back into shape after every song, and it is the style for nights when you want to look fun rather than formal. The slicked-back front keeps it polished, while the curled ends keep it playful — the contrast is the whole point, and it is what separates a party ponytail from a gym ponytail.
Best for: nights out, dancing, birthdays, and any evening when you will be on your feet. How to style: smooth the top with a gel or pomade, secure high on the crown with a strong elastic, and curl the ponytail itself after it is tied up — curling the gathered ponytail is faster and gives a more uniform bounce. What to ask a stylist: for layers in the ponytail length, because layers are what make the curls bounce instead of hanging straight. Time: 15 to 20 minutes. Cost: a strong elastic and a curling iron. Common mistake: placing the ponytail too low, which turns a party look into a work look.
15. Glossy Hollywood Waves
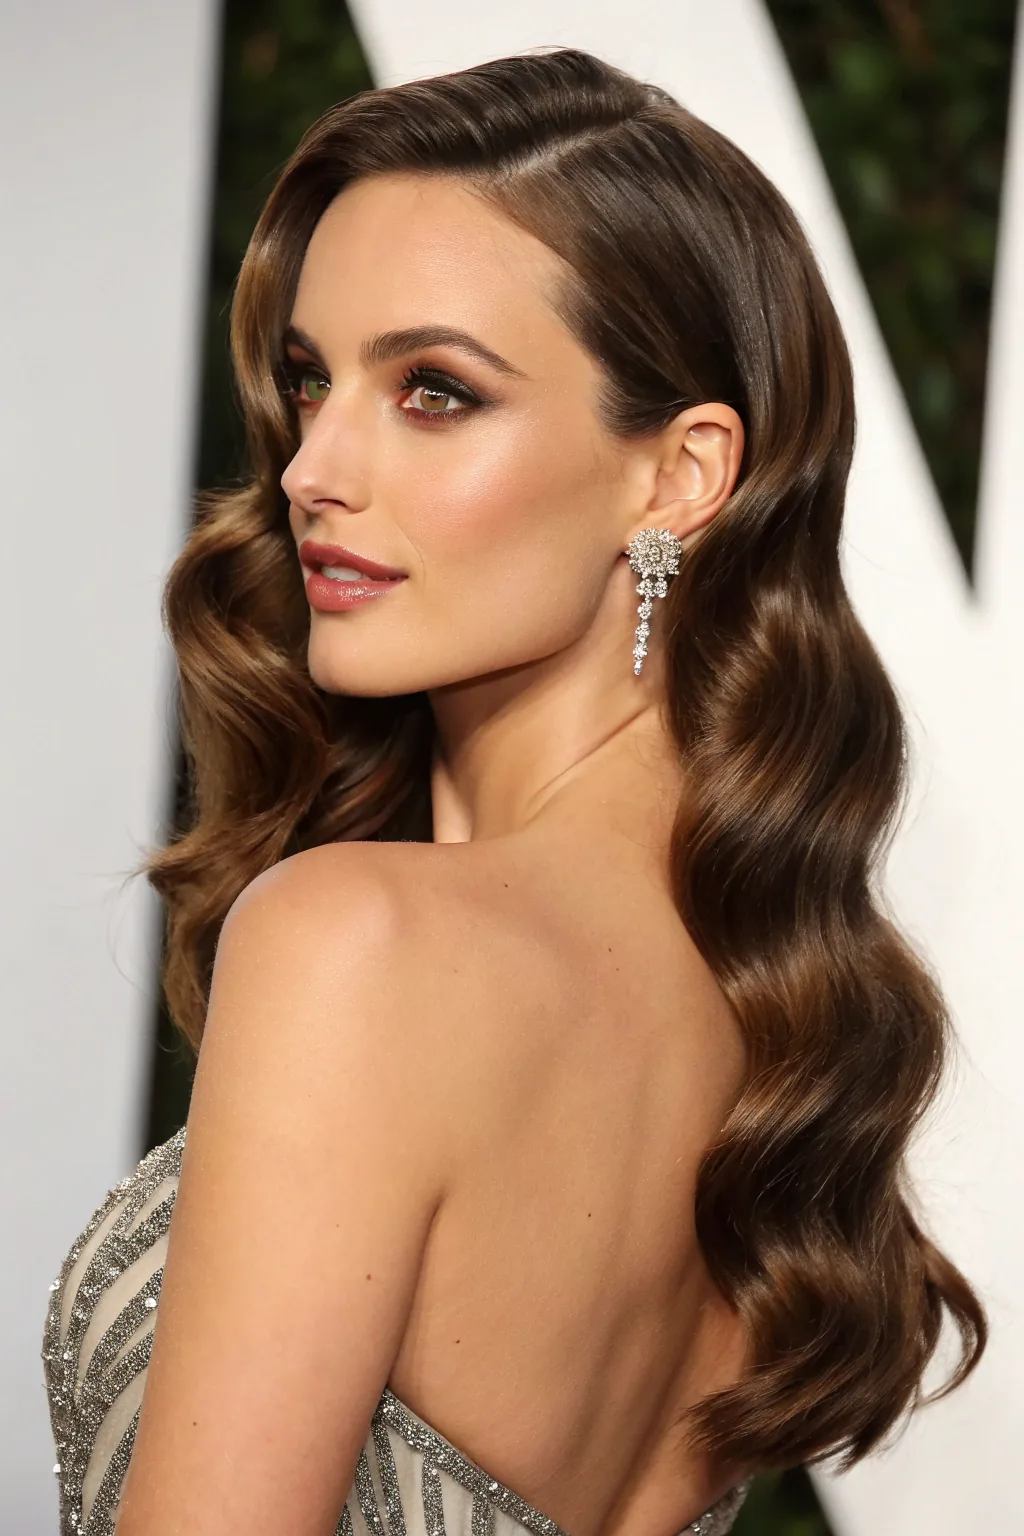
Glossy Hollywood waves are the most glamorous style on this list, and the one that makes the biggest entrance: deep, sculpted waves that fall in a single glossy curtain over one shoulder, with a deep side part and a shine that looks like a red carpet. The waves are set, not tousled — each one brushed out into a smooth, continuous S-curve that holds its shape all night. It is the style for a formal night out, a wedding guest look, or any evening when the dress code leans towards drama. It takes time and patience, but the result is the most photographed hairstyle of the night, because it looks extraordinary from every angle.
How long it takes: 45 to 60 minutes. What you need: a curling iron, setting clips, a soft-bristle brush, and a shine spray. Best with: a long formal dress, a dress with a dramatic neckline, and medium to long hair. Set the curls with clips while they cool — a wave that cools in a clip will hold its shape for hours, while a wave brushed out while still warm will fall flat within the hour. The quick verdict: the most effort on this list, and the most reward — save it for the nights that deserve it.
16. The Sparkling Hair Clip Updo
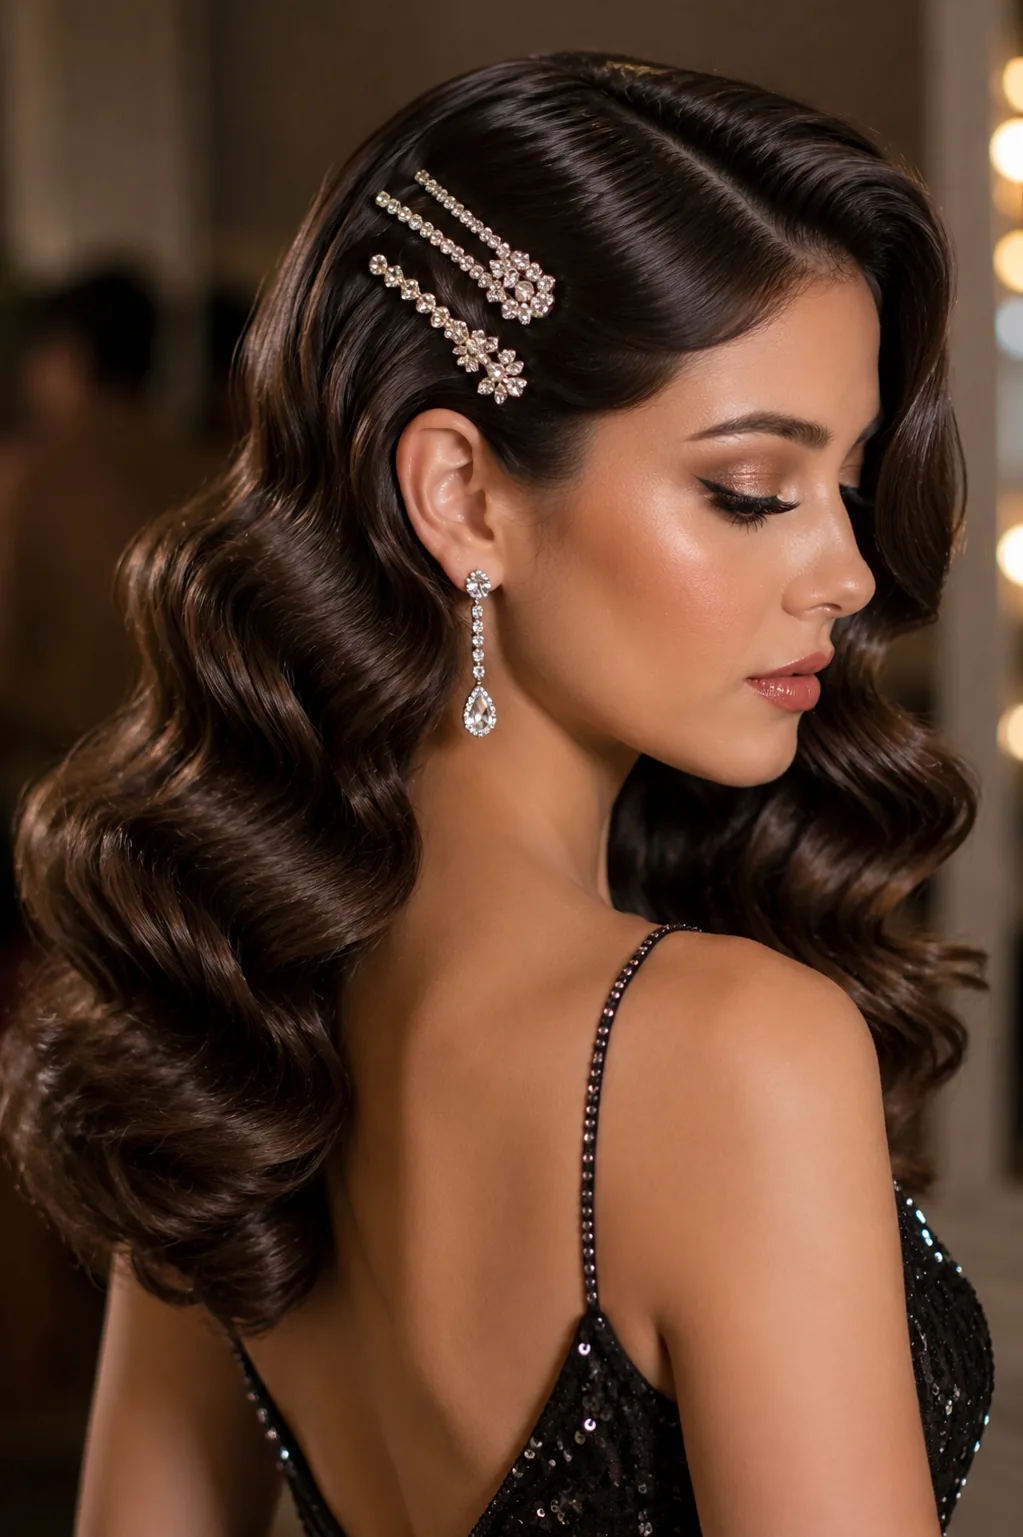
The sparkling hair clip updo is the fastest way to turn an ordinary updo into a night-out updo: a low bun or a soft twist, finished with a crystal or pearl clip that catches the light in every photo. The clip is the whole trick — it adds glamour without adding styling time, it shows off the earrings and the neckline, and it turns a simple style into one that looks like you planned it for days. The updo itself should be soft and a little undone, because the clip needs a relaxed base to sit on: a tight, severe bun will swallow a delicate clip, while a soft, textured bun will show it off.
Pros: five minutes of styling plus a clip, and the look is done. Cons: a cheap clip will slip on smooth hair, so secure it with a hidden bobby pin as well as its own clasp. How to style: twist the hair into a low bun, pin it loosely, and place the clip just above or beside the bun. What to ask a stylist: for a cut with soft layers, because layers give the bun its texture. Cost: the clip itself, which can be as cheap as a few dollars or as expensive as you like. The quick verdict: the best return on investment of any night-out style — one accessory, endless compliments.
17. Your First Balayage
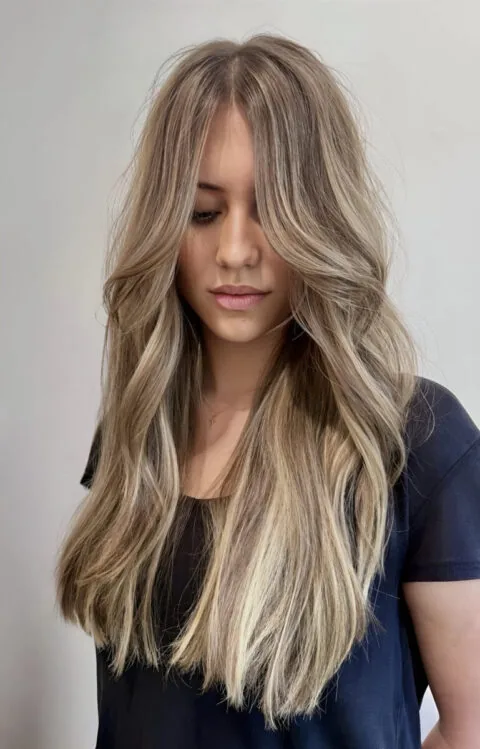
Your first balayage is a rite of passage in your 20s, and it is the colour to choose if you want a change that looks expensive, grows out gracefully, and does not chain you to the salon every six weeks. Balayage is hand-painted, which means the colour is placed where the sun would naturally lighten your hair — around the face, at the ends, and through the top layers — so the result is soft, dimensional, and completely natural-looking. There is no harsh root line, because there is no line at all: the colour melts from your natural shade into the lighter one, and the grow-out is so gentle that most women go three or four months between appointments.
Best for: first-time colour, anyone who wants lighter hair without the maintenance of full highlights. What to ask a colourist: to see photos of their balayage work on your hair colour and texture, and to tell you honestly how many sessions it will take to reach the shade you want — dark hair may need two visits. Cost: more than highlights up front, less over a year, because the grow-out is so forgiving. Maintenance: a purple shampoo once a week if you go blonde, and a gloss treatment every eight weeks to keep the tone fresh. Common mistake: asking for the lightest possible blonde in one session, which damages the hair and gives a brassy result — a good balayage is built gradually.
18. Cherry Cola Hair

Cherry cola hair is the colour trend that took over your 20s for a reason: a deep, glossy brown with a rich cherry-red undertone that looks dark and mysterious indoors and glows red in the sunlight. It is the perfect first vivid colour, because it is not as loud as full red or as high-maintenance as blonde — it works on dark hair without heavy bleaching, it suits almost every skin tone, and it fades gracefully into a warm brown rather than a brassy orange. It is also the colour that photographs best in your 20s: it has depth, it has shine, and it makes every outfit look a little more expensive.
Pros: low bleach, low maintenance, and a colour that suits nearly everyone. Cons: the red tone fades faster than brown, so it needs a colour-protecting shampoo and cool water to stay rich. How to get it: ask for a deep brunette base with a cherry-red gloss or toner on top, rather than a permanent red dye, so the colour can be refreshed or removed easily. Cost: a salon gloss every six to eight weeks to keep the cherry tone alive. Maintenance: sulphate-free shampoo, and a red colour-depositing conditioner once a fortnight. The quick verdict: the safest way to be bold with colour, and the shade most likely to become your signature.
19. The Bold Money Piece
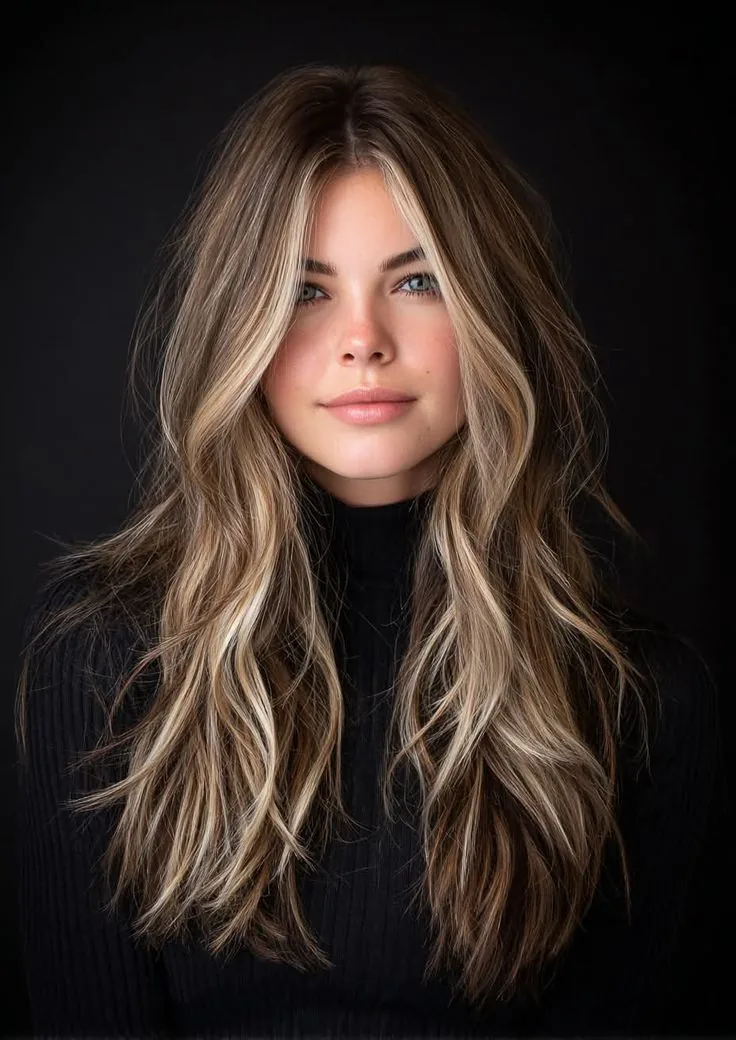
The money piece is the smallest colour change with the biggest impact: two face-framing sections at the front, lightened several shades brighter than the rest of the hair, so the face is lit up like a frame. It is the style for the 20-something who wants to try blonde without committing her whole head to it, and it works because it puts the brightness exactly where it matters — around the eyes and the cheekbones — while the rest of the hair stays natural. The result is a look that is striking in photos, flattering in person, and surprisingly low-maintenance, because the money piece is only two small sections and it grows out without a harsh line.
Best for: anyone curious about blonde, anyone who wants a change that is visible but not overwhelming. How to get it: ask for a money piece two to three shades lighter than your natural colour, starting at the parting and framing the face down to the chin. What to ask a colourist: whether your hair needs bleach or just a high-lift tint, and how the money piece will grow out with your parting. Cost: much cheaper than a full head of highlights, and easy to refresh. Common mistake: making the money piece too wide or too light, which turns a face-framing highlight into a skunk stripe — keep it soft and blended at the roots.
20. Pastel Ends Without the Commitment
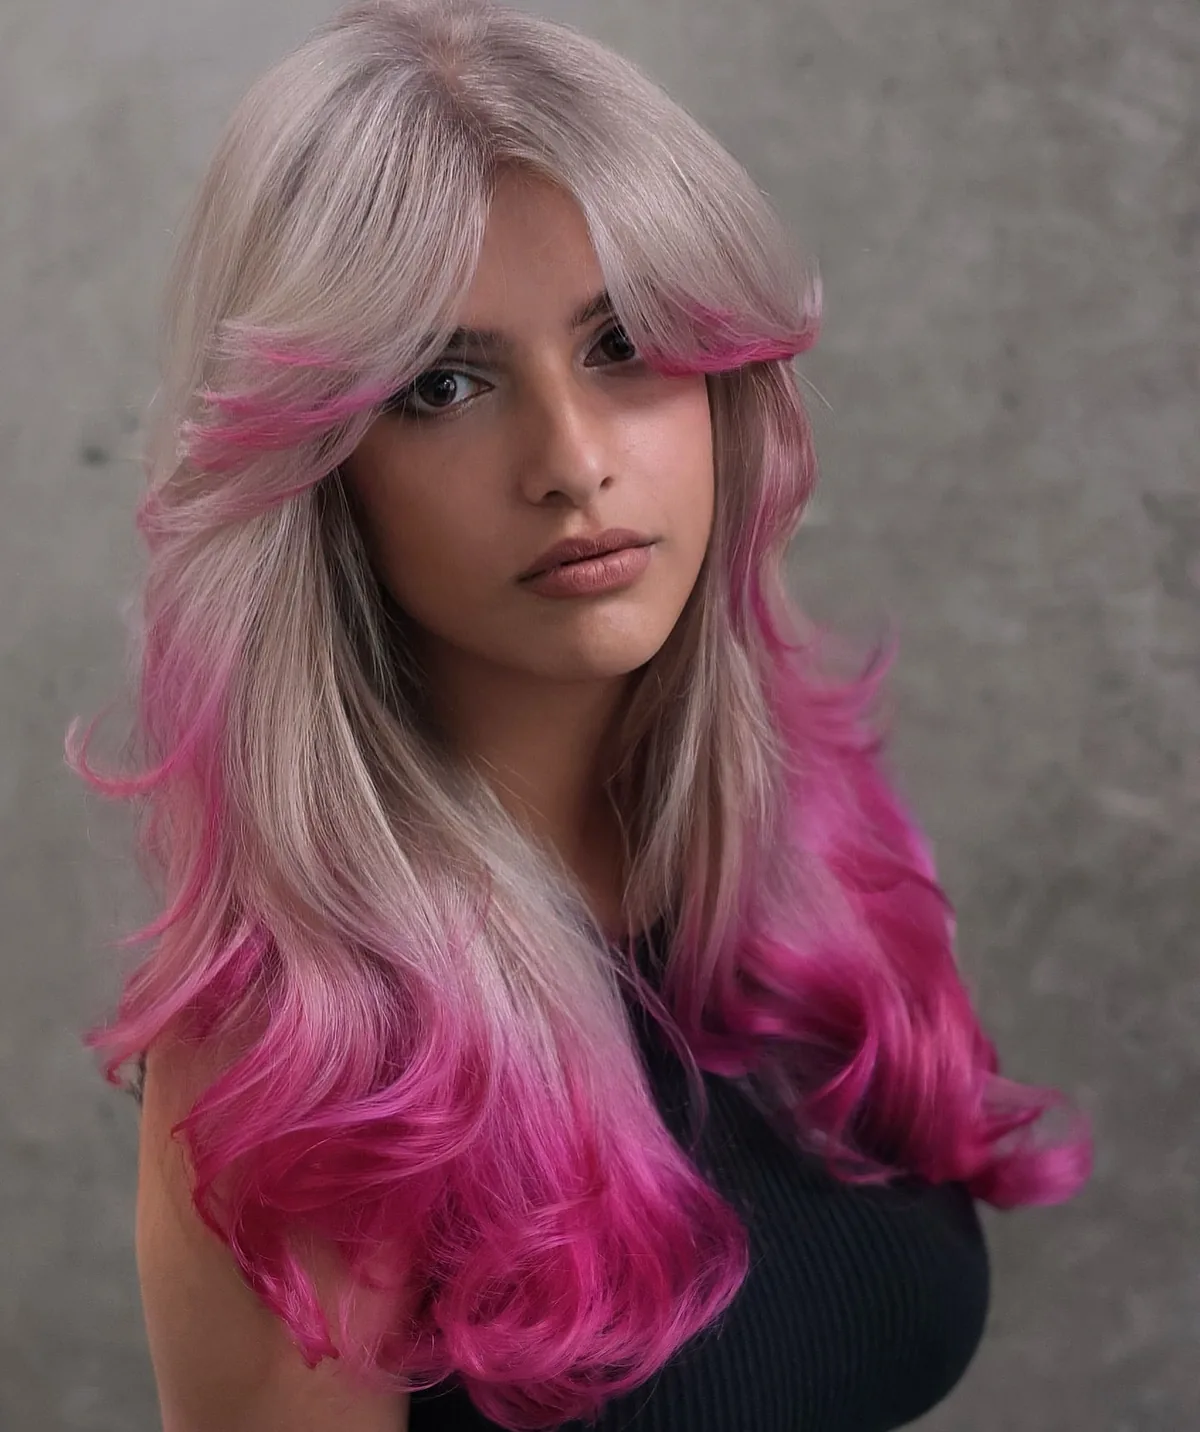
Pastel ends are the playful side of colour in your 20s: the last few inches of the hair dipped in pink, lilac, blue, or peach, while the roots and the top stay completely natural. It is the colour for the woman who wants to be fun without being committed, because pastel ends wash out in a few weeks, grow out without a line, and can be cut off in a single trim if you change your mind. It is also the colour that suits a festival, a holiday, or a summer of experimenting — and it is the one your grandmother will forgive, because it is only the ends.
Pros: no bleach on the roots, no root maintenance, and a colour you can remove by trimming. Cons: pastel needs pre-lightened hair to show up, so dark hair will need bleaching on the ends first, and the colour fades fast — two to three weeks of vibrancy, then a soft wash-out. How to get it: a semi-permanent pastel dye over lightened ends, applied at home or in a salon, with cold-water washes to make it last. Cost: a tube of semi-permanent dye and an hour of your time. Maintenance: almost none, because the fade is part of the look. The quick verdict: the lowest-stakes way to wear a colour you have always wanted to try.
21. The Big Chop: Going Pixie in Your 20s
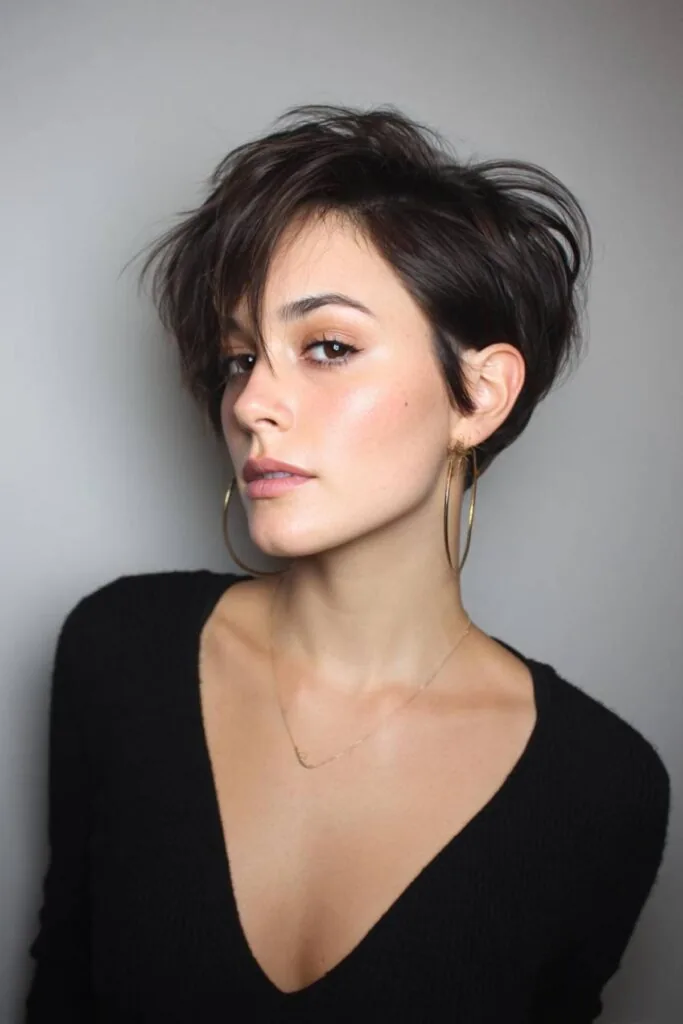
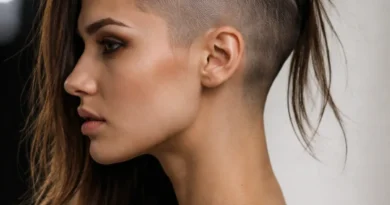
The big chop — going pixie in your 20s — is the haircut that changes how you see yourself. It is bold, it is liberating, and it is the cut that most women say they wish they had tried sooner, because it strips away everything you were hiding behind and leaves only your face, your bone structure, and your confidence. A pixie is not one cut: it can be soft and textured, sleek and side-swept, choppy and edgy, or grown out and piecey, and a good stylist will shape it to your face rather than forcing a single template onto it. The first week feels strange — you will reach for hair that is not there — and then, suddenly, it feels like you.
Pros: five-minute styling, no more bad hair days, and a cut that shows off your earrings, your cheekbones, and your neckline. Cons: it needs a trim every four to six weeks to keep its shape, and growing it out takes patience. What to ask a stylist: to show you how to style it with your fingers and a little pomade, because a pixie styled with a brush looks flat and a pixie styled with your hands looks modern. Cost: a great cut, plus a small pot of texturising paste. Common mistake: cutting a pixie the week before a big event, when you have not yet learned to style it — get the chop when you have a quiet week to practise. The quick verdict: the bravest cut on this list, and the one most likely to become your favourite.
22. The Textured Pixie
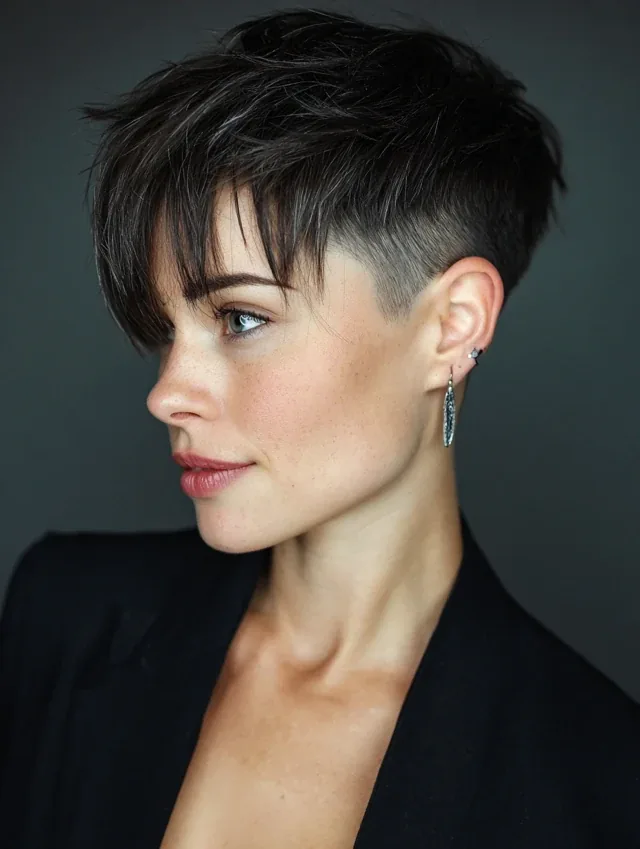
The textured pixie is the pixie for women who want short hair without the severity: choppy, piecey layers on top, a little length at the front to sweep across the forehead, and a soft, tapered back that keeps the shape clean. The texture is the whole point — it gives the cut movement, it stops the hair from looking flat, and it means the style works with a little pomade and your fingers rather than a brush and a dryer. It is the short cut that suits almost every face shape, because the pieces can be adjusted: longer at the front for a round face, more volume on top for a long face, and a deep side part for a square jaw.
Best for: anyone who wants short hair that still feels feminine and soft. How to style: a pea-sized amount of texturising paste, worked through damp hair with your fingers, and a quick tousle — the whole routine takes two minutes. What to ask a stylist: for a pixie cut with the texture cut in, not just styled in, because a cut with built-in texture will look good even on the days you do nothing to it. Time: two minutes a day, plus a trim every five weeks. Cost: a pot of paste that lasts for months. Common mistake: using too much product, which turns piecey texture into greasy clumps — start with less than you think you need.
23. The French Bob

The French bob is the chicest short cut of your 20s: a chin-length bob with a soft, slightly curved shape, often worn with a wispy fringe or a deep side part, and an effortlessness that looks like you woke up in Paris. It is shorter than a classic bob, which is what makes it feel modern — the length sits at the jaw, the ends are soft rather than blunt, and the whole cut moves when you do. It suits fine hair beautifully, because the short length gives it volume it could never have long, and it suits a woman who wants a cut that looks like a statement without needing an hour of styling.
Pros: it looks expensive with almost no effort, and it grows out into a lob gracefully. Cons: it needs a trim every six weeks to keep the jaw-length shape, and it does not suit very thick hair unless the stylist thins it properly. How to style: a quick blow-dry with a round brush, or air-dry with a little texturising spray for a more undone version. What to ask a stylist: for the bob to be cut to your jawline, not to a standard length, because the French bob only works when it is tailored to your face. The quick verdict: the short cut that makes every outfit look like you planned it.
24. The Modern Shag
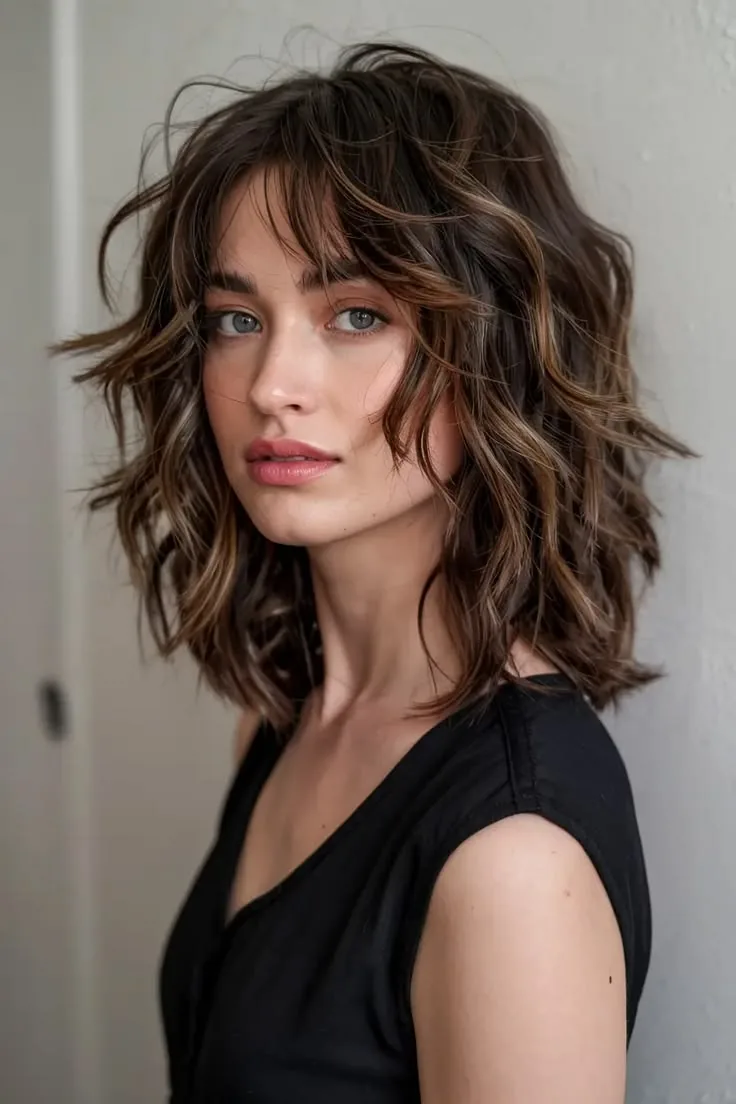
The modern shag is the cool-girl cut of your 20s: choppy layers throughout, a curtain fringe or a wispy bang, and a lived-in texture that looks like you have never owned a hairbrush — even though you have. It is the cut for women who hate neat hair, who want volume without trying, and who love the idea of a style that looks better slightly messy than it does freshly styled. The layers are the engine: short on top for volume, longer at the sides for shape, and thinned at the ends so the cut moves instead of sitting in a solid block. It works on straight, wavy, and curly hair, and it is the cut that makes thin hair look thicker and thick hair look lighter.
Best for: anyone who wants a low-effort cut with a lot of personality. How to style: a texturising spray on damp hair, a scrunch, and air-dry — the shag does the rest. What to ask a stylist: for a shag cut to your texture, because a shag on straight hair needs different layering than a shag on curly hair, and a good stylist will know the difference. Maintenance: a trim every eight weeks, because the layers lose their shape as they grow. Common mistake: straightening a shag every day, which kills the texture that makes it a shag — if you want straight hair, get a different cut. The quick verdict: the most fun you can have with a pair of scissors.
25. The Bixie Cut
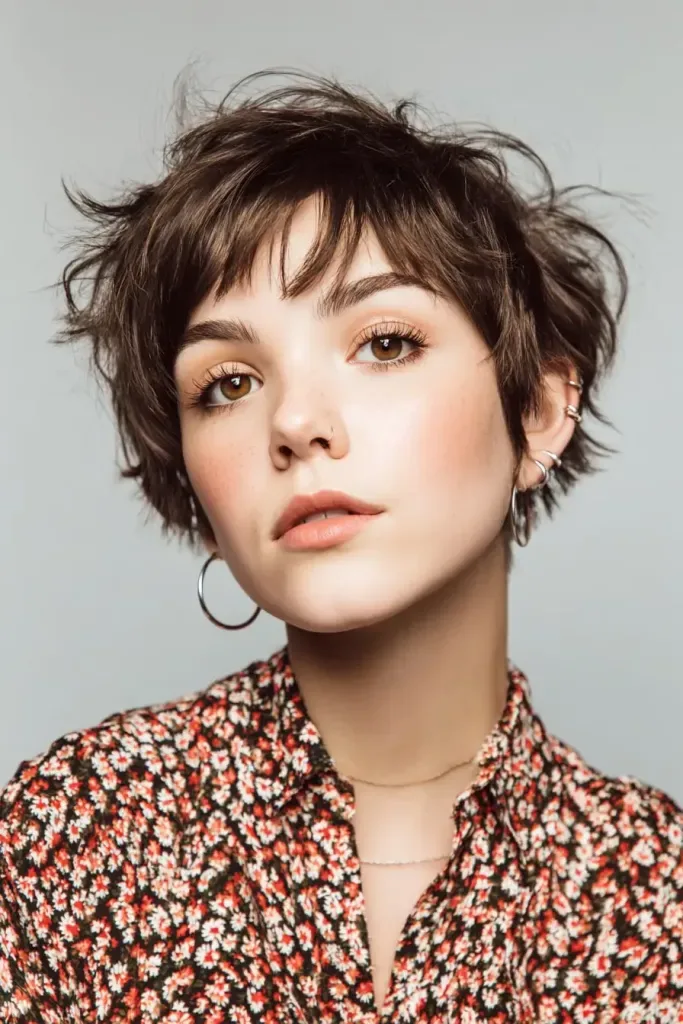
The bixie — half bob, half pixie — is the in-between cut that became a star in its own right: longer than a pixie, shorter than a bob, with the texture of a pixie and the length of a bob, and a versatility that neither cut has on its own. It can be worn sleek and side-parted for work, tousled and textured for the weekend, or tucked behind the ears for a night out, and it suits the woman who wants short hair but is not ready for a full pixie. The bixie is also the perfect grow-out cut: it is what a pixie becomes when you let it grow, and what a bob becomes when you cut it shorter, so it is the cut that meets you wherever your hair is right now.
Pros: it works on almost every face shape, and it is the easiest short cut to style. Cons: it needs a trim every five to six weeks, because the in-between length loses its shape fast. How to style: a little texturising paste for the tousled version, or a flat iron and a shine serum for the sleek version — two looks from one cut. What to ask a stylist: for the bixie to be cut with your natural texture in mind, because the cut relies on texture to hold its shape. Cost: a good cut and a pot of paste. The quick verdict: if you cannot decide between a pixie and a bob, the bixie is the answer — and it might be the cut you keep.
26. Long Layers That Actually Move
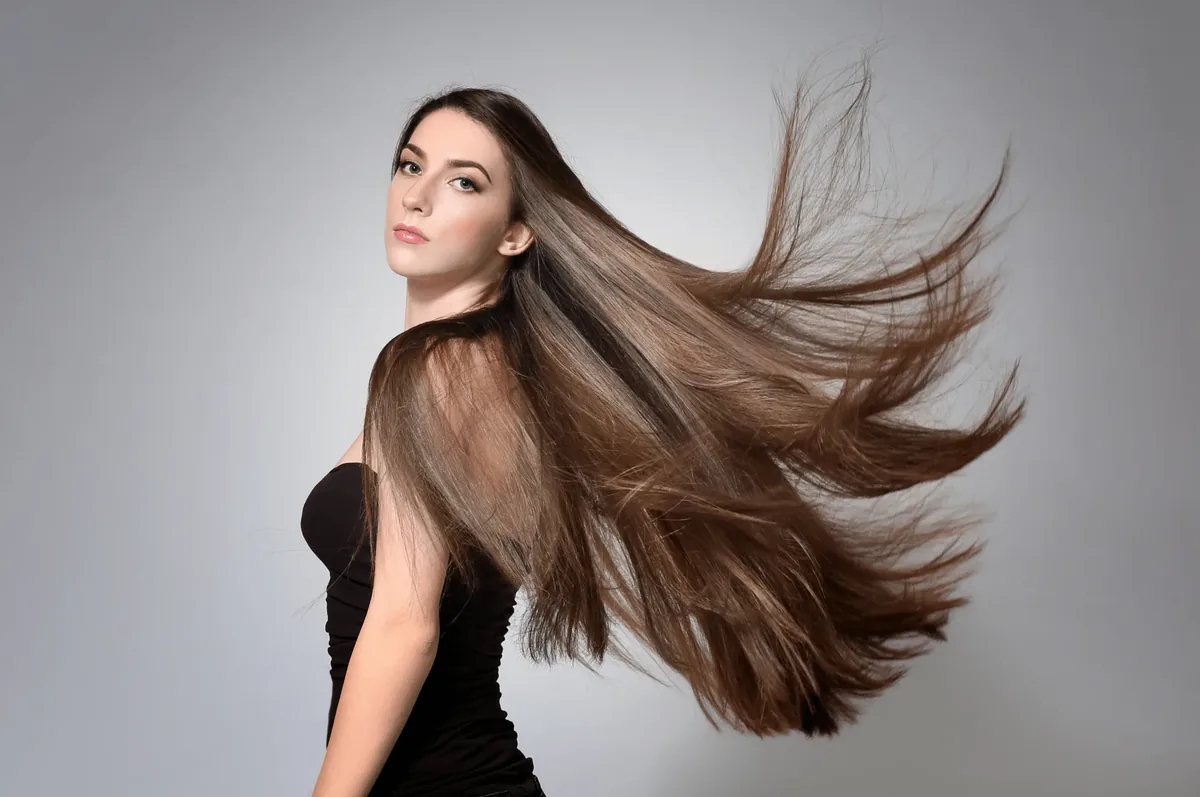
Long layers that actually move are the answer to the most common complaint about long hair: that it hangs like a curtain, heavy and flat, with no life in it. The fix is layering, but not the old-fashioned kind — modern long layers are cut to follow the shape of your head, with shorter pieces around the face and longer layers through the back, so the hair has movement at every length. The result is long hair that swings when you walk, bounces when you turn your head, and holds a wave instead of pulling it straight. It is the cut for the woman who loves her length and wants it to look alive, not just long.
Best for: anyone with long hair that feels heavy or shapeless. How to style: a blow-dry with a round brush, or a curling wand through the mid-lengths and ends only — the layers do the work, so you do not need to curl from the roots. What to ask a stylist: for face-framing layers that start at the cheekbone, and for the layers to be cut on dry hair, so the stylist can see how they actually fall. Time: 20 minutes to style. Cost: a good cut every ten weeks. Common mistake: asking for layers that are too short, which turns long hair into a shag — long layers should be subtle, with the shortest piece no higher than the collarbone.
27. The Curtain-Layered Blowout

The curtain-layered blowout is the blowout that took over social media in your 20s, and it earned its fame: long layers cut to frame the face like curtains, blow-dried with a round brush so they curve away from the face in soft, bouncy wings. It is the style that makes long hair look expensive, because the layers give it shape and the blowout gives it shine, and it is the style that photographs best from the front, because the curtain layers frame the face perfectly. It works on hair from shoulder-length to long, and it is the blowout to ask for when you want your hair to look like you just left the salon — because you probably did.
How long it takes: 25 to 35 minutes. What you need: a round brush, a blow dryer with a nozzle, and a volumising mousse at the roots. Best with: long layers, a centre part, and medium to thick hair. Blow-dry the curtain sections away from the face, rolling the brush outwards — the outward roll is what creates the curtain sweep, while rolling inwards will give you a dated flick. The quick verdict: the most requested blowout of the decade, and the one most worth learning to do yourself, because a home version is almost as good as the salon one once you have practised it three times.
28. Mermaid Waves for Long Hair
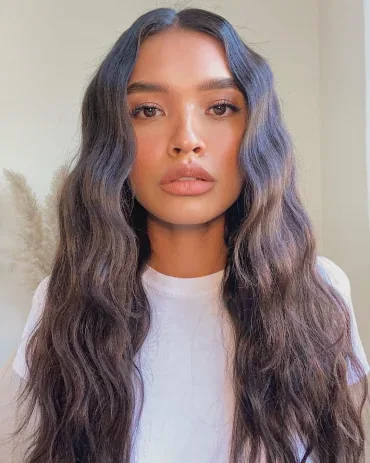
Mermaid waves are long hair at its most romantic: soft, flowing waves that fall past the shoulders in a loose, undulating curtain, with a shine that catches the light and a movement that makes the hair look alive. They are the style for the woman who has grown her hair long and wants to show it off, and they work because the waves are loose and brushed out rather than tight and defined — the hair looks like it has been in the sea, not in a curling iron. It is also the style that suits a wedding guest look, a holiday, or a summer evening, because it is relaxed and glamorous at the same time.
Best for: long hair, holidays, weddings as a guest, and any occasion when you want your length to be the star. How to style: a large-barrel curling wand, big sections, and a brush-through once the waves have cooled — the brushing is what turns curls into mermaid waves. What to ask a stylist: for long layers, because layers are what stop mermaid waves from looking like one heavy sheet of hair. Time: 30 minutes on long hair. Cost: a curling wand and a shine spray. Common mistake: using a small barrel, which gives tight curls instead of waves — for mermaid waves, the barrel should be at least 32 millimetres.
29. The Braided Crown for Long Hair

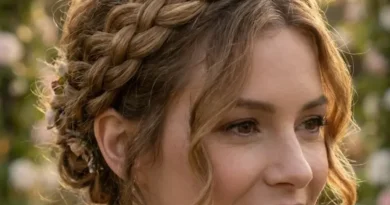
The braided crown is the most romantic style for long hair, and the one that gets the most compliments in photos: two braids worked from each side of the head and pinned across the crown like a halo, with the rest of the hair falling loose underneath. The braid puts the texture on display — every twist shows off the colour and the dimension of the hair — while the loose lengths underneath keep the look soft and feminine rather than severe. It is a style that says garden party and fairytale at once, and it is surprisingly secure, because the braid anchors the hair in place section by section, so it survives a whole day of celebrating.
How long it takes: 30 to 45 minutes. What you need: a curling iron for the loose lengths, a texturising spray for grip, and six to eight bobby pins. Best with: a flowy dress, a wedding guest outfit, and long hair. Curl the hair before you braid — curls give the braid grip and fullness, and straight hair will slip out of a crown braid within the hour. The quick verdict: the long-hair style that looks the most complicated and is the most forgiving to do yourself, because the braid hides any unevenness in the waves underneath.
30. The Curly Shag
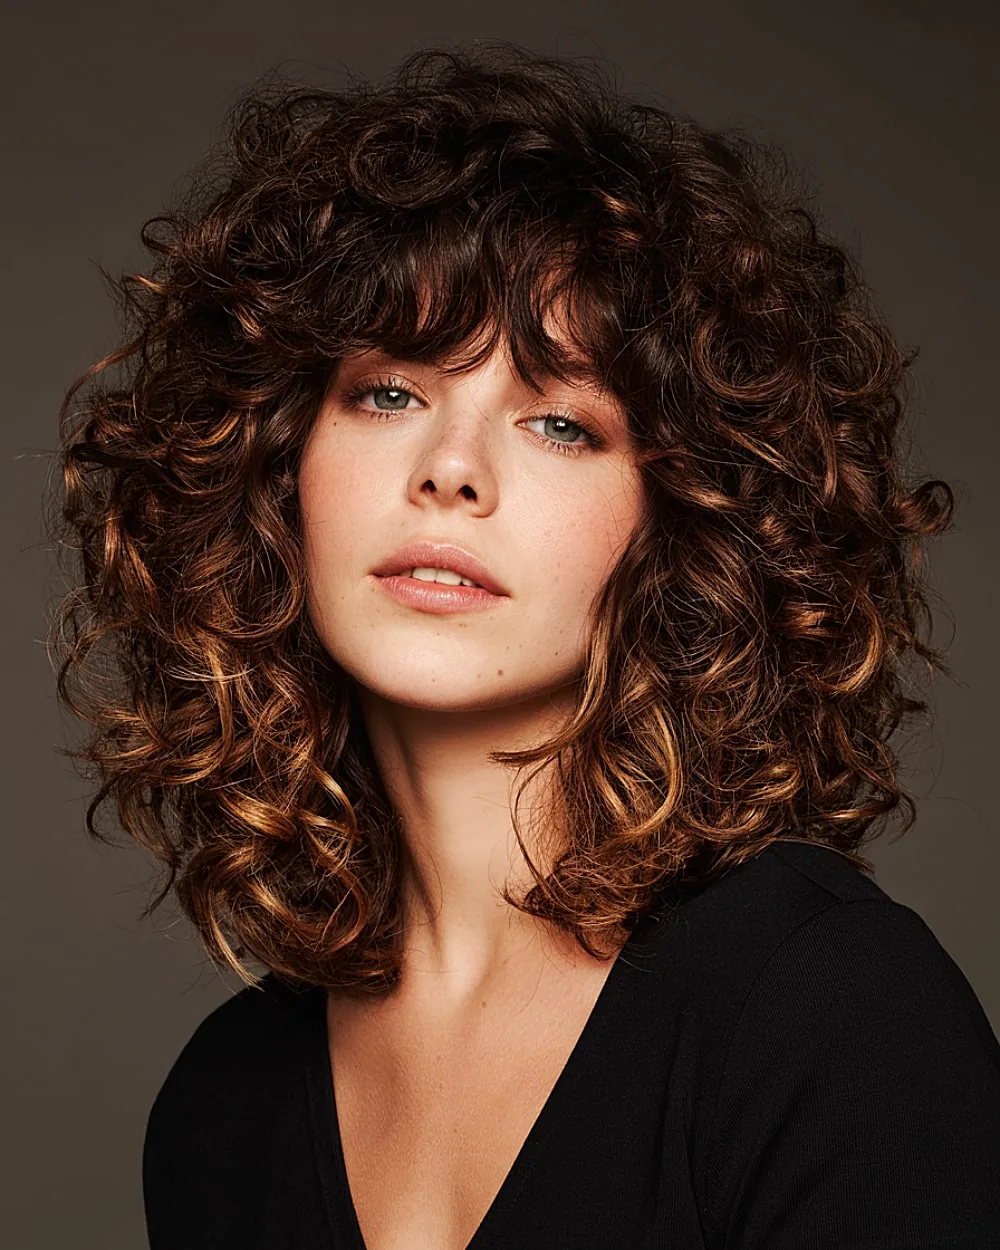
The curly shag is the cut that finally lets curly hair be itself: choppy layers cut to follow the curl pattern, a fringe that curls softly across the forehead, and a shape that is round, full, and joyful rather than triangular and heavy. It is the cut for the woman who has spent years fighting her curls into submission and is ready to let them do what they want — because a curly shag does not fight the curl, it frames it. The layers remove the weight that pulls curls down, so the curls spring up, the volume comes back, and the hair looks alive in a way that a blunt cut never can.
Best for: naturally curly and wavy hair that feels heavy or shapeless. How to style: a curl cream on wet hair, a diffuser on low heat, and hands off while it dries — touching curly hair while it dries is what causes frizz. What to ask a stylist: for a curly cut, done on dry hair, by a stylist who specialises in curls, because a curly shag cut on wet hair will shrink up and end up shorter than you asked for. Time: 20 minutes with a diffuser. Cost: a curl cream and a diffuser attachment. Common mistake: cutting curly hair wet and straight, which is how most curly women end up with a cut that is two inches shorter than they wanted.
31. Wash-and-Go Curls, Defined
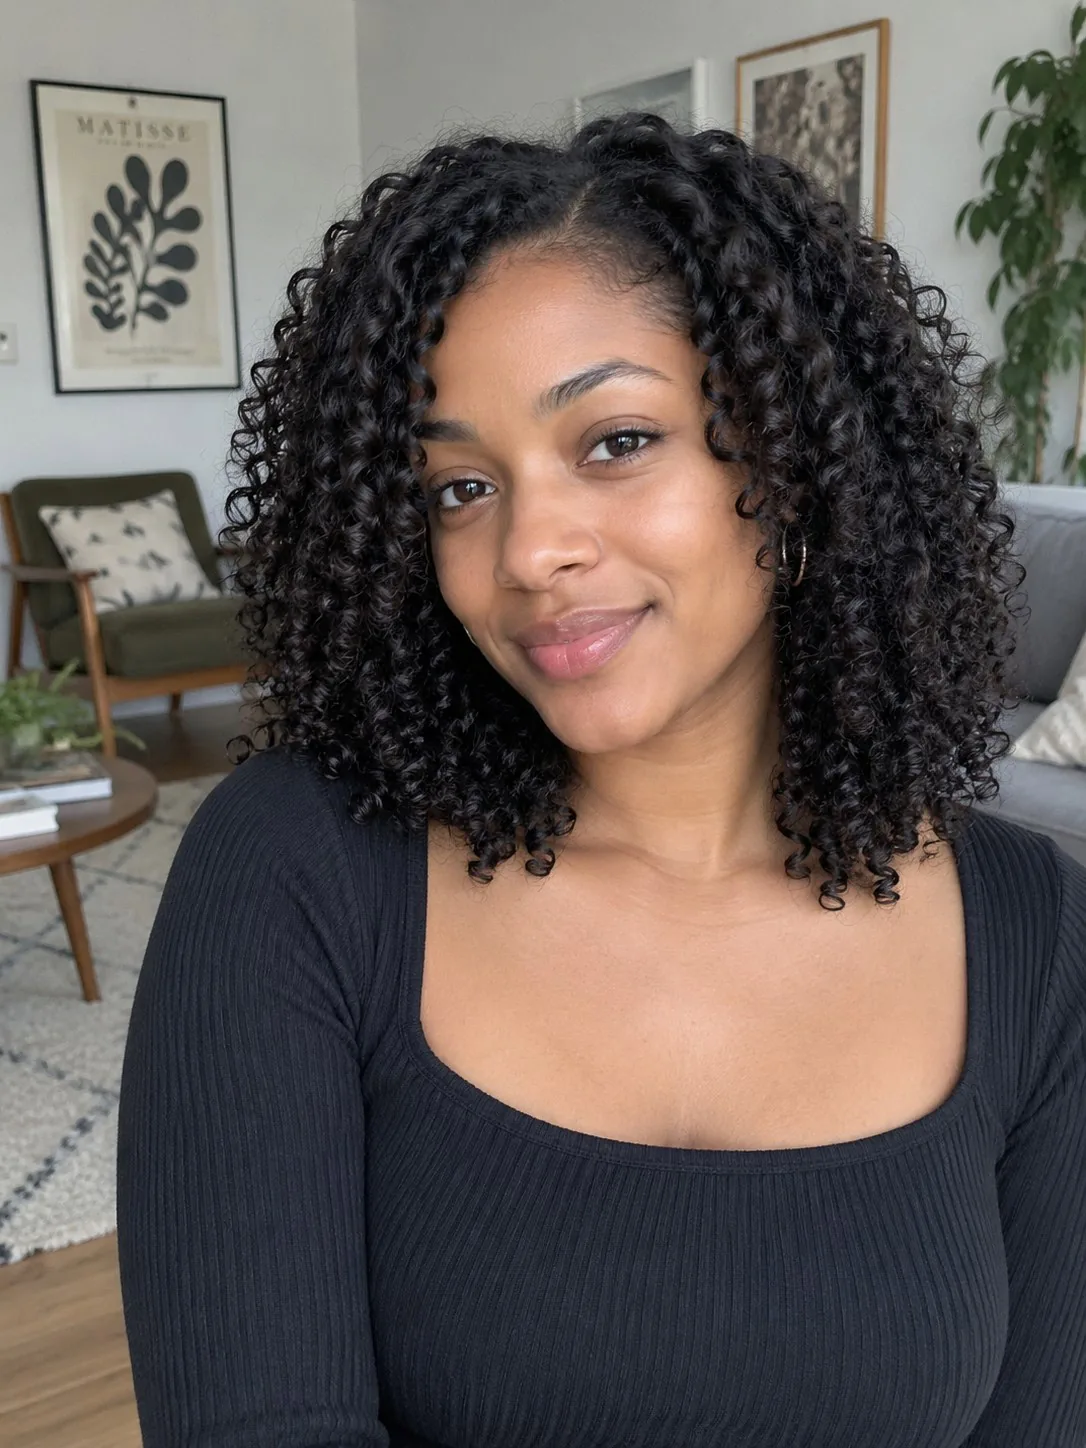
Wash-and-go curls are the holy grail of curly hair in your 20s: wash, apply product, and go, with curls that are defined, bouncy, and frizz-free by the time you leave the house. The routine is simpler than it sounds, but it has rules: the hair must be soaking wet when the product goes on, the product must be worked through in sections, and the hair must not be touched again until it is completely dry. Get those three things right and the curls will clump, define, and hold for days. Get them wrong and you will have frizz by lunchtime and a bun by 3 p.m.
Pros: no heat, no tools, and a routine that gets faster the more you do it. Cons: it takes practice to find the right products for your curl type, and the drying time can be an hour or more on thick hair. How to style: a leave-in conditioner, then a curl cream, then a gel for hold, all applied to soaking wet hair in sections, then air-dry or diffuse. What to ask a stylist: for a curl-by-curl cut, which follows your natural pattern instead of fighting it. Maintenance: a silk pillowcase or a pineapple ponytail at night to keep the curls defined for day two and three. The quick verdict: the routine that turns curly hair from a daily battle into a daily joy.
32. The Curly Bob
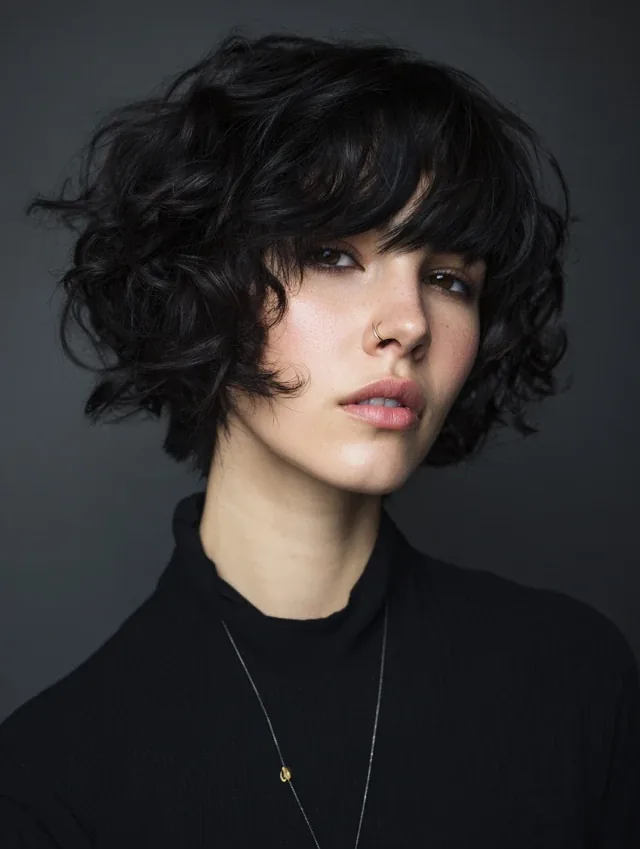
The curly bob is the short cut that lets curls be the star: a chin-length bob cut to follow the curl pattern, worn with the curls defined, bouncy, and full of life. The volume is the point — the curls are allowed to expand, to frame the face, and to move when you do, so the whole look is joyful and energetic rather than controlled. It is the cut for the woman with naturally curly hair who has spent years straightening it and is ready to let it be itself for one night — or for every night. It needs almost no styling beyond curl cream and a diffuser, and it will not fall flat, because curls do not fall — they spring back.
Best for: naturally curly hair, and anyone who wants a short cut with maximum personality. How to style: curl cream on wet hair, a diffuser on low heat, and a pick at the roots for extra volume. What to ask a stylist: for the bob to be cut dry, curl by curl, because wet curly hair shrinks as it dries and a wet cut will end up far shorter than you wanted. Time: 20 minutes with a diffuser. Cost: curl cream and a diffuser. Common mistake: straightening a curly bob for a special occasion, which defeats the purpose — the curly bob is beautiful because it is curly, not in spite of it.
33. Twist-Out Curls for Natural Hair
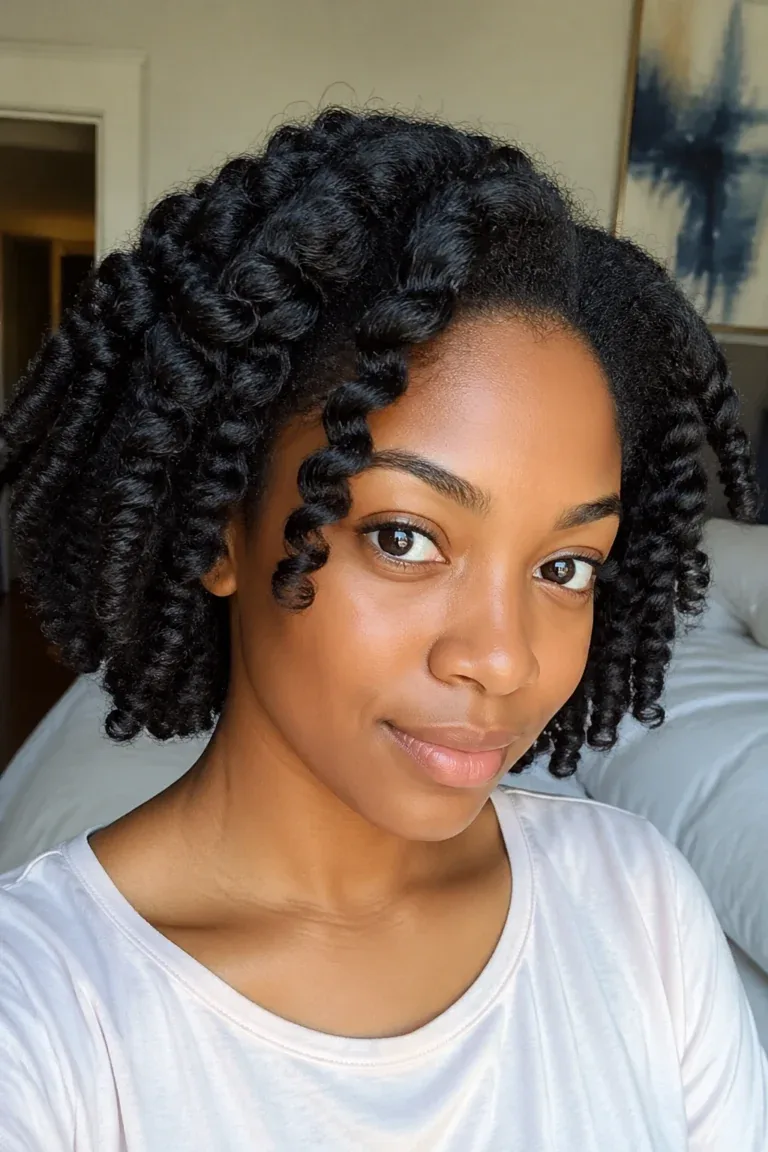
A twist-out is the styling technique that gives natural hair its most defined, bouncy curls: the hair is twisted into small two-strand twists while damp, left to dry completely, and then unravelled to reveal soft, stretched curls with incredible definition. It is the style for the woman who wants a wash-and-go look with more structure, and it is the technique that works on almost every curl pattern, from loose waves to tight coils. The twist-out is also a protective style in disguise: while the twists are in, the hair is protected from breakage and manipulation, and when they come out, the curls last for days with minimal refreshing.
Best for: natural hair, and anyone who wants defined curls without heat. How to style: a leave-in conditioner and a styling cream on damp hair, twisted in small sections, and left to dry fully — at least four hours, or overnight under a satin bonnet. What to ask a stylist: for a shape-up or a trim that follows your curl pattern, so the twist-out falls in a flattering shape. Time: 30 to 45 minutes to twist, plus drying time. Cost: a leave-in and a styling cream. Common mistake: unravelling the twists before they are completely dry, which turns definition into frizz — patience is the whole technique. The quick verdict: the most versatile natural-hair style on this list, and the one that rewards patience the most.
34. Box Braids for a Low-Maintenance Season
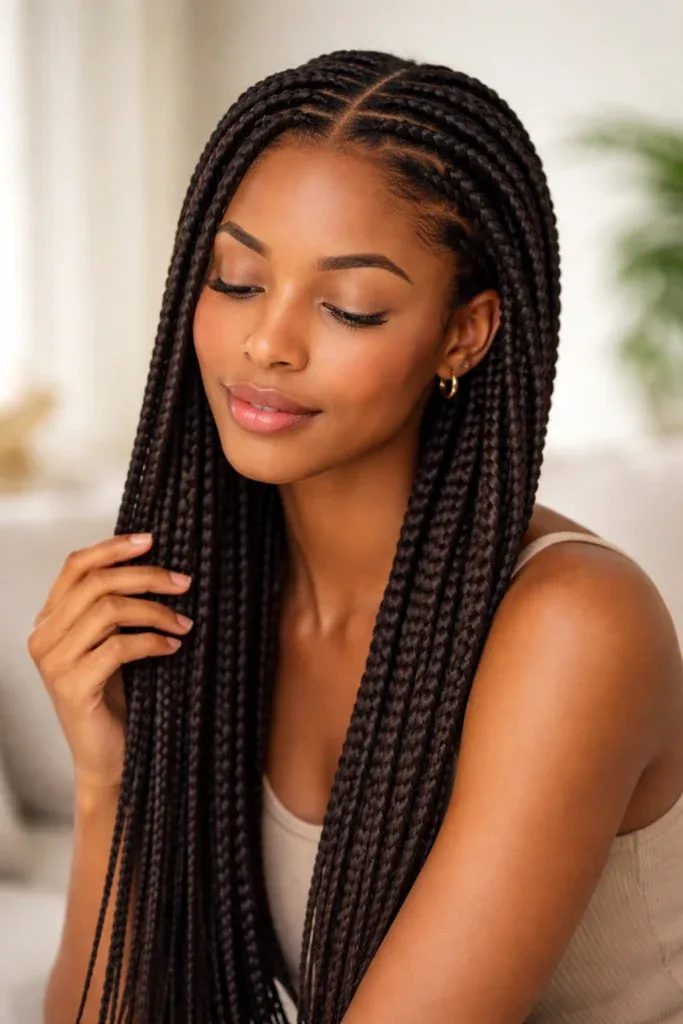
Box braids are the protective style that gives your 20s back to you: four to eight weeks of hair that is done, every single morning, with no styling, no heat, and no bad hair days. The braids are installed in small, square sections, and they protect the natural hair underneath from breakage, manipulation, and the weather, while giving you a style that works for work, for nights out, for the gym, and for holidays. They can be worn long or short, thick or thin, with colour or without, and they can be styled into buns, ponytails, and updos just like loose hair — only faster, because the braids hold their shape.
Pros: weeks of zero styling, hair growth protected, and endless styling options. Cons: the installation takes four to eight hours and costs more than a haircut, and braids that are installed too tightly can damage the hairline. How to get them: a braider who specialises in protective styles, with a consultation first to agree on size, length, and colour. Maintenance: a silk scarf at night, a light oil on the scalp once a week, and a wash every two weeks with diluted shampoo. Common mistake: leaving braids in for too long — eight weeks is the maximum, because after that the new growth tangles and the braids start to damage the hair they were protecting. The quick verdict: the best investment you can make in a busy season of your life.
35. The Silk Press
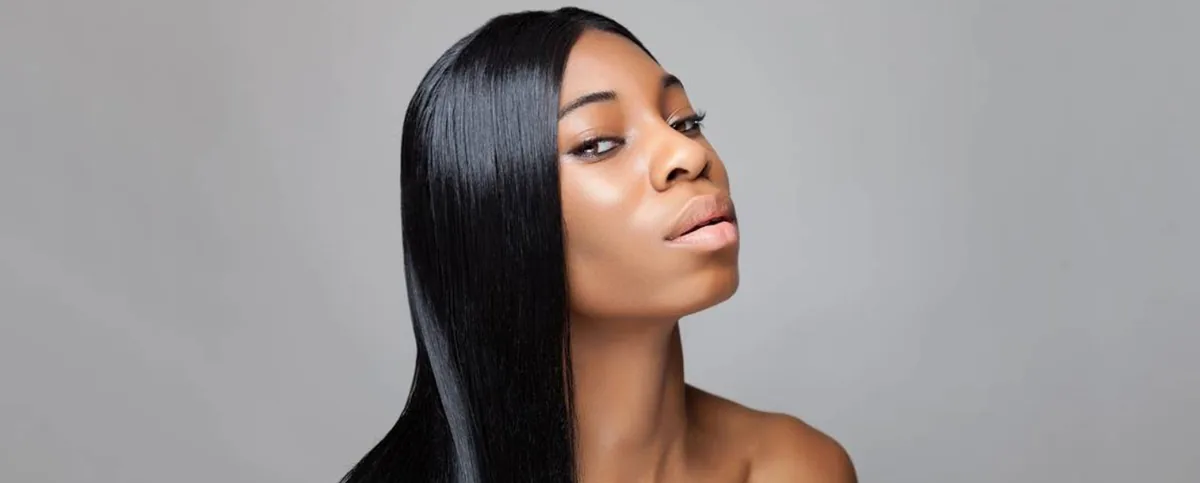
The silk press is the straightening technique that turns natural hair into a glossy, flowing, silk-smooth style without a relaxer and without the damage of a daily flat iron. The hair is washed, deep-conditioned, blow-dried straight, and then pressed with a flat iron in small sections, with a heat protectant at every step — the result is hair that moves like silk, shines like glass, and lasts for two weeks if it is protected from humidity and water. It is the style for the woman who wants to wear her natural hair straight for a special occasion, a holiday, or a season, without committing to a chemical straightener.
Best for: natural hair, special occasions, and anyone who wants a straight style without a relaxer. How to get it: a stylist who specialises in silk presses, because the technique is in the blow-dry and the temperature, not just the flat iron. Cost: more than a regular blowout, because it includes a deep-conditioning treatment and takes longer. Maintenance: wrap the hair in a silk scarf at night, avoid water and humidity, and use a light serum on the ends. Common mistake: getting a silk press too often, which causes heat damage over time — once a month at most, with a deep-conditioning treatment between presses. The quick verdict: the most glamorous way to wear natural hair straight, and the one that treats your hair with the most respect.
36. The Protective Low Bun
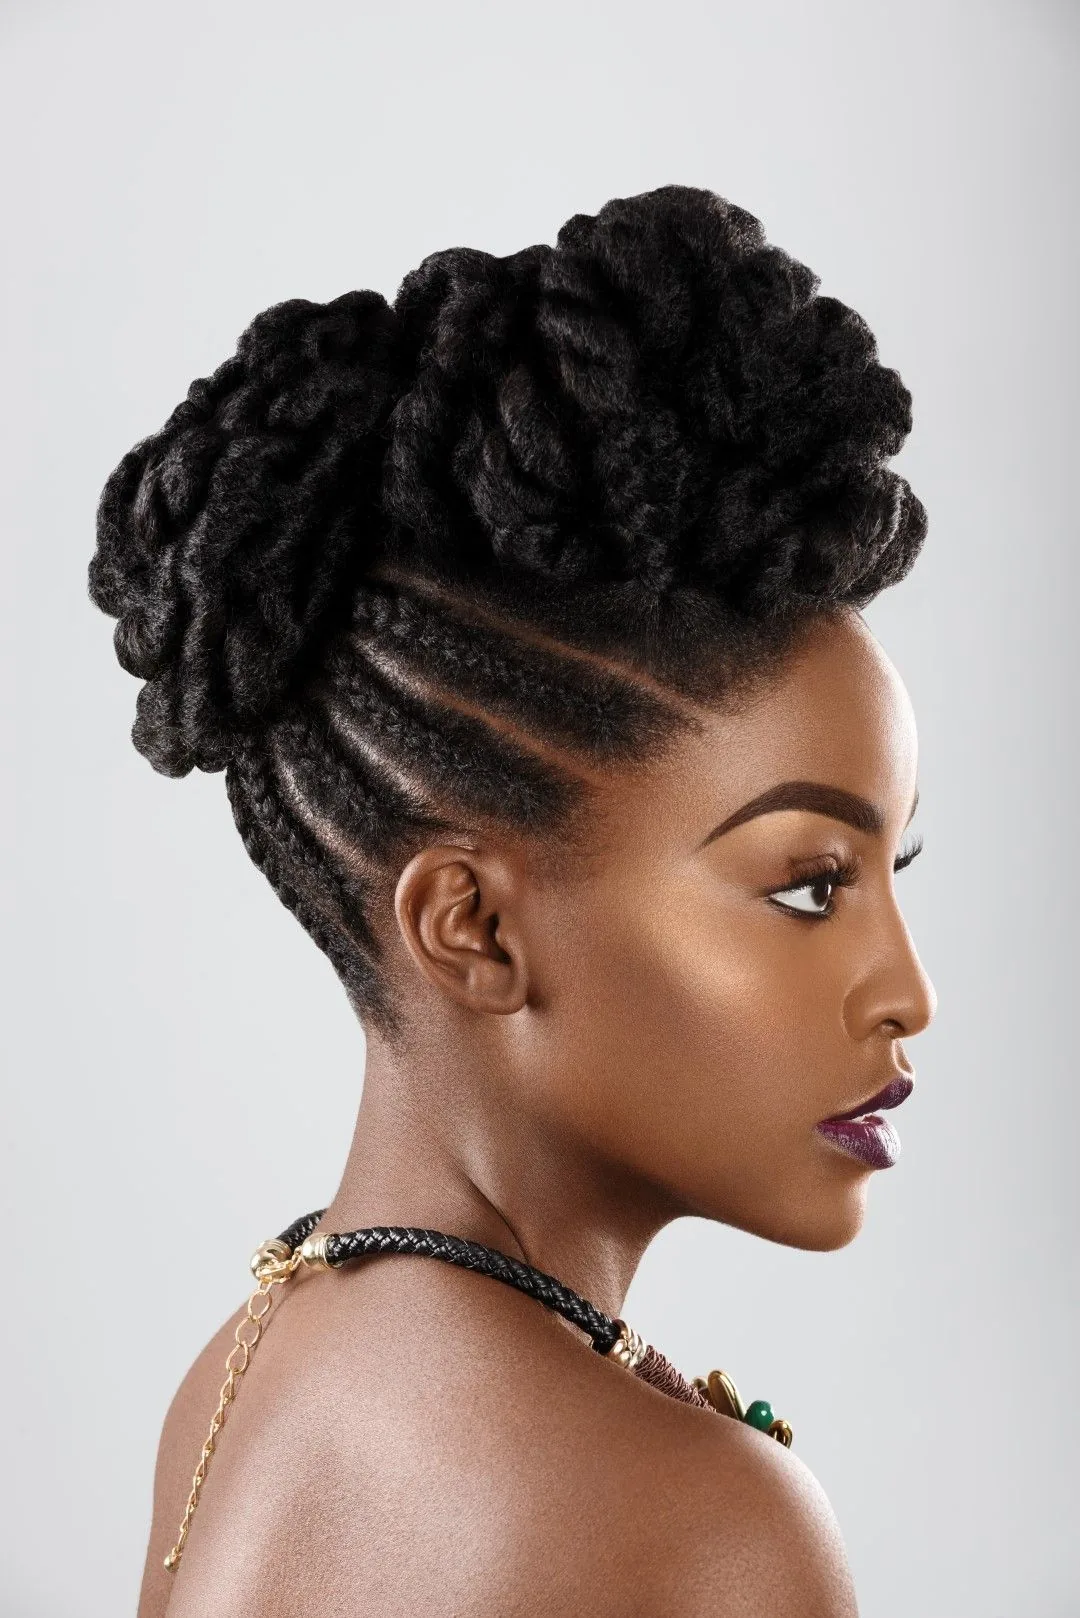
The protective low bun is the style that does the most with the least: the hair gathered low at the nape, twisted into a soft knot, and tucked away from the weather, the friction, and the daily manipulation that causes breakage. It is the bun for the woman who is growing her hair out, recovering from damage, or simply too busy to style her hair every day — and it is also the bun that looks elegant enough for work, because the low position and the smooth finish read as polished rather than lazy. The key is gentleness: a soft elastic, no tight pulling, and a silk scrunchie instead of a rubber band, so the bun protects the hair instead of breaking it.
Pros: it protects the ends, it takes three minutes, and it works on every hair type. Cons: wearing the same bun every day can cause breakage at the same spot, so vary the position — low one day, side the next, high on the weekend. How to style: a leave-in conditioner, a soft brush to smooth the top, and a silk scrunchie to secure the bun. What to ask a stylist: for a trim of the ends before you start a protective routine, because healthy ends are easier to protect than split ones. Maintenance: a weekly deep-conditioning mask, and a silk pillowcase at night. The quick verdict: the simplest protective style there is, and the one your hair will thank you for.
37. The Scarf-Wrapped Updo
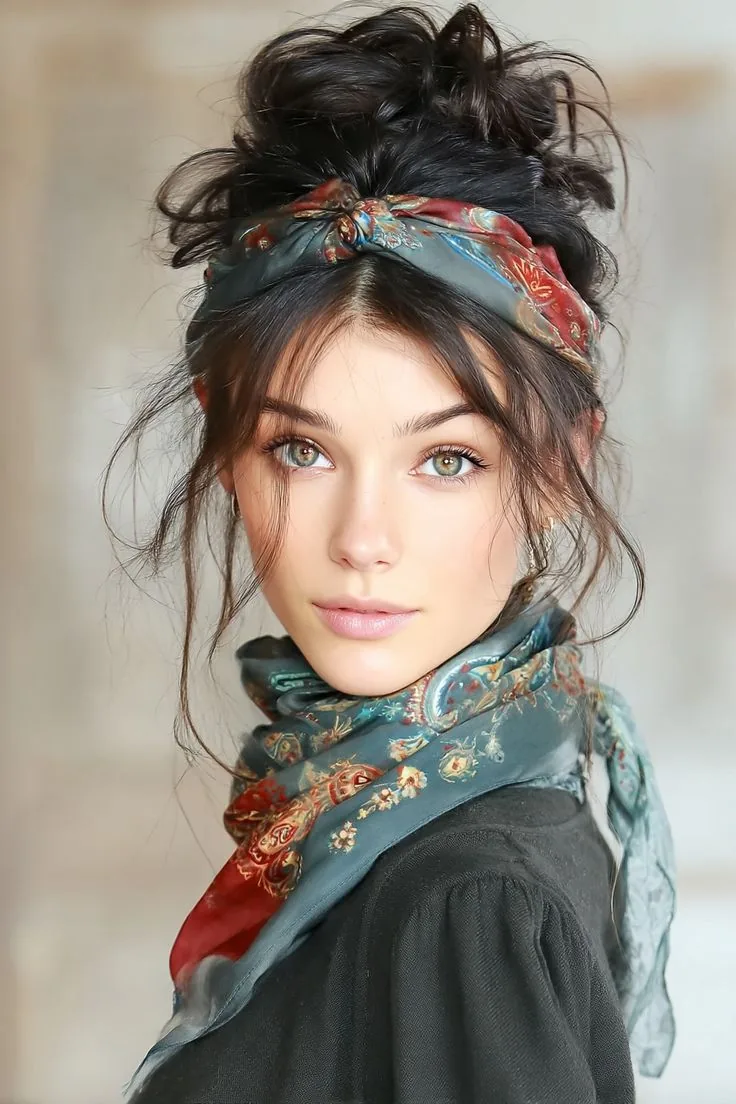
The scarf-wrapped updo is the style that turns a bad hair day into a fashion statement: the hair twisted up and wrapped in a silk or satin scarf, with the ends of the scarf tied in a bow, a knot, or a turban-style wrap. It is the updo for the woman who has no time, no clean hair, and no patience — and it is also the updo that protects the hair underneath from the sun, the wind, and the friction of a rough pillowcase. The scarf is the accessory and the style in one: a silk scarf adds shine and colour, a patterned scarf adds personality, and a plain black scarf adds elegance. It works on every hair type, every length, and every occasion, from a market run to a dinner.
Best for: bad hair days, protective styling, holidays, and any day when you want to look put-together in sixty seconds. How to style: twist the hair into a low bun, wrap the scarf around it, and tie it at the front, the side, or the top — the position changes the whole look. What to ask a stylist: nothing, because this is a style you do yourself, but a silk scarf is worth the investment, because silk protects the hair while cotton dries it out. Cost: a scarf, which you probably already own. Maintenance: wash the scarf regularly, because it sits against your hairline. The quick verdict: the fastest good hair day on this list, and the one that doubles as a fashion accessory.
38. The Grow-Out Lob

The grow-out lob is the long bob that is doing the most work in your 20s: it is the cut you get when you are growing out a bob, the cut you get when you are growing out a pixie, and the cut you get when you want long hair but are not ready to commit to it. The lob sits at the collarbone, which is the most versatile length there is — long enough to tie up, short enough to stay bouncy, and flattering on almost every face shape. It can be worn straight and sleek, waved and tousled, or pulled into a low ponytail, and it is the length that makes every other style on this list easier, because it is the length that does not fight you.
Pros: it suits everyone, it grows out gracefully, and it is the easiest length to style. Cons: it needs a trim every eight weeks to keep the collarbone length, because a lob that grows past the shoulders stops being a lob. How to style: a blow-dry with a round brush for the polished version, or a texturising spray and a scrunch for the tousled version. What to ask a stylist: for the lob to be cut to your collarbone, not to a standard length, and for long layers through the back so the hair moves. Cost: a regular cut every two months. The quick verdict: if you do not know what to do with your hair, get a lob — it is the cut that buys you time while you decide.
What is the best hairstyle for a woman in her 20s?
The best hairstyle for a woman in her 20s is one that fits her real life — her job, her budget, her hair texture, and how much time she wants to spend styling it. A long bob or soft layers suit almost everyone and work for both the office and a night out; curtain bangs are the lowest-risk change; and a textured pixie or a shag suits anyone who wants a bold, low-maintenance cut. The right style is the one you will actually maintain, not the one that looks best in a photo.
What hairstyle is best for a first job?
The best hairstyle for a first job is a clean, polished cut that looks intentional without needing an hour of styling each morning. A long bob, soft layers, or a shoulder-length cut with face-framing pieces all work, because they look professional when blow-dried smooth and can be tousled or pulled up after work. Avoid anything that needs daily heat styling to look tidy, and choose a cut that still looks neat on the days you only have five minutes.
How often should I trim my hair in my 20s?
Trim your hair every eight to twelve weeks if it is long, every six to eight weeks if it is a bob or a lob, and every four to six weeks if it is a pixie. Regular trims do not make your hair grow faster, but they do stop split ends from travelling up the hair shaft, which is what makes hair look thin and damaged. If you are growing your hair out, ask for a dusting — a trim of just the very ends — every eight weeks, so the shape stays tidy while the length catches up.
What is the cheapest way to try a new hair colour?
The cheapest way to try a new hair colour is a semi-permanent dye or a gloss, which washes out in a few weeks and costs a fraction of a salon colour. A money piece or a balayage is the cheapest salon option over a year, because the grow-out is so gentle that you only need two or three appointments a year. Avoid bleaching at home without a strand test, because a colour correction costs far more than the original colour would have.
How do I recover from heat damage?
Recover from heat damage by taking a two- to four-week break from all heat styling, using a weekly deep-conditioning mask and a protein treatment every two weeks, and trimming off the worst of the split ends. Damaged hair cannot be repaired, only managed while new healthy hair grows in, so protect the new growth with a heat protectant every time you use heat and keep the iron at 180 degrees or below. Your 20s are the best decade for recovery, because hair grows fastest at this age.
How do I grow out a pixie without the awkward stage?
Grow out a pixie without the awkward stage by getting a trim every six to eight weeks to shape the back and sides while the length catches up, and by styling through the transition with headbands, clips, and a texturising product. Slick the sides back with pomade, pin one side behind the ear, or add a deep side part to turn an in-between length into a look on purpose. Most grow-outs take eight to twelve months to reach a bob, and the women who make it through are the ones who planned the awkward months instead of being surprised by them.
What hairstyles survive a festival?
Hairstyles that survive a festival are braids, buns, and space buns, because they lock the hair in place section by section and keep the hair off a sweaty neck. Start with day-old hair for grip, work dry shampoo through the roots before you braid, and pack a festival kit with elastics, bobby pins, and a scarf for the second day, when the braids come out and the waves underneath become the style. Avoid any style that needs a mirror and a socket, because at a festival you have neither.
Should I go to a salon or do my own hair?
Go to a salon for a first balayage, a big chop, or a colour correction, because getting those wrong takes months to fix. Do it yourself for a trim of the very ends, a gloss, a root touch-up, or a simple style you have practised before. If you are visiting a salon for the first time, bring two or three photos of the same style from different angles, and ask how long it will take, what it will cost in total, how it will grow out, and what you need to do at home to maintain it.
What is a good 5-minute morning hairstyle?
A good 5-minute morning hairstyle starts the night before: sleep with your hair in a loose braid or a high, loose bun, and you will wake up with soft waves. In the morning, refresh the roots with dry shampoo, decide in seconds whether the hair goes down, half-up, or up, and finish with one accessory — a claw clip, a low ponytail with a wrapped elastic, or a scarf. Keep a small kit by the mirror with dry shampoo, one clip, one elastic, and hair oil, and the routine becomes automatic within a week.
How do I add volume to fine hair?
Add volume to fine hair by blow-drying the roots upwards with a round brush, using a volumising mousse at the roots before you dry, and choosing a cut with layers, because layers give fine hair movement it cannot get from length alone. A textured bob or a shag suits fine hair better than long, one-length hair, which pulls itself flat. Avoid heavy oils and conditioners on the roots, and use dry shampoo between washes to keep the roots lifted.
Conclusion
Your 20s are the decade to try things — the pixie, the balayage, the cherry cola, the festival braids — and the decade to learn what actually suits you, because the only way to find out is to try. The styles in this guide are not rules. They are starting points: a lob when you do not know what to do, a low ponytail when you are running late, a balayage when you want a change, and a silk press when you want to feel extraordinary. The best hairstyle for a woman in her 20s is the one that fits her job, her budget, her texture, and her mood on a given morning — and the one she will actually maintain, not the one that looks best in a photo.
Start with one change, not five: a trim, a fringe, a money piece, or a new morning routine. Give it a month, see how it feels, and then decide what comes next. Your hair will grow back, your colour will fade, and your 20s will give you a dozen chances to try again — so take the chance, book the appointment, and enjoy the decade when your hair finally belongs to you.