The Top Knot, Elevated: 33 Sleek, Messy and Braided Top Knots for Every Hair Day
There is no hairstyle that works harder than the top knot. It is the thirty-second fix on a bad hair day, the polished knot that sits above a tailored blazer, and the red-carpet updo that photographers love — all in the same twist of hair. No other style moves so easily between the gym, the office and a night out, and no other style asks so little of you in return: one elastic, a couple of pins, and a mirror. The problem is that the line between a top knot that looks intentional and one that looks accidental is very thin. The same knot can read as chic and deliberate or as something you threw up while running late, and the difference is rarely the hair itself — it is the placement, the texture and the finish.
This guide brings together 33 top knot hairstyles for women, grouped by style family so you can find your version fast: sleek and polished knots for work and formal occasions, messy and textured knots for easy everyday wear, braided and twisted knots when you want something with detail, half-up top knots when you want your length down too, and knots matched to your hair length and your plans. Eight guides answer the questions women actually ask about top knots: sleek versus messy and when each one wins, how to get height without damaging your hair, how to keep fine hair from slipping out and heavy hair from pulling, the two-minute gym-to-dinner refresh, braided knots step by step, the accessories that make a knot look finished, and how to take it all down without breakage. Every style notes how long it takes, what you need, and who it suits best — so your next top knot looks like a choice, not an accident.
Sleek vs Messy Top Knot — Which One, When
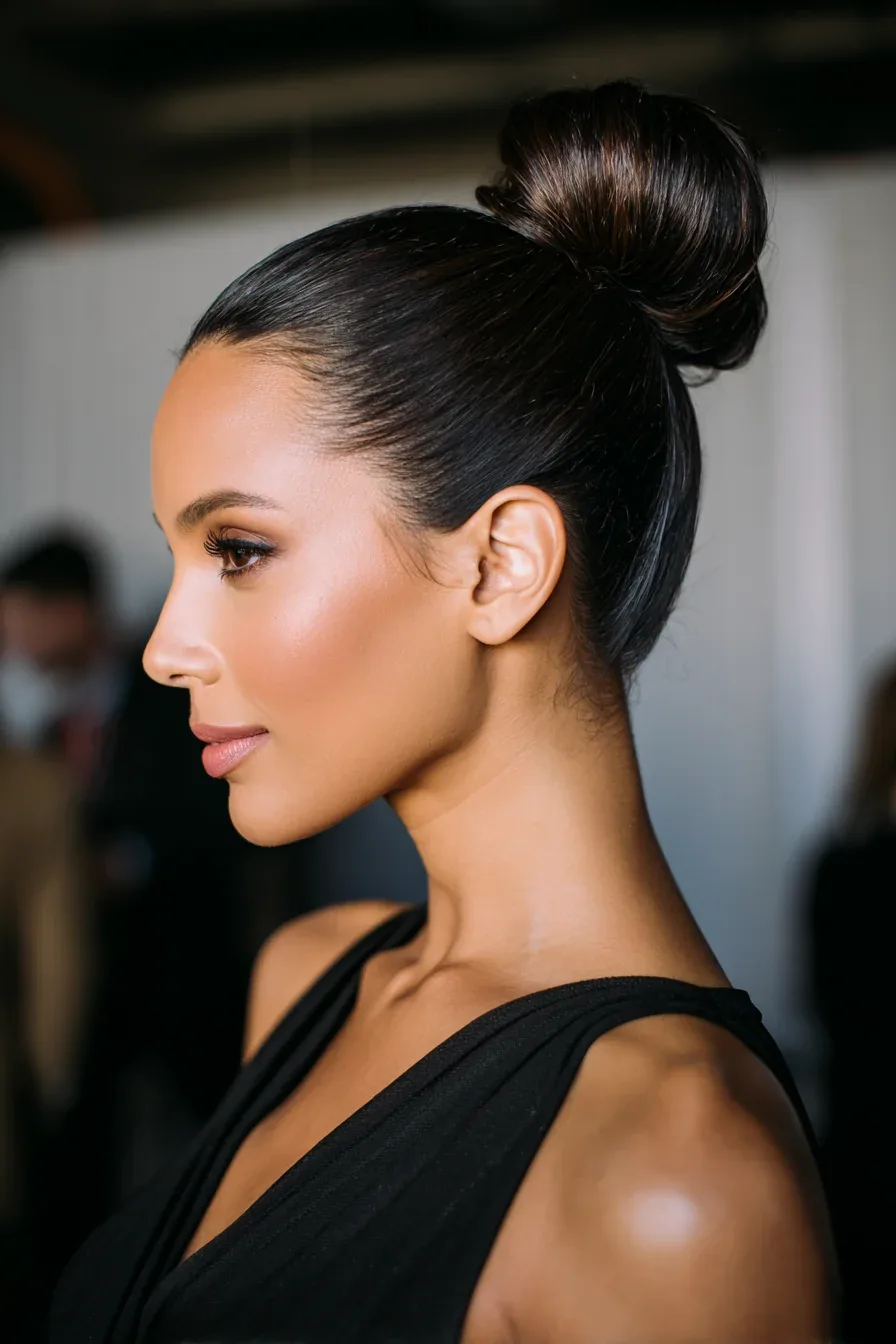
A sleek top knot and a messy top knot are not really the same hairstyle worn two ways — they send two different messages, and choosing the wrong one for the occasion is the most common top knot mistake there is. A sleek knot is smooth, controlled and deliberate: every strand brushed back, the surface glossy, the knot compact and symmetrical. It reads as professional and polished, which is why it works for job interviews, weddings, formal dinners and any room where you want to look like you meant it. A messy knot is textured, soft and a little undone: pieces pulled loose, volume at the crown, a knot that looks like it happened naturally. It reads as relaxed and approachable, which is why it works for weekends, coffee runs, casual dates and days when you want to look good without looking like you tried.
The practical rule is simple: the more formal the setting, the sleeker the knot. If the outfit has structure — a blazer, a silk dress, tailored trousers — the knot should have structure too. If the outfit is soft — denim, a knit, a sundress — the knot can be soft as well. Texture is the other deciding factor. Fine, straight hair usually looks better sleek, because a messy knot on fine hair can collapse into a wisp; thick, wavy or curly hair usually looks better messy, because the natural texture does half the work. And if you are unsure, aim for the middle ground: a smooth front with a slightly textured knot. That version is appropriate almost anywhere, and it is the easiest one to fix if it starts to loosen.
Getting Height and Volume Without Backcombing Damage
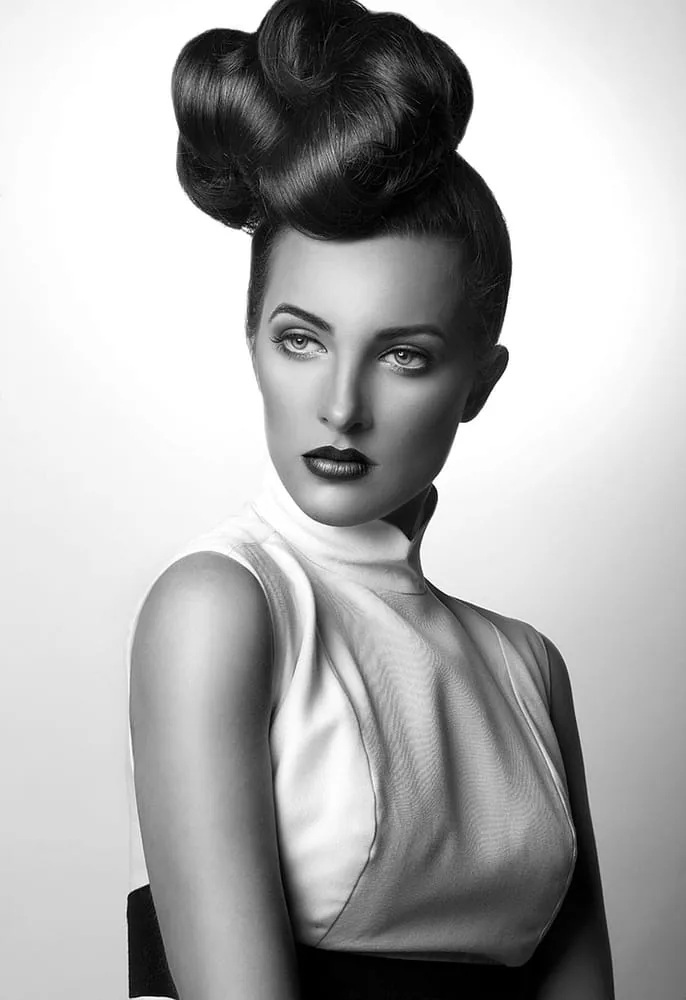
Height is what separates a top knot from a plain bun, and the old way of getting it — backcombing the hair into a tangled nest — is also the fastest way to damage it. Backcombing works by ruffling the cuticle against its natural direction, and done daily it leaves hair rough, tangled and prone to snapping, especially at the crown where the knot sits. The good news is that you can get the same lift without any of it. Start by blow-drying the roots upwards with a round brush, or flipping your head upside down and drying the crown on a low heat — lift created by heat and direction lasts far longer than lift created by friction. A little volumising powder or dry shampoo worked into the roots gives the hair grip and fullness without a single stroke of a teasing comb.
Placement does as much work as product. A knot placed at the very top of the crown looks taller than the same knot placed two inches lower, because the skull’s curve adds its own height. Gather the hair while your head is tilted slightly back, which pulls the roots up rather than flat, and secure the ponytail first before you form the knot — a high, tight ponytail base is the foundation of a tall knot, and a low, loose base will always sit flat no matter how much you tease it. If you still want more height, use a small hair doughnut or a rolled sock as a form inside the knot: the hair wraps around something solid, the knot looks full and tall, and nothing inside it is being damaged. Finish with a light-hold spray rather than a hard one, so the knot keeps its shape without going stiff.
Top Knots for Fine Hair That Slips Out
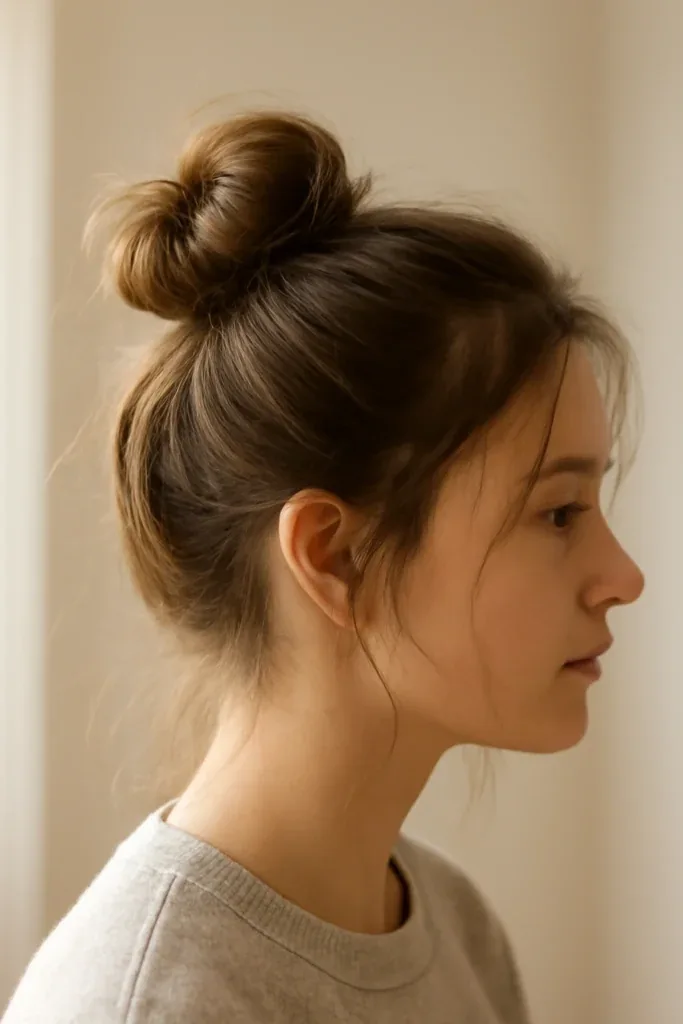
Fine hair is the hardest hair to put in a top knot, and the reason is simple: it is smooth, light and slippery, so elastics slide, pins fall out, and a knot that looked perfect at 8 a.m. can be a sad little wisp by noon. The fix is not a stronger elastic — it is grip. Fine hair needs texture before it needs structure, so start with day-old hair rather than freshly washed hair, and work a texturising spray or a generous amount of dry shampoo through the roots and lengths before you gather anything. Dry shampoo does double duty here: it absorbs the oils that make fine hair slippery, and it gives each strand something to hold on to. A light mousse worked through damp hair before blow-drying adds the same grip from the inside.
Technique matters just as much as product. Use a thin, fabric-covered elastic rather than a thick one, and wrap it three times instead of two — the extra wrap is what stops the slow slide. When you form the knot, twist the hair loosely rather than tightly: a tight twist on fine hair squeezes out what little volume there is and makes the knot look smaller, while a loose twist traps air and makes it look fuller. Fan the knot out gently once it is pinned, pulling small sections outward to widen it, and pin with U-shaped hairpins rather than bobby pins — bobby pins slide out of fine hair, but a U-pin woven through the knot and into the base holds like an anchor. And keep the knot high: a high knot on fine hair looks deliberately small and chic, while a low one just looks like there is not much hair there.
Top Knots for Thick, Heavy Hair That Pulls
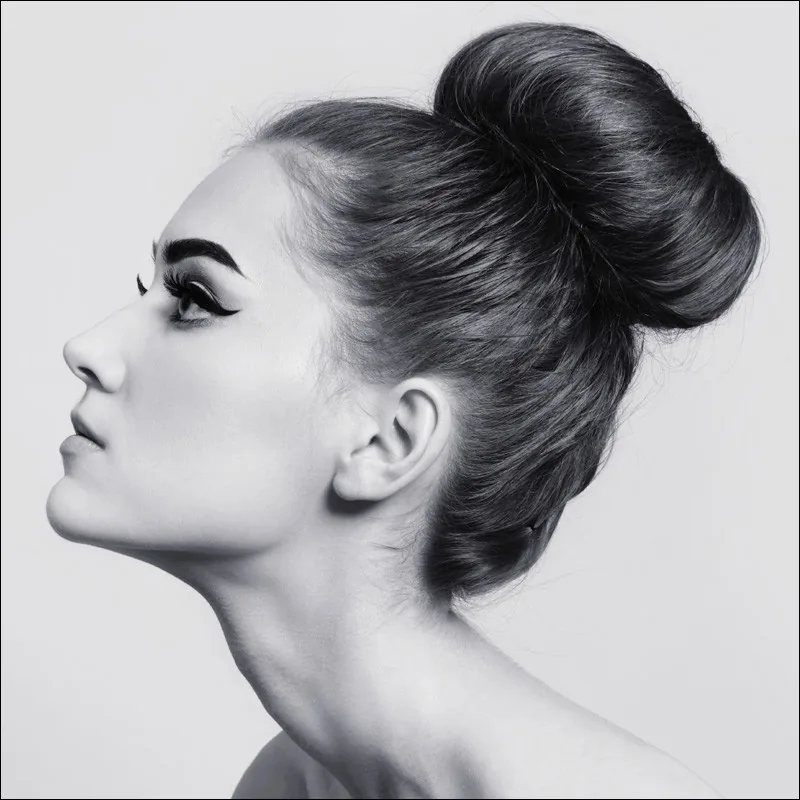
Thick hair makes a beautiful top knot — full, tall and dramatic — but it also makes a heavy one, and a heavy knot pulls. The pulling starts at the scalp, where the weight of the knot drags the hairline, and by the end of the day it can mean a headache, a sore scalp, and the temptation to take the whole thing down. The first fix is distribution: never hang all that weight from a single elastic. Gather the hair into two ponytails — one high, one just below it — or split the knot into sections and pin each section separately, so the weight is shared across several anchor points instead of one. A strong, thick elastic, or two elastics looped together, holds far better than a thin one that has to stretch to its limit.
The second fix is position. A knot balanced directly on top of the crown pulls straight down on the hairline; a knot placed slightly back, at the highest point of the skull, distributes the weight more evenly and feels lighter. If your hair is very long as well as thick, do not wind the whole length into one knot — fold the ponytail in half first, then wrap the folded loop, so the knot is compact and the weight sits close to the head instead of swinging. And give your scalp a break: a top knot worn every day in the same spot will thin the hairline over time, so vary the position — high one day, mid-height the next — and take the knot down the moment you get home. A knot that feels comfortable when you put it in is a knot that will still feel comfortable at 6 p.m.; if it hurts at the start, it will only hurt more later.
The 2-Minute Gym-to-Dinner Top Knot Refresh
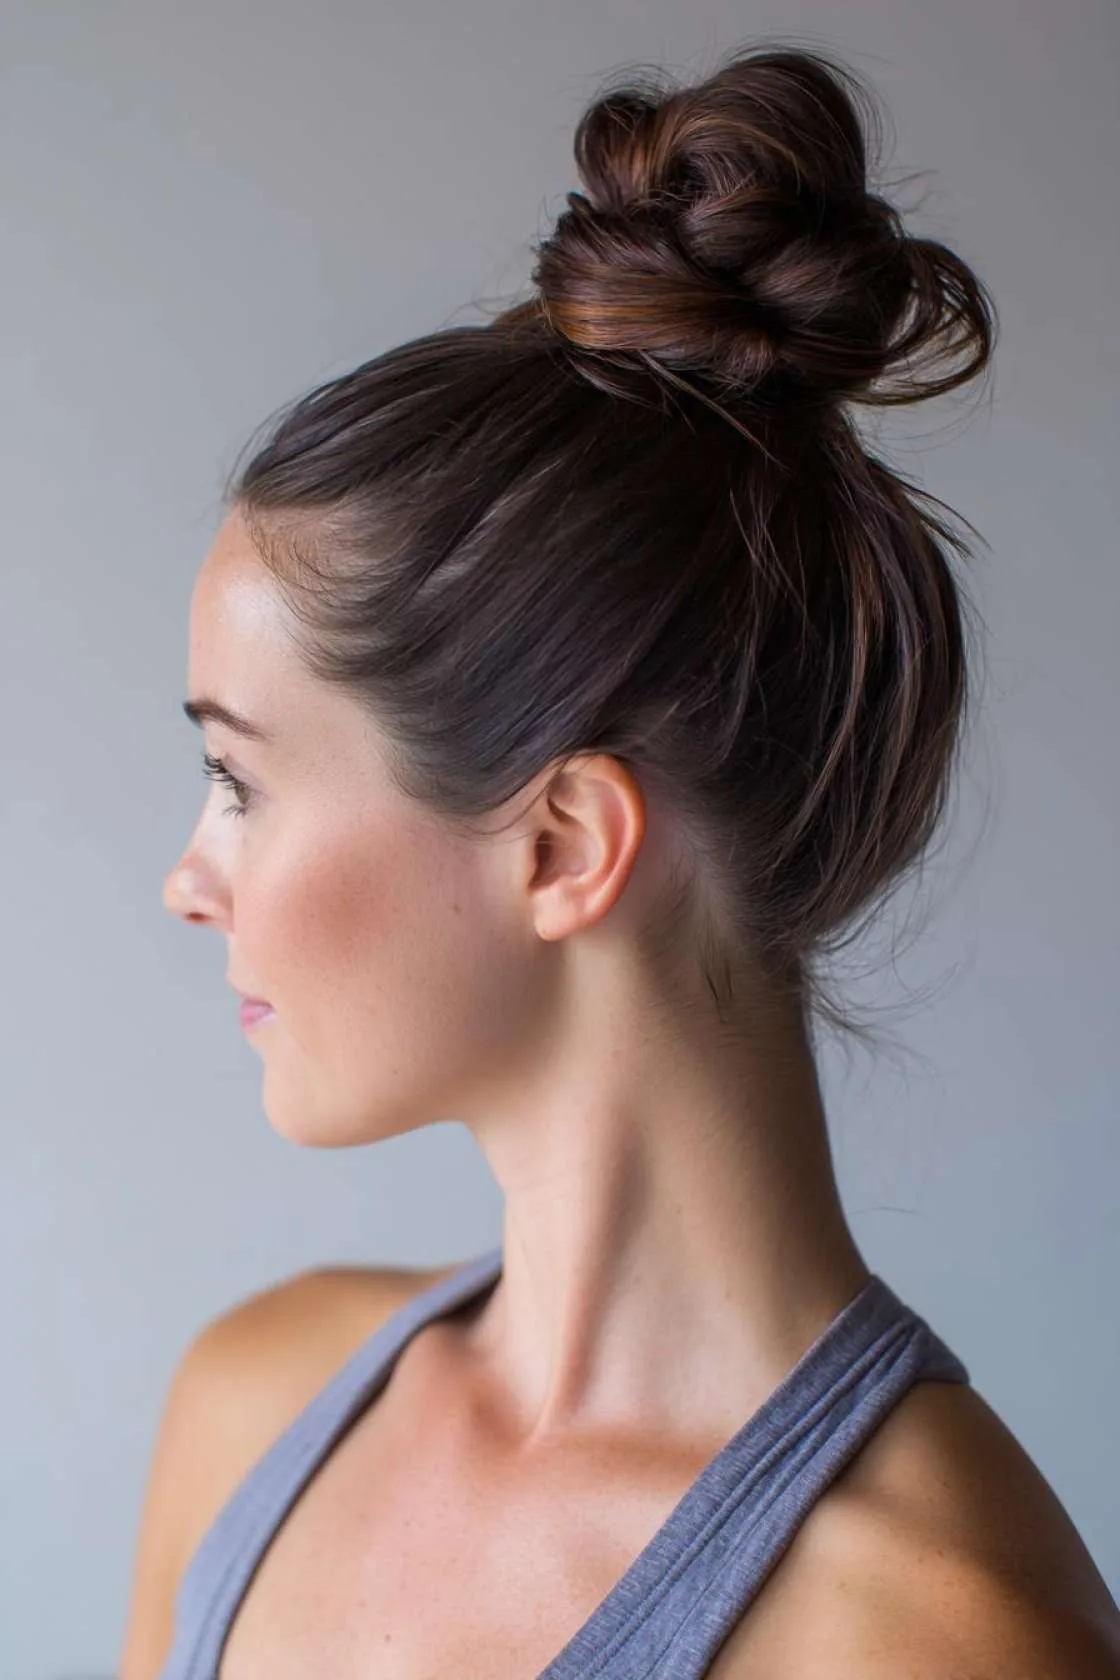
The gym-to-dinner top knot is the ultimate test of the style: the knot that survived a workout has to look like it was made for a restaurant, and you have about two minutes in a bathroom to make it happen. The good news is that a sweaty top knot is actually a head start, not a disaster — the dampness at the roots gives you the smoothing power of a blow-dry without the heat, and the texture the workout created is exactly the texture a good messy knot needs. Start by taking the knot down completely and shaking the hair out at the roots. Then smooth the front with your fingers and a little water or a dab of styling cream: the hairline is what people see first, and a clean, smooth hairline is what makes the whole refresh look intentional.
Then rebuild the knot higher than it was. A gym knot usually sits low and loose; moving it to the crown instantly makes it look like an evening style, and the height lifts the face in the same way a pair of heels lifts an outfit. Twist the hair loosely, pin the knot, and pull out two soft face-framing pieces — they hide any frizz and soften the look in seconds. A spritz of dry shampoo at the roots absorbs the sweat and adds volume, and a quick pass of a smoothing serum over the top layer kills the flyaways. Keep a tiny kit in your gym bag and this whole refresh takes under two minutes: a spare elastic, three bobby pins, a travel-size dry shampoo and a small serum. The result is a knot that looks like you styled it for dinner, not like you survived a spin class in it — even though you did both.
Braided and Twisted Top Knots, Step by Step
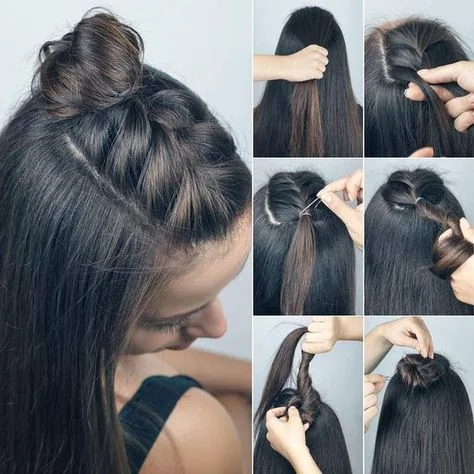
Braided and twisted top knots look complicated, but they are built from the same three moves every time: braid or twist a section, bring it up to the crown, and pin it into the knot. The easiest version to learn is the twisted top knot. Gather the hair into a high ponytail, split it into two sections, twist each section in the same direction, then twist the two sections around each other in the opposite direction — the opposing twists lock together, so the rope holds itself. Wrap the rope around the base of the ponytail, pin it, and you have a knot with beautiful, visible texture that took about ninety seconds and will not budge all day. It works on almost every hair type, and it is the best braided knot to start with if you have never done one before.
A braided top knot takes a little more practice but the same logic. For a Dutch braid into a top knot, flip your head upside down and braid from the nape upwards, adding hair as you go, until you reach the crown — then gather everything into a ponytail and form the knot from the remaining length. The upside-down braid is what gives this style its drama: the braid runs visibly up the back of the head, so the knot looks like the finale of something, not just a bun on top. For a simpler version, braid the ponytail itself — a three-strand braid, a fishtail, or a four-strand braid — then coil the braid around its own base and pin it. A braided knot is naturally secure, because the braid’s weave locks the hair in place section by section, so it is the knot to choose on windy days, for dancing, or whenever you need a style that will still look perfect hours later.
Accessories That Make a Top Knot Look Finished

A top knot is a simple shape, which is exactly why accessories work so well on it: one beautiful detail against a clean knot reads as deliberate, while the same detail lost in loose hair would disappear. The most useful accessory is the scrunchie, and it has come a long way from the 1980s — a silk or velvet scrunchie in a colour that matches your outfit turns an everyday knot into a finished look in one second, and it is gentler on the hair than a plain elastic, so it is the accessory that is also a hair-health choice. A silk scarf tied around the base of the knot does the same job with more drama: the tails of the scarf fall down the back of the head and add colour and movement to an otherwise plain silhouette.
Metal and pearl details suit a sleeker knot. A gold or silver cuff wrapped around the base hides the elastic completely and makes the knot look sculpted, like jewellery for your hair. Pearl pins pushed into the knot itself — two or three, clustered on one side — catch the light and turn a work knot into an evening knot without restyling anything. A slim headband worn with a top knot keeps the front smooth and adds a polished frame to the face, which is useful when the hairline is growing out or the front pieces will not behave. The rule is the same as with any accessory: one statement, not five. A scrunchie and a scarf and a cuff and pearl pins will fight each other, and the knot will disappear under the decoration. Pick the one piece that matches the occasion, put it on last, and let the knot do the rest.
Taking It Down Without Breakage — The Night Routine
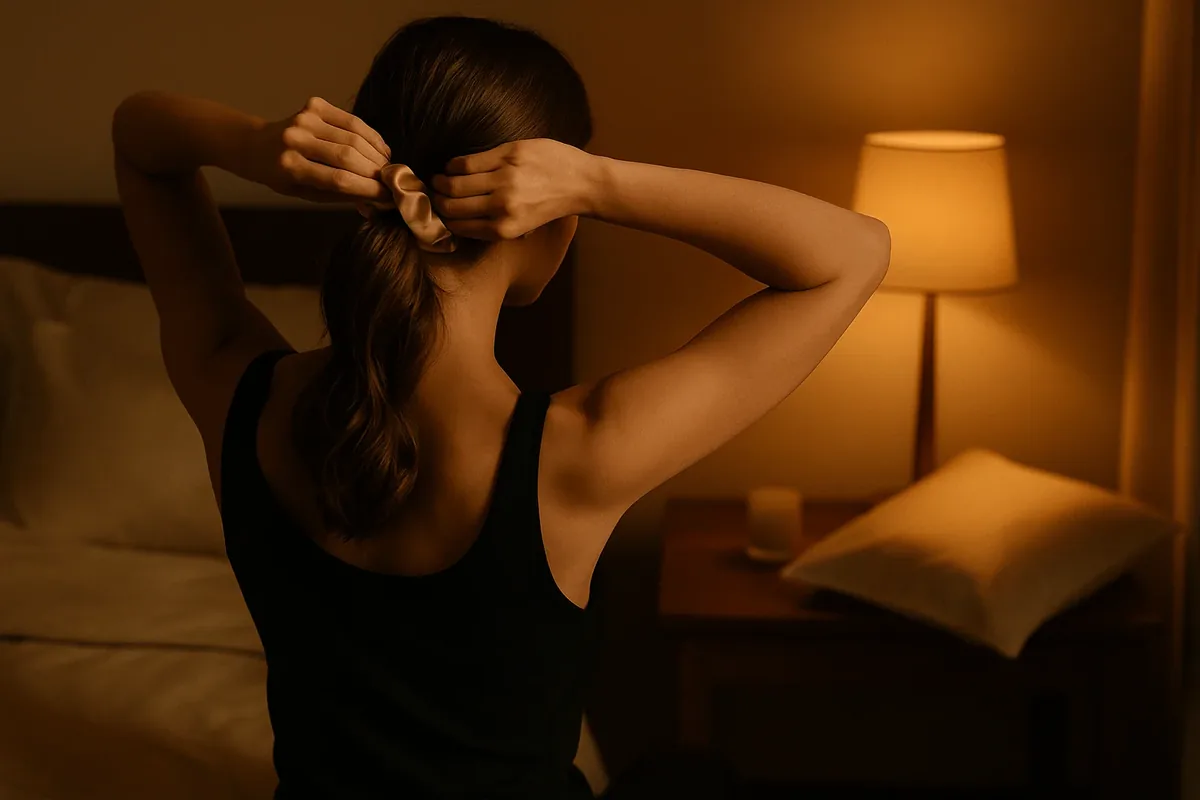
The way you take a top knot down matters as much as the way you put it up, because most top knot damage does not happen while the knot is in — it happens when you rip it out at the end of the day. An elastic that has been stretched around the same section of hair for ten hours has created a pressure point, and yanking it out snaps the hairs caught underneath it. Always unwind the knot first, sliding the pins out one at a time, and then loosen the elastic by pulling it gently apart rather than dragging it down the length of the hair. If the elastic is stuck, a drop of hair oil on the knot will help it slide out without a fight. It takes thirty seconds longer, and it saves the hairs that would otherwise end up in the bin.
Once the knot is down, the hair needs a chance to recover before bed. Brush it gently from the ends upwards with a wide-tooth comb or a soft-bristle brush — never a fine-tooth comb on knot-tired hair — and work a little leave-in conditioner or hair oil through the lengths, especially if you wore the knot high and tight. If you wash your hair at night, let it dry at least halfway before you sleep, because wet hair tied up for the night breaks far more easily than dry hair. And if you are a daily top knot wearer, give your hair one knot-free day a week, or vary the position so the same hairs are not under pressure every single day. A top knot is the hardest-working hairstyle you own; treating it gently at night is what keeps it working for years.
1. Classic Sleek High Top Knot
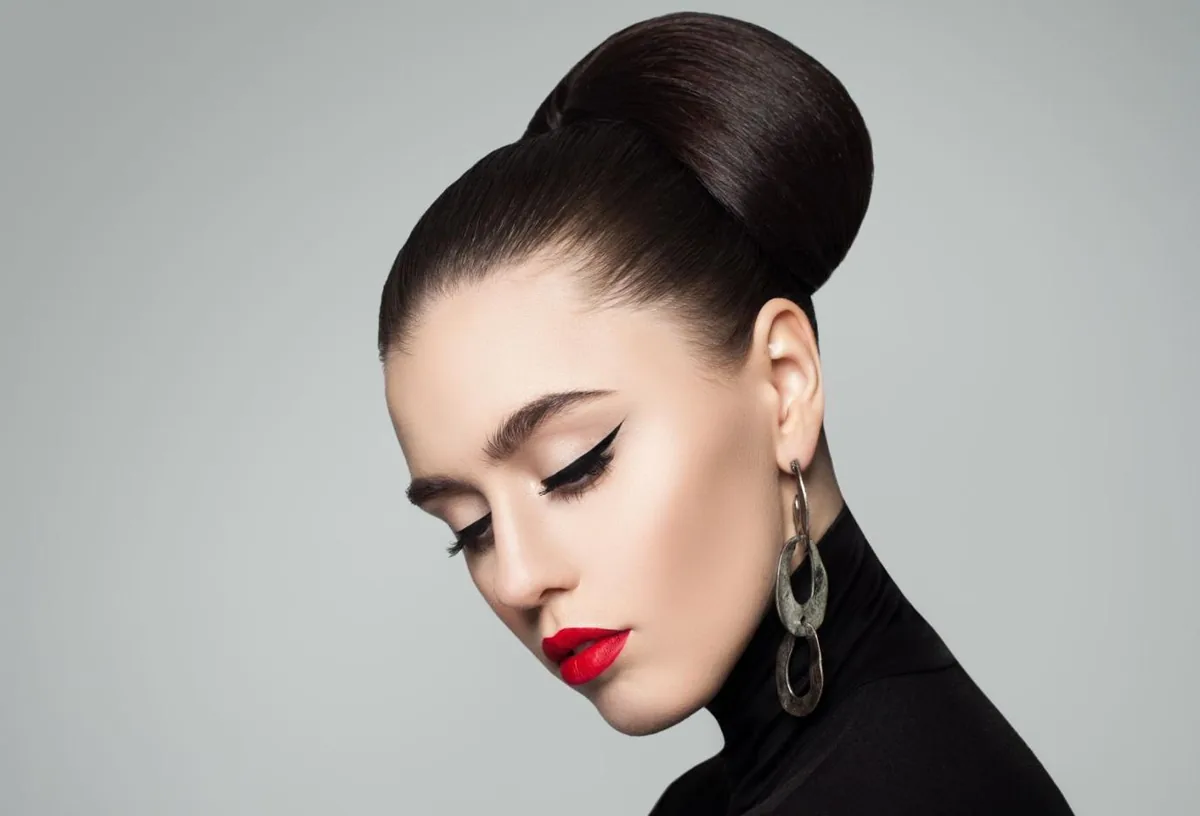
The classic sleek high top knot is the original, and still the best version of the style: the hair brushed smooth all the way back, gathered at the very top of the crown, and wound into a compact, glossy knot that sits like a crown. There is nothing fussy about it, and that is exactly the point — the sleekness makes the face the focus, the neck look longer, and the whole outfit look more expensive. It is the knot that works with a blazer at work, a silk dress at dinner, and a swimsuit on holiday, because its only statement is control. And it is one of the most reliable styles you can wear: once it is pinned, it does not move, it does not frizz, and it looks exactly the same in the last photo as it did in the first.
Best for: work, interviews, formal occasions, and anyone with straight or wavy hair. How to style: brush the hair back with a smoothing serum, gather it at the crown, secure with a strong elastic, twist the length and wrap it around the base, pinning as you go. What to ask a stylist: for a knot that sits high enough to lift the face but not so high it looks like a fountain — the sweet spot is the top of the crown, where the skull starts to curve. Time: 10 to 15 minutes. The common mistake is gathering the hair too low, which turns a top knot into an ordinary bun; if the knot is not sitting on top of the head, it is not a top knot.
2. Ballerina Top Knot

The ballerina top knot is the most disciplined version of the style, and the one that has survived a century of fashion because it is so clean: the hair pulled back without a single flyaway, the knot perfectly round, perfectly centred, and perfectly smooth. Dancers wear it because it never moves, never distracts, and never falls into the face — and those are exactly the qualities that make it work offstage too, for weddings, for the office, and for any day when you need your hair to be the last thing you think about. The secret is the doughnut: a small foam or mesh form that the hair wraps around, giving the knot a perfectly round shape that no amount of freehand wrapping can match.
How to style: pull the hair into a high ponytail, slide a doughnut over it, spread the hair evenly over the form, and tuck the ends underneath with pins. Pros: the most secure top knot there is, completely symmetrical, and it makes fine hair look thick. Cons: it can look severe if the front is too tight, and it needs a doughnut or a rolled sock to get the shape right. Quick verdict: if you want a knot that looks like it was done by a professional, this is the one — the doughnut does the professional part for you. Pull two tiny pieces loose at the temples if the look feels too strict; that one softening detail is the difference between a dancer and a boardroom.
3. Slicked-Back Low Top Knot
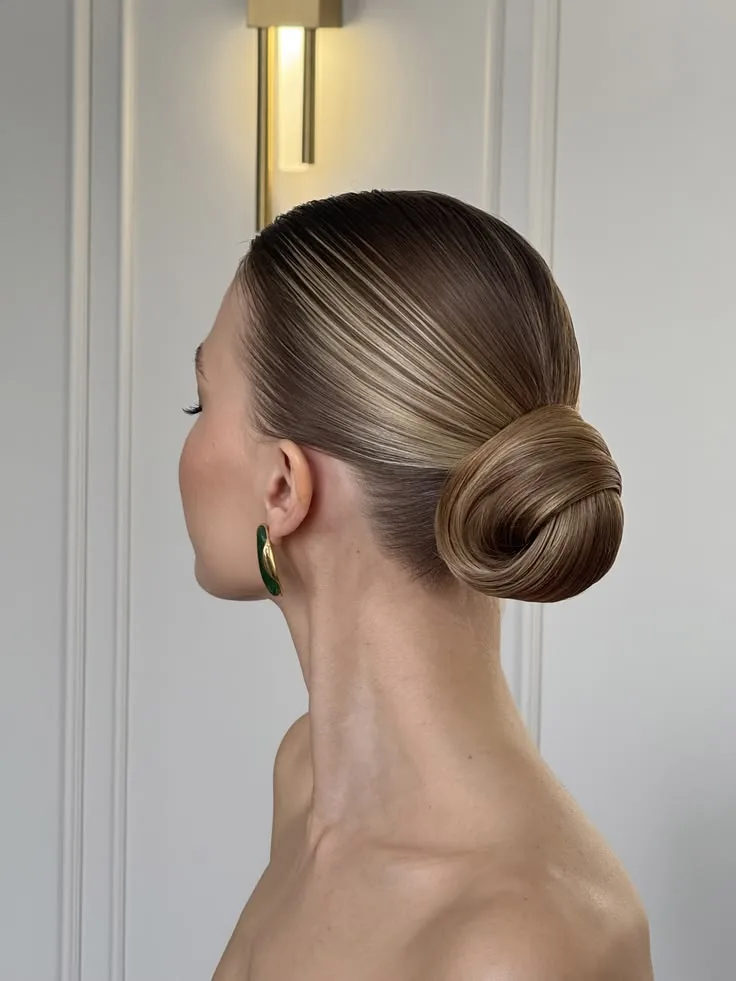
A slicked-back low top knot is the quiet-luxury version of the style: the hair smoothed flat against the head with gel or pomade, gathered at the back of the crown rather than the top, and wound into a small, polished knot. It sits lower than a classic top knot, which changes the whole feeling of it — less playful, more grown-up, and unmistakably deliberate. This is the knot that pairs with gold jewellery, a tailored coat and a red lip, because the slicked surface and the low placement make the face and the outfit the stars. It is also the most forgiving knot for hair that is growing out or between cuts, because the slicking hides uneven lengths that a loose style would show.
Best for: evenings out, formal events, and anyone who loves a polished, editorial look. How to style: apply a strong-hold gel to damp hair, comb it straight back with a fine-tooth comb, gather at the back of the crown, twist and pin. The common mistake is using too little product — a slicked knot needs enough gel to hold the hair flat, and a light serum will not do it. Maintenance: it takes five minutes to put in and holds all day, but the gel means you will want to wash your hair that night. Cost: almost nothing — a good gel and a comb are all you need. If the slicked look feels too severe, leave the knot slightly loose and textured while keeping the front smooth; the contrast is what makes it modern rather than retro.
4. Polished Top Knot with a Deep Side Part
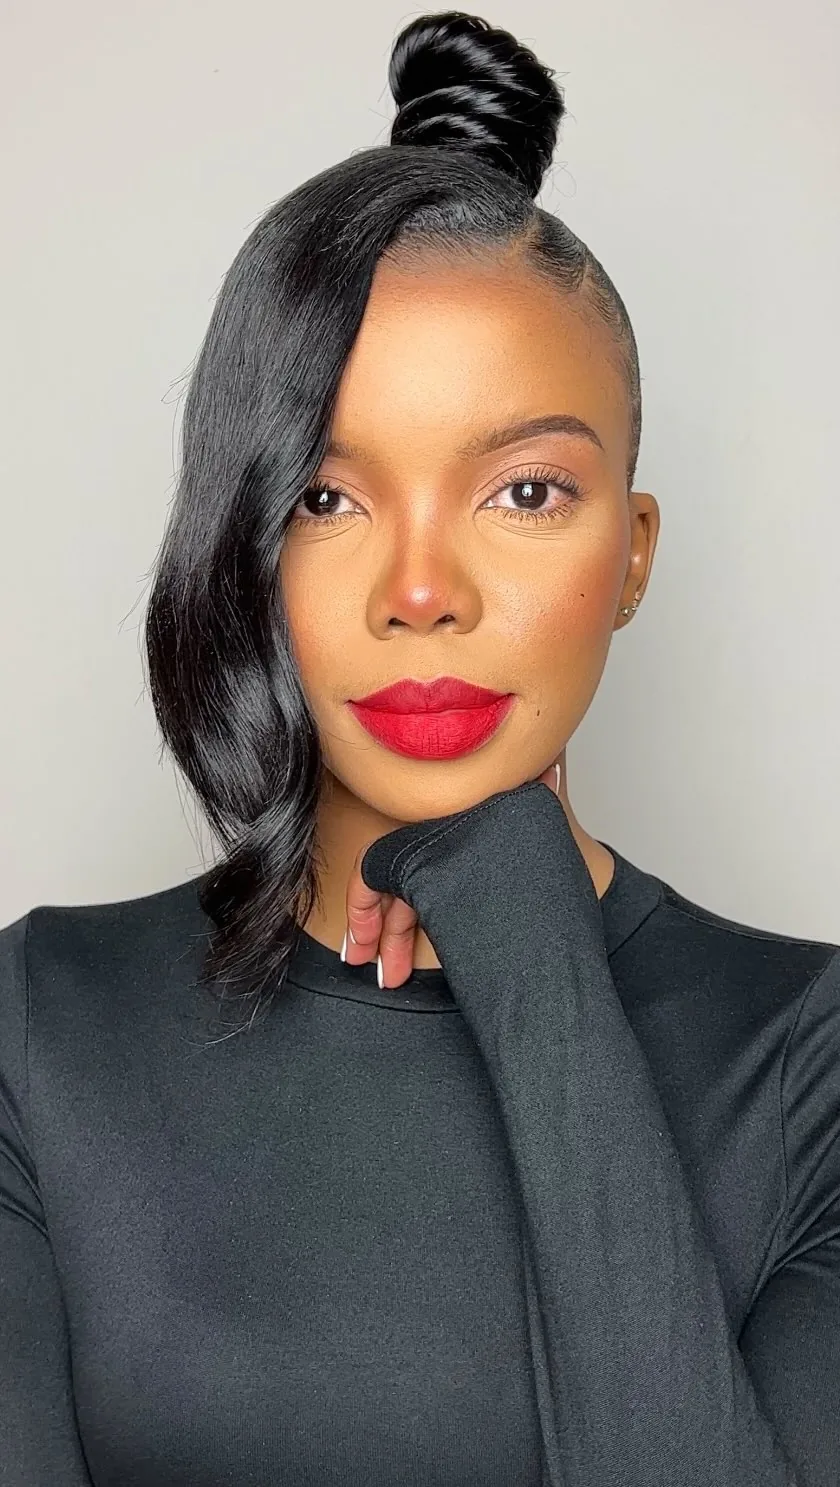
A deep side part changes a top knot completely: instead of the hair being pulled straight back, it is swept across the forehead in a heavy, glossy fall, and the knot sits at the top like the full stop at the end of a sentence. The sweep is what makes it glamorous — it creates a long, elegant line from the part to the knot, it frames one side of the face beautifully, and it photographs like an old-Hollywood wave without any of the curling. This is the knot for a dress with a deep neckline or an asymmetrical shoulder, because the diagonal line of the hair echoes the diagonal line of the outfit. It also suits round and square faces particularly well, because the sweep breaks up the symmetry and lengthens the face.
How to style: part the hair deeply on one side while it is damp, smooth the top section with a flat iron, then gather everything up and form the knot. Pros: instantly glamorous, flatters most face shapes, and the part gives the knot a structure that a centre part never will. Cons: the part needs to be set while the hair is damp or it will drift back, and the style takes a few minutes longer than a plain knot. What to ask a stylist: for the part to be placed at the arch of the eyebrow — that is the line that flatters almost everyone. A shine serum on the swept section is the finishing touch; the gloss is what sells the whole look.
5. Glass-Hair Top Knot
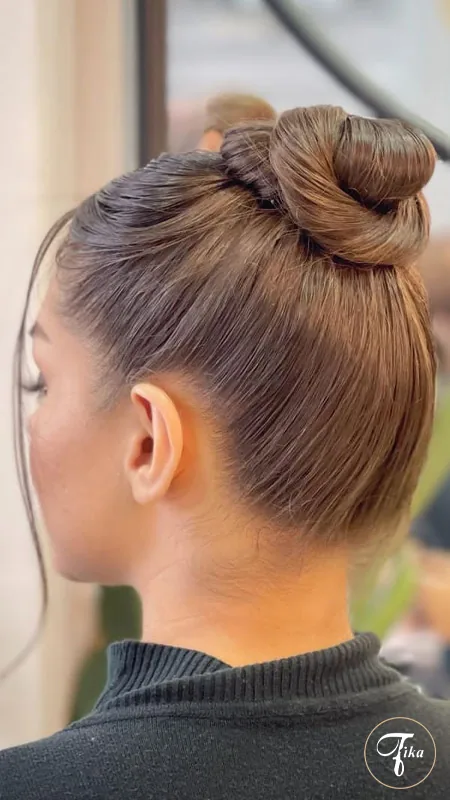
A glass-hair top knot takes the sleekest hair trend of the last few years and puts it on top of your head: the front smoothed to a mirror shine, the knot itself perfectly straight and glossy, and not a single flyaway anywhere. The effect is pure minimalism — the hair does nothing except shine, and the shine does all the talking. It works best on naturally straight hair, because the style is about enhancing what the hair already does, and it pairs beautifully with a bold dress or a statement earring, because the hair stays quiet and lets the outfit shine. The catch is condition: glass hair shows every split end and every dull patch, so the hair has to be healthy, well-trimmed and properly glossed before you start.
How to style: flat-iron the front sections first, smooth with a shine serum, gather high, and wrap the knot tightly so its surface is as smooth as the front. Time: 20 to 25 minutes, most of it on the straightening. Maintenance: the knot itself holds well, but the shine needs a serum touch-up if the day is humid. The common mistake is applying serum after the knot is finished — serum on top of finished hair just sits there and looks greasy, while serum worked in before the heat seals the shine in. Quick verdict: if your hair is straight, healthy and glossy, this is the most expensive-looking knot on the list, and it costs nothing but a flat iron and a good serum.
6. Top Knot with a Wrapped Base
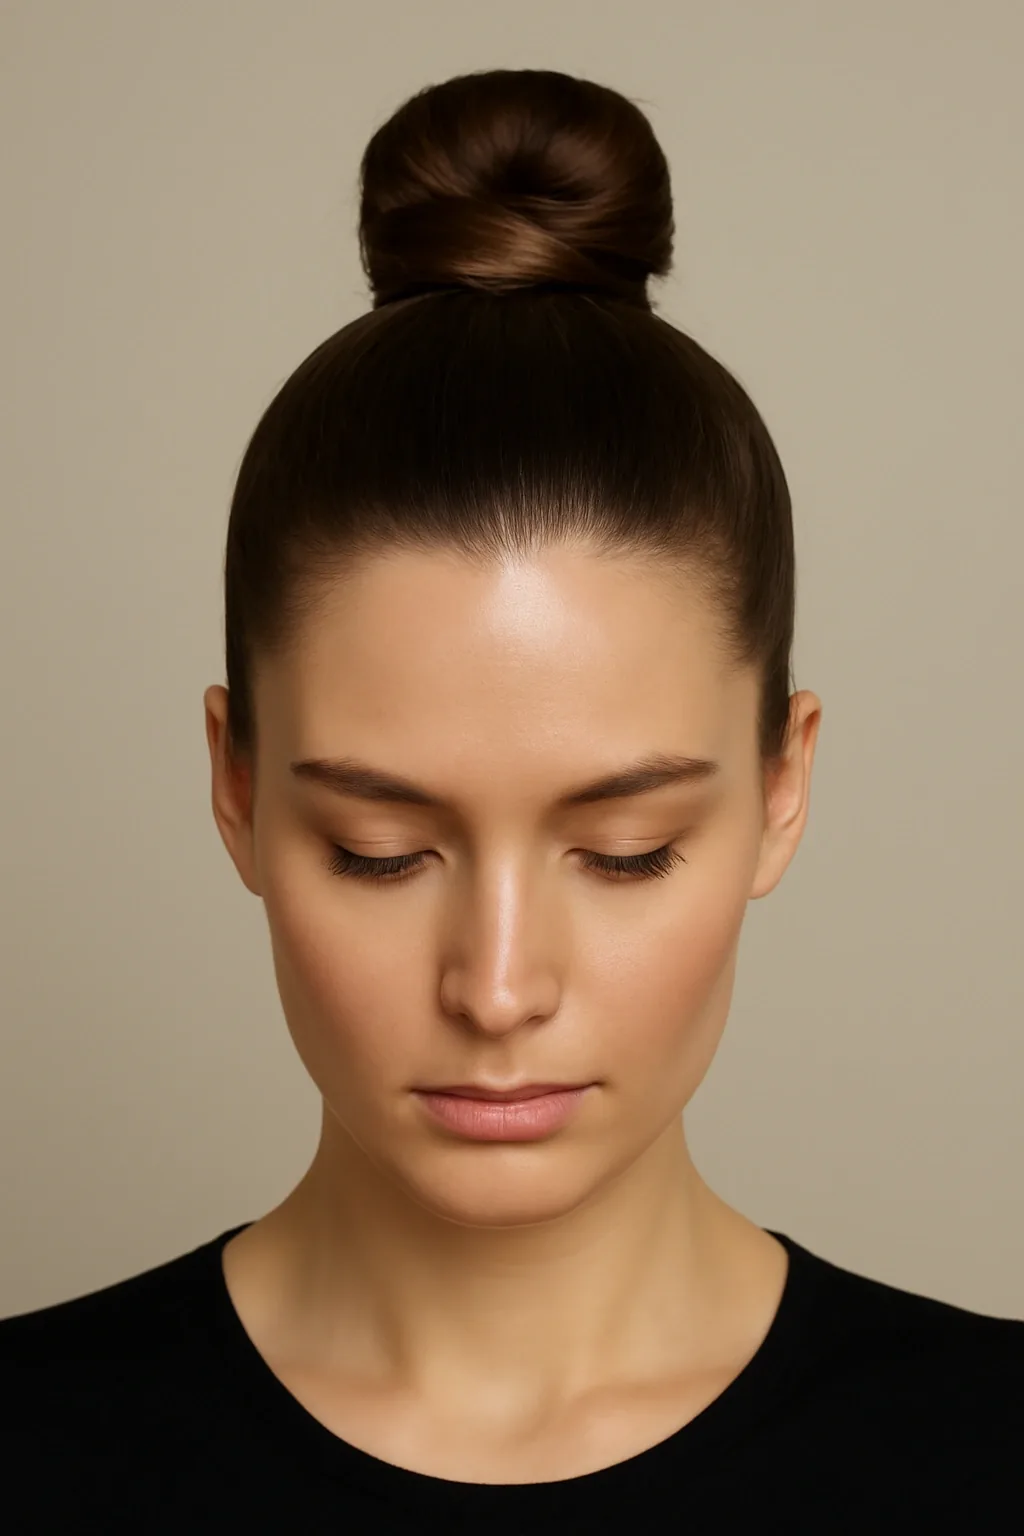
The wrapped base is the detail that separates a good top knot from a great one: instead of the elastic showing at the bottom of the knot, a section of hair is wrapped around the base to hide it completely. It is a tiny detail — ten seconds of work — and it changes the whole look, because a visible elastic says everyday and a wrapped base says finished. This is the version of the top knot that stylists use on red carpets and in photoshoots, and it is the easiest professional trick to copy at home. The wrap also does a practical job: it locks the knot in place, because the wrapped section acts like an extra pin holding the structure together.
Best for: anyone who wants a polished knot without buying anything new — the wrap uses your own hair. How to style: form the knot as usual, then take a small section from underneath the ponytail, wrap it around the base two or three times, and pin the end underneath. Pros: hides the elastic, adds hold, and costs nothing. Cons: it needs enough hair length to wrap, so it is harder on very short hair, and the wrap can slip on silky hair unless it is pinned well. What to ask a stylist: for the wrap to be taken from the underside of the ponytail, so the top of the knot stays smooth. If the wrap keeps coming loose, a single bobby pin pushed through the wrap and into the knot base will hold it all day.
7. Effortless Messy Top Knot
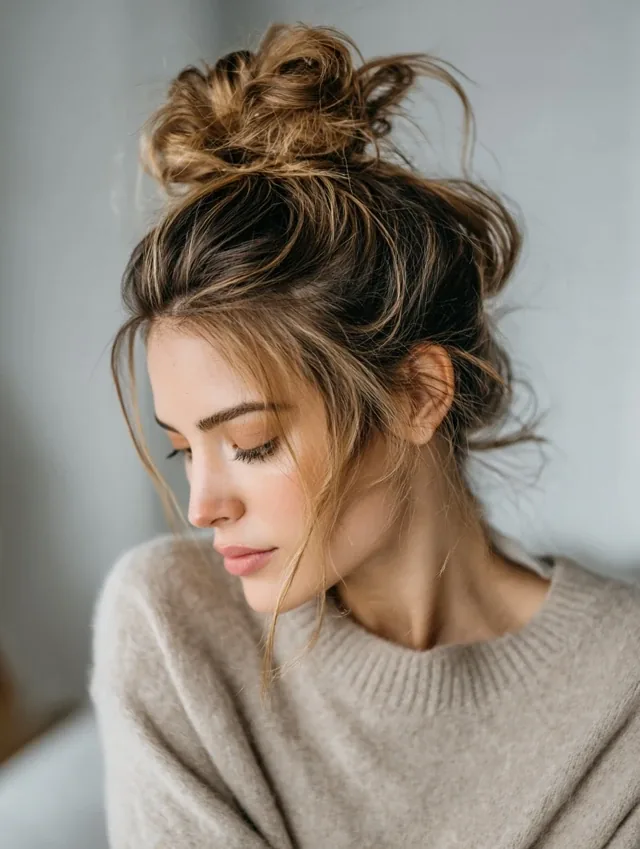
The effortless messy top knot is the most-worn top knot in the world, and the hardest one to get right — because a good messy knot is not actually messy. The pieces that look like they fell out by accident were pulled out on purpose, the volume that looks natural was created with dry shampoo, and the knot that looks like it took ten seconds took ten minutes of careful loosening. The trick is to build a neat knot first and then undo it slightly: form a proper top knot, pin it securely, and only then pull small pieces loose at the front, loosen the knot’s edges, and tug a few strands out around the nape. Undoing a finished knot gives you control over the mess; starting messy just gives you a mess.
Best for: weekends, casual days, and anyone with wavy or textured hair. How to style: work dry shampoo or texturising spray through the hair, gather loosely, twist and pin, then loosen the knot by pulling its edges outward. The common mistake is gathering the hair too tightly at the start — a messy knot needs a loose base, or there is nothing to loosen later. Maintenance: almost none, which is the point; a messy knot is supposed to soften as the day goes on. Quick verdict: this is the knot for the days when you want to look like you did not try, and the irony is that the best ones take the most practice. Do it three times and your hands will learn it.
8. Textured Top Knot with Face-Framing Pieces
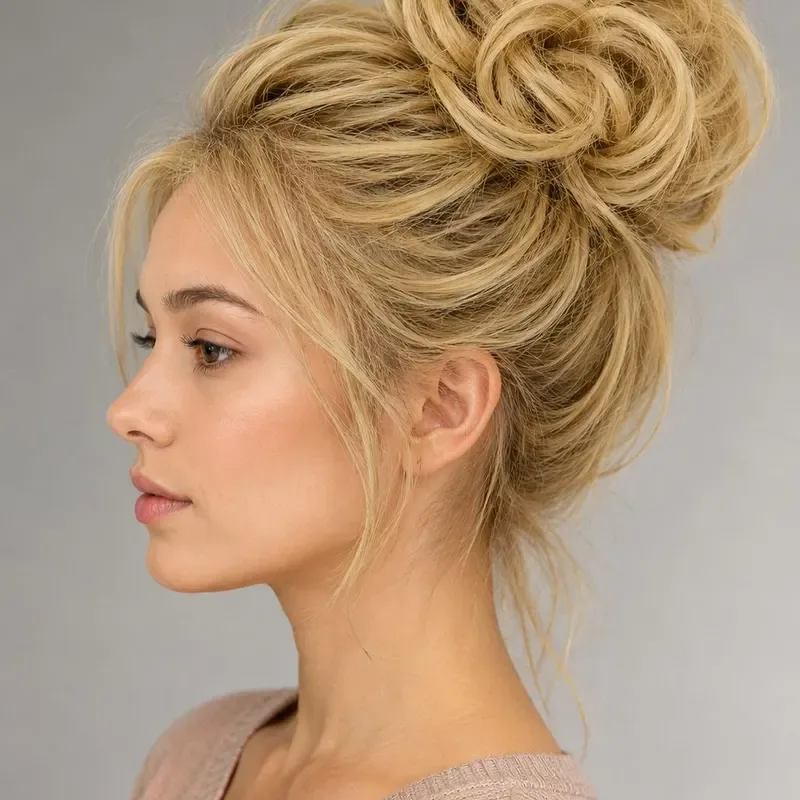
Face-framing pieces are the secret ingredient of a good messy top knot: two soft strands pulled out at the front, falling past the cheekbones, that turn a plain knot into a hairstyle. Without them, a top knot can look severe, pulling the whole face back and exposing everything. With them, the face is softened, the cheekbones are framed, and the knot looks romantic rather than functional. The pieces should be thin — no wider than a finger — and they should start at the temples, not at the parting, so they fall naturally rather than looking like they were cut in. Curl them lightly with a flat iron if you want a polished finish, or leave them straight for a more casual feel.
How to style: pull the front pieces out before you form the knot, not after — pulling them out afterwards tugs the knot loose, while pulling them out first lets you shape them properly. Pros: flatters almost every face shape, hides a growing-out fringe, and makes the knot look intentional. Cons: the pieces can fall into your face on a windy day, and they need a light spray to stay in place. Best for: round and square faces, which benefit most from the softening, and anyone whose hairline feels too exposed in a plain knot. If the pieces keep slipping back, pin them loosely behind the ear with a single bobby pin — the knot stays, the softness stays, and nothing falls in your eyes.
9. Voluminous Messy Top Knot
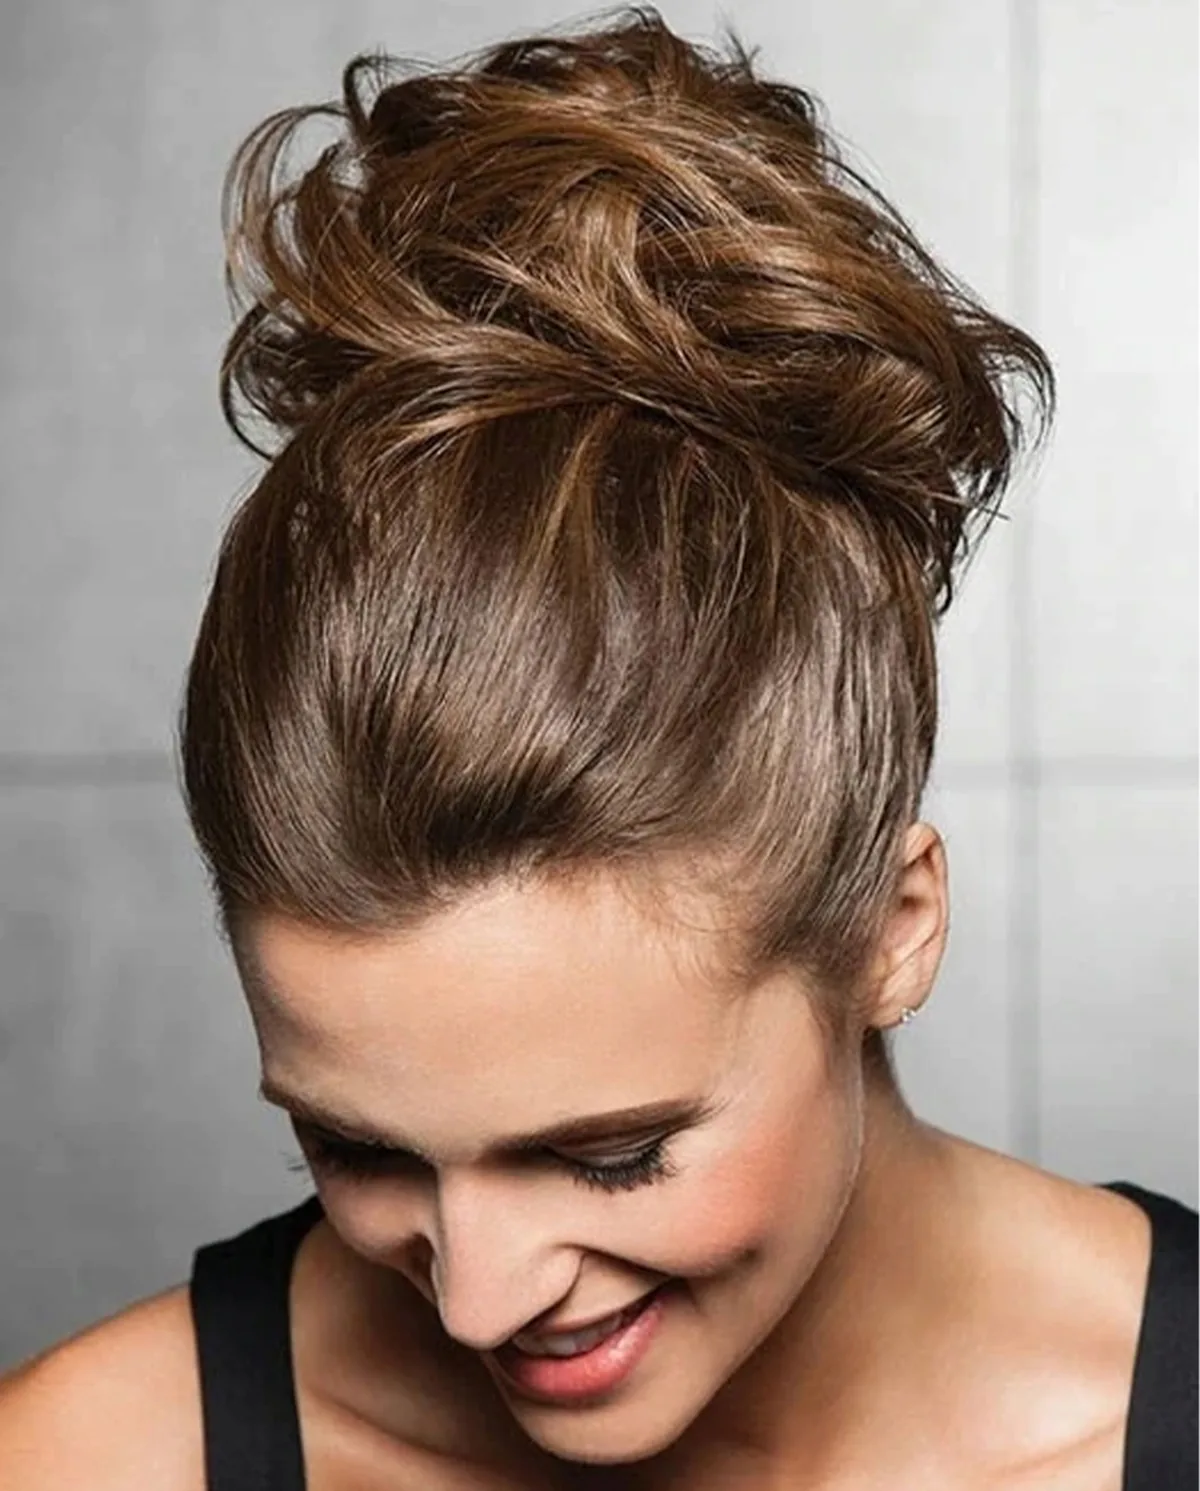
A voluminous messy top knot is the answer for anyone whose knot always ends up looking small: a big, full, cloud-like knot that sits high on the head and makes a statement. The volume comes from three places, and none of them is backcombing. First, texture: dry shampoo or volumising powder at the roots gives the hair the grip and fullness it needs. Second, the fan: once the knot is pinned, pull its edges outward gently, section by section, until the knot is twice as wide as it started. Third, the doughnut: a small foam form inside the knot gives it a solid, full core that no amount of fanning can create on its own. Together, they turn even medium-thickness hair into a knot that looks like it belongs to someone with twice as much hair.
Best for: fine to medium hair, and anyone who loves a big, bold knot. How to style: texturise, gather high, form the knot around a small doughnut, pin, then fan the edges out. Time: 15 minutes. The common mistake is fanning the knot before it is pinned — an unpinned knot will fall apart when you pull at it, while a pinned one will hold its shape and let you stretch it. Maintenance: a big knot is heavier than a small one, so use two elastics and check the pins after a few hours. Quick verdict: if your knots always look like a small button on top of your head, the doughnut and the fan are the two tricks that change everything.
10. Undone Top Knot with Loose Tendrils
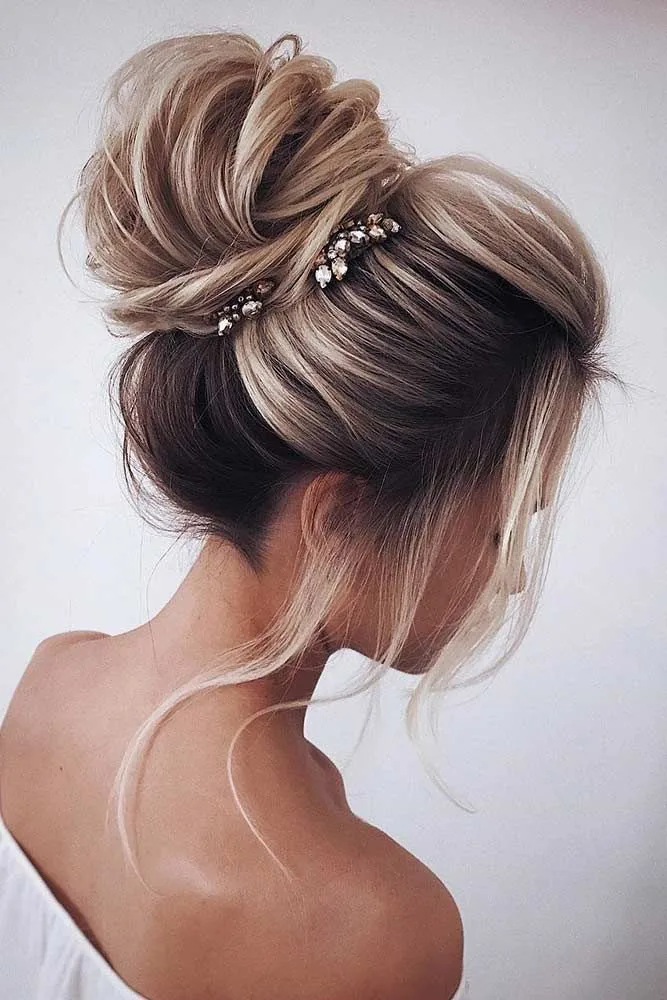
An undone top knot with loose tendrils is the romantic version of the messy knot: the knot itself is soft and slightly loose, and several fine tendrils are pulled out around the face and at the nape, so the whole style looks like it happened naturally on a summer evening. The tendrils are what make it romantic — without them, a loose knot can look unfinished, but with them, it looks like the hair just fell that way. Leave the tendrils longer than you think they should be, because they will spring up as the day goes on, and a tendril that starts at the cheekbone will be at the temple by evening. Curl the tendrils lightly for a soft finish, or leave them straight for a more modern feel.
Best for: dates, weddings as a guest, and soft, romantic outfits. How to style: form a loose knot, then pull tendrils out at the temples and the nape, curling the ends lightly. Pros: deeply flattering, softens the face, and looks beautiful in photos. Cons: the tendrils need a light spray to stay put, and they can look messy rather than romantic if too many are pulled out — three or four is enough. What to ask a stylist: for the tendrils to be cut slightly longer at the front, so they fall naturally when the hair is up. This is the knot to choose when you want to look like you did not try very hard, and you want everyone to think you look beautiful anyway.
11. Beachy Textured Top Knot
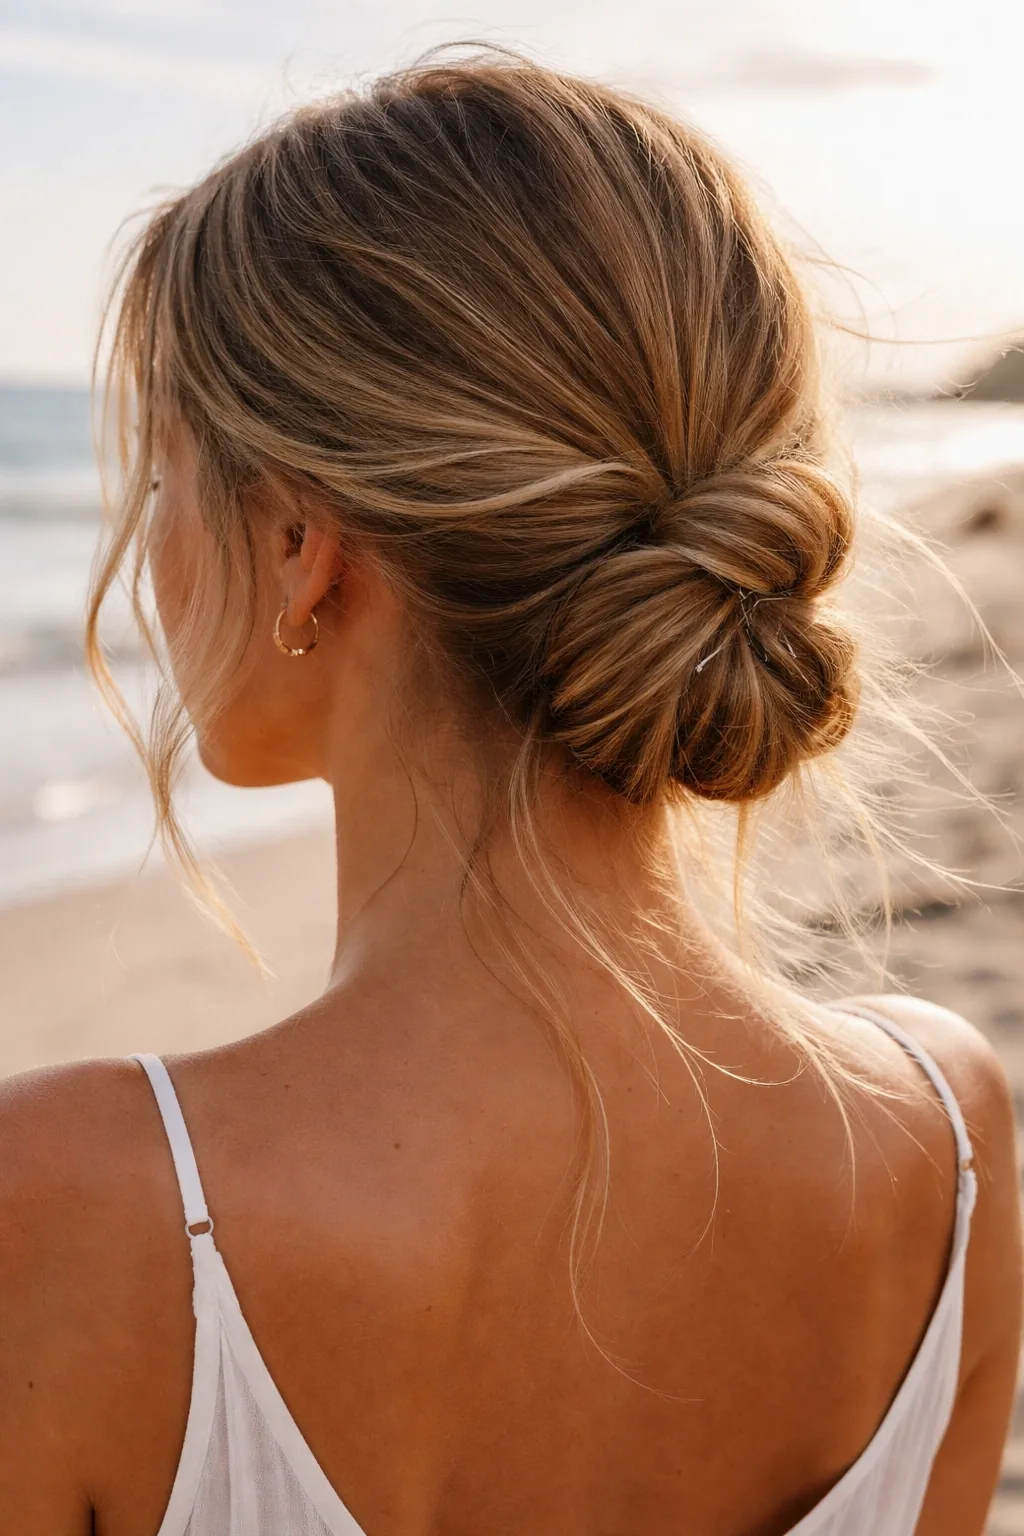
A beachy textured top knot is the summer version of the style: salt-spray texture, a slightly undone knot, and the feeling that you have just come from the sea. The texture is the whole point — the hair should look like it has been in salt water and sun, with pieces going in different directions and a soft, matte finish rather than a glossy one. Sea-salt spray is the key product: spray it through damp hair, scrunch, and let it dry naturally before you gather the knot, and the hair will hold its texture without any heat. This is the knot for holidays, festivals, beach days and any summer outfit that is more linen than silk.
How to style: salt spray on damp hair, air-dry or diffuse, gather loosely at the crown, twist and pin, then pull a few pieces loose. Time: 10 minutes if the hair is already textured. Pros: almost no heat needed, looks better as the day goes on, and suits wavy and curly hair beautifully. Cons: salt spray can dry the hair out if used every day, so follow it with a conditioning treatment once a week. The common mistake is using a smoothing serum with a beachy knot — the two textures fight each other, and the knot ends up looking confused. Keep the finish matte, keep the knot loose, and let the texture do the talking.
12. Top Knot with Curtain Bangs
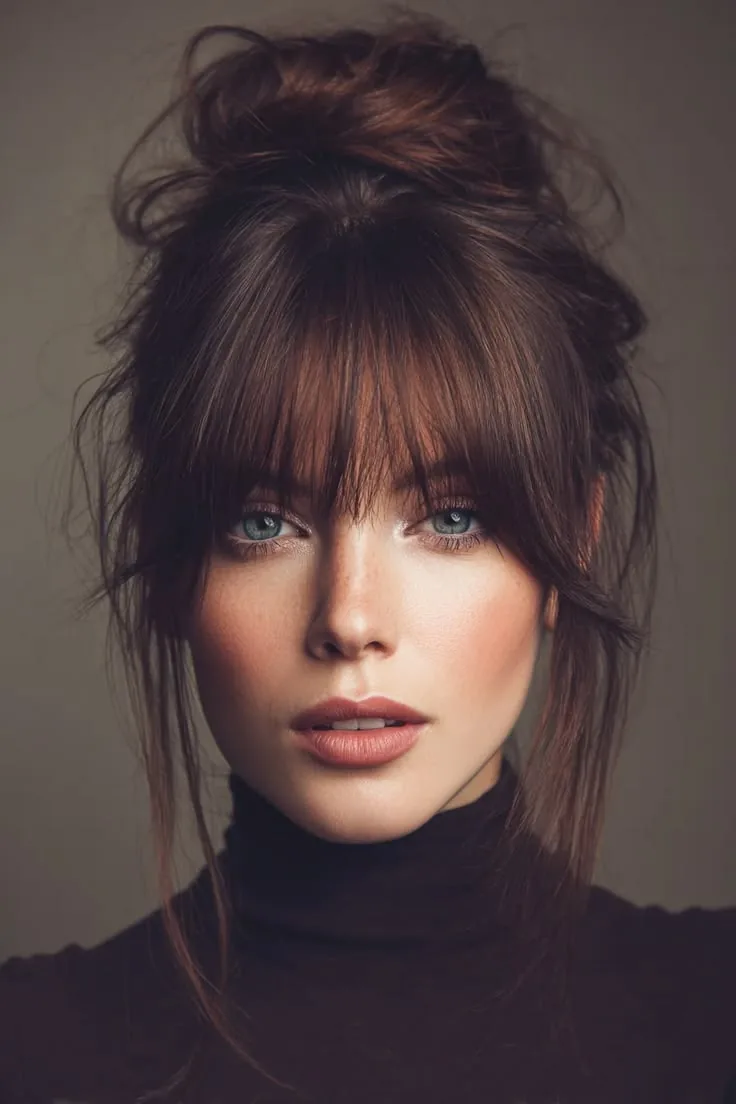
Curtain bangs and a top knot were made for each other: the bangs fall in soft, face-framing sweeps on either side of the forehead, and the knot sits high above them, so the whole look is balanced — structure on top, softness at the front. The bangs do the job that face-framing pieces do in a messy knot, but better, because they are cut to fall that way and they stay there all day without pins or spray. This is the knot for anyone with a fringe who has ever felt that putting their hair up exposes too much forehead, because the curtain bangs keep the face framed even when everything else is pulled back. It also suits long faces particularly well, because the bangs break up the length.
Best for: anyone with curtain bangs or a growing-out fringe. How to style: blow-dry the bangs first, sweeping them to each side, then gather the rest of the hair into a high knot. Pros: the bangs stay in place all day, the face stays framed, and the knot looks finished without any extra pieces pulled out. Cons: the bangs need a quick blow-dry to sit right, and they can go flat in humidity. What to ask a stylist: for the curtain bangs to be cut to cheekbone length, which is the length that frames the face best with a top knot. A round brush and a minute of heat is all the bangs need — the knot does the rest.
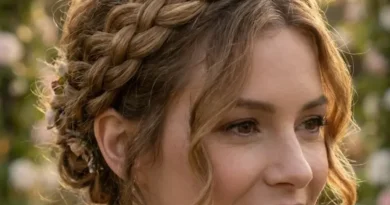
13. Braided Crown Top Knot
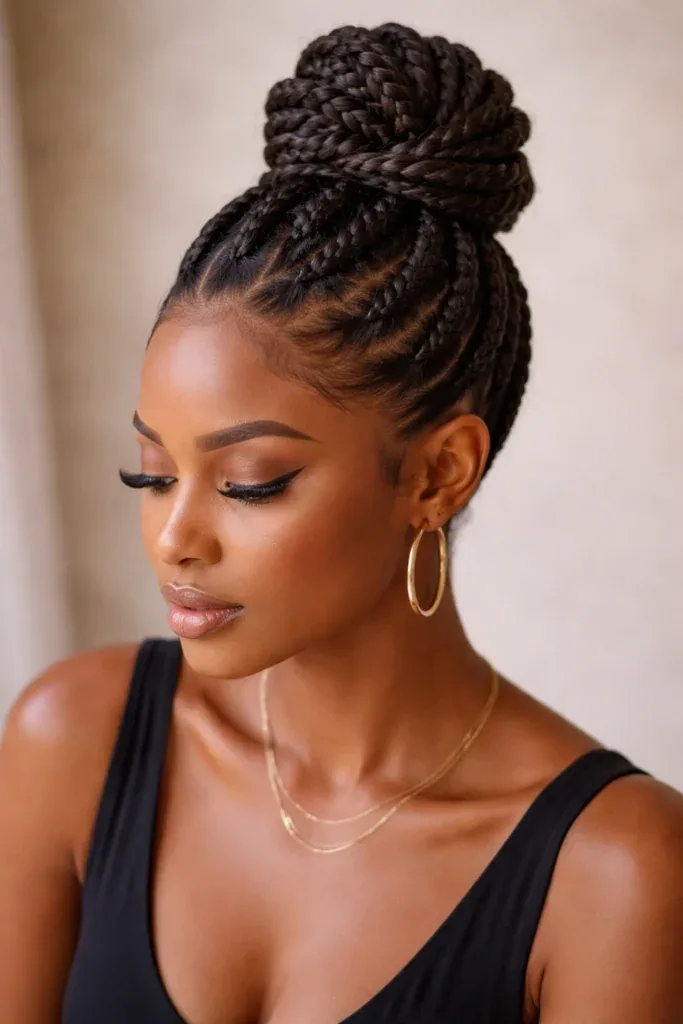
A braided crown top knot is the most romantic braided version of the style: two braids worked from each side of the head and pinned across the crown, with the knot sitting in the middle like a jewel. The braids put the texture on display — every twist shows off the colour and the dimension of the hair — while the knot gives the style its height and its finish. It is a style that says garden party and fairytale at once, and it is surprisingly secure, because the braids anchor the hair in place section by section, so it survives wind, dancing and long days far better than a plain knot. It takes a little practice, but once you have braided one side, the other side is just a mirror image.
How to style: braid two sections from behind each ear up towards the crown, pin them across the top, gather the remaining hair into a knot in the centre. Time: 30 to 40 minutes. Pros: stunning from every angle, very secure, and the braids add detail that a plain knot never has. Cons: it needs medium to long hair, and the braids take practice to make even. What to ask a stylist: for the braids to be pulled apart slightly — pancaking them makes them look fuller and more romantic, while tight braids can look severe. Curl the hair before you braid, because curls give the braid grip and fullness, and straight hair will slip out of a crown braid within the hour.
14. Dutch Braid into Top Knot
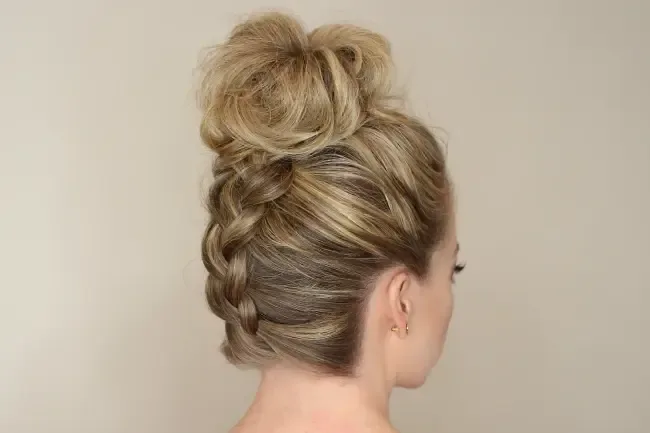
A Dutch braid into a top knot is the most dramatic braided knot on this list: the braid starts at the nape, runs visibly up the back of the head, and finishes in a knot at the crown, so the hairstyle tells a story from the back. The Dutch braid — braided under rather than over, so it sits on top of the hair like a rope — is what gives this style its bold, three-dimensional look. It is the knot to choose for the gym, for dancing, or for any day when you need a style that will not move, because the braid locks the hair in place from the nape all the way up, and the knot is simply the end of the braid rather than a separate structure. It also looks incredible from behind, which is where half your photos are taken.
How to style: flip your head upside down, Dutch-braid from the nape to the crown, gather everything into a ponytail, and form the knot. Time: 20 to 30 minutes once you have practised it. Pros: extremely secure, looks amazing from the back, and the braid keeps the hair off the neck. Cons: braiding upside down takes practice, and it is hard to do neatly on yourself the first few times. The common mistake is braiding too loosely at the nape — the braid needs to be snug at the start, or it will sag by midday. Practise on a weekend first; by the third try, your hands will know the motion.
15. Fishtail Braid Top Knot
A fishtail braid top knot is the most intricate-looking knot on this list, and the one that gets the most compliments: the ponytail is fishtail-braided — woven from two sections instead of three, so it looks finer and more delicate than an ordinary braid — and then coiled around its own base to form a knot with beautiful, visible texture. The fishtail is the star of this style, so the front stays simple: smooth, sleek, and pulled back cleanly, so nothing competes with the braid. It looks far more complicated than it is, and it is one of the most secure knots you can wear, because the two-section weave locks the hair in place and barely loosens over hours.
How to style: gather a high ponytail, fishtail-braid the length, coil the braid around the base, and pin. Time: 20 to 30 minutes. Pros: gorgeous texture, very secure, and it makes the knot look far more expensive than it is. Cons: a fishtail takes longer than a three-strand braid, and it needs enough length to show the weave properly. Best for: weddings, parties, and anyone who loves detail. Pull the braid apart gently once it is coiled — pancaking the fishtail is what makes it look full and textured, and a tight, skinny fishtail looks thin by comparison. If the fishtail feels slow, practise it on a ponytail first, without the knot; the weave becomes automatic after a few tries.
16. Twisted Rope Top Knot
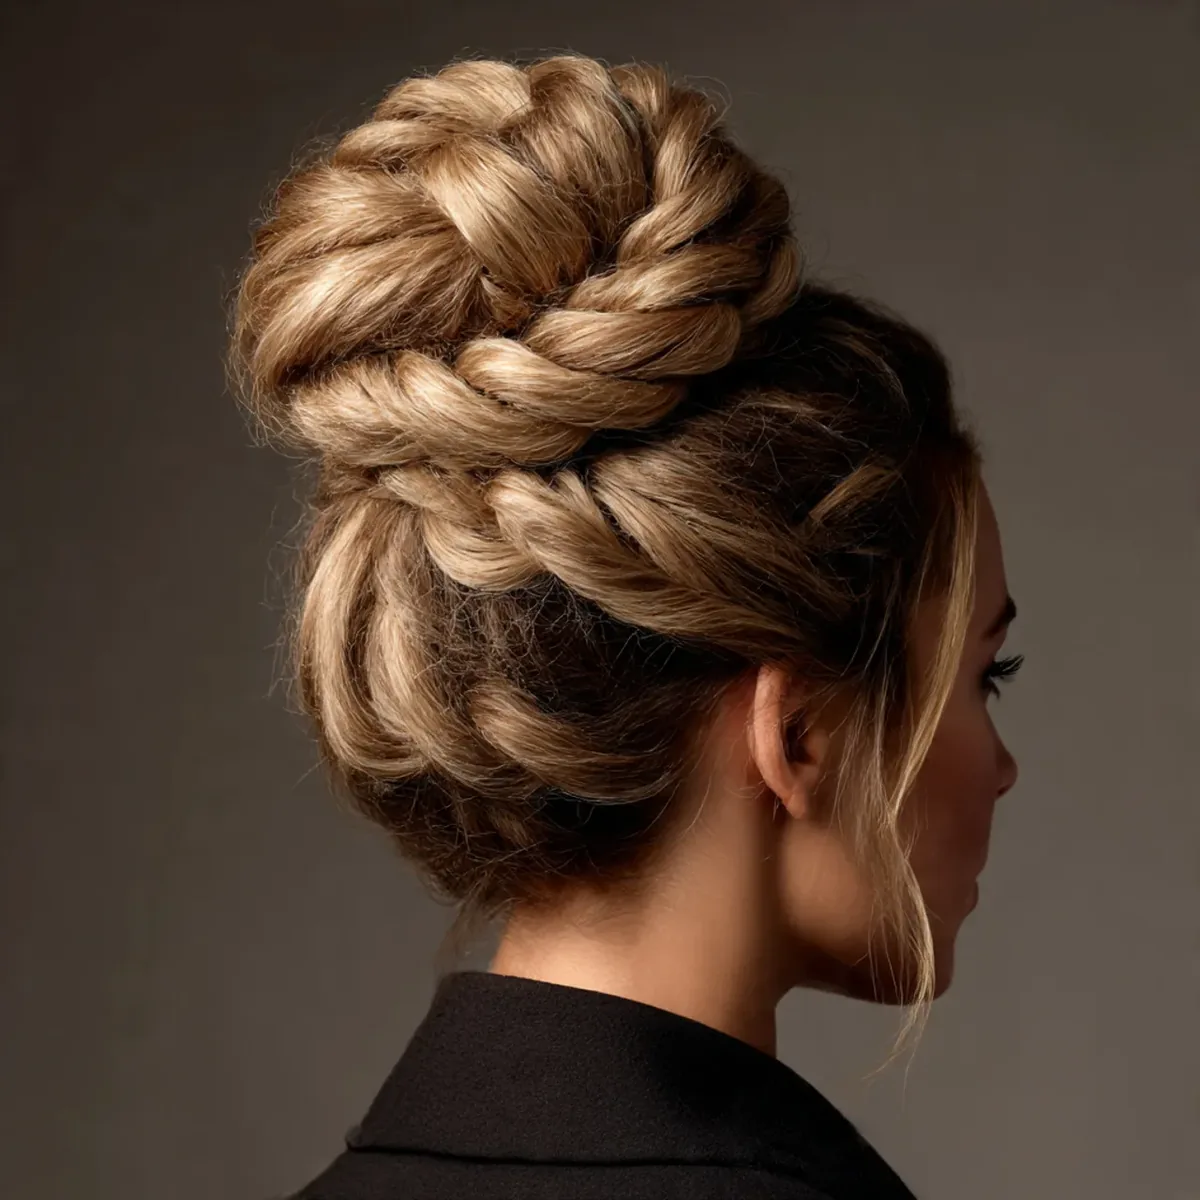
A twisted rope top knot is the easiest braided-style knot to learn, and one of the prettiest: the hair is divided into two sections, each twisted in the same direction, then the two sections are twisted around each other in the opposite direction, creating a rope that holds itself together. The opposing twists are the trick — they lock against each other, so the rope will not unravel, and the knot made from it is naturally secure without many pins. The texture is beautiful too: the rope shows clear, defined twists that catch the light, giving the knot a sculpted look that a plain twist never has. It works on almost every hair type, and it is the best first braided knot if you have never done one before.
How to style: high ponytail, split in two, twist each section clockwise, twist them together anticlockwise, wrap the rope around the base, pin. Time: 10 to 15 minutes. Pros: fast, secure, works on fine hair as well as thick hair, and needs only two or three pins. Cons: the rope can look thin on very fine hair, and it needs a little texturising spray for grip on silky hair. Quick verdict: if you can twist two pieces of hair, you can make this knot — it is the highest-impact, lowest-effort braided top knot there is. Fan the rope out slightly once it is wrapped to make the knot look fuller.
17. French Braid Top Knot

A French braid top knot is the classic braided version of the style: a French braid worked from the front hairline back to the crown, finishing in a knot at the top. The braid runs over the top of the head, so it is visible from the front — unlike the Dutch braid, which runs up the back — and that makes it the braided knot to choose when you want the detail where people can see it. It is also the most practical braided knot for keeping the front of the hair under control: the braid gathers every strand from the hairline backwards, so there are no flyaways, no loose pieces, and nothing falling into your face. It suits thick hair particularly well, because the braid distributes the weight across the whole head rather than hanging it all from one point.
Best for: work, workouts, and anyone with thick hair that pulls in a plain knot. How to style: French-braid from the front hairline to the crown, gather the rest into a ponytail, and form the knot. Time: 20 to 25 minutes. Pros: keeps the front completely smooth, distributes weight, and looks polished from the front. Cons: French braiding your own hair takes practice, and the braid needs to be tight at the hairline or it will loosen. What to ask a stylist: for the braid to be started close to the hairline, so it frames the face rather than sitting too far back. A little texturising spray before you start gives the braid the grip it needs to stay neat.
18. Bubble Braid Top Knot
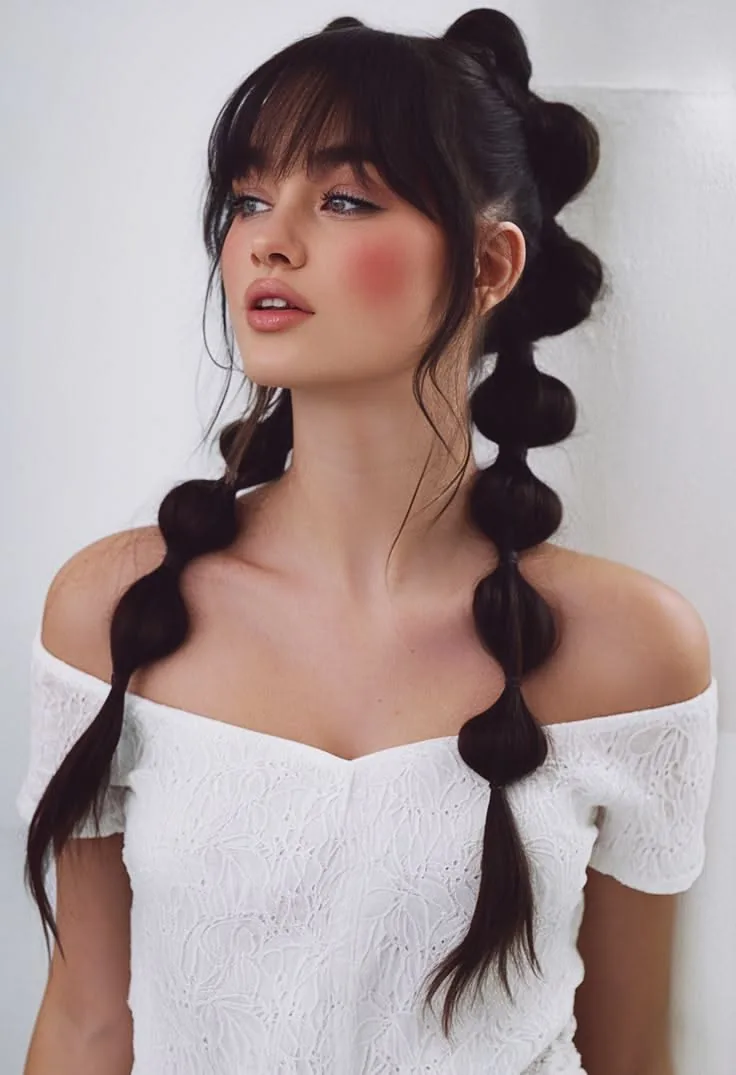
A bubble braid top knot is the most playful knot on this list, and the one that photographs best on social media: the ponytail is divided into sections by small elastics, and each section is pulled out into a round bubble, so the knot sits on top of a column of puffs that looks like something from a cartoon — in the best way. It is a style that suits festivals, parties and fun nights out, because it is bold, youthful and impossible to ignore. It also works brilliantly on fine hair, because the bubbles create the illusion of volume that the hair itself does not have, and it is one of the easiest braided-style knots to do: there is no actual braiding involved, just elastics and a little pulling.
How to style: high ponytail, add elastics every two inches down the length, pull each section out into a bubble, then coil the bubbled length into a knot. Time: 15 to 20 minutes. Pros: no braiding skill needed, creates huge volume on fine hair, and looks completely different from every other knot. Cons: it is a statement style, so it does not suit formal occasions, and it needs several small elastics. The common mistake is pulling the bubbles out unevenly — take your time and make each bubble roughly the same size, or the knot will look lopsided. Quick verdict: if you want a top knot that gets compliments from strangers, this is the one.
19. Classic Half-Up Top Knot
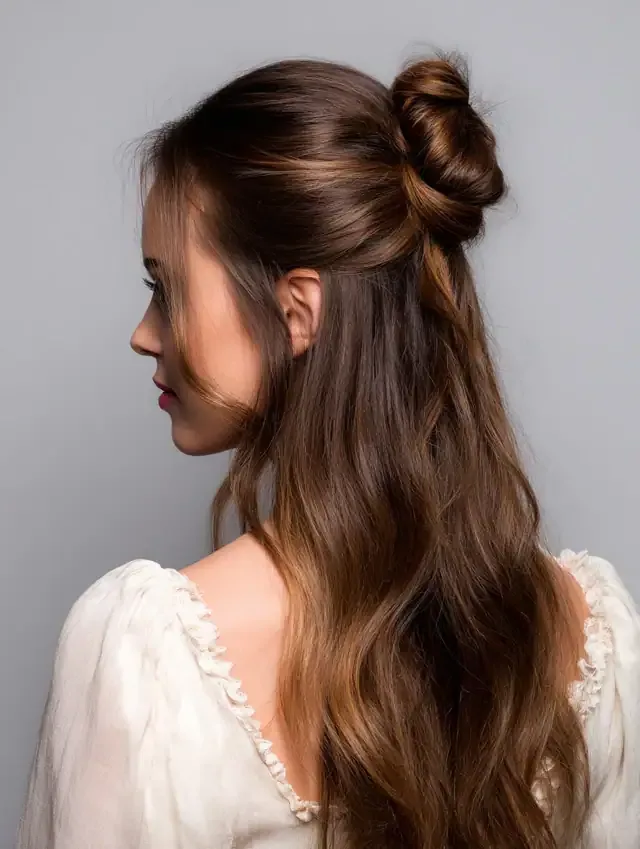
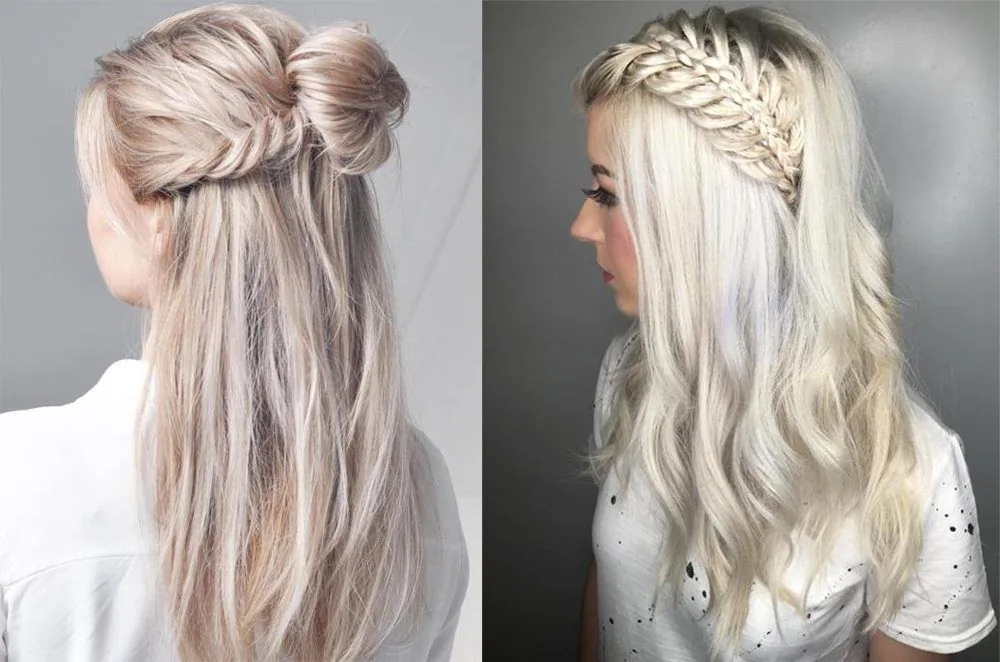
A half-up top knot is the best of both worlds: the top section of the hair is gathered into a knot at the crown, while the rest falls loose down the back, so you get the lift and the polish of a top knot and the length and movement of wearing your hair down. It is the knot for girls who love their long hair and do not want to hide it, and it flatters almost every face shape, because the knot lifts the face while the loose lengths soften the jawline. It is also one of the easiest top knots to do: the top section is a small amount of hair, so it gathers quickly, and the knot itself can be as neat or as messy as you like — the loose hair underneath makes any version look intentional.
Best for: long hair, casual days, and anyone who wants a top knot without giving up their length. How to style: section off the top third of the hair from temple to temple, gather it at the crown, twist and pin. Time: 5 to 10 minutes. Pros: fast, flattering, and it keeps the hair off the face while showing off the length. Cons: the knot can look small on fine hair, and the loose hair underneath needs a little styling or it can look flat. What to ask a stylist: for the section to be taken from the temples, not from the ears — a wider section makes a bigger, better-proportioned knot. Curl the loose lengths lightly for a finished look, or leave them straight for a more casual feel.
20. Half-Up Top Knot with Curls
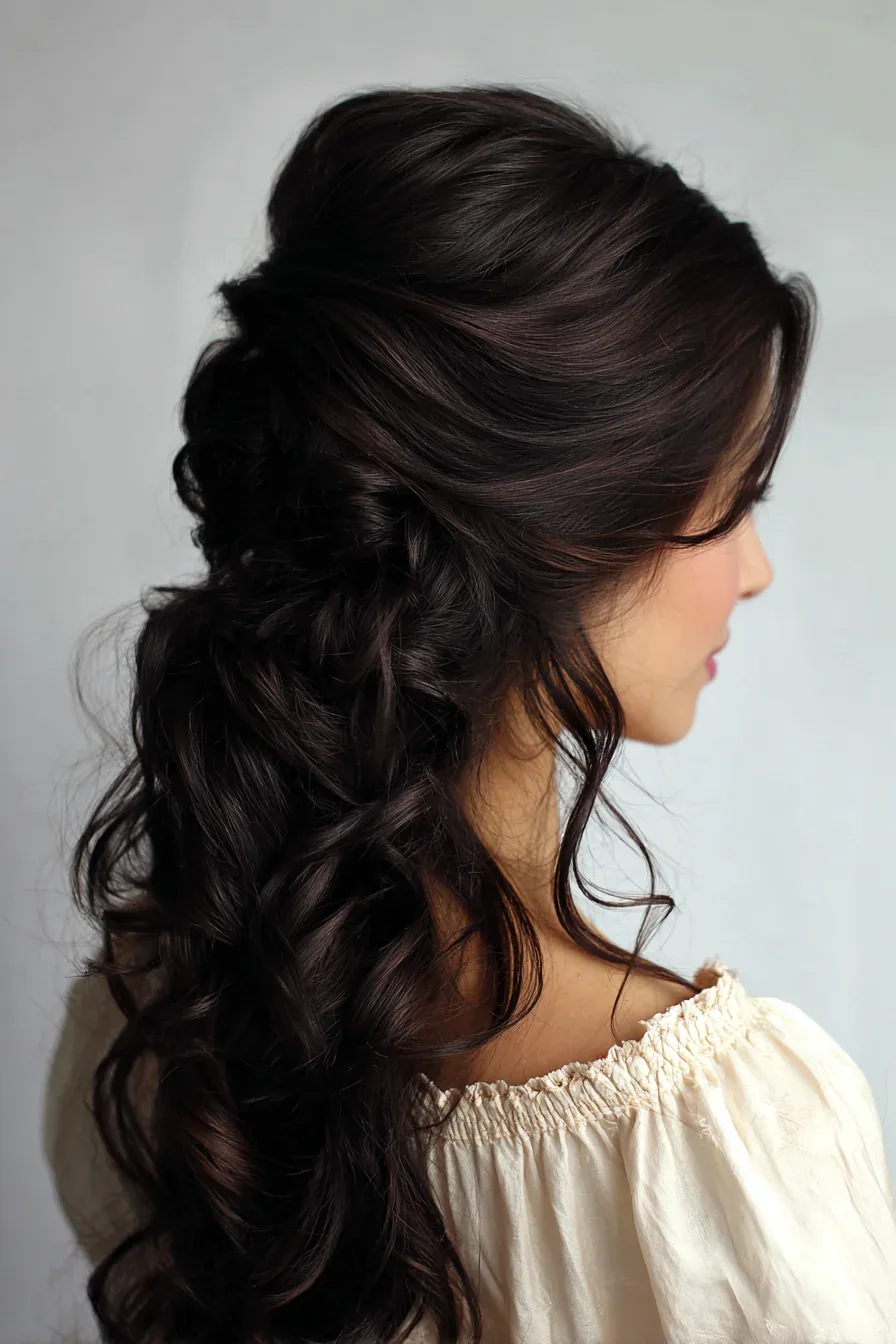
A half-up top knot with curls is the romantic version of the half-up: the top section is knotted at the crown, and the hair underneath falls in soft, loose curls that catch the light with every turn. The curls are what make it special — they give the style movement, softness and length, so the knot feels like the finishing touch on a beautiful hairstyle rather than the whole hairstyle. It is the knot to choose for dates, weddings as a guest, and any evening when you want to look like you put thought into your hair but not too much thought. It also photographs beautifully, because the knot gives the photo structure and the curls give it softness, and it suits almost every dress.
How to style: curl the hair first, then section off the top third and form the knot — curling first gives the knot texture and grip, and the curls underneath will hold better. Time: 25 to 35 minutes including curling. Pros: romantic, photogenic, and the curls make the knot look fuller. Cons: it takes longer than a plain half-up, and the curls need a light spray to survive the evening. The common mistake is making the knot too tight — a half-up knot should be slightly loose and soft, because the curls underneath are already doing the glamorous work. Let each curl cool in your hand before you brush it out, and the waves will last all night.
21. Half-Up Top Knot for Short Hair

Best for: bobs, lobs, and anyone growing out a pixie. How to style: section off the top section from temple to temple, twist it into a small knot, and pin with two bobby pins. Time: 5 minutes. Pros: the fastest top knot there is, keeps hair out of the face, and looks great on short cuts. Cons: the knot is small, so it needs a little texturising spray to hold, and it can look messy rather than cute if the section is too thin. Quick verdict: if you have a bob and you have never tried a half-up knot, try it once — it takes five minutes, and it changes the whole cut. Add a tiny scrunchie for a pop of colour.
22. Double Top Knots (Space Buns)
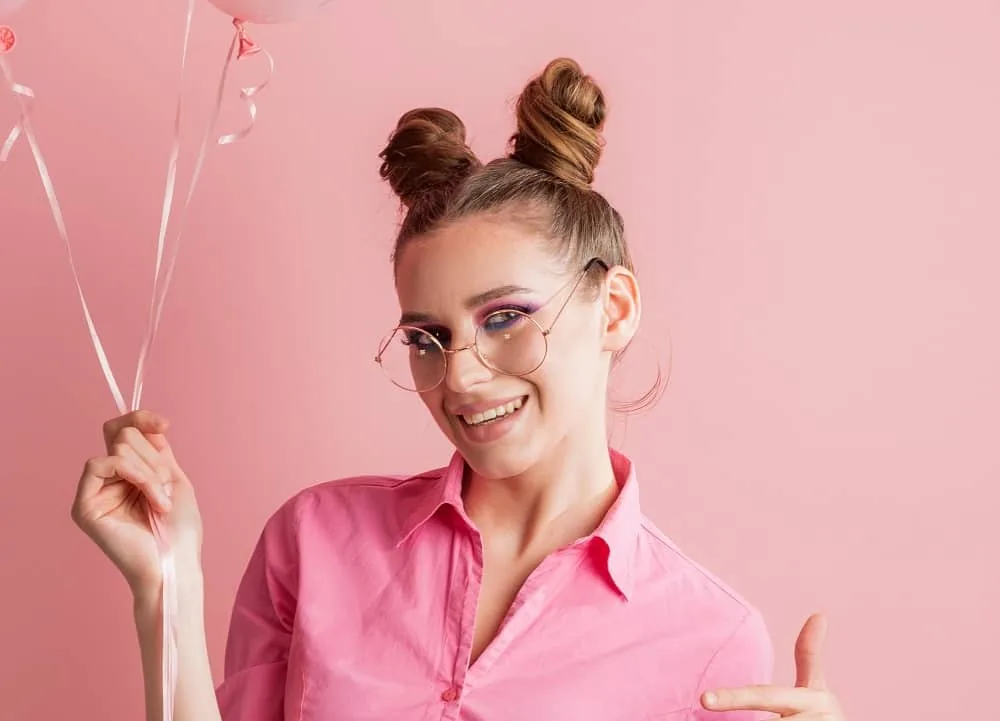
Double top knots — space buns — are the most playful version of the style: two small knots sitting on either side of the crown, like a pair of ears, giving the whole look a fun, youthful energy. They started as a festival style, but they have moved well beyond that: worn neat and small, they look chic and modern; worn messy and big, they look like a party. The trick is placement: the knots should sit on the top corners of the head, roughly above the outer corners of the eyebrows, and they should be roughly the same size, or the whole look will feel lopsided. They suit round and heart-shaped faces particularly well, because the two knots balance the width of the face.
How to style: part the hair down the centre, gather each side into a high ponytail, twist and pin each one into a knot. Time: 15 to 20 minutes. Pros: fun, youthful, and the two knots distribute the weight so they feel lighter than one big knot. Cons: they are a statement style, so they do not suit formal occasions, and they need the parting to be straight or they will look uneven. Best for: festivals, parties, casual days, and anyone who wants a top knot with personality. The common mistake is placing the knots too far apart, which makes them look like side buns; keep them high and close to the crown, and they will read as top knots.
23. Top Knot for Long Hair
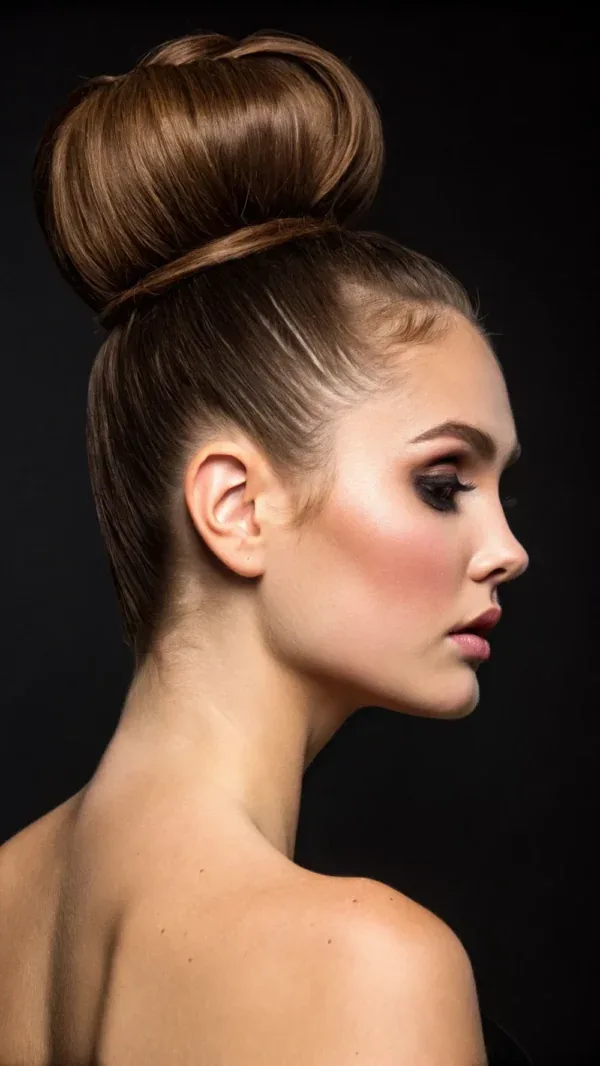
Long hair makes the most dramatic top knot there is: a tall, full knot with enough length to wrap several times around its own base, creating a knot with real presence. The challenge with long hair is not making the knot big enough — it is making it stay up. A long ponytail is heavy, and a heavy knot pulls, sags and loosens, so the technique has to be different from a knot on medium hair. Fold the ponytail in half before you wrap it, so the knot is compact and the weight sits close to the head instead of swinging. Or split the length into two sections, wrap them in opposite directions, and pin each one separately, so the weight is shared. A strong elastic — or two — is essential, and a doughnut inside the knot gives the length something solid to wrap around.
Best for: anyone with hair past the shoulders who wants a knot with real drama. How to style: high ponytail, fold the length in half, wrap around the base, pin generously. Time: 15 minutes. Pros: the fullest, tallest knot possible, and the most versatile — the same length can make a sleek knot, a messy knot or a braided knot. Cons: heavy, so it needs strong elastics and plenty of pins, and it can cause a headache if it is too tight. Maintenance: take it down as soon as you get home, and vary the position day to day so the same hairs are not under pressure. Quick verdict: long hair is the best raw material for a top knot, as long as you respect the weight.
24. Top Knot for Medium Hair

Medium hair — shoulder length to collarbone — is the sweet spot for a top knot: long enough to wrap into a proper knot, short enough that the knot is light and comfortable all day. It is the easiest length to work with, because the ponytail is not heavy, the knot does not need a doughnut, and the whole style takes about five minutes. The only challenge is the ends: on medium hair, the ends of the ponytail are close to the knot, so they can poke out and make the knot look unfinished. Tuck them under the knot and pin them, or wrap them around the base to hide the elastic — either way, the ends need to be dealt with, or they will deal with themselves by sticking out at odd angles.
Best for: the everyday top knot — work, errands, the gym, and everything in between. How to style: gather high, twist, wrap, pin the ends underneath. Time: 5 to 10 minutes. Pros: light, comfortable, fast, and the knot holds well because the hair is not heavy. Cons: the knot is smaller than on long hair, so it benefits from a little fanning out, and the ends need tucking. What to ask a stylist: for layers that are long enough to reach the knot — short layers around the crown can slip out of a medium-length knot and need pinning. A little dry shampoo at the roots before you gather the hair gives a medium-length knot the grip and volume it needs to look full.
25. Top Knot for Short Hair and Lobs
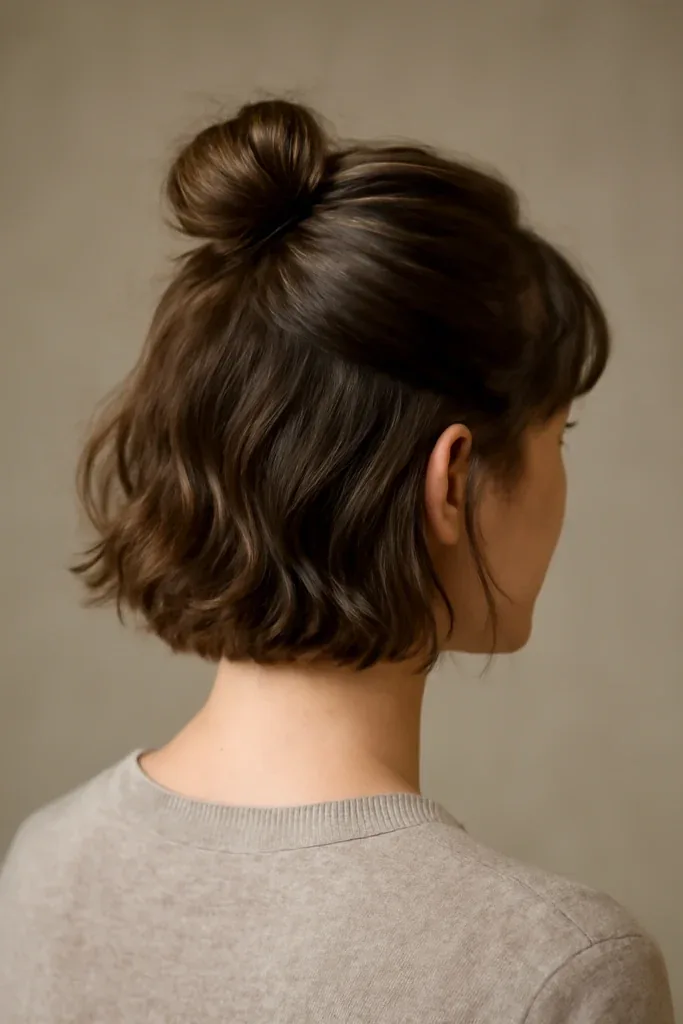
A top knot on short hair — a lob or a bob — is a small, neat knot that sits high on the crown, and it is far more achievable than most short-haired women think. The key is to work with the length you have rather than fighting it: gather the hair that reaches, twist it into a small knot, and pin it. The knot will be small, and that is fine — a small knot on a short cut looks deliberate and chic, like a punctuation mark on top of the haircut. The pieces that do not reach the knot are not a failure; they are a feature. Leave them loose around the nape and the ears, and the style looks like a modern, textured updo rather than a knot that ran out of hair.
How to style: gather the top section into a high ponytail with a small elastic, twist and pin, leaving the shorter pieces loose. Time: 5 to 10 minutes. Pros: keeps the hair off the face, looks modern and intentional, and takes almost no time. Cons: the knot is small, and very short layers may need several pins to stay in. Best for: lobs, bobs, and anyone growing out a shorter cut. The common mistake is trying to force every strand into the knot — on short hair, the loose pieces are part of the look, and fighting them just creates frizz. Use a texturising spray for grip, and let the nape pieces fall where they want to.
26. Top Knot for Curly Hair
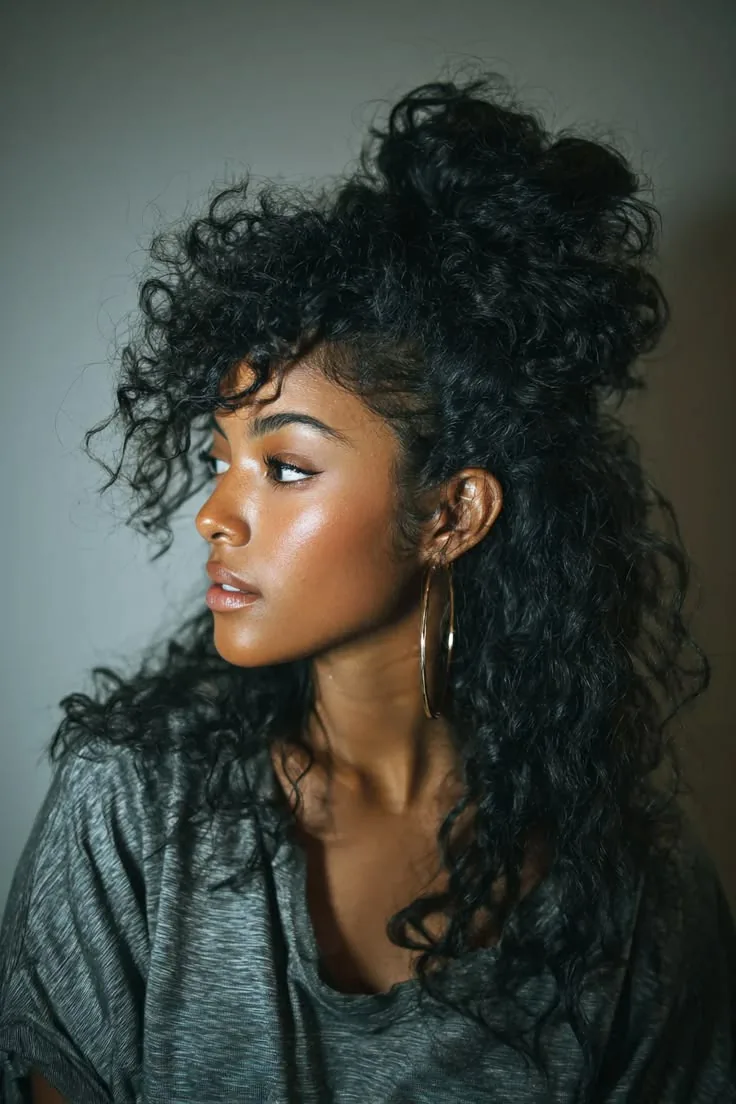
Curly hair makes one of the most beautiful top knots there is, because the curls do half the work: they give the knot natural volume, texture and fullness that straight hair has to fake with products and doughnuts. A curly top knot is also one of the most forgiving, because the curl pattern hides any unevenness in the knot and the texture keeps pins in place. The secret is to work with the curls, not against them: gather the hair gently, without brushing it out, because brushing curly hair creates frizz and destroys the curl pattern. Use your fingers to gather, a wide-tooth comb if you must, and let the curls fall where they want to inside the knot.
Best for: anyone with natural curls or waves who wants a knot with built-in texture. How to style: finger-gather the hair into a high ponytail, twist loosely, and pin, leaving a few curls loose at the front. Time: 10 minutes. Pros: natural volume, great hold, and the curls make the knot look full without any products. Cons: the knot can look bigger than expected, so it needs a little shaping, and curly hair can be heavy, so the knot needs a strong elastic. Maintenance: a silk scrunchie is gentler on curls than a plain elastic, and it stops the breakage that tight elastics cause. Quick verdict: if you have curly hair, your top knot is already better than most people’s — the curls are doing the work for you.
27. Top Knot for Fine Hair
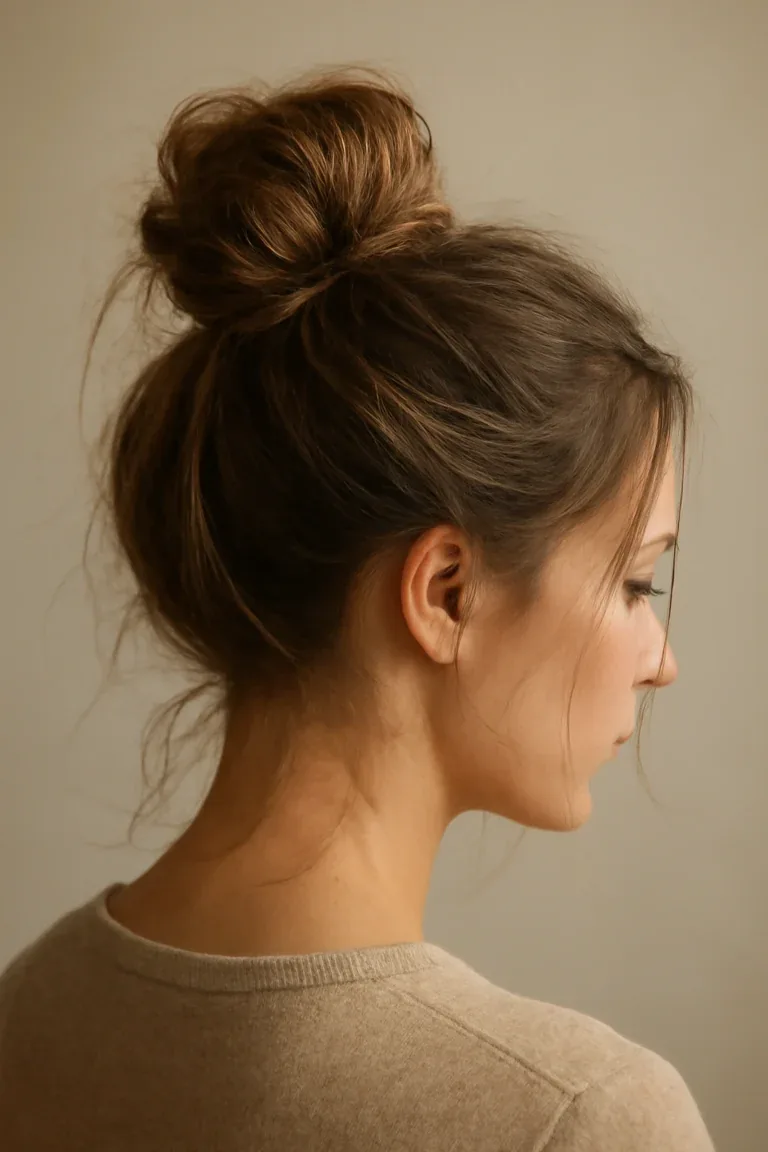
A top knot on fine hair is the hardest version to make look good, and the most satisfying when it works: a small, neat knot that looks deliberately chic rather than thin. The secret is volume before structure. Fine hair needs texture before it needs a knot, so start with day-old hair, work dry shampoo through the roots, and use a volumising powder at the crown — these give each strand the grip and fullness it needs to hold a knot. A hair doughnut is the fine-haired woman’s best friend: it gives the knot a solid core, so the hair wraps around something substantial and the knot looks twice as big as it is. Without a doughnut, a fine-hair knot can look like a small button; with one, it looks like a proper top knot.
How to style: texturise, gather high, wrap the hair around a small doughnut, pin, and fan the edges out. Time: 10 to 15 minutes. Pros: with a doughnut, a fine-hair knot can look as full as a thick-hair knot, and it is light and comfortable. Cons: it needs products and a doughnut to look full, and it can slip if the hair is too clean. The common mistake is gathering fine hair too tightly — a tight knot on fine hair looks smaller, not neater, because the tension squeezes out what little volume there is. Gather loosely, wrap loosely, and fan the knot out once it is pinned. A U-shaped hairpin holds a fine-hair knot far better than a bobby pin, which slides out.
28. Work-Ready Top Knot
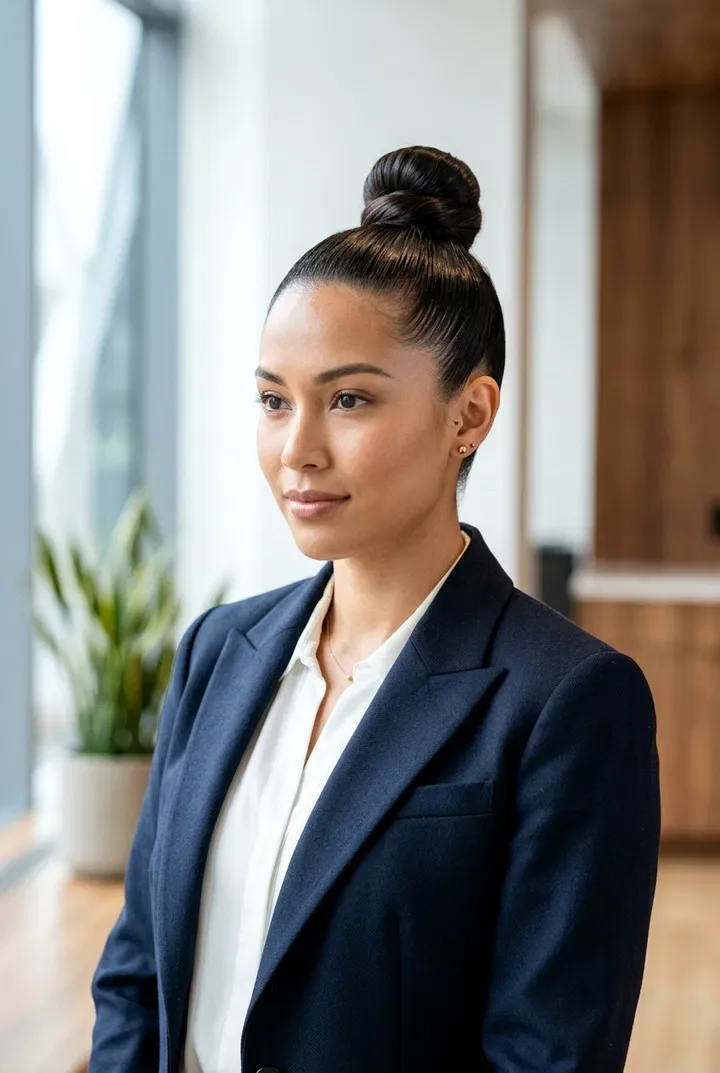
A work-ready top knot is the knot that means business: sleek at the front, neat at the back, and secure enough to survive a full day of meetings without a single touch-up. It is not the most creative knot on this list, and it does not need to be — its job is to look polished, professional and completely reliable, and it does that job better than any other hairstyle. The front is the key: smooth, controlled, with no flyaways and no loose pieces, because a neat hairline is what makes the whole look read as professional. A smoothing serum and a fine-tooth comb will get you there in two minutes, and a strong-hold spray will keep it there until you get home.
Best for: the office, interviews, presentations, and any day when you need to look polished. How to style: smooth the front with serum, gather high, wrap into a neat knot, pin, and spray. Time: 10 minutes. Pros: professional, reliable, and it keeps the hair completely out of the way. Cons: it can feel strict if the knot is too tight, so keep the tension firm but not painful. What to ask a stylist: for a knot that sits at the crown rather than the very top, which reads as more professional than a high, playful knot. Keep a spare elastic and three bobby pins in your desk drawer — a work knot that loosens at 3 p.m. is a two-minute fix, not a disaster.
29. Gym Top Knot
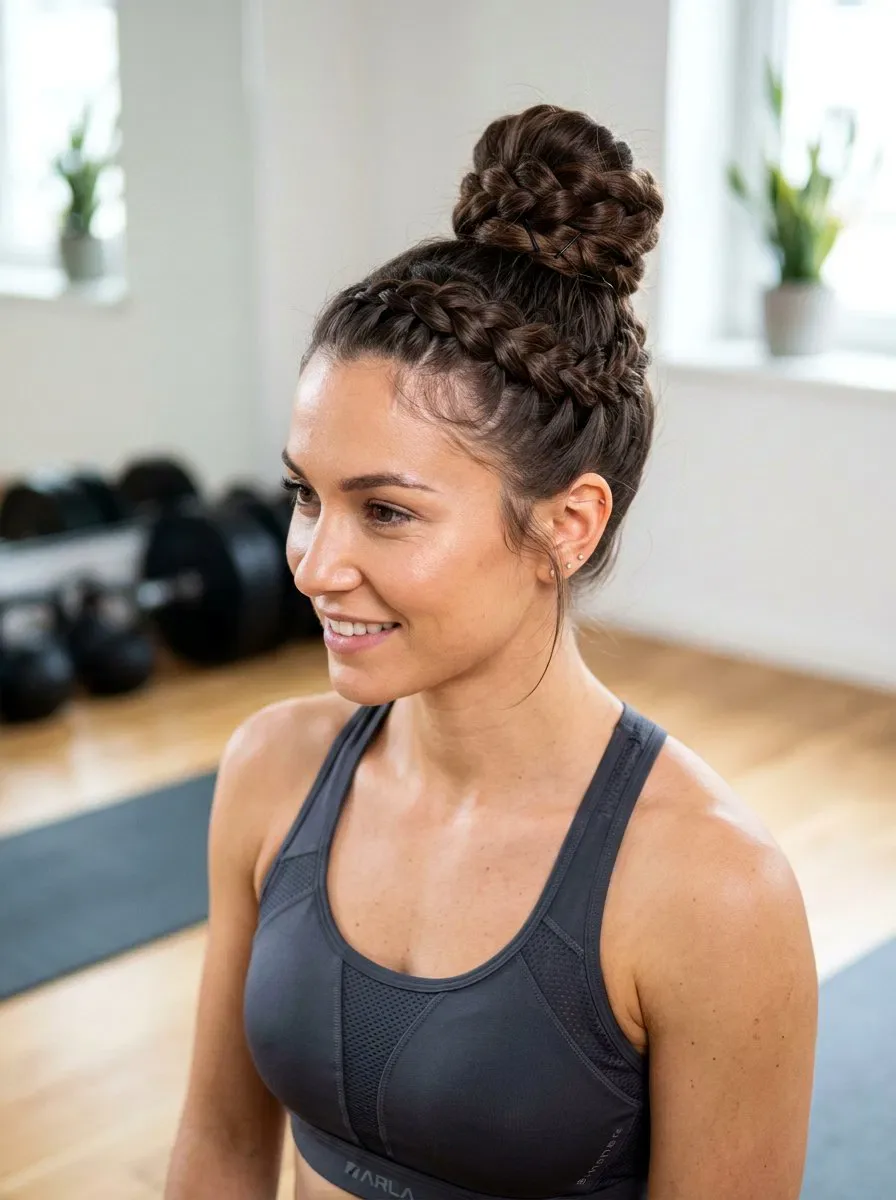
A gym top knot has one job: to stay up, stay out of the way, and survive a workout without falling apart. It is the most functional knot on this list, and the rules are different from a fashion knot — hold matters more than looks, and comfort matters more than polish. The best gym knot is a high, tight knot secured with a strong elastic and a few pins, with the hair gathered while the head is tilted back so the knot sits high and the weight is balanced. A braided or twisted knot is even better for the gym, because the braid’s weave locks the hair in place and the knot will not loosen no matter how much you move. Avoid a doughnut at the gym: it adds weight and heat, and it is one more thing to fall out.
How to style: gather high and tight, twist, pin with two or three bobby pins, and spray lightly. Time: 5 minutes. Pros: keeps the hair completely off the neck, survives any workout, and looks good enough to wear to the shop afterwards. Cons: a tight gym knot can cause a headache if it is too tight, so keep it firm but not painful. Maintenance: take it down as soon as you get home, and use a silk scrunchie rather than a tight elastic if you work out daily — a tight elastic worn every day will break the hair at the same spot. The common mistake is using a thin elastic that snaps mid-workout; a thick, strong elastic is worth the investment.
30. Wedding Guest Top Knot

A wedding guest top knot is the knot that dresses up: polished, romantic, and finished with a detail that makes it look like an occasion style rather than an everyday one. The knot itself can be sleek or softly textured, but the finish is what matters — a pearl pin, a gold cuff, a silk scarf, or a few face-framing curls that soften the front. The rule for wedding guest hair is to look beautiful without outshining the bride, and a top knot is perfect for that: it is elegant and elevated, but it is not a bridal style, so it will never compete. It also photographs beautifully, because the knot lifts the face and shows off the neckline and the earrings.
Best for: weddings, christenings, and any formal daytime event. How to style: form a polished knot, add one accessory — pearl pins or a gold cuff — and leave two soft pieces at the front. Time: 15 to 20 minutes. Pros: elegant, photogenic, and it stays put through a long day of ceremony, photos and dancing. Cons: it needs a little more effort than an everyday knot, and the accessory needs to be secured well or it will slip. What to ask a stylist: for the knot to be finished with a wrap of hair around the base, which hides the elastic and makes the whole style look professionally done. Do a trial run with the outfit on, and take photos from the front and the back.
31. Date Night Top Knot
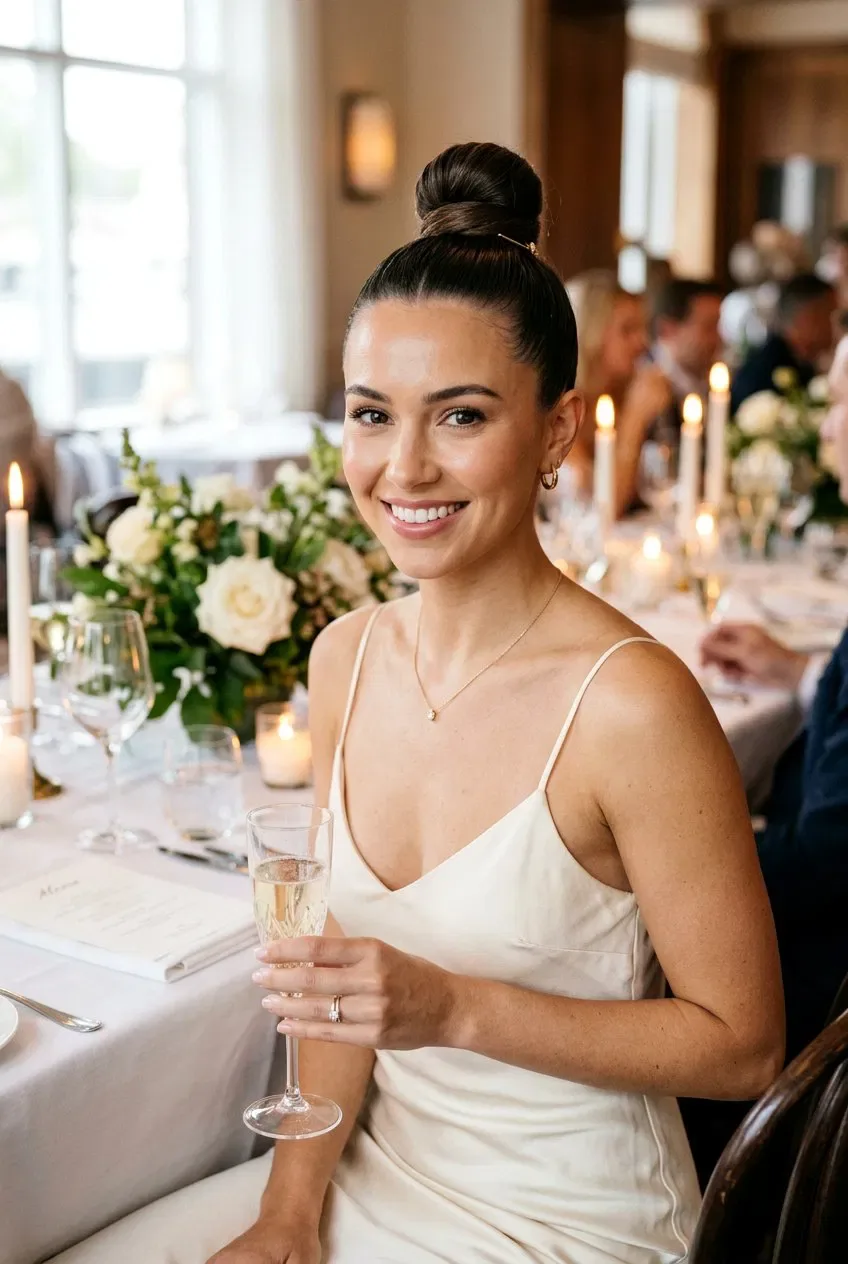
A date night top knot is the knot that looks effortless but is anything but: soft, slightly messy, with loose tendrils at the front and a knot that looks like it happened naturally. The trick is the softness — a date night knot should never look severe, because the whole point is to look relaxed and approachable. Pull the knot a little looser than usual, pull out two or three tendrils, curl them lightly, and leave the front slightly textured rather than slicked back. The result is a knot that looks like you spent ten minutes on it, even if you spent thirty, and that is exactly the impression you want. It pairs beautifully with a soft dress, a little jewellery, and a lip colour that does the talking.
Best for: dates, dinners, and evenings when you want to look beautiful without looking overdone. How to style: form a loose knot, pull tendrils out at the temples, curl them lightly, and finish with a light spray. Time: 15 minutes. Pros: romantic, flattering, and the softness suits almost everyone. Cons: the tendrils need a light spray to stay in place, and the knot can loosen if it is too soft, so pin it well underneath. The common mistake is making the knot too neat — a date night knot should look like you could have done it in the car, not like you spent an hour in front of the mirror. Keep the front soft, keep the knot loose, and let the tendrils do the flirting.
32. Festival Top Knot
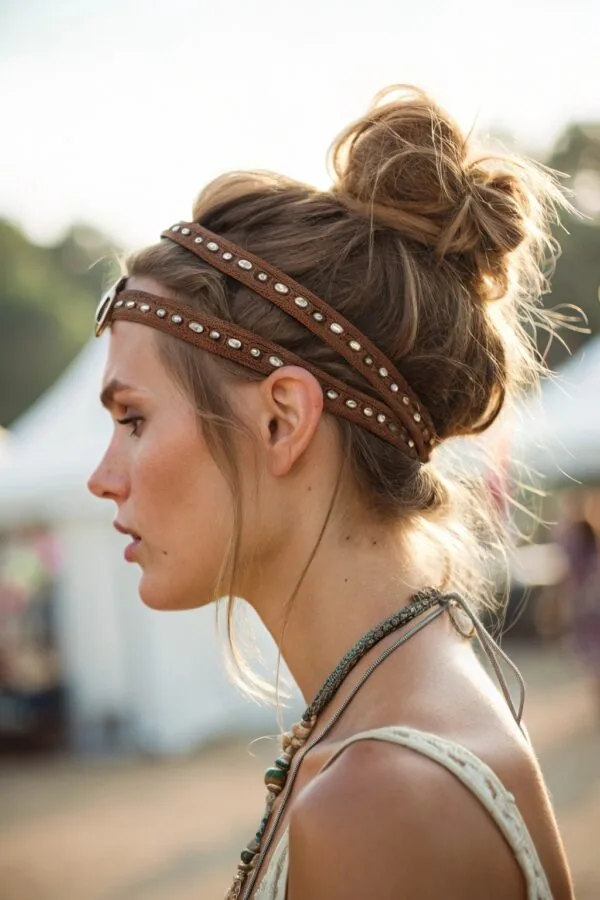
A festival top knot is the knot that goes big: high, textured, and finished with something fun — a scarf, a braid, glitter, or a flower. It is the knot for long days outdoors, for dancing in a field, and for outfits that are more about colour and joy than about polish. The practical side matters as much as the look: a festival knot needs to survive heat, wind and hours of dancing, so it should be a braided or twisted knot, or a plain knot secured with plenty of pins, rather than a loose messy knot that will fall apart by midday. A scarf tied around the base is both decoration and insurance — it holds the knot together and adds colour at the same time.
How to style: braid or twist the hair into a high knot, secure with strong pins, and finish with a scarf or a few small braids around the base. Time: 20 minutes. Pros: fun, secure, and it looks great in photos. Cons: it is a statement style, so it does not suit formal occasions, and the extras — scarf, glitter, braids — take a few minutes to add. Best for: festivals, concerts, holidays, and any day when the outfit is bold. Maintenance: carry a few spare pins, because a festival knot gets tested by wind and dancing, and a quick re-pin is easier than a rebuild. Quick verdict: if the day is going to be fun, the knot should be fun too.
33. Top Knot for a Night Out

A top knot for a night out is the knot that goes glamorous: sleek, high, and polished, with a shine that catches the light and a height that lifts the whole face. It is the knot that pairs with a little black dress, statement earrings and a bold lip, because the sleekness of the hair makes the outfit and the makeup the stars. The front should be smooth and controlled — a smoothing serum, a fine-tooth comb, and a strong-hold spray — and the knot itself should be compact and glossy, not loose and textured. This is not the knot for a messy, undone look; a night-out knot is deliberate, and the deliberateness is the point. It also survives a long night better than loose hair, because there is nothing to fall flat or frizz.
Best for: nights out, parties, and evenings when the outfit is bold. How to style: smooth the front, gather high, wrap into a compact knot, pin, and finish with a shine spray. Time: 15 minutes. Pros: glamorous, secure, and it makes the face look lifted and the neck look longer. Cons: it needs products and a little time, and it can feel strict if the knot is too tight. What to ask a stylist: for the knot to sit at the very top of the crown, which gives the most lift and the most drama. The common mistake is leaving the front too loose — a night-out knot needs a smooth front, or the whole look falls apart. Finish with a spritz of shine spray, and the knot will catch the light all night.
How do I do a top knot that stays up all day?
To make a top knot stay up all day, start with day-old hair rather than freshly washed hair, work a texturising spray or dry shampoo through the roots for grip, and secure the ponytail with a strong elastic wrapped three times. Form the knot, pin it with U-shaped hairpins rather than bobby pins, and finish with a flexible-hold hairspray. A braided or twisted knot holds even longer, because the braid’s weave locks the hair in place section by section.
How do I make a top knot look neat instead of messy?
To make a top knot look neat, smooth the front with a serum or gel and a fine-tooth comb before you gather the hair, wrap the knot tightly and evenly around its base, and hide the elastic by wrapping a section of hair around it. Pin any loose ends underneath the knot, and finish with a strong-hold hairspray. The difference between neat and messy is almost entirely in the front: a smooth, controlled hairline makes the whole knot look intentional, even if the knot itself is slightly textured.
Can I wear a top knot with short hair?
Yes, you can wear a top knot with short hair — a bob or a lob works best, and a half-up top knot works even on shorter cuts. Gather the top section into a small knot at the crown and pin it with two bobby pins, leaving the shorter pieces loose around the nape and ears. The knot will be small, and that is part of the charm: a tiny knot on a short cut looks playful and deliberate. Use a texturising spray for grip, and do not try to force every strand into the knot.
What is the difference between a top knot and a messy bun?
A top knot sits high on the crown of the head, while a messy bun usually sits lower, at the back or the nape. A top knot is also more deliberate: it is gathered high, wrapped around its own base, and pinned into a compact shape, while a messy bun is looser and lower. The two styles overlap — a messy top knot is a top knot with a relaxed finish — but the placement is the real difference. If the knot is on top of the head, it is a top knot; if it is at the back, it is a bun.
How do I add volume to a top knot?
To add volume to a top knot, work dry shampoo or volumising powder into the roots before you gather the hair, and use a hair doughnut or a rolled sock as a form inside the knot — the hair wraps around something solid, so the knot looks full and tall. Once the knot is pinned, fan its edges outward gently, pulling small sections out to widen it. Gather the hair while your head is tilted slightly back, which pulls the roots up rather than flat, and place the knot at the very top of the crown, where the skull’s curve adds its own height.
Are top knots bad for your hair?
Top knots are not bad for your hair if you wear them correctly, but a tight knot worn every day in the same spot can cause breakage and thinning at the hairline. To protect your hair, keep the knot firm but not painful, vary the position from day to day, use a silk scrunchie or a fabric-covered elastic rather than a tight rubber band, and take the knot down as soon as you get home. Never rip the elastic out — unwind the knot and slide the pins out first. One knot-free day a week gives the hair time to recover.
How do I do a top knot on fine hair?
To do a top knot on fine hair, start with day-old hair and work dry shampoo or texturising spray through it for grip, because fine hair is slippery and needs texture before structure. Use a thin, fabric-covered elastic wrapped three times, twist the hair loosely rather than tightly, and wrap it around a small hair doughnut so the knot looks full. Fan the knot out once it is pinned, and secure it with U-shaped hairpins, which hold fine hair far better than bobby pins.
What face shape suits a top knot?
A top knot suits almost every face shape, because the height lifts the face and the knot itself can be adjusted to flatter. Oval faces suit any top knot. Round faces benefit from a high knot with volume at the crown, which lengthens the face, and a few face-framing pieces to soften the width. Long faces suit a slightly lower knot with curtain bangs or face-framing pieces, which break up the length. Square faces suit a softer, slightly messy knot with tendrils, which softens the jawline. The placement and the front pieces matter more than the knot itself.
How do I do a braided top knot?
To do a braided top knot, gather the hair into a high ponytail, braid the length — a three-strand braid, a fishtail or a Dutch braid all work — then coil the braid around the base of the ponytail and pin it. For a more dramatic version, braid from the nape upwards while your head is upside down, then gather everything into a ponytail at the crown and form the knot from the remaining length. A braided knot is naturally secure, because the braid’s weave locks the hair in place, so it is the knot to choose on windy days or for dancing.
How do I keep a top knot from giving me a headache?
To keep a top knot from giving you a headache, keep it firm but not tight — if it hurts when you put it in, it will hurt more later. Place the knot slightly back from the very top of the crown, where the weight distributes more evenly, and share the weight across more than one anchor point by splitting the hair into two ponytails or pinning the knot in sections. Use a strong elastic rather than a thin one stretched to its limit, and take the knot down the moment you get home. If a knot regularly gives you a headache, try a looser, lower version.
Conclusion
The top knot is the hardest-working hairstyle you own, and the reason it has survived every trend is that it does so many jobs at once: the thirty-second fix on a bad hair day, the polished knot for work, the romantic knot for a wedding, and the braided knot that survives a festival. The best top knot is not the most complicated one, and it is not the one with the most pins. It is the one that matches the day — sleek when the occasion is formal, messy when it is relaxed, braided when it needs to last — and the one that feels comfortable on your head. Placement, texture and finish are what separate a knot that looks intentional from one that looks accidental, and now you know all three.
Start with the version that suits your hair: a doughnut for fine hair, a braid for thick hair, a loose twist for curly hair, and a half-up knot if you are not ready to give up your length. Practise it twice on a quiet day, so your hands learn the motion before the morning you actually need it. Pack the pins, the spray and the confidence, and then stop worrying about your hair — a good top knot stays where you put it, and the best ones look like they were never a second thought at all.